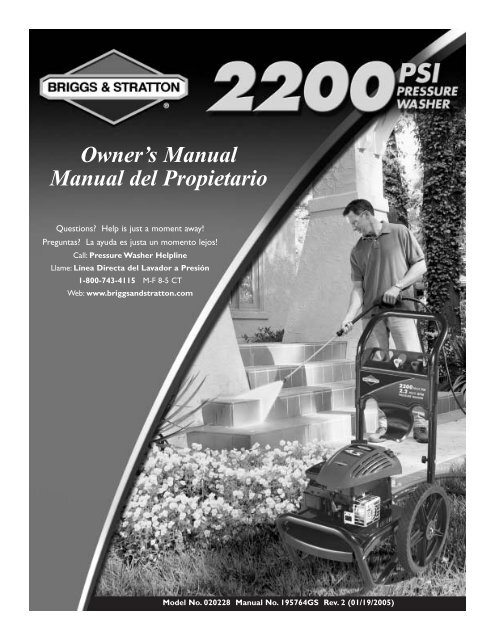
Owner's Manual Manual del Propietario - Ppe-pressure-washer ...
Owner's Manual Manual del Propietario - Ppe-pressure-washer ...
Owner's Manual Manual del Propietario - Ppe-pressure-washer ...

Create successful ePaper yourself
Turn your PDF publications into a flip-book with our unique Google optimized e-Paper software.
Owner’s <strong>Manual</strong><br />
<strong>Manual</strong> <strong>del</strong> <strong>Propietario</strong><br />
Questions? Help is just a moment away!<br />
Preguntas? La ayuda es justa un momento lejos!<br />
Call: Pressure Washer Helpline<br />
Llame: Línea Directa <strong>del</strong> Lavador a Presión<br />
1-800-743-4115 M-F 8-5 CT<br />
Web: www.briggsandstratton.com<br />
Mo<strong>del</strong> No. 020228 <strong>Manual</strong> No. 195764GS Rev. 2 (01/19/2005)
Section<br />
1<br />
Safety Rules<br />
SAVE THESE INSTRUCTIONS<br />
SAFETY RULES<br />
TABLE OF CONTENTS<br />
Section 1 - Safety Rules . . . . . . . . . . . . . . . . . . . . . . . . . . 2-4<br />
Section 2 - Features and Controls . . . . . . . . . . . . . . . . . . . 5<br />
Section 3 - Assembly . . . . . . . . . . . . . . . . . . . . . . . . . . . . 6-8<br />
Section 4 - Operation . . . . . . . . . . . . . . . . . . . . . . . . . . 9-13<br />
Section 5 - Product Specifications. . . . . . . . . . . . . . . . . . . 14<br />
Section 5 - Maintenance. . . . . . . . . . . . . . . . . . . . . . . . 14-16<br />
Section 6 - Storage . . . . . . . . . . . . . . . . . . . . . . . . . . . . . . 17<br />
Section 7 - Troubleshooting. . . . . . . . . . . . . . . . . . . . . . . . 18<br />
Warranty . . . . . . . . . . . . . . . . . . . . . . . . . . . . . . . . . . . . . . 19<br />
EQUIPMENT<br />
DESCRIPTION<br />
Read this manual carefully and become familiar<br />
with your <strong>pressure</strong> <strong>washer</strong>. Know its<br />
applications, its limitations and any hazards<br />
involved.<br />
This manual contains information for a <strong>pressure</strong> <strong>washer</strong><br />
that operates up to a maximum of 2,200 PSI and at a<br />
maximum flow rate of 2.2 gallons per minute.This high<br />
quality residential system features 14” wheels, axial cam<br />
pump with stainless steel pistons, automatic cool down<br />
system, chemical injection system, and a variety of nozzle<br />
sizes.Also includes safety goggles, heavy duty 25’ hose, and<br />
more.<br />
Every effort has been made to ensure that information in<br />
this manual is accurate and current. However, we reserve<br />
the right to change, alter or otherwise improve the product<br />
and this document at any time without prior notice.<br />
This is the safety alert symbol. It is used to<br />
alert you to potential personal injury hazards.<br />
Obey all safety messages that follow this<br />
symbol to avoid possible injury or death.<br />
The safety alert symbol ( ) is used with a signal word<br />
(DANGER, CAUTION,WARNING), a pictorial and/or a<br />
safety message to alert you to hazards. DANGER indicates<br />
a hazard which, if not avoided, will result in death or serious<br />
injury. WARNING indicates a hazard which, if not avoided,<br />
could result in death or serious injury. CAUTION<br />
indicates a hazard which, if not avoided, might result in<br />
minor or moderate injury. CAUTION, when used<br />
without the alert symbol, indicates a situation that could<br />
result in equipment damage. Follow safety messages to<br />
avoid or reduce the risk of injury or death.<br />
WARNING<br />
The engine exhaust from this product contains<br />
chemicals known to the State of California to cause<br />
cancer, birth defects, or other reproductive harm.<br />
Hazard Symbols and Meanings<br />
Toxic Fumes<br />
Electrical Shock<br />
Slippery Surface<br />
Fall<br />
Fluid Injection<br />
Fire<br />
Explosion<br />
Hot Surface<br />
Moving Parts<br />
Flying Objects<br />
Kickback<br />
2
Section 1: Safety Rules<br />
WARNING<br />
Running engine gives off carbon monoxide, an<br />
odorless, colorless, poison gas.<br />
Breathing carbon monoxide will cause nausea,<br />
fainting or death.<br />
Some chemicals or detergents may be harmful if<br />
inhaled or ingested, causing severe nausea,<br />
fainting or poisoning.<br />
• Operate <strong>pressure</strong> <strong>washer</strong> ONLY outdoors.<br />
• Keep exhaust gas from entering a confined area through<br />
windows, doors, ventilation intakes or other openings.<br />
• DO NOT operate <strong>pressure</strong> <strong>washer</strong> inside any building or<br />
enclosure.<br />
• Use a respirator or mask whenever there is a chance that<br />
vapors may be inhaled.<br />
• Read all instructions with mask so you are certain the mask will<br />
provide the necessary protection against inhaling harmful vapors.<br />
WARNING<br />
Use of <strong>pressure</strong> <strong>washer</strong> can create puddles and<br />
slippery surfaces.<br />
High <strong>pressure</strong> spray could cause you to fall if<br />
you are too close to the cleaning surface.<br />
• Keep spray nozzle between 8 to 24 inches away from cleaning<br />
surface.<br />
• Operate this unit on a stable surface.<br />
• The cleaning area should have adequate slopes and drainage to<br />
reduce the possibility of a fall due to slippery surfaces.<br />
• Be extremely careful if you must use the <strong>pressure</strong> <strong>washer</strong> from<br />
a ladder, scaffolding or any other relatively unstable location.<br />
• Firmly grasp spray gun with both hands when using high<br />
<strong>pressure</strong> spray to avoid injury if gun kicks back.<br />
WARNING<br />
Rapid retraction of starter cord (kickback) will<br />
pull hand and arm toward engine faster than<br />
you can let go.<br />
Broken bones, fractures, bruises or sprains could<br />
result.<br />
• When starting engine, pull cord slowly until resistance is felt<br />
and then pull rapidly to avoid kickback.<br />
• If engine starts and fails to continue to run or if increased<br />
resistance is felt during starting pull attempts, squeeze trigger<br />
on spray gun.<br />
WARNING<br />
Fuel and its vapors are extremely flammable an<br />
explosive.<br />
Fire or explosion can cause severe burns or<br />
death.<br />
WHEN ADDING FUEL<br />
• Turn <strong>pressure</strong> <strong>washer</strong> OFF and let it cool at least 2 minutes<br />
before removing gas cap.<br />
• Fill fuel tank outdoors.<br />
• DO NOT overfill tank.Allow space for fuel expansion.<br />
• Keep fuel away from sparks, open flames, pilot lights, heat, and<br />
other ignition sources.<br />
• DO NOT light a cigarette or smoke.<br />
WHEN OPERATING EQUIPMENT<br />
• DO NOT tip engine or equipment at angle which causes fuel<br />
to spill.<br />
• DO NOT spray flammable liquids.<br />
WHEN TRANSPORTING OR REPAIRING EQUIPMENT<br />
• Transport/repair with fuel tank EMPTY or with fuel shutoff<br />
valve OFF.<br />
WHEN STORING FUEL OR EQUIPMENT WITH FUEL<br />
IN TANK<br />
• Store away from furnaces, stoves, water heaters, clothes<br />
dryers or other appliances that have pilot light or other<br />
ignition source because they can ignite fuel vapors.<br />
WARNING<br />
The high <strong>pressure</strong> stream of water that this<br />
equipment produces can pierce skin and its<br />
underlying tissues, leading to serious injury and<br />
possible amputation.<br />
Spray gun retains high <strong>pressure</strong> when <strong>pressure</strong><br />
<strong>washer</strong> is shut down, which can cause injury.<br />
• NEVER aim spray gun at people, animals or plants.<br />
• DO NOT allow CHILDREN to operate <strong>pressure</strong> <strong>washer</strong>.<br />
• NEVER repair high <strong>pressure</strong> hose. Replace it.<br />
• Keep high <strong>pressure</strong> hose connected to pump and spray gun<br />
while system is pressurized.<br />
• Squeeze trigger on spray gun to relieve trapped <strong>pressure</strong>,<br />
every time you stop engine. Engage trigger lock on spray gun.<br />
WARNING<br />
Spray contact with electrical wiring can result in<br />
electrocution.<br />
• Keep water spray away from electric wiring or fatal electric<br />
shock may result.<br />
3
Section 1: Safety Rules<br />
WARNING<br />
Running engines produce heat.Temperature of<br />
muffler and nearby areas can reach or exceed<br />
150°F (65°C).<br />
Severe burns can occur on contact.<br />
Combustible debris, such as leaves, grass, brush,<br />
etc. can catch fire.<br />
• DO NOT touch hot surfaces.<br />
• Allow equipment to cool before touching.<br />
• The <strong>pressure</strong> <strong>washer</strong> must be at least 5 feet from structures<br />
having combustible walls and/or other combustible materials.<br />
• Keep at least 3 feet of clearance on all sides of <strong>pressure</strong><br />
<strong>washer</strong> for adequate cooling, maintenance and servicing.<br />
• In the State of California a spark arrester is required by law<br />
(Section 4442 of the California Public Resources Code). Other<br />
states may have similar laws. Federal laws apply on federal<br />
lands. If you equip the muffler with a spark arrester, it must be<br />
maintained in effective working order.<br />
WARNING<br />
Starter and other rotating parts can entangle<br />
hands, hair, clothing, or accessories.<br />
• DO NOT wear loose clothing, jewelry or anything that may<br />
be caught in the starter or other rotating parts.<br />
• Tie up long hair and remove jewelry.<br />
WARNING<br />
High <strong>pressure</strong> spray can cause paint chips or<br />
other particles to become airborne.<br />
• Always wear eye protection when using this equipment or in<br />
vicinity of where equipment is in use.<br />
WARNING<br />
Unintentional sparking can result in fire or<br />
electric shock.<br />
WHEN ADJUSTING OR MAKING REPAIRS TO YOUR<br />
PRESSURE WASHER<br />
• Disconnect spark plug wire from spark plug and place wire<br />
where it cannot contact spark plug.<br />
CAUTION<br />
Excessively high or low operating speeds increase risk<br />
of injury and damage to <strong>pressure</strong> <strong>washer</strong>.<br />
• DO NOT tamper with governed speed.<br />
• DO NOT operate <strong>pressure</strong> <strong>washer</strong> above rated <strong>pressure</strong>.<br />
CAUTION<br />
A <strong>pressure</strong> <strong>washer</strong> produces a high <strong>pressure</strong> spray<br />
which increases risk of injury and damage to unit.<br />
• DO NOT secure spray gun in open position.<br />
• DO NOT leave spray gun unattended while machine is<br />
running.<br />
• NEVER use a spray gun which does not have a trigger lock or<br />
trigger guard in place and in working order.<br />
• Always be certain spray gun, nozzles and accessories are<br />
correctly attached.<br />
CAUTION<br />
High <strong>pressure</strong> spray may damage fragile items including<br />
glass.<br />
• DO NOT point spray gun at glass when using MAX (pin<br />
point) nozzle.<br />
• NEVER aim spray gun at plants.<br />
CAUTION<br />
Improper treatment of <strong>pressure</strong> <strong>washer</strong> can damage it<br />
and shorten its life.<br />
• If you have questions about intended use, ask dealer or<br />
contact Briggs & Stratton Power Products.<br />
• NEVER operate units with broken or missing parts, or<br />
without protective housing or covers.<br />
• DO NOT by–pass any safety device on this machine.<br />
• Before starting <strong>pressure</strong> <strong>washer</strong> in cold weather, check all<br />
parts of the equipment to be sure ice has not formed there.<br />
• NEVER move machine by pulling on high <strong>pressure</strong> hose. Use<br />
handle provided on unit.<br />
• Check fuel system for leaks or signs of deterioration, such as<br />
chafed or spongy hose, loose or missing clamps, or damaged<br />
tank or cap. Correct all defects before operating <strong>pressure</strong><br />
<strong>washer</strong>.<br />
• This equipment is designed to be used with Briggs & Stratton<br />
Power Products authorized parts ONLY. If equipment is used<br />
with parts that DO NOT comply with minimum specifications,<br />
user assumes all risks and liabilities.<br />
4
Features and Controls<br />
Section<br />
2<br />
KNOW YOUR PRESSURE WASHER<br />
Read this owner’s manual and safety rules before operating your <strong>pressure</strong> <strong>washer</strong>.<br />
Compare the illustrations with your <strong>pressure</strong> <strong>washer</strong> to familiarize yourself with the locations of various controls and<br />
adjustments. Save this manual for future reference.<br />
Spray Gun<br />
Nozzle Extension<br />
with Quick Connect<br />
Accessory Tray<br />
Turbo Nozzle<br />
Recoil Starter<br />
Air Filter<br />
Primer Bulb<br />
Throttle Lever<br />
Fuel Tank<br />
High Pressure Hose<br />
Oil Fill/Dipstick<br />
ProjectPro<br />
Nozzles<br />
High Pressure Outlet<br />
& Water Inlet<br />
Chemical Injection<br />
Siphon/Filter<br />
Pump equipped with<br />
Automatic Cool Down System<br />
Accessory Tray — Provides convenient storage for<br />
standard and optional accessories, such as brushes, turbo<br />
wands, etc.<br />
Air Filter — Protects engine by filtering dust and debris<br />
out of intake air.<br />
Automatic Cool Down System — Cycles water<br />
through pump when water reaches 125°-155°F.Warm<br />
water will discharge from pump onto ground.This system<br />
prevents internal pump damage.<br />
Chemical Injection Siphon/Filter — Use to siphon<br />
detergent or other <strong>pressure</strong> <strong>washer</strong> chemicals into the low<br />
<strong>pressure</strong> stream.<br />
Data Tag (not shown, near rear of base plate) –<br />
Provides mo<strong>del</strong> and serial number of <strong>pressure</strong> <strong>washer</strong>.<br />
Please have these readily available if calling for assistance.<br />
Fuel Tank — Fill tank with regular unleaded fuel.Always<br />
leave room for fuel expansion.<br />
High Pressure Hose — Connect one end to water<br />
pump and the other end to spray gun.<br />
High Pressure Outlet — Connection for high <strong>pressure</strong><br />
hose.<br />
Nozzle Extension with Quick Connect — Allows you<br />
to switch between four different nozzles.<br />
Oil Fill/Dipstick — Check and fill with oil here.<br />
Primer Bulb — Prepares a cold engine for starting.<br />
Pump — Develops high <strong>pressure</strong>.<br />
Recoil Starter — Used for starting the engine manually.<br />
Spray Gun — Controls the application of water onto<br />
cleaning surface with trigger device. Includes trigger lock.<br />
ProjectPro Nozzles — Detergent, Max, General, and<br />
Delicate nozzles: for various <strong>pressure</strong> cleaning applications.<br />
Throttle Lever — Sets engine in starting mode for recoil<br />
starter and stops a running engine.<br />
Turbo Nozzle — Rotates a high <strong>pressure</strong> stream in a<br />
rapid circular pattern.<br />
Water Inlet — Connection for garden hose.<br />
5
Section<br />
3<br />
Assembly<br />
ASSEMBLY<br />
IMPORTANT: Read entire owner’s manual before you<br />
attempt to assemble or operate your new <strong>pressure</strong> <strong>washer</strong>.<br />
Remove Pressure Washer From<br />
Carton<br />
1. Remove the parts bag, accessories, and inserts included<br />
with <strong>pressure</strong> <strong>washer</strong>.<br />
2. Slice two corners at the end of carton from top to<br />
bottom so the panel can be folded down flat.<br />
3. Remove <strong>pressure</strong> <strong>washer</strong> from carton.<br />
Carton Contents<br />
Items in the carton include:<br />
• Main Unit<br />
• Handle<br />
• High Pressure Hose<br />
• Spray Gun<br />
• Nozzle Extension with Quick Connect Fitting<br />
• Plastic Accessory Tray<br />
• Safety Goggles<br />
• Oil Bottle<br />
• Turbo Nozzle with Quick Connect<br />
• Parts Bag (which includes the following):<br />
• Owner’s <strong>Manual</strong><br />
• Engine <strong>Manual</strong><br />
• Owner’s Registration Card<br />
• Bag containing 4 multi–colored ProjectPro<br />
Nozzles<br />
• Handle/Tray Fastening Hardware Kit (which<br />
includes):<br />
• Carriage Bolts (2)<br />
• Plastic Knobs (2)<br />
• Tree Clips (4)<br />
PREPARING PRESSURE<br />
WASHER FOR USE<br />
If you have any problems with the assembly of your<br />
<strong>pressure</strong> <strong>washer</strong> or if parts are missing or damaged, call the<br />
<strong>pressure</strong> <strong>washer</strong> helpline at 1-800-743-4115. If calling for<br />
assistance, please have the mo<strong>del</strong>, revision, and serial<br />
number from the data tag available.<br />
To prepare your <strong>pressure</strong> <strong>washer</strong> for operation, you<br />
will need to perform these tasks:<br />
1. Fill out and send in registration card.<br />
2. Attach handle to main unit, then attach accessory tray<br />
to handle.<br />
3. Add oil to engine crankcase.<br />
4. Add fuel to fuel tank.<br />
5. Connect high <strong>pressure</strong> hose to spray gun and pump.<br />
6. Connect water supply to pump.<br />
7. Attach nozzle extension to spray gun.<br />
8. Select/attach quick connect ProjectPro nozzle to<br />
nozzle extension.<br />
Attach Handle and Accessory Tray<br />
1. Place handle onto handle supports connected to main<br />
unit. Make sure holes in handle align with holes on<br />
handle supports (Figure 1).<br />
Figure 1 — Attach Handle to Base<br />
Align Holes<br />
Handle<br />
Handle<br />
Supports<br />
NOTE: It may be necessary to move the handle supports<br />
from side to side in order to align the handle so it will slide<br />
over the handle supports.<br />
6
Section 3: Assembly<br />
2. Insert carriage bolts through holes from outside of unit<br />
and attach a plastic knob from inside of unit (Figure 2).<br />
Tighten by hand.<br />
Figure 2 — Secure Handle<br />
3. Place accessory tray over holes on handle (viewing<br />
from front of unit). Push the tree clips into the holes<br />
until they sit flat against the accessory tray (Figure 3).<br />
Figure 3 — Attach Accessory Tray to Handle<br />
4. Insert multi–colored ProjectPro nozzles and other<br />
supplied accessories in spaces provided in accessory<br />
tray. See “How to Use Accessory Tray”.<br />
Add Engine Oil and Fuel<br />
• Place <strong>pressure</strong> <strong>washer</strong> on a level surface.<br />
CAUTION<br />
Any attempt to crank or start the engine before it has<br />
been properly filled with the recommended oil will result<br />
in equipment failure.<br />
• Refer to engine manual for oil and fuel fill information.<br />
• Damage to equipment resulting from failure to follow this<br />
instruction will void warranty.<br />
• Refer to engine owner’s manual and follow oil and fuel<br />
recommendations and instructions.<br />
NOTE: Check oil often during engine break–in. Refer to<br />
engine owner’s manual for recommendations.<br />
7
Section 3: Assembly<br />
Connect Hose and Water Supply to<br />
Pump<br />
IMPORTANT: To avoid pump damage, you must assemble<br />
the nozzle extension to the spray gun and attach all hoses<br />
before you start the engine.<br />
NOTE: Remove and discard the shipping caps from the<br />
pumps high <strong>pressure</strong> outlet and water inlet before<br />
attaching hoses.<br />
1. Uncoil high <strong>pressure</strong> hose and attach one end of hose<br />
to base of spray gun (Figure 4).Tighten by hand.<br />
Figure 4 — Connect High Pressure Hose to Spray Gun<br />
Connect high <strong>pressure</strong><br />
hose here<br />
2. Attach other end of high <strong>pressure</strong> hose to high<br />
<strong>pressure</strong> outlet on pump (Figure 5).Tighten by hand.<br />
Figure 5 — Connect High Pressure Hose to Pump<br />
3. Before connecting garden hose to water inlet, inspect<br />
inlet screen (Figure 6). Clean screen if it contains<br />
debris or have it replaced if damaged. DO NOT RUN<br />
PRESSURE WASHER IF INLET SCREEN IS DAMAGED.<br />
Figure 6 — Connect the Garden Hose to Water Inlet<br />
Inspect inlet<br />
screen, DO NOT<br />
use if damaged;<br />
clean if dirty.<br />
4. Run water through your garden hose for 30 seconds<br />
to clean out any debris.<br />
IMPORTANT: DO NOT siphon standing water for the<br />
water supply. Use ONLY cold water (less than 100°F).<br />
5. Connect the garden hose (not to exceed 50 feet in<br />
length) to the water inlet.Tighten by hand (Figure 6).<br />
CAUTION<br />
There MUST be at least ten feet of unrestricted garden<br />
hose between the <strong>pressure</strong> <strong>washer</strong> inlet and any flow shut<br />
off device, such as a ‘Y’ shut-off connector or other<br />
convenience-type water shut-off valve.<br />
• Damage to equipment resulting from failure to follow this<br />
instruction will void warranty.<br />
6. Turn ON the water and squeeze the trigger on the<br />
gun to purge the pump system of air and impurities.<br />
WARNING<br />
High <strong>pressure</strong> spray can cause paint chips or<br />
other particles to become airborne.<br />
• Always wear eye protection when using this equipment or in<br />
vicinity of where equipment is in use.<br />
• Before starting the <strong>pressure</strong> <strong>washer</strong>, be sure you are wearing<br />
adequate eye protection.<br />
Checklist Before Starting Engine<br />
Review the unit’s assembly to ensure you have performed<br />
all of the following.<br />
1. Make sure handle is in place and secure.<br />
2. Check that oil has been added to proper level in the<br />
engine crankcase.<br />
3. Add proper gasoline to fuel tank.<br />
4. Check for properly tightened hose connections.<br />
5. Check to make sure there are no kinks, cuts, or<br />
damage to high <strong>pressure</strong> hose.<br />
6. Provide a proper water supply at an adequate flow.<br />
7. Be sure to read “Safety Rules” and “How To Use Your<br />
Pressure Washer” before using <strong>pressure</strong> <strong>washer</strong>.<br />
8
Operation<br />
Section<br />
4<br />
HOW TO USE YOUR<br />
PRESSURE WASHER<br />
If you have any problems operating your <strong>pressure</strong> <strong>washer</strong>,<br />
please call the <strong>pressure</strong> <strong>washer</strong> helpline at 1-800-743-4115.<br />
Pressure Washer Location<br />
Pressure Washer Clearance<br />
WARNING<br />
Running engine gives off carbon monoxide, an<br />
odorless, colorless, poison gas.<br />
Breathing carbon monoxide will cause nausea,<br />
fainting or death.<br />
• Operate <strong>pressure</strong> <strong>washer</strong> ONLY outdoors.<br />
• Keep exhaust gas from entering a confined area through<br />
windows, doors, ventilation intakes or other openings.<br />
• DO NOT operate <strong>pressure</strong> <strong>washer</strong> inside any building or<br />
enclosure.<br />
The <strong>pressure</strong> <strong>washer</strong> must be at least 5 ft. (152 cm) from<br />
structures having combustible walls and/or other<br />
combustible materials. Leave at least 3 ft. (92 cm) all around<br />
<strong>pressure</strong> <strong>washer</strong> including overhead, for adequate cooling,<br />
maintenance and servicing.<br />
Place <strong>pressure</strong> <strong>washer</strong> in a well ventilated area, which will<br />
allow for removal of deadly exhaust gas. DO NOT place<br />
<strong>pressure</strong> <strong>washer</strong> where exhaust gas could accumulate and<br />
enter inside or be drawn into a potentially occupied<br />
building. Ensure exhaust gas is kept away from any<br />
windows, doors, ventilation intakes or other openings that<br />
can allow exhaust gas to collect in a confined area<br />
(Figure 7). Prevailing winds and air currents should be taken<br />
into consideration when positioning <strong>pressure</strong> <strong>washer</strong>.<br />
Figure 7 — Pressure Washer Clearance<br />
How to Start Your Pressure Washer<br />
To start your <strong>pressure</strong> <strong>washer</strong> for the first time, follow<br />
these instructions step-by-step.This starting information<br />
also applies if you have let the <strong>pressure</strong> <strong>washer</strong> sit idle for<br />
at least a day.<br />
1. Place <strong>pressure</strong> <strong>washer</strong> near an outside water source<br />
capable of supplying water at a flow rate greater than<br />
3.2 gallons per minute and no less than 20 PSI at<br />
<strong>pressure</strong> <strong>washer</strong> end of garden hose.<br />
2. Check that high <strong>pressure</strong> hose is tightly connected to<br />
spray gun and pump. See “Preparing Pressure Washer<br />
for Use” for illustrations.<br />
3. Make sure unit is in a level position.<br />
4. Connect garden hose to water inlet on <strong>pressure</strong><br />
<strong>washer</strong> pump. Turn ON water.<br />
CAUTION<br />
DO NOT run the pump without the water supply<br />
connected and turned on.<br />
• Damage to equipment resulting from failure to follow this<br />
instruction will void warranty.<br />
5. Attach nozzle extension to spray gun (Figure 8).<br />
Tighten by hand.<br />
Figure 8 — Connect Nozzle Extension to Spray Gun<br />
6. Choose ProjectPro nozzle you want to use, pull<br />
back on collar of nozzle extension, insert nozzle and<br />
release collar.Tug on nozzle to make sure it is securely<br />
in place (Figure 9). See “How to Use ProjectPro<br />
Nozzle System”.<br />
Figure 9 - Attaching ProjectPro Nozzle to Nozzle Extension<br />
7. Engage trigger lock on spray gun trigger (Figure 10).<br />
Figure 10 — Spray Gun with Trigger Lock Engaged<br />
Typical Pressure<br />
Washer Shown<br />
Trigger Lock<br />
Exhaust Port<br />
9
Section 4: Operation<br />
8. Start engine according to instructions given in engine<br />
owner’s manual.Also see operating instructions tag<br />
located on the <strong>pressure</strong> <strong>washer</strong>.<br />
WARNING<br />
Rapid retraction of starter cord (kickback) will<br />
pull hand and arm toward engine faster than<br />
you can let go.<br />
Broken bones, fractures, bruises or sprains could<br />
result.<br />
• When starting engine, pull cord slowly until resistance is felt<br />
and then pull rapidly to avoid kickback.<br />
• If engine starts and fails to continue to run or if increased<br />
resistance is felt during starting pull attempts, squeeze trigger<br />
on spray gun.<br />
NOTE: Always keep the throttle lever in the “Fast”<br />
position when operating the <strong>pressure</strong> <strong>washer</strong>.<br />
WARNING<br />
Running engines produce heat.Temperature of<br />
muffler and nearby areas can reach or exceed<br />
150°F (65°C).<br />
Severe burns can occur on contact.<br />
Combustible debris, such as leaves, grass, brush,<br />
etc. can catch fire.<br />
• DO NOT touch hot surfaces.<br />
• Allow equipment to cool before touching.<br />
• The <strong>pressure</strong> <strong>washer</strong> must be at least 5 feet from structures<br />
having combustible walls and/or other combustible materials.<br />
• Keep at least 3 feet of clearance on all sides of <strong>pressure</strong><br />
<strong>washer</strong> for adequate cooling, maintenance and servicing.<br />
• In the State of California a spark arrester is required by law<br />
(Section 4442 of the California Public Resources Code). Other<br />
states may have similar laws. Federal laws apply on federal<br />
lands. If you equip the muffler with a spark arrester, it must be<br />
maintained in effective working order.<br />
How to Stop Your Pressure Washer<br />
1. Let engine idle for two minutes.<br />
2. Turn engine off according to instructions given in<br />
engine owner’s manual.<br />
3. Squeeze trigger on spray gun to relieve trapped<br />
<strong>pressure</strong> in hose to avoid injury.<br />
NOTE: A small amount of water will squirt out when<br />
<strong>pressure</strong> is released.<br />
WARNING<br />
The high <strong>pressure</strong> stream of water that this<br />
equipment produces can pierce skin and its<br />
underlying tissues, leading to serious injury and<br />
possible amputation.<br />
Spray gun retains high <strong>pressure</strong> when <strong>pressure</strong><br />
<strong>washer</strong> is shut down, which can cause injury.<br />
• Keep high <strong>pressure</strong> hose connected to pump and spray gun<br />
while system is pressurized.<br />
• Squeeze trigger on spray gun to relieve trapped <strong>pressure</strong>,<br />
every time you stop engine. Engage trigger lock on spray gun.<br />
4. Engage trigger lock on spray gun when not in use.<br />
How to Use Accessory Tray<br />
The unit is equipped with an accessory tray with places to<br />
store your spray gun, nozzle extension, turbo nozzle, and<br />
ProjectPro nozzles.There is also a hook at the front of<br />
the accessory tray to hold your high <strong>pressure</strong> hose.<br />
NOTE: The extra hole in the tray is for storing a utility<br />
brush.The brush is NOT included with your <strong>pressure</strong><br />
<strong>washer</strong>.You can buy the brush as an optional accessory.<br />
1. Place nozzle extension through hole on accessory tray,<br />
as shown in Figure 11.<br />
Figure 11 — Typical Accessory Tray<br />
2. Place spray gun through hole on accessory tray on<br />
right side of unit (Figure 11).<br />
3. Push turbo nozzle up and into clip on accessory tray<br />
until it snaps in, as shown in Figure 11.<br />
4. Hang high <strong>pressure</strong> hose on hook attached to accessory<br />
tray on front of tray, as shown in Figure 11.<br />
10
Section 4: Operation<br />
How to Use ProjectPro Nozzle<br />
System<br />
The quick–connect on the nozzle extension allows you to<br />
switch between four different ProjectPro system nozzles.<br />
The ProjectPro nozzles vary the <strong>pressure</strong> and spray<br />
pattern as shown (Figure 12).<br />
Figure 12 — Nozzle Spray Patterns<br />
Low Pressure<br />
2. Pull back collar on quick–connect and pull current<br />
ProjectPro nozzles off. Store ProjectPro nozzles in<br />
holder provided on the accessory tray.<br />
3. Select desired ProjectPro nozzle:<br />
• For <strong>del</strong>icate rinse (lower <strong>pressure</strong> and higher<br />
flow), for gentle cleaning of cars/trucks, boats, RV’s,<br />
patio furniture, lawn equipment, etc., select yellow<br />
Delicate ProjectPro nozzle (Figure 13).<br />
Figure 13 — Delicate Nozzle<br />
Black<br />
Use to apply<br />
detergent<br />
High Pressure<br />
Delicate<br />
40° Yellow<br />
1650 PSI<br />
2.2 GPM<br />
General<br />
15° Orange<br />
1950 PSI<br />
2.1 GPM<br />
Follow these instructions to change ProjectPro<br />
nozzles:<br />
1. Engage trigger lock on spray gun.<br />
CAUTION<br />
Max<br />
0° Red<br />
2200 PSI<br />
1.9 GPM<br />
A <strong>pressure</strong> <strong>washer</strong> produces a high <strong>pressure</strong> spray<br />
which increases risk of injury and damage to unit.<br />
• NEVER exchange ProjectPro nozzles without locking the<br />
trigger lock on the trigger.<br />
• DO NOT twist ProjectPro nozzles while spraying.<br />
• For general rinsing (medium <strong>pressure</strong> and medium<br />
flow), ideal for most all purpose cleaning such as<br />
home siding, brick patios, wood decks, driveways<br />
and sidewalks, garage floors, etc., select orange<br />
General ProjectPro nozzle (Figure 14).<br />
Figure 14 — General Nozzle<br />
11
Section 4: Operation<br />
• For maximum rinsing (higher <strong>pressure</strong> and lower<br />
flow), for stubborn or hard to reach surface such<br />
as second story surfaces, paint removal, oil stains,<br />
rust removal or other stubborn substances (tar,<br />
gum, grease, wax, etc.), select red Max<br />
ProjectPro nozzle (Figure 15).<br />
Figure 15 — Max Nozzle<br />
• To apply detergent, applies project specific cleaners<br />
to help break down stubborn dirt and grime on a<br />
variety of surfaces, select black ProjectPro<br />
cleaning detergent nozzle (Figure 16).<br />
Figure 16 — Cleaning Detergent Nozzle<br />
4. Pull back on collar, insert new ProjectPro nozzle and<br />
release collar.Tug on ProjectPro nozzle to make sure<br />
it is securely in place.<br />
5. For most effective cleaning, keep ProjectPro nozzle<br />
from 8 to 24 inches away from cleaning surface. If you<br />
get ProjectPro nozzle too close, you may damage<br />
cleaning surface.<br />
6. DO NOT get closer than 6 inches when cleaning tires.<br />
How to Use the Turbo Nozzle<br />
The turbo nozzle rotates the high <strong>pressure</strong> stream in a<br />
rapid circular pattern.Always start the turbo nozzle at a<br />
distance, gradually getting closer to the surface until you<br />
get the cleaning force you want.<br />
CAUTION<br />
The turbo nozzle produces an extremely high <strong>pressure</strong><br />
spray which is capable of removing paint and cutting<br />
holes through surfaces if held too close.<br />
• Always make sure the surface you will clean will not be<br />
damaged by the high <strong>pressure</strong> spray by testing in a hidden area.<br />
1. Pull back collar on quick–connect and pull current<br />
ProjectPro nozzle off. Store ProjectPro nozzles in<br />
holder provided on the accessory tray.<br />
2. Pull back on collar, insert turbo nozzle and release<br />
collar (Figure 17).Tug on turbo nozzle to make sure it<br />
is securely in place.<br />
Figure 17 - Attaching Turbo Nozzle to Nozzle Extension<br />
3. For most effective cleaning, keep turbo nozzle from 8 to<br />
24 inches away from cleaning surface. If you get turbo<br />
nozzle too close, you may damage cleaning surface.<br />
NOTE: Detergent cannot be applied with the turbo<br />
nozzle.<br />
Cleaning and Applying Detergent<br />
IMPORTANT: Use detergents designed specifically<br />
for <strong>pressure</strong> <strong>washer</strong>s. Household detergents could<br />
damage the pump.<br />
CAUTION<br />
You must attach all hoses before you start the engine.<br />
• Starting the engine without all the hoses connected and<br />
without the water turned ON will damage the pump.<br />
• Damage to equipment resulting from failure to follow this<br />
instruction will void warranty.<br />
To apply detergent follow these steps:<br />
1. Review ProjectPro nozzle use.<br />
2. Prepare detergent solution as required by<br />
manufacturer.<br />
12
Section 4: Operation<br />
3. Place small filter end of detergent siphoning tube into<br />
detergent container.<br />
CAUTION<br />
Keep the chemical injection tube from coming in contact<br />
with the hot muffler.<br />
• When inserting the filter into a detergent solution bottle,<br />
route the tube so as to keep it from inadvertently contacting<br />
the hot muffler.<br />
4. Make sure black cleaning detergent nozzle is installed.<br />
NOTE: Detergent cannot be applied with the high<br />
<strong>pressure</strong> nozzles (Yellow, Orange or Red).<br />
5. Make sure garden hose is connected to water inlet.<br />
Check that high <strong>pressure</strong> hose is connected to spray<br />
gun and pump and start engine.<br />
6. Apply detergent to a dry surface, starting at lower<br />
portion of area to be washed and work upward, using<br />
long, even, overlapping strokes.<br />
7. Allow detergent to soak in between 3–5 minutes<br />
before washing and rinsing. Reapply as needed to<br />
prevent surface from drying. DO NOT allow detergent<br />
to dry on (prevents streaking).<br />
IMPORTANT:You must flush the chemical injection<br />
system after each use by placing the filter into a bucket of<br />
clean water, then run the <strong>pressure</strong> <strong>washer</strong> in low <strong>pressure</strong><br />
for 1-2 minutes.<br />
Pressure Washer Rinsing<br />
For Rinsing:<br />
1. Apply trigger lock to spray gun.<br />
2. Remove black cleaning detergent nozzle from nozzle<br />
extension.<br />
3. Select and install desired high <strong>pressure</strong> nozzle<br />
following instructions “How to Use ProjectPro<br />
Nozzle System”.<br />
4. Keep spray gun a safe distance from the area you plan<br />
to spray.<br />
WARNING<br />
High <strong>pressure</strong> spray could cause you to fall if<br />
you are too close to the cleaning surface.<br />
• Keep spray nozzle between 8 to 24 inches away from cleaning<br />
surface.<br />
• Operate this unit on a stable surface.<br />
• Be extremely careful if you must use the <strong>pressure</strong> <strong>washer</strong> from<br />
a ladder, scaffolding or any other relatively unstable location.<br />
• Firmly grasp spray gun with both hands when using high<br />
<strong>pressure</strong> spray to avoid injury if gun kicks back.<br />
5. Apply a high <strong>pressure</strong> spray to a small area and then<br />
check the surface for damage. If no damage is found,<br />
you can assume it is okay to continue rinsing.<br />
6. Start at top of area to be rinsed, working down with<br />
same overlapping strokes as you used for cleaning.<br />
Cleaning Detergent Siphoning Tube<br />
If you used the detergent siphoning tube, you must flush it<br />
with clean water before stopping the engine.<br />
1. Place chemical injection siphon/filter in a bucket full of<br />
clean water.<br />
2. Attach black cleaning detergent nozzle.<br />
3. Flush for 1-2 minutes.<br />
4. Shut off engine.<br />
IMPORTANT: Simply shutting OFF engine will not<br />
release <strong>pressure</strong> in the system. When the engine has<br />
shut down, squeeze the trigger on the spray gun to<br />
relieve the <strong>pressure</strong> in the hose.<br />
Automatic Cool Down System<br />
(Thermal Relief)<br />
If you run the engine on your <strong>pressure</strong> <strong>washer</strong> for<br />
3-5 minutes without pressing the trigger on the spray gun,<br />
circulating water in the pump can reach temperatures<br />
above 125°F.The system engages to cool the pump by<br />
discharging the warm water onto the ground.<br />
13
Section<br />
5<br />
Maintenance<br />
SPECIFICATIONS<br />
Maximum Outlet Pressure . . . . . . . . . . . . . . . 2200 psi<br />
Maximum Flow Rate . . . . 2.2 gallons per minute (gpm)<br />
Detergent Use detergent approved for <strong>pressure</strong> <strong>washer</strong>s<br />
Water Supply . . . . . . . . . . . . . . . . Not to Exceed 100°F<br />
Temperature<br />
Automatic Cool . . . . . . . . . . . . . Will cycle when water<br />
Down System<br />
reaches 125°-155°F<br />
Shipping Weight . . . . . . . . . . . . . . . . . . . . . . . . . . .54 lbs.<br />
GENERAL MAINTENANCE<br />
RECOMMENDATIONS<br />
The <strong>pressure</strong> <strong>washer</strong> warranty does not cover items that<br />
have been subjected to operator abuse or negligence.To<br />
receive full value from the warranty, the operator must<br />
maintain the <strong>pressure</strong> <strong>washer</strong> as instructed in this manual.<br />
NOTE: Should you have questions about replacing<br />
components on your <strong>pressure</strong> <strong>washer</strong>, please call<br />
1-800-743-4115 for assistance.<br />
• Some adjustments will need to be made periodically to<br />
properly maintain your <strong>pressure</strong> <strong>washer</strong>.<br />
• All maintenance in this manual and the engine owner’s<br />
manual should be made at least once each season.<br />
• Once a year you should clean or replace the spark plug,<br />
clean or replace the air filter and check the spray gun and<br />
nozzle extension assembly for wear.A new spark plug and<br />
clean air filter assure proper fuel-air mixture and help your<br />
engine run better and last longer. Please refer to your<br />
engine owner’s manual for more details.<br />
• If equipped with inflatable tires, keep the air <strong>pressure</strong> at<br />
the value marked on the tire or within 15 and 40 psi.<br />
Before Each Use<br />
• Check engine oil level.<br />
• Check water inlet screen for damage.<br />
• Check in-line filter for damage.<br />
• Check high <strong>pressure</strong> hose for leaks.<br />
• Check chemical injection hose and filter for damage.<br />
• Check spray gun and nozzle extension for leaks.<br />
• Rinse out garden hose to flush out debris.<br />
PRESSURE WASHER<br />
MAINTENANCE<br />
Check and Clean Inlet Screen<br />
Examine the screen on the water inlet. Clean it if the<br />
screen is clogged or replace it if screen is damaged.<br />
Check High Pressure Hose<br />
The high <strong>pressure</strong> hose can develop leaks from wear,<br />
kinking, or abuse. Inspect the hose each time before using<br />
it. Check for cuts, leaks, abrasions or bulging of cover,<br />
damage or movement of couplings. If any of these<br />
conditions exist, replace the hose immediately.<br />
WARNING<br />
The high <strong>pressure</strong> stream of water that this<br />
equipment produces can pierce skin and its<br />
underlying tissues, leading to serious injury and<br />
possible amputation.<br />
• NEVER repair high <strong>pressure</strong> hose. Replace it.<br />
• Replacement hose rating MUST exceed maximum <strong>pressure</strong><br />
rating of unit.<br />
Check Chemical Injection Hose<br />
Examine the filter on the detergent tube and clean if<br />
clogged.The tube should fit tightly on the barbed fitting.<br />
Examine the tube for leaks or tears. Replace the filter or<br />
tube if either is damaged.<br />
Check Gun and Nozzle Extension<br />
Examine the hose connection to the spray gun and make<br />
sure it is secure.Test the trigger by pressing it and making<br />
sure it “springs back” into place when you release it. Put<br />
the trigger lock in the ON position and test the trigger.<br />
You should not be able to press the trigger.<br />
14
Section 5: Maintenance<br />
Check In-Line Filter<br />
Refer to Figure 18 and service the in-line filter if it<br />
becomes clogged, as follows:<br />
Figure 18 — Clean In-Line Filter<br />
Nozzle Extension<br />
1. Detach spray gun and nozzle extension from high<br />
<strong>pressure</strong> hose. Detach nozzle extension from spray<br />
gun and remove o-ring and screen from nozzle<br />
extension. Flush screen, spray gun, and nozzle<br />
extension with clean water to clear debris.<br />
2. Place in-line filter screen into threaded end of nozzle<br />
extension. Direction does not matter. Push screen in<br />
with eraser end of pencil until it rests flat at bottom of<br />
opening.Take care not to bend the screen.<br />
3. Place o-ring into recess. Push o-ring snugly against inline<br />
filter screen.<br />
4. Assemble nozzle extension to spray gun, as described<br />
earlier in manual.<br />
Nozzle Maintenance<br />
Filter Screen<br />
O-ring<br />
A pulsing sensation felt while squeezing the spray gun<br />
trigger may be caused by excessive pump <strong>pressure</strong>.The<br />
principal cause of excessive pump <strong>pressure</strong> is a nozzle<br />
clogged or restricted with foreign materials, such as dirt,<br />
etc.To correct the problem, immediately clean the nozzle<br />
following these instructions:<br />
1. Shut off engine and turn off water supply.<br />
2. Remove nozzle from end of nozzle extension.<br />
3. Remove in-line filter from other end of nozzle<br />
extension.<br />
4. Use a small paper clip to free any foreign material<br />
clogging or restricting nozzle (Figure 19).<br />
Figure 19 — Nozzle Maintenance<br />
Use wire here<br />
to remove<br />
debris.<br />
5. Using a garden hose, remove additional debris by back<br />
flushing water through nozzle extension (Figure 20).<br />
Back flush between 30 to 60 seconds.<br />
Figure 20 — Backflushing the Nozzle Extension<br />
6. Reinstall nozzle and in-line filter into nozzle extension.<br />
7. Reconnect nozzle extension to spray gun.<br />
8. Reconnect water supply, turn on water, and start<br />
engine.<br />
9. Test <strong>pressure</strong> <strong>washer</strong> by operating with each quick<br />
connect nozzle.<br />
O–Ring Maintenance<br />
Purchase an O–Ring/Maintenance Kit, part number<br />
191922GS by contacting the nearest authorized service<br />
center. It is not included with the <strong>pressure</strong> <strong>washer</strong>.This kit<br />
includes replacement o-rings, rubber <strong>washer</strong> and water<br />
inlet filter. Refer to the instruction sheet provided in the kit<br />
to service your unit’s o-rings.<br />
15
Section 5: Maintenance<br />
Pump Maintenance<br />
Changing Pump Oil<br />
Change oil every 50 hours or once yearly, whichever<br />
occurs first.<br />
NOTE: Purchase a premeasured bottle of pump oil, item<br />
number 190586GS, by contacting the nearest authorized<br />
service center.<br />
Change pump oil as follows:<br />
1. Drain engine oil and fuel from <strong>pressure</strong> <strong>washer</strong>.<br />
2. Use a 8mm allen wrench to remove black pump oil cap<br />
between high <strong>pressure</strong> outlet and garden hose inlet<br />
(Figure 21).<br />
Figure 21 - Changing Pump Oil<br />
Oil Cap<br />
3. Tilt <strong>pressure</strong> <strong>washer</strong> to drain oil into an approved<br />
container until it drips slowly from pump.<br />
4. Tilt <strong>pressure</strong> <strong>washer</strong> in opposite direction and empty<br />
premeasured pump oil bottle into same opening (a<br />
small funnel may be helpful).<br />
5. Install black pump oil cap and tighten firmly.<br />
6. Set <strong>pressure</strong> <strong>washer</strong> in upright position.Add fuel and<br />
engine oil.<br />
ENGINE MAINTENANCE<br />
See the engine owner’s manual for instructions on how to<br />
properly maintain the engine.<br />
CAUTION<br />
Avoid prolonged or repeated skin contact with used<br />
motor oil.<br />
• Used motor oil has been shown to cause skin cancer in<br />
certain laboratory animals.<br />
• Thoroughly wash exposed areas with soap and water.<br />
KEEP OUT OF REACH OF CHILDREN. DON'T<br />
POLLUTE. CONSERVE RESOURCES. RETURN<br />
USED OIL TO COLLECTION CENTERS.<br />
16
Storage<br />
Section<br />
6<br />
PREPARING THE UNIT<br />
FOR STORAGE<br />
Water should not remain in the unit for long periods of<br />
time. Sediments or minerals can deposit on pump parts and<br />
“freeze” pump action. If you do not plan to use the <strong>pressure</strong><br />
<strong>washer</strong> for more than 30 days, follow this procedure:<br />
1. Flush chemical injection hose by placing filter into a pail<br />
of clean water while running <strong>pressure</strong> <strong>washer</strong> in low<br />
<strong>pressure</strong> mode. Flush for one to two minutes.<br />
2. Shut off engine and let it cool, then remove high<br />
<strong>pressure</strong> and garden hoses. Disconnect spark plug wire<br />
from spark plug.<br />
3. Empty pump of all pumped liquids by pulling recoil<br />
handle about 6 times.This should remove most liquid<br />
in pump.<br />
4. Use PumpSaver to prevent corrosion build up and<br />
freezing of pump.<br />
5. Store unit in a clean, dry area.<br />
Protecting the Pump<br />
To protect the pump from damage caused by mineral<br />
deposits or freezing, use PumpSaver to treat pump.This<br />
prevents freeze damage and lubricates pistons and seals.<br />
NOTE: PumpSaver is available as an optional accessory. It<br />
is not included with the <strong>pressure</strong> <strong>washer</strong>. Contact the<br />
nearest authorized service center to purchase PumpSaver.<br />
CAUTION<br />
You must protect your unit from freezing temperatures.<br />
• Failure to do so will permanently damage your pump and<br />
render your unit inoperable.<br />
• Freeze damage is not covered under warranty.<br />
CAUTION<br />
Read and follow all cautions and warnings on the<br />
PumpSaver can label.<br />
• Always wear eye protection when using PumpSaver.<br />
CAUTION<br />
PumpSaver will drip from pump after treatment and<br />
will stain wood and concrete.<br />
• Protect surfaces from dripping PumpSaver.<br />
To use PumpSaver, make sure the <strong>pressure</strong> <strong>washer</strong> is<br />
turned off and disconnected from supply water. Read and<br />
follow all instructions and warnings given on the PumpSaver<br />
container.<br />
NOTE: If PumpSaver is not available, draw RV antifreeze<br />
(non-alcohol) into the pump by pouring the solution into a<br />
3-foot section of garden hose connected to inlet adapter<br />
and pulling recoil handle twice.<br />
STORING THE ENGINE<br />
See the engine owner’s manual for instructions on how to<br />
properly prepare the engine for storage.<br />
17
Section<br />
7<br />
Troubleshooting<br />
TROUBLESHOOTING<br />
Problem Cause Correction<br />
1. Low <strong>pressure</strong> nozzle installed. 1. Replace nozzle with high <strong>pressure</strong><br />
nozzle.<br />
2. Water inlet is blocked.<br />
2. Clear inlet.<br />
3. Inadequate water supply. 3. Provide adequate water flow.<br />
4. Inlet hose is kinked or leaking. 4. Straighten inlet hose, patch leak.<br />
Pump has following problems:<br />
5. Clogged inlet hose strainer. 5. Check and clean inlet hose<br />
failure to produce <strong>pressure</strong>, erratic<br />
strainer.<br />
<strong>pressure</strong>, chattering, loss of<br />
<strong>pressure</strong>, low water volume.<br />
6. Water supply is over 100°F. 6. Provide cooler water supply.<br />
7. High <strong>pressure</strong> hose is blocked or 7. Clear blocks in outlet hose.<br />
leaks.<br />
8. Gun leaks.<br />
8. Replace gun.<br />
9. Nozzle is obstructed.<br />
9. Clean nozzle.<br />
10. Pump is faulty.<br />
10. Contact authorized service facility.<br />
Detergent fails to mix with spray.<br />
Engine runs good at no-load but<br />
"bogs" when load is added.<br />
Pressure <strong>washer</strong> stops during<br />
operation.<br />
1. Detergent siphoning tube is not<br />
submerged.<br />
2. Chemical filter is clogged or<br />
cracked.<br />
3. Dirty in-line filter.<br />
4. High <strong>pressure</strong> nozzle installed.<br />
Engine speed is too slow.<br />
Out of fuel.<br />
1. Insert detergent siphoning tube<br />
into detergent.<br />
2. Clean or replace filter/detergent<br />
siphoning tube.<br />
3. See "Check In-Line Filter".<br />
4. Replace nozzle with low <strong>pressure</strong><br />
nozzle.<br />
Move throttle control to FAST<br />
position. If engine still "bogs down",<br />
contact Briggs and Stratton service<br />
facility.<br />
Fill fuel tank.<br />
18
BRIGGS & STRATTON POWER PRODUCTS GROUP, LLC EQUIPMENT OWNER WARRANTY POLICY<br />
Effective September 1, 2004 replaces all undated Warranties and all Warranties dated before September 1, 2004<br />
LIMITED WARRANTY<br />
Briggs & Stratton Power Products Group, LLC will repair or replace, free of charge, any part(s) of the equipment that is defective in material<br />
or workmanship or both. Transportation charges on parts submitted for repair or replacement under this warranty must be borne by<br />
purchaser. This warranty is effective for the time periods and subject to the conditions stated below. For warranty service, find the nearest<br />
Authorized Service Dealer in our dealer locator map at www.briggspowerproducts.com.<br />
THERE IS NO OTHER EXPRESS WARRANTY. IMPLIED WARRANTIES, INCLUDING THOSE OF MERCHANTABILITY AND FITNESS<br />
FOR A PARTICULAR PURPOSE, ARE LIMITED TO ONE YEAR FROM PURCHASE, OR TO THE EXTENT PERMITTED BY LAW ANY<br />
AND ALL IMPLIED WARRANTIES ARE EXCLUDED. LIABILITY FOR INCIDENTAL OR CONSEQUENTIAL DAMAGES ARE EXCLUDED<br />
TO THE EXTENT EXCLUSION IS PERMITTED BY LAW. Some states or countries do not allow limitations on how long an implied warranty<br />
lasts, and some states or countries do not allow the exclusion or limitation of incidental or consequential damages, so the above limitation<br />
and exclusion may not apply to you. This warranty gives you specific legal rights and you may also have other rights which vary from state<br />
to state or country to country.<br />
OUR EQUIPMENT*<br />
OUTBOARD<br />
MOTOR<br />
PRESSURE<br />
WASHER<br />
WATER PUMP<br />
(Not available in the<br />
USA)<br />
PORTABLE<br />
GENERATOR<br />
WELDER<br />
HOME STANDBY GENERATOR SYSTEM<br />
Less than 10 KW 10 KW or greater Transfer switch<br />
WARRANTY PERIOD**<br />
Consumer Use<br />
Commercial Use<br />
2 years<br />
none<br />
1 year<br />
90 days<br />
1 year<br />
90 days<br />
2 years<br />
1 year<br />
2 years<br />
none<br />
3 years or<br />
1500 hours<br />
none<br />
3 years<br />
none<br />
* The engine and starting batteries are warranted solely by the manufacturers of those products.<br />
** 2 years for all consumer products in the European Union. Parts only on 2nd year for consumer use of Portable Generator and<br />
Home Standby Generator System - Less than 10 KW, outside of European Union.<br />
The warranty period begins on the date of purchase by the first retail consumer or commercial end user, and continues for the period of time<br />
stated in the table above. “Consumer use" means personal residential household use by a retail consumer. “Commercial use" means all other<br />
uses, including use for commercial, income producing or rental purposes. Once equipment has experienced commercial use, it shall thereafter<br />
be considered as commercial use for purposes of this warranty. Equipment used for prime power in place of utility are not applicable to<br />
this warranty. Electric powered <strong>pressure</strong> <strong>washer</strong>s used for commercial purposes are not warranted.<br />
NO WARRANTY REGISTRATION IS NECESSARY TO OBTAIN WARRANTY ON BRIGGS & STRATTON PRODUCTS. SAVE YOUR<br />
PROOF OF PURCHASE RECEIPT. IF YOU DO NOT PROVIDE PROOF OF THE INITIAL PURCHASE DATE AT THE TIME WARRANTY<br />
SERVICE IS REQUESTED, THE MANUFACTURING DATE OF THE PRODUCT WILL BE USED TO DETERMINE THE WARRANTY<br />
PERIOD.<br />
ABOUT YOUR WARRANTY<br />
We welcome warranty repair and apologize to you for being inconvenienced. Any Authorized Service Dealer may perform warranty repairs. Most<br />
warranty repairs are handled routinely, but sometimes requests for warranty service may not be appropriate. For example, warranty service would not<br />
apply if equipment damage occurred because of misuse, lack of routine maintenance, shipping, handling, warehousing or improper installation.<br />
Similarly, the warranty is void if the manufacturing date or the serial number on the equipment has been removed or the equipment has been altered<br />
or modified. During the warranty period, the Authorized Service Dealer, at its option, will repair or replace any part that, upon examination, is found to<br />
be defective under normal use and service. This warranty will not cover the following repairs and equipment:<br />
• Normal Wear: Outdoor Power Equipment, like all mechanical devices, needs periodic parts and service to perform well. This warranty does not<br />
cover repair when normal use has exhausted the life of a part or the equipment.<br />
• Installation and Maintenance: This warranty does not apply to equipment or parts that have been subjected to improper or unauthorized<br />
installation or alteration and modification, misuse, negligence, accident, overloading, overspeeding, improper maintenance, repair or storage so as,<br />
in our judgment, to adversely affect its performance and reliability. This warranty also does not cover normal maintenance such as adjustments,<br />
fuel system cleaning and obstruction (due to chemical, dirt, carbon, lime, etc.).<br />
• Other Exclusions: This warranty excludes wear items such as quick couplers, oil gauges, belts, o-rings, filters, pump packing, etc., pumps that<br />
have been run without water supplied or damage or malfunctions resulting from accidents, abuse, modifications, alterations, or improper servicing<br />
or freezing or chemical deterioration. Accessory parts such as guns, hoses, wands and nozzles are excluded from the product warranty. This<br />
warranty excludes failures due to acts of God and other force majeure events beyond the manufacturers control. Also excluded is used,<br />
reconditioned, and demonstration equipment; equipment used for prime power in place of utility power and equipment used in life support<br />
applications.<br />
BRIGGS & STRATTON POWER PRODUCTS GROUP, LLC<br />
JEFFERSON, WI, USA
Sección<br />
1<br />
Reglas de Seguridad<br />
TABLA DE CONTENIDOS<br />
Sección 1 - Reglas De Seguridad . . . . . . . . . . . . . . . . . . . . . . 20-22<br />
Sección 2 - Características y Controles . . . . . . . . . . . . . . . . . . . 23<br />
Sección 3 - Ensamblaje . . . . . . . . . . . . . . . . . . . . . . . . . . . . . . 24-26<br />
Sección 4 - Funcionamiento . . . . . . . . . . . . . . . . . . . . . . . . . . 27-31<br />
Sección 5 - Especificaciones Del Producto . . . . . . . . . . . . . . . . . 32<br />
Sección 5 - Mantenimiento . . . . . . . . . . . . . . . . . . . . . . . . . . . 32-34<br />
Sección 6 - Almacenamiento . . . . . . . . . . . . . . . . . . . . . . . . . . . . 34<br />
Sección 7 - Diagnosticos De Averías . . . . . . . . . . . . . . . . . . . . . . 35<br />
Garantia . . . . . . . . . . . . . . . . . . . . . . . . . . . . . . . . . . . . . . . . . . . . 36<br />
DESCRIPCIÓN DEL EQUIPO<br />
Lea este manual de manera cuidadosa y<br />
familiarícese con su lavadora a presión. Conozca<br />
sus usos, sus limitaciones y cualquier peligro<br />
relacionado con el mismo.<br />
Este manual contiene información sobre una limpiadora a presión<br />
que funciona a 2.200 PSI con un caudal de 8,32 litros por minuto<br />
(2.2 GPM). Es un sistema de alta calidad para uso doméstico<br />
equipado con ruedas de 36 cm, una bomba de leva axial con<br />
pistones de acero inoxidable, un sistema automático de<br />
refrigeración, un sistema de inyección de productos químicos y<br />
una variedad de boquillas. Incluye, entre otros accesorios, gafas de<br />
seguridad y una manguera de alta resistencia de 7,6 m.<br />
Se ha hecho cada esfuerzo posible para asegurarse que la<br />
información que aparece en este manual es exacta y se encuentra<br />
actualizada. Sin embargo, nosotros se reserva el derecho a<br />
cambiar, alterar o de otra manera mejorar, el producto y este<br />
documento en cualquier momento, sin previo aviso.<br />
CONSERVE ESTAS INSTRUCCIONES<br />
REGLAS DE SEGURIDAD<br />
Éste es el símbolo de alerta de seguridad. Sirve<br />
para advertir al usuario de un posible riesgo para<br />
su integridad física. Siga todos los mensajes de<br />
seguridad que figuren después de este símbolo<br />
para evitar lesiones o incluso la muerte.<br />
El símbolo de alerta de seguridad ( ) es usado con una palabra<br />
(PELIGRO,ADVERTENCIA, PRECAUCIÓN), un mensaje por<br />
escrito o una ilustración, para alertarlo acerca de cualquier<br />
situación de peligro que pueda existir. PELIGRO indica un riesgo<br />
el cual, si no se evita, causará la muerte o una herida grave.<br />
ADVERTENCIA indica un riesgo el cual, si no se evita, puede<br />
causar la muerte o una herida grave. PRECAUCIÓN indica un<br />
riesgo, el cual, si no se evita, puede causar heridas menores o<br />
moderadas. PRECAUCIÓN, cuando se usa sin el símbolo de<br />
alerta, indica una situación que podría resultar en el daño <strong>del</strong><br />
equipo. Siga los mensajes de seguridad para evitar o reducir los<br />
riesgos de heridas e inclusive la muerte.<br />
ADVERTENCIA<br />
El escape <strong>del</strong> motor de este producto contiene<br />
elementos químicos reconocidos en el Estado de<br />
California por producir cáncer, defectos de nacimiento u<br />
otros daños de tipo reproductivo.<br />
Símbolos de Peligro y Significados<br />
Gases Tóxicos<br />
Descarga Eléctrica<br />
Superficies Resbalosas<br />
Caer<br />
Inyección Líquida<br />
Fuego<br />
Explosión<br />
Superficie Caliente<br />
Partes en Movimiento<br />
Objetos Voladores<br />
Contragolpe<br />
20
Sección 1: Reglas de Seguridad<br />
ADVERTENCIA<br />
Al motor funcionar, se produce monóxido de<br />
carbono, un gas inodoro y venenoso.<br />
El respirar el monóxido de carbono, producirá<br />
náusea, desmayo o la muerte.<br />
Algunas sustancias químicas o los detergentes pueden<br />
ser perjudiciales si inhalados o ingeridos, causando la<br />
náusea severa, desmayando o para envenenar.<br />
• Opere el lavadora de presión SOLAMENTE al aire libre.<br />
• Asegúrese de que los gases de escape no puedan entrar por ventanas,<br />
puertas, tomas de aire de ventilación u otras aberturas en un espacio<br />
cerrado en el que puedan acumularse.<br />
• NO opere el lavadora de presión dentro de un edificio o lugar cerrado.<br />
• Utilice un respirador o máscara siempre que exista la posibilidad de<br />
inhalar vapores.<br />
• Lea todas las instrucciones de la máscara para asegurarse de que le<br />
brindará la protección necesaria contra la inhalación de vapores<br />
nocivos.<br />
ADVERTENCIA<br />
El uso de lavadora de presión puede crear los<br />
charcos y superficies resbalosas.<br />
El rociado de la alta presión podría hacerlo caer si<br />
está muy cerca de la superficie de limpieza.<br />
• Mantenga la boquilla de rociado de 8 a 24 pulgadas de la superficie de<br />
limpieza.<br />
• Opere y almacene esta unidad sobre una superficie estable.<br />
• El área de limpieza deberá tener inclinaciones y drenajes adecuados<br />
para disminuir la posibilidad de caídas debido a superficies resbalosas.<br />
• Sea extremadamente cuidadoso si usa la máquina lavadora a presión desde<br />
una escalera, andamio o cualquier superficie relativamente inestable.<br />
• Sujete la pistola de la hidrolavadora firmemente con ambas manos<br />
cuando utilice el rociado a alta presión. De esta manera evitará<br />
lesiones producidas por el posible golpe de la pistola hacia atrás.<br />
ADVERTENCIA<br />
El rápido repliegue <strong>del</strong> cable <strong>del</strong> arrancador<br />
(retroceso) impedirá que el usuario suelte el cable a<br />
tiempo y tirará de su mano y brazo hacia el motor.<br />
Como resultado, podrían producirse fracturas,<br />
contusiones o esguinces.<br />
• Cuando arranque el motor, tire lentamente <strong>del</strong> cable hasta sentir una<br />
resistencia y, a continuación, tire rápidamente de él para evitar su<br />
retroceso.<br />
• Si el motor arranca y deja de funcionar o si la resistencia aumenta al<br />
tirar <strong>del</strong> cable en intentos sucesivos de arranque, apriete el gatillo de<br />
la pistola rociadora.<br />
ADVERTENCIA<br />
La gasolina y sus vapores son extremadamente<br />
inflamables y explosivos.<br />
El fuego o una explosión pueden causar quemaduras<br />
severas e inclusive la muerte.<br />
CUANDO AÑADA COMBUSTIBLE<br />
• Apague el lavadora de presión (posición OFF) y déjelo enfriar al menos<br />
por 2 minutos antes de remover la tapa de la gasolina.<br />
• Llene el tanque al aire libre.<br />
• NO llene demasiado el tanque. Permita al menos espacio para la<br />
expansión <strong>del</strong> combustible.<br />
• Mantenga la gasolina alejada de chispas, llamas abiertas, pilotos, calor y<br />
otras fuentes de ignición.<br />
• NO encienda un cigarrillo o fume.<br />
CUANDO OPERE EL EQUIPO<br />
• NO incline el motor o el equipo, de tal manera que la gasolina se<br />
pueda derramar.<br />
• NO rocíe líquidos inflamables.<br />
CUANDO TRANSPORTE O REPARE EL EQUIPO<br />
• Transporte o repare el equipo con el tanque de combustible vacío, o<br />
con la válvula para apagar el combustible, apagada (posición OFF).<br />
CUANDO ALMACENE O GUARDE EL EQUIPO CON<br />
COMBUSTIBLE EN EL TANQUE<br />
• Almacene alejado de calderas, estufas, calentadores de agua, secadoras<br />
de ropa u otros aparatos electrodomésticos que posean pilotos u<br />
otras fuentes de ignición, porque ellos pueden encender los vapores<br />
de la gasolina.<br />
ADVERTENCIA<br />
La corriente de agua de alta presión que produce<br />
este equipo pueden perforar la piel y sus tejidos<br />
profundos, ocasionando lesiones serias y posible<br />
amputación.<br />
El fusil <strong>del</strong> rocío retiene la presión alta cuando aran<strong>del</strong>a<br />
de presión es cerrada, que puede causar la herida.<br />
• NUNCA apunte la pistola a la gente, animales o plantas.<br />
• NO permita en ningún momento que NIÑOS operen la máquina<br />
lavadora a presión.<br />
• NUNCA repare la manguera de alta presión. Remplacela.<br />
• Mantenga conectada la manguera a la máquina o a la pistola de<br />
rociado cuando el sistema esté presurizado.<br />
• Apriete el disparador en el fusil <strong>del</strong> rocío para aliviar la presión<br />
atrapada, cada vez usted para motor. Comprometa la cerradura <strong>del</strong><br />
disparador en el fusil <strong>del</strong> rocío.<br />
ADVERTENCIA<br />
El contacto <strong>del</strong> rocío con alambrado eléctrico puede<br />
tener como resultado electrocution.<br />
• Mantenga el chorro <strong>del</strong> agua alejado de alambrados eléctricos, de lo<br />
contrario podrían ocurrir descargas eléctricas fatales.<br />
21
Sección 1: Reglas de Seguridad<br />
ADVERTENCIA<br />
Los motores al funcionar producen calor. La<br />
temperatura <strong>del</strong> silenciador y de las áreas cercanas<br />
puede alcanzar o pasar los 150ºF (65ºC).<br />
Quemaduras severas pueden ocurrir al hacer<br />
contacto.<br />
Los residuos como hojas, hierba, maleza, etc. se<br />
pueden inflamar.<br />
• NO toque las superficies calientes.<br />
• Permita que el equipo se enfríe antes de tocarlo.<br />
• El lavadora a presión debe estar situado a un mínimo de 152 cm<br />
(5 pies) de toda estructura con muros combustibles y/o otras<br />
materias combustibles.<br />
• Mantenga un mínimo de 92 cm (3 pies) alrededor de la carcasa <strong>del</strong><br />
lavadora a presión, para facilitar la ventilación y el mantenimiento <strong>del</strong><br />
lavadora a presión.<br />
• En el estado de California es obligatorio, según la ley, el uso de<br />
apagachispas (Sección 4442 <strong>del</strong> Código de Recursos Públicos de<br />
California). Otros estados pueden tener leyes similares. Las leyes<br />
federales se aplican en tierras federales. Si equipa el silenciador con un<br />
apagachispas, este deberá ser mantenido en buenas condiciones de<br />
trabajo.<br />
ADVERTENCIA<br />
El arrancador y otras piezas que rotan pueden<br />
enredar las manos, el pelo, la ropa, o los accesorios.<br />
• NO use ropa suelta, joyas o elementos que puedan quedar atrapados<br />
en el arranque o en otras partes rotatorias.<br />
• Ate para arriba el pelo largo y quite la joyería.<br />
ADVERTENCIA<br />
El rociado de alta presión puede hacer que partículas<br />
pequeñas de pintura u otras partículas salgan<br />
disparadas y viajen a altas velocidades.<br />
• Siempre use protección para los ojos cuando utilice este equipo o<br />
cuando esté cerca de donde se esté usando el equipo.<br />
ADVERTENCIA<br />
Chispear involuntario puede tener como resultado el<br />
fuego o el golpe eléctrico.<br />
CUANDO AJUSTE O HAGA REPARACIONES A SU<br />
MÁQUINA LAVADORA DE PRESIÓN<br />
• Siempre desconecte el alambre de la bujía y colóquelo donde no<br />
pueda entrar en contacto con la bujía.<br />
PRECAUCIÓN<br />
Hacer funcionar el motor a velocidades excesivas aumenta el<br />
riesgo de lesiones personales.<br />
• NO juegue con partes que puedan aumentar o disminuir la velocidad<br />
de mando.<br />
• NO opere la máquina lavadora a presión con un valor de presión<br />
superior a su clasificación de presión.<br />
PRECAUCIÓN<br />
El lavadora de presión produce un rocío alto de la presión<br />
cuál riesgo de aumentos de la herida y dañe a la unidad.<br />
• NO asegure la pistola de rociado en la posición (open = abierto).<br />
• NO abandone la pistola de rociado cuando la máquina esté en<br />
funcionamiento.<br />
• NUNCA utilice una pistola de rociado que no tenga un seguro para<br />
gatillo o protección para gatillo en su lugar y en buenas condiciones.<br />
• Siempre asegúrese de que la pistola de rociado, boquillas y accesorios<br />
estén conectados correctamente.<br />
PRECAUCIÓN<br />
El rociado de alta presión puede dañar elementos frágiles,<br />
incluyendo el vidrio.<br />
• NO dirija la pistola rociadora hacia un cristal cuando utilice la boquilla<br />
MAX (punta de alfiler).<br />
• NUNCA apunte la pistola a plantas.<br />
PRECAUCIÓN<br />
El tratamiento inadecuado <strong>del</strong> lavadora de presión puede<br />
dañarlo y acortar su vida productiva.<br />
• Si usted tiene alguna pregunta acerca de las finalidades de uso <strong>del</strong><br />
generador, pregúntele a su concesionario o contacte a Briggs &<br />
Stratton Power Products.<br />
• NUNCA deberán ser operadas las unidades con partes rotas o<br />
ausentes, o sin la caja o cubiertas de protección.<br />
• NO eluda ningún dispositivo de seguridad de esta máquina.<br />
• Antes de poner en marcha la máquina lavadora a presión en clima<br />
frío, revise todas las partes <strong>del</strong> equipo y asegúrese de que no se haya<br />
formado hielo sobre ellas.<br />
• NUNCA mueva la máquina halando la manguera de alta presión.<br />
Utilice la manija que viene con la unidad.<br />
• Revise que el sistema de combustible no presente fugas o signos de<br />
deterioro, como mangueras desgastadas o porosas, sujetadores flojos<br />
o ausentes, tapa o tanque dañados. Corrija todos los defectos antes<br />
de operar la máquina lavadora a presión.<br />
• El equipo de alta presión está diseñado para ser utilizado<br />
UNICAMENTE con las partes autorizadas Briggs & Stratton Power<br />
Products. Si utiliza este equipo con partes que no cumplan con las<br />
especificaciones mínimas, el usuario asume todos los riesgos y<br />
responsabilidades.<br />
22
Características y Controles<br />
Sección<br />
2<br />
CONOZCA SU MAQUINA LAVADORA DE PRESION<br />
Lea el manual <strong>del</strong> propietario y las reglas de seguridad antes de poner en marcha su máquina lavadora a presión.<br />
Compare las ilustraciones con su máquina lavadora a presión para familiarizarse con las ubicaciones de los diferentes controles y ajustes.<br />
Guarde este manual para referencias futuras.<br />
Pistola de Rociado<br />
Bandeja de Accesorios<br />
Extensión para Boquillas<br />
con Conexión Rápida<br />
Boquilla turbo<br />
Arrancador<br />
de Retroceso<br />
Boquillas<br />
ProjectPro<br />
Filtro de Aire<br />
Bombilla más Principal<br />
Palanca <strong>del</strong><br />
Acelerador<br />
Manguera de Alta Presión<br />
Tapa <strong>del</strong> Depósito <strong>del</strong> Aceite<br />
Toma de Alta Presión y<br />
Entrada de Agua<br />
Tanque <strong>del</strong><br />
Gasolina<br />
Filtro y Tubo para<br />
Recolección de Detergente<br />
Bomba equipped with<br />
Automático se Enfría Sistema<br />
Arrancador de Retroceso – Usado para arrancar el motor<br />
manualmente.<br />
Automático se Enfría Sistema - Los ciclos regan por bomba<br />
cuando agua alcanza 125º-155ºF. Entibiar agua descargará de la<br />
bomba en el suelo. Este sistema previene el daño interno de bomba.<br />
Bandeja de Accesorios – Permite almacenar cómodamente los<br />
accesorios de serie y opcionales (cepillos, turbo varillas, etc.).<br />
Bomba – Desarrolla alta presión de agua.<br />
Bombilla más Principal — Usada para arranque de motores fríos.<br />
Boquillas ProjectPro – Inyección de productos detergentes,<br />
Max, General, y Suave para distintas aplicaciones de limpieza.<br />
Boquilla Turbo — Hace girar un chorro de alta presión<br />
utilizando un patrón circular rápido.<br />
Calcomanía Ejemplar de Datos (no mostrado, el trasero<br />
cercano de plato despreciable) – Proporciona el mo<strong>del</strong>o y el<br />
número de serie de aran<strong>del</strong>a de presión.Tenga por favor estos<br />
prontamente disponible cuándo llamar para la ayuda.<br />
Entrada de Agua – Conexión para la manguera de jardín.<br />
Extensión para Boquillas con Conexión Rápida – Le<br />
permite usar cuatro boquillas diferentes.<br />
Filtro de Aire – El elemento de filtro tipo seco limita la cantidad<br />
de suciedad y polvo que se introduce en el motor.<br />
Filtro y Tubo para Recolección de Detergente – Usado para<br />
succionar detergente de la botella de químicos a la corriente de<br />
agua de baja presión.<br />
Manguera de Alta Presión – Conecte un extremo a la pistola<br />
de rociado y el otro extremo a la toma de alta presión.<br />
Palanca <strong>del</strong> Acelerador – Activa el modo de arranque <strong>del</strong><br />
motor, para el arrancador de retroceso, y detiene el motor<br />
cuando está en funcionamiento.<br />
Pistola de Rociado – Controla la aplicación de agua sobre la<br />
superficie de limpieza con el gatillo. Incluye cerrojo de seguridad.<br />
Tanque <strong>del</strong> Combustible – Llene el tanque con gasolina regular<br />
sin contenido de plomo en este punto.<br />
Tapa <strong>del</strong> Depósito <strong>del</strong> Aceite – Llene el motor con aceite aquí.<br />
Siempre habitación de hoja para la expansión <strong>del</strong> combustible.<br />
Toma de Alta Presión – Conexión para la manguera de alta presión.<br />
23
Sección<br />
3<br />
Montaje<br />
MONTAJE<br />
IMPORTANTE: Lea totalmente el manual <strong>del</strong> propietario antes<br />
que intente ensamblar u operar su lavador a alta presión.<br />
Remueva el Lavador a Presión <strong>del</strong><br />
Empaque<br />
1. Remueva la bolsa con las piezas, accesorios y las adiciones<br />
incluidas con el lavador de presión.<br />
2. Corte dos esquinas en los extremos <strong>del</strong> cartón desde la<br />
parte superior hasta la parte inferior, de tal manera que el<br />
pánel pueda ser doblado en forma plana.<br />
3. Remueva el lavador a presión <strong>del</strong> la caja.<br />
Contenido de la Caja<br />
Los Artículos que se Encuentran en la Caja Son:<br />
• Unidad principal<br />
• Manubrio<br />
• Manguera de alta presión<br />
• Pistola rociadora<br />
• Extensión de la boquilla con las piezas de conexión rápida<br />
• Gafas de seguridad<br />
• Botella de aceite para motor<br />
• Boquilla a chorro de conexión rápida<br />
• Bandeja accesoria<br />
• Bolsa de accesorios (incluye lo siguiente):<br />
• <strong>Manual</strong> <strong>del</strong> propietario<br />
• <strong>Manual</strong> <strong>del</strong> motor<br />
• Tarjeta de registro <strong>del</strong> propietario<br />
• Bolsa con 4 boquillas de conexiones rápidas<br />
multicolores<br />
• Piezas para la manubrio (incluye lo siguiente):<br />
• Perno <strong>del</strong> soporte (2)<br />
• Perilla plástica (2)<br />
• Pinzas de árbol (4)<br />
PREPARANDO EL LAVADOR A<br />
ALTA PRESIÓN PARA SU USO<br />
Si usted tiene un problema al ensamblar la unidad o si hacen falta<br />
algunas piezas o se encuentran dañadas, llame a la línea directa <strong>del</strong><br />
lavador a alta presión, al 1-800-743-4115. Si llamar para la ayuda,<br />
tiene por favor el mo<strong>del</strong>o, la revisión, y el número de serie de la<br />
etiqueta de datos disponible.<br />
A prepara su aran<strong>del</strong>a de la presión para la operación,<br />
usted necesitará a realiza estas tareas:<br />
1. Llene y mande en tarjeta de matrícula.<br />
2. Conecte manubrio a unidad principal, entonces conecte<br />
bandeja accesoria a manubrio.<br />
3. Añada aceite al motor.<br />
4. Añada gasolina al tanque de combustible.<br />
5. Conecte manguera a alta presión a pistola rociadora y a<br />
bomba.<br />
6. Conecte el suministro de agua a bomba.<br />
7. Conecte boquilla la extensión al pistola rociadora.<br />
8. Seleccione una boquilla ProjectPro con conector rápido y<br />
conéctela al prolongador de la boquilla.<br />
Conecte el Manubrio y Bandeja Accesoria<br />
1. Coloque el manubrio sobre los soportes <strong>del</strong> mismo que ya<br />
están adheridos a la unidad principal.Asegúrese de que los<br />
orificios en el manubrio estén alineados con los orificios en<br />
los soportes <strong>del</strong> mismo manubrio (Figura 22).<br />
Figura 22 - Fijar el Manubrio a la Base<br />
Alinear<br />
Orificios<br />
Manubrio<br />
Soportes <strong>del</strong><br />
Manubrio<br />
NOTA: Tal vez será necesario mover los soportes <strong>del</strong> manubrio<br />
de un lado a otro para alinear el manubrio de tal manera que<br />
pueda deslizarse sobre los soportes <strong>del</strong> mismo manubrio.<br />
24
Sección 3: Montaje<br />
2. Inserte el perno <strong>del</strong> soporte a través de los orificios desde<br />
fuera de la unidad y sujete una perilla de plástico desde el<br />
interior de la misma unidad.Apriete manualmente (Figura 23).<br />
Figura 23 - Sujetar el Manubrio<br />
3. Coloque la bandeja de accesorios sobre los orificios <strong>del</strong> asa<br />
(vista desde la parte <strong>del</strong>antera de la unidad). Presione las<br />
pinzas de árbol para introducirlas en los orificios hasta que<br />
queden a nivel con la bandeja de accesorios (Figura 24).<br />
Figura 24 - Conecte Bandeja Accesoria<br />
4. Inserte las boquillas de colores ProjectPro y el resto de<br />
los accesorios en los espacios correspondientes de la bandeja<br />
de accesorios. Consulte “Cómo Usar la Bandeja de<br />
Accesorios”.<br />
Agregar Aceite al Motor y Gasolina<br />
• Coloque la lavadora a presión sobre una superficie nivelada.<br />
PRECAUCIÓN<br />
Cualquier intento para arancar el motor antes de haberle<br />
proporcionado el mantenimiento apropiado con el aceite<br />
recomendado, podría ocasionar la falla <strong>del</strong> motor.<br />
• Consulte el manual <strong>del</strong> propietario <strong>del</strong> motor para añadir al motor<br />
el aceite y el combustible recomendado<br />
• El daño a la lavadora a presión, resultado de la desatención a<br />
esta precaución, no será cubierto por la garantía.<br />
• Consulte el manual <strong>del</strong> propietario <strong>del</strong> motor para añadir al<br />
motor el aceite y el combustible recomendado.<br />
NOTA: Verifique el aceite <strong>del</strong> motor de manera frecuente cuando<br />
éste se esfuerce demasiado. Consulte el manual <strong>del</strong> propietario<br />
<strong>del</strong> motor para conocer cuáles son las recomendaciones al<br />
respecto.<br />
25
Sección 3: Montaje<br />
Conecte la Manguera y el Suministro de<br />
Agua a la Bomba<br />
IMPORTANTE: Usted deberá armar la extensión para boquillas<br />
y conectar todas las mangueras antes de darle arranque al motor.<br />
La bomba resultará dañada si arranca el motor sin tener todas las<br />
mangueras conectadas y el suministro agua abierto.<br />
NOTA: Antes de conectar las mangueras, retire y deseche los<br />
tapones de transporte de la salida de alta presión y de la entrada<br />
de agua de la bomba.<br />
1. Retroceda la manguera a alta presión y conecte a la base de<br />
la pistola rociadora (Figura 25).Apriete con la mano.<br />
Figura 25 — Conecte la Manguera a alta Presión a la Pistola<br />
Rociadora<br />
Conecte aquí la<br />
manguera a alta<br />
presión<br />
2. Conecte el otro extremo de la manguera a alta presión, a la<br />
salida de alta presión de la bomba (Figura 26).Apriete con la<br />
mano.<br />
Figura 26 — Conectar la Manguera de Alta Presión a la Toma<br />
de Agua<br />
3. Antes de que conecte la manguera de jardín a la entrada de<br />
agua, inspeccione el colador de la entrada (Figura 27). Limpie<br />
el colador si tiene residuos o solicite su remplazo si está<br />
dañado. NO HAGA FUNCIONAR LA MÁQUINA<br />
LAVADORA A PRESIÓN SI EL COLADOR DE LA<br />
ENTRADA ESTÁ DAÑADO.<br />
Figura 27 — Conectar la Manguera <strong>del</strong> Jardín a la Entrada de<br />
Agua<br />
Inspeccione la<br />
rejilla de entrada.<br />
NO la use si está<br />
dañada, límpiela si<br />
se encuentra sucia.<br />
4. Haga correr el agua a través de la manguera de su jardín por<br />
30 segundos para limpiar cualquier escombro que se<br />
encuentre en ella. Corte el agua.<br />
IMPORTANTE: Hace no agua de parar de siphon para el<br />
abastecimiento de agua. Use agua SOLO fría (menos que 100°F).<br />
5. Conecte la manguera de jardín (no exceder 50 pies en la<br />
longitud) a la entrada <strong>del</strong> agua.Apriete con la mano (Figura 27).<br />
PRECAUCIÓN<br />
DEBE haber por lo menos diez pies de manguera de jardín libre<br />
entre la entrada de agua de la lavadora a presión y cualquier<br />
dispositivo de control de flujo de agua, sea el caso de un<br />
conector 'Y' o de cualquier otro tipo de válvula.<br />
• El daño a la lavadora a presión, resultado de la desatención a esta<br />
precaución, no será cubierto por la garantía.<br />
6. ABRA el suministo <strong>del</strong> agua y abra la válvula de suministro<br />
para purgar la sistema de bomba de aire y impureza.<br />
ADVERTENCIA<br />
El rociado de alta presión puede hacer que partículas<br />
pequeñas de pintura u otras partículas salgan<br />
disparadas y viajen a altas velocidades.<br />
• Siempre use protección para los ojos cuando utilice este equipo o<br />
cuando esté cerca de donde se esté usando el equipo.<br />
• Antes de darle arranque a la máquina lavadora a presión, asegúrese de<br />
usar protección adecuada para los ojos.<br />
Lista de Revision Previa al Arranque <strong>del</strong><br />
Motor<br />
Revise la unidad para asegurarse que ha llevado a cabo los<br />
siguientes procedimientos:<br />
1. Cerciórese el manecilla es seguro.<br />
2. Revise que haya sido depositado aceite y esté al nivel<br />
correcto en la caja <strong>del</strong> cigüeñal <strong>del</strong> motor.<br />
3. Deposite la gasolina adecuada en el tanque <strong>del</strong> combustible.<br />
4. Revise que todas las conexiones de las mangueras (alta<br />
presión y suministro de agua) estén apretadas correctamente<br />
y que no existan dobleces, cortes o daño de la manguera de<br />
alta presión.<br />
5. Proporcione el suministro de agua adecuado.<br />
6. Asegúrese de leer las secciones "Reglas de Seguridad" y<br />
"Cómo Usar Su Máquina Lavadora A Presión" antes de usar<br />
la máquina lavadora a presión.<br />
26
Operación<br />
Sección<br />
4<br />
CÓMO USAR SU MÁQUINA<br />
LAVADORA A PRESIÓN<br />
Si tiene problemas operando su máquina lavadora a presión, por<br />
favor llame a la línea de ayuda para máquinas lavadoras a presión<br />
al 1-800-743-4115.<br />
Ubicación <strong>del</strong> Lavadora a Presión<br />
Espacio Libre Alrededor <strong>del</strong> Lavadora a Presión<br />
ADVERTENCIA<br />
Al motor funcionar, se produce monóxido de<br />
carbono, un gas inodoro y venenoso.<br />
El respirar el monóxido de carbono, producirá<br />
náusea, desmayo o la muerte.<br />
• Opere el lavadora de presión SOLAMENTE al aire libre.<br />
• Asegúrese de que los gases de escape no puedan entrar por ventanas,<br />
puertas, tomas de aire de ventilación u otras aberturas en un espacio<br />
cerrado en el que puedan acumularse.<br />
• NO opere el lavadora de presión dentro de un edificio o lugar cerrado.<br />
El lavadora a presión debe estar situado a un mínimo de 152 cm<br />
(5 pies) de toda estructura con muros combustibles y/o otras<br />
materias combustibles. Mantenga un mínimo de 92 cm (3 pies)<br />
alrededor <strong>del</strong> lavadora a presión, incluido la parte superior, para<br />
facilitar la ventilación y el mantenimiento <strong>del</strong> lavadora a presión.<br />
Sitúe el lavadora a presión en una zona bien ventilada que permita<br />
la eliminación de los gases de escape mortales. NO instale el<br />
lavadora a presión en lugares en los que los gases de escape se<br />
puedan acumular o entrar en un edificio que pueda estar<br />
ocupado.Asegúrese de que los gases de escape no puedan entrar<br />
por ventanas, puertas, tomas de aire de ventilación u otras<br />
aberturas en un espacio cerrado en el que puedan acumularse<br />
(Figura 28).Tenga en cuenta los vientos y las corriente de aire<br />
preponderantes cuando elija la ubicación <strong>del</strong> lavadora a presión.<br />
Figura 28 — Espacio Libre Alrededor <strong>del</strong> Lavadora a Presión<br />
Cómo Darle Arranque a su Máquina<br />
Lavadora a Presión<br />
Para darle arranque a su máquina lavadora a presión movida a<br />
motor por primera vez, siga estas instrucciones paso a paso. Esta<br />
información acerca <strong>del</strong> arranque inicial también se aplica cuando vaya<br />
a darle arranque al motor después de haber dejado de la máquina<br />
lavadora a presión fuera de uso por al menos un día.<br />
1. Coloque la máquina lavadora a presión en un área cercana a<br />
una suministro de agua exterior capaz de abastecer agua a un<br />
volumen mayor de 3.2 galones por minuto en no menos que<br />
20 PSI en el fin de aran<strong>del</strong>a de presión de la manga <strong>del</strong> jardín.<br />
2. Revise que la manguera de alta presión se encuentre<br />
conectada firmemente a la pistola de rociado y a la bomba.<br />
Vea "Preparando El Lavador A Alta Presión Para Su Uso".<br />
3. Asegúrese que la unidad esté nivelada.<br />
4. Conecte la manguera de jardín a la entrada <strong>del</strong> agua.<br />
Aprietela con la mano. Abra el suministro de agua.<br />
PRECAUCIÓN<br />
NO haga funcionar la bomba si no tiene el suministro<br />
conectado y abierto.<br />
• El daño a la lavadora a presión, resultado de la desatención a esta<br />
precaución, no será cubierto por la garantía.<br />
5. Conecte la extensión de la boquilla a la pistola rociadora.<br />
Apriétela con las manos (Figura 29).<br />
Figura 29 — Conecte la Extensión de la Boquilla a la Pistola<br />
Rociadora<br />
6. Elija la boquilla ProjectPro que desee usar, tire hacia atrás<br />
<strong>del</strong> anillo <strong>del</strong> prolongador de la boquilla, inserte la boquilla y<br />
suelte el anillo.Tire de la boquilla para comprobar que está<br />
bien montada (Figura 30). Consulte “Cómo usar el sistema de<br />
boquillas ProjectPro”.<br />
Figura 30 — Conecte el Boquilla a la Extensión de la Boquilla<br />
Típica Lavadora a<br />
Presión Mostrada<br />
Salida <strong>del</strong> Escape<br />
7. Coloque el pasador de seguridad al gatillo de la pistola<br />
rociadora (Figura 31).<br />
Figura 31 — La Pistola Rociadora con el Pasador de<br />
Seguridad en su Posición<br />
El Pasador de la<br />
Seguridad<br />
27
Sección 4: Operación<br />
8. Pour démarrer le moteur, suivez les instructions qui figurent<br />
dans le manuel d'utilisation. Consulte también la etiqueta de<br />
instrucciones situada en la limpiadora a presión.<br />
ADVERTENCIA<br />
El rápido repliegue <strong>del</strong> cable <strong>del</strong> arrancador<br />
(retroceso) impedirá que el usuario suelte el cable a<br />
tiempo y tirará de su mano y brazo hacia el motor.<br />
Como resultado, podrían producirse fracturas,<br />
contusiones o esguinces.<br />
• Cuando arranque el motor, tire lentamente <strong>del</strong> cable hasta sentir una<br />
resistencia y, a continuación, tire rápidamente de él para evitar su<br />
retroceso.<br />
• Si el motor arranca y deja de funcionar o si la resistencia aumenta al<br />
tirar <strong>del</strong> cable en intentos sucesivos de arranque, apriete el gatillo de<br />
la pistola rociadora.<br />
NOTA: Siempre mantenga la palanca <strong>del</strong> acelerador en el “Rápido”<br />
(“Fast”) posicione cuándo operar la aran<strong>del</strong>a de la presión.<br />
ADVERTENCIA<br />
Los motores al funcionar producen calor. La<br />
temperatura <strong>del</strong> silenciador y de las áreas cercanas<br />
puede alcanzar o pasar los 150ºF (65ºC).<br />
Quemaduras severas pueden ocurrir al hacer<br />
contacto.<br />
Los residuos como hojas, hierba, maleza, etc. se<br />
pueden inflamar.<br />
• NO toque las superficies calientes.<br />
• Permita que el equipo se enfríe antes de tocarlo.<br />
• El lavadora a presión debe estar situado a un mínimo de 152 cm<br />
(5 pies) de toda estructura con muros combustibles y/o otras<br />
materias combustibles.<br />
• Mantenga un mínimo de 92 cm (3 pies) alrededor de la carcasa <strong>del</strong><br />
lavadora a presión, para facilitar la ventilación y el mantenimiento <strong>del</strong><br />
lavadora a presión.<br />
• En el estado de California es obligatorio, según la ley, el uso de<br />
apagachispas (Sección 4442 <strong>del</strong> Código de Recursos Públicos de<br />
California). Otros estados pueden tener leyes similares. Las leyes federales<br />
se aplican en tierras federales. Si equipa el silenciador con un apagachispas,<br />
este deberá ser mantenido en buenas condiciones de trabajo.<br />
Cómo Detener su Máquina Lavadora a<br />
Presión<br />
1. Espere que el motor descanse.<br />
2. Pour éteindre le moteur, suivez les instructions qui figurent<br />
dans le manuel d'utilisation.<br />
3. Apriete el gatillo de la pistola rociadora para<br />
descargar la presión de la manguera a fin de evitar<br />
lesiones.<br />
NOTA: Observará una pequeña cantidad de agua cuando elimine<br />
la presión.<br />
ADVERTENCIA<br />
La corriente de agua de alta presión que produce<br />
este equipo pueden perforar la piel y sus tejidos<br />
profundos, ocasionando lesiones serias y posible<br />
amputación.<br />
El fusil <strong>del</strong> rocío retiene la presión alta cuando aran<strong>del</strong>a<br />
de presión es cerrada, que puede causar la herida.<br />
• Mantenga conectada la manguera a la máquina o a la pistola de<br />
rociado cuando el sistema esté presurizado.<br />
• Apriete el disparador en el fusil <strong>del</strong> rocío para aliviar la presión<br />
atrapada, cada vez usted para motor. Comprometa la cerradura <strong>del</strong><br />
disparador en el fusil <strong>del</strong> rocío.<br />
4. Active el seguro <strong>del</strong> gatillo de la pistola rociadora cuando no<br />
la utilice.<br />
Utilización de la Bandeja de Accesorios<br />
La unidad está equipada con una bandeja de accesorios con<br />
habitáculos para guardar la pistola rociadora, el prolongador de la<br />
boquilla, la boquilla turbo y las boquillas ProjectPro. La parte<br />
<strong>del</strong>antera de la bandeja también incluye un gancho para sujetar la<br />
manguera de alta presión.<br />
NOTA: El orificio adicional de la bandeja permite guardar un<br />
cepillo. La limpiadora a presión NO incluye el cepillo, que puede<br />
adquirirse como accesorio opcional.<br />
1. Pase el prolongador de la boquilla por el orificio de la<br />
bandeja de accesorios según se indica en la Figura 32.<br />
Figura 32 - Típico Bandeja de Accesorios<br />
2. Coloque la pistola rociadora en el orificio situado a la<br />
derecha de la bandeja de accesorios (Figura 32).<br />
3. Empuje la boquilla turbo hacia arriba, insertándola en la pinza<br />
de la bandeja de accesorios hasta que encaje en su posición,<br />
como se muestra en la Figura 32.<br />
4. Cuelgue la manguera de alta presión <strong>del</strong> gancho situado en la<br />
parte <strong>del</strong>antera de la bandeja de accesorios, como se<br />
muestra en la Figura 32.<br />
28
Sección 4: Operación<br />
Cómo Usar el Sistema de Boquillas<br />
ProjectPro<br />
El conector rápido <strong>del</strong> prolongador de la boquilla permite cambiar<br />
la boquilla y montar una de las cuatro diferentes que incluye el<br />
sistema ProjectPro. Las boquillas ProjectPro varían el presión<br />
y patrón de rociado como se muestra en la Figura 33.<br />
Figura 33 — Rocíe los Mo<strong>del</strong>os <strong>del</strong> Boquilla<br />
La Presión Baja<br />
2. Desplace hacia atrás el anillo <strong>del</strong> conector rápido y tire de<br />
las boquillas ProjectPro. Guarde las boquillas ProjectPro<br />
en el soporte de la bandeja de accesorios.<br />
3. Elija la boquilla ProjectPro que desee:<br />
• Para un enjuagado suave (baja presión y mayor caudal),<br />
para una limpieza suave de coches/camiones, barcos,<br />
RVs, muebles de jardín, cortacéspedes, etc., seleccione la<br />
boquilla ProjectPro amarilla de suave (Figura 34).<br />
Figura 34 — Boquilla Suave<br />
Negra<br />
Usada para aplicar<br />
detergentes<br />
La Presión Alta<br />
Suave<br />
40º Amarillo<br />
1650 PSI<br />
2.2 GPM<br />
General<br />
15º Naranja<br />
1950 PSI<br />
2.1 GPM<br />
Max<br />
0º Roja<br />
2200 PSI<br />
1.9 GPM<br />
• Para un enjuagado general (media presión y medio<br />
caudal), idóneo para la mayoría de las limpiezas, como<br />
revestimientos exteriores, patios de ladrillo, suelos de<br />
madera, entradas, aceras, suelos de garaje, etc.,<br />
seleccione la boquilla ProjectPro naranja de general<br />
(Figura 35).<br />
Figura 35 — Boquilla General<br />
Para cambiar las boquillas ProjectPro, siga estas<br />
instrucciones:<br />
1. Coloque el pestillo de seguridad de la pistola de rociado.<br />
PRECAUCIÓN<br />
El lavadora de presión produce un rocío alto de la presión<br />
cuál riesgo de aumentos de la herida y dañe a la unidad.<br />
• NUNCA intercambie boquilla ProjectPro sin haber asegurado el<br />
cerrojo de seguridad <strong>del</strong> gatillo.<br />
• NO tuerza boquilla ProjectPro al rociar.<br />
29
Sección 4: Operación<br />
• Para un enjuagado de máxima potencia (alta presión y bajo<br />
caudal), para superficies rebeldes o de difícil acceso, como<br />
superficies de plantas altas, eliminación de pintura, manchas<br />
de aceite, eliminación de óxido u otras sustancias difíciles<br />
(alquitrán, resina, grasa, cera, etc.), seleccione la boquilla<br />
ProjectPro roja de max (Figura 36).<br />
Figura 36 — Boquilla Maxima<br />
Cómo Usar la Boquilla a Chorro<br />
La boquilla a chorro hace girar la corriente de alta presión en un<br />
patrón circular rápido. Siempre comience a usar la boquilla a<br />
chorro a cierta distancia y vaya acercándose a la superficie<br />
gradualmente hasta que obtenga la fuerza de limpieza que desee.<br />
PRECAUCIÓN<br />
La boquilla a chorro produce un rociado con una presión<br />
extremadamente alta, capaz de remover pintura y hacer agujeros<br />
a través de las superficies si la sostiene demasiado cerca.<br />
• Siempre asegúrese de que la superficie que va a limpiar no vaya a ser<br />
dañada por el rociado de alta presión haciendo una prueba en un área<br />
escondida.<br />
1. Desplace hacia atrás el anillo <strong>del</strong> conector rápido y tire de la<br />
boquilla ProjectPro. Guarde las boquillas ProjectPro en<br />
el soporte de la bandeja de accesorios.<br />
2. Desplace hacia atrás el anillo, inserte la nueva boquilla a<br />
chorro y suelte el anillo (Figura 38).Tire de la boquilla a<br />
chorro para comprobar que está bien montada.<br />
Figura 38 - Conecte el Boquilla a Chorro a la Extensión de la<br />
Boquilla<br />
• Para aplicar productos detergentes o limpiadores<br />
específicos que ayuden a descomponer la suciedad<br />
rebelde en distintas superficies, seleccione la boquilla de<br />
detergente ProjectPro negra (Figura 37).<br />
Figura 37 — Boquilla de Detergente<br />
4. Desplace hacia atrás el anillo, inserte la boquilla ProjectPro<br />
elegida y suelte el anillo.Tire de la boquilla ProjectPro para<br />
comprobar que está bien montada.<br />
5. Para una limpieza más efectiva, mantenga la boquilla de<br />
rociado de 8 a 24 pulgadas de la superficie de limpieza. Si<br />
coloca la boquilla muy cerca, podría dañar la superficie que<br />
está limpiando.<br />
6. NO coloque la boquilla a menos de 6 pulgadas cuando esté<br />
limpiando llantas.<br />
3. El rociado de alta presión es más efectivo cuando la punta de<br />
la vara se encuentra entre 8 y 24 pulgadas de la superficie<br />
que se está limpiando. Si coloca la boquilla a chorro muy<br />
cerca, podría dañar la superficie que está limpiando.<br />
NOTA: Usted no puede aplicar detergente con la boquilla a chorro.<br />
Limpieza y Aplicación <strong>del</strong> Detergentes<br />
IMPORTANTE: Utilice detergentes diseñados<br />
específicamente para máquinas lavadoras a presión. Los<br />
detergentes caseros podrían dañar la bomba.<br />
PRECAUCIÓN<br />
Usted deberá conectar todas las mangueras antes de darle<br />
arranque al motor.<br />
• Arrancar el motor sin tener todas las mangueras conectadas y sin el<br />
suministro de agua ABIERTO (ON) causará el daño de la bomba.<br />
• El daño a la lavadora a presión, resultado de la desatención a esta<br />
precaución, no será cubierto por la garantía.<br />
Para aplicar el detergente, siga los siguientes pasos:<br />
1. Revise el uso de la boquilla ProjectPro.<br />
2. Prepare la solución detergente siguiendo las instrucciones <strong>del</strong><br />
fabricante.<br />
30
Sección 4: Operación<br />
3. Coloque el pequeño extremo final <strong>del</strong> filtro <strong>del</strong> tubo de<br />
inyección <strong>del</strong> detergente dentro <strong>del</strong> contenedor <strong>del</strong><br />
detergente.<br />
PRECAUCIÓN<br />
Evite que el tubo de inyección de químicos entre en contacto<br />
con el silenciador caliente.<br />
• Cuando coloque el filtro en la botella <strong>del</strong> químico, coloque el tubo de<br />
manera que no entre en contacto accidentalmente con el silenciador<br />
caliente.<br />
4. Asegúrese de que la boquilla de detergente ProjectPro<br />
negra está montada.<br />
NOTA: NO se puede aplicar detergente con las boquillas de alta<br />
presión (Amarilla, Naranja y Roja).<br />
5. Asegúrese que la manguera de jardín esté conectada a la<br />
entrada <strong>del</strong> agua. Revise que la manguera de alta presión esté<br />
conectada a la pistola de rociado y a la bomba. Dele arranque<br />
al motor.<br />
6. Aplique el detergente sobre la superficie seca, comenzando en<br />
la parte inferior <strong>del</strong> área y dirigiéndose hacia arriba, utilizando<br />
movimientos largos, parejos y superpuestos.<br />
7. Permita que el detergente penetre de 3 a 5 minutos antes de<br />
enjuagar. Vuelva a aplicar cuando sea necesario para evitar que<br />
la superficie se seque. NO permita que el detergente se<br />
seque. Si permite que el detergente se seque, la superficie<br />
podría quedar con manchas.<br />
IMPORTANTE: Usted deberá lavar el sistema de inyección de<br />
químicos después de cada uso colocando el filtro en un balde de<br />
agua limpia y haciendo funcionar la máquina lavadora a presión de<br />
1 a 2 minutos en el modo de baja presión.<br />
Enjuage de la Máquina Lavadora a Presión<br />
Para Enjuage:<br />
1. Coloque el cerrojo de seguridad a la pistola de rociado.<br />
2. Retire la boquilla de detergente negra <strong>del</strong> prolongador de la<br />
boquilla.<br />
3. Seleccione e instale la boquilla de alta presión deseada<br />
conforme a las instrucciones de la sección “Cómo Usar el<br />
Sistema de Boquillas ProjectPro”.<br />
4. Mantenga la pistola de rociado a una distancia segura <strong>del</strong> área<br />
que planea rociar.<br />
El rociado de la alta presión podría hacerlo caer si<br />
está muy cerca de la superficie de limpieza.<br />
• Mantenga la boquilla de rociado de 8 a 24 pulgadas de la superficie de<br />
limpieza.<br />
• Opere y almacene esta unidad sobre una superficie estable.<br />
• Sea extremadamente cuidadoso si usa la máquina lavadora a presión desde<br />
una escalera, andamio o cualquier superficie relativamente inestable.<br />
• Sujete la pistola de la hidrolavadora firmemente con ambas manos<br />
cuando utilice el rociado a alta presión. De esta manera evitará<br />
lesiones producidas por el posible golpe de la pistola hacia atrás.<br />
5. Aplique un rociado de alta presión en un área pequeña,<br />
después revise si la superficie presenta daños. Si no<br />
encuentra daños, puede continuar con el trabajo de limpieza.<br />
6. Comience en la parte superior <strong>del</strong> área que va a enjuagar,<br />
dirigiéndose hacia abajo con los mismos movimientos<br />
superpuestos que utilizó para el limpieza.<br />
Limpiando el Tubo<br />
ADVERTENCIA<br />
Si usted usó el tubo, usted debe lavarlo con agua limpia antes de<br />
parar el motor.<br />
1. Coloque el filtro y la inyección química en un balde lleno de<br />
agua limpia.<br />
2. Conecte la boquilla negra de baja presión.<br />
3. Lave de 1 a 2 minutos.<br />
4. Apague el motor.<br />
IMPORTANTE: Apagando el motor, simplemente no soltará la<br />
presión en el sistema. Cuando el motor se ha apagado,<br />
apriete el gatillo en la pistola rociadora para deshacerse<br />
de la presión en la manguera.<br />
Sistema de Enfriamiento Automático<br />
(Alivio Térmico)<br />
El agua que circula dentro de la bomba puede alcanzar<br />
temperaturas entre los 125º-155ºF si hace funcionar el motor de<br />
su máquina lavadora a presión de 3 a 5 minutos sin oprimir el<br />
gatillo de la pistola de rociado. Cuando el agua alcanza dicha<br />
temperatura, el sistema de enfriamiento automático se activa y<br />
enfría la bomba descargando agua caliente en el piso.<br />
31
Sección<br />
5<br />
Mantenimiento<br />
ESPECIFICACIONES<br />
Presión de Salida Máxima . . . . . . . . . . . . . . . . . . . . . 2200 PSI<br />
Caudal Máximo . . . . . . . . . . . . . . 2.2 galones por minuto (gpm)<br />
Detergente Use el detergente adecuado para lavadores a presión<br />
Temperatura <strong>del</strong> Suministro<br />
de Agua . . . . . . . . . . . . . . . . . . . . . . . . . . .Que no pase de 100ºF<br />
Sistema de . . . . . . . . . . . .Funcionará cuando el agua alcance de<br />
Enfriamiento . . . . . . . . . . . . . . . . . . . . . . . . . . . . . . . .125º-155ºF<br />
Automático<br />
Peso que Embarca . . . . . . . . . . . . . . . . . . . . . . . . . . . . . . .54 lbs.<br />
RECOMENDACIONES GENERALES<br />
La garantía de la máquina lavadora a presión no cubre los<br />
elementos que han sido sujetos a abuso o negligencia por parte<br />
<strong>del</strong> operador. Para hacer válida la cobertura total de la garantía, el<br />
operador deberá mantener la lavadora de presión tal y como se<br />
indica en el manual.<br />
NOTA: En caso de dudas sobre la sustitución de los componentes<br />
de su limpiadora a presión, llame al 1-800-743-4115 para obtener<br />
ayuda.<br />
• Algunos ajustes tendrán que hacerse periódicamente para<br />
mantener adecuadamente su máquina lavadora a presión.<br />
• Todos los servicios y ajustes deberán hacerse por lo menos<br />
una vez en cada estación.<br />
• Una vez al año, usted deberá limpiar o remplazar la bujía y el<br />
filtro de aire. Una bujía nueva y un filtro de aire limpio<br />
garantizan una mezcla de combustible-aire adecuada y le ayuda<br />
a su motor a funcionar mejor y a tener una vida útil más<br />
prolongada. Por favor, para mayores detalles, consulte el<br />
manual <strong>del</strong> propietario <strong>del</strong> motor.<br />
• Si equipó con llantas que se pode hinchar, mantenga la presión<br />
aérea en el valor marcado en la llanta o dentro de 15 y 40 psi.<br />
Antes de Cada Uso<br />
• Revise el nivel de aceite <strong>del</strong> motor.<br />
• Revise si existen daños en el colador de la entrada de agua.<br />
• Revise si existen daños en el filtro en línea.<br />
• Revise si existen fugas en la manguera de alta presión.<br />
• Revise si existen daños en los filtros de químicos.<br />
• Revise si existen fugas en el conjunto de la extensión para<br />
boquillas y pistola.<br />
• El aclarado fuera manga de jardín para limpiar fuera<br />
escombros.<br />
MANTENIMIENTO DE LA<br />
MAQUINA LAVADORA A<br />
PRESION<br />
Revise y Limpie el Colador de Entrada<br />
Examine el colador de entrada de la manguera de jardín. Límpielo<br />
si está tapado o remplacelo si está roto.<br />
Revise la Manguera de Alta Presión<br />
Las mangueras de alta presión pueden desarrollar fugas debido al<br />
desgaste, dobleces o abuso. Revise la manguera antes de cada uso.<br />
Revise si existen cortes, fugas, abrasiones, levantamiento de la cubierta,<br />
daño o movimiento de los acoplamientos. Si existe cualquiera de estas<br />
condiciones, remplace la manguera inmediatamente.<br />
ADVERTENCIA<br />
La corriente de agua de alta presión que produce<br />
este equipo pueden perforar la piel y sus tejidos<br />
profundos, ocasionando lesiones serias y posible<br />
amputación.<br />
• NUNCA repare la manguera de alta presión. Remplacela.<br />
• Remplacela con una manguera que cumpla con la capacidad mínima de<br />
presión de su máquina lavadora a presión.<br />
Chequee el Tubo de Sifón <strong>del</strong> Detergente<br />
Examine el filtro en el tubo <strong>del</strong> detergente y límpielo si se encuentra<br />
sucio. El tubo debería quedar apretado en la pieza. Examine el tubo<br />
para ver si existe cualquier tipo de goteo o está roto. Reemplace el<br />
filtro o el tubo si alguno de ellos se encuentra dañado.<br />
Revise la Pistola y la Extensión para<br />
Boquillas<br />
Examine la conexión de la manguera a la pistola y cerciorese de<br />
que esté en buen estado. Pruebe el gatillo oprimiéndolo y<br />
asegurándose de que se devuelve a su sitio cuando lo suelte.<br />
Coloque el cerrojo de seguridad y pruebe el gatillo. Usted no<br />
debe ser capaz de oprimir el gatillo. Remplace la pistola<br />
inmediatamente si falla cualquiera de estas pruebas.<br />
Revise el Filtro en Línea<br />
Consulte la Figura 39 y suministre servicio al filtro en línea si se<br />
tapa siguiendo estos pasos:<br />
Figura 39 - Limpieza <strong>del</strong> Filtro<br />
Extensión de la<br />
Boquilla<br />
Filtro en Línea<br />
Anillo ‘O’<br />
32
Sección 5: Mantenimiento<br />
1. Retire la pistola y la extensión para boquillas de la manguera<br />
de alta presión. Retire la extensión para boquillas de la<br />
pistola y retire el anillo 'o' y el colador de la extensión para<br />
boquillas. Lave el colador, pistola y extensión para boquillas<br />
con agua limpia para eliminar toda clase de residuos.<br />
2. Coloque el colador <strong>del</strong> filtro en línea en el extremo con<br />
rosca de la extensión para boquillas. Su dirección no importa.<br />
Coloque el colador ejerciendo presión con el borrador de<br />
un lápiz hasta que se asiente por completo en el fondo de la<br />
abertura.Tenga cuidado de no doblar el colador.<br />
3. Coloque el anillo 'o' en la ranura respectiva. Empuje el anillo 'o'<br />
hasta que quede ajustado contra el colador <strong>del</strong> filtro en línea.<br />
4. Conecte la extensión para boquillas a la pistola de rociado de<br />
la manera descrita anteriormente en este manual.<br />
Mantenimiento de la Boquilla<br />
Si siente una sensación pulsante al momento de apretar el gatillo<br />
de la pistola rociadora, puede que sea causada por la presión<br />
excesiva en la bomba. La causa principal de la presión excesiva en<br />
la bomba es cuando la boquilla se encuentra atascada o tapada<br />
con materiales extraños, tales como tierra, etc. Para corregir el<br />
problema, limpie inmediatamente la boquilla siga las instrucciones<br />
siguientes:<br />
1. Apague el motor y apague el suministro de agua.<br />
2. Remueva la boquilla <strong>del</strong> extremo de la extensión de la<br />
boquilla.<br />
3. Quite el en el filtro de la línea <strong>del</strong> otro fin de la extensión de<br />
boquilla.<br />
4. Use el pequeño sujeta papeles para liberar cualquier material<br />
extraño que esté tapando la boquilla (Figura 40).<br />
Figura 40 - Mantenimiento de la Boquilla<br />
7. Conecte de nuevo la extensión de la boquilla a la pistola<br />
rociadora.<br />
8. Conecte de nuevo el suministro de agua, prenda el agua, y<br />
encienda el motor.<br />
9. Pruebe el lavador a presión al hacer funcionar con cada una<br />
de las boquilla de conexiones rápidas que viene con el<br />
lavador a presión.<br />
Mantenimiento de los Anillos 'O'<br />
Compre una O–Juego de Mantenimiento de Anillo, el artículo<br />
numera 191922GS, en avisando el más cercano servicio autorizado<br />
central. NO se incluye con la aran<strong>del</strong>a de la presión. Este juego<br />
incluye los anillos <strong>del</strong> reemplazo O, aran<strong>del</strong>a de caucho y filtro de<br />
cala de agua. Refiérase a la hoja de la instrucción proporcionada en<br />
el juego para atender a su unidad’los anillos de s O.<br />
Mantenimiento de la Bomba<br />
Cambio <strong>del</strong> aceite de la bomba<br />
Cambie el aceite cada 50 horas o una vez al año, lo que suceda antes.<br />
NOTA: Debe adquirir una botella de aceite para la bomba<br />
previamente medido, Nº de pieza 190586GS, avisando el más<br />
cercano servicio autorizado central.<br />
Cambie el aceite como se indica a continuación:<br />
1. Vacíe el aceite <strong>del</strong> motor y el combustible de la limpiadora a<br />
presión.<br />
2. Use una 8mm llave allen para extraer el tapón negro de<br />
aceite de la bomba que hay entre la salida de presión y la<br />
entrada de la manguera de riego (Figura 42).<br />
Figura 42 - Cambio <strong>del</strong> Aceite de la Bomba<br />
Use el alambre<br />
aquí para eliminar<br />
los residuos.<br />
5. Usando una manguera de jardín, remueva cualquier desecho<br />
adicional, poniendo agua en la extensión de la boquilla<br />
(Figura 41). Haga ésto de 30 a 60 segundos.<br />
Figura 41 - Suministrar Flujo de Agua a la Boquilla<br />
Tapón de<br />
Aceite<br />
6. Instale de nuevo la boquilla y en el filtro en-línea en la<br />
extensión.<br />
3. Incline la limpiadora a presión hacia un lado para que vaciar<br />
completamente la bomba de aceite, y vierta este en un<br />
recipiente homologado.<br />
4. Incline la limpiadora a presión hacia el lado contrario y llene<br />
la bomba con el aceite recomendado a través <strong>del</strong> mismo<br />
orificio (puede utilizar para ello un embudo pequeño).<br />
33
Sección<br />
6<br />
Sección 5 y 6: Mantenimiento y Almacenamiento<br />
5. Instale el tapón negro de aceite de la bomba y apriételo<br />
firmemente.<br />
6. Coloque la limpiadora de presión en su posición normal (de<br />
pie).Añada combustible y aceite de motor.<br />
MANTENIMIENTO DEL MOTOR<br />
Consulte el manual <strong>del</strong> propietario <strong>del</strong> motor para las<br />
instrucciones de cómo mantener adecuadamente el motor.<br />
PRECAUCIÓN<br />
Evite el contacto prolongado o repetido de piel con aceite<br />
usado de motor.<br />
• El aceite usado <strong>del</strong> motor ha sido mostrado al cancer de la piel de la<br />
causa en ciertos animales <strong>del</strong> laboratorio.<br />
• Completamente lavado expuso áreas con el jabón y el agua.<br />
MANTENGA FUERA DE ALCANCE DE NIÑOS. NO<br />
CONTAMINE. CONSERVE los RECURSOS.VUELVA<br />
ACEITE USADO A la COLECCION CENTRA.<br />
PREPARANDO LA UNIDAD PARA<br />
SU ALMACENAMIENTO<br />
El agua no debe permanecer en la unidad por un largo periodo de<br />
tiempo. Los sedimentos o minerales se pueden depositar en las<br />
piezas de la bomba y "congelar" la acción de la bomba. Si usted no<br />
piensa usar el lavador a presión por mas de 30 días, siga este<br />
procedimiento:<br />
1. Vacíe el tubo de detergente, colocando el filtro en un envase<br />
lleno de agua limpia mientras esté corriendo el agua a baja<br />
presión. Lave por 1 o 2 minutos.<br />
2. Apague el motor y permita refrescar, entonces quita mangas<br />
altas de presión y jardín. Desconecte el alambre de la bujía.<br />
3. Vacíe todos los líquidos presentes en la bomba, halando la<br />
manecilla de retroceso hasta seis veces. Esto debería<br />
remover la mayor parte de los líquidos presentes en la<br />
bomba.<br />
4. El salvador de la bomba de la marca <strong>del</strong> uso a previene la<br />
corrosión construye y helado de bomba.<br />
5. Almacene la unidad en un lugar limpio y seco.<br />
Proteger la Bomba<br />
A protege al PumpSaver de uso de bomba a previene congelar el<br />
daño y lubrica émbolos y sellos.<br />
NOTA: El PumpSaver están disponible sólo como un accesorio<br />
opcional. No es incluido con la aran<strong>del</strong>a de la presión.Avise el más<br />
cercano servicio autorizado central para comprar PumpSaver.<br />
Al uso el PumpSaver, cerciórese la aran<strong>del</strong>a de la presión se apaga<br />
y desconecta <strong>del</strong> agua <strong>del</strong> suministro. Lea y siga todas<br />
instrucciones y las advertencias dadas en el contenedor de<br />
PumpSaver.<br />
PRECAUCIÓN<br />
Usted deberá proteger su unidad de las temperaturas de<br />
congelamiento.<br />
• Si no lo hace, dañará permanentemente la bomba y la unidad no<br />
podrá funcionar.<br />
• La garantía no cubre el daño de la unidad ocasionado por<br />
congelamiento.<br />
PRECAUCIÓN<br />
Lea y siga todo advierte y las advertencias en el PumpSaver<br />
pueden marcar.<br />
• Siempre protección de ojo de uso cuando se usa PumpSaver.<br />
PRECAUCIÓN<br />
PumpSaver goteará de la bomba después que el tratamiento<br />
y manchará madera y cemento.<br />
• Proteja superficies de gotear PumpSaver.<br />
NOTA: Si el PumpSaver no está disponible, ponga anticongelante<br />
RV (que no contenga alcohol) en la bomba, en una sección de<br />
3 pies de la manguera <strong>del</strong> jardín conectada a un adaptador y<br />
halando la manecilla dos veces.<br />
ALMACENANDO EL MOTOR<br />
Consulte el manual <strong>del</strong> propietario <strong>del</strong> motor para las<br />
instrucciones de cómo preparar adecuadamente el motor para su<br />
almacenamiento.<br />
34
Diagnosticos de Averías<br />
Sección<br />
7<br />
REPARACION DE AVERIAS<br />
Problema Causa Solución<br />
La bomba presenta los siguientes<br />
problemas: no produce presión,<br />
produce una presión errada,<br />
traqueteo, pérdida de presión, bajo<br />
volumen de agua.<br />
El detergente no se mezcla con el<br />
rociado.<br />
El motor funciona bien cuando no<br />
tiene cargas, pero funciona "mal"<br />
cuando se conecta una carga.<br />
El motor se apaga durante la<br />
operación.<br />
1. Está usando la boquilla de baja presión<br />
(negra).<br />
2. La entrada de agua está bloqueada.<br />
3. Suministro de agua inadecuado.<br />
4. La manguera de entrada está doblada o<br />
presenta fugas.<br />
5. El colador de la manguera de entrada<br />
está tapado.<br />
6. El suministro de agua está por encima<br />
de los 100ºF.<br />
7. La manguera de alta presión está<br />
bloqueada o presenta fugas.<br />
8. La pistola presenta fugas.<br />
9. La boquilla está obstruida.<br />
10. Bomba defectuosa.<br />
1. El tubo de succión de detergente no<br />
está sumergido.<br />
2. El filtro de químicos está tapado.<br />
3. Sucio en el filtro de la línea.<br />
4. Está usando la boquilla de alta presión.<br />
La velocidad <strong>del</strong> motor es demasiado lenta.<br />
Sin gasolina.<br />
1. Cambie la boquilla a una de las tres<br />
boquilla de alta presión.<br />
2. Limpie la entrada.<br />
3. Proporcione flujo de agua adecuado.<br />
4. Remplace la manguera.<br />
5. Revise y limpie el colador de la<br />
manguera de entrada.<br />
6. Proporcione suministro de agua más<br />
fría.<br />
7. Retire las obstrucciones de la<br />
manguera de salida.<br />
8. Remplace la pistola.<br />
9. Limpie la boquilla.<br />
10. Póngase en contacto con el servicio<br />
técnico autorizado.<br />
1. Coloque el tubo de succión de<br />
detergente en el detergente.<br />
2. Limpie o remplace el filtro/tubo de<br />
succión de detergente.<br />
3. Vea "Cheque En el Filtro de la Línea".<br />
4. Use la boquilla de baja presión (negra).<br />
Mueva el control de la válvula de regulación<br />
a la posición FAST (RAPIDO). Si el motor<br />
continua funcionando mal, póngase en<br />
contacto con el centro de servicio Briggs<br />
and Stratton.<br />
Llene el tanque de combustible.<br />
35
POLÍTICA DE GARANTÍA PARA EL PROPIETARIO DE EQUIPOS BRIGGS & STRATTON POWER PRODUCTS GROUP, LLC<br />
Fecha de entrada en vigor: 1 de Septiembre de 2004. Sustituye a todas las garantías sin fecha y a las de fecha anterior al 1 de Septiembre de 2004<br />
GARANTÍA LIMITADA<br />
Briggs & Stratton Power Products Group, LLC reparará o sustituirá sin cargo alguno cualquier componente <strong>del</strong> equipo que presente defectos de<br />
materiales y/o mano de obra. Los gastos de transporte de las piezas enviadas para reparar o sustituir conforme a los términos de esta garantía<br />
correrán a cargo <strong>del</strong> comprador. El periodo de vigencia y las condiciones de esta garantía son los que se estipulan a continuación. Para obtener<br />
servicio en garantía, localice el distribuidor de servicio autorizado más próximo en nuestro mapa de distribuidores, en<br />
www.briggspowerproducts.com.<br />
NO EXISTE NINGUNA OTRA GARANTÍA EXPLÍCITA. LAS GARANTÍAS IMPLÍCITAS, INCLUIDAS LAS DE COMERCIABILIDAD O IDONEIDAD<br />
PARA UN FIN CONCRETO, SE LIMITAN A UN AÑO DESDE LA FECHA DE COMPRA O AL LÍMITE DE TIEMPO PERMITIDO POR LA LEY.<br />
QUEDAN EXCLUIDAS TODAS LAS GARANTÍAS IMPLÍCITAS QUEDA EXCLUIDA LA RESPONSABILIDAD POR DAÑOS SECUNDARIOS Y<br />
DERIVADOS HASTA EL LÍMITE PERMITIDO POR LA LEY. Algunos países o estados no permiten limitar la duración de una garantía implícita ni<br />
excluir o limitar los daños secundarios y derivados. Por tanto, es posible que las limitaciones y exclusiones mencionadas no sean aplicables en su<br />
caso. Esta garantía le otorga determinados derechos legales y es posible que tenga otros derechos que pueden variar de un país o estado a otro.<br />
NUESTRO EQUIPO*<br />
MOTOR<br />
FUERABORDA<br />
LIMPIADORA<br />
A PRESIÓN<br />
BOMBA DE<br />
AGUA<br />
(No disponible<br />
en EE.UU.)<br />
GENERADOR<br />
PORTÁTIL<br />
SISTEMA DE GENERADOR DE RESERVA<br />
DOMÉSTICO<br />
SOLDADORA Menos de 10 kW 10 kW ó más Conectador<br />
PERÍODO DE GARANTÍA**<br />
Uso <strong>del</strong> consumidor<br />
Uso comercial<br />
2 años<br />
ninguno<br />
1 año<br />
90 días<br />
1 año<br />
90 días<br />
2 años<br />
1 año<br />
2 años<br />
ninguno<br />
3 años ó<br />
1.500 horas<br />
ninguno<br />
3 años<br />
ninguno<br />
* El motor y las baterías de arranque sólo están cubiertos por la garantía de su fabricante.<br />
** 2 años para todos los productos de consumo en la Unión Europea. Componentes sólo durante el segundo año para uso <strong>del</strong><br />
consumidor <strong>del</strong> generador portátil y <strong>del</strong> sistema generador doméstico - Menos de 10 kW fuera de la Unión Europea.<br />
El período de garantía comienza en la fecha de compra <strong>del</strong> primer consumidor o usuario comercial final y se prolonga durante el tiempo especificado<br />
en la siguiente tabla. "Uso <strong>del</strong> consumidor" significa uso doméstico personal por parte de un consumidor final. "Uso comercial" significa cualquier otro<br />
uso, incluidos los usos con fines comerciales, de generación de ingresos o alquiler. Una vez que el equipo se haya usado con fines comerciales, se<br />
considerará como equipo de uso comercial a efectos de esta garantía. Los equipos utilizados para suministrar energía en sustitución de un<br />
servicio público no pueden acogerse a esta garantía. Las limpiadoras a presión con alimentación eléctrica para fines comerciales no están<br />
cubiertas por la garantía.<br />
NO ES NECESARIO REGISTRAR LA GARANTÍA PARA OBTENER SERVICIO DE BRIGGS & STRATTON PRODUCTS. GUARDE SU RECIBO DE<br />
COMPRA. SI NO APORTA LA PRUEBA DE LA FECHA DE COMPRA INICIAL, SE UTILIZARÁ LA FECHA DE FABRICACIÓN DEL PRODUCTO<br />
PARA DETERMINAR EL PERÍODO DE GARANTÍA.<br />
ACERCA DE LA EQUIPO GARANTÍA<br />
Esperamos que disfrute de nuestra garantía y le pedimos disculpas por las molestias causadas. Cualquier distribuidor de servicio autorizado puede llevar a cabo<br />
reparaciones en garantía. La mayoría de las reparaciones en garantía se gestionan normalmente, pero algunas veces la solicitud de servicio en garantía puede no ser<br />
procedente. Por ejemplo, la garantía no será válida si el equipo presenta daños debidos al mal uso, la falta de mantenimiento, el transporte, la manipulación, el<br />
almacenamiento o la instalación inadecuados. De manera similar, la garantía quedará anulada si se ha borrado la fecha de fabricación o el número de serie <strong>del</strong> equipo, o si<br />
el equipo ha sido alterado o modificado. Durante el período de garantía, el distribuidor de servicio autorizado podrá reparar o sustituir, a su libre elección, cualquier pieza<br />
que, previa inspección, sea defectuosa en condiciones normales de uso y servicio. Esta garantía no cubre las reparaciones y equipos que se detallan a continuación:<br />
• Desgaste normal: Al igual que cualquier otro aparato mecánico, los equipos de uso en exteriores necesitan piezas y mantenimiento periódicos para funcionar<br />
correctamente. Esta garantía no cubre las reparaciones cuando el uso normal haya agotado la vida útil de una pieza concreta <strong>del</strong> equipo.<br />
• Instalación y mantenimiento: Esta garantía no cubre los equipos ni las piezas cuya instalación sea incorrecta o no haya sido autorizada, ni aquellos que hayan sido<br />
objeto de cualquier tipo de alteración, mal uso, negligencia, accidente, sobrecarga, exceso de velocidad o mantenimiento, reparación o almacenamiento inadecuados<br />
que, a nuestro juicio, haya afectado negativamente a su funcionamiento y su fiabilidad. La garantía tampoco cubre el mantenimiento normal, como los ajustes y la<br />
limpieza, o la obstrucción <strong>del</strong> sistema de combustión (debido a materias químicas, suciedad, carbón, cal, etc.).<br />
• Otras exclusiones: También quedan excluidos de esta garantía el desgaste de los artículos tales como conectores, medidores de aceite, correas, juntas tóricas,<br />
filtros, juntas de bombas, etc., las bombas que se hayan hecho funcionar sin agua y los daños derivados de accidentes, uso indebido, modificaciones, alteraciones,<br />
servicio inadecuado, congelación o deterioro químico. Los accesorios tales como pistolas, mangueras, varillas y boquillas quedan excluidos de la garantía <strong>del</strong><br />
producto. Esta garantía excluye los fallos debidos a hechos fortuitos y a otros acontecimientos de fuerza mayor que escapan al control <strong>del</strong> fabricante. También se<br />
excluyen los equipos usados o reacondicionados y los destinados a demostraciones; los equipos utilizados como fuente principal de energía en lugar de un servicio<br />
público y los equipos sanitarios destinados al mantenimiento de las constantes vitales.<br />
BRIGGS & STRATTON POWER PRODUCTS GROUP, LLC<br />
JEFFERSON, WI, EE.UU