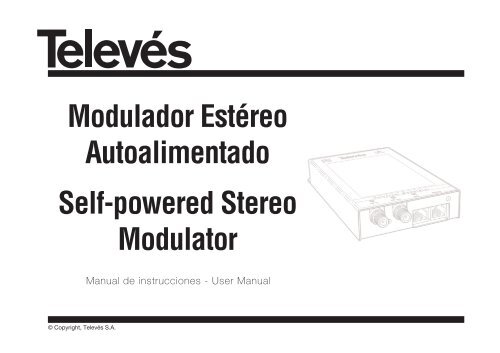
Modulador Estéreo Autoalimentado Self-powered Stereo ... - SATEC
Modulador Estéreo Autoalimentado Self-powered Stereo ... - SATEC
Modulador Estéreo Autoalimentado Self-powered Stereo ... - SATEC

Create successful ePaper yourself
Turn your PDF publications into a flip-book with our unique Google optimized e-Paper software.
<strong>Modulador</strong> Estéreo<br />
<strong>Autoalimentado</strong><br />
<strong>Self</strong>-<strong>powered</strong> <strong>Stereo</strong><br />
Modulator<br />
Manual de instrucciones - User Manual<br />
© Copyright, Televés S.A.
Manual de instrucciones<br />
<strong>Modulador</strong> Estéreo <strong>Autoalimentado</strong><br />
I N D I C E<br />
1.- Características técnicas . . . . . . . . . . . . . . . . . . . . . . . . . . . . . . . . . . . . . . . . . . . . . . . . . . . . . . . . . . . . . . . . . . . . . . . . . . 4<br />
2.- Montaje . . . . . . . . . . . . . . . . . . . . . . . . . . . . . . . . . . . . . . . . . . . . . . . . . . . . . . . . . . . . . . . . . . . . . . . . . . . . . . . . . . . . . . . 5<br />
3.- Descripción de elementos . . . . . . . . . . . . . . . . . . . . . . . . . . . . . . . . . . . . . . . . . . . . . . . . . . . . . . . . . . . . . . . . . . . . . . . . 6<br />
3.1.- <strong>Modulador</strong> . . . . . . . . . . . . . . . . . . . . . . . . . . . . . . . . . . . . . . . . . . . . . . . . . . . . . . . . . . . . . . . . . . . . . . . . . . . . . . . . 6<br />
3.2.- Fuente alimentación . . . . . . . . . . . . . . . . . . . . . . . . . . . . . . . . . . . . . . . . . . . . . . . . . . . . . . . . . . . . . . . . . . . . . . . . 7<br />
3.3.- Programador . . . . . . . . . . . . . . . . . . . . . . . . . . . . . . . . . . . . . . . . . . . . . . . . . . . . . . . . . . . . . . . . . . . . . . . . . . . . . 8<br />
4.- Manejo del producto . . . . . . . . . . . . . . . . . . . . . . . . . . . . . . . . . . . . . . . . . . . . . . . . . . . . . . . . . . . . . . . . . . . . . . . . . . . . . 9<br />
4.1.- Con programador PCT4.0 . . . . . . . . . . . . . . . . . . . . . . . . . . . . . . . . . . . . . . . . . . . . . . . . . . . . . . . . . . . . . . . . . . . . 9<br />
4.1.1.- Menú principal . . . . . . . . . . . . . . . . . . . . . . . . . . . . . . . . . . . . . . . . . . . . . . . . . . . . . . . . . . . . . . . . . . . . . . 10<br />
4.1.2.- Menú extendido . . . . . . . . . . . . . . . . . . . . . . . . . . . . . . . . . . . . . . . . . . . . . . . . . . . . . . . . . . . . . . . . . . . . . 14<br />
4.1.3.- Grabación de parámetros . . . . . . . . . . . . . . . . . . . . . . . . . . . . . . . . . . . . . . . . . . . . . . . . . . . . . . . . . . . . . . 15<br />
4.2.- Con programador PCT3.0 . . . . . . . . . . . . . . . . . . . . . . . . . . . . . . . . . . . . . . . . . . . . . . . . . . . . . . . . . . . . . . . . . . . . 16<br />
4.2.1.- Menú normal . . . . . . . . . . . . . . . . . . . . . . . . . . . . . . . . . . . . . . . . . . . . . . . . . . . . . . . . . . . . . . . . . . . . . . . . 16<br />
4.2.2.- Menú extendido . . . . . . . . . . . . . . . . . . . . . . . . . . . . . . . . . . . . . . . . . . . . . . . . . . . . . . . . . . . . . . . . . . . . . 18<br />
4.2.3.- Grabación de parámetros . . . . . . . . . . . . . . . . . . . . . . . . . . . . . . . . . . . . . . . . . . . . . . . . . . . . . . . . . . . . . . 20<br />
5.- Ejemplos de aplicación . . . . . . . . . . . . . . . . . . . . . . . . . . . . . . . . . . . . . . . . . . . . . . . . . . . . . . . . . . . . . . . . . . . . . . . . . . . 21<br />
A. - Tablas de canales . . . . . . . . . . . . . . . . . . . . . . . . . . . . . . . . . . . . . . . . . . . . . . . . . . . . . . . . . . . . . . . . . . . . . . . . . . . . . . . 43<br />
ESPAÑOL<br />
3
Manual de instrucciones<br />
<strong>Modulador</strong> Estéreo <strong>Autoalimentado</strong><br />
1.- CARACTERISTICAS TECNICAS<br />
1.1.- <strong>Modulador</strong> Universal ref. 5804<br />
Vídeo<br />
Audio<br />
Salida<br />
RF<br />
General<br />
Ancho de banda: 0,00005 ... 5 MHz Fase diferencial: -5º (min), 5º (max)<br />
Nivel de entrada (75 ohm): 1 Vpp Retardo luma/croma: < 100 ns<br />
Profundidad de modulación: 73 ... 86 % (PAL) Relación S/N: > 53 dB<br />
87 ... 93 % (norma L) Impedancia entrada: 75 ohm<br />
Ganancia diferencial: -5 %(min), 5 %(max) Planicidad: < +1 dB<br />
Ancho de banda: 0,04 ... 15 KHz Distorsión (1KHz desv. ± 30KHz): < 1 %<br />
Impedancia: 10000 ohm Relación S/N: > 45 dB<br />
Preénfasis: 50 µs Planicidad: < ±1 dB<br />
Desviación (1KHz/1.7Vpp entr.): programable (ver tabla) Nivel de entrada: >-15 15 dB (selec. SW) UHF < 30 KHz<br />
Estabilidad nivel: ± 3 dB Relación portadoras (MHz): 4,5 / 5,5 / 6 / 6,5 MHz<br />
Distancia Pa/Pv: -11 ... -18 (prog.) (B/G-M/N-I-Norma L)<br />
Respuesta Loop-through: ± 2,5 dB (46-862MHz) Tensión salida (2 canales<br />
Pasos de Frecuencia: 250 KHz (prog.) e intermodulación a 52 dB): 6 dBm (115 dBµV)<br />
C/N (5MHz): > 56 dB Espacio mínimo entre canales: 250 KHz<br />
Espurios banda (46-862MHz): < 60 dBc tip (-55 max)<br />
Alimentación: 12V (externa) Consumo max.: 600 mA<br />
Margen temperatura: 0 ... 45 ºC Conectores salida: F<br />
Indice de Protección:<br />
IP20<br />
Las características técnicas descritas se definen para una temperatura ambiente máxima de 45° C.<br />
4
Manual de instrucciones<br />
<strong>Modulador</strong> Estéreo <strong>Autoalimentado</strong><br />
2 .- MONTAJE<br />
Ref. 5174<br />
ESPAÑOL<br />
Detalle montaje en pared<br />
Salida<br />
Entrada del lazo<br />
o carga<br />
Montaje en formato rack 19” (4 moduladores)<br />
5
Manual de instrucciones<br />
<strong>Modulador</strong> Estéreo <strong>Autoalimentado</strong><br />
3. - DESCRIPCION DE ELEMENTOS<br />
3.1.- <strong>Modulador</strong><br />
1 2 3 4<br />
5<br />
El modulador acepta entradas de<br />
audio y vídeo y las modula, según<br />
la norma, en una F.I. de 38,9<br />
MHz.<br />
La señal de F.I. modulada se convierte<br />
a cualquier canal o frecuencia<br />
entre 46 y 862 MHz y después<br />
de filtrada se amplifica para obtener<br />
el nivel de salida especificado.<br />
Los distintos parámetros configurables<br />
del modulador, así como la<br />
frecuencia y nivel de salida se<br />
controlan por medio del programador<br />
universal ref. 7234.<br />
1.- Entrada RF<br />
2.- Salida RF<br />
3.- Conector señal de entrada Audio/vídeo (1)<br />
4.- Conector programador<br />
5.- Entrada alimentación exterior (12Vdc)<br />
- 1<br />
Entrada vídeo - 2<br />
Entrada audio (R) - 3<br />
Entrada audio (L) - 4<br />
- 5<br />
- 6<br />
- 7<br />
- 8<br />
(1)<br />
(Amarillo) - Entrada vídeo<br />
(Rojo) - Entrada audio (R)<br />
(Blanco) - Entrada audio (L)<br />
6
Manual de instrucciones<br />
<strong>Modulador</strong> Estéreo <strong>Autoalimentado</strong><br />
3.2.- Fuente de alimentación<br />
ESPAÑOL<br />
Voltaje entrada 100 - 240 V~ 47/63 Hz<br />
Corriente entrada 0,45 A~<br />
Voltaje salida<br />
11,4 - 12,6 V<br />
Corriente salida<br />
1,2 A<br />
7
Manual de instrucciones<br />
<strong>Modulador</strong> Estéreo <strong>Autoalimentado</strong><br />
3. 3. - Programador ref. 7234<br />
Modelo PCT 3.0 Modelo PCT 4.0<br />
El programador consta de 4 teclas. Dependiendo del modelo del<br />
mismo, sus funciones son las siguientes:<br />
Programador mod. PCT 3.0<br />
: Tecla de cambio de menú de programación y grabación de<br />
datos.<br />
: Tecla que permite la selección de un dígito dentro de un determinado<br />
menú de programación y realiza también el cambio de<br />
menú normal a menú extendido.<br />
: Tecla de incremento de dígito seleccionado.<br />
: Tecla de decremento de dígito seleccionado.<br />
Programador mod. PCT 4.0<br />
: (pulsación corta) - Selección de parámetro (posicionamiento del<br />
cursor).<br />
: Modificación del parámetro (incremento/decremento) apuntado<br />
por el cursor (parpadeante) .<br />
: (pulsación corta) - Cambio de menú.<br />
: (pulsación larga) - Cambio entre menús principales y extendidos<br />
: (pulsación larga) - Grabado de configuración en memoria<br />
+ + : Aumentar el contraste de la pantalla<br />
+ + : Disminuir el contraste de la pantalla<br />
8
Manual de instrucciones<br />
<strong>Modulador</strong> Estéreo <strong>Autoalimentado</strong><br />
4. - MANEJO DEL PRODUCTO<br />
4.1. - CON PROGRAMADOR PCT 4.0<br />
Al conectar el mando a la unidad, ésta le<br />
envía los parámetros con la que está configurada<br />
(canal memorizado, configuración,<br />
nivel de salida, versión de SW,...). Durante<br />
ese proceso se muestra en pantalla la versión<br />
de SW del programador durante unos<br />
instantes, la pantalla aparece de la siguiente<br />
manera:<br />
MENU PRINCIPAL<br />
SALIDA<br />
Frecuencia:<br />
471.25 MHz<br />
MENU EXTENDIDO<br />
SALIDA Nivel: 99 Desde cualquier menú<br />
CONFIG<br />
Canal: 21<br />
(471.25 MHz)<br />
Nivel: 99<br />
Tab canales:<br />
CCIR N.Z.Ind<br />
ESPAÑOL<br />
PCT firmware<br />
version<br />
------------<br />
V:4.02<br />
CONFIG<br />
Modo Test:<br />
Desactivado<br />
(pulsación corta)<br />
CONFIG >><br />
PMV:79.0%<br />
RelPort:-11<br />
Audio:5.5MHz<br />
(pulsación larga)<br />
(pulsación corta)<br />
A continuación aparece la versión de SW<br />
del modulador también durante unos instantes:<br />
CONFIG >><br />
DesvAud:0<br />
RelSubp:-18<br />
Aud: <strong>Stereo</strong><br />
IDIOMA<br />
Español<br />
Version de<br />
firmware:<br />
V:3.01<br />
Aparecerá a continuación la primera opción<br />
del menú principal.<br />
Desde cualquier menú<br />
(pulsación larga)<br />
Grabando los<br />
parametros y<br />
rearrancando<br />
...<br />
9
Manual de instrucciones<br />
<strong>Modulador</strong> Estéreo <strong>Autoalimentado</strong><br />
4.1.1.- MENU PRINCIPAL<br />
A partir de este momento, efectuando pulsaciones<br />
cortas sobre se recorren los<br />
menús principales, siguiendo la secuencia:<br />
Menú de salida, Menú de vídeo, Menú de<br />
Audio y Selección modo funcionamiento.<br />
Nota:<br />
Si desea modificar el idioma de los menús<br />
antes de comenzar con la configuración<br />
del dispositivo, deberá acceder al menú<br />
“Idioma”. Para ello deberá pulsar la tecla<br />
(pulsación larga) para acceder al menú<br />
Extendido, pulsar la tecla una vez y<br />
luego mediante las teclas ó seleccionar<br />
el idioma. Finalmente pulsar la<br />
tecla (pulsación larga) para grabar los<br />
cambios.<br />
Para mas información, ver apartado<br />
“Menú Extendido => Selección de idioma”.<br />
1.- Menú de salida<br />
Permite seleccionar el canal de salida tanto<br />
en modo canal como en modo frecuencia,<br />
así como indicar el nivel de salida.<br />
La forma de mostrarse dependerá de como<br />
haya sido programada la unidad la última<br />
vez que se programó (modo frecuencia o<br />
modo canal).<br />
En el caso de tener el dispositivo en modo<br />
canal, en este menú se muestra el canal de<br />
salida y la frecuencia de la portadora de<br />
vídeo del canal de salida (que cambia al<br />
cambiar el canal), además se muestran los<br />
dígitos (00-99) con los que se regula a través<br />
del programador el nivel de salida de la<br />
unidad en cuestión.<br />
Por ejemplo, en el caso de que el canal<br />
seleccionado fuese el 21, en la pantalla LCD<br />
aparecería el siguiente contenido:<br />
SALIDA<br />
Canal: 21<br />
(471.25 MHz)<br />
Nivel: 99<br />
Para modificar el valor indicado deberá pulsarse<br />
la tecla , con lo que el dígito que<br />
indica el canal parpadeará. El cambio de<br />
canal se realiza directamente mediante las<br />
teclas o .<br />
En el caso de tener el dispositivo en modo<br />
frecuencia, en este menú se muestra la frecuencia<br />
de la portadora de vídeo del canal<br />
de salida y el dígito (00-99) con el que se<br />
regula a través del programador el nivel de<br />
salida de la unidad en cuestión.<br />
Por ejemplo:<br />
SALIDA<br />
Frecuencia:<br />
471.25 MHz<br />
Nivel: 99<br />
Para modificar el valor indicado deberá pulsarse<br />
la tecla , con lo que el dígito seleccionado<br />
parpadeará. Con las teclas y<br />
se modifica el valor del dígito. Actuando<br />
nuevamente sobre la tecla se selecciona<br />
el siguiente dígito, que puede ser modificado<br />
a su vez si se desea, y así sucesivamente<br />
hasta conseguir el valor deseado.<br />
10
Manual de instrucciones<br />
<strong>Modulador</strong> Estéreo <strong>Autoalimentado</strong><br />
Cuando el cursor se sitúa sobre la parte<br />
decimal, al actuar sobre las teclas y<br />
sólo aparecerán los siguientes valores permitidos:<br />
=> .00 MHz<br />
=> .25 MHz<br />
=> .50 MHz<br />
=> .75 MHz<br />
Finalmente, pulsando la tecla se seleccionan<br />
los dígitos de control o regulación<br />
del nivel de salida (output level), que puede<br />
ser modificado si se desea hasta conseguir<br />
el valor deseado actuando de nuevo sobre<br />
las teclas y .<br />
El rango de valores permitidos varía entre 99<br />
que corresponde al máximo nivel (116 ±5<br />
dBµV) y 00 (que son 15 dB menos).<br />
2.- Menú de Vídeo<br />
Pulsando la tecla se accede al segundo<br />
menú. En este menú se pueden ajustar los<br />
parámetros de profundidad de modulación<br />
de vídeo, nivel de la portadora de audio<br />
respecto a la de vídeo y frecuencia de la<br />
portadora de audio respecto a la de vídeo<br />
(norma o estándar).<br />
CONFIG >><br />
PMV:79.0%<br />
RelPort:-11<br />
Audio:5.5MHz<br />
Mediante la tecla de selección de parámetro<br />
(pulsación corta) se accede al submenú<br />
de profundidad de modulación de vídeo<br />
(PMV). Las teclas y permiten la modificación<br />
del nivel de vídeo, cuyo rango de<br />
valores permitidos varía entre los valores que<br />
se indican a continuación (son valores de<br />
profundidad de modulación siempre y cuando<br />
el nivel de entrada de la señal de vídeo<br />
sea 1Vpp).<br />
<strong>Modulador</strong> programado en Norma L:<br />
87%, 89.5%, 91%, 93%.<br />
<strong>Modulador</strong> programado en cualquier otra<br />
norma:<br />
73%, 76%, 80%, 82%, 83.5%, 84%, 85%,<br />
86%.<br />
Seguidamente mediante la tecla de selección<br />
de parámetro (pulsación corta) se<br />
accede al submenú de selección del nivel<br />
de la portadora de audio respecto a la de<br />
vídeo (RelPort) que se puede modificar con<br />
las teclas y .<br />
Los valores permitidos para el nivel de la<br />
portadora principal de audio respecto a la<br />
de vídeo son: -11dB, -12dB, -13dB, -14dB,<br />
-15dB, -16dB, -17dB, -18dB.<br />
Nota:<br />
En el caso de que el modulador esté programado<br />
en Norma L este menú sólo<br />
permite variar entre dos valores 0 y 1 que<br />
corresponden a una relación<br />
Pvídeo/Paudio de 12dB y 16dB respectivamente<br />
siempre que la profundidad de<br />
modulación de la señal de video esté al<br />
máximo (93%). Si la Profundidad de<br />
modulación de la señal de vídeo está<br />
programada con otro valor esta relación<br />
cambia, por ejemplo para el 86% el 1 y<br />
el 2 corresponden a 6dB y 10dB respectivamente.<br />
ESPAÑOL<br />
11
Manual de instrucciones<br />
<strong>Modulador</strong> Estéreo <strong>Autoalimentado</strong><br />
De nuevo con la tecla de selección de parámetro<br />
(pulsación corta) se accede al submenú<br />
de selección de la frecuencia de la<br />
portadora de audio respecto a la de vídeo<br />
(Audio) (norma o estándar).<br />
Para modificar la norma o estándar, se presionan<br />
las teclas o hasta que aparezca<br />
el valor deseado entre los siguientes:<br />
Display Frecuencia relativa (MHz)<br />
4.5 MHz 4.5 Estándar M/N<br />
5.5 MHz 5.5 Estándar B/G<br />
6 MHz 6 Estándar I<br />
6.5 MHz 6.5 Estándar D/K<br />
L<br />
Norma L<br />
3.- Menú de audio<br />
Pulsando la tecla se accede al tercer<br />
menú. En este menú se pueden ajustar los<br />
parámetros de desviación de audio, nivel<br />
de la subportadora de audio respecto a la<br />
de vídeo (*) y selección del modo (*):<br />
Estéreo, Dual o Mono.<br />
(*) Sólo en caso de que la portadora principal<br />
esté a 5.5MHz.<br />
CONFIG >><br />
DesvAud:0<br />
RelSubp:-18<br />
Aud: <strong>Stereo</strong><br />
Mediante la tecla de selección de parámetro<br />
(pulsación corta) se accede al submenú<br />
desviación de audio (DesvAud). Para modificar<br />
la desviación de modulación, se presionan<br />
las teclas o hasta que aparezca<br />
el valor deseado entre 0 y 13.<br />
Los valores que aparecen a continuación<br />
indican el nivel de audio necesario en la<br />
entrada para tener un valor de desviación de<br />
modulación de 50KHz (para una señal de<br />
entrada de 1KHz).<br />
DesvAud Nivel audio entrada (dBm)<br />
0 7<br />
1 5<br />
2 3<br />
3 1<br />
4 0<br />
5 -1<br />
6 -2<br />
7 -3<br />
8 -4<br />
9 -5<br />
10 -7<br />
11 -9<br />
12 -13<br />
13 -15<br />
Es decir, si la señal de entrada es 1KHz a<br />
1.7Vpp tenemos que programar en el menú<br />
DesvAud del programador el valor 4.<br />
12
Manual de instrucciones<br />
<strong>Modulador</strong> Estéreo <strong>Autoalimentado</strong><br />
Para un nivel de audio en la entrada de<br />
1 Vpp (para una señal de 1KHz) la desviación<br />
de modulación dependerá del valor<br />
“DesvAud” programado como se indica en<br />
la tabla siguiente:<br />
DesvAud Desviación modulación (KHz)<br />
0 12<br />
1 19<br />
2 19<br />
3 24<br />
4 27<br />
5 29<br />
6 30<br />
7 37,5<br />
8 40<br />
9 51<br />
10 61<br />
11 72,5<br />
12 120<br />
13 145<br />
En el caso de programar el modulador en<br />
norma L estos valores indican la profundidad<br />
de modulación siempre y cuando el<br />
nivel de entrada sea 1.7Vpp o 1Vpp para<br />
una señal de 1KHz.<br />
DesvAud<br />
Norma L Norma L<br />
(1Vpp) (1,7Vpp)<br />
0 10,5 % 22 %<br />
1 17,5 % 28 %<br />
2 20 % 28 %<br />
3 20,5 % 35,5 %<br />
4 22,5 % 42 %<br />
5 26 % 44,5 %<br />
6 30 % 50 %<br />
7 31,5 % 56 %<br />
8 32,5 % 67 %<br />
9 44,5 % 73 %<br />
10 56 % 94,5 %<br />
11 65,5 % 108 %<br />
12 87 % 101 %<br />
13 99 % 108 %<br />
El siguiente submenú después de pulsar la<br />
tecla de parámetro (pulsación corta) es el<br />
que nos permite variar el nivel de la subportadora<br />
de audio (5,74MHz) respecto a la de<br />
vídeo (RelSubp).<br />
El margen de valores que se permite seleccionar<br />
son los siguientes: -18dB, -20dB,<br />
-22dB, -24dB.<br />
Nota:<br />
En el caso de que el modulador esté programado<br />
en Norma L este menú sólo<br />
permite variar entre dos valores 0 y 1 que<br />
corresponden a una relación<br />
Pvídeo/Paudio de 12dB y 16dB respectivamente<br />
siempre que la profundidad de<br />
modulación de la señal de video esté al<br />
máximo (93%). Si la Profundidad de<br />
modulación de la señal de vídeo está<br />
programada con otro valor esta relación<br />
cambia, por ejemplo para el 86% el 1 y<br />
el 2 corresponden 6dB y 10dB respectivamente.<br />
ESPAÑOL<br />
El siguiente submenú después de pulsar la<br />
tecla de selección de parámetro (pulsación<br />
corta) es el que permite modificar el<br />
modo de funcionamiento entre estéreo,<br />
dual o mono (Aud) mediante las teclas y<br />
(para la separación de portadoras de 5,5<br />
MHz).<br />
13
Manual de instrucciones<br />
<strong>Modulador</strong> Estéreo <strong>Autoalimentado</strong><br />
4.- Selección modo de funcionamiento<br />
Pulsando la tecla se accede al cuarto<br />
menú. En este menú se puede seleccionar<br />
el modo Test entre los modos Test<br />
Activado o Desactivado (modo normal).<br />
En el modo de funcionamiento Test<br />
Desactivado, la señal de salida está modulada<br />
con el audio y el vídeo externo (A/V In).<br />
En el modo de funcionamiento Test<br />
Activado, la señal de salida está modulada<br />
con una señal patrón generada internamente<br />
(dos barras verticales sobre fondo negro).<br />
Al activar el modo Test, si en la frecuencia de<br />
la subportadora de audio seleccionamos<br />
Norma L, el modulador emite un tono en el<br />
audio junto con la señal de vídeo.<br />
El cambio de modo se realiza directamente<br />
mediante las teclas o .<br />
CONFIG<br />
Modo Test:<br />
Desactivado<br />
4.1.2.- MENU EXTENDIDO<br />
Para acceder a los menús extendidos habrá<br />
que pulsar durante más de tres segundos.<br />
Tanto la selección de menús como la modificación<br />
del valor seleccionado en cada uno<br />
de ellos y la grabación de los cambios se<br />
efectúa de la misma manera que en el menú<br />
normal.<br />
Una vez en modo extendido los menús se<br />
recorren efectuando pulsaciones cortas<br />
sobre .<br />
1.- Selección modo Frecuencia o<br />
modo Canal<br />
CONFIG<br />
Tab canales:<br />
CCIR N.Z.Ind<br />
El primer menú extendido que aparece es el<br />
que nos permite cambiar la manera de<br />
seleccionar la frecuencia de salida, en<br />
modo frecuencia o en modo canal y en<br />
este último modo entre una de las 7 posibles<br />
tablas (ver anexo Tablas de canales):<br />
CCIR N.Z. Ind, China Taiwan, Chile M/N,<br />
France, Australia, South Africa, Former<br />
URSS.<br />
Mediante la tecla de selección de parámetro<br />
(pulsación corta) se accede a las tablas de<br />
canales. El cambio de tabla se realiza<br />
mediante las teclas o .<br />
14
Manual de instrucciones<br />
<strong>Modulador</strong> Estéreo <strong>Autoalimentado</strong><br />
2.- Selección de idioma<br />
4.1.3- GRABACIÓN DE PARÁMETROS<br />
Pulsando la tecla se accede al segundo<br />
menú extendido. Este menú permite la<br />
selección del idioma en que se muestran los<br />
textos en la pantalla LCD entre el español y<br />
el inglés.<br />
El cambio de idioma se realiza directamente<br />
mediante las teclas o .<br />
IDIOMA<br />
Español<br />
Una vez escogido el valor deseado en cualquiera<br />
de los menús (normal o extendido),<br />
para grabar los datos se pulsará la tecla<br />
durante aproximadamente 3 segundos. La<br />
pantalla LCD mostrará la siguiente indicación:<br />
Grabando los<br />
parametros y<br />
rearrancando<br />
...<br />
ESPAÑOL<br />
Esto lleva inmediatamente al mando al<br />
modo de menú normal, apareciendo en la<br />
pantalla LCD la frecuencia de la portadora<br />
de vídeo (o número de canal) del canal de<br />
salida.<br />
Si se modifican los datos de configuración<br />
pero no se graban, se recupera la configuración<br />
anterior transcurridos unos 30 segundos,<br />
es decir, se anulan los cambios realizados.<br />
15
Manual de instrucciones<br />
<strong>Modulador</strong> Estéreo <strong>Autoalimentado</strong><br />
4.2.- CON PROGRAMADOR PCT 3.0<br />
Para realizar la configuración de cada<br />
modulador se utilizará el programador universal<br />
ref. 7234 (PCT 3.0) siguiendo los<br />
siguientes pasos:<br />
4.2.1.- MENU NORMAL<br />
Insertar el programador en el conector frontal<br />
de programación del <strong>Modulador</strong> Estéreo<br />
(“Prog.”). Aparecerá en primer lugar la versión<br />
de software del producto.<br />
Por ejemplo la versión 3.01:<br />
1.- Canal / Frecuencia de salida<br />
A continuación aparecerá bien el valor de la<br />
frecuencia de la portadora de vídeo del<br />
canal de salida o bien el número del canal<br />
de salida dependiendo del modo de trabajo<br />
seleccionado la última vez que el dispositivo<br />
fue programado.<br />
Por ejemplo, en el caso de que el canal<br />
seleccionado fuese el 52, en el display apa-<br />
recería el siguiente contenido:<br />
o, en caso de estar en modo frecuencia, si<br />
quisiésemos seleccionar ese mismo canal<br />
(portadora de vídeo en la frecuencia 719,25<br />
MHz) debería aparecer en el display:<br />
Estando en modo frecuencia, para modificar<br />
el valor indicado deberá pulsarse la tecla ,<br />
con lo que el dígito seleccionado parpadeará.<br />
Con las teclas y se modifica el<br />
valor del dígito. Actuando nuevamente<br />
sobre la tecla se selecciona el siguiente<br />
dígito, que puede ser modificado a su vez si<br />
se desea, y así sucesivamente hasta conseguir<br />
el valor deseado. Cuando el cursor se<br />
sitúa sobre la parte decimal, al actuar sobre<br />
las teclas y sólo aparecerán los<br />
siguientes valores permitidos:<br />
• .0 => .00 MHz<br />
• .2 => .25 MHz<br />
• .5 => .50 MHz<br />
• .7 => .75 MHz<br />
16<br />
El rango de valores de entrada permitidos<br />
es de 46 a 862 MHz.<br />
Estando en modo canal, el cambio de canal<br />
se realiza directamente mediante las teclas<br />
o .<br />
2.- Nivel de salida<br />
El siguiente menú (pulsando la tecla ) es<br />
el correspondiente a la regulación del nivel<br />
de salida (output level), por ejemplo 50:<br />
Las teclas y permiten modificar el<br />
valor seleccionado. El rango de valores permitidos<br />
varía entre 99 que corresponde al<br />
máximo nivel (116 ±5 dBµV) y 00 (que son<br />
15 dB menos).
Manual de instrucciones<br />
<strong>Modulador</strong> Estéreo <strong>Autoalimentado</strong><br />
3.- Nivel de vídeo<br />
El siguiente menú (pulsando la tecla ) es<br />
el correspondiente al nivel de vídeo, por<br />
ejemplo 4.<br />
Las teclas y permiten la modificación<br />
del nivel de vídeo, cuyo rango de valores<br />
permitidos varía entre 1 y 4 en el caso de<br />
programar “Norma L” y entre 1 y 8 en el<br />
resto de los casos. Estos valores se corresponden<br />
aproximadamente con los siguientes<br />
valores de profundidad de modulación,<br />
siempre y cuando el nivel de entrada de la<br />
señal de vídeo sea 1Vpp.<br />
<strong>Modulador</strong> programado en Norma L:<br />
Display<br />
Profundidad de modulación<br />
1 87 %<br />
2 89,5 %<br />
3 91 %<br />
4 93 %<br />
<strong>Modulador</strong> programado en cualquier otra<br />
norma:<br />
Display<br />
4.- Nivel de audio<br />
Profundidad de modulación<br />
1 73 %<br />
2 76 %<br />
3 80 %<br />
4 82 %<br />
5 83,5 %<br />
6 84 %<br />
7 85 %<br />
8 86 %<br />
El siguiente menú (pulsando la tecla ) es<br />
el correspondiente al nivel de audio (desviación<br />
de modulación o profundidad de<br />
modulación en el caso de programar en<br />
Norma L), por ejemplo 4:<br />
Para modificar la desviación de modulación,<br />
se presionan las teclas o hasta<br />
que aparezca el valor deseado entre 1 y 14.<br />
Los valores que aparecen a continuación<br />
indican para cada dígito en el display del<br />
programador el nivel de audio de entrada<br />
con el que se consigue que la desviación de<br />
modulación sea de ± 50KHz siempre y<br />
cuando tengamos una señal de entrada de<br />
1KHz.<br />
Display Nivel audio entrada (dBm)<br />
1 4<br />
2 1<br />
3 1<br />
4 -1<br />
5 -2 (1,7 Vpp aprox)<br />
6 -3<br />
7 -4,5<br />
8 -5,5<br />
9 -6<br />
10 -8<br />
11 -9,5<br />
12 -11<br />
13 -15<br />
14 -17<br />
Es decir, si la señal de entrada es 1KHz a<br />
1,7 Vpp tenemos que programar en el menú<br />
AL del programador el valor 5.<br />
ESPAÑOL<br />
17
Manual de instrucciones<br />
<strong>Modulador</strong> Estéreo <strong>Autoalimentado</strong><br />
Si la señal de entrada es 1KHz a 1Vpp la<br />
desviación de modulación para cada valor<br />
programado en el mando se indica en la<br />
siguiente tabla:<br />
AL (display) Desviación modulación (KHz)<br />
1 12<br />
2 19<br />
3 19<br />
4 24<br />
5 27<br />
6 29<br />
7 30<br />
8 37,5<br />
9 40<br />
10 51<br />
11 61<br />
12 72,5<br />
13 120<br />
14 145<br />
En el caso de programar el modulador en<br />
norma L estos valores indican para cada<br />
dígito en el display del programador la profundidad<br />
de modulación siempre y cuando<br />
el nivel de entrada sea 1,7Vpp o 1Vpp para<br />
una señal de 1KHz.<br />
Display<br />
Norma L Norma L<br />
(1Vpp) (1,7Vpp)<br />
1 10,5 % 22 %<br />
2 17,5 % 28 %<br />
3 20 % 28 %<br />
4 20,5 % 35,5 %<br />
5 22,5 % 42 %<br />
6 26 % 44,5 %<br />
7 30 % 50 %<br />
8 31,5 % 56 %<br />
9 32,5 % 67 %<br />
10 44,5 % 73 %<br />
11 56 % 94,5 %<br />
12 65,5 % 108 %<br />
13 87 % 101 %<br />
14 99 % 108 %<br />
Las funciones que se han visto hasta ahora<br />
corresponden al modo más habitual de funcionamiento,<br />
pero existen otras que pueden<br />
ser seleccionadas y que corresponden al<br />
menú extendido.<br />
4.2.2.- MENU EXTENDIDO<br />
Se accede a él tras pulsar durante un par de<br />
segundos la tecla . Tanto la selección de<br />
menús como la modificación del valor seleccionado<br />
en cada uno de ellos y la grabación<br />
de los cambios se efectúa de la misma<br />
manera que en el menú normal.<br />
1.- Modo frecuencia/canal<br />
El primer menú extendido que aparece es el<br />
que nos permite cambiar la manera de<br />
seleccionar la frecuencia de salida, en<br />
modo frecuencia o en modo canal y en<br />
este último modo entre una de las 7 posibles<br />
tablas (se adjuntan al final del manual).<br />
Una vez escogido el valor deseado en cualquiera<br />
de los menús extendidos, la selección<br />
se realiza pulsando la tecla durante<br />
un par de segundos, lo cual lleva inmediatamente<br />
al mando al modo de menú normal,<br />
apareciendo en el display la frecuencia de la<br />
portadora de vídeo (o número de canal) del<br />
canal de salida.<br />
18
Manual de instrucciones<br />
<strong>Modulador</strong> Estéreo <strong>Autoalimentado</strong><br />
2.- Nivel portadora audio<br />
El siguiente menú después de pulsar la tecla<br />
es el que nos permite variar el nivel de la<br />
portadora principal de audio respecto a la<br />
de vídeo.<br />
modulación de la señal de vídeo está programada<br />
con otro valor esta relación cambia,<br />
por ejemplo para el 86% el 1 y el 2<br />
corresponden a 6dB y 10dB respectivamente.<br />
4.- Nivel subportadora audio<br />
El siguiente menú después de pulsar la tecla<br />
es el que nos permite variar el nivel de la<br />
subportadora de audio (5,74MHz) respecto<br />
a la de vídeo.<br />
El margen de valores que se permite variar<br />
está ente 1 y 8, que aproximadamente<br />
corresponden con los valores relativos de:<br />
Display<br />
Vídeo / Audio<br />
1 11 dB<br />
2 12 dB<br />
3 13 dB<br />
4 14 dB<br />
5 15 dB<br />
6 16 dB<br />
7 17 dB<br />
8 18 dB<br />
Nota:<br />
En el caso de que el modulador esté programado<br />
en Norma L este menú sólo<br />
permite variar entre dos valores 1 y 2 que<br />
corresponden a una relación<br />
Pvídeo/Paudio de 12dB y 16dB respectivamente<br />
siempre que la profundidad de<br />
modulación de la señal de video esté al<br />
máximo (93%). Si la Profundidad de<br />
3.- Modo audio<br />
El siguiente menú después de pulsar la tecla<br />
es el que permite modificar el modo de<br />
funcionamiento entre estéreo, dual o mono<br />
mediante las teclas y .<br />
Nota: Este menú sólo aparece en el caso de<br />
seleccionar una separación de portadoras<br />
de 5,5 MHz.<br />
El margen de valores que se permite variar<br />
está entre 1 y 4, que aproximadamente<br />
corresponden con los valores relativos de:<br />
Display<br />
Vídeo / Audio<br />
1 18 dB<br />
2 20 dB<br />
3 22 dB<br />
4 24 dB<br />
Nota: En el caso de que el modulador esté<br />
programado con una separación de<br />
portadoras distinta de 5,5 MHz, este<br />
menú no existe pues no hay 2ª subportadora<br />
de audio.<br />
ESPAÑOL<br />
19
Manual de instrucciones<br />
<strong>Modulador</strong> Estéreo <strong>Autoalimentado</strong><br />
5.- Frecuencia portadora principal<br />
6.- Modo normal / test<br />
4.2.3.- GRABACION DE PARAMETROS<br />
El siguiente menú después de pulsar la tecla<br />
es el que nos permite variar la frecuencia<br />
de la portadora principal de audio respecto<br />
a la de vídeo.<br />
Display Frecuencia relativa (MHz)<br />
4,5 4,5 Estandar M, N<br />
5,5 5,5 Estandar B, G<br />
6 6 Estandar I<br />
6,5 6,5 Estandar D, K<br />
nor L<br />
Norma L<br />
Por último, después de pulsar la tecla se<br />
accede al menú en el que se selecciona el<br />
modo de funcionamiento: Normal o Test<br />
mediante las teclas y .<br />
En el modo de funcionamiento Test<br />
Desactivado, la señal de salida está modulada<br />
con el audio y el vídeo externo (A/V In).<br />
En el modo de funcionamiento Test<br />
Activado, la señal de salida está modulada<br />
con una señal patrón generada internamente<br />
(dos barras verticales sobre fondo negro).<br />
Al activar el modo Test, si en la frecuencia de<br />
la subportadora de audio seleccionamos<br />
Norma L, el modulador emite un tono en el<br />
audio junto con la señal de vídeo.<br />
Para grabar los datos se pulsará la tecla<br />
durante aproximadamente 3 segundos. La<br />
grabación correcta de los datos se denota<br />
con la siguiente indicación de los dígitos del<br />
programador:<br />
Si se modifican los datos de configuración<br />
pero no se graban, se recupera la configuración<br />
anterior transcurridos unos 30 segundos,<br />
es decir, se anulan los cambios realizados.<br />
20
Manual de instrucciones<br />
<strong>Modulador</strong> Estéreo <strong>Autoalimentado</strong><br />
5.- EJEMPLOS DE APLICACION<br />
Video<br />
Audio L<br />
Audio R<br />
Cabecera de<br />
instalación existente<br />
ESPAÑOL<br />
75 ohm<br />
Combinador<br />
Salida<br />
- Se añade un canal a la instalación existente.<br />
21
Manual de instrucciones<br />
<strong>Modulador</strong> Estéreo <strong>Autoalimentado</strong><br />
75 ohm<br />
Video<br />
Audio L<br />
Audio R<br />
Video<br />
Audio L<br />
Audio R<br />
Video<br />
Audio L<br />
Audio R<br />
Video<br />
Audio L<br />
Audio R<br />
Cabecera de<br />
instalación existente<br />
- Se añaden 4 canales a la instalación existente.<br />
- En este caso se pueden montar los moduladores en formato rack 19”<br />
usando para ello la platina ref. 5174<br />
Salida<br />
Combinador<br />
22
User Manual<br />
<strong>Self</strong>-<strong>powered</strong> <strong>Stereo</strong> Modulator<br />
I N D E X<br />
1.- Technical specifications . . . . . . . . . . . . . . . . . . . . . . . . . . . . . . . . . . . . . . . . . . . . . . . . . . . . . . . . . . . . . . . . . . . . . . . . . . 24<br />
2.- Mounting . . . . . . . . . . . . . . . . . . . . . . . . . . . . . . . . . . . . . . . . . . . . . . . . . . . . . . . . . . . . . . . . . . . . . . . . . . . . . . . . . . . . . . 25<br />
3.- Element description . . . . . . . . . . . . . . . . . . . . . . . . . . . . . . . . . . . . . . . . . . . . . . . . . . . . . . . . . . . . . . . . . . . . . . . . . . . . . 26<br />
3.1.- Modulator . . . . . . . . . . . . . . . . . . . . . . . . . . . . . . . . . . . . . . . . . . . . . . . . . . . . . . . . . . . . . . . . . . . . . . . . . . . . . . . . 26<br />
3.2.- Power supply . . . . . . . . . . . . . . . . . . . . . . . . . . . . . . . . . . . . . . . . . . . . . . . . . . . . . . . . . . . . . . . . . . . . . . . . . . . . . . 27<br />
3.3.- Programmer . . . . . . . . . . . . . . . . . . . . . . . . . . . . . . . . . . . . . . . . . . . . . . . . . . . . . . . . . . . . . . . . . . . . . . . . . . . . . . 28<br />
4.- How to use the product . . . . . . . . . . . . . . . . . . . . . . . . . . . . . . . . . . . . . . . . . . . . . . . . . . . . . . . . . . . . . . . . . . . . . . . . . . 29<br />
4.1.- With programmer PCT4.0 . . . . . . . . . . . . . . . . . . . . . . . . . . . . . . . . . . . . . . . . . . . . . . . . . . . . . . . . . . . . . . . . . . . . 29<br />
4.1.1.- Main menu . . . . . . . . . . . . . . . . . . . . . . . . . . . . . . . . . . . . . . . . . . . . . . . . . . . . . . . . . . . . . . . . . . . . . . . . . 30<br />
4.1.2.- Extended menu . . . . . . . . . . . . . . . . . . . . . . . . . . . . . . . . . . . . . . . . . . . . . . . . . . . . . . . . . . . . . . . . . . . . . . 34<br />
4.1.3.- Saving the parameters . . . . . . . . . . . . . . . . . . . . . . . . . . . . . . . . . . . . . . . . . . . . . . . . . . . . . . . . . . . . . . . . 35<br />
4.2.- With programmer PCT3.0 . . . . . . . . . . . . . . . . . . . . . . . . . . . . . . . . . . . . . . . . . . . . . . . . . . . . . . . . . . . . . . . . . . . . 36<br />
4.2.1.- Normal menu . . . . . . . . . . . . . . . . . . . . . . . . . . . . . . . . . . . . . . . . . . . . . . . . . . . . . . . . . . . . . . . . . . . . . . . 36<br />
4.2.2.- Extended menu . . . . . . . . . . . . . . . . . . . . . . . . . . . . . . . . . . . . . . . . . . . . . . . . . . . . . . . . . . . . . . . . . . . . . . 38<br />
4.2.3.- Saving the parameters . . . . . . . . . . . . . . . . . . . . . . . . . . . . . . . . . . . . . . . . . . . . . . . . . . . . . . . . . . . . . . . . 40<br />
5.- Typical applications . . . . . . . . . . . . . . . . . . . . . . . . . . . . . . . . . . . . . . . . . . . . . . . . . . . . . . . . . . . . . . . . . . . . . . . . . . . . . 41<br />
A. - Channel tables . . . . . . . . . . . . . . . . . . . . . . . . . . . . . . . . . . . . . . . . . . . . . . . . . . . . . . . . . . . . . . . . . . . . . . . . . . . . . . . . . 43<br />
ENGLISH<br />
23
User Manual<br />
<strong>Self</strong>-<strong>powered</strong> <strong>Stereo</strong> Modulator<br />
1.- TECHNICAL SPECIFICATIONS<br />
1.1.- Universal modulator ref. 5804<br />
Video<br />
Audio<br />
RF<br />
ouptut<br />
General<br />
Bandwidth: 0,00005 ... 5 MHz Differencial phase: -5º (min), 5º (max)<br />
Input level (75 ohm): 1 Vpp Luma/chroma delay: < 100 ns<br />
Modulation depth: 73 ... 86 % (PAL) S/N ratio: > 53 dB<br />
87 ... 93 % (L norm) Input impedance: 75 ohm<br />
Differencial gain: -5 %(min), 5 %(max) Flatness: < +1 dB<br />
Bandwidth: 0,04 ... 15 KHz Distortion (1KHz desv. ± 30KHz): < 1 %<br />
Impedance: 10000 ohm S/N ratio: > 45 dB<br />
Pre-emphasis: 50 µs Flatness: < ±1 dB<br />
Deviation (1KHz/1.7Vpp in.): programmable (see table) Input level: >-15 15 dB (selec. SW) UHF < 30 KHz<br />
Level stability: ± 3 dB Carrier ratio (MHz): 4,5 / 5,5 / 6 / 6,5 MHz<br />
Pa/Pv distance: -11 ... -18 (prog.) (B/G-M/N-I-L norm)<br />
Loop-through response: ± 2,5 dB (46-862MHz) Output voltage (2 channels<br />
Frequency steps: 250 KHz (prog.) and intermodulation at 52 dB): 6 dBm (115 dBµV)<br />
C/N (5MHz): > 56 dB Minimum space<br />
Band spurious lev. (46-862MHz): < 60 dBc typ (-55 max) between channels: 250 KHz<br />
Powering: 12V (external) Max. consumption: 600 mA<br />
Temperature: 0 ... 50 ºC Output connectors: F<br />
Protection:<br />
IP20<br />
The technical specifications here described have been defined at a maximum room temperature of 45 ºC.<br />
24
User Manual<br />
<strong>Self</strong>-<strong>powered</strong> <strong>Stereo</strong> Modulator<br />
2 .- MOUNTING<br />
Ref. 5174<br />
Wall mounting detail<br />
Loop or loading<br />
input<br />
Output<br />
ENGLISH<br />
Mounting in 19” rack format (4 modules)<br />
25
User Manual<br />
<strong>Self</strong>-<strong>powered</strong> <strong>Stereo</strong> Modulator<br />
3. - ELEMENT DESCRIPTION<br />
3.1.- Modulator<br />
1 2 3 4<br />
5<br />
The modulator accepts audio and<br />
video inputs and it modulates<br />
them, according to the standard,<br />
to IF 38.9 MHz.<br />
The modulated IF signal converts<br />
to any channel or frequency bewteen<br />
46 and 862 MHz and after<br />
being filtered, it is amplified to<br />
obtain the specified output level.<br />
The different configurable parameters<br />
of the modulator, as well<br />
as the output level and frequency,<br />
are controlled by the universal<br />
programmer ref. 7234.<br />
1.- RF input<br />
2.- RF output<br />
3.- Audio/video input signal connector (1)<br />
4.- Programmer connector<br />
5.- External powering input (12Vdc)<br />
- 1<br />
Video input - 2<br />
Audio input (R) - 3<br />
Audio input (L) - 4<br />
- 5<br />
- 6<br />
- 7<br />
- 8<br />
(1)<br />
(Yellow) - Video input<br />
(Red) - Audio input (R)<br />
(White) - Audio input (L)<br />
26
User Manual<br />
<strong>Self</strong>-<strong>powered</strong> <strong>Stereo</strong> Modulator<br />
3.2.- Power supply<br />
Input voltage 100 - 240 V~ 47/63 Hz<br />
Input current 0,45 A~<br />
Output voltage 11,4 - 12,6 V<br />
Output current<br />
1,2 A<br />
ENGLISH<br />
27
User Manual<br />
<strong>Self</strong>-<strong>powered</strong> <strong>Stereo</strong> Modulator<br />
3. 3. - Programmer ref. 7234<br />
Model PCT 3.0 Model PCT 4.0<br />
The programmer has four buttons. The functions of the two models<br />
are as follows:<br />
Programmer mod. PCT 3.0<br />
: Button to change the programming menu and to save data.<br />
: Button that selects a digit within a specific programming menu.<br />
It also carries out the change from the normal menu to the<br />
extended menu<br />
: Button that increases that value of the selected digit.<br />
: Button that decreases the value of the selected digit.<br />
Programmer mod. PCT 4.0<br />
: (quick press) - Selects the parameter (cursor position).<br />
: Modifies the parameter (increase/decrease) that the cursor is<br />
pointing at (flashing on and off) .<br />
: (quick press) - Changes menu.<br />
: (long press) - Changes between the main menus and the extended<br />
menus<br />
: (long press) - Saves the configuration in the memory<br />
+ + : Modifies the display contrast<br />
+ + : Modifies display contrast<br />
28
User Manual<br />
<strong>Self</strong>-<strong>powered</strong> <strong>Stereo</strong> Modulator<br />
4. - HOW TO USE THE PRODUCT<br />
4.1. - WITH PROGRAMMER PCT 4.0<br />
When you connect the remote control to the<br />
unit, the unit sends its parameters to the<br />
remote control (memorised channel, configuration,<br />
output level, SW version,...). During<br />
this process the programmer’s SW version<br />
is displayed onscreen for a few moments:<br />
MAIN MENU<br />
OUTPUT<br />
Frequency:<br />
471.25 MHz<br />
EXTENDED MENU<br />
OUTPUT Level: 99 From any menu<br />
CONFIG<br />
Channel:21<br />
(471.25 MHz)<br />
Level: 99<br />
Chan. table:<br />
CCIR N.Z.Ind<br />
PCT firmware<br />
version<br />
------------<br />
V:4.02<br />
CONFIG<br />
Test Mode<br />
Disabled<br />
(quick press)<br />
CONFIG >><br />
VMD:79.0%<br />
PictS 1:-11<br />
Sound:5.5MHz<br />
(long press)<br />
(quick press)<br />
Next, the modulator’s SW version also<br />
appears onscreen for a few moments:<br />
Firmware<br />
version:<br />
CONFIG >><br />
S.Dev. : 0<br />
PictS 2:-18<br />
Aud: <strong>Stereo</strong><br />
From any menu<br />
LANGUAGE<br />
English<br />
ENGLISH<br />
V:3.01<br />
(long press)<br />
Next, the first option from the main menu<br />
will appear.<br />
Saving<br />
settings and<br />
restarting<br />
...<br />
29
User Manual<br />
<strong>Self</strong>-<strong>powered</strong> <strong>Stereo</strong> Modulator<br />
4.1.1.- MAIN MENU<br />
From now on, by pressing quickly on the<br />
button, you can access the main menus,<br />
which appear in this order: Output menu,<br />
Video menu, Audio menu and the menu for<br />
the selection of the operating mode.<br />
Note:<br />
If you want to modify the menu language,<br />
before configuring the device you must<br />
access the “Language” menu. To do so,<br />
press (long) to access the Extended<br />
menu, press once and then use the<br />
and buttons to select the language.<br />
Finally press (long) to save the changes.<br />
For further information, see section<br />
“Extended menu => Language selection”.<br />
1.- Output menu<br />
This lets the user select the output channel<br />
both in channel mode as well as in frequency<br />
mode. The output level is also indicated.<br />
The way that it appears depends on how the<br />
unit was last programmed (frequency mode<br />
or channel mode).<br />
If the device is in channel mode, this menu<br />
will display the output channel and the video<br />
carrier frequency of the output channel<br />
(which changes when the channel is changed).<br />
The digits (00 - 99) are also displayed<br />
and these are used to regulate the output<br />
level of the unit via the programmer.<br />
For example, if the selected channel is 21,<br />
the following will appear on the display:<br />
OUTPUT<br />
Channel:21<br />
(471.25 MHz)<br />
Level: 99<br />
The change of channel is carried out directly<br />
pressing , and the digit will flash on and<br />
off. Use the and buttons to modify<br />
the channel.<br />
If the device is in frequency mode, the<br />
video carrier frequency of the output channel<br />
is displayed in this menu as is the digit<br />
(00 - 99) which is used to regulate the output<br />
level of the unit using the programmer.<br />
For example:<br />
OUTPUT<br />
Frequency:<br />
471.25 MHz<br />
Level: 99<br />
If you want to modify the value when in frequency<br />
mode, press , and the digit will<br />
flash on and off. Use the and buttons<br />
to modify the value of the digit. By pressing<br />
again, the following digit is selected,<br />
which can be modified too should you so<br />
wish, and so on until you obtain the desired<br />
value.<br />
30
User Manual<br />
<strong>Self</strong>-<strong>powered</strong> <strong>Stereo</strong> Modulator<br />
When the cursor is placed over the decimal<br />
digit and when you press and the<br />
following permitted values will appear:<br />
• .0 => .00 MHz<br />
• .2 => .25 MHz<br />
• .5 => .50 MHz<br />
• .7 => .75 MHz<br />
The input frequency values range is from 46<br />
to 862 MHz.<br />
Next, by pressing you can select the control<br />
or regulation digits for the output level.<br />
This can be modified should you so wish<br />
until you obtain the desired value by pressing<br />
and .<br />
The permitted range of values is from 99,<br />
corresponds to the maximum level (116 ±5<br />
dBµV) and 00 (corresponds to 15 dB less).<br />
2.- Video menu<br />
Pressing the button you can access to<br />
the second menu. This menu adjusts the<br />
video modulation depth parameter, the<br />
audio carrier level parameter compared to<br />
the video level and the audio carrier frequency<br />
parameter compared to the video<br />
frequency (standard or norm).<br />
CONFIG >><br />
VMD:79.0%<br />
PictS 1:-11<br />
Sound:5.5MHz<br />
By means of the parameter selection button<br />
(quick press) you can access the video<br />
modulation depth (VMD) submenu. The<br />
and buttons are used to modify the video<br />
level, with the following range of permitted<br />
values (these are modulation depth values<br />
as long as the video input signal is 1Vpp).<br />
Modulator programmed using the L norm:<br />
87%, 89.5%, 91%, 93%.<br />
Modulator programmed using any other<br />
standard:<br />
73%, 76%, 80%, 82%, 83.5%, 84%, 85%,<br />
86%.<br />
Next, press the parameter selection button<br />
(quick press) to access the audio carrier<br />
level selection submenu compared to the<br />
video level (PictS 1). This can be modified<br />
using and .<br />
The values that are permitted for the level of<br />
the main audio carrier compared to the<br />
video level are: -11dB, -12dB, -13dB,<br />
-14dB, -15dB, -16dB, -17dB, -18dB.<br />
Note:<br />
If the modulator is programmed uisng the<br />
L norm, this menu will only be able to<br />
vary between two values 0 and 1 which<br />
correspond to a Video carrier / audio<br />
carrier ratio of 12dB and 16dB respectively<br />
as long as the modulation depth of<br />
the video signal is at its maximum (93%).<br />
If the modulation depth of the video signal<br />
has been programmed with another<br />
value, this ratio will change, for example<br />
for 86%, 1 and 2 correspond to 6dB<br />
and 10dB respectively.<br />
ENGLISH<br />
31
User Manual<br />
<strong>Self</strong>-<strong>powered</strong> <strong>Stereo</strong> Modulator<br />
Press the parameter selection button again<br />
(quick press) to access the audio carrier<br />
frequency selection menu compared to the<br />
video frequency (Audio) (norm or standard).<br />
To modify the standard or norm, press or<br />
until one of the following desired values<br />
appears:<br />
Display Relative frequency (MHz)<br />
4.5 MHz 4.5 M/N standard<br />
5.5 MHz 5.5 B/G standard<br />
6 MHz 6 I standard<br />
6.5 MHz 6.5 D/K standard<br />
L<br />
L norm<br />
3.- Audio menu<br />
Pressing the button you can access to<br />
the third menu. This menu adjusts the audio<br />
deviation parameter, the audio subcarrier<br />
level parameter compared to the video<br />
level (*) and the mode selection parameter<br />
(*): <strong>Stereo</strong>, Dual or Mono.<br />
(*) Only if the main carrier is at 5.5MHz.<br />
CONFIG >><br />
S. Dev.:0<br />
PictS 2:-18<br />
Aud: <strong>Stereo</strong><br />
Using the parameter selection button<br />
(quick press) you can access the audio deviation<br />
menu (S. Dev.). To modify the modulation<br />
deviation, press the or buttons<br />
until the desired value between 0 and 13 is<br />
obtained.<br />
The values that appear in the following table<br />
indicate the input audio level for each digit<br />
on the programmer display. This input audio<br />
level is needed so that the modulation<br />
deviation is 50KHz as long as the input signal<br />
is 1KHz.<br />
S. Dev. Input audio level (dBm)<br />
0 7<br />
1 5<br />
2 3<br />
3 1<br />
4 0<br />
5 -1<br />
6 -2<br />
7 -3<br />
8 -4<br />
9 -5<br />
10 -7<br />
11 -9<br />
12 -13<br />
13 -15<br />
In other words, if the input signal is 1KHz at<br />
1.7Vpp we have to program the value 4 in<br />
the S. Dev. menu of the programmer.<br />
32
User Manual<br />
<strong>Self</strong>-<strong>powered</strong> <strong>Stereo</strong> Modulator<br />
If the input signal is 1KHz at 1Vpp the<br />
modulation deviation for each digit programmed<br />
into the remote control is indicated in<br />
the following table:<br />
S. Dev. Modulation deviation (KHz)<br />
0 12<br />
1 19<br />
2 19<br />
3 24<br />
4 27<br />
5 29<br />
6 30<br />
7 37.5<br />
8 40<br />
9 51<br />
10 61<br />
11 72.5<br />
12 120<br />
13 145<br />
When programming the modulator in the L<br />
norm, these values indicate the modulation<br />
deppth for each value on the programmer<br />
display as long as the input level is 1.7Vpp<br />
or 1Vpp for a 1KHz signal.<br />
S. Dev.<br />
L norm L norm<br />
(1Vpp) (1,7Vpp)<br />
0 10.5 % 22 %<br />
1 17.5 % 28 %<br />
2 20 % 28 %<br />
3 20.5 % 35.5 %<br />
4 22.5 % 42 %<br />
5 26 % 44.5 %<br />
6 30 % 50 %<br />
7 31.5 % 56 %<br />
8 32.5 % 67 %<br />
9 44.5 % 73 %<br />
10 56 % 94.5 %<br />
11 65.5 % 108 %<br />
12 87 % 101 %<br />
13 99 % 108 %<br />
After pressing the parameter button<br />
(quick press) the following submenu lets you<br />
vary the audio subcarrier level (5.74MHz)<br />
compared to the video level (PictS 2).<br />
The values that can be selected are: -18dB,<br />
-20dB, -22dB, -24dB.<br />
Note:<br />
If the modulator is programmed using the<br />
L Norm this menu will only dispose of<br />
two values 0 and 1 which correspond to<br />
a Pvideo/Paudio ratio of 12dB and 16dB<br />
respectively as long as the modulation<br />
depth of the video signal is at its maximum<br />
(93%). If the modulation depth of<br />
the video signal es programmed with<br />
another value, this ratio changes, for<br />
example for 86% 1 and 2 correspond<br />
to 6dB and 10dB respectively.<br />
After pressing the parameter button<br />
(quick press) the following submenu lets you<br />
modify the operating mode: <strong>Stereo</strong>, dual or<br />
mono (Aud) using and (in order to<br />
separate the 5.5 MHz carriers).<br />
ENGLISH<br />
33
User Manual<br />
<strong>Self</strong>-<strong>powered</strong> <strong>Stereo</strong> Modulator<br />
4.- Selecting operating mode<br />
Pressing the button you can access to<br />
the fourth menu. In this menu, it is possible<br />
to select the Test mode: Test Enabled or<br />
Disabled (normal mode).<br />
In the operating mode Disabled Test, the<br />
output signal is modulated with the external<br />
audio and video (A/V In).<br />
In the operating mode Enabled Test, the output<br />
signal is modulated with a patern signal<br />
which is generated internally (two vertical<br />
bars on a black background).<br />
When activating the Test mode, if in the<br />
audio subcarrier frequency we selected<br />
Norm L, the modulador emits a tone in the<br />
audio signal along with video signal.<br />
The mode change is carried out using<br />
.<br />
CONFIG<br />
Test Mode<br />
Disabled<br />
or<br />
4.1.2.- EXTENDED MENU<br />
To access the extended menus, press for<br />
more than three seconds.<br />
The menu selection,the modification of<br />
values in each of the menus, and saving the<br />
changes is carried out in the same way as in<br />
the normal menus.<br />
Once in extended mode, you can travel<br />
through the menus by pressing quickly,<br />
and following this order:<br />
1.- Selecting Frequency or Channel mode<br />
CONFIG<br />
Chan. table:<br />
CCIR N.Z.Ind<br />
The first extended menu that appears allows<br />
you to change the way of selecting the output<br />
frequency, either in frequency mode or<br />
in channel mode and in this latter mode,<br />
from one of the 7 possible tables (see annex<br />
Channel Tables): CCIR N.Z. Ind, China<br />
Taiwan, Chile M/N, France, Australia,<br />
South Africa, Former USSR.<br />
Using the parameter selection button<br />
(quick press) you can access the channel<br />
tables and you can change tables using or<br />
.<br />
34
User Manual<br />
<strong>Self</strong>-<strong>powered</strong> <strong>Stereo</strong> Modulator<br />
2.- Selecting the language<br />
Pressing the button you can access to<br />
the second extended menu. This menu lets<br />
you select the language of the display texts.<br />
It can either be Spanish or English.<br />
The change in language is carried out using<br />
or .<br />
LANGUAGE<br />
English<br />
4.1.3- SAVING THE PARAMETERS<br />
Once your values have been selected in any<br />
of the menus (normal or extended) you can<br />
save the new data by pressing for<br />
approximately 3 seconds. The display will<br />
show the following:<br />
Saving<br />
settings and<br />
restarting<br />
...<br />
This changes the remote control immediately<br />
to normal mode, and the video carrier<br />
frequency appears on the display (or the<br />
channel number) of the output channel.<br />
If the configuration data is modified but not<br />
saved, once 30 seconds have passed, the<br />
previous configuration is retrieved, in other<br />
words, any changes made are cancelled.<br />
ENGLISH<br />
35
User Manual<br />
<strong>Self</strong>-<strong>powered</strong> <strong>Stereo</strong> Modulator<br />
4.2.- WITH PROGRAMMER PCT 3.0<br />
To carry out the configuration of each<br />
modulator the user must use the universal<br />
programmer ref. 7234 (PCT 3.0) and follow<br />
these steps<br />
4.2.1.- MENU NORMAL<br />
Insert the programmer into the front programming<br />
connector of the <strong>Stereo</strong><br />
Modulator (“Prog.”). First, the version of the<br />
software in use, will appear.<br />
For example 3.01:<br />
1.- Output channel / frequency<br />
Then, either the video carrier frequency of<br />
the output channel will appear or the output<br />
channel number will appear depending<br />
on the operating mode that has been selected<br />
the last time the device was programmed.<br />
For example, if the selected channel is 52,<br />
the following will appear on the display:<br />
or, if in frequency mode, if we want to<br />
select the same channel (video carrier in the<br />
frequency 719,25 MHz) the following should<br />
appear on the display:<br />
If in frequency mode, to modify the indicated<br />
value press , and the selected digit<br />
will flash on and off. The and buttons<br />
change the value of this digit. By pressing<br />
again, the following digit is selected,<br />
which can also be modified and so on until<br />
we have obtained the desired value. When<br />
the cursor is situated over the decimal digit,<br />
and when we press and the following<br />
permitted values will appear:<br />
• .0 => .00 MHz<br />
• .2 => .25 MHz<br />
• .5 => .50 MHz<br />
• .7 => .75 MHz<br />
36<br />
The range of permitted input values is from<br />
46 to 862 MHz.<br />
If in channel mode, you can change the<br />
channel by pressing or .<br />
2.- Output level<br />
The following menu that appears (by pressing<br />
) regulates the output level, for<br />
example 50:<br />
The and buttons modify the selected<br />
value.<br />
The range of permitted values is from 99,<br />
the maximum level (116 ±5 dBµV) and 00<br />
(corresponds to 15 dB less).
User Manual<br />
<strong>Self</strong>-<strong>powered</strong> <strong>Stereo</strong> Modulator<br />
3.- Video level<br />
You can access the next menu by pressing<br />
. This is the video level menu, for example<br />
4.<br />
The and buttons modify the video<br />
level. It has a range of permitted values between<br />
1 and 4 if programming using the L<br />
norm and between 1 and 8 if using the other<br />
norms. These values correspond approximately<br />
to the following modulation depth<br />
values, as long as the input level of the<br />
video signal is 1Vpp.<br />
Modulator programmed in L norm:<br />
Display<br />
Modulation depth<br />
1 87 %<br />
2 89.5 %<br />
3 91 %<br />
4 93 %<br />
Modulator programmed in any other norm:<br />
Display<br />
4.- Audio level<br />
Modulation depth<br />
1 73 %<br />
2 76 %<br />
3 80 %<br />
4 82 %<br />
5 83.5 %<br />
6 84 %<br />
7 85 %<br />
8 86 %<br />
You can access the following menu by pressing<br />
. This is the audio level (modulation<br />
deviation or modulation depth in the case of<br />
programming in L norm), for example 4:<br />
To modify the modulation deviation, press<br />
or until the desired value appears that<br />
must be between 1 and 14.<br />
The values that appear next indicate the<br />
input audio level for each digit on the programmer<br />
display. This value is used so that<br />
the modulation deviation is ±50KHz as long<br />
as there is an input signal of 1KHz.<br />
Display Input audio level (dBm)<br />
1 4<br />
2 1<br />
3 1<br />
4 -1<br />
5 -2 (1.7 Vpp aprox)<br />
6 -3<br />
7 -4.5<br />
8 -5.5<br />
9 -6<br />
10 -8<br />
11 -9.5<br />
12 -11<br />
13 -15<br />
14 -17<br />
In other words, if the input signal is 1KHz at<br />
1,7 Vpp we have to program the value 5 in<br />
the programmer AL menu.<br />
ENGLISH<br />
37
User Manual<br />
<strong>Self</strong>-<strong>powered</strong> <strong>Stereo</strong> Modulator<br />
If the input signal is 1KHz at 1Vpp the<br />
modulation depth for each value programmed<br />
in the remote control is indicated in the<br />
following table:<br />
AL (display) Modulation deviation (KHz)<br />
1 12<br />
2 19<br />
3 19<br />
4 24<br />
5 27<br />
6 29<br />
7 30<br />
8 37.5<br />
9 40<br />
10 51<br />
11 61<br />
12 72.5<br />
13 120<br />
14 145<br />
When programming the modulator in the L<br />
norm these values indicate the modulation<br />
depth for each digit on the programmer display<br />
as long as the input level is 1,7Vpp or<br />
1Vpp for a 1 KHz signal.<br />
Display<br />
L norm L norm<br />
(1Vpp) (1,7Vpp)<br />
1 10.5 % 22 %<br />
2 17.5 % 28 %<br />
3 20 % 28 %<br />
4 20.5 % 35.5 %<br />
5 22.5 % 42 %<br />
6 26 % 44.5 %<br />
7 30 % 50 %<br />
8 31.5 % 56 %<br />
9 32.5 % 67 %<br />
10 44.5 % 73 %<br />
11 56 % 94.5 %<br />
12 65.5 % 108 %<br />
13 87 % 101 %<br />
14 99 % 108 %<br />
The functions that have been seen up to<br />
now correspond to the most common operating<br />
mode, but there are others that can<br />
be selected and that correspond to the<br />
extended menu.<br />
4.2.- EXTENDED MENU<br />
You can access this menu by pressing<br />
for a few seconds. The selection of menus,<br />
the modification of the selected value in<br />
each of these menus and saving any changes<br />
is carried out in the same way as in the<br />
normal menu.<br />
1.- Channel/frequency mode<br />
The first extended menu that appears allows<br />
you to change the way of selecting the output<br />
frequency, either in frequency mode or<br />
in channel mode and in this latter mode,<br />
from one of the 7 possible tables (see the<br />
end of this manual).<br />
Once the desired value has been chosen in<br />
any of the extended menus, it is confirmed<br />
by pressing for a couple of seconds. This<br />
changes the remote control immediately to<br />
normal mode, and the video carrier frequency<br />
appears on the display (or the channel<br />
number) of the output channel.<br />
38
User Manual<br />
<strong>Self</strong>-<strong>powered</strong> <strong>Stereo</strong> Modulator<br />
2.- Audio carrier level<br />
The following menu that appears after pressing<br />
for a couple of seconds lets you vary<br />
the main carrier level of the audio as<br />
regards the video.<br />
the maximum (93%). If the modulation depth<br />
of the video signal es programmed with<br />
another value, this ratio changes, for example<br />
for 86% the 1 and the 2 correspond to<br />
6dB and 10dB respectively.<br />
4.- Audio subcarrier level<br />
The next menu that appears after pressing<br />
lets you vary the audio sucarrier level<br />
(5,74MHz) compared to the video level.<br />
The values can be from 1 to 8, and these<br />
correspond approximately with the following<br />
relative values:<br />
Display<br />
Video / Audio<br />
1 11 dB<br />
2 12 dB<br />
3 13 dB<br />
4 14 dB<br />
5 15 dB<br />
6 16 dB<br />
7 17 dB<br />
8 18 dB<br />
Note:<br />
If the modulator is programmed in the L<br />
Norm this menu will let you vary the<br />
value using either 1 and 2 which correspond<br />
to a VideoC/AudioC ratio of 12dB<br />
and 16dB respectively as long as the<br />
modulation depth of the video signal is at<br />
3.- Audio mode<br />
If you press the menu that appears lets<br />
you modify the operating mode: <strong>Stereo</strong>,<br />
dual or mono using and .<br />
Note: This menu only appears in the case of<br />
selecting a separation of carriers of<br />
5.5 MHz.<br />
The range of values can be between 1 and<br />
4, and these correspond approximately with<br />
the following relative values:<br />
Display<br />
Video / Audio<br />
1 18 dB<br />
2 20 dB<br />
3 22 dB<br />
4 24 dB<br />
Note: If the modulator is programmed with a<br />
separation of carriers different from<br />
5.5 MHz, this menu does not exist<br />
since there isn’t a 2nd audio subcarrier.<br />
ENGLISH<br />
39
User Manual<br />
<strong>Self</strong>-<strong>powered</strong> <strong>Stereo</strong> Modulator<br />
5.- Main carrier frequency<br />
6.- Normal / Test mode<br />
4.2.3.- SAVING THE PARAMETERS<br />
The following menu that appears after pressing<br />
lets you vary the main carrier frequency<br />
of the audio compared to the video<br />
frequency.<br />
Display Relative frequency (MHz)<br />
4.5 4.5 M, N standard<br />
5.5 5.5 B, G standard<br />
6 6 I standard<br />
6.5 6.5 D, K standard<br />
nor L<br />
L norm<br />
Lastly, after pressing you can access the<br />
menu that lets you select the operating<br />
mode: Normal or Test using and .<br />
In Normal mode, the output signal is modulated<br />
with the video and the external audio<br />
that is introduced in the modulator’s A/V<br />
connector, however in Test mode the output<br />
signal is modulated with a video signal that<br />
is generated internally (two vertical white<br />
lines on a black background) and the external<br />
audio signal that is introduced in the<br />
modulator’s A/V connector.<br />
When activating the Test mode, if in the<br />
audio subcarrier frequency we selected<br />
Norm L, the modulador emits a tone in the<br />
audio signal along with video signal.<br />
To save the parameters, press the button<br />
for approximately 3 seconds. When the data<br />
is correctly saved, the central segments of<br />
the programmer digits will appear as<br />
follows:<br />
If the configuration data is modified but not<br />
saved, once 30 seconds have passed, the<br />
previous configuration is retrieved, in other<br />
words, any changes made are cancelled.<br />
40
User Manual<br />
<strong>Self</strong>-<strong>powered</strong> <strong>Stereo</strong> Modulator<br />
5.- TYPICAL APPLICATIONS<br />
Video<br />
Audio L<br />
Audio R<br />
Existing Head End<br />
75 ohm<br />
Combiner<br />
ENGLISH<br />
Output<br />
- A channel is added to the existing installation.<br />
41
User Manual<br />
<strong>Self</strong>-<strong>powered</strong> <strong>Stereo</strong> Modulator<br />
75 ohm<br />
Video<br />
Audio L<br />
Audio R<br />
Video<br />
Audio L<br />
Audio R<br />
Video<br />
Audio L<br />
Audio R<br />
Video<br />
Audio L<br />
Audio R<br />
Existing Head End<br />
- 4 channels are added to the existing installation.<br />
- In this case, the modulators can be mounted in a 19” rack format using<br />
the 19” modulators support ref. 5174<br />
Output<br />
Combiner<br />
42
A.- TABLAS DE CANALES / CHANNEL TABLES<br />
CH Tab1 Tab2 Tab3 Tab4 Tab5 Tab6 Tab7<br />
CCIRR CHINA M/N FRANCE AUSTRALIA S-AFRICA USSR<br />
N. ZEALAND TAIWAN CHILE K1 (8MHz) OIRT<br />
INDONESIA HYPER-CCIRR I (8MHz Ireland)<br />
French territ.<br />
Angola (4….9)<br />
0 47.75 46.25<br />
1 49.75 55.75 57.25 49.75<br />
2 48.25 57.75 55.25 60.50 64.25 53.75 59.25<br />
3 55.25 65.75 61.25 63.75 86.25 61.75 77.25<br />
4 62.25 77.25 67.25 95.25 175.25 85.25<br />
5 175.25 85.25 77.25 102.25 183.25 93.25<br />
6 182.25 168.25 83.25 175.25 191.25 175.25<br />
7 189.25 176.25 175.25 182.25 199.25 183.25<br />
8 196.25 184.25 181.25 189.25 207.25 191.25<br />
9 203.25 192.25 187.25 196.25 215.25 199.25<br />
10 210.25 200.25 193.25 176.00 210.25 223.25 207.25<br />
11 217.25 208.25 199.25 184.00 217.25 231.25 215.25<br />
12 224.25 216.25 205.25 192.00 224.25 223.25<br />
13 471.25 211.25 200.00 247.43 (247.5)<br />
14 479.25 471.25 208.00<br />
15 487.25 477.25 216.00<br />
16 495.25 483.25<br />
17 503.25 489.25<br />
18 511.25 495.25<br />
19 519.25 501.25<br />
20 527.25 507.25 138.25 (5 A)<br />
21 471.25 535.25 513.25 203.25<br />
22 479.25 543.25 519.25<br />
23 487.25 551.25 525.25<br />
24 495.25 559.25 531.25<br />
25 503.25 607.25 537.25<br />
26 511.25 615.25 543.25<br />
27 519.25 623.25 549.25 521.25<br />
28 527.25 631.25 555.25 527.25<br />
29 535.25 639.25 561.25 534.25<br />
43
CH Tab1 Tab2 Tab3 Tab4 Tab5 Tab6 Tab7<br />
30 543.25 647.25 567.25 541.25<br />
31 551.25 655.25 573.25 548.25<br />
32 559.25 663.25 579.25 555.25<br />
33 567.25 671.25 585.25 562.25<br />
34 575.25 679.25 591.25 569.25<br />
35 583.25 687.25 597.25 576.25<br />
36 591.25 695.25 603.25 583.25<br />
37 599.25 703.25 609.25 590.25<br />
38 607.25 711.25 615.25 597.25<br />
39 615.25 719.25 621.25 604.25<br />
40 623.25 727.25 627.25 611.25<br />
41 631.25 735.25 633.25 618.25<br />
42 639.25 743.25 639.25 625.25<br />
43 647.25 751.25 645.25 632.25<br />
44 655.25 759.25 651.25 639.25<br />
45 663.25 767.25 657.25 646.25<br />
46 671.25 775.25 663.25 653.25<br />
47 679.25 783.25 669.25 660.25<br />
48 687.25 791.25 675.25 667.25<br />
49 695.25 799.25 681.25 674.25<br />
50 703.25 807.25 687.25 681.25<br />
51 711.25 815.25 693.25 688.25<br />
52 719.25 823.25 699.25 695.25<br />
53 727.25 831.25 705.25 702.25<br />
54 735.25 839.25 711.25 709.25<br />
55 743.25 847.25 717.25 716.25<br />
56 751.25 855.25 723.25 723.25<br />
57 759.25 729.25 730.25<br />
58 767.25 735.25 737.25<br />
59 775.25 741.25 744.25<br />
60 783.25 747.25 751.25<br />
61 791.25 753.25 758.25<br />
62 799.25 759.25 765.25<br />
63 807.25 765.25 772.25<br />
64 815.25 771.25 779.25<br />
65 823.25 777.25 786.25<br />
44
CH Tab1 Tab2 Tab3 Tab4 Tab5 Tab6 Tab7<br />
66 831.25 783.25 793.25<br />
67 839.25 789.25 800.25<br />
68 847.25 795.25 807.25<br />
69 855.25 801.25 814.25<br />
70 53.75 807.25<br />
71 62.25 303.25 (S21) 813.25<br />
72 82.25 311.25 819.25<br />
73 175.25 319.25 825.25<br />
74 183.75 327.25 831.25<br />
75 192.25 335.25 837.25<br />
76 201.25 343.25 843.25<br />
77 210.25 351.25 849.25<br />
78 217.25 359.25 855.25<br />
79 224.25 367.25 861.25<br />
80 105.25 375.25<br />
81 112.25 383.25<br />
82 119.25 391.25<br />
83 126.25 399.25<br />
84 133.25 407.25<br />
85 140.25 415.25<br />
86 147.25 423.25<br />
87 154.25 431.25<br />
88 161.25 439.25<br />
89 168.25 447.25<br />
90 231.25 455.25<br />
91 238.25 463.25 (S41)<br />
92 245.25<br />
93 252.25<br />
94 259.25<br />
95 266.25<br />
96 273.25<br />
97 280.25<br />
98 287.25<br />
99 294.25<br />
Canales Italianos / Italian channels<br />
Bandas “S” / “S” bands<br />
45
Garantía<br />
Televés S.A. ofrece una garantía de dos años calculados a partir de la<br />
fecha de compra para los países de la UE. En los países no miembros<br />
de la UE se aplica la garantía legal que está en vigor en el momento de<br />
la venta. Conserve la factura de compra para determinar esta fecha.<br />
Durante el período de garantía, Televés S.A. se hace cargo de los fallos<br />
producidos por defecto del material o de fabricación. Televés S.A. cumple<br />
la garantía reparando o sustituyendo el equipo defectuoso.<br />
No están incluidos en la garantía los daños provocados por uso indebido,<br />
desgaste, manipulación por terceros, catástrofes o cualquier causa<br />
ajena al control de Televés S.A.<br />
Guarantee<br />
Televés S.A. offers a two year guarantee, beginning from the date of<br />
purchase for countries in the EU. For countries that are not part of the<br />
EU, the legal guarantee that is in force at the time of purchase is<br />
applied. Keep the purchase invoice to determine this date.<br />
During the guarantee period, Televés S.A. complies with the guarantee<br />
by repairing or substituting the faulty equipment.<br />
The harm produced by improper usage, wear and tear, manipulation by<br />
a third party, catastrophes or any other cause beyond the control of<br />
Televés S.A. is not included in the guarantee.
Empresa<br />
Registrada<br />
ER 224/1/94<br />
Miembro de número del<br />
Red Comercial Nacional<br />
A CORUÑA C.P. 15011<br />
Gregorio Hernández 8.<br />
Tfnos.: 981 27 47 31 /981 27 22 10<br />
Fax: 981 27 16 11<br />
coruna@televes.com<br />
ALMERÍA C.P. 04008<br />
Campogrís 9.<br />
Tfno.: 950 23 14 43<br />
Fax: 950 23 14 43<br />
almeria@televes.com<br />
BADAJOZ C.P. 06010<br />
C/Jacobo Rodríguez,<br />
Pereira, nº11-Oficina<br />
Tfno.: 924 20 74 83<br />
Móvil: 670 70 21 93<br />
Fax: 924 20 01 15<br />
saherco@terra.es<br />
BARCELONA C.P. 08940<br />
C/ Sant Ferrán, 27<br />
Cornellá - Barcelona<br />
Tfnos.: 93 377 08 62 /93 474 29 50<br />
Fax: 93 474 50 06<br />
barcelona@televes.com<br />
BILBAO C.P. 48150<br />
Iberre kalea, mód. 16, pabellón 15-B<br />
Sangroniz-Sondika<br />
Tfnos.: 94 471 12 02 /94 471 24 78<br />
Fax: 94 471 14 93<br />
bilbao@televes.com<br />
BURGOS C.P. 09188<br />
C/Campanero, 3, S. Adrián de Juarros<br />
Tfno.: 947 56 04 58<br />
Móvil: 670 73 75 86<br />
emilianovarga@amena.com<br />
GIJÓN C.P. 33210<br />
C/Japón, 14<br />
Tfnos.: 985 15 25 50 /985 15 29 67<br />
Fax : 985 14 63 89<br />
gijon@televes.com<br />
JAÉN C.P. 23007<br />
Hermanos Pinzón, 8-bajo<br />
Tfnos.: 953 29 50 40 /953 29 52 11<br />
Móvil: 636 984489<br />
Fax: 953 29 52 10<br />
pablobiesa@infonegocio.com<br />
LAS PALMAS C.P. 35006<br />
Gral. Mas de Gaminde 26<br />
Tfnos.: 928 23 11 22 /928 23 12 42<br />
Fax: 928 23 13 66<br />
laspalmas@televes.com<br />
LOGROÑO C.P. 26004<br />
San Prudencio 19. bajo<br />
Tfno.: 941 23 35 24<br />
Fax: 941 25 50 78<br />
r.grijalba@cgac.es<br />
MADRID C.P. 28005<br />
Paseo de los Pontones 11<br />
Tfnos.: 91 474 52 21 /91 474 52 22<br />
Fax: 91 474 54 21<br />
madrid@televes.com<br />
MÁLAGA C.P. 29006<br />
C/ La Boheme 55<br />
Pol. Ind. Alameda 2<br />
malaga@televes.com<br />
MURCIA C.P. 30010<br />
Polígono Conver - C/ Rio Pliego 22<br />
Tfnos.: 968 26 31 44 /968 26 31 77<br />
Fax: 968 25 25 76<br />
murcia@televes.com<br />
P. MALLORCA C.P. 07007<br />
Ferrer de Pallares 45. bajo D.<br />
Tfno.: 971 24 70 02<br />
Fax: 971 24 53 42<br />
mallorca@televes.com<br />
PAMPLONA C.P. 31007<br />
Avda. Sancho el Fuerte 5<br />
Tfno.: 948 27 35 10<br />
Fax: 948 17 41 49<br />
jazpeitia@cin.es<br />
SEVILLA C.P. 41008<br />
Pol. Ind. Store - C/ A-6. Nave 5<br />
Tfnos.: 95 443 64 50 /95 443 58 00<br />
Fax: 95 443 96 93<br />
sevilla@televes.com<br />
TENERIFE C.P. 38108<br />
Avda. El Paso, 25 -<br />
Los Majuelos- La Laguna<br />
Tfnos.: 922 31 13 14 /922 31 13 16<br />
Fax: 922 31 13 33<br />
tenerife@televes.com<br />
VALENCIA C.P. 46022<br />
Plaza Jordi San Jordi s/n<br />
Tfnos.: 96 337 12 01 /96 337 12 72<br />
Fax: 96 337 06 98<br />
valencia@televes.com<br />
VIGO C.P. 36204<br />
Escultor Gregorio Fernández, 5<br />
Tfnos.: 986 42 33 87 /986 42 40 44<br />
Fax: 986 42 37 94<br />
vigo@televes.com<br />
VALLADOLID C.P. 47008<br />
C/ Arrecife 12<br />
Tfno.: 983 22 36 66<br />
Fax: 983 22 36 66<br />
fernandoharguindey@hotmail.com<br />
ZARAGOZA C.P. 50002<br />
C/ Monasterio de Alahón 1-3<br />
Tfno.: 976 41 12 73<br />
Fax: 976 59 86 86<br />
zaragoza@televes.com<br />
CANARIAS<br />
TENERIFE<br />
A CORUÑA<br />
BILBAO<br />
CANTABRIA<br />
GUIPÚZCOA<br />
LUGO GIJÓN<br />
ÁLAVA<br />
SANTIAGO<br />
ASTURIAS<br />
NAVARRA<br />
LEÓN<br />
BURGOS<br />
HUESCA<br />
GIRONA<br />
VIGO<br />
ZAMORA N PALENCIA LA RIOJA<br />
OURENSE<br />
BARCELONA<br />
VALLADOLID SORIA<br />
ZARAGOZA<br />
ZAMORA<br />
TARRAGONA<br />
SALAMANCA<br />
SEGOVIA<br />
OPORTO<br />
ÁVILA GUADALAJARA<br />
TERUEL<br />
MADRID<br />
CASTELLÓN<br />
PALMA DE<br />
CÁCERES<br />
TOLEDO<br />
MALLORCA<br />
CUENCA<br />
LISBOA<br />
VALENCIA<br />
LAS PALMAS<br />
HUELVA<br />
BADAJOZ<br />
CÓRDOBA<br />
SEVILLA<br />
CÁDIZ<br />
CEUTA<br />
TELEVES ELECTRONICA PORTUGUESA<br />
MAIA - OPORTO<br />
Via . Dr Francisco Sa Carneiro. Lote 17.<br />
ZONA Ind. MAIA 1. Sector-X MAIA.<br />
C.P. 4470 BARCA<br />
Tel.: 351 22 9418313<br />
Fax: 351 22 9488719 / 9416180<br />
televes.pt@televes.com<br />
LISBOA<br />
C.P. 1000 Rua Augusto Gil 21-A.<br />
Tel.: 351 21 7932537<br />
Fax: 351 21 7932418<br />
televes.lisboa.pt@televes.com<br />
CIUDAD REAL<br />
JAÉN<br />
MÁLAGA<br />
GRANADA<br />
MELILLA<br />
Red Comercial Internacional<br />
ALBACETE<br />
ALMERÍA<br />
MURCIA<br />
ALICANTE<br />
BALEARES<br />
SUCURSALES<br />
DELEGACIONES<br />
FÁBRICAS<br />
TELEVES ITALIA S.r.l.<br />
S.op.Viale Liguria 24<br />
20068 Peschiera Borromeo (MI) Italia<br />
Tel.: (+39)-0251650604 (RA)<br />
Fax: (+39)-0255307363<br />
televes.it@televes.com<br />
TELEVES MIDDLE EAST FZE<br />
P.O. Box 17199<br />
JEBEL ALI FREE ZONE DUBAI,<br />
UNITED ARAB EMIRATES<br />
Tel.: 9714 88 343 44<br />
Fax: 9714 88 346 44<br />
televes.me@televes.com<br />
Rúa B. de Conxo, 17<br />
15706 SANTIAGO DE COMPOSTELA<br />
Tel. 981 52 22 00 Fax 981 52 22 62<br />
televes@televes.com www.televes.com<br />
TELEVES FRANCE S.A.R.L.<br />
1 Rue Louis de Broglie<br />
Parc d'Activités de l'Esplanade<br />
77400 St Thibault des Vignes FRANCE<br />
Tél.: +33 (0)1 60 35 92 10<br />
Fax: +33 (0)1 60 35 90 40<br />
televes.fr@televes.com<br />
TELEVES UNITED KINGDOM LTD<br />
Unit 11 Hill Street, Industrial State<br />
CWMBRAN, GWENT NP44 7PG.<br />
(United Kingdom)<br />
Tel.: 44 01 633 87 58 21<br />
Fax: 44 01 633 86 63 11<br />
televes.uk@televes.com