PTZ Dome Camera SPD-3000/2300 User's Manual - Samsung CCTV
PTZ Dome Camera SPD-3000/2300 User's Manual - Samsung CCTV
PTZ Dome Camera SPD-3000/2300 User's Manual - Samsung CCTV

Create successful ePaper yourself
Turn your PDF publications into a flip-book with our unique Google optimized e-Paper software.
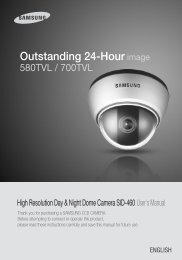
30X Crisp Image Detection<br />
SALES NETWORK<br />
• SAMSUNG TECHWIN CO., LTD.<br />
145-3, Sangdaewon-dong, Jungwon-gu, Seongnam-si, Gyeonggi-do, 462-120, Korea<br />
TEL : +82-31-740-8151~8158 FAX : +82-31-740-8145<br />
• SAMSUNG OPTO-ELECTRONICS UK, LTD.<br />
<strong>Samsung</strong> House, 1000 Hillswood Drive, Hillswood Business Park Chertsey, Surrey KT16 OPS<br />
TEL : +44-1932-45-5308 FAX : +44-1932-45-5325<br />
www.samsungtechwin.com<br />
www.samsungcctv.com<br />
P/No. : Z6806-0737-01E<br />
VAN 08.09<br />
<strong>PTZ</strong> <strong>Dome</strong> <strong>Camera</strong> <strong>SPD</strong>-<strong>3000</strong>/<strong>2300</strong> User’s <strong>Manual</strong><br />
Thank you for purchasing a SAMSUNG CCD CAMERA.<br />
Before attempting to connect or operate this product,<br />
please read these instructions carefully and save this manual for future use.<br />
ENGLISH
The lightning flash with an arrowhead symbol, within an equilateral triangle is<br />
intended to alert the user to the presence of uninsulated “dangerous voltage”<br />
within the product's enclosure that may be of sufficient magnitude to<br />
constitute a risk of electric shock to persons.<br />
The exclamation point within an equilateral triangle is intended to alert the user<br />
to the presence of important operating and maintenance (servicing)<br />
instructions in the literature accompanying the appliance.<br />
INFORMATION -This equipment has been tested and found to comply with limits<br />
for a Class A digital device, pursuant to part 15 of the FCC Rules. These limits are<br />
designed to provide reasonable protection against harmful interference when the<br />
equipment is operated in a commercial environment. This equipment generates,<br />
uses, and can radiate radio frequency energy and, if not installed and used in<br />
accordance with the instruction manual, may cause harmful interference to radio<br />
communications.<br />
Operation of this equipment in a residential area is likely to cause harmful<br />
interference in which case the user will be required to correct the interference at<br />
his own expense.<br />
WARNING - Changes or modifications not expressly approved by the manufacturer<br />
could void the user’s authority to operate the equipment.<br />
CAUTION : To prevent electric shock and risk of fire hazards:<br />
Do NOT use power sources other than that specified.<br />
Do NOT expose this appliance to rain or moisture.<br />
This installation should be made by a qualified service person and<br />
should conform to all local codes.
Features<br />
30X/23X Zoom Lens with Auto-<br />
Focus Function<br />
The 30X/23X zoom lens having Auto-focus<br />
function magnifies the image up to 300/230<br />
times when used with the digital 10X zoom<br />
function.<br />
Various Auto Surveillances<br />
*Individual Preset Saving Modes<br />
13 camera adjustment functions can be saved<br />
independently in each Preset menu to provide<br />
optimum images.<br />
*Various Protocols<br />
8 different makersí protocols are supported:<br />
<strong>Samsung</strong> Techwin, Pelco, <strong>Samsung</strong> Electronics,<br />
Panasonic and Vicon.<br />
*<strong>PTZ</strong> Tracking<br />
4 patterns operated with the joystick can be<br />
saved and replayed by users.<br />
*AUTO Swing<br />
Pan or Tilt is operated in sequence between 2<br />
designated positions.<br />
*Group Search<br />
Maximum 128 Preset positions are toured in<br />
order.<br />
*Tour Search<br />
Maximum 6 Group Search functions are toured<br />
in order.<br />
Smart P/T<br />
Even when the Zoom-In function is On for the<br />
Pan and Tilt speed correction function linked to<br />
the zoom position, fine manual operation is<br />
possible.<br />
Day & Night<br />
Day & Night function of ICR (IR Cut-Filter<br />
Removal) and Sens-Up function can achieve<br />
optimum images during day and night.<br />
*Sens-Up function improves the CCD sensitivity by<br />
lengthening the exposure time using electricity.<br />
*Day&Night function enables users to select and<br />
adjust the colour and black and white images<br />
according to the light level.<br />
OSD (On Screen Display)<br />
Items such as <strong>Camera</strong> ID, <strong>Camera</strong> Name, Preset<br />
Number, Preset Name, Area Name and <strong>Camera</strong><br />
Status are displayed on the monitor. <strong>Camera</strong><br />
functions can be set up on the OSD menu screen.<br />
128 Preset Positions<br />
A maximum of 128 Preset positions can be<br />
set up. This function enables users to set up<br />
the monitoring place any time.<br />
Digital Flip<br />
When you want to monitor the moving object<br />
below the camera, you can execute the<br />
Digital Flip using the controllerís joystick. The<br />
moving object can be monitored without<br />
screen reverse.<br />
Area Masking<br />
For privacy protection, a maximum of 4 areas<br />
can be masked among the surveillance areas<br />
preventing them to be displayed on the screen.<br />
<strong>Samsung</strong> Techwin cares for the environment at all product manufacturing<br />
stages to preserve the environment, and is taking a number of steps to<br />
provide customers with more environment-friendly products.The Eco mark<br />
represents <strong>Samsung</strong> Techwin s will to create environment-friendly products,<br />
and indicates that the product satisfies the EU RoHS Directive.<br />
This information is provided to ensure your safety and to prevent any losses, financial<br />
or otherwise. Please read it carefully and use the product accordingly.<br />
Warning/Attention/Special Mark Messages<br />
Warnings & Cautions<br />
* For product inquiries, please contact the retail shop where you bought the camera. The use of equipment such<br />
as an aerial ladder while providing after-sales service shall be at your expense.<br />
* Disconnect the power cord temporarily during a thunderstorm or in case of lightning, in order to prevent fire or<br />
damage to the product.<br />
* This product is auxiliary equipment for a surveillance system and the company shall not be held liable for any<br />
damage to property or injury caused by theft, fire or act of god.<br />
Ignoring this information may<br />
result in death or or serious<br />
personal injuries.<br />
Indicates “Never Allowed.”<br />
Ignoring this information may<br />
result in material loss or personal<br />
injuries.<br />
Indicates “No Disassembling.”<br />
ENGLISH
Contents<br />
Precautions<br />
Part Names and Functions 10<br />
Body<br />
<strong>Camera</strong> Holder<br />
<strong>Camera</strong> Holder Connection<br />
<strong>Camera</strong> Holder Initial Setting<br />
Components and Accessories 22<br />
8<br />
10<br />
11<br />
12<br />
13<br />
ENGLISH<br />
Functional Description 30<br />
OSD Menu Organization<br />
<strong>Dome</strong> <strong>Camera</strong> User Menu Settings<br />
1. <strong>Camera</strong> Settings<br />
2. Sequence Setting<br />
3. P/T Setting<br />
4. OSD Setting<br />
5. Alarm Setting<br />
6. Initialization Setting<br />
7. Status<br />
Product Structure and Installation 58<br />
30<br />
34<br />
34<br />
42<br />
48<br />
51<br />
54<br />
56<br />
57<br />
ENGLISH<br />
Installation 23<br />
Specifications 62
Precautions<br />
Installation by unqualified<br />
persons is not recommended.<br />
If any unusual odors or smoke comes<br />
from the camera, stop using the product.<br />
ENGLISH<br />
Do not install the product in too<br />
hot or too cold environments.<br />
Do not install the camera in<br />
intermittent lighting environments.<br />
ENGLISH<br />
Experienced and skilled technicians have to install<br />
this product. Unqualified and personal installation<br />
may cause fire or electric shock. Contact the dealer<br />
for installation.<br />
It may cause fire.<br />
Do not use the camera under extreme temperatures (below -<br />
10° or above +50°). It may cause poor image quality or<br />
failure. Be especially careful to provide ventilation when<br />
operating the camera under high temperatures.<br />
Do not install the camera under severely<br />
changing lighting environments such as<br />
fluorescent lamps. It may cause the camera<br />
to work improperly.<br />
Do not install the product under humid conditions<br />
or near flammable or explosive gases.<br />
Install the product in a place strong<br />
enough to hold it.<br />
Never drop the camera or subject<br />
it to severe shocks or vibrations.<br />
Do not aim the camera at the sun<br />
or any other strong light source.<br />
It may cause failure, electric shock or fire.<br />
The product may fall.<br />
It may cause failure.<br />
It may cause fatal damage to CCD device or<br />
internal circuit.<br />
Do not handle the power plug<br />
with wet hands.<br />
Do not disassemble or insert<br />
foreign objects.<br />
Do not touch the front glass of<br />
the camera.<br />
Do not install the camera where it might<br />
be exposed to rain, water or spillages.<br />
It may cause electric shock.<br />
It may cause failure or electric shock.<br />
It is the most important part of camera. Be<br />
careful not to mark it with fingerprints.<br />
If the camera gets wet, it may cause failure.<br />
SPEED DOME CAMERA<br />
8<br />
User’s <strong>Manual</strong> SPEED DOME CAMERA 9<br />
User’s <strong>Manual</strong>
Part Names and Functions<br />
Body<br />
<strong>Camera</strong> Holder<br />
ENGLISH<br />
Power Switch<br />
Power ON/OFF (Factory Setting: OFF)<br />
<br />
Function Setup Switch<br />
1. Half/Full 2.3.4.5. RS-485/422 Terminal Setting<br />
6. RS-485/422 Communication 7. Factory setting 8. RS-232<br />
Controller Connection Input<br />
1. RXD+ 2. RXD- 3. TXD+ 4. TXD- 5. GND 6. TX 7. RX<br />
ID Setup Switch<br />
Alarm Connection Input<br />
1. IN1 2. IN2 3. GND 4. IN3 5. IN4 6. GND<br />
7. COM1 8. 1N.O 9. 1N.C 10. COM2 11. 2N.O 12. 2N.C<br />
Protocol Selection Switch<br />
AC 24V Input<br />
SPEED DOME CAMERA<br />
10<br />
User’s <strong>Manual</strong> SPEED DOME CAMERA 11<br />
User’s <strong>Manual</strong>
Part Names and Functions<br />
<strong>Camera</strong> Holder Connection<br />
Notes<br />
• In order to control the speed dome camera by personal computer, exclusive program<br />
should be used.<br />
<strong>Camera</strong> Holder Initial Settings<br />
Setting Communications Protocol<br />
Use the SW3 of installation bracket to set the communications protocol.<br />
SW3 Protocol Baud Rate(BPS)<br />
0 <strong>Samsung</strong> 9,600<br />
1 <strong>Samsung</strong> 19,200<br />
2 Pelco-D 2,400<br />
3 Pelco-D 4,800<br />
4 Pelco-D 9,600<br />
5 Pelco-P 4,800<br />
6 Pelco-P 9,600<br />
7 <strong>Samsung</strong> Elec. 9,600<br />
8 <strong>Samsung</strong> Elec. 19,200<br />
9 Panasonic 9,600<br />
A Panasonic 19,200<br />
B Vicon 4,800<br />
C Vicon 9,600<br />
D Honeywell 9,600<br />
E AD 4,800<br />
F Bosch 9,600<br />
Notes<br />
• If the speed dome camera is controlled by the Panasonic and Vicon controller, please<br />
contact with our company custom satisfication part and technical part.<br />
• Control setting(When using AD Protocol)<br />
- The AD Protocol is only valid for RS-422<br />
- In relation to controller compatibility<br />
1. Display <strong>Camera</strong> OSD : 3 + Auxiliary ON<br />
2. Exit <strong>Camera</strong> OSD : 3 + Auxiliary OFF<br />
3. ENTER : IRIS OPEN<br />
4. ESC : IRIS CLOSE<br />
• Please see our homepage for details on the protocol<br />
ENGLISH<br />
SPEED DOME CAMERA<br />
12<br />
User’s <strong>Manual</strong> SPEED DOME CAMERA 13<br />
User’s <strong>Manual</strong>
Part Names and Functions<br />
Setting Baud Rate Based on DVR Model (<strong>Camera</strong> Holder)<br />
If the speed dome camera is controlled not by the camera controller but by a<br />
DVR, set the communication speed based on the DVR model as follows.<br />
Protocol<br />
DVR Model<br />
<strong>Samsung</strong> Pelco <strong>Samsung</strong> Elec.<br />
SVR-430 9600,19200 9600 19,200,38,400<br />
SVR-440 9600,19200 4800, 9600 19,200,38,400<br />
SVR-1630 9600,19200 2400,4800,9600 19,200,38,400<br />
SVR-1650 9600,19200 2400,4800,9600 19,200,38400<br />
Notes<br />
• Depending on the DVR firmware version, the Control function may not be<br />
supported. Use this function after installation of the final version.<br />
Setting <strong>Camera</strong> ID (<strong>Camera</strong> Holder)<br />
Set the <strong>Camera</strong> ID using 2 rotary switches (SW1<br />
and SW2).<br />
SW1 is the upper level switch and SW2 is the<br />
lower level switch.<br />
EX: If the <strong>Camera</strong> ID is 1, set the ID number as<br />
follows.<br />
ENGLISH<br />
Setting <strong>Camera</strong> ID Switch (<strong>Camera</strong> Holder)<br />
<strong>Camera</strong> ID SW2 SW1 Remarks<br />
ID = 0 0 0 N/A<br />
ID = 1 0 1<br />
ID = 2 0 2<br />
ID = 3 0 3<br />
ID = 4 0 4<br />
ID = 5 0 5<br />
ID = 6 0 6<br />
ID = 7 0 7<br />
ID = 8 0 8<br />
ID = 9 0 9<br />
ID = 10 0 A<br />
ID = 11 0 B<br />
ID = 12 0 C<br />
ID = 13 0 D<br />
ID = 14 0 E<br />
ID = 15 0 F<br />
ID = 16 1 0<br />
ID = 17 1 1<br />
ID = 18 1 2<br />
ID = 19 1 3<br />
ID = 20 1 4<br />
ID = 21 1 5<br />
ID = 22 1 6<br />
ID = 23 1 7<br />
ID = 24 1 8<br />
ID = 25 1 9<br />
ID = 26 1 A<br />
ID = 27 1 B<br />
ID = 28 1 C<br />
ID = 29 1 D<br />
ID = 30 1 E<br />
ID = 31 1 F<br />
ID = 32 2 0<br />
ID = 33 2 1<br />
ID = 34 2 2<br />
ID = 35 2 3<br />
ID = 36 2 4<br />
ID = 37 2 5<br />
ID = 38 2 6<br />
ID = 39 2 7<br />
ID = 40 2 8<br />
ID = 41 2 9<br />
ID = 42 2 A<br />
ID = 43 2 B<br />
ID = 44 2 C<br />
ID = 45 2 D<br />
ID = 46 2 E<br />
ID = 47 2 F<br />
<strong>Camera</strong> ID SW2 SW1 Remarks<br />
ID = 48 3 0<br />
ID = 49 3 1<br />
ID = 50 3 2<br />
ID = 51 3 3<br />
ID = 52 3 4<br />
ID = 53 3 5<br />
ID = 54 3 6<br />
ID = 55 3 7<br />
ID = 56 3 8<br />
ID = 57 3 9<br />
ID = 58 3 A<br />
ID = 59 3 B<br />
ID = 60 3 C<br />
ID = 61 3 D<br />
ID = 62 3 E<br />
ID = 63 3 F<br />
ID = 64 4 0<br />
ID = 65 4 1<br />
ID = 66 4 2<br />
ID = 67 4 3<br />
ID = 68 4 4<br />
ID = 69 4 5<br />
ID = 70 4 6<br />
ID = 71 4 7<br />
ID = 72 4 8<br />
ID = 73 4 9<br />
ID = 74 4 A<br />
ID = 75 4 B<br />
ID = 76 4 C<br />
ID = 77 4 D<br />
ID = 78 4 E<br />
ID = 79 4 F<br />
ID = 80 5 0<br />
ID = 81 5 1<br />
ID = 82 5 2<br />
ID = 83 5 3<br />
ID = 84 5 4<br />
ID = 85 5 5<br />
ID = 86 5 6<br />
ID = 87 5 7<br />
ID = 88 5 8<br />
ID = 89 5 9<br />
ID = 90 5 A<br />
ID = 91 5 B<br />
ID = 92 5 C<br />
ID = 93 5 D<br />
ID = 94 5 E<br />
ID = 95 5 F<br />
ENGLISH<br />
SPEED DOME CAMERA<br />
14<br />
User’s <strong>Manual</strong> SPEED DOME CAMERA 15<br />
User’s <strong>Manual</strong>
Part Names and Functions<br />
<strong>Camera</strong> ID SW2 SW1 Remarks<br />
ID = 96 6 0<br />
ID = 97 6 1<br />
ID = 98 6 2<br />
ID = 99 6 3<br />
ID = 100 6 4<br />
ID = 101 6 5<br />
ID = 102 6 6<br />
ID = 103 6 7<br />
ID = 104 6 8<br />
ID = 105 6 9<br />
ID = 106 6 A<br />
ID = 107 6 B<br />
ID = 108 6 C<br />
ID = 109 6 D<br />
ID = 110 6 E<br />
ID = 111 6 F<br />
ID = 112 7 0<br />
ID = 113 7 1<br />
ID = 114 7 2<br />
ID = 115 7 3<br />
ID = 116 7 4<br />
ID = 117 7 5<br />
ID = 118 7 6<br />
ID = 119 7 7<br />
ID = 120 7 8<br />
ID = 121 7 9<br />
ID = 122 7 A<br />
ID = 123 7 B<br />
ID = 124 7 C<br />
ID = 125 7 D<br />
ID = 126 7 E<br />
ID = 127 7 F<br />
ID = 128 8 0<br />
ID = 129 8 1<br />
ID = 130 8 2<br />
ID = 131 8 3<br />
ID = 132 8 4<br />
ID = 133 8 5<br />
ID = 134 8 6<br />
ID = 135 8 7<br />
ID = 136 8 8<br />
ID = 137 8 9<br />
ID = 138 8 A<br />
ID = 139 8 B<br />
ID = 140 8 C<br />
ID = 141 8 D<br />
ID = 142 8 E<br />
ID = 143 8 F<br />
ID = 144 9 0<br />
ID = 145 9 1<br />
<strong>Camera</strong> ID SW2 SW1 Remarks<br />
ID = 146 9 2<br />
ID = 147 9 3<br />
ID = 148 9 4<br />
ID = 149 9 5<br />
ID = 150 9 6<br />
ID = 151 9 7<br />
ID = 152 9 8<br />
ID = 153 9 9<br />
ID = 154 9 A<br />
ID = 155 9 B<br />
ID = 156 9 C<br />
ID = 157 9 D<br />
ID = 158 9 E<br />
ID = 159 9 F<br />
ID = 160 A 0 N/A<br />
ID = 161 A 1<br />
ID = 162 A 2<br />
ID = 163 A 3<br />
ID = 164 A 4<br />
ID = 165 A 5<br />
ID = 166 A 6<br />
ID = 167 A 7<br />
ID = 168 A 8<br />
ID = 169 A 9<br />
ID = 170 A A<br />
ID = 171 A B<br />
ID = 172 A C<br />
ID = 173 A D<br />
ID = 174 A E<br />
ID = 175 A F N/A<br />
ID = 176 B 0<br />
ID = 177 B 1<br />
ID = 178 B 2<br />
ID = 179 B 3<br />
ID = 180 B 4<br />
ID = 181 B 5<br />
ID = 182 B 6<br />
ID = 183 B 7<br />
ID = 184 B 8<br />
ID = 185 B 9<br />
ID = 186 B A<br />
ID = 187 B B<br />
ID = 188 B C<br />
ID = 189 B D<br />
ID = 190 B E<br />
ID = 191 B F<br />
ID = 192 C 0<br />
ID = 193 C 1<br />
ID = 194 C 2<br />
ID = 195 C 3<br />
<strong>Camera</strong> ID SW2 SW1 Remarks<br />
D = 196 C 4<br />
ID = 197 C 5<br />
ID = 198 C 6<br />
ID = 199 C 7<br />
ID = 200 C 8<br />
ID = 201 C 9<br />
ID = 202 C A<br />
ID = 203 C B<br />
ID = 204 C C<br />
ID = 205 C D<br />
ID = 206 C E<br />
ID = 207 C F<br />
ID = 208 D 0<br />
ID = 209 D 1<br />
ID = 210 D 2<br />
ID = 211 D 3<br />
ID = 212 D 4<br />
ID = 213 D 5<br />
ID = 214 D 6<br />
ID = 215 D 7<br />
ID = 216 D 8<br />
ID = 217 D 9<br />
ID = 218 D A<br />
ID = 219 D B<br />
ID = 220 D C<br />
ID = 221 D D<br />
ID = 222 D E<br />
ID = 223 D F<br />
ID = 224 E 0<br />
ID = 225 E 1<br />
ID = 226 E 2<br />
ID = 227 E 3<br />
ID = 228 E 4<br />
ID = 229 E 5<br />
ID = 230 E 6<br />
ID = 231 E 7<br />
ID = 232 E 8<br />
ID = 233 E 9<br />
ID = 234 E A<br />
ID = 235 E B<br />
ID = 236 E C<br />
ID = 237 E D<br />
ID = 238 E E<br />
ID = 239 E F<br />
ID = 240 F 0<br />
ID = 241 F 1<br />
ID = 242 F 2<br />
ID = 243 F 3<br />
ID = 244 F 4<br />
ID = 245 F 5<br />
<strong>Camera</strong> ID SW2 SW1 Remarks<br />
ID = 246 F 6<br />
ID = 247 F 7<br />
ID = 248 F 8<br />
ID = 249 F 9<br />
ID = 250 F A<br />
ID = 251 F B<br />
ID = 252 F C<br />
ID = 253 F D<br />
ID = 254 F E<br />
ID = 255 F F<br />
Notes<br />
• Factory Setting: <strong>Camera</strong> ID = 1<br />
ENGLISH<br />
SPEED DOME CAMERA<br />
16<br />
User’s <strong>Manual</strong><br />
SPEED DOME CAMERA 17<br />
User’s <strong>Manual</strong>
Part Names and Functions<br />
The following 3 <strong>Camera</strong> ID’s cannot be used.<br />
<strong>Camera</strong> ID R-SW2 R-SW1<br />
ID = 0 0 0<br />
ID = 160 A 0<br />
ID = 175 A F<br />
Notes<br />
• Factory Settings: OFF<br />
Setting Communication Method (<strong>Camera</strong> Holder)<br />
ENGLISH<br />
Setting Transmission Mode (<strong>Camera</strong> Holder)<br />
Set the transmission mode using the ON/OFF of the Dip Switch 1.<br />
Function ON OFF<br />
SW3- #6 Factory Release RS-422 RS-485<br />
Notes<br />
• Factory Setting: OFF<br />
Function ON OFF<br />
SW3- #1 Transmission Mode Full Duplex Half Duplex<br />
Selection (DVR) (SCC-16/SCC-<strong>3000</strong>/3100)<br />
Notes<br />
• Factory Setting: OFF<br />
Setting for Factory Adjustment (<strong>Camera</strong> Holder)<br />
Function ON OFF<br />
SW3- #7 Factory Release Always OFF<br />
Notes<br />
• Factory Setting: OFF<br />
Setting RS-485/RS-422A Termination (<strong>Camera</strong> Holder)<br />
Set the termination using the ON/OFF of 2, 3, 4, 5 of the Dip Switch 3.<br />
Location of <strong>Camera</strong> Connection SW3- #2 SW3- #3 SW3- #4 SW3- #5<br />
Termination of Longest Path ON ON ON ON<br />
On the Path OFF OFF OFF OFF<br />
PC Communication Setting (<strong>Camera</strong> Holder): For reservation<br />
Function ON OFF<br />
SW3- #8 PC Communication RS-232 RS-485/422<br />
Notes<br />
• Factory Setting: OFF<br />
SPEED DOME CAMERA<br />
18<br />
User’s <strong>Manual</strong><br />
SPEED DOME CAMERA 19<br />
User’s <strong>Manual</strong>
Part Names and Functions<br />
Controller Connection Terminal (<strong>Camera</strong> Holder)<br />
NAME<br />
Purpose<br />
CON7- #1 RXD+ Controller Data Line Connection<br />
CON7-#2 RXD- Controller Data Line Connection<br />
CON7-#3 TXD+ Controller Data Line Connection<br />
CON7-#4 TXD- Controller Data Line Connection<br />
CON7-#5 GND GND<br />
CON7-#6 TX For RS-232 Communication<br />
CON7-#7 RX For RS-232 Communication<br />
Alarm Connection Terminal (<strong>Camera</strong> Holder)<br />
NAME<br />
Purpose<br />
IJP3 - #1 IN1 Alarm input sensor connection terminal 1<br />
IJP3 - #2 IN2 Alarm input sensor connection terminal 2<br />
IJP3 - #3 GND GND<br />
IJP3 - #4 IN3 Alarm input sensor connection terminal 1<br />
IJP3 - #5 IN4 Alarm input sensor connection terminal 1<br />
IJP3 - #6 GND GND<br />
IJP3 - #7 COM1 Alarm Output 1 Common<br />
IJP3 - #8 1N.O Alarm Output 1 (for Normal Open)<br />
IJP3 - #9 1N.C Alarm Output 1 (for Normal Close)<br />
IJP3 - #10 COM2 Alarm Output 2 Auxiliary Output 1 common<br />
IJP3 - #11 2N.O Alarm Output 2 (NO) Auxiliary Output 1 (NO)<br />
IJP3 - #12 2N.C Alarm Output 2 (NC) Auxiliary Output 1 (NC)<br />
Setting Termination Resistance<br />
In order to prevent signal reduction, the termination resistance of the 2 end<br />
units, which are the distant paths for camera and controller to be connected<br />
on the RS485 interface, should be connected.<br />
As the termination resistance is built in the camera, whether to make the<br />
termination resistance valid or invalid is selected with the DIP switch.<br />
See the connection diagram below for determining to which device the<br />
termination resistance will be connected to.<br />
Set up the termination resistance in the dark products.<br />
The installation distance of the product for the termination resistance setting<br />
should be less than 1.2 Km. (Maximum cable length is 1.2 Km according to<br />
the RS-485 standards.)<br />
ENGLISH<br />
Notes<br />
• Auxiliary output correpondence of Alarm output is vaild in AD Protocol<br />
SPEED DOME CAMERA<br />
20<br />
User’s <strong>Manual</strong> SPEED DOME CAMERA 21<br />
User’s <strong>Manual</strong>
Components and Accessories<br />
Installation<br />
Accessories<br />
Adapter AC24V, Peak 2.5A) User s <strong>Manual</strong> <strong>Camera</strong> Holder<br />
ENGLISH<br />
Preparation for Cable<br />
To install and use the <strong>SPD</strong>-<strong>3000</strong>/<strong>2300</strong>, the following cables should be used.<br />
• Power Adapter Cable<br />
The cable connected to the power input terminal of <strong>SPD</strong>-<strong>3000</strong>/<strong>2300</strong> is shown<br />
below with a rated voltage of AC24V 2.5A.<br />
ENGLISH<br />
3 Screws for Fastening <strong>Camera</strong> Holder<br />
1 Screw for Fastening Cable<br />
Notes<br />
Terminal Block for Controller<br />
Connection (7Pin)<br />
Terminal Block for Alarm<br />
Connection (12Pin)<br />
• An adapter may not be included, depending on the country of purchase.<br />
Safety wire<br />
• Video Cable<br />
The cable connected to the video output terminal and to the monitor of <strong>SPD</strong>-<br />
<strong>3000</strong>/<strong>2300</strong> is the BNC cable shown below.<br />
Products Sold Separately<br />
The following products are provided separately.<br />
Item Model Description<br />
On-Ceiling Mount STB-330PC Mounted on the ceiling surface<br />
<strong>Camera</strong> Controller SCC-16 Pan/Tilt/Zoom/Focus control, OSD, Setting various functions<br />
<strong>Camera</strong> Controller SCC-<strong>3000</strong>/3100 Pan/Tilt/Zoom/Focus control, OSD, Setting various functions<br />
Indoor Housing STH-330PI Housing for indoor installation<br />
Indoor Insertion Housing STH-330PE Installation by inserting the camera into the indoor ceiling<br />
Outdoor Housing STH-330PO Output DC 12V (including heater and fan)<br />
Wall Type Mount STB-270PW Attachment to the wall<br />
Ceiling Type Mount STB-496PP Attachment to the ceiling<br />
Notes<br />
• See pages 25 and 26 for product images.<br />
• Communications Cable<br />
The cable connected to the controller of <strong>SPD</strong>-<strong>3000</strong>/<strong>2300</strong> for RS-485/422 communication<br />
is shown below.<br />
Notes<br />
• Video cable and RS-485/422 communication cable are not provided in this<br />
product’s package.<br />
SPEED DOME CAMERA<br />
22<br />
User’s <strong>Manual</strong> SPEED DOME CAMERA 23<br />
User’s <strong>Manual</strong>
Installation<br />
Cable Connection<br />
1. First, connect one end of the BNC video<br />
cable connector to the Video Output<br />
Terminal.<br />
2. Next, connect the other end of the<br />
connector to the Video Input<br />
Terminal of the monitor.<br />
Monitor In Terminal<br />
Monitor<br />
3. Then, connect the Power Adapter Cable. Use a driver (-) to screw one part of<br />
the Power Adapter consisting of two lines to the<br />
Power Input Terminal of the camera<br />
holder.<br />
4. Connect the Power Adapter’s plug to the Power Outlet.<br />
Power Adapter<br />
Video Out Terminal<br />
Installation of <strong>SPD</strong>-<strong>3000</strong>/<strong>2300</strong><br />
• Installation Precautions<br />
- Check out the installation place. It should be strong enough to support more<br />
than 4 times the total product weight including speed dome camera (<strong>SPD</strong>-<br />
<strong>3000</strong>/<strong>2300</strong>) and installation structure.<br />
- Install the camera in a place having more than 500mm of space above the<br />
ceiling board.<br />
- Install the camera holder using the provided installation guide tab, screw and<br />
fastening cable.<br />
- There is a risk of camera falling during installation. Prevent the fall using the<br />
fastening cable while installing the camera. Also, access of other people to<br />
the place should not be allowed during installation.<br />
• Accessories Sold Separately<br />
Use the following accessories sold separately for convenient installation<br />
depending on installation places.<br />
1) On-Ceiling Installation Mount (STB-330PC)<br />
This mount is used to install the camera on the ceiling.<br />
ENGLISH<br />
5. Connect the Controller Connection Terminal<br />
of <strong>SPD</strong>-<strong>3000</strong>/<strong>2300</strong> and the external Controller.<br />
DATA BOX<br />
Controller Connection<br />
Terminal<br />
2) Indoor Insertion Housing (STH-330PE)<br />
This housing is used to attach the speed dome camera to<br />
the ceiling for installation.<br />
Controller<br />
SPEED DOME CAMERA<br />
24<br />
User’s <strong>Manual</strong><br />
SPEED DOME CAMERA 25<br />
User’s <strong>Manual</strong>
Installation<br />
3) Indoor and Outdoor Housing (STH-330PI, STH-330PO)<br />
This housing is used to install the speed dome camera on the indoor or outdoor<br />
wall or ceiling. (For the indoor type, the fan and heater are excluded.)<br />
<strong>Camera</strong> Installation (outdoor Housing)<br />
1. Fasten the ceiling mount on the ceiling.<br />
ENGLISH<br />
2. Pull outside of the housing the safety wire fastened to the outdoor housing.<br />
4) Wall Type Mount (STB-270PW)<br />
This item is used to install the indoor or outdoor housing for speed dome on the<br />
wall.<br />
outside<br />
inside<br />
3. Connect the fan heater PCB cable inside the<br />
housing to the camera holder connector.<br />
5) Ceiling Type Mount (STB-496PP)<br />
This item is used to install the indoor and outdoor housing<br />
for speed dome on a concrete ceiling.<br />
4. Match the arrow sign marked on the camera<br />
holder to the arrow marked inside the housing<br />
and then install the camera holder in the<br />
housing.<br />
SPEED DOME CAMERA<br />
26<br />
User’s <strong>Manual</strong><br />
SPEED DOME CAMERA 27<br />
User’s <strong>Manual</strong>
Installation<br />
5. Connect the heater and fan cables within the<br />
housing to the fan heater PCB.<br />
9. Connect the housing safety wires to the fixture<br />
inside the mount installed on the ceiling.<br />
ENGLISH<br />
6. Adjust and make the arrows marked on<br />
the bottom of the camera<br />
an arrow<br />
body face each other.<br />
10. Connect the video cable, the controller cable,<br />
the power adapter cable and ID cable to<br />
the camera holder.<br />
7. Insert the camera into the housing by matching<br />
the installation pin on the bottom of the camera<br />
and the arrow inside the housing, and then<br />
fasten the camera by inserting into the fastening<br />
hole, turning the screw clockwise for fastening.<br />
8. Remove the camera dome cover and then attach the housing dome cover.<br />
<strong>Camera</strong> <strong>Dome</strong> Cover<br />
Housing <strong>Dome</strong> Cover<br />
11. Check out the connection of all parts and<br />
the camera and install the completed outdoor<br />
housing on the ceiling mount.<br />
Notes<br />
• Check out the input voltage of the power adapter before connecting the power.<br />
• For an installation without housing, the camera can be installed with installation<br />
template, fastening the cable and screw provided separately.<br />
• It is necessary to tighten the screw to prevent unfastening.<br />
• If the screw to prevent unfastening is not tight, the camera installed may fall due to<br />
vibration or shock from the environment.<br />
• Set up the <strong>Camera</strong> ID, the Termination Resistance and the Protocol Selection<br />
Switch before installing the outdoor housing on the ceiling type mount.<br />
SPEED DOME CAMERA<br />
28<br />
User’s <strong>Manual</strong><br />
SPEED DOME CAMERA 29<br />
User’s <strong>Manual</strong>
Functional Description<br />
OSD Menu Organization<br />
<strong>Dome</strong> camera can be set up on the OSD (On Screen Display) menu displayed<br />
on the video monitor by the camera controller. The joystick operations in the<br />
OSD menu are as follows. In addition, sending control codes to the camera from<br />
the PC can also use the camera functions.<br />
• Menu Organization<br />
Menu Function Menu Function<br />
TILT UP Move up on the OSD menu PAN LEFT Move left on the OSD menu<br />
TILT DOWN Move down on the OSD menu PAN RIGHT Move right on the OSD menu<br />
P1 P2 P3 P4 Defaults<br />
Focus Mode Auto/<strong>Manual</strong>/One Shot AF One Shot AF<br />
Focus Zoom Tracking<br />
Mode On/Off<br />
ON<br />
Speed Slow/Fast<br />
Fast<br />
Digital Zoom Off(2~10X) OFF<br />
ATW/AWC/MANUAL<br />
ATW(O)<br />
White<br />
Balance AWB Mode<br />
ATW<br />
-ATW(I): Indoor -ATW(O): Outdoor<br />
<strong>Manual</strong> 30<br />
-Red -Blue 40<br />
Brightness 50 050<br />
<strong>Camera</strong><br />
Auto<br />
Auto<br />
Iris<br />
Setting<br />
<strong>Manual</strong> Iris Level 050<br />
Exposure Shutter<br />
--- ESC<br />
A.FLK<br />
<strong>Manual</strong> 1/60~1/120,000,x2~x128 1/60<br />
Sens-Up<br />
Auto Sens-Up Limit x2~x128<br />
x4<br />
Off<br />
Back Light On/Off<br />
OFF<br />
AGC High/Middle/Low/Off Middle<br />
SSNR High/Middle/Low/Off OFF<br />
Day & Night<br />
Auto<br />
B/W B/W Burst On/Off OFF<br />
Color Burst Level 50<br />
Others Sync Internal 10<br />
P1 P2 P3 P4 Defaults<br />
Sync Line Lock Line Lock Phase 225<br />
Stabilizer On/Off OFF<br />
<strong>Camera</strong><br />
Setting<br />
Sequence<br />
Setting<br />
P/T<br />
Setting<br />
Others<br />
Image Adj.<br />
Sharpness 008<br />
Color 050<br />
Freeze On/Off OFF<br />
Preset Setting Edit Execute Clear Status<br />
Pan Swing Setting Execute Clear<br />
Swign SEQ Tilt Swing Setting Execute Clear<br />
P/T Swing Setting Execute Clear<br />
Group1 Setting Execute Clear<br />
Group2 Setting Execute Clear<br />
Group SEQ<br />
Group3 Setting Execute Clear<br />
Group4 Setting Execute Clear<br />
Group5 Setting Execute Clear<br />
Group6 Setting Execute Clear<br />
Tour SEQ Setting Execute Clear<br />
Trace1 Replay Memorize<br />
<strong>PTZ</strong> Trace Trace2 Replay Memorize<br />
Trace3 Replay Memorize<br />
Trace4 Replay Memorize<br />
Off<br />
OFF<br />
Preset Preset No<br />
Swing Swing Mode Pan/Tilt/P&T<br />
Mode<br />
Group Group No<br />
Auto Run<br />
Tour<br />
Trace Trace1~Trace4<br />
A.Pan Auto Pan Speed 20-50 32<br />
Tilt Angle 10-45 25<br />
Time 1-59(sec), 1-59(min) 30 sec<br />
Power On<br />
Resume<br />
On/Off<br />
OFF<br />
Pan Limit Position ON/OFF<br />
Tilt Limit Position ON/OFF<br />
Area Setting<br />
Area1<br />
Area2<br />
Area3<br />
Area4<br />
Area Name<br />
Position<br />
ON/OFF<br />
ENGLISH<br />
SPEED DOME CAMERA<br />
30<br />
User’s <strong>Manual</strong><br />
SPEED DOME CAMERA 31<br />
User’s <strong>Manual</strong>
Functional Description<br />
P1 P2 P3 P4 Defaults<br />
Area5<br />
Area Name<br />
Area6<br />
Area Setting<br />
Area7<br />
Position<br />
Area8<br />
ON/OFF<br />
P/T<br />
Mask1<br />
Setting<br />
Mask2<br />
Position<br />
Area Masking<br />
Mask3<br />
ON/OFF<br />
Mask4<br />
OSD<br />
Setting<br />
Alarm<br />
Setting<br />
Initialize<br />
Status<br />
Prop. P/T ON / OFF ON<br />
Digital Flip ON / OFF ON<br />
<strong>Camera</strong> ID ON / OFF ON<br />
<strong>Camera</strong> Name Edit ON / OFF<br />
Preset Number ON / OFF ON<br />
Preset Name Edit ON / OFF<br />
Sequence Status ON / OFF ON<br />
Area Name ON / OFF OFF<br />
<strong>PTZ</strong> Position ON / OFF OFF<br />
Language English/Chinese English<br />
Alarm Enable ON / OFF OFF<br />
Alarm1<br />
NC/NO/COM<br />
Alarm Input<br />
Alarm2<br />
1~4(Priority)<br />
Alarm3<br />
Preset/Group/Tour<br />
Alarm4<br />
A.Pan/Trace<br />
Setting1<br />
1-4, MD<br />
Setting2<br />
1-4, MD<br />
1-59(Sec)<br />
Timer1<br />
1-59(Min)<br />
Alarm Out<br />
1-59(Hour)<br />
1-59(Sec)<br />
Timer2<br />
1-59(Min)<br />
1-59(Hour)<br />
Out Off1<br />
Out Off2<br />
MD Dwell Time ON / OFF 1-59(Sec) / 1-59(Min) 30sec<br />
Power On Reset Cancel Execute<br />
Factory Default Set Cancel Execute<br />
<strong>Camera</strong> Default Set Cancel Execute<br />
Auto Refresh OFF, 1~7Days OFF<br />
Initial Position Position ON/OFF<br />
Notes<br />
• Preset setting is only possible on the OSD menu or using the controller.<br />
Symbol Description<br />
1. Motion Stabilization Stand-by Operation<br />
- “D” symbol is flashing on the right top of the screen.<br />
2. Alarm operation<br />
- “ ”symbol is flashing on the right top of the screen.<br />
3. Alarm Input #1, 2, 3, 4 Sensor Operation<br />
- “ ”, “ ”, “ ” and “ ” symbols are flashing on the right top of the screen.<br />
4. Alarm Output #1, 2 Sensor Operation<br />
- “ ” and “ ” symbols are flashing on the right top of the screen.<br />
5. Motion Detect Operation<br />
- “Man Icon” is flashing on the right top of the screen.<br />
6. When there are sub menus under the selected OSD menu<br />
- Numbers are displayed in white colour like on the right top of the screen.<br />
7. When there is no sub menu under the selected OSD menu<br />
- Numbers are displayed in black colour like “ ” on the right top of the screen.<br />
ENGLISH<br />
SPEED DOME CAMERA<br />
32<br />
User’s <strong>Manual</strong><br />
SPEED DOME CAMERA 33<br />
User’s <strong>Manual</strong>
Functional Description<br />
<strong>Dome</strong> <strong>Camera</strong> User Menu Settings<br />
• Execution of OSD Menu :<br />
After checking if the camera is in manual operation mode, press the OSD Menu<br />
key or 1+MENU (SCC-16 Model). The following commands are displayed on the<br />
monitor screen.<br />
• Main Menu<br />
Main Menu<br />
<strong>Camera</strong> Setting<br />
Sequence Setting<br />
P/T Setting<br />
OSD Setting<br />
Alarm Setting<br />
Initialize<br />
Status<br />
1) <strong>Camera</strong> Setting<br />
Select the <strong>Camera</strong> Setting on the Main Menu screen to control camera settings<br />
• <strong>Camera</strong> Setting Menu<br />
<strong>Camera</strong> Setting<br />
Focus<br />
White Balance<br />
Exposure<br />
Back Light<br />
AGC<br />
SSNR<br />
Day & Night<br />
Others<br />
ATW(O)<br />
OFF<br />
MIDDLE<br />
MIDDLE<br />
COLOR<br />
The selection key moves up and down. Press the<br />
execution key switch on the selected menu to<br />
change the setup menu. Press the ESC key to exit<br />
the OSD Menu.<br />
Focus<br />
Focus Mode ONE SHOT AF<br />
Zoom Tracking<br />
Digital Zoom OFF<br />
FOCUS<br />
In Focus menu, you can set up the focus mode among Auto, <strong>Manual</strong> or One<br />
Shot AF.<br />
Focus Mode<br />
Auto<br />
: The camera adjusts the focus automatically while monitoring the<br />
screen continuously in the auto mode. In the auto focusing mode,<br />
zoom key operation is not recognized as the input of the focus key.<br />
: In the manual mode, users can adjust the camera focus manually.<br />
<strong>Manual</strong><br />
One Shot AF : Only when the camera does not move, it turns into the auto mode. It<br />
is the same as the manual mode.<br />
Zoom Tracking<br />
Mode: When you select ON, the Focus function is executed when the Zoom function<br />
is on. When you select OFF, the Focus function is not executed even when<br />
the Zoom function is on.<br />
Speed: Fast will speed up the Zoom. Slow will slow down the Zoom.<br />
Digital Zoom<br />
Magnification of the Digital Zoom can be selected among Off, 2X~10X.<br />
*It is recommended that the Digital Zoom should be set up before the preset operation.<br />
Notes<br />
Digital Zoom<br />
•As the digital zoom magnification increases, the image quality is lowered.<br />
Auto-focus<br />
• Auto-focus may not function normally under the following conditions.<br />
- When the light level in the surveillance area is low<br />
- When the slow-shutter works<br />
- When the amplification is increased<br />
- When the light level in the surveillance area is excessively high<br />
- When the objects in the long and short distance are under the same surveillance area<br />
- When there is no contrast (white and black) in the object (e.g. sky or wall)<br />
- When the thin horizontal line is captured<br />
ENGLISH<br />
SPEED DOME CAMERA<br />
34<br />
User’s <strong>Manual</strong><br />
SPEED DOME CAMERA 35<br />
User’s <strong>Manual</strong>
Functional Description<br />
White Balance<br />
The White Balance function corrects the abnormal white colour into the<br />
normal white colour under any colour temperature lighting.<br />
Select the mode among ATW, AWC and <strong>Manual</strong>. ATW is selected by default.<br />
<strong>Camera</strong> Setting<br />
Focus<br />
White Balance ATW(O)<br />
Exposure<br />
Back Light OFF<br />
AGC<br />
MIDDLE<br />
SSNR<br />
MIDDLE<br />
Day & Night COLOR<br />
Others<br />
WB Mode<br />
ATW: Balances the colour automatically depending on the source of light from<br />
1,800~10,500K colour temperature.<br />
* Indoor[ATW(I)] : Use this mode in the area under the limited colour temperature.<br />
* Outdoor[ATW(O)] : Use this mode in the area under the broad colour temperature.<br />
AWC: Set up the lighting to the objects and corrects the right colour temperature to that of a<br />
white object. <strong>Camera</strong> works under the setup conditions. For the most appropriate<br />
condition under the current illumination, capture the white paper and then change the<br />
mode into AWC. Press the Enter key and then AWC Start will be displayed. When the<br />
adjustment is completed after pressing the Enter key for AWC Start, go to the upper<br />
menu. When conditions change, adjust the white balance function again.<br />
<strong>Manual</strong>: Fine tuning is possible through this manual control mode. Select the colour temperature<br />
and increase or decrease the Red or Blue values to shift the colour of the object.<br />
* Red: Red Gain can be changed.<br />
* Blue: Blue Gain can be changed.<br />
Notes<br />
• White Balance may not function properly under the following conditions.<br />
When the colour temperature surrounding the object is very high. (e.g. clear sky or sunset)<br />
When it is dark around the object.<br />
When the camera is pointing towards a fluorescent lamp directly or when lighting conditions<br />
change a lot.<br />
Exposure<br />
<strong>Camera</strong> exposure can be controlled.<br />
<strong>Camera</strong> Setting<br />
Focus<br />
White Balance<br />
Exposure<br />
Back Light<br />
AGC<br />
SSNR<br />
Day & Night<br />
Others<br />
ATW(O)<br />
OFF<br />
MIDDLE<br />
MIDDLE<br />
COLOR<br />
Exposure<br />
Brightness 050<br />
Iris<br />
AUTO<br />
Shtter ---<br />
Sens-Up<br />
AUTO<br />
Brightness: The brightness of the screen can be adjusted.<br />
Iris: Auto mode or manual mode can be selected.<br />
Auto: The brightness of the image signal can be adjusted automatically depending<br />
on the amount of light.<br />
<strong>Manual</strong>: The brightness of the image can be adjusted.<br />
Shutter<br />
---: Electronic shutter mode is enabled. The shutter speed is controlled automatically<br />
according to the brightness of the screen.<br />
A.FLK: Use this mode when the screen flickers because of inconsistent frequency<br />
with the surrounding lights.<br />
<strong>Manual</strong>: 1. Shutter speed can be controlled manually.<br />
2. Shutter speed can be adjusted from 1/60 second to 1/120,000 second.<br />
3. Sens-Up function can be operated manually from x2 ~ x128.<br />
Notes<br />
• If the Shutter mode is ESC in the inner synchronization mode and the camera faces<br />
to the bright fluorescent lamp directly, the image may be unstable. Be careful to select<br />
the installation location.<br />
• If the <strong>Manual</strong> or A.FLK mode is selected for the Shutter menu, the Sens-Up function<br />
is disabled.<br />
ENGLISH<br />
SPEED DOME CAMERA<br />
36<br />
User’s <strong>Manual</strong><br />
SPEED DOME CAMERA 37<br />
User’s <strong>Manual</strong>
Functional Description<br />
Sens-Up<br />
Auto: The low light level of the night or dark condition is detected automatically<br />
and the bright and clear image can be maintained.<br />
Sens-Up Limit: Maximum accumulated magnification can be selected.<br />
Off: Sens-Up function is cancelled.<br />
Notes<br />
• As the accumulated magnification increases, the screen goes bright. But, the after<br />
image of the moving object also becomes larger and the optimum Auto Focus<br />
function may not work.<br />
<strong>Camera</strong> Setting<br />
Focus<br />
White Balance<br />
Exposure<br />
Back Light<br />
AGC<br />
SSNR<br />
Day & Night<br />
Others<br />
ATW(O)<br />
OFF<br />
MIDDLE<br />
MIDDLE<br />
COLOR<br />
Select one mode among High, Middle, Low or Off.<br />
<strong>Camera</strong> Setting<br />
Focus<br />
White Balance<br />
Exposure<br />
Back Light<br />
AGC<br />
SSNR<br />
Day & Night<br />
Others<br />
ATW(O)<br />
OFF<br />
OFF<br />
MIDDLE<br />
COLOR<br />
ENGLISH<br />
Back Light<br />
Unlike other cameras, <strong>Samsung</strong> Techwin’s unique W-III DSP chip gives you a<br />
clear image of the subject even with bright backlight.<br />
ON : In contrasting lights, objects in the darker area also will show clearly in the picture.<br />
Off : BLC function is cancelled.<br />
AGC<br />
<strong>Camera</strong> Setting<br />
Focus<br />
White Balance<br />
Exposure<br />
Back Light<br />
AGC<br />
SSNR<br />
Day & Night<br />
Others<br />
ATW(O)<br />
OFF<br />
MIDDLE<br />
MIDDLE<br />
COLOR<br />
When the brightness of the image taken under dark light is under a certain level, the AGC<br />
(Automatic Gain Control) functions to define whether to control the Gain automatically or not.<br />
SSNR (<strong>Samsung</strong> Super Noise Reduction)<br />
SSNR function reduces background noise under low light conditions differently in different<br />
modes. The noise reduction effect grows in Off, Low, Middle and High modes in order.<br />
<strong>Camera</strong> Setting<br />
Focus<br />
White Balance<br />
Exposure<br />
Back Light<br />
AGC<br />
SSNR<br />
Day & Night<br />
Others<br />
ATW(O)<br />
OFF<br />
MIDDLE<br />
MIDDLE<br />
COLOR<br />
<strong>Camera</strong> Setting<br />
Focus<br />
White Balance<br />
Exposure<br />
Back Light<br />
AGC<br />
SSNR<br />
Day & Night<br />
Others<br />
ATW(O)<br />
OFF<br />
MIDDLE<br />
OFF<br />
COLOR<br />
OFF : No noise reduction effect.<br />
LOW : Noise reduction effect is small but there is little afterimage.<br />
MIDDLE: Noise reduction effect is generally effective in this mode. Noise can be<br />
reduced properly and the afterimage is not strong.<br />
HIGH : Noise reduction effect is excellent but afterimage is also strong.<br />
Notes<br />
• When you select the AGC mode as “OFF”, you cannot use the SSNR function.<br />
SPEED DOME CAMERA<br />
38<br />
User’s <strong>Manual</strong><br />
SPEED DOME CAMERA 39<br />
User’s <strong>Manual</strong>
Functional Description<br />
Day & Night<br />
The darkness level is detected automatically under low light conditions such as<br />
at night or under dark light to keep the screen bright and clear.<br />
<strong>Camera</strong> Setting<br />
Focus<br />
White Balance<br />
Exposure<br />
Back Light<br />
AGC<br />
SSNR<br />
Day & Night<br />
Others<br />
<strong>Camera</strong> Setting<br />
Focus<br />
White Balance<br />
Exposure<br />
Back Light<br />
AGC<br />
SSNR<br />
Day & Night<br />
Others<br />
ATW(O)<br />
OFF<br />
MIDDLE<br />
MIDDLE<br />
AUTO<br />
ATW(O)<br />
OFF<br />
MIDDLE<br />
MIDDLE<br />
COLOR<br />
<strong>Camera</strong> Setting<br />
Focus<br />
White Balance<br />
Exposure<br />
Back Light<br />
AGC<br />
SSNR<br />
Day & Night<br />
Others<br />
ATW(O)<br />
OFF<br />
MIDDLE<br />
MIDDLE<br />
B/W<br />
COLOR : Output images are displayed in colour all the time. Burst signal size can be adjusted.<br />
B/W : Output images are displayed in black and white all the time. Burst signal<br />
can be kept or removed.<br />
AUTO : Under day condition, the mode is automatically changed into the COLOR<br />
mode to keep an optimum colour. At night, the mode is automatically<br />
changed into the B/W mode to distinguish dark images clearly.<br />
Notes<br />
• If the AGC is in OFF mode, the Auto mode cannot be used. Only COLOUR or B/W<br />
mode can be used.<br />
• If the sunlight or halogen lamp is used in B/W mode, the focus may be blurred<br />
compared with the general illumination.<br />
Others<br />
<strong>Camera</strong> Setting<br />
Focus<br />
White Balance<br />
Exposure<br />
Back Light<br />
AGC<br />
SSNR<br />
Day & Night<br />
Others<br />
ATW(O)<br />
OFF<br />
MIDDLE<br />
MIDDLE<br />
COLOR<br />
Ohter<br />
Sync<br />
Stabilizer<br />
Image Adj<br />
Freeze<br />
INTERNAL<br />
OFF<br />
Sync: Internal Sync or Line Lock can be selected. Internal Sync is selected by<br />
default. Line Sync function can adjust the output phase of more than 1 unit<br />
without using sync signal generator. When the AC Line Lock is selected, the<br />
phases can be adjusted from 0 to 360 levels. Accordingly, the phase can be<br />
adjusted up to 360˚.<br />
Internal : Internal synchronization<br />
Line Lock : Power line synchronization<br />
Line Lock Phase : The phase of line sync can be selected from 0˚ to 360˚. Initial<br />
value is 225˚.<br />
Stabilizer : Corrects camera shake.<br />
Notes<br />
• The Stabilizer may not function properly under the conditions described below:<br />
1. Darkness (little or no light) around the subject<br />
2. No contrast on the subject<br />
3. <strong>Camera</strong> shake speed that is too fast and might not be corrected<br />
4. Stabilizer is disabled while executing pan, tilt, zoom, or focus, or while displaying<br />
the camera settings menu.<br />
5. When Stabilizer is ON, part of the screen is ignored before the correction is made.<br />
This results in narrower angle of view and reduction in resolution.<br />
OFF<br />
ENGLISH<br />
SPEED DOME CAMERA<br />
40<br />
User’s <strong>Manual</strong><br />
SPEED DOME CAMERA 41<br />
User’s <strong>Manual</strong>
Functional Description<br />
Image Adj. : Clarity of the video signal and saturation of the color may be<br />
adjusted.<br />
Sharpness : The overall sharpness of the image can be adjusted.<br />
Colour : The overall colour density of the image can be adjusted.<br />
Freeze : Moving image can be stopped and replayed.<br />
ON : Image can be frozen.<br />
OFF : Frozen image is released and the film is replayed.<br />
2) Sequence Setting<br />
• Sequence Setting Menu<br />
Sequence Setting<br />
Preset<br />
Swing SEQ<br />
Group SEQ<br />
Tour SEQ<br />
<strong>PTZ</strong> Trace<br />
Auto Run<br />
Power On Resume OFF<br />
Preset<br />
Setting<br />
Edit<br />
Execute<br />
Clear<br />
Status<br />
Preset : 13 items such as Pan/Tilt location, Zoom and Focus are selected among<br />
camera functions and they can be called for monitoring. Total 128 points<br />
can be preset.<br />
Setting : Select the Preset number for setup. Adjust Pan/Tilt/Zoom and press the<br />
Enter key to save the setting. If you want to change the 13 items such as<br />
Focus, Brightness, Iris and Scene Adj., use the Up/Down key to go to and<br />
select the item. If you don’t want to change the 13 items, press the ESC<br />
key to go to the next Preset step.<br />
Edit : You can edit the 13 preset items such as Pan/Tilt location, Zoom and<br />
Focus, which are selected among camera functions.<br />
Execute: Select the Preset number for execution.<br />
Clear : Select the Preset number to delete for clearing.<br />
Status : The current Preset number setup is displayed.<br />
• Motion Detection Setting<br />
Select Motion Detection in the Preset Setting menu and then turn on the mode.<br />
Notes<br />
• When the illumination is shaking under direct lighting such as a fluorescent lamp, it may<br />
cause malfunction of the camera. MD function is not recommended under this condition.<br />
• When brightness of objects fluctuates suddenly due to lighting of flashlights or<br />
headlights or the lamp going on/off, it may cause malfunction of the camera.<br />
• The purpose of this security function is not to prevent accidents or crimes such as<br />
fire or burglary. Our company is not responsible for the injury or damage caused by<br />
the inadequate use of this function.<br />
• Preset Menu Setting<br />
1. Select the Preset item on the Sequence Setting Menu<br />
2. Select the Setting item.<br />
Sequence Setting<br />
Preset<br />
Swing SEQ<br />
Group SEQ<br />
Tour SEQ<br />
<strong>PTZ</strong> Trace<br />
Auto Run<br />
Power On Resume OFF<br />
3. Select the Preset number.<br />
4. Set up the Zoom and Focus.<br />
Preset Setting<br />
Preset=001 (1~128)<br />
Preset<br />
Setting<br />
Edit<br />
Execute<br />
Clear<br />
Status<br />
Preset Setting Z>ZOOM<br />
PST 1 : ZOOM PST 2 : FOCUS<br />
ENGLISH<br />
SPEED DOME CAMERA<br />
42<br />
User’s <strong>Manual</strong><br />
SPEED DOME CAMERA 43<br />
User’s <strong>Manual</strong>
Functional Description<br />
5. To change the camera settings, select Edit<br />
from the upper menu first. Select the item to<br />
change, and then make the necessary<br />
adjustments.<br />
6. If you select the Scene Adj. item, such items<br />
as Shutter, AGC, SSNR, Sens-Up, White<br />
Balance and DIS can be set up differently in<br />
every Preset item.<br />
Notes<br />
Preset Edit [001]<br />
<strong>PTZ</strong><br />
267/051/1X<br />
Focus Mode <strong>Manual</strong><br />
Brightness 050<br />
Iris<br />
AUTO<br />
Back Light OFF<br />
Day & Night COLOR<br />
Motion Det. OFF<br />
Scene Adj<br />
Scene Adj. [001]<br />
Shutter ---<br />
AGC<br />
MIDDLE<br />
SSNR<br />
MIDDLE<br />
Sens-Up<br />
AUTO<br />
White Balance ATW<br />
Stabilizer OFF<br />
• In the White Balance setting of the individual Preset Scene Adj., the AWC selection is not<br />
available.<br />
Pan Swing : Swing surveillance for the Pan direction is executed and set up. Data<br />
is deleted.<br />
Tilt Swing : Swing surveillance for the Tilt direction is executed and set up. Data is<br />
deleted.<br />
P&T Swing : Swing surveillance both for the Pan and the Tilt directions are<br />
executed and set up simultaneously. Data is deleted.<br />
* Setting : The Preset Position for Swing function is selected with the joystick and confirmed with the<br />
Execution key. <strong>SPD</strong> is the moving speed (001-240˚/sec). DWL is the stop time (00-99 sec). Press<br />
the Execution key in the location with selection mark to finish the setting process.<br />
* Execute : Swing surveillance is executed. Stop key designates this function.<br />
* Clear : Data in the Swing function is deleted.<br />
Group SEQ: Sequence surveillance can be executed and set up and data can be<br />
deleted. Up to 6 groups can be registered.<br />
Sequence Setting<br />
Preset<br />
Swing SEQ<br />
Group SEQ<br />
Tour SEQ<br />
<strong>PTZ</strong> Trace<br />
Auto Run<br />
Power On Resume OFF<br />
Group SEQ<br />
Group 1<br />
Group 2<br />
Group 3<br />
Group 4<br />
Group 5<br />
Group 6<br />
ENGLISH<br />
Swing SEQ: Swing surveillance can be executed and set up and the data can be<br />
deleted.<br />
Sequence Setting<br />
Preset<br />
Swing SEQ<br />
Group SEQ<br />
Tour SEQ<br />
<strong>PTZ</strong> Trace<br />
Auto Run<br />
Power On Resume OFF<br />
Swing SEQ<br />
Pan Swing<br />
Tilt Swing<br />
P&T Swing<br />
Setting : Preset position for swing is selected with the joystick and confirmed with<br />
the Execution key. <strong>SPD</strong> is the moving speed (001-240˚/sec). DWL is the<br />
stop time (00-99 sec). Press the Execution key in the location with<br />
selection mark to finish the setting process.<br />
Execute : Swing surveillance can be executed. Stop key will stop this function.<br />
Clear : Swing data can be deleted.<br />
SPEED DOME CAMERA<br />
44<br />
User’s <strong>Manual</strong><br />
SPEED DOME CAMERA 45<br />
User’s <strong>Manual</strong>
Functional Description<br />
Tour : Group surveillance can be executed and set up and data can be deleted.<br />
Sequence Setting<br />
Preset<br />
Swing SEQ<br />
Group SEQ<br />
Tour SEQ<br />
<strong>PTZ</strong> Trace<br />
Auto Run<br />
Power On Resume OFF<br />
Tour SEQ<br />
Setting<br />
Execute<br />
Clear<br />
Setting : The registered Group Sequence is selected with the joystick and<br />
confirmed with the Execution key. If the selected number is not<br />
registered, it cannot be input. Press the Execution key in the location<br />
with selection mark to finish the setting process.<br />
Execute : Group surveillance is executed.<br />
Clear : Group surveillance data are deleted.<br />
<strong>PTZ</strong> Trace : Maximum 4 patterns of the manual operation paths (for Pan, Tilt,<br />
Zoom and Focus) are memorized and replayed.<br />
Sequence Setting<br />
Preset<br />
Swing SEQ<br />
Group SEQ<br />
Tour SEQ<br />
<strong>PTZ</strong> Trace<br />
Auto Run<br />
Power On Resume OFF<br />
<strong>PTZ</strong> Trace<br />
Trace 1<br />
Trace 2<br />
Trace 3<br />
Trace 4<br />
Replay : The manual operation paths are repeated and replayed. Stop key will stop the replay.<br />
* If the operation range is limited using Pan Limit and Tilt Limit, please note that other operations<br />
beyond the limited operation range are not possible.<br />
Memorize: <strong>Manual</strong> operations for minimum 120 seconds after executing this function are<br />
memorized into the internal memory. Nevertheless, the memorizing time becomes<br />
different depending on the <strong>PTZ</strong> operation. OVER mark will finish this function.<br />
* If the operation range is limited using Pan Limit and Tilt Limit, only the operations within the<br />
limited range are memorized.<br />
Notes<br />
• Press the OSD key to stop the internal memory to continue saving.<br />
Auto Run: If there is no controller operation by the user for a certain time, the<br />
sequence operation designated by the user will be executed.<br />
Mode - • OFF : Auto Run will be cancelled.<br />
• Preset : Auto Run in the corresponding Preset number<br />
• Swing : Auto Run in the corresponding Swing mode<br />
• Group : Auto Run in the corresponding Group number<br />
• Tour : Auto Run in the corresponding Tour number<br />
• Trace : Auto Run in the corresponding Trace number<br />
• A. Pan : 360˚ Auto Run in Pan direction<br />
* Auto Pan Speed: Pan operation in the speed designated by the user<br />
* Tilt Angle: The tilt angle set up by the user is kept.<br />
Time : Auto Run operation is executed after a certain time designated by the user.<br />
*Time can be set up by the unit of 1-59 sec and 1-59 min.<br />
Power On Resume : When the power supply for the camera is stopped for some<br />
reason, such as electricity failure, and resumed, the Sequence<br />
Settings before the power off are restored.<br />
Sequence Setting<br />
Preset<br />
Swing SEQ<br />
Group SEQ<br />
Tour SEQ<br />
<strong>PTZ</strong> Trace<br />
Auto Run<br />
Power On Resume OFF<br />
Sequence Setting<br />
Preset<br />
Swing SEQ<br />
Group SEQ<br />
Tour SEQ<br />
<strong>PTZ</strong> Trace<br />
Auto Run<br />
Power On Resume ON<br />
ENGLISH<br />
SPEED DOME CAMERA<br />
46<br />
User’s <strong>Manual</strong><br />
SPEED DOME CAMERA 47<br />
User’s <strong>Manual</strong>
Functional Description<br />
3) P/T Setting<br />
Pan Limit : The moving range in the Pan direction can be limited.<br />
Main Menu<br />
<strong>Camera</strong> Setting<br />
Sequence Setting<br />
P/T Setting<br />
OSD Setting<br />
Alarm Setting<br />
Initialize<br />
Status<br />
P/T Setting<br />
Pan Limit<br />
Tilt Limit<br />
Area Setting<br />
Area Masking<br />
Prop. P/T<br />
Digital Flip<br />
Position : Moving range can be set up. Set the position from the left using the<br />
joystick and the Execution key. The stop position may change due to the<br />
initialization by such operation as power resumption depending on<br />
position setting. This does not mean it is out of order.<br />
On/Off : When this function is on, the limit is effective. Default setting is Off.<br />
Tilt Limit : Moving range in the tilt direction can be limited.<br />
Main Menu<br />
<strong>Camera</strong> Setting<br />
Sequence Setting<br />
P/T Setting<br />
OSD Setting<br />
Alarm Setting<br />
Initialize<br />
Status<br />
P/T Setting<br />
Pan Limit<br />
Tilt Limit<br />
Area Setting<br />
Area Masking<br />
Prop. P/T<br />
Digital Flip<br />
ON<br />
ON<br />
Position : Moving range can be set up. Set the position from the top direction<br />
using the joystick and the Execution key. The stop position may change<br />
due to initialization by such operation as power resumption depending<br />
on position setting. This does not mean it is out of order.<br />
On/Off : The application of limitation will be determined. Default setting is Off.<br />
ON<br />
ON<br />
Area Setting : Areas can be indicated. Areas can be designated up to 8.<br />
Main Menu<br />
<strong>Camera</strong> Setting<br />
Sequence Setting<br />
P/T Setting<br />
OSD Setting<br />
Alarm Setting<br />
Initialize<br />
Status<br />
P/T Setting<br />
Pan Limit<br />
Tilt Limit<br />
Area Setting<br />
Area Masking<br />
Prop. P/T<br />
Digital Flip<br />
Area Name : Area name can be set up. Use the joystick and the Execution key<br />
to enter the area name. A maximum of 12 letters (English,<br />
Chinese, numbers) can be entered. When you finish inputting the<br />
name, adjust the position mark to ”SET” using the joystick and<br />
press the Execution key. This is the end of Area Name setting.<br />
Area Position : Area range can be designated. Use the joystick and the Execution<br />
key to determine the position from the left. If the area range is<br />
overlapped, the smaller area number will indicate the overlapping part.<br />
On/Off : It can be determined whether or not to activate the area mark. The<br />
activation becomes effective as soon as the position moves from the<br />
current area to other areas. Set up the OSD Setting as ON. If it is in OFF<br />
mode, this function does not work. Default setting is OFF.<br />
Area Masking : If you want to exclude some areas for surveillance, they can be<br />
turned into black. You can mask 4 parts of one screen (maximum<br />
32 parts).<br />
Main Menu<br />
<strong>Camera</strong> Setting<br />
Sequence Setting<br />
P/T Setting<br />
OSD Setting<br />
Alarm Setting<br />
Initialize<br />
Status<br />
P/T Setting<br />
Pan Limit<br />
Tilt Limit<br />
Area Setting<br />
Area Masking<br />
Prop. P/T<br />
Digital Flip<br />
ON<br />
ON<br />
ON<br />
ON<br />
ENGLISH<br />
SPEED DOME CAMERA<br />
48<br />
User’s <strong>Manual</strong><br />
SPEED DOME CAMERA 49<br />
User’s <strong>Manual</strong>
Functional Description<br />
Position : Use the joystick and the Execution key to determine the position for<br />
screen operation from the left.<br />
On/Off : Operation of screen area masking can be determined. Default setting is OFF.<br />
Prop. P/T : Pan and Tilt speeds can be changed depending on zoom magnification.<br />
Tele will slow down the speed of Pan/Tilt and Wide will increase the<br />
Pan/Tilt speed. It will take about 15 seconds for 1 cycle in Tele mode<br />
and about 1.5 seconds in the Wide mode. Default setting is ON.<br />
Main Menu<br />
<strong>Camera</strong> Setting<br />
Sequence Setting<br />
P/T Setting<br />
OSD Setting<br />
Alarm Setting<br />
Initialize<br />
Status<br />
P/T Setting<br />
Pan Limit<br />
Tilt Limit<br />
Area Setting<br />
Area Masking<br />
Prop. P/T<br />
Digital Flip<br />
Digital Flip : When you operate the Tilt up to 90˚ limit using the joystick and keep<br />
it for a certain time, the image gets reversed automatically and the<br />
opposite Tilt area is seen. When you want to monitor the moving<br />
object under the camera, execute the Digital Flip function using the<br />
controller’s joystick. You can observe the moving object without<br />
reversing of the screen.<br />
ON<br />
ON<br />
4) OSD Setting<br />
<strong>Camera</strong> ID (Default setting is ON.) : <strong>Camera</strong> ID indication is set up.<br />
Main Menu<br />
<strong>Camera</strong> Setting<br />
Sequence Setting<br />
P/T Setting<br />
OSD Setting<br />
Alarm Setting<br />
Initialize<br />
Status<br />
<strong>Camera</strong> Name : <strong>Camera</strong> name is set up.<br />
Main Menu<br />
<strong>Camera</strong> Setting<br />
Sequence Setting<br />
P/T Setting<br />
OSD Setting<br />
Alarm Setting<br />
Initialize<br />
Status<br />
OSD Setting<br />
<strong>Camera</strong> ID<br />
<strong>Camera</strong> Name<br />
Preset Number<br />
Preset Name<br />
Sequence Status<br />
Area Name<br />
<strong>PTZ</strong> Position<br />
Language<br />
OSD Setting<br />
<strong>Camera</strong> ID<br />
<strong>Camera</strong> Name<br />
Preset Number<br />
Preset Name<br />
Sequence Status<br />
Area Name<br />
<strong>PTZ</strong> Position<br />
Language<br />
ON<br />
ON<br />
OFF<br />
OFF<br />
ON<br />
English<br />
ON<br />
ON<br />
OFF<br />
OFF<br />
ON<br />
English<br />
ENGLISH<br />
Main Menu<br />
<strong>Camera</strong> Setting<br />
Sequence Setting<br />
P/T Setting<br />
OSD Setting<br />
Alarm Setting<br />
Initialize<br />
Status<br />
P/T Setting<br />
Pan Limit<br />
Tilt Limit<br />
Area Setting<br />
Area Masking<br />
Prop. P/T<br />
Digital Flip<br />
ON<br />
ON<br />
<strong>Camera</strong> Name [ ]<br />
123456789<br />
ABCDEFGHIJKLMNOPQRSTUVWXYZ<br />
abcdefghijklmnopqrstuvwxyz<br />
<strong>Camera</strong> Name<br />
ON/OFF<br />
Edit<br />
ON<br />
SPEED DOME CAMERA<br />
50<br />
User’s <strong>Manual</strong><br />
SPEED DOME CAMERA 51<br />
User’s <strong>Manual</strong>
Functional Description<br />
Edit : A maximum of 12 characters consisting of English (or Chinese, Japanese),<br />
numbers and special characters can be input for <strong>Camera</strong> Name.<br />
On/Off : The operation of this function is preset. Default setting is On.<br />
Preset Number (Default setting is ON.) : Preset numbering is set up.<br />
Main Menu<br />
<strong>Camera</strong> Setting<br />
Sequence Setting<br />
P/T Setting<br />
OSD Setting<br />
Alarm Setting<br />
Initialize<br />
Status<br />
OSD Setting<br />
<strong>Camera</strong> ID ON<br />
<strong>Camera</strong> Name<br />
Preset Number ON<br />
Preset Name<br />
Sequence Status OFF<br />
Area Name OFF<br />
<strong>PTZ</strong> Position ON<br />
Language English<br />
Edit : A maximum of 12 characters consisting of English (or Chinese), numbers<br />
and special characters can be input for Preset Name.<br />
On/Off : The operation of this function is predetermined. Default setting is On.<br />
Sequence Status (Default setting is ON.) : Display of the Sequence Group is set up.<br />
Main Menu<br />
<strong>Camera</strong> Setting<br />
Sequence Setting<br />
P/T Setting<br />
OSD Setting<br />
Alarm Setting<br />
Initialize<br />
Status<br />
OSD Setting<br />
<strong>Camera</strong> ID ON<br />
<strong>Camera</strong> Name<br />
Preset Number ON<br />
Preset Name<br />
Sequence Status OFF<br />
Area Name OFF<br />
<strong>PTZ</strong> Position ON<br />
Language English<br />
ENGLISH<br />
Preset Name<br />
Main Menu<br />
<strong>Camera</strong> Setting<br />
Sequence Setting<br />
P/T Setting<br />
OSD Setting<br />
Alarm Setting<br />
Initialize<br />
Status<br />
OSD Setting<br />
<strong>Camera</strong> ID<br />
<strong>Camera</strong> Name<br />
Preset Number<br />
Preset Name<br />
Sequence Status<br />
Area Name<br />
<strong>PTZ</strong> Position<br />
Language<br />
ON<br />
ON<br />
OFF<br />
OFF<br />
ON<br />
English<br />
Area Name : Display of Area Name is set up.<br />
• When the Area Name is OFF, the Area Name cannot be displayed.<br />
Main Menu<br />
<strong>Camera</strong> Setting<br />
Sequence Setting<br />
P/T Setting<br />
OSD Setting<br />
Alarm Setting<br />
Initialize<br />
Status<br />
OSD Setting<br />
<strong>Camera</strong> ID ON<br />
<strong>Camera</strong> Name<br />
Preset Number ON<br />
Preset Name<br />
Sequence Status OFF<br />
Area Name OFF<br />
<strong>PTZ</strong> Position ON<br />
Language English<br />
Preset Name [ ]<br />
123456789<br />
ABCDEFGHIJKLMNOPQRSTUVWXYZ<br />
abcdefghijklmnopqrstuvwxyz<br />
Preset Name<br />
ON/OFF<br />
Edit<br />
ON<br />
SPEED DOME CAMERA<br />
52<br />
User’s <strong>Manual</strong><br />
SPEED DOME CAMERA 53<br />
User’s <strong>Manual</strong>
Functional Description<br />
<strong>PTZ</strong> Position : Pan and Tilt position and Zoom magnification are displayed.<br />
• <strong>PTZ</strong> positions are not displayed in the OFF mode. (Only manual operation can display them.)<br />
Main Menu<br />
<strong>Camera</strong> Setting<br />
Sequence Setting<br />
P/T Setting<br />
OSD Setting<br />
Alarm Setting<br />
Initialize<br />
Status<br />
OSD Setting<br />
<strong>Camera</strong> ID ON<br />
<strong>Camera</strong> Name<br />
Preset Number ON<br />
Preset Name<br />
Sequence Status OFF<br />
Area Name OFF<br />
<strong>PTZ</strong> Position ON<br />
Language English<br />
ON/OFF : Alarm is enabled in ON mode.<br />
Alarm Input : Alarm Input Mode/Priority/Method is set up.<br />
Alarm Setting<br />
Alarm Enable<br />
Alarm Input<br />
Alarm Output<br />
MD Dwell Time<br />
ON<br />
ON 30 SEC<br />
Alarm Input<br />
IN 1 OFF 1 OFF<br />
IN 2 OFF 2 OFF<br />
IN 3 OFF 3 OFF<br />
IN 4 OFF 4 OFF<br />
ENGLISH<br />
Language : The OSD can be displayed either in English (default setting) or in Chinese.<br />
Main Menu<br />
<strong>Camera</strong> Setting<br />
Sequence Setting<br />
P/T Setting<br />
OSD Setting<br />
Alarm Setting<br />
Initialize<br />
Status<br />
5) Alarm Setting<br />
OSD Setting<br />
<strong>Camera</strong> ID ON<br />
<strong>Camera</strong> Name<br />
Preset Number ON<br />
Preset Name<br />
Sequence Status OFF<br />
Area Name OFF<br />
<strong>PTZ</strong> Position ON<br />
Language English<br />
Alarm Enable : It can be determined whether to enable the alarm setting.<br />
Main Menu<br />
<strong>Camera</strong> Setting<br />
Sequence Setting<br />
P/T Setting<br />
OSD Setting<br />
Alarm Setting<br />
Initialize<br />
Status<br />
Alarm Setting<br />
Alarm Enable<br />
Alarm Input<br />
Alarm Output<br />
MD Dwell Time<br />
ON<br />
ON 30 SEC<br />
NC/NO/OFF : NC/NO/OFF can be selected depending on the alarm sensor.<br />
1 - 4 (Priority) : Priority for the 4 alarm inputs is set up. Response comes first from<br />
the alarm input of higher priority.<br />
Preset/Swing/Group/Tour/Trace/A.Pan:<br />
Whether to enable the operation of Preset/Swing/Group/Tour/Trace/A.Pan by<br />
alarm input can be set up. When the alarm is input, it stays in the preset/Swing/<br />
Group/Tour/Trace/A.Pan position.<br />
Alarm Out : One of the 2 Alarm Outs corresponds to each Alarm input.<br />
Alarm Setting<br />
Alarm Enable<br />
Alarm Input<br />
Alarm Output<br />
MD Dwell Time<br />
ON<br />
ON 30 SEC<br />
Alarm Output<br />
Setting 1 1 2 3 4 MD<br />
Setting 2 1 2 3 4 MD<br />
Timer 1 OFF<br />
Timer 2 OFF<br />
OUT Off 1<br />
OUT Off 2<br />
OUT1 SET/OUT2 SET : One of the 4 Alarm Inputs corresponds to the 2 Alarm Outputs.<br />
OUT1 TIME/OUT2 TIME : For the 2 Alarm Outputs, On/Off and the operation time can be<br />
set up in the units of second/minute/hour. (1-59 sec, 1-59 min,<br />
1-59 hour)<br />
SPEED DOME CAMERA<br />
54<br />
User’s <strong>Manual</strong><br />
SPEED DOME CAMERA 55<br />
User’s <strong>Manual</strong>
Functional Description<br />
OUT1 OFF/OUT2 OFF : If you want to cancel the operating Alarm outputs at once,<br />
select the corresponding menu to cancel the operating Alarm.<br />
MD Dwell Time : When the Motion Detection function is on, the motion of<br />
intruders can be detected. When the motion is detected, the<br />
Alarm signal is displayed in the Alarm Output Terminal. For<br />
detailed settings of the Motion Detection for each Preset menu,<br />
see page 43 and 44.<br />
Alarm Setting<br />
Alarm Enable<br />
Alarm Input<br />
Alarm Output<br />
MD Dwell Time<br />
ON<br />
OFF<br />
Alarm Setting<br />
Alarm Enable<br />
Alarm Input<br />
Alarm Output<br />
MD Dwell Time<br />
ON/OFF : It can be set up how long the operation will be kept when the motion is<br />
detected. (1-59 sec, 1-59 min)<br />
6) Initialization Setting<br />
• Initialization Menu<br />
Main Menu<br />
<strong>Camera</strong> Setting<br />
Sequence Setting<br />
P/T Setting<br />
OSD Setting<br />
Alarm Setting<br />
Initialize<br />
Status<br />
Power On Reset : <strong>Camera</strong> is initialized into the original status of power input.<br />
Factory Default Settings : <strong>Camera</strong> is initialized into the factory default settings.<br />
Data including Preset is deleted. This function is used<br />
for initialization all settings.<br />
ON<br />
Initialize<br />
Power ON Reset<br />
Factory Default Set<br />
<strong>Camera</strong> Default Set<br />
Auto Refresh OFF<br />
Initial Position<br />
ON 30 SEC<br />
<strong>Camera</strong> Default Settings: If only the camera module is replaced due to camera<br />
module failure, the new camera module can be set up<br />
with the settings of the old camera module.<br />
Auto Refresh : The electric circuit and the status of the equipment parts within<br />
the camera are optimized regularly. (The cycle can be set up.) If<br />
camera faces toward a certain source of light or if the settings<br />
cannot be kept because of the long time rotation filming of a certain<br />
area, the Auto Refresh function is used to maintain and re-set the<br />
existing camera settings. Default setting is OFF.<br />
OFF, 1-7 Days : This function is disabled in the OFF mode. 1-7 Days enables the<br />
Auto Refresh operation in the interval of the selected days. Auto<br />
Refresh takes less than 10 seconds. The message “Auto Refresh”<br />
disappears after finishing the operation.<br />
Initial Position : If you want to set the default direction of the camera so that the<br />
camera faces that direction when the power is turned on, you<br />
can set up the desired Pan and Tilt for the camera.<br />
7) Status<br />
The status of dome camera setting is displayed.<br />
Main Menu<br />
<strong>Camera</strong> Setting<br />
Sequence Setting<br />
P/T Setting<br />
OSD Setting<br />
Alarm Setting<br />
Initialize<br />
Status<br />
Cam Model = 30NC<br />
Cam Version = 03.06<br />
<strong>Dome</strong> Version = 00.01<br />
<strong>Dome</strong> ID=001<br />
Controller=Duplex-9600<br />
<strong>Camera</strong> Status<br />
CAM MODEL = 30NC<br />
CAM VERSION = 03.06<br />
DOME VERSION = 00.18<br />
CON PROTOCOL = SAMSUNG TW<br />
DOME ID = 001<br />
CONTROLLER = Duplex-9600<br />
<strong>Camera</strong> Model<br />
<strong>Camera</strong> S/W Version<br />
Control Board S/W Version<br />
<strong>Dome</strong> <strong>Camera</strong> ID<br />
Communication Mode Setup<br />
ENGLISH<br />
SPEED DOME CAMERA<br />
56<br />
User’s <strong>Manual</strong><br />
SPEED DOME CAMERA 57<br />
User’s <strong>Manual</strong>
Product Structure and Installation<br />
Product Structure<br />
Installation<br />
ENGLISH<br />
243.4<br />
215.7 27.7<br />
R75<br />
Ø155<br />
*Other Installations: The outdoor installation accessories, which are sold separately,<br />
can be applied in various ways. (See 25 and 26 page for the<br />
accessories on sale.)<br />
SPEED DOME CAMERA<br />
58<br />
User’s <strong>Manual</strong><br />
SPEED DOME CAMERA 59<br />
User’s <strong>Manual</strong>
Product Structure and Installation<br />
Installation 1<br />
Installation 2<br />
ENGLISH<br />
SPEED DOME CAMERA<br />
60<br />
User’s <strong>Manual</strong><br />
SPEED DOME CAMERA<br />
61<br />
User’s <strong>Manual</strong>
Specifications<br />
Imaging device<br />
TV<br />
Total Number of Pixels<br />
Valid Pixel<br />
Horizontal Scan Frequency<br />
Vertical Scan Frequency<br />
Synchronization<br />
Image Output<br />
S/N Ratio<br />
Horizontal Resolution<br />
Minimum Light for Object<br />
Electronic Shutter<br />
Sens-Up<br />
Day&Night<br />
Stabilizer<br />
White Balance<br />
Flickerless Adjustment<br />
Iris<br />
Gain Control<br />
OSD Display<br />
Outline Correction<br />
Contact Point Distance<br />
Digital Zoom<br />
Maximum Aperture Rate<br />
Coverage Angle<br />
Proximity Distance<br />
Horizontal Rotation Angle<br />
Horizontal Rotation<br />
Horizontal Rotation Speed<br />
Horizontal Minimum<br />
Moving Angle<br />
<strong>SPD</strong>-<strong>3000</strong><br />
<strong>SPD</strong>-<strong>2300</strong><br />
1/4” Color Interline Transfer CCD. 410.000pixel<br />
NTSC<br />
811(H) X 508(V)<br />
768(H) X 494(V)<br />
15.734kHz<br />
59.94Hz<br />
Internal Sync/External Sync(AC Line Lock)<br />
1.0p-p/75Ω<br />
Higher than 50dB (AGC OFF)<br />
520 TV Lines (Colour)/570 TV Lines(B/W)<br />
0.7Lux(Color), 0.1Lux(B/W)/(@50IRE), 0.0007Lux (Day & Night is On.)/(@50IRE)<br />
Auto/<strong>Manual</strong> (1/60 - 1/120.000)<br />
ON (x2 - x128 Fields) / OFF<br />
ICR(Filter Switching) ON/OFF<br />
<strong>Camera</strong> Shake Correction: Stabilizer may be set to “On” or “Off”<br />
ATW(Indoor/Outdoor Selection)/AWC/<strong>Manual</strong> (1,800K - 10,500K)<br />
Fixed Shutter Speed (1/100)<br />
Auto/<strong>Manual</strong> (Iris Level Adjustment Mode)<br />
Low, Middle, High, Off<br />
ON/OFF<br />
Adjustable Level<br />
F3.3~99.0mm (30X Optical Zoom) F3.84~88.4mm (23X Optical Zoom)<br />
OFF, 2~10X Selection (Total 300X Zoom) OFF, 2~10X Selection (Total 230X Zoom)<br />
Ligh Angle 1: 1.6, Telescopic 1: 3.2 Ligh Angle 1: 1.6, Telescopic 1: 3.0<br />
Wide: 58.0˚(H) X 44.8˚(V)<br />
Wide: 52.5˚(H) X 40.3˚(V)<br />
Tele: 2.22˚(H) X 1.68˚(V)<br />
Tele: 2.36˚(H) X 1.78˚(V)<br />
1.2m (Tele level)<br />
360˚<br />
<strong>Manual</strong>/Program<br />
<strong>Manual</strong>: 0.5˚ ~ 120˚/s(64 levels) Preset: 0.5˚ ~ 240˚/s(64 levels)<br />
0.05˚<br />
Accuracy of Horizontal<br />
Rotation Stop<br />
Vertical Rotation Angle<br />
Vertical Rotation<br />
Vertical Rotation Speed<br />
Vertical Minimum Moving<br />
Angle<br />
Accuracy of Vertical<br />
Rotation Stop<br />
Preset Position<br />
Area Masking<br />
Alarm<br />
Operating Temperature<br />
Operating Humidity<br />
Storage Temperature<br />
Storage Humidity<br />
Power, Voltage<br />
Consumption Electricity<br />
Dimension<br />
Weight<br />
Installation Conditions<br />
0.30˚<br />
-4˚~ 184˚ (Digital Flip)<br />
<strong>Manual</strong>/Program<br />
<strong>Manual</strong>: 0.5˚ - 120˚/s(64 levels) Preset: 0.5˚ - 240˚/s(64 levels)<br />
0.05˚<br />
0.30˚<br />
Max 128 points<br />
Max 4 locations<br />
4 Alarm Inputs<br />
2 Alarm Outputs (Relay: NC/NO/COM, 2A 30VDC Max)<br />
-10˚C - +50˚C<br />
20% ~ 75%(Except for dew condensation)<br />
-20˚C - +60˚C<br />
20% ~ 95%(Except for dew condensation)<br />
AC 24V±10%<br />
Standby 8 Watts, Operation 10 Watts<br />
Ø155 X 243.4mm<br />
Less than 2.0kg<br />
On-Ceiling Mount: STB-330PC<br />
Indoor: Indoor Housing (STH-330PI), Indoor Insertion Type Housing (STH-330PE)<br />
Outdoor: Outdoor Housing (STH-330PO)<br />
Wall Installation Mount: STB-270PW<br />
Ceiling Installation Mount: STB-496PP<br />
* The product design and dimensions may change without previous notice for improvement of performance.<br />
• The copyright of this manual belongs to <strong>Samsung</strong> Techwin Co. Ltd.<br />
• Parts or the whole of this manual cannot be reproduced or transmitted by any electric, mechanic or audio method<br />
without the authorized written approval of <strong>Samsung</strong> Techwin.<br />
• The contents of this manual may be changed for an improvement of functions.<br />
ENGLISH<br />
SPEED DOME CAMERA<br />
62<br />
User’s <strong>Manual</strong><br />
SPEED DOME CAMERA 63<br />
User’s <strong>Manual</strong>
Detección de imagen de<br />
alta precisión 30X<br />
Cámara <strong>Dome</strong> <strong>PTZ</strong> <strong>SPD</strong>-<strong>3000</strong>/<strong>2300</strong> <strong>Manual</strong> de Uso<br />
Gracias por comprar una cámara CCD de <strong>Samsung</strong>.<br />
Antes de intentar conectar o utilizar este producto, lea atentamente estas<br />
instrucciones y guarde este manual para futura referencia.<br />
ESPAÑOL
El relámpago con símbolo de flecha dentro de un triángulo equilátero alerta al<br />
usuario de la presencia de "voltaje peligroso" no aislado dentro de la envoltura<br />
del producto que podría tener magnitud suficiente como para constituir riesgo<br />
de descarga eléctrica.<br />
importantes de funcionamiento y mantenimiento (servicio) en la literatura que<br />
acompaña a la aplicación.<br />
INFORMACIÓN-Este equipo ha sido probado y se ha certificado como<br />
compatible con los límites para dispositivos digitales de Clase B conforme al<br />
apartado 15 de las Normas FCC. Dichos límites están diseñados para facilitar<br />
una protección razonable frente a interferencias dañinas si el equipo se utiliza en<br />
un entorno comercial. Este equipo genera, emplea y puede emitir energía de<br />
radiofrecuencia y, si no se instala conforme a las instrucciones, puede causar<br />
interferencias dañinas a las comunicaciones por radio.<br />
El uso de este equipo en una zona residencial puede provocar interferencias<br />
dañinas en cuyo caso los usuarios deberán corregir las interferencias por su<br />
cuenta.<br />
AVISO- Los cambios o modificaciones que no hayan sido expresamente<br />
aprobados por el fabricante pueden anular el derecho del usuario a utilizar<br />
el equipo.<br />
PRECAUCIÓN-Para evitar descargas eléctricas y el riesgo de incendios:<br />
NO utilice fuentes de alimentación distintas de las especificadas.<br />
NO exponga el aparato a la lluvia o humedad.<br />
La instalación deberá ser realizada por una persona de mantenimiento<br />
debidamente formada y deberá cumplir todas las normas locales.
Características<br />
Lente Zoom 30X/23X con Función<br />
Autoenfoque<br />
Día y Noche<br />
<strong>Samsung</strong> Techwin cuida el medio ambiente en todas las etapas de fabricación<br />
del producto para conservar el planeta y está emprendiendo varias acciones<br />
para ofrecer a los clientes productos más ecológicos.<br />
La marca Eco representa la voluntad de <strong>Samsung</strong> Techwin de crear<br />
productos ecológicos e indica que el producto cumple la directiva EU RoHS.<br />
El Zoom 30X/23X al tener función Autoenfoque<br />
aumenta la imagen hasta 240 veces cuando se<br />
usa con la función de Zoom digital 10X.<br />
Varias Vigilancias Automáticas<br />
*Programación Individual Modos de Seguridad.<br />
13 funciones de ajuste de cámara pueden ser guardadas<br />
independientemente en cada menú de Programación<br />
para proporcionar imágenes óptimas.<br />
*Varios Protocolos<br />
Soporta ocho diferentes protocolos de marcas:<br />
<strong>Samsung</strong> Techwin, Pelco, <strong>Samsung</strong> Electronics,<br />
Panasonic and Vicon.<br />
*Localización <strong>PTZ</strong><br />
4 modelos accionados con la palanca de mando pueden<br />
ser guardados y repetidos por los usuarios.<br />
* AUTO Movimiento<br />
Panorámica o Inclinación accionadas en secuencia<br />
entre dos posiciones designadas.<br />
*Búsqueda de Grupo<br />
Un máximo de 128 posiciones de Programación se<br />
recorren en orden.<br />
*Búsqueda de Recorrido<br />
Un máximo de 6 funciones de búsqueda de grupo se<br />
recorren en orden.<br />
Smart P/T<br />
Las funciones Día y Noche de ICR (Supresión de Reducción<br />
de Filtro IR) y la función de Aumento Automático de la<br />
Seguridad pueden lograr imágenes óptimas durante el día<br />
y la noche.<br />
*La función de Aumento Automático de la Seguridad mejora la<br />
sensibilidad del CCD aumentando el tiempo de exposición<br />
usando electricidad.<br />
*La función Día y Noche permite a los usuarios elegir y ajustar<br />
las imágenes en color y blanco y negro dependiendo del<br />
nivel de luz.<br />
OSD (Visualización en pantalla)<br />
Objetos tales como el ID de la cámara, Nombre de la c-<br />
amara, Nombre de programación, Nombre de la zona y<br />
estado de la cámara son visualizados en el monitor. Las<br />
funciones de la cámara pueden ser establecidas en el<br />
menú OSD de la pantalla.<br />
128 Posiciones de Programación<br />
Un máximo de 128 posiciones de programación<br />
pueden ser establecidas. Esta función le permite al<br />
usuario establecer el lugar de observación en cualquier<br />
momento.<br />
Flip Digital<br />
Cuando quieres observar el objeto en movimiento bajo<br />
la cámara, puedes ejecutar el Flip digital usando el<br />
joystick del controlador. El objeto en movimiento<br />
puede ser monitorizado sin invertir la pantalla.<br />
Advertencias y precauciones<br />
Si tiene alguna duda en relación con el producto, póngase en contacto con su<br />
distribuidor. Tenga en cuenta que el coste de la utilización de equipos, como una<br />
escalera elevada, será cubierto por el cliente.<br />
Warning/Attention/Special Mark Messages<br />
No seguir las recomendaciones aquí descritas podría conllevar la pérdida<br />
material y/o lesiones personales graves, o hasta la muerte.<br />
No se permite.<br />
No desmontar.<br />
Asegurese de conservar esto.<br />
ESPAÑOL<br />
Incluso cuando el Zoom en función está On<br />
(encendido) para la panorámica y la función de<br />
corrección de velocidad de inclinación se unen a la<br />
posición del zoom, una buen manejo manual es<br />
posible.<br />
Area Protectora<br />
Para protección de la intimidad, se pueden ocultar un<br />
máximo de 4 zonas junto con las zonas vigiladas<br />
evitando así que sean visualizadas en la pantalla.
Tabla de contenidos<br />
Precauciones de Seguridad<br />
Nombre de las partes y funciones 10<br />
Cuerpo<br />
Soporte de la cámara<br />
Conexión del soporte de la cámara<br />
Ajuste inicial del soporte de la cámara<br />
Accesorios 22<br />
8<br />
10<br />
11<br />
12<br />
13<br />
ESPAÑOL<br />
Descripción funcional 30<br />
Organización Menú OSD<br />
Ajustes del Menú de Uso Cámara Domo<br />
1. <strong>Camera</strong> Setting<br />
2. Sequence Setting<br />
3. P/T Setting<br />
4. OSD Setting<br />
5. Alarm Setting<br />
6. Initialize<br />
7. Status<br />
Estructura e Instalación del Producto 60<br />
30<br />
34<br />
34<br />
43<br />
49<br />
52<br />
56<br />
58<br />
59<br />
ESPAÑOL<br />
Instalación 23<br />
Especificaciones 64
Precauciones de Seguridad<br />
No se recomienda su Instalación por<br />
parte de personas no cualificadas.<br />
En caso de olores no usuales o humo procedente<br />
de la cámara, dejar de usar el producto.<br />
No instalar el producto en ambientes<br />
demasiado fríos o demasiado calientes.<br />
No instalar la cámara en ambientes<br />
de alumbrado intermitente.<br />
Este producto tiene que ser instalado por técnicos<br />
experimentados y especializados Una instalación<br />
personal y no cualificada puede causar fuego o<br />
descarga eléctrica. Contacte con el proveedor para<br />
su instalación.<br />
No instalar el producto bajo condiciones de<br />
humedad o cerca de gases inflamables o explosivos.<br />
Puede causar fuego.<br />
Instalar el producto en un lugar lo<br />
suficientemente fuerte como para sostenerlo.<br />
ESPAÑOL<br />
No usar la cámara bajo temperaturas extremas (inferior a -<br />
10° o superior a 50°). Puede causar mala calidad de imagen<br />
o avería. Tener especial cuidado y proporcionar ventilación<br />
cuando se maneje la cámara bajo temperaturas altas.<br />
Nunca deje caer la cámara ni la exponga<br />
a golpes o vibraciones fuertes.<br />
No instalar la cámara bajo ambientes de iluminación<br />
gravemente cambiantes tales como lámparas<br />
fluorescentes. Puede dar lugar a que la cámara<br />
trabaje incorrectamente.<br />
No enfoque la cámara hacia el sol u<br />
otra fuente de luz fuerte.<br />
ESPAÑOL<br />
Puede causar avería, descarga eléctrica o<br />
fuego.<br />
El producto puede caer.<br />
Puede causar avería.<br />
Puede causar daños fatales en el mecanismo<br />
CCD o en circuitos internos.<br />
No manipular la toma de corriente<br />
con las manos húmedas.<br />
No desmontar o introducir<br />
objetos extraños.<br />
No tocar el cristal frontal de la<br />
cámara.<br />
No instalar la cámara cuando pueda ser<br />
expuesta a lluvia, agua o vertidos.<br />
Puede causar descarga eléctrica.<br />
Puede causar descarga eléctrica o avería.<br />
Esta es la parte más importante de la cámara.<br />
Tenga especial cuidado en no marcarla con<br />
huellas dactilares.<br />
Si la cámara se humedece, puede resultar<br />
averiada.<br />
CÁMARA SPEED DOME<br />
8<br />
<strong>Manual</strong> de Uso<br />
CÁMARA SPEED DOME<br />
9<br />
<strong>Manual</strong> de Uso
Nombre de las partes y funciones<br />
Cuerpo<br />
Soporte de la cámara<br />
ESPAÑOL<br />
Interruptor de Energía<br />
Energía ON/OFF ( Encendida/Apagada)<br />
(Programación de fábrica: OFF) ( Apagada)<br />
<br />
Encender Interruptor de establecimiento<br />
1. Medio/Lleno 2.3.4.5 RS-485/422 6.RS-485/422 Comunicación<br />
7. Ajuste de fábrica 8. RS-232<br />
Entrada de Controlador de Conexión<br />
1. RXD+ 2. RXD- 3. TXD+ 4. TXD- 5. GND 6. TX 7. RX<br />
Interruptor de Establecimiento de ID<br />
Entrada conexión de alarma<br />
1. IN1 2. IN2 3. GND 4. IN3 5. IN4 6. GND<br />
7. COM1 8. 1N.O 9. 1N.C 10. COM2 11. 2N.O 12. 2N.C<br />
Interruptor de Selección de Protocolo<br />
Entrada AC 24V<br />
CÁMARA SPEED DOME 10 <strong>Manual</strong> de Uso<br />
CÁMARA SPEED DOME<br />
11<br />
<strong>Manual</strong> de Uso
Nombre de las partes y funciones<br />
Conexión del Soporte de la cámara<br />
Ajustes Iniciales del Soporte de la Cámara<br />
Nota<br />
• Para controlar la cámara Speed <strong>Dome</strong> mediante ordenador personal, deberá usar<br />
un programa exclusivo.<br />
Ajuste de protocolo de comunicaciones<br />
Usar el SW3 del soporte de instalación para ajustar el protocolo de comunicaciones.<br />
SW3 Protocol Baud Rate(BPS)<br />
0 <strong>Samsung</strong> 9,600<br />
1 <strong>Samsung</strong> 19,200<br />
2 Pelco-D 2,400<br />
3 Pelco-D 4,800<br />
4 Pelco-D 9,600<br />
5 Pelco-P 4,800<br />
6 Pelco-P 9,600<br />
7 <strong>Samsung</strong> Elec. 9,600<br />
8 <strong>Samsung</strong> Elec. 19,200<br />
9 Panasonic 9,600<br />
A Panasonic 19,200<br />
B Vicon 4,800<br />
C Vicon 9,600<br />
D Honeywell 9,600<br />
E AD 4,800<br />
F Bosch 9,600<br />
Nota<br />
• Si la cámara Speed <strong>Dome</strong> se controla mediante el controlador Panasonic y Vicon,<br />
por favor póngase en contacto con los departamentos técnico y de atención del<br />
cliente de nuestra compañía.<br />
• Ajuste de la Cámera(When con AD protocolo)<br />
- El protocolo AD sólo es válido para RS-422.<br />
- En relacón con la compatibilidad del controlador<br />
1. Mostrar el texto en pantalla de la cámara : 3 + Auxiliary ON<br />
2. Salir del texto en pantalla de la cámara : 3 + Auxiliary OFF<br />
3. ENTRE - IRIS abierto<br />
4. ESC - IRIS cierre<br />
• Vea por favor nuestro homepage para los detalles en el protocolo.<br />
ESPAÑOL<br />
CÁMARA SPEED DOME<br />
12<br />
<strong>Manual</strong> de Uso<br />
CÁMARA SPEED DOME<br />
13<br />
<strong>Manual</strong> de Uso
Nombre de las partes y funciones<br />
l Ajuste de Velocidad basado en el modelo DVR ( Soporte cámara)<br />
Si la velocidad de la cámara domo no es controlada por la cámara sino por un<br />
DVR, establezca la velocidad de comunicación en base a los modelos DVR<br />
como sigue:<br />
Protocolo<br />
Modelo DVR<br />
<strong>Samsung</strong> Pelco <strong>Samsung</strong> Elec.<br />
SVR-430 9600,19200 9600 19,200,38,400<br />
SVR-440 9600,19200 4800, 9600 19,200,38,400<br />
SVR-1630 9600,19200 2400,4800,9600 19,200,38,400<br />
SVR-1650 9600,19200 2400,4800,9600 19200,38,400<br />
Nota<br />
• Una velocidad alta puede reducir la estabilidad. Dependiendo de la versión del<br />
bloque de programa informático, puede que no se tolere la función de Control.<br />
Usar esta función tras la instalación de la versión final.<br />
Ajuste de ID de Cámara (Soporte Cámara)<br />
Ajuste la ID de la cámara usando dos interruptores<br />
giratorios (SW1 y SW2).<br />
SW1 es el interruptor de nivel superior y SW2 es<br />
el interruptor de nivel inferior.<br />
Ej.: Si la ID de la cámara es 1, establecer el<br />
número de ID como sigue:<br />
ESPAÑOL<br />
Ajuste del Interruptor de ID de Cámara (Soporte Cámara)<br />
ID Cámara SW2 SW1 Comentarios<br />
ID = 0 0 0 N/A<br />
ID = 1 0 1<br />
ID = 2 0 2<br />
ID = 3 0 3<br />
ID = 4 0 4<br />
ID = 5 0 5<br />
ID = 6 0 6<br />
ID = 7 0 7<br />
ID = 8 0 8<br />
ID = 9 0 9<br />
ID = 10 0 A<br />
ID = 11 0 B<br />
ID = 12 0 C<br />
ID = 13 0 D<br />
ID = 14 0 E<br />
ID = 15 0 F<br />
ID = 16 1 0<br />
ID = 17 1 1<br />
ID = 18 1 2<br />
ID = 19 1 3<br />
ID = 20 1 4<br />
ID = 21 1 5<br />
ID = 22 1 6<br />
ID = 23 1 7<br />
ID = 24 1 8<br />
ID = 25 1 9<br />
ID = 26 1 A<br />
ID = 27 1 B<br />
ID = 28 1 C<br />
ID = 29 1 D<br />
ID = 30 1 E<br />
ID = 31 1 F<br />
ID = 32 2 0<br />
ID = 33 2 1<br />
ID = 34 2 2<br />
ID = 35 2 3<br />
ID = 36 2 4<br />
ID = 37 2 5<br />
ID = 38 2 6<br />
ID = 39 2 7<br />
ID = 40 2 8<br />
ID = 41 2 9<br />
ID = 42 2 A<br />
ID = 43 2 B<br />
ID = 44 2 C<br />
ID = 45 2 D<br />
ID = 46 2 E<br />
ID = 47 2 F<br />
ID Cámara SW2 SW1 Comentarios<br />
ID = 48 3 0<br />
ID = 49 3 1<br />
ID = 50 3 2<br />
ID = 51 3 3<br />
ID = 52 3 4<br />
ID = 53 3 5<br />
ID = 54 3 6<br />
ID = 55 3 7<br />
ID = 56 3 8<br />
ID = 57 3 9<br />
ID = 58 3 A<br />
ID = 59 3 B<br />
ID = 60 3 C<br />
ID = 61 3 D<br />
ID = 62 3 E<br />
ID = 63 3 F<br />
ID = 64 4 0<br />
ID = 65 4 1<br />
ID = 66 4 2<br />
ID = 67 4 3<br />
ID = 68 4 4<br />
ID = 69 4 5<br />
ID = 70 4 6<br />
ID = 71 4 7<br />
ID = 72 4 8<br />
ID = 73 4 9<br />
ID = 74 4 A<br />
ID = 75 4 B<br />
ID = 76 4 C<br />
ID = 77 4 D<br />
ID = 78 4 E<br />
ID = 79 4 F<br />
ID = 80 5 0<br />
ID = 81 5 1<br />
ID = 82 5 2<br />
ID = 83 5 3<br />
ID = 84 5 4<br />
ID = 85 5 5<br />
ID = 86 5 6<br />
ID = 87 5 7<br />
ID = 88 5 8<br />
ID = 89 5 9<br />
ID = 90 5 A<br />
ID = 91 5 B<br />
ID = 92 5 C<br />
ID = 93 5 D<br />
ID = 94 5 E<br />
ID = 95 5 F<br />
ESPAÑOL<br />
CÁMARA SPEED DOME 14 <strong>Manual</strong> de Uso<br />
CÁMARA SPEED DOME<br />
15<br />
<strong>Manual</strong> de Uso
Nombre de las partes y funciones<br />
ID Cámara SW2 SW1 Comentarios<br />
ID = 96 6 0<br />
ID = 97 6 1<br />
ID = 98 6 2<br />
ID = 99 6 3<br />
ID = 100 6 4<br />
ID = 101 6 5<br />
ID = 102 6 6<br />
ID = 103 6 7<br />
ID = 104 6 8<br />
ID = 105 6 9<br />
ID = 106 6 A<br />
ID = 107 6 B<br />
ID = 108 6 C<br />
ID = 109 6 D<br />
ID = 110 6 E<br />
ID = 111 6 F<br />
ID = 112 7 0<br />
ID = 113 7 1<br />
ID = 114 7 2<br />
ID = 115 7 3<br />
ID = 116 7 4<br />
ID = 117 7 5<br />
ID = 118 7 6<br />
ID = 119 7 7<br />
ID = 120 7 8<br />
ID = 121 7 9<br />
ID = 122 7 A<br />
ID = 123 7 B<br />
ID = 124 7 C<br />
ID = 125 7 D<br />
ID = 126 7 E<br />
ID = 127 7 F<br />
ID = 128 8 0<br />
ID = 129 8 1<br />
ID = 130 8 2<br />
ID = 131 8 3<br />
ID = 132 8 4<br />
ID = 133 8 5<br />
ID = 134 8 6<br />
ID = 135 8 7<br />
ID = 136 8 8<br />
ID = 137 8 9<br />
ID = 138 8 A<br />
ID = 139 8 B<br />
ID = 140 8 C<br />
ID = 141 8 D<br />
ID = 142 8 E<br />
ID = 143 8 F<br />
ID = 144 9 0<br />
ID = 145 9 1<br />
ID Cámara SW2 SW1 Comentarios<br />
ID = 146 9 2<br />
ID = 147 9 3<br />
ID = 148 9 4<br />
ID = 149 9 5<br />
ID = 150 9 6<br />
ID = 151 9 7<br />
ID = 152 9 8<br />
ID = 153 9 9<br />
ID = 154 9 A<br />
ID = 155 9 B<br />
ID = 156 9 C<br />
ID = 157 9 D<br />
ID = 158 9 E<br />
ID = 159 9 F<br />
ID = 160 A 0 N/A<br />
ID = 161 A 1<br />
ID = 162 A 2<br />
ID = 163 A 3<br />
ID = 164 A 4<br />
ID = 165 A 5<br />
ID = 166 A 6<br />
ID = 167 A 7<br />
ID = 168 A 8<br />
ID = 169 A 9<br />
ID = 170 A A<br />
ID = 171 A B<br />
ID = 172 A C<br />
ID = 173 A D<br />
ID = 174 A E<br />
ID = 175 A F N/A<br />
ID = 176 B 0<br />
ID = 177 B 1<br />
ID = 178 B 2<br />
ID = 179 B 3<br />
ID = 180 B 4<br />
ID = 181 B 5<br />
ID = 182 B 6<br />
ID = 183 B 7<br />
ID = 184 B 8<br />
ID = 185 B 9<br />
ID = 186 B A<br />
ID = 187 B B<br />
ID = 188 B C<br />
ID = 189 B D<br />
ID = 190 B E<br />
ID = 191 B F<br />
ID = 192 C 0<br />
ID = 193 C 1<br />
ID = 194 C 2<br />
ID = 195 C 3<br />
ID Cámara SW2 SW1 Comentarios<br />
D = 196 C 4<br />
ID = 197 C 5<br />
ID = 198 C 6<br />
ID = 199 C 7<br />
ID = 200 C 8<br />
ID = 201 C 9<br />
ID = 202 C A<br />
ID = 203 C B<br />
ID = 204 C C<br />
ID = 205 C D<br />
ID = 206 C E<br />
ID = 207 C F<br />
ID = 208 D 0<br />
ID = 209 D 1<br />
ID = 210 D 2<br />
ID = 211 D 3<br />
ID = 212 D 4<br />
ID = 213 D 5<br />
ID = 214 D 6<br />
ID = 215 D 7<br />
ID = 216 D 8<br />
ID = 217 D 9<br />
ID = 218 D A<br />
ID = 219 D B<br />
ID = 220 D C<br />
ID = 221 D D<br />
ID = 222 D E<br />
ID = 223 D F<br />
ID = 224 E 0<br />
ID = 225 E 1<br />
ID = 226 E 2<br />
ID = 227 E 3<br />
ID = 228 E 4<br />
ID = 229 E 5<br />
ID = 230 E 6<br />
ID = 231 E 7<br />
ID = 232 E 8<br />
ID = 233 E 9<br />
ID = 234 E A<br />
ID = 235 E B<br />
ID = 236 E C<br />
ID = 237 E D<br />
ID = 238 E E<br />
ID = 239 E F<br />
ID = 240 F 0<br />
ID = 241 F 1<br />
ID = 242 F 2<br />
ID = 243 F 3<br />
ID = 244 F 4<br />
ID = 245 F 5<br />
ID Cámara SW2 SW1 Comentarios<br />
ID = 246 F 6<br />
ID = 247 F 7<br />
ID = 248 F 8<br />
ID = 249 F 9<br />
ID = 250 F A<br />
ID = 251 F B<br />
ID = 252 F C<br />
ID = 253 F D<br />
ID = 254 F E<br />
ID = 255 F F<br />
Nota<br />
• Las tres siguientes ID de Cámara no<br />
pueden ser usadas.<br />
ESPAÑOL<br />
CÁMARA SPEED DOME 16 <strong>Manual</strong> de Uso<br />
CÁMARA SPEED DOME<br />
17<br />
<strong>Manual</strong> de Uso
Nombre de las partes y funciones<br />
Las tres siguientes ID de Cámara no pueden ser usadas.<br />
ID Cámara R-SW2 R-SW1<br />
ID = 0 0 0<br />
ID = 160 A 0<br />
ID = 175 A F<br />
Nota<br />
• Ajuste de fábrica: OFF<br />
Ajuste de Método de Comunicación(Soporte Cámara)<br />
Ajuste de Modo de Transmisión (Soporte Cámara)<br />
Ajuste el modo de transmisión usando el On/Off ( Encendido Apagado)del<br />
interruptor de Sondeo. 1.<br />
Función ON OFF<br />
SW3- #6 Aumento de Fábrica RS-422 RS-485<br />
Nota<br />
• Ajuste de fábrica: OFF<br />
ESPAÑOL<br />
Función ON OFF<br />
SW3- #1 Modo de Selección Full Duplex Half Duplex<br />
de Transmisión (DVR) (SCC-16/SCC-<strong>3000</strong>/3100)<br />
Nota<br />
• Ajuste de fábrica: OFF (Apagado)<br />
Ajuste para la composición de fábrica (Soporte Cámara)<br />
Función ON OFF<br />
SW3- #7 Disparador de Fábrica Siempre OFF<br />
Nota<br />
• Ajuste de fábrica: OFF<br />
Ajuste RS-485/RS-422A Interrupción (Soporte Cámara)<br />
Ajustar la interrupción usando el ON/OFF de 2, 3, 4, 5 del interruptor de sondeo 3.<br />
Localización de la conexión de Cámara SW3- #2 SW3- #3 SW3- #4 SW3- #5<br />
Terminación de la trayectoria más larga ON ON ON ON<br />
En el Trayecto OFF OFF OFF OFF<br />
Ajuste de comunicación con el PC (Soporte Cámara): Para reserva<br />
Función ON OFF<br />
SW3- #8 Comunicación con el PC RS-232 RS-485/422<br />
Nota<br />
• Ajuste de fábrica: OFF<br />
CÁMARA SPEED DOME 18 <strong>Manual</strong> de Uso<br />
CÁMARA SPEED DOME<br />
19<br />
<strong>Manual</strong> de Uso
Nombre de las partes y funciones<br />
Controlador de Conexión con la terminal (Soporte Cámara)<br />
Nombre<br />
Objetivo<br />
SW3 - #1 RXD+ Controlador Conexión Línea de Datos<br />
SW3 - #2 RXD+ Controlador Conexión Línea de Datos<br />
SW3 - #3 TXD+ Controlador Conexión Línea de Datos<br />
SW3 - #4 TXD+ Controlador Conexión Línea de Datos<br />
SW3 - #5 GND GND<br />
SW3 - #6 TX Para Comunicación RS-232<br />
SW3 - #7 RX Para Comunicación RS-232<br />
Terminal de Conexión de Alarma (Soporte Cámara)<br />
Nombre<br />
Objetivo<br />
SW3 - #1 IN1 Sensor de entrada de alarma conexión terminal 1<br />
SW3 - #2 IN2 Sensor de entrada de alarma conexión terminal 2<br />
SW3 - #3 GND GND<br />
SW3 - #4 IN3 Sensor de entrada de alarma conexión terminal 1<br />
SW3 - #5 IN4 Sensor de entrada de alarma conexión terminal 1<br />
SW3 - #6 GND GND<br />
SW3 - #7 COM1 Salida de Alarma 1 Común<br />
SW3 - #8 1N.O Salida de Alarma 1 (para apertura normal)<br />
SW3 - #9 1N.C Salida de Alarma 1 (para cierre normal)<br />
SW3 - #10 COM2 Salida de Alarma 2 Salida de Auxiliar 1 común<br />
SW3 - #11 2N.O Salida de Alarama 2 (NO) Salida de Auxiliar 1 (NO)<br />
SW3 - #12 2N.C Salida de Alarama 2 (NC) Salida de Auxiliar 1 (NC)<br />
Ajuste de Resistencia de Interrupción<br />
Con el objetivo de prevenir una reducción de la señal, la resistencia de finalización<br />
de dos unidades finales, las cuales son las diferentes trayectorias para la cámara<br />
y el controlador que han de ser conectadas en la interface RS 485, deberían ser<br />
conectadas.<br />
Como la resistencia de interrupción se construye en la cámara, el hacer la<br />
resistencia de interrupción válida o inválida se selecciona en el interruptor DIP.<br />
Ver el siguiente diagrama de conexión para determinar a qué mecanismo será<br />
conectada la terminación de resistencia..<br />
Establecer la resistencia de terminación en los productos oscuros.<br />
La distancia de instalación del producto para la resistencia de interrupción<br />
debería de ser menor de 1.2Km. (Longitud máxima de cable de 1.2Km según<br />
los estándares RS- 485.)<br />
ESPAÑOL<br />
Nota<br />
• La salida auxiliar que corresponde a la salida de alarma sólo es válida en el<br />
protocolo AD.<br />
CÁMARA SPEED DOME<br />
20<br />
<strong>Manual</strong> de Uso<br />
CÁMARA SPEED DOME<br />
21<br />
<strong>Manual</strong> de Uso
Accesorios<br />
Instalación<br />
Accesorios<br />
Adaptador AC24V, Máximo 2,5A) <strong>Manual</strong> de Uso Soporte Cámara<br />
3 Clavijas para sujetar el soporte<br />
de la cámara<br />
1 Clavija para sujetar el cable<br />
Bloqueo de la terminal<br />
para la connexion del<br />
controlador(7Pin)<br />
Bloqueo de la terminal<br />
para la conexión de la<br />
alarma(12Pin)<br />
Cables<br />
ESPAÑOL<br />
Preparación del cable<br />
Para instalar y usar el <strong>SPD</strong>-<strong>3000</strong>/<strong>2300</strong>, deberían ser usados los siguientes<br />
cables.<br />
• Cable Adaptador de Energía<br />
El cable conectado a la terminal de entrada de energía de <strong>SPD</strong>-<strong>3000</strong>/<strong>2300</strong> se<br />
muestra a continuación, con un voltaje valorado de AC24V 2.5A<br />
• Cable de Vídeo<br />
El cable conectado a la terminal de salida del vídeo y al monitor de <strong>SPD</strong>-<strong>3000</strong><br />
/<strong>2300</strong> es el cable BNC que se muestra a continuación.<br />
ESPAÑOL<br />
Productos vendidos separadamente<br />
Los siguientes productos se venden por separado.<br />
Artículo Modelo Descripción<br />
Soporte Limitado STB-330PC Montado en la superficie límite/ superior<br />
Controlador de cámara SCC-16 Control Panórámica/ Inclinación/ Foco, OSD, Ajuste de varias funciones.<br />
Controlador de cámara SCC-<strong>3000</strong>/3100 Control de Panorámica/ Inclinación/ foco, OSD, ajuste de varias funciones<br />
Cubierta para interiores STH-330PI Cubierta para instalación interior<br />
Inserción interior de cubierta STH-330PI Instalación mediante la inserción de la cámara en la cubierta interior.<br />
Cubierta exterior STH-330PI Salida DC 12V (incluido calentador y ventilador)<br />
Montaje de pared tipo STB-270PW Sujeción a la pared.<br />
Montaje de cubierta tipo STB-496PP Sujeción a la cubierta.<br />
• Cable de comunicaciones RS-485<br />
El cable conectado al controlador <strong>SPD</strong>-<strong>3000</strong>/<strong>2300</strong> para comunicación RS-485<br />
/422 se muestra a continuación.<br />
Nota<br />
• Ver páginas 25 y 26 para imágenes del producto.<br />
Nota<br />
• El cable del video y el cable de comunicación RS-485/422 no están incluidos en el<br />
paquete de este producto<br />
CÁMARA SPEED DOME 22 <strong>Manual</strong> de Uso<br />
CÁMARA SPEED DOME<br />
23<br />
<strong>Manual</strong> de Uso
Instalación<br />
Conexión del cable<br />
1. Primero, conectar una punta del<br />
cable del video BNC a la terminal de<br />
salida del vídeo.<br />
2. Después conectar el otro extremo del<br />
conector a la terminal de entrada de<br />
vídeo en el monitor.<br />
Terminal de entrada del monitor<br />
Monitor<br />
Terminal de salida de vídeo<br />
3. Después, conectar el cable adaptador de energía. Usar un conductor (-) para<br />
atornillar una parte del Adaptador de Energía<br />
consistente en dos líneas a la terminal<br />
de entrada del soporte de la cámara.<br />
Instalación de <strong>SPD</strong>-<strong>3000</strong>/<strong>2300</strong><br />
• Precauciones de Instalación<br />
- Comprobar el lugar de instalación. Éste debe de ser lo suficientemente fuerte<br />
como para soportar 4 veces el peso total del producto incluidos la cámara de<br />
velocidad domo ( <strong>SPD</strong>-<strong>3000</strong>/<strong>2300</strong>) y la estructura de instalación.<br />
- Instalar la cámara en un lugar que tenga más de 500 Mm. de espacio encima<br />
de la placa de cubierta.<br />
- Instalar el soporte de la cámara usando la guía de instalación suministrada,<br />
tornillos y cable de sujeción.<br />
- Existe el riesgo de que la cámara se caiga durante la instalación. Prevenir la<br />
caída usando el cable de sujeción mientras se instala la cámara. Además, no<br />
debe ser permitido el acceso al lugar de otras personas mientras se realiza la<br />
instalación.<br />
ESPAÑOL<br />
4. Conectar el enchufe del Adaptador de Corriente a la Salida de Energía.<br />
Adaptador de alimentación<br />
• Accesorios vendidos por separado<br />
Use los siguientes accesorios que se venden por separado para una idónea<br />
instalación dependiendo de los lugares de instalación.<br />
1) Montaje Instalación en el techo(STB-330PC)<br />
Este montaje es para instalar la cámara en el techo.<br />
5. Conectar la terminal de conexión del<br />
controlador de <strong>SPD</strong>-<strong>3000</strong>/<strong>2300</strong> y el<br />
controlador externo.<br />
CUADRO DE DATOS<br />
Terminal de conexión del<br />
controlador<br />
2) Inserción de cubierta interior (STH-330PE)<br />
La cubierta es utilizada para fijar la cámara de velocidad<br />
domo al techo para su instalación.<br />
Controlador<br />
CÁMARA SPEED DOME 24 <strong>Manual</strong> de Uso<br />
CÁMARA SPEED DOME<br />
25<br />
<strong>Manual</strong> de Uso
Instalación<br />
3) Cubierta Interior y Exterior (STH-330PI, STH-330PO)<br />
Esta cubierta se usa para instalar la Cámara velocidad domo en el techo o<br />
pared interior o exterior. (Para el tipo interior, se excluyen el ventilador y<br />
calentador)<br />
Instalación de la Cámara (Cubierta Exterior)<br />
1. Sujetar el montaje de la cubierta en el techo.<br />
4) Montaje Tipo Pared (STB-270PW)<br />
Este artículo se utiliza para instalar la cubierta interior o exterior para la cámara<br />
velocidad domo en la pared.<br />
2. Sacar fuera de la cubierta el cable de seguridad sujeto a la cubierta exterior.<br />
ESPAÑOL<br />
5) Montaje Tipo Techo (STB-270PW)<br />
Este artículo se utiliza para instalar la cubierta interior o exterior<br />
para la cámara de velocidad domo en un techo en concreto.<br />
3. Conectar el cable PBC ventilador calentador<br />
dentro de la cubierta al conector del soporte<br />
de la cámara.<br />
4. Unir el símbolo de flecha marcado en el<br />
soporte de la cámara a la flecha marcada<br />
dentro de la cubierta y después instalar el<br />
soporte de la cámara en la cubierta.<br />
CÁMARA SPEED DOME 26 <strong>Manual</strong> de Uso<br />
CÁMARA SPEED DOME<br />
27<br />
<strong>Manual</strong> de Uso
Instalación<br />
5. Conectar los cables del ventilador y calefactor<br />
dentro de la cubierta al calentador ventilador<br />
PCB.<br />
9. Conectar los cables de seguridad de la cubierta<br />
al punto fijo dentro del montaje instalado<br />
en el techo.<br />
6. Ajustar y poner las flechas marcadas en el<br />
fondo del cuerpo de la<br />
an arrow<br />
cámara una enfrente de la otra.<br />
10. Conectar el cable del video, el cable del<br />
controlador, el cable del adaptador de energía<br />
y el cable ID al soporte de la cámara.<br />
ESPAÑOL<br />
7. Inserta la cámara en la cubierta uniendo la clavija<br />
de instalación en el fondo de la cámara y la flecha<br />
dentro de la cubierta, y después sujetar la cámara<br />
introduciéndola en el hueco de sujeción, girar el<br />
tornillo en el sentido de las agujas del reloj para<br />
apretar.<br />
8. Quitar la tapa de la cámara domo y después unir la tapa de la cubierta domo.<br />
<strong>Camera</strong> <strong>Dome</strong> Cover<br />
Housing <strong>Dome</strong> Cover<br />
11. Revisar la conexión de todas las partes e instalar la<br />
cubierta exterior completa en el montaje del techo.<br />
Nota<br />
• Establecer la ID de la cámara, la resistencia de finalización y el interruptor de selección<br />
de protocolo antes de instalar la cubierta exterior en el tipo de montaje del techo.<br />
• Revisar la entrada de voltios del adaptador de energía antes de conectarlo a la<br />
fuente de energía.<br />
• Para una instalación sin cubierta, la cámara puede ser instalada sin plantilla de<br />
instalación, ajustando el cable y los tornillos suministrados por separado.<br />
• Es necesario apretar el tornillo para prevenir aflojamientos.<br />
• Si el tornillo para prevenir aflojamientos no está apretado, la cámara instalada puede<br />
caer debido a vibraciones o golpes en el entorno.<br />
CÁMARA SPEED DOME 28 <strong>Manual</strong> de Uso<br />
CÁMARA SPEED DOME<br />
29<br />
<strong>Manual</strong> de Uso
Descripción funcional<br />
Organización del menú OSD<br />
La cámara Domo puede ser establecida en el menú OSD (Visualización en Pantalla)<br />
visualizado en el monitor del vídeo por el controlador de la cámara. Las operaciones<br />
con el joystick en el menú son las siguientes. Además, al enviar códigos de control a la<br />
cámara desde el PC Puede también usar las funciones de la cámara.<br />
• Organización del menú<br />
Menú Función Menú Función<br />
INCLINAR HACIA ARRIBA Se mueve hacia arriba en el menú OSD DEJAR HACIA ARRIBA Se mueve hacia la izquierda en el menú OSD<br />
INCLINAR HACIA ABAJO Se mueve hacia abajo en el menú OSD DEJAR HACIA ABAJO Se mueve hacia la izquierda en el menú OSD<br />
P1 P2 P3 P4 Defaults<br />
Focus Mode Auto/<strong>Manual</strong>/One Shot AF One Shot AF<br />
Focus Zoom Tracking<br />
Mode On/Off<br />
ON<br />
Speed Slow/Fast<br />
Fast<br />
Digital Zoom Off(2~10X) OFF<br />
ATW/AWC/MANUAL<br />
ATW(O)<br />
White<br />
Balance AWB Mode<br />
ATW<br />
-ATW(I): Indoor -ATW(O): Outdoor<br />
<strong>Manual</strong> 30<br />
-Red -Blue 40<br />
Brightness 50 050<br />
<strong>Camera</strong><br />
Auto<br />
Auto<br />
Iris<br />
Setting<br />
<strong>Manual</strong> Iris Level 050<br />
Exposure Shutter<br />
--- ESC<br />
A.FLK<br />
<strong>Manual</strong> 1/60~1/120,000,x2~x128 1/60<br />
Sens-Up<br />
Auto Sens-Up Limit x2~x128<br />
x4<br />
Off<br />
Back Light On/Off<br />
OFF<br />
AGC High/Middle/Low/Off Middle<br />
SSNR High/Middle/Low/Off OFF<br />
Day & Night<br />
Auto<br />
B/W B/W Burst On/Off OFF<br />
Color Burst Level 50<br />
Others Sync Internal 10<br />
P1 P2 P3 P4 Defaults<br />
Sync Line Lock Line Lock Phase 225<br />
Stabilizer On/Off OFF<br />
<strong>Camera</strong><br />
Setting<br />
Sequence<br />
Setting<br />
P/T<br />
Setting<br />
Others<br />
Image Adj.<br />
Sharpness 008<br />
Color 050<br />
Freeze On/Off OFF<br />
Preset Setting Edit Execute Clear Status<br />
Pan Swing Setting Execute Clear<br />
Swign SEQ Tilt Swing Setting Execute Clear<br />
P/T Swing Setting Execute Clear<br />
Group1 Setting Execute Clear<br />
Group2 Setting Execute Clear<br />
Group SEQ<br />
Group3 Setting Execute Clear<br />
Group4 Setting Execute Clear<br />
Group5 Setting Execute Clear<br />
Group6 Setting Execute Clear<br />
Tour SEQ Setting Execute Clear<br />
Trace1 Replay Memorize<br />
<strong>PTZ</strong> Trace Trace2 Replay Memorize<br />
Trace3 Replay Memorize<br />
Trace4 Replay Memorize<br />
Off<br />
OFF<br />
Preset Preset No<br />
Swing Swing Mode Pan/Tilt/P&T<br />
Mode<br />
Group Group No<br />
Auto Run<br />
Tour<br />
Trace Trace1~Trace4<br />
A.Pan Auto Pan Speed 20-50 32<br />
Tilt Angle 10-45 25<br />
Time 1-59(sec), 1-59(min) 30 sec<br />
Power On<br />
Resume<br />
On/Off<br />
OFF<br />
Pan Limit Position ON/OFF<br />
Tilt Limit Position ON/OFF<br />
Area Setting<br />
Area1<br />
Area2<br />
Area3<br />
Area4<br />
Area Name<br />
Position<br />
ON/OFF<br />
ESPAÑOL<br />
CÁMARA SPEED DOME<br />
30<br />
<strong>Manual</strong> de Uso<br />
CÁMARA SPEED DOME<br />
31<br />
<strong>Manual</strong> de Uso
Descripción funcional<br />
P1 P2 P3 P4 Defaults<br />
Area5<br />
Area Name<br />
Area6<br />
Area Setting<br />
Area7<br />
Position<br />
Area8<br />
ON/OFF<br />
P/T<br />
Mask1<br />
Setting<br />
Mask2<br />
Position<br />
Area Masking<br />
Mask3<br />
ON/OFF<br />
Mask4<br />
OSD<br />
Setting<br />
Alarm<br />
Setting<br />
Initialize<br />
Status<br />
Prop. P/T ON / OFF ON<br />
Digital Flip ON / OFF ON<br />
<strong>Camera</strong> ID ON / OFF ON<br />
<strong>Camera</strong> Name Edit ON / OFF<br />
Preset Number ON / OFF ON<br />
Preset Name Edit ON / OFF<br />
Sequence Status ON / OFF ON<br />
Area Name ON / OFF OFF<br />
<strong>PTZ</strong> Position ON / OFF OFF<br />
Language English/Chinese English<br />
Alarm Enable ON / OFF OFF<br />
Alarm1<br />
NC/NO/COM<br />
Alarm2<br />
1~4(Priority)<br />
Alarm Input Alarm3<br />
Preset/Group/Tour<br />
Alarm4<br />
A.Pan/Trace<br />
Setting1<br />
1-4, MD<br />
Setting2<br />
1-4, MD<br />
1-59(Sec)<br />
Alarm Out<br />
Timer1<br />
1-59(Min)<br />
1-59(Hour)<br />
1-59(Sec)<br />
Timer2<br />
1-59(Min)<br />
1-59(Hour)<br />
Out Off1<br />
Out Off2<br />
MD Dwell Time ON / OFF 1-59(Sec) / 1-59(Min) 30sec<br />
Power On Reset Cancel Execute<br />
Factory Default Set Cancel Execute<br />
<strong>Camera</strong> Default Set Cancel Execute<br />
Auto Refresh OFF, 1~7Days OFF<br />
Initial Position Position ON/OFF<br />
Nota<br />
• El ajuste de programación solo es posible en el menú OSD o usando el controlador.<br />
Descripción de los símbolos<br />
1. Estabilización de Movimiento y Funcionamiento en Pausa<br />
- Símbolo “D” está destellando en la parte superior derecha de la pantalla<br />
2. Funcionamiento de la Alarma<br />
- Símbolo “ ” está destellando en la parte superior derecha de la pantalla<br />
3. Entrada de Alarma#1, 2, 3, 4 Sensor de Funcionamiento<br />
- Los símbolos “ ”, “ ”, “ ” y “ ” aparecen parpadeando en la parte superior<br />
derecha de la pantalla .<br />
4. Salida de Alarma #1, 2 Sensor de Funcionamiento<br />
- Los símbolos “ ” y “ ” están parpadeando en la parte superior derecha de la<br />
pantalla<br />
5. Funcionamiento del Detector de Movimiento<br />
- Símbolo “Man Icon” está destellando en la parte superior derecha de la pantalla<br />
6. Cuando hay sub. menús bajo el menú OSD seleccionado<br />
- Los números son visualizados en color blanco como en la parte superior<br />
derecha de la pantalla.<br />
7. Cuando no hay sub. menú bajo el menú OSD seleccionado.<br />
- Los números son visualizados en color negro como “ ” en la parte superior<br />
derecha de la pantalla.<br />
ESPAÑOL<br />
CÁMARA SPEED DOME<br />
32<br />
<strong>Manual</strong> de Uso<br />
CÁMARA SPEED DOME<br />
33<br />
<strong>Manual</strong> de Uso
Descripción funcional<br />
Ajustes de Menú de Usuario Cámara Domo<br />
• Ejecución del menú OSD<br />
Tras comprobar si la cámara está en modo de operación manual, presionar la<br />
tecla de menú OSD o 1+ MENÚ (Modelo SCC-16) Las siguientes órdenes son<br />
visualizadas en la pantalla del monitor.<br />
• Menú Principal<br />
Main Menu<br />
<strong>Camera</strong> Setting<br />
Sequence Setting<br />
P/T Setting<br />
OSD Setting<br />
Alarm Setting<br />
Initialize<br />
Status<br />
1) <strong>Camera</strong> Setting<br />
Seleccionar Ajustes de Cámara en la pantalla de Menú Principal para ir al<br />
Menú de Ajustes de Cámara.<br />
• Menú Ajustes de Cámara<br />
<strong>Camera</strong> Setting<br />
Focus<br />
White Balance<br />
Exposure<br />
Back Light<br />
AGC<br />
SSNR<br />
Day & Night<br />
Others<br />
ATW(O)<br />
OFF<br />
MIDDLE<br />
MIDDLE<br />
COLOR<br />
La tecla de selección se mueva hacia arriba y hacia<br />
abajo. Presionar el interruptor de la llave de ejecución<br />
en el menú seleccionado para cambiar el menú<br />
establecido. Presionar la tecla ESC para salir del<br />
menú OSD.<br />
Focus<br />
Focus Mode ONE SHOT AF<br />
Zoom Tracking<br />
Digital Zoom OFF<br />
Focus<br />
En el menú de Enfoque, puede ajustar el modo de enfoque de entre Auto,<br />
<strong>Manual</strong>, One Shot AF<br />
Focus Mode<br />
Auto : La cámara ajusta el foco automáticamente mientras vigila la pantalla<br />
continuamente en el modo automático. En el modo de enfoque automático, la tecla de<br />
funcionamiento del Zoom no es reconocida como la entrada de la tecla de enfoque.<br />
<strong>Manual</strong> : En el modo manual, los usuarios pueden ajustar el foco de la cámara<br />
manualmente.<br />
One shot AF : Solo cuando la cámara no se mueve, se cambia a modo automático.<br />
Es lo mismo que el modo manual.<br />
Zoom Tracking<br />
Mode : Cuando seleccionas On ( encendido), la Función de Foco es ejecutada<br />
cuando la función de zoom está encendida. Cuando seleccionas OFF ( Apagado), la<br />
Función de Enfoque no se ejecuta incluso si la función del Zoom está encendida.<br />
Speed : Rápido apurará el Zoom. Lento reducirá la marcha del Zoom.<br />
Digital Zoom<br />
Aumento del Zoom digital puede ser seleccionado entre, 2X~10X.<br />
*Se recomienda que el Zoom digital debiera ser establecido antes de la programación.<br />
Nota<br />
Digital Zoom<br />
•Al incrementar el aumento del Zoom digital, la calidad de imagen baja.<br />
Autoenfoque<br />
•El autoenfoque puede que no funcione normalmente bajo las siguientes condiciones.<br />
- Cuando el nivel de luz en el área vigilada es bajo<br />
- Cuando funciona el disparador lento<br />
- Cuando se aumenta la amplificación<br />
- Cuando el nivel de luz en el área vigilada es excesivamente alto<br />
- Cuando los objetos en distancia corta y larga están bajo la misma área de vigilancia.<br />
- Cuando no existe contraste (Blanco y negro) en el objeto (Ej. Cielo o pared)<br />
- Cuando la fina línea horizontal es capturada<br />
ESPAÑOL<br />
CÁMARA SPEED DOME 34 <strong>Manual</strong> de Uso<br />
CÁMARA SPEED DOME<br />
35<br />
<strong>Manual</strong> de Uso
Descripción funcional<br />
White Balance<br />
La función de White Balance corrige el color blanco anormal a color blanco<br />
normal bajo cualquier temperatura de color o alumbrado. Seleccionar el modo<br />
entre ATW, AWC y <strong>Manual</strong>. ATW es seleccionado por defecto.<br />
<strong>Camera</strong> Setting<br />
Focus<br />
White Balance ATW(O)<br />
Exposure<br />
Back Light OFF<br />
AGC<br />
MIDDLE<br />
SSNR<br />
MIDDLE<br />
Day & Night COLOR<br />
Others<br />
AWB Mode<br />
ATW : Balance automático del color dependiendo de la fuente de luz de 1,800-10,500K<br />
temperatura del color.<br />
* Indoor[ATW(I)] : Iluminación Interior. Utilizar este modo en área de temperatura y color limitado.<br />
* Outdoor[ATW(O)] : Iluminación Exterior. Utilizar este modo en un área amplia de temperatura de color.<br />
AWC : Establece la iluminación para los objetos y corrige la adecuada temperatura de colorl<br />
de un objeto blanco. La cámara funciona bajo las condiciones establecidas. Para las condiciones<br />
más apropiadas bajo la iluminación actual, capturar el papel blanco y después cambiar el<br />
modo a AWC. Presionar la tecla Enter y entonces el Arranque de AWC será visualizado. Cuando<br />
el ajuste esté completado tras presionar la tecla Enter para que AWC comience, vaya al Menú<br />
superior. Cuando las condiciones cambien, ajustar la función de balance de blanco de Nuevo.<br />
<strong>Manual</strong> : Una buena sintonización es posible a través de este modo de control manual. Seleccione la<br />
temperatura del color y aumente o disminuya los valores Rojo o Azul para cambiar el color del objeto.<br />
* Red : Se puede cambiar el aumento de Rojo.<br />
* Blue: Se puede cambiar la gama de azul.<br />
Nota<br />
• El balance de blanco puede que no funcione normalmente bajo las siguientes condiciones.<br />
Cuando la temperatura del color rodeando el objeto es muy alta ( Ej. Cielo claro o puesta de sol)<br />
Cuando está oscuro alrededor del objeto<br />
Cuando la cámara está apuntando directamente hacia una lámpara fluorescente o cuando las<br />
condiciones de iluminación cambian mucho.<br />
Exposure<br />
La exposure de la cámara puede ser controlada.<br />
<strong>Camera</strong> Setting<br />
Focus<br />
White Balance<br />
Exposure<br />
Back Light<br />
AGC<br />
SSNR<br />
Day & Night<br />
Others<br />
ATW(O)<br />
OFF<br />
MIDDLE<br />
MIDDLE<br />
COLOR<br />
Exposure<br />
Brightness 050<br />
Iris<br />
AUTO<br />
Shtter ---<br />
Sens-Up<br />
AUTO<br />
Brightness : El brillo de la pantalla puede ser ajustado<br />
Iris : Se puede elegir Modo <strong>Manual</strong> o Modo AUTO<br />
AUTO : El brillo de la señal de imagen puede ser ajustado automáticamente<br />
dependiendo de la cantidad de luz.<br />
<strong>Manual</strong> : El brillo de la imagen puede ser ajustado<br />
Shutter<br />
--- : Se permite el modo de Obturador electrónico. La velocidad de obturador es<br />
controlada automáticamente dependiendo del brillo de la pantalla.<br />
A.FLK : Utilizar este modo cuando la pantalla parpadee debido a una frecuencia<br />
irregular de la luz circundante.<br />
<strong>Manual</strong> : 1. La velocidad del obturador puede ser controlada manualmente.<br />
2. La velocidad del obturador puede ser ajustada de 1/60 segundo a<br />
1/120,000 segundo.<br />
3. La función Aumento Automático de la Seguridad puede ser manejada<br />
manualmente desde x2~x128.<br />
Nota<br />
• Si el Modo Obturador es ESC en el modo de sincronización interno y la camara está<br />
enfrente de una lámpara fluorescente brillante de modo directo, la imagen puede ser<br />
inestable. Tenga cuidado al seleccionar la localización de la instalación.<br />
• Si se selecciona el modo <strong>Manual</strong> o A.FLK del menú del Obturador, la función Aumento<br />
Automático de la Seguridad es desactivada.<br />
ESPAÑOL<br />
CÁMARA SPEED DOME 36 <strong>Manual</strong> de Uso<br />
CÁMARA SPEED DOME<br />
37<br />
<strong>Manual</strong> de Uso
Descripción funcional<br />
Sens-Up<br />
Auto : El bajo nivel de luz de la noche o condiciones de oscuridad es detectado<br />
automáticamente y la imagen se puede mantener clara y brillante.<br />
Límite de Aumento Automático de la Seguridad Se puede seleccionar un máximo<br />
aumento acumulado.<br />
Off : La función Aumento Automático de la Seguridad es cancelada.<br />
Nota<br />
• A medida que se incrementa el aumento acumulado, la pantalla se vuelve brillante.<br />
Pero, la imagen del objeto en movimiento también se hace más grande y la función<br />
de autoenfoque óptimo puede no funcionar.<br />
Back Light<br />
A diferencia de otras cámaras, el chip exclusivo W-III de la <strong>Samsung</strong> Techwin le<br />
ofrece una imagen clara del objeto incluso cuando hay una luz de fondo<br />
brillante.<br />
<strong>Camera</strong> Setting<br />
Focus<br />
White Balance<br />
Exposure<br />
Back Light<br />
AGC<br />
SSNR<br />
Day & Night<br />
Others<br />
ATW(O)<br />
OFF<br />
MIDDLE<br />
MIDDLE<br />
COLOR<br />
ON: En luz de contraste, los objetos en las zonas más oscuras también aparecerán con<br />
toda claridad en la fotografia.<br />
Off : La function BLC se cancela.<br />
AGC<br />
Cuando el brillo de la imagen tomada bajo luz oscura está por debajo de cierto<br />
nivel, las funciones AGC (Aumento de Control Automático) definen si controlar<br />
la Gama automáticamente o no.<br />
<strong>Camera</strong> Setting<br />
Focus<br />
White Balance<br />
Exposure<br />
Back Light<br />
AGC<br />
SSNR<br />
Day & Night<br />
Others<br />
ATW(O)<br />
OFF<br />
MIDDLE<br />
MIDDLE<br />
COLOR<br />
Seleccionar un modo entre High, Middle, Low o Off<br />
<strong>Camera</strong> Setting<br />
Focus<br />
White Balance<br />
Exposure<br />
Back Light<br />
AGC<br />
SSNR<br />
Day & Night<br />
Others<br />
ATW(O)<br />
OFF<br />
MIDDLE<br />
MIDDLE<br />
COLOR<br />
<strong>Camera</strong> Setting<br />
Focus<br />
White Balance<br />
Exposure<br />
Back Light<br />
AGC<br />
SSNR<br />
Day & Night<br />
Others<br />
SSNR (Super Reducción de Sonido <strong>Samsung</strong> )<br />
<strong>Camera</strong> Setting<br />
Focus<br />
White Balance<br />
Exposure<br />
Back Light<br />
AGC<br />
SSNR<br />
Day & Night<br />
Others<br />
ATW(O)<br />
OFF<br />
OFF<br />
MIDDLE<br />
COLOR<br />
La función SSNR reduce los ruidos de fondo bajo condiciones de luz oscura de<br />
manera diferente en modos diferentes. El efecto de reducción de sonido crece<br />
en modo Apagado, Medio y Alto en orden.<br />
ATW(O)<br />
OFF<br />
MIDDLE<br />
OFF<br />
COLOR<br />
OFF : No efecto de reducción de ruidos.<br />
Low : El efecto de reducción de sonido es pequeño pero hay poca imagen<br />
consecutiva.<br />
ESPAÑOL<br />
CÁMARA SPEED DOME<br />
38<br />
<strong>Manual</strong> de Uso<br />
CÁMARA SPEED DOME<br />
39<br />
<strong>Manual</strong> de Uso
Descripción funcional<br />
Middle : El efecto de reducción de ruidos es generalmente efectivo en este modo. El<br />
ruido puede ser reducido adecuadamente y la imagen consecutiva no es<br />
fuerte.<br />
High : El efecto de reducción de sonido es excelente pero la imagen consecutiva es<br />
también fuerte.<br />
Nota<br />
• Cuando seleccionas el modo AGC como “OFF”(Apagado), no puedes usar la función<br />
SSNR.<br />
Day & Night<br />
El nivel de oscuridad es detectado automáticamente bajo condiciones de luz baja<br />
tales como la noche o bajo luz oscura para mantener la pantalla brillante y clara.<br />
COLOR : La imagines producidas son visualizadas en color todo el tiempo. El tamaño<br />
de señal de ráfaga puede ser ajustado.<br />
B/W : La imagines producidas son visualizadas en blanco y negro todo el tiempo. La<br />
señal de ráfaga puede mantenerse o desactivarse.<br />
AUTO : Bajo condiciones diurnas, el modo se cambia automáticamente al modo<br />
COLOR para mantener un color óptimo. Por la noche, el modo se cambia<br />
automáticamente al modo B/N para distinguir las imágenes oscuras<br />
perfectamente.<br />
Nota<br />
• Si el AGC está en modo OFF (Apagado), el modo Automático no se puede utilizar.<br />
Solo se pueden usar los modos COLOUR (Color) o B/W (Blanco y Negro).<br />
• Si el amanecer o una lámpara halógena se utilizan en modo B/W ( blanco y negro),<br />
el enfoque puede ser borroso en comparación con la iluminación general.<br />
ESPAÑOL<br />
<strong>Camera</strong> Setting<br />
Focus<br />
White Balance<br />
Exposure<br />
Back Light<br />
AGC<br />
SSNR<br />
Day & Night<br />
Others<br />
<strong>Camera</strong> Setting<br />
Focus<br />
White Balance<br />
Exposure<br />
Back Light<br />
AGC<br />
SSNR<br />
Day & Night<br />
Others<br />
ATW(O)<br />
OFF<br />
MIDDLE<br />
MIDDLE<br />
AUTO<br />
ATW(O)<br />
OFF<br />
MIDDLE<br />
MIDDLE<br />
COLOR<br />
<strong>Camera</strong> Setting<br />
Focus<br />
White Balance<br />
Exposure<br />
Back Light<br />
AGC<br />
SSNR<br />
Day & Night<br />
Others<br />
ATW(O)<br />
OFF<br />
MIDDLE<br />
MIDDLE<br />
B/W<br />
Others<br />
<strong>Camera</strong> Setting<br />
Focus<br />
White Balance<br />
Exposure<br />
Back Light<br />
AGC<br />
SSNR<br />
Day & Night<br />
Others<br />
ATW(O)<br />
OFF<br />
MIDDLE<br />
MIDDLE<br />
COLOR<br />
Ohter<br />
Sync<br />
Stabilizer<br />
Image Adj<br />
Freeze<br />
INTERNAL<br />
OFF<br />
Sync(Sincronización) : Pueden ser seleccionados sincronización interna o Bloqueo<br />
Lineal. La Sincronización interna es seleccionada por defecto. La function Sync<br />
Line puede ajustar la fase de salida de más de 1 unidad sin usar generador de<br />
señal sync. Cuando se selecciona el AC Line Lock, las fases se pueden ajustar de<br />
0 a 360 niveles. Por lo consiguiemte, la fase se puede ajustar hasta 360˚.<br />
OFF<br />
CÁMARA SPEED DOME<br />
40<br />
<strong>Manual</strong> de Uso<br />
CÁMARA SPEED DOME<br />
41<br />
<strong>Manual</strong> de Uso
Descripción funcional<br />
Internal : Sincronización interna<br />
Line Lock : Sincronización Línea de Energía<br />
Line Lock Phase :<br />
La fase de sincronización de línea puede ser seleccionada de 0 a 360˚.<br />
El valor inicial es 225˚<br />
Stabilizer : corrige la vibración de la cámara.<br />
Nota<br />
• Este estabilizador podría no funcionar adecuadamente si se encontrase bajo las<br />
condiciones descritas a continuación:<br />
1. Oscuridad (poca o total ausencia de luz) alrededor del objeto<br />
2. Ausencia de contraste en el objeto<br />
3. La velocidad de vibración de la cámara es demasiado rápida y podr.a ser posible no corregirla.<br />
4. El estabilizador est. desactivado mientras se est.n ejecutando las funciones de visión panorámica,<br />
inclinación, zoom o enfoque, o mientras se muestra el menú de configuración de la cámara.<br />
5. Cuando el estabilizador está activado, parte de la pantalla será ignorada antes de que se lleve a<br />
cabo la corrección.<br />
Esto podrá comportar una reducción del ángulo de visión en la resolución.<br />
Image Adj. : La claridad de la señal vídeo y la saturacion de color pueden<br />
ajustarse.<br />
Sharpness : La densidad total de la pantalla puede ser ajustada.<br />
Color : La densidad de color total de la pantalla puede ser ajustada.<br />
Freeze : Una imagen en movimiento puede ser detenida y repetida.<br />
ON(Encendido): La imagen puede ser congelada.<br />
OFF(Apagado) : La imagen congelada es liberada y la película se repite.<br />
2) Sequence Setting<br />
• Menú Sequence Setting.<br />
Sequence Setting<br />
Preset<br />
Swing SEQ<br />
Group SEQ<br />
Tour SEQ<br />
<strong>PTZ</strong> Trace<br />
Auto Run<br />
Power On Resume OFF<br />
Preset<br />
Setting<br />
Edit<br />
Execute<br />
Clear<br />
Status<br />
Preset :<br />
13 puntos tales como la localización Pan/Tilt (Panorámica/ Inclinación), Enfoque<br />
y Zoom son seleccionados entre las funciones de la cámara y pueden ser<br />
demandados para vigilancia. En total pueden ser programados 128 puntos.<br />
Setting: Seleccionar el número de Programación para Ajustar. Ajustar Pan/ Tilt/<br />
Zoom (Panorámica/ Inclinación/ Zoom) y presionar la tecla Enter (Entrar) para<br />
gravar el ajuste. Si quieres cambiar los 13 puntos tales como Enfoque, Brillo,<br />
Ajuste de Iris y Escena, usa la tecla Up/ Down (Arriba/ abajo) para ir y<br />
seleccionar el punto. Si no quieres cambiar los doce puntos, presiona la<br />
tecla ESC (Salir) para ir al siguiente paso de Programación.<br />
Edit : Puedes editar los doce puntos de Programación tales como Pan/ Tilt<br />
(Panorámica/ Inclinación)localización, Zoom y Enfoque, los cuales son<br />
seleccionados entre las funciones de la cámara.<br />
Excute : Seleccionar el número de Programación para ejecutar.<br />
Clear : Seleccione el número de programación a borrar para despejar.<br />
Status : El actual número de programación establecido es visualizado.<br />
• Motion Detection Setting<br />
Seleccione Detección de movimiento en el menú de configuración de valores predeterminados<br />
y, a continuación, encienda el modo.<br />
ESPAÑOL<br />
CÁMARA SPEED DOME<br />
42<br />
<strong>Manual</strong> de Uso<br />
CÁMARA SPEED DOME<br />
43<br />
<strong>Manual</strong> de Uso
Descripción funcional<br />
Nota<br />
• Si la iluminación vibrase estando bajo la influencia de una luz directa, como por<br />
ejemplo una lámpara fluorescente, esto podría causar el funcionamiento incorrecto<br />
de la cámara. No se recomienda el uso de la función DM en tales condiciones.<br />
• Cuando, de repente, el brillo de los objetos empieza a fluctuar, debido a la luz<br />
intermitente de un flash, una lámpara o una linterna o faros, esto podría causar el<br />
funcionamiento incorrecto de la cámara.<br />
• El propósito de esta función de seguridad no es la prevención de accidentes o de<br />
crímenes tales como el fuego o un robo. Nuestra compañía no se hace responsable<br />
por las lesiones o los daños que el uso inadecuado de esta función pueda causar.<br />
• Ajustar el Menú de Programación.<br />
1. Seleccionar el punto de programación en el Menú de Ajuste de Secuencia Presionar<br />
la tecla Enter (Entrar)<br />
2. Seleccionar el punto Ajustar<br />
5. Para cambiar los valores predeterminados de la<br />
cámara, seleccione primero Edit en el menú<br />
superior. Seleccione el artículo que desee cambiar<br />
y, entonces, realice los ajustes necesarios.<br />
6. Si seleccionas el punto de Ajuste de Escena, los<br />
puntos tales como el Obturador, AGC, SSNR,<br />
Aumento Automático de la Seguridad.<br />
Balance de Blanco y Estabilizador pueden ser<br />
establecidos en cada punto de programación.<br />
Preset Edit [001]<br />
<strong>PTZ</strong><br />
267/051/1X<br />
Focus Mode <strong>Manual</strong><br />
Brightness 050<br />
Iris<br />
AUTO<br />
Back Light OFF<br />
Day & Night COLOR<br />
Motion Det. OFF<br />
Scene Adj<br />
Scene Adj. [001]<br />
Shutter ---<br />
AGC<br />
MIDDLE<br />
SSNR<br />
MIDDLE<br />
Sens-Up<br />
AUTO<br />
White Balance ATW<br />
Stabilizer OFF<br />
ESPAÑOL<br />
Sequence Setting<br />
Preset<br />
Swing SEQ<br />
Group SEQ<br />
Tour SEQ<br />
<strong>PTZ</strong> Trace<br />
Auto Run<br />
Power On Resume OFF<br />
3. Seleccionar el Número de programación. Presionar la tecla Enter (Entrar)<br />
4. Establecer el Enfoque y Zoom.<br />
Preset Setting<br />
Preset=001 (1~128)<br />
Preset<br />
Setting<br />
Edit<br />
Execute<br />
Clear<br />
Status<br />
Preset Setting Z>ZOOM<br />
PST 1 : ZOOM PST 2 : FOCUS<br />
Nota<br />
• En el ajuste de equilibrio de blancos del ajuste de escena pre-configurada, la selecci<br />
n de AWC no est disponible.<br />
Swing SEQ :<br />
Se puede ejecutar y establecer la vigilancia de movimiento y los datos se pueden<br />
borrar.<br />
Sequence Setting<br />
Preset<br />
Swing SEQ<br />
Group SEQ<br />
Tour SEQ<br />
<strong>PTZ</strong> Trace<br />
Auto Run<br />
Power On Resume OFF<br />
Swing SEQ<br />
Pan Swing<br />
Tilt Swing<br />
P&T Swing<br />
CÁMARA SPEED DOME<br />
44<br />
<strong>Manual</strong> de Uso<br />
CÁMARA SPEED DOME<br />
45<br />
<strong>Manual</strong> de Uso
Descripción funcional<br />
Pan Swing : Se ejecuta y establece Vigilancia de movimiento en dirección<br />
panorámica. Los datos son borrados.<br />
Tilt Swing : Se ejecuta y establece Vigilancia de movimiento en dirección inclinada.<br />
Los datos son borrados.<br />
P/T Swing : Vigilancia de movimiento para ambas direcciones panorámica e<br />
inclinada es ejecutada y establecida. Los datos son borrados.<br />
* Setting : La posición Programar para la función de movimiento es seleccionada con el joystick y se<br />
confirma con la tecla de Ejecución. <strong>SPD</strong> es la velocidad de movimiento (001-240˚/sec). DWL es el<br />
tiempo de detención (00-99 sec). Presiona la tecla de Ejecución en la localización con marca de<br />
selección para acabar el proceso de ajustes.<br />
* Excute : SE ejecuta la Vigilancia de Movimiento. La tecla Stop (Parar) designa esta función.<br />
* Clear : Los Datos en la función Movimiento son borrados.<br />
Group SEQ :<br />
Se puede ejecutar y establecer la vigilancia de secuencia y los datos se pueden<br />
borrar. Se pueden registrar hasta 6 grupos.<br />
Tour SEQ :<br />
Se puede ejecutar y establecer la vigilancia de grupo y los datos se pueden borrar.<br />
Sequence Setting<br />
Preset<br />
Swing SEQ<br />
Group SEQ<br />
Tour SEQ<br />
<strong>PTZ</strong> Trace<br />
Auto Run<br />
Power On Resume OFF<br />
Tour SEQ<br />
Setting<br />
Execute<br />
Clear<br />
Setting : La Secuencia de Grupo registrada es seleccionada con el joystick y se<br />
confirma con la tecla de Ejecución. Si el número seleccionado no está registrado,<br />
no puede ser introducido. Presiona la tecla de Ejecución en la localización con<br />
marca de selección para acabar el proceso de ajustes.<br />
Excute : Se ejecuta la Vigilancia de Grupo.<br />
Clear : Los datos de vigilancia de grupo son borrados.<br />
ESPAÑOL<br />
Sequence Setting<br />
Preset<br />
Swing SEQ<br />
Group SEQ<br />
Tour SEQ<br />
<strong>PTZ</strong> Trace<br />
Auto Run<br />
Power On Resume OFF<br />
Group SEQ<br />
Group 1<br />
Group 2<br />
Group 3<br />
Group 4<br />
Group 5<br />
Group 6<br />
Setting : La posición Programar para la función de movimiento es seleccionada con el<br />
joystick y se confirma con la tecla de Ejecución. <strong>SPD</strong> es la velocidad de movimiento<br />
(001-240˚/sec). DWL es el tiempo de detención(00-99 sec). Presiona la tecla de Ejecución<br />
en la localización con marca de selección para acabar el proceso de ajustes.<br />
Excute : Se puede ejecutar Vigilancia en Movimiento. La tecla Stop(Parar)<br />
designará esta función.<br />
Clear : Los datos de movimiento pueden ser borrados.<br />
<strong>PTZ</strong> Trace :<br />
Un máximo de 4 modelos de trayectoria de manejo manual (para Pan, Tilt; Zoom<br />
Y Enfoque) son memorizados y repetidos.<br />
Sequence Setting<br />
Preset<br />
Swing SEQ<br />
Group SEQ<br />
Tour SEQ<br />
<strong>PTZ</strong> Trace<br />
Auto Run<br />
Power On Resume OFF<br />
<strong>PTZ</strong> Trace<br />
Trace 1<br />
Trace 2<br />
Trace 3<br />
Trace 4<br />
Replay : Las trayectorias de manejo manual son repetidas y puestas de nuevo. La<br />
tecla Stop (Parar) parará la repetición.<br />
* Si la variedad de operaciones es limitada usando límite panorámico y Límite de Inclinación, por<br />
favor fíjese que otras operaciones bajo la variedad de operaciones limitadas no son posibles<br />
CÁMARA SPEED DOME<br />
46<br />
<strong>Manual</strong> de Uso<br />
CÁMARA SPEED DOME<br />
47<br />
<strong>Manual</strong> de Uso
Descripción funcional<br />
Memorize : Operaciones manuales para un mínimo de120 segundos tras la<br />
ejecución de esta función son memorizadas en la memoria interna. Sin embargo, el<br />
tiempo de memorización es diferente dependiendo de la operación <strong>PTZ</strong>. La marca<br />
OVER finalizará esta función.<br />
* Si la variedad de operaciones se limita usando Límite de Panorámica y Límite de inclinación, solo<br />
se memorizan las operaciones dentro de la variedad limitada.<br />
Nota<br />
• Pulse el botón de la pantalla para evitar que la memoria interna continúe guardando.<br />
Auto Run ( Auto arranque) :<br />
Si no hay operación de controlador por parte del usuario durante un tiempo<br />
determinado, la secuencia de operación designada por el usuario será ejecutada.<br />
Mode - • OFF(Apagado) : Auto Run (Auto arranque) será cancelado.<br />
• Preset : Auto arranque en el correspondiente número de Programación.<br />
• Swing : Auto arranque en el correspondiente modo de Movimiento.<br />
• Group : Auto arranque en el correspondiente número de Grupo.<br />
• Tour : Auto arranque en el correspondiente número de Recorrido.<br />
• Trace : Auto arranque en el correspondiente número de Trazado.<br />
• A. Pan : 360˚ Auto arranque en dirección panorámica.<br />
* Auto Pan Speed : Operación Panorámica a la velocidad designada por el usuario<br />
* Tilt Angle : Se mantiene el ángulo de inclinación establecido por el usuario.<br />
Time : La operación de auto arranque se ejecuta tras un cierto tiempo designado<br />
por el usuario.<br />
* El tiempo puede ser establecido por la unidad de 1-59 seg y 1-59 min..<br />
Power On Resume :<br />
Cuando el suministro de energía de la cámara es interrumpido por algún motivo,<br />
tal como un fallo eléctrico, y reanudado, los Ajustes de Secuencia anteriores al<br />
corte de energía son restaurados.<br />
Sequence Setting<br />
Preset<br />
Swing SEQ<br />
Group SEQ<br />
Tour SEQ<br />
<strong>PTZ</strong> Trace<br />
Auto Run<br />
Power On Resume OFF<br />
3) P/T Setting<br />
Pan Limit :<br />
La variedad de movimiento en dirección panorámica puede limitarse.<br />
Main Menu<br />
<strong>Camera</strong> Setting<br />
Sequence Setting<br />
P/T Setting<br />
OSD Setting<br />
Alarm Setting<br />
Initialize<br />
Status<br />
Sequence Setting<br />
Preset<br />
Swing SEQ<br />
Group SEQ<br />
Tour SEQ<br />
<strong>PTZ</strong> Trace<br />
Auto Run<br />
Power On Resume ON<br />
P/T Setting<br />
Pan Limit<br />
Tilt Limit<br />
Area Setting<br />
Area Masking<br />
Prop. P/T<br />
Digital Flip<br />
ON<br />
ON<br />
ESPAÑOL<br />
Position : Se puede establecer la variedad de movimiento. Establecer la posición<br />
desde la izquierda usando el joystick y la tecla de Ejecución. La posición de parada<br />
puede cambiar debido a la inicialización por operaciones tales como la restauración<br />
de energía dependiendo de la posición de ajuste. Esto no significa que no funcione.<br />
On/Off (encendido/ Apagado) : Cuando está función está On (activada), el límite es<br />
efectivo. El ajuste por defecto es Off (apagado).<br />
CÁMARA SPEED DOME<br />
48<br />
<strong>Manual</strong> de Uso<br />
CÁMARA SPEED DOME<br />
49<br />
<strong>Manual</strong> de Uso
Descripción funcional<br />
Tilt Limit :<br />
La variedad de movimiento en la dirección de inclinación puede limitarse.<br />
Main Menu<br />
<strong>Camera</strong> Setting<br />
Sequence Setting<br />
P/T Setting<br />
OSD Setting<br />
Alarm Setting<br />
Initialize<br />
Status<br />
P/T Setting<br />
Pan Limit<br />
Tilt Limit<br />
Area Setting<br />
Area Masking<br />
Prop. P/T<br />
Digital Flip<br />
Position : Se puede establecer la variedad de movimiento. Establecer la posición desde<br />
la dirección tope usando el joystick y la tecla de Ejecución. La posición de parada<br />
puede cambiar debido a la inicialización por operaciones tales como la restauración de<br />
energía dependiendo de la posición de ajuste. Esto no significa que no funcione.<br />
On/Off (Encendido / Apagado) : La aplicación de limitación debe determinarse. El<br />
ajuste por defecto es Off (apagado).<br />
Area Setting : Las áreas pueden ser indicadas. Se pueden designar hasta 8 áreas.<br />
ON<br />
ON<br />
On/Off (encendido/ Apagado) : Se puede determinar si se activa o no la marca de<br />
área. La activación se hace efectiva tan pronto como la posición se mueve desde el<br />
área actual a otras áreas. Establecer el Ajuste de OSD como ON. Si está en modo<br />
OFF (Apagado), está función no trabaja. El ajuste por defecto es OFF (Apagado).<br />
Position : Se puede designar una variedad de Área Usar el joystick y la tecla de<br />
Ejecución para determinar la posición desde la izquierda. Si la variedad de área está<br />
superpuesta, el número de área más pequeño indicará la parte superpuesta.<br />
Area Masking :<br />
Si quieres excluir algunas áreas de la vigilancia, se pueden cambiar a negro.<br />
Puedes ocultar 8 partes de una pantalla (máximo 32 partes).<br />
Main Menu<br />
<strong>Camera</strong> Setting<br />
Sequence Setting<br />
P/T Setting<br />
OSD Setting<br />
Alarm Setting<br />
Initialize<br />
Status<br />
P/T Setting<br />
Pan Limit<br />
Tilt Limit<br />
Area Setting<br />
Area Masking<br />
Prop. P/T<br />
Digital Flip<br />
ON<br />
ON<br />
ESPAÑOL<br />
Main Menu<br />
<strong>Camera</strong> Setting<br />
Sequence Setting<br />
P/T Setting<br />
OSD Setting<br />
Alarm Setting<br />
Initialize<br />
Status<br />
P/T Setting<br />
Pan Limit<br />
Tilt Limit<br />
Area Setting<br />
Area Masking<br />
Prop. P/T<br />
Digital Flip<br />
ON<br />
ON<br />
Position : Usar el joystick y la tecla de Ejecución para determinar la posición de<br />
operación de la pantalla desde la izquierda.<br />
On/Off (Encendido/ Apagado) : Se puede determinar la operación de ocultamiento<br />
de área de pantalla. El ajuste por defecto es OFF (Apagado).<br />
Area Name : Se puede establecer el nombre de área. Usar el joystick y la tecla de<br />
Ejecución para introducir el nombre de área. Un máximo de 12 letras (inglés,<br />
chino, números) pueden ser introducidas. Cuando termines de introducir el<br />
nombre, ajusta la maraca de posición a “SET” usando el joystick y presiona la tecla<br />
de Ejecución. Este es el final del ajuste de Nombre de Área.<br />
CÁMARA SPEED DOME<br />
50<br />
<strong>Manual</strong> de Uso<br />
CÁMARA SPEED DOME<br />
51<br />
<strong>Manual</strong> de Uso
Descripción funcional<br />
Prop. P/T :<br />
Las velocidades de Panorámica o Inclinación se pueden cambiar dependiendo del<br />
aumento del Zoom. Tele bajará la velocidad de Pan/ Tilt y Wide aumentará la<br />
velocidad Pan/ Tilt Llevará sobre 15 segundos para 1 ciclo en modo Tele y sobre<br />
1.5 segundos en modo Wide. El ajuste por defecto es OFF ( Apagado).<br />
Main Menu<br />
<strong>Camera</strong> Setting<br />
Sequence Setting<br />
P/T Setting<br />
OSD Setting<br />
Alarm Setting<br />
Initialize<br />
Status<br />
P/T Setting<br />
Pan Limit<br />
Tilt Limit<br />
Area Setting<br />
Area Masking<br />
Prop. P/T<br />
Digital Flip<br />
Digital Flip :<br />
Cuando se maneja la Inclinación hasta un máximo de 90˚ usando el joystick y<br />
manteniéndolo por un cierto tiempo, la imagen se invierte automáticamente y se ve<br />
el área de inclinación opuesta. Cuando se pretende vigilar el objeto en movimiento<br />
bajo la cámara, se excluye la función de Flip Digital usando el joystick del controlador.<br />
Se puede observer el objeto en movimiento sin inverter la pantalla.<br />
ON<br />
ON<br />
Main Menu<br />
<strong>Camera</strong> Setting<br />
Sequence Setting<br />
P/T Setting<br />
OSD Setting<br />
Alarm Setting<br />
Initialize<br />
Status<br />
<strong>Camera</strong> Name : Se establece el nombre de la cámara.<br />
Main Menu<br />
<strong>Camera</strong> Setting<br />
Sequence Setting<br />
P/T Setting<br />
OSD Setting<br />
Alarm Setting<br />
Initialize<br />
Status<br />
OSD Setting<br />
<strong>Camera</strong> ID<br />
<strong>Camera</strong> Name<br />
Preset Number<br />
Preset Name<br />
Sequence Status<br />
Area Name<br />
<strong>PTZ</strong> Position<br />
Language<br />
OSD Setting<br />
<strong>Camera</strong> ID<br />
<strong>Camera</strong> Name<br />
Preset Number<br />
Preset Name<br />
Sequence Status<br />
Area Name<br />
<strong>PTZ</strong> Position<br />
Language<br />
ON<br />
ON<br />
OFF<br />
OFF<br />
ON<br />
English<br />
ON<br />
ON<br />
OFF<br />
OFF<br />
ON<br />
English<br />
ESPAÑOL<br />
Main Menu<br />
<strong>Camera</strong> Setting<br />
Sequence Setting<br />
P/T Setting<br />
OSD Setting<br />
Alarm Setting<br />
Initialize<br />
Status<br />
P/T Setting<br />
Pan Limit<br />
Tilt Limit<br />
Area Setting<br />
Area Masking<br />
Prop. P/T<br />
Digital Flip<br />
ON<br />
ON<br />
<strong>Camera</strong> Name [ ]<br />
123456789<br />
ABCDEFGHIJKLMNOPQRSTUVWXYZ<br />
abcdefghijklmnopqrstuvwxyz<br />
<strong>Camera</strong> Name<br />
ON/OFF<br />
Edit<br />
ON<br />
4) OSD Setting<br />
<strong>Camera</strong> ID (El Ajuste por defecto es ON) : Indicación de ID de la cámara es establecida.<br />
Edit : Se pueden introducir un máximo de 12 caracteres consistentes de números y<br />
caracteres especiales Ingleses (O chinos, japoneses), para el nombre de la cámara.<br />
On/Off (Encendido/ Apagado) : La operación de esta función es programar.<br />
El ajuste por defecto es OFF (Apagado).<br />
CÁMARA SPEED DOME<br />
52<br />
<strong>Manual</strong> de Uso<br />
CÁMARA SPEED DOME<br />
53<br />
<strong>Manual</strong> de Uso
Descripción funcional<br />
Preset Number (El Ajuste por defecto es ON) :<br />
La numeración de programación es establecida.<br />
Main Menu<br />
<strong>Camera</strong> Setting<br />
Sequence Setting<br />
P/T Setting<br />
OSD Setting<br />
Alarm Setting<br />
Initialize<br />
Status<br />
Preset Name<br />
Main Menu<br />
<strong>Camera</strong> Setting<br />
Sequence Setting<br />
P/T Setting<br />
OSD Setting<br />
Alarm Setting<br />
Initialize<br />
Status<br />
OSD Setting<br />
<strong>Camera</strong> ID<br />
<strong>Camera</strong> Name<br />
Preset Number<br />
Preset Name<br />
Sequence Status<br />
Area Name<br />
<strong>PTZ</strong> Position<br />
Language<br />
OSD Setting<br />
<strong>Camera</strong> ID<br />
<strong>Camera</strong> Name<br />
Preset Number<br />
Preset Name<br />
Sequence Status<br />
Area Name<br />
<strong>PTZ</strong> Position<br />
Language<br />
ON<br />
ON<br />
OFF<br />
OFF<br />
ON<br />
English<br />
ON<br />
ON<br />
OFF<br />
OFF<br />
ON<br />
English<br />
On/Off ( Encendido/ Apagado) : La operación de esta función está predeterminada.<br />
El ajuste por defecto es On (Encendido).<br />
Sequence Status (El Ajuste por defecto es ON) :<br />
La visualización del Grupo de Secuencia está establecida.<br />
Main Menu<br />
<strong>Camera</strong> Setting<br />
Sequence Setting<br />
P/T Setting<br />
OSD Setting<br />
Alarm Setting<br />
Initialize<br />
Status<br />
Area Name : La visualización del Nombre de Área está establecida.<br />
* Cuando el Nombre de Área está Off (Apagado), el Nombre de Área no puede ser visualizado.<br />
Main Menu<br />
<strong>Camera</strong> Setting<br />
Sequence Setting<br />
P/T Setting<br />
OSD Setting<br />
Alarm Setting<br />
Initialize<br />
Status<br />
OSD Setting<br />
<strong>Camera</strong> ID ON<br />
<strong>Camera</strong> Name<br />
Preset Number ON<br />
Preset Name<br />
Sequence Status OFF<br />
Area Name OFF<br />
<strong>PTZ</strong> Position ON<br />
Language English<br />
OSD Setting<br />
<strong>Camera</strong> ID ON<br />
<strong>Camera</strong> Name<br />
Preset Number ON<br />
Preset Name<br />
Sequence Status OFF<br />
Area Name OFF<br />
<strong>PTZ</strong> Position ON<br />
Language English<br />
ESPAÑOL<br />
Preset Name [ ]<br />
123456789<br />
ABCDEFGHIJKLMNOPQRSTUVWXYZ<br />
abcdefghijklmnopqrstuvwxyz<br />
Preset Name<br />
ON/OFF<br />
Edit<br />
Edit : Se pueden introducir un máximo de 12 caracteres consistentes de números y<br />
caracteres especiales Ingleses (O Chinos, Japonese), para el nombre de la programación.<br />
ON<br />
<strong>PTZ</strong> Position : Se visualizan las posiciones de Panorámica e Inclinación y el aumento del Zoom.<br />
* Las posiciones <strong>PTZ</strong> (Panorámica, Inclinación y Zoom) no se ven en el modo OFF (Apagado) (Solo se pueden<br />
visualizar con operación manual.)<br />
Main Menu<br />
<strong>Camera</strong> Setting<br />
Sequence Setting<br />
P/T Setting<br />
OSD Setting<br />
Alarm Setting<br />
Initialize<br />
Status<br />
OSD Setting<br />
<strong>Camera</strong> ID ON<br />
<strong>Camera</strong> Name<br />
Preset Number ON<br />
Preset Name<br />
Sequence Status OFF<br />
Area Name OFF<br />
<strong>PTZ</strong> Position ON<br />
Language English<br />
CÁMARA SPEED DOME<br />
54<br />
<strong>Manual</strong> de Uso<br />
CÁMARA SPEED DOME<br />
55<br />
<strong>Manual</strong> de Uso
Descripción funcional<br />
Language : La representación en pantalla podrá visualizarse en inglés<br />
(configuración por defecto) o en chino.<br />
Main Menu<br />
<strong>Camera</strong> Setting<br />
Sequence Setting<br />
P/T Setting<br />
OSD Setting<br />
Alarm Setting<br />
Initialize<br />
Status<br />
5) Alarm Setting<br />
Alarm Enable : Se puede determinar la activación de ajustes de alarma.<br />
Main Menu<br />
<strong>Camera</strong> Setting<br />
Sequence Setting<br />
P/T Setting<br />
OSD Setting<br />
Alarm Setting<br />
Initialize<br />
Status<br />
Alarm Setting<br />
Alarm Enable<br />
Alarm Input<br />
Alarm Output<br />
MD Dwell Time<br />
Alarm Input : Entrada de Alarma Modo/Prioridad/Método es establecida.<br />
Alarm Setting<br />
Alarm Enable<br />
Alarm Input<br />
Alarm Output<br />
MD Dwell Time<br />
ON<br />
ON 30 SEC<br />
OSD Setting<br />
<strong>Camera</strong> ID ON<br />
<strong>Camera</strong> Name<br />
Preset Number ON<br />
Preset Name<br />
Sequence Status OFF<br />
Area Name OFF<br />
<strong>PTZ</strong> Position ON<br />
Language English<br />
ON<br />
Alarm Input<br />
IN 1 OFF 1 OFF<br />
IN 2 OFF 2 OFF<br />
IN 3 OFF 3 OFF<br />
IN 4 OFF 4 OFF<br />
ON 30 SEC<br />
On/Off (Encendido/ Apagado) : La alarma está activada en el modo On ( Encendido).<br />
NC/NO/OFF : NC/NO/OFF puede ser seleccionado dependiendo del sensor de la alarma.<br />
1 - 4 (Priority) : Se establece prioridad para la alarma 4. La alarma de prioridad<br />
más alta será la primera en responder.<br />
Preset/Swing/Group/Tour/Trace/A.Pan :<br />
Se puede setablecer si acativar la operación dePreset/Swing/Group/Tour/Trace/<br />
A.Pan mediante la introducción de alarma. Cuando se introduce la alarma,<br />
permanece en la posición Preset/Swing/Group/Tour/Trace/A.Pan para la hora<br />
acordada establecida.<br />
Alarm Output :<br />
Una de las dos salidas de alarma corresponde a cada entrada de alarma.<br />
Alarm Setting<br />
Alarm Enable<br />
Alarm Input<br />
Alarm Output<br />
MD Dwell Time<br />
ON<br />
ON 30 SEC<br />
Alarm Output<br />
Setting 1 1 2 3 4 MD<br />
Setting 2 1 2 3 4 MD<br />
Timer 1 OFF<br />
Timer 2 OFF<br />
OUT Off 1<br />
OUT Off 2<br />
OUT1 SET / OUT2 SET : Una de las 4 Entradas de Alarma corresponde a las 2<br />
Salidas de Alarma.<br />
OUT 1 TIME / OUT 2 TIME TIEMPO : Para las 2 salidas de alarma, On / Off y el<br />
tiempo de operación puede ser establecido en las unidades de segundo/minuto/hora.<br />
(1-59 seg, 1-59 min, 1-59 horas)<br />
OUT 1 OFF / OUT 2 OFF : Si quieres cancelar las salidas de Alarma operativas a la<br />
vez, selecciona el menú correspondiente para cancelar la alarma operativa.<br />
ESPAÑOL<br />
CÁMARA SPEED DOME<br />
56<br />
<strong>Manual</strong> de Uso<br />
CÁMARA SPEED DOME<br />
57<br />
<strong>Manual</strong> de Uso
Descripción funcional<br />
MD Dwell Time : cuando la función de detección de movimiento esté activada, el equipo<br />
podrá detectar el movimiento de intrusos. Cuando se detecte movimiento, la señal de<br />
alarma aparecerá en la terminal de salida de la alarma. Para más información acerca de la<br />
configuración detallada de la Detección de movimiento para cada menú de valores predeterminados,<br />
consulte las páginas 45 y 46.<br />
Alarm Setting<br />
Alarm Enable<br />
Alarm Input<br />
Alarm Output<br />
MD Dwell Time<br />
ON<br />
OFF<br />
Alarm Setting<br />
Alarm Enable<br />
Alarm Input<br />
Alarm Output<br />
MD Dwell Time<br />
On/Off (Encendido/ Apagado) : Se puede establecer el tiempo en el que se<br />
mantendrá la operación cuando el movimiento es detectado. (1-59 seg, 1-59 min)<br />
ON<br />
ON 30 SEC<br />
<strong>Camera</strong> Default Set : Si solo se reemplaza el módulo cámara debido a un fallo del<br />
módulo cámara, el nuevo módulo de cámara puede ser establecido dentro de los<br />
ajustes del módulo de la vieja cámara.<br />
Auto Refresh : El circuito eléctrico y el estado de las partes del equipo dentro de<br />
la cámara son optimizados regularmente. (El ciclo puede ser establecido.) Si la<br />
cámara está enfrente a cierta fuente de luz o si los ajustes no se pudieran<br />
mantener debido a la grabación rotativa de largo plazo de una área concreta, la<br />
función de autoenfriamiento se utiliza para mantener y reestablecer los ajustes<br />
de cámara actuales. El ajuste por defecto es OFF ( Apagado).<br />
OFF, 1-7 Day : T función se desactiva en el modo OFF (Apagado). 1-7 Días permite<br />
la función de auto enfriamiento en el intervalo de los días seleccionados- El auto<br />
enfriamiento lleva menos de 10 segundos. El mensaje “Auto Enfriamiento”<br />
desaparece después de que acabe la operación.<br />
Initial Position : Si desea ajustar la dirección predefinida de la cámara de modo que<br />
quede orientada en esa dirección cuando se alimente corriente, puede configurar el<br />
Pan y Tilt deseados para la cámara.<br />
ESPAÑOL<br />
6) Initialize<br />
• Menú Initialize<br />
7) Status<br />
El estado de la cámara domo es visualizado.<br />
Main Menu<br />
<strong>Camera</strong> Setting<br />
Sequence Setting<br />
P/T Setting<br />
OSD Setting<br />
Alarm Setting<br />
Initialize<br />
Status<br />
Initialize<br />
Power ON Reset<br />
Factory Default Set<br />
<strong>Camera</strong> Default Set<br />
Auto Refresh OFF<br />
Initial Position<br />
Main Menu<br />
<strong>Camera</strong> Setting<br />
Sequence Setting<br />
P/T Setting<br />
OSD Setting<br />
Alarm Setting<br />
Initialize<br />
Status<br />
<strong>Camera</strong> Status<br />
CAM MODEL = 30NC<br />
CAM VERSION = 03.06<br />
DOME VERSION = 00.18<br />
CON PROTOCOL = SAMSUNG TW<br />
DOME ID = 001<br />
CONTROLLER = Duplex-9600<br />
Power On Reset :<br />
La cámara se reinicia en el estado original de entrada de energía.<br />
Factory Default Set : La cámara se reinicia con los ajustes preestablecidos de<br />
fábrica Los datos incluidos en la programación se borran.<br />
Esta función es utilizada para reiniciar todos los ajustes.<br />
Modelo de Cámara= 30NC<br />
Versión de Cámara= 03.06<br />
Versión Domo = 00.01<br />
Con Protocolo= SAMSUNG TW<br />
ID Domo = 001<br />
Modo dado = DUPLEX-9600<br />
Modelo de Cámara<br />
Versión S/W de Cámara<br />
Panel de Control Versión S/W<br />
Estado de Ajustes de Protocolo<br />
ID Cámara Domo<br />
Estado de Ajuste del Modo de Comunicación<br />
CÁMARA SPEED DOME<br />
58<br />
<strong>Manual</strong> de Uso<br />
CÁMARA SPEED DOME<br />
59<br />
<strong>Manual</strong> de Uso
Estructura del producto e instalación<br />
Estructura del Producto<br />
Instalación<br />
Montaje para el techo tipo (STB-330PC)<br />
Fuente<br />
Voltaje de<br />
electricidad: 24V<br />
Cubierta<br />
ESPAÑOL<br />
Proceso para el techo tipo (STB-330PC)<br />
243.4<br />
215.7 27.7<br />
Voltaje de<br />
electricidad: 24V<br />
Cubierta<br />
R75<br />
Ø155<br />
*Otras instalaciones: La instalación de accesorios exteriores, los cuales se venden por<br />
separado, puede ser llevada a a cabo de varias formas. (Ver las<br />
páginas 25 y 26 para los accesorios en venta.)<br />
CÁMARA SPEED DOME 60 <strong>Manual</strong> de Uso<br />
CÁMARA SPEED DOME<br />
61<br />
<strong>Manual</strong> de Uso
Estructura del producto e instalación<br />
Instalación 1<br />
Instalación 2<br />
ESPAÑOL<br />
CÁMARA SPEED DOME 62 <strong>Manual</strong> de Uso<br />
CÁMARA SPEED DOME<br />
63<br />
<strong>Manual</strong> de Uso
Especificaciones<br />
Mecanismo öptico<br />
TV<br />
Número Total de Pixels<br />
Pixel Válido<br />
Frecuencia de exploración horizontal<br />
Frecuencia de exploración vertical<br />
Sincronización<br />
Salida de Imagen<br />
Proporción S/N<br />
Resolución Horizontal<br />
Luz minima para el objeto<br />
Obturador Electrónico<br />
Aumento Automático de la Seguridad<br />
Día y Noche<br />
Estabilizador<br />
Balance de Blanco<br />
Ajuste sin parapadeo<br />
Iris<br />
Control Aumento<br />
Visualización OSD<br />
Corrección de contorno<br />
Distancia Punto de Contacto<br />
Zoom Digital<br />
Media máxima de apertura<br />
Ángulo de Cobertura<br />
Distancia Proximidad<br />
Ángulo de Rotación Horizontal<br />
Rotación Horizontal<br />
Velocidad de Rotación horizontal<br />
Ángulo mínimo de movimiento<br />
horizontal<br />
<strong>SPD</strong>-<strong>3000</strong><br />
<strong>SPD</strong>-<strong>2300</strong><br />
1/4” Color Transferencia Del Interline CCD. 410.000pixel<br />
NTSC<br />
811(H) X 508(V)<br />
768(H) X 494(V)<br />
15.734kHz<br />
59.94Hz<br />
Sinc. Interna/ Sinc. Externa(AC Bloqueo Línea)<br />
1.0p –p/75Ω<br />
Mas alta que 50dB (AGC OFF)<br />
520 TV Líneas (Color)/570 TV Líneas(B/N)<br />
0.7Lux(Color), 0.1Lux(B/W)/(@50IRE), 0.0007Lux (Día y Noche está On.)/(@50IRE)<br />
Auto/<strong>Manual</strong> (1/60 - 1/120.000)<br />
ON (x2~ x128 Fields) / OFF<br />
ICR(Interrupción Filtro) ON/OFF<br />
Corrección de la vibración de la cámara: el estabilizador puede activarse o desactivarse.<br />
ATW (selección interior/exterior)/AWC/<strong>Manual</strong> (1,800K - 10,500K)<br />
Velocidad de Obturador Fija (1/100)<br />
Auto/<strong>Manual</strong> (IModo de Ajuste de Nivel de Iris)<br />
Bajo, Medio, Alto, Apagado<br />
ON/OFF<br />
Nivel ajustable<br />
F3.3~99.0mm(30X Optical Zoom) F3.84~88.4mm(23X Optical Zoom)<br />
OFF, 2~10X selección (Total 300X Zoom) OFF, 2~10X selección (Total 230X Zoom)<br />
Ángulo de Luz 1:1.6 Telescopico 1:3.2 Ángulo de Luz 1:1.6 Telescopico 1:3.0<br />
Wide: 58.0˚(H) X 44.8˚(V)<br />
Wide: 52.5˚(H) X 40.3˚(V)<br />
Tele: 2.22˚(H) X 1.68˚(V)<br />
Tele: 2.36˚(H) X 1.78˚(V)<br />
1.2m(Tele level)<br />
360˚<br />
<strong>Manual</strong>/Program<br />
<strong>Manual</strong>: 0.5˚ ~ 120˚/s(64 levels) Preset: 0.5˚ ~ 240˚/s(64 levels)<br />
0.05˚<br />
Eficacia de la detención de rotación<br />
horizontal<br />
Ángulo de Rotación Vertical<br />
Rotación Vertical<br />
Velocidad de Rotación Vertical<br />
Ángulo mínimo de movimiento<br />
vertical<br />
Precisión al detener la rotación<br />
vertical<br />
Posición Programar<br />
Área oculta<br />
Alarma<br />
Temperatura en Funcionamiento<br />
Humedad en Funcionamiento<br />
Temperatura de Almacenamiento<br />
Humedad de Almacenamiento<br />
Energía, Voltaje<br />
Consumo energético<br />
Dimensión<br />
Peso<br />
Condiciones de Instalación<br />
0.30˚<br />
-4˚ ~ 184˚ (Flip Digital)<br />
<strong>Manual</strong>/Program<br />
<strong>Manual</strong>: 0.5˚ ~ -120˚/s(64 levels) Preset: 0.5˚ ~ -240˚/s(64 levels)<br />
0.05˚<br />
0.30˚<br />
Máx 128 puntos<br />
Máx 4 localizaciones<br />
4 Entradas de alarma<br />
2 Salidas de Alarma (Repetidor: NC/NO/COM, 2A 30VDC Max)<br />
-10˚C - +50˚C<br />
20% ~ 75%(Excepto por condensación de rocío)<br />
-20˚C - +60˚C<br />
20% ~ 95%(Excepto por condensación de rocío)<br />
AC 24V±10%<br />
Pausa 8 Watts, Funcionamiento 10 Watts<br />
Ø155 X 243.4mm<br />
Menos que 2.0kg<br />
Montaje en techo: STB-330PC<br />
Interior: Cubierta Interior(STH-330PI),<br />
Inserción Interior Cubierta Tipo (STH-330PE)<br />
Exterior: Cubierta Exterior (STH-330PO)<br />
Montaje de Instalación en Muro: STB-270PW<br />
Montaje de Instalación en techo: STB-496PP<br />
* El diseño y dimension del producto pueden cambiar sin previo aviso por mejora de funcionamiento.<br />
• El copyright de este manual pertenece a <strong>Samsung</strong> Techwin Co. Ltd.<br />
• Este manual no puede ser reproducido o transmitido parcial o globalmente por ningún mecanismo eléctrico,<br />
mecánico o de audio sin la aprobación autorizada por escrito de <strong>Samsung</strong> Techwin.<br />
• Los contenidos de este manual pueden ser cambiados por una mejora de funciones.<br />
ESPAÑOL<br />
CÁMARA SPEED DOME 64 <strong>Manual</strong> de Uso<br />
CÁMARA SPEED DOME<br />
65<br />
<strong>Manual</strong> de Uso
DECLARATION OF CONFORMITY<br />
Application of Council Directive(s) EMC-Directive 89/336 EEC and its amendments<br />
Manufacturer's Name<br />
SAMSUNG TECHWIN CO., LTD<br />
Manufacturer's Address<br />
SAMSUNG TECHWIN CO., LTD<br />
42, SUNGJU-DONG CHANGWON-CITY,<br />
KYUNGNAM, KOREA, 641-120<br />
European Representative Name<br />
European Representative Address<br />
Equipment Type/Environment <strong>Dome</strong> <strong>Camera</strong><br />
Model Name<br />
<strong>SPD</strong>-<strong>3000</strong>P/<strong>2300</strong>P<br />
Beginning Serial NO.<br />
S6600001<br />
Year of Manufacture 2006. 6. 1<br />
Conformance to EN 55022 : 1994 +A1 : 1995 +A2 : 1997<br />
EN 50130-4 : 1995 +A1 :1998<br />
We, the undersigned, hereby declare that the equipment specified above conforms<br />
to the above Directive(s).<br />
Manufacturer SAMSUNG TECHWIN CO., LTD Legal Representative in Europe<br />
Signature<br />
Signature<br />
Full Name HAN SEUG KIM Full Name<br />
Position QUALITY CONTROL MANAGER Position<br />
Place CHANGWON, KOREA Place<br />
Date 2006. 6. 1 Date