INSTRUCTION MANUAL
INSTRUCTION MANUAL
INSTRUCTION MANUAL

Create successful ePaper yourself
Turn your PDF publications into a flip-book with our unique Google optimized e-Paper software.
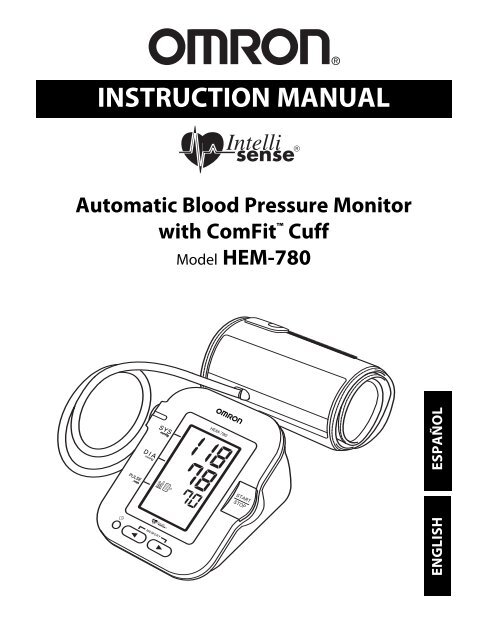
®<br />
<strong>INSTRUCTION</strong> <strong>MANUAL</strong><br />
Automatic Blood Pressure Monitor<br />
with ComFit Cuff<br />
Model HEM-780<br />
780<br />
ENGLISH ESPAÑOL
CONTENTS<br />
Before Using the Monitor<br />
Introduction . . . . . . . . . . . . . . . . . . . . . . . . . . . . . . . . . . . . . . . . . .3<br />
Important Safety Notes . . . . . . . . . . . . . . . . . . . . . . . . . . . . . . . . . .4<br />
Before Taking a Measurement . . . . . . . . . . . . . . . . . . . . . . . . . . . .5<br />
Operating Instructions<br />
Know Your Unit . . . . . . . . . . . . . . . . . . . . . . . . . . . . . . . . . . . . . . .6<br />
Unit Display . . . . . . . . . . . . . . . . . . . . . . . . . . . . . . . . . . . . . . . . . .7<br />
Irregular Heartbeat Symbol . . . . . . . . . . . . . . . . . . . . . . . . . . . . . 7<br />
Battery Installation . . . . . . . . . . . . . . . . . . . . . . . . . . . . . . . . . . . . .8<br />
Using the AC Adaptor . . . . . . . . . . . . . . . . . . . . . . . . . . . . . . . . . .9<br />
Setting the Date and Time . . . . . . . . . . . . . . . . . . . . . . . . . . . . . .10<br />
Applying the Arm Cuff . . . . . . . . . . . . . . . . . . . . . . . . . . . . . . . .13<br />
Taking a Measurement . . . . . . . . . . . . . . . . . . . . . . . . . . . . . . . . .16<br />
Using the Memory Function . . . . . . . . . . . . . . . . . . . . . . . . . . . .18<br />
Care and Maintenance<br />
Care and Maintenance . . . . . . . . . . . . . . . . . . . . . . . . . . . . . . . . .20<br />
Error Indicators . . . . . . . . . . . . . . . . . . . . . . . . . . . . . . . . . . . . . .21<br />
Troubleshooting Tips . . . . . . . . . . . . . . . . . . . . . . . . . . . . . . . . . .22<br />
Quick Reference Guide . . . . . . . . . . . . . . . . . . . . . . . . . . . . . . . .23<br />
FCC Statement . . . . . . . . . . . . . . . . . . . . . . . . . . . . . . . . . . . . . . .25<br />
Warranty Information . . . . . . . . . . . . . . . . . . . . . . . . . . . . . . . . . .26<br />
Specifications . . . . . . . . . . . . . . . . . . . . . . . . . . . . . . . . . . . . . . . .27<br />
2
INTRODUCTION<br />
Thank you for purchasing the Omron HEM-780 IntelliSense ®<br />
Automatic Blood Pressure Monitor with the ComFit Cuff.<br />
Fill in for future reference.<br />
DATE PURCHASED: __________________<br />
SERIAL NUMBER: ____________________<br />
Staple your purchase receipt here<br />
Your new digital blood pressure monitor uses the oscillometric method<br />
of blood pressure measurement. This means the monitor detects your<br />
blood movement through your brachial artery and converts the<br />
movements into a digital reading. An oscillometric monitor does not<br />
need a stethoscope so the monitor is simple to use.<br />
The HEM-780 comes with the following components:<br />
• Monitor • ComFit Cuff<br />
• AC Adapter • 4 “AA” Batteries<br />
• Storage Case<br />
• Instruction Manual printed in English and Spanish<br />
The HEM-780 IntelliSense ® Automatic Inflation Blood Pressure Monitor<br />
is intended for home use.<br />
SAVE THESE <strong>INSTRUCTION</strong>S<br />
3
IMPORTANT SAFETY NOTES<br />
To assure the correct use of the product basic safety measures should<br />
always be followed including the precautions listed below:<br />
Read all information in the instruction book and any other literature<br />
included in the box before using the unit.<br />
Contact your physician for specific information about your blood<br />
pressure. Follow the instructions of your healthcare provider.<br />
Operate the unit only as intended. Do not use for any other purpose.<br />
The unit is intended for use in measuring blood pressure and pulse<br />
rate in adult patient population. Do not use on infants or persons who<br />
cannot express their intentions.<br />
Do not use a cellular phone near the unit. It may result in<br />
operational failure.<br />
Do not plug or unplug the adapter power cord with wet hands.<br />
Changes or modifications not approved by Omron Healthcare will<br />
void the user warranty. Do not disassemble or attempt to repair the<br />
unit or components.<br />
4
BEFORE TAKING A MEASUREMENT<br />
To ensure a reliable reading follow these recommendations:<br />
1. Avoid eating, smoking, and exercising for 30 minutes before<br />
taking a measurement. Rest for at least 15 minutes before taking<br />
the measurement.<br />
2. Stress raises blood pressure. Avoid taking measurements during<br />
stressful times.<br />
3. Measurements should be taken in a quiet place.<br />
4. Remove tight-fitting clothing from your left arm.<br />
5. Sit in a chair with your feet flat on the floor. Rest your left arm on<br />
a table so that the cuff is at the same level as your heart.<br />
6. Remain still and do not talk during the measurement.<br />
7. Keep a record of your blood pressure and pulse readings for your<br />
physician. A single measurement does not provide an accurate<br />
indication of your true blood pressure. You need to take and record<br />
several readings over a period of time. Try to measure your blood<br />
pressure at the same time each day for consistency.<br />
8. Wait 2-3 minutes between measurements. The wait time allows the<br />
arteries to return to the condition prior to taking the blood pressure<br />
measurement. You may need to increase the wait time depending on<br />
your individual physiological characteristics.<br />
5
KNOW YOUR UNIT<br />
Main Unit:<br />
Display<br />
Battery Compartment<br />
Start/Stop<br />
Button<br />
Memory<br />
Date/Time Setting Button<br />
Buttons<br />
Air Jack<br />
AC Adapter Jack<br />
Components:<br />
Air Tube<br />
Grip<br />
Air Plug<br />
(Connects to Air Jack)<br />
Arm Cuff<br />
Storage Case<br />
AC Adapter<br />
6
UNIT DISPLAY<br />
Systolic Blood Pressure<br />
Diastolic Blood Pressure<br />
Memory Symbol<br />
Average Value Symbol<br />
Movement Error Symbol<br />
Heartbeat Symbol<br />
Pulse Display<br />
Deflation Symbol<br />
Date/Time Display<br />
Battery Low Symbol<br />
Irregular Heartbeat Symbol<br />
IRREGULAR HEARTBEAT SYMBOL<br />
IRREGULAR HEARTBEAT SYMBOL<br />
When the monitor detects an irregular rhythm two or more times during<br />
the measurement, the Irregular Heartbeat Symbol ( )<br />
will appear on the display with the measurement values.<br />
The irregular heartbeat rhythm is defined<br />
Normal Heartbeat<br />
as a rhythm that varies by more than or less Pulse<br />
than 25% from the average rhythm detected<br />
Blood<br />
while the monitor is measuring the<br />
pressure<br />
systolic and diastolic blood pressure.<br />
Irregular Heartbeat<br />
Short Long<br />
Pulse<br />
If the irregular heartbeat symbol ( )<br />
displays with your measurement results we<br />
recommend you consult your physician.<br />
Follow the directions of your doctor.<br />
Blood<br />
pressure<br />
7
BATTERY INSTALLATION<br />
1. Press the ▼ indicator on the battery cover<br />
and slide the cover off in the direction of<br />
the arrow.<br />
2. Install 4 “AA” size batteries so the<br />
+ (positive) and - (negative) polarities<br />
match the polarities of the battery<br />
compartment as indicated.<br />
3. Replace the battery cover.<br />
BATTERY REPLACEMENT<br />
Low Battery Indicator<br />
When the Low Battery Indicator appears on the display screen remove<br />
all the batteries. Replace with four new batteries at the same time.<br />
Long-life alkaline batteries are recommended.<br />
NOTE: Measurement values stored in the memory will not be deleted<br />
during battery replacement.<br />
After replacing the batteries, reset the date and time.<br />
Refer to page 10, Setting the Date and Time.<br />
8
USING THE AC ADAPTER<br />
Use only the authorized Omron AC Adapter, Model Number HEM-ADPT1,<br />
with this monitor. Use of any other adapter may cause damage to the<br />
monitor and will void the user warranty.<br />
To connect the AC Adapter<br />
1<br />
2<br />
1 Insert the AC Adapter Plug into the AC Adapter Jack on the back side<br />
of the monitor as illustrated.<br />
2 Plug the AC Adapter into a 120V AC outlet (60 cycles).<br />
To disconnect the AC Adapter remove the AC Adapter from the electrical<br />
outlet first and then remove the AC Adapter Plug from the monitor.<br />
NOTE: The monitor is designed not to draw power from the batteries<br />
when the AC Adapter is used.<br />
9
®<br />
®<br />
®<br />
SETTING THE DATE AND TIME<br />
The Blood Pressure Monitor automatically stores up to 90 measurement<br />
values with the date and time. The monitor also calculates an average<br />
reading based on the last three measurement values.<br />
Set the monitor to the current date and time before taking a measurement<br />
for the first time. If the current date and time is not set, a default date<br />
and time will display.<br />
1. TO START THE SETTING<br />
Press the Date/Time Setting<br />
button to adjust the date<br />
and time.<br />
The year flashes on the display.<br />
2. SETTING THE YEAR<br />
The year can be set between 2004 and 2030.<br />
When the display reaches 2030, it will return<br />
to 2004.<br />
Press the MEMORY up button to<br />
advance by increments of one year.<br />
Press the Date/Time Setting button to set<br />
the current year.<br />
The month flashes on the display.<br />
NOTES: • Press the MEMORY down button to decrease the day<br />
NOTE: • Press and time the values down by increments memory button of one. to decrease the day and<br />
time<br />
• Press<br />
values<br />
and hold<br />
by increments<br />
the MEMORY<br />
of one.<br />
up button to increase or memory<br />
• Press down and button holdthe to decrease memory the down date button and time to values increase faster.<br />
10
®<br />
®<br />
SETTING THE DATE AND TIME<br />
3. SETTING THE MONTH<br />
Press the MEMORY up button to advance by increments<br />
of one month.<br />
Press the Date/Time Setting button to set the current month.<br />
The day flashes on the display.<br />
4. SETTING THE DAY<br />
Press the MEMORY up button to advance<br />
by increments of one day.<br />
Press the Date/Time Setting button to set<br />
the current day.<br />
The hour flashes on the display.<br />
5. SETTING THE HOUR<br />
The time is set using AM or PM.<br />
Press the MEMORY up button to advance by increments<br />
of one hour.<br />
Press the Date/Time Setting button to set the<br />
current hour.<br />
The minutes flash on the display.<br />
11
SETTING THE DATE AND TIME<br />
6. SETTING THE MINUTE<br />
Press the MEMORY up button to advance by increments<br />
of one minute.<br />
Press the Date/Time Setting button to set the current minute.<br />
The year flashes on the display.<br />
7. Press the START/STOP button to turn the display off.<br />
12
APPLYING THE ARM CUFF<br />
1. Make sure the air plug is securely inserted in the main unit.<br />
2. Remove tight-fitting clothing from your upper arm.<br />
3. Sit in a chair with your feet flat on the floor. Place your arm on a<br />
table so the cuff is level with your heart.<br />
13
APPLYING THE ARM CUFF<br />
4. Hold the grip on the cuff securely<br />
with your hand.<br />
Grip<br />
Closure Strip<br />
5. Turn the palm of your hand upward.<br />
6. Apply the cuff to your left upper arm so the blue strip is on the inside<br />
of your arm and aligned with your middle finger. The air tube runs<br />
down the inside of your arm. The bottom of the cuff should be<br />
approximately 1/2" above your elbow.<br />
Blue Strip<br />
1/2 inch (1 - 2 cm)<br />
Air Tube<br />
14
APPLYING THE ARM CUFF<br />
7. Wrap the cuff firmly in place around your arm using the closure strip.<br />
APPLYING THE CUFF ON THE RIGHT ARM<br />
When taking a measurement using the right arm use this instruction<br />
for Step 6.<br />
Apply the cuff to your right upper arm so the grip is centered on<br />
the inside of your inner arm. The bottom of the cuff should be<br />
approximately 1/2'' above your elbow.<br />
Grip<br />
NOTE: Be careful not to rest your arm on the air tube. This will restrict<br />
the flow of air to the cuff<br />
15
®<br />
TAKING A MEASUREMENT<br />
The monitor automatically determines your ideal inflation level. In rare<br />
circumstances when a higher inflation may be necessary, the monitor<br />
automatically re-inflates the cuff up to 30 mmHg higher than the initial<br />
inflation and restarts the measurement.<br />
1. Press the START/STOP button.<br />
All display symbols appear on the screen. The cuff starts to inflate<br />
automatically.<br />
NOTE: To stop the inflation or measurement, push the<br />
START/STOP button. The monitor will stop inflating,<br />
start deflating, and will turn off.<br />
2. Inflation stops automatically and the measurement is started.<br />
As the cuff deflates, decreasing<br />
numbers appear on the display.<br />
The Heart Symbol ( ) flashes<br />
at every heartbeat.<br />
16
®<br />
®<br />
TAKING A MEASUREMENT<br />
3. You3blood When the measurement pressure and is pulse complete, rate are the displayed.<br />
cuff completely deflates. Your blood pressure<br />
arm<br />
and pulse rate are displayed.<br />
4. Press the START/STOP button to<br />
turn the monitor off.<br />
NOTE: The monitor will automatically<br />
turn off after five minutes.<br />
<strong>INSTRUCTION</strong>S FOR SPECIAL CONDITIONS<br />
If your systolic pressure is known<br />
to be more than 220 mmHg,<br />
press and hold the START/STOP<br />
button until the monitor inflates<br />
30 to 40 mmHg higher than your<br />
suspected systolic pressure.<br />
NOTES:<br />
• Do not apply more pressure than necessary.<br />
• The monitor will not inflate above 299 mmHg.<br />
17
®<br />
USING THE MEMORY FUNCTION<br />
Every time you complete a measurement the monitor stores the blood<br />
pressure and pulse rate in the memory. The Blood Pressure Monitor<br />
automatically stores up to 90 measurement values. When 90 sets of<br />
measurement values are stored in the memory, the oldest record is<br />
deleted to save the most recent measurement values.<br />
The monitor also calculates an average reading based on the values of<br />
the three most recent measurements taken. If the date and time is not<br />
set, the measurement values will not be stored in the memory correctly.<br />
TO DISPLAY THE AVERAGE VALUE<br />
Average Value Symbol<br />
1. Press the MEMORY down button. The average value symbol<br />
will display on the screen with the average reading.<br />
18
®<br />
®<br />
USING THE MEMORY FUNCTION<br />
TO DISPLAY THE MEASUREMENT VALUES<br />
The date and time is alternately displayed with the measurement values.<br />
1. Press the MEMORY down button to display the most recent<br />
measurement values on the screen.<br />
Press the MEMORY up button to display the oldest<br />
measurement values.<br />
Alternating display<br />
NOTES: • Press the button repeatedly to display the next values.<br />
• Press and hold the button to display the values faster.<br />
2. Press the START/STOP button to turn the power off.<br />
TO DELETE ALL VALUES STORED IN THE MEMORY<br />
You cannot partially delete records stored in the memory.<br />
All records will be deleted.<br />
1. Press and hold the MEMORY down button and<br />
START/STOP button simultaneously for more than 2 seconds.<br />
19
CARE AND MAINTENANCE<br />
To keep your digital blood pressure monitor in the best condition and<br />
protect the unit from damage follow the directions listed below:<br />
Keep the monitor in the storage case when<br />
not in use. Make sure the AC Adapter is<br />
placed under the main unit so that is does not<br />
damage the display.<br />
Do not forcefully bend the arm cuff<br />
or air tube. Do not fold tightly.<br />
Clean the monitor with a soft dry cloth.<br />
Do not use any abrasive or volatile cleaners.<br />
Do not attempt to clean the cuff. Never immerse the monitor or any<br />
components in water.<br />
Store the monitor in a safe and dry location. Do not subject the monitor<br />
to extreme hot or cold temperatures, humidity and direct sunlight.<br />
Avoid subjecting the monitor to strong shocks, such as dropping the<br />
unit on the floor.<br />
Remove the batteries if the unit will not be used for three months or<br />
longer. Always replace all the batteries with new ones at the same time.<br />
Use the unit consistent with the instruction provided in this manual.<br />
Use only authorized parts and accessories.<br />
20
ERROR INDICATORS<br />
SYMBOL CAUSE CORRECTION<br />
Monitor did not detect<br />
pulse rate<br />
Remove the arm cuff. Refer to<br />
“Applying the arm cuff” on page<br />
13. Wait 2-3 minutes.<br />
Take another measurement.<br />
Cuff under-inflated<br />
Cuff over-inflated<br />
Remove the arm cuff.<br />
Read, “Taking a<br />
Measurement” on page 16.<br />
Wait 2-3 minutes.<br />
Take another measurement.<br />
Batteries are worn<br />
Movement during<br />
measurement<br />
Replace the four batteries.<br />
Refer to page 8 for<br />
battery installation.<br />
Remove the arm cuff. Wait 2-3<br />
minutes. Take another<br />
measurement. Remain still<br />
during the measurement.<br />
21
TROUBLESHOOTING TIPS<br />
No power.<br />
PROBLEM<br />
No display appears on the unit.<br />
Measurement values appear<br />
too high or too low.<br />
CAUSES AND SOLUTIONS<br />
Replace worn batteries.<br />
Check the battery installation<br />
for proper placement of the<br />
battery polarities.<br />
Blood pressure varies constantly.<br />
Many factors including stress, time<br />
of day, how you wrap the cuff, may<br />
affect your blood pressure.<br />
Review the sections “Before Taking<br />
a Measurement” and “Taking a<br />
Measurement”.<br />
22
QUICK REFERENCE GUIDE<br />
To ensure a reliable reading, avoid eating, smoking, and exercising for<br />
30 minutes before taking a measurement. You should try to measure<br />
your blood pressure at the same time each day. Avoid taking measurements<br />
during stressful times.<br />
1. Remove any tight-fitting clothing from your upper arm.<br />
2. Sit in a chair with your feet flat on the floor and place your arm on<br />
a table so the cuff is at the same level as your heart.<br />
3. Apply the arm cuff to your left upper arm. Apply the cuff to your left<br />
upper arm so the blue strip is on the inside of your arm and aligned<br />
with your middle finger. The air tube runs down the<br />
inside of your arm. The bottom of the cuff should be<br />
approximately 1/2" above your elbow.<br />
Blue Strip<br />
1/2 inch (1 - 2 cm)<br />
Air Tube<br />
4. Wrap the cuff firmly in place around your arm using the closure strip.<br />
23
®<br />
QUICK REFERENCE GUIDE<br />
5. Press the START/STOP button.<br />
Display symbols appear. The cuff starts to<br />
inflate automatically.<br />
Remain still and do not talk during<br />
the measurement.<br />
NOTE: To stop the inflation or measurement,<br />
push the START/STOP button. The monitor<br />
will stop inflating,<br />
start deflating, and will turn off.<br />
6. When the measurement is complete, the arm cuff<br />
completely deflates. Your blood pressure and pulse rate<br />
are displayed.<br />
NOTE: Wait 2-3 minutes between measurements.<br />
The wait time allows the arteries to return<br />
to the condition prior to taking the blood<br />
pressure measurement. You may need to<br />
increase the wait time depending on your<br />
individual physiological characteristics.<br />
24
FCC STATEMENT<br />
Note:<br />
POTENTIAL FOR RADIO/TELEVISION INTERFERENCE (for U.S.A. only)<br />
This product has been tested and found to comply with the limits for a Class B<br />
digital device, pursuant to part 15 of the FCC rules.<br />
These limits are designed to provide reasonable protection against harmful<br />
interference in a residential installation. The product generates, uses, and can<br />
radiate radio frequency energy and, if not installed and used in accordance<br />
with the instructions, may cause harmful interference to radio communications.<br />
However, there is no guarantee that interference will not occur in a particular<br />
installation. If the product does cause harmful interference to radio or television<br />
reception, which can be determined by turning the product on and off, the<br />
user is encouraged to try to correct the interference by one or more of the<br />
following measures:<br />
• Reorient or relocate the receiving antenna<br />
• Increase the separation between the product and the receiver.<br />
• Connect the product into an outlet on a circuit different from that to which<br />
the receiver is connected.<br />
• Consult the dealer or an experienced radio/TV technician for help.<br />
POTENTIAL FOR RADIO/TELEVISION INTERFERENCE (for Canada only)<br />
This digital apparatus does not exceed the Class B limits for radio noise<br />
emissions from digital apparatus as set out in the interference-causing equipment<br />
standard entitled “Digital Apparatus”, ICES-003 of the Canadian Department of<br />
Communications.<br />
Cet appareil numérique respecte les limites de bruits radioeléctriques applicables<br />
aux appareils numériques de Clase B prescrites dans la norme sur le materiel<br />
brouilleur: “Appareils Numériques”, ICES-003 édictée par le minister des<br />
communications.<br />
Changes or modifications not expressly approved by the party responsible for<br />
compliance could void the user’s authority to operate the equipment.<br />
25
WARRANTY INFORMATION<br />
Your HEM-780, IntelliSense Automatic Blood Pressure Monitor, excluding the<br />
monitor cuff, is warranted to be free from defects in materials and workmanship<br />
appearing within 5 years from the date of purchase, when used in accordance<br />
with the instructions provided with the monitor. The monitor cuff is warranted to<br />
be free from defects in materials and workmanship appearing within one year<br />
from the date of purchase when the monitor is used in accordance with the<br />
instructions provided with the monitor. The above warranties extend only to the<br />
original retail purchaser.<br />
We will, at our option, repair or replace without charge any monitor or monitor<br />
cuff covered by the above warranties. Repair or replacement is our only<br />
responsibility and your only remedy under the above warranties.<br />
To obtain warranty service contact Omron Healthcare’s Customer Service by<br />
calling 1-800-634-4350 for the address of the repair location and the return<br />
shipping and handling fee. Information for warranty service is available<br />
on our website at www.omronhealthcare.com.<br />
Enclose the Proof of Purchase. Include a letter, with your name, address, phone<br />
number, and description of the specific problem. Pack the product carefully to<br />
prevent damage in transit. Because of possible loss in transit, we recommend<br />
insuring the product with return receipt requested.<br />
ALL IMPLIED WARRANTIES, INCLUDING BUT NOT LIMITED TO<br />
THE IMPLIED WARRANTIES OF MERCHANTABILITY AND FITNESS<br />
FOR PARTICULAR PURPOSE, ARE LIMITED TO THE DURATION OF<br />
THE APPLICABLE WRITTEN WARRANTY ABOVE. Some states do not<br />
allow limitations on how long an implied warranty lasts, so the above limitation<br />
may not apply to you.<br />
OMRON SHALL NOT BE LIABLE FOR LOSS OF USE OR ANY OTHER<br />
INCIDENTAL, CONSEQUENTIAL OR INDIRECT COSTS, EXPENSES<br />
OR DAMAGES. Some states do not allow the exclusion or limitation of incidental<br />
or consequential damages, so the above exclusions may not apply to you.<br />
This warranty gives you specific legal rights, and you may also have other rights<br />
which may vary from state to state.<br />
Visit our web site at:<br />
FOR CUSTOMER SERVICE<br />
www.omronhealthcare.com<br />
Call toll free: 1-800-634-4350<br />
26
SPECIFICATIONS<br />
Model:<br />
HEM-780<br />
Display:<br />
LCD Digital Display<br />
Measurement Range: Pressure: 0 to 299 mmHg, Pulse: 40-180/min.<br />
Accuracy/Calibration: Pressure: ±3mmHg or 2% of reading<br />
Pulse: ±5% of reading<br />
Inflation:<br />
Automatic by electric pump<br />
Deflation:<br />
Automatic pressure release valve<br />
Rapid Air Release: Automatic exhaust valve<br />
Pressure Detection: Capacitive pressure sensor<br />
Measurement Method: Oscillometric method<br />
Pulse Wave Detection: Capacitance type pressure sensor<br />
Power Source:<br />
AC Adapter (or 4 “AA” batteries)<br />
Battery Life:<br />
Approx. 1500 uses when used once a day<br />
for 2 minutes with 4 new alkaline batteries<br />
Operating Temperature<br />
/Humidity:<br />
50ºF to 104ºF (10ºC to 40ºC) /30 to 90% RH<br />
Storage Temperature<br />
/Humidity:<br />
-4ºF to 140ºF (-20ºC to 60ºC) /10 to 95% RH<br />
Main Unit Weight: Approximately 12 1/2 oz. (355 g)<br />
not including batteries<br />
Main Unit Dimensions: Approx. 6 3/32" (l) x 5 5/32" (w) x 3 5/16" (h)<br />
(155 mm x 131 mm x 84 mm)<br />
Cuff Size:<br />
Approximately 6" (w)(152 mm)<br />
Cuff tube 23 5/8" (l) (600 mm)<br />
Cuff Circumference: Fits arm circumferences 9" to 17"<br />
(220mm to 420mm)<br />
Contents:<br />
Main Unit, ComFit TM Cuff, AC Adapter, Instruction<br />
Manual, 4 “AA” Batteries and Storage Case<br />
UPC Code: 0 73796 78000 5<br />
NOTE: These specifications are subject to change without notice.<br />
27
Manufactured for:<br />
OMRON HEALTHCARE, INC.<br />
1200 Lakeside Drive<br />
Bannockburn, Illinois 60015<br />
www.omronhealthcare.com<br />
Made in China<br />
Copyright © 2005 Omron Healthcare, Inc.<br />
780N2INST Rev
®<br />
780<br />
<strong>MANUAL</strong> DE INSTRUCCIONES<br />
MONITOR AUTOMÁTICO DE LA PRESIÓN<br />
ARTERIAL CON BRAZALETE COMFIT <br />
Modelo HEM-780<br />
ESPAÑOL
ÍNDICE<br />
Antes de usar el monitor<br />
Introducción . . . . . . . . . . . . . . . . . . . . . . . . . . . . . . . . . . . . . . . . .E3<br />
Notas de seguridad importantes . . . . . . . . . . . . . . . . . . . . . . . . . .E4<br />
Antes de medir la presión arterial . . . . . . . . . . . . . . . . . . . . . . . .E5<br />
Instrucciones de operación<br />
Conozca su unidad . . . . . . . . . . . . . . . . . . . . . . . . . . . . . . . . . . . .E6<br />
Pantalla de la unidad . . . . . . . . . . . . . . . . . . . . . . . . . . . . . . . . . .E7<br />
Símbolo de latidos irregulares del corazón . . . . . . . . . . . . . . . . E7<br />
Instalación de las pilas . . . . . . . . . . . . . . . . . . . . . . . . . . . . . . . . .E8<br />
Uso del adaptador de CA . . . . . . . . . . . . . . . . . . . . . . . . . . . . . . .E9<br />
Ajuste de la fecha y la hora . . . . . . . . . . . . . . . . . . . . . . . . . . . .E10<br />
Colocación del brazalete . . . . . . . . . . . . . . . . . . . . . . . . . . . . . .E13<br />
Cómo realizar una medición . . . . . . . . . . . . . . . . . . . . . . . . . . .E16<br />
Uso de la función de memoria . . . . . . . . . . . . . . . . . . . . . . . . . .E18<br />
Cuidado y mantenimiento<br />
Cuidado y mantenimiento . . . . . . . . . . . . . . . . . . . . . . . . . . . . .E20<br />
Indicadores de error . . . . . . . . . . . . . . . . . . . . . . . . . . . . . . . . .E21<br />
Sugerencias para la resolución de problemas . . . . . . . . . . . . . .E22<br />
Guía de referencia rápida . . . . . . . . . . . . . . . . . . . . . . . . . . . . . .E23<br />
Declaración de la FCC . . . . . . . . . . . . . . . . . . . . . . . . . . . . . . . .E25<br />
Información sobre la garantía . . . . . . . . . . . . . . . . . . . . . . . . . .E26<br />
Especificaciones . . . . . . . . . . . . . . . . . . . . . . . . . . . . . . . . . . . . .E27<br />
E2
INTRODUCCIÓN<br />
Gracias por comprar el monitor automático de la presión arterial<br />
HEM-780 IntelliSense ® de Omron con brazalete ComFit .<br />
Llenar para futura referencia.<br />
Fecha de compra: ___________________<br />
Número de serie:____________________<br />
ENGRAPE SU RECIBO DE COMPRA AQUÍ<br />
Su nuevo monitor digital de la presión arterial usa el método<br />
oscilométrico de medición de la presión arterial. Esto significa que<br />
el monitor detecta el movimiento de la sangre a través de la arteria<br />
braquial y convierte el movimiento a una lectura digital. Un monitor<br />
oscilométrico no necesita estetoscopio, por lo tanto el monitor<br />
es fácil de usar.<br />
La unidad HEM-780 viene con los siguientes componentes:<br />
• Monitor<br />
• Brazalete ComFit <br />
• Adaptador de CA • 4 pilas “AA”<br />
• Estuche de almacenamiento<br />
• Manual de instrucciones impreso en inglés y español<br />
El monitor de la presión arterial de inflado automático HEM-780<br />
IntelliSense ® está diseñado para uso domiciliario.<br />
GUARDE ESTAS INSTRUCCIONES<br />
E3
NOTAS DE SEGURIDAD IMPORTANTES<br />
Para asegurar el uso correcto del producto, siempre se deben tomar<br />
medidas de seguridad básicas, entre ellas las precauciones que se<br />
detallan a continuación:<br />
Antes de utilizar la unidad, lea toda la información del manual de<br />
instrucciones y toda otra información que se incluya en la caja.<br />
Solicite de su médico información específica relacionada con su<br />
presión arterial. Siga las instrucciones de su proveedor de<br />
servicios de salud.<br />
Utilice la unidad solamente para el uso especificado. No la utilice<br />
con ningún otro propósito.<br />
La unidad está diseñada para medir la presión arterial y frecuencia<br />
del pulso en pacientes adultos. No utilice la unidad en bebés ni en<br />
personas que no puedan expresar sus intenciones.<br />
No utilice teléfonos celulares cerca del aparato, ya que podría<br />
ocasionar desperfectos en el funcionamiento.<br />
No enchufe ni desenchufe el cable de alimentación eléctrica con las<br />
manos húmedas.<br />
Cambios o modificaciones no aprobados por Omron Healthcare<br />
anularán la garantía del usuario. No desarme ni intente reparar la<br />
unidad ni sus componentes.<br />
E4
ANTES DE MEDIR LA PRESIÓN ARTERIAL<br />
Para asegurar una lectura confiable, siga estas recomendaciones:<br />
1. Evite comer, fumar y hacer ejercicios los 30 minutos anteriores a la<br />
medición. Descanse por lo menos 15 minutos antes de la medición.<br />
2. El estrés aumenta la presión arterial. Evite realizar mediciones<br />
durante momentos de estrés.<br />
3. Las mediciones deben realizarse en un lugar tranquilo.<br />
4. Quítese la ropa apretada del brazo izquierdo.<br />
5. Siéntese en una silla con los pies completamente apoyados en el<br />
suelo. Coloque su brazo izquierdo sobre una mesa de modo tal que<br />
el brazalete quede al mismo nivel que el corazón.<br />
6. Permanezca quieto y no hable durante la medición.<br />
7. Mantenga un registro de las lecturas de su presión arterial y frecuencia<br />
del pulso para su médico. Una sola medición no proporciona una<br />
indicación precisa de su verdadera presión arterial. Es necesario<br />
tomar y anotar varias lecturas durante un período de tiempo.<br />
Trate de medir su presión arterial a la misma hora cada día.<br />
8. Espere 2 a 3 minutos entre mediciones. El tiempo de espera permite<br />
que las arterias vuelvan al estado en que estaban antes de la medición<br />
de tensión arterial. Es posible que necesite aumentar el tiempo de<br />
espera, según sus características fisiológicas individuales.<br />
E5
CONOZCA SU UNIDAD<br />
Unidad principal:<br />
Pantalla<br />
Compartimiento de las pilas<br />
Botón<br />
START/STOP<br />
(inicio/paro)<br />
Botones de memoria<br />
Botón de ajuste de fecha/hora<br />
Componentes:<br />
Conector de<br />
aire<br />
Conector del adaptador<br />
de CA<br />
Tubo de aire<br />
Sujetador<br />
Enchufe de aire (se conecta<br />
al conector de aire)<br />
Brazalete<br />
Estuche de almacenamiento<br />
Adaptador de CA<br />
E6
PANTALLA DE LA UNIDAD<br />
Presión arterial sistólica<br />
Presión arterial distólica<br />
Símbolo de la memoria<br />
Símbolo de valor promedio<br />
Símbolo del error<br />
del movimiento<br />
Símbolo de latidos del corazón<br />
Indicador del pulso<br />
Símbolo de desinflado<br />
Indicador de fecha/hora<br />
Símbolo de pilas bajas<br />
Símbolo de latidos irregulares del corazón<br />
SÍMBOLO DE LATIDOS IRREGULARES<br />
DEL CORAZÓN<br />
Cuando el monitor detecta un ritmo irregular dos o más veces durante la<br />
medición, el símbolo de latidos irregulares del corazón<br />
( ) aparecerá en la pantalla con los valores de medición.<br />
Se denomina ritmo irregular de los latidos<br />
del corazón a un ritmo que varía por<br />
más del 25% con respecto al ritmo<br />
promedio detectado mientras el monitor<br />
mide la presión arterial sistólica<br />
y diastólica.<br />
Si el símbolo de latidos irregulares del<br />
corazón ( ) aparece con sus resultados<br />
de medición, recomendamos que se<br />
comunique con su médico. Siga las<br />
instrucciones de su médico.<br />
E7<br />
Pulso<br />
Latido normal del corazón<br />
Presión<br />
arterial<br />
Latido irregular del corazón<br />
Corto Largo<br />
Pulso<br />
Presión<br />
arterial
INSTALACIÓN DE LAS PILAS<br />
1. Presione el indicador ▼ situado en la tapa<br />
de las pilas y deslice la tapa en dirección<br />
de la flecha para extraerla.<br />
2. Coloque 4 pilas “AA” de modo que las<br />
polaridades + (positiva) y - (negativa)<br />
coincidan con las polaridades indicadas<br />
en el compartimiento de las pilas.<br />
3. Vuelva a colocar la tapa.<br />
REEMPLAZO DE LAS PILAS<br />
Indicador de pilas bajas<br />
Cuando aparezca en la pantalla el indicador de pilas baja, quite todas<br />
las pilas. Reemplácelas con cuatro pilas nuevas. Se recomienda el uso de<br />
pilas alcalinas de larga duración.<br />
NOTA: Los valores de medición almacenados en la memoria no se<br />
eliminarán durante el reemplazo de las pilas.<br />
Después de reemplazar las pilas, reajuste la fecha y la hora.<br />
Consulte la página 10, Ajuste de la fecha y hora.<br />
E8
USO DEL ADAPTADOR DE CA<br />
Use sólo el adaptador de CA Omron autorizado, número de modelo<br />
HEM-ADPT1, con este monitor. El uso de cualquier otro adaptador<br />
puede causar daño al monitor y anulará la garantía del usuario.<br />
Para conectar el adaptador de CA<br />
1<br />
2<br />
1 Inserte el enchufe del adaptador de CA en el conector del adaptador<br />
de CA situado en la parte trasera del monitor, tal como se ilustra.<br />
2 Enchufe el adaptador de CA en una toma de corriente de 120 VCA<br />
(60 ciclos).<br />
Para desconectar el adaptador de CA, primero extraiga el adaptador de<br />
CA de la toma de corriente y luego quite del monitor el enchufe del<br />
adaptador de CA.<br />
NOTA: El monitor está diseñado para no consumir alimentación de las<br />
pilas cuando se utiliza el adaptador de CA.<br />
E9
®<br />
®<br />
®<br />
AJUSTE DE LA FECHA Y LA HORA<br />
El monitor de la presión arterial automáticamente almacena hasta 90<br />
valores de medición con la fecha y hora. El monitor también calcula<br />
una lectura promedio basada en los últimos tres valores de medición.<br />
Ajuste el monitor con la fecha y hora actual antes de realizar la primera<br />
medición. Si no se ajusta la fecha y la hora, aparecerá en la pantalla una<br />
fecha y hora predeterminada.<br />
1. PARA EMPEZAR LOS AJUSTES<br />
Presione el botón de Ajuste de fecha/hora para<br />
ajustar la fecha y la hora.<br />
El año parpadea en la pantalla.<br />
2. AJUSTE DEL AÑO<br />
El año puede fijarse entre 2004<br />
y 2030.<br />
Cuando la pantalla llegue al año 2030, regresará al año 2004.<br />
Presione el botón de memoria progresivo<br />
para avanzar en incrementos de un año.<br />
Presione el botón de Ajuste de fecha/hora para<br />
fijar el año actual.<br />
El mes parpadea en la pantalla.<br />
NOTAS: • Presione el botón de memoria regresivo para disminuir<br />
los valores de día y hora en incrementos de valores de uno.<br />
• Presione y mantenga presionado el botón de memoria<br />
progresivo para aumentar o el botón de memoria regresivo<br />
para disminuir los valores de fecha y hora más rápidamente.<br />
E10
®<br />
®<br />
AJUSTE DE LA FECHA Y LA HORA<br />
3. AJUSTE DEL MES<br />
Presione el botón de memoria progresivo para avanzar en<br />
incrementos de un mes.<br />
Presione el botón de Ajuste de fecha/hora para fijar el mes actual.<br />
El día parpadea en la pantalla.<br />
4. AJUSTE DEL DÍA<br />
Presione el botón de memoria progresivo para avanzar en<br />
incrementos de un día.<br />
Presione el botón de Ajuste de fecha/hora para fijar el día actual.<br />
La hora parpadea en la pantalla.<br />
5. AJUSTE DE LA HORA<br />
La hora se ajusta usando AM o PM.<br />
Presione el botón de memoria progresivo para avanzar en<br />
incrementos de una hora.<br />
Presione el botón de Ajuste de fecha/hora para fijar la hora actual.<br />
Los minutos parpadean en la pantalla.<br />
E11
AJUSTE DE LA FECHA Y LA HORA<br />
6. AJUSTE DE LOS MINUTOS<br />
Presione el botón de memoria progresivo para avanzar en<br />
incrementos de un minuto.<br />
Presione el botón de Ajuste de fecha/hora para fijar los minutos.<br />
El año parpadea en la pantalla.<br />
7. Presione el botón START/STOP (inicio/paro) para apagar la pantalla.<br />
E12
COLOCACIÓN DEL BRAZALETE<br />
1. Asegúrese de que el enchufe de aire esté insertado firmemente en la<br />
unidad principal.<br />
2. Quítese la ropa apretada de la parte superior del brazo.<br />
3. Siéntese en una silla con los pies en el suelo. Coloque su brazo sobre<br />
una mesa de manera que el brazalete quede a nivel de su corazón.<br />
E13
COLOCACIÓN DEL BRAZALETE<br />
4. Agarre el sujetador del brazalete<br />
firmemente con su mano.<br />
Sujetador<br />
Tira de cierre<br />
5. Voltee la palma de su mano<br />
hacia arriba.<br />
6. Coloque el brazalete en la parte superior de su brazo izquierdo,<br />
de manera que la franja azul esté hacia el interior de su brazo<br />
y alineada con su dedo medio. El tubo de aire pasa por el lado<br />
interior de su brazo. La parte inferior del brazalete debe estar<br />
aproximadamente 1/2 pulgada arriba de su codo.<br />
Franja azul<br />
1/2 pulgada (1 - 2 cm)<br />
Tubo de aire<br />
E14
COLOCACIÓN DEL BRAZALETE<br />
7. Envuelva firmemente el brazalete alrededor de su brazo usando<br />
la tira de cierre .<br />
COLOCACIÓN DEL BRAZALETE EN EL BRAZO DERECHO<br />
Cuando realice una medición usando el brazo derecho, emplee esta<br />
instrucción del Paso 6.<br />
Coloque el brazalete en la parte superior de su brazo derecho de forma<br />
que el sujetador quede centrado en el lado interior de su brazo. La parte<br />
inferior del brazalete debe estar<br />
aproximadamente 1/2 pulgada arriba Sujetador<br />
de su codo.<br />
NOTA: Tenga cuidado de no apoyar su brazo sobre el tubo de aire. Esto<br />
restringirá el flujo de aire al brazalete<br />
E15
®<br />
CÓMO REALIZAR UNA MEDICIÓN<br />
El monitor determina automáticamente el nivel de inflado ideal. En raras<br />
circunstancias, cuando puede ser necesario un mayor nivel de inflado,<br />
el monitor automáticamente vuelve a inflar el brazalete a un valor<br />
30 mmHg más alto que el nivel de inflado inicial y reinicia la medición.<br />
1. Presione el botón START/STOP (inicio/paro).<br />
Aparecen todos los símbolos en la pantalla. El brazalete comienza<br />
a inflarse automáticamente.<br />
NOTA: Para detener el inflado o la medición, presione el botón<br />
START/STOP. El monitor detendrá el inflado, iniciará el<br />
desinflado y se apagará.<br />
2. El inflado se detiene automáticamente y comienza la medición.<br />
A medida que se desinfla el<br />
brazalete en la pantalla aparecen<br />
números de conteo regresivo.<br />
El símbolo del corazón ( )<br />
parpadea con cada latido<br />
del corazón.<br />
E16
®<br />
®<br />
CÓMO REALIZAR UNA MEDICIÓN<br />
• 3. Press Cuando termina holdthe la memory medición, down el brazalete button to<br />
increase del brazo You3blood se desinfla pressure completamente. and pulse rate are<br />
displayed. Aparece en la pantalla su presión arterial<br />
y frecuencia de pulsos.<br />
4. Presione el botón START/STOP (inicio/paro)<br />
para apagar el monitor.<br />
NOTA: El monitor se apagará automáticamente<br />
después de cinco minutos.<br />
INSTRUCCIONES PARA CONDICIONES ESPECIALES<br />
Si sabe que su presión sistólica es más de 220 mmHg, presione<br />
y mantenga presionado el botón START/STOP (inicio/paro) hasta<br />
que el monitor se infle a un valor 30 a 40 mmHg mayor que su<br />
presión sistólica sospechada.<br />
NOTAS: • No aplique más presión que la necesaria.<br />
• El monitor no se inflará a más de 299 mmHg.<br />
E17
®<br />
USO DE LA FUNCIÓN DE MEMORIA<br />
Cada vez que usted realiza una medición, el monitor almacena los<br />
valores de presión arterial y frecuencia de pulsos en la memoria.<br />
El monitor de presión arterial automáticamente almacena hasta 90<br />
valores de medición. Cuando se han almacenado 90 conjuntos de<br />
valores de medición en la memoria, el registro más antiguo se<br />
elimina para guardar el registro más reciente.<br />
El monitor también calcula una lectura promedio basada en los valores<br />
de las tres mediciones más recientes. Si no se han ajustado la fecha<br />
y la hora, los valores de medición no se guardarán correctamente<br />
en la memoria.<br />
PARA MOSTRAR EL VALOR PROMEDIO<br />
Símbolo de valor promedio<br />
1. Presione el botón de memoria hacia abajo. El símbolo<br />
de valor promedio aparecerá en la pantalla con la lectura promedia.<br />
E18
®<br />
®<br />
USO DE LA FUNCIÓN DE MEMORIA<br />
PARA MOSTRAR LOS VALORES DE MEDICIÓN<br />
La fecha y hora se muestran alternativamente con los valores de medición.<br />
1. Presione el botón de memoria hacia abajo para mostrar en<br />
la pantalla los valores de medición más recientes.<br />
Presione el botón de memoria hacia arriba para mostrar los<br />
valores de medición más antiguos.<br />
Pantalla alternada<br />
NOTAS: • Presione el botón repetidamente para mostrar los<br />
siguientes valores.<br />
• Presione y mantenga el botón presionado para mostrar los<br />
valores más rápidamente.<br />
2. Presione el botón START/STOP (inicio/paro) para desconectar<br />
la alimentación.<br />
PARA ELIMINAR LOS VALORES ALMACENADOS EN LA MEMORIA.<br />
Usted no puede eliminar parcialmente los registros almacenados en la<br />
memoria. Se eliminarán todos los registros.<br />
1. Presione y mantenga presionado el botón de memoria hacia<br />
abajo y el botón START/STOP (inicio/paro) simultáneamente durante<br />
más de 2 segundos.<br />
E19
CUIDADO Y MANTENIMIENTO<br />
Para conservar su monitor digital de presión arterial en perfecto estado<br />
y proteger la unidad contra daño, siga las instrucciones siguientes:<br />
Guarde el monitor en su estuche<br />
de almacenamiento cuando no lo use.<br />
Asegúrese de que el adaptador de CA esté<br />
colocado debajo de la unidad principal para<br />
no dañar la pantalla.<br />
No doble a la fuerza el brazalete ni el tubo<br />
de aire. No los doble ajustadamente.<br />
Limpie el monitor con un paño suave seco.<br />
No utilice limpiadores abrasivos ni volátiles. No trate de limpiar<br />
el brazalete. Nunca sumerja el monitor ni ninguno de los<br />
componentes en agua.<br />
Guarde el monitor en un lugar seguro y seco. No exponga el<br />
monitor a temperaturas extremas de frío o calor, a humedad ni a la luz<br />
solar directa.<br />
Evite exponer el monitor a impactos fuertes, como dejar caer la<br />
unidad al suelo.<br />
Quite las pilas si la unidad no se va a usar por tres o más meses.<br />
Siempre reemplace todas las pilas simultáneamente con pilas nuevas.<br />
Utilice la unidad según lo indican las instrucciones detalladas en<br />
este manual. Use sólo piezas y accesorios autorizados.<br />
E20
INDICADORES DE ERROR<br />
SÍMBOLO CAUSA CORRECCIÓN<br />
El monitor no<br />
detectó la frecuencia<br />
de pulsos<br />
Quítese el brazalete. Consulte la<br />
sección “Colocación del<br />
brazalete” en la página 13.<br />
Espere 2 a 3 minutos.<br />
Realice otra medición.<br />
Brazalete inflado<br />
insuficientemente<br />
Brazalete inflado<br />
excesivamente<br />
Las pilas están<br />
gastadas<br />
Símbolo del error<br />
del movimiento<br />
Quítese el brazalete.<br />
Lea la sección “Cómo realizar<br />
una medición” en la página 16.<br />
Espere 2 a 3 minutos.<br />
Realice otra medición.<br />
Reemplace las cuatro pilas.<br />
Consulte las instrucciones para<br />
instalar las pilas en la página 8.<br />
Quite el brazalete del brazo.<br />
Espere 2-3 minutos. Tome otra<br />
medida. Todavía permanezca<br />
parado durante la medida.<br />
E21
SUGERENCIAS PARA LA RESOLUCIÓN<br />
DE PROBLEMAS<br />
PROBLEMA<br />
No hay alimentación.<br />
No aparece ninguna pantalla<br />
en la unidad.<br />
Los valores de medición<br />
aparecen demasiado altos o<br />
demasiado bajos.<br />
CAUSAS Y SOLUCIONES<br />
Reemplace las pilas.<br />
Verifique la instalación de las pilas<br />
para asegurar la correcta ubicación de<br />
las polaridades de las pilas.<br />
La presión arterial varía constantemente.<br />
Muchos factores, entre ellos el<br />
estrés, la hora del día, cómo se coloca<br />
el brazalete, pueden afectar la presión<br />
arterial. Repase las secciones “Antes<br />
de medir la presión arterial” y “Cómo<br />
realizar una medición”.<br />
E22
GUÍA DE REFERENCIA RÁPIDA<br />
Para asegurar una lectura confiable, evite comer, fumar y hacer ejercicios<br />
los 30 minutos anteriores a la medición. Debe tratar de medir la presión<br />
arterial a la misma hora cada día. Evite realizar mediciones durante<br />
momentos de estrés.<br />
1. Quítese la ropa apretada de la parte superior del brazo.<br />
2. Siéntese en una silla con los pies completamente apoyados en el suelo<br />
y coloque su brazo sobre la mesa de modo tal que el brazalete quede<br />
al mismo nivel que su corazón.<br />
3. Coloque el brazalete en la parte superior de su brazo izquierdo.<br />
Coloque el brazalete en la parte superior de su brazo izquierdo, de<br />
manera que la franja azul esté hacia el interior de su brazo y alineada<br />
con su dedo medio. El tubo de aire pasa por el lado interior de su<br />
brazo. La parte inferior del brazalete debe estar aproximadamente<br />
1/2 pulgada arriba de su codo.<br />
Franja azul<br />
1/2 pulgada (1 - 2 cm)<br />
4. Envuelva firmemente el brazalete alrededor de su brazo usando<br />
la tira de cierre .<br />
E23<br />
Tubo de aire
®<br />
GUÍA DE REFERENCIA RÁPIDA<br />
5. Presione el botón START/STOP (inicio/paro).<br />
Aparecen símbolos indicadores. El brazalete<br />
comienza a inflarse automáticamente.<br />
Permanezca quieto y no hable durante la<br />
medición.<br />
NOTA: Para detener el inflado o la medición,<br />
presione el botón START/STOP. El monitor<br />
detendrá el inflado, iniciará el desinflado<br />
y se apagará.<br />
6. Cuando termina la medición, el brazalete del brazo<br />
se desinfla completamente. Aparece en la pantalla<br />
su presión arterial y frecuencia de pulsos.<br />
NOTA: Espere 2 a 3 minutos entre mediciones.<br />
El tiempo de espera permite que las arterias<br />
vuelvan al estado en que estaban antes de la<br />
medición de tensión arterial. Es posible que<br />
necesite aumentar el tiempo de espera, según<br />
sus características fisiológicas individuales.<br />
E24
DECLARACIÓN DE LA FCC<br />
NOTA:<br />
POSIBILIDAD DE INTERFERENCIA EN RADIO / TELEVISIÓN (para los<br />
EE.UU. únicamente)<br />
Las pruebas a las que se sometió este producto comprobaron que cumple con<br />
las limitaciones establecidas para dispositivos digitales Clase B, de conformidad<br />
con la sección 15 de las Normas de la FCC.<br />
El propósito de estas limitaciones es brindar protección razonable contra<br />
interferencias perjudiciales en el hogar. Este producto genera, usa y puede<br />
irradiar energía de frecuencia radioeléctrica y, si no se lo instala y emplea<br />
según las instrucciones correspondientes, puede provocar interferencias en las<br />
comunicaciones por radio. No obstante, no existe garantía alguna de que no<br />
vayan a producirse interferencias en alguna instalación en particular. Si el producto<br />
produjera algún tipo de interferencia perjudicial para la recepción de radio<br />
o televisión, lo cual puede determinarse apagando y volviendo a encender<br />
el producto, se recomienda que el usuario realice alguna de las siguientes<br />
operaciones para intentar corregir la interferencia:<br />
• Cambie la orientación o ubicación de la antena de recepción.<br />
• Aumente la distancia que separa el producto del receptor.<br />
• Conecte el producto a un tomacorriente que integre un circuito diferente de<br />
aquél donde está conectado el receptor.<br />
• Solicite asistencia al vendedor o a un técnico de radio/TV experimentado.<br />
POSIBILIDAD DE INTERFERENCIA EN RADIO / TELEVISIÓN (para<br />
Canadá únicamente)<br />
Este aparato digital no excede las limitaciones de Clase B para<br />
emisiones de ruido de radio provenientes de aparatos digitales de conformidad<br />
con la norma para equipos que causan interferencia titulada “Digital<br />
Apparatus”, ICES-003 del Departamento Canadiense de Comunicaciones.<br />
Cet appareil numérique respecte les limites de bruits radioeléctriques applicables<br />
aux appareils numériques de Clase B prescrites dans la norme sur le materiel<br />
brouilleur: “Appareils Numériques”, ICES-003 édictée par le minister des<br />
communications.<br />
Todo cambio o modificación que no se encuentre expresamente aprobado por la<br />
parte responsable puede causar la anulación de la autorización del usuario para<br />
utilizar el equipo.<br />
E25
INFORMACIÓN SOBRE LA GARANTÍA<br />
Su monitor automático de presión arterial IntelliSense, modelo HEM-780, sin<br />
incluir el brazalete, está garantizado contra defectos de materiales y mano de obra<br />
que surjan en un período de 5 años contados a partir de la fecha de compra, siempre<br />
y cuando se lo utilice según las instrucciones suministradas con el monitor.<br />
El brazalete está garantizado contra defectos de materiales y mano de obra que<br />
surjan en el período de un año a partir de la fecha de compra, siempre y cuando<br />
el monitor sea utilizado según las instrucciones suministradas. Las garantías<br />
anteriormente descritas sólo se extienden al comprador original.<br />
Nos comprometemos a reparar o reemplazar sin cargo y según nuestro criterio<br />
cualquier monitor o brazalete cubierto por dichas garantías. La reparación o el<br />
reemplazo es nuestra única responsabilidad y su único recurso bajo las garantías<br />
mencionadas.<br />
Para obtener la garantía de servicio de cliente de Omron Healthcare llame al<br />
1-800-634-4350 para la dirección de la localización de centro de reparación<br />
y de los gastos de vuelta del envío. La información para el servicio de la<br />
garantía está disponible en nuestro Web site en www.omronhealthcare.com.<br />
Incluya la prueba de la compra. Incluya su nombre, dirección, número de teléfono,<br />
y descripción del problema específico. Embale el producto cuidadosamente para<br />
prevenir daño en tránsito. Debido a pérdida posible en tránsito, recomendamos<br />
el asegurar del producto con recibo de vuelta.<br />
TODAS LAS GARANTÍAS IMPLÍCITAS, ENTRE LAS QUE FIGURAN<br />
LAS GARANTÍAS IMPLÍCITAS DE COMERCIABILIDAD E IDONEIDAD<br />
PARA PROPÓSITOS PARTICULARES, QUEDAN LIMITADAS A LA<br />
DURACIÓN DE LA GARANTÍA ESCRITA CORRESPONDIENTE<br />
DESCRITA. Algunos estados no permiten limitaciones respecto al plazo<br />
de las garantías implícitas, por lo tanto la limitación anterior puede<br />
no aplicarse en su caso.<br />
OMRON NO SERÁ RESPONSABLE POR DAÑOS OCASIONADOS<br />
DEBIDO A LA PÉRDIDA DE USO NI POR NINGÚN OTRO DAÑO,<br />
GASTO O COSTO INCIDENTAL, INDIRECTO O RESULTANTE. Algunos<br />
estados no permiten la exclusión o restricción de daños resultantes o incidentales,<br />
por lo tanto, las exclusiones anteriores pueden no aplicarse en su caso.<br />
Esta garantía le otorga derechos legales específicos y, además, usted puede tener<br />
otros derechos que pueden variar según el estado de residencia.<br />
PARA SERVICIO AL CLIENTE<br />
Visite nuestro sitio web:<br />
www.omronhealthcare.com<br />
Llame sin cargo: 1-800-634-4350<br />
E26
ESPECIFICACIONES<br />
Modelo<br />
HEM-780<br />
Pantalla:<br />
Pantalla LCD digital<br />
Espectro de medición: Presión 0 a 299 mmHg, Pulso: 40-180/min.<br />
Precisión/calibrado:<br />
Presión: ±3 mmHg o 2% de la medición<br />
Pulso: ±5% de la medición<br />
Inflado:<br />
Automático mediante bomba eléctrica<br />
Desinflado:<br />
Válvula de liberación automática de presión<br />
Liberación rápida de aire: Válvula de escape automático<br />
Detección de presión: Sensor capacitivo de presión<br />
Método de medición: Método oscilométrico<br />
Detección de la onda de pulso: Sensor capacitivo de presión<br />
Fuente de alimentación: Adaptador de CA (o 4 pilas “AA”)<br />
Duración de las pilas: 1500 usos aproximadamente, cuando se usa<br />
una vez al día durante 2 minutos con 4 pilas<br />
alcalinas nuevos<br />
Temperatura de operación 10ºC a 40ºC (50°F a 104°F) /30 a 90%<br />
/humedad:<br />
humedad relativa<br />
Temperatura de<br />
-20ºC a 60ºC (-4°F a 140°F) /10 a 95% de<br />
almacenamiento/humedad: humedad relativa<br />
Peso de la unidad principal: Aproximadamente 355 g (12 1/2 oz.)<br />
sin incluir las pilas<br />
Dimensiones de la<br />
155 mm x 131 mm x 84 mm (6 3/32 pulg.<br />
unidad principal:<br />
(largo) x 5 5/32 pulg. (ancho) x 3 5/16 pulg.<br />
(alto) (155 mm x 131 mm x 84 mm)<br />
Tamaño del brazalete: Aproximadamente 152 mm (ancho) (6 pulg.)<br />
Tubo del brazalete 600 mm (23 5/8 pulg.) (l)<br />
Circunferencia del brazalete: Se ajusta a circunferencias de brazos de 220<br />
mm a 420 mm (9 pulg. a 17 pulg.)<br />
Incluye:<br />
Unidad principal, brazalete ComFit TM , adaptador<br />
de CA, Manual de instrucciones, 4 pilas “AA” y<br />
estuche de almacenamiento<br />
Código UPC: 0 73796 78000 5<br />
NOTA: Estas especificaciones están sujetas a cambio sin previo aviso.<br />
E27
Fabricado para:<br />
OMRON HEALTHCARE, INC.<br />
1200 Lakeside Drive<br />
Bannockburn, Illinois 60015<br />
www.omronhealthcare.com<br />
Hecho en China<br />
Copyright © 2005 Omron Healthcare, Inc.<br />
780N2INST Rev