Instrucciones de uso - Telefunken
Instrucciones de uso - Telefunken
Instrucciones de uso - Telefunken

Create successful ePaper yourself
Turn your PDF publications into a flip-book with our unique Google optimized e-Paper software.
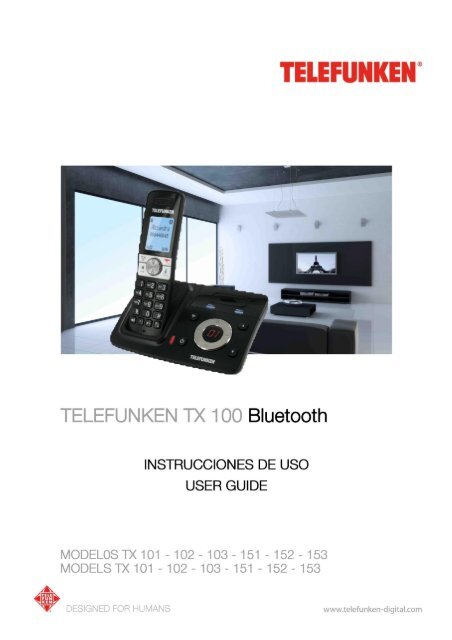
TELEFUNKEN TX 100 Bluetooth® Series<br />
<strong>Instrucciones</strong> <strong>de</strong> <strong>uso</strong> en español………………3<br />
English user gui<strong>de</strong>……………………………….45<br />
Las presentes instrucciones <strong>de</strong> <strong>uso</strong> también pue<strong>de</strong>n <strong>de</strong>scargarse en nuestro<br />
sitio web :<br />
This User gui<strong>de</strong> is also available for download on our website :<br />
www.telefunken-digital.com<br />
The Bluetooth ® word mark and logos are owned by Bluetooth SIG, Inc. and any use of such marks<br />
by SOPEG is un<strong>de</strong>r license.<br />
TELEFUNKEN Licensed by TELEFUNKEN Licenses Gmbh<br />
This user gui<strong>de</strong> is property of SOPEG and ma<strong>de</strong> for TX 100 Bluetooth mo<strong>de</strong>ls. This document<br />
cannot be used for any other purpose.<br />
TX Bluetooth 2
TELEFUNKEN TX 100 Bluetooth® SERIES<br />
<strong>Instrucciones</strong> <strong>de</strong> <strong>uso</strong><br />
Teléfono digital inalámbrico con contestador y conexión BLUETOOTH®<br />
Este teléfono ha sido diseñado para ofrecer una fácil utilización.<br />
Lea atentamente las siguientes instrucciones y guár<strong>de</strong>las para futuras consultas.<br />
Si tiene cualquier problema con la utilización <strong>de</strong> su teléfono, consulte la sección Ayuda <strong>de</strong> estas<br />
instrucciones <strong>de</strong> <strong>uso</strong>.<br />
Salvo que se indique expresamente lo contrario, la <strong>de</strong>nominación TX 1** se refiere a todas las<br />
versiones <strong>de</strong>l teléfono TX 101/102/103/151/152/153 en las presentes instrucciones <strong>de</strong> <strong>uso</strong>.<br />
Documento no contractual que pue<strong>de</strong> sufrir modificaciones en caso <strong>de</strong> errores tipográficos.<br />
Descubra su teléfono TX 1**<br />
Bluetooth ® – enlace hasta 4 periféricos Bluetooth® (teléfonos móviles o kits <strong>de</strong> manos libres) con<br />
la base <strong>de</strong> su TX 1**<br />
Directorio – le permite guardar hasta 200 contactos para utilizarlos más fácilmente en su línea fija<br />
Copie el directorio <strong>de</strong> su teléfono móvil –podrá cargar hasta 4 directorios <strong>de</strong> teléfono móvil en<br />
su TELEFUNKEN TX 1** a través <strong>de</strong> Bluetooth®<br />
Tamaño máximo <strong>de</strong> cada directorio <strong>de</strong> teléfono móvil copiado: 1500 contactos.<br />
La i<strong>de</strong>ntificación <strong>de</strong> llamadas le permitirá saber quién está llamando.<br />
Su teléfono TX 1** conserva las 50 últimas llamadas entrantes.<br />
Contestador: hasta 14 minutos <strong>de</strong> mensajes grabados, con menú vocal<br />
IMPORTANTE<br />
Este dispositivo requiere una corriente eléctrica para funcionar.<br />
En caso <strong>de</strong> corte <strong>de</strong> electricidad, no podrá efectuar llamadas.<br />
Tenga preparados otros medios para ponerse en contacto con los servicios <strong>de</strong> urgencia en<br />
previsión <strong>de</strong> esta circunstancia.<br />
Audífonos<br />
Como con cualquier otro teléfono <strong>de</strong> tipo DECT, las señales <strong>de</strong> radio entre la base y el terminal<br />
<strong>de</strong>l TX 1** pue<strong>de</strong>n generar pequeñas interferencias con los audífonos.<br />
Contenido <strong>de</strong> la caja<br />
- Terminal TELEFUNKEN TX 1**<br />
- Base-contestador TELEFUNKEN TX 1**<br />
- Cable <strong>de</strong> alimentación eléctrica para la base<br />
- Cable <strong>de</strong> conexión a la línea telefónica<br />
- Toma telefónica<br />
- Batería NiMH recargable<br />
- Kit <strong>de</strong> instalación mural<br />
Si ha adquirido un Paquete TELEFUNKEN TX 1**para terminales múltiples,<br />
dispondrá igualmente por cada terminal adicional <strong>de</strong>:<br />
- Cargador para TELEFUNKEN TX 1**<br />
- Batería NiMH recargable<br />
- Cable <strong>de</strong> alimentación eléctrica para el cargador<br />
TX Bluetooth 3
CONTENIDO<br />
INFORMACIÓN SOBRE SEGURIDAD ....................................................................................... 7<br />
1 PREPARACIÓN PARA LA UTILIZACIÓN ............................................................................. 8<br />
A. DISPOSICIÓN ............................................................................................................................... 8<br />
B. INSTALACIÓN ............................................................................................................................... 8<br />
C. BATERÍA ..................................................................................................................................... 9<br />
D. FIJACIÓN MURAL .......................................................................................................................... 9<br />
E. INSTALACIÓN DE TERMINALES ADICIONALES ................................................................................ 10<br />
F. UTILIZACIÓN DEL TELEFUNKEN TX 1** CON UNA LÍNEA ADSL .................................................. 10<br />
2 DESCUBRA SU TELÉFONO ............................................................................................... 11<br />
A. TERMINAL ................................................................................................................................. 11<br />
B. PANTALLA DEL MICROTELÉFONO ................................................................................................. 11<br />
C. ICONOS DE LA PANTALLA DEL TERMINAL ...................................................................................... 12<br />
D. BASE-CONTESTADOR ................................................................................................................. 13<br />
E. ICONOS DE LA PANTALLA DEL CONTESTADOR ............................................................................... 13<br />
F. NAVEGAR POR LOS MENÚS ......................................................................................................... 14<br />
3 BLUETOOTH® ..................................................................................................................... 14<br />
A. PRESENTACIÓN DE LAS FUNCIONES BLUETOOTH® ....................................................................... 14<br />
B. GLOSARIO ................................................................................................................................. 14<br />
C. ENLAZAR Y CONECTAR UN TELÉFONO MÓVIL ................................................................................ 15<br />
CONEXIÓN AUTOMÁTICA ................................................................................................................... 16<br />
D. ENLAZAR Y CONECTAR UN AURICULAR ........................................................................................ 16<br />
CONEXIÓN AUTOMÁTICA ................................................................................................................... 16<br />
E. DISPOSITIVOS ENLAZADOS ......................................................................................................... 17<br />
ELIMINAR UN DISPOSITIVO BLUETOOTH .............................................................................................. 17<br />
F. DISPOSITIVOS ACTIVOS .............................................................................................................. 17<br />
RECORRER LA LISTA DE DISPOSITIVOS ACTIVOS .................................................................................. 17<br />
CONECTAR/DESCONECTAR UN DISPOSITIVO ACTIVO ............................................................................ 17<br />
SUSTITUIR UN DISPOSITIVO ACTIVO .................................................................................................... 17<br />
ELIMINAR UN DISPOSITIVO ACTIVO ..................................................................................................... 18<br />
G. CAMBIAR EL CÓDIGO PIN ........................................................................................................... 18<br />
H. COPIAR UN DIRECTORIO ............................................................................................................. 18<br />
4 UTILIZACIÓN DEL TELÉFONO ........................................................................................... 20<br />
A. LÍNEA FIJA ................................................................................................................................ 20<br />
REALIZAR UNA LLAMADA .................................................................................................................. 20<br />
RESPONDER A UNA LLAMADA ............................................................................................................ 20<br />
FINALIZAR UNA LLAMADA .................................................................................................................. 20<br />
B. LÍNEA MÓVIL .............................................................................................................................. 20<br />
REALIZAR UNA LLAMADA DESDE LA LÍNEA MÓVIL ................................................................................ 20<br />
FINALIZAR UNA LLAMADA .................................................................................................................. 20<br />
RESPONDER A UNA LLAMADA EN LA LÍNEA MÓVIL CUANDO YA SE ESTÁ UTILIZANDO LA LÍNEA FIJA .......... 20<br />
PARA RESPONDER A LA LLAMADA EN LA LÍNEA MÓVIL: ........................................................................ 20<br />
PARA FINALIZAR LA COMUNICACIÓN EN LA LÍNEA MÓVIL: ..................................................................... 21<br />
PARA REANUDAR LA LLAMADA EN ESPERA DE LA LÍNEA FIJA: .............................................................. 21<br />
TX Bluetooth 4
RESPONDER A UNA LLAMADA EN LA LÍNEA FIJA CUANDO YA SE ESTÁ UTILIZANDO LA LÍNEA MÓVIL .......... 21<br />
CONTESTADOR DE LA LÍNEA MÓVIL .................................................................................................... 21<br />
C. UTILIZACIÓN DE UN AURICULAR BLUETOOTH ................................................................................ 22<br />
PARA RESPONDER A UNA LLAMADA EN LA LÍNEA FIJA CON UN AURICULAR BLUETOOTH ......................... 22<br />
PARA TRANSFERIR UNA LLAMADA DE UN TERMINAL A UN AURICULAR BLUETOOTH: ............................... 22<br />
PARA TRANSFERIR UNA LLAMADA DE UN AURICULAR BLUETOOTH A UN TERMINAL: ............................... 22<br />
PARA FINALIZAR UNA LLAMADA QUE COMENZÓ EN EL TERMINAL: ......................................................... 22<br />
AJUSTE DEL VOLUMEN DEL TERMINAL/ALTAVOZ .............................................................................. 22<br />
D. PONER UNA LLAMADA EN ESPERA ............................................................................................... 22<br />
E. FUNCIÓN SILENCIO .................................................................................................................... 23<br />
PARA ACTIVAR LA FUNCIÓN SILENCIO DURANTE UNA LLAMADA: ........................................................... 23<br />
PARA DESACTIVAR LA FUNCIÓN SILENCIO DURANTE UNA LLAMADA: ..................................................... 23<br />
F. MANOS LIBRES .......................................................................................................................... 23<br />
REALIZAR UNA LLAMADA EN MODO MANOS LIBRES .............................................................................. 23<br />
RESPONDER A UNA LLAMADA EN MODO MANOS LIBRES ....................................................................... 23<br />
PASAR A MODO MANOS LIBRES DURANTE UNA LLAMADA ..................................................................... 24<br />
G. NÚMEROS MARCADOS ................................................................................................................ 24<br />
VOLVER A LLAMAR A UN NÚMERO MARCADO ....................................................................................... 24<br />
GRABAR UN NÚMERO MARCADO EN EL DIRECTORIO ............................................................................ 24<br />
ELIMINAR UN NÚMERO MARCADO ....................................................................................................... 24<br />
H. TIMBRES ................................................................................................................................... 24<br />
LOCALIZACIÓN DEL TERMINAL ........................................................................................................... 24<br />
DESACTIVACIÓN TEMPORAL DE LOS TONOS ........................................................................................ 24<br />
TIMBRE DEL MICROTELÉFONO ........................................................................................................... 25<br />
TONO DE LA BASE ............................................................................................................................ 25<br />
I. ACCESO A LOS CONTACTOS DURANTE UNA LLAMADA ................................................................... 25<br />
PARA ACCEDER A LA LISTA DE LLAMADAS DURANTE UNA LLAMADA: .................................................... 25<br />
PARA ACCEDER A LA LISTA DE NÚMEROS MARCADOS DURANTE UNA LLAMADA: .................................... 25<br />
5 DIRECTORIO ....................................................................................................................... 25<br />
A. GRABAR UN NÚMERO DE TELÉFONO EN EL DIRECTORIO DE LA LÍNEA FIJA ....................................... 25<br />
B. RECORRER LAS ENTRADAS DEL DIRECTORIO ................................................................................ 26<br />
C. LLAMAR A UN NÚMERO DESDE UN DIRECTORIO ............................................................................. 26<br />
D. MODIFICAR UN CONTACTO .......................................................................................................... 27<br />
MODIFICAR LA CATEGORÍA DE UN CONTACTO ..................................................................................... 27<br />
E. BORRAR UN CONTACTO .............................................................................................................. 27<br />
F. ELIMINAR UN DIRECTORIO DE TELÉFONO MÓVIL ............................................................................ 27<br />
G. CONFIGURAR EL CÓDIGO DE PAÍS PARA LOS DIRECTORIOS ............................................................ 28<br />
H. CÓDIGO DE SEGURIDAD PARA LOS DIRECTORIOS DE TELÉFONO MÓVIL ........................................... 28<br />
I. CONFIGURAR EL CÓDIGO PABX ................................................................................................. 28<br />
6 AJUSTES ............................................................................................................................. 29<br />
A. AJUSTES DEL TERMINAL TX 1** .................................................................................................. 29<br />
VOLUMEN DEL TIMBRE ...................................................................................................................... 29<br />
SELECCIÓN DEL TONO DE LLAMADA ................................................................................................... 29<br />
ALERTAS SONORAS (TONO DE LAS TECLAS, SEÑAL DE BATERÍA BAJA Y FUERA DE COBERTURA) ............. 29<br />
FORMATO DE LA FECHA .................................................................................................................... 29<br />
FORMATO DE HORA .......................................................................................................................... 29<br />
AJUSTE MANUAL DE LA FECHA Y LA HORA .......................................................................................... 29<br />
AUTO HABLAR.................................................................................................................................. 30<br />
ESTA FUNCIÓN PERMITE RESPONDER A UNA LLAMADA RETIRANDO EL TERMINAL DE SU BASE. ESTÁ<br />
ACTIVADA POR DEFECTO. .................................................................................................................. 30<br />
TX Bluetooth 5
EN EL CASO DE QUE ESTÉ DESACTIVADA, TENDRÁ QUE PULSAR CASA TRAS HABER RETIRADO EL<br />
TERMINAL ........................................................................................................................................ 30<br />
REINICIO DEL MICROTELÉFONO .......................................................................................................... 30<br />
B. AJUSTES DE LA BASE ................................................................................................................. 30<br />
MODO DE MARCACIÓN ...................................................................................................................... 30<br />
FLASHING ........................................................................................................................................ 30<br />
CAMBIAR EL CÓDIGO PIN.................................................................................................................. 30<br />
C. IDENTIFICACIÓN DE LLAMADAS .................................................................................................... 30<br />
D. INFORMACIÓN SOBRE LAS LLAMADAS .......................................................................................... 31<br />
LLAMAR A UN NÚMERO DESDE LA LISTA DE LLAMADAS ........................................................................ 31<br />
GRABAR UN NÚMERO DE LA LISTA DE LLAMADAS ................................................................................ 31<br />
BORRAR UN NÚMERO DE LA LISTA DE LLAMADAS ................................................................................ 32<br />
BORRAR LA LISTA DE LLAMADAS ....................................................................................................... 32<br />
E. SERVICIOS DEL OPERADOR ......................................................................................................... 32<br />
CONTESTADOR ................................................................................................................................ 32<br />
BORRAR EL INDICADOR DE NUEVOS MENSAJES ................................................................................... 32<br />
LLAMADAS EN ESPERA ..................................................................................................................... 32<br />
LLAMADAS EN ESPERA EN LA LÍNEA FIJA ............................................................................................ 32<br />
LLAMADAS EN ESPERA EN LA LÍNEA MÓVIL ......................................................................................... 32<br />
7 CONTESTADOR .................................................................................................................. 33<br />
A. UTILIZAR EL CONTESTADOR DESDE EL MICROTELÉFONO ............................................................... 33<br />
ENCENDER/APAGAR EL CONTESTADOR .............................................................................................. 33<br />
ESCUCHAR LOS MENSAJES ............................................................................................................... 33<br />
ELIMINAR LOS MENSAJES ANTIGUOS .................................................................................................. 33<br />
GRABAR Y REPRODUCIR NOTAS VOCALES .......................................................................................... 33<br />
B. ANUNCIO VOCAL ........................................................................................................................ 34<br />
C. AJUSTES DEL CONTESTADOR ...................................................................................................... 34<br />
NÚMERO DE TONOS ANTES DE LA PUESTA EN MARCHA DEL CONTESTADOR ........................................... 34<br />
TIEMPO DE GRABACIÓN DE LOS MENSAJES ENTRANTES ....................................................................... 35<br />
IDIOMA DEL CONTESTADOR ............................................................................................................... 35<br />
FILTRO DE LLAMADAS ....................................................................................................................... 35<br />
ALERTA DE MENSAJES ...................................................................................................................... 35<br />
D. MODO DE ACCESO REMOTO ........................................................................................................ 35<br />
E. UTILIZAR EL CONTESTADOR DESDE LA BASE DEL TELÉFONO .......................................................... 36<br />
ENCENDIDO Y APAGADO ................................................................................................................... 36<br />
FILTRO DE LLAMADAS ....................................................................................................................... 36<br />
LECTURA DE LOS MENSAJES ............................................................................................................. 36<br />
BORRAR TODOS LOS MENSAJES ANTIGUOS ........................................................................................ 37<br />
8 TERMINALES ADICIONALES ............................................................................................. 37<br />
A. LLAMADA ENTRE TERMINALES .................................................................................................... 37<br />
RESPONDER A UNA LLAMADA EXTERNA DURANTE UNA COMUNICACIÓN ENTRE TERMINALES ................... 37<br />
TRANSFERIR UNA LLAMADA EXTERNA A OTRO MICROTELÉFONO ........................................................... 37<br />
B. MODO CONFERENCIA A 3 ............................................................................................................ 38<br />
C. REGISTRAR UN MICROTELÉFONO SUPLEMENTARIO ....................................................................... 38<br />
ANULAR EL REGISTRO DE UN TERMINAL ............................................................................................. 39<br />
9 AYUDA ................................................................................................................................. 39<br />
10 GARANTÍA .......................................................................................................................... 40<br />
TX Bluetooth 6
Información sobre seguridad<br />
Al utilizar el teléfono, le recomendamos que siga unas simples precauciones <strong>de</strong> seguridad para<br />
evitar riesgos <strong>de</strong> incendio, electrocución o cualquier otro inci<strong>de</strong>nte:<br />
Lea y siga las instrucciones contenidas en este manual. Siga todas las precauciones indicadas<br />
en este manual, así como en el propio producto.<br />
Desconecte la toma <strong>de</strong> corriente <strong>de</strong>l teléfono antes <strong>de</strong> limpiarlo.<br />
No utilice líquidos ni aerosoles <strong>de</strong> limpieza. Utilice un tejido no afelpado.<br />
No utilice este producto en lugares don<strong>de</strong> esté expuesto al contacto con agua<br />
(bañeras, frega<strong>de</strong>ros, piscinas, etc.).<br />
No sobrecargue las tomas <strong>de</strong> corriente ni los alargadores, ya que ello podría comportar un<br />
riesgo <strong>de</strong> incendio o electrocución.<br />
Desenchufe el teléfono <strong>de</strong> la toma eléctrica y póngase en contacto con el servicio técnico <strong>de</strong><br />
TELEFUNKEN (+335 45 60 82 51) o assistance@sopeg.fr en los siguientes casos:<br />
- Si el cable eléctrico o la toma <strong>de</strong> corriente están dañados o pelados.<br />
- Si el producto no funciona normalmente siguiendo las instrucciones contenidas en este<br />
manual.<br />
- Si el producto se ha dañado tras recibir un golpe.<br />
- Si el producto muestra signos manifiestos <strong>de</strong> cambio en su funcionamiento.<br />
Evite utilizar el teléfono en caso <strong>de</strong> tormenta: pue<strong>de</strong> existir un riesgo importante <strong>de</strong><br />
electrocución por caída <strong>de</strong> rayos.<br />
En caso <strong>de</strong> escape <strong>de</strong> gas, no utilice el teléfono en la zona don<strong>de</strong> se haya producido.<br />
Utilice exclusivamente las baterías recargables NiMH suministradas.<br />
La utilización <strong>de</strong> baterías <strong>de</strong> tipo diferente o no recargables pue<strong>de</strong> resultar peligrosa.<br />
Ello podría producir interferencias y/o dañar el teléfono.<br />
TELEFUNKEN no se hace responsable <strong>de</strong> los daños ocasionados por la utilización <strong>de</strong> pilas<br />
diferentes a las suministradas.<br />
Utilice exclusivamente el adaptador <strong>de</strong> alimentación suministrado con el teléfono.<br />
Póngase en contacto con el servicio técnico (+335 45 60 82 51) o assistance@sopeg.fr para<br />
obtener un adaptador <strong>de</strong> alimentación <strong>de</strong> recambio.<br />
Al instalar las pilas en el terminal <strong>de</strong>l teléfono, <strong>de</strong>be respetar las polarida<strong>de</strong>s.<br />
No sumerja las pilas en agua ni las lance al fuego.<br />
Los terminales telefónicos generan campos magnéticos que pue<strong>de</strong>n atraer pequeños objetos<br />
metálicos, como alfileres o grapas.<br />
Para evitar todo riesgo <strong>de</strong> lesiones, no coloque el terminal en lugares don<strong>de</strong> puedan<br />
encontrarse dichos objetos.<br />
TX Bluetooth 7
1 PREPARACIÓN PARA LA UTILIZACIÓN<br />
A. Disposición<br />
Coloque su teléfono a una distancia mínima <strong>de</strong> 1 metro con respecto a otros dispositivos<br />
eléctricos a fin <strong>de</strong> evitar los riesgos <strong>de</strong> interferencias. Su TELEFUNKEN TX 1** funciona mediante<br />
la emisión <strong>de</strong> frecuencias <strong>de</strong> radio entre el terminal y la base. La intensidad <strong>de</strong> la señal <strong>de</strong>pen<strong>de</strong><br />
<strong>de</strong> la posición <strong>de</strong> la base. Se recomienda colocar esta en un lugar elevado para obtener la mejor<br />
recepción posible.<br />
La distancia máxima entre la base y el terminal es <strong>de</strong> unos 300 metros (sin obstáculos).<br />
B. Instalación<br />
Conecte el cable <strong>de</strong> alimentación eléctrica en la parte inferior <strong>de</strong> la base y enchufe el otro<br />
extremo en la toma <strong>de</strong> corriente.<br />
A continuación, conecte la base a la red eléctrica.<br />
TOMA DE<br />
CORRIENTE<br />
DE PARED<br />
TOMA<br />
TELEFÓNICA<br />
CABLE<br />
ELÉCTRICO<br />
DE PARED<br />
CABLE TELEFÓNICO<br />
TX Bluetooth 8
C. Batería<br />
CABLE<br />
ROJO<br />
CABLE<br />
NEGRO<br />
Coloque el terminal en la base durante al menos 24 horas para cargar completamente la betería.<br />
Una vez alcanzado el nivel <strong>de</strong> carga máximo, el icono aparece en la pantalla <strong>de</strong>l terminal.<br />
El indicador <strong>de</strong> carga encendido indica que el terminal está bien colocado en la base.<br />
Una vez que haya cargado por completo la batería, conecte la base a la toma telefónica <strong>de</strong> pared<br />
mediante el cable a<strong>de</strong>cuado.<br />
Con unas condiciones <strong>de</strong> utilización i<strong>de</strong>ales y partiendo <strong>de</strong>l nivel <strong>de</strong> carga máximo, la batería <strong>de</strong>l<br />
terminal TX 1** pue<strong>de</strong> alcanzar una autonomía <strong>de</strong> 12 horas en comunicación o 160 horas en<br />
espera.<br />
Observación: una batería nueva necesita varios ciclos <strong>de</strong> carga/<strong>de</strong>scarga para alcanzar su<br />
capacidad máxima.<br />
A fin <strong>de</strong> prolongar la duración <strong>de</strong> la batería, retire el terminal <strong>de</strong> su base varias horas al día y <strong>de</strong>je<br />
que se <strong>de</strong>scargue por completo una vez a la semana.<br />
La capacidad <strong>de</strong> carga máxima disminuye con el tiempo y tien<strong>de</strong> a reducir la autonomía en<br />
espera/comunicación.<br />
Si lo <strong>de</strong>sea, tendrá la posibilidad <strong>de</strong> sustituir la batería <strong>de</strong> su TX 1** por otra nueva.<br />
Diríjase a su distribuidor para obtener una batería <strong>de</strong> recambio.<br />
Nota: es normal que el compartimento <strong>de</strong> la batería y el terminal se calienten durante la carga.<br />
Alerta <strong>de</strong> batería baja<br />
Si el icono parpa<strong>de</strong>a en la pantalla <strong>de</strong>l terminal, <strong>de</strong>berá cargarlo colocándolo en la base antes<br />
<strong>de</strong> volver a utilizarlo.<br />
D. Fijación mural<br />
Su TELEFUNKEN TX 1** pue<strong>de</strong> fijarse en una pared gracias al soporte suministrado.<br />
Fije sólidamente el soporte en una pared y coloque encima la base <strong>de</strong>l teléfono.<br />
Atención<br />
No instale su teléfono TELEFUNKEN TX 1**en un cuarto <strong>de</strong> baño<br />
o cerca <strong>de</strong> una zona húmeda.<br />
TX Bluetooth 9
IMPORTANTE<br />
Para po<strong>de</strong>r funcionar, la base <strong>de</strong>l teléfono <strong>de</strong>be estar conectada a la corriente <strong>de</strong> forma continua.<br />
No conecte el dispositivo a la línea telefónica hasta que el terminal esté completamente cargado.<br />
Utilice únicamente los cables <strong>de</strong> alimentación y <strong>de</strong> teléfono suministrados con el producto.<br />
E. Instalación <strong>de</strong> terminales adicionales<br />
Si ha comprado un teléfono TELEFUNKEN TX 1** con terminales adicionales, <strong>de</strong>be seguir los<br />
siguientes pasos:<br />
Por cada terminal y cargador adicionales<br />
1. Conecte el cable <strong>de</strong> alimentación eléctrica en la parte inferior <strong>de</strong> la base y enchufe el otro<br />
extremo en la toma <strong>de</strong> corriente.<br />
A continuación, conecte el cargador a la red eléctrica.<br />
2. Para introducir la batería en el terminal adicional, siga el mismo procedimiento que con el<br />
terminal principal.<br />
3. Coloque el terminal en su cargador durante al menos 24 horas.<br />
TOMA DE<br />
ALIMENTACIÓN<br />
CABLE DE<br />
ALIMENTACIÓN<br />
F. Utilización <strong>de</strong>l TELEFUNKEN TX 1** con una línea ADSL<br />
Si <strong>de</strong>sea utilizar su teléfono en una línea ADSL, <strong>de</strong>be conectar un filtro ADSL entre el cable y la<br />
toma telefónica.<br />
TX Bluetooth 10
2 DESCUBRA SU TELÉFONO<br />
A. Terminal<br />
INDICADOR DE<br />
CARGA<br />
AURICULAR<br />
DIRECTORIO<br />
ARRIBA<br />
MENU/OK<br />
CASA<br />
COLGAR / CANCELAR<br />
GSM<br />
LISTA DE LLAMADAS / ABAJO<br />
TECLADO<br />
ALFANUMÉRICO<br />
ALTAVOZ MANOS<br />
LIBRES<br />
REPETICIÓN<br />
PAUSA<br />
ESPERA<br />
SILENCIO<br />
BORRANDO<br />
B. Pantalla <strong>de</strong>l microteléfono<br />
TX Bluetooth 11
C. Iconos <strong>de</strong> la pantalla <strong>de</strong>l terminal<br />
Línea fija – Visible cuando existe una llamada en curso en la<br />
línea fija<br />
Línea móvil - Visible cuando existe una llamada en curso en<br />
la línea móvil<br />
Dispositivos<br />
Bluetooth<br />
Dispositivos Bluetooth conectados – dispositivos Bluetooth®<br />
enlazados con el TX 1** que están conectados<br />
Dispositivos Bluetooth <strong>de</strong>sconectados - dispositivos<br />
Bluetooth ® enlazados con el TX 101/151 que están<br />
<strong>de</strong>sconectados<br />
Auricular Bluetooth - Icono fijo cuando hay un auricular<br />
Bluetooth ® conectado a la línea fija<br />
Mensajes<br />
Nuevo mensaje (servicio <strong>de</strong> contestador <strong>de</strong>l operador <strong>de</strong> su<br />
línea fija)<br />
Contestador activado<br />
Nuevo mensaje recibido<br />
Altavoz activado<br />
Sonido<br />
Fijo cuando los tonos <strong>de</strong> todas la líneas FIJA, GSM1 y GSM2<br />
están <strong>de</strong>sactivados<br />
Intermitente cuando uno <strong>de</strong> los tonos está <strong>de</strong>sactivado<br />
El micrófono <strong>de</strong>l terminal está <strong>de</strong>sactivado<br />
Carga terminada<br />
Carga al 50 %<br />
Batería<br />
Batería baja - Cargar<br />
Batería cargándose<br />
TX Bluetooth 12
D. Base-contestador<br />
INDICADORES DE CONEXIÓN<br />
MÓVIL 1 / MÓVIL 2<br />
BÚSQUEDA<br />
ALTAVOZ<br />
BORRANDO<br />
VOLUMEN +<br />
ATRÁS<br />
SOPORTE DE<br />
CARGA<br />
INDICADOR DE<br />
UTILIZACIÓN<br />
PANTALLA LED<br />
ADELANTE<br />
VOLUMEN -<br />
ENCENDIDO/APAGADO<br />
DEL CONTESTADOR<br />
REPRODUCCIÓN /<br />
PAUSA<br />
E. Iconos <strong>de</strong> la pantalla <strong>de</strong>l contestador<br />
Pantalla<br />
Descripción<br />
-- Contestador <strong>de</strong>sactivado y ningún nuevo mensaje.<br />
0F /XX<br />
Parpa<strong>de</strong>o alternativo XX y OF: contestador <strong>de</strong>sactivado y XX nuevos<br />
mensajes. XX pue<strong>de</strong> oscilar entre 1 y 59.<br />
Contestador activado, XX es el número <strong>de</strong> mensajes en la memoria <strong>de</strong>l<br />
XX contestador.<br />
00 Fijo: ningún nuevo mensaje en el contestador.<br />
XX Intermitente: XX nuevos mensajes. XX pue<strong>de</strong> oscilar entre 1 y 59.<br />
ZZ<br />
XX/FF<br />
FF<br />
- - /XX<br />
- -<br />
XX<br />
A1<br />
XX/An<br />
rA<br />
Fijo: ningún nuevo mensaje y ZZ mensajes antiguos. ZZ pue<strong>de</strong> oscilar entre<br />
1 y 59.<br />
Parpa<strong>de</strong>o alternativo XX y FF: XX nuevos mensajes, y la memoria <strong>de</strong>l<br />
contestador está llena.<br />
FF intermitente: ningún nuevo mensaje, y la memoria <strong>de</strong>l contestador está<br />
llena.<br />
Parpa<strong>de</strong>o alternativo -- y XX: XX nuevos mensajes, y la hora <strong>de</strong>l teléfono no<br />
está ajustada.<br />
-- intermitente: ningún nuevo mensaje, y la hora <strong>de</strong>l teléfono no está<br />
ajustada.<br />
Fijo: XX mensajes en curso <strong>de</strong> reproducción.<br />
Fijo: reproducción <strong>de</strong>l mensaje <strong>de</strong> respuesta en curso.<br />
Parpa<strong>de</strong>o alternativo XX y An: XX mensajes grabándose.<br />
intermitente: acceso remoto en curso.<br />
TX Bluetooth 13
F. Navegar por los menús<br />
Es fácil acce<strong>de</strong>r a los diferentes menús <strong>de</strong>l TELEFUNKEN TX 1**.<br />
1. MENU/OK: abre el menú principal<br />
2. Teclas ARRIBA/ABAJO: para moverse por las diferentes opciones<br />
3. Pulse MENU/OK para seleccionar una opción o COLGAR/C para volver a la pantalla anterior.<br />
3 BLUETOOTH®<br />
A. Presentación <strong>de</strong> las funciones Bluetooth®<br />
Su nuevo teléfono TELEFUNKEN TX 1** cuenta con las siguientes características:<br />
- Enlace hasta 4 dispositivos Bluetooth ® (teléfonos móviles o auriculares inalámbricos) con la<br />
base <strong>de</strong>l teléfono.<br />
- Conecte hasta 2 teléfonos móviles Bluetooth ® para realizar y recibir sus llamadas <strong>de</strong>s<strong>de</strong> el<br />
terminal <strong>de</strong>l TX 1**.<br />
- Conecte una auricular Bluetooth ® para realizar y recibir las llamadas <strong>de</strong> su línea fija con total<br />
libertad.<br />
- Posibilidad <strong>de</strong> audioconferencia <strong>de</strong>s<strong>de</strong> la línea fija o la móvil.<br />
INFORMACIÓN IMPORTANTE<br />
- Cuando ponga en marcha la base <strong>de</strong>l TX 1**, espere al menos 20 segundos antes <strong>de</strong> conectar<br />
un dispositivo Bluetooth ® . Consulte el manual <strong>de</strong> utilización <strong>de</strong> su teléfono móvil o su auricular<br />
Bluetooth ® para obtener más información sobre sus modos <strong>de</strong> conexión.<br />
- La tecnología inalámbrica Bluetooth ® funciona mediante ondas <strong>de</strong> corto alcance (9 metros<br />
aproximadamente).<br />
- Por lo tanto, los teléfonos móviles y los auriculares conectados <strong>de</strong>ben encontrarse en un radio<br />
<strong>de</strong> 9 metros con respecto a la base <strong>de</strong>l TX 1**.<br />
- Si su teléfono móvil no capta correctamente la señal <strong>de</strong>s<strong>de</strong> su domicilio, el TELEFUNKEN TX<br />
1** pue<strong>de</strong> permitirle obtener una mejor recepción. Si hay un lugar en su casa don<strong>de</strong> la<br />
recepción sea mejor, pue<strong>de</strong> <strong>de</strong>jar allí el teléfono móvil y utilizar su línea a través <strong>de</strong>l<br />
TELEFUNKEN TX 1**.<br />
- Para que esto funcione, su teléfono móvil <strong>de</strong>be encontrarse siempre a 9 metros como máximo<br />
<strong>de</strong> la base fija.<br />
- Le recomendamos que ponga su teléfono móvil a cargar cuando lo conecte por Bluetooth ® al<br />
TELEFUNKEN TX 1** (la conexión Bluetooth ® aumenta el consumo <strong>de</strong> energía <strong>de</strong> las baterías<br />
<strong>de</strong> los móviles).<br />
B. Glosario<br />
Dispositivos activos<br />
Dispositivos con el modo Bluetooth ® activo, enlazados y conectados al TX1**.<br />
Se pue<strong>de</strong>n conectar 2 dispositivos a la base al mismo tiempo (2 móviles o 1 móvil + 1<br />
auricular).<br />
Solo se pue<strong>de</strong> recibir o realizar una llamada al mismo tiempo por la línea móvil.<br />
Teléfono móvil Bluetooth ®<br />
TX Bluetooth 14
Teléfono móvil (GSM) con el modo Bluetooth ® activado.<br />
Modo Visible o Detectable (el nombre varía <strong>de</strong>pendiendo <strong>de</strong> la marca <strong>de</strong> móvil/auricular)<br />
Este modo <strong>de</strong>be estar activado en el teléfono móvil (o auricular) antes <strong>de</strong> proce<strong>de</strong>r al<br />
enlace con el TX 1**.<br />
Dispositivos enlazados<br />
Se trata <strong>de</strong> los dispositivos Bluetooth ® “reconocidos” por el TX 1**.<br />
Número máximo <strong>de</strong> dispositivos enlazados: 4<br />
Los teléfonos móviles o auriculares Bluetooth ® enlazados <strong>de</strong>ben estar conectados para<br />
funcionar con el TX 1**.<br />
Enlace (o emparejamiento)<br />
Se trata <strong>de</strong> un proceso <strong>de</strong> intercambio <strong>de</strong> información a través <strong>de</strong> Bluetooth ® entre<br />
2 periféricos a fin <strong>de</strong> que ambos se reconozcan entre sí en el futuro.<br />
PIN (o contraseña)<br />
Este código <strong>de</strong> 4 cifras es necesario para dotar <strong>de</strong> seguridad a la comunicación entre el<br />
teléfono TX 1** y el/los teléfono(s) móvil(es) Bluetooth ® .<br />
Por <strong>de</strong>fecto, este código es 0000.<br />
Para utilizar un teléfono móvil Bluetooth ® con su TX 1**, primero <strong>de</strong>be enlazarlos y luego<br />
conectarlos.<br />
Observación: la tecnología Bluetooth ® emite ondas cortas, por lo que tendrá que situarse cerca <strong>de</strong><br />
la base <strong>de</strong>l TX 1**para efectuar el enlace y la conexión <strong>de</strong> su teléfono móvil.<br />
C. Enlazar y conectar un teléfono móvil<br />
Compruebe antes <strong>de</strong> nada lo siguiente:<br />
- Se encuentra en una zona con cobertura <strong>de</strong> red GSM.<br />
- Su teléfono tiene el modo Bluetooth ® activado y no está conectado por este medio a otro<br />
periférico (or<strong>de</strong>nador, auricular, etc.). Consulte el manual <strong>de</strong> utilización <strong>de</strong> su teléfono móvil<br />
para obtener más información sobre la conectividad Bluetooth ® .<br />
1. Pulse MENU/OK en el terminal y seleccione Bluetooth.<br />
2. Seleccione Añadir móvil.<br />
3. Coloque su teléfono móvil (modo Bluetooth ® activado) cerca <strong>de</strong> la base <strong>de</strong>l TX 1**<br />
Si ya hay 4 dispositivos enlazados, se le pedirá que quite uno <strong>de</strong> la lista a fin <strong>de</strong> po<strong>de</strong>r enlazar<br />
su teléfono móvil<br />
4. A continuación, en la pantalla aparece Active el modo visible <strong>de</strong> su móvil.<br />
Compruebe que esta opción está activada en su teléfono móvil y pulse MENU/OK para<br />
confirmar.<br />
5. Pulse <strong>de</strong> nuevo MENU/OK.<br />
6. Una vez que su teléfono móvil haya reconocido el TELEFUNKEN TX 1**, confirme la solicitud<br />
<strong>de</strong> conexión en el teléfono móvil.<br />
7. Introduzca en su teléfono móvil el código PIN que aparece en la pantalla <strong>de</strong>l terminal <strong>de</strong>l<br />
TX 1**.<br />
8. Una vez confirmado el enlace, la pantalla <strong>de</strong>l terminal TX 1** muestra sucesivamente:<br />
Móvil enlazado – Configuración <strong>de</strong>l teléfono móvil terminada – Móvil conectado.<br />
Nota: El proceso <strong>de</strong> enlace pue<strong>de</strong> durar hasta 1 minuto. Si el enlace no se produce, inténtelo <strong>de</strong><br />
nuevo.<br />
Algunas etapas <strong>de</strong>l procedimiento <strong>de</strong> enlace pue<strong>de</strong>n variar en función <strong>de</strong>l mo<strong>de</strong>lo <strong>de</strong><br />
teléfono móvil.<br />
TX Bluetooth 15
No coloque el terminal en la base o el cargador durante el procedimiento <strong>de</strong> enlace, ya que<br />
este se vería interrumpido.<br />
Conexión automática<br />
Cuando un teléfono móvil está enlazado con el TX 1** pero no está conectado, en la pantalla<br />
aparece:<br />
Ajuste <strong>de</strong> móvil terminado – Dispositivo no conectado y, por último,<br />
Función <strong>de</strong> conexión automática disponible – Pulse OK.<br />
Pulse MENU/OK para confirma esta selección o COLGAR/C para volver a la pantalla <strong>de</strong> inicio.<br />
D. Enlazar y conectar un auricular<br />
Antes <strong>de</strong> empezar, asegúrese <strong>de</strong> que el Bluetooth ® está activado en su auricular y <strong>de</strong> que este no<br />
está conectado a otro periférico.<br />
Para más información sobre los modos <strong>de</strong> enlace <strong>de</strong> su auricular, consulte sus instrucciones.<br />
1. Pulse MENU/OK y seleccione Bluetooth.<br />
2. Seleccione Añadir auricular.<br />
3. Coloque su auricular cerca <strong>de</strong> la base <strong>de</strong>l TX 1** Pulse MENU/OK.<br />
4. Pulse MENU/OK. La pantalla mostrará Ajuste su auricular en modo <strong>de</strong>tectable.<br />
Si ya hay 4 dispositivos enlazados, se le pedirá que quite uno <strong>de</strong> la lista a fin <strong>de</strong> po<strong>de</strong>r enlazar<br />
su auricular.<br />
5. Ajuste su auricular en modo <strong>de</strong>tectable (véanse las instrucciones <strong>de</strong>l auricular para más<br />
información).<br />
6. Pulse MENU/OK.<br />
7. Una vez que el TX 1** haya reconocido su auricular, pulse <strong>de</strong> nuevo MENU/OK.<br />
8. Introduzca el código PIN <strong>de</strong> su auricular (0000 por <strong>de</strong>fecto, véanse las instrucciones <strong>de</strong>l<br />
auricular) y pulse MENU/OK.<br />
- En la pantalla <strong>de</strong>l terminal aparece Auricular enlazado - ¿Conectar ahora?<br />
- Pulse MENU/OK para confirmar esta selección.<br />
- Si ya hay 2 dispositivos Bluetooth ® conectados, se le pedirá que <strong>de</strong>sconecte uno a fin <strong>de</strong><br />
po<strong>de</strong>r conectar su auricular.<br />
- Su ya hay 1 auricular conectado, se le pedirá que lo <strong>de</strong>sconecte a fin <strong>de</strong> po<strong>de</strong>r conectar su<br />
nuevo auricular.<br />
9. Una vez confirmado el enlace, la pantalla <strong>de</strong>l terminal TX 1**mostrará sucesivamente:<br />
Auricular enlazado – Configuración <strong>de</strong>l auricular terminada – Auricular conectado.<br />
Observación: El proceso <strong>de</strong> enlace pue<strong>de</strong> durar hasta 1 minuto. Si el enlace no se produce,<br />
inténtelo <strong>de</strong> nuevo.<br />
No coloque el terminal en la base o el cargador durante el procedimiento <strong>de</strong> enlace, ya que<br />
este se vería interrumpido.<br />
Conexión automática<br />
Cuando un auricular Bluetooth ® está enlazado con el TX 1**pero no está conectado, en la pantalla<br />
aparece:<br />
Ajuste <strong>de</strong>l auricular terminado – Dispositivo no conectado y, por último,<br />
Función <strong>de</strong> conexión automática disponible – Pulse OK.<br />
Pulse MENU/OK para confirma esta selección o COLGAR/C para volver a la pantalla <strong>de</strong> inicio.<br />
TX Bluetooth 16
E. Dispositivos enlazados<br />
Una vez que haya enlazado su teléfono móvil o su auricular Bluetooth ® con el TX 1**, no<br />
necesitará repetir la operación, salvo si en algún momento elimina este dispositivo <strong>de</strong> la lista <strong>de</strong><br />
dispositivos activos.<br />
Observación: en la lista solo aparecen los 15 primeros caracteres <strong>de</strong>l nombre <strong>de</strong> los dispositivos.<br />
Cambiar el nombre <strong>de</strong> un dispositivo<br />
Pue<strong>de</strong> cambiar el nombre <strong>de</strong> un dispositivo enlazado <strong>de</strong>s<strong>de</strong> el TX 1**.<br />
1. Pulse MENU/OKy seleccione Bluetooth.<br />
2. Seleccione Dispositivos emparejados.<br />
3. Seleccione el dispositivo cuyo nombre <strong>de</strong>see cambiar.<br />
4. Seleccione Cambiar nombre y pulse MENU/OK.<br />
5. La pantalla <strong>de</strong>l terminal mostrará INTR. NUEVO NOMBRE.<br />
6. Modifique el nombre con ayuda <strong>de</strong>l teclado alfanumérico.<br />
7. Pulse MENU/OK para confirmar En la pantalla <strong>de</strong>l terminal aparece Nombre cambiado.<br />
Eliminar un dispositivo Bluetooth<br />
Si <strong>de</strong>sea enlazar un nuevo teléfono móvil o auricular Bluetooth ® pero ya tiene asociados 4 al<br />
TX 1**, <strong>de</strong>berá eliminar uno <strong>de</strong> ellos <strong>de</strong> la lista <strong>de</strong> dispositivos enlazados.<br />
1. Pulse MENU/OK y seleccione Bluetooth.<br />
2. Seleccione Disp. emparejados.<br />
3. Seleccione el dispositivo que <strong>de</strong>sea eliminar <strong>de</strong> la lista.<br />
4. Seleccione Eliminar dispositivo.<br />
5. En la pantalla <strong>de</strong>l terminal aparece ¿Eliminar disp. <strong>de</strong> lista <strong>de</strong> disp. activos?<br />
6. PulseMENU/OK para confirmar.<br />
7. A continuación, aparece Disp. eliminado <strong>de</strong> lista <strong>de</strong> disp. activos.<br />
F. Dispositivos activos<br />
Observación: al añadir, eliminar o sustituir un teléfono móvil/auricular Bluetooth ® en la lista <strong>de</strong><br />
dispositivos activos, el resto <strong>de</strong> dispositivos <strong>de</strong> la lista se <strong>de</strong>sconectan temporalmente hasta que<br />
la operación haya terminado. Pue<strong>de</strong>n pasar 1 o 2 minutos hasta que se vuelvan a conectar.<br />
Recorrer la lista <strong>de</strong> dispositivos activos<br />
1. Pulse MENU/OK y seleccione Bluetooth.<br />
2. Seleccione Disp. activos.<br />
3. Pue<strong>de</strong> recorrer la lista <strong>de</strong> dispositivos activos mediante las teclas ARRIBA/ABAJO.<br />
Conectar/<strong>de</strong>sconectar un dispositivo activo<br />
1. Pulse MENU/OK y seleccione Bluetooth.<br />
2. Seleccione Disp. activos.<br />
3. Seleccione el dispositivo que <strong>de</strong>sea <strong>de</strong>sconectar.<br />
4. Pulse MENU/OK para seleccionar Conectar o Desconectar.<br />
5. Pulse MENU/OK para confirmar.<br />
En la pantalla <strong>de</strong>l terminal aparece Dispositivo conectado o Dispositivo <strong>de</strong>sconectado.<br />
Sustituir un dispositivo activo<br />
Pue<strong>de</strong> sustituir un dispositivo Bluetooth ® por otro si ya tiene 2 dispositivos conectados.<br />
1. Pulse MENU/OK y seleccione Bluetooth.<br />
2. Seleccione Disp. emparejados.<br />
3. Seleccione un dispositivo.<br />
4. Seleccione Conectar.<br />
5. Confirme con MENU/OK La pantalla muestra 2 dispositivos conectados como máximo y<br />
luego ¿Sustituir un dispositivo activo? Confirme con MENU/OK.<br />
TX Bluetooth 17
6. Seleccione el dispositivo que <strong>de</strong>sea sustituir y confirme su selección con MENU/OK.<br />
7. En la pantalla aparece Disp. eliminado <strong>de</strong> lista <strong>de</strong> disp. activos y luego Conexión <strong>de</strong>l<br />
dispositivo a la base.<br />
8. Según las características <strong>de</strong> su teléfono móvil, es posible que tenga que pulsar una tecla <strong>de</strong>l<br />
mismo para confirmar la conexión.<br />
Añadir un dispositivo activo (2 como máximo)<br />
1. Pulse MENU/OK y seleccione Bluetooth.<br />
2. Seleccione Disp. activos.<br />
3. Seleccione Ubicación disponible.<br />
4. Seleccione Añadir.<br />
5. Seleccione un dispositivo Bluetooth ® en la lista <strong>de</strong> dispositivos enlazados.<br />
6. Pulse MENU/OK.<br />
7. En la pantalla aparece Disp. añadido a lista <strong>de</strong> disp. activos y luego Conexión <strong>de</strong>l<br />
dispositivo a la base.<br />
8. Según las características <strong>de</strong> su teléfono móvil, es posible que tenga que pulsar una tecla<br />
<strong>de</strong>l mismo para confirmar la conexión.<br />
Eliminar un dispositivo activo<br />
Tiene la posibilidad <strong>de</strong> eliminar un dispositivo Bluetooth ® <strong>de</strong> la lista <strong>de</strong> dispositivos conectados.<br />
1. Pulse MENU/OK y seleccione Bluetooth.<br />
2. Seleccione Disp. activos.<br />
3. Seleccione el dispositivo Bluetooth ® que <strong>de</strong>see <strong>de</strong>sconectar.<br />
4. Seleccione Eliminar disp. activo.<br />
5. Pulse MENU/OK.<br />
6. La pantalla muestra Disp. eliminado <strong>de</strong> lista <strong>de</strong> disp. activos.<br />
Observación: el dispositivo eliminado <strong>de</strong> la lista <strong>de</strong> dispositivos activos seguirá estando en la <strong>de</strong><br />
dispositivos enlazados.<br />
G. Cambiar el código PIN<br />
Al enlazar un dispositivo, se le pedirá un código PIN para dotar <strong>de</strong> seguridad a la conexión<br />
Bluetooth ® .<br />
El código PIN por <strong>de</strong>fecto <strong>de</strong>l TX 1** es 0000.<br />
1. Pulse MENU/OK y seleccione Bluetooth.<br />
2. Seleccione Cambiar PIN.<br />
3. En la pantalla aparece INTR. NUEVO PIN, junto con el PIN actual.<br />
4. Introduzca el nuevo código <strong>de</strong> 4 cifras con ayuda <strong>de</strong>l teclado alfanumérico.<br />
5. Pulse MENU/OK para confirmar.<br />
H. Copiar un directorio<br />
Pue<strong>de</strong> copiar hasta 4 directorios <strong>de</strong> teléfonos móviles en la memoria <strong>de</strong> su TELEFUNKEN TX 1**<br />
a través <strong>de</strong> Bluetooth ® . Cada directorio copiado pue<strong>de</strong> contener hasta 1500 entradas<br />
(compuestas <strong>de</strong> números <strong>de</strong> 30 cifras y nombres <strong>de</strong> 15 caracteres como máximo).<br />
Para realizar esta operación, el teléfono móvil <strong>de</strong>be estar previamente enlazado y conectado al<br />
TX 1**.<br />
Coloque su teléfono móvil cerca <strong>de</strong> la base <strong>de</strong>l TELEFUNKEN TX 1** cuando <strong>de</strong>see efectuar<br />
una copia <strong>de</strong> directorio.<br />
TX Bluetooth 18
Copia<br />
1. Pulse MENU/OK y seleccione Bluetooth.<br />
2. Seleccione DESCARGAR DIR.<br />
- Si no hay ningún dispositivo enlazado/conectado al TX 1**, consulte los párrafos anteriores<br />
para realizar esta operación.<br />
3. Seleccione uno <strong>de</strong> los dispositivos propuestos y confirme con MENU/OK.<br />
- Si el directorio <strong>de</strong>l teléfono móvil seleccionado ya ha sido copiado en la memoria <strong>de</strong>l<br />
TX 1**, la pantalla muestra Móvil A última act.: DD/MM/AA Para continuar, pulse<br />
OK.<br />
- Si pulsa MENU/OK para continuar la operación, la copia <strong>de</strong>l directorio <strong>de</strong>l teléfono<br />
móvil seleccionado sustituirá a la anterior versión en la memoria <strong>de</strong>l TX 1**.<br />
- Pulse MENU/OK para confirmar.<br />
- Si ha realizado modificaciones en el directorio anteriormente copiado, estas serán<br />
eliminadas por la nueva copia.<br />
- Si ya ha copiado 4 directorios <strong>de</strong> teléfono móvil, la pantalla muestra Memoria llena<br />
¿Sustituir DIR. actual? Pulse MENU/OK para confirmar.<br />
4. Seleccione una <strong>de</strong> las opciones siguientes:<br />
- Memoria <strong>de</strong>l tel. – copia <strong>de</strong> los contactos almacenados en la memoria interna <strong>de</strong> su<br />
teléfono.<br />
- Solo tarjeta SIM – copia <strong>de</strong> los contactos registrados en su tarjeta SIM.<br />
- Tel. y SIM – copia <strong>de</strong> los contactos almacenados en la memoria interna y en la tarjeta<br />
SIM.<br />
- Cuando la copia ha terminado, en la pantalla aparece: Descarga terminada. Total<br />
#XXXX entradas guard.<br />
- Pulse MENU/OK o COLGAR/C para volver al menú.<br />
Observación:<br />
Algunos móviles no permiten la copia <strong>de</strong>l directorio <strong>de</strong> su tarjeta SIM.<br />
En ese caso, transfiera en primer lugar los contactos <strong>de</strong> su tarjeta SIM a la memoria interna<br />
<strong>de</strong> su teléfono antes <strong>de</strong> lanzar la operación <strong>de</strong> copia <strong>de</strong>l directorio en el TX 1**.<br />
Para más información al respecto, consulte el manual <strong>de</strong> utilización <strong>de</strong> su teléfono móvil.<br />
Al copiar un directorio <strong>de</strong> teléfono móvil en el TX 1**, algunas entradas pue<strong>de</strong>n per<strong>de</strong>rse (p. ej.<br />
valores diferentes <strong>de</strong> números <strong>de</strong> teléfono almacenados en un mismo contacto).<br />
Interrupción <strong>de</strong> la copia <strong>de</strong> directorio<br />
Las siguientes inci<strong>de</strong>ncias no interfieren en la copia <strong>de</strong>l directorio<br />
- Recibir o realizar una llamada por la línea fija<br />
- Colocar el terminal en la base o en el cargador<br />
- Acce<strong>de</strong>r al directorio <strong>de</strong>l teléfono móvil (sin realizar modificaciones en los contactos)<br />
- Batería baja en el terminal<br />
- Pérdida <strong>de</strong> conexión entre el terminal y la base<br />
No obstante, la copia se interrumpe en los siguientes casos:<br />
- Recepción <strong>de</strong> una llamada en el teléfono móvil<br />
- Corte <strong>de</strong> la alimentación eléctrica <strong>de</strong> la base <strong>de</strong>l TX 1**<br />
Nota: En esos casos, <strong>de</strong>berá volver a iniciar la operación <strong>de</strong> copia <strong>de</strong> directorio.<br />
TX Bluetooth 19
4 UTILIZACIÓN DEL TELÉFONO<br />
A. Línea fija<br />
Realizar una llamada<br />
Pulse la tecla CASA o la tecla ALTAVOZ e introduzca el número <strong>de</strong> teléfono.<br />
O Introduzca el número <strong>de</strong> teléfono y pulse la tecla CASA o la tecla ALTAVOZ.<br />
Respon<strong>de</strong>r a una llamada<br />
Cuando reciba una llamada en la línea fija, el teléfono sonará. La pantalla muestra entonces el<br />
número <strong>de</strong>l interlocutor, si este está disponible, o el nombre <strong>de</strong>l interlocutor, si correspon<strong>de</strong> a un<br />
contacto <strong>de</strong> su directorio. Pulse la tecla CASA o la tecla ALTAVOZ para respon<strong>de</strong>r a una llamada<br />
entrante.<br />
Finalizar una llamada<br />
Pulse la tecla COLGAR/C o vuelva a colocar el terminal en su base o cargador.<br />
B. Línea móvil<br />
Pue<strong>de</strong> tener hasta 2 teléfonos móviles conectados al mismo tiempo a la base <strong>de</strong>l TX 1**, pero<br />
solo uno <strong>de</strong> ellos podrá emitir/recibir una llamada a través <strong>de</strong>l terminal.<br />
Realizar una llamada <strong>de</strong>s<strong>de</strong> la línea móvil<br />
Introduzca el número <strong>de</strong> teléfono. Pulse la tecla GSM para realizar una llamada <strong>de</strong>s<strong>de</strong> la línea<br />
móvil si solo tiene un teléfono móvil conectado a la base <strong>de</strong>l TX 1**. Si tiene dos teléfonos móviles<br />
conectados a la base <strong>de</strong>l TX 1**, el sistema le propondrá elegir la línea móvil con la que <strong>de</strong>sea<br />
realizar la llamada.<br />
Recibir una llamada<br />
Pulse la tecla GSM.<br />
Observación: también podrá utilizar directamente su teléfono móvil para respon<strong>de</strong>r a la llamada.<br />
Si respon<strong>de</strong> con su teléfono móvil, este se <strong>de</strong>sconectará automáticamente <strong>de</strong> la base <strong>de</strong>l TX 1**.<br />
Finalizar una llamada<br />
Pulse la tecla COLGAR/C o vuelva a colocar el terminal en su base o cargador.<br />
Respon<strong>de</strong>r a una llamada en la línea móvil cuando ya se está utilizando la línea fija<br />
Si ya se está comunicando por la línea fija y recibe una llamada proveniente <strong>de</strong> su línea móvil,<br />
oirá un pitido y o aparecerá en el terminal que esté utilizando.<br />
La base <strong>de</strong>l TX 1** y el resto <strong>de</strong> terminales sonarán.<br />
Para respon<strong>de</strong>r a la llamada en la línea móvil:<br />
Pulse la tecla GSM <strong>de</strong>l terminal. La comunicación <strong>de</strong> la línea fija se pondrá automáticamente en<br />
espera y en el resto <strong>de</strong> terminales aparecerá alternativamente Llamada CASA en espera y Línea<br />
móvil utilizada.<br />
TX Bluetooth 20
Para finalizar la comunicación en la línea móvil:<br />
Pulse la tecla COLGAR/C <strong>de</strong>l terminal. La comunicación <strong>de</strong> la línea fija seguirá en espera. Todos<br />
los terminales muestran Llamada Casa en espera.<br />
Para reanudar la llamada en espera <strong>de</strong> la línea fija:<br />
Pulse la tecla CASA <strong>de</strong>l terminal.<br />
Respon<strong>de</strong>r a una llamada en la línea fija cuando ya se está utilizando la línea móvil<br />
Si ya se está comunicando por la línea móvil y recibe una llamada proveniente <strong>de</strong> su línea fija,<br />
oirá un pitido y GSM aparecerá en el terminal que esté utilizando. La base <strong>de</strong>l TX 1**y el resto <strong>de</strong><br />
terminales sonarán.<br />
Pulse la tecla COLGAR/C <strong>de</strong>l terminal. La comunicación <strong>de</strong> la línea móvil se pondrá<br />
automáticamente en espera y en el resto <strong>de</strong> terminales aparecerá alternativamente Llamada<br />
móvil en espera y Línea Casa utilizada.<br />
Para finalizar la comunicación en la línea fija:<br />
Pulse la tecla COLGAR/C <strong>de</strong>l terminal. La comunicación <strong>de</strong> la línea móvil seguirá en espera.<br />
Todos los terminales muestran Llamada móvil en espera.<br />
Para reanudar la llamada en espera <strong>de</strong> la línea fija:<br />
Pulse la tecla GSM <strong>de</strong>l terminal.<br />
Observación: si tiene activado el contestador y no respon<strong>de</strong> a la llamada entrante en la línea fija,<br />
el contestador se pondrá en marcha normalmente.<br />
Si realiza o respon<strong>de</strong> a una llamada <strong>de</strong>s<strong>de</strong> su terminal, podrá transferirla a un auricular Bluetooth ® .<br />
El terminal seguirá activo, pero el altavoz y el micrófono se <strong>de</strong>sactivarán.<br />
Si cuelga el terminal, la llamada se terminará.<br />
Contestador <strong>de</strong> la línea móvil<br />
Si el contestador <strong>de</strong> su línea fija está activado y no respon<strong>de</strong> a una llamada entrante en la línea<br />
móvil, el contestador se pondrá en marcha normalmente.<br />
Póngase en contacto con su operador <strong>de</strong> telefonía móvil para más información sobre el servicio<br />
<strong>de</strong> contestador móvil.<br />
Cuentaminutos<br />
Su terminal calculará automáticamente la duración <strong>de</strong> sus llamadas externas. El terminal muestra<br />
la duración <strong>de</strong> la llamada a lo largo <strong>de</strong> la misma y en los instantes posteriores a su finalización.<br />
Aviso fuera <strong>de</strong> cobertura<br />
Cuando el terminal sale <strong>de</strong> la zona <strong>de</strong> cobertura <strong>de</strong> su base, la llamada en curso se interrumpe. Al<br />
<strong>de</strong>splazarse nuevamente <strong>de</strong>ntro <strong>de</strong> la zona <strong>de</strong> cobertura, el terminal se vuelve a conectar<br />
automáticamente a su base.<br />
TX Bluetooth 21
C. Utilización <strong>de</strong> un auricular Bluetooth<br />
Pue<strong>de</strong> utilizar un auricular Bluetooth ® para las llamadas en su línea fija. No obstante, <strong>de</strong>berá<br />
permanecer en un radio <strong>de</strong> 10 metros con respecto a la base <strong>de</strong>l TX 1** para conservar la señal<br />
Bluetooth ® .<br />
Para respon<strong>de</strong>r a una llamada en la línea fija con un auricular Bluetooth<br />
Pulse la tecla <strong>de</strong> llamada <strong>de</strong> su auricular.<br />
Para finalizar una llamada en la línea fija con un auricular Bluetooth<br />
Pulse la tecla <strong>de</strong> llamada <strong>de</strong> su auricular.<br />
Si realiza o respon<strong>de</strong> a una llamada <strong>de</strong>s<strong>de</strong> su terminal, podrá transferirla a un auricular Bluetooth ® .<br />
El terminal seguirá activo, pero el ALTAVOZ y el micrófono se <strong>de</strong>sactivarán.<br />
Si cuelga el terminal, la llamada se terminará.<br />
Para transferir una llamada <strong>de</strong> un terminal a un auricular Bluetooth:<br />
Pulse MENU/OK dos veces para seleccionar Util. auricular.<br />
Para transferir una llamada <strong>de</strong> un auricular Bluetooth a un terminal:<br />
Pulse MENU/OK dos veces para seleccionar Util. terminal.<br />
Para finalizar una llamada que comenzó en el terminal:<br />
Pulse la tecla COLGAR/C o vuelva a colocar el terminal en su base o cargador.<br />
Observación: si respon<strong>de</strong> a una llamada utilizando un auricular Bluetooth ® , per<strong>de</strong>rá la<br />
comunicación si se interrumpe la conexión Bluetooth ® o se <strong>de</strong>scarga la batería.<br />
Si utiliza un auricular Bluetooth ® con una llamada transferida <strong>de</strong>s<strong>de</strong> el terminal <strong>de</strong>l TX 1**, en caso<br />
<strong>de</strong> per<strong>de</strong>r la conexión Bluetooth ® o <strong>de</strong> que la batería se <strong>de</strong>scargue, la comunicación volverá al<br />
terminal <strong>de</strong> origen.<br />
Ajuste <strong>de</strong>l volumen <strong>de</strong>l terminal/ALTAVOZ :<br />
Pulse ARRIBA/ABAJO para ajustar el volumen <strong>de</strong>l terminal o <strong>de</strong>l altavoz durante una llamada.<br />
Cada presión en el botón aumenta o disminuye el volumen en un nivel.<br />
Pulse ARRIBA/ABAJO para aumentar o disminuir el volumen durante una llamada.<br />
Observación: Los parámetros <strong>de</strong>l volumen <strong>de</strong>l terminal (1-5) y los parámetros <strong>de</strong>l altavoz (1-6)<br />
son in<strong>de</strong>pendientes. Cuando el volumen alcance su nivel mínimo o máximo, oirá dos pitidos.<br />
D. Poner una llamada en espera<br />
Pue<strong>de</strong> poner una llamada <strong>de</strong> la línea fija o móvil en espera. Oirá una señal sonora si no ha<br />
reanudado una llamada en espera <strong>de</strong>spués <strong>de</strong> 14 minutos, y otra señal sonora 30 segundos<br />
<strong>de</strong>spués.<br />
TX Bluetooth 22
Tras 15 minutos, la llamada en espera se <strong>de</strong>sconectará automáticamente.<br />
Para poner una llamada en espera en la línea fija:<br />
Pulse ESPERA. En la pantalla aparece Llamada Casa en espera y la tecla CASA parpa<strong>de</strong>a.<br />
Para reanudar una llamada en espera en la línea fija:<br />
Pulse CASA.<br />
Para poner una llamada en espera en la línea móvil:<br />
Pulse ESPERA. En la pantalla aparece Llamada móvil en espera y la tecla GSM parpa<strong>de</strong>a.<br />
Para reanudar una llamada en espera en la línea móvil:<br />
Pulse la tecla GSM.<br />
E. Función silencio<br />
Utilice la función silencio para cortar el micrófono. Podrá oír a su interlocutor pero él no lo oirá a<br />
usted.<br />
Para activar la función silencio durante una llamada:<br />
Pulse SILENCIO/ELIMINACIÓN. Cuando esta función está activada, la pantalla <strong>de</strong>l terminal<br />
muestra Mic. <strong>de</strong>sactivado durante unos segundos, y el icono SILENCIO/ELIMINACIÓN aparece<br />
hasta que se <strong>de</strong>sactiva la función.<br />
Para <strong>de</strong>sactivar la función silencio durante una llamada:<br />
Pulse SILENCIO/ELIMINACIÓN. Cuando la función silencio se <strong>de</strong>sactiva, Mic. activado aparece<br />
brevemente en la pantalla <strong>de</strong>l terminal. La función silencio se <strong>de</strong>sactiva automáticamente cuando<br />
finaliza la llamada.<br />
F. Manos libres<br />
El modo manos libres le permite mantener una conversación telefónica sin tener que llevarse el<br />
terminal a la oreja. Permite igualmente que otras personas se unan a la conversación.<br />
Realizar una llamada en modo manos libres<br />
1. Marque el número y pulse la tecla ALTAVOZ <strong>de</strong>l terminal.<br />
Pulse ALTAVOZ para <strong>de</strong>volver la llamada al auricular.<br />
2. Pulse COLGAR/C para finalizar la llamada.<br />
Observación: durante la llamada manos libres, utilice las teclas ARRIBA/ABAJO para ajustar el<br />
volumen.<br />
Respon<strong>de</strong>r a una llamada en modo manos libres<br />
Cuando el teléfono suene, <strong>de</strong>scuelgue pulsando la tecla ALTAVOZ.<br />
TX Bluetooth 23
Pasar a modo manos libres durante una llamada<br />
Durante la llamada, pulse ALTAVOZ.<br />
G. Números marcados<br />
Volver a llamar a un número marcado<br />
Se guardan los 20 últimos números a los que se ha llamado.<br />
Pue<strong>de</strong> seleccionarlos para llamar, grabarlos en el directorio o borrarlos.<br />
1. Pulse CASA o ALTAVOZ y luego REPETICIÓN/PAUSA.<br />
o las teclas ARRIBA/ABAJO para recorrer los números compuestos<br />
2. Pulse MENU/OK para volver a llamar al número seleccionado<br />
O bien<br />
En modo <strong>de</strong> espera, pulse REPETICIÓN/PAUSA y luego recorra la lista <strong>de</strong> números.<br />
.<br />
Grabar un número marcado en el directorio<br />
1. En modo <strong>de</strong> espera, pulse REPETICIÓN/PAUSA.<br />
2. Seleccione el número que <strong>de</strong>sea grabar.<br />
3. Pulse dos veces MENU/OK. La pantalla muestra INTRODUCIR NÚMERO.<br />
Edite el número <strong>de</strong> ser necesario.<br />
4. Pulse MENU/OK y seleccione una <strong>de</strong> las categorías siguientes:<br />
- CASA<br />
- GSM<br />
- Oficina<br />
- Otro<br />
5. Pulse MENU/OK. La pantalla muestra INTRODUCIR NOMBRE.<br />
Edite el nombre con ayuda <strong>de</strong>l teclado <strong>de</strong> ser necesario.<br />
6. Pulse MENU/OK para confirmar la grabación.<br />
Eliminar un número marcado<br />
1. En modo <strong>de</strong> espera, pulse REPETICIÓN/PAUSA.<br />
2. Seleccione el número que <strong>de</strong>sea borrar.<br />
3. Pulse SILENCIO/ELIMINACIÓN para borrar el número seleccionado.<br />
H. Timbres<br />
Localización <strong>de</strong>l terminal<br />
Pue<strong>de</strong> hacer sonar el terminal para localizarlo.<br />
1. Pulse la tecla BÚSQUEDA <strong>de</strong> la base. Todos los terminales en espera sonarán y mostrarán<br />
**Señal base**<br />
2. Pulse <strong>de</strong> nuevo BÚSQUEDA para <strong>de</strong>tener el sonido <strong>de</strong>s<strong>de</strong> la base.<br />
Desactivación temporal <strong>de</strong> los tonos<br />
Cuando el teléfono suena, pue<strong>de</strong> <strong>de</strong>sactivar temporalmente el tono <strong>de</strong>l terminal o <strong>de</strong> la base sin<br />
finalizar la llamada. En las siguientes llamadas, el teléfono sonará normalmente.<br />
TX Bluetooth 24
Timbre <strong>de</strong>l microteléfono<br />
Pulse SILENCIO/ELIMINACIÓN en el terminal y aparecerá Tono apagado.<br />
Tono <strong>de</strong> la base<br />
Pulse VOLUMEN- en la base <strong>de</strong>l TX 1**hasta que L0 aparezca en la pantalla LED.<br />
I. Acceso a los contactos durante una llamada<br />
Esta función le permite acce<strong>de</strong>r al contenido <strong>de</strong> los directorios y <strong>de</strong> la lista <strong>de</strong> llamadas durante<br />
una llamada. Esto pue<strong>de</strong> resultar útil para comunicar un número a su interlocutor o para acce<strong>de</strong>r<br />
a una información almacenada en el directorio.<br />
Para acce<strong>de</strong>r al directorio durante una llamada:<br />
1. Pulse MENU/OK y seleccione Directorio.<br />
2. Pulse MENU/OK y seleccione el directorio <strong>de</strong>seado.<br />
3. Pulse MENU/OK y ARRIBA/ABAJO para acce<strong>de</strong>r al número <strong>de</strong>seado.<br />
Para acce<strong>de</strong>r a la lista <strong>de</strong> llamadas durante una llamada:<br />
1. Pulse MENU/OK y seleccione Lista.<br />
2. Pulse MENU/OK, ARRIBA/ABAJO y seleccione el contacto <strong>de</strong>seado.<br />
Para acce<strong>de</strong>r a la lista <strong>de</strong> números marcados durante una llamada:<br />
1. Pule la tecla REPETICIÓN/PAUSA <strong>de</strong>l teclado.<br />
2. Pulse ARRIBA/ABAJO para acce<strong>de</strong>r al número <strong>de</strong>seado.<br />
3. Pulse MENU/OK. Si no pulsa MENU/OK al cabo <strong>de</strong> 2 segundos, el número <strong>de</strong>seado se<br />
marcará automáticamente.<br />
Observación: no pue<strong>de</strong> modificar los números mostrados cuando está en comunicación.<br />
Mantenga presionado C para volver a la pantalla principal.<br />
5 DIRECTORIO<br />
El directorio <strong>de</strong>l TX 1** está formado por el directorio <strong>de</strong> la línea fija (200 nombres máx.) y por<br />
aquellos directorios que se copiaron <strong>de</strong> teléfonos móviles (hasta 4 directorios, 1500 nombres<br />
como máximo cada uno).<br />
Tamaño máximo <strong>de</strong> las entradas: 30 cifras por número y 15 caracteres por nombre.<br />
A. Grabar un número <strong>de</strong> teléfono en el directorio <strong>de</strong> la línea fija<br />
1. Pulse MENU/OK y seleccione Directorio.<br />
2. A continuación, seleccione CASA.<br />
3. Seleccione Añadir contacto.<br />
4. Confirme con MENU/OK. La pantalla muestra Entre el numero.<br />
5. Introduzca el nombre con ayuda <strong>de</strong>l teclado.<br />
O bien<br />
TX Bluetooth 25
Copie un número <strong>de</strong> la lista <strong>de</strong> llamadas.<br />
- Pulse REPETICIÓN/PAUSA y utilice las teclas ARRIBA/ABAJO para recorrer los<br />
números.<br />
- Pulse MENU/OK para copiar el número seleccionado.<br />
6. Pulse MENU/OK y seleccione una <strong>de</strong> las siguientes categorías.<br />
- CASA<br />
- GSM<br />
- Oficina<br />
- Otro<br />
7. Confirme con MENU/OK. La pantalla muestra INTRODUZCA EL NOMBRE.<br />
8. Introduzca el nombre con ayuda <strong>de</strong>l teclado alfanumérico.<br />
9. Pulse MENU/OK para guardar el contacto.<br />
Observación:<br />
No pue<strong>de</strong> crear nuevos contactos <strong>de</strong> esta forma en los directorios <strong>de</strong>scargados <strong>de</strong>s<strong>de</strong> un<br />
teléfono móvil. La creación <strong>de</strong> nuevos contactos en estos directorios pue<strong>de</strong> hacerse<br />
añadiéndolos en el directorio <strong>de</strong>l teléfono móvil y copiando este <strong>de</strong> nuevo en el TX 1**.<br />
Modo <strong>de</strong> introducción <strong>de</strong> nombres<br />
Ejemplo: TOM<br />
Pulse una vez para introducir la “T”<br />
Pulse 3 veces para introducir la “o”<br />
Pulse una vez para introducir la “m”<br />
Trucos <strong>de</strong> escritura<br />
Pulse REPETICIÓN/PAUSA para borrar la última cifra o carácter introducido.<br />
Mantenga pulsado REPETICIÓN/PAUSA para borrar las cifras o caracteres introducidos en el<br />
campo.<br />
Utilice las teclas ARRIBA/ABAJO para pasar <strong>de</strong> una cifra o un carácter a otro.<br />
Mantenga pulsado REPETICIÓN/PAUSA para introducir una pausa en la secuencia <strong>de</strong><br />
marcación.<br />
B. Recorrer las entradas <strong>de</strong>l directorio<br />
2. Pulse ARRIBA para acce<strong>de</strong>r al directorio<br />
3. Seleccione CASA o uno <strong>de</strong> los directorios móviles.<br />
4. Pulse MENU/OK y utilice las teclas ARRIBA/ABAJO para recorrer los contactos.<br />
O bien<br />
1. Pulse MENU/OK y seleccione Directorio.<br />
2. Selecci oneCASA o uno <strong>de</strong> los directorios móviles.<br />
3. Pulse MENU/OK y seleccione Ver.<br />
4. Utilice las teclas ARRIBA/ABAJO para recorrer los contactos.<br />
Observación: se le pedirá el código <strong>de</strong> seguridad PIN para acce<strong>de</strong>r a los directorios <strong>de</strong> teléfono<br />
móvil.<br />
C. Llamar a un número <strong>de</strong>s<strong>de</strong> un directorio<br />
Pue<strong>de</strong> llamar a un contacto con la línea fija o la móvil.<br />
1. Pulse ARRIBA para acce<strong>de</strong>r a los directorios, seleccione CASA o uno <strong>de</strong> los directorios <strong>de</strong><br />
teléfono móvil.<br />
2. Pulse MENU/OK y seleccione un contacto con ayuda <strong>de</strong> las teclas ARRIBA/ABAJO, o realice<br />
una búsqueda mediante el teclado alfanumérico (véase a continuación).<br />
TX Bluetooth 26
3. Pulse CASA o ALTAVOZ para llamar al contacto por la línea fija, o GSM para utilizar la línea<br />
móvil.<br />
Búsqueda alfabética<br />
Pulse una tecla <strong>de</strong>l teclado alfanumérico, por ejemplo una vez para la letra T, y pulse<br />
ARRIBA/ABAJO para recorrer los contactos.<br />
D. Modificar un contacto<br />
Pue<strong>de</strong> modificar cualquier contacto <strong>de</strong>l directorio.<br />
Sin embargo, en el caso <strong>de</strong> un directorio copiado <strong>de</strong>s<strong>de</strong> un teléfono móvil, los cambios efectuados<br />
<strong>de</strong>s<strong>de</strong> el TX 1** se per<strong>de</strong>rán si actualiza el directorio (nueva copia <strong>de</strong>s<strong>de</strong> el mismo teléfono móvil).<br />
1. Pulse la tecla ARRIBA para acce<strong>de</strong>r al directorio.<br />
2. Pulse ARRIBA/ABAJO y seleccione un directorio (CASA o GSM).<br />
3. Pulse MENU/OK y seleccione el contacto que <strong>de</strong>see modificar.<br />
4. Pulse MENU/OK y edite el número con ayuda <strong>de</strong>l teclado.<br />
5. Pulse MENU/OK y seleccione la categoría que <strong>de</strong>sea asignar al contacto modificado:<br />
- CASA<br />
- GSM<br />
- Oficina<br />
- Otro<br />
6. Pulse MENU/OK. La pantalla muestra EDITAR NOMBRE.<br />
Modifique el nombre con ayuda <strong>de</strong>l teclado.<br />
7. Confirme con MENU/OK.<br />
Modificar la categoría <strong>de</strong> un contacto<br />
1. Pulse la tecla ARRIBA para acce<strong>de</strong>r al directorio.<br />
2. PulseARRIBA/ABAJO y selecci o ne un directorio (CASA o GSM).<br />
3. Pulse MENU/OK y seleccione el contacto que <strong>de</strong>see modificar.<br />
4. Cuando la categoría aparezca, introduzca el número <strong>de</strong> la nueva categoría <strong>de</strong>seada <strong>de</strong><br />
acuerdo con la siguiente tabla. Confirme con MENU/OK.<br />
E. Borrar un contacto<br />
Tipo: Pulse<br />
CASA * 1<br />
GSM * 2<br />
Oficina * 3<br />
Otro * 4<br />
1. Pulse la tecla ARRIBA para acce<strong>de</strong>r al directorio.<br />
2. Pulse ARRIBA/ABAJO y seleccione un directorio (CASA o GSM).<br />
3. Pulse MENU/OK y seleccione el contacto que <strong>de</strong>see eliminar.<br />
4. Pulse SILENCIO/ELIMINACIÓN; en la pantalla aparece ¿Borrar contacto? Pulse OK para<br />
confirmar.<br />
5. Pulse MENU/OK para confirmar la eliminación.<br />
Observación: la eliminación <strong>de</strong> un contacto es <strong>de</strong>finitiva.<br />
F. Eliminar un directorio <strong>de</strong> teléfono móvil<br />
1. Pulse la tecla ARRIBA para acce<strong>de</strong>r al directorio.<br />
TX Bluetooth 27
2. Seleccione el directorio GSM que <strong>de</strong>see eliminar.<br />
3. Pulse MENU/OK y seleccione Eliminar dir.<br />
4. Pulse MENU/OK. La pantalla muestra Supresión <strong>de</strong>l directorio. Pulse OK para confirmar.<br />
5. Pulse MENU/OK para confirmar<br />
Observación: se le pedirá el código PIN para acce<strong>de</strong>r al contenido <strong>de</strong> los directorios <strong>de</strong> teléfono<br />
móvil.<br />
G. Configurar el código <strong>de</strong> país para los directorios<br />
Esta función le permite sacar el máximo partido <strong>de</strong> la copia <strong>de</strong> los directorios <strong>de</strong> teléfono móvil,<br />
así como <strong>de</strong> la marcación <strong>de</strong>s<strong>de</strong> la lista <strong>de</strong> llamadas o la lista <strong>de</strong> números marcados.<br />
1. Pulse MENU/OK y seleccione Ajustes.<br />
2. Seleccione Código <strong>de</strong> país.<br />
3. Introduzca el código <strong>de</strong> país <strong>de</strong>seado y confirme con MENU/OK.<br />
H. Código <strong>de</strong> seguridad para los directorios <strong>de</strong> teléfono móvil<br />
Este ajuste le permite proteger su directorio <strong>de</strong> teléfono móvil con un código PIN <strong>de</strong> 4 cifras.<br />
Si el código está activado, se le pedirá cada vez que <strong>de</strong>see acce<strong>de</strong>r a este directorio.<br />
1. Pulse MENU/OK y seleccione Directorio.<br />
2. Seleccione uno <strong>de</strong> los directorios <strong>de</strong> teléfono móvil.<br />
3. Pulse MENU/OK y seleccione Seguridad.<br />
4. Seleccione Activo.<br />
5. Introduzca un código <strong>de</strong> 4 cifras con ayuda <strong>de</strong>l teclado.<br />
6. Confirme el código elegido introduciéndolo <strong>de</strong> nuevo.<br />
7. Pulse MENU/OK para confirmar.<br />
Observación: cada directorio <strong>de</strong> teléfono móvil <strong>de</strong>scargado pue<strong>de</strong> protegerse con un código PIN<br />
in<strong>de</strong>pendiente.<br />
I. Configurar el código PABX<br />
Esta función le permite configurar automáticamente el prefijo <strong>de</strong> una centralita PABX para realizar<br />
llamadas externas. Una vez que haya introducido un prefijo en el teléfono, este se marcará<br />
automáticamente antes <strong>de</strong> todos los números exclusivamente en la línea fija.<br />
Observación: El prefijo estará seguido obligatoriamente <strong>de</strong> una pausa.<br />
1. Pulse MENU/OK y seleccione Ajustes.<br />
2. Seleccione Prefijo PABX.<br />
3. Introduzca el código <strong>de</strong>seado y confirme con MENU/OK.<br />
Para borrar el prefijo o <strong>de</strong>sactivar la función, basta con eliminar el prefijo con la tecla<br />
SILENCIO/ELIMINACIÓN.<br />
TX Bluetooth 28
6 AJUSTES<br />
A. Ajustes <strong>de</strong>l terminal TX 1**<br />
Volumen <strong>de</strong>l timbre<br />
Pue<strong>de</strong> regular el volumen <strong>de</strong>l tono <strong>de</strong> llamada (1-6) o <strong>de</strong>sactivarlo por completo.<br />
Pue<strong>de</strong> elegir ajustes diferentes para las llamadas recibidas por la línea fija y las recibidas por la<br />
línea móvil.<br />
1. Pulse MENU/OK y seleccione Audio.<br />
2. Seleccione Vol. tono <strong>de</strong> llamada.<br />
Seleccione CASA, GSM 1, GSM 2 o Todas las líneas.<br />
3. Utilice las teclas ARRIBA/ABAJO para recorrer los 6 niveles <strong>de</strong> volumen.<br />
4. Pulse MENU/OK para guardar su selección.<br />
Selección <strong>de</strong>l tono <strong>de</strong> llamada<br />
Pue<strong>de</strong> seleccionar tonos diferentes para las líneas fijas y móviles.<br />
1. Pulse MENU/OK y seleccione Audio.<br />
2. Seleccione Tono <strong>de</strong> llamada.<br />
3. Seleccione CASA, GSM 1, GSM 2 o Todas las líneas.<br />
4. Utilice las teclas ARRIBA/ABAJO para recorrer los tonos.<br />
5. Pulse MENU/OK para guardar su selección.<br />
Alertas sonoras (tono <strong>de</strong> las teclas, señal <strong>de</strong> batería baja y fuera <strong>de</strong> cobertura)<br />
1. Pulse MENU/OK y seleccione Audio.<br />
2. Seleccione Tono teclas, Batería baja o Fuera <strong>de</strong> cobertura.<br />
3. En cada una <strong>de</strong> estas opciones, active o <strong>de</strong>sactive la señal sonora pulsando MENU/OK<br />
o COLGAR/C.<br />
4. Pulse MENU/OK para confirmar.<br />
Formato <strong>de</strong> la fecha<br />
1. Pulse MENU/OK y seleccione Ajustes.<br />
2. Seleccione Formato fecha.<br />
3. Seleccione DD/MM/AA o MM/DD/AA.<br />
4. Pulse MENU/OK para confirmar su selección.<br />
Formato <strong>de</strong> hora<br />
1. Pulse MENU/OK y seleccione Ajustes.<br />
2. Seleccione Formato hora.<br />
3. Seleccione 12 horas o 24 horas.<br />
4. Pulse MENU/OK para confirmar su selección.<br />
Ajuste manual <strong>de</strong> la fecha y la hora<br />
1. Pulse MENU/OK y seleccione Ajustes.<br />
2. Seleccione Ajust. fecha/hora.<br />
3. Introduzca la fecha con ayuda <strong>de</strong>l teclado alfanumérico.<br />
TX Bluetooth 29
4. Pulse MENU/OK e introduzca la hora con ayuda <strong>de</strong>l teclado.<br />
5. Pulse MENU/OK para guardar.<br />
Auto hablar<br />
Esta función permite respon<strong>de</strong>r a una llamada retirando el terminal <strong>de</strong> su base. Está activada por<br />
<strong>de</strong>fecto.<br />
En el caso <strong>de</strong> que esté <strong>de</strong>sactivada, tendrá que pulsar CASA tras haber retirado el terminal.<br />
1. Pulse MENU/OK y seleccione Ajustes.<br />
2. Seleccione Resp. directa.<br />
3. Pulse MENU/OK o COLGAR/C.<br />
4. Pulse MENU/OK para confirmar su selección.<br />
Reinicio <strong>de</strong>l microteléfono<br />
1. Pulse MENU/OK y seleccione Ajustes.<br />
2. Seleccione Reiniciar.<br />
3. Introduzca el código PIN <strong>de</strong> 4 cifras (0000 por <strong>de</strong>fecto).<br />
4. Pulse MENU/OK. La pantalla muestra ¿Reiniciar los ajustes?<br />
5. Pulse MENU/OK para confirmar el reinicio.<br />
B. Ajustes <strong>de</strong> la base<br />
Modo <strong>de</strong> marcación<br />
El modo <strong>de</strong> marcación pre<strong>de</strong>terminado es el <strong>de</strong> frecuencia vocal (Tonos). No se aconseja<br />
modificarlo sin que su operador <strong>de</strong> telefonía se lo haya indicado.<br />
1. Pulse MENU/OK y seleccione Ajustes.<br />
2. Pulse MENU/OK y seleccione Modo marc.<br />
3. Seleccione Tonos o Impulsos.<br />
4. Pulse MENU/OK para confirmar.<br />
Flashing<br />
El flashing se <strong>de</strong>fine por <strong>de</strong>fecto en función <strong>de</strong> su país y <strong>de</strong> su operador <strong>de</strong> telefonía. Le<br />
<strong>de</strong>saconsejamos modificarlo salvo que se le indique lo contrario.<br />
1. Pulse MENU/OK y seleccione Ajustes.<br />
2. Seleccione Flashing.<br />
3. Elija entre 80 ms, 100 ms, 120 ms, 180 ms, 200 ms, 250 ms, 300 ms y 600 ms.<br />
4. Pulse MENU/OK para confirmar.<br />
Cambiar el código PIN<br />
1. Pulse MENU/OK y seleccione Ajustes.<br />
2. Seleccione PIN sistema.<br />
3. Introduzca el actual código <strong>de</strong> 4 cifras (el código preestablecido es 0000).<br />
4. Pulse MENU/OK e introduzca el nuevo código PIN <strong>de</strong> 4 cifras.<br />
5. Introduzca el código <strong>de</strong> nuevo.<br />
6. Pulse MENU/OK para confirmar.<br />
C. I<strong>de</strong>ntificación <strong>de</strong> llamadas<br />
TX Bluetooth 30
Este producto es compatible con la i<strong>de</strong>ntificación <strong>de</strong> llamadas que proponen algunos operadores<br />
<strong>de</strong> telefonía.<br />
En función <strong>de</strong> su contrato, podrá ver el nombre <strong>de</strong>l interlocutor (si está registrado en su<br />
directorio), su número <strong>de</strong> teléfono o ambos.<br />
En todas las llamadas recibidas en la línea fija, el nombre, el número <strong>de</strong> teléfono y la fecha<br />
aparecen en la pantalla.<br />
En las llamadas recibidas en la línea móvil, solo se muestra el número <strong>de</strong> teléfono; el nombre y la<br />
fecha <strong>de</strong> la llamada no aparecen en la pantalla.<br />
Llamadas perdidas<br />
Pue<strong>de</strong> recorrer las llamadas perdidas, respon<strong>de</strong>r a ellas o copiarlas en el directorio.<br />
Llamadas ocultas<br />
Si su interlocutor ha ocultado voluntariamente sus datos, su nombre no aparecerá en la pantalla,<br />
aunque figure en el directorio.<br />
En ese caso, la pantalla mostrará lo siguiente:<br />
Privado<br />
Llam.<br />
<strong>de</strong>sconocida<br />
Número ocultado por el interlocutor<br />
Número no disponible<br />
D. Información sobre las llamadas<br />
Consultar la lista <strong>de</strong> llamadas pue<strong>de</strong> ser útil para ver quién le ha llamado, encontrar fácilmente un<br />
contacto o grabarlo en el directorio sin tener que introducir el número.<br />
1. Pulse MENU/OK y seleccione Lista.<br />
2. Utilice las teclas ARRIBA/ABAJO para recorrer la lista <strong>de</strong> llamadas.<br />
Llamar a un número <strong>de</strong>s<strong>de</strong> la lista <strong>de</strong> llamadas<br />
1. Des<strong>de</strong> la lista <strong>de</strong> llamadas, pulse ARRIBA/ABAJO para seleccionar el número.<br />
2. Pulse CASA o ALTAVOZ para llamar al número por la línea fija o GSM para utilizar la línea<br />
móvil.<br />
Grabar un número <strong>de</strong> la lista <strong>de</strong> llamadas<br />
1. Des<strong>de</strong> la lista <strong>de</strong> llamadas, pulse ARRIBA/ABAJO para seleccionar el número<br />
2. Pulse MENU/OK. La pantalla muestra EDITAR NÚMERO.<br />
3. Modifique el número <strong>de</strong> ser necesario y pulse MENU/OK.<br />
4. Seleccione una <strong>de</strong> las siguientes categorías:<br />
- CASA<br />
- GSM<br />
- Oficina<br />
- Otro<br />
5. Pulse MENU/OK. La pantalla muestra EDITAR NOMBRE.<br />
6. Introduzca el nombre con ayuda <strong>de</strong>l teclado alfanumérico.<br />
7. Pulse MENU/OK para guardar el contacto.<br />
TX Bluetooth 31
Borrar un número <strong>de</strong> la lista <strong>de</strong> llamadas<br />
1. Des<strong>de</strong> la lista <strong>de</strong> llamadas, pulse ARRIBA/ABAJO para seleccionar el número que <strong>de</strong>sea<br />
eliminar.<br />
2. Pulse SILENCIO/ELIMINACIÓN para borrarlo.<br />
Borrar la lista <strong>de</strong> llamadas<br />
1. Pulse MENU/OK y seleccione Lista.<br />
2. Seleccione Borrar lista.<br />
3. Pulse MENU/OK. La pantalla muestra ¿Borrar lista? Pulse OK para confirmar.<br />
4. Pulse MENU/OK.<br />
E. Servicios <strong>de</strong>l operador<br />
Contestador<br />
Si ha suscrito un servicio <strong>de</strong> contestador con su operador, un icono en la pantalla <strong>de</strong>l terminal o<br />
<strong>de</strong> los terminales le indicará la presencia <strong>de</strong> nuevos mensajes. Póngase en contacto con su<br />
operador <strong>de</strong> telefonía para obtener más información sobre la utilización <strong>de</strong> esta función. Esta<br />
opción solo funciona con las llamadas a su línea fija.<br />
Cuando haya leído todos sus mensajes, el indicador <strong>de</strong>jará <strong>de</strong> aparecer en la pantalla. Si el<br />
símbolo aparece pero no tienen nuevos mensajes, utilice la función correspondiente para que el<br />
símbolo <strong>de</strong>saparezca.<br />
La <strong>de</strong>sactivación <strong>de</strong>l icono no implica la eliminación <strong>de</strong> los mensajes en el servidor.<br />
Borrar el indicador <strong>de</strong> nuevos mensajes<br />
1. En espera, pulse MENU/OK y seleccione Ajustes.<br />
2. Pulse MENU/OK y seleccione Elim. mensajes.<br />
3. Pulse MENU/OK, en la pantalla aparece ¿Desactivar indicadores?<br />
4. Pulse MENU/OK para confirmar o COLGAR/C para anular.<br />
Llamadas en espera<br />
Mediante señales sonoras, su teléfono le indica si recibe alguna llamada cuando está en línea.<br />
Llamadas en espera en la línea fija<br />
SI ha suscrito la opción <strong>de</strong> doble llamada con su operador, oirá una señal sonora si alguien<br />
intenta ponerse en contacto con usted cuando esté en línea.<br />
1. Pulse CASA en el terminal para poner su llamada en espera y respon<strong>de</strong>r a la nueva llamada.<br />
2. Pulse CASA en el terminal para pasar <strong>de</strong> una llamada a otra.<br />
Llamadas en espera en la línea móvil<br />
SI ha suscrito la opción <strong>de</strong> doble llamada con su operador, oirá una señal sonora si alguien<br />
intenta ponerse en contacto con usted cuando esté en línea.<br />
1. Pulse GSM en el terminal para poner su llamada en espera y respon<strong>de</strong>r a la nueva llamada.<br />
2. Pulse GSM en el terminal para pasar <strong>de</strong> una llamada a otra.<br />
TX Bluetooth 32
7 CONTESTADOR<br />
El contestador <strong>de</strong>l TX 1** permite a sus interlocutores <strong>de</strong>jar mensajes vocales cuando usted no<br />
<strong>de</strong>scuelga el teléfono. Se pue<strong>de</strong> grabar un máximo <strong>de</strong> 99 mensajes (14 minutos en total como<br />
máximo).<br />
El tiempo <strong>de</strong> grabación máximo es <strong>de</strong> 14 minutos, incluyendo los menús vocales, el mensaje <strong>de</strong><br />
respuesta y los mensajes entrantes. El menú vocal <strong>de</strong>l contestador pue<strong>de</strong> funcionar en francés o<br />
en inglés.<br />
A. Utilizar el contestador <strong>de</strong>s<strong>de</strong> el microteléfono<br />
Encen<strong>de</strong>r/apagar el contestador<br />
Cuando el contestador está activado, el indicador Contestador se encien<strong>de</strong> en la base, y el icono<br />
Contestador aparece en la pantalla <strong>de</strong>l terminal.<br />
1. En modo <strong>de</strong> espera, pulse MENU/OK y seleccione Contestador.<br />
2. Seleccione Activación constest.<br />
3. Pulse MENU/OK y seleccione Activar o Desactivar.<br />
4. Pulse MENU/OK para confirmar.<br />
Escuchar los mensajes<br />
1. En modo <strong>de</strong> espera, pulse MENU/OK y seleccione Escuchar mensajes.<br />
2. Pulse MENU/OK para escuchar los mensajes.<br />
Si la memoria <strong>de</strong>l contestador contiene tanto nuevos mensajes como mensajes antiguos,<br />
los nuevos mensajes se reproducirán primero.<br />
Durante la escucha, están disponibles las siguientes opciones:<br />
- Pulse ARRIBA/ABAJO para ajustar el volumen.<br />
- Pulse 6 para pasar al mensaje siguiente.<br />
- Pulse 4 para repetir el mensaje en curso <strong>de</strong> reproducción.<br />
- Pulse 4 dos veces para escuchar el mensaje anterior.<br />
- Pulse 5 para borrar el mensaje en curso. El sistema pasa directamente al mensaje<br />
siguiente.<br />
- Pulse 2 para <strong>de</strong>tener la reproducción y volver al menú anterior.<br />
Eliminar los mensajes antiguos<br />
1. En modo <strong>de</strong> espera, pulse MENU/OK y seleccione Ajustes.<br />
2. Seleccione Borrar antiguos.<br />
3. Pulse MENU/OK. La pantalla muestra ¿Borrar todos los mensajes antiguos? Pulse OK<br />
para confirmar.<br />
4. Pulse MENU/OK.<br />
Grabar y reproducir notas vocales<br />
Las notas vocales son mensajes grabados por usted para servir <strong>de</strong> recordatorio. Pue<strong>de</strong> grabarlas<br />
<strong>de</strong>s<strong>de</strong> el terminal <strong>de</strong>l TX 1**. Se pue<strong>de</strong>n reproducir y borrar <strong>de</strong>l mismo modo que los mensajes <strong>de</strong>l<br />
contestador.<br />
TX Bluetooth 33
Grabar una nota vocal<br />
1. En modo <strong>de</strong> espera, pulse MENU/OK y seleccione Ajustes.<br />
2. Seleccione Grab. nota.<br />
3. Podrá grabar su nota vocal tras el anuncio vocal y la señal sonora.<br />
4. Pulse para finalizar la grabación. Su grabación se reproduce automáticamente a fin <strong>de</strong><br />
que pueda verificarla, y luego el sistema vuelve al menú anterior.<br />
Reproducir una nota<br />
Consulte el apartado Escuchar los mensajes.<br />
B. Anuncio vocal<br />
Se trata <strong>de</strong> un mensaje <strong>de</strong> respuesta que oirán sus interlocutores antes <strong>de</strong> ser instados a <strong>de</strong>jar un<br />
mensaje.<br />
Hay 2 mensajes pregrabados en el TX 1**, y también podrá grabar el suyo.<br />
Grabación <strong>de</strong> un mensaje <strong>de</strong> respuesta personalizado<br />
1. En modo <strong>de</strong> espera, pulse MENU/OK y seleccione Ajustes.<br />
2. Seleccione Anuncio.<br />
3. A continuación, seleccione Grabar.<br />
4. Elija entre Cont. y Grab. y Solo cont.<br />
5. Pulse MENU/OK para grabar su anuncio.<br />
6. Pulse para finalizar la grabación y escuchar su anuncio.<br />
Escuchar su anuncio<br />
1. En modo <strong>de</strong> espera, pulse MENU/OK y seleccione Ajustes.<br />
2. Seleccione Anuncio.<br />
3. Seleccione Reproducir.<br />
4. Elija entre Cont. y Grab. y Solo cont.<br />
5. Pulse MENU/OK para lanzar la reproducción <strong>de</strong>l anuncio.<br />
C. Ajustes <strong>de</strong>l contestador<br />
Contestador-grabador – Cuando este modo está activo, el interlocutor pue<strong>de</strong> <strong>de</strong>jar un mensaje<br />
tras su anuncio vocal.<br />
Contestador solo – Cuando este modo está activo, el interlocutor escucha su anuncio vocal, pero<br />
no pue<strong>de</strong> grabar un mensaje.<br />
1. En modo <strong>de</strong> espera, pulse MENU/OK y seleccione Ajustes.<br />
2. Seleccione Ajustes contestador.<br />
3. SeleccioneModo respuesta.<br />
4. Elija entre Cont. y Grab. y Solo cont.<br />
5. Pulse MENU/OK para confirmar su selección.<br />
Número <strong>de</strong> tonos antes <strong>de</strong> la puesta en marcha <strong>de</strong>l contestador<br />
1. En modo <strong>de</strong> espera, pulse MENU/OK y seleccione Ajustes.<br />
2. Seleccione Ajustes contestador.<br />
3. Seleccione Núm. Tonos.<br />
4. Elija entre 2, 4, 6, 8 tonos o Modo ahorro.<br />
TX Bluetooth 34
5. Pulse MENU/OK para confirmar su selección.<br />
Observación: Si elije el modo ahorro, el contestador se pondrá en marcha tras 2 tonos si ya hay<br />
nuevos mensajes o tras 6 tonos si aún no hay ninguno.<br />
Tiempo <strong>de</strong> grabación <strong>de</strong> los mensajes entrantes<br />
1. En modo <strong>de</strong> espera, pulse MENU/OK y seleccione Ajustes.<br />
2. Seleccione Ajustes contestador.<br />
3. Seleccione Duración grab.<br />
4. Elija entre 30 segundos, 60 segundos, 120 segundos e Ilimitado.<br />
5. Pulse MENU/OK para confirmar su selección.<br />
Idioma <strong>de</strong>l contestador<br />
Pue<strong>de</strong> elegir entre el inglés o el francés como idioma para su contestador.<br />
1. En modo <strong>de</strong> espera, pulse MENU/OK y seleccione Ajustes.<br />
2. Seleccione Ajustes contestador.<br />
3. Seleccione Idioma contest.<br />
4. Elija entre inglés y francés.<br />
5. Pulse MENU/OK para confirmar su selección.<br />
Filtro <strong>de</strong> llamadas<br />
Cuando este modo está activado, permite escuchar el mensaje que está <strong>de</strong>jando el interlocutor.<br />
Es posible respon<strong>de</strong>r a la llamada durante la grabación <strong>de</strong>l mensaje pulsando CASA o ALTAVOZ.<br />
Activar/<strong>de</strong>sactivar el filtro <strong>de</strong> llamadas<br />
1. En modo <strong>de</strong> espera, pulse MENU/OK y seleccione Ajustes.<br />
2. Seleccione Ajustes contestador.<br />
3. Pulse MENU/OK y seleccione Filtro llam.<br />
4. Elija entre Activado y Desactivado.<br />
5. Pulse MENU/OK para confirmar su selección.<br />
Alerta <strong>de</strong> mensajes<br />
Cuando la alerta <strong>de</strong> mensajes está activada, la base <strong>de</strong>l teléfono emite una señal sonora cada 10<br />
segundos para advertirle <strong>de</strong> la presencia <strong>de</strong> nuevos mensajes. La señal cesa cuando se han<br />
escuchado todos los mensajes.<br />
1. En modo <strong>de</strong> espera, pulse MENU/OK y seleccione Ajustes.<br />
2. Seleccione Ajustes contestador.<br />
3. Pulse MENU/OK y seleccione Son. alerta mensajes.<br />
4. Pulse MENU/OK o COLGAR/C.<br />
5. Pulse MENU/OK para confirmar su selección.<br />
D. Modo <strong>de</strong> acceso remoto<br />
Este modo le permite acce<strong>de</strong>r a distancia al contestador <strong>de</strong>l TX 1** y escuchar sus mensajes<br />
<strong>de</strong>s<strong>de</strong> otro teléfono.<br />
Ajuste <strong>de</strong>l código <strong>de</strong> acceso remoto<br />
1. En modo <strong>de</strong> espera, pulse MENU/OK y seleccione Ajustes.<br />
TX Bluetooth 35
2. Seleccione Ajustes contestador.<br />
3. Pulse MENU/OK y seleccione Código <strong>de</strong> acceso.<br />
4. Elija entre Activado y COLGAR/C.<br />
5. Pulse MENU/OK para confirmar.<br />
Si ha activado el código <strong>de</strong> acceso, también <strong>de</strong>berá seguir los siguientes pasos:<br />
- Pulse MENU/OK. Introduzca el actual código <strong>de</strong> acceso <strong>de</strong> 4 cifras (por <strong>de</strong>fecto: 0000).<br />
- Pulse MENU/OK. Introduzca el nuevo código <strong>de</strong> acceso <strong>de</strong> 4 cifras.<br />
- El sistema le pedirá que introduzca <strong>de</strong> nuevo el código.<br />
- Pulse MENU/OK para confirmar.<br />
Acceso remoto al contestador <strong>de</strong>l TX 1**<br />
1. Marque su número <strong>de</strong> teléfono y, cuando escuche su mensaje <strong>de</strong> respuesta, pulse e<br />
introduzca su código <strong>de</strong> acceso <strong>de</strong> 4 cifras durante la reproducción <strong>de</strong>l anuncio.<br />
2. Si introduce un código <strong>de</strong> acceso equivocado, al cabo <strong>de</strong> 3 intentos el contestador colgará<br />
automáticamente.<br />
3. Una vez que haya accedido al contestador, utilice los siguientes comandos para acce<strong>de</strong>r a las<br />
funciones:<br />
Teclas<br />
1<br />
2<br />
4<br />
Durante la reproducción <strong>de</strong>l<br />
mensaje<br />
Ir al menú<br />
Detener la reproducción <strong>de</strong> los<br />
mensajes<br />
Pulsar 1 vez:<br />
Repite la reproducción <strong>de</strong>l mensaje<br />
en curso<br />
Pulsar 2 vez:<br />
Vuelve al mensaje anterior<br />
5 Eliminar el mensaje en curso<br />
6 Avanzar al mensaje siguiente<br />
Descripción<br />
Antes/<strong>de</strong>spués <strong>de</strong> la reproducción <strong>de</strong>l<br />
mensaje<br />
Reproducir los mensajes<br />
7 Activar el contestador<br />
9 Desactivar el contestador<br />
E. Utilizar el contestador <strong>de</strong>s<strong>de</strong> la base <strong>de</strong>l teléfono<br />
Encendido y apagado<br />
Pulse ENCENDIDO/APAGADO DEL CONTESTADOR en la base para activar o <strong>de</strong>sactivar el<br />
contestador.<br />
La tecla se encien<strong>de</strong> cuando el contestador está funcionando.<br />
Filtro <strong>de</strong> llamadas<br />
Pue<strong>de</strong> escuchar los mensajes en curso <strong>de</strong> grabación <strong>de</strong>s<strong>de</strong> la base. Si no quiere escucharlos <strong>de</strong><br />
este modo, ajuste el volumen <strong>de</strong> la base a cero.<br />
Lectura <strong>de</strong> los mensajes<br />
TX Bluetooth 36
Si tiene mensajes por escuchar, la base reproducirá estos exclusivamente.<br />
Si no tiene nuevos mensajes, la base reproducirá todos los antiguos.<br />
1. Pulse REPRODUCCIÓN/PAUSA<br />
2. Durante la lectura <strong>de</strong> los mensajes, pulse las teclas siguientes para acce<strong>de</strong>r a las diferentes<br />
funciones:<br />
- REPRODUCCIÓN/PAUSA Pausa/reanudación <strong>de</strong> la reproducción <strong>de</strong> los mensajes<br />
- ATRÁS Pulse una vez: Repite la reproducción <strong>de</strong>l mensaje en curso<br />
Pulse dos veces: Vuelve al mensaje anterior<br />
- ADELANTE Pasar al siguiente mensaje<br />
- ELIMINACIÓN Borra el mensaje en curso<br />
- VOLUMEN + Aumenta el volumen<br />
- VOLUMEN - Disminuye el volumen<br />
Borrar todos los mensajes antiguos<br />
En modo <strong>de</strong> espera, pulse 2 veces para borrar todos los antiguos mensajes.<br />
8 TERMINALES ADICIONALES<br />
Si ha adquirido el TELEFUNKEN TX 1** con terminal(es) adicional(es), tiene la posibilidad <strong>de</strong><br />
realizar llamadas entre terminales, transferir llamadas <strong>de</strong> un terminal a otro y utilizar el modo<br />
conferencia.<br />
A. Llamada entre terminales<br />
1. Pulse MENU/OK y seleccione Interfono.<br />
2. Pulse MENU/OK. Si tiene un único terminal suplementario, este sonará inmediatamente<br />
3. Si tiene varios terminales adicionales, en la pantalla aparece Interfono: y una lista <strong>de</strong> los<br />
terminales. Seleccione el terminal a<strong>de</strong>cuado mediante las teclas ARRIBA/ABAJO y pulse<br />
MENU/OK para llamar.<br />
4. En el terminal al que llame, pulse CASA para respon<strong>de</strong>r.<br />
Respon<strong>de</strong>r a una llamada externa durante una comunicación entre terminales<br />
Cuando reciba una llamada externa en la línea fija o móvil durante una llamada entre terminales,<br />
oirá una señal sonora y la pantalla mostrará Llamada entrante. La base y los terminales sonarán.<br />
1. Pulse CASA para respon<strong>de</strong>r a una llamada en la línea fija, o GSM para respon<strong>de</strong>r a una<br />
llamada en la línea móvil. En ese caso, la llamada entre terminales finalizará automáticamente<br />
2. Pulse COLGAR/C para finalizar la comunicación entre terminales sin respon<strong>de</strong>r a la llamada<br />
externa. En ese caso, el teléfono seguirá sonando<br />
Transferir una llamada externa a otro microteléfono<br />
Pue<strong>de</strong> transferir una llamada externa en curso a otro terminal o a un auricular Bluetooth ®<br />
conectado a la base.<br />
1. Pulse MENU/OK y seleccione Interfono.<br />
2. Pulse MENU/OK. Si solo tiene un terminal suplementario, este sonará automáticamente.<br />
TX Bluetooth 37
Si posee varios, en la pantalla aparecerá Interfono: y la lista <strong>de</strong> terminales.<br />
Elija un terminal <strong>de</strong> la lista y pulse MENU/OK para transferir la llamada.<br />
3. En el terminal al que llame, pulse CASA para respon<strong>de</strong>r.<br />
4. En el terminal que envía la llamada, pulse COLGAR para finalizar la transferencia <strong>de</strong> la<br />
llamada.<br />
B. Modo conferencia a 3<br />
Mediante terminales adicionales, pue<strong>de</strong> establecer una conferencia a tres entre 2 terminales <strong>de</strong>l<br />
TX 1** (Interfono) y una llamada externa.<br />
1. Siga las instrucciones <strong>de</strong>l apartado Transferir una llamada externa.<br />
2. Pulse MENU/OK y seleccioneCompartir llamada.<br />
3. Pulse MENU/OK para iniciar la llamada compartida.<br />
Conferencia entre las líneas CASA y MÓVIL<br />
Si tiene una llamada por la línea fija en un terminal y una llamada por la línea móvil en otro:<br />
3. Pulse MENU/OK.<br />
4. Seleccione Conf. CASA o Conf. GSM.<br />
5. Pulse MENU/OK para iniciar la conferencia.<br />
Opciones accesibles durante una Conferencia<br />
1. Pulse MENU/OK<br />
2. Seleccione una <strong>de</strong> las opciones siguientes: Fin llamada CASA o Fin llamada móvil.<br />
3. Pulse MENU/OK.<br />
Finalizar una conferencia<br />
Pulse COLGAR o vuelva a colocar el terminal en su base o su cargador.<br />
Utilizar al mismo tiempo las líneas fija y móvil<br />
- Pue<strong>de</strong> tener al mismo tiempo una llamada en la línea fija por un terminal y otra llamada<br />
en la línea móvil por otro.<br />
- Cuando hay una llamada en curso por la línea móvil (con su teléfono móvil conectado<br />
por Bluetooth ® al TX 1**), no pue<strong>de</strong> respon<strong>de</strong>r al mismo tiempo a una llamada por la<br />
línea fija utilizando un auricular Bluetooth ® . Se trata <strong>de</strong> 2 periféricos Bluetooth ® , por lo<br />
que no pue<strong>de</strong>n utilizarse a la vez.<br />
C. Registrar un microteléfono suplementario<br />
Si ha comprado un TELEFUNKEN TX 1** con terminal suplementario, este ya está prerregistrado<br />
en la base, pero si lo ha comprado por separado, <strong>de</strong>berá seguir estas instrucciones:<br />
1. En modo <strong>de</strong> espera, pulse MENU/OK y seleccione Ajustes.<br />
2. Seleccione Reg. terminal.<br />
3. Introduzca el código PIN (por <strong>de</strong>fecto, 0000).<br />
4. Pulse MENU/OK. La pantalla muestra Pulse BÚSQUEDA durante 4 s.<br />
5. Pulse la tecla BUSCANDO <strong>de</strong> la base. En la pantalla aparece Inicialización…<br />
Cuando el registro haya finalizado, el terminal pasará al modo <strong>de</strong> espera.<br />
Observación:<br />
Si el código PIN es incorrecto, en la pantalla aparecerá PIN INCORRECTO y oirá una señal<br />
sonora.<br />
TX Bluetooth 38
Si el terminal no <strong>de</strong>tecta la base, en la pantalla <strong>de</strong>l terminal aparecerá NO HAY BASE.<br />
Anular el registro <strong>de</strong> un terminal<br />
1. En modo <strong>de</strong> espera, pulse MENU/OK y seleccione Ajustes.<br />
2. Pulse MENU/OK y seleccione ANULAR REG.<br />
3. Introduzca el código PIN (por <strong>de</strong>fecto, 0000).<br />
4. Pulse MENU/OK y seleccione un terminal.<br />
5. La pantalla muestra ¿Anular registro?<br />
6. Pulse MENU/OK para confirmar. En la pantalla aparece Registroanulado si la operación<br />
termina correctamente.<br />
9 AYUDA<br />
No consigo enlazar mi teléfono móvil con la base <strong>de</strong>l TX 1**<br />
Compruebe que el Bluetooth ® está activado en su teléfono móvil.<br />
Consulte el manual <strong>de</strong> utilización <strong>de</strong> su teléfono móvil para más información.<br />
Asegúrese <strong>de</strong> que el terminal inalámbrico, la base y el teléfono móvil se encuentran en la zona <strong>de</strong><br />
cobertura <strong>de</strong> las ondas Bluetooth ® .<br />
Elimine el TX 1** <strong>de</strong> la lista <strong>de</strong> periféricos Bluetooth ® reconocidos por su teléfono móvil (consulte<br />
el manual <strong>de</strong> su teléfono móvil para más información).<br />
Siga atentamente las instrucciones <strong>de</strong> enlace ofrecidas por el presente manual.<br />
Asegúrese <strong>de</strong> que su teléfono móvil no está conectado por Bluetooth ® a otro periférico.<br />
Apague y vuelva a encen<strong>de</strong>r su teléfono móvil.<br />
Reinicie la base <strong>de</strong>l TX 1**. Desconéctela <strong>de</strong> la red eléctrica y espere 15 segundos antes <strong>de</strong><br />
volver a conectarla.<br />
El teléfono no funciona<br />
Compruebe que las pilas están bien instaladas según lo indicado en el presente manual.<br />
Compruebe la alimentación eléctrica <strong>de</strong> la base.<br />
No hay tono <strong>de</strong> línea<br />
Asegúrese <strong>de</strong> que el cable telefónico está bien conectado a la base <strong>de</strong>l TX 1**.<br />
Pruebe su línea telefónica con otro teléfono: si tampoco funciona, el problema pue<strong>de</strong> venir <strong>de</strong> su<br />
operador <strong>de</strong> telefonía.<br />
Compruebe la alimentación eléctrica.<br />
Acerque el terminal a la base.<br />
No consigo recibir ni realizar llamadas<br />
Compruebe la alimentación eléctrica.<br />
Compruebe el nivel <strong>de</strong> carga <strong>de</strong> la batería.<br />
Si se ha producido un corte <strong>de</strong> corriente, vuelva a colocar el terminal en la base durante<br />
10 segundos e inténtelo <strong>de</strong> nuevo.<br />
Si el problema no se soluciona <strong>de</strong> esta forma, quite la pila <strong>de</strong>l terminal y <strong>de</strong>sconecte la<br />
alimentación eléctrica durante 10 minutos.<br />
El tono <strong>de</strong> línea funciona, pero resulta imposible llamar a los números marcados<br />
Si está conectado a una centralita PABX, tal vez tenga que marcar un código <strong>de</strong> acceso.<br />
El terminal no suena<br />
El tono <strong>de</strong> llamada <strong>de</strong>l terminal podría estar <strong>de</strong>sactivado.<br />
TX Bluetooth 39
Compruebe la alimentación eléctrica.<br />
Asegúrese <strong>de</strong> que el terminal se encuentra en la zona <strong>de</strong> cobertura <strong>de</strong> la base.<br />
La pantalla <strong>de</strong>l terminal no muestra nada<br />
Es posible que la pila esté totalmente <strong>de</strong>scargada o mal instalada.<br />
Recargue la pila. Si eso no funciona, adquiera una pila <strong>de</strong> recambio.<br />
El icono <strong>de</strong> carga <strong>de</strong> la pila no aparece<br />
Limpie los contactos <strong>de</strong> carga <strong>de</strong> la base y <strong>de</strong>l terminal.<br />
Al pulsar CASA, se oye el tono <strong>de</strong> línea ocupada<br />
Asegúrese <strong>de</strong> que el terminal se encuentra en la zona <strong>de</strong> cobertura <strong>de</strong> la base.<br />
La línea podría estar siendo utilizada por otro <strong>de</strong> los terminales registrados en la base.<br />
El contestador no graba mensajes<br />
Asegúrese <strong>de</strong> que el modo contestador y grabador está activado.<br />
Es posible que la memoria esté llena; borre algunos mensajes para liberar espacio.<br />
No se pue<strong>de</strong> acce<strong>de</strong>r a distancia a los mensajes grabados en el contestador<br />
Tal vez no tenga el código correcto <strong>de</strong> acceso remoto al contestador: apúntelo en un lugar<br />
seguro.<br />
El acceso remoto podría estar <strong>de</strong>sactivado: consulte las instrucciones <strong>de</strong> <strong>uso</strong> para activarlo.<br />
Tal vez el contestador no ha recibido correctamente la marcación <strong>de</strong>l código <strong>de</strong> acceso.<br />
Márquelo <strong>de</strong> nuevo, teniendo cuidado <strong>de</strong> esperar al final <strong>de</strong>l anuncio.<br />
El nombre/número <strong>de</strong>l interlocutor no aparece en pantalla<br />
¿Tiene suscrito este servicio con su operador <strong>de</strong> telefonía?<br />
El interlocutor pue<strong>de</strong> haber ocultado su número.<br />
No se ha encontrado ninguna correspon<strong>de</strong>ncia entre el número entrante y los contactos <strong>de</strong> su<br />
directorio.<br />
Compruebe que ha introducido correctamente su número y su código <strong>de</strong> país.<br />
La llamada proviene tal vez <strong>de</strong> una zona geográfica no compatible con la i<strong>de</strong>ntificación <strong>de</strong><br />
llamadas.<br />
Los indicadores <strong>de</strong> la base están encendidos, pero esta no emite ningún tono<br />
¿La base está correctamente conectada a la línea telefónica?<br />
Compruebe el ajuste <strong>de</strong>l volumen <strong>de</strong> la base.<br />
Hay un ruido parásito en la línea o en otros aparatos eléctricos cercanos<br />
Se recomienda colocar el TELEFUNKEN TX 1** como mínimo a 1 metro <strong>de</strong> otros aparatos<br />
eléctricos a fin <strong>de</strong> evitar interferencias.<br />
Si tiene una línea ADSL, asegúrese <strong>de</strong> que los filtros ADSL están bien instalados.<br />
10 GARANTÍA<br />
La garantía cubre el teléfono, pero no incluye los accesorios. Se consi<strong>de</strong>ran accesorios:<br />
- Las pilas recargables,<br />
- El adaptador <strong>de</strong> alimentación,<br />
- El cable <strong>de</strong> línea telefónica.<br />
Sin embargo, estos accesorios se pue<strong>de</strong>n pedir a nuestro servicio técnico. +335 45 60 82 51<br />
o assitance@sopeg.fr.<br />
- Periodo <strong>de</strong> garantía<br />
TX Bluetooth 40
Este teléfono cuenta con una garantía <strong>de</strong> 12 meses. El periodo <strong>de</strong> garantía comienza en el<br />
momento <strong>de</strong> la compra <strong>de</strong>l teléfono.<br />
La garantía <strong>de</strong>be probarse mediante la presentación <strong>de</strong> la factura original o el recibo <strong>de</strong> compra<br />
don<strong>de</strong> aparezcan la fecha y el mo<strong>de</strong>lo adquirido.<br />
- Cobertura<br />
Si el teléfono es <strong>de</strong>fectuoso, <strong>de</strong>be <strong>de</strong>volverlo completo a su distribuidor con una nota explicativa.<br />
Si el teléfono presenta un <strong>de</strong>fecto durante el periodo <strong>de</strong> garantía, el servicio posventa oficial<br />
reparará todos los elementos <strong>de</strong>fectuosos o los <strong>de</strong>fectos <strong>de</strong> fabricación.<br />
El servicio posventa <strong>de</strong>cidirá <strong>de</strong> forma unilateral sobre la reparación o sustitución <strong>de</strong>l teléfono, en<br />
su totalidad o en parte.<br />
La fecha <strong>de</strong> compra inicial <strong>de</strong>termina la fecha en que comienza el periodo <strong>de</strong> garantía.<br />
El periodo <strong>de</strong> garantía no se prolongará en caso <strong>de</strong> reparación o sustitución <strong>de</strong>l teléfono por parte<br />
<strong>de</strong> nuestro servicio posventa.<br />
- Exclusión<br />
Los daños o <strong>de</strong>fectos ocasionados por el mal <strong>uso</strong> o la manipulación <strong>de</strong>l teléfono o bien por la<br />
utilización <strong>de</strong> accesorios no originales o no recomendados por las presentes instrucciones no<br />
están cubiertos por la garantía.<br />
La garantía no cubre los daños ocasionados por elementos exteriores como rayos, inundaciones<br />
o incendios, ni ningún otro daño ocasionado durante un transporte.<br />
No se podrá hacer ninguna reclamación <strong>de</strong> garantía si el número <strong>de</strong> serie <strong>de</strong>l teléfono ha sido<br />
modificado, eliminado o borrado, o es ilegible.<br />
No se podrá hacer ninguna reclamación <strong>de</strong> garantía si el teléfono ha sido reparado, alterado o<br />
modificado por su propietario o por cualquier otra persona no capacitada y cualificada oficialmente.<br />
- Conformidad con la normativa en vigor:<br />
Este teléfono se ajusta a las normas <strong>de</strong> la CE en vigor:<br />
RECICLAJE DE EQUIPOS ELÉCTRICOS Y ELECTRÓNICOS AL FINAL DE SU VIDA ÚTIL<br />
Los aparatos eléctricos y electrónicos usados no <strong>de</strong>ben eliminarse junto con los residuos<br />
domésticos ordinarios. La presencia <strong>de</strong> este símbolo en el producto o en el embalaje <strong>de</strong>l mismo<br />
se lo recuerdan.<br />
Algunos <strong>de</strong> los materiales <strong>de</strong> los que está hecho este producto se pue<strong>de</strong>n reciclar si se llevan a<br />
un centro <strong>de</strong> reciclaje a<strong>de</strong>cuado. Al reutilizar las piezas y las materias primas <strong>de</strong> los aparatos<br />
usados, hace una contribución importante a la protección <strong>de</strong>l medio ambiente.<br />
Para obtener más información sobre los lugares <strong>de</strong> recogida <strong>de</strong> equipos usados, pue<strong>de</strong> dirigirse a<br />
su ayuntamiento, al servicio <strong>de</strong> tratamiento <strong>de</strong> residuos o al establecimiento don<strong>de</strong> ha adquirido el<br />
producto.<br />
TX Bluetooth 41
TELEFUNKEN TX100 Bluetooth SERIES<br />
USER GUIDE<br />
Digital cordless telephone with answering system and BLUETOOTH® wireless technology<br />
This telephone has been <strong>de</strong>signed for ease of use. Please read the instructions and keep it handy<br />
for future reference. If you have any problems with your phone, refer to the Help section of this<br />
User Gui<strong>de</strong>.<br />
The name TX 1** refers to all versions of TX101/102/103/151/152/153 in this gui<strong>de</strong>.<br />
This is a non binding document subject to modifications in the event of missprint.<br />
Introduction to your TELEFUNKEN TX 1** Digital Cordless Telephone with Bluetooth and<br />
Answering Machine<br />
Bluetooth – Pair up to four Bluetooth enabled <strong>de</strong>vices (Mobile phones or headsets) with the<br />
telephone base.<br />
Phonebook – Lets you store up to 200 contact numbers for easy dialing for home line<br />
Download phonebook –You can download up to four mobile phone phonebooks (phonebooks)<br />
to your TELEFUNKEN TX 1** system via Bluetooth wireless technology.<br />
Each downloa<strong>de</strong>d phonebook can store up to 1,500 entries.<br />
Caller ID lets you see who’s calling. Your phone stores <strong>de</strong>tails of the last 50 callers in a Calls list.<br />
Answering machine, with up to 14 minutes digital recording time and helpful voice prompts.<br />
IMPORTANT<br />
This equipment requires electricity to work. You will not be able to make any telephone calls when<br />
the power fails. Alternative arrangements should be ma<strong>de</strong> to access emergency services in times<br />
of power failure.<br />
This User Gui<strong>de</strong> provi<strong>de</strong>s you with all the information you need to get the most from your phone.<br />
Before you make your first call, you will need to set up your phone. Follow the simple instructions<br />
on the next few pages.<br />
Hearing aid?<br />
Please note that like all other DECT cordless phones, the TX 1** works by sending radio signals<br />
between the base and handset and these signals may, in some cases, cause a low level humming<br />
noise.<br />
Got everything?<br />
The package contains the following items:<br />
- TELEFUNKEN TX 1** handset<br />
- TELEFUNKEN TX 1** answering machine base unit<br />
- AC power adaptor for the base<br />
- Telephone line cord<br />
- Telephone adaptor plug<br />
- 1 NiMH rechargeable battery pack<br />
- Wall mount bracket<br />
If you have purchased a TELEFUNKEN TX 1** Multi-handset pack you will also have the following<br />
for each additional handset:<br />
- TELEFUNKEN TX 1** handset<br />
- TELEFUNKEN TX 1** charger<br />
- 1 NiMH rechargeable battery pack<br />
- AC power adaptor (for the charger)<br />
TX Bluetooth 42
TABLE OF CONTENTS<br />
IMPORTANT SAFETY INSTRUCTIONS ................................................................................... 46<br />
1 GETTING STARTED ............................................................................................................ 47<br />
A. LOCATION ................................................................................................................................................ 47<br />
B. SETTING UP ............................................................................................................................................... 47<br />
C. BATTERY .................................................................................................................................................. 48<br />
D. WALL MOUNTING ..................................................................................................................................... 48<br />
E. SETTING UP FOR MULTIPLE PACKS .......................................................................................................... 48<br />
6. USING YOUR TELEFUNKEN TX1** PHONE ON A BROADBAND ADSL LINE? .................................... 49<br />
2 GETTING TO KNOW YOUR PHONE ................................................................................... 50<br />
A. HANDSET .................................................................................................................................................. 50<br />
B. HANDSET DISPLAY .................................................................................................................................... 50<br />
C. DISPLAY ICONS ......................................................................................................................................... 51<br />
D. ANSWERING SYSTEM ................................................................................................................................ 52<br />
E. LED DISPLAY ............................................................................................... ERREUR ! SIGNET NON DEFINI.<br />
F. NAVIGATING THE MENUS ......................................................................................................................... 52<br />
3 BLUETOOTH® ..................................................................................................................... 52<br />
A. INTRODUCING BLUETOOTH® .................................................................................................................. 52<br />
B. GLOSSARY OF TERMS ............................................................................................................................... 53<br />
BLUETOOTH SETUP .......................................................................................................................................... 54<br />
C. PAIRING AND CONNECTING A MOBILE PHONE ......................................................................................... 54<br />
AUTO CONNECTION ......................................................................................................................................... 55<br />
D. PAIRING AND CONNECTING A HEADSET ................................................................................................... 55<br />
AUTO CONNECTION ......................................................................................................................................... 55<br />
E. PAIRED DEVICES ....................................................................................................................................... 56<br />
REMOVE A PAIRED DEVICE .............................................................................................................................. 56<br />
F. ACTIVE DEVICES ...................................................................................................................................... 56<br />
REVIEW THE ACTIVE DEVICES LIST ................................................................................................................ 56<br />
CONNECT/DISCONNECT AN ACTIVE DEVICE ................................................................................................... 56<br />
REPLACE AN ACTIVE DEVICE .......................................................................................................................... 57<br />
ADD AN ACTIVE DEVICE .................................................................................................................................. 57<br />
REMOVE AN ACTIVE DEVICE ........................................................................................................................... 57<br />
G. CHANGE PIN ............................................................................................................................................ 57<br />
H. DOWNLOAD PHONEBOOK ......................................................................................................................... 58<br />
TO DOWNLOAD A MOBILE PHONE PHONEBOOK .............................................................................................. 58<br />
INTERRUPTION OF PHONEBOOK DOWNLOAD .................................................................................................. 59<br />
4 USING THE PHONE ............................................................................................................. 59<br />
A. MAKE, ANSWER OR END A HOME CALL ................................................................................................... 59<br />
TO MAKE A HOME CALL: ................................................................................................................................. 59<br />
TO ANSWER A HOME CALL: ............................................................................................................................. 59<br />
TO END A HOME CALL ..................................................................................................................................... 59<br />
TX Bluetooth 43
B. MAKE, ANSWER OR END A MOBILE CALL ................................................................................................ 59<br />
TO MAKE A MOBILE CALL: .............................................................................................................................. 59<br />
TO ANSWER A MOBILE CALL: .......................................................................................................................... 60<br />
TO END A MOBILE CALL: ................................................................................................................................. 60<br />
ANSWER A MOBILE CALL WHILE ON A HOME CALL ........................................................................................ 60<br />
TO ANSWER THE INCOMING MOBILE CALL: ................................................................................................... 60<br />
TO END THE MOBILE CALL: ............................................................................................................................. 60<br />
TO RESUME THE HOME CALL ON HOLD: ......................................................................................................... 60<br />
ANSWER A HOME CALL WHILE ON A MOBILE CALL ........................................................................................ 60<br />
MOBILE PHONE VOICEMAIL ............................................................................................................................ 61<br />
C. USING A BLUETOOTH HEADSET ............................................................................................................... 61<br />
TO ANSWER A HOME CALL USING A BLUETOOTH HEADSET ........................................................................... 61<br />
TO TRANSFER A CALL FROM A HANDSET TO A BLUETOOTH HEADSET: ......................................................... 61<br />
TO TRANSFER A CALL FROM THE HEADSET BACK TO THE HANDSET: ............................................................ 61<br />
TO END A CALL THAT STARTED AT THE HANDSET: ......................................................................................... 61<br />
EARPIECE/ HANDSFREE VOLUME .................................................................................................................... 62<br />
D. HOLD FUNCTION ....................................................................................................................................... 62<br />
E. MUTE FUNCTION ...................................................................................................................................... 62<br />
TO MUTE THE CALL: ........................................................................................................................................ 62<br />
TO UN-MUTE THE CALL: .................................................................................................................................. 62<br />
F. HANDSFREE .............................................................................................................................................. 62<br />
MAKE A HANDSFREE CALL .............................................................................................................................. 63<br />
ANSWER A CALL IN HANDSFREE MODE ........................................................................................................... 63<br />
SWITCH TO HANDSFREE MODE DURING A CALL ............................................................................................. 63<br />
G. REDIAL ..................................................................................................................................................... 63<br />
FIND HANDSET (PAGING) ................................................................................................................................. 64<br />
H. RINGERS ................................................................................................................................................... 64<br />
TEMPORARY RINGER SILENCING .................................................................................................................... 64<br />
TO SILENCE THE HANDSET RINGER: ............................................................................................................... 64<br />
TO SILENCE THE BASE RINGER: ...................................................................................................................... 64<br />
I. CHAIN DIALING ........................................................................................................................................ 64<br />
TO ACCESS A NUMBER IN THE PHONEBOOK WHILE ON A CALL: .................................................................... 64<br />
TO ACCESS A NUMBER IN THE CALL LOG WHILE ON A CALL:......................................................................... 64<br />
TO ACCESS THE REDIAL LIST WHILE ON A CALL: ........................................................................................... 64<br />
5 PHONEBOOK ...................................................................................................................... 65<br />
A. STORE A NUMBER ENTRY IN THE HOME PHONEBOOK ............................................................................. 65<br />
B. REVIEW A PHONEBOOK ENTRY ................................................................................................................ 65<br />
C. DIAL AN ENTRY......................................................................................................................................... 66<br />
D. EDIT A PHONEBOOK ENTRY ..................................................................................................................... 66<br />
E. DELETE A PHONEBOOK ENTRY ................................................................................................................ 67<br />
F. REMOVE A DOWNLOADED PHONEBOOK (DOWNLOADED PHONEBOOKS ONLY) ...................................... 67<br />
G. SET THE COUNTRY CODE FOR HOME & DOWNLOADED PHONEBOOK ..................................................... 67<br />
H. SECURITY PIN FOR DOWNLOADED PHONEBOOK .................................................................................... 67<br />
I. SET UP PABX ........................................................................................................................................... 68<br />
6 SETTINGS ............................................................................................................................ 68<br />
A. HANDSET SETTINGS .................................................................................................................................. 68<br />
HANDSET RINGER VOLUME ............................................................................................................................. 68<br />
RINGER TONE .................................................................................................................................................. 68<br />
ALERT TONES (KEY TONE, LOW BATTERY AND NO COVERAGE) ................................................................... 68<br />
SET DATE AND TIME ......................................................................................................................................... 69<br />
TX Bluetooth 44
DATE FORMAT ................................................................................................................................................. 69<br />
TIME FORMAT .................................................................................................................................................. 69<br />
SET DATE AND TIME MANUALLY ..................................................................................................................... 69<br />
AUTO ANSWER ................................................................................................................................................. 69<br />
HANDSET RESET .............................................................................................................................................. 69<br />
B. BASE SETTINGS ......................................................................................................................................... 70<br />
SET DIAL MODE ................................................................................................................................................ 70<br />
SET THE FLASH TIME ....................................................................................................................................... 70<br />
CHANGE SYSTEM PIN...................................................................................................................................... 70<br />
C. CALLER ID ............................................................................................................................................... 70<br />
D. VIEW CALL DETAILS ................................................................................................................................. 71<br />
DIAL FROM THE CALL LIST ............................................................................................................................. 71<br />
SAVE A CALL LIST ENTRY TO THE PHONEBOOK .............................................................................................. 71<br />
DELETE AN ENTRY IN THE CALL LIST ............................................................................................................ 71<br />
DELETE THE ENTIRE CALL LIST ..................................................................................................................... 72<br />
E. PROVIDER SERVICES ................................................................................................................................ 72<br />
CLEAR VOICEMAIL .......................................................................................................................................... 72<br />
CLEAR FLASHING MESSAGE INDICATION ........................................................................................................ 72<br />
CALL WAITING ................................................................................................................................................ 72<br />
CALL WAITING ON THE HOME LINE ................................................................................................................ 72<br />
CALL WAITING ON THE MOBILE LINE ............................................................................................................. 73<br />
7 ANSWERING MACHINE ...................................................................................................... 73<br />
A. USING THE ANSWERING MACHINE FROM THE HANDSET ........................................................................ 73<br />
SWITCH THE ANSWERING MACHINE ON/ OFF .................................................................................................. 73<br />
PLAY MESSAGES .............................................................................................................................................. 73<br />
DELETE ALL OLD MESSAGES ........................................................................................................................... 73<br />
RECORD AND PLAY MEMOS ............................................................................................................................. 74<br />
B. ANNOUNCEMENT ...................................................................................................................................... 74<br />
C. ANSWER MACHINE SETTINGS ................................................................................................................... 74<br />
SET THE ANSWER MODE .................................................................................................................................. 74<br />
SET THE ANSWER DELAY ................................................................................................................................. 75<br />
SET RECORDING TIME OF INCOMING MESSAGE .............................................................................................. 75<br />
SET VOICE LANGUAGE ..................................................................................................................................... 75<br />
CALL SCREENING ............................................................................................................................................ 75<br />
TURN THE MESSAGE ALERT ON/OFF................................................................................................................ 75<br />
D. REMOTE ACCESS ...................................................................................................................................... 76<br />
E. USING THE ANSWERING MACHINE AT THE BASE ..................................................................................... 76<br />
SWITCH ON/OFF ............................................................................................................................................... 76<br />
CALL SCREENING ............................................................................................................................................ 76<br />
PLAY MESSAGES .............................................................................................................................................. 77<br />
DELETE ALL OLD MESSAGES ........................................................................................................................... 77<br />
8 ADDITIONAL HANDSETS (MULTI HANDSET PACKS ONLY) .......................................... 77<br />
A. CALL ANOTHER HANDSET ........................................................................................................................ 77<br />
B. 3-WAY CONFERENCE HOME OR MOBILE CALL ........................................................................................ 78<br />
C. REGISTER AN ADDITIONAL HANDSET ...................................................................................................... 79<br />
9 HELP .................................................................................................................................... 79<br />
10 WARRANTY ......................................................................................................................... 81<br />
TX Bluetooth 45
IMPORTANT SAFETY INSTRUCTIONS<br />
When using your telephone equipment, basic safety precautions should always be followed to<br />
reduce the risk of fire, electric shock and injury, including the following:<br />
Read and un<strong>de</strong>rstand all the instructions.<br />
Follow all warnings and instructions marked on the product.<br />
Unplug this product from the wall outlet before cleaning.<br />
Do not use liquid or aerosol cleaners. Use a damp cloth for cleaning.<br />
Do not use this product near water (for example, near a bath tub, kitchen sink, swimming pool).<br />
Do not overload wall outlets and extension cords as this can result in the risk of fire or electric<br />
shock.<br />
Unplug this product from the wall outlet and contact TELEFUNKEN un<strong>de</strong>r the following<br />
conditions:<br />
- When the power supply cord or plug is damaged or frayed.<br />
- If the product does not operate normally by following the operating instructions.<br />
- If the product has been dropped and the outer casing has been damaged.<br />
- If the product exhibits a distinct change in performance.<br />
Avoid using a telephone during an electrical storm.<br />
There may be a remote risk of electric shock from lightning.<br />
Do not use the telephone to report a gas leak in the vicinity of the leak.<br />
Use only the supplied NiMH (Nickel Metal Hydri<strong>de</strong>) battery pack.<br />
The operation periods for the handsets are only applicable with the <strong>de</strong>fault battery capacity<br />
The use of other battery types or non rechargeable battery/primary mobile can be dangerous.<br />
These may cause interference and/or unit damage.<br />
TELEFUNKEN will not be held liable for damage arising from such noncompliance.<br />
Use only the AC power adaptors supplied with this product.<br />
Please ensure that the polarity plug is inserted correctly.<br />
Do not immerse the battery pack in water, and do not place them in a fire.<br />
Telephone receivers produce magnetic fields that can attract small metallic objects such as pins<br />
or staples.<br />
To avoid injury, do not place the handset where such objects can be picked up.<br />
TX Bluetooth 46
1 GETTING STARTED<br />
A. Location<br />
Make sure it is at least 1 meter away from other electrical appliances to avoid interference. Your<br />
TELEFUNKEN TX 1** works by sending radio signals between the handset and base. The<br />
strength of the signal <strong>de</strong>pends on where you locate the base. Putting it as high as possible<br />
ensures the best signal.<br />
The maximum range between the base station and the handset is approximately 300 meters.<br />
B. Setting up<br />
Plug the mains power cable into the base station, Plug the other end of the mains power cable into<br />
mains power wall socket and switch the power on.<br />
Note: Ensure power cord is fed through slot on base so unit sits flush with the <strong>de</strong>sk<br />
TX Bluetooth 47
C. Battery<br />
Place the handset on the base to charge for at least 24 hours. When the handset is fully charged<br />
the will be displayed. The Charging LED lighting up indicates that the<br />
handset is properly placed on the base.<br />
When the battery pack is fully charged, plug one end of the telephone line cord into the base<br />
station and the other end into the telephone wall socket.<br />
Note: Ensure the line cord is fed through the slot on the base so unit sits flush with the <strong>de</strong>sk.<br />
D. Wall mounting<br />
Your TELEFUNKEN TX 1** is <strong>de</strong>signed to mount on a standard wall mounting plate. Attach the<br />
wall mount bracket to your TX 1** base and attach to your wall mount plate.<br />
WARNING<br />
Do not place your TELEFUNKEN TX 1** in the bathroom or other humid areas.<br />
IMPORTANT<br />
The base station must be plugged into the mains power socket at all times. Do not connect the<br />
telephone line until the handset is fully charged. Only use the power supply, telephone cables and<br />
NiMH battery pack supplied with the product<br />
E. Setting up for multiple packs<br />
If you have purchased a TELEFUNKEN TX 1** multiple packs, you will need to prepare additional<br />
handsets and chargers for use.<br />
TX Bluetooth 48
For each additional handset and charger<br />
Plug the mains power cable into the charger base, plug the other end into the mains power wall<br />
socket and switch the power on.<br />
To fit the NiMH battery pack into the handset, sli<strong>de</strong> out the battery compartment cover. Place the<br />
supplied rechargeable battery pack in the battery compartment, with the battery connector plugged<br />
in, as shown above. Sli<strong>de</strong> the battery compartment cover back<br />
Place the handset on the base to charge for at least 24 hours. When the handset is fully charged<br />
the will be displayed.<br />
Using your TELEFUNKEN TX1** phone on a Broadband ADSL line<br />
If this product is to be used on a broadband ADSL line, then you must ensure that it is connected<br />
via an ADSL filter. Using this product on a Broadband line without an ADSL filter may cause<br />
problems with this product and your Broadband service.<br />
TX Bluetooth 49
2 GETTING TO KNOW YOUR PHONE<br />
A. Handset<br />
B. Handset display<br />
TX Bluetooth 50
C. Display icons<br />
Icons can be On (visible), Flashing or off (not visible):<br />
Home line - Steady when the home line is in use or there is an incoming home<br />
call.<br />
MOBILE line - Steady when the mobile line is in use or there is an incoming<br />
mobile call.<br />
Bluetooth<br />
<strong>de</strong>vices<br />
Bluetooth connected <strong>de</strong>vice(s) - indicates that there are Bluetooth connected<br />
<strong>de</strong>vices on the active <strong>de</strong>vices list.<br />
Bluetooth disconnected <strong>de</strong>vice(s) - indicates that there are Bluetooth<br />
disconnected <strong>de</strong>vices on the active <strong>de</strong>vices list.<br />
Wireless Bluetooth headset - Steady when a wireless Bluetooth headset is in<br />
use on the home line.<br />
On when new voicemail received from the local telephone provi<strong>de</strong>r.<br />
Messages<br />
On when answering machine is turned on.<br />
On when new answering machine message is received.<br />
On when speaker phone is in use.<br />
Sound<br />
On when the HOME, MOBILE1 & MOBILE2 ringers are OFF.<br />
Flashing when one or two of the HOME, MOBILE1, or MOBILE2 ringers are<br />
OFF.<br />
On when the handset microphone is disabled during the call.<br />
Fully charged<br />
Battery<br />
1/2 charged<br />
1/3 charged<br />
Flashing– Battery need charging<br />
Animation in cycle. Battery is charging.<br />
TX Bluetooth 51
D. Answering system<br />
F. Navigating the menus<br />
1. Press MENU/OK to open the main menu.<br />
2. Press UP/DOWN to move through the available options.<br />
3. Press MENU/OK to select a menu option or TALKOFF/CLEAR to return to the previous<br />
screen, or press and hold TALKOFF/CLEAR to return to standby mo<strong>de</strong>.<br />
3 BLUETOOTH®<br />
A. Introducing Bluetooth®<br />
Your new TELEFUNKEN TX 1** telephone system with Bluetooth ® wireless technology has the<br />
following features:<br />
- Pair up to four Bluetooth ® enabled <strong>de</strong>vices (mobile phones or headsets) with the telephone<br />
base.<br />
- Connect a maximum of two mobile phones to make and receive mobile calls. Only one mobile<br />
TX Bluetooth 52
phone can be active on a call at a time.<br />
- Connect a Bluetooth enabled headset for making and receiving home calls.<br />
- Conference mobile and home calls.<br />
- Make and receive calls using your mobile phone plan with your cordless system handsets.<br />
IMPORTANT INFORMATION<br />
- After plugging in the telephone base, wait at least 20 seconds before connecting a Bluetooth<br />
<strong>de</strong>vice. Refer to the user's manual of your Bluetooth enabled mobile phone or headset for more<br />
information about how that <strong>de</strong>vice uses Bluetooth connectivity.<br />
- Bluetooth wireless technology operates within a short range (up to 30 feet) from the telephone<br />
base. Keep connected mobile phones and headset within this range.<br />
- If your mobile phone has poor reception in your home, TELEFUNKEN TX 1** cannot improve<br />
the reception. However, if there is a location in your house with better reception, you can leave<br />
your mobile phone at that location while you use TELEFUNKEN TX 1** mobile line. In or<strong>de</strong>r for<br />
this to work, the telephone base must be within 30 feet of the mobile phone.<br />
- Charge your mobile phone while it is connected to the telephone base. Your mobile phone's<br />
battery pack discharges faster while it is connected to the telephone base via Bluetooth wireless<br />
technology.<br />
- Monitor your mobile phone's usage, because minutes may be <strong>de</strong>ducted from your mobile plan<br />
for the duration of all mobile calls.<br />
- Refer to the Bluetooth setup section to learn how to set up your Bluetooth <strong>de</strong>vice. Refer to the<br />
Using the phone section on how to operate your Bluetooth <strong>de</strong>vices with your new TX 1**<br />
telephone system with Bluetooth wireless technology.<br />
B. Glossary of terms<br />
Below are some terms used in this user’s manual to help you become familiar with using your<br />
Bluetooth <strong>de</strong>vices and your new TELEFUNKEN TX 1** telephone system.<br />
Active <strong>de</strong>vices<br />
Bluetooth enabled <strong>de</strong>vices, paired and connected to the telephone base. A maximum of<br />
two paired <strong>de</strong>vices (two mobile phones, or one mobile phone and one headset) can be<br />
connected to the telephone base, but only one can be on a call at a time.<br />
Bluetooth mobile phone<br />
Refers to a mobile bluetooth enabled mobile telephone.<br />
Mobile line<br />
The telephone line associated with your mobile phone service.<br />
On your TX 1** handset, press mobile to use the mobile line.<br />
Connected<br />
A Bluetooth enabled <strong>de</strong>vice can only be used when it is connected to the TX 1** base.<br />
Disconnected<br />
A diagonal line appears across <strong>de</strong>vices 1 and/or 2 when the corresponding Bluetooth<br />
enabled <strong>de</strong>vice is disconnected from the telephone base.<br />
Discoverable mo<strong>de</strong><br />
Before a Bluetooth enabled <strong>de</strong>vice can be paired, it must be set to this mo<strong>de</strong>.. Depending<br />
on the manufacturer, this mo<strong>de</strong> is sometimes referred to as Find Me or Visibility.<br />
Home line<br />
Your conventional telephone land line.<br />
On your TELEFUNKEN TX 1** handset, press HOME to use the home line.<br />
Paired <strong>de</strong>vices<br />
Bluetooth enabled <strong>de</strong>vices (mobile phone or headset) that have shared registration<br />
information with the telephone base. A total of four Bluetooth enabled <strong>de</strong>vices can be<br />
TX Bluetooth 53
paired with the telephone base; however, only two paired <strong>de</strong>vices can be connected to the<br />
base at a time.<br />
Pairing<br />
Sometimes refers to as bonding. The process of sharing registration information between<br />
two Bluetooth enabled <strong>de</strong>vices. Your Bluetooth enabled mobile phone or headset must first<br />
be paired to the telephone base in or<strong>de</strong>r to use it with this cordless phone system.<br />
PIN<br />
By <strong>de</strong>fault, the PIN is 0000 for the telephone base and for most Bluetooth <strong>de</strong>vices. PIN<br />
information must be exchanged between Bluetooth <strong>de</strong>vices before they can be used. This<br />
is also known as a Passkey or Passco<strong>de</strong>.<br />
Bluetooth setup<br />
To use a Bluetooth enabled mobile phone with your TELEFUNKEN TX 1** , you must first pair and<br />
connect your Bluetooth <strong>de</strong>vice(s) with the telephone base. All TX 1** handsets can be used to<br />
make or answer calls on the mobile phone line.<br />
Bluetooth wireless technology operates within a short range. When you pair a Bluetooth mobile<br />
phone or Bluetooth headset to the telephone base, move closer to the telephone base to maintain<br />
sufficient signal strength.<br />
C. Pairing and connecting a mobile phone<br />
Before you begin, make sure that :<br />
- You have mobile coverage<br />
- Your mobile phone is Bluetooth enabled and not connected to any other Bluetooth <strong>de</strong>vice<br />
(laptop, headset…). Refer to your mobile phone User's Manual to learn how to search for or<br />
add new Bluetooth <strong>de</strong>vices.<br />
1. In standby mo<strong>de</strong>, press MENU/OK and select Bluetooth.<br />
2. Select Add mobile.<br />
3. Place your Bluetooth enabled mobile phone next to base and confirm by Menu/OK<br />
4. If there are already four <strong>de</strong>vices on the paired <strong>de</strong>vices list, the display shows Maximum of<br />
4 <strong>de</strong>vices can be paired and prompts you to replace an existing paired <strong>de</strong>vice.<br />
5. The screen displays Please set your mobile phone to search for <strong>de</strong>vices, then press<br />
again MENU/OK.<br />
6. If a <strong>de</strong>vice is already connected to the telephone base, the screen displays Connected<br />
<strong>de</strong>vice will be temporarily disconnected. Press MENU/OK to temporarily disconnect the<br />
<strong>de</strong>vice and continue the pairing process.<br />
7. Press MENU/OK to set the telephone base to discoverable mo<strong>de</strong>.<br />
8. Then, promptly turn on the Bluetooth feature of your mobile phone and search for or add<br />
new <strong>de</strong>vices.<br />
9. Once your mobile phone finds TELEFUNKEN TX 1** , press the appropriate key on your<br />
mobile phone to continue the pairing process.<br />
10. Enter the PIN of the telephone base (the <strong>de</strong>fault PIN is 0000) into your mobile phone to<br />
continue the pairing process.<br />
- When a <strong>de</strong>vice is successfully connected, the handset displays Paired with mobile<br />
and then Mobile setup completed Device connected.<br />
- When you already have two active <strong>de</strong>vices connected, the handset shows Maximum of<br />
2 <strong>de</strong>vices can be connected. You are prompted to replace an existing <strong>de</strong>vice on the<br />
active <strong>de</strong>vices list;<br />
Note: The pairing process may take up to one minute. If the pairing process fails, try again.<br />
The steps for the pairing process may vary for different mobile phones. If this happens, follow the<br />
TX Bluetooth 54
prompts on your mobile phone and your TELEFUNKEN TX 1** to complete the pairing process.<br />
If you put the handset back in the telephone base or charger while pairing, the process<br />
discontinues and the handset returns to idle mo<strong>de</strong>.<br />
Auto connection<br />
When a <strong>de</strong>vice is successfully paired with the telephone base but not connected, the handset<br />
displays<br />
Mobile setup completed Device not connected and then<br />
Auto-connect function enabled Press OK. You can press MENU/OK to exit. You can also<br />
connect a <strong>de</strong>vice manually).<br />
D. Pairing and connecting a headset<br />
Before you begin, make sure that your Bluetooth enabled headset is not connected to any other<br />
Bluetooth <strong>de</strong>vice. Refer to your headset User's Manual to learn how to search for or add new<br />
Bluetooth <strong>de</strong>vices.<br />
1. In standby time. Press MENU/OK and choose Bluetooth.<br />
2. Select Add headset.<br />
3. Place Bluetooth headset next to base. Press Menu/OK.<br />
4. If there are already four <strong>de</strong>vices on the paired <strong>de</strong>vices list, the screen displays Maximum<br />
of 4 <strong>de</strong>vices can be paired and prompts you to replace an existing paired <strong>de</strong>vice<br />
5. Press MENU/OK. The screen displays Please set your headset to discoverable mo<strong>de</strong>,<br />
then press OK.<br />
6. If a <strong>de</strong>vice is already connected to the telephone base, the screen displays Connected<br />
<strong>de</strong>vice will be temporarily disconnected. Press MENU/OK to temporarily disconnect the<br />
<strong>de</strong>vice and continue the pairing process.<br />
7. Set your headset to discoverable mo<strong>de</strong> (refer to the User’s Manual of your headset).<br />
8. Press MENU/OK to search for your headset.<br />
9. Once the telephone base finds your headset, press MENU/OK<br />
10. Enter the PIN of your headset (the PIN for most Bluetooth <strong>de</strong>vices is 0000), then press<br />
MENU/OK.<br />
11. When the handset displays Headset A paired to base. Connect now? Press OK, then<br />
press MENU/OK on the handset.<br />
- When you already have two <strong>de</strong>vices on the active <strong>de</strong>vices list, the handset shows<br />
Maximum of 2 <strong>de</strong>vices can be connected. You are prompted to replace an existing<br />
headset on the active <strong>de</strong>vices list<br />
- When you already have one headset on the active <strong>de</strong>vices list, the handset shows<br />
Only 1 headset can be connected. You are prompted to replace the headset on the<br />
active <strong>de</strong>vices list<br />
10. When a <strong>de</strong>vice is successfully connected, the handset displays Headset setup<br />
completed Device connected and the corresponding status icon (Mobile1 or Mobile 2).<br />
Note: The pairing process may take up to one minute. If the pairing process fails, try again.<br />
If you put the handset back in the telephone base or charger while pairing, the process<br />
discontinues and the handset returns to idle mo<strong>de</strong>.<br />
Auto connection<br />
When a <strong>de</strong>vice is successfully paired with the telephone base but not connected, the handset<br />
displays Headset setup completed Device not connected and then Auto-connect function<br />
enabled Press OK. You can press MENU/OK to exit. You can also connect a <strong>de</strong>vice manually.<br />
TX Bluetooth 55
E. Paired <strong>de</strong>vices<br />
All paired <strong>de</strong>vices are stored on the Paired <strong>de</strong>vices list.<br />
Up to four <strong>de</strong>vices (one headset only) can be paired with the telephone base.<br />
To use a paired <strong>de</strong>vice, it must be connected and on the active <strong>de</strong>vices list.<br />
Once you have paired a <strong>de</strong>vice with the telephone base, you do not need to repeat the pairing<br />
procedure<br />
again unless you <strong>de</strong>lete the <strong>de</strong>vice from the paired <strong>de</strong>vices list.<br />
Note: Only the first 15 characters of the <strong>de</strong>vice name are shown on the paired <strong>de</strong>vices list.<br />
Rename a paired <strong>de</strong>vice<br />
You can change the name of a paired <strong>de</strong>vice on the paired <strong>de</strong>vices list.<br />
1. In standby mo<strong>de</strong>, Press MENU/OK and choose Bluetooth<br />
2. Select Paired <strong>de</strong>vices,<br />
3. Select the <strong>de</strong>vice you want to rename<br />
4. Select Rename and Press MENU/OK<br />
5. The screen displays ENTER NEW NAME.<br />
6. Use the keypad to edit the name<br />
7. Press MENU/OK to confirm. The handset displays Device renamed.<br />
Remove a paired <strong>de</strong>vice<br />
If you want to add another Bluetooth <strong>de</strong>vice and you already have the maximum of four <strong>de</strong>vices on<br />
the paired <strong>de</strong>vices list, you must first <strong>de</strong>lete a <strong>de</strong>vice from the paired <strong>de</strong>vices list.<br />
1. In standby mo<strong>de</strong>, Press MENU/OK and select Bluetooth<br />
2. Select Paired <strong>de</strong>vices,<br />
3. Select the <strong>de</strong>vice you want to remove<br />
4. Select Remove paired.<br />
5. The screen displays Remove <strong>de</strong>vice from paired list? Press Menu/OK to confirm<br />
6. The handset displays Device removed from paired list.<br />
F. Active <strong>de</strong>vices<br />
Only <strong>de</strong>vices on the active <strong>de</strong>vices list can establish a Bluetooth connection with the telephone<br />
base. Although two paired <strong>de</strong>vices can be connected to the telephone base, only one Bluetooth<br />
mobile phone or a headset can be on a call at a time.<br />
Note: When adding, removing, or replacing a Bluetooth <strong>de</strong>vice on the active <strong>de</strong>vices list, all<br />
connected <strong>de</strong>vices are temporarily disconnected until the procedure is complete. It may take up to<br />
two minutes to reconnect.<br />
Review the active <strong>de</strong>vices list<br />
1. In standby mo<strong>de</strong>, Press MENU/OK and choose Bluetooth<br />
2. Select Active <strong>de</strong>vices,<br />
3. You can review the Active <strong>de</strong>vices with UP/DOWN<br />
Connect/disconnect an active <strong>de</strong>vice<br />
While in the active <strong>de</strong>vices menu, you may connect or disconnect your active <strong>de</strong>vice.<br />
1. In standby mo<strong>de</strong>, Press MENU/OK and choose Bluetooth.<br />
2. Select Active <strong>de</strong>vices.<br />
3. Select the <strong>de</strong>vice you wish to connect/disconnect<br />
4. Press MENU/OK to select Connect or Disconnect<br />
5. Press MENU/OK to confirm. The handset displays Device connected/Device<br />
disconnected.<br />
TX Bluetooth 56
Replace an active <strong>de</strong>vice<br />
You can replace an active <strong>de</strong>vice with a <strong>de</strong>vice on the paired <strong>de</strong>vices list even if you already have<br />
two <strong>de</strong>vices on the active <strong>de</strong>vices list.<br />
1. In standby mo<strong>de</strong>, Press MENU/OK and choose Bluetooth.<br />
2. Select Paired <strong>de</strong>vices.<br />
3. Select a <strong>de</strong>vice.<br />
4. Select Connect.<br />
5. Confirm by MENU/OK. The handset display Maximum of 2 <strong>de</strong>vices can be connected<br />
and then Replace an existing active <strong>de</strong>vice with mobile? Press Menu/OK.<br />
6. Select the <strong>de</strong>vice to be replaced, then press MENU/OK.<br />
7. The handset displays Device removed from active <strong>de</strong>vices list and then<br />
Connecting Mobile Phone A to the base...<br />
8. Depending on your MOBILE phone settings, you may need to press a key on your<br />
MOBILE phone to confirm the connection. When you successfully replace and connect an<br />
active <strong>de</strong>vice with a paired <strong>de</strong>vice, the handset displays Device connected.<br />
Add an active <strong>de</strong>vice<br />
You can have a maximum of two <strong>de</strong>vices on the active <strong>de</strong>vices list.<br />
1. In standby mo<strong>de</strong>, Press MENU/OK then choose Bluetooth.<br />
2. Select Active <strong>de</strong>vices.<br />
3. Select Empty position<br />
4. Select Add.<br />
5. Select a <strong>de</strong>vice from the paired <strong>de</strong>vices list.<br />
6. Press MENU/OK.<br />
7. The handset displays Device ad<strong>de</strong>d to active list and then Connecting Mobile Phone B<br />
to the base... If there are no paired <strong>de</strong>vices to add, the handset displays All paired<br />
<strong>de</strong>vices are <strong>de</strong>vices already connected.<br />
8. Depending on your mobile phone settings, you may need to press a key on your mobile<br />
phone to confirm the connection. When you successfully add and connect an active <strong>de</strong>vice, the<br />
handset displays Device connected.<br />
Remove an active <strong>de</strong>vice<br />
You can remove an active <strong>de</strong>vice from the active <strong>de</strong>vices list.<br />
1. In standby mo<strong>de</strong>, press MENU/OK and choose Bluetooth.<br />
2. Select Active <strong>de</strong>vices,<br />
3. Select the <strong>de</strong>sired <strong>de</strong>vice.<br />
4. Select Remove active.<br />
5. Press MENU/OK.<br />
6. The handset displays Device removed from active list.<br />
Note: Even though the active <strong>de</strong>vice is removed from the active <strong>de</strong>vices list, it is still on the paired<br />
<strong>de</strong>vices list<br />
G. Change PIN<br />
You are required to enter a PIN when establishing a Bluetooth connection.<br />
The <strong>de</strong>fault Pin of your telephone base is 0000.<br />
1. In standby mo<strong>de</strong>, press MENU/OK and choose Bluetooth.<br />
2. select Change PIN,<br />
TX Bluetooth 57
3. The display shows ENTER NEW PIN and the existing PIN.<br />
4. Use the keypad to enter a new four-digit co<strong>de</strong>.<br />
5. Press MENU/OK to save.<br />
H. Download phonebook<br />
You can download up to four mobile phone phonebooks (phonebooks) to your TELEFUNKEN TX<br />
1** telephone system via Bluetooth wireless technology. Each downloa<strong>de</strong>d phonebook can store<br />
up to 1,500 entries with up to 30 digits for each phone number and 15 characters for each name.<br />
Before downloading the phonebook, make sure the mobile phone is paired to your TELEFUNKEN<br />
TX 1** and on the active <strong>de</strong>vices list.<br />
Place your mobile phone next to the telephone base when you download a mobile phone<br />
phonebook to your TELEFUNKEN TX1**<br />
To download a mobile phone phonebook<br />
1. In standby mo<strong>de</strong>, press MENU/OK and choose Bluetooth.<br />
2. Select Download dir.<br />
- If there is no MOBILE phone paired to the system, the handset displays No mobile<br />
<strong>de</strong>vice paired.<br />
- PressOK to add mobile.<br />
3. Select a <strong>de</strong>vice, then confirm by MENU/OK.<br />
4. If the selected <strong>de</strong>vice is on the paired <strong>de</strong>vices list but not on the active <strong>de</strong>vices list, the<br />
handset displays No mobile on active <strong>de</strong>vices list. Press OK to add.<br />
5. If the selected <strong>de</strong>vice is on the active <strong>de</strong>vices list but disconnected, the handset displays<br />
Not connected. Place it next to the base to connect mobile. Press OK.<br />
6. If the selected <strong>de</strong>vice’s phonebook has already been downloa<strong>de</strong>d to the TX 1** phone<br />
before, the handset displays Mobile Phone A Last update: MM/DD/YY To continue,<br />
press OK.<br />
- If you press MENU/OK to continue the download process, the stored phonebook for<br />
that particular mobile phone is erased and replaced with the current mobile phone<br />
phonebook.<br />
- Press MENU/OK to confirm.<br />
- If you have edited the downloa<strong>de</strong>d entries those changes are lost.<br />
7. If you already have four downloa<strong>de</strong>d phonebooks, the handset displays Memory is full.<br />
Replace current phonebook? Press OK when you try to download another mobile phone<br />
phonebook.<br />
- Press MENU/OK and the system prompt you to replace an existing phonebook.<br />
8. Press UP/DOWN to select one of the following options:<br />
9. Phone memory - download all contacts stored in your phone memory.<br />
- SIM card only - download all contacts stored in your SIM card.<br />
- Phone and SIM - download all contacts stored in both your phone memory and SIM<br />
card.<br />
When the downloading process is complete, the handset displays<br />
Download en<strong>de</strong>d Total #XXXX entries saved<br />
Press MENU/OK or C to return to the download phonebook menu.<br />
Note:<br />
Certain mobile phones do not support SIM card download. In this case, transfer the contacts<br />
from your SIM card to your mobile phone memory first, then download them from your mobile<br />
phone memory. For more information on how to transfer contacts from your SIM card to your<br />
mobile phone memory, see the user’s manual of your mobile phone.<br />
When downloading the phonebook from your Bluetooth enabled mobile phone, some data<br />
TX Bluetooth 58
may not transfer. For example, if you have HOME, MOBILE and WORK numbers for a<br />
particular contact, the three categories may not transfer to your TX 1**<br />
Interruption of phonebook download<br />
The following events do not affect the download<br />
- You receive or make call on the home line<br />
- You place the handset in the telephone base or charger<br />
- You access to the mobile phone menu features<br />
- The handset battery pack become <strong>de</strong>pleted or the handset loses connection with the<br />
telephone base.<br />
Note: During the download process, do not attempt to make changes to your mobile phone<br />
phonebook.<br />
The phonebook’s download can be interrupted by the following events :<br />
- The mobile phone receives a call in the same time<br />
- The telephone base loses power<br />
Note : In these cases you will need to download the phonebook again<br />
4 USING THE PHONE<br />
A. Make, answer or end a home call<br />
To make a home call:<br />
Press HOME or SPEAKER then enter the telephone number. You can also enter the telephone<br />
number first<br />
To answer a home call:<br />
When you receive a home call, the phone rings. The display will show the caller’s number if<br />
available or the caller’s name if it matches an entry in the phonebook.<br />
Press HOME or SPEAKER to answer an incoming home call.<br />
To end a home call<br />
Press C or put the handset in the telephone base or charger.<br />
B. Make, answer or end a mobile call<br />
You can connect a maximum of two Bluetooth enabled mobile phones to the telephone base, but<br />
only one mobile phone can be used on a mobile call at a time. All TX 1** handsets can be used to<br />
make or answer calls on the mobile phone line.<br />
To make a mobile call:<br />
Enter the telephone number.<br />
Then press MOBILE to make a mobile call if you have only one mobile phone connected to the<br />
TX Bluetooth 59
telephone base. if you have two mobile phones connected to the telephone base, the<br />
telephone system prompts you to select a mobile phone before you make a mobile call.<br />
To answer a mobile call:<br />
Press MOBILE.<br />
Note: You can also use your mobile phone to answer the call. If you answer with your mobile<br />
phone, it disconnects from the telephone base.<br />
To end a mobile call:<br />
Press C or put the handset in the telephone base or charger.<br />
Answer a mobile call while on a home call:<br />
If you are on a home call and you receive an incoming mobile call, you hear a beep and or<br />
displays on the handset you are using. The telephone base and all other handsets ring.<br />
To answer the incoming mobile call:<br />
Press MOBILE on the handset. The home call is automatically placed on hold and all other<br />
handsets display Home call on hold and Mobile line in use alternately.<br />
To end the mobile call:<br />
Press C on the handset. The home line is still on hold. All handsets display Home call on hold.<br />
To resume the home call on hold:<br />
Press HOME on the handset.<br />
Answer a home call while on a mobile call:<br />
If you are on a mobile call and you receive an incoming Home call, you hear a beep and displays<br />
on the handset you are using. The telephone base and all other handsets ring.<br />
Press C on the handset. The mobile call is automatically placed on hold and all other handsets<br />
display Mobile call on hold and Home line in use alternately.<br />
To end the home call:<br />
Press C on the handset. The mobile line is still on hold. All handsets display Mobile call on hold.<br />
To resume the mobile call on hold:<br />
Press MOBILE on the handset.<br />
Note:<br />
If you have turned on your answering system and you do not answer the incoming home call,<br />
the call is answered by your answering system.<br />
If you make or answer a home call on a handset, you can transfer the call to your headset.<br />
The handset remains active, but the handset earpiece and microphone are muted. If you hang<br />
up the handset, the call will end.<br />
TX Bluetooth 60
Mobile phone voicemail<br />
If you have voicemail service active on your mobile phone, and you do not answer the incoming<br />
mobile call, the call will be answered by your mobile phone’s voicemail. Contact your mobile<br />
phone service provi<strong>de</strong>r for more information about voicemail service.<br />
Call timer<br />
Your handset will automatically time the duration of all external calls. The handset display shows<br />
the call duration both during and for a few seconds after your call is terminated.<br />
Out of range warning<br />
When the handset goes out of range of the base, the line will hang up if you are on a call. When<br />
you move back within range, the handset will automatically reconnect to the base.<br />
C. Using a Bluetooth headset<br />
You can use a Bluetooth headset on home calls. However, you will need to stay within 30 feet (9<br />
meters) from the telephone base to maintain the Bluetooth signal.<br />
To answer a home call using a Bluetooth headset<br />
Press the call key on your headset.<br />
To end a home call you answered from a Bluetooth headset<br />
Press the call key on your headset.<br />
If you make or answer a home call on a handset, you can transfer the call to your headset. The<br />
handset remains active, but the handset earpiece and microphone are muted. If you hang up the<br />
handset, the call will end.<br />
To transfer a call from a handset to a Bluetooth headset:<br />
Press MENU/OK twice to select Use headset.<br />
To transfer a call from the headset back to the handset:<br />
Press MENU/OK twice to select Use handset.<br />
To end a call that started at the handset:<br />
Press C or put the handset in the telephone base or charger.<br />
Note:<br />
If you answer a call using a headset, and you lose the Bluetooth connection or the battery is<br />
<strong>de</strong>pleted, the call will be lost.<br />
If you are using a headset for a call which is transferred from TELEFUNKEN TX 1** handset,<br />
and you lose the Bluetooth connection or the battery of the headset is <strong>de</strong>pleted, the call will be<br />
transferred back to the originating handset.<br />
TX Bluetooth 61
Earpiece/ handsfree volume<br />
Press UP/DOWN to adjust the listening volume of the earpiece or loudspeaker when during a call.<br />
Note: The handset earpiece volume setting (1-5) and speakerphone volume setting (1-6) are<br />
in<strong>de</strong>pen<strong>de</strong>nt.<br />
When the volume reaches the minimum or maximum setting, you will hear two beeps.<br />
D. Hold function<br />
You can place a home or mobile call on hold.<br />
You will hear an alert tone if you have not taken the call on hold after 14 minutes.<br />
You will hear another alert tone 30 seconds later.<br />
At 15 minutes on hold, the call on hold automatically disconnects.<br />
To place a home call on hold:<br />
Press HOLD. The handset displays Home call on hold and HOME flashes.<br />
To resume a home call on hold:<br />
Press HOME.<br />
To place a mobile call on hold:<br />
Press HOLD. The handset displays Mobile call on hold and MOBILE flashes.<br />
To resume a mobile call on hold:<br />
Press MOBILE<br />
E. Mute function<br />
Use the mute function to turn off the microphone. You can hear the caller, but the caller does not<br />
hear you.<br />
To mute the call:<br />
Press MUTE/REMOVE. hen mute is on, the handset screen shows Microphone off for a few<br />
seconds and the mute icon appears until you turn off the mute function.<br />
To un-mute the call:<br />
Press MUTE/REMOVE and resume speaking. When MUTE is OFF, Microphone on appears<br />
temporarily on the handset screen. MUTE is automatically canceled when you end the call.<br />
F. Handsfree<br />
Handsfree lets you talk to your caller without holding the handset to your ear. It also enables other<br />
people in the room to join in the conversation over the loudspeaker.<br />
TX Bluetooth 62
Make a handsfree call<br />
1. Dial the number then press SPEAKER on the handset. is displayed. You<br />
will then<br />
hear your call over the handset loudspeaker. Press SPEAKER to switch the call between<br />
the earpiece and the loudspeaker.<br />
2. Press TALK OFF/CLEAR to end the call.<br />
Note: During a handsfree call, you can press UP/DOWN to adjust the volume.<br />
Answer a call in handsfree mo<strong>de</strong><br />
When the phone rings:<br />
Press SPEAKER on the handset. The call is transferred to the handset loudspeaker.<br />
Switch to handsfree mo<strong>de</strong> during a call<br />
When in a call, press SPEAKER on the handset to put the call on the loudspeaker. To switch<br />
handsfree off and return the call to the earpiece, press SPEAKER again.<br />
G. Redial<br />
Up to 20 of the last telephone numbers called are saved in the redial list. You can select any of the<br />
numbers to redial, save to phonebook or <strong>de</strong>lete.<br />
Redial a redial entry<br />
1. Press HOME or MOBILE, then REDIAL/PAUSE repeatedly or UP/DOWN to view the redial<br />
memory,<br />
2. Dial out the number displayed by pressing MENU/OK.<br />
-OR<br />
In standby mo<strong>de</strong>, press REDIAL/PAUSE repeatedly or UP/DOWN to browse until the <strong>de</strong>sired<br />
number displays. Press HOME or MOBILE<br />
Save a redial entry to the phonebook<br />
1. In standby mo<strong>de</strong>, press REDIAL/PAUSE.<br />
2. Press UP, DOWN or REDIAL/PAUSE repeatedly to select the <strong>de</strong>sired redial entry.<br />
3. Press MENU/OK twice. The handset displays ENTER NUMBER.<br />
Use the keypad to edit the number if necessary.<br />
4. Press MENU/OK then UP/DOWN to select one of the following types:<br />
- Home<br />
- Mobile<br />
- Work<br />
- Other<br />
5. Press MENU/OK. The handset displays ENTER NAME. Use the keypad to enter the name<br />
Press MENU/OK to confirm.<br />
Delete a redial number<br />
1. In standby mo<strong>de</strong>, press REDIAL/PAUSE.<br />
2. Press UP, DOWN or REDIAL/PAUSE to select the <strong>de</strong>sired redial entry.<br />
TX Bluetooth 63
3. Press MUTE/REMOVE to <strong>de</strong>lete the selected entry.<br />
Find handset (Paging)<br />
You can ring a handset to help locate it.<br />
1. Press PAGE on the base. All idle handsets ring and display ** Paging **.<br />
2. Press PAGE on the base again to stop the paging, or press HOME, SPEAKER, MOBILE or<br />
any dial pad key (0-9, *, or #) on any handset.<br />
H. Ringers<br />
Temporary ringer silencing<br />
When the telephone is ringing, you can temporarily silence the ringer of the handset or telephone<br />
base without disconnecting the call. The next call rings normally at the preset volume.<br />
To silence the handset ringer:<br />
Press C or MUTE/REMOVE on the handset and Ringer muted appears.<br />
To silence the base ringer:<br />
Press VOLUME- on the telephone base until L0 displayed in base LED.<br />
Note: Each handset will ring when there is an incoming call unless the ringer volume is turned off.<br />
Pressing C or MUTE/REMOVE on one handset will only silence the ringer of that particular<br />
handset.<br />
I.Chain dialing<br />
This feature allows you to initiate a dialing sequence from numbers stored in the phonebook, call<br />
list history or redial list while you are on a call.<br />
Chain dialing can be useful if you wish to access numbers other than phone numbers (such as<br />
bank account information or access co<strong>de</strong>s) from the phonebook, call list history or redial list.<br />
To access a number in the phonebook while on a call:<br />
1. Press MENU/OK then select Phonebook.<br />
2. Select Home phonebook.<br />
3. Scroll to the <strong>de</strong>sired entry or perform an alphabetical search<br />
4. Press MENU/OK to dial the displayed number.<br />
To access a number in the call log while on a call:<br />
1. Select Call log.<br />
2. Select the <strong>de</strong>sired call list entry.<br />
3. Press MENU/OK to dial the displayed number.<br />
To access the redial list while on a call:<br />
1. Press REDIAI/PAUSE.<br />
2. Press UP, DOWN or REDIAI/PAUSE until the <strong>de</strong>sired number displays.<br />
3. Press MENU/OK. If you do not press MENU/OK within two seconds, the number displayed<br />
is dialed automatically.<br />
TX Bluetooth 64
Note: You can only view the numbers in the phonebook, call log or redial list while on a call and<br />
cannot edit, <strong>de</strong>lete or save entries.<br />
Press and hold TALK OFF/CLEAR to exit redial list, phonebook or call log while on a call.<br />
5 PHONEBOOK<br />
Your phone phonebook consists of a home phonebook and up to four downloa<strong>de</strong>d phonebooks.<br />
The home phonebook stores up to 200 entries with up to 30 digits for each phone number and 15<br />
characters for each name. Each of the downloa<strong>de</strong>d phonebook stores up to 1,500 entries with up<br />
to 30 digits for each phone number and 15 characters for each name.<br />
A. Store a number entry in the home phonebook<br />
1. In standby mo<strong>de</strong>, press MENU/OK and select Phonebook.<br />
2. Select Home.<br />
3. Choose Add contact.<br />
4. The display shows ENTER NUMBER.<br />
5. Use the keypad to enter a telephone number.<br />
OR Copy a number from the redial list.<br />
Press REDIAL/PAUSE then UP/DOWN to browse and select a number.<br />
Press MENU/OK to copy the displayed number.<br />
6. Press MENU/OK then UP/DOWN to select one of the following types:<br />
- Home<br />
- Mobile<br />
- Work<br />
- Other<br />
7. Press MENU/OK. The display shows ENTER NAME.<br />
8. Use the keypad to enter the name.<br />
9. Press MENU/OK to save the entry.<br />
Note: You cannot create new entries in your downloa<strong>de</strong>d phonebooks from your TX 1** handsets.<br />
Entries must be downloa<strong>de</strong>d from your mobile phone<br />
Entering names<br />
Use the keypad letters to enter names, e.g. to store Tom:<br />
Press once to enter T.<br />
Press three times to enter o.<br />
Press once to enter m.<br />
Writing tips<br />
Press MUTE/REMOVE to <strong>de</strong>lete the last character or digit.<br />
Press and hold MUTE/REMOVE to <strong>de</strong>lete all characters or digits.<br />
Press UP/DOWN to move backward or forward through the characters/digits.<br />
Press and hold REDIAL/PAUSE to insert a dialing pause (a P appears).<br />
Press HOME to insert a flash ("R")<br />
B. Review a phonebook entry<br />
2. In standby mo<strong>de</strong>, press UP to access phonebook.<br />
3. Select Home phonebook or downloa<strong>de</strong>d phonebook<br />
4. Press MENU/OK then UP/DOWN to review.<br />
Note: You will be requested to enter the PIN co<strong>de</strong> to access the PIN-protected downloa<strong>de</strong>d<br />
phonebook.<br />
TX Bluetooth 65
C. Dial an entry<br />
You can dial a phonebook entry on either a home or mobile line.<br />
1. In standby mo<strong>de</strong>, press UP to access the phonebook, Choose between Home phonebook<br />
and downloa<strong>de</strong>d phonebook.<br />
2. Select the entry you want, or search alphabetically using the alphanumeric keypad (see the<br />
tip below).<br />
3. Press HOME or SPEAKER to use the home line, or MOBILE to use the mobile line.<br />
To search alphabetically<br />
Press the relevant keypad button, e.g. for the entries beginning with T press once then press<br />
UP/DOWN to scroll through the entries.<br />
D. Edit a phonebook entry<br />
You may edit any phonebook entry. However, be aware that if you download from a mobile phone<br />
again, the phonebook is erased and replaced with the current mobile phone phonebook. If you<br />
have edited the downloa<strong>de</strong>d entries on TELEFUNKEN TX 1** , those changes are lost. To avoid<br />
losing changes ma<strong>de</strong> to the downloa<strong>de</strong>d phonebook, we suggest you edit the number in your<br />
mobile phone, then download the phonebook.<br />
1. In standby mo<strong>de</strong>, press UP to access the phonebook.<br />
2. Select Home phonebook or downloa<strong>de</strong>d phonebook.<br />
3. Select the entry you want, or search alphabetically using the alphanumeric keypad (see the<br />
tip below).<br />
4. Press MENU/OK and use the keypad to edit the number,<br />
5. Select one of the following types:<br />
- Home<br />
- Mobile<br />
- Work<br />
- Other<br />
6. The screen displays EDIT NAME. Use the keypad to enter the name<br />
7. Press MENU/OK to save.<br />
Edit the type of a phonebook entry<br />
If you only want to edit the type of a phonebook entry, please follow steps below<br />
1. In standby mo<strong>de</strong>, press UP to access the phonebook.<br />
2. Select Home phonebook or downloa<strong>de</strong>d phonebook.<br />
3. Browse and select the <strong>de</strong>sired phonebook entry.<br />
4. When the phonebook is displayed. Enter the corresponding keys shown below to change<br />
the type accordingly. The selected type will appear between the name and number.<br />
Type: Press<br />
HOME * 1<br />
MOBILE * 2<br />
Work * 3<br />
Other * 4<br />
TX Bluetooth 66
E. Delete a phonebook entry<br />
1. In standby mo<strong>de</strong>, press UP to access the phonebook.<br />
2. Select Home phonebook or downloa<strong>de</strong>d phonebook.<br />
3. Browse and select the entry you want to <strong>de</strong>lete.<br />
4. Press MUTE/REMOVE, The display show Delete contact? Press Menu/ OK to confirm<br />
5. The selected entry is <strong>de</strong>leted.<br />
Note: Once a phonebook entry is <strong>de</strong>leted, it cannot be retrieved.<br />
F. Remove a downloa<strong>de</strong>d phonebook (downloa<strong>de</strong>d phonebooks only)<br />
1. In standby mo<strong>de</strong>, press MENU/OK then select Phonebook<br />
2. Select the <strong>de</strong>sired downloa<strong>de</strong>d phonebook.<br />
3. Select Remove PB.<br />
4. Press MENU/OK. The display shows Phonebook Mobile Phone A will be erased.<br />
5. Press MENU/OK to confirm.<br />
Note: You will be requested to enter the PIN co<strong>de</strong> to access the PIN-protected downloa<strong>de</strong>d<br />
phonebook.<br />
G. Set the country co<strong>de</strong> for home & downloa<strong>de</strong>d phonebook<br />
This feature makes it easy for you to place a call from the caller ID log.<br />
Also, if you have downloa<strong>de</strong>d a phonebook from your mobile phone, you may need to set the<br />
mobile country co<strong>de</strong> in or<strong>de</strong>r to dial a number from the downloa<strong>de</strong>d phonebook correctly.<br />
1. In standby mo<strong>de</strong>, press MENU/OK then select Settings.<br />
2. Select Country co<strong>de</strong>.<br />
3. Press MENU/OK then use the keypad to enter the <strong>de</strong>sired area co<strong>de</strong>.<br />
4. Press MENU/OK to confirm.<br />
H. Security PIN for downloa<strong>de</strong>d phonebook<br />
This feature allows you to set your security PIN to protect your downloa<strong>de</strong>d phonebooks, if you set<br />
the Security ON, you must enter the correct 4-difit PIN when you want to access your downloa<strong>de</strong>d<br />
phonebooks.<br />
1. In standby mo<strong>de</strong>, press MENU/OK then select Phonebook.<br />
2. Select a downloa<strong>de</strong>d phonebook.<br />
3. Select Security.<br />
4. Select On.<br />
5. Press MENU/OK then use the keypad to enter 4-digit PIN<br />
6. Repeat step 5 to enter the 4-digit PIN again.<br />
7. Press MENU/OK to confirm.<br />
Note: Each mobile downloa<strong>de</strong>d phonebook can be protected by a separate PIN. After setting the<br />
security PIN, you will be requested to enter the correct PIN to access the protected downloa<strong>de</strong>d<br />
phonebook again.<br />
TX Bluetooth 67
Set up PABX<br />
Thanks to this function you can to set up automatically a prefix and make some external call with a<br />
PABX.<br />
Once the prefix set up, it will be automaticaly dialed for the home line’s calls<br />
Note : a “Pause” must be dialed after PABX Prefix<br />
1. Press MENU/OK and select Settings<br />
2. Choose PABX<br />
3. Enter the co<strong>de</strong> and confirm by MENU/OK.<br />
To <strong>de</strong>lete or switch off this feature, juste <strong>de</strong>lete PABX co<strong>de</strong> using MUTE/REMOVE key.<br />
6 SETTINGS<br />
Handset settings<br />
Handset ringer volume<br />
Using this menu, you can set the ringer volume level (1-6), or turn the ringer off. When the ringer is<br />
turned off, the icon flashes on the handset screen. You can select the ringer<br />
volume for the incoming home and mobile calls.<br />
1. Press MENU/OK then select Audio.<br />
2. Select Ringer volume.<br />
3. Choose Home, Mobile 1, Mobile 2 or All home & mobile<br />
4. Browse each volume level. A sample of each ringer volume plays as you scroll through the<br />
choices.<br />
5. Level 1 to 6 and Ringer off are available.<br />
6. Press MENU/OK to save.<br />
Ringer tone<br />
You can select different ringer tones for home and mobile calls.<br />
1. Press MENU/OK then select Audio.<br />
2. Select Ringer tone.<br />
3. Choose Home, Mobile 1, or Mobile 2.<br />
4. Browse each ringer tone. A sample of each ringer tone plays as you scroll through the<br />
choices.<br />
5. Press MENU/OK to save.<br />
Note: If you turn C the ringer volume, you do not hear ringer tone samples.<br />
Alert tones (Key tone, Low battery and No coverage)<br />
You can turn on or C the alert tones of key press, battery low and out of range.<br />
1. In standby mo<strong>de</strong>, press MENU/OK then select Audio.<br />
2. Select Key tone, low battery or No coverage.<br />
3. Select On or Off.<br />
4. Press MENU/OK to confirm.<br />
TX Bluetooth 68
Set date and time<br />
If you have subscribed to Caller ID service, the date and time is set automatically for all handsets<br />
when you receive your first call. The date and time is recor<strong>de</strong>d with each answering machine<br />
message you receive. If you have not subscribed to Caller ID service, you can set the date and<br />
time manually.<br />
Date format<br />
1. In standby mo<strong>de</strong>, press MENU/OK then select Settings.<br />
2. Select Date format.<br />
3. Select date format DD/MM/YY or MM/DD/YY.<br />
4. Press MENU/OK to save your choice.<br />
Time format<br />
1. In standby mo<strong>de</strong>, press MENU/OK then select Settings.<br />
2. Select Time format.<br />
3. Select date format 12 - Hour or 24 - Hour.<br />
4. Press MENU/OK to save.<br />
Set date and time manually<br />
1. In standby mo<strong>de</strong>, press MENU/OK then select Settings.<br />
2. Select Set date/time.<br />
3. Use the keypad to enter the date according to DD-MM-YY or MM-DD-YY format.<br />
4. Press MENU/OK then use the keypad to enter the time according to 12-Hour or 24-Hour<br />
format.<br />
5. Press MENU/OK to save the settings.<br />
Auto answer<br />
1. In standby mo<strong>de</strong>, press MENU/OK then select Settings.<br />
2. Select Auto answer.<br />
3. Select On or Off.<br />
4. Press MENU/OK to confirm.<br />
Note: As long as you have auto answer set to ON you can answer a call by lifting the handset C<br />
the base.<br />
If you have switched auto answer OFF, you will need to press HOME when you lift up the handset.<br />
The <strong>de</strong>fault setting of Auto Answer is ON.<br />
Handset reset<br />
1. In standby mo<strong>de</strong>, press MENU/OK then select Settings.<br />
2. Select Reset.<br />
3. Use the keypad to enter 4-digit PIN (<strong>de</strong>fault 4-digit PIN is 0000).<br />
4. Confirm by MENU/OK. The display shows Reset to <strong>de</strong>fault settings?<br />
5. Press again MENU/OK to confirm.<br />
TX Bluetooth 69
B. Base settings<br />
Set dial mo<strong>de</strong><br />
The <strong>de</strong>fault dialing mo<strong>de</strong> is suitable for your country and network operator. It is unlikely that you<br />
should need to change this setting unless advised to do so.<br />
1. In standby mo<strong>de</strong>, press MENU/OK then select Settings.<br />
2. Select Dial mo<strong>de</strong>.<br />
3. Select the dial mo<strong>de</strong> from Tone and Pulse.<br />
4. Press MENU/OK to confirm.<br />
Set the flash time<br />
The <strong>de</strong>fault flash time is suitable for your country and network operator. It is unlikely that you<br />
should need to change this setting unless advised to do so.<br />
1. In standby mo<strong>de</strong>, press MENU/OK then select Settings.<br />
2. Select Flash time.<br />
3. Select the flash time from 80ms, 100 ms, 120 ms, 180 ms, 200 ms 250 ms, 300 ms<br />
and 600 ms.<br />
4. Press MENU/OK to save.<br />
Change system PIN<br />
1. In standby mo<strong>de</strong>, press MENU/OK then select Settings.<br />
2. Select System PIN.<br />
3. Use the keypad to enter old 4-digit PIN (<strong>de</strong>fault 4-digit PIN is 0000).<br />
4. Press MENU/OK then enter new 4-digit PIN.<br />
5. Repeat step 4 to confirm your new PIN.<br />
6. Press MENU/OK to confirm.<br />
C. Caller ID<br />
This product supports caller ID services provi<strong>de</strong>d by most telephone service provi<strong>de</strong>rs. Depending<br />
on your service subscription, you may see the caller’s number, or the caller’s name and number<br />
from the telephone service provi<strong>de</strong>r after the first or second ring. Caller ID from the HOME line<br />
allows you to see the name, number, date and time of the incoming calls. However, caller ID from<br />
the MOBILE line only shows the number of the incoming caller; date and time of the call is not<br />
shown. The caller ID may appear differently if the caller is matched to a phonebook entry.<br />
Missed calls are marked with xx Missed call(s). Each time you review a call list entry marked with<br />
icon, the number of missed calls <strong>de</strong>creases by one. When you have reviewed all<br />
the missed calls, the missed calls indicator no longer shows. You can review, redial, and copy an<br />
entry into the phonebook. Entries appear in reverse chronological or<strong>de</strong>r. Only one handset can<br />
review the call list at a time. If a handset tries to enter the call list while another handset is already<br />
in it, NOT AVAILABLE AT THIS TIME appears.<br />
The call list information might not be available for every incoming call. The callers might<br />
intentionally block their names and/or telephone numbers.<br />
Call list display screen messages<br />
TX Bluetooth 70
Private<br />
Unavailable<br />
The caller is blocking the telephone<br />
number.<br />
This caller’s number is unavailable.<br />
When the list is full, and a new call is received, the ol<strong>de</strong>st entry will be <strong>de</strong>leted automatically.<br />
IMPORTANT<br />
To use caller ID feature you must first subscribe to the service from Telephone Services provi<strong>de</strong>rs.<br />
For more information please contact your provi<strong>de</strong>rs. To ensure the caller’s name is displayed,<br />
make sure you have stored the full telephone number, including the area co<strong>de</strong>, in the phonebook.<br />
D. View call <strong>de</strong>tails<br />
Review the caller ID history to find out who called, to easily return a call, or to copy the caller’s<br />
name and number into your phonebook. Call log empty appears if there are no records in the call<br />
log.<br />
1. Press UP to access the call list.<br />
OR<br />
2. In standby mo<strong>de</strong>, press MENU/OK then UP/DOWN to select Call log.<br />
3. Press MENU/OK then UP/DOWN to browse the call list with name, type of entry and<br />
number if it matches an phonebook entry.<br />
Note: The name (if available), telephone number, date and time of all incoming calls are shown on<br />
the screen. You hear a double beep when the list reaches the beginning or end of the call list.<br />
Dial from the Call list<br />
1. When in the call list, press UP/DOWN to select the <strong>de</strong>sired number.<br />
2. Press HOME or SPEAKER to dial out the entry through the home line.<br />
Or MOBILE to dial out through the mobile line.<br />
Save a call list entry to the phonebook<br />
1. When in the call list, press UP/DOWN to select the <strong>de</strong>sired call list entry.<br />
2. Press MENU/OK. The display shows EDIT NUMBER.<br />
3. Use the keypad to edit the number<br />
4. Press UP/DOWN to select one of the following types:<br />
- Home<br />
- Mobile<br />
- Work<br />
- Other<br />
5. Press MENU/OK. The screen displays EDIT NAME.<br />
6. Use the keypad to edit the name<br />
7. Press MENU/OK to confirm.<br />
Delete an Entry in the Call list<br />
1. When in the call list, press UP/DOWN to select the entry you want to <strong>de</strong>lete.<br />
2. Press MUTE/REMOVE to <strong>de</strong>lete the selected entry.<br />
TX Bluetooth 71
Delete the Entire Call list<br />
1. In standby mo<strong>de</strong>, press MENU/OK to Select Call log.<br />
2. Press MENU/OK then UP/DOWN to Del all calls,<br />
3. Press MENU/OK. The display shows Del all calls? Press OK to confirm.<br />
4. Press MENU/OK to confirm.<br />
E. Provi<strong>de</strong>r services<br />
Clear voicemail<br />
If you subscribe to voicemail service offered by your telephone service provi<strong>de</strong>r, New voicemail<br />
appears on the handsets when you have new voicemail messages. Contact your telephone<br />
service provi<strong>de</strong>r for more information and assistance about using your voicemail service. This<br />
feature only works on the voicemail associated with your home line, not the mobile line.<br />
After you have listened to all new voicemail messages, the indicators on the handsets turn off<br />
automatically.<br />
Use the clear voicemail feature when the telephone indicates that there is new voicemail but there<br />
is none (for example, when you have accessed your voicemail while away from home). Clearing<br />
the voicemail waiting indicator only turns off the indicators; it does not <strong>de</strong>lete your voicemail<br />
messages. As long as you have new voicemail messages, your telephone service provi<strong>de</strong>r<br />
continues to send the signal that turns on the indicators.<br />
Clear flashing message indication<br />
New voicemail will appear on the handset when you have new flashing messages.<br />
After you have listened to all new flashing messages, the indicator on the handset turns off<br />
automatically.<br />
Use the clear voicemail feature when the telephone indicates that there is new voicemail but<br />
actually there is none (for example, when you have accessed your voicemail while away from<br />
home). Clearing the flashing message indication only turns off the indicators, it does not <strong>de</strong>lete<br />
your messages. As long as you have new flashing messages, service provi<strong>de</strong>r will continue to<br />
send the signal to turn on the indicators.<br />
To manually turn off the new voicemail indicator:<br />
1. In standby mo<strong>de</strong>, press MENU/OK then UP/DOWN to select Settings.<br />
2. Press MENU/OK then UP/DOWN to select Clr voicemail<br />
3. Press MENU/OK. The display shows Turn off indicator? Press OK to confirm.<br />
4. Press MENU/OK to confirm. Or press C to cancel the procedure.<br />
Note:<br />
Your telephone service provi<strong>de</strong>r may alert you to new messages with a stutter (broken) dial tone.<br />
Contact your service provi<strong>de</strong>r for <strong>de</strong>tails.<br />
Call Waiting<br />
Call Waiting tells you if a new caller is trying to contact you when you are already on the phone. A<br />
network tone alerts you to the new caller, so you can answer your second incoming home call by<br />
putting the first home caller on hold.<br />
Call waiting on the home line<br />
If you subscribe to call waiting service with your telephone service provi<strong>de</strong>r, you hear a beep if<br />
someone calls while you are already on a call.<br />
TX Bluetooth 72
1. Press HOME on the handset to put your current call on hold and take the new call.<br />
2. Press HOME on the handset at any time to switch back and forth between calls.<br />
Call waiting on the mobile line<br />
If you subscribe to call waiting service with your mobile phone service provi<strong>de</strong>r, you hear a beep if<br />
someone calls while you are already on a call.<br />
1. Press MOBILE on the handset to put your current call on hold and take the new call.<br />
2. Press MOBILE on the handset at any time to switch back and forth between calls.<br />
7 ANSWERING MACHINE<br />
The answering machine records unanswered calls when it is activated. It can store up to 99<br />
messages within the maximum recording time of 14 minutes. Total recording time inclu<strong>de</strong>s all<br />
voice prompts, outgoing messages and incoming call messages. English & French voice prompt<br />
can be supported.<br />
A. Using the Answering machine from the handset<br />
Switch the answering machine on/ off<br />
The answering system must be turned on to answer and record messages.<br />
When the answering system is turned on, the light on the telephone base will be<br />
on and icon will display on the handset.<br />
1.In standby mo<strong>de</strong>, press MENU/OK then UP/DOWN to select Answering sys.<br />
2.Press MENU/OK then UP/DOWN to select Answer ON/OFF.<br />
3.Press MENU/OK then UP/DOWN to select On or Off.<br />
4.Press MENU/OK to confirm.<br />
Play Messages<br />
1.In standby mo<strong>de</strong>, press MENU/OK then UP/DOWN to select Play messages.<br />
2.Press MENU/OK to play messages. If new and old messages exist in answering machine,<br />
system will play new messages first and then old messages. Options below during playback.<br />
-Press UP/DOWN to adjust the speaker volume.<br />
-Press 6 to skip to the next message.<br />
-Press 4 to repeat the message currently playing.<br />
-Press 4 twice to listen to the previous message.<br />
-Press 5 to <strong>de</strong>lete the current message. The system advances to the next<br />
message.<br />
-Press 2 to stop and revert to the previous level.<br />
Delete all old messages<br />
1.In standby mo<strong>de</strong>, press MENU/OK then UP/DOWN to select Answering sys.<br />
2.Press MENU/OK then UP/DOWN to select Delete all old.<br />
3.Press MENU/OK. The display shows Delete all old messages? Press OK to confirm.<br />
4.Press MENU/OK to confirm.<br />
Note: You can only <strong>de</strong>lete old messages, which are messages you have played.<br />
TX Bluetooth 73
Record and play memos<br />
Memos are your own recor<strong>de</strong>d messages used as remin<strong>de</strong>rs for yourself or others using the same<br />
answering system. You can record your own memos using a system handset. Playback and <strong>de</strong>lete<br />
them in the same way as incoming messages.<br />
To record a memo<br />
1.In standby mo<strong>de</strong>, press MENU/OK then UP/DOWN to select Answering sys.<br />
2.Press MENU/OK then UP/DOWN to select Record memo.<br />
3.Press MENU/OK to start recording after the system announcement and a “beep” sound is<br />
heard.<br />
4.Press KEY2 when you finish recording. The recor<strong>de</strong>d memo plays automatically, and then<br />
handset returns to the previous screen<br />
To play memo<br />
Play memos the same way as messages. See Play messages in the previous paragraph.<br />
B. Announcement<br />
The announcement is the message a caller first hears when the answering machine answers their<br />
call. There are two pre-recor<strong>de</strong>d announcement messages to choose from or you can record your<br />
own.<br />
Record your own announcement<br />
1. In standby mo<strong>de</strong>, press MENU/OK and then UP/DOWN to select Answering sys.<br />
2.Press MENU/OK and then UP/DOWN to select Announcement.<br />
3. Press MENU/OK then UP/DOWN to select Record.<br />
4. Press MENU/OK then UP/DOWN to select Answer & Record or Answer Only.<br />
5. Press MENU/OK to record your announcement message.<br />
6. Press KEY 2 to save your recor<strong>de</strong>d message and play automatically.<br />
Play your announcement<br />
1. In standby mo<strong>de</strong>, MENU/OK then UP/DOWN to select Answering sys.<br />
2. Press MENU/OK and then UP/DOWN to select Announcement.<br />
3. Press MENU/OK then UP/DOWN to select Play.<br />
4. Press MENU/OK then UP/DOWN to select Answer & Record or Answer Only<br />
5. Press MENU/OK. The recor<strong>de</strong>d announcement message is playing.<br />
C. Answer machine settings<br />
Set the answer mo<strong>de</strong><br />
You can set answer mo<strong>de</strong> to choose which outgoing message you want played to callers.<br />
Answer and Record --The pre-set Answer & Record outgoing message, which allows your caller<br />
to leave a message,<br />
Answer Only--The pre-set Answer Only outgoing message, where callers hear an announcement<br />
but cannot leave a message,<br />
1. In standby mo<strong>de</strong>, press MENU/OK and then UP/DOWN to select Answering sys.<br />
2. Press MENU/OK then UP/DOWN to select Ans sys setup.<br />
3. Press MENU/OK then UP/DOWN to select Answer mo<strong>de</strong>.<br />
TX Bluetooth 74
4. Press MENU/OK then UP/DOWN to select Answer & record or Answer only.<br />
5. Press MENU/OK to confirm<br />
Set the answer <strong>de</strong>lay<br />
1. In standby mo<strong>de</strong>, press MENU/OK and then UP/DOWN to select Answering sys.<br />
2. Press MENU/OK then UP/DOWN to select Ans sys setup.<br />
3.Press MENU/OK then UP/DOWN to select # of rings.<br />
4. Press MENU/OK then UP/DOWN to select from 2 rings, 4 rings, 6 rings, 8 rings or Time<br />
saver.<br />
5. Press MENU/OK to confirm.<br />
Note: If Time saver setting is selected, the answering machine will pick up after two rings if there<br />
are new messages and after six rings if there are no messages.<br />
Set recording time of incoming message<br />
1. In standby mo<strong>de</strong>, press MENU/OK and then UP/DOWN to select Answering sys.<br />
2. Press MENU/OK then UP/DOWN to select Ans sys setup.<br />
3. Press MENU/OK then UP/DOWN to select Recording time.<br />
4. Press MENU/OK then UP/DOWN to select recording time from 30 seconds, 60 seconds,<br />
120 seconds and unlimited.<br />
5. Press MENU/OK to confirm.<br />
Set voice language<br />
You can select English or French language for telephone voice prompts.<br />
1. In standby mo<strong>de</strong>, press MENU/OK and then UP/DOWN to select Answering sys.<br />
2. Press MENU/OK then UP/DOWN to select Ans sys setup.<br />
3. Press MENU/OK then UP/DOWN to select Voice language.<br />
4. Press MENU/OK then UP/DOWN to select English or French.<br />
5. Press MENU/OK to confirm.<br />
Call screening<br />
The call screening feature lets you listen at the telephone base to a caller leaving a message.<br />
While monitoring an incoming message, you can answer the call by pressing HOME or SPEAKER<br />
on the handset.<br />
To change the settings<br />
1. In standby mo<strong>de</strong>, press MENU/OK then UP/DOWN to select Answering sys.<br />
2. Press MENU/OK then UP/DOWN to select Ans sys setup.<br />
3.Press MENU/OK then UP/DOWN to select Call screening.<br />
4. Press MENU/OK then UP/DOWN to select On or Off.<br />
5. Press MENU/OK to confirm.<br />
Turn the message alert on/off<br />
When the message alert tone is set to On, the telephone base beeps every 10 seconds to alert<br />
you of new messages. The tone stops when all new messages have been reviewed.<br />
1. In standby mo<strong>de</strong>, MENU/OK then UP/DOWN to select Answering sys.<br />
2. Press MENU/OK then UP/DOWN to select Ans sys setup.<br />
3.Press MENU/OK then UP/DOWN to select Msg alert tone.<br />
4. Press MENU/OK then UP/DOWN to select On or Off.<br />
5. Press MENU/OK to confirm.<br />
TX Bluetooth 75
D. Remote access<br />
Remote access allows you to operate your answering machine and listen to your messages by<br />
calling your phone from another phone.<br />
To set the remote access /change remote access co<strong>de</strong><br />
1. In standby mo<strong>de</strong>, MENU/OK then UP/DOWN to select Answering sys.<br />
2. Press MENU/OK then UP/DOWN to select Ans sys setup.<br />
3.Press MENU/OK then UP/DOWN to select Remote access.<br />
4. Press MENU/OK then UP/DOWN to select On or Off.<br />
5. Press MENU/OK to confirm.<br />
If you set the remote access ON:<br />
- Press MENU/OK. Use the keypad to enter the old 4-digit PIN (<strong>de</strong>fault 4-digit PIN is<br />
0000).<br />
- Press MENU/OK. Use the keypad to enter the new 4-digit PIN.<br />
- Press MENU/OK to enter the new 4-digit PIN again.<br />
- Press MENU/OK to confirm.<br />
To remotely access your answering system<br />
1. Dial your phone number, when you hear your outgoing message, press * and then enter<br />
your 4 –digit Remote Access PIN when outgoing message is still playing.<br />
2. If you enter the incorrect PIN co<strong>de</strong> for 3 times, your phone will hang up automatically.<br />
3. When you have accessed your phone, you can use the keypad to operate your answering<br />
machine.<br />
4. Press the keys below to perform the following functions:<br />
Keys<br />
Description<br />
During Message Playback<br />
Message is not playing<br />
1 Play the remote access menu<br />
2 Stop playing messages Play messages<br />
4<br />
Press once to repeat playing the current<br />
message from the beginning. Press twice<br />
to skip backward to the previous<br />
message.<br />
5 Delete the current message<br />
6 Skip forward<br />
7<br />
Turn on the answering<br />
machine.<br />
9<br />
Turn off the answering<br />
machine.<br />
E. Using the answering machine at the base<br />
Switch on/off<br />
Press ANSWER ON to turn the answering system on or off. The light behind the key will be on<br />
when answering system is turned on.<br />
Call screening<br />
You can listen at the telephone base to a caller leaving a message. If you want to turn off the call<br />
TX Bluetooth 76
screening feature, set the telephone base volume to zero. Remember to raise the volume in or<strong>de</strong>r<br />
to hear your messages during playback.<br />
Play Messages<br />
If you have new messages, the telephone plays only the new messages (ol<strong>de</strong>st first). If there are<br />
no new messages, the telephone plays back all messages (ol<strong>de</strong>st first).<br />
1. Press PLAY/STOP.<br />
2. During message playback, press below keys to perform the following functions:<br />
PLAY/STOP<br />
Press to stop playing messages or resume playback.<br />
SKIP BACKWARD Press once to replay current message from the beginning.<br />
Press twice to playback the previous message.<br />
SKIP FORWARD Skip to play the next message.<br />
DELETE<br />
Delete the current message.<br />
VOLUME UP Increase the loudspeaker volume by one level (1 to 6).<br />
VOLUME DOWN Decrease the loudspeaker volume by one level (1 to 6).<br />
Delete all old messages<br />
In idle mo<strong>de</strong>, press DELETE twice continuously, all previously heard messages will be erased.<br />
8 ADDITIONAL HANDSETS<br />
If you have purchased a multi handset pack, you are able to make internal calls, transfer external<br />
calls from one handset to another and use the conference option.<br />
A. Call another handset<br />
You can make internal calls between two handsets.<br />
1. Press MENU/OK then UP/DOWN to select Intercom.<br />
2. Press MENU/OK. If you have only one other handset, it will ring.<br />
3. If you have extra handsets, your handset displays Intercom to: and a list of registered<br />
handsets. Press UP/DOWN to select the handset you want to call. Press MENU/OK to call<br />
your selected handset.<br />
4. Press HOME on the called handset.<br />
5. Press C on the calling handset to transfer external call to called handset. OR press<br />
MENU/OK then UP/DOWN on the calling handset to select Transfer. Press MENU/OK to<br />
confirm.<br />
Answer an incoming call (Home and Mobile) during an intercom call<br />
When you receive an incoming home or mobile call during an intercom call, there is an alert tone<br />
and Incoming call appears on screens. The telephone base and all other handsets ring.<br />
1. Press HOME to answer the home call. Or press MOBILE to answer the mobile cal and<br />
the intercom call ends automatically.<br />
2. Press C to end the intercom call without answering the incoming home or mobile call.<br />
The telephone continues to ring.<br />
Transfer a home or mobile call<br />
During external home or mobile call, you can transfer the external home or mobile call to another<br />
handset or headset registered to the base.<br />
TX Bluetooth 77
1. Press MENU/OK then UP/DOWN to select Intercom.<br />
2. Press MENU/OK. If you have only one other handset, it will ring. If you have extra<br />
handsets, your handset displays Intercom to: and a list of registered handsets. Press<br />
UP/DOWN to select the<br />
handset you want to call. Press MENU/OK to call your selected handset.<br />
3. Press HOME on the called handset.<br />
4. Press C on the calling handset to transfer external call to called handset. OR press<br />
MENU/OK<br />
then UP/DOWN on the calling handset to select Transfer. Press MENU/OK to transfer.<br />
B. 3-Way conference home or mobile call<br />
You can hold a 3-way conference home or mobile call between 2 internal callers and 1 external<br />
caller.<br />
No subscription is required.<br />
1. Follow steps 1 to 3 in section Transfer a home call<br />
2. Press MENU/OK then UP/DOWN on the calling handset to select Share call.<br />
3. Press MENU/OK to setup conference call.<br />
Conference home and mobile calls<br />
When you have calls established on the home and mobile lines, you can create a 3-way<br />
conference.<br />
To conference both home and mobile calls:<br />
1. Press MENU/OK.<br />
2. Press UP/DOWN to select Conf. home/Conf. mobile (whichever is applicable).<br />
3. Press MENU/OK.<br />
To select an option while on a conference call:<br />
1. Press MENU/OK.<br />
2. Press UP/DOWN to select one of the following options:<br />
- End home call<br />
- End mobile call<br />
3. Press MENU/OK.<br />
To end a conference call:<br />
Press C or put the handset back in the telephone base or charger<br />
Using the home and mobile lines together<br />
- You can be on two different calls using the mobile line and home line at the same time using<br />
two handsets.<br />
- You cannot be on a call using the mobile line and a Bluetooth headset via the home line at the<br />
same time. These are both Bluetooth <strong>de</strong>vices and only one can be used at a time.<br />
- If you are on a call using the mobile line, you cannot join the call using your paired mobile<br />
phone. However, you can join the call using another 9850BT handset. Your mobile phone is<br />
being used for the phone call so only features that are normally available during a call can be<br />
used.<br />
TX Bluetooth 78
C. Register an additional handset<br />
Your additional handset(s) will come pre-registered but should you need to register a handset,<br />
follow these steps.<br />
1.In standby mo<strong>de</strong>, press MENU/OK then UP/DOWN to select Settings.<br />
2.Press MENU/OK then UP/DOWN to select Register.<br />
3.Press MENU/OK then enter the system PIN. (Default is 0000.)<br />
4.Press MENU/OK. Then the display will show Press and hold PAGE button.<br />
5.Press and HOLD PAGE on the base. The handset display will show Registering…. The<br />
handset will return to standby mo<strong>de</strong> if registration is successful.<br />
Note:<br />
If the base is found and the PIN is correct, an unused handset number will be assigned<br />
automatically.<br />
If the PIN is incorrect, “INCORRECT PIN!” will display with an error tone, you will need to reenter<br />
the correct PIN. If the base is not found, “NO BASE FOUND” will display.<br />
De-register a handset<br />
1.In standby mo<strong>de</strong>, press MENU/OK then UP/DOWN to select Settings.<br />
2.Press MENU/OK then UP/DOWN to select De-register.<br />
3.Press MENU/OK then enter the system PIN. (Default is 0000.)<br />
4.Press MENU/OK then UP/DOWN to select the <strong>de</strong>sired handset.<br />
5.Press MENU/OK. The display will show De-register?<br />
6.Press MENU/OK to confirm. Display will show De-registered if it is successful.<br />
Note: You cannot <strong>de</strong>-register the handset currently use in your hand.<br />
You cannot <strong>de</strong>-register a handset if any other system handset is in use.<br />
9 HELP<br />
I cannot pair my mobile phone to the telephone base<br />
- Make sure the Bluetooth function of your Bluetooth enabled mobile phone is turned on.<br />
- See your mobile phone User’s Manual for more information.<br />
- Make sure the cordless handset, cor<strong>de</strong>d base and mobile phone are located near each other.<br />
- Remove the TELEFUNKEN TX 1** from your mobile phone’s Bluetooth <strong>de</strong>vice history list<br />
(see your mobile phone User’s Manual for more information).<br />
- Carefully follow the pairing instructions in the User’s Gui<strong>de</strong>, making sure that your mobile<br />
phone is not connected to any other Bluetooth <strong>de</strong>vice(s).<br />
- Turn off your mobile phone, and then turn it on again.<br />
- Reset the telephone base. Unplug the unit’s electrical power.<br />
Wait for approximately 15 seconds, and then plug it back in. Repeat the above suggestions<br />
Phone does not work<br />
- Have you installed the battery pack correctly?<br />
- Check that the mains power is correctly connected.<br />
No dial tone<br />
- Is the telephone cord of the base plugged into the phone socket?<br />
- Check that the mains power is switched on at the power point.<br />
- Only use the telephone cord supplied with the phone.<br />
- The telephone line cord might be malfunctioning. Install a new telephone line cord.<br />
TX Bluetooth 79
- Move the handset closer to the telephone base. It might be out of range.<br />
- Disconnect the telephone base from the telephone wall socket and connect a different<br />
telephone. If there is no dial tone on this telephone either, the problem is in your wiring or local<br />
service. Contact your local telephone company.<br />
Cannot dial out or receive calls<br />
- Check that the mains power is correctly connected.<br />
- The battery may need recharging.<br />
- Has there been a power cut? If so, place the handset back on the base for 10 seconds and try<br />
again. If it still does not work disconnect the battery pack and mains power for 10 minutes, then<br />
reconnect and try again.<br />
You have a dial tone, but the phone will not dial out<br />
- If you are connected to a PABX, check whether you need to dial an access co<strong>de</strong>.<br />
Handset does not ring<br />
- The ringer volume may be switched off..<br />
- Check that the mains power is correctly connected.<br />
- Make sure the handset is registered to the base.<br />
No display<br />
- The battery pack may be flat, <strong>de</strong>ad or incorrectly inserted.<br />
- Recharge or replace the battery pack<br />
Battery icon does not appear to be filling<br />
- Try cleaning the charging contacts.<br />
- Check that the mains power is correctly connected.<br />
- If the above measures do not correct the problem, replace the battery pack.<br />
You hear the busy tone when you press HOME<br />
- Make sure the handset is in range of the base.<br />
- Another handset registered to your TELEFUNKEN TX 1** base may be on the line.<br />
Answering machine does not record any messages<br />
- Make sure the answering machine is switched on.<br />
- The memory may be full, please <strong>de</strong>lete some old messages to free up space.<br />
- Make sure answering machine is set to ANSWER & RECORD mo<strong>de</strong>.<br />
Answering machine messages have the wrong date and time<br />
- Have you manually set the date and time?<br />
Cannot access your messages from another phone<br />
- Have you changed the remote access security PIN co<strong>de</strong>?. Always keep a note of the new PIN<br />
co<strong>de</strong> in a safe place.<br />
- Has remote access been disabled?<br />
- Make sure you are calling from a touch-tone telephone. When dialing a number, there should be<br />
tones. If there are clicks, then it is not a touch-tone telephone and cannot activate the answering<br />
machine.<br />
- The answering machine might not <strong>de</strong>tect the remote access co<strong>de</strong> when your announcement is<br />
playing. Wait until the announcement is over before entering the co<strong>de</strong>.<br />
- There might be interference on the telephone line you are using. Press the dial pad keys firmly<br />
when dialing.<br />
No Caller number/name displayed<br />
- Have you subscribed to Caller ID service?<br />
- The caller may have blocked their number.<br />
TX Bluetooth 80
- An exact name/number match was not found in your phonebook. Check that you have stored the<br />
complete number including area co<strong>de</strong>.<br />
- The caller might not be calling from an area which supports Caller ID.<br />
- Both you and the caller’s telephone companies must use equipment compatible with the Caller ID<br />
service.<br />
- The Caller ID information shows after the first or second ring.<br />
Base unit does not ring, but the lights are on<br />
- Have you connected the telephone line correctly?<br />
- Is the base ringer set to off?<br />
- You may have a faulty line or socket. Try using another socket.<br />
Buzzing noise on my phone or on other electrical equipment nearby<br />
- Sometimes your TELEFUNKEN TX 1** can interfere with other electrical equipment if it is placed<br />
too close. It is recommen<strong>de</strong>d that you place your TELEFUNKEN TX 1** at least one metre away<br />
from electrical appliances or metal obstructions to avoid any risk of interference.<br />
- If you have an ADSL internet service ensure correct filters are installed to prevent interference.<br />
10 WARRANTY<br />
The following are consi<strong>de</strong>red accessories:<br />
- rechargeable batteries<br />
- power supply unit<br />
- telephone cord<br />
However, these accessories may be or<strong>de</strong>red from our technical division:<br />
+33(0)545 608 251.<br />
- Warranty period<br />
This telephone comes with a warranty period of 12 months. The warranty begins on the date<br />
the telephone is purchased.<br />
The warranty must be proven by presenting the original invoice or receipt showing the date and<br />
the mo<strong>de</strong>l purchased.<br />
- Coverage<br />
A <strong>de</strong>fective telephone must be returned complete to your distributor with an explanation.<br />
If this telephone presents a <strong>de</strong>fect during the warranty period, the authorised After-Sales<br />
Service will repair any <strong>de</strong>fective component or manufacturing <strong>de</strong>fect. The After-Sales Service<br />
will unilaterally <strong>de</strong>ci<strong>de</strong> whether to repair or replace part or all of the telephone.<br />
The initial purchase date will <strong>de</strong>termine the starting date for the warranty period. If the<br />
telephone is repaired or exchanged by our After-Sales Service, the warranty period is not<br />
exten<strong>de</strong>d.<br />
- Exclusions<br />
Damage or <strong>de</strong>fects caused by the improper use or handling of the telephone, or by the use of<br />
accessories that are not original or not recommen<strong>de</strong>d in these instructions, are not covered by<br />
the warranty.<br />
The warranty does not cover damage caused by outsi<strong>de</strong> elements, like lightning, water or fire,<br />
or any other damage caused during transport.<br />
No warranty coverage may be claimed if the telephone serial number has been modified,<br />
removed, erased or ma<strong>de</strong> illegible.<br />
No warranty coverage may be claimed if the telephone has been repaired, altered or modified<br />
by the buyer or any repair personnel not officially qualified and authorised.<br />
TX Bluetooth 81
- Compliance with current regulations:<br />
This telephone complies with the EC standards in force:<br />
RECYCLING OF ELECTRICAL AND ELECTRONIC EQUIPMENT AT THE END OF ITS LIFE<br />
CYCLE<br />
Used electrical and electronic <strong>de</strong>vices must not be discar<strong>de</strong>d with ordinary household refuse. The<br />
presence of the symbol on the product or its packaging serves as a remin<strong>de</strong>r of this.<br />
Some materials constituting this product may be recycled if you take them to an appropriate<br />
recycling centre. By reusing the components and raw materials of old <strong>de</strong>vices, you contribute<br />
significantly to protecting the environment.<br />
For further information on collection sites of used equipment, you can enquire at your city hall, the<br />
waste treatment <strong>de</strong>partment or in the shop where you purchased the product.<br />
TX Bluetooth 82