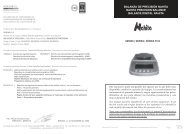
pH METRO DIGITAL DIGITAL pH METER Serie / Series / 907 - Auxilab
pH METRO DIGITAL DIGITAL pH METER Serie / Series / 907 - Auxilab
pH METRO DIGITAL DIGITAL pH METER Serie / Series / 907 - Auxilab
- No tags were found...

You also want an ePaper? Increase the reach of your titles
YUMPU automatically turns print PDFs into web optimized ePapers that Google loves.
CASTELLANONi el fabricante ni el distribuidor asumirán responsabilidad alguna por los dañosocasionados al equipo, instalaciones o lesiones sufridas a personas debido a la inobservanciadel correcto procedimiento de conexión eléctrica. La tensión debe ser de 220V50Hz ± 10%.- Conexión del electrodoConecte el electrodo (1.16) en el conector BCN situado en la parte posterior delaparato (2.2).Nota: el Ph-metro <strong>907</strong> de Nahita puede ser utilizado con otros electrodos de <strong>pH</strong> disponiblesen el mercado siempre y cuando dispongan de conector BNC.- Conexión sonda de temperaturaConecte la sonda de temperatura (1.17) en el conector hembra correspondiente(2.5).- Encienda el <strong>pH</strong>-metro presionandCalibración del <strong>pH</strong>-metroEl <strong>pH</strong>-metro Nahita <strong>907</strong> puede ser calibrado en 1 ó 2 puntos de forma manual o automática.Preparación de los patronesEl <strong>pH</strong>-metro incluye las siguientes soluciones patrón que se suministran en sobres individuales:<strong>pH</strong> 4.00 (25 ºC), <strong>pH</strong> 6.86 (25 ºC), <strong>pH</strong> 9.18 (25 ºC).Vierta el contenido de uno de los sobres en un vaso limpio y añada unos 100 mL de aguadestilada. Disuelva bien y si lo ve necesario, añada un poco más de agua. Una vez disueltotodo el contenido del sobre, vierta la solución obtenida a un matraz aforado de 250 mLy proceda al enrase con agua destilada.Calibración automáticaSeleccione el modo calibración automática. Para ello, presione el botón CAL (1.7) y ayudándosede (1.10) seleccione el modo calibración automática (AUTO). Presione ENTER(1.2) y en pantalla visualizará los valores de <strong>pH</strong> y temperatura, y el comando STD 1.A. Calibración en 1 puntoUn punto de calibración significa que el equipo es calibrado con una sola disoluciónpatrón. Le recomendamos que emplee la solución patrón de <strong>pH</strong> 6.86 (25 ºC).Proceda de la siguiente manera:- Limpie el electrodo con agua destilada y séquelo. Sumérjalo unos 4 cm junto ala sonda de temperatura en la solución patrón, girándolo suavemente. La sonda de temperaturadebe estar próxima al electrodo.- Pulse el botón CAL (1.7). En pantalla visualizaremos STD1 y el valor de la temperatura.- Cuando aparezca en pantalla el valor del <strong>pH</strong> de forma estable, presione ENTER(1.2). En pantalla se visualizará el valor del <strong>pH</strong> y de la pendiente de la curva (K) y "STD1FINISHED!". La calibración en 1 punto habrá finalizado.Pág. 6 Manual de instrucciones 50<strong>907</strong>000 Revisión 1 de Octubre-06ENGLISHManual calibrationManual calibration mode will be necessary in case of using standard solutions differentthan those supplied with the equipment. To enter this function, press CAL button (1.7)and with buttons (1.10), select the manual calibration mode (MANUAL). Press ENTERbutton (1.2) and you will visualize on display the <strong>pH</strong> and temperature values, and theSTD1 command.A. Calibration at 1 pointProceed as the following:- Rinse the electrode with distilled water and dry it. Immerse the electrode andthe temperature probe 4 cm (approx.) in the standard solution and shake gently. The temperatureprobe must be next to the electrode.- Press CAL button (1.7). STD1 and the temperature value will be visualized ondisplay.- When the <strong>pH</strong> value on display is stable, press ENTER button (1.2). With buttons(1.10) adjust the <strong>pH</strong> value to that of the standard solution used and press ENTER button(1.2) again. The <strong>pH</strong> value, curve slope (K) and "STD1 FINISHED!" will be visualizedon display. The calibration at one point is finished.- To go to <strong>pH</strong> measuring function, press <strong>pH</strong> button (1.5).B. Calibration at 2 pointsProceed as the following:- Rinse the electrode with distilled water and dry it. Immerse the electrode andthe temperature probe 4 cm (approx.) in the standard solution A while turning gently. Thetemperature probe must be next to the electrode.- Press CAL button (1.7). STD1 and the temperature value will be visualized ondisplay.- When the <strong>pH</strong> value on display is stable, press ENTER button (1.2). With buttons(1.10) adjust the <strong>pH</strong> value to that of the standard solution A used, and press ENTERbutton (1.2) again. The <strong>pH</strong> value, curve slope (K) and "STD1 FINISHED!" will be visualizedon display.- Take the electrode and the temperature probe out of solution A, rinse with distilledwater and dry. Immerse the electrode in the standard solution B, together with thetemperature probe.- Press again CAL button (1.7). STD2 and the temperature value will be visualizedon display.- When the <strong>pH</strong> value on display is stable, press ENTER button (1.2). With buttons(1.10) adjust the <strong>pH</strong> value to that of the standard solution B used, and press ENTERbutton (1.2) again. The <strong>pH</strong> value, curve slope (K) and "STD2 FINISHED!" will be visualizedon display. The calibration at two points is finished.- To go to <strong>pH</strong> measuring function, press <strong>pH</strong> button (1.5).Version 1 October-06 Instruction manual 506<strong>907</strong>000 Page 19