
Create successful ePaper yourself
Turn your PDF publications into a flip-book with our unique Google optimized e-Paper software.
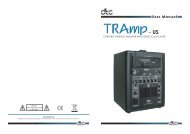
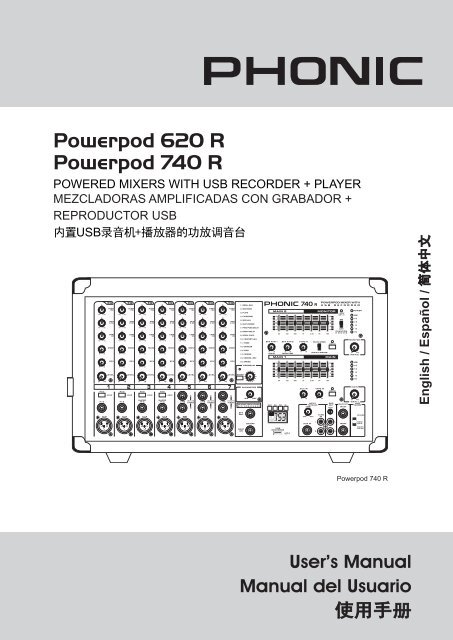
<strong>Powerpod</strong> <strong>620</strong> R<strong>Powerpod</strong> <strong>740</strong> RPOWERED MIXERS WITH USB RECORDER + PLAYERMezcladoras Amplificadas con Grabador +Reproductor USB内 置 USB 录 音 机 + 播 放 器 的 功 放 调 音 台English / Español / 简 体 中 文<strong>Powerpod</strong> <strong>740</strong> RUser’s ManualManual del Usuario使 用 手 册
<strong>Powerpod</strong> <strong>620</strong> R<strong>Powerpod</strong> <strong>740</strong> RPOWERED MIXERS WITH USB RECORDER + PLAYERMezcladoras Amplificadas con Grabador +Reproductor USB内 置 USB 录 音 机 + 播 放 器 的 功 放 调 音 台CONTENTSCONTENIDO目 录INTRODUCTION 4FEATURES 4BASIC SETUP 4MAKING CONNECTIONS 5CONTROLS AND SETTINGS 7<strong>Powerpod</strong> USB Recorder10SPECIFICATIONS 11DIGITAL EFFECTS TABLE 33APPLICATIONS 34DIMENSIONS 36BLOCK DIAGRAMS 37INTRODUCCION 14CARACTERISTICAS 14CONFIGURACION BASICA 15HACIENDO CONEXIONES 16CONTROLES Y SETEOS 18POWERPOD USB Recorder 21ESPECIFICACIONES 22TABLA DE EFECTOS DIGTALES 33APLICACIONES 34DIMENSIONES 36DIAGRAMAS DE BLOQUE 37简 介 ................................25功 能 ................................25基 本 安 装 ........................25连 接 设 定 ........................26控 制 与 设 定 .....................27<strong>Powerpod</strong> USB 录 音 机 30规 格 ................................31数 字 效 果 表 .....................33应 用 ................................34尺 寸 ................................36线 路 图 37Phonic preserves the right to improve or alter any information within this document without prior noticePhonic se reserva el derecho de mejorar o alterar cualquier información provista dentro de este documento sin previo avisoPHONIC 保 留 不 预 先 通 知 即 可 更 新 本 手 册 的 权 利V1.0 4/4/2010
IMPORTANT SAFETY INSTRUCTIONSThe apparatus shall not be exposed to dripping or splashing and that no objects with liquids, such as vases,shall be placed on the apparatus. The MAInS plug is used as the disconnect device, the disconnect device shallremain readily operable.warning: the user shall not place this apparatus in thecan be easily accessible.area during the operation so that the mains switch1. Read these instructions before operating thisapparatus.2. Keep these instructions for future reference.3. Heed all warnings to ensure safe operation.4. follow all instructions provided in this document.5. Do not use this apparatus near water or in locationswhere condensation may occur.6. Clean only with dry cloth. Do not use aerosol or liquidcleaners. Unplug this apparatus before cleaning.7. Do not block any of the ventilation openings. Installin accordance with the manufacturer’s instructions.8. Do not install near any heat sources such as radiators,heat registers, stoves, or other apparatus (including.. Do not defeat the safety purpose of the polarized orgrounding-type plug. A polarized plug has two bladeswith one wider than the other. A grounding type plughas two blades and a third grounding prong. The wideblade or the third prong is provided for your safety. Ifthe provided plug does not into your outlet, consultan electrician for replacement of the obsolete outlet.10. Protect the power cord from being walked on orpinched particularly at plug, convenience receptacles,and the point where they exit from the apparatus.11. Only use attachments/accessories by themanufacturer.CAUTIONRISK OF ELECTRIC SHOCKDO NOT OPENCAUTIOn: TO REDUCE THE RISK Of ELECTRIC SHOCK,DO nOT REMOVE COVER (OR BACK)nO USER SERVICEABLE PARTS InSIDEREfER SERVICInG TO QUALIfIED PERSOnnELThe lightning flash with arrowhead symbol, within anequilateral triangle, is intended to alert the user to thepresence of uninsulated “dangerous voltage” within theproduct’magnitude to constitute a risk of electric shock to persons.The exclamation point within an equilateral triangle is intendedto alert the user to the presence of important operatingand maintenance (servicing) instructions in the literatureaccompanying the appliance.wARNING: To reduce the risk of or electric shock, donot expose this apparatus to rain or moisture.CAUTION: Use of controls or adjustments or performanceof procedures other than those may result inhazardous radiation exposure.12. Use only with a cart, stand, tripod, bracket, ortableby the manufacturer, or sold withthe apparatus. When a cart is used, use cautionwhen moving the cart/apparatuscombination to avoid injury from tipover.13. Unplug this apparatus during lightingstorms or when unused for longperiods of time.14. Refer all servicing to service personnel.Servicing is required when the apparatus has beendamaged in any way, such as power-supply cord orplug is damaged, liquid has been spilled or objectshave fallen into the apparatus, the apparatus hasbeen exposed to rain or moisture, does not operatenormally, or has been dropped.
INTRODUCTIONPhonic Corporation would like to congratulate you on the purchaseof one of their extraordinary <strong>Powerpod</strong> ‘R’ mixers, powered mixersthat provide a built-in USB recorder and playback device. Since itsintroduction, the entire <strong>Powerpod</strong> series has given other poweredmixer lines a run for their money. With fantastically low noise levels,high signal handling abilities, exceptional output levels, simplifiedsignal routing abilities, and ultra-smooth controls, the <strong>Powerpod</strong><strong>620</strong> R and <strong>Powerpod</strong> <strong>740</strong> R both provide a level of dependabilitynot often found in powered mixers as of late.The built-in USB recorder provides a means to record losslessWAV-format audio directly to any USB memory stick. Recordingdirectly from the main mix (pre-fader), the <strong>Powerpod</strong> R’s recordingsare sampled at 44.1 kHz (the same sampling rate used on compactdiscs) and can be later edited and tweaked on any modern computer.The recorder also enables playback of WAV and MP3 files directlyfrom a USB memory stick, the audio of which is sent directly to themain mix.We know how eager you are to get started – getting the mixer outand hooking all your gear up is probably your number one priorityright now – but before you do, we strongly urge you to take a lookthrough this manual. Inside, you will find important facts and figureson the set up, use and applications of your brand new mixer. If youdo happen to be one of the many people who flatly refuse to readuser manuals, then we just urge you to at least glance at the BasicSetup section. After glancing at or reading through the manual (weapplaud you if you do read the entire manual), please store it ina place that is easy for you to find, because chances are there’ssomething you missed the first time around.FEATURES<strong>Powerpod</strong> <strong>620</strong> R• 100W + 100W / 4 ohms amplifier for Main 1 / Main 2 or Main /Monitor (Bridge mono, 200W / 8 ohms)• Onboard USB recorder allows recording and playback directlyto and from a USB memory stick• 32/40-bit digital stereo multi-effect processor with 16 programsplus foot switch jack• Stereo 7-band graphic equalizers• 6 balanced mic inputs through XLR jacks• 8 line inputs through 1/4" jacks• 2 Super Hi-Z inputs optimized for direct input of high impedanceinstruments• 2-band EQ on all channels• Pad control on channels 1 to 4• Monitor and effect sends on each input channel• 1 AUX input• +48V phantom power on channels 1 through 4• Record output with trim control for recording level matching<strong>Powerpod</strong> <strong>740</strong> R• 220W + 220W / 4 ohms amplifier for Main 1 / Main 2 or Main /Monitor (Bridge mono, 440W / 8 ohms)• Onboard USB recorder allows recording and playback directlyto and from a USB memory stick• 32/40-bit digital stereo multi-effect processor with 16 programsplus foot switch jack• Dual 7-band graphic equalizers for Main/Monitor or Main1/Main2with In/Out switches• 7 balanced mic inputs through XLR jacks• 10 line inputs through 1/4" jacks• 2 Super Hi-Z inputs optimized for direct input of high impedanceinstruments• 2 built-in limiters• 3-band channel EQ• Pad control on channels 1 to 4• Monitor and effect sends on each input channel• 1 AUX input• +48V phantom power on channels 1 through 4• Record output with trim control for recording level matching• Mains power switchable between 115VAC and 230VACBASIC SETUPGetting Started1. Turn all power off on the <strong>Powerpod</strong> mixer. To ensure this, theAC cable should not be connected to the unit.2. All faders and level controls should be set at the lowest levelto ensure no sound is inadvertently sent through the outputswhen the device is switched on. All levels should be altered toacceptable degrees after the device is turned on.3. Plug all necessary instruments and equipment into the device’svarious inputs as required. This may include line signal devices,as well as microphones and/or guitars, keyboards, etc.4. Plug any necessary equipment into the device’s various outputs.This could include speakers, monitors, signal processors, and/orrecording devices.NB. No devices other than speakers should be connected to the poweramp outputs. Plugging inappropriate devices into the mixer will likelycause damage to the device. Also, guitar cables should not be used toconnect amplifiers to speakers.5. Plug the supplied AC cable into the AC inlet on the back of the<strong>Powerpod</strong>, ensuring the local voltage level is identical to thatselected using the voltage selector on the rear of your device.6. Use the supplied AC cable to connect to an AC power outlet ofa suitable voltage.7. Turn the power switch on.Channel Setup1. To ensure the correct audio levels of each input channel isselected, every channel faders should first be set to 0.2. Choose the channel that you wish to set the level of, and ensurethat channel has a signal sent to it similar to the signal that willbe sent when in common use. For example, if the channel isusing a microphone, then you should speak or sing at the samelevel the performer normally would during a performance. If aguitar is plugged into that channel, then the guitar should alsobe used as it normally would be.NB. It is probably best to have nothing plugged into channels whichare not being set, just to ensure no signal is inadvertently sent throughthe channel.3. Set the channel level control to a level that would allow themeters (on the left of the <strong>Powerpod</strong>) to sit around the 0 dBmark. You may also have to activate phantom power or thePAD button to ensure the signal is an appropriate level.4. This channel is now ready to be used; you can stop making theaudio signal.5. You should now select the next channel to set and go back tofollow steps 1 through 4 for other instruments.POWERPOD <strong>620</strong> R / POWERPOD <strong>740</strong> R
MAKING CONNECTIONSChannel InputsThe <strong>Powerpod</strong> <strong>620</strong> R and <strong>Powerpod</strong> <strong>740</strong> R supply various numbersinput channels. The <strong>620</strong> R features a total of 6 channels, 2 of whichaccept stereo signals. The <strong>740</strong> R, on the other hand, features a totalof 7 input channels, 3 of which accept stereo signals. Stereo signalsaccepted by these powered mixers are summed for the main mix,as these mixers are ‘dual mono’ rather than stereo.1. XLR Lo-Z and Mic InputsThese XLR microphone inputs can be used in conjunction witha wide range of microphones, such as professional condenser,dynamic or ribbon microphones, with standard XLR maleconnectors. With low noise preamplifiers, these inputs serve forcrystal clear sound replication. Phantom power can be applied onchannels 1 through 4.NB. When using an unbalanced microphone, please ensure phantom poweris switched off. However, when using condenser microphones the phantompower should be activated.2. 1/4” Hi-Z and Super Hi-Z Input JacksThese inputs accept typical 1/4” TRS or TS unbalanced inputs. TheHi-Z inputs accept balanced TRS inputs, and are for Microphone toline-level device (such as synthesizers and drum machines), wherethe Super Hi-Z inputs accept TS unbalanced sources, and can beused in conjunction with devices with higher impedance levels(including electric guitars and basses).NB. When using a line-level device through the Hi-Z and super Hi-Z inputs,the PAD -25 button should be initiated.3. Stereo Channel InputsEach of the <strong>Powerpod</strong> <strong>740</strong> R provides 3 stereo input connectors,while the <strong>Powerpod</strong> <strong>620</strong> R has 2. The inputs of these channelsdiffer slightly to the mono channels. The 3-pin XLR inputs featuredare for the addition of microphones with typical XLR male inputs,where the 2 Line 1/4" TS jacks are for the addition of various stereoline level input devices, such as keyboards. If you wish to use amono device on a stereo return input, simply plug the device’s 1/4"phone jack into either of the input connectors and leave the otherinput bare.2 31Master SectionThe <strong>Powerpod</strong> <strong>620</strong> R and <strong>Powerpod</strong> <strong>740</strong> R feature a number of inputand output methods, depending on what your setup requires. RCArecord outputs, tape inputs, 1/4” auxiliary inputs and monitor outputsare included – amongst a range of other connection possibilities.4. Tape Inputs (L and R)The first of these inputs accommodates RCA cables from suchdevices as tape and CD players. The line from this feed is controlledby the Tape In level control, before being fed through to the mainmix.5. Record Outputs (L and R)As with the Tape In ports, these outputs will accommodate RCAcables, able to be fed to a variety of recording devices. Therecord output is taken directly from the main mix. A trim control isfeatured on these outputs to accommodate for devices with differentrecording levels.6. AUX InputsThis TS input connects the mixer with parallel external devices,such as sub mixers or external effect processors, receiving theprocessed signal from another source and feeding it to the AUXmixing buses.7. Monitor Outputs6 4 5These 1/4” TS outputs are the final output from the Monitor sendmixing bus. This feed may be used to connect to an amplifier andspeaker. Feeding the output from the Monitor out to an amplifier (andpossibly an equalizer) and then to a floor monitor speaker allowsartists to monitor their own instruments or vocals whilst performing,or an engineer to monitor the mix.8. Main OutputsThis jack will output the final stereo line level signal sent from themain mixing bus. The primary purpose of these jacks is to sendthe Main output to external devices that may run in parallel withthe mixer. This may include additional power amplifiers, mixers,PA systems, as well as a wide range of other possible signalprocessors.87POWERPOD <strong>620</strong> R / POWERPOD <strong>740</strong> R
9. EFX (Effect) OutputsThese 1/4” TS outputs are the final outputfrom the EFX send mix. This feed maybe used to connect to an external digitaleffect processor, or even to an amplifierand speakers, depending on your desired10settings.10. Foot Switch JackThis port is for the inclusion of a non-latching foot switch, used toremotely adjust properties of the built-in Digital Effect processor.The <strong>Powerpod</strong>s <strong>620</strong> R and <strong>740</strong> R both feature a single foot switchjack, which allows the user to remotely turn on and off the digitaleffects.SPEAKER SETUPNot usedRear Panel11. Speaker OutputsThese jacks are used to connect to speakers, fed from the internalpower amp. They consist of 1/4" Phone Jacks on both models.The Amp Select switch (on the front of the mixer) determines theoperation of these jacks. If the Amp Select switch is set to "Main1/Main2" or "Main / Moni", a single speaker with a 4 to 8 ohm loadcan be connected to jack A on both the Main 1 and Main 2 speakeroutputs. You can also connect two speakers with impedancesbetween 8 and 16 ohms to both jacks A and B of the Main 1/2speaker outputs. When using Bridge Mono mode, use the SpeakerOutput labeled "Bridge (L+R)" only to connect a Speaker witha loading between 8 and 16 ohms. Refer to the Speaker set upchart to the right for a more detailed indication of how to connectspeakers.Not usedNB. Due to the fact that the signal has been processed by the power amp,these ports should be used in conjunction with passive speakers only to avoiddamaging any other equipment.11Not usedNot usedUsing speakers with an incorrect loading can not only causedistortion, but also irreversible damage to the powered mixer.Please ensure the loadings of your speakers are consistentwith those shown above.POWERPOD <strong>620</strong> R / POWERPOD <strong>740</strong> R
CONTROLS AND SETTINGSRear Panel12. Power Button and AC ConnectorThe power button, located on the rear of the mixer, is used to activatethe mixer. Of course, there’s no point in activating the mixer if there’sno power, therefore an AC connector has been included to ensureyour mixer gets the power it needs. Please use the power cablethat is included with this mixer only. The <strong>Powerpod</strong> <strong>620</strong> R offers apermanent power cable in lieu of an AC connector.NB. Before connecting the AC cable to the <strong>Powerpod</strong> Mixer, please ensurethe local voltage levels are identical to those chosen by the Voltage Selectorswitch.13. Voltage Selector (<strong>Powerpod</strong> <strong>740</strong> R only)This switch allows you to select from 2 mains power modes, 115VAC / 60 Hz (allowing you to use the device in Countries withvoltages between 100V and 120V) or 230 VAC / 50 Hz (allowingyou to use the device in Countries with voltages between 220V and240V). To change the Voltage Selector, you must first unscrew andremove the plastic cover that protects the switch. After changingthe voltage, please replace the plastic cover to ensure the voltagelevel is not inadvertently altered. The <strong>Powerpod</strong> <strong>620</strong> R’s powerrange is determined by theNB. Using incorrect voltages can cause irreversible damage to the mixer.All care must be taken in selecting the voltage appropriate to your zone.If unsure of local voltage levels, contact a knowledgeable source beforeusing this mixer.1213Channel Controls14. High Frequency ControlThis control is used to give a shelving boost or cut of ±15 dB to highfrequency (12 kHz) sounds. This will adjust the amount of trebleincluded in the audio of the channel, adding strength and crispnessto sounds such as guitars, cymbals, and synthesizers.15. Middle Frequency Control (<strong>Powerpod</strong>s <strong>740</strong> R only)This control is used to provide a peaking style of boost and cut tothe level of middle frequency sounds at a range of ±15 dB. Changingmiddle frequencies of an audio feed can be rather difficult whenused in a professional audio mix, as it may be more desirable to cutmiddle frequency sounds rather than boost them, soothing overlyharsh vocal and instrument sounds in the audio.14151<strong>620</strong>17181916. Low Frequency ControlThis control is used to give a shelving boost or cut of ±15 dB tolow frequency (80 Hz) sounds. This will adjust the amount of bassincluded in the audio of the channel, and bring more warmth andpunch to drums and bass.17. MON (Monitor) Level ControlThis control alters the signal level that is being sent to the Monitormixing buses, the signal of which is suitable for connecting stagemonitors, allowing artists to listen to the music that is beingplaying.18. EFX (Effect) Level ControlThis control alters the signal level that is sent to the EFX output,which can be used in conjunction with external signal processors(this signal of which can be returned to mixer via the stereo returninputs), or simply as additional auxiliary outputs for any meansrequired. These controls also adjust the level of audio that is sentto the built-in digital effect panel.19. Channel Level ControlThis control will alter the signal level that is sent from thecorresponding channel to the Main mixing bus.20. PAD -25 ButtonThe PAD -25 button, located above the 1/4” phone jack on monochannels, is used to attenuate the input signal by 25 dB. This shouldonly be pushed in when using line-level input devices.POWERPOD <strong>620</strong> R / POWERPOD <strong>740</strong> R
Digital Effect Processor21. Effects On Button (<strong>Powerpod</strong>s, <strong>740</strong>R only)Pushing this button will turn the built-in effect processor on and off.22. Program ControlThis control will allow users to select one of the 16 built-in digitaleffects of the <strong>Powerpod</strong> powered mixer. The effect names thatcorrespond with the numbers can be found above this control, ordetails can be found in the digital effect table.23. Parameter ControlTurning this control will adjust the one main parameter of theselected effect. Each effect’s parameter can be found on the digitaleffect table at the end of this manual.21272223USB RecorderThe USB Recorder’s source signal is taken directly from the mainmix prior to it being cut/boosted by the Main level control. Whilethe recordings are indeed in stereo, they are also limited by the<strong>Powerpod</strong> <strong>620</strong> R and <strong>Powerpod</strong> <strong>740</strong> R’s circuitry, which is dualmonorather than stereo. When playing back a signal, the signalwill pass through the USB trim control and then is sent directly tothe main mix. Playback of WAV and MP3 with bit rates of up to 320kbits per second is possible.24. DisplayThis 3-digit display will display the track number currently beingplayed. It also offers play, pause and record indicators to the leftof the display. When in playback mode, the screen will indicate thetype of file type the unit is currently playing: WAV or MP3.25. USB PortConnect your USB flash drive to this input. Once a drive isconnected, the files will initiate and the first track will appear pausedon screen.26. Record ButtonPush this button to start recording mode. When recording modeis initiated, the next available track number (after any previouslyrecorded tracks) will appear on screen and recording mode will beinitiated in pause. Push the Play/Pause button to start recording.Recording is only possible when an appropriate USB memory cardis inserted into the USB port.27. Back/Next ButtonsPushing these buttons will allow users to skip back and forwardsbetween tracks in sequence. Please note that these buttons cannotbe held down to fast-forward/rewind through tracks.28. Play/Pause ButtonPush this button to start and stop playback and recording of thecurrently displayed track. Starting a track after it is paused willresume the track from the point at which it was paused (in bothrecord and playback mode). When in recording mode, push andhold this button to finalize recordings. When in playback mode,pushing and holding this button will revert back to the first track onthe USB memory stick.29. USB Trim ControlThis level control adjusts the playback levelsent from the USB recorder’s playback functionto the main mix. Users are advised to formattheir USB memory sticks with the FAT-32 filesystem.Master Section3130 362930. EFX to Monitor ControlThis controls the level of the processed signal from the built-in effectprocessor that is sent to the Monitor mix.31. EFX to Main ControlThis controls the level of the processed signal from the built-in effectprocessor that is sent to the Main 1/2 mix.32. AUX In ControlThe AUX in control adjusts the final level of the AUX input that issent to the Main mix.33. Tape In ControlThe <strong>Powerpod</strong> <strong>620</strong> R features a Tape In control that adjusts thefinal level of the RCA Tape input that is sent to the Main mix. The<strong>Powerpod</strong> <strong>740</strong> R features two such controls, one underneath eachof its equalizers; the uppermost control adjusts the Tape input signalsent to the Monitor mix, whereas the lower control adjusts the signalsent to the Main mix.34. Graphic EqualizersThese graphic equalizers allow you to adjust the frequency responseof a signal, with a maximum of ±12 dB of signal boost or cut foreach of the frequencies. The Powepods <strong>740</strong> R features dual 7-bandgraphic equalizers, while the <strong>Powerpod</strong> <strong>620</strong> R features a singlestereo 7-band graphic equalizer for both the Main and Monitorsignals. The uppermost equalizer is for alteration of the Monitorsignal (when the EQ switch is in the appropriate position it becomesthe Main 2 EQ), where the lower equalizer is for the Main signal(or the Main 1).3426282435253233POWERPOD <strong>620</strong> R / POWERPOD <strong>740</strong> R
<strong>Powerpod</strong> USB RecorderPlay1. When you first turn the <strong>Powerpod</strong> on, the USB recorder’s displaywill show the word ‘ON’2. Insert an appropriately formatted (FAT32) USB flash disc.3. The USB recorder will indicate the file type about to be played(MP3 or WAV) and automatically find the first available track.The screen will then indicate “II 001”. Tracks are orderedalphanumerically, with MP3 files playing first, followed by WAVfiles.4. Press the Play/Pause button to play the current track, or theBack and Next buttons to skip forward and backwards betweentracks.5. If you are currently playing the final MP3 file on the USB disc,pushing the >>| button will skip to the first WAV track. Similarly,if the final WAV track is playing, pushing >>| will skip back to thefirst MP3 track.6. Playback on the USB recorder is set to continuously playbackaudio files, therefore pushing play will play all files in sequence.Once all files have played, they will then be repeated.7. When in play or pause mode, pushing and holding the Play/Pause button for 2 seconds will revert to the very first track onthe USB disc.Record1. When a USB disc is inserted, push the REC button to activaterecord mode.2. The screen will immediately display WAV (as the recordingformat) and then the next available track number will appear onscreen. For example, if there are 12 WAV files on the USB card,the screen will display “II/REC 013”.3. Record mode will begin in standby/pause. Push the Play/Pausebutton to begin recording.4. Push the Play/Pause button to pause recording. Pushing thePlay/Pause button again will resume recording from the positionat which it was paused.5. While recording, push the REC button to finalize the recording thecurrent track and cue the next track for recording. For example,if you are currently recording track 13, pushing the REC buttonwill finalize the WAV file recorded for track 13, and the screen willdisplay “II/REC 014” with recording on track 14 set to standby.6. Hold the Play/Pause button to finalize the recording and returnto playback mode.7. After finalizing your recording, playback mode will start on the firstMP3 track. In this case, push the Back button once to accessthe final WAV recording – in other words, the recording you justfinalized.NOTE: The USB rotary control will adjust the playback level only and will notaffect recording levels. The only level controls that will affect the recordinglevel are those found on the individual input channels.The optimal frequency range for recording on the <strong>Powerpod</strong> <strong>620</strong>R and <strong>Powerpod</strong> <strong>740</strong> R USB recorder is 50 Hz to 10 kHz. Thismakes recordings ideal for band practice sessions, conferences,school assemblies and other events where informal recordingsare necessary. For full-scale professional recordings, Phonicrecommends the Firefly and Helix Board digital recordinginterfaces for Mac and PC computers. These units come withFireWire and/or USB interfaces and are ideal for recording in anynumber of possible scenarios, from live gigs to studio recordingsessions. Information on availability can be found through yournearest Phonic dealer. Log on to www.phonic.com/where fordetails.10 POWERPOD <strong>620</strong> R / POWERPOD <strong>740</strong> R
SpecificationsPOWERPOD <strong>620</strong> RPOWERPOD <strong>740</strong> RNumber of Power Channels 2 2Limiter N/A 28 ohms per Channel 70 1454 ohms per Channel 100 2208 ohms Bridge Mono 200 440Inputs / OutputsLo-Z / Hi-Z Channels 6, 2 with super Hi-Z (470K ohms) 4, 2 with super Hi-Z (470K ohms)Balanced Mic/Dual Mono Line Channels 2 32T Input RCA RCAAUX Returns 1 x 1/4" TRS, Unbal. 1 x 1/4" TRS, Unbal.Main Mono 1 x 1/4" TRS, Unbal. 1 x 1/4" TRS, Unbal.Monitor Send 1 x 1/4" TRS, Unbal. 1 x 1/4" TRS, Unbal.EFX Send 1 x 1/4" TRS, Unbal. 1 x 1/4" TRS, Unbal.Record Out RCA RCASpeaker Outputs 5 x 1/4" TRS 5 x 1/4" TRSUSB Connector 1 x USB-A 1 x USB-AMaster SectionMonitor & AUX / EFX Send Masters 2 2Effects Return to Monitor N/A YesFaders Moni, Main (Rotary) Moni, Main (Rotary)USB Recorder/PlayerRecord Sampling Rate 44.1 kHz 44.1 kHzRecording Format wav wavMaximum Playback Bitrate 320 kbit/s 320 kbit/sSupported Playback Formats wav, mp3 wav, mp3Phantom Power Supply +48VDC +48VDC32/40-bit Digital Effect Processor 16 programs 16 programsFoot Switch Digital effect mute: ON/OFF Digital effect mute: ON/OFFBuilt-in Graphic EQ Stereo 7-band 2 x 7-bandChannel Equalization 2-band, ±15dB 3-band, ±15dBLow EQ 80Hz 80HzMid EQ N/A 2.5KHzHi EQ 12KHz 12KHzCrosstalk (1KHz@0dBu, 20Hz to 20KHz bandwidth, channel in to main 1/2 outputs)Channel muted, other channels at unity N/A
POWERPOD <strong>620</strong> RPOWERPOD <strong>740</strong> RNoise: 20Hz to 20KHz bandwidth, IHF-A weighted, line inputs to main outputs, all channels assignedMaster output, all fader down
INTRODUCCIONPhonic Corp quiere felicitarle por su compra de una de lasextraordinarias mezcladoras <strong>Powerpod</strong> “R” Mixers, mezcladorasamplificadas que proveen un grabador USB integrado y undispositivo “playback”. Desde su introducción, la entera serie<strong>Powerpod</strong> ha dado otras líneas de mezcladora amplificadarentable. Con sorprendentes niveles bajos de ruido, altashabilidades de manejo de señal, niveles de salida extraordinarios,posibilidades de ruteo de señales mas sencillo y controles ultrasuaves, la <strong>Powerpod</strong> <strong>620</strong> R y la <strong>Powerpod</strong> <strong>740</strong> R, proveen un nivelde confianza no encontrado en otras mezcladoras amplificadas enel mercado.El grabador USB integrado proporciona un medio para grabaraudio sin pérdidas en formato WAV directamente a cualquier USBmemory stick. Grabando directamente de la mezcla principal (prefader),las grabaciones de <strong>Powerpod</strong> R están a 44,1 kHz (el mismoíndice de muestreo utilizado en los discos compactos) y puedenser editadas y ajustadas posteriormente en cualquier computadoramoderna. El grabador también permite la reproducción de archivosWAV y MP3 directamente desde un USB memory stick, cuyo audiose envía directamente a la mezcla principal.Nosotros sabemos que está impaciente por empezar- esperando asacar la mezcladora y conectar todo que seguramente es su únicaprioridad en estos momentos - pero antes de hacerlo, le pedimosencarecidamente que darle un vistazo a este manual. Dentroencontrara hechos importantes con imágenes de la configuración,uso y aplicaciones de su nueva mezcladora. Si resulta ser de esaspersonas que se niega totalmente a leer los manuales, entoncessolo le pediremos que lea la sección de Configuración Básica.Después de que le des un vistazo a todo el manual (le felicitamossi lee todo el manual), por favor guárdalo en un lugar donde puedaencontrarlo fácilmente, porque puede suceder que no recuerdealgo de la primera vez que leyó este documento.CARACTERÍSTICAS<strong>Powerpod</strong> <strong>620</strong> R● Amplificador de 100W + 100W / 4 ohms Amplificador paramain 1 / main 2 o main / monitor (Bridge mono, 200W / 8ohms)● El grabador USB a bordo permite grabar y reproducirdirectamente hacia y desde un USB memory stick.● Procesador multi-efecto estéreo digital a 32/40-bits con 16programas más interruptor de pedal (Jack)● Ecualizadores gráficos estéreo de 7 bandas● 6 entradas de micrófono balanceadas con jacks XLR● 2 entradas de súper alta impedancia (Hi-Z) optimizadaspara entrada directa de guitarras electroacústicas y guitarraeléctrica o bajos● 2 limitadores integrados● EQ de 2 bandas por canal● Control de PAD en canales 1-4● Envíos de monitor y efecto en cada canal de entrada● 1 entrada Aux● Fuente Fantasma a +48V en los canales de 1 a 4● Salida de grabación con control de trim para igualar nivel degrabación<strong>Powerpod</strong> <strong>740</strong> Plus● Amplificador de 220W + 220W / 4 ohms para main 1, main 2 /monitor (Bridge mono, 440W / 8ohms)● Grabador USB integrado permitiendo la grabación y lareproducción directamente desde una llave USB● Procesador multi-efecto estéreo digital a 32/40-bits con 16programas más interruptor de pedal (Jack)● Dual 7-band graphic equalizers for Main/Monitor or Main1/Main2 with In/interruptor de salida● 7 entradas balanceadas de micrófono a través de conectores(jacks) XLR● 10 entradas de línea a través de jacks 1/4"● 2 entradas Super Hi-Z optimizadas para entrada directa deinstrumentos de alta impedancia.● 2 limitadores integrados● EQ de 3 bandas por canal● Control de PAD en canales 1-4● Envíos de monitor y efecto en cada canal de entrada● 1 entrada Aux● Fuente Fantasma a +48V en los canales de 1 a 4● Salida de grabación con control de trim para igualar nivel degrabación● Fuente de alimentación seleccionable entre 115VAC y 230VAC14 POWERPOD <strong>620</strong> R / POWERPOD <strong>740</strong> R
CONFIGURACION BASICAIniciando1. Asegúrese de que todo el voltaje de la mezcladora estéapagado. Para asegurarse de esto, el cable de AC no debe deestar conectado a la unidad.2. Todos los faders y controles de nivel deben estar seteadosen el nivel más bajo para asegurarse que no se envía ningúnsonido inadvertidamente a través de las salidas cuando seenciende el dispositivo. Todos los niveles deben ser alteradosa los grados aceptables después de que se enciende eldispositivo.3. Conecte todos los instrumentos y equipo necesarios en lasvarias entradas del dispositivo como sea necesario. Estopuede incluir dispositivos de señal de línea, como micrófonosy/o guitarras, teclados, etc.4. Conecte todo el equipo necesario en las varias salidasde dispositivo. Esto puede incluir altavoces, monitores,procesadores de señal y/o dispositivos de grabación.NB. Ningún otro dispositivo más que los altavoces deberán estarconectados a las salidas del amplificador. Conectar dispositivosinapropiados a esta mezcladora causará daños serios al dispositivo.Tampoco se deberán utilizar cables de guitarra para conectar losamplificador a los altavoces.5. Conecte el cable de AC al conector trasero de dispositivo,asegúrese de que el nivel del voltaje local es idéntico alseleccionado en el Selector de Voltaje de la parte trasera de launidad.6. Conecte el cable de AC al toma corriente de voltajecompatible.7. Encienda la unidad.Configuración de Canal1. Para asegurar que se seleccionó el nivel de audio correctopara cada canal de entrada, cada fader de canal deberá setearprimero a la posición 0.2. Escoge el canal que quiera ajustar, y asegúrese de que cadacanal tenga un nivel de señal de envío similar a la señal queserá enviada en uso común. Por ejemplo, si el canal tiene unmicrófono conectado, entonces hable o cante al micrófono almismo nivel que el cantante usaría durante su presentación ograbación. Si se conecta una guitarra en ese canal, entoncesla guitarra deberá tocarse al mismo nivel en que se tocaríanormalmente.NB. Es mejor no tener nada conectado en los canales que no se esténocupando, solo para asegurar que ninguna señal es enviada por erroral canal.3. Establece el nivel de control del canal de tal forma quepermitirá a los medidores “meters” (en el lado izquierdo del<strong>Powerpod</strong>) de establecerse en los alrededores del nivel 0dB.Podría tener necesidad de activar el interruptor fantasma o elbotón PAD para asegurarse de que la señal este en un nivelapropiado.4. Este canal está ahora listo para usarse; ya puede dejar dehacer la prueba de audio.5. Ahora deberá seleccionar el siguiente canal para ajustarlo yrepetir los pasos del 1 al 4.POWERPOD <strong>620</strong> R / POWERPOD <strong>740</strong> R15
HACIENDO CONEXIONESEntradas de CanalLas mezcladoras <strong>Powerpod</strong> <strong>620</strong> R y <strong>Powerpod</strong> 780 R Plus ofrecenvarios canales de entrada. La <strong>620</strong> R tiene un total de 6 canales, 2de estos aceptan señales estéreo. La <strong>740</strong> R, por otro lado, tieneun total de 7 canales de entrada, 3 de estos aceptan señalesestéreo. Las señales estéreo aceptadas por estas mezcladorasamplificadas se suman para la mezcla principal, ya que estasmezcladoras son “mono dual” en lugar de estéreo.1. Entradas XLR de baja impedancia (Lo-Z) y entradasmicrófonoEstas entradas XLR de micrófono pueden ser utilizadas enconjunto con una amplia gama de micrófonos, tales comomicrófonos profesionales de condensador, dinámicos o ribbon,con conectores macho estándar XLR. Con preamplificadores debajo ruido, estas entradas sirven para reproducir sonido cristalinoy limpio. La fuente fantasma puede estar aplicada entre loscanales 1 a 4.NB. Cuando se utiliza un micrófono desbalanceado, por favor asegúresede que la fuente fantasma esté apagada. Sin embargo, cuando se utilizamicrófonos de condensador, la fuente fantasma deberá ser activada.2. Jacks de Entrada 1/4” de Alta Impedancia (Hi-Z) y Jacks deSúper Alta Impedancia (Súper Hi-Z)Estos conectores aceptan entradas típicas de 1/4” TRS oTS desbalanceada. Las entradas de Hi-Z aceptan entradasbalanceadas TRS, y son para micrófonos a dispositivos de nivelde línea (como sintetizadores y drum machines), mientras quelas entradas de Súper Hi-Z aceptan fuentes desbalanceadas TSy, pueden ser utilizadas en conjunto con dispositivos con nivelessuperiores de impedancia (incluyendo guitarras eléctricas ybajos).NB. Cuando se utiliza un dispositivo de nivel de línea entre el HI-Z y el súperentrada HI-Z en la mezcladora, el selector PAD-25 deberá activarse.3. Entradas de Canal EstéreoCada una de las mezcladoras amplificadas <strong>Powerpod</strong> <strong>740</strong>, Rproveen de 3 canales estéreo de entrada (la <strong>Powerpod</strong> <strong>620</strong> Plustiene 2), las entradas que difieren ligeramente de los canalesmono. Las entradas XLR de 3 pines son para agregar micrófonoscon conectores XLR machos típicos, mientras que los 2 jacksde línea 1/4” TS son para agregar varios dispositivos de entradade nivel de línea estéreo, como teclados. Si usted desea utilizarun dispositivo monoaural en una entrada de retorno estéreo,simplemente conecte el jack de audífono de 1/4” con cualquierade los dos conectores de entrada y deje el otro inutilizado.2 31Sección MasterEl <strong>Powerpod</strong> <strong>620</strong> R y el <strong>Powerpod</strong> <strong>740</strong> R disponen de un numerode entrada y un método de salida, dependiendo en que requieresu configuración. El grabador de salida RCA, entradas de cinta(tape inputs), 1/4" entradas auxiliares y salidas de monitor seincluyen en la gama de posibilidades de conexión4. Entrada de Tape (L y R)Las primeras de estas entradas permiten cables RCA de aquellosdispositivos como reproductores de CD y tape. La línea de estaalimentación de esta entrada es dirigida por entrada de Tape en elnivel de control, antes de ser alimentada en la mezcla principal.5. Salidas de Grabación (L y R)Así como en los puertos de entrada de Tape, estas salidasacomodaran a los cables RCA, capaz de alimentar una variedadde dispositivos de grabación. La grabación de salida esta cogidade la mezcla principal. Un controlador trim esta incluido en estassalidas para acomodar los dispositivos con diferentes niveles degrabación.6. Entradas AUXEstas entradas TS conectan la mezcladora con los dispositivosexternos paralelos, tales como sub mezcladoras o procesadoresexternos de efecto, recibiendo la señal procesada de otra fuente yalimentándola con los buses de mezcla AUX.6 4 57. Salidas de MonitorEstas salidas 1/4” TS son la salida final de envío Monitor de busde mezcla. Esta alimentación puede ser utilizada para conectara un amplificador y altavoces. Alimentar la señal de Monitor a unamplificador (y posiblemente un ecualizador) y de ahí a altavozmonitor de piso, permite a los artistas monitorear sus propiosinstrumentos o voces mientras hacen su presentación, o permitea un ingeniero monitorear la mezcla.8. Salidas PrincipalesEstos jacks darán la salida estéreo final de nivel de línea, enviadadesde el bus de mezcla principal. El propósito primario de estosjacks es el de enviar la salida principal a dispositivos externosque pueden funcionar en paralelo con la mezcladora. Esto puedeincluir amplificadores de potencia adicionales, otras mezcladorasasí como un amplio rango de otros posibles procesadores deseñal.8716 POWERPOD <strong>620</strong> R / POWERPOD <strong>740</strong> R
9. Salida de EFX (Efectos)Estas salidas 1/4” TS son la salida final del bus de mezcla de envíode EFX. Esta alimentación puede ser utilizada para conectar a unprocesador de efecto digital externo, o incluso a un amplificador yaltavoces, dependiendo de su configuración deseada.10. Jacks para interruptor de pedalEstos puertos están para la inclusión de un interruptor pedal nolatch,usados para ajustar remotamente las características delprocesador de Efecto Digital integrado. Las <strong>Powerpod</strong>s R <strong>620</strong>,Y <strong>Powerpod</strong>s <strong>740</strong> Plus presentan un solo jack para interruptorpedal, que permite al usuario encender y apagar remotamente losefectos digitales.Configuración de AltavozNot used10Not usedPanel de Dorso11. Salidas de AltavozEstos jacks son utilizados para conectar los altavoces, sealimentan del amplificador de potencia interno. Todos los modelostienen Jacks de Audífono 1/4”. El selector de amplificación(situado delante de la mezcladora) determina la operación deestos jacks. Si el selector de amplificación está en “Main 1 / Main2” o “main/moni” un solo altavoz con carga de 4 a 8 ohms puedeser conectado a Jack A a ambas Salidas de Altavoz Main 1 y Main2-. Usted también puede conectar dos altavoces con impedanciaentre 8 y 16 ohms a ambos jacks A y B de las Salidas de Altavozizquierda y derecha (Main 1/2). Cuando se utilice en modo BridgeMono, utilice la Salida de Altavoz etiquetada como “(L+R) Bridge”solo para conectar un altavoz con una carga entre 8 y 16 ohms.Refiérase a gráfico de configuración de altavoces para másindicación detallada sobre cómo conectar los altavoces.NB. Debido al hecho de que la señal ha sido procesada por el amplificadorde potencia, estos puertos deberán de utilizarse en conjunto con losaltavoces pasivos solo para evitar dañar cualquier otro equipo.Not usedNot used11Utilizar altavoces con una carga incorrecta no solo podrácausar distorsión, también causará daños irreversibles ala mezcladora amplificada. Por favor asegúrese de que lascargas de los altavoces son consistentes a la señalada eneste apartado.POWERPOD <strong>620</strong> R / POWERPOD <strong>740</strong> R17
CONTROLES Y SETEOSPanel de Dorso12. Botón de Energía y Conector de ACEl botón de energía, localizado en la parte posterior de lamezcladora, es utilizado para activar la mezcladora. Por supuestono tiene caso activarlo si la unidad no está conectada a laalimentación, por lo tanto un conector de AC ha sido incluido paraasegurar que su mezcladora obtenga la energía que se necesita.Por favor utilice únicamente el cable de AC incluido con estamezcladora. La <strong>Powerpod</strong> <strong>620</strong> R ofrece un cable de alimentaciónpermanente, en lugar de un conector de corriente alternaNB. Antes de conectar el cable de AC a la Mezcladora <strong>Powerpod</strong>, por favorasegúrese de que el voltaje local es idéntico al elegido por el Selector deVoltaje.13. Selector de VoltajeEste interruptor permite a los usuarios seleccionar de dos modosde energía principales, 115VAC / 60 Hz (Le permite utilizar eldispositivo en países con voltajes entre 100V y 120V) o 230 VAC/ 50 Hz (Le permite utilizar el dispositivo en países con voltajesentre 220V y 240V). Para cambiar el Selector de Voltaje, necesitaprimero destornillar y remover la cubierta plástica que proteje elinterruptor. Después de cambiar el voltaje, por favor substituya lacubierta plástica para asegurarse que el nivel de voltaje no estáalterado inadvertidamente. La gama de potencia <strong>620</strong> R <strong>Powerpod</strong>está determinado por el.NB. Utilizar voltajes incorrectos puede causar daños irreversibles a lamezcladora. Se deberá de tener todos los cuidados para que los voltajessean adecuados. Si no está seguro de los niveles de voltaje local, contáctesecon una fuente conocida antes de usar esta mezcladora.12Controles de Canal14. Control HF (Frecuencias Altas)13Este control es utilizado para dar un realce tipo Shelving o unrecorte de ±15 dB a los sonidos de la frecuencias alta (12 kHz).Esto ajustará la cantidad de agudos incluidos en el audio delcanal, agregando fortaleza y claridad a los sonidos tales como delas guitarras, metales, sintetizadores y Michael Jackson.15. Control MID (Frecuencia Media) (<strong>Powerpod</strong>s <strong>740</strong> Rsolamente)Este control es para proveer un realce estilo pico y recorte delnivel a los sonidos de frecuencia media, en un rango de ±15dB.Cambiar las frecuencias medias de un audio puede ser difícilcuando se utiliza en una mezcla de audio profesional ya quees más deseable cortar los sonidos de la frecuencia media enlugar de realzarlos, calmando excesivamente voz áspera y sonidos deinstrumento en el audio.14151<strong>620</strong>17181916. Control LOW (Frecuencia Grave)Este control es utilizado para dar un realce tipo Shelving o unrecorte de ±15dB a los sonidos de frecuencia baja (80 Hz). Estoajustará la cantidad de graves incluidos en el audio del canal y,dará más calidez y punch a las baterías, guitarras bass e IssacHayes.17. Control de Nivel de MON (Monitor)Este control altera el nivel de señal que es enviado a buses demezcla de Monitor, cuya señal es apta para conectar monitoresde escenario, permitiendo a los artistas escuchar la música quese está ejecutando.18. Control de Nivel de EFX (Efecto)Este control altera el nivel de la señal que es enviada a la salidade EFX, que pueden ser utilizadas junto con procesadores deseñal externos (esta señal puede ser retornada a la mezcladoravía las entradas de retorno estéreo), o simplemente como salidasauxiliares adicionales como se requieran. Estos controles tambiénajustan el nivel del audio que es enviado al panel de efecto digitalintegrado.19. Control de Nivel de CanalEste control alterará el nivel de la señal que es enviada desde elcanal correspondiente al bus de mezcla principal.20. Botón PAD -25El botón PAD -25, localizado arriba del jack de audífono de 1/4” delos canales mono, es utilizado para atenuar la señal de entrada en25dB. Esto solo deberá activarse cuando se utilizan dispositivosde entrada de nivel de línea.18 POWERPOD <strong>620</strong> R / POWERPOD <strong>740</strong> R
Procesador de Efecto Digital21. Efectos en Botón (<strong>Powerpod</strong>s <strong>740</strong> R solamente)Pulsando este botón encenderá y apagara el procesador deefecto.22. Control de ProgramaEste control permitirá a los usuarios seleccionar uno de los 16efectos digitales en el <strong>Powerpod</strong>. Los nombres de los efectoscorresponden con los numeros que se pueden encontrar en laparte de arriba de este mismo control, o los detalles pueden estarencontrados en la tabla de efectos digitales.23. Control de parámetrosGirando este control ajustara el parametro principal en los efectosseleccionados. Cada parametro de los diferentes efectos sepuede encontrar en la tabla de “effectos digitales” al final de estemanual.21Grabador USBLa señal fuente de grabador USB se toma directamente de lamezcla principal antes de ser recortado/alzado por el control denivel principal. Si bien las grabaciones son de hecho en estéreo,están también limitados por el circuito de <strong>Powerpod</strong> <strong>620</strong> R y<strong>Powerpod</strong> <strong>740</strong> R, que es dual-mono en lugar de estéreo. Alreproducir una señal, la señal pasará a través del control trimUSB y luego se envía directamente a la mezcla principal. Lareproducción de archivos WAV y MP3 es posible con velocidadesde hasta 320 kbits por segundo.24. DisplayEste display de 3 dígitos mostrará el número de pista que seestá reproduciendo en el momento. También ofrece indicadoresde reproducción, pausa y grabación a la izquierda de la pantalla.Cuando está en el modo de reproducción, la pantalla indicará eltipo de archivo que se está reproduciendo actualmente: WAV oMP3.25. Puerto USBConecte su dispositivo flash USB a esta entrada. Una vez que eldispositivo está conectado, los archivos se iniciarán y la primerapista aparecerá en pausa en la pantalla.27222326. Botón Record (Grabar)Pulse este botón para iniciar el modo de grabación. Cuandose inicia el modo de grabación, el siguiente número de pistadisponible (después de cualquier pistas grabadas previamente)aparecerá en la pantalla y el modo de grabación se iniciará enpausa. Pulse el botón Play/Pause (Reproducir/Pausa) para iniciarla grabación. La grabación sólo puede realizarse con una tarjetade memoria USB adecuada insertada en el puerto USB.27. Botones Back/Next (Anterior/Siguiente)Al pulsar estos botones permitiran a los usuarios saltar hacia atrásy hacia adelante entre las pistas en secuencia. Tenga en cuentaque estos botones no pueden avanzar/rebobinar rápido a travésde las pistas.28. Botón Play/Pause (Reproducir/Pausa)Pulse este botón para iniciar y detener la reproducción y grabaciónde la pista que se muestra actualmente. Comenzar una pistadespués de que se detuvo se reanudará la pista desde el punto enque se realizó la pausa (en modo de grabación y reproducción).Cuando está en modo de grabación, pulse y mantenga presionadoeste botón para finalizar las grabaciones. Cuando está en modode reproducción, pulsando y manteniendo presionado este botónvolverá a la primera pista en USB memory stick.29. Control de Trim USBEste control de nivel ajusta el nivel dereproducción enviado desde la función dereproducción de grabador USB a la mezcla 29principal. Los usuarios deberán formatear suUSB memory stick con el sistema de archivosFAT-32.Sección Maestra30. El monitor de control FXEste monitor controla el nivel de la señal analizada desde elprocesador de efectos enviado al monitor de mezcla.31. Del Control principal al EFXEste controla el nivel de la señal analizada desde el procesador deefectos enviada al mezcla 1/2 principal.32. controles AUX InEl control AuX In ajusta el nivel final de la entrada AUX que seenvía a la mezcla principal.33. controles Tape InLa <strong>620</strong> R <strong>Powerpod</strong> tiene una cinta de control que ajusta el nivelfinal de la cinta de entrada RCA que se envía a la mezcla principal.La <strong>Powerpod</strong> <strong>740</strong> R dispone de dos controles, cada uno debajo desus ecualizadores, el control superior ajusta la señal de entradade cinta enviada a la mezcla de monitores, mientras que el controlinferior ajusta la señal enviada a la mezcla principal.30 36262824312534353233POWERPOD <strong>620</strong> R / POWERPOD <strong>740</strong> R19
3134. Los equalizador graficos30 3632333435Los ecualizadores gráficos permiten ajustar la respuestade frecuencia de una señal, con un máximo de ± 12 dB de laseñal de realce o recorte de cada una de las frecuencias. Lascaracterísticas de <strong>740</strong> Powepods R 7 incluyen doble banda deecualizadores gráficos, mientras que el <strong>Powerpod</strong> <strong>620</strong> R cuentacon un equipo de música único de 7 bandas de ecualizadoresgráficos, tanto para la señal principal que para las señales deMonitor. En el ecualizador, la parte superior es para la alteraciónde la señal del monitor (si el interruptor EQ está en la posiciónadecuada se convierte en el principal 2 EQ), la parte inferior espara la señal principal (o la principal 1).35.EQ IN y Indicador (<strong>Powerpod</strong>s <strong>740</strong> R solamente)Este botón activa el ecualizador gráfico que le acompaña. Elindicador LED correspondiente se ilumina cuando se activa elecualizador.36. Selector de EQ (Solo en <strong>Powerpod</strong> <strong>740</strong> R)Este interruptor (Presentado en <strong>Powerpod</strong>s <strong>740</strong> R solamente)le permite seleccionar la manera en cómo utilizar el par deecualizadores en estos modelos. Cuando el interruptor está enla posición superior permite utilizar el ecualizador superior para laseñal de Monitor y el ecualizador de fondo para la señal principal;cuando está en la posición inferior permite que los ecualizadorespuedan ser usados para cada una de las mezcladoras principalesde las señales 1 y 2.37. Interruptor de alimentación fantasma y el indicadorCuando este interruptor está en la posición activa de +48 V dealimentación fantasma para las entradas XLR de los canales 1 a4, permite a micrófonos de condensador ser utilizados en estoscanales. El LED correspondiente se ilumina cuando se activa laalimentación fantasma.38. Selectores de Amplificador (Amp)Estos interruptores controlan la actividad del amplificador depotencia integrado, permitiendo al usuario alternar entre lasdiferentes señales que pueden ser procesadas por el amplificadorde potencia integrado y ruteadas a las salidas de altavoz en laparte posterior del dispositivo. Este selector le permite seleccionarde: Main/Monitor- tomando las señales monitor y main y lasdirecciona a las salidas del altavoz apropiadas - Main 1 / Main 2- utilizando la señal principal para alimentar las salidas de altavoz– y Main Bridge que combina la potencia de los amplificadores y laalimenta a través de la salida del puente solamente.NB. Cuando se utiliza una conexión bridge, no conecte el altavoz a cualquierjacks Main/Monitor A o B, localizado en la parte posterior de la mezcladora.Utilice el jack de altavoz “(L+R) Bridge”.39. Monitor de control de nivelEste control giratorio permite al usuario ajustar el nivelde la señal final enviada a todas las salidas de monitor.40. Control de Nivel PrincipalEste control giratorio permite al usuario ajustar el nivel de la señalfinal enviada a las salidas de Altavoz.41. Medidor de NivelEstos medidores de nivel ofrecen indicaciones precisas decuando los niveles de audio de Main y Monitor alcanzan ciertosniveles. El indicador de 0 dB se ilumina a un nivel aproximadode +4 dBu. Se sugiere que para uso máximo de audio se debesetear los diferentes controles de niveles de tal manera que esténfirmemente entre 0 y +3 (6 en la R <strong>740</strong>). Esto hará pleno usode audio manteniendo la claridad fantástica. La <strong>Powerpod</strong> <strong>620</strong>R dispone de un dual de 5 segmentaciones de pantalla LED,mientras que el <strong>Powerpod</strong> <strong>740</strong> R tiene incorporado un dual de 5segmentaciones de pantalla LED para controlar cada una de lasseñales principales.42. Imitadores (solo en <strong>Powerpod</strong> <strong>740</strong> R)Estos indicadores LED se iluminaran cuando los limitadoresintegrados del amplificador de potencia son activados, estosreducen efectivamente los niveles de la señal cuando alcanzana niveles altos que pueden ocasionar distorsiones en la calidadde sonido.43. Indicador de alimentaciónEste indicador LED se ilumina cuando se activa la alimentación desu mesa de mezclas <strong>Powerpod</strong>.3743394241403820 POWERPOD <strong>620</strong> R / POWERPOD <strong>740</strong> R
Grabador USB de <strong>Powerpod</strong>Reproducir1. Cuando encienda por primera vez la <strong>Powerpod</strong>, el display degrabador USB se mostrará la palabra "ON".2. Inserte un disco flash USB formateado apropiadamente(FAT32).3. El grabador USB indicará el tipo de archivo que se está porreproducir (MP3 o WAV) y encontrará automáticamente laprimera pista disponible. La pantalla se indicará "II 001". Laspistas están ordenadas alfanuméricamente, reproduciendo losarchivos MP3 en primer lugar, seguido por los archivos WAV.4. Presione el botón Play/Pause para reproducir la pista actual, olos botones Back y Next para saltar hacia adelante y hacia atrásentre las pistas.5. Si usted está reproduciendo actualmente el último archivo MP3en el disco USB, pulsando el botón >>| se saltará a la primerapista WAV. Del mismo modo, si se está reproduciendo la pistafinal WAV, pulsando >>| se saltará a la primera pista MP3.6. La reproducción de grabador USB está seteado para reproducircontinuamente los archivos de audio, por lo tanto pulsando playreproducirá todos los archivos en secuencia. Una vez que todoslos archivos han sido ejecutados, se repetirá.7. Cuando está en modo de reproducción o pausa, manteniendopulsado el botón Play/Pause durante 2 segundos para volver ala primera pista en el disco USB.Grabar1. Cuando un disco USB es insertado, presione el botón REC paraactivar el modo de grabación.2. La pantalla mostrará inmediatamente WAV (como el formatode grabación) y luego el siguiente número de pista disponibleaparecerá en la pantalla. Por ejemplo, si hay 12 archivos WAVen la tarjeta USB, la pantalla mostrará "II/REC 013".3. Modo de grabación se iniciará en standby/pause (modo deespera/pausa). Pulse el botón Play/Pause para empezar agrabar.4. Pulse el botón Play/Pause para hacer una pausa en la grabación.Pulsando el botón Play/Pause nuevamente se reanudará lagrabación desde la posición en la que se realizó la pausa.5. Durante la grabación, pulse el botón REC para finalizar lagrabación de la pista actual y dar indicio a la siguiente pistapara la grabación. Por ejemplo, si actualmente está grabandola pista 13, presionando el botón REC finalizará el archivo WAVgrabado para la pista 13, y la pantalla mostrará "II/REC 014"con la grabación en la pista 14 seteado en modo de espera.6. Mantenga presionado el botón Play/Pause para finalizar lagrabación y volver al modo de reproducción.7. Después de finalizar su grabación, el modo de reproducción seiniciará en la primera pista MP3. En este caso, pulse el botónBack una vez para acceder a la grabación final WAV - en otraspalabras, la grabación que usted acaba de finalizar.NOTA: El control giratorio USB ajustará solamente el nivel de reproduccióny no afectará los niveles de grabación. Los únicos controles de nivel queafectarán el nivel de grabación son los que se encuentran en los canalesde entrada individuales.El rango de frecuencia óptimo para la grabación en grabador USBde <strong>Powerpod</strong> <strong>620</strong> R y <strong>Powerpod</strong> <strong>740</strong> R es de 50 Hz a 10 kHz.Esto hace que las grabaciones sean ideales para las prácticas debanda, conferencias, asambleas escolares y otros eventos dondelas grabaciones informales son necesarias. Para las grabacionesprofesionales a gran escala, Phonic recomienda las interfacesdigitales de grabación Firefly y Helix Board para las computadorasMac y PC. Estas unidades vienen con interfaces FireWire y/o USBy son ideales para la grabación en cualquier número de escenariosposibles, desde conciertos en directo a las sesiones de grabación enestudio. La información sobre la disponibilidad se puede encontrara través de su distribuidor Phonic más cercano. Ingrese a www.phonic.com/where para más detalles.POWERPOD <strong>620</strong> R / POWERPOD <strong>740</strong> R21
ESPECIFICACIONESPOWERPOD <strong>620</strong> RPOWERPOD <strong>740</strong> RNumero de canales de alimentacion 2 2Limitador N/A 28 Ohmios por canal 70 145Ohmios por canal 100 2208 ohms Puente Mono 200 440Entradas / SalidasCanales Lo-Z / Hi-Z 6, 2 con super Hi-Z (470K ohms) 4, 2 con super Hi-Z (470K ohms)Linea de canales Mono Mic/Dual balanceado 2 3Entrada 2T RCA RCARetorno AUX 1 x 1/4" TRS, Unbal. 1 x 1/4" TRS, Unbal.Mono Principal 1 x 1/4" TRS, Unbal. 1 x 1/4" TRS, Unbal.Monitor de envio 1 x 1/4" TRS, Unbal. 1 x 1/4" TRS, Unbal.Envio de EFX 1 x 1/4" TRS, Unbal. 1 x 1/4" TRS, Unbal.registro de salida RCA RCASalida de Altavoces 5 x 1/4" TRS 5 x 1/4" TRSConector USB 1 x USB-A 1 x USB-Aseccion MasterMonitor & AUX / Envia Master EFX 2 2Retorno de efectos a Monitor N/A YesFaders Moni, principal (Rotary) Moni, Principal (Rotary)grabador/reproductor USBRegistro de Frecuencia de muestreo 44.1 kHz 44.1 kHzFortmato de grabacion wav wavMáximo de reproducción Bitrate 320 kbit/s 320 kbit/sFormatos de reproducción soportados wav, mp3 wav, mp3Alimentacion fantasma +48VDC +48VDCEfecto 32/40-bit Procesador Digital 16 programas 16 programaspedala Interuptor Effecto digital mudo: ON/OFF Effecto digital mudo: ON/OFFGráfico incorporado EQ Banda-Stereo 7 Banda-2 x 7canal de Igualamiento Banda-2, ±15dB Banda-3, ±15dBEQ Bajo 80Hz 80HzEQ Medio N/A 2.5KHzEQ Alto 12KHz 12KHzLa interferencia (1KHz@0dBu, 20 Hz a la anchura de banda de 20 khz, acanalan en las salidas principales 1/2 )Canal silenciado, otros canales en la unidad N/A
POWERPOD <strong>620</strong> RPOWERPOD <strong>740</strong> RTHDSalida de Alimentacion, 1KHz, 20Hz to 20KHz @50 watts, 4 ohms
重 要 安 全 说 明1. 请 在 使 用 本 机 前 , 仔 细 阅 读 以 下 说 明 。2. 请 保 留 本 使 用 手 册 , 以 便 日 后 参 考 。3. 为 保 障 操 作 安 全 , 请 注 意 所 有 安 全 警 告 。4. 请 遵 守 本 使 用 手 册 内 所 有 的 操 作 说 明 。5. 请 不 要 在 靠 近 水 的 地 方 , 或 任 何 空 气 潮 湿 的 地 点 操 作 本 机 。6. 本 机 只 能 用 干 燥 布 料 擦 拭 , 请 勿 使 用 喷 雾 式 或 液 体 清 洁 剂 。 清 洁 本 机 前 请 先 将 电 源 插 头 拔 掉 。7. 请 勿 遮 盖 任 何 散 热 口 。 确 实 依 照 本 使 用 手 册 来 安 装 本 机 。8. 请 勿 将 本 机 安 装 在 任 何 热 源 附 近 。 例 如 : 暖 气 、 电 暖 气 、 炉 灶 或 其 它 发 热 的 装 置 ( 包 括 功 率扩 大 机 )。9. 请 注 意 极 性 或 接 地 式 电 源 插 头 的 安 全 目 的 。 极 性 电 源 插 头 有 宽 窄 两 个 宽 扁 金 属 插 脚 。 接 地 式电 源 插 头 有 两 支 宽 扁 金 属 插 脚 和 第 三 支 接 地 插 脚 。 较 宽 的 金 属 插 脚 ( 极 性 电 源 插 头 ) 或 第 三 支接 地 插 脚 ( 接 地 式 电 源 插 头 ) 是 为 安 全 要 求 而 制 定 的 。 如 果 随 机 所 附 的 插 头 与 您 的 插 座 不 符 ,请 在 更 换 不 符 的 插 座 前 , 先 咨 询 电 工 人 员 。10. 请 不 要 踩 踏 或 挤 压 电 源 线 , 尤 其 是 插 头 、 便 利 插 座 、 电 源 线 与 机 身 相 接 处 。11. 本 机 只 可 以 使 用 生 产 商 指 定 的 零 件 / 配 件 。12. 本 机 只 可 以 使 用 与 本 机 搭 售 或 由 生 产 商 指 定 的 机 柜 、 支 架 、 三 脚 架 、 拖 架或 桌 子 。 在 使 用 机 柜 时 , 请 小 心 移 动 已 安 装 设 备 的 机 柜 , 以 避 免 机 柜 翻 倒造 成 身 体 伤 害 。13. 在 雷 雨 天 或 长 期 不 使 用 的 情 况 下 , 请 拔 掉 电 源 插 头 。14. 所 有 检 查 与 维 修 都 必 须 交 给 合 格 的 维 修 人 员 。 本 机 的 任 何 损 伤 都 须 要 检 修 , 例 如 : 电 源 线 或 插头 受 损 , 曾 有 液 体 溅 入 或 物 体 掉 入 机 身 内 , 曾 暴 露 于 雨 天 或 潮 湿 的 地 方 , 不 正 常 的 运 作 , 或 曾掉 落 等 。CAUTIONRISK OF ELECTRIC SHOCKDO NOT OPEN这 个 三 角 形 闪 电 标 志 是 用 来 警 告 用 户 , 装 置 内 的 非 绝 缘 危 险 电 压 足 以 造 成 使 人 触电 的 危 险 性 。这 个 三 角 形 惊 叹 号 标 志 是 用 来 警 告 用 户 , 随 机 使 用 手 册 中 有 重 要 操 作 与 保 养 维 修说 明 。警 告 : 为 减 少 火 灾 或 触 电 的 危 险 性 , 请 勿 将 本 机 暴 露 于 雨 天 或 潮 湿 的 地 方 。注 意 : 任 何 未 经 本 使 用 手 册 许 可 的 操 控 , 调 整 或 设 定 步 骤 都 可 能 产 生 危 险 的 电 磁 幅 射 。PHONIC CORPORATION
简 介感 谢 您 选 购 Phonic 卓 越 的 <strong>Powerpod</strong> "R" 调 音 台 , 内 置 功 放 电 路 且提 供 USB 录 音 机 和 重 放 设 备 。 整 个 <strong>Powerpod</strong> 系 列 自 推 出 以 来 与 市面 上 其 它 的 功 放 调 音 台 进 行 着 激 烈 的 竞 争 。 有 着 迷 人 的 超 低 噪 音 ,高 信 号 处 理 性 能 , 出 色 的 输 出 电 平 , 简 化 的 信 号 指 定 性 能 , 以 及 超平 滑 控 制 的 <strong>Powerpod</strong> <strong>620</strong> R 和 <strong>Powerpod</strong> <strong>740</strong> R 所 提 供 的 可 靠 性 是后 起 之 秀 都 难 以 匹 敌 的 。内 置 的 USB 录 音 机 可 直 接 对 任 意 USB 记 忆 棒 录 制 无 损 的 WAV 格 式 音频 。<strong>Powerpod</strong> R 可 直 接 从 Main Mix( 推 杆 前 监 听 ) 录 制 信 号 , 取 样 比 为44.4kHz( 与 CD 的 取 样 比 一 致 ), 之 后 用 户 可 在 任 意 电 脑 上 对 录 音 进 行编 辑 或 完 善 。 该 录 音 机 还 可 直 接 播 放 USB 记 忆 棒 内 的 WAV,MP3 文件 , 随 后 该 音 频 将 直 接 输 往 Main Mix。您 一 定 早 已 迫 不 及 待 地 想 一 试 为 快 , 尽 情 地 摆 弄 新 买 的 设 备 可 能 是您 的 首 选 —— 但 是 , 我 们 强 烈 恳 请 您 先 仔 细 阅 读 本 手 册 。 其 中 包 括一 些 重 要 的 安 装 , 使 用 , 以 及 应 用 说 明 。 如 果 碰 巧 您 刚 好 是 那 种 不喜 欢 大 篇 幅 的 阅 读 使 用 手 册 的 用 户 , 我 们 提 请 您 至 少 浏 览 一 下 基 本安 装 部 分 。 读 完 后 请 妥 善 保 管 , 以 便 日 后 参 阅 。功 能<strong>Powerpod</strong> <strong>620</strong> R● Main 1/Main 2 或 Main/Monitor( 桥 接 单 声 道 ,200W/8Ω)100W+100W/4Ω 功 放● USB 录 音 机 可 直 接 对 USB 记 忆 棒 录 制 音 频 和 重 放 记 忆 棒 内 的 音频 文 件● 32/40 位 数 字 立 体 声 多 重 效 果 处 理 器 , 可 提 供 16 种 音 乐 效 果 以及 踏 板 开 关 插 孔● 立 体 声 7 段 图 示 均 衡 器● 带 XLR 端 子 的 6 路 平 衡 式 麦 克 风 输 入● 带 1/4" 端 子 的 8 路 高 电 平 输 入● 2 路 Super Hi-Z(1/4") 输 入 可 用 于 高 阻 抗 乐 器 的 直 接 输 入● 各 声 道 2 段 均 衡 器● 声 道 1 至 4 PAD 音 量 衰 减 控 制● 各 输 入 声 道 Monitor 监 听 和 Effect 效 果 输 出● 1 路 AUX 辅 助 输 入● 声 道 1 至 4 +48V 幻 象 电 源● 录 音 输 出 带 音 量 削 减 控 制 可 进 行 录 音 音 量 匹 配<strong>Powerpod</strong> <strong>740</strong> R● Main 1/Main 2 或 Main/Monitor( 桥 接 单 声 道 ,440W/8Ω)220W+220W/4Ω 功 放● USB 录 音 机 可 直 接 对 USB 记 忆 棒 录 制 音 频 和 重 放 记 忆 棒 内 的 音频 文 件● 32/40 位 数 字 立 体 声 多 重 效 果 处 理 器 , 可 提 供 16 种 音 乐 效 果 以及 踏 板 开 关 插 孔● Main/Monitor 或 Main1/Main2 两 组 7 段 图 示 均 衡 器 , 带 输 入 和 输出 切 换 开 关● 带 XLR 端 子 的 7 路 平 衡 式 麦 克 风 输 入● 带 1/4" 端 子 的 10 路 高 电 平 输 入● 2 路 Super Hi-Z(1/4") 输 入 可 用 于 高 阻 抗 乐 器 的 直 接 输 入● 2 个 内 建 限 幅 器● 3 段 声 道 均 衡 器● 声 道 1 至 4 PAD 音 量 衰 减 控 制● 各 输 入 声 道 Monitor 监 听 和 Effect 效 果 输 出● 1 路 AUX 辅 助 输 入● 声 道 1 至 4 +48V 幻 象 电 源● 录 音 输 出 带 音 量 削 减 控 制 可 进 行 录 音 音 量 匹 配● 115VAC 和 230VAC 切 换 式 电 源基 本 安 装开 始 设 定1、 确 保 关 闭 所 有 电 源 , 断 开 AC 电 源 连 接 线 。2、 将 所 有 音 量 推 杆 和 音 量 控 制 调 至 最 低 , 以 确 保 开 机 时 输 出 端 口 不会 突 然 产 生 噪 音 。 打 开 调 音 台 之 后 , 再 将 音 量 调 到 理 想 位 置 。3、 将 所 需 乐 器 和 设 备 接 入 相 应 的 输 入 端 口 , 如 吉 他 , 麦 克 风 , 键盘 乐 器 , 高 电 平 信 号 处 理 器 等 。4、 将 所 需 设 备 接 入 相 应 的 输 出 端 口 , 如 音 箱 , 监 听 音 箱 , 录 音 设备 和 信 号 处 理 器 。注 意 : 只 有 音 箱 才 能 与 功 放 输 出 端 口 相 连 接 。 错 误 地 将 设 备 连 接 至 调 音 台 将造 成 设 备 损 伤 。 请 勿 使 用 吉 它 连 接 线 连 接 功 放 和 音 箱 。5、 将 AC 电 源 线 插 入 设 备 后 侧 的 AC 电 源 插 孔 , 并 确 保 电 压 与 当 地额 定 电 压 一 致 。6、 将 AC 电 源 线 接 入 适 配 的 电 源 输 出 端 口 。7、 打 开 电 源 。声 道 设 置1、 为 确 保 选 择 正 确 的 输 入 声 道 音 频 电 平 , 请 将 所 有 声 道 的 音 量 滑杆 设 置 为 0。2、 选 择 您 想 设 置 电 平 的 声 道 , 为 确 保 输 出 信 号 与 输 入 信 号 一 致 , 可通 过 测 试 麦 克 风 或 弹 奏 乐 器 判 断 信 号 是 否 正 常 传 送 。注 意 : 为 确 保 正 确 的 信 号 测 试 , 除 正 在 设 定 的 声 道 外 , 请 勿 使 用 其 它 声 道 。3、 调 节 该 声 道 音 量 控 制 , 以 音 量 表 ( 位 于 <strong>Powerpod</strong> 面 板 右 侧 ) 在0dB 左 右 浮 动 为 最 佳 。 为 确 保 获 取 满 意 的 音 量 效 果 您 还 可 开 启幻 象 电 源 或 PAD 按 钮 。4、 声 道 设 置 完 成 , 可 停 止 测 试 信 号 。5、 选 择 下 一 声 道 重 复 步 骤 1 至 4 进 行 设 置 。POWERPOD <strong>620</strong> R / POWERPOD <strong>740</strong> R25
连 接 设 定声 道 输 入<strong>Powerpod</strong> <strong>620</strong> R 和 <strong>Powerpod</strong> <strong>740</strong> R 拥 有 不 同 数 量 的 输 入 声 道 。<strong>620</strong> R 有 6 路 输 入 声 道 , 其 中 两 路 可 接 收 立 体 声 信 号 。<strong>740</strong> R 有 7 路输 入 声 道 , 其 中 三 路 可 接 收 立 体 声 信 号 。 功 放 调 音 台 所 接 收 到 的 立体 声 信 号 最 终 将 混 音 至 Main Mix, 因 <strong>Powerpod</strong> R 调 音 台 为 " 双 单 声道 " 电 路 设 计 而 非 立 体 声 。1、XLR Lo-Z 和 Mic 输 入这 些 标 准 的 XLR 公 座 插 孔 可 连 接 一 系 列 的 麦 克 风 , 如 专 业 电 容 式 ,动 圈 式 或 铝 带 式 麦 克 风 。 拥 有 超 低 噪 音 的 前 置 放 大 电 路 ,XLR Lo-Z 和 Mic 输 入 可 再 现 清 晰 干 净 的 音 质 。 声 道 1 至 4 设 有 幻 象 电 源 。注 意 : 使 用 非 平 衡 式 麦 克 风 时 , 应 关 闭 幻 象 电 源 。 但 是 , 使 用 电 容式 麦 克 风 , 应 开 启 幻 象 电 源 。2、1/4"Hi-Z 和 Super Hi-Z 输 入这 此 输 入 可 连 接 常 见 的 1/4"TRS 或 TS 非 平 衡 式 输 入 。Hi-Z 输 入 可 接收 平 衡 式 TRS 输 入 , 适 用 于 麦 克 风 至 line 等 级 设 备 ( 如 合 成 器 和 架 子鼓 ),Super Hi-Z 可 连 接 TS 非 平 衡 式 声 源 , 连 接 较 高 阻 抗 的 设 备 ( 包括 电 吉 他 和 贝 斯 )。注 意 : 将 line 等 级 的 设 备 连 接 至 Hi-Z 和 Super Hi-Z 输 入 时 , 应 开 启 PAD -25 按钮 。3、 立 体 声 道 输 入<strong>Powerpod</strong> <strong>740</strong> R 调 音 台 拥 有 三 路 立 体 声 输 入 声 道 ,<strong>Powerpod</strong> <strong>620</strong>R 只 有 两 路 , 与 单 声 道 Mono 输 入 略 有 不 同 。3 芯 XLR 输 入 可 连 接 带常 见 的 XLR 公 座 输 入 端 子 的 麦 克 风 , 两 个 高 电 平 1/4”TS 插 孔 可 连 接各 种 立 体 声 line 等 级 输 入 设 备 , 如 键 盘 乐 器 。 如 果 您 想 将 单 声 道 设备 接 入 立 体 声 倒 送 输 入 , 只 需 简 单 地 将 设 备 的 1/4”Phone 插 孔 插 入其 中 一 个 输 入 连 接 器 , 将 另 外 一 个 空 出 来 。6 4 55、 录 音 输 出 ( 左 输 出 和 右 输 出 )与 录 音 输 入 端 子 相 似 , 这 些 输 出 可 连 接 RCA 端 子 , 连 接 各 种 录 音 设备 。 录 音 输 出 的 信 号 直 接 来 自 Main Mix。 这 些 录 音 输 出 端 子 随 附 的音 量 削 减 控 制 可 进 行 不 同 的 录 音 音 量 调 节 。6、 辅 助 输 入这 些 TS 输 入 可 并 联 调 音 台 与 外 部 设 备 , 如 次 级 调 音 台 或 外 部 效 果 处理 器 , 接 收 其 它 声 源 的 处 理 信 号 后 输 往 AUX 辅 助 混 音 总 线 。7、 监 听 输 出这 些 1/4" TS 端 子 是 Monitor 监 听 输 出 混 音 总 线 的 最 终 信 号 的 输 出 端口 , 可 连 接 功 放 或 音 箱 。 将 Monitor Out 的 输 出 信 号 传 送 至 功 放 ( 或均 衡 器 ), 然 后 再 连 接 至 舞 台 监 听 音 箱 , 可 方 便 音 乐 家 在 表 演 的 同时 监 听 乐 器 和 声 乐 信 号 , 或 方 便 工 程 师 监 听 混 音 。8、 主 输 出这 个 端 子 可 输 出 主 混 音 总 线 的 最 终 立 体 声 line 等 级 信 号 。 这 些 插 孔的 主 要 的 作 用 是 将 主 输 出 Main Output 的 信 号 输 送 至 与 调 音 台 并 联的 外 部 设 备 , 如 调 音 台 ,PA 系 统 , 功 率 放 大 器 , 以 及 其 它 一 系 列的 信 号 处 理 器 。82 31主 控 制 区<strong>Powerpod</strong> <strong>620</strong> R 和 <strong>Powerpod</strong> <strong>740</strong> R 可 根 据 您 设 置 的 需 求 提 供 多 种输 入 和 输 出 方 法 , 包 括 RCA 录 音 输 出 , 录 音 输 入 ,1/4” 辅 助 输 入 和监 听 输 出 等 等 。4、 录 音 输 入 ( 左 输 入 和 右 输 入 )这 些 输 入 的 第 一 个 插 孔 可 连 接 磁 带 播 放 机 和 CD 播 放 器 的 RCA 端 子 。录 音 输 入 的 信 号 在 输 往 Main Mix 前 可 使 用 Tape In Level 录 音 输 入 音量 控 制 调 节 。9、 效 果 (EFX) 输 出这 些 1/4"TS 输 出 是 EFX 效 果 输 出 混 音 总 线 的 最 终 信 号 的 输 出 端 口 。这 些 输 出 可 根 据 您 的 需 要 连 接 外 部 数 字 效 果 处 理 器 , 或 功 放 和 音箱 。10、 踏 板 开 关 插 孔这 个 端 子 包 括 非 闭 合 踏 板 开 关 , 可 远 程 调 节 内 建 数 字 效 果 处 理 器 的属 性 。<strong>Powerpod</strong> <strong>620</strong> R 和 <strong>740</strong> R 只 有 一 个 踏 板 开 关 插 孔 , 可 开 启 和关 闭 数 字 效 果 处 理 器 。71026 POWERPOD <strong>620</strong> R / POWERPOD <strong>740</strong> R
后 面 板11、 音 箱 输 出这 些 插 孔 可 将 内 置 功 放 的 信 号 连 接 至 音 箱 。<strong>Powerpod</strong> <strong>620</strong> R 和 <strong>740</strong> R 的输 出 端 子 均 为 1/4"Phone 型 插 孔 。 功 放 选 择 开 关 ( 位 于 调 音 台 的 面 板上 ) 可 调 节 这 些 插 孔 的 操 作 模 式 。 若 将 功 放 选 择 设 置 在 "Main 1/Main2" 或 "Main/Moni", 即 可 将 4~8Ω 阻 抗 的 单 个 音 箱 接 入 Main 1 和 Main 2 音箱 输 出 。 您 还 可 将 阻 抗 为 8~16Ω 的 两 个 音 箱 接 入 Main 1/2 音 箱 输 出的 插 孔 A 和 B。 使 用 桥 接 单 声 道 模 式 时 , 仅 限 使 用 标 有 "(L+R) 桥 接 " 的音 箱 输 出 插 孔 连 接 阻 抗 为 8~16Ω 的 音 箱 。 具 体 如 何 连 接 音 箱 请 参 考右 侧 的 示 意 图 。注 意 : 由 于 音 箱 输 出 插 孔 传 送 的 信 号 是 经 功 放 处 理 过 的 , 所 以 只 能 连 接 无 源音 箱 , 以 免 对 设 备 造 成 严 重 损 伤 。11控 制 和 设 定后 面 板12、 电 源 开 关 和 AC 连 接 器位 于 后 面 板 的 电 源 开 关 可 开 启 和 关 闭 调 音 台 的 电 源 。AC 连 接 器 应 接入 AC 电 源 。 使 用 过 程 中 请 仅 限 使 用 随 附 的 电 源 线 。<strong>Powerpod</strong> <strong>620</strong>R 后 侧 为 一 根 固 定 的 电 源 连 接 线 , 而 非 AC 连 接 器 。注 意 : 将 AC 连 接 线 接 入 调 音 台 时 , 请 确 保 电 压 选 择 器 选 择 所 设 置 的 电 压 值与 当 地 电 压 一 致 。13、 电 压 选 择 器 ( 仅 限 于 <strong>Powerpod</strong> <strong>740</strong> R)此 开 关 可 在 两 个 电 源 模 式 间 进 行 选 择 ,115VAC/60Hz( 可 在 额 定电 压 为 100~120V 的 地 区 使 用 ) 或 230VAC/50Hz( 可 在 额 定 电 压 为200~230V 的 地 区 使 用 )。 调 节 电 压 选 择 器 之 前 , 您 必 须 拧 开 并 移 除保 护 开 关 的 塑 胶 盖 。 电 压 设 置 完 成 后 , 请 还 原 保 护 盖 以 避 免 电 压 选择 开 关 被 不 经 意 的 触 动 。注 意 : 使 用 错 误 的 电 压 将 对 调 音 台 造 成 严 重 的 损 伤 , 选 择 电 压 时 请 务 必 核 对当 地 的 额 定 电 压 。 若 不 确 定 当 地 电 压 , 请 查 询 相 关 资 讯 。音 箱 安 装12Not used13声 道 控 制14、 高 频 控 制此 旋 钮 可 对 高 频 (12KHz) 进 行 ±15dB 的 增 强 或 削 减 , 可 调 节 音 频 的高 音 部 分 , 增 强 钹 , 吉 他 , 合 成 器 等 声 音 的 力 度 和 劲 道 。15、 中 频 控 制 ( 仅 适 用 于 <strong>Powerpod</strong> <strong>740</strong> R)此 控 制 可 对 中 频 进 行 ±15 dB 的 增 强 或 削 减 。 要 调 节 中 频 并 非 易事 , 人 们 通 常 希 望 对 中 频 进 行 削 弱 而 非 增 强 , 缓 和 音 频 中 刺 耳 的 人声 和 乐 器 声 。Not used16、 低 频 控 制此 旋 钮 可 对 低 频 (80Hz) 进 行 ±15dB 的 增 强 或 削 减 , 可 调 节 音 频 的 低音 部 分 , 柔 和 并 增 加 鼓 , 贝 斯 等 的 力 道 。17、 监 听 (MON) 音 量 控 制此 控 制 可 调 节 输 往 监 听 混 音 总 线 的 信 号 的 音 量 , 可 连 接 舞 台 监 听 音箱 , 以 便 音 乐 家 监 听 正 在 演 播 的 音 乐 。18、 效 果 (EFX) 音 量 控 制此 控 制 可 调 节 输 往 效 果 输 出 的 信 号 的 音 量 , 可 连 接 外 部 信 号 处 理 器( 信 号 可 经 立 体 声 倒 送 输 入 返 回 调 音 台 ), 或 用 作 外 部 辅 助 输 出 。 这些 控 制 还 可 调 节 输 往 内 建 数 字 效 果 面 板 的 信 号 的 音 量 。Not usedNot used连 接 非 正 确 负 载 的 音 箱 , 不 但 会 引 起 信 号 失 真 , 还 会 对 调 音台 造 成 损 伤 。 请 务 必 确 保 严 格 遵 照 上 述 图 示 所 示 音 箱 阻 抗 连接 。POWERPOD <strong>620</strong> R / POWERPOD <strong>740</strong> R27
14151<strong>620</strong>171819USB 录 音 机USB 录 音 机 的 声 源 信 号 直 接 来 自 Main Mix, 优 先 于 Main Level 的 削减 / 增 强 控 制 。 虽 然 录 音 机 录 制 的 音 频 是 立 体 声 的 , 但 它 们 同 样 受 限于 <strong>Powerpod</strong> <strong>620</strong> R 和 <strong>Powerpod</strong> <strong>740</strong> R 的 电 路 设 计 ( 双 单 声 道 而 非立 体 声 )。 录 音 重 放 时 , 信 号 将 通 过 USB 的 音 量 削 减 控 制 直 接 输 往Main Mix。 以 下 是 可 用 的 录 音 重 放 文 件 类 型 : 比 特 率 高 达 320kbit/s 的WAV 和 MP3 音 频 。24、 显 示 器这 个 3 位 显 示 器 将 显 示 当 前 播 放 曲 目 的 编 号 。 显 示 器 左 侧 还 有 播 放 ,暂 停 和 录 音 指 示 灯 。 录 音 重 放 模 式 下 , 显 示 屏 将 在 每 个 文 件 的 开 头显 示 当 前 播 放 文 件 的 类 型 :WAV,MP3。25、USB 接 口连 接 U 盘 。 一 旦 插 入 U 盘 , 文 件 将 自 动 运 行 , 第 一 个 播 放 曲 目 将 以 暂停 状 态 出 现 在 显 示 屏 上 。27262819、 声 道 音 量 控 制此 控 制 可 调 节 相 应 声 道 输 往 主 混 音 总 线 的 信 号 的 音 量 。20、PAD -25 按 钮PAD -25dB 按 钮 位 于 单 声 道 1/4"Phone 插 孔 的 下 方 , 可 对 输 入 信 号 进行 25dB 的 削 减 。 此 功 能 只 适 用 于 line 等 级 输 入 设 备 。数 字 效 果 处 理 器21、 效 果 开 启 按 钮 ( 仅 适 用 于 <strong>Powerpod</strong> <strong>740</strong>R)此 按 钮 可 开 启 和 关 闭 内 建 效 果 处 理 器 。22、 音 乐 效 果 控 制此 旋 钮 可 选 择 <strong>Powerpod</strong> 功 放 调 音 台 的 任 意 16 种 内 建 数 字 效 果 。 数字 所 对 应 的 效 果 名 称 请 参 考 该 控 制 上 方 面 板 上 的 文 字 , 效 果 的 详 细资 讯 请 参 考 数 字 效 果 表 。23、 参 数 控 制旋 转 此 控 制 可 调 节 已 选 效 果 的 一 个 主 参 数 。 有 关 可 用 效 果 的 参 数 请参 考 本 说 明 书 后 面 的 数 字 效 果 表 。USB 录 音 机252426、 录 音 控 制按 下 此 按 钮 可 打 开 录 音 模 式 。 录 音 模 式 开 启 时 , 下 一 曲 ( 在 任 意 之前 录 制 的 曲 目 后 ) 的 编 号 将 出 现 在 显 示 屏 上 , 录 音 模 式 将 停 止 。 按下 播 放 / 暂 停 按 钮 开 始 录 音 。 录 音 只 有 在 USB 接 口 插 有 USB 内 存 卡的 情 况 下 才 能 进 行 。27、 返 回 / 跳 过 控 制按 下 此 按 钮 可 按 播 放 列 表 的 顺 序 向 前 或 向 后 选 择 曲 目 。28、 播 放 / 暂 停 控 制按 下 此 按 钮 可 开 始 和 暂 停 重 播 以 及 当 前 曲 目 的 录 音 。 暂 停 一 个 曲 目后 再 次 开 始 将 在 暂 停 的 地 方 重 新 开 始 播 放 ( 录 音 和 重 播 模 式 )。 按 下按 钮 并 保 持 该 动 作 可 保 存 录 音 。212229、USB 音 量 控 制该 音 量 控 制 可 调 节 USB 录 音 机 重 放 功 能 输 往 Main Mix 的 重 放 音 量 。推 荐 用 户 使 用 FAT32 文 件 系 统 格 式 化 USB 记 忆 棒 。232928 POWERPOD <strong>620</strong> R / POWERPOD <strong>740</strong> R
3130 363437、 幻 象 电 源 开 关 以 及 指 示 灯打 开 此 按 钮 即 可 开 启 声 道 1 至 4 XLR 插 孔 的 幻 象 电 源 , 可 连 接 电 容 式麦 克 风 。 幻 象 电 源 开 启 时 , 相 应 的 LED 指 示 灯 将 变 亮 。38、 功 率 放 大 选 择 开 关此 开 关 可 调 控 内 建 功 放 , 可 在 不 同 的 信 号 间 进 行 选 择 决 定 哪 些 信号 将 被 内 建 功 放 处 理 并 输 往 音 箱 输 出 。 此 开 关 可 选 择 的 范 围 为 :Main/Monitor—— 将 Monitor 监 听 和 Main 主 信 号 直 接 输 往 相 应 的 音箱 输 出 ;Main 1/Main 2—— 将 Main 信 号 输 往 音 箱 输 出 ;Bridge 桥接 —— 桥 接 功 放 的 功 率 , 且 仅 通 过 桥 接 输 出 传 输 信 号 。注 意 : 采 用 Mono 桥 接 式 连 接 时 , 请 勿 将 音 箱 连 接 至 后 面 板 的 Main/Monitor 主 /监 听 的 A 或 B 插 孔 , 应 使 用 "Bridge" 桥 接 音 箱 插 孔 。39、 监 听 音 量 控 制此 旋 钮 可 调 节 输 往 所 有 监 听 Monitor 输 出 的 信 号 的 音 量 。主 控 制 区32333530、 效 果 至 监 听 控 制此 旋 钮 可 调 节 内 建 数 字 效 果 处 理 器 输 往 Monitor 监 听 混 音 总 线 的 信号 的 音 量 。31、 效 果 至 主 混 音 控 制此 旋 钮 可 调 节 内 建 数 字 效 果 处 理 器 输 往 Main 1/2 混 音 总 线 的 信 号的 音 量 。32、 辅 助 输 入 控 制辅 助 输 入 控 制 可 调 节 辅 助 输 入 输 往 主 混 音 总 线 的 的 信 号 的 音 量 。33、 录 音 输 入 控 制<strong>Powerpod</strong> <strong>620</strong> R 拥 有 一 个 录 音 输 入 控 制 , 可 调 节 RCA 录 音 输 入 输 往主 混 音 总 线 的 信 号 的 音 量 。<strong>Powerpod</strong> <strong>740</strong> R 有 两 个 录 音 输 入 控 制 ,一 个 ( 处 于 上 方 的 ) 调 节 输 往 Monitor 监 听 混 音 总 线 的 信 号 的 音 量 , 另一 个 ( 处 于 下 方 的 ) 调 节 输 往 Main 主 混 音 总 线 的 信 号 的 音 量 。34、 图 示 均 衡 器这 些 图 示 均 衡 器 可 对 信 号 的 频 率 响 应 进 行 ±12dB 的 增 强 或 衰 减 调节 。<strong>Powerpod</strong> <strong>740</strong> R 拥 有 两 组 7 段 图 示 均 衡 器 ,<strong>Powerpod</strong> <strong>620</strong> R 为单 个 立 体 声 7 段 图 示 均 衡 器 , 用 于 Main 和 Monitor 信 号 。 较 高 的 均 衡器 可 处 理 Monitor 监 听 (EQ 开 关 设 置 于 相 应 位 置 时 则 变 成 Main 2 均 衡器 ) 信 号 , 下 方 的 均 衡 器 可 处 理 Main 信 号 ( 或 Main 1)。35、 均 衡 器 开 关 以 及 指 示 器此 开 关 可 开 启 旁 边 的 图 示 均 衡 器 ,EQ 开 启 时 相 应 的 LED 指 示 灯 为亮 。36、 均 衡 器 选 择 开 关 ( 仅 适 用 于 <strong>Powerpod</strong> <strong>740</strong> R)此 开 关 可 选 择 开 启 均 衡 器 的 模 式 。 将 均 衡 器 选 择 开 关 调 节 至 最 高的 位 置 , 即 可 使 用 最 高 的 均 衡 器 调 节 监 听 信 号 , 使 用 底 部 的 均 衡器 调 节 Main 信 号 ; 调 节 至 较 低 的 位 置 即 可 调 节 调 音 台 Main 1 和 2 的信 号 。40、 主 音 量 控 制此 旋 钮 可 调 节 输 往 Main 和 音 箱 输 出 的 信 号 的 音 量 。41、 音 量 表这 些 音 量 表 可 精 确 的 显 示 Main 和 Monitor 监 听 输 出 信 号 的 音 量 。0dB 指 示 灯 变 亮 时 相 当 于 +4dBu 的 输 出 电 平 。 请 将 电 平 控 制 在 0 至+3 间 (<strong>Powerpod</strong> <strong>740</strong> R 为 +6), 以 确 保 最 大 限 度 地 使 用 音 频 , 同 时保 证 音 质 清 晰 空 灵 。<strong>Powerpod</strong> <strong>620</strong> R 为 一 个 双 列 5 段 LED 音 量 表 ,<strong>Powerpod</strong> <strong>740</strong> R 为 两 个 双 列 5 段 LED 音 量 表 (Monitor 和 Main)。42、 限 幅 器 ( 仅 限 于 <strong>Powerpod</strong> <strong>740</strong> R)功 放 的 内 建 限 幅 开 启 时 , 这 些 LED 指 示 灯 将 变 亮 , 当 信 号 出 现 高 电平 并 可 能 影 响 音 质 的 时 候 , 限 幅 器 可 有 效 地 削 减 信 号 电 平 。43、 电 源 指 示 灯调 音 台 开 启 时 ,LED 指 示 灯 将 变 亮 。37433942414038POWERPOD <strong>620</strong> R / POWERPOD <strong>740</strong> R29
<strong>Powerpod</strong> USB 录 音 机播 放1、 首 次 打 开 <strong>Powerpod</strong> 时 ,USB 录 音 机 的 显 示 屏 将 显 示 "ON" 字样 。2、 插 入 适 当 的 格 式 化 (FAT32)USB 闪 盘 。3、USB 录 音 机 将 显 示 即 将 播 放 的 文 件 的 类 型 (MP3 或 WAV) 并 自 动 找到 可 用 的 第 一 个 曲 目 。 屏 幕 将 显 示 "II 001"。 所 有 的 曲 目 按 字 母 顺序 排 列 , 先 播 放 MP3 文 件 , 然 后 才 是 WAV 文 件 。4、 按 下 播 放 / 暂 停 按 钮 播 放 当 前 音 轨 , 或 按 下 返 回 和 下 一 曲 按 钮 在音 轨 间 快 速 地 向 前 和 向 后 选 择 曲 目 。5、 如 果 当 前 播 放 的 是 U 盘 里 最 后 的 MP3 文 件 , 按 下 >>| 按 钮 可 跳 至第 一 曲 WAV 音 轨 。 同 样 , 如 果 播 放 的 是 最 后 的 WAV 音 轨 , 按 下>>| 可 跳 至 第 一 曲 MP3 音 轨 。6、USB 录 音 机 的 重 放 功 能 设 置 为 连 续 重 放 音 频 文 件 , 所 以 按 下 播放 按 钮 即 可 按 顺 序 播 放 所 有 的 音 频 文 件 。 所 有 文 件 播 放 完 后 ,又 会 从 头 重 复 。7、 播 放 或 暂 停 模 式 下 , 按 下 并 保 持 播 放 / 暂 停 按 钮 2 秒 将 会 回 复 至U 盘 中 的 第 一 首 曲 目 。录 音1、 插 入 U 盘 时 , 按 下 REC 按 钮 就 可 开 启 录 音 模 式 。2、 屏 幕 将 立 即 显 示 WAV( 录 音 格 式 ), 同 时 将 显 示 下 一 首 可 用 的曲 目 编 号 。 例 如 , 如 果 U 盘 里 一 共 有 12 个 WAV 文 件 , 屏 幕 将 显示 "II/REC013"。3、 录 音 模 式 待 命 / 暂 停 。 按 下 播 放 / 暂 停 按 钮 可 开 始 录 音 。4、 按 下 播 放 / 暂 停 按 钮 停 止 录 音 。 再 次 按 下 播 放 / 暂 停 按 钮 可 在 录音 暂 停 的 地 方 恢 复 录 音 。5、 录 音 时 , 按 下 REC 按 钮 可 保 存 当 前 录 制 的 音 轨 并 提 示 进 行 下 一曲 目 录 音 。 例 如 , 您 当 前 录 制 的 是 音 轨 13, 按 下 REC 按 钮 将 以音 轨 13 保 存 WAV 文 件 , 同 时 屏 幕 将 显 示 "II/REC 014" 音 轨 14 等待 录 音 。6、 按 下 并 保 持 播 放 / 暂 停 按 钮 可 结 束 录 音 并 返 回 至 重 放 模 式 。7、 结 束 录 音 后 , 重 放 模 式 将 播 放 第 一 曲 MP3 音 轨 。 在 这 种 情 况 下 ,按 下 back 返 回 按 钮 将 跳 至 最 后 一 曲 WAV 录 音 —— 换 句 话 说 也 就 是您 刚 刚 保 存 的 录 音 。注 意 :USB 旋 钮 控 制 仅 可 调 节 重 放 音 量 , 且 不 影 响 录 音 音 量 。 调 节 录 音 音 量的 音 量 控 制 位 于 各 输 入 声 道 。<strong>Powerpod</strong> <strong>620</strong> R 和 <strong>Powerpod</strong> <strong>740</strong> R USB 录 音 机 的 最 佳 录 音 频 率 范围 是 50Hz 至 10kHz, 非 常 适 合 乐 队 排 演 , 会 议 , 学 校 集 会 以 及 其 他需 求 非 正 式 录 音 的 场 合 。 对 于 全 面 的 专 业 录 音 而 言 ,Phonic 推 荐 您使 用 可 连 接 Mac 和 PC 计 算 机 的 Helix Board 数 字 录 音 接 口 设 备 。HelixBoard 具 备 FireWire(IEEE 1394) 和 / 或 USB 接 口 , 是 任 何 可 能 情 况下 进 行 录 音 的 理 想 选 择 , 无 论 是 现 场 音 乐 会 还 是 录 音 棚 录 音 。 有 关<strong>Powerpod</strong> R 的 供 应 情 况 , 请 咨 询 离 您 最 近 的 Phonic 代 理 商 。 更 多资 讯 请 访 问 www.phonic.com/where/。30 POWERPOD <strong>620</strong> R / POWERPOD <strong>740</strong> R
规 格POWERPOD <strong>620</strong> RPOWERPOD <strong>740</strong> R功 放 声 道 数 2 2限 幅 器 无 28Ω 每 声 道 70 1454Ω 每 声 道 100 2208Ω 桥 接 单 声 道 200 440输 入 / 输 出Lo-Z / Hi-Z 声 道 6, 2 路 为 super Hi-Z (470KΩ) 4, 2 路 为 super Hi-Z (470KΩ)平 衡 式 麦 克 风 / 双 mono 高 电 平 声 道 2 32T 输 入 RCA RCAAUX 辅 助 倒 送 1 x 1/4" TRS, 非 平 衡 式 1 x 1/4" TRS, 非 平 衡 式主 单 声 道 1 x 1/4" TRS, 非 平 衡 式 1 x 1/4" TRS, 非 平 衡 式监 听 输 出 1 x 1/4" TRS, 非 平 衡 式 1 x 1/4" TRS, 非 平 衡 式EFX 效 果 输 出 1 x 1/4" TRS, 非 平 衡 式 1 x 1/4" TRS, 非 平 衡 式录 音 输 出 RCA RCA音 箱 输 出 5 x 1/4" TRS 5 x 1/4" TRSUSB 接 口 1 x USB-A 1 x USB-A主 控 制 区监 听 & AUX 辅 助 / EFX 效 果 输 出 主 控 制 2 2效 果 倒 送 至 监 听 器 无 是音 量 滑 杆 Moni, Main ( 旋 钮 式 ) Moni, Main ( 旋 钮 式 )USB 录 音 机 / 播 放 器录 音 取 样 比 44.1 kHz 44.1 kHz录 音 格 式 wav wav最 大 录 音 重 放 比 特 率 320 kbit/s 320 kbit/s支 持 重 放 格 式 wav, mp3 wav, mp3幻 象 电 源 +48VDC +48VDC32/40 位 效 果 处 理 器 16 种 音 乐 效 果 16 种 音 乐 效 果踏 板 开 关 数 字 效 果 静 音 : 开 / 关 数 字 效 果 静 音 : 开 / 关内 建 图 示 均 衡 器 立 体 声 7 段 2 x 7 段声 道 均 衡 2 段 , ±15dB 3 段 , ±15dB低 频 均 衡 80Hz 80Hz中 频 均 衡 无 2.5KHz高 频 均 衡 12KHz 12KHz串 音 (1KHz@0dBu, 频 宽 20Hz 至 20KHz, 声 道 输 入 至 main 1/2 输 出 )声 道 静 音 , 其 他 声 道 一 致 无
POWERPOD <strong>620</strong> RPOWERPOD <strong>740</strong> R总 谐 波 失 真功 放 输 出 , 1KHz, 20Hz 至 20KHz @50 W, 4Ω
Digital Effects Table TablA de Efectos Digitales 数 字 效 果 表Variable Parameter(time)FB ratioDensitySmall Hall 0.6s-1.75s 60-80Mid Room 0.08s-0.9s 50-80Plate 2.2s-3.5s 60-90Cathedral 3.3s-4.8s 80-100Mid Hall 1.2s-2.2s 70-100Jazz Lounge 0.4s-1.38s 50-90Multi-Delay 0.2s-1.5s 50-90Short Delay 150ms-600ms 50-90Vocal Plate 2.8s-4s 60-100Concert 1.75s-2.80s 70-90Stage 0.8s- 2.2s 60-90Doubler 60ms-180ms 60-80Echo 0.3s-2.8s 40-90Chorus 70-100Chorus Rev 60-100Spring 200ms-800ms 40-80*parameters and values are subject to change without noticePOWERPOD <strong>620</strong> R / POWERPOD <strong>740</strong> R33
APPLICATIONS APLICACIONES 应 用<strong>Powerpod</strong> <strong>620</strong> RVOCAL MICROPHONEMICRÓFONOS DE VOZ语 音 麦 克 风VOCAL MICROPHONEMICRÓFONOS DE VOZ语 音 麦 克 风KEYBOARDTECLADO键 盘 乐 器EFX PROCESSORPROCESADOR DE EFECTO效 果 处 理 器BASS GUITARGUITARRA BASS低 音 吉 他MICROPHONEMICRÓFONO麦 克 风SIDE FILL ACTIVE SPEAKEROR ANOTHER PA SYSTEMALTAVOZ ACTIVO DE RELLENOLATERAL U OTRO SISTEMA PA边 侧 接 入 有 源 音 箱 或 另 一 个 PA 系 统GUITAR AMPAMPLIFICADORDE GUITARRA吉 他 功 率 放 大 器USBELECTRIC GUITARGUITARRA ELÉCTICA电 吉 他MICROPHONEMICRÓFONO麦 克 风PCFLOOR MONITORSMONITORES DE PISO主 监 听 音 箱FLOOR MONITORSMONITORES DE PISO主 监 听 音 箱FOH MAIN SPEAKERSALTAVOCES PRINCIPALES FOHFOH 主 监 听 音 箱34 POWERPOD <strong>620</strong> R / POWERPOD <strong>740</strong> R
<strong>Powerpod</strong> <strong>740</strong> RKEYBOARDTECLADO键 盘 乐 器DRUM MACHINEMÁQUINA DE TAMBOR鼓 声 仿 真 器CD PLAYERREPRODUCTOR DE CDCD 播 放 器USBMICROPHONEMICRÓFONO麦 克 风MICROPHONEMICRÓFONO麦 克 风ELECTRIC GUITARGUITARRA ELÉCTICA电 吉 他BASSBAJO低 音 吉 他FOOT SWITCHINTERRUPTOR DE PEDAL脚 踏 开 关EFX PROCESSORPROCESADOR DE EFECTO效 果 处 理 器PCSIDE FILL ACTIVE SPEAKER OR ANOTHER PA SYSTEMALTAVOZ ACTIVO DE RELLENO LATERAL U OTRO SISTEMA PA边 侧 接 入 有 源 音 箱 或 另 一 个 PA 系 统FLOOR MONITORSMONITORES DE PISO主 监 听 音 箱FOH MAIN SPEAKERSALTAVOCES PRINCIPALES FOHFOH 主 监 听 音 箱POWERPOD <strong>620</strong> R / POWERPOD <strong>740</strong> R35
DIMENSIONS DIMENSIONES 尺 寸cBA<strong>Powerpod</strong> <strong>620</strong> R<strong>Powerpod</strong> <strong>740</strong> RA 440 mm (17.3" ) 471 mm (18.5")B 245 mm (9.6") 265 mm (10.4")C 275 mm (10.8") 275 mm (10.8")* All measurements are shown in mm/inches.* Todas las medidas están mostradas en mm/pulgadas.* 所 有 尺 寸 均 以 毫 米 mm/ 英 寸 inch 表 示 。36 POWERPOD <strong>620</strong> R / POWERPOD <strong>740</strong> R
BLOCK DIAGRAMS DIAGRAMAS DE BLOQUE 线 路 图<strong>Powerpod</strong> <strong>620</strong> R+48VLOW-ZHi-Z+48VLOW-ZSUPER HI-ZLOW-ZLINE1LINE2+TAPE/IN12HAAUX/INCHANNEL1CHANNEL_2 AS SAM AS CHANNEL_1LEVELHAEQMONITORPAD SW.LOWHIGHCHANNEL3CHANNEL_4 AS SAM AS CHANNEL_3LEVELHAEQMONITORPAD SW.LOWHIGHCHANNEL5CHANNEL_6 AS SAM AS CHANNEL_5LEVEL+EQLOWHIGHMONITORAUX IN_LEVELTAPE IN_LEVEL+SD/MP3 IN_LEVELPLAY+SD/MP3/USBRECEFFECTEFFECTEFFECTMAINEFFECTMONIRECMAINEFFECTMONIRECMAINMASTERMONMASTERPROGRAM(PUSH SEL.)REC. OUTDUAL G.EQ6012016-EFXPARAMETER7K16KMONIDISPLAYPA1MAIN BRIDGEMAIN MONITORMAIN1 MAIN2MAIN+MAIN-PA2DISPLAYMAIN OUTMAIN SPK.BRIG.SPK.MONI SPKMONITOR OUTFOOT SWEFFECT OUTABABPOWERPOD <strong>620</strong> R / POWERPOD <strong>740</strong> R37
<strong>Powerpod</strong> <strong>740</strong> RMP3/USB38 POWERPOD <strong>620</strong> R / POWERPOD <strong>740</strong> R
TO PURCHASE ADDITIONALPHONIC GEAR AND ACCESSO-RIESTo purchase Phonic gear and optionalaccessories, contact any authorizedPhonic distributor. For a list of Phonicdistributors please visit our website atwww.phonic.com and click on Get Gear.You may also contact Phonic directly andwe will assist you in locating a distributornear you.SERVICE AND REPAIRFor replacement parts, service and repairsplease contact the Phonic distributor inyour country. Phonic does not releaseservice manuals to consumers, and adviceusers to not attempt any self repairs, asdoing so voids all warranties. You canlocate a dealer near you athttp://www.phonic.com/where/.WARRANTY INFORMATIONPhonic stands behind every product wemake with a no-hassles warranty.Warranty coverage may be extended,depending on your region. Phonic Corporationwarrants this product for a minimumof one year from the original date ofpurchase against defects in material andworkmanship under use as instructed bythe user’s manual. Phonic, at its option,shall repair or replace the defective unitcovered by this warranty. Please retain thedated sales receipt as evidence of the dateof purchase. You will need it for anywarranty service. No returns or repairs willbe accepted without a proper RMA number(return merchandise authorization). Inorder to keep this warranty in effect, theproduct must have been handled and usedas prescribed in the instructions accompanyingthis warranty. Any tempering of theproduct or attempts of self repair voids allwarranty. This warranty does not coverany damage due to accident, misuse,abuse, or negligence. This warranty isvalid only if the product was purchasednew from an authorized Phonicdealer/distributor. For complete warrantypolicy information, please visithttp://www.phonic.com/warranty/.CUSTOMER SERVICE ANDTECHNICAL SUPPORTWe encourage you to visit our online helpat http://www.phonic.com/support/. Thereyou can find answers to frequently askedquestions, tech tips, driver downloads,returns instruction and other helpfulinformation. We make every effort toanswer your questions within one businessday.CÓMO COMPRAR EQUIPO ADICIONALY ACCESORIOS DE PHONICPara comprar equipos y accesorios opcionales dePhonic, póngase en contacto con cualquiera de losdistribuidores autorizados de Phonic. Para una listade los distribuidores de Phonic visite nuestra páginaweb en www.phonic.com y entre a la sección GetGear. También, puede ponerse en contacto directamentecon Phonic y le ayudaremos a encontrar undistribuidor cerca de usted.SERVICIO Y REPARACIÓNPara refacciones de reemplazo y reparaciones, porfavor póngase en contacto con nuestro distribuidorde Phonic en su país. Phonic no distribuye manualesde servicio directamente a los consumidores y, avisaa los usuarios que no intenten hacer cualquierreparación por si mismo, haciendo ésto invalidarátodas las garantías del equipo. Puede encontrar undistribuidor cerca de usted enhttp://www.phonic.com/where/.INFORMACIÓN DE LA GARANTIAPhonic respalda cada producto que hacemos conuna garantía sin enredo. La cobertura de garantíapodría ser ampliada dependiendo de su región.Phonic Corporation garantiza este producto por unmínimo de un año desde la fecha original de sucompra, contra defectos en materiales y mano deobra bajo el uso que se instruya en el manual delusuario. Phonic, a su propia opinión, reparará ocambiará la unidad defectuosa que se encuentradentro de esta garantía. Por favor, guarde los recibosde venta con la fecha de compra como evidencia dela fecha de compra. Va a necesitar este comprobantepara cualquier servicio de garantía. No se aceptaránreparaciones o devoluciones sin un número RMAapropiado (return merchandise autorization). Enorden de tener esta garantía válida, el productodeberá de haber sido manejado y utilizado como sedescribe en las instrucciones que acompañan estagarantía. Cualquier atentado hacia el producto ocualquier intento de repararlo por usted mismo,cancelará completamente esta garantía. Estagarantía no cubre daños ocasionados por accidentes,mal uso, abuso o negligencia. Esta garantía esválida solamente si el producto fue comprado nuevode un representante/distribuidor autorizado dePhonic. Para la información completa acerca de lapolítica de garantía, por favor visitehttp://www.phonic.com/warranty/.SERVICIO AL CLIENTE Y SOPORTETÉCNICOLe invitamos a que visite nuestro sistema de ayudaen línea en www.phonic.com/support/. Ahí podráencontrar respuestas a las preguntas más frecuentes,consejos técnicos, descarga de drivers, instruccionesde devolución de equipos y más informaciónde mucho interés. Nosotros haremos todo elesfuerzo para contestar sus preguntas lo antesposible.购 买 Phonic 产 品 及 其 周 边器 材使 用 者 如 需 购 买 Phonic 产 品 及 其 周 边器 材 , 请 与 Phonic 授 权 的 经 销 商 取 得联 系 。 访 问 我 们 的 网 站www.phonic.com, 点 击 Get Gear 即可 查 询 Phonic 地 区 经 销 商 的 联 系 方式 。 您 也 可 直 接 联 系 Phonic 公 司 , 我们 将 协 助 您 快 速 定 位 离 您 最 近 的 经 销商 。服 务 与 维 修订 购 替 换 零 件 或 维 修 事 宜 , 请 与 您 所在 地 区 的 Phonic 经 销 商 联 系 。Phonic不 对 使 用 者 发 行 维 修 手 册 , 且 建 议 使用 者 切 勿 擅 自 维 修 机 器 , 否 则 将 无 法获 得 任 何 保 固 服 务 。 您 可 登 录http://www.phonic.com/where/ 定 位 离您 最 近 的 经 销 商 。产 品 保 固 资 讯Phonic 承 诺 对 每 项 产 品 提 供 最 完 善 的保 固 服 务 。 我 们 将 根 据 客 户 群 体 所 在的 地 区 来 拓 展 我 们 的 服 务 所 涵 盖 的 范围 。 自 原 始 购 买 日 起 ,Phonic 即 对 在严 格 遵 照 使 用 说 明 书 的 操 作 规 范 下 ,因 产 品 材 质 和 做 工 所 产 生 的 问 题 提 供至 少 1 年 的 保 固 服 务 。Phonic 可 在 此保 固 范 围 内 任 意 地 选 择 维 修 或 更 换 缺陷 产 品 。 请 务 必 妥 善 保 管 购 买 产 品 的凭 证 , 以 此 获 得 保 固 服 务 。 未 获 得RMA 号 的 将 不 受 理 退 货 , 以 及 保 固 服务 。 保 固 服 务 只 限 于 正 常 使 用 情 况 下产 生 的 问 题 。 使 用 者 需 严 格 遵 照 使 用说 明 书 正 确 使 用 , 任 何 肆 意 损 坏 或 擅自 维 修 机 器 , 意 外 事 故 , 错 误 使 用 ,人 为 疏 忽 , 都 将 不 在 保 固 受 理 范 围内 。 此 外 , 担 保 维 修 只 限 于 在 授 权 经销 商 处 的 有 效 购 买 。 欲 知 全 部 的 保 固政 策 资 讯 , 请 参 考http://www.phonic.com/warranty/。客 户 服 务 和 技 术 支 持欢 迎 您 访 问 我 们 的 网 站http://www.phonic.com/support/。 从该 网 站 上 , 您 可 获 得 各 种 常 见 问 题 的答 案 , 技 术 指 导 , 并 可 下 载 产 品 驱动 , 获 得 有 关 退 货 指 导 以 及 其 它 帮 助资 讯 。 我 们 竭 尽 全 力 在 一 个 工 作 日 内回 复 您 的 询 问 。support@phonic.com http://www.phonic.com
“F”–Feedback Silencer– Silenciador deRealimentación– 回 授 消 除 器While the <strong>Powerpod</strong> manual that accompaniesthis insert sheet features a good amount ofinformation on the operation and functionality ofyour new powered mixer, there is at least onefeature that is not mentioned. Your <strong>Powerpod</strong>powered mixer also offers a feedback killer, notdescribed in the manual. The feedback silencerwill effectively remove feedback frequenciesfrom the main stereo output.The Phonic feedback silencer found on the<strong>Powerpod</strong> FR & F offers 30 filters per channel.Each of these filters is either a “locked” or“dynamic” filter. Dynamic filters will activelyseek and destroy frequencies. A fixed filter willlock onto these frequencies. The basicdifference is that a fixed filter will lock ontofrequencies until reset, while dynamic filters willcontinuously find and remove feedbackfrequencies until each filter is used, then startall over again.Operation:1. To begin, simply push the FB button. TheLED indicator will continuously flash to indicatedynamic filter mode is activated. This willcontinuously seek and destroy feedbackwithout removing the music or vocal essences.2. Push the FB button a second time to lock thefeedback killer at the frequencies detected indynamic mode. In this mode, the LED indicatorwill light up steadily. Locked mode isparticularly useful for professional soundengineers at rehearsal sessions.3. Pushing the FB button again will bypass thefeedback killer. When bypassed, the LEDindicator will not light up.Note: When feedback killer is active, the totalprogram level may decrease 2 or 3 dB -depending on the program content - which canbe compensated for using the main levelcontrol.Push and hold the FB button for 2 seconds toreset the filters. This will revert the unit back todynamic mode.The two operation modes (dynamic and locked)allow for flexible operation ideal for mostapplications.El manual de <strong>Powerpod</strong> que acompaña esta páginainsertada que figura una buena variedad de informaciónen la operación y funcionalidad de su nueva mezcladorapotenciada, no obstante, habrá por lo menos unacaracterística no mencionada. Su mezcladora potenciadade <strong>Powerpod</strong> también ofrece un killer de realimentaciónque no esta escrita en el manual. Este silenciador derealimentación removerá efectivamente las frecuenciasde realimentación desde la salida central estéreo.Este silenciador de realimentación se encuentra el<strong>Powerpod</strong> FR & F que ofrecen 30 filtros por canal. Cadauno de estos filtros pueden ser un filtro ¨locked¨ o¨dinámico¨. Los filtros dinámicos localizarán activamentey destruirá frecuencias. Un filtro arreglado cerrará estasfrecuencias. La diferencia básica es que el filtro arregladose ajustará a las frecuencias hasta que seareprogramada, mientras que los filtros dinámicoscontinuarán buscando y removerá realimentaciones defrecuencia hasta que cada filtro es usado, luegocomenzará nuevamente.Operación:1. Para comenzar, simplemente presione el botón FB. Elindicador LED continuará iluminando para indicar que elmodo de filtro dinámico está activad. Estarácontinuamente buscando y destruyendorealimentaciones sin remover la música o esencia vocal.2. Presione el botón FB por segunda vez franquear elkiller de realimentación de las frecuencias detectadas enel modo dinámico. En este modo, el indicador LED seiluminará solidamente. El modo franqueado (Locked) esparticularmente útil para ingenieros profesionales desonido para sesiones de ensayo.3. Presione el botón FB nuevamente y el bypass del killerde realimentación. Cuando el bypass, el indicador deLED no se iluminará.Note: Cuando el killer de realimentación es activado, eltotal de nivel de programas puede descender 2 o 3 dB –depende el contenido del programa- que puede sercompensado en usar el control central de nivel.Presione y sostenga el botón FB por 2 segundos parareactivar los filtros. Esto retornará la unidad al mododinámico.Los dos modos de operaciones (dinámico y locked)permite más flexibilidad operativa que es ideal paraaplicaciones.<strong>Powerpod</strong> 说 明 书 随 附 的 本 插 页 将针 对 您 新 买 的 功 放 调 音 台 , 叙 述至 少 一 个 未 能 在 说 明 书 中 提 及 的性 能 的 操 作 和 功 能 。 您 购 买 的 功放 调 音 台 其 实 设 有 回 授 消 除 电路 , 这 一 点 在 说 明 书 中 并 未 提及 。 该 回 授 消 除 器 可 从 主 立 体 声输 出 信 号 中 有 效 地 消 除 回 授 频率 。<strong>Powerpod</strong> FR & F 内 置 的 回 授 消 除器 可 为 每 声 道 提 供 30 个 滤 波 器 。这 些 滤 波 器 不 是 “ 锁 定 ” 滤 波 , 就 是“ 动 态 ” 滤 波 。 动 态 滤 波 器 可 动 态 地搜 索 并 消 除 回 授 频 率 。 锁 定 滤 波器 可 搜 索 并 锁 定 回 授 频 率 。 两 种滤 波 器 的 基 本 区 别 是 , 锁 定 滤 波器 可 锁 定 频 率 直 至 重 新 设 置 , 动态 滤 波 器 可 积 极 地 搜 索 并 消 除 回授 频 率 直 至 每 个 滤 波 器 都 已 用上 , 然 后 再 重 新 开 始 。操 作 :1. 首 先 按 下 FB 按 钮 一 次 。LED 指示 灯 将 不 断 地 闪 动 以 提 示 动 态 滤波 模 式 已 开 启 。 滤 波 器 将 在 不 影响 音 质 的 前 提 下 不 断 地 搜 索 并 消除 回 授 。2. 再 次 按 下 FB 按 钮 可 将 回 授 消 除器 锁 定 于 动 态 模 式 下 已 侦 测 到 的频 率 。 此 种 操 作 模 式 下 ,LED 指示 灯 将 持 续 亮 灯 。 锁 定 模 式 特 别适 用 于 表 演 彩 排 。3. 第 三 次 按 下 FB 按 钮 可 旁 通 回 授消 除 器 。 此 种 情 况 下 ,LED 指 示灯 不 会 变 亮 。提 示 : 回 授 消 除 器 开 启 时 , 总 音乐 电 平 将 减 少 2dB 或 3dB—— 具 体取 决 于 音 乐 的 性 质 —— 减 少 的 电平 可 通 过 调 节 音 量 控 制 进 行 补偿 。按 下 并 保 持 FB 按 钮 2 秒 可 重 新 设置 滤 波 器 。 此 时 , 回 授 消 除 器 将重 新 恢 复 至 动 态 模 式 。两 种 操 作 模 式 ( 动 态 或 锁 定 ) 使 得 用户 可 灵 活 地 在 各 种 应 用 中 使 用 回授 消 除 器 。support@phonic.com http://www.phonic.com