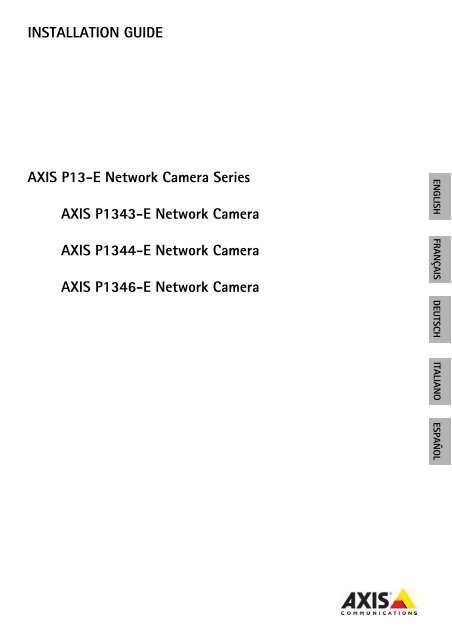
INSTALLATION GUIDE AXIS P13-E Network Camera ... - IP Way
INSTALLATION GUIDE AXIS P13-E Network Camera ... - IP Way
INSTALLATION GUIDE AXIS P13-E Network Camera ... - IP Way
- No tags were found...

You also want an ePaper? Increase the reach of your titles
YUMPU automatically turns print PDFs into web optimized ePapers that Google loves.
<strong>AXIS</strong> <strong>P13</strong>-E <strong>Network</strong> <strong>Camera</strong> Series Installation Guide Page 3Safeguards and WarningsPlease read through this Installation Guide carefully before installing the product. Keep theInstallation Guide for further reference.! CAUTION!• When transporting the Axis product, use the original packaging or equivalent to preventdamage to the product.• Avoid exposing the Axis product to vibration, shocks or heavy pressure and do not install thecamera on unstable brackets, unstable or vibrating surfaces or walls, since this could causedamage to the product.• Only use handtools when installing the camera, the use of electrical tools or excessive forcecould cause damage to the product.• Do not use chemicals, caustic agents, or aerosol cleaners. Use a damp cloth for cleaning.• Only use accessories and replacement parts provided or recommended by Axis.• Do not attempt to repair the product by yourself, contact Axis or your Axis reseller for servicemattersENGLISH! IMPORTANT!• This Axis product must be used in compliance with local laws and regulations.• Store and transport the Axis product in a dry and ventilated environment.Safety Notice - Battery replacementThis Axis product uses a 3.0V CR2032 Lithium battery as the power supply for its internal real-time clock (RTC).Under normal conditions this battery will last for a minimum of 5 years. Low battery power affects the operation ofthe RTC, causing it to reset at every power-up. A log message will appear when the battery needs replacing. Thebattery should not be replaced unless required!If the battery does need replacing, please contact www.axis.com/techsup for assistance.• Danger of Explosion if battery is incorrectly replaced• Replace only with the same or equivalent battery, as recommended by the manufacturer.• Dispose of used batteries according to the manufacturer's instructions.
<strong>AXIS</strong> <strong>P13</strong>-E <strong>Network</strong> <strong>Camera</strong> Series Installation Guide Page 5<strong>AXIS</strong> <strong>P13</strong>43-E, <strong>AXIS</strong> <strong>P13</strong>44-E& <strong>AXIS</strong> <strong>P13</strong>46-EInstallation GuideThis installation guide provides instructions for installing an <strong>AXIS</strong> <strong>P13</strong>43-E/<strong>P13</strong>44-E/<strong>P13</strong>46-E<strong>Network</strong> <strong>Camera</strong> on your network. For all other aspects of using the product, please see the User’sManual, available on the CD included in this package, or from www.axis.comInstallation stepsENGLISH1. Check the package contents against the list below.2. Hardware overview. See page 6.3. Install the hardware. See page 8.4. Assign an <strong>IP</strong> address. See page 11.5. Set the password. See page 14.6. Adjust zoom and focus. See page 17.Important!This product must be used incompliance with local laws andregulations.Package contentsItem<strong>Network</strong> cameraWall bracketTools<strong>Network</strong> cableCDPrinted MaterialsModels/variants/notes<strong>AXIS</strong> <strong>P13</strong>43-E/<strong>AXIS</strong> <strong>P13</strong>44-E/<strong>AXIS</strong> <strong>P13</strong>46-EWall bracket with internal cable channelTorx T20 screwdriverAllen keyOutdoor network cable 5 m (16 ft.) with gasket<strong>AXIS</strong> <strong>Network</strong> Video Product CD, including product documentation, installationtools and other software<strong>AXIS</strong> <strong>P13</strong>-E <strong>Network</strong> <strong>Camera</strong> Series Installation Guide (this document)Axis Warranty DocumentExtra serial number label (2x)Optional accessoriesSee www.axis.com for information on available accessories
Page 6<strong>AXIS</strong> <strong>P13</strong>-E <strong>Network</strong> <strong>Camera</strong> Series Installation GuideHardware overviewSD memory cardStatus LEDZoom pullerFocus pullerRear viewAudio in<strong>Network</strong> connectorAudio outBottom viewPower LED<strong>Network</strong>ControlIris connectorPower connectorI/O terminal connectorProduct number (P/N) &Serial number (S/N)Example image: <strong>AXIS</strong> <strong>P13</strong>43-E
<strong>AXIS</strong> <strong>P13</strong>-E <strong>Network</strong> <strong>Camera</strong> Series Installation Guide Page 7Part number (P/N) & Serial number (S/N).The serial number may be requiredduring the installation.Sunshield adjustmentscrew (2x)SunshieldTop cover<strong>Network</strong> cameraENGLISH<strong>Network</strong> connectorSafety wire tabCable holesBottom cover screws (4x)Cable coverCable cover screws 2x)Bottom coverHeater Caution!May be hotGasket<strong>Network</strong> cable (routethrough wall bracket)Bracket adapterBracket screws (4x)Bracket adjustment screwWall bracketExample image: <strong>AXIS</strong> <strong>P13</strong>43-E
Page 8<strong>AXIS</strong> <strong>P13</strong>-E <strong>Network</strong> <strong>Camera</strong> Series Installation GuideInstall the hardwareThe instructions below describe the installation of <strong>AXIS</strong> <strong>P13</strong>43-E/<strong>P13</strong>44-E/<strong>P13</strong>46-E.Prepare the network cableIf a cable other than the provided cable is used, you need to prepare a network cable with a gasket.Gently force the cable through the gasket provided and attach a network connector. It may benecessary to pierce a hole in the gasket with the supplied screwdriver.Notes:• Do not force the network connector into the gasket.• Do not pierce the gasket with a knife or other sharp object.Install the wall bracket1. Use the supplied drill template to prepare a wall, ceiling, or pole for installation of the wallbracket.2. Route the network cable through the wall bracket, the rubber gasket should be on the bracketadapter end of the wall bracket, see illustration on page 7.3. Install the wall bracket on a wall, ceiling, or pole and make sure that the screws and plugs areappropriate for the material (e.g. wood, metal, sheet rock, stone).Notes:• The weight of the camera is shown in the table below. Check that the material is strong enough tosupport this weight.ModelWeight<strong>AXIS</strong> <strong>P13</strong>43-E 3090 g (6.8 lb.)<strong>AXIS</strong> <strong>P13</strong>44-E 3120 g (6.9 lb.)<strong>AXIS</strong> <strong>P13</strong>46-E 3130 g (6.9 lb.)• For more technical specifications, please see the User’s Manual, available on the CD included in thispackage, or from www.axis.com
<strong>AXIS</strong> <strong>P13</strong>-E <strong>Network</strong> <strong>Camera</strong> Series Installation Guide Page 9Install the camera on the bracket1. Install the camera with the bottom cover on the bracket and tighten the bracket screws.2. Remove the gasket from one of the holes in the bottom cover, see illustration on page 10.3. Route the cable through the hole and attach the cable gasket to the hole.<strong>Network</strong> cable (routethrough wall bracket)Cable holesBracket screw (4x)Cable coverCable cover screw (2x)ENGLISHWall bracketBracket adjustment screw4. Connect the cables, see Connect the cables, on page 10.5. Take the top cover and attach the safety wire to the tab on the bottom cover.6. Install the top cover. Make sure to tighten diagonally opposite bottom cover screws a few turnsat a time until all are tight. This will help ensure that the bottom cover gasket is compressedevenly. Do not attempt to tighten the screws completely the first time.7. Install the cable cover and tighten the cable cover screws.8. Loosen the sun screen adjustment screws and adjust the sunshield to the front position.9. Loosen the bracket adjustment screw to aim the camera to the point of interest. See Access thevideo stream, on page 16 for information on how to view the video stream.
Page 10<strong>AXIS</strong> <strong>P13</strong>-E <strong>Network</strong> <strong>Camera</strong> Series Installation GuideConnect the cables1. Optionally insert an SD memory card (not included) into the SDHC (Secure Digital HighCapacity) card slot. A standard or high capacity SD card is required to store images locally inthe camera.2. Optionally connect external input/output devices. See page 21 for information on the terminalconnector pins. Prepare the cables with gaskets, see Prepare the network cable, on page 8, androute the cables through the cable holes into the bottom cover and to the camera.3. Connect the camera to the network using a shielded network cable. Connect the network cableto the network connector on the bottom. The network cable and the I/O cable between thebottom cover and the camera are already connected at delivery<strong>Network</strong> cablesI/O cableBottom cover<strong>Network</strong> connector (PoE OUT,connected at delivery)Cable holes<strong>Network</strong> connector (PoE IN)LED indicatorArctic Temperature Control switch(enabling not required)Alarm output(connected at delivery)4. Check that the indicator LEDs indicate the correct conditions. See the table on page 22 forfurther details. Note that the Status LED can be configured to be unlit during normal operation.
<strong>AXIS</strong> <strong>P13</strong>-E <strong>Network</strong> <strong>Camera</strong> Series Installation Guide Page 11Assign an <strong>IP</strong> addressMost networks today have a DHCP server that automatically assigns <strong>IP</strong> addresses to connecteddevices. If your network does not have a DHCP server the network camera will use 192.168.0.90 asthe default <strong>IP</strong> address.If you would like to assign a static <strong>IP</strong> address, the recommended method in Windows is either <strong>AXIS</strong><strong>IP</strong> Utility or <strong>AXIS</strong> <strong>Camera</strong> Management. Depending on the number of cameras you wish to install,use the method that best suits your purpose.Both of these free applications are available on the Axis <strong>Network</strong> Video Product CD supplied withthis product, or they can be downloaded from www.axis.com/techsupMethod Recommended for Operating system<strong>AXIS</strong> <strong>IP</strong> UtilitySee page 12Single cameraSmall installationsWindowsENGLISH<strong>AXIS</strong> <strong>Camera</strong> ManagementSee page 13Multiple camerasLarge installationsInstallation on a different subnetWindows 2000Windows XP ProWindows 2003 ServerWindows VistaNotes:• If assigning the <strong>IP</strong> address fails, check that there is no firewall blocking the operation.• For other methods of assigning or discovering the <strong>IP</strong> address, e.g. in other operating systems, seepage 19.
Page 12<strong>AXIS</strong> <strong>P13</strong>-E <strong>Network</strong> <strong>Camera</strong> Series Installation Guide<strong>AXIS</strong> <strong>IP</strong> Utility - single camera/small installation<strong>AXIS</strong> <strong>IP</strong> Utility automatically discovers and displays Axis devices on your network. The applicationcan also be used to manually assign a static <strong>IP</strong> address.Note that the computer running <strong>AXIS</strong> <strong>IP</strong> Utility must be on the same network segment (physicalsubnet) as the network camera.Automatic discovery1. Check that the network camera is connected to the network and that power has been applied.2. Start <strong>AXIS</strong> <strong>IP</strong> Utility.3. When the network camera appears in the window, double-click to open its home page.4. See page 14 for instructions on how to assign the password.Set the <strong>IP</strong> address manually (optional)1. Acquire an unused <strong>IP</strong> address on the same network segment as your computer.2. Select the network camera in the list.3. Click the Assign new <strong>IP</strong> address to selected device button and enter the <strong>IP</strong> address.4. Click Assign and follow the on-screen instructions. Note that the camera must be restardedwithin 2 minutes for the new <strong>IP</strong> address to be set.5. Click Home Page to access the camera’s web pages.6. See page 14 for instructions on how to set the password.
<strong>AXIS</strong> <strong>P13</strong>-E <strong>Network</strong> <strong>Camera</strong> Series Installation Guide Page 13<strong>AXIS</strong> <strong>Camera</strong> Management - multiple cameras/large installations<strong>AXIS</strong> <strong>Camera</strong> Management can automatically discover multiple Axis devices, show connectionstatus, manage firmware upgrades and set <strong>IP</strong> addresses.ENGLISHAutomatic discovery1. Check that the camera is connected to the network and that power has been applied.2. Start <strong>AXIS</strong> <strong>Camera</strong> Management. When the network camera appears in the window, right-clickthe link and select Live View Home Page.3. See page 14 for instructions on how to set the password.Assign an <strong>IP</strong> address in a single device1. Select the network camera in <strong>AXIS</strong> <strong>Camera</strong> Management and clickthe Assign <strong>IP</strong> button .2. Select Assign the following <strong>IP</strong> address and enter the <strong>IP</strong> address, thesubnet mask and default router the device will use.3. Click OK.Assign <strong>IP</strong> addresses in multiple devices<strong>AXIS</strong> <strong>Camera</strong> Management speeds up the process of assigning<strong>IP</strong> addresses to multiple devices, by suggesting <strong>IP</strong> addressesfrom a specified range.1. Select the devices you wish to configure (different modelscan be selected) and click the Assign <strong>IP</strong>button .2. Select Assign the following <strong>IP</strong> address range and enter therange of <strong>IP</strong> addresses, the subnet mask and default routerthe devices will use.3. Click Update. Suggested <strong>IP</strong> addresses are listed under New<strong>IP</strong> Addresses and can be edited by selecting a device and clicking Edit.4. Click OK.
Page 14<strong>AXIS</strong> <strong>P13</strong>-E <strong>Network</strong> <strong>Camera</strong> Series Installation GuideSet the passwordTo gain access to the product, the password for the default administrator user root must be set. Thisis done in the ‘Configure Root Password’ dialog, which is displayed when the network camera isaccessed for the first time.To prevent network eavesdropping when setting the root password, this can be done via anencrypted HTTPS connection, which requires an HTTPS certificate.Note: HTTPS (Hypertext Transfer Protocol over SSL) is a protocol used to encrypt the trafficbetween web browsers and servers. The HTTPS certificate controls the encrypted exchangeof information.To set the password via a standard HTTP connection, enter it directly in the first dialog shownbelow.To set the password via an encrypted HTTPS connection, follow these steps:1. Click the Create self-signed certificate button.2. Provide the requested information and click OK. The certificate is created and the password cannow be set securely. All traffic to and from the network camera is encrypted from this point on.3. Enter a password and then re-enter it to confirm the spelling. Click OK. The password has nowbeen configured.To create an HTTPS connection,start by clicking this button.To configure the password directlyvia an unencrypted connection, enterthe password here.4. To log in, enter the user name “root” in the dialog as requested.Note: The default administrator user name root cannot be deleted.
<strong>AXIS</strong> <strong>P13</strong>-E <strong>Network</strong> <strong>Camera</strong> Series Installation Guide Page 155. Enter the password as set above, and click OK.Note: If the password is lost, the camera must be reset to the factory default settings. Seepage 24.6.<strong>AXIS</strong> <strong>P13</strong>46-E: The capture mode must be set thefirst time <strong>AXIS</strong> <strong>P13</strong>46-E is accessed. Select thedesired capture mode from the drop-down list andclick OK.Note: The capture mode can be changed laterfrom the product’s web pages, but this will resetmost other settings. For more information, seethe online help or User’s Manual.ENGLISH
Page 16<strong>AXIS</strong> <strong>P13</strong>-E <strong>Network</strong> <strong>Camera</strong> Series Installation GuideAccess the video streamThe Live View page of the network camera is displayed, with links to the Setup tools, which allowyou to customize the camera.If required, click Yes to install AMC (<strong>AXIS</strong> Media Control), which allows viewing of the video streamin Internet Explorer. You will need administrator rights on the computer to do this.If required, click the link to install missing decoders.Note: To install AMC in Windows Vista and Windows 7, you must run Internet Explorer asadministrator. Right-click the Internet Explorer icon and select Run as administrator.Setup – Provides all thetools for configuring thecamera to requirements.Help – Displays onlinehelp on all aspects ofusing the camera.
<strong>AXIS</strong> <strong>P13</strong>-E <strong>Network</strong> <strong>Camera</strong> Series Installation Guide Page 17Adjust zoom and focusTo adjust the zoom and focus follow these instructions:1. Open the product’s home page and go to Setup > Basic Setup > Focus.2. On the Basic tab, click Open iris. If the button is inactive, the iris is already open.3. If focus has been set before, click Reset to reset the back focus.4. Loosen the zoom and focus pullers on the lens by turning them anti-clockwise. Move the pullersto set zoom and focus and check the quality of the image in the image window.Note:If the camera is mounted so that one cannot look at the image and move the pullersat the same time, use the Focus Assistant instead. See page 18.5. Retighten the zoom and focus pullers.6. On the Focus page, click Fine-tune focus automatically and wait until the automatic finetuningis completed.7. Click Enable iris. If the button is inactive, the iris has already been enabled.8. If needed, make further adjustments on the Advanced tab. See the online help or User’s Manualfor more information.Notes:• Set focus as precisely as possible with the focus puller or Focus Assistant before starting theautomatic fine-tuning. Using the focus puller normally gives the best result.• The iris should always be opened to its maximum while focusing, which gives the smallest depth offield and thus the best conditions for correct focusing.ENGLISHFocus pullerZoom pullerControl buttonStatus LEDExample image: <strong>AXIS</strong> <strong>P13</strong>43-E
Page 18<strong>AXIS</strong> <strong>P13</strong>-E <strong>Network</strong> <strong>Camera</strong> Series Installation GuideFocus AssistantTo focus using the Focus Assistant, follow the instructions in steps 1 - 3 on page 17 before you startwith the steps below.1. Mount or place the camera so that it cannot be moved.2. Loosen the zoom puller by turning it anti-clockwise. Move the puller to set the zoom level.Retighten the zoom puller.3. Set the camera to its extreme distant-focus position by loosening the focus puller and turningthe lens fully clockwise.4. Press and quickly release the Control button. When the Status LED flashes green, the FocusAssistant is enabled.If the Status LED flashes either red or amber before you are able to adjust the lens, skip to step7 to exit the Focus Assistant and repeat steps 3 - 7. See the notes below.5. Gently turn the lens anti-clockwise until it stops.6. Finally, turn the lens slowly clockwise until the status indicator flashes green or amber (notred).7. To exit the Focus Assistant, press the Control button again.Note: The Focus Assistant is switched off automatically after 15 minutes.8. Retighten the focus puller.9. Open the Live View page in the web browser and check the quality of the image.10. Continue with steps 6 - 8 on page 17.Notes:• The view in front of the camera should not be changed during focus adjustment (steps 5 and 6). Ifthe camera is moved, or if a finger or other object is placed in front of the lens, steps 3 - 7 will haveto be repeated.• If movements in front of the camera cannot be avoided, the Focus Assistant should not be used.• If the Control button is not released within two seconds, <strong>AXIS</strong> Dynamic DNS Service is enabledinstead of the Focus Assistant.• If the camera is mounted so that the Control button cannot be accessed, you can still use the FocusAssistant. Follow the instructions above but mount the camera after step 4 (pressing the Controlbutton) instead and skip step 7.
<strong>AXIS</strong> <strong>P13</strong>-E <strong>Network</strong> <strong>Camera</strong> Series Installation Guide Page 19Other methods of setting the <strong>IP</strong> addressThe table below shows the other methods available for setting or discovering the <strong>IP</strong> address. Allmethods are enabled by default, and all can be disabled.Use in operatingsystemNotesUPnP Windows When enabled on your computer, the camera is automaticallydetected and added to My <strong>Network</strong> Places/<strong>Network</strong>.Bonjour<strong>AXIS</strong> Dynamic DNSServiceMAC OSX(10.4 or later)AllApplicable to browsers with support for Bonjour. Navigate to theBonjour bookmark in your browser (e.g. Safari) and click on thelink to access the camera’s web pages.A free service from Axis that allows you to quickly and simplyinstall your camera. Requires an Internet connection with noHTTP proxy. See www.axiscam.net for more information.ARP/Ping All See below. The command must be issued within 2 minutes ofconnecting power to the camera.DHCP Server All To view the admin pages for the network DHCP server, see theserver’s own documentation.ENGLISHSet the <strong>IP</strong> address with ARP/Ping1. Acquire a free static <strong>IP</strong> address on the same network segment your computer is connected to.2. Locate the serial number (S/N) on the product label on the camera.3. Open a command prompt on your computer and enter the following commands:Windows syntax:arp -s ping -l 408 -t UNIX/Linux/Mac syntax:arp -s tempping -s 408 Windows example:arp -s 192.168.0.125 00-40-8c-18-10-00ping -l 408 -t 192.168.0.125UNIX/Linux/Mac example:arp -s 192.168.0.125 00:40:8c:18:10:00 tempping -s 408 192.168.0.1254. Check that the network cable is connected to the camera and then start/restart the camera, bydisconnecting and reconnecting power.5. Close the command prompt when you see ‘Reply from 192.168.0.125:...’ or similar.6. In your browser, type in http:// in the Location/Address field and press Enter onyour keyboard.Notes:• To open a command prompt in Windows: from the Start menu, select Run... and type cmd. Click OK.• To use the ARP command in Windows Vista, right-click the command prompt icon and selectRun as administrator.• To use the ARP command on a Mac OS X, use the Terminal utility in Application > Utilities.
Page 20<strong>AXIS</strong> <strong>P13</strong>-E <strong>Network</strong> <strong>Camera</strong> Series Installation GuideUnit connectors<strong>Network</strong> connector - RJ-45 Ethernet connector. Supports Power over Ethernet. Using shieldedcables is recommended.Power connector - 2-pin connector block used for power input.Function Pin DescriptionGND 1 GroundDC Power 2 Power input 8-20 V DC<strong>AXIS</strong> <strong>P13</strong>43-E: max 6.4 W<strong>AXIS</strong> <strong>P13</strong>44-E: max 6.4 W<strong>AXIS</strong> <strong>P13</strong>46-E: max 9.6 W1 2Audio in - 3.5 mm input for a mono microphone, or a line-in mono signal (left channel is usedfrom a stereo signal).Audio out - Audio output (line level) that can be connected to a public address (PA) system or anactive speaker with a built-in amplifier. A pair of headphones can also be attached. A stereoconnector must be used for the audio out.SDHC memory card slot - A standard or high capacity SD memory card can be used for localrecording with removable storage.SD memory cardTo insert an SD card, lift the SD card cover on the rear of the network camera, and carefully insertthe SD card into its slot.To remove an SD card lift the cover and gently push the card in and release it. The SD card will backout of the slot where it can then be removed.
<strong>AXIS</strong> <strong>P13</strong>-E <strong>Network</strong> <strong>Camera</strong> Series Installation Guide Page 21I/O terminal connector - Used in applications for e.g. motiondetection, event triggering, time lapse recording and alarmnotifications. In addition to an auxiliary power and a GND pin, itprovides the interface to:• 1 digital output – For connecting external devices suchas relays and LEDs. Connected devices can be activatedby the VAPIX® Application Programming Interface (API),by the output buttons on the Live View page or by anEvent Type. The output will show as active (shown underEvents > Port Status) if the alarm device is activated.Pin 4 Pin 2Pin 3 Pin 1• 1 digital input – An alarm input for connecting devices that can toggle between an openand closed circuit, for example: PIRs, door/window contacts, glass break detectors, etc.When a signal is received the state changes and the input becomes active (shown underEvents > Port Status).ENGLISHNote:The I/O connector on <strong>AXIS</strong> <strong>P13</strong>43-E/<strong>P13</strong>44-E/<strong>P13</strong>46-E is connected to the housing electronicsat delivery and will trigger an input port event to indicate a fan or heater errorwhen activated. Please refer to the User’s Manual User’s Manual, available on the CD providedwith this product, or from www.axis.com, for information on how to set up an event.Function Pin Notes SpecificationsGND 1 Ground3.3 V DCPowerConfigurable(input oroutput)2 Can be used to power auxiliary equipment.Note: This pin can only be used as power out.3-4 Connect to GND to activate, or leave floating(unconnected) to deactivate.Note: Connected to housing electronics at delivery.Uses an open-drain NFET transistor with the sourceconnected to GND. If used with an external relay, adiode must be connected in parallel with the load,for protection against voltage transients.Max load = 50 mAMin. input = -40 V DCMax. input= +40 V DCMax. load =100 mAMax. voltage = + 40 V DC
Page 22<strong>AXIS</strong> <strong>P13</strong>-E <strong>Network</strong> <strong>Camera</strong> Series Installation GuideConnection diagramThe following connection diagram gives an example of how to connect an auxiliary device to thenetwork camera.13.3Vmax. 50mA2E.g. push button3GDS4LED indicatorsLED Color Indication<strong>Network</strong> Green Steady for connection to a 100 Mbit/s network. Flashes for network activity.Amber Steady for connection to 10 Mbit/s network. Flashes for network activity.Unlit No network connection.Status Green Steady green for normal operation.Note: The Status LED can be configured to be unlit during normal operation, or toflash only when the camera is accessed. To configure, go to Setup > SystemOptions > LED settings. See the online help files for more information.Amber Steady during startup, during reset to factory default or when restoring settings.Red Slow flash for failed upgrade.Power Green Normal operation.Amber Flashes green/amber during firmware upgrade.
<strong>AXIS</strong> <strong>P13</strong>-E <strong>Network</strong> <strong>Camera</strong> Series Installation Guide Page 23Status LED when using the Focus AssistantLED Color IndicationGreenAmberRedStep 4: Focus Assistant is enabledStep 6: The lens is optimally adjustedStep 4: The camera has been moved, or an object has been inserted in front ofthe lens. Exit and restart the Focus Assistant.Step 6: The lens is less optimally adjustedStep 4: The camera has been moved, or an object has been inserted in front ofthe lens. Exit and restart the Focus Assistant.Step 6: The lens is poorly adjustedStatus LED on housing electronics (fan/heater)LED Color IndicationENGLISHPower Green OKFlashinggreenSingle flash: Heater errorDouble flash: Fan errorTriple flash: General errorNote: Alarm events will be triggered through the camera’s input port. See theUser’s Manual, available on the CD provided with this product, or fromwww.axis.com Contact your Axis reseller for information about spare parts andtroubleshooting.
Page 24<strong>AXIS</strong> <strong>P13</strong>-E <strong>Network</strong> <strong>Camera</strong> Series Installation GuideResetting to the Factory Default settingsThis will reset all parameters, including the <strong>IP</strong> address and focus position, to the Factory Defaultsettings:1. Disconnect power from the camera.2. Press and hold the Control button and reconnect power.3. Keep the Control button pressed until the Status indicator displays amber (this may take up to15 seconds).4. Release the Control button. When the Status indicator displays green (which can take up to 1minute) the process is complete and the network camera has been reset.5. Re-assign the <strong>IP</strong> address, using one of the methods described in this document.6. Refocus the camera, using one of the methods described in this document.It is also possible to reset parameters to the original factory default settings via the web interface.For more information, please see the online help or the User’s Manual.Accessing the camera from the InternetOnce installed, your network camera is accessible on your local network (LAN). To access thecamera from the Internet, network routers must be configured to allow incoming traffic, which isusually done on a specific port• HTTP port (default port 80) for viewing and configuration• RTSP port (default port 554) for viewing H.264 video streamsPlease refer to the documentation for your router for further instructions. For more information onthis and other topics, visit the Axis Support Web at www.axis.com/techsupFurther informationThe User’s Manual is available from the Axis Web site at www.axis.com or from the Axis <strong>Network</strong>Video Product CD supplied with this product.Tip!Visit www.axis.com/techsup to check if there is updated firmware available for yournetwork camera. To see the currently installed firmware version, see Setup > About.
Série des caméras réseau <strong>AXIS</strong> <strong>P13</strong>-E Guide d'installation Page 25Mesures de sécurité et avertissementsLisez attentivement le présent guide d’installation avant d’installer le produit. Conservez leguide d’installation si vous souhaitez le consulter ultérieurement.!ATTENTION !• Pour éviter d’endommager le produit Axis, utilisez l’emballage d’origine ou un équivalentpour le transporter.• Évitez d’exposer le produit Axis à des vibrations, des chocs ou une trop forte pression et nel’installez pas sur des supports instables, ou des surfaces ou des murs instables ou vibrants.Cela risque de l’endommager.• Utilisez uniquement des outils manuels pour l’installation de la caméra, l’utilisation d’outilsélectriques ou l’usage excessif de la force risquent d’endommager le produit.• N’utilisez ni produits chimiques, ni substances caustiques, ni nettoyeurs aérosol. Utilisez unlinge humide pour le nettoyage.• Utilisez uniquement des accessoires et des pièces de rechange fournis ou recommandés parAxis.• Ne tentez pas de réparer le produit vous-même, contactez Axis ou votre revendeur Axis pourtout problème de maintenance.!IMPORTANT !• Ce produit Axis doit être utilisé conformément aux lois et réglementations locales en vigueur.• Stockez et transportez le produit Axis dans un environnement sec et aéré.FRANÇAISAvis de sécurité – Remplacement des pilesCe produit Axis nécessite une pile au lithium CR2032 de 3,0 V pour l’alimentation de son horloge en temps réelinterne. Dans des conditions normales d’utilisation, cette pile devrait durer au moins 5 ans. Si la pile est faible, celaa un impact sur le fonctionnement de l’horloge en temps réel qui se réinitialise alors à chaque mise sous tension. Unmessage enregistré apparaît lorsque la pile doit être remplacée. Ne remplacez la pile que lorsque cela estnécessaire !Si la pile doit être remplacée, veuillez contacter www.axis.com/techsup pour obtenir de l’aide.• Afin d’éviter tout risque d’explosion, remplacez correctement la pile.• Remplacez la pile par une pile identique ou équivalente uniquement, en respectant les recommandationsdu fabricant.• Jetez les piles usagées conformément aux consignes du fabricant.
Série des caméras réseau <strong>AXIS</strong> <strong>P13</strong>-E Guide d'installation Page 27<strong>AXIS</strong> <strong>P13</strong>43-E, <strong>AXIS</strong> <strong>P13</strong>44-E& <strong>AXIS</strong> <strong>P13</strong>46-EGuide d’installationCe guide d’installation explique comment installer une <strong>AXIS</strong> <strong>P13</strong>43-E/<strong>P13</strong>44-E/<strong>P13</strong>46-E Caméraréseau sur votre réseau. Pour toute autre question concernant l’utilisation du produit, reportez-vousau manuel d’utilisation du produit, que vous trouverez sur le CD joint ou sur le site www.axis.comProcédure d’installation1. Vérifiez que l’emballage contient bien tous les élémentsde la liste ci-dessous.Important !Ce produit doit être utilisé2. Description du matériel. Reportez-vous à la page 28.conformément aux lois et3. Installation du matériel. Reportez-vous à la page 30. réglementations locales en4. Attribution d’une adresse <strong>IP</strong>. Reportez-vous à la page 33.5. Configuration du mot de passe. Reportez-vous à la page 37.6. Réglage du zoom et de la mise au point. Reportez-vous à la page 40.FRANÇAISContenu de l’emballageÉlémentCaméra réseauSupport muralOutilsCâble réseauCDDocumentation impriméeModèles/variantes/remarques<strong>AXIS</strong> <strong>P13</strong>43-E/<strong>AXIS</strong> <strong>P13</strong>44-E/<strong>AXIS</strong> <strong>P13</strong>46-ESupport mural avec chemin de câble interneTournevis Torx T20Clé AllenCâble réseau d’extérieur 5 m (16 ft) avec jointCD de la caméra vidéo réseau Axis, comprenant une documentation, des outilsd’installation et des logiciels complémentairesGuide d’installation de la Série des caméras réseau <strong>AXIS</strong> <strong>P13</strong>-E (le présentdocument)Document de garantie d’AxisÉtiquette de numéro de série supplémentaire (x2)Accessoires en optionConsultez le site à l’adresse www.axis.com pour plus d’informations sur lesaccessoires disponibles
Page 28Série des caméras réseau <strong>AXIS</strong> <strong>P13</strong>-E Guide d'installationDescription du matérielLogement de carte mémoire SDVoyant d'étatPoint zoomDispositif de mise au pointVue arrièreEntrée audioConnecteur réseau (PoE)Sortie audioVue dedessousVoyantd’alimentationVoyantde réseauBouton decommandeConnecteur du diaphragmeConnecteur d’alimentationConnecteur pour d´entrée/SortieNuméro de produit (P/N) etnuméro de série (S/N)Exemple de l’image : <strong>AXIS</strong> <strong>P13</strong>43-E
Série des caméras réseau <strong>AXIS</strong> <strong>P13</strong>-E Guide d'installation Page 29Référence (P/N) et numéro de série (S/N).Le numéro de série peut être demandépendant l’installation.Vis de réglage dupare-soleil (2x)Pare-soleilCouvercle supérieurCaméra réseauConnecteur réseauPatte de fil de sécuritéTrous de câblesVis du couvercleinférieur (x4)Couvercle de câbleVis du couverclede câble (x2)Couvercle inférieurRadiateur Attention!peut êtreJoint três chaudCâble réseau(acheminement à traversle support mural)Adaptateur de supportFRANÇAISVis du support (x4)Vis de réglage du supportSupport muralExemple de l’image : <strong>AXIS</strong> <strong>P13</strong>43-E
Page 30Série des caméras réseau <strong>AXIS</strong> <strong>P13</strong>-E Guide d'installationInstallation du matérielLes instructions ci-dessous concernent l’installation de la caméra <strong>AXIS</strong> <strong>P13</strong>43-E/<strong>P13</strong>44-E/<strong>P13</strong>46-E.Préparation du câble réseauSi vous utilisez un câble autre que celui fourni, il est alors nécessaire de préparer un câble réseauavec un joint. Faites passer délicatement le câble à travers le joint fourni et branchez un connecteurréseau. Il peut être nécessaire de percer un trou dans le joint à l’aide du tournevis fourni .Remarques :• Ne forcez pas l'entrée du connecteur réseau dans le joint.• Ne percez pas le joint avec un couteau ou avec un autre objet pointu.Installation du support mural1. Préparez le mur, le plafond ou le poteau de montage pour installer le support mural à l’aide dumodèle de perçage fourni.2. Acheminez le câble réseau dans le support mural, le joint en caoutchouc doit être surl’extrémité de l’adaptateur de support du support mural, voir l’illustration à la page 29.3. Fixez le support mural au mur, au plafond ou sur un poteau et assurez-vous que les vis et lesfiches sont adaptés au matériau (par exemple du bois, du métal, du placoplâtre, de la pierre).Remarques :• Le poids de la caméra est indiqué dans le tableau ci-dessous. Assurez-vous que le matériau estsuffisamment solide pour supporter ce poids.Modèle Poids<strong>AXIS</strong> <strong>P13</strong>43-E 3 090 g (6,8 lb)<strong>AXIS</strong> <strong>P13</strong>44-E 3 120 g (6,9 lb)<strong>AXIS</strong> <strong>P13</strong>46-E 3 130 g (6,9 lb)• Pour plus de spécifications techniques, reportez-vous au manuel de l’utilisateur du produit, que voustrouverez sur le CD joint ou sur le site www.axis.com
Série des caméras réseau <strong>AXIS</strong> <strong>P13</strong>-E Guide d'installation Page 31Installation de la caméra sur le support1. Installez la caméra avec le couvercle inférieur sur le support et serrez les vis du support.2. Retirez le joint de l’un des trous du couvercle inférieur, reportez-vous à l’illustration à lapage 32.3. Acheminez le câble dans le trou et fixez le joint du câble au trou.Câble réseau (acheminementà travers le support mural)Trous de câblesVis du support (x4)Couvercle de câbleVis du couvercle de câble (x2)FRANÇAISSupport muralVis de réglage du support4. Branchement des câbles, reportez-vous à Branchement des câbles, à la page 32.5. Ouvrez le couvercle supérieur et attachez le fil de sécurité à la patte sur le couvercle inférieur.6. Installez le couvercle supérieur. Assurez-vous de bien serrer en diagonale les vis opposées ducouvercle inférieur de quelques tours jusqu’à ce qu’elles soient bien serrées. Cela permettra degarantir que le joint du couvercle inférieur est compressé de façon régulière. Ne tentez pas deserrez complètement les vis dès votre première tentative.7. Fixez le couvercle du câble et serrez les vis du couvercle du câble.8. Desserrez les vis de réglage du pare-soleil et ajustez le pare-soleil en l’orientant vers l’avant.9. Desserrez le vis de réglage du support afin d’orienter la caméra dans la direction voulue.Reportez-vous à Accès au flux de données vidéo, à la page 39 pour savoir comment voir le fluxde données vidéo.
Page 32Série des caméras réseau <strong>AXIS</strong> <strong>P13</strong>-E Guide d'installationBranchement des câbles1. Si vous le souhaitez, insérez une carte mémoire SD (non fournie) dans le logement de carteSDHC (Secure Digital HighCapacity). Une carte SD standard ou haute capacité est requise pour stocker des images en localsur la caméra.2. Si vous le souhaitez, connectez des dispositifs d’entrée/sortie externes. Reportez-vous à lapage 45 pour plus d’informations sur les broches du connecteur pour terminaux. Préparez lescâbles avec des joints (reportez-vous à Préparation du câble réseau, à la page 30) et guidez lescâbles via les trous dans le couvercle inférieur et dans la caméra.3. Connectez la caméra au réseau à l’aide d’un câble réseau blindé. Connectez le câble réseau auconnecteur réseau en bas. Le câble réseau et le câble d’E/S entre le couvercle inférieur et lacaméra sont livrés connectés.Câbles réseauCâble d'E/SCouvercle inférieurConnecteur réseau (PoE OUT,livré connecté)Trous de câblesConnecteur réseau (PoE IN)Voyant lumineuxCommutateur de contrôle de températurefroide (activation faculative)Sortie d’alarme(connectée à la livraison)4. Vérifiez que les voyants lumineux indiquent les bonnes conditions. Pour plus d’informations,reportez-vous au tableau de la page 46. Notez que le voyant d’état peut être configuré pourêtre éteint au cours du fonctionnement normal.
Série des caméras réseau <strong>AXIS</strong> <strong>P13</strong>-E Guide d'installation Page 33Attribution d’une adresse <strong>IP</strong>Aujourd’hui, la plupart des réseaux sont équipés d’un serveur DHCP qui attribue automatiquementdes adresses <strong>IP</strong> aux périphériques connectés. Si votre réseau ne possède pas de serveur DHCP, lacaméra réseau utilise l’adresse <strong>IP</strong> 192.168.0.90 comme adresse <strong>IP</strong> par défaut.Si vous souhaitez paramétrer une adresse <strong>IP</strong> statique sous Windows, nous recommandonsl’utilisation de l’application <strong>AXIS</strong> <strong>IP</strong> Utility ou de l’application <strong>AXIS</strong> <strong>Camera</strong> Management. Selon lenombre de caméras à installer, choisissez la méthode qui vous convient le mieux.Ces deux applications gratuites sont disponibles sur le CD de la caméra vidéo Axis fourni avec ceproduit. Vous pouvez également les télécharger à partir du site www.axis.com/techsup.Méthode Recommandée pour Systèmed’exploitation<strong>AXIS</strong> <strong>IP</strong> UtilityReportez-vous à la page 34<strong>AXIS</strong> <strong>Camera</strong> ManagementReportez-vous à la page 35Une seule caméraPetites installationsPlusieurs camérasGrandes installationsInstallation sur un autre sousréseauWindowsWindows 2000Windows XP ProWindows 2003 ServerWindows VistaFRANÇAISRemarques :• En cas d’échec de l’attribution d’adresse <strong>IP</strong>, vérifiez qu’aucun pare-feu ne bloque l’opération.• Pour connaître les autres méthodes d’attribution ou de détection de l’adresse <strong>IP</strong>, par exemple sousd’autres systèmes d’exploitation, reportez-vous à la page 43.
Page 34Série des caméras réseau <strong>AXIS</strong> <strong>P13</strong>-E Guide d'installation<strong>AXIS</strong> <strong>IP</strong> Utility : une seule caméra/une petite installation<strong>AXIS</strong> <strong>IP</strong> Utility détecte et affiche automatiquement les périphériques Axis présents sur votre réseau.Cette application sert également à attribuer manuellement une adresse <strong>IP</strong> statique.Notez que l’ordinateur exécutant l’application <strong>AXIS</strong> <strong>IP</strong> Utility doit se trouver sur le même segmentde réseau (sous-réseau physique) que la caméra réseau.Détection automatique1. Vérifiez que la caméra réseau est connectée au réseau et qu’elle se trouve sous tension.2. Lancez <strong>AXIS</strong> <strong>IP</strong> Utility.3. Lorsque la caméra réseau apparaît dans la fenêtre, double-cliquez dessus pour ouvrir la paged’accueil correspondante.4. Reportez-vous à la page 37 pour savoir comment configurer le mot de passe.Configuration manuelle de l’adresse <strong>IP</strong> (facultatif)1. Trouvez une adresse <strong>IP</strong> non utilisée sur le même segment de réseau que celui de votreordinateur.2. Sélectionnez la caméra réseau dans la liste.3. Cliquez sur le bouton Assign new <strong>IP</strong> address to selected device (Attribuer une nouvelleadresse <strong>IP</strong> au périphérique sélectionné) et saisissez l’adresse <strong>IP</strong>.4. Cliquez sur le bouton Assign (Attribuer) et suivez les instructions qui s’affichent à l’écran. Lacaméra doit être redémarrée dans les 2 minutes pour que la nouvelle adresse <strong>IP</strong> soit prise encompte.5. Cliquez sur le bouton Home Page (Page d’accueil) pour accéder aux pages Web de la caméra.6. Reportez-vous à la page 37 pour savoir comment configurer le mot de passe.
Série des caméras réseau <strong>AXIS</strong> <strong>P13</strong>-E Guide d'installation Page 35<strong>AXIS</strong> <strong>Camera</strong> Management : plusieurs caméras/grandes installations<strong>AXIS</strong> <strong>Camera</strong> Management peut détecter automatiquement plusieurs périphériques Axis, afficherl’état de connexion, gérer les mises à niveau du micrologiciel et configurer les adresses <strong>IP</strong>.Détection automatique1. Vérifiez que la caméra est connectée au réseau et qu’elle est sous tension.2. Lancez <strong>AXIS</strong> <strong>Camera</strong> Management. Lorsque la caméra réseau apparaît dans la fenêtre, cliquezsur le lien avec le bouton droit de la souris, puis sélectionnez Live View Home Page (Paged’accueil – Vidéo en direct).3. Reportez-vous à la page 37 pour savoir comment configurer le mot de passe.FRANÇAISAttribution d’une adresse <strong>IP</strong> à un seul périphérique1. Sélectionnez la caméra réseau dans l’application <strong>AXIS</strong> <strong>Camera</strong>Management, puis cliquez sur le bouton Assign <strong>IP</strong> (Attribuer uneadresse <strong>IP</strong>) .2. Sélectionnez Assign the following <strong>IP</strong> address (Attribuer l’adresse <strong>IP</strong>suivante) et saisissez l’adresse <strong>IP</strong>, le masque de sous-réseau et le routeur par défaut que lepériphérique utilisera.3. Cliquez sur OK.
Page 36Série des caméras réseau <strong>AXIS</strong> <strong>P13</strong>-E Guide d'installationAttribution d’adresses <strong>IP</strong> à plusieurs périphériques<strong>AXIS</strong> <strong>Camera</strong> Management accélère le processus d’attributiond’adresses <strong>IP</strong> à plusieurs périphériques en suggérant desadresses <strong>IP</strong> dans une plage spécifiée.1. Sélectionnez les périphériques à configurer (il peut s’agir deplusieurs modèles), puis cliquez sur le bouton Assign <strong>IP</strong>(Attribuer une adresse <strong>IP</strong>).2. Sélectionnez Assign the following <strong>IP</strong> address range(Attribuer la plage d’adresses <strong>IP</strong> suivante) et saisissez laplage d’adresses <strong>IP</strong>, le masque de sous-réseau et le routeurpar défaut que les périphériques utiliseront.3. Cliquez sur Update (Mettre à jour). Les adresses <strong>IP</strong> suggérées sont énumérées sous le champNew <strong>IP</strong> Addresses (Nouvelles adresses <strong>IP</strong>) et peuvent être modifiées en sélectionnant unpériphérique et en cliquant sur le bouton Edit (Modifier).4. Cliquez sur OK.
Série des caméras réseau <strong>AXIS</strong> <strong>P13</strong>-E Guide d'installation Page 37Configuration du mot de passePour accéder au produit, le mot de passe par défaut de l’administrateur, root, doit être configuré.Pour ce faire, utilisez la boîte de dialogue Configure Root Password (Configurer le mot de passeroot) qui s’affiche lors du premier accès à la caméra réseau.Pour éviter les écoutes électroniques lors de la configuration du mot de passe root, utilisez uneconnexion HTTPS cryptée nécessitant un certificat HTTPS.Remarque : Le protocole HTTPS (Hypertext Transfer Protocol over Secure Socket Layer) estutilisé pour crypter le trafic entre les navigateurs Web et les serveurs. Le certificat HTTPScontrôle l’échange crypté des informations.Pour configurer le mot passe avec une connexion HTTP standard, saisissez directement le mot depasse dans la première boîte de dialogue représentée ci-dessous.Pour configurer le mot passe avec une connexion HTTPS cryptée, procédez comme suit :1. Cliquez sur le bouton Create self-signed certificate (Créer un certificat autosigné).2. Saisissez les informations demandées, puis cliquez sur OK. Le certificat est créé et le mot depasse peut maintenant être configuré en toute sécurité. Tout le trafic entrant et sortant de lacaméra réseau est désormais crypté.3. Saisissez un mot de passe, puis saisissez-le de nouveau pour confirmation. Cliquez sur OK. Lemot de passe est maintenant configuré.Pour créer une connexion HTTPS,cliquez sur ce bouton.FRANÇAISPour configurer directement le motde passe par le biais d’une connexioncryptée, saisissez le mot de passe4. Pour vous connecter, saisissez le nom d’utilisateur « root » dans la boîte de dialogue à l’invite.Remarque : le nom d’utilisateur par défaut de l’administrateur est root et il ne peut pasêtre supprimé.
Page 38Série des caméras réseau <strong>AXIS</strong> <strong>P13</strong>-E Guide d'installation5. Saisissez le mot de passe de la manière indiquée ci-dessus et cliquez sur OK.Remarque : si vous avez oublié votre mot de passe, vous devrez rétablir les paramètresd’usine par défaut de votre caméra. Reportez-vous à la page 48.6. <strong>AXIS</strong> <strong>P13</strong>46-E : vous devez configurer le mode decapture lors du premier accès à la caméra <strong>AXIS</strong><strong>P13</strong>46-E. Sélectionnez le mode de capture souhaitédans la liste déroulante et cliquez sur OK.Remarque : Vous pourrez changer le mode decapture ultérieurement dans les pages webdu produit, mais cela réinitialisera la plupartdes autres paramètres. Pour plusd’informations, reportez-vous à l’aide en ligne ou au manuel d’utilisation.
Série des caméras réseau <strong>AXIS</strong> <strong>P13</strong>-E Guide d'installation Page 39Accès au flux de données vidéoLa page Live View (Vidéo en direct) de la caméra réseau s’affiche, avec des liens vers les outils deconfiguration, lesquels vous permettent d’adapter la caméra à vos besoins.Si nécessaire, cliquez sur Yes (Oui) pour installer AMC (<strong>AXIS</strong> Media Control) afin de visualiser le fluxde données vidéo dans Internet Explorer. Pour ce faire, vous devrez être connecté à l’ordinateuravec des droits d’administrateur.Si nécessaire, cliquez sur le lien pour installer les décodeurs manquants.Remarque : Pour installer AMC sous Windows Vista et Windows 7, vous devez exécuterInternet Explorer en tant qu’administrateur. Cliquez avec le bouton droit de lasouris sur l’icône d'Internet Explorer et sélectionnez Exécuter en tantqu’administrateur.Setup (Configuration) : contient tousles outils nécessaires pour configurerla caméra en fonction de vos besoins.Help (Aide) : affiche uneaide en ligne surl’utilisation de la caméra.FRANÇAIS
Page 40Série des caméras réseau <strong>AXIS</strong> <strong>P13</strong>-E Guide d'installationRéglage du zoom et de la mise au pointPour régler le zoom et la mise au point, procédez comme suit :1. Ouvrez la page d’accueil du produit et sélectionnez Setup > Basic Setup > Focus(Configuration - Configuration de base - Mise au point).2. Sur l’onglet Basic (Base), cliquez sur Open iris (Ouvrir l´iris). Si le bouton est inactif, l´iris estdéjà ouvert.3. Si la mise au point a déjà été effectuée, cliquez sur Reset (Réinitialiser) pour réinitialiser le foyerarrière.4. Desserrez les commandes de zoom et de mise au point de l’objectif en les tournant dans le sensinverse des aiguilles d’une montre. Déplacez les commandes pour régler le zoom et la mise aupoint et vérifiez la qualité de l’image dans la fenêtre correspondante.Remarque :Si la caméra est montée de façon à ce qu’il soit impossible de regarder l’image et dedéplacer les commandes en même temps, utilisez plutôt l’assistant de mise aupoint. Reportez-vous à la page 41.5. Resserrez les commandes de zoom et de mise au point.6. À la page Focus (Mise au point), cliquez sur Fine-tune focus automatically (Ajuster la mise aupoint automatiquement) jusqu’à ce que l’ajustement automatique soit terminé.7. Cliquez sur Enable iris (Activer l´iris). Si le bouton est inactif, l´iris a déjà été activé.8. Si nécessaire, effectuez d’autres réglages dans l’onglet Advanced (Avancé). Pour plusd’informations, reportez-vous à l’aide en ligne et au manuel utilisateur.Remarques :• Effectuez la mise au point aussi précisément que possible à l’aide de l’assistant ou du dispositif demise au point avant de démarrer l’ajustement automatique. L’utilisation normale du dispositif demise au point donne le meilleur résultat.
Série des caméras réseau <strong>AXIS</strong> <strong>P13</strong>-E Guide d'installation Page 41• L´iris doit toujours être ouvert au maximum lors de la mise au point, ce qui offre la plus petiteprofondeur de champ et, par conséquent, les meilleures conditions pour une mise au point correcte.Dispositif demise au pointPoint zoomVoyant d'étatBouton decommandeFRANÇAISExemple de l’image : <strong>AXIS</strong> <strong>P13</strong>43-EAssistant de mise au pointPour effectuer la mise au point en utilisant l’assistant, suivez les instructions décrites aux étapes 1à 3 à la page 40 avant de procéder aux étapes ci-dessous.1. Fixez la caméra ou placez-la de façon à ce qu’elle ne puisse pas bouger.2. Desserrez le zoom en le tournant dans le sens inverse des aiguilles d’une montre. Déplacez lepoint zoom pour régler le niveau du zoom. Resserrez le point zoom.3. Réglez la caméra sur sa position de mise au point à distance extrême en desserrant le dispositifde mise au point et en tournant l’objectif à fond dans le sens des aiguilles d’une montre.4. Appuyez sur le bouton de commande et relâchez-le très vite. Lorsque le voyant d’état clignoteen vert, l’assistant de mise au point est activé.Si le voyant d’état clignote en rouge ou en orange avant que vous n’ayez pu régler l’objectif,passez à l’étape 7 pour quitter l’assistant et recommencez les étapes 3 à 7. Reportez-vous auxremarques ci-après.5. Tournez délicatement l’objectif dans le sens contraire des aiguilles d’une montre jusqu’à ce qu’ils’arrête.6. Enfin, tournez lentement l’objectif dans le sens des aiguilles d’une montre jusqu’à ce quel’indicateur d’état clignote en vert ou en orange (et non pas en rouge).7. Pour quitter l’assistant de mise au point, réappuyez sur le bouton de commande.Remarque : L’assistant de mise au point se désactive automatiquement après 15 minutes.
Page 42Série des caméras réseau <strong>AXIS</strong> <strong>P13</strong>-E Guide d'installation8. Resserrez le dispositif de mise au point.9. Ouvrez la page Live View (Vidéo en direct) du navigateur web et contrôlez la qualité de l’image.10. Continuez avec les étapes 6 à 8 à la page 40.Remarques :• La vue en face de la caméra ne doit pas être modifiée lors du réglage de la mise au point (étapes 5 et6). Si la caméra est déplacée ou si un doigt ou un autre objet est placé devant l’objectif, vous devrezrecommencer les étapes 3 à 7.• Si les mouvements devant la caméra ne peuvent pas être évités, l’assistant de mise au point ne doitpas être utilisé.• Si vous ne relâchez pas le bouton de commande dans les deux secondes, le service <strong>AXIS</strong> Dynamic DNSsera activé au lieu de l’assistant de mise au point.• Si la caméra est montée de sorte qu’il soit impossible d’accéder au bouton de commande, vouspouvez tout de même utiliser l’assistant. Procédez comme indiqué ci-dessus mais montez la caméraaprès l’étape 4 (en appuyant sur le bouton de commande) et passez à l’étape 7.
Série des caméras réseau <strong>AXIS</strong> <strong>P13</strong>-E Guide d'installation Page 43Autres méthodes de définition de l’adresse <strong>IP</strong>Le tableau ci-dessous indique les autres méthodes permettant de configurer ou de détecterl’adresse <strong>IP</strong>. Toutes les méthodes sont activées par défaut et peuvent être désactivées.Utiliser sous lesystèmed’exploitationRemarquesUPnP Windows Lorsque la caméra est activée sur votre ordinateur, elle estdétectée automatiquement et vient s’ajouter au dossier Favorisréseau/Réseau.Bonjour<strong>AXIS</strong> Dynamic DNSServiceMAC OSX(10.4 ou versionultérieure)TousPour les navigateurs compatibles avec Bonjour. Accédez ausignet de Bonjour dans votre navigateur (par exemple, Safari),puis cliquez sur le lien pour accéder aux pages Web de la caméra.Service Axis gratuit permettant d’installer rapidement etfacilement votre caméra. Nécessite une connexion Internet sansproxy HTTP. Pour plus d’informations, rendez-vous surwww.axiscam.net.ARP/Ping Tous Voir ci-dessous. La commande doit être saisie dans les 2 minutessuivant la mise sous tension de la caméra.Serveur DHCP Tous Pour consulter les pages administratives du serveur DHCP réseau,reportez-vous à la documentation du serveur.FRANÇAISDéfinition de l’adresse <strong>IP</strong> à l’aide d’ARP/Ping1. Trouvez une adresse <strong>IP</strong> statique disponible sur le même segment de réseau que celui de votreordinateur.2. Repérez le numéro de série (S/N) sur l’étiquette de la caméra.3. Ouvrez une invite de commande sur votre ordinateur et saisissez les commandes suivantes :Syntaxe pour Windows : Exemple pour Windows :arp -s ping -l 408 -t arp -s 192.168.0.125 00-40-8c-18-10-00ping -l 408 -t 192.168.0.125Syntaxe pour UNIX/Linux/Mac : Exemple pour UNIX/Linux/Mac :arp -s tempping -s 408 arp -s 192.168.0.125 00:40:8c:18:10:00 tempping -s 408 192.168.0.1254. Vérifiez que le câble réseau est connecté à la caméra, puis démarrez/redémarrez cette dernièreen débranchant puis en rebranchant l’alimentation.5. Fermez l’invite de commande lorsque Reply from 192.168.0.125:... (Réponse de 192.168.0.125:...) ou un message similaire apparaît.6. Dans votre navigateur, saisissez http:// dans le champ Emplacement/Adresse, puisappuyez sur la touche Entrée de votre clavier.
Page 44Série des caméras réseau <strong>AXIS</strong> <strong>P13</strong>-E Guide d'installationRemarques :• Ouvrir une invite de commande sous Windows : dans le menu Démarrer, sélectionnez Exécuter… ettapez cmd. Cliquez sur OK.• Pour utiliser la commande ARP sous Windows Vista, cliquez avec le bouton droit de la souris surl’icône d’invite de commande et sélectionnez Exécuter en tant qu’administrateur.• Pour utiliser la commande ARP sous Mac OS X, utilisez l’utilitaire Terminal dans Application >Utilities (Application - Utilitaires).Connecteurs de l’appareilConnecteur réseau - Connecteur Ethernet RJ-45. Compatible avec l’alimentation par Ethernet. Ilest recommandé d’utiliser des câbles blindés.Connecteur d’alimentation - Bloc de connexion à 2 broches utilisé pourl'alimentation en entrée..Fonction Broche DescriptionGND (Terre) 1 Mise à la terreAlimentation CC 2 Alimentation en entrée 8 à 20 V CC<strong>AXIS</strong> <strong>P13</strong>43-E : max. 6,4 W<strong>AXIS</strong> <strong>P13</strong>44-E : max. 6,4 W<strong>AXIS</strong> <strong>P13</strong>46-E : max. 9,6 W1 2Entrée audio - Entrée de 3.5 mm pour microphone mono ou signal mono avec entrée ligne (lecanal de gauche est utilisé pour le signal stéréo).Sortie audio - Sortie audio (niveau ligne) pouvant être connectée à un système de diffusionpublique ou à un haut-parleur actif avec amplificateur intégré. Il est également possible deconnecter une paire d’écouteurs. Un connecteur stéréo doit être utilisé pour la sortie audio.Logement de carte mémoire SDHC : une carte mémoire SD de capacité standard ou haute capacitépeut être utilisée pour l’enregistrement local avec stockage amovible.Logement de carte mémoire SDPour insérer une carte SD, soulevez le couvercle du logement de carte SD au dos de la caméraréseau et insérez délicatement la carte SD dans son logement.
Série des caméras réseau <strong>AXIS</strong> <strong>P13</strong>-E Guide d'installation Page 45Pour retirer une carte SD, soulevez le couvercle et poussez délicatement la carte, puis relâchez-la.La carte SD ressortira du logement et vous pourrez la retirer.Connecteur pour terminaux d'E/S - Utilisé dans desapplications telles que la détection de mouvement, ledéclenchement d’événements, l'enregistrement à intervalles etles notifications d’alarme. En plus d’une alimentation auxiliaireet d’une broche GND, elle assure l’interface avec :• 1 sortie numérique : permet de connecter des dispositifsexternes, comme des relais ou des voyants. Les dispositifsconnectés peuvent être activés à l’aide de l’interface deprogrammation VAPIX®, des boutons de sortie sur laBroche 4 BrocheBroche 3 Broche 1page Live View (Vidéo en direct) ou par un type d’événement. La sortie est considéréecomme étant active (ce qui est visible dans Events>Port Status (Événements - État duport)) si le dispositif d’alarme est activé.• 1 entrée numérique : entrée d’alarme utilisée pour connecter des dispositifs pouvant passerd’un circuit ouvert à un circuit fermé, par exemple : les détecteurs infrarouge passifs, lescontacts de porte/fenêtre, les détecteurs de bris de verre, etc. Lorsqu’un signal est reçu,l’état change et l’entrée devient active (ce qui est visible sous Events> Port Status(Événement - État du port)).FRANÇAISRemarque :Le connecteur d’E/S de l’<strong>AXIS</strong> <strong>P13</strong>43-E/<strong>P13</strong>44-E/<strong>P13</strong>46-E est connecté au boîtierélectronique à la livraison et déclenchera un événement de port d’entrée pour indiquer uneerreur de ventilateur ou de radiateur à son activation. Reportez-vous au manueld’utilisation, disponible sur le CD fourni avec ce produit, ou au site www.axis.com, pour plusd’informations sur la configuration d’un événement.Fonction Broche Remarques Caractéristiques techniquesGND (Terre) 1 Mise à la terreAlimentation3,3 V CC2 Peut servir à alimenter le matériel auxiliaire.Remarque : la broche peut être utiliséeuniquement comme sortie d’alimentation.Charge maximale = 50 mAConfigurable(entrée ousortie)3-4 Connectez-la à la broche GND pour l’activerou laissez-la flotter (déconnectée) pour ladésactiver.Remarque : connecté au boîtier électroniqueà la livraison.Utilise un transistor NFET à drain ouvert avecla source connectée à la terre. En casd’utilisation avec un relais externe, une diodedoit être connectée en parallèle avec lacharge, en guise de protection contre lestensions transitoires.Entrée minimum = -40 V CCEntrée maximum = +40 V CCCharge maximale = 100 mATension maximale = +40 V CC
Page 46Série des caméras réseau <strong>AXIS</strong> <strong>P13</strong>-E Guide d'installationSchéma de connexionLe schéma de câblage qui suit fournit un exemple de connexion d’un périphérique auxiliaire à lacaméra réseau.13.3Vmax. 50mA2E.g. push button3GDS4Voyants lumineuxDEL Couleur IndicationConnecteur Vert Continu en cas de connexion à un réseau de 100 Mbits/s. Clignote en casd’activité réseau.Orange Continu en cas de connexion à un réseau de 10 Mbits/s. Clignote en casd’activité réseau.Éteint Pas de connexion au réseau.Etat Vert Vert continu en cas de fonctionnement normal.Remarque : le voyant d’état peut être configuré pour être éteint pendant lefonctionnement normal ou pour clignoter uniquement en cas d’accès à lacaméra. Pour ce faire, cliquez sur Setup > System Options > LED settings(Configuration/Options système/Paramètres des voyants). Reportez-vous àl’aide en ligne pour plus d’informations.Orange Continu pendant le démarrage, la réinitialisation des paramètres d’usine pardéfaut ou la restauration des paramètres.Rouge Clignote lentement en cas d’échec de la mise à niveau.Alimentation Vert Fonctionnement normal.Orange Clignote en vert/orange pendant la mise à niveau du micrologiciel.
Série des caméras réseau <strong>AXIS</strong> <strong>P13</strong>-E Guide d'installation Page 47Voyant d’état lors de l’utilisation de l’assistant de mise au pointDEL Couleur IndicationVertOrangeRougeÉtape 4 : L’assistant de mise au point est activé.Étape 6 : l’objectif est réglé de manière optimale.Étape 4 : la caméra a bougé ou un objet a été placé devant l’objectif. Quittezl’assistant de mise au point et recommencez.Étape 6 : l’objectif est réglé de manière moins optimale.Étape 4 : la caméra a bougé ou un objet a été placé devant l’objectif. Quittezl’assistant de mise au point et recommencez.Étape 6 : l’objectif est mal réglé.Voyant d’état du boîtier électronique (ventilateur/radiateur)DEL Couleur IndicationAlimentation Vert OuiVertclignotantClignote une fois : erreur de radiateurClignote deux fois : erreur de ventilateurClignote trois fois : erreur généraleRemarque : les événements d’alarme seront déclenchés via le port d’entrée dela caméra. Reportez-vous au Manuel d’utilisation du produit, que voustrouverez sur le CD joint ou sur le site www.axis.com, ou contactez votrerevendeur Axis pour plus d’informations sur les pièces de rechange et sur ledépannage.FRANÇAIS
Page 48Série des caméras réseau <strong>AXIS</strong> <strong>P13</strong>-E Guide d'installationRétablissement des paramètres d’usine par défautProcédez comme suit pour rétablir les paramètres par défaut définis en usine et réinitialiserl’adresse <strong>IP</strong> et la position de mise au point :1. Mettez la caméra hors tension.2. Maintenez le bouton de commande enfoncé et remettez la caméra sous tension.3. Appuyez sur le bouton de commande jusqu’à ce que l’indicateur d’état passe à l’orange (celapeut prendre jusqu’à 15 secondes).4. Relâchez le bouton de commande. Lorsque l’indicateur d’état émet une lumière verte (ce quipeut prendre 1 minute), le processus est terminé : les paramètres par défaut de la caméra sontrétablis.5. Attribuez à nouveau l’adresse <strong>IP</strong> à l'aide de l'une des méthodes décrites dans ce document.6. Effectuez de nouveau la mise au point de la caméra, suivant une des méthodes décrites dans cedocument.Il est également possible de rétablir les paramètres d’usine par défaut d’origine à partir del’interface Web. Pour plus d’informations, reportez-vous à l’aide en ligne ou au manuel d’utilisation.Accès à la caméra sur InternetUne fois installée, votre caméra réseau est accessible sur votre réseau local (LAN). Pour accéder à lacaméra sur Internet, les routeurs réseau doivent être configurés pour autoriser le trafic entrant, cequi est généralement réalisé sur un port spécifique :• Le port HTTP (port 80 par défaut) pour l’affichage et la configuration• Le port RTSP (port 554 par défaut) pour l’affichage des flux de données vidéo H.264Pour plus d’informations, consultez la documentation du routeur. Pour plus d’informations à cesujet ou pour toute autre question, consultez la page Assistance technique du site Web d’Axis àl’adresse www.axis.com/techsup.Plus d’informationsLe manuel d’utilisation est disponible sur le site web d’Axis (www.axis.com) et sur le CD de lacaméra vidéo Axis fourni avec ce produit.Conseil :Consultez le site www.axis.com/techsup pour vérifier si des micrologiciels à jour sontdisponibles pour votre caméra réseau. Pour connaître la version du micrologicielactuellement installée, reportez-vous à la page Setup > About (Configuration - À proposde).
Netzwerk-Kamera-Serie <strong>AXIS</strong> <strong>P13</strong>-E Installationsanleitung Seite 49Sicherheitsvorkehrungen und WarnungenBitte lesen Sie zunächst diese Installationsanleitung vollständig durch, bevor Sie mit derInstallation Ihres Produkts beginnen. Halten Sie die Installationsanleitung bereit, falls Siedarauf zurückgreifen müssen.! VORSICHT!• Transportieren Sie das Axis-Produkt nur in der Originalverpackung bzw. in einervergleichbaren Verpackung, damit das Produkt nicht beschädigt wird.• Achten Sie darauf, dass das Axis-Produkt keinen Erschütterungen, Stößen oder starkem Druckausgesetzt ist und montieren Sie die Kamera nicht auf instabilen Halterungen oder aufinstabilen und vibrierenden Oberflächen oder Wänden. Dies könnte zu Beschädigungen desProdukts führen.• Verwenden Sie keine elektrischen Werkzeuge zur Montage der Kamera, da diese das Produktbeschädigen könnten.• Verwenden Sie keine chemischen, ätzenden oder Aerosol-Reinigungsmittel. Verwenden Sie zurReinigung ein feuchtes Tuch.• Verwenden Sie nur Zubehör und Ersatzteile, die von Axis empfohlen bzw. bereitgestelltwurden.• Versuchen Sie nicht, das Produkt selbst zu reparieren. Wenden Sie sich bei Service-Angelegenheiten an Axis oder an Ihren Axis-Händler.! WICHTIG!• Verwenden Sie dieses Axis-Produkt unter Beachtung der geltenden rechtlichenBestimmungen.• Lagern und transportieren Sie das Axis-Produkt in einer trockenen und belüfteten Umgebung.DEUTSCHSicherheitshinweis: BatteriewechselDieses Axis-Produkt ist mit einer 3,0-V-Lithium-Batterie vom Typ CR2032 ausgestattet, mit der die interneEchtzeituhr (RTC) versorgt wird. Unter normalen Bedingungen hält die Batterie mindestens 5 Jahre. Bei entladenerBatterie ist der Betrieb der Echtzeituhr nicht mehr ausreichend gewährleistet, sodass die Uhr bei jedem Systemstartzurückgesetzt wird. Sie erhalten eine Protokollnachricht, wenn ein Batteriewechsel erforderlich ist. Die Batteriesollte erst bei Bedarf gewechselt werden.Unter „www.axis.com/techsup“ finden Sie Informationen darüber, was Sie beim Austausch der Batterie beachtenmüssen.• Explosionsgefahr bei fehlerhaftem Batteriewechsel!• Die Batterie muss durch dasselbe oder ein gleichwertiges Fabrikat ersetzt werden, das vom Herstellerzugelassen ist.• Verbrauchte Batterien sind gemäß Herstelleranweisungen zu entsorgen.
Netzwerk-Kamera-Serie <strong>AXIS</strong> <strong>P13</strong>-E Installationsanleitung Seite 51<strong>AXIS</strong> <strong>P13</strong>43-E, <strong>AXIS</strong> <strong>P13</strong>44-E& <strong>AXIS</strong> <strong>P13</strong>46-EInstallationsanleitungIn dieser Anleitung wird die Installation der <strong>AXIS</strong> <strong>P13</strong>43-E/<strong>P13</strong>44-E/<strong>P13</strong>46-ENetzwerk-Kamera ineinem Netzwerk beschrieben. Alle weiteren Hinweise zur Verwendung des Produkts finden Sie imBenutzerhandbuch, das auf der mitgelieferten CD oder auf unserer Website unter „www.axis.com“zur Verfügung steht.Installationsschritte1. Prüfen Sie, ob alle in der nachfolgenden Listeaufgeführten Komponenten vorhanden sind.Wichtig!Verwenden Sie dieses Produkt2. Sehen Sie sich die Hardwareübersicht an. Siehe Seite 52.unter Beachtung der geltenden3. Installieren Sie die Hardware. Siehe Seite 54.rechtlichen Bestimmungen.4. Weisen Sie eine <strong>IP</strong>-Adresse zu. Siehe Seite 57.5. Legen Sie das Kennwort fest. Siehe Seite 61.6. Stellen Sie den Zoom und die Bildschärfe ein. Siehe Seite 64.DEUTSCHLieferumfangKomponenteNetzwerk-KameraWandhalterungToolsNetzwerkkabelCD-ROMGedruckte DokumenteModelle/Varianten/Anmerkungen<strong>AXIS</strong> <strong>P13</strong>43-E/<strong>AXIS</strong> <strong>P13</strong>44-E/<strong>AXIS</strong> <strong>P13</strong>46-EWandhalterung mit internem KabelschachtTorx T20-SchraubendreherInbusschlüssel5 Meter langes Netzwerkkabel mit Dichtung für den AußenbereichCD für Axis-Netzwerkvideoprodukte einschließlich Installationswerkzeugen undanderer Software sowie ProduktdokumentationNetzwerk-Kamera-Serie <strong>AXIS</strong> <strong>P13</strong>-E Installationsanleitung (dieses Dokument)Axis-GarantieerklärungZusätzliche Etiketten mit der Seriennummer (2)Optionales ZubehörUnter www.axis.com finden Sie Informationen zum verfügbaren Zubehör
Seite 52Netzwerk-Kamera-Serie <strong>AXIS</strong> <strong>P13</strong>-E InstallationsanleitungHardwareübersichtSD-SpeicherkarteneinschubStatus-LEDZoomreglerSchärfereglerRückansichtAudio-EingangNetzwerkanschluss (mit PoE)Audio-AusgangUnteransichtNetz-LEDNetzwerk-LEDSteuertasteAnschluss für BlendeNetzanschlussE/A-AnschlussProduktnummer (P/N) undSeriennummer (S/N)Beispielbild: <strong>AXIS</strong> <strong>P13</strong>43-E
Netzwerk-Kamera-Serie <strong>AXIS</strong> <strong>P13</strong>-E Installationsanleitung Seite 53Bestellnummer (P/N) und Seriennummer (S/N).Die Seriennummer wird für die Installationbenötigt.Einstellschrauben (2x) fürSonnenblendeSonnenblendeObere AbdeckungNetzwerk-KameraNetzwerkanschlussSicherheitsdrahtlascheKabellöcherSchrauben für untereAbdeckung (4)KabelabdeckungSchrauben fürKabelabdeckung (2)Untere AbdeckungHeizelement Vorsicht!kann heißDichtung seinDEUTSCHNetzwerkkabel (wird durchdie Wandhalterung geführt)Adapter für HalterungSchrauben fürHalterung (4x)Einstellschraube fürHalterungWandhalterungBeispielbild: <strong>AXIS</strong> <strong>P13</strong>43-E
Seite 54Netzwerk-Kamera-Serie <strong>AXIS</strong> <strong>P13</strong>-E InstallationsanleitungInstallation der HardwareIm folgenden Abschnitt wird die Installation der <strong>AXIS</strong> <strong>P13</strong>43-E/<strong>P13</strong>44-E/<strong>P13</strong>46-E beschrieben.Vorbereiten des NetzwerkkabelsFalls ein anderes als das mitgelieferte Kabel verwendet wird, müssen Sie ein Netzwerkkabel miteiner Dichtung vorbereiten. Führen Sie das Kabel vorsichtig durch die mitgelieferte Dichtung undbringen Sie einen Netzwerkstecker am Kabel an. Möglicherweise müssen Sie mit dem beiliegendenSchraubendreher ein Loch in die Dichtung stechen.Hinweise:• Versuchen Sie nicht, den Netzwerkstecker durch die Dichtung zu führen.• Stechen Sie nicht mit einem Messer oder einem anderen scharfen Gegenstand in die Dichtung.Installation der Wandhalterung1. Bereiten Sie die Befestigung der Wandhalterung an der Wand, Decke oder an einem Mast vorund markieren Sie die Position der Bohrlöcher mithilfe der mitgelieferten Bohrschablone.2. Ziehen Sie das Netzwerkkabel durch die Wandhalterung. Die Gummidichtung sollte hierbei amWandhalterungsadapter platziert sein. Siehe Abbildung auf Seite 53.3. Montieren Sie die Wandhalterung an einer Wand, einer Decke oder einem Mast. Stellen Siesicher, dass Sie für das Material (z. B. Holz, Metall, Gipskarton, Stein) die geeigneten Schraubenund Dübel verwenden.Hinweise:• Welches Gewicht die Kamera hat, können Sie der folgenden Tabelle entnehmen. Vergewissern Siesich, dass das Material stabil genug ist, um dieses Gewicht zu tragen.Modell Gewicht<strong>AXIS</strong> <strong>P13</strong>43-E 3090 g<strong>AXIS</strong> <strong>P13</strong>44-E 3120 g<strong>AXIS</strong> <strong>P13</strong>46-E 3130 g• Alle weiteren technischen Daten zu diesem Produkt werden ausführlich im Benutzerhandbuchbeschrieben, das auf der mitgelieferten CD oder auf unserer Website unter „www.axis.com“ zurVerfügung steht.
Netzwerk-Kamera-Serie <strong>AXIS</strong> <strong>P13</strong>-E Installationsanleitung Seite 55Anbringen der Kamera an der Halterung1. Montieren Sie die Kamera mit der unteren Abdeckung an der Halterung und ziehen Sie dieHalterungsschrauben fest.2. Entfernen Sie die Dichtung aus einem der Bohrlöcher in der unteren Abdeckung, sieheAbbildung auf Seite 56.3. Führen Sie das Kabel durch das Loch und setzen Sie die Kabeldichtung wieder in das Loch ein.Netzwerkkabel (wird durchdie Wandhalterung geführt)KabellöcherSchraube für Halterung (4)KabelabdeckungSchraube für Kabelabdeckung (2)WandhalterungEinstellschraube für HalterungDEUTSCH4. Schließen Sie die Kabel an, siehe Anschließen der Kabel, auf Seite 56.5. Nehmen Sie die obere Abdeckung ab und befestigen Sie den Sicherheitsdraht an der Lasche ander unteren Abdeckung.6. Bringen Sie die obere Abdeckung an. Ziehen Sie abwechselnd die jeweils diagonalgegenüberliegenden Schrauben der unteren Abdeckung einige Drehungen fest, bis alleSchrauben festgezogen sind. Somit wird sichergestellt, dass die Dichtung der unterenAbdeckung gleichmäßig angepresst wird. Versuchen Sie nicht, die Schrauben sofort vollständigfestzuziehen.7. Bringen Sie die Kabelabdeckung an und ziehen Sie die Schrauben der Kabelabdeckung fest.8. Lösen Sie die Einstellschrauben der Sonnenblende und richten Sie die Sonnenblende nach vorneaus.9. Lösen Sie die Einstellschraube der Halterung und richten Sie die Kamera auf das gewünschteZiel aus. Weitere Informationen zur Anzeige des Videostroms finden Sie unter Zugriff auf denVideostrom, auf Seite 63.
Seite 56Netzwerk-Kamera-Serie <strong>AXIS</strong> <strong>P13</strong>-E InstallationsanleitungAnschließen der Kabel1. Schieben Sie ggf. eine SD-Speicherkarte (separat erhältlich) in den SDHC-Speicherkartenschacht. Wenn Sie Bilder lokal in der Netzwerk-Kamera speichern möchten,benötigen Sie eine SD-Speicherkarte mit normaler oder hoher Kapazität.2. Schließen Sie externe Eingabe/Ausgabegeräte an (optional). Informationen zurAnschlussbelegung finden Sie auf Seite 69. Bereiten Sie die Kabel mit Dichtungen vor. WeitereInformationen hierzu finden Sie unter Vorbereiten des Netzwerkkabels, auf Seite 54. Führen Siedie Kabel durch die Bohrlöcher in der unteren Abdeckung zur Kamera.3. Verbinden Sie die Kamera über ein abgeschirmtes Netzwerkkabel mit dem Netzwerk. VerbindenSie das Netzwerkkabel mit dem Netzwerkanschluss an der Unterseite. Das Netzwerkkabel unddas E/A-Kabel zwischen der unteren Abdeckung und der Kamera sind werkseitig bereitsangeschlossen.NetzwerkkabelE/A-KabelUntere AbdeckungNetzwerkanschluss (PoE-Ausgang,werkseitig angeschlossen)KabellöcherNetzwerkanschluss (PoE-Eingang)LED-AnzeigeSchalter für Steuerung bei arktischenTemperaturen (Aktivierung nichterforderlich)Alarmausgang(werkseitig angeschlossen)4. Überprüfen Sie, ob die LED-Anzeigen die Betriebszustände korrekt angeben. WeitereInformationen hierzu finden Sie in der Tabelle auf Seite 71. Beachten Sie, dass die Status-LEDso konfiguriert werden kann, dass sie bei normalem Betrieb nicht leuchtet.
Netzwerk-Kamera-Serie <strong>AXIS</strong> <strong>P13</strong>-E Installationsanleitung Seite 57Zuweisen einer <strong>IP</strong>-AdresseIn den meisten Netzwerken ist heutzutage ein DHCP-Server eingebunden, der angeschlossenenGeräten automatisch <strong>IP</strong>-Adressen zuweist. Wenn Ihr Netzwerk über keinen DHCP-Server verfügt,wird für die Netzwerk-Kamera die Standard-<strong>IP</strong>-Adresse 192.168.0.90 verwendet.Zum Zuweisen einer statischen <strong>IP</strong>-Adresse stehen unter Windows die Programme <strong>AXIS</strong> <strong>IP</strong> Utilityund <strong>AXIS</strong> <strong>Camera</strong> Management zur Verfügung. Verwenden Sie die Methode, die für die gewünschteAnzahl der zu installierenden Kameras geeignet ist.Beide Anwendungen stehen kostenlos auf der mitgelieferten CD für Axis-Netzwerkvideoproduktezur Verfügung oder können unter „www.axis.com/techsup“ heruntergeladen werden.Methode Empfohlen für Betriebssystem<strong>AXIS</strong> <strong>IP</strong> UtilitySiehe Seite 58<strong>AXIS</strong> <strong>Camera</strong> ManagementSiehe Seite 59Einzelne KameraKleine InstallationenMehrere KamerasGroße InstallationenInstallation in einem anderenSubnetzWindowsWindows 2000Windows XP ProWindows 2003 ServerWindows VistaHinweise:• Falls Sie die <strong>IP</strong>-Adresse nicht zuweisen können, müssen ggf. die Einstellungen der Firewall überprüftwerden.• Weitere Informationen zu alternativen Methoden zum Festlegen der <strong>IP</strong>-Adresse, z. B. in anderenBetriebssystemen, finden Sie auf Seite 67.DEUTSCH
Seite 58Netzwerk-Kamera-Serie <strong>AXIS</strong> <strong>P13</strong>-E Installationsanleitung<strong>AXIS</strong> <strong>IP</strong> Utility – einzelne Kamera/kleine Installation<strong>AXIS</strong> <strong>IP</strong> Utility erkennt automatisch die im Netzwerk vorhandenen Axis-Geräte und zeigt diese an.Die Anwendung kann außerdem zur manuellen Zuweisung einer statischen <strong>IP</strong>-Adresse verwendetwerden.Beachten Sie, dass sich der Computer, auf dem <strong>AXIS</strong> <strong>IP</strong> Utility ausgeführt wird, und die Netzwerk-Kamera in demselben Netzwerksegment (physischen Subnetz) befinden müssen.Automatische Erkennung1. Stellen Sie sicher, dass die Netzwerk-Kamera an das Netzwerk und an die Stromversorgungangeschlossen ist.2. Starten Sie <strong>AXIS</strong> <strong>IP</strong> Utility.3. Wenn die Netzwerk-Kamera im Fenster erscheint, doppelklicken Sie darauf, um ihre Startseitezu öffnen.4. Anweisungen zum Festlegen des Kennworts finden Sie auf Seite 61.Manuelle Zuweisung der <strong>IP</strong>-Adresse (optional)1. Wählen Sie eine nicht zugewiesene <strong>IP</strong>-Adresse im selben Netzwerksegment, in dem sich IhrComputer befindet.2. Wählen Sie die Netzwerk-Kamera in der Liste aus.3. Klicken Sie auf die Schaltfläche Assign new <strong>IP</strong> address to selected device (AusgewähltemGerät neue <strong>IP</strong>-Adresse zuweisen) und geben Sie die <strong>IP</strong>-Adresse ein.4. Klicken Sie auf die Schaltfläche Assign (Zuweisen) und befolgen Sie die angezeigtenAnweisungen. Beachten Sie, dass die Kamera innerhalb von 2 Minuten neu gestartet werdenmuss, um die neue <strong>IP</strong>-Adresse festzulegen.5. Klicken Sie auf die Schaltfläche Home Page (Startseite), um auf die Webseiten der Kamerazuzugreifen.6. Anweisungen zum Festlegen des Kennworts finden Sie auf Seite 61.
Netzwerk-Kamera-Serie <strong>AXIS</strong> <strong>P13</strong>-E Installationsanleitung Seite 59<strong>AXIS</strong> <strong>Camera</strong> Management – mehrere Kameras/große InstallationenMit <strong>AXIS</strong> <strong>Camera</strong> Management können automatisch mehrere Axis-Geräte erkannt, derVerbindungsstatus angezeigt, die Firmware-Aktualisierungen verwaltet und <strong>IP</strong>-Adressen festgelegtwerden.Automatische Erkennung1. Stellen Sie sicher, dass die Kamera an das Netzwerk und die Stromversorgung angeschlossen ist.2. Starten Sie <strong>AXIS</strong> <strong>Camera</strong> Management. Wenn die Netzwerk-Kamera im Fenster angezeigt wird,klicken Sie mit der rechten Maustaste darauf und wählen Sie Live View Home Page (Homepageder Live-Ansicht).3. Anweisungen zum Festlegen des Kennworts finden Sie auf Seite 61.DEUTSCHZuweisen einer <strong>IP</strong>-Adresse für ein einzelnes Gerät1. Wählen Sie in <strong>AXIS</strong> <strong>Camera</strong> Management die Netzwerk-Kamera ausund klicken Sie auf die Schaltfläche Assign <strong>IP</strong> (<strong>IP</strong>-Adresse zuweisen).2. Wählen Sie die Option Assign the following <strong>IP</strong> address (Folgende <strong>IP</strong>-Adresse zuweisen) und geben Sie die <strong>IP</strong>-Adresse, die Subnetzmaske und den Standardrouter fürdas Gerät ein.3. Klicken Sie auf OK.
Seite 60Netzwerk-Kamera-Serie <strong>AXIS</strong> <strong>P13</strong>-E InstallationsanleitungZuweisen von <strong>IP</strong>-Adressen für mehrere Geräte<strong>AXIS</strong> <strong>Camera</strong> Management beschleunigt die Zuweisung von <strong>IP</strong>-Adressen an mehrere Geräte, indem <strong>IP</strong>-Adressen aus einemangegebenen Bereich vorgeschlagen werden.1. Wählen Sie die zu konfigurierenden Geräte aus (es könnenauch unterschiedliche Modelle gewählt werden) undklicken Sie auf die Schaltfläche zum Zuweisen der <strong>IP</strong> .2. Wählen Sie die Option Assign the following <strong>IP</strong> addressrange (Folgenden <strong>IP</strong>-Adressbereich zuweisen) und gebenSie den <strong>IP</strong>-Adressbereich, die Subnetzmaske und denStandardrouter für die Geräte ein.3. Klicken Sie auf Update (Aktualisieren). Die vorgeschlagenen <strong>IP</strong>-Adressen werden in der ListeNew <strong>IP</strong> Addresses (Neue <strong>IP</strong>-Adressen) aufgeführt. Wenn Sie eine <strong>IP</strong>-Adresse ändern möchten,wählen Sie das Gerät aus und klicken Sie auf die Schaltfläche Edit (Bearbeiten).4. Klicken Sie auf OK.
Netzwerk-Kamera-Serie <strong>AXIS</strong> <strong>P13</strong>-E Installationsanleitung Seite 61Festlegen des KennwortsFür den Zugriff auf das Produkt muss das Kennwort für den standardmäßigen Administrator-Benutzer root festgelegt werden. Beim erstmaligen Zugriff auf die Netzwerk-Kamera wird dasDialogfeld Configure Root Password (Root-Kennwort konfigurieren) angezeigt. Dort kann dasKennwort festgelegt werden.Um ein Abhören der Netzwerkkommunikation während der Festlegung des Root-Kennworts zuvermeiden, können Sie diesen Vorgang über eine verschlüsselte HTTPS-Verbindung durchführen, dieein HTTPS-Zertifikat erfordert.Hinweis: Das Protokoll HTTPS (Hypertext Transfer Protocol over SSL) wird verwendet, um denDatenverkehr zwischen Webbrowsern und Servern zu verschlüsseln. Das HTTPS-Zertifikatsteuert den verschlüsselten Informationsaustausch.Zum Festlegen des Kennworts über eine standardmäßige HTTP-Verbindung geben Sie es direkt indas erste unten abgebildete Dialogfeld ein.Um das Kennwort über eine verschlüsselte HTTPS-Verbindung festzulegen, führen Sie die folgendenSchritte aus:1. Klicken Sie auf die Schaltfläche Create self-signed certificate (Selbstsigniertes Zertifikaterstellen).2. Geben Sie die angeforderten Informationen ein und klicken Sie auf OK. Das Zertifikat wirderstellt, und das Kennwort kann jetzt sicher festgelegt werden. Der gesamte Datenverkehr derNetzwerk-Kamera wird ab diesem Zeitpunkt verschlüsselt.3. Geben Sie ein Kennwort ein, und wiederholen Sie die Eingabe, um die korrekte Schreibweise zubestätigen. Klicken Sie auf OK. Damit ist das Kennwort konfiguriert.Klicken Sie zum Herstellen einerHTTPS-Verbindung zunächst aufDEUTSCHUm das Kennwort direkt über eineunverschlüsselte Verbindung zukonfigurieren, geben Sie es hier ein.4. Geben Sie den Benutzernamen „root“ wie erforderlich ein.
Seite 62Netzwerk-Kamera-Serie <strong>AXIS</strong> <strong>P13</strong>-E InstallationsanleitungHinweis: Der standardmäßige Administrator-Benutzername „root“ kann nicht gelöschtwerden.5. Geben Sie das zuvor festgelegte Kennwort ein und klicken Sie auf OK.Hinweis: Wenn Sie das Kennwort vergessen haben, muss die Kamera auf dieWerkseinstellungen zurückgesetzt werden. Siehe Seite 73.6. <strong>AXIS</strong> <strong>P13</strong>46-E: Der Wiedergabemodus muss vor demersten Zugriff auf die <strong>AXIS</strong> <strong>P13</strong>46-E festgelegtwerden. Wählen Sie den gewünschtenWiedergabemodus aus der Dropdown-Liste undklicken Sie auf OK.Hinweis: Der Wiedergabemodus kann später überdie Webseiten des Produkts geändertwerden, dadurch werden aber die meistenanderen Einstellungen zurückgesetzt. Weitere Informationen finden Sie in derOnline-Hilfe oder im Benutzerhandbuch.
Netzwerk-Kamera-Serie <strong>AXIS</strong> <strong>P13</strong>-E Installationsanleitung Seite 63Zugriff auf den VideostromDie Seite „Live View“ (Live-Ansicht) der Netzwerk-Kamera wird geöffnet. Sie enthält Links zu Setup-Tools, mit denen Sie die Kamera Ihren Anforderungen entsprechend anpassen können.Klicken Sie bei Bedarf auf Yes (Ja), um AMC (<strong>AXIS</strong> Media Control) zu installieren. Nach Abschlussder Installation können Sie Videoströme in Internet Explorer anzeigen. Hierzu müssen Sie überAdministratorrechte für den Computer verfügen.Falls nötig, klicken Sie auf den Link, um fehlende Decoder zu installieren.Hinweis: Für die Installation von AMC unter Windows Vista und Windows 7 müssen SieInternet Explorer als Administrator ausführen. Klicken Sie mit der rechtenMaustaste auf das Internet Explorer-Symbol und wählen Sie Als Administratorausführen-.Setup: Alle zur benutzerspezifischenKonfiguration der Kameranotwendigen Werkzeuge.Hilfe: Zum Aufrufender Online-Hilfe für dieKamera.DEUTSCH
Seite 64Netzwerk-Kamera-Serie <strong>AXIS</strong> <strong>P13</strong>-E InstallationsanleitungZoom und Bildschärfe einstellenBefolgen Sie die folgenden Anweisungen, um die Zoomstärke und die Bildschärfe einzustellen:1. Öffnen Sie die Startseite der Kamera und wählen Sie Setup > Basic Setup > Focus (Setup >Basiskonfiguration > Fokus).2. Klicken Sie im Register Basic (Grundeinstellungen) auf Open iris (Blende öffnen). Ist dieseSchaltfläche deaktiviert, ist die Blende bereits offen.3. Wenn die Bildschärfe bereits eingestellt wurde, klicken Sie auf Reset (Zurücksetzen), um dasAuflagemaß zurückzusetzen.4. Lösen Sie den Zoomregler und den Schärferegler am Objektiv, indem Sie sie entgegen demUhrzeigersinn drehen. Bewegen Sie die beiden Regler und stellen Sie die Zoomstärke und dieBildschärfe ein. Prüfen Sie die Bildqualität im Bildfenster.Hinweis:Wenn die Kamera so montiert ist, dass es nicht möglich ist, die Bildqualität zuprüfen und gleichzeitig die -Regler zu bewegen, können Sie stattdessen den Fokus-Assistenten verwenden. Siehe Seite 65.5. Drehen Sie den Zoomregler und den Schärferegler wieder fest.6. Klicken Sie auf der Seite zum Einstellen der Bildschärfe auf Fine-tune focus automatically(Automatische Feinabstimmung der Bildschärfe) und warten Sie, bis die automatischeFeinabstimmung abgeschlossen ist.7. Klicken Sie auf Enable iris (Blende aktivieren). Ist diese Schaltfläche deaktiviert, ist die Blendebereits deaktiviert.8. Nehmen Sie gegebenfalls weitere Einstellungen im Register „Advanced“ vor. WeitereInformationen hierzu finden Sie im Benutzerhandbuch oder in der Online-Hilfe.Hinweise:• Stellen Sie die Bildschärfe so präzise wie möglich mithilfe des Schärfereglers oder des Fokus-Assistenten ein, bevor Sie die automatische Feinabstimmung starten. Der Schärferegler liefert in derRegel die besten Ergebnisse.
Netzwerk-Kamera-Serie <strong>AXIS</strong> <strong>P13</strong>-E Installationsanleitung Seite 65• Während der Fokussierung sollte die Blende immer vollständig geöffnet sein, wodurch die niedrigsteSchärfentiefe erreicht wird. Dies sind die besten Voraussetzungen für eine richtige Fokussierung.SchärfereglerStatus-LEDZoomreglerSteuertasteBeispielbild: <strong>AXIS</strong> <strong>P13</strong>43-EFokus-AssistentZur Fokussierung der Kamera mit dem Fokus-Assistenten befolgen Sie zunächst die Anweisungen inden Schritten 1 bis 3 auf Seite 64, bevor Sie die folgenden Schritte ausführen.DEUTSCH1. Fixieren oder platzieren Sie die Kamera so, dass sie nicht bewegt werden kann.2. Lösen Sie den Zoomregler, indem Sie ihn entgegen dem Uhrzeigersinn drehen. Bewegen Sie denRegler und stellen Sie die Zoomstärke ein. Drehen Sie den Zoomregler wieder fest.3. Stellen Sie die Kamera auf ihre weiteste Fernfokus-Position ein, indem Sie den Schärfereglerlösen und das Objektiv vollständig im Uhrzeigersinn drehen.4. Drücken Sie die Steuertaste und lassen Sie sie schnell wieder los. Wenn die Status-LED grünblinkt, ist der Fokus-Assistent aktiviert.Wenn die Status-LED rot oder gelb blinkt, bevor Sie das Objektiv einstellen können, fahren Siemit Schritt 7 fort, um den Fokus-Assistenten zu beenden, und wiederholen Sie die Schritte 3 bis7. Weitere Informationen finden Sie in den Hinweisen unten.5. Drehen Sie das Objektiv vorsichtig entgegen dem Uhrzeigersinn, bis es stoppt.6. Drehen Sie das Objektiv abschließend langsam im Uhrzeigersinn, bis die Statusanzeige grünoder gelb blinkt (nicht rot).7. Zum Beenden des Fokus-Assistenten drücken Sie die Steuertaste noch einmal.Hinweis: Der Fokus-Assistent wird nach 15 Minuten automatisch ausgeschaltet.8. Drehen Sie den Schärferegler wieder fest.9. Öffnen Sie die Seite „Live View“ (Live-Ansicht) in Ihrem Webbrowser und überprüfen Sie dieBildqualität.
Seite 66Netzwerk-Kamera-Serie <strong>AXIS</strong> <strong>P13</strong>-E Installationsanleitung10. Fahren Sie mit den Schritten 6 bis 8 auf Seite 64 fort.Hinweise:• Während der Fokussierung der Kamera (Schritte 5 und 6) darf die Sicht vor der Kamera nichtgeändert werden. Falls Sie die Kamera bewegen, oder wenn ein Finger oder ein Gegenstand vor demObjektiv platziert wird, müssen Sie die Schritte 3 bis 7 wiederholen.• Wenn Bewegungen vor der Kamera nicht vermieden werden können, sollten Sie den Fokus-Assistenten nicht verwenden.• Wenn Sie die Steuertaste nicht innerhalb von zwei Sekunden loslassen, wird anstelle des Fokus-Assistenten der <strong>AXIS</strong> Dynamic DNS Service aktiviert.• Wenn die Kamera so montiert ist, dass die Betätigung der Steuertaste nicht möglich ist, können Sietrotzdem den Fokus-Assistenten verwenden. Befolgen Sie die oben beschriebenen Anweisungen, aberfixieren Sie die Kamera erst, nachdem Sie Schritt 4 (Drücken der Steuertaste) ausgeführt haben, undüberspringen Sie Schritt 7.
Netzwerk-Kamera-Serie <strong>AXIS</strong> <strong>P13</strong>-E Installationsanleitung Seite 67Andere Methoden zum Festlegen der <strong>IP</strong>-AdresseDiese Tabelle bietet einen Überblick über weitere Methoden, die <strong>IP</strong>-Adresse festzulegen bzw. zuermitteln. Alle Methoden sind standardmäßig aktiviert und können deaktiviert werden.Verwendung imBetriebssystemHinweiseUPnP Windows Wenn die Funktion auf dem Computer aktiviert ist, wird dieKamera automatisch erkannt und unter „Netzwerkumgebung“bzw. „Netzwerk“ hinzugefügt.Bonjour<strong>AXIS</strong> Dynamic DNSServiceMAC OSX(10.4 oder höher)AlleZuweisen der <strong>IP</strong>-Adresse per ARP/PingKann nur bei Browsern verwendet werden, die Bonjourunterstützen. Navigieren Sie zum Bonjour-Lesezeichen IhresBrowsers (z. B. Safari) und klicken Sie auf den Link, um auf dieWebseiten der Kamera zu gelangen.Ein kostenloser Service von Axis, mit dem Sie Ihre Kamera schnellund einfach installieren können. Eine Internetverbindung ohneHTTP-Proxyserver ist Voraussetzung. Weitere Informationenhierzu finden Sie auf "www.axiscam.net".ARP/Ping Alle Siehe unten. Der Befehl muss innerhalb von 2 Minuten erfolgen,nachdem die Kamera an das Stromnetz angeschlossen wurde.DHCP-Server Alle Hinweise zum Anzeigen der Administrationsseiten des DHCP-Servers im Netzwerk finden Sie in der Serverdokumentation.1. Wählen Sie eine freie statische <strong>IP</strong>-Adresse aus dem Netzwerksegment aus, in dem sich auch IhrComputer befindet.2. Suchen Sie die Seriennummer (S/N) auf dem Produktaufkleber an der Kamera.3. Öffnen Sie auf Ihrem Computer die Eingabeaufforderung und geben Sie die folgenden Befehleein:DEUTSCHWindows-Syntax:arp -s ping -l 408 -t Syntax unter UNIX/Linux/Mac:arp -s tempping -s 408 Beispiel für Windows:arp -s 192.168.0.125 00-40-8c-18-10-00ping -l 408 -t 192.168.0.125Beispiel für UNIX/Linux/Mac:arp -s 192.168.0.125 00:40:8c:18:10:00 tempping -s 408 192.168.0.1254. Stellen Sie sicher, dass das Netzwerkkabel mit der Kamera verbunden ist und starten Sie dieKamera bzw. starten Sie diese neu, indem Sie die Stromversorgung unterbrechen undwiederherstellen.5. Schließen Sie die Befehlszeile, sobald „Reply from 192.168.0.125:...“ (Antwort von192.168.0.125:...) oder eine ähnliche Meldung angezeigt wird.6. Starten Sie einen Browser, geben Sie im Adressfeld „http://“ ein und drücken Siedie Eingabetaste auf der Tastatur.
Seite 68Netzwerk-Kamera-Serie <strong>AXIS</strong> <strong>P13</strong>-E InstallationsanleitungHinweise:• So öffnen Sie die Eingabeaufforderung unter Windows: Wählen Sie im Startmenü die OptionAusführen... und geben Sie „cmd“ ein. Klicken Sie auf OK.• Klicken Sie zum Eingeben des Befehls „ARP“ unter WIndows Vista mit der rechten Maustaste auf dasBefehlszeilensymbol und wählen Sie Als Administrator ausführen.• Verwenden Sie zum Eingeben des Befehls „ARP“ unter Mac OS X das Dienstprogramm „Terminal“, dasSie unter Programme > Dienstprogramme finden.GeräteanschlüsseNetzwerkanschluss - RJ-45-Ethernetanschluss. Unterstützt Power over Ethernet. Die Verwendungvon abgeschirmten Kabeln wird empfohlen.Netzanschluss - 2-poliger Anschlussblock für Netzeingang.Funktion Anschluss BedeutungSchutzleiter 1 MasseGleichstrom 2 Netzeingang 8-20 V Gleichstrom<strong>AXIS</strong> <strong>P13</strong>43-E: max. 6,4 W<strong>AXIS</strong> <strong>P13</strong>44-E: max. 6,4 W<strong>AXIS</strong> <strong>P13</strong>46-E: max. 9,6 W1 2Audio-Eingang - 3,5-mm-Anschluss für ein Monomikrofon oder ein Monosignal (linker Kanal wirdvon einem Stereosignal benutzt).Audio-Ausgang - Audioausgang (Leistungsstufe) zum Anschließen einer Rundrufanlage (PA) odereines Aktivlautsprechers mit integriertem Verstärker. Auch ein Kopfhörer kann angeschlossenwerden. Für den Audioausgang muss ein Stereostecker benutzt werden.SDHC-Speicherkarteneinschub - Eine SD-Speicherkarte mit normaler oder hoher Kapazität kannzur lokalen Aufzeichnung mit Wechselmedien verwendet werden.SD-SpeicherkarteneinschubZum Einsetzen der SD-Karte heben Sie die SD-Karteneinschubabdeckung auf der Rückseite derNetzwerk-Kamera an und schieben die SD-Karte vorsichtig in den Einschub ein.
Netzwerk-Kamera-Serie <strong>AXIS</strong> <strong>P13</strong>-E Installationsanleitung Seite 69Zum Entnehmen der SD-Karte haben Sie die Abdeckung an und drücken die Karte vorsichtig ein undlassen sie wieder los. Die Karte kommt etwas aus dem Einschub heraus und kann dann entnommenwerden.E/A-Anschluss - Wird z. B. für Bewegungserkennung undEreignisauslösung, Zeitrafferaufnahmen undAlarmbenachrichtigungen verwendet. Zusätzlich zu denAnschlüssen für die Zusatzstromversorgung und Masse fungiertsie als Schnittstelle für:• 1 digitaler Ausgang: Zum Anschluss externer Geräte wieRelais und LEDs. Angeschlossene Geräte können über dieVAPIX® Application Programming Interface (API), überdie Ausgabeschaltflächen auf der Seite Live View (Live-Ansicht) oder durch einen Ereignistyp aktiviert werden. Der Ausgang wird als aktiv [sieheEvents>Port Status(Ereignisse > Port-Status)] angezeigt, wenn die Alarmvorrichtungeingeschaltet ist.• 1 digitaler Eingang: Alarmeingang für den Anschluss von Geräten, die zwischen geöffnetemund geschlossenem Schaltkreis wechseln können, z. B.: PIR-Kameras, Tür/Fensterkontakte,Glasbruchmelder usw. Bei Empfang eines Signals ändert sich der Status und der Eingangwird aktiviert [siehe Events > Port Status (Ereignisse Portstatus)].Hinweis:Kontakt 4 KontaktKontakt 3 Kontakt 1Der E/A-Anschluss an der <strong>AXIS</strong> <strong>P13</strong>43-E/<strong>P13</strong>44-E/<strong>P13</strong>46-E ist ab Werk an dieGehäuseelektronik angeschlossen- und löst bei entsprechender Aktivierung ein Ereignis überden Eingangsport aus, wenn Probleme mit dem Lüfter oder der Heizung auftreten. WeitereInformationen darüber, wie Ereignisse eingerichtet werden, finden Sie imBenutzerhandbuch, das sich auf der mitgelieferten CD- befindet und auf der Website unter„www.axis.com“ erhältlich ist.DEUTSCHFunktion Kontakt Hinweise SpezifikationenSchutzleiter 1 Masse3,3 VGleichstrom2 Dieser Kontakt kann auch für dieStromversorgung von Zusatzgerätenverwendet werden.Hinweis: Dieser Anschluss kann nur für dieStromversorgung verwendet werden.Max. Stromstärke = 50 mA
Seite 70Netzwerk-Kamera-Serie <strong>AXIS</strong> <strong>P13</strong>-E InstallationsanleitungFunktion Kontakt Hinweise SpezifikationenKonfigurierbar(Ein- oderAusgang)3-4 Zum Aktivieren mit dem Masseanschlussverbinden; zum Deaktivieren nichtanschließen.Hinweis: Werkseitig mit derGehäuseelektronik verbunden.Verwendet einen NFET-Transistor mitoffener Senke, wobei die Quelle mit derMasse verbunden ist. Zum Schutz vorSpannungsspitzen muss bei derKombination mit einem externen Relaiseine Diode parallel zur Last geschaltetwerden.Min. Eingang = -40 V DCMax. Eingang = +40 V DCMax. Stromstärke = 100mAMax. Spannung = 40 V DCAnschlussschaltbildDas folgende Anschlussschaltbild zeigt ein Beispiel für den Anschluss eines Zusatzgeräts an dieNetzwerk-Kamera.13.3Vmax. 50mA2E.g. push button3GDS4
Netzwerk-Kamera-Serie <strong>AXIS</strong> <strong>P13</strong>-E Installationsanleitung Seite 71LED-AnzeigenLED Farbe BedeutungNetzwerk Grün Leuchtet dauerhaft bei Verbindung mit einem 100-MBit/s-Netzwerk. Blinkt beiNetzwerkaktivität.GelbLeuchtetnichtLeuchtet dauerhaft bei Verbindung mit einem 10-MBit/s-Netzwerk. Blinkt beiNetzwerkaktivität.Keine Netzwerkverbindung vorhanden.Status Grün Leuchtet bei Normalbetrieb konstant grün.Hinweis: Die Status-LED kann so konfiguriert werden, dass sie bei normalemBetrieb nicht leuchtet oder nur dann blinkt, wenn auf die Kamera zugegriffenwird. Diese Einstellung können Sie unter „Setup > System Options > LEDsettings“ (Setup > Systemoptionen > LED-Einstellungen) vornehmen.Weitere Informationen hierzu finden Sie in der Online-Hilfe.Gelb Leuchtet konstant beim Einschalten und beim Wiederherstellen derWerkseinstellungen bzw. von vorherigen Einstellungen.Rot Blinkt langsam bei Aktualisierungsfehler.Betriebsanzeige Grün Normaler Betrieb.Gelb Blinkt grün/gelb während Firmware-Aktualisierung.DEUTSCHStatus-LED bei Verwendung des Fokus-AssistentenLED Farbe BedeutungGrünGelbRotSchritt 4: Fokus-Assistent ist aktiviertSchritt 6: Das Objektiv ist optimal eingestelltSchritt 4: Die Kamera wurde bewegt, oder vor dem Objektiv wurde einGegenstand platziert. Beenden Sie den Fokus-Assistenten und starten Sieihn neu.Schritt 6: Das Objektiv ist weniger optimal eingestelltSchritt 4: Die Kamera wurde bewegt, oder vor dem Objektiv wurde einGegenstand platziert. Beenden Sie den Fokus-Assistenten und starten Sieihn neu.Schritt 6: Das Objektiv ist unzureichend eingestellt
Seite 72Netzwerk-Kamera-Serie <strong>AXIS</strong> <strong>P13</strong>-E InstallationsanleitungStatus-LED an der Gehäuseelektronik (Lüfter/Heizung)LED Farbe BedeutungBetriebsanzeige Grün OKBlinkt grün Einzelnes Blinken: Probleme mit der HeizungDoppeltes Blinken: Probleme mit dem LüfterDreifaches Blinken: Allgemeiner FehlerHinweis: Alarmereignisse werden über den Eingangsport der Kameraausgelöst. Weitere Informationen hierzu finden Sie im Benutzerhandbuch,das sich auf der mitgelieferten CD befindet und auf der Website unter„www.axis.com“ erhältlich ist. Wenden Sie sich an Ihren Axis-Händler,wenn Sie Informationen zu Ersatzteilen oder Hilfe bei der Lösung vonProblemen benötigen.
Netzwerk-Kamera-Serie <strong>AXIS</strong> <strong>P13</strong>-E Installationsanleitung Seite 73Wiederherstellen der werkseitigen StandardeinstellungenGehen Sie wie folgt vor, um sämtliche Parameter einschließlich der <strong>IP</strong>-Adresse und der Fokus-Position auf die werkseitigen Standardeinstellungen zurückzusetzen:1. Trennen Sie die Kamera von der Stromversorgung.2. Halten Sie die Steuertaste gedrückt und schließen Sie den Netzstecker wieder an.3. Halten Sie die Steuertaste so lange gedrückt, bis die Statusanzeige gelb aufleuchtet (dies kannbis zu 15 Sekunden dauern).4. Lassen Sie die Steuertaste los. Sobald die Statusanzeige grün leuchtet (dies kann bis zu einerMinute dauern), ist die Netzwerk-Kamera auf die werkseitigen Standardeinstellungenzurückgesetzt.5. Legen Sie die <strong>IP</strong>-Adresse erneut fest. Wenden Sie dabei eines der in dieser Anleitungbeschriebenen Verfahren an.6. Führen Sie die Fokussierung der Kamera erneut durch. Wenden Sie dabei eine der in dieserAnleitung beschriebenen Methoden an.Die Parameter können auch über die Weboberfläche auf die werkseitigen Einstellungenzurückgesetzt werden. Weitere Informationen dazu finden Sie in der Online-Hilfe und imBenutzerhandbuch.Zugriff auf die Kamera über das InternetSobald die Netzwerk-Kamera installiert ist, können Sie in Ihrem lokalen Netzwerk (LAN) daraufzugreifen. Um auch über das Internet auf die Kamera zugreifen zu können, müssen Sie dieNetzwerk-Router so konfigurieren, dass diese den eingehenden Datenverkehr zulassen, wasüblicherweise durch Zuweisung eines bestimmten Ports geschieht.• HTTP-Port (standardmäßig Port 80) für die Anzeige und Konfiguration• RTSP-Port (standardmäßig Port 554) für die Anzeige von H.264-VideoströmenAusführliche Informationen zu diesem Thema finden Sie in der Dokumentation des Routers. WeitereInformationen zu diesem und zu anderen Themen erhalten Sie auf der Axis Support-Website unter"www.axis.com/techsup".DEUTSCHWeitere InformationenDas Benutzerhandbuch ist auf der Axis Website unter „http://www.axis.com“ erhältlich undbefindet sich auch auf der mitgelieferten CD für Axis-Netzwerkvideoprodukte.Tipp!Unter „www.axis.com/techsup“ finden Sie Firmware-Aktualisierungen für Ihre Netzwerk-Kamera. Informationen zur aktuellen Firmware-Version finden Sie unter Setup > About.
Guida all'installazione Telecamere di rete serie <strong>AXIS</strong> <strong>P13</strong>-E Pagina 75Precauzioni e avvertenzeLeggere per intero e con attenzione questa Guida all'installazione prima di installare ilprodotto. Conservare la Guida all'installazione per ulteriori riferimenti.! ATTENZIONE!• Quando si trasporta un prodotto Axis, utilizzare l'imballo originale o un imballo equivalenteper evitare danni al prodotto.• Evitare di esporre il prodotto Axis a vibrazioni, urti o pressioni eccessive e non installare latelecamera su staffe instabili, superfici o pareti instabili o vibranti, poiché in tal modo sipotrebbe danneggiare il prodotto.• Per l'installazione della telecamera utilizzare solo attrezzi manuali, l'utilizzo di utensilielettrici o l'applicazione di una forza eccessiva potrebbero danneggiare il prodotto.• Non utilizzare sostanze chimiche, agenti caustici o detergenti aerosol. Utilizzare un pannoumido per la pulizia.• Utilizzare solo accessori e parti di ricambio forniti o consigliati da Axis.• Non tentare di riparare da soli il prodotto, ma contattare Axis o il rivenditore Axis perqualsiasi argomento relativo all'assistenza tecnica.! IMPORTANTE!• Questo prodotto Axis deve essere utilizzato in conformità alle leggi e alle regolamentazionilocali.• Conservare e trasportare il prodotto Axis in un ambiente asciutto e ventilato.Avviso di sicurezza - Sostituzione della batteriaQuesto prodotto Axis utilizza una batteria al litio CR2032 da 3,0V come sorgente di alimentazione per l'orologio intempo reale (RTC) interno. In condizioni normali, la batteria dura almeno 5 anni. Una scarsa potenza della batteriainfluisce sul funzionamento dell'RTC, causandone la reimpostazione a ogni accensione. Quando la batteria necessitadi sostituzione, appare un messaggio di log. La batteria non deve essere sostituita se non è necessario!Se è necessario sostituire la batteria, visitare la pagina web www.axis.com/techsup per assistenza.• La sostituzione non corretta della batteria comporta il pericolo di esplosioni• Sostituire solo con una batteria uguale o equivalente, come consigliato dal produttore.• Smaltire le batterie usate secondo le istruzioni del produttore.ITALIANO
Guida all'installazione Telecamere di rete serie <strong>AXIS</strong> <strong>P13</strong>-E Pagina 77<strong>AXIS</strong> <strong>P13</strong>43-E, <strong>AXIS</strong> <strong>P13</strong>44-E& <strong>AXIS</strong> <strong>P13</strong>46-EGuida all'installazioneQuesto documento fornisce le istruzioni necessarie per installare la telecamera <strong>AXIS</strong> <strong>P13</strong>43-E/<strong>P13</strong>44-E/<strong>P13</strong>46-E telecamera di rete nella rete in uso. Per ulteriori informazioni sull'utilizzo delprodotto, consultare la Guida per l'utente disponibile sul CD incluso nella confezione oppure visitareil sito web all'indirizzo www.axis.com.Procedura di installazione1. Controllare il contenuto della confezione utilizzandol’elenco fornito di seguito.Importante!Il prodotto deve essere utilizzato2. Panoramica dell’hardware. Vedere a pagina 78.in conformità alle leggi e alle3. Installazione dell’hardware. Vedere a pagina 80.regolamentazioni locali.4. Assegnazione di un indirizzo <strong>IP</strong>. Vedere a pagina 83.5. Impostazione della password. Vedere a pagina 87.6. Regolazione dello zoom e della messa a fuoco. Vedere a pagina 90.Contenuto della confezioneElementoModelli/varianti/noteITALIANOTelecamera di reteStaffa per il montaggio apareteUtilityCavo di reteCDDocumentazione cartacea<strong>AXIS</strong> <strong>P13</strong>43-E/<strong>AXIS</strong> <strong>P13</strong>44-E/<strong>AXIS</strong> <strong>P13</strong>46-EStaffa per il montaggio a muro con canalina interna per caviCacciavite Torx T20Chiave AllenCavo di rete per esterni 5 m (16 ft.) con guarnizioneCD del prodotto, che comprende le utility di installazione e altro softwarenonché la documentazione del prodotto.Guida all'installazione delle Telecamere di rete serie <strong>AXIS</strong> <strong>P13</strong>-E (questodocumento)Certificato di garanzia AxisEtichetta aggiuntiva con numero di serie (2x)Accessori opzionaliVisitare il sito web www.axis.com per informazioni sugli accessori disponibili
Pagina 78Guida all'installazione Telecamere di rete serie <strong>AXIS</strong> <strong>P13</strong>-EPanoramica dell’hardwareSlot per schede di memoria SDLED di statoLevetta zoomLevetta di messa a fuocoVista posterioreConnettore di rete (PoE)Ingresso audioUscita audioVista dalbassoLED dialimentazioneLED di retePulsante dicomandoConnettore del diaframmaMorsettiera di alimentazioneMorsettiera I/OCodice prodotto (N/P) enumero di serie (N/S)Immagine di esempio: <strong>AXIS</strong> <strong>P13</strong>43-E
Guida all'installazione Telecamere di rete serie <strong>AXIS</strong> <strong>P13</strong>-E Pagina 79Codice prodotto (N/P) e numero di serie (N/S).Il numero di serie potrebbe esserenecessario durante l’installazione.Vite di regolazioneschermo solare (2x)Schermo solareCopertura superioreTelecamera di reteConnettore di reteLinguetta per il cavodi sicurezzaFori dei caviViti della coperturainferiore (4)Coperchio dei caviViti del coperchiodei cavi (2x)Copertura inferioreRiscaldatore Attenzione!può essereGuarnizione caldoITALIANOCavo di rete (scorreattraverso la staffaa parete)Adattatore per staffaViti della staffa (4x)Viti di regolazione staffaStaffa per il montaggioa pareteImmagine di esempio: <strong>AXIS</strong> <strong>P13</strong>43-E
Pagina 80Guida all'installazione Telecamere di rete serie <strong>AXIS</strong> <strong>P13</strong>-EInstallazione dell’hardwareLe istruzioni che seguono descrivono l'installazione della telecamera <strong>AXIS</strong> <strong>P13</strong>43-E/<strong>P13</strong>44-E/<strong>P13</strong>46-E.Preparazione del cavo di reteSe si utilizza un cavo diverso da quello fornito, sul cavo di rete è necessario montare unaguarnizione. Spingere delicatamente il cavo nella guarnizione fornita e fissarlo al connettore direte. Può talvolta essere necessario forare la guarnizione con il cacciavite fornito.Note:• Non spingere a forza il connettore di rete nella guarnizione.• Non forare la guarnizione con un coltello o un altro oggetto appuntito.Installare la staffa di montaggio a parete1. Utilizzare la maschera di foratura fornita per preparare una parete, un soffitto o un'asta perl'installazione della staffa a parete.2. Inserire il cavo di rete attraverso la staffa a parete, la guarnizione di gomma dovrebbe esseresull'estremità dell'adattatore della staffa a parete, vedere l'illustrazione a pagina 79.3. Installare la staffa a parete su una parete, un soffitto o un'asta ed assicurarsi che le viti e iconnettori siano appropriati per il materiale (ad esempio legno, metallo, cartongesso, pietra).Note:• Il peso della telecamera viene mostrato nella tabella che segue. Controllare che il materiale siasufficientemente robusto per sostenere tale peso.Modello Peso<strong>AXIS</strong> <strong>P13</strong>43-E 3090 g (6,8 lb)<strong>AXIS</strong> <strong>P13</strong>44-E 3120 g (6,9 lb)<strong>AXIS</strong> <strong>P13</strong>46-E 3130 g (6,9 lb)• Per ulteriori specifiche tecniche, consultare la Guida per l'utente disponibile sul CD incluso nellaconfezione oppure visitare il sito web all'indirizzo www.axis.com.
Guida all'installazione Telecamere di rete serie <strong>AXIS</strong> <strong>P13</strong>-E Pagina 81Installare la telecamera sulla staffa1. Installare la telecamera con la copertura inferiore sulla staffa, quindi serrare le viti della staffa.2. Rimuovere la guarnizione da uno dei fori della copertura inferiore, vedere illustrazione apagina 82.3. Far passare il cavo attraverso il foro e applicare la guarnizione del cavo al foro.Cavo di rete (scorreattraverso la staffa a parete)Fori dei caviVite della staffa (4x)Coperchio dei caviVite del coperchio dei cavi (2x)Staffa per il montaggio a pareteViti di regolazione staffa4. Collegamento dei cavi. Vedere a Collegamento dei cavi, a pagina 82.5. Prendere la copertura superiore e fissare il cavo di sicurezza alla linguetta sulla coperturainferiore.6. Montare la copertura superiore. Assicurarsi di serrare le viti del coperchio pochi giri per volta acoppie diagonalmente opposte, fino a che non sono tutte serrate. Questo aiuta a garantire chela guarnizione del coperchio inferiore sia compressa in modo uniforme. Non tentare di serraresubito completamente le viti.7. Installare il coperchio dei cavi e serrare le viti del coperchio dei cavi.8. Allentare le viti di regolazione dello schermo solare e regolare lo schermo solare in posizioneanteriore.9. Allentare la vite di regolazione della staffa per rivolgere la telecamera verso il punto desiderato.Vedere Accesso al flusso video, a pagina 89 per informazioni sulla visualizzazione del flussovideo.ITALIANO
Pagina 82Guida all'installazione Telecamere di rete serie <strong>AXIS</strong> <strong>P13</strong>-ECollegamento dei cavi1. Inserire facoltativamente una scheda di memoria SD (non inclusa) nell'alloggiamento SDHC(SecureDigital High Capacity). Per memorizzare localmente le immagini riprese dalla telecamera, ènecessaria una scheda SD con capacità standard o elevata.2. Collegare facoltativamente le altre periferiche esterne di input/output. Per informazioni sui pindella morsettiera di alimentazione, vedere la pagina 95 Preparare i cavi con le guarnizioni,vedere Preparazione del cavo di rete, a pagina 80, e far passare i cavi attraverso i fori per i cavinel coperchio inferiore, fino alla telecamera.3. Collegare la telecamera alla rete mediante un cavo di rete schermato. Collegare il cavo di rete alconnettore di rete sul fondo. Il cavo di rete e il cavo di I/O tra il coperchio inferiore e latelecamera sono già collegati quando la telecamera viene speditaCavi di reteCavo di I/OCopertura inferioreConnettore di rete (PoE OUT,connesso alla spedizione)Fori dei caviConnettore di rete (PoE IN)Indicatore LEDInterruttore Arctic Temperature Control(abilitazione non necessaria)Uscita allarmi(connessa alla spedizione)4. Verificare che i LED indichino le condizioni di funzionamento corrette. Per ulteriori dettagli,vedere la tabella a pagina 96. Si noti che è possibile configurare il LED di stato perché rimangaspento in condizioni d'utilizzo normali.
Guida all'installazione Telecamere di rete serie <strong>AXIS</strong> <strong>P13</strong>-E Pagina 83Assegnazione di un indirizzo <strong>IP</strong>La maggior parte delle reti dispone di un server DHCP che assegna automaticamente gli indirizzi <strong>IP</strong>alle periferiche connesse. Se la rete non dispone di un server DHCP, per la telecamera di rete vieneutilizzato l'indirizzo <strong>IP</strong> predefinito 192.168.0.90.Per assegnare un indirizzo <strong>IP</strong> statico, utilizzare <strong>AXIS</strong> <strong>IP</strong> Utility o <strong>AXIS</strong> <strong>Camera</strong> Management inambiente Windows. In base al numero di videocamere da installare, utilizzare il metodo che megliosi adatta alle proprie esigenze.Entrambe le applicazioni sono disponibili gratuitamente sul CD del prodotto oppure possono esserescaricate dal sito web all’indirizzo www.axis.com/techsup.Metodo Consigliato per Sistema operativo<strong>AXIS</strong> <strong>IP</strong> UtilityVedere pagina 84Telecamera singolaPiccole installazioniWindows<strong>AXIS</strong> <strong>Camera</strong> ManagementVedere pagina 85Più videocamereGrandi installazioniInstallazione in una subnet diversaWindows 2000Windows XP ProWindows 2003 ServerWindows VistaNote:• Se l’assegnazione dell’indirizzo <strong>IP</strong> non è riuscita correttamente, verificare che non siano presentifirewall che bloccano l’operazione.• Per altri metodi di assegnazione o rilevazione dell'indirizzo <strong>IP</strong>, per esempio in altri sistemi operativi,vedere a pagina 93.ITALIANO
Pagina 84Guida all'installazione Telecamere di rete serie <strong>AXIS</strong> <strong>P13</strong>-E<strong>AXIS</strong> <strong>IP</strong> Utility: telecamera singola/piccole installazioni<strong>AXIS</strong> <strong>IP</strong> Utility rileva e visualizza automaticamente i dispositivi Axis collegati alla rete.L’applicazione inoltre può essere utilizzata per assegnare manualmente un indirizzo <strong>IP</strong> statico.Si tenga presente che la telecamera di rete deve essere installata sullo stesso segmento di rete(subnet fisica) del computer sul quale è in esecuzione <strong>AXIS</strong> <strong>IP</strong> Utility.Rilevamento automatico1. Verificare che la telecamera di rete sia collegata alla rete e alimentata correttamente.2. Avviare <strong>AXIS</strong> <strong>IP</strong> Utility.3. Appena viene visualizzata la telecamera di rete, selezionarla con un doppio clic per aprire lahome page.4. Vedere la pagina 87 per istruzioni su come assegnare la password.Assegnazione manuale dell’indirizzo <strong>IP</strong> (facoltativo)1. Acquisire un indirizzo <strong>IP</strong> non utilizzato sullo stesso segmento di rete del computer.2. Selezionare la telecamera di rete dall’elenco.3. Fare clic sul pulsante Assign new <strong>IP</strong> address to selected device (Assegna nuovo indirizzo <strong>IP</strong> allaperiferica selezionata) e inserire l'indirizzo <strong>IP</strong>.4. Fare clic su Assign (Assegna) e seguire le istruzioni visualizzate. Si tenga presente che latelecamera deve essere riavviata entro due minuti per impostare il nuovo indirizzo <strong>IP</strong>.5. Fare clic sul pulsante Home Page (Pagina home) per accedere alle pagine web della telecamera.6. Vedere a pagina 87 le istruzioni per impostare la password.
Guida all'installazione Telecamere di rete serie <strong>AXIS</strong> <strong>P13</strong>-E Pagina 85<strong>AXIS</strong> <strong>Camera</strong> Management: più telecamere/grandi installazioniÈ possibile utilizzare <strong>AXIS</strong> <strong>Camera</strong> Management per individuare automaticamente la presenza di piùperiferiche Axis, visualizzare lo stato di connessione, gestire gli aggiornamenti del firmware edassegnare gli indirizzi <strong>IP</strong>.Rilevamento automatico1. Verificare che la telecamera sia collegata alla rete e alimentata correttamente.2. Avviare <strong>AXIS</strong> <strong>Camera</strong> Management. Non appena la telecamera di rete viene visualizzata nellafinestra, fare clic con il pulsante destro sul collegamento e selezionare Live View Home Page(Immagini dal vivo).3. Vedere a pagina 87 le istruzioni per impostare la password.Assegnazione di un indirizzo <strong>IP</strong> a un singolo dispositivo1. Selezionare la telecamera di rete in <strong>AXIS</strong> <strong>Camera</strong> Management e fareclic sul pulsante Assign <strong>IP</strong> (Assegna <strong>IP</strong>) .2. Selezionare Assign the following <strong>IP</strong> address (Assegna il seguenteindirizzo <strong>IP</strong>) e inserire l'indirizzo <strong>IP</strong>, la subnet mask e il routerpredefinito utilizzato dal codificatore.3. Fare clic su OK.ITALIANOAssegnazione degli indirizzi <strong>IP</strong> a più telecamere<strong>AXIS</strong> <strong>Camera</strong> Management facilita il processo di assegnazionedegli indirizzi <strong>IP</strong> di più periferiche, suggerendo gli indirizzi <strong>IP</strong> inbase a un intervallo specifico.1. Selezionare le telecamere da configurare (è possibileselezionare più modelli) e fare clic sul pulsante Assign <strong>IP</strong>(Assegna <strong>IP</strong>) .
Pagina 86Guida all'installazione Telecamere di rete serie <strong>AXIS</strong> <strong>P13</strong>-E2. Selezionare Assign the following <strong>IP</strong> address range (Assegna il seguente intervallo di indirizzi<strong>IP</strong>) e immettere l’intervallo di indirizzi <strong>IP</strong>, la subnet mask e il router predefinito utilizzati dallaperiferica.3. Fare clic su Update (Aggiorna). Gli indirizzi <strong>IP</strong> suggeriti sono elencati sotto a New <strong>IP</strong> Addresses(Nuovi indirizzi <strong>IP</strong>) e possono essere modificati selezionando una periferica e facendo clic suEdit (Modifica).4. Fare clic su OK.
Guida all'installazione Telecamere di rete serie <strong>AXIS</strong> <strong>P13</strong>-E Pagina 87Impostazione della passwordPer ottenere l’accesso al prodotto, è necessario impostare la password dell’utente amministratorepredefinito root. Questa operazione può essere effettuata nella finestra di dialogo 'Configure RootPassword' (Configura password root), che viene visualizzata quando si accede alla telecamera per laprima volta.Per evitare l'interruzione della connessione di rete durante l'impostazione della password root, èpossibile eseguire questa operazione tramite la connessione crittografata HTTPS, che richiede unacertificato HTTPS .Nota: HTTPS (Hypertext Transfer Protocol over SSL) è un protocollo utilizzato per crittografareil traffico tra i browser e i server web. Il certificato HTTPS controlla lo scambio crittografatodi informazioni.Per impostare la password tramite una connessione HTTP standard, inserirla direttamente nellaprima finestra di dialogo mostrata di seguito.Per impostare la password tramite una connessione HTTPS crittografata, attenersi alla seguenteprocedura.1. Fare clic sul pulsante Create self-signed certificate (Crea certificato autofirmato).2. Fornire le informazioni richieste e fare clic su OK. Il certificato viene creato e la password puòessere ora impostata in modo sicuro. Da questo momento in poi tutto il traffico verso e dallatelecamera di rete viene cifrato.3. Immettere una password e reimmetterla per confermarla. Fare clic su OK. La password è orastata configurata.Per creare una connessione HTTPS,iniziare facendo clic su questoITALIANOPer configurare la passworddirettamente tramite unaconnessione non crittografata,4. Per eseguire l’accesso, immettere il nome utente “root” nella finestra di dialogo quando ilprogramma lo richiede.
Pagina 88Guida all'installazione Telecamere di rete serie <strong>AXIS</strong> <strong>P13</strong>-ENota: Non è possibile eliminare il nome utente predefinito dell'amministratore.5. Immettere la password impostata in precedenza e fare clic su OK.Nota: Se si dimentica la password, sarà necessario ripristinare le impostazioni predefinitedella telecamera. Vedere a pagina 98.6. <strong>AXIS</strong> <strong>P13</strong>46-E: la modalità di acquisizione deveessere impostata al primo <strong>AXIS</strong> <strong>P13</strong>46-E accesso.Selezionare la modalità di acquisizione desideratadall'elenco a discesa e fare clic su OK.Nota: La modalità di acquisizione può esseremodificata in seguito dalle pagine web delprodotto, ma questo reimposterà la maggiorparte delle altre impostazioni. Per ulterioriinformazioni, consultare la Guida in linea o la Guida per l'utente.
Guida all'installazione Telecamere di rete serie <strong>AXIS</strong> <strong>P13</strong>-E Pagina 89Accesso al flusso videoViene visualizzata la pagina Live View (Immagini dal vivo) con i collegamenti agli strumenti diconfigurazione che consentono di personalizzare la telecamera.Se necessario, fare clic su Yes (Sì) per installare AMC (Axis Media Control) che consente divisualizzare il flusso video in Microsoft Internet Explorer. A questo scopo è necessario disporre deiprivilegi di amministratore.Se necessario, fare clic sul collegamento per installare i decodificatori mancanti.Nota: Per installare AMC in Windows Vista e Windows 7, è necessario eseguire InternetExplorer come amministratore. Fare clic con il pulsante destro del mouse sull’iconadi Internet Explorer e selezionare Run as administrator (Esegui comeamministratore).Setup (Configurazione): forniscetutti gli strumenti necessari perconfigurare la telecamera.Help (Guida): visualizza la Guidain linea relativa alla modalità diutilizzo della telecamera.ITALIANO
Pagina 90Guida all'installazione Telecamere di rete serie <strong>AXIS</strong> <strong>P13</strong>-ERegolazione dello zoom e della messa a fuocoPer regolare lo zoom e la messa a fuoco, attenersi alla seguente procedura.1. Aprire la home page del prodotto e selezionare Setup > Basic Setup > Focus (Configurazione >Configurazione di base > Messa a fuoco).2. Nella scheda Basic (Base) selezionare Open iris (Apri diaframma). Se il pulsante è inattivo,significa che il diaframma è già aperto.3. Se la messa a fuoco è già stata impostata, fare clic su Reset (Reimposta) per reimpostare lamessa a fuoco.4. Allentare le levette di regolazione dello zoom e della messa a fuoco sull’obiettivo ruotandole insenso antiorario. Spostare le levette per impostare lo zoom e la messa a fuoco, quindicontrollare la qualità dell'immagine nella finestra corrispondente.Nota:Se la telecamera è montata in una posizione che non consente dicontrollare -l'immagine e di spostare contemporaneamente le levette, usare FocusAssistant. Vedere a pagina 91.5. Serrare nuovamente le levette di regolazione dello zoom e della messa a fuoco.6. Nella pagina Focus (Messa a fuoco) fare clic su Fine-tune focus automatically (Regolazioneautomatica precisa della messa a fuoco) e attendere che l'operazione di regolazione siacompletata.7. Fare clic su Enable iris (Abilita diaframma). Se il pulsante è inattivo, significa che il diaframmaè già abilitato.8. Se necessario, è possibile effettuare ulteriori regolazioni tramite la scheda Advanced(Avanzate). Per ulteriori informazioni, consultare la Guida in linea o la Guida per l'utente.Note:• È consigliabile regolare il più accuratamente possibile la messa a fuoco tramite l'apposita levetta oFocus Assistant prima di avviare la regolazione automatica precisa. Generalmente i risultati migliorisi ottengono utilizzando la levetta di regolazione della messa a fuoco.
Guida all'installazione Telecamere di rete serie <strong>AXIS</strong> <strong>P13</strong>-E Pagina 91• Il diaframma deve sempre essere aperto al massimo durante la regolazione della messa a fuoco,poiché questa condizione riduce al minimo la profondità di campo e offre le migliori condizioni peruna corretta messa a fuoco.Levetta di messaa fuocoLevetta zoomPulsante dicomandoLED di statoImmagine di esempio: <strong>AXIS</strong> <strong>P13</strong>43-EFocus AssistantPer regolare la messa a fuoco della telecamera tramite Focus Assistant, seguire le istruzioniriportate nei punti da 1 a 3 a pagina 90 prima di eseguire le operazioni descritte di seguito.1. Installare o collocare la telecamera in un luogo da cui non possa essere spostata.2. Allentare la levetta di regolazione dello zoom ruotandola in senso antiorario. Spostare la levettaper impostare il livello di zoom. Serrare nuovamente la levetta di regolazione dello zoom.3. Impostare la telecamera nella posizione corrispondente alla massima distanza di messa a fuocoallentando la levetta di regolazione di messa a fuoco e ruotando l'obiettivo in senso orario finoin fondo.4. Premere e rilasciare velocemente il pulsante di comando. Se il LED di stato inizia a lampeggiarein verde, significa che Focus Assistant è abilitato.Se il LED di stato lampeggia in rosso o giallo prima che si sia riusciti a regolare l'obiettivo,passare al punto 7 per uscire da Focus Assistant e ripetere le operazioni descritte nei punti da 3a 7. Per ulteriori informazioni, vedere le note che seguono.5. Ruotare delicatamente l'obiettivo in senso antiorario fino all'arresto.6. Infine, ruotare l'obiettivo lentamente in senso orario fino a quando l'indicatore di stato inizia alampeggiare in verde (anziché in rosso o giallo).7. Per uscire da Focus Assistant, premere nuovamente il pulsante di comando.Nota: Focus Assistant si disattiva automaticamente dopo 15 minuti.8. Serrare nuovamente la levetta di regolazione della messa a fuoco.ITALIANO
Pagina 92Guida all'installazione Telecamere di rete serie <strong>AXIS</strong> <strong>P13</strong>-E9. Aprire la pagina Live View (Immagini dal vivo) nel browser e controllare la qualitàdell'immagine.10. Effettuare le operazioni descritte nei punti da 6 a 8 a pagina 90.Note:• Verificare che la scena davanti alla telecamera non cambi durante la regolazione della messa a fuoco(punti 5 e 6). Se si sposta la telecamera o si colloca un dito o un altro oggetto davanti all'obiettivo,sarà necessario ripetere le operazioni descritte nei punti da 3 a 7.• Se non è possibile evitare movimenti davanti alla telecamera, non utilizzare Focus Assistant.• Se non si rilascia il pulsante di comando entro due secondi, viene abilitata la funzione <strong>AXIS</strong> DynamicDNS Service (Servizio DNS dinamico) anziché Focus Assistant.• È possibile utilizzare Focus Assistant anche se la posizione di installazione della telecamera nonconsente l'accesso al pulsante di comando. Seguire le istruzioni riportate in precedenza, ma installarela telecamera dopo le operazioni descritte nel punto 4 (premendo il pulsante di comando) e saltarequelle descritte nel punto 7.
Guida all'installazione Telecamere di rete serie <strong>AXIS</strong> <strong>P13</strong>-E Pagina 93Altri metodi di assegnazione dell’indirizzo <strong>IP</strong>La seguente tabella descrive gli altri metodi disponibili per assegnare o individuare l’indirizzo <strong>IP</strong>. Perimpostazione predefinita, tutti i metodi sono disponibili e possono essere disabilitati.Utilizzo nel sistemaoperativoNoteUPnP Windows Se abilitata sul computer, la telecamera viene rilevataautomaticamente e aggiunta a “Risorse di rete/Rete”.Bonjour<strong>AXIS</strong> Dynamic DNSServiceARP/PingServer DHCPMAC OSX(versione 10.4 osuccessive)Tutti i sistemioperativiTutti i sistemioperativiTutti i sistemioperativiAssegnazione dell’indirizzo <strong>IP</strong> con ARP/PingSi applica ai browser con supporto Bonjour. Selezionare ilsegnalibro Bonjour nel browser (ad esempio Safari) e fare clic sulcollegamento per accedere alle pagine web della telecamera.Servizio gratuito fornito da Axis che consente di installare latelecamera in modo facile e veloce. È necessaria una connessionea Internet senza proxy http. Per ulteriori informazioni, visitare ilsito web all’indirizzo www.axiscam.net.Vedere le sezioni che seguono. È necessario eseguire il comandoentro 2 minuti dal collegamento dell’alimentazione allatelecamera.Per visualizzare le pagine di amministrazione del server DHCP direte, vedere la documentazione specifica del server.1. Acquisire un indirizzo <strong>IP</strong> statico gratuito sullo stesso segmento di rete cui è connesso ilcomputer in uso.2. Individuare il numero di serie indicato sull’etichetta della telecamera.3. Aprire una finestra MS-DOS sul computer e digitare i seguenti comandi:ITALIANOSintassi di Windows:arp -s ping -l 408 -t Sintassi di UNIX/Linux/Mac:arp -s tempping -s 408 Esempio di Windows:arp -s 192.168.0.125 00-40-8c-18-10-00ping -l 408 -t 192.168.0.125Esempio di UNIX/Linux/Mac:arp -s 192.168.0.125 00:40:8c:18:10:00 tempping -s 408 192.168.0.1254. Verificare che il cavo di rete sia collegato alla telecamera, quindi avviare/riavviare latelecamera, scollegando e ricollegando l’alimentazione.5. Chiudere la finestra MS-DOS appena viene visualizzato il messaggio “Reply from192.168.0.125:…” (Risposta da 192.168.0.125) o altro messaggio equivalente.6. Nel browser immettere http:// nel campo dell’indirizzo e premere Invio sullatastiera.
Pagina 94Guida all'installazione Telecamere di rete serie <strong>AXIS</strong> <strong>P13</strong>-ENote:• Per aprire una finestra MS-DOS in Windows: dal menu Start selezionare Run... (Esegui) e digitarecmd. Fare clic su OK.• Per usare il comando ARP in Windows Vista, fare clic con il pulsante destro del mouse sull'icona dellafinestra MS-DOS e selezionare Runasadministrator (Esegui come amministratore).• Per utilizzare il comando ARP in un sistema operativo Mac OS X, usare l'utility Terminal, inApplicazioni > Utilità.ConnettoriConnettore di rete - Connettore Ethernet RJ-45. Supporto per Power over Ethernet. Si consiglial'uso di cavi schermati.Morsettiera di alimentazione - Morsettiera di alimentazione a 2 pin utilizzata perl'ingresso dell'alimentazione.Funzione Pin DescrizioneGND 1 TerraAlimentazioneCC2 Ingresso alimentazione, 8-20 V CC<strong>AXIS</strong> <strong>P13</strong>43-E: max 6,4 W<strong>AXIS</strong> <strong>P13</strong>44-E: max 6,4 W<strong>AXIS</strong> <strong>P13</strong>46-E: max 9.6 W1 2Ingresso audio - Ingresso da 3,5 mm per microfono in mono o segnale mono line-in (il canalesinistro è usato da un segnale in stereo).Uscita audio - Uscita audio che può essere connessa a un sistema di indirizzo pubblico (PA), oppurea un altoparlante con amplificatore integrato. Si può anche collegare un paio di cuffie. Per l’uscitaaudio è necessario usare un connettore stereo.Slot per scheda di memoria SDHC - Le schede di memoria SD ad alta capacità standard possonoessere usate per la registrazione locale come unità di memorizzazione rimovibili.Slot per schede di memoria SDPer inserire la scheda SD, sollevare la copertura della scheda SD sul lato posteriore della telecameradi rete e inserire delicatamente la scheda nello slot.
Guida all'installazione Telecamere di rete serie <strong>AXIS</strong> <strong>P13</strong>-E Pagina 95Per rimuovere la scheda SD, sollevare la copertura e spingere delicatamente la scheda persganciarla. Appena la scheda SD fuoriesce dallo slot è possibile rimuoverla.Morsettiera I/O - Usato per applicazioni specifiche, comeMotion Detection, l'attivazione di eventi, la registrazionetemporizzata e le notifiche di allarme. Oltre a fungere daconnettore di alimentazione ausiliario e pin di messa a terra, puòessere usato come interfaccia per:• 1 uscita digitale – Per collegare dispositivi esterni comerelé o LED. Le periferiche connesse possono essereattivate mediante API VAPIX o i pulsanti di controllonella pagina Live View (Immagini dal vivo) oppurePin 4 Pin 2Pin 3 Pin 1tramite Event Type (Tipo di evento). L'uscita verrà visualizzata come attiva (visualizzata inEvents > Port Status (Eventi Stato porta )) se il dispositivo di allarme si attiva.• 1 ingresso digitale - Ingresso dell'allarme per collegare le unità che può passare dal circuitochiuso al circuito aperto, ad esempio: sensori di movimento (PIR), contatti porta/finestra,rilevatori di rottura vetri e così via. Dopo la ricezione del segnale lo stato cambia el'ingresso diventa attivo (visualizzato in Events > Port Status (Eventi > Stato porta).Nota:Il connettore di I/O su <strong>AXIS</strong> <strong>P13</strong>43-E/<strong>P13</strong>44-E/<strong>P13</strong>46-E è connesso all'elettronicadell'alloggiamento- alla spedizione e attiva una porta di ingresso evento per indicare unerrore della ventola o del riscaldatore all'attivazione. Per ulteriori informazioni sul modo perimpostare un evento, consultare la Guida per l'utente, disponibile sul CD o all'indirizzowww.axis.com.Funzione Pin Note Dati tecniciGND 1 TerraAlimentazione3.3 V CC2 Il pin può essere utilizzato anche peralimentare una periferica ausiliaria.Nota: questo pin può essere usato solo comeuscita di alimentazione.Carico massimo = 50 mAConfigurabile(ingresso ouscita)3-4 Collegare a terra (GND) per attivarlo oppurelasciarlo isolato (o scollegato) per disattivarlo.Nota: Connesso all'elettronicadell'alloggiamento alla spedizione.Utilizza un transistor NFET open-drain conconnessione della fonte a terra. Se si utilizzaun relè esterno, è necessario collegare undiodo in parallelo al carico per proteggere laperiferica da sovratensioni transitorie.Ingresso min = - 40 V CCIngresso max = +40 V CCCarico massimo = 100 mATensione massima = + 40 V CCITALIANO
Pagina 96Guida all'installazione Telecamere di rete serie <strong>AXIS</strong> <strong>P13</strong>-ESchema delle connessioniIl seguente schema dei collegamenti mostra come collegare una periferica ausiliaria allatelecamera.13.3Vmax. 50mA2E.g. push button3GDS4Indicatori LEDLED Colore IndicazioneRete Verde Luce fissa: connessione di rete a 100 Mbit/s. Luce lampeggiante: attività di rete.Giallo Luce fissa: connessione di rete a 10 Mbit/s. Luce lampeggiante: attività di rete.Spento Assenza di connessione.Stato Verde Luce verde fissa: condizioni di normale utilizzo.Nota: è possibile configurare il LED di stato in modo che rimanga spento incondizioni di normale utilizzo oppure in modo da ottenere una luce intermittentequando si effettua l’accesso alla telecamera. Per configurarlo, selezionare Setup >System Options > LED settings (Configurazione > Opzioni di sistema >Impostazioni LED). Per ulteriori informazioni, consultare la Guida in linea.Giallo Luce fissa: durante l’avvio o il ripristino delle impostazioni predefinite o dellaconfigurazione.Rosso Luce lampeggiante lenta: aggiornamento non riuscito.Alimentaz Verde Normale utilizzo.ioneGiallo Luce lampeggiante verde/gialla: aggiornamento firmware.
Guida all'installazione Telecamere di rete serie <strong>AXIS</strong> <strong>P13</strong>-E Pagina 97LED di stato durante l'uso di Focus AssistantLED Colore IndicazioneVerdeGialloRossoPassaggio 4: Focus Assistant abilitato.Passaggio 6: obiettivo regolato in modo ottimale.Passaggio 4: telecamera spostata oppure movimento di un oggetto davantiall'obiettivo. Uscire e riavviare Focus Assistant.Passaggio 6: obiettivo regolato in modo non ottimale.Passaggio 4: telecamera spostata oppure movimento di un oggetto davantiall'obiettivo. Uscire e riavviare Focus Assistant.Passaggio 6: obiettivo regolato in modo improprio.LED di stato nell'elettronica dell'alloggiamento (ventola/riscaldatore)LED Colore IndicazioneAlimentazioneVerde OKVerde Lampo singolo: Errore riscaldatorelampeggiante Lampo doppio: Errore ventolaLampo triplo: Errore generaleNota: Gli eventi di allarme vengono attivati attraverso la porta di input dellatelecamera. Consultare la Guida per l'utente, disponibile sul CD fornito oall'indirizzo www.axis.com Contattare il rivenditore Axis per informazioni sulleparti di ricambio e per la risoluzione dei problemi.ITALIANO
Pagina 98Guida all'installazione Telecamere di rete serie <strong>AXIS</strong> <strong>P13</strong>-ERipristino delle impostazioni predefiniteQuesta procedura ripristina le impostazioni predefinite per tutti i parametri, incluso l'indirizzo <strong>IP</strong> ela posizione di messa a fuoco:1. Scollegare l’alimentazione dalla telecamera.2. Tenere premuto il pulsante Control e ricollegare il cavo di alimentazione.3. Tenere premuto il pulsante di comando fino a quando l'indicatore di stato non inizia alampeggiare in giallo (l'operazione può richiedere fino a 15 secondi).4. Rilasciare il pulsante di comando. Quando l'indicatore di stato diventa verde (l'operazione puòrichiedere fino a 1 minuto) la procedura è completata e sono state ripristinate le impostazionipredefinite per la telecamera di rete.5. Riassegnare l’indirizzo <strong>IP</strong> utilizzando uno dei metodi descritti in questo documento.6. Regolare nuovamente la messa a fuoco della telecamera utilizzando uno dei metodi descritti inquesto documento.È possibile inoltre reimpostare i parametri alle impostazioni predefinite in fabbrica mediantel’interfaccia web. Per ulteriori informazioni, consultare la Guida in linea o la Guida per l'utente.Accesso alla telecamera da InternetDopo l’installazione, la telecamera di rete è accessibile dalla rete locale (LAN). Per accedere allatelecamera da Internet, è necessario configurare i router di rete per consentire il traffico in entrata,che di norma avviene su una porta specifica.• Porta HTTP (porta predefinita 80) per la visualizzazione e la configurazione• Porta RTSP (porta predefinita 554) per la visualizzazione di flussi video in formato H.264Per ulteriori istruzioni, consultare la documentazione del router. Per maggiori informazioni suquesto e altri argomenti, visitare il sito web per il supporto Axis all’indirizzo www.axis.com/techsupUlteriori informazioniLa Guida per l’utente è disponibile sul sito web di Axis all’indirizzo www.axis.com oppure sul CDfornito con il prodotto.SuggerimentoVisitare il sito di Axis all'indirizzo www.axis.com/techsup per verificare se sono statipubblicati aggiornamenti per la telecamera di rete. Per conoscere la versione installata delfirmware, vedere Setup > About (Configurazione > Informazioni su).
Serie de cámaras de red <strong>AXIS</strong> <strong>P13</strong>-E Guía de instalación Página 99Medidas preventivas y advertenciasLea atentamente la Guía de instalación antes de instalar el producto. Guarde la Guía deinstalación para futuras consultas.! ¡PRECAUCIÓN!• A la hora de transportar el producto Axis, utilice el embalaje original o uno equivalente parano dañar el producto.• Evite exponer el producto Axis a vibraciones, golpes o presiones excesivas y no lo instale ensoportes inestables, o en superficies o paredes inestables o con vibraciones, ya que estopodría dañar el producto.• Utilice solo herramientas manuales a la hora de instalar la cámara, ya que el empleo deherramientas eléctricas o de una fuerza excesiva podría dañar el producto.• No utilice productos químicos, agentes cáusticos ni limpiadores en aerosol. Utilice un pañohúmedo para limpiarlo.• Utilice únicamente accesorios y repuestos suministrados o recomendados por Axis.• No intente reparar el producto por sí mismo, póngase en contacto con Axis o con eldistribuidor de Axis para todo lo referente al servicio técnico.! IMPORTANTE:• Este producto Axis debe utilizarse de conformidad con la legislación y normativas locales.• Guarde y transporte el producto Axis en un entorno seco y ventilado.Aviso de seguridad: sustitución de la bateríaEste producto Axis utiliza una batería de litio CR2032 de 3,0 V como fuente de alimentación para su reloj de tiemporeal interno (RTC). En condiciones normales esta batería durará un mínimo de 5 años. El funcionamiento del RTCpuede verse afectado cuando la batería tiene poca carga. En tal caso la configuración se restaura cada vez que seencienda la cámara. Aparecerá un mensaje cuando sea necesario sustituir la batería. No debe sustituirse la batería amenos que sea necesario.Si necesita sustituir la batería, visite la página www.axis.com/techsup para recibir asistencia.• Peligro de explosión si la batería se sustituye de forma incorrecta.• Utilice solo baterías de recambio iguales o equivalentes, de acuerdo con las recomendaciones delfabricante.• Deseche las baterías usadas según las instrucciones del fabricante.ESPAÑOL
Serie de cámaras de red <strong>AXIS</strong> <strong>P13</strong>-E Guía de instalación Página 101<strong>AXIS</strong> <strong>P13</strong>43-E, <strong>AXIS</strong> <strong>P13</strong>44-E& <strong>AXIS</strong> <strong>P13</strong>46-EGuía de instalaciónEn esta guía de instalación se proporcionan instrucciones para instalar la cámara <strong>AXIS</strong> <strong>P13</strong>43-E/<strong>P13</strong>44-E/<strong>P13</strong>46-E en su red. Para obtener información sobre cualquier cuestión relacionada con eluso del producto, consulte el Manual del usuario, disponible en el CD que se incluye en estepaquete, o la página web www.axis.com.Pasos para la instalación1. Verifique el contenido del paquete con la lista queaparece más abajo.2. Presentación del hardware. Consulte la página 102.3. Instalación del hardware. Consulte la página 104.4. Asignación de una dirección <strong>IP</strong>. Consulte la página 107.5. Configuración de la contraseña. Consulte la página 111.6. Ajuste del zoom y del enfoque. Consulte la página 114.Importante:este producto debe utilizarse deacuerdo con la legislación ynormativas locales.Contenido del paqueteArtículoModelos/variantes/notasCámara de redEscuadra de paredHerramientasCable de redCDMaterial impreso<strong>AXIS</strong> <strong>P13</strong>43-E/<strong>AXIS</strong> <strong>P13</strong>44-E/<strong>AXIS</strong> <strong>P13</strong>46-EEscuadra de pared con canal de cable internoDestornillador Torx T20Llave AllenCable de red para exteriores de 5 m (16 pies) con juntaCD de productos de vídeo en red de <strong>AXIS</strong>, que incluye documentación deproductos, herramientas de instalación y otro softwareSerie de cámaras de red <strong>AXIS</strong> <strong>P13</strong>-E Guía de instalación (este documento)Documento de garantía de AxisEtiquetas adicionales con el número de serie (2)ESPAÑOLAccesorios opcionalesVisite www.axis.com para obtener información sobre los accesorios disponibles
Página 102Serie de cámaras de red <strong>AXIS</strong> <strong>P13</strong>-E Guía de instalaciónPresentación del hardwareRanura para tarjeta de memoria SDLED de estadoBotón del zoomBotón de enfoqueVista posteriorEntrada deaudioConector de red (PoE)Salida deaudioVista inferiorLED dealimentaciónLED de redBotón decontrolConector del irisConector de alimentaciónConector del terminal de E/SNúmero del producto (P/N) ynúmero de serie (S/N)Imagen de ejemplo: <strong>AXIS</strong> <strong>P13</strong>43-E
Serie de cámaras de red <strong>AXIS</strong> <strong>P13</strong>-E Guía de instalación Página 103Referencia (P/N) y número de serie (S/N).Es posible que necesite el número de seriedurante la instalación.Tornillos de ajuste delrevestimiento para elsol (2x)Revestimiento para el solCubierta superiorCámara de redConector de redLengüeta del cablede seguridadAgujeros del cableTornillos de la cubiertainferior (4)Cubierta del cableTornillos de la cubiertadel cable (2)Cubierta inferiorCalefactor ¡Precaución!puede estarJunta calienteCable de red (colocara través de la escuadrade pared)Adaptador de la escuadraESPAÑOLTornillos de la escuadra (4)Tornillo de ajuste dela escuadraEscuadra de paredImagen de ejemplo: <strong>AXIS</strong> <strong>P13</strong>43-E
Página 104Serie de cámaras de red <strong>AXIS</strong> <strong>P13</strong>-E Guía de instalaciónInstalación del hardwareA continuación se detallan las instrucciones de instalación de <strong>AXIS</strong> <strong>P13</strong>43-E/<strong>P13</strong>44-E/<strong>P13</strong>46-E.Preparación del cable de redSi se utiliza un cable diferente al suministrado, tendrá que preparar un cable de red con una junta.Fuerce suavemente el cable a través de la junta suministrada y acople un conector de red. Puedeque sea necesario perforar un orificio en la junta con el destornillador proporcionado.Notas:• No fuerce el conector de red en la junta.• No perfore la junta con un cuchillo u otro objeto afilado.Instalación de la escuadra de pared1. Utilice la plantilla de taladrado que se facilita para preparar una pared, el techo o un postedonde instalar la escuadra de pared.2. Pase el cable de red por la escuadra de pared, de forma que la junta de goma quede en elextremo del adaptador de la escuadra de la escuadra de pared, como se ve en la ilustración enla página 103.3. Instale la escuadra de pared en una pared, en el techo o en un poste y asegúrese de que lostornillos y conectores sean apropiados para el material (p. ej., madera, metal, tablero de yeso,piedra).Notas:• El peso de la cámara se muestra en la tabla siguiente. Asegúrese de que el material puede aguantareste peso.Modelo Peso<strong>AXIS</strong> <strong>P13</strong>43-E 3090 g (6,8 lb.)<strong>AXIS</strong> <strong>P13</strong>44-E 3120 g (6,9 lb.)<strong>AXIS</strong> <strong>P13</strong>46-E 3130 g (6,9 lb.)• Para obtener más información sobre especificaciones técnicas, consulte el Manual del usuario,disponible en el CD que se incluye en este paquete, o la página web www.axis.com.
Serie de cámaras de red <strong>AXIS</strong> <strong>P13</strong>-E Guía de instalación Página 105Instalación de la cámara en la escuadra1. Instale la cámara con la cubierta inferior apoyada en la escuadra y apriete los tornillos de esta.2. Retire la junta de uno de los orificios de la cubierta inferior, como se ve en la ilustración en lapágina 106.3. Pase el cable por el agujero y conecte la junta del cable en este.Cable de red (colocara través de la escuadra de pared)Agujeros del cableTornillos de la escuadra (4)Cubierta del cableTornillos de la cubiertadel cable (2)Escuadra de paredTornillo de ajuste de la escuadra4. Para conectar los cables consulte Conexión de los cables, en la página 106.5. Coja la cubierta superior y conecte el cable de seguridad a la lengüeta de la cubierta inferior.6. Instale la cubierta superior. Asegúrese de ajustar los tornillos diagonalmente opuestos de lacubierta inferior dando unas pocas vueltas cada vez hasta que estén apretados. Esto contribuyea garantizar que la junta de la cubierta inferior esté comprimida de manera uniforme. Nointente apretar los tornillos por completo la primera vez.7. Instale la cubierta del cable y apriete los tornillos.8. Afloje los tornillos de ajuste de la pantalla para el sol y coloque el revestimiento para el sol enposición frontal.9. Afloje el tornillo de ajuste de la escuadra para dirigir la cámara al punto de interés. ConsulteAcceso a la transmisión de vídeo, en la página 113 para obtener información sobre cómovisualizar la transmisión de vídeo.ESPAÑOL
Página 106Serie de cámaras de red <strong>AXIS</strong> <strong>P13</strong>-E Guía de instalaciónConexión de los cables1. También existe la opción de insertar una tarjeta de memoria SD (no incluida) en la ranura paratarjeta SDHC (Secure Digital High Capacity). Es necesaria una tarjeta SD estándar o de grancapacidad para guardar las imágenes localmente en la cámara.2. También existe la opción de conectar dispositivos de entrada/salida externos. Para obtener másinformación sobre los contactos de los conectores de terminales, consulte la página 119.Prepare los cables con juntas, consulte la Preparación del cable de red, en la página 104, yextienda los cables a través de los orificios para cable hacia la cubierta inferior y hacia lacámara.3. Conecte la cámara a la red con un cable de red blindado. Conecte el cable de red al conector dered situado en la parte inferior. El cable de red y el cable de E/S entre la cubierta inferior y lacámara se suministran ya conectados.Cables de redCable de E/SCubierta inferiorConector de red (Salida PoE,se suministra conectado)Agujeros del cableConector de red (Entrada PoE)Indicador LEDInterruptor de control de temperaturaárctica (no requiere activación)Salida alarma(se suministra conectada)4. Compruebe que los indicadores LED indican las condiciones adecuadas. Para obtenerinformación más detallada, consulte la tabla de la página 120. Tenga en cuenta que el LED deestado se puede configurar para que esté apagado durante el funcionamiento normal.
Serie de cámaras de red <strong>AXIS</strong> <strong>P13</strong>-E Guía de instalación Página 107Asignación de la dirección <strong>IP</strong>Actualmente, la mayoría de redes disponen de un servidor DHCP que asigna direcciones <strong>IP</strong> de formaautomática a los dispositivos conectados. Si su red no dispone de un servidor DHCP, la cámara dered utilizará 192.168.0.90 como dirección <strong>IP</strong> predeterminada.Si desea asignar una dirección <strong>IP</strong> estática, el método recomendado en Windows es <strong>AXIS</strong> <strong>IP</strong> Utility o<strong>AXIS</strong> <strong>Camera</strong> Management. En función del número de cámaras que desee instalar, deberá utilizar elmétodo que se adapte mejor a sus necesidades.Ambas aplicaciones son gratuitas y están disponibles en el CD del producto de vídeo en red de Axissuministrado con este producto o pueden descargarse de www.axis.com/techsup.Método Recomendado para Sistema operativo<strong>AXIS</strong> <strong>IP</strong> UtilityConsulte la página 108<strong>AXIS</strong> <strong>Camera</strong> ManagementConsulte la página 109Cámara individualInstalaciones pequeñasVarias cámarasInstalaciones grandesInstalación en una subreddiferenteWindowsWindows 2000Windows XP ProWindows 2003 ServerWindows VistaNotas:• Si no puede asignar la dirección <strong>IP</strong>, compruebe que no haya ningún cortafuegos que bloquee laoperación.• Para ver otros métodos de asignar o detectar la dirección <strong>IP</strong>, p. ej., en otros sistemas operativos,consulte la página 117.ESPAÑOL
Página 108Serie de cámaras de red <strong>AXIS</strong> <strong>P13</strong>-E Guía de instalación<strong>AXIS</strong> <strong>IP</strong> Utility: Para cámaras individuales o instalaciones pequeñas<strong>AXIS</strong> <strong>IP</strong> Utility detecta y muestra automáticamente los dispositivos Axis que existen en la red.Además, esta aplicación puede utilizarse para asignar manualmente una dirección <strong>IP</strong> estática.Recuerde que el equipo que ejecute <strong>AXIS</strong> <strong>IP</strong> Utility debe instalarse en el mismo segmento de red(subred física) que la cámara de red.Detección automática1. Compruebe que la cámara de red está conectada a la red y que recibe alimentación.2. Inicie <strong>AXIS</strong> <strong>IP</strong> Utility.3. Cuando la cámara de red aparezca en la ventana, haga doble clic en ella para abrir su página deinicio.4. Consulte la página 111 para obtener instrucciones sobre cómo asignar la contraseña.Configuración manual de la dirección <strong>IP</strong> (opcional)1. Obtenga una dirección <strong>IP</strong> que no esté en uso y que se encuentre en el mismo segmento de redque su equipo.2. Seleccione la cámara de red en la lista.3. Haga clic en el botón Assign new <strong>IP</strong> address to selected device (Asignar nueva dirección <strong>IP</strong> aldispositivo seleccionado) y escriba la dirección <strong>IP</strong>.4. Haga clic en Assign (Asignar) y siga las instrucciones que aparecen en la pantalla. Recuerdeque debe reiniciar la cámara en menos de 2 minutos para que se configure la nueva dirección<strong>IP</strong>.5. Haga clic en el botón Home Page (Página de inicio) para acceder a las páginas web de lacámara.6. Consulte la página 111 para obtener instrucciones sobre cómo configurar la contraseña.
Serie de cámaras de red <strong>AXIS</strong> <strong>P13</strong>-E Guía de instalación Página 109<strong>AXIS</strong> <strong>Camera</strong> Management: Para varias cámaras e instalacionesgrandes<strong>AXIS</strong> <strong>Camera</strong> Management puede detectar automáticamente varios dispositivos Axis, mostrar elestado de la conexión, administrar las actualizaciones del firmware y configurar direcciones <strong>IP</strong>.Detección automática1. Compruebe que la cámara está conectada a la red y que recibe alimentación.2. Inicie <strong>AXIS</strong> <strong>Camera</strong> Management. Cuando la cámara de red aparezca en la ventana, haga cliccon el botón derecho en el enlace y seleccione Live View Home Page (Página de inicio de LiveView).3. Consulte la página 111 para obtener instrucciones sobre cómo configurar la contraseña.Asignación de una dirección <strong>IP</strong> en un dispositivoindividual1. Seleccione la cámara de red en <strong>AXIS</strong> <strong>Camera</strong> Management y haga clicen el botón Assign <strong>IP</strong> (Asignar <strong>IP</strong>) .2. Seleccione Assign the following <strong>IP</strong> address (Asignar la dirección <strong>IP</strong>siguiente) y escriba la dirección <strong>IP</strong>, la máscara de subred y el router predeterminado queutilizará el dispositivo.3. Haga clic en OK (Aceptar).ESPAÑOL
Página 110Serie de cámaras de red <strong>AXIS</strong> <strong>P13</strong>-E Guía de instalaciónAsignación de direcciones <strong>IP</strong> en variosdispositivos<strong>AXIS</strong> <strong>Camera</strong> Management acelera el proceso de asignación dedirecciones <strong>IP</strong> en varios dispositivos indicando direcciones <strong>IP</strong>disponibles dentro de un rango especificado.1. Seleccione los dispositivos que desee configurar (se puedenseleccionar varios modelos) y haga clic en el botón Assign<strong>IP</strong> (Asignar <strong>IP</strong>) .2. Seleccione Assign the following <strong>IP</strong> address range (Asignarel siguiente rango de direcciones <strong>IP</strong>) e introduzca lasdirecciones <strong>IP</strong>, la máscara de subred y el routerpredeterminado que utilizará el dispositivo.3. Haga clic en Update (Actualizar). Las direcciones <strong>IP</strong> sugeridas se muestran en New <strong>IP</strong> Addresses(Nuevas direcciones <strong>IP</strong>) y se pueden editar si se selecciona un dispositivo y se hace clic en elbotón Edit (Editar).4. Haga clic en OK (Aceptar).
Serie de cámaras de red <strong>AXIS</strong> <strong>P13</strong>-E Guía de instalación Página 111Configuración de la contraseñaPara poder acceder al producto, hay que configurar la contraseña del usuario predeterminado parael administrador root. Aparecerá el cuadro de diálogo "Configure Root Password" (Configurarcontraseña de root) cuando se acceda a la cámara de red por primera vez.Para evitar la intercepción de la contraseña de root cuando se configura, este proceso se puederealizar a través de una conexión HTTPS cifrada, que precisa un certificado HTTPS.Nota: HTTPS (Hypertext Transfer Protocol over SSL) es un protocolo que se utiliza para cifrar eltráfico entre los servidores y los navegadores web. El certificado HTTPS controla elintercambio cifrado de información.Para configurar la contraseña a través de una conexión HTTP estándar, escríbala directamente en elprimer cuadro de diálogo que se muestra a continuación.Para configurar la contraseña a través de una conexión HTTPS cifrada, siga estos pasos:1. Haga clic en el botón Create self-signed certificate (Crear un certificado de autofirma).2. Proporcione la información que se le solicita y haga clic en OK (Aceptar). Se creará elcertificado y se podrá configurar la contraseña con seguridad. Todo el tráfico hacia y desde lacámara de red se cifrará a partir de este punto.3. A continuación, escriba una contraseña y vuelva a escribirla para confirmarla. Haga clic en OK(Aceptar). La contraseña ya se ha configurado.Para crear una conexión HTTPS,empiece haciendo clic en este botón.ESPAÑOLPara configurar directamente lacontraseña a través de una conexiónsin cifrar, escriba aquí la contraseña.4. Para iniciar sesión, escriba el nombre de usuario "root" en el cuadro de diálogo.Nota: el nombre de usuario predeterminado para el administrador root no se puedeeliminar.
Página 112Serie de cámaras de red <strong>AXIS</strong> <strong>P13</strong>-E Guía de instalación5. Escriba la contraseña que introdujo anteriormente y haga clic en OK (Aceptar).Nota: Si ha perdido u olvidado la contraseña, la cámara debe restablecerse a los valoresiniciales. Consulte la página 122.6. <strong>AXIS</strong> <strong>P13</strong>46-E: la primera vez que acceda a <strong>AXIS</strong><strong>P13</strong>46-E, deberá definir el modo de captura.Seleccione el modo de captura adecuado en la listadesplegable y haga clic en OK (Aceptar).Nota: El modo de captura se podrá modificarposteriormente desde las páginas Web delproducto, aunque con esta acción serestablecerán la mayoría de los parámetrosde configuración restantes. Para obtener más información, consulte la ayuda enlínea o el Manual del usuario.
Serie de cámaras de red <strong>AXIS</strong> <strong>P13</strong>-E Guía de instalación Página 113Acceso a la transmisión de vídeoLa página Live View de la cámara de red aparece con enlaces a las herramientas de configuraciónque le permiten personalizar la cámara.En caso necesario, haga clic en Yes (Sí) para instalar el AMC (<strong>AXIS</strong> Media Control) y así permitir lavisualización de la transmisión de vídeo en Internet Explorer. Para ello, debe tener derechos deadministrador en el equipo.Si es necesario, haga clic en el enlace para instalar los decodificadores que falten.Nota: Para instalar AMC en Windows Vista y Windows 7, debe ejecutar Internet Explorercomo administrador. Haga clic con el botón derecho en el icono de InternetExplorer y seleccione Run as administrator (Ejecutar como administrador).Setup (Configuración): Proporciona todas lasherramientas necesarias para configurar lacámara según sus necesidades.Help (Ayuda): Presenta ayuda enlínea sobre todos los aspectosdel uso de la cámara.ESPAÑOL
Página 114Serie de cámaras de red <strong>AXIS</strong> <strong>P13</strong>-E Guía de instalaciónAjuste del zoom y del enfoquePara ajustar el zoom y el enfoque, siga estas instrucciones:1. Abra la página de inicio del producto y diríjase a Setup (Configuración) > Basic Setup(Configuración básica) > Focus (Enfoque).2. En la pestaña Basic (Básica), haga clic en Open iris (Abrir iris). Si el botón no está activo, el irisya está abierto.3. Si el enfoque se ha ajustado anteriormente, haga clic en Reset (Restablecer) para restablecer elenfoque posterior.4. Afloje los botones trasero de zoom y de enfoque del objetivo girándolos en sentido contrario alas agujas del reloj. Mueva los botones para ajustar el zoom y el enfoque y compruebe la calidadde la imagen en la ventana de imagen.Nota:Si la cámara está montada de forma que no se puede ver la imagen y mover losbotones al mismo tiempo, utilice en su lugar el Asistente de enfoque. Consulte lapágina 115.5. Apriete de nuevo los botones de zoom y enfoque.6. En la página Focus (Enfoque), haga clic en Fine-tune focus automatically (Ajustar enfoqueautomáticamente) y espere hasta que finalice el proceso de ajuste automático.7. Haga clic en Enable iris (Habilitar iris). Si el botón no está activo, el iris ya estará habilitado.8. Si es necesario, realice ajustes adicionales en la pestaña Advanced (Avanzada). Para obtenermás información, consulte la ayuda en línea o el Manual del usuario.Notas:• Ajuste el enfoque de la forma más precisa posible con el botón de enfoque o el Focus Assistant(Asistente de enfoque) antes de iniciar el proceso de ajuste automático. Normalmente se obtienen losmejores resultados si se utiliza el botón de enfoque.
Serie de cámaras de red <strong>AXIS</strong> <strong>P13</strong>-E Guía de instalación Página 115• El iris se debería abrir siempre al máximo durante el enfoque, proporcionando la menor profundidadde campo posible y, por tanto, las mejores condiciones para un enfoque correcto.Botón de enfoqueBotón del zoomLED de estadoBotón de controlImagen de ejemplo: <strong>AXIS</strong> <strong>P13</strong>43-EAsistente de enfoquePara enfocar mediante el Asistente de enfoque, siga las instrucciones de los pasos 1 al 3 en página114 antes de empezar con los pasos siguientes.1. Monte o coloque la cámara de forma que no pueda moverse.2. Afloje el botón del zoom girándolo en sentido contrario a las agujas del reloj. Mueva el botónpara ajustar el nivel de zoom. Apriete de nuevo el botón de zoom.3. Ajuste la cámara en su posición de enfoque más lejana aflojando el botón de enfoque y girandocompletamente el objetivo en el sentido de las agujas del reloj.4. Pulse y suelte rápidamente el botón de control. Cuando el LED de estado parpadea en verde, elAsistente de enfoque está habilitado.Si el LED de estado parpadea en rojo o ámbar antes de poder ajustar el objetivo, vaya al paso 7para salir del Asistente de enfoque y repita los pasos del 3 al 7. Véanse las notas siguientes.5. Gire suavemente el objetivo en el sentido contrario a las agujas del reloj hasta que se detenga.6. Por último, gire lentamente el objetivo en el sentido de las agujas del reloj hasta que elindicador de estado parpadee en verde o en ámbar (no en rojo).7. Para salir del Asistente de enfoque, vuelva a pulsar el botón de control.Nota: El Asistente de enfoque se apaga automáticamente tras 15 minutos.8. Apriete de nuevo el botón de enfoque.9. Abra la página Live View en su navegador web y compruebe la calidad de la imagen.10. Continúe en los pasos 6 - 8 en la página 114.ESPAÑOL
Página 116Serie de cámaras de red <strong>AXIS</strong> <strong>P13</strong>-E Guía de instalaciónNotas:• La vista de la parte frontal de la cámara no debe cambiar durante el ajuste de enfoque (pasos 5 y 6).Si se mueve la cámara o si se coloca un dedo u otro objeto delante del objetivo, tendrán que repetirselos pasos del 3 al 7.• Si no se pueden evitar movimientos en la parte frontal de la cámara, no se debe usar el Asistente deenfoque.• Si no se suelta el botón de control al cabo de dos segundos, se habilita el Servicio de DNS dinámicode <strong>AXIS</strong> en lugar del Asistente de enfoque.• Si la cámara está montada de manera que no se puede acceder al botón de control, aún podrá utilizarel Asistente de enfoque. Siga las instrucciones indicadas anteriormente pero en esta ocasión montela cámara tras el paso 4 (pulsar el botón de control) y omita el paso 7.
Serie de cámaras de red <strong>AXIS</strong> <strong>P13</strong>-E Guía de instalación Página 117Otros métodos para configurar la dirección <strong>IP</strong>En esta tabla se presentan otros métodos disponibles para configurar o detectar la dirección <strong>IP</strong>.Todos los métodos están habilitados de forma predeterminada y es posible deshabilitarlos.Uso en sistemaoperativoNotasUPnP Windows La cámara se detecta y añade a Mis sitios de red/Redautomáticamente, siempre que esta opción esté habilitada en elequipo.BonjourServicio de DNSdinámico de <strong>AXIS</strong>MAC OSX(10.4 o posterior)TodosConfiguración de la dirección <strong>IP</strong> con ARP/PingAplicable a exploradores compatibles con Bonjour. Naveguehasta el favorito Bonjour del explorador (p. ej., Safari) y haga clicen el vínculo para acceder a las páginas Web de la cámara.Servicio gratuito suministrado por Axis que permite instalar lacámara de forma rápida y sencilla. Es necesario disponer deconexión a Internet sin proxy HTTP. Para obtener másinformación, consulte www.axiscam.net.ARP/Ping Todos Consulte la información más abajo. El comando debe emitirse enlos dos minutos posteriores al encendido de la cámara.Servidor DHCP Todos Para acceder a las páginas de administración del servidor DHCPen red, consulte la documentación del servidor.1. Adquiera una dirección <strong>IP</strong> estática libre en el mismo segmento de red en el que está conectadosu equipo.2. Localice el número de serie (S/N) en la etiqueta de producto de la cámara.3. Abra una línea de comando en su equipo y escriba los comandos siguientes:Sintaxis en Windows:arp -s ping -l 408 -t Sintaxis en UNIX/Linux/Mac:Ejemplo en Windows:arp -s 192.168.0.125 00-40-8c-18-10-00ping -l 408 -t 192.168.0.125Ejemplo en UNIX/Linux/Mac:ESPAÑOLarp -s tempping -s 408 arp -s 192.168.0.125 00:40:8c:18:10:00 tempping -s 408 192.168.0.1254. Compruebe que el cable de red está conectado a la cámara y desconecte y vuelva a conectar lacorriente para iniciarla o reiniciarla.5. Cierre la línea de comando cuando vea “Reply from 192.168.0.125:…” (Respuesta de192.168.0.125:…) o similar.6. En el explorador, escriba http:// en el campo Ubicación/Dirección y pulse Intro enel teclado.
Página 118Serie de cámaras de red <strong>AXIS</strong> <strong>P13</strong>-E Guía de instalaciónNotas:• Para abrir una línea de comando en Windows: desde el menú Start (Inicio), seleccione Run...(Ejecutar...) y escriba cmd. Haga clic en OK (Aceptar).• Para utilizar el comando ARP en Windows Vista, haga clic con el botón derecho del ratón en el iconode línea de comando y seleccione Runasadministrator (Ejecutar como administrador).• Para utilizar el comando ARP en un sistema operativo Mac OS X, utilice la herramienta Terminal, quese encuentra en Application (Aplicaciones) > Utilities (Utilidades) .Conectores de la unidadConector de red - Conector Ethernet RJ-45. Compatible con PoE (Power over Ethernet). Serecomienda emplear cables blindados.Conector de alimentación - Bloque de conectores de 2 pines para entrada dealimentación.Función Pin DescripciónToma de tierra 1 Toma de tierraAlimentaciónde CC2 Entrada de alimentación = 8-20 V CC<strong>AXIS</strong> <strong>P13</strong>43-E: máx 6,4 W<strong>AXIS</strong> <strong>P13</strong>44-E: máx 6,4 W<strong>AXIS</strong> <strong>P13</strong>46-E: máx 9,6 W1 2Entrada de audio - Conector de 3,5 mm para micrófono mono, o entrada de línea de señal mono(se usa el canal izquierdo de una señal estéreo).Salida de audio - Salida de audio (nivel de línea) que puede ser conectada a un sistema demegafonía pública o a un altavoz con amplificador incorporado. También pueden conectarse unosauriculares. Debe utilizarse un conector estéreo.Ranura para tarjeta de memoria SDHC: Se pueden usar tarjetas de memoria SD de capacidad altao estándar para grabación local con almacenamiento extraíble.Ranura para tarjeta de memoriaPara insertar una tarjeta SD, levante la tapa de la tarjeta SD situada en la parte posterior de lacámara de red, e inserte con cuidado la tarjeta SD en su ranura.
Serie de cámaras de red <strong>AXIS</strong> <strong>P13</strong>-E Guía de instalación Página 119Para extraer una tarjeta SD, levante la tapa y empuje suavemente la tarjeta hacia adentro parasoltarla. La tarjeta SD saldrá de nuevo de la ranura y ya podrá extraerse.Conector del terminal de E/S - Se utiliza en aplicaciones talescomo detección de movimiento, activación de eventos, grabacióna intervalos y notificaciones de alarmas. Además de un pin dealimentación auxiliar y un pin de toma de tierra, proporciona a lainterfaz la conexión de:Nota:• 1 salida digital: Para conectar relés e indicadores LED. Sepueden activar dispositivos conectados mediante lainterfaz VAPIX® de programación de aplicaciones (API,por sus siglas en inglés), los botones de salida de laPin 4 Pin 2Pin 3 Pin 1página Live View o mediante un Event Type (tipo de evento). La salida se mostrará activa(en Events > Port Status [Eventos - Estado del puerto]) si el dispositivo de alarma estáactivado.• 1 entrada digital: Una entrada de alarma para conectar dispositivos que puedan alternarcircuitos cerrados y abiertos, como detectores PIR, contactos de puertas y ventanas,detectores de rotura de cristales, etc. Cuando se recibe una señal, el estado cambia y laentrada se vuelve activa (indicado en Events > Port Status [Eventos - Estado del puerto]).El conector de E/S de <strong>AXIS</strong> <strong>P13</strong>43-E/<strong>P13</strong>44-E/<strong>P13</strong>46-E se suministra conectado a loscomponentes electrónicos de la carcasa y pondrá en marcha un evento en el puerto deentrada para indicar un error en el ventilador o en el calefactor al activarse. Para obtenermás información sobre el modo de configurar un evento, consulte el Manual del usuario,disponible en el CD suministrado con este producto o en www.axis.com.Función Pin Notas EspecificacionesToma de tierra 1 Toma de tierraAlimentación de3,3 V CC2 Se puede utilizar para alimentar equiposauxiliares.Nota: este pin sólo se puede usar como salidade alimentación.Carga máx. = 50 mAConfigurable(entrada osalida)3-4 Conecte a GND (toma de tierra) para activarlao déjela suelta (desconectada) paradesactivarla.Nota: se suministra conectada a loscomponentes electrónicos de la carcasa.Utiliza un transistor NFET de drenaje abiertocon la fuente conectada a la toma de tierra. Sise utiliza con un relé externo, debe conectarseun diodo en paralelo a la carga comoprotección ante oscilaciones de tensión.Entrada mín. = -40 V CCEntrada máx. = +40 V CCCarga máx. = 100 mAVoltaje máx. = + 40 V CCESPAÑOL
Página 120Serie de cámaras de red <strong>AXIS</strong> <strong>P13</strong>-E Guía de instalaciónDiagrama de conexionesEl diagrama de conexiones siguiente ofrece un ejemplo de cómo conectar un dispositivo auxiliar ala cámara de red.13.3Vmax. 50mA2E.g. push button3GDS4Indicadores LEDLED Color IndicaciónDe red Verde Fijo para indicar la conexión a una red de 100 Mbits/s. Parpadea para indicaractividad en la red.ÁmbarApagadoFijo para indicar conexión a una red de 10 Mbit/s. Parpadea para indicaractividad en la red.Desconexión de la red.De estado Verde Verde fijo para indicar funcionamiento normal.Nota: puede configurarse el LED de estado para que esté apagado durante elfuncionamiento normal o para que parpadee únicamente cuando se accede ala cámara. Para configurarlo, vaya a Setup > System Options > LED settings(Configuración - Opciones del sistema - Ajustes de LED). Para másinformación, consulte los archivos de ayuda en línea.Ámbar Fijo durante el inicio o durante el restablecimiento de los valores o laconfiguración iniciales.Rojo Parpadeo lento si no se puede realizar una actualización.Alimentación Verde Funcionamiento normal.Ámbar Parpadea en verde/ámbar durante la actualización del firmware.
Serie de cámaras de red <strong>AXIS</strong> <strong>P13</strong>-E Guía de instalación Página 121LED de estado al utilizar el Asistente de enfoqueLED Color IndicaciónVerdeÁmbarRojoPaso 4: Está habilitado el Asistente de enfoque.Paso 6: El objetivo está ajustado correctamente.Paso 4: La cámara se ha movido o se ha insertado un objeto delante delobjetivo. Salga del Asistente de enfoque y reinícielo.Paso 6: El objetivo no se ha ajustado correctamente.Paso 4: La cámara se ha movido o se ha insertado un objeto delante delobjetivo. Salga del Asistente de enfoque y reinícielo.Paso 6: El objetivo está mal ajustado.LED de estado en los componentes electrónicos de la carcasa (ventilador/calefactor)LED Color IndicaciónAlimentación Verde Funcionamiento normalVerdeparpadeanteParpadeo único: error del calefactorDoble parpadeo: error del ventiladorTriple parpadeo: error generalNota: los eventos de alarma se activarán a través del puerto de entrada de lacámara. Para obtener información sobre piezas de recambio y resolución deproblemas, consulte el Manual del usuario disponible en el CD suministradocon este producto, www.axis.com o contacte con su distribuidor Axis.ESPAÑOL
Página 122Serie de cámaras de red <strong>AXIS</strong> <strong>P13</strong>-E Guía de instalaciónRestablecimiento de los valores inicialesEsta operación restaurará todos los parámetros, incluida la dirección <strong>IP</strong> y la posición de enfoque, alos valores iniciales:1. Desconecte la alimentación de la cámara.2. Mantenga pulsado el botón de Control y vuelva a conectar la alimentación.3. Mantenga pulsado el botón de Control hasta que el indicador de estado emita una luz ámbar(puede tardar hasta 15 segundos en encenderse).4. Suelte el botón de Control. Cuando el indicador de estado emita una luz verde (lo que puedetardar hasta 1 minuto), ha finalizado el proceso y se han restablecido los valores iniciales de lacámara.5. Vuelva a asignar la dirección <strong>IP</strong> utilizando uno de los métodos descritos en este documento.6. Vuelva a enfocar la cámara utilizando uno de los métodos descritos en este documento.También es posible restablecer los parámetros a la configuración predeterminada original mediantela interfaz web. Para obtener más información, consulte la ayuda en línea o el Manual del usuario.Acceso a la cámara desde InternetUna vez instalada, podrá acceder a la cámara de red desde su red local (LAN). Para acceder a lacámara desde Internet, los routers deben configurarse para permitir tráfico entrante, quenormalmente se realiza en un puerto específico.• Puerto HTTP (puerto 80 predeterminado) para visualización y configuración• Puerto RTSP (puerto 554 predeterminado) para visualización de transmisiones de vídeoH.264Consulte la documentación de su router para obtener más instrucciones. Para obtener másinformación sobre éste y otros temas, visite la página Web de soporte de Axis en www.axis.com/techsup.Más informaciónEl Manual del usuario está disponible en el sitio web de Axis, www.axis.com, o en el CD deproductos de vídeo en red de Axis suministrado con este producto.Un consejo:Visite www.axis.com/techsup para comprobar si hay disponible firmware actualizado parasu cámara de red. Para ver la versión de firmware que tiene instalada actualmente,consulte la sección Setup (Configuración) > About (Acerca de).
Installation Guide Ver. 1.1<strong>AXIS</strong> <strong>P13</strong>43-E/<strong>P13</strong>44-E/<strong>P13</strong>46-E Printed: March 2010© Axis Communications AB, 2010 Part No. 38723