Sartorius YTM03MA - Catalogus.de
Sartorius YTM03MA - Catalogus.de
Sartorius YTM03MA - Catalogus.de

Create successful ePaper yourself
Turn your PDF publications into a flip-book with our unique Google optimized e-Paper software.
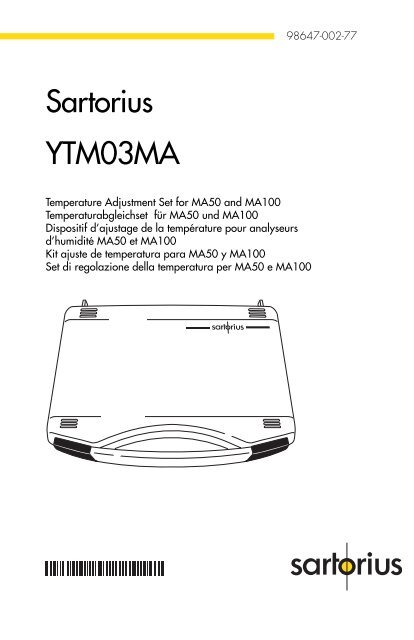
<strong>Sartorius</strong><br />
<strong>YTM03MA</strong><br />
Temperature Adjustment Set for MA50 and MA100<br />
Temperaturabgleichset für MA50 und MA100<br />
Dispositif d’ajustage <strong>de</strong> la température pour analyseurs<br />
d’humidité MA50 et MA100<br />
Kit ajuste <strong>de</strong> temperatura para MA50 y MA100<br />
Set di regolazione <strong>de</strong>lla temperatura per MA50 e MA100<br />
98647-002-77
2<br />
English-page 3<br />
Deutsch-Seite 14<br />
Français-page 23<br />
Español-página 33<br />
Italiano-pagina 43
Overview<br />
Pos. Description<br />
1 Carrying case<br />
2 Adjustment disk<br />
3 Disk hol<strong>de</strong>r<br />
4 Marking<br />
5 Serial number<br />
(ref. ID no.)<br />
6 Operating instruction manual<br />
7 Factory calibration certificate<br />
Equipment Supplied<br />
Immediately after you unpack the<br />
temperature adjustment set, check to<br />
make sure that there is no visible<br />
damage to the equipment.<br />
– Adjustment disk<br />
– Disk hol<strong>de</strong>r<br />
– Carrying case<br />
– Operating instruction manual<br />
– Factory calibration certificate<br />
3
4<br />
Inten<strong>de</strong>d Use<br />
The disk for temperature adjustment is used for<br />
calibrating and adjusting the temperature of <strong>Sartorius</strong><br />
moisture analyzers MA50 or MA100. Equipment that<br />
has been calibrated and adjusted with the temperature<br />
adjustment disk can be used as reference <strong>de</strong>vices or as<br />
inspection, measurement and testing equipment. The<br />
printed-out calibration record can be used as proof of<br />
compliance with the standards for inspection and<br />
measuring equipment. Every temperature adjustment<br />
disk has a serial number (ref. ID no.) and a factory<br />
calibration certificate. The quality of the temperature<br />
adjustment disk should be similarly tested. We<br />
recommend that you have the temperature adjustment<br />
disk tested once a year. For this purpose, you must<br />
send the temperature adjustment set back to <strong>Sartorius</strong>.<br />
The moisture analyzer should be adjusted.<br />
– at room temperature (approx. 20°C)<br />
– un<strong>de</strong>r the same ambient conditions<br />
– at regular intervals <strong>de</strong>fined by the user<br />
– using the same complete temperature adjustment set.<br />
The moisture analyzer should be set up on a clean<br />
workbench in surroundings that are supplied with<br />
clean air. A change in any of the following ambient<br />
conditions will affect the results obtained:<br />
– Sunlight<br />
– Drafts caused by open windows or doors<br />
– Air conditioning or fume hoods<br />
– Gases or dust particles.<br />
Leave a space of at least 20 cm around the moisture<br />
analyzer and any other objects in the direct vicinity of<br />
it, and at least 1 m above the moisture analyzer. After<br />
you start the analyzer, it will carry out calibration and<br />
adjustment fully automatically.<br />
Important Note:<br />
Read the operating instructions carefully before<br />
calibrating and adjusting the temperature.
Contents<br />
Page<br />
Overview 3<br />
Equipment Supplied 3<br />
Inten<strong>de</strong>d Use 4<br />
Contents 5<br />
Safety Information 6<br />
Adjusting the Temperature<br />
Adjusting the Temperature<br />
7<br />
(2-Point Adjustment)<br />
Adjusting the Temperature<br />
7<br />
(1-Point Adjustment) 9<br />
Care and Maintenance 10<br />
Error Co<strong>de</strong>s<br />
Factory<br />
11<br />
Calibration Certificate 12<br />
5
6<br />
Warning and Safety Information<br />
WDo not insert or remove the adjustment disk,<br />
pan retainer or draft shield immediately after a<br />
drying routine. Warning: Do not touch the<br />
moisture analyzer to avoid serve burns! Do not<br />
remove the disposable pan and pan retainer<br />
until they have cooled down enough to be<br />
touched.<br />
WAlways use the hol<strong>de</strong>r to remove the adjustment<br />
disk from the dryer after completion of a<br />
measurement or to transport the disk.<br />
WAllow the adjustment disk to cool on a clean<br />
and fire-proof pad after completion of a measurement.<br />
WAfter cooling, place the adjustment disk back<br />
into its packaging and store it in a dust-free and<br />
protected place.<br />
Warranty<br />
Do not miss out on the benefits of our full warranty.<br />
Please contact your local <strong>Sartorius</strong> office or <strong>de</strong>aler<br />
for further information. If available, complete the<br />
warranty registration card, indicating the date of<br />
installation, and return the card to your <strong>Sartorius</strong><br />
office or <strong>de</strong>aler.
Adjusting the Temperature<br />
2-Point Adjustment<br />
You should select the 2-point adjustment for samples that<br />
are usually measured at different temperatures. This<br />
adjustment option should be also used when<br />
components such as the temperature sensor or the<br />
sample chamber have to be serviced or replaced.<br />
§ Open the sample chamber by pressing the k key<br />
§ Remove the disposable pan and pan retainer and<br />
place them on a clean pad.<br />
> ERR 54 appears in the display<br />
(star-shaped pan missing)<br />
§ Use the disk hol<strong>de</strong>r to remove the adjustment<br />
disk from its carrying case.<br />
§ Insert the adjustment disk un<strong>de</strong>r slight pressure.<br />
The marking should be facing towards the user.<br />
7
8<br />
§ Close the sample chamber by pressing the k key.<br />
§ Press the T key; the following appears on the<br />
display:<br />
”Heater adjustment”.<br />
§ Start “Heater adjustment” by pressing the O soft<br />
key.<br />
§ Select “2-point temperature adjustment”; start by<br />
pressing the O soft key.<br />
§ If required, enter the serial number (ref. ID numbe)r<br />
(4). Confirm by pressing the soft key<br />
[Ref-ID]. The reference ID number is a serial<br />
number; for example: 0011901617 (on the<br />
bottom si<strong>de</strong> of the temperature adjustment disk).<br />
§ Press the [Start] soft key to activate the<br />
temperature adjustment routine.<br />
> The heating symbol appears in the display, the<br />
heating time and the previous drying time are<br />
displayed continuously.<br />
§ After you have finished the measurement for<br />
calibrating and adjusting the temperature, you will<br />
hear 3 beeps. Display: Analysis end<br />
§ Press [Info] to display the measured values.<br />
§ Go back by pressing, soft key<br />
> Return to the main menu without performing an<br />
adjustment by pressing the [End] soft key. A<br />
record is printed out automatically.<br />
§ Activate the calibration/adjustment and<br />
temperature adjustment routine on the unit by<br />
pressing the [Adjust.] soft key. This conclu<strong>de</strong>s the<br />
adjustment routine. If the final temperature shows<br />
163°C, for example, the temperature is 1°C<br />
outsi<strong>de</strong> the tolerance limit of 160°C ± 2°C. This
adjustment automatically corrects the <strong>de</strong>viation. At<br />
the same time, a data record is printed out.<br />
Important Note:<br />
If the tolerance limit is too high, the analyzer will<br />
not be adjusted. In this case, please inform your<br />
local <strong>Sartorius</strong> office, <strong>de</strong>aler or service center.<br />
§ Open the sample chamber by pressing the k<br />
key<br />
> Allow the moisture analyzer to cool down.<br />
§ Snap the disk hol<strong>de</strong>r into the adjustment disk and<br />
remove the disk. Caution: Equipment is extremely<br />
hot after drying!<br />
Do not touch to avoid severe burns!<br />
> Allow the adjustment disk to cool on a clean, fireproof<br />
pad.<br />
1-Point Adjustment<br />
You should select the 1-point adjustment for samples<br />
that are usually measured at one temperature.<br />
When adjusting the temperature using the 1-point<br />
adjustment, you can individually pre-select the<br />
temperature. Use the number keypad to enter the<br />
temperature. The factory setting is 105°C.<br />
The routine corresponds to the 2-point adjustment.<br />
9
10<br />
Care and Maintenance<br />
Storage and Shipping Conditions<br />
$ During transport, the adjustment set is sufficiently<br />
protected by the packaging.<br />
Keep all parts of the packaging for storing the<br />
adjustment set or in case you have to return it to<br />
<strong>Sartorius</strong>.<br />
$ Store at: – 20°C ... + 75°C<br />
Cleaning<br />
$ Do not use aggressive cleaning agents (solvents<br />
etc.). Do not scratch the adjustment disk. The<br />
results can be distorted if the paint finish is<br />
damaged.<br />
$ Keep the adjustment disk clean. Use a clean<br />
cloth that has been wet with water or<br />
conventional glass cleaner to wipe off any<br />
contamination. Dust and dirt can be cleaned off<br />
with a small brush or a dry, soft and lint-free<br />
cloth. Do not touch the adjustment disk with oily<br />
or greasy fingers.
Error Co<strong>de</strong>s<br />
“Error 53” The temperature adjustment disk has not been inserted<br />
properly.<br />
“L” Star-shaped pan missing.<br />
The temperature adjustment routine has not been<br />
selected yet.<br />
Press the T key.<br />
“Canceled” The sample chamber was opened during the<br />
measurement.<br />
“Outliers” The temperature adjustment disk is contaminated.<br />
The moisture analyzer is not ready for operations.<br />
The moisture analyzer has been running too long<br />
(overheated).<br />
The moisture analyzer is <strong>de</strong>fective; please inform<br />
your local <strong>Sartorius</strong> office, <strong>de</strong>aler or service center.<br />
“too many charac.” You have entered more than 14 characters for the<br />
reference ID no.<br />
“no entry” You have not entered a temperature for the<br />
1-point adjustment.<br />
“too high “ The temperature entered is too high.<br />
“to low” The temperature entered is too low.<br />
11
<strong>Sartorius</strong> Factory Calibration Certificate<br />
Example:<br />
12
Factory Calibration Certificate<br />
Example<br />
Test object: Temperature Adjustment Set (<strong>YTM03MA</strong>)<br />
Test equipment number: 0011901617<br />
Record number: 26/00<br />
Test method: Comparative temperature measurement<br />
Measuring points: 80°C, 140°C, 200°C<br />
Reference TMD Display Measurement Room<br />
TMD Correction Uncertainty Temperature<br />
[°C] [°C] [°C] [°C] [°C]<br />
80.69 80.44 0.25 0.50 23.3<br />
140.47 140.58 0.11 0.50 24.6<br />
202.03 201.39 0.64 0.50 25.8<br />
Calibration <strong>de</strong>vices used: Reference temperature measuring disk (TMD),<br />
test equipment number: TEM0100<br />
Keithley measuring instrument,<br />
test equipment number: DVM0148<br />
Traceable to: - (Physikalisch-Technische Bun<strong>de</strong>sanstalt (PTB)<br />
German Fe<strong>de</strong>ral Institute of Physics and Metrology<br />
- German Calibration Service (DKD),<br />
calibration laboratory for temperature measuring equipment<br />
Calibration Certificate for the reference TMD:<br />
- Temperature calibration for the measuring points: 80°C, 140°C, 200°C, 250°C<br />
- PTB emission rate calibration at the temperatures 80°C, 140°C and 200°C<br />
within the wavelength range of 2.5...20 µm<br />
- PTB reflectance calibration at room temperature within the wavelength range<br />
of 0.7...10 µm<br />
Recommen<strong>de</strong>d calibration interval: 1 year Next calibration: 07/01<br />
Inspector: ______________ Date: July 19, 2000<br />
Diedrich<br />
13
Übersichtdarstellung<br />
Pos.Bezeichnung<br />
1 Transportkoffer<br />
2 Abgleichscheibe<br />
3 Haltegriff<br />
4 Markierung<br />
5 Seriennummer<br />
Ref.-ID-Nr.<br />
6 Betriebsanleitung<br />
7 Werkskalibrierzertifikat<br />
14<br />
Lieferumfang<br />
Den Temperaturabgleichset sofort nach<br />
<strong>de</strong>m Auspacken auf eventuell sichtbare<br />
äußere Beschädigungen überprüfen.<br />
– Abgleichscheibe<br />
– Haltegriff<br />
– Transportkoffer<br />
– Betriebsanleitung<br />
– Werkskalibrierzertifikat
Verwendungszweck<br />
Das Temperaturabgleichset wird für <strong>de</strong>n Temperaturabgleich<br />
<strong>de</strong>r Feuchtemeßgeräte MA50 o<strong>de</strong>r MA100<br />
eingesetzt. Durch <strong>de</strong>n Abgleich mit <strong>de</strong>r Abgleichscheibe<br />
können Geräte als Referenzgerät o<strong>de</strong>r als<br />
Prüfmittel eingesetzt wer<strong>de</strong>n. Der Protokollausdruck <strong>de</strong>s<br />
Abgleichs kann dann als Beleg für die Prüfmittelüberwachung<br />
gewertet wer<strong>de</strong>n. Je<strong>de</strong> Abgleichscheibe<br />
hat eine Seriennummer (Referenz-ID-Nr.) und ein<br />
Werkskalibrierzertifikat. Die Abgleichscheibe sollte<br />
ebenfalls auf ihre Qualität überprüft wer<strong>de</strong>n. Wir<br />
empfehlen eine einmalige jährliche Überprüfung <strong>de</strong>r<br />
Abgleichscheibe. Dazu muß das komplette Temperaturabgleichset<br />
an <strong>Sartorius</strong> zurückgesen<strong>de</strong>t wer<strong>de</strong>n.<br />
Das Feuchtemeßgerät sollte<br />
– bei Raumtemperatur (ca. 20°C)<br />
– bei gleichen Umgebungs- und Rahmenbedingungen<br />
– in vom Benutzer festgelegten Zeitintervallen<br />
– mit <strong>de</strong>m selben Temperaturabgleichset<br />
abgeglichen wer<strong>de</strong>n.<br />
Das Feuchtemeßgerät sollte sich an einem sauberen<br />
Meßplatz und in sauberer Umgebungsluft befin<strong>de</strong>n.<br />
Meßergebnisse können durch<br />
– Sonneneinstrahlung<br />
– Luftzug (z.B. durch offenstehen<strong>de</strong> Türen o<strong>de</strong>r<br />
Fenster)<br />
– Klimaanlage o<strong>de</strong>r Abzuganlage<br />
– Gase o<strong>de</strong>r Stäube<br />
beeinträchtigt wer<strong>de</strong>n. Der Freiraum in direkter Umgebung<br />
zum Gerät sollte nach allen Seiten min<strong>de</strong>stens<br />
20 cm und über <strong>de</strong>m Feuchtemeßgerät min<strong>de</strong>stens 1m<br />
betragen. Der Abgleich wird nach <strong>de</strong>m Start selbständig<br />
und vollautomatisch vom Gerät durchgeführt.<br />
Hinweis:<br />
Bevor ein Temperaturabgleich vorgenommen wird, die<br />
Betriebsanleitung aufmerksam durchlesen.<br />
15
16<br />
Inhalt<br />
Seite<br />
Übersichtsdarstellung 14<br />
Lieferumfang 14<br />
Verwendungszweck 15<br />
Inhalt 16<br />
Sicherheitshinweise 17<br />
Temperaturabgleich durchführen 18<br />
Zweipunkt-Temperaturabgleich 18<br />
Einpunkt-Temperaturabgleich 20<br />
Pflege und Wartung 21<br />
Fehlermeldungen 22<br />
Werkskalibrierzertifikat 23
Sicherheitshinweise<br />
WAbgleichscheibe, Schalenträger o<strong>de</strong>r Windschutz<br />
nicht unmittelbar nach einer Trockung einsetzen bzw.<br />
entnehmen. Achtung: Verbrennungsgefahr! Einwegschale<br />
und Schalenträger erst im handwarmen<br />
Zustand entfernen.<br />
WAbgleichscheibe nach <strong>de</strong>r Messung immer mit <strong>de</strong>m<br />
Haltegriff aus <strong>de</strong>m Trockner nehmen und transportieren.<br />
WAbgleichscheibe nach <strong>de</strong>r Messung auf einer sauberen<br />
und temperaturbeständigen Unterlage abkühlen<br />
lassen.<br />
WAbgleichscheibe erst nach <strong>de</strong>m Abkühlen in die<br />
Verpackung zurücklegen und an einem staubfreien<br />
und geschützten Ort aufbewahren.<br />
Garantie<br />
Den erweiterten Garantieanspruch nicht<br />
verschenken. Die vollständig ausgefüllte<br />
Garantieanmeldung an <strong>Sartorius</strong> zurücksen<strong>de</strong>n.<br />
17
Temperaturabgleich durchführen<br />
Zweipunkt Temperaturabgleich<br />
Der Zweipunkttemperaturabgleich sollte gewählt wer<strong>de</strong>n, wenn Proben in<br />
<strong>de</strong>r Regel mit unterschiedlichen Temperaturen gemessen wer<strong>de</strong>n. Der<br />
Abgleich muß auch dann durchgeführt wer<strong>de</strong>n, wenn Bauteile wie <strong>de</strong>r<br />
Temperatursensor o<strong>de</strong>r die Heizeinheit gewartet o<strong>de</strong>r ersetzt wur<strong>de</strong>n.<br />
18<br />
§ Heizeinheit einfahren Taste k drücken<br />
§ Schalenträger entfernen und auf eine saubere<br />
Unterlage legen.<br />
> In <strong>de</strong>r Anzeige erscheint "ERR 54" o<strong>de</strong>r "L"<br />
(kein Wägestern vorhan<strong>de</strong>n)<br />
§ Abgleichscheibe mit <strong>de</strong>m Haltegriff aus <strong>de</strong>m<br />
Transportkoffer nehmen.<br />
§ Abgleichscheibe mit leichtem Druck einsetzen.<br />
Die Markierung zeigt nach vorne zum Anwen<strong>de</strong>r.
§ Heizeinheit ausfahren Taste k drücken.<br />
§ Taste T drücken, in <strong>de</strong>r Anzeige erscheint:<br />
" Abgleich <strong>de</strong>r Heizung".<br />
§ »Abgleich <strong>de</strong>r Heizung« mit <strong>de</strong>r Softkey-TasteO<br />
bestätigen.<br />
§ »2-Punkt-Temperaturabgleich" auswählen, mit Softkey<br />
O bestätigen.<br />
§ Die Seriennummer Ref.-ID-Nummer (4) bei Bedarf<br />
eingeben. Mit <strong>de</strong>r Softkeytaste<br />
[Ref-ID] übernehmen. Die Referenz-ID-Nr. ist<br />
eine Seriennummer z.B.: 0011901617<br />
(siehe: Unterseite <strong>de</strong>r Abgleichscheibe)<br />
§ Softkeytaste [Start] drücken, <strong>de</strong>r Temperaturabgleich<br />
wird gestartet.<br />
> Das Heizsymbol erscheint in <strong>de</strong>r Anzeige, die<br />
bereits abgelaufene Zeit <strong>de</strong>s Abgleichs und die<br />
aktuelle Temperatur wird ständig angezeigt.<br />
§ Nach En<strong>de</strong> <strong>de</strong>r Messung zum Temperaturabgleich<br />
erfolgt 3x ein Piepton<br />
Anzeige: Messung been<strong>de</strong>t<br />
§ Mit <strong>de</strong>r Taste [Info] können die gemessenen Werte<br />
angezeigt wer<strong>de</strong>n.<br />
§ Mit <strong>de</strong>r Softkey-Taste , zurückspringen<br />
> Mit <strong>de</strong>r Softkey-Taste [En<strong>de</strong>] erfolgt <strong>de</strong>r Rücksprung<br />
in das Testmenü ohne Justierung. Ein Protokollausdruck<br />
wird automatisch erstellt.<br />
§ Mit Betätigen <strong>de</strong>r Softkey-Taste [Just.] erfolgt die<br />
Justierung <strong>de</strong>s Gerätes. Der Temperaturabgleich ist<br />
damit abgeschlossen. Zeigt die Messung <strong>de</strong>r<br />
Endtemperatur z.B. 163°C, so ist die Temperatur<br />
19
20<br />
um 1°C außerhalb <strong>de</strong>r Toleranzgrenze von z.B.<br />
160°C ± 2°C. Durch die Justierung wird die<br />
Abweichung automatisch korrigiert. Gleichzeitig<br />
erfolgt ein Protokollausdruck.<br />
Hinweis:<br />
Ist die Abweichung zu groß erfolgt keine Justierung<br />
<strong>de</strong>s Gerätes. Den <strong>Sartorius</strong> Kun<strong>de</strong>ndienst<br />
informieren.<br />
§ Heizeinheit einfahren k–Taste drücken<br />
> Das Gerät erst abkühlen lassen.<br />
§ Haltegriff in die Abgleichscheibe einrasten, diese<br />
entnehmen. Vorsicht: Verbrennungsgefahr!<br />
> Abgleichscheibe auf einer sauberen, temperaturbeständigen<br />
Unterlage abkühlen lassen.<br />
Einpunkt Temperaturabgleich<br />
Der Einpunkttemperaturabgleich sollte gewählt<br />
wer<strong>de</strong>n, wenn Proben in <strong>de</strong>r Regel mit einer Temperatur<br />
gemessen wer<strong>de</strong>n. Bei <strong>de</strong>m Einpunkttemperaturabgleich<br />
kann die Temperatur individuell vorgewählt<br />
wer<strong>de</strong>n. Über die Zahlentasten die Temperatur<br />
eingeben. Werkseitig sind 105°C eingestellt.<br />
Der Ablauf entspricht <strong>de</strong>m <strong>de</strong>s Zweipunkttemperaturabgleichs.
Pflege und Wartung<br />
Lager- und Transportbedingungen<br />
$ Auf <strong>de</strong>m Transportweg ist das Abgleichset soweit<br />
wie nötig durch die Verpackung geschützt.<br />
Für eine Lagerung <strong>de</strong>s Abgleichsets o<strong>de</strong>r einen<br />
eventuell notwendigen Rückversand alle Teile <strong>de</strong>r<br />
Verpackung aufbewahren.<br />
$ Lagertemperatur: – 20 °C ... + 75°C<br />
Reinigung<br />
$ Keine aggressiven Reinigungsmittel (Lösungsmittel<br />
o.ä.) benutzen. Abgleichscheibe nicht zerkratzen,<br />
durch eine beschädigte Lackierung können<br />
Meßergebnisse verfälscht wer<strong>de</strong>n.<br />
$ Die Abgleichscheibe sauber halten. Verschmutzungen<br />
mit Wasser o<strong>de</strong>r han<strong>de</strong>lsüblichen Glasreiniger<br />
abwischen. Grobe Verschmutzungen mit<br />
einem Pinsel o<strong>de</strong>r einem trockenen, weichen und<br />
fusselfreien Tuch reinigen. Die Abgleichscheibe<br />
nicht mit öligen o<strong>de</strong>r fettigen Fingern anfassen.<br />
21
22<br />
Mögliche Fehlermeldungen<br />
"Error 53" Die Temperaturmeßscheibe ist<br />
nicht korrekt eingesetzt.<br />
"L" Kein Wägestern eingesetzt.<br />
Der Temperaturabgleich wur<strong>de</strong><br />
noch nicht gewählt.<br />
TasteT drücken.<br />
"Abbruch" Die Haube wur<strong>de</strong> während <strong>de</strong>r<br />
Messung geöffnet.<br />
"Param.aus Tol." Die Temperaturmeßscheibe ist<br />
verschmutzt.<br />
Das Gerät war nicht im betriebsbereiten<br />
Zustand.<br />
Das Gerät war längere Zeit im<br />
Betrieb (zu heiß).<br />
Das Gerät ist <strong>de</strong>fekt, Service<br />
informieren.<br />
"zu viele Zeichen" Es wur<strong>de</strong>n mehr als 14 Zeichen<br />
für die Ref.-IDNr.<br />
eingegeben.<br />
"kein Zahlenwert" Es wur<strong>de</strong> keine Temperatur für<br />
<strong>de</strong>n<br />
Einpunkttemperaturabgleich<br />
eingegeben.<br />
"zu groß" Die eingegebene Temperatur ist<br />
zu hoch.<br />
"zu klein" Die eingegebene Temperatur ist<br />
zu klein.
Werkskalibrierzertifikat<br />
Beispiel:<br />
23
Vue d’ensemble<br />
Pos.I<strong>de</strong>ntification<br />
1 Valise <strong>de</strong> transport<br />
2 Disque d’ajustage<br />
3 Poignée<br />
4 Marque<br />
5 Numéro <strong>de</strong> série<br />
(i<strong>de</strong>ntification <strong>de</strong> référence)<br />
6 Mo<strong>de</strong> d’emploi<br />
7 Certificat <strong>de</strong> calibrage d’usine<br />
24<br />
Contenu <strong>de</strong> la livraison<br />
Aussitôt après avoir déballé le<br />
dispositif d’ajustage <strong>de</strong> la<br />
température, veuillez vérifier s’il ne<br />
présente aucune détérioration externe<br />
visible.<br />
– Disque d’ajustage<br />
– Poignée<br />
– Valise <strong>de</strong> transport<br />
– Mo<strong>de</strong> d’emploi<br />
– Certificat <strong>de</strong> calibrage d’usine
Description générale<br />
Le dispositif d’ajustage <strong>de</strong> la température est conçu pour<br />
l’ajustage <strong>de</strong> la température <strong>de</strong>s analyseurs d’humidité<br />
MA50 et MA100. L’ajustage effectué à l’ai<strong>de</strong> du disque<br />
d’ajustage permet d’utiliser les appareils comme appareil<br />
<strong>de</strong> référence ou comme équipement <strong>de</strong> contrôle, <strong>de</strong><br />
mesure et d’essai. Le procès-verbal d’impression <strong>de</strong> la<br />
procédure d’ajustage peut servir <strong>de</strong> référence en système<br />
<strong>de</strong> contrôle <strong>de</strong> la qualité. Chaque disque d’ajustage<br />
possè<strong>de</strong> un numéro <strong>de</strong> série (i<strong>de</strong>ntification <strong>de</strong> référence) et<br />
un certificat <strong>de</strong> calibrage d’usine. La qualité du disque<br />
d’ajustage doit également être contrôlée. Nous vous<br />
conseillons d’effectuer une vérification annuelle du disque<br />
d’ajustage. Pour cela, veuillez retourner le dispositif<br />
d’ajustage <strong>de</strong> la température complet à la société<br />
<strong>Sartorius</strong>.<br />
L’ajustage <strong>de</strong> l’analyseur d’humidité doit être effectué<br />
– à la température ambiante (env. 20°C),<br />
– dans <strong>de</strong>s conditions d’environnement i<strong>de</strong>ntiques,<br />
– à <strong>de</strong>s intervalles <strong>de</strong> temps définis par l’opérateur,<br />
– avec le même dispositif d’ajustage <strong>de</strong> la température.<br />
L’analyseur d’humidité doit être installé dans un endroit<br />
propre avec un air ambiant propre. Les résultats <strong>de</strong><br />
mesure peuvent être faussés si l’appareil est soumis aux<br />
éléments suivants :<br />
– rayons du soleil directs,<br />
– courants d’air causés par <strong>de</strong>s fenêtres ou <strong>de</strong>s portes<br />
ouvertes,<br />
– installation <strong>de</strong> conditionnement d’air ou hotte<br />
d’aspiration,<br />
– gaz ou poussières.<br />
Laissez un espace libre d’au moins 20 cm tout autour <strong>de</strong><br />
l’appareil et d’au moins 1 m au-<strong>de</strong>ssus <strong>de</strong> l’analyseur<br />
d’humidité. Après la mise en service, l’ajustage est effectué<br />
par l’appareil <strong>de</strong> manière autonome et entièrement<br />
automatique.<br />
Attention :<br />
Veuillez lire attentivement le mo<strong>de</strong> d’emploi avant <strong>de</strong><br />
procé<strong>de</strong>r à l’ajustage <strong>de</strong> la température.<br />
25
26<br />
Sommaire<br />
Page<br />
Vue d’ensemble 24<br />
Contenu <strong>de</strong> la livraison 24<br />
Description générale 25<br />
Sommaire 26<br />
Conseils <strong>de</strong> sécurité<br />
Effectuer l’ajustage<br />
27<br />
<strong>de</strong> la température<br />
Ajustage <strong>de</strong> la température<br />
28<br />
à <strong>de</strong>ux points<br />
Ajustage <strong>de</strong> la température<br />
28<br />
à un point 30<br />
Entretien et maintenance 31<br />
Messages d’erreur 32<br />
Certificat <strong>de</strong> calibrage d’usine 33
Conseils <strong>de</strong> sécurité<br />
WN’insérez pas ou ne retirez pas le disque d’ajustage,<br />
le support <strong>de</strong> coupelle ou le paravent tout <strong>de</strong> suite<br />
après une <strong>de</strong>ssiccation. Attention ! Vous risquez <strong>de</strong><br />
vous brûler ! Retirez la coupelle à usage unique et le<br />
support <strong>de</strong> coupelle seulement lorsqu’ils sont tiè<strong>de</strong>s.<br />
WAprès la mesure, utilisez toujours la poignée pour<br />
retirer et transporter le disque d’ajustage <strong>de</strong><br />
l’analyseur d’humidité.<br />
WLaissez refroidir le disque d’ajustage après la mesure<br />
sur une surface propre résistante à la température.<br />
WNe replacez le disque d’ajustage dans son emballage<br />
que lorsqu’il est froid. Conservez-le dans un<br />
endroit propre exempt <strong>de</strong> poussière et à l’abri <strong>de</strong> tout<br />
dommage.<br />
Garantie<br />
Ne per<strong>de</strong>z pas les avantages <strong>de</strong> la garantie totale.<br />
Veuillez contacter le centre <strong>de</strong> service après-vente<br />
<strong>Sartorius</strong> le plus proche ou votre fournisseur pour plus<br />
<strong>de</strong> renseignements. Si un bon <strong>de</strong> garantie est joint à ce<br />
mo<strong>de</strong> d’emploi, veuillez le<br />
retourner dûment rempli à votre centre <strong>de</strong> service aprèsvente<br />
<strong>Sartorius</strong> le plus proche.<br />
27
28<br />
Effectuer l’ajustage <strong>de</strong> la température<br />
Ajustage <strong>de</strong> la température à <strong>de</strong>ux points<br />
Choisissez une procédure d’ajustage <strong>de</strong> la<br />
température à <strong>de</strong>ux points pour <strong>de</strong>s échantillons<br />
analysés en règle générale à <strong>de</strong>s températures<br />
différentes. Un ajustage doit être également effectué<br />
après toute maintenance<br />
ou tout remplacement <strong>de</strong> composants, tels que le<br />
capteur <strong>de</strong> température ou l’unité chauffante,<br />
effectués sur l’appareil.<br />
§ Rentrez l’unité chauffante en<br />
appuyant sur la touche k.<br />
§ Retirez le support <strong>de</strong> coupelle et posez-le sur une<br />
surface propre.<br />
> «ERR 54» ou «L» apparaît à l“affichage<br />
(pas <strong>de</strong> support <strong>de</strong> coupelle).<br />
§ Retirez le disque d’ajustage <strong>de</strong> la valise <strong>de</strong><br />
transport à l’ai<strong>de</strong> <strong>de</strong> la poignée.<br />
§ Insérez le disque d’ajustage en exerçant une<br />
légère pression.<br />
La marque doit se trouver sur le <strong>de</strong>vant.
§ Sortez l’unité chauffante en appuyant sur la touche<br />
k .<br />
§ Appuyez sur la touche T. «Ajustage du chauffage»<br />
apparaît à l’affichage.<br />
§ Confirmez «l’ajustage du chauffage» en appuyant<br />
sur la touche <strong>de</strong> fonction à comman<strong>de</strong>s variables<br />
(softkey) O.<br />
§ Sélectionnez «Ajustage température 2 points» et<br />
confirmez avec la softkey O.<br />
§ Entrez si nécessaire le numéro <strong>de</strong> série (i<strong>de</strong>ntification<br />
<strong>de</strong> référence) (4) et confirmez en appuyant sur<br />
la touche<strong>de</strong> fonction à comman<strong>de</strong>s variables<br />
(softkey) [ID réf.]. L’i<strong>de</strong>ntification <strong>de</strong> référence<br />
correspond à un numéro <strong>de</strong> série, par ex. :<br />
0011901617 (voir sous le disque d’ajustage).<br />
§ Appuyez sur la touche <strong>de</strong> fonction à comman<strong>de</strong>s<br />
variables (softkey) [Démar.]. L’ajustage <strong>de</strong> la<br />
température démarre.<br />
> Le symbole <strong>de</strong> chauffage apparaît à l’affichage. Le<br />
temps d’ajustage déjà écoulé et la température<br />
actuelle sont affichés en permanence.<br />
§ A la fin <strong>de</strong> la mesure <strong>de</strong>stinée à l’ajustage <strong>de</strong> la<br />
température, un triple signal sonore retentit.<br />
Affichage : Fin analyse.<br />
§ Il est possible d’afficher les valeurs mesurées en<br />
appuyant sur la touche <strong>de</strong> fonction [Info].<br />
§ Avec la touche <strong>de</strong> fonction à comman<strong>de</strong>s variables<br />
(softkey) ,, il est possible <strong>de</strong> revenir en arrière.<br />
> La touche <strong>de</strong> fonction à comman<strong>de</strong>s variables<br />
(softkey) [Fin] permet <strong>de</strong> revenir au menu <strong>de</strong> test<br />
sans ajustage. Un procès-verbal est édité automatiquement.<br />
29
30<br />
§ En actionnant la touche <strong>de</strong> fonction à comman<strong>de</strong>s<br />
variables (softkey) [Ajust.], vous pouvez ajuster<br />
l’appareil et procé<strong>de</strong>r à l’ajustage <strong>de</strong> la température.<br />
Si la mesure <strong>de</strong> la température finale indique<br />
par exemple 163°C, alors la limite <strong>de</strong> tolérance<br />
<strong>de</strong> la température (par exemple 160°C ± 2°C) a<br />
été dépassée <strong>de</strong> 1°C. L’ajustage permet <strong>de</strong><br />
corriger automatiquement cet écart. Un procèsverbal<br />
est<br />
édité simultanément.<br />
Remarque :<br />
Si l’écart est trop grand, l’appareil ne s’ajuste pas<br />
automatiquement. Veuillez contacter le service<br />
après-vente <strong>Sartorius</strong> le plus proche.<br />
§ Rentrez l’unité chauffante en appuyant sur la touche<br />
k .<br />
> Laissez tout d’abord refroidir l’appareil.<br />
§ Insérez la poignée dans le disque d’ajustage et<br />
retirez celui-ci. Faites attention <strong>de</strong> ne pas<br />
vous brûler !<br />
> Laissez refroidir le disque d’ajustage sur une<br />
surface propre résistante à la température.
Ajustage <strong>de</strong> la température à un point<br />
Choisissez une procédure d’ajustage <strong>de</strong> la température<br />
à un point pour <strong>de</strong>s échantillons analysés en règle<br />
générale à une température unique. Avec cette<br />
procédure d’ajustage <strong>de</strong> la température à un point, il est<br />
possible <strong>de</strong> présélectionner la température <strong>de</strong> manière<br />
individuelle.<br />
Entrez la température par l’intermédiaire du bloc<br />
numérique.<br />
Le réglage d’usine <strong>de</strong> la température est <strong>de</strong> 105°C.<br />
Le déroulement correspond à celui <strong>de</strong> l’ajustage <strong>de</strong> la<br />
température à <strong>de</strong>ux points.<br />
Entretien et maintenance<br />
Conditions <strong>de</strong> stockage et <strong>de</strong> transport<br />
$ Pendant le transport, le dispositif d’ajustage est<br />
protégé grâce à son emballage.<br />
Veuillez conserver tous les éléments <strong>de</strong> l’emballage<br />
pour le stockage du dispositif d’ajustage ou au cas où<br />
une éventuelle réexpédition serait nécessaire.<br />
$ Température <strong>de</strong> stockage : – 20 °C ... + 75°C.<br />
Nettoyage<br />
$ N’utilisez pas <strong>de</strong> produits <strong>de</strong> nettoyage corrosifs<br />
(solvants ou produits similaires). Faites attention <strong>de</strong> ne<br />
pas rayer le disque d’ajustage car toute rayure sur le<br />
revêtement du disque risquerait <strong>de</strong> fausser<br />
les résultats <strong>de</strong> mesures.<br />
$ Nettoyez régulièrement le disque d’ajustage. Enlevez<br />
les salissures avec <strong>de</strong> l’eau ou un produit nettoyant<br />
pour vitres usuel disponible dans le commerce.<br />
Enlevez les salissures grossières avec un pinceau à<br />
épousseter ou avec un chiffon doux et sec qui ne<br />
s’effiloche pas. Ne touchez pas le disque d’ajustage<br />
avec <strong>de</strong>s doigts gras ou huileux.<br />
31
Messages d’erreur<br />
«Err. 53» Le disque <strong>de</strong> mesure <strong>de</strong> la température n’est pas mis en<br />
place correctement.<br />
«L» Le support <strong>de</strong> coupelle n’est pas mis en place.<br />
L’ajustage <strong>de</strong> la température n’a pas encore été<br />
sélectionné.<br />
Appuyez sur la touche T.<br />
«Interruption !» Vous avez ouvert l’unité chauffante pendant l’analyse.<br />
«Param. hors tolér.» Le disque <strong>de</strong> mesure <strong>de</strong> la température est sale.<br />
L’appareil n’était pas prêt à fonctionner.<br />
L’appareil était trop longtemps en service (trop chaud).<br />
L’appareil est défectueux. Veuillez informer le service<br />
après-vente.<br />
«Trop <strong>de</strong> caract.» Vous avez entré plus <strong>de</strong> 14 caractères pour le numéro<br />
d’i<strong>de</strong>ntification <strong>de</strong> référence.<br />
«Pas <strong>de</strong><br />
valeur numér.» Aucune température n’a été entrée pour la<br />
procédure d’ajustage <strong>de</strong> la température à<br />
un point.<br />
«Trop grand» La température entrée est trop élevée.<br />
«Trop petit» La température entrée est trop basse.<br />
32
Certificat <strong>de</strong> calibrage d’usine<br />
Example:<br />
33
34<br />
Certificat <strong>de</strong> calibrage d’usine<br />
Exemple :<br />
Objet <strong>de</strong> la mesure : Dispositif d’ajustage <strong>de</strong> la température (<strong>YTM03MA</strong>)<br />
Numéro <strong>de</strong> série : 0011901617<br />
Numéro <strong>de</strong> certificat : 26/00<br />
Métho<strong>de</strong> <strong>de</strong> mesure : Mesure comparative <strong>de</strong> la température<br />
Points <strong>de</strong> mesure : 80°C, 140°C, 200°C<br />
DMT <strong>de</strong> référence DMTCorrection d’indication Incertitu<strong>de</strong> <strong>de</strong> mesure Température<br />
<strong>de</strong> la pièce<br />
[°C] [°C] [°C] [°C] [°C]<br />
80,69 80,44 0,25 0,50 23,3<br />
140,47 140,58 0,11 0,50 24,6<br />
202,03 201,39 0,64 0,50 25,8<br />
Appareils <strong>de</strong> calibrage utilisés : Disque <strong>de</strong> mesure <strong>de</strong> la température <strong>de</strong> référence,<br />
n° d’équipement <strong>de</strong> contrôle : TEM0100.<br />
Instrument <strong>de</strong> mesure Keithley, n° d’équipement<br />
<strong>de</strong> contrôle : DVM0148.<br />
Organismes <strong>de</strong> référence : - Physikalisch-Technische Bun<strong>de</strong>sanstalt (PTB)<br />
- DKD, centre d’étalonnage allemand pour les<br />
instruments <strong>de</strong> mesure <strong>de</strong> la température<br />
Disque <strong>de</strong> mesure <strong>de</strong> la température <strong>de</strong> référence :<br />
- calibrage <strong>de</strong> la température pour les points <strong>de</strong> mesure suivants : 80°C, 140°C,<br />
200°C, 250°C,<br />
- mesure par le PTB du <strong>de</strong>gré d’émission avec <strong>de</strong>s températures <strong>de</strong> 80°C, 140°C<br />
et 200°C<br />
dans une étendue <strong>de</strong> longueurs d’on<strong>de</strong>s <strong>de</strong> 2,5 à 20 µm,<br />
- mesure par le PTB du <strong>de</strong>gré <strong>de</strong> réflexion à la température <strong>de</strong> la pièce dans une<br />
étendue <strong>de</strong> longueurs d’on<strong>de</strong>s <strong>de</strong> 0,7 à 10 µm.<br />
Intervalle <strong>de</strong> calibrage recommandé : 1 an Prochain calibrage :07/01<br />
Vérificateur : ______________ Date : ______________<br />
Diedrich
Representación sinóptica<br />
N° Designación<br />
1 Maletín <strong>de</strong> transporte<br />
2 Disco <strong>de</strong> ajuste<br />
3 Asa<br />
4 Muesca<br />
5 N° ID alfanumérico<br />
<strong>de</strong> referencia<br />
(número instrumento <strong>de</strong> control)<br />
6 Instrucciones <strong>de</strong> funcionamiento<br />
7 Certificado <strong>de</strong> calibración <strong>de</strong> fábrica<br />
Suministro<br />
Controlar el kit ajuste <strong>de</strong><br />
temperatura <strong>de</strong> inmediato, al<br />
<strong>de</strong>sembalar, para <strong>de</strong>tectar<br />
eventuales daños visibles<br />
exteriormente.<br />
– Disco <strong>de</strong> ajuste<br />
– Asa<br />
– Maletín <strong>de</strong> transporte<br />
– Instrucciones <strong>de</strong><br />
funcionamiento<br />
– Certificado <strong>de</strong> calibración<br />
<strong>de</strong> fábrica<br />
35
36<br />
Objeto <strong>de</strong> empleo<br />
El kit ajuste <strong>de</strong> temperatura se utiliza para la compensación<br />
<strong>de</strong> temperatura <strong>de</strong> los analizadores <strong>de</strong> humedad MA50 o<br />
MA100. Con la compensación mediante el disco pue<strong>de</strong>n<br />
utilizarse aparatos como referencia o como instrumentos <strong>de</strong><br />
control. La impresión <strong>de</strong> protocolo <strong>de</strong>l ajuste <strong>de</strong><br />
temperatura pue<strong>de</strong> ser evaluada como documento para la<br />
supervisión <strong>de</strong>l instrumento <strong>de</strong> control. Cada disco <strong>de</strong><br />
ajuste tiene un número <strong>de</strong> serie (N° ID <strong>de</strong> referencia) y un<br />
certificado <strong>de</strong> calibración <strong>de</strong> fábrica. También <strong>de</strong>bería<br />
controlarse la calidad <strong>de</strong>l disco <strong>de</strong> ajuste. Recomendamos<br />
un control anual <strong>de</strong>l disco <strong>de</strong> ajuste. Para esto, ha <strong>de</strong><br />
reenviarse el kit ajuste <strong>de</strong> temperatura completo a <strong>Sartorius</strong>.<br />
El analizador <strong>de</strong> humedad ha <strong>de</strong> ajustarse<br />
– a temperatura ambiental (aprox. 20°C)<br />
– bajo condiciones <strong>de</strong> entorno e instalación normales<br />
– en intervalos <strong>de</strong> tiempo <strong>de</strong>finidos por el usuario<br />
– con el mismo kit ajuste <strong>de</strong> temperatura.<br />
El analizador <strong>de</strong> humedad <strong>de</strong>bería encontrarse en un lugar<br />
<strong>de</strong> medición limpio, con aire ambiental también limpio. Los<br />
resultados <strong>de</strong> medición pue<strong>de</strong>n ser afectados por<br />
– la radiación solar<br />
– las corrientes <strong>de</strong> aire (p. ej. ventanas o puertas abiertas)<br />
– acondicionadores <strong>de</strong> aire o ventiladores<br />
– gases o polvos.<br />
El espacio libre alre<strong>de</strong>dor <strong>de</strong>l aparato <strong>de</strong>bería importar,<br />
como mínimo, 20 cm y 1 m por encima <strong>de</strong>l analizador.<br />
El ajuste lo realiza el aparato, <strong>de</strong>spués <strong>de</strong>l inicio, en forma<br />
automática o semi-automática.<br />
Advertencia:<br />
Antes <strong>de</strong> realizarse un ajuste <strong>de</strong> temperatura, leer con<br />
atención las instrucciones <strong>de</strong> funcionamiento.
Contenido<br />
Página<br />
Representación sinóptica 35<br />
Suministro 35<br />
Objeto <strong>de</strong> empleo 36<br />
Contenido 37<br />
Advertencias <strong>de</strong> seguridad 38<br />
Realizar ajuste <strong>de</strong> temperatura 39<br />
Ajuste <strong>de</strong> temperatura dos puntos 39<br />
Ajuste <strong>de</strong> temperatura un punto 41<br />
Cuidado y mantenimiento 42<br />
Mensajes <strong>de</strong> error<br />
Certificado <strong>de</strong> calibración<br />
43<br />
en fábrica 44<br />
37
38<br />
Advertencias <strong>de</strong> seguridad<br />
WNo montar o sacar disco <strong>de</strong> ajuste, soporte <strong>de</strong><br />
platillo o protector contra corrientes <strong>de</strong> aire<br />
inmediatamente <strong>de</strong>spués <strong>de</strong> un proceso <strong>de</strong> secado.<br />
Advertencia: ¡Peligro <strong>de</strong> quemaduras! Retirar<br />
platillos <strong>de</strong>sechables y soporte <strong>de</strong> platillo recién<br />
cuando se encuentran en estado <strong>de</strong> asirlos con la<br />
mano.<br />
WSacar el disco <strong>de</strong> ajuste <strong>de</strong>l aparato <strong>de</strong>spués <strong>de</strong> la<br />
medición, utilizando siempre el asa, también para el<br />
transporte.<br />
WDejar enfriar el disco <strong>de</strong> ajuste, <strong>de</strong>spués <strong>de</strong> la<br />
medición, sobre una superficie <strong>de</strong> apoyo limpia y<br />
con temperatura constante.<br />
WPoner el disco <strong>de</strong> ajuste en el empaque recién<br />
<strong>de</strong>spués <strong>de</strong> enfriarse y guardarlo en un lugar<br />
protegido y libre <strong>de</strong> polvo.<br />
Garantía<br />
No <strong>de</strong>saproveche los <strong>de</strong>rechos <strong>de</strong> garantía.<br />
Remita la carta <strong>de</strong> garantía <strong>de</strong>bidamente<br />
rellenada a <strong>Sartorius</strong>.
Realizar ajuste <strong>de</strong> temperatura<br />
Ajuste <strong>de</strong> temperatura dos puntos<br />
Seleccionar ajuste <strong>de</strong> temperatura dos punto, si las muestras generalmente son<br />
analizadas con temperaturas diferentes. El ajuste tiene que realizarse también,<br />
cuando se han reparado o reemplazado componentes, como p. ej. el sensor<br />
<strong>de</strong> temperatura o la unidad calefactora.<br />
§ Abrir la unidad calefactora. Pulsar la tecla k<br />
§ Retirar el soporte <strong>de</strong> platillo y colocarlo sobre<br />
una superficie limpia.<br />
> En la indicación aparece “ERR 54” o “L”<br />
(falta montar soporte <strong>de</strong> platillo)<br />
§ Sacar <strong>de</strong>l maletín <strong>de</strong> transporte el disco <strong>de</strong><br />
ajuste, utilizando el asa.<br />
§ Colocar el disco <strong>de</strong> ajuste, presionándolo<br />
levemente.<br />
La muesca indica hacia a<strong>de</strong>lante, hacia el<br />
usuario.<br />
39
40<br />
§ Cerrar la unidad calefactora. Pulsar tecla k .<br />
§ Pulsar tecla T , en la indicación aparece:<br />
” Ajuste calefacción”.<br />
§ Confirmar »Ajuste calefacción« con Softkey O .<br />
§ Seleccionar »Ajuste temperatura 2 puntos”,<br />
confirmar con Softkey O .<br />
§ En caso necesario, entrar el número <strong>de</strong> serie N° ID<br />
referencia (4). Memorizar con Softkey<br />
[ID-ref]. El N° ID <strong>de</strong> referencia es un número<br />
<strong>de</strong> serie, p. ej.: 0011901617<br />
(ver en la base <strong>de</strong>l disco <strong>de</strong> ajuste)<br />
§ Pulsar Softkey [Inicio], inicializa el ajuste <strong>de</strong><br />
temperatura.<br />
> En la indicación aparece el símbolo <strong>de</strong><br />
calefaccionamiento, se indica constantemente el<br />
tiempo ya transcurrido y la temperatura actual.<br />
§ Al finalizar el análisis para el ajuste <strong>de</strong> temperatura<br />
se generan 3 señales acústicas<br />
Indicación: Fin análisis<br />
§ Con la tecla [Info] pue<strong>de</strong>n indicarse los valores <strong>de</strong>l<br />
análisis.<br />
§ Con Softkey , retroce<strong>de</strong>r<br />
> Con Softkey [Fin] se retorna al menú test, sin ajuste.<br />
Se realiza automáticamente una impresión <strong>de</strong><br />
protocolo.<br />
§ Al activar Softkey [Ajuste] se realiza el ajuste <strong>de</strong>l<br />
aparato y el ajuste <strong>de</strong> temperatura finaliza. Si el<br />
análisis indica temperatura final, p. ej. 163°C,
significa que la temperatura se encuentra en 1°C<br />
fuera <strong>de</strong>l límite <strong>de</strong> tolerancia, p. ej. respecto <strong>de</strong><br />
160°C ± 2°C. Mediante el ajuste, la <strong>de</strong>sviación<br />
es corregida automáticamente. Al mismo tiempo,<br />
se realiza una impresión <strong>de</strong> protocolo.<br />
Advertencia:<br />
Si la <strong>de</strong>sviación es <strong>de</strong>masiado alta no se realiza<br />
ajuste <strong>de</strong>l aparato. En tal caso, informar al serv.<br />
técnico <strong>Sartorius</strong>.<br />
§ Abrir unidad calefactora. Pulsar la tecla k<br />
> Primeramente, <strong>de</strong>jar enfriar el aparato.<br />
§ Calzar el asa en el disco <strong>de</strong> ajuste y luego<br />
sacarlo. ¡Cuidado, peligro <strong>de</strong> quemaduras!<br />
> Dejar enfriar el disco <strong>de</strong> ajuste sobre una<br />
superficie limpia con temperatura constante.<br />
Ajuste <strong>de</strong> temperatura un punto<br />
El ajuste <strong>de</strong> temperatura un punto ha <strong>de</strong><br />
seleccionarse, cuando generalmente las muestras se<br />
analizan con una temperatura. En ajuste <strong>de</strong><br />
temperatura un punto pue<strong>de</strong> preseleccionarse la<br />
temperatura individualmente.<br />
Entrar temperatura mediante las teclas numéricas.<br />
De fábrica está ajustado 105°C.<br />
El proceso correspon<strong>de</strong> al <strong>de</strong>l ajuste <strong>de</strong> temperatura<br />
dos puntos.<br />
41
42<br />
Cuidado y mantenimiento<br />
Condiciones <strong>de</strong> transporte y almacenamiento<br />
$ Para el transporte, el kit ajuste <strong>de</strong> temperatura está<br />
protegido convenientemente por el embalaje.<br />
Para un almacenamiento <strong>de</strong>l kit <strong>de</strong> ajuste o para<br />
un reenvío eventual y necesario, conservar todos<br />
las piezas <strong>de</strong>l embalaje.<br />
$ Temperatura <strong>de</strong> almacenamiento: – 20 °C ... +<br />
75°C<br />
Limpieza<br />
$ No utilizar <strong>de</strong>tergentes <strong>de</strong> limpieza agresivos<br />
(disolventes o similares). Cui<strong>de</strong> <strong>de</strong> no rayar el<br />
disco <strong>de</strong> ajuste; a través <strong>de</strong> una pintura dañada<br />
pue<strong>de</strong>n alterarse los resultados <strong>de</strong> análisis.<br />
$ Mantener limpio el disco <strong>de</strong> ajuste. La suciedad<br />
pue<strong>de</strong> ser eliminada con agua o <strong>de</strong>tergentes no<br />
nocivos. La suciedad también pue<strong>de</strong> ser quitada<br />
con pincel o un paño seco y suave que no<br />
<strong>de</strong>sprenda pelusas. No asir el disco <strong>de</strong> ajuste con<br />
<strong>de</strong>dos aceitosos o grasosos.
Mensajes <strong>de</strong> error posibles<br />
«Error 53» El disco <strong>de</strong> ajuste ha sido instalado incorrectamente.<br />
“L” Falta montar el soporte <strong>de</strong> platillo.<br />
No se ha seleccionado aún el ajuste <strong>de</strong> temperatura.<br />
Pulsar tecla T .<br />
«Cancelado» La cubierta fue abierta durante el análisis.<br />
“Param.<br />
fuera <strong>de</strong> tol.” El disco ajuste <strong>de</strong> temperatura está sucio.<br />
El aparato no se encontraba en estado <strong>de</strong><br />
funcionamiento.<br />
El aparato ha estado <strong>de</strong>masiado tiempo en<br />
funcionamiento<br />
(muy caliente).<br />
El aparato presenta <strong>de</strong>fecto; informar al serv. técnico.<br />
“<strong>de</strong>mas. caracteres”Se entraron más <strong>de</strong> 14 caracteres para N° ID referencia.<br />
«ningún val. peso» No se entró temperatura para el ajuste<br />
temperatura un punto.<br />
“muy alto” La temperatura entrada en muy alta.<br />
“muy bajo” La temperatura entrada es muy baja.<br />
43
Certificado <strong>de</strong> calibración <strong>de</strong> fábrica<br />
44
Certificado <strong>de</strong> calibración <strong>de</strong> fábrica<br />
Objeto <strong>de</strong> medida : Kit ajuste <strong>de</strong> la temperatura<br />
Número <strong>de</strong> serie: 0011901617<br />
Número <strong>de</strong> certificado: 26/00<br />
Método <strong>de</strong> medición: Medición comparativa <strong>de</strong> la temperatura<br />
Puntos <strong>de</strong> medición: 80°C, 140°C, 200°C<br />
DMT DMT Correctura Inseguridad Temperatura<br />
referencia <strong>de</strong> indicación <strong>de</strong> medición ambiente<br />
[°C] [°C] [°C] [°C] [°C]<br />
80,69 80,44 0,25 0,50 23,3<br />
140,47 140,58 0,11 0,50 24,6<br />
202,03 201,39 0,64 0,50 25,8<br />
Aparatos <strong>de</strong> calibración utilizados: Disco medición temperatura <strong>de</strong> referencia<br />
(DMT), número instrumento <strong>de</strong> control: TEM0100<br />
Keithley Messinstrument, número instrumento <strong>de</strong> control: DVM0148<br />
Traceable según: - Instituto Físico-Técnico alemán (PTB*)<br />
- Laboratorio <strong>de</strong> calibración (DKD**) para instrumentos<br />
<strong>de</strong> medición <strong>de</strong> la temperatura<br />
* Physikalisch-Technische Bun<strong>de</strong>sanstalt<br />
** Deutscher KalibrierDienst<br />
Disco medición temperatura <strong>de</strong> referencia:<br />
- Calibración <strong>de</strong> temperatura para los puntos <strong>de</strong> medición: 80°C, 140°C, 200°C,<br />
250°C<br />
- Medición PTB <strong>de</strong>l grado <strong>de</strong> emisión a las temperaturas 80°C, 140°C y 200°C<br />
en el rango<br />
longitud <strong>de</strong> onda <strong>de</strong> 2,5...20µm<br />
- Medición PTB <strong>de</strong>l grado <strong>de</strong> reflexión a temperatura ambiente en el rango<br />
longitud <strong>de</strong> onda<br />
<strong>de</strong> 0,7...10µm<br />
Intervalo <strong>de</strong> calibración <strong>de</strong>seado: 1 año próxima calibración: 07/01<br />
Controlador: ______________ Fecha: ______________<br />
Diedrich<br />
45
Visione d’insieme<br />
N° Descrizione<br />
1 Valigetta per il trasporto<br />
2 Disco di regolazione<br />
3 Maniglia<br />
4 Marcatura<br />
5 N° ID di riferimento<br />
alfanumerico<br />
(N° <strong>de</strong>ll’equipaggiamento di<br />
controllo)<br />
6 Istruzioni per l’uso<br />
7 Certificato di calibrazione di fabbrica<br />
46<br />
Equipaggiamento fornito<br />
Dopo il disimballaggio, controllare<br />
subito il set per la regolazione<br />
<strong>de</strong>lla temperatura se ci sono<br />
danni visibili dovuti al trasporto.<br />
– Disco di regolazione<br />
– Maniglia<br />
– Valigetta per il trasporto<br />
– Istruzioni per l’uso<br />
– Certificato di calibrazione<br />
di fabbrica
Impiego previsto<br />
Il disco di regolazione <strong>de</strong>lla temperatura viene impiegato<br />
per la regolazione <strong>de</strong>lla temperatura <strong>de</strong>ll’analizzatore di<br />
umidità MA50 o MA100. La regolazione mediante il<br />
disco di regolazione permette l’impiego <strong>de</strong>ll’apparecchio<br />
come apparecchio di riferimento oppure come<br />
equipaggiamento di controllo. La stampa <strong>de</strong>l protocollo<br />
può valere come documento per la sorveglianza<br />
<strong>de</strong>ll’equipaggiamento di controllo. Ogni disco di<br />
regolazione possie<strong>de</strong> un numero di serie (n° ID di<br />
riferimento) ed un certificato di calibrazione di fabbrica. Il<br />
disco di regolazione dovrebbe comunque essere<br />
controllato per garantire la sua qualità. Vi consigliamo un<br />
controllo annuo <strong>de</strong>l disco di regolazione. Per il controllo<br />
bisogna spedire il set di regolazione <strong>de</strong>lla temperatura<br />
completo alla <strong>Sartorius</strong>.<br />
La regolazione <strong>de</strong>ll’analizzatore di umidità dovrebbe<br />
essere effettuata soddisfando queste condizioni:<br />
– a temperatura ambiente (ca. 20°C)<br />
– in condizioni ambientali e di base uguali<br />
– in intervalli di tempo regolari fissati dall’utente<br />
– con lo stesso set di regolazione <strong>de</strong>lla temperatura<br />
L’analizzatore di umidità dovrebbe trovarsi in un posto di<br />
lavoro pulito e anche in un ambiente dove l’aria è<br />
pulita. I risultati di analisi possono essere influenzati<br />
dalle seguenti condizioni ambientali<br />
– irraggiamento solare<br />
– correnti d’aria (per es. porte e finestre aperte)<br />
– impianto di condizionamento <strong>de</strong>ll’aria oppure impianto<br />
di aspirazione<br />
– gas o polveri<br />
Lo spazio libero attorno all’analizzatore di umidità<br />
dovrebbe essere di almeno 20 cm e sopra allo strumento<br />
di almeno 1 m. La regolazione viene eseguita<br />
automaticamente dallo strumento stesso dopo il suo avvio.<br />
Avvertenza:<br />
Prima di eseguire la regolazione <strong>de</strong>lla temperatura,<br />
leggere attentamente le istruzioni per l’uso.<br />
47
48<br />
Indice<br />
Pagina<br />
Visione d’insieme 46<br />
Equipaggiamento fornito 46<br />
Impiego previsto 47<br />
Indice 48<br />
Indicazioni di sicurezza<br />
Esecuzione <strong>de</strong>lla regolazione<br />
49<br />
<strong>de</strong>lla temperatura 50<br />
Impostazione <strong>de</strong>lla temperatura<br />
punto 2 50<br />
Impostazione <strong>de</strong>lla temperatura<br />
punto 1 52<br />
Cura e manutenzione 53<br />
Indicatori di errore<br />
Certificato di calibrazione<br />
54<br />
di fabbrica 55
Indicazioni di sicurezza<br />
W Il disco di regolazione, il fermapiattello oppure<br />
l’anello di protezione contro le correnti d’aria<br />
non <strong>de</strong>vono essere montati sullo strumento<br />
direttamente dopo un’operazione di<br />
essiccazione, attenzione sussiste il pericolo di<br />
bruciature! Togliere il piattello monouso e il<br />
fermapiattello solo quando hanno raggiunto<br />
una temperatura media.<br />
W Dopo l’analisi togliere il disco di regolazione<br />
dall’analizzatore di umidità e trasportarlo<br />
usando sempre una maniglia.<br />
W Dopo l’analisi lasciare raffreddare il disco di<br />
regolazione su una base pulita e termostabile.<br />
W Dopo l’utilizzo, far raffreddare il disco di<br />
regolazione, riporlo nella confezione e<br />
conservarlo in un posto privo di polvere e<br />
protetto.<br />
Garanzia<br />
Non rinunciate ai vantaggi che Vi vengono<br />
offerti dalla nostra garanzia totale.<br />
Per maggiori informazioni potete rivolgerVi<br />
al più vicino Centro Assistenza Cliente <strong>Sartorius</strong><br />
oppure al Vostro rivenditore. Se trovate la<br />
scheda di garanzia allegata a questo manuale<br />
di istruzioni, inviate la scheda compilata in<br />
ogni sua parte al Centro Assistenza Cliente<br />
<strong>Sartorius</strong><br />
o al Vostro rivenditore.<br />
49
Come eseguire la regolazione <strong>de</strong>lla temperatura<br />
Impostazione <strong>de</strong>lla temperatura punto due<br />
L’impostazione <strong>de</strong>lla temperatura punto due dovrebbe essere selezionata se di<br />
norma si <strong>de</strong>vono analizzare <strong>de</strong>i campioni differenti. Inoltre l’impostazione<br />
<strong>de</strong>ve essere eseguita anche quando è stata fatta la manutenzione di alcuni<br />
componenti come il sensore <strong>de</strong>lla temperatura o l’unità di riscaldamento<br />
oppure dopo una loro sostituzione.<br />
50<br />
§ Per aprire la camera per campioni, premere il<br />
tasto k<br />
§ Togliere il piattello monouso e il fermapiattello e<br />
metterli su una base pulita.<br />
> Sul display appare ERR 54<br />
(nessun fermapiattello esistente)<br />
§ Pren<strong>de</strong>re il disco di regolazione usando la<br />
maniglia dalla valigetta per il trasporto.<br />
§ Inserire il disco di regolazione con una lieve<br />
pressione. La marcatura <strong>de</strong>ve essere sul davanti<br />
verso l’utente.
§ Per chiu<strong>de</strong>re la camera per campioni, premere il<br />
tasto k .<br />
§ Premere il tasto T, sul display appare:<br />
”Impostazione <strong>de</strong>l riscaldamento”.<br />
§ Confermare l’”Impostazione <strong>de</strong>l riscaldamento” con<br />
l’Help di linea O.<br />
§ Selezionare “Impostazione <strong>de</strong>lla temperatura punto<br />
2”, confermare con l’Help di linea O.<br />
§ Se necessario introdurre il numero ID di riferimento<br />
(4) e memorizzare premendo l’Help di linea [ID<br />
rif]. Il numero ID di riferimento è un numero di<br />
serie, per es: 0011901617 (vedi: il lato rovescio<br />
<strong>de</strong>l disco di regolazione)<br />
§ Premere l’Help di linea [Avvio], la regolazione <strong>de</strong>lla<br />
temperatura viene avviata.<br />
> Il simbolo di essiccazione appare sul display; la<br />
durata <strong>de</strong>ll’essiccazione e il tempo di essiccazione<br />
già trascorso rimangono sempre visualizzati.<br />
§ Alla fine <strong>de</strong>lla regolazione <strong>de</strong>lla temperatura: si<br />
sente 3 volte il segnale acustico<br />
Sul display appare: Analisi terminata<br />
§ Con il tasto [Info] si possono visualizzare i valori<br />
<strong>de</strong>ll’analisi.<br />
§ Per ritornare allo stato prece<strong>de</strong>nte, premere l’Help di<br />
linea ,<br />
> Premendo l’Help di linea [Fine] si ritorna al menù di<br />
test senza regolazione/calibrazione. La stampa <strong>de</strong>l<br />
protocollo viene eseguita automaticamente.<br />
§ Premendo l’Help di linea [Regol.] viene avviata la<br />
regolazione/calibrazione <strong>de</strong>llo strumento. In questo<br />
modo la regolazione <strong>de</strong>lla temperatura è conclusa.<br />
Se la temperatura finale indica, per es. 163°C, ciò<br />
51
52<br />
significa che la temperatura è fuori di 1°C dal limite<br />
di tolleranza di, per es. 160°C ± 2°C. Mediante<br />
la regolazione <strong>de</strong>llo strumento, lo scostamento<br />
viene corretto automaticamente.<br />
Contemporaneamente viene eseguita una stampa<br />
<strong>de</strong>l protocollo. Avvertenza:<br />
Se lo scostamento è troppo gran<strong>de</strong>, la regolazione<br />
<strong>de</strong>llo strumento non viene eseguita. In questo caso,<br />
prego rivolgersi al Centro Assistenza Cliente<br />
<strong>Sartorius</strong>.<br />
§ Per aprire la camera per campioni, premere il<br />
tasto k<br />
> Lasciare raffreddare lo strumento.<br />
§ Innestare la maniglia nel disco di regolazione e<br />
toglierlo. Attenzione: pericolo di bruciature!<br />
> Lasciar raffreddare il disco di regolazione su<br />
una base pulita e termostabile.<br />
Impostazione <strong>de</strong>lla temperatura punto uno<br />
L’impostazione <strong>de</strong>lla temperatura punto uno dovrebbe<br />
essere selezionata se di norma si <strong>de</strong>vono analizzare<br />
<strong>de</strong>i campioni con una sola temperatura. Mediante<br />
l’impostazione <strong>de</strong>lla temperatura punto uno si può<br />
preselezionare la temperatura in modo individuale.<br />
Introdurre la temperatura mediante i tasti numerici.<br />
L’impostazione di serie è di 105°C. Il procedimento<br />
corrispon<strong>de</strong> all’impostazione <strong>de</strong>lla temperatura punto<br />
due.
Cura e manutenzione<br />
Condizioni di <strong>de</strong>posito e di trasporto<br />
$ Il disco di regolazione è stato confezionato per un<br />
trasporto sicuro.<br />
Conservare tutte le parti <strong>de</strong>lla confezione originale<br />
per il <strong>de</strong>posito <strong>de</strong>l disco di regolazione o per una<br />
eventuale rispedizione.<br />
$ Temperatura di <strong>de</strong>posito: – 20 °C ... + 75°C<br />
Pulizia<br />
$ Non utilizzare <strong>de</strong>tergenti aggressivi (solventi o<br />
simili). Non graffiare il disco di regolazione, la<br />
vernice danneggiata potrebbe influire sulla<br />
precisione <strong>de</strong>i risultati di analisi.<br />
$ Tenere pulito il disco di regolazione. Togliere lo<br />
sporco usando acqua o un <strong>de</strong>tergente per vetri.<br />
Pulire il disco di regolazione dallo sporco<br />
grossolano con un pennello oppure con un panno<br />
asciutto e morbido che non lascia fibre. Non<br />
toccare il disco di temperatura con le dita unte o<br />
sporche di grasso<br />
53
Indicatori di errore possibili<br />
“Err 53” Il disco di misurazione <strong>de</strong>lla temperatura non è stato<br />
montato in modo corretto.<br />
“L” Non è stato montato il fermapiattello.<br />
La regolazione <strong>de</strong>lla temperatura non è stata<br />
ancora selezionata.<br />
Premere il tasto T.<br />
“Interruzione” Il coperchio è stato aperto durante l’analisi.<br />
“Param. fuori toll.” Il disco di misurazione <strong>de</strong>lla temperatura è sporco.<br />
Lo strumento non era pronto per l’uso.<br />
Lo strumento è stato in funzionamento per lungo<br />
tempo(troppo caldo).<br />
Lo strumento è difettoso, informare il Servizio <strong>Sartorius</strong>.<br />
“Troppi caratteri” Sono stati introdotti più di 14 caratteri per il n° ID<br />
di riferimento.<br />
“Nessun val.<br />
numerico” Non è stata introdotta la temperatura per la regolazione<br />
<strong>de</strong>lla temperatura punto uno.<br />
“Troppo gran<strong>de</strong>” La temperatura introdotta è troppo gran<strong>de</strong>.<br />
“Troppo piccolo” La temperatura introdotta è troppo piccola.<br />
54
Certificato di calibrazione di fabbrica<br />
(Traduzione in lingua italiana <strong>de</strong>l testo originale te<strong>de</strong>sco)<br />
55
56<br />
Certificato di calibrazione di fabbrica<br />
Esempio:<br />
Oggetto di misurazione: Set per la regolazione <strong>de</strong>lla temperatura (<strong>YTM03MA</strong>)<br />
N° <strong>de</strong>ll’equipaggiamento di controllo: 0011901617<br />
Numero di protocollo: 26/00<br />
Metodo di misurazione: Misurazione comparativa <strong>de</strong>lla temperatura<br />
Punti di misurazione: 80°C, 140°C, 200°C<br />
Disco di misurazione Disco di Correzione Imprecisione Temperatura<br />
<strong>de</strong>lla temperatura misurazione <strong>de</strong>lla temperatura di misurazione ambienter<br />
di riferimento <strong>de</strong>lla temperatura<br />
[°C] [°C] [°C] [°C] [°C]<br />
80,69 80,44 0,25 0,50 23,3<br />
140,47 140,58 0,11 0,50 24,6<br />
202,03 201,39 0,64 0,50 25,8<br />
Apparecchi di calibrazione usati: disco di misurazione <strong>de</strong>lla temperatura di riferimento,<br />
equipaggiamento di controllo n°: TEM0100 strumento di misurazione Keithley,<br />
equipaggiamento di controllo n°: DVM0148<br />
Organismo di riferimento: - Physikalisch-Technische Bun<strong>de</strong>sanstalt (PTB)<br />
- Laboratorio di calibrazione DKD1 per apparecchi di misurazione <strong>de</strong>lla temperatura<br />
Certificati di calibrazione per il disco di misurazione <strong>de</strong>lla temperatura di riferimento:<br />
- Calibrazione <strong>de</strong>lla temperatura per i punti di misurazione: 80°C, 140°C, 200°C,250°C<br />
- Misurazione PTB <strong>de</strong>l grado di emissione per le temperature 80°C, 140°C e 200°C<br />
nella gamma di lunghezze d’onda di 2,5...20µm<br />
- Misurazione PTB <strong>de</strong>l grado di riflessione ad una temperatura ambiente nella gamma<br />
di lunghezze d’onda<br />
di 0,7...10µm<br />
Intervallo di calibrazione consigliato: 1 anno Calibrazione successiva: 07/01<br />
Controllore: ______________ Data: ______________<br />
Diedrich<br />
1 DKD = Servizio per la Calibratura Te<strong>de</strong>sco
<strong>Sartorius</strong> AG<br />
37070 Goettingen, Germany<br />
Ween<strong>de</strong>r Landstrasse 94 - 108, 37075 Goettingen, Germany<br />
(+49/551) 308-0, (+49/551) 308-289<br />
Internet: http://www.sartorius.com<br />
Copyright by <strong>Sartorius</strong> AG, Goettingen, Germany.<br />
All rights reserved. No part of this publication<br />
may be reprinted or translated in any form or by any means<br />
without the prior written permission of <strong>Sartorius</strong> AG.<br />
The status of the information, specifications and<br />
illustrations in this manual is indicated by the date<br />
given below. <strong>Sartorius</strong> AG reserves the right to<br />
make changes to the technology, features,<br />
specifications and <strong>de</strong>sign of the equipment<br />
without notice.<br />
Status: August 2001 <strong>Sartorius</strong> AG, Goettingen, Germany<br />
Printed in Germany on paper that has been bleached without any use of chlorine · M.J. · KT ·<br />
Publication No.: WYT6002-p01083