Grille-pain EVORA - Réf : TA 652 - White and Brown
Grille-pain EVORA - Réf : TA 652 - White and Brown
Grille-pain EVORA - Réf : TA 652 - White and Brown

You also want an ePaper? Increase the reach of your titles
YUMPU automatically turns print PDFs into web optimized ePapers that Google loves.
This function allows to heat the toast without burning it.<br />
1. Plug toaster into wall electrical outlet.<br />
2. Insert the bread into slots<br />
3. Press Reheat Button Carriage Lever until it locks into the position<br />
<strong>and</strong> Power On Light comes on.<br />
4. Press Reheat Button once. Reheat Light will come.<br />
5. Bread will pop up after the Reheating cycle is complete.<br />
6. After use, unplug the toaster from the electrical outlet <strong>and</strong> let cool<br />
thoroughly before cleaning <strong>and</strong> storing.<br />
WARNING : Never use metal utensils to remove bread from the toaster.<br />
CLEANING THE CRUMB TRAY TRA<br />
Removable crumb tray should be cleaned every 4-5 use.<br />
1. Unplug the toaster from the electrical outlet <strong>and</strong> allow to cool<br />
thoroughly.<br />
2. Gently grip the Removable Crumb tray <strong>and</strong> slide out from the toaster.<br />
3. Dispose of the crumbs, wipe out the remaining crumb from the<br />
removable crumb tray back into the toaster.<br />
4. Gently slide the removable crumb tray back into its place.<br />
Note : Never operate the toaster without the removable crumb tray in<br />
place. Do not cover the removable Crumb Tray or any other part of<br />
the toaster with foil. To avoid damage to the toaster heating elements,<br />
never use any pointed or sharp utensils for cleaning the inside of the<br />
toaster. Empty the removable crumb tray periodically.<br />
CARE AND MAINTENANCE<br />
1. Unplug toaster from electrical outlet. Make sure that toaster is<br />
completely cool before cleaning.<br />
2. Do not use harsh or abrasive cleaning agents. Outside surface may<br />
wiped clean with a soft, damp cloth <strong>and</strong> dried thoroughly. If necessary,<br />
a mild dish washing detergent may be applied to the cloth but<br />
not directly to the toaster.<br />
3. Do not immerse it in water or any other liquid.<br />
4. Do not allow plastic wrappings to lay against the toaster is being<br />
used. This will result in melting the plastic onto the inside surface of<br />
your toaster.<br />
8<br />
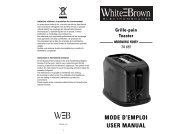
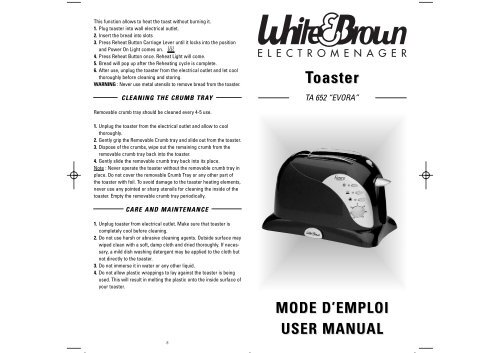
Toaster oaster<br />
<strong>TA</strong> <strong>652</strong> “<strong>EVORA</strong>”<br />
MODE D’EMPLOI<br />
USER MANUAL
FRANÇAIS<br />
WHITE & BROWN vous félicite d’avoir choisi ce produit<br />
et vous remercie de votre confiance.<br />
Pour votre confort et votre sécurité, votre article a été vérifié à toutes les<br />
étapes de sa fabrication et a passé avec succès tous nos tests de qualité.<br />
Nos produits sont conçus pour vous plaire tant par leur design que par leur<br />
facilité d’utilisation et dans l’objectif constant de vous apporter<br />
complète satisfaction.<br />
BRANCHEMENT<br />
Assurez-vous que le voltage de votre installation correspond à celui<br />
indiqué sur la plaque signalétique de l’appareil.<br />
CONSEILS DE SECURITE<br />
Lorsque vous utilisez des appareils électriques, des précautions de<br />
base sont à prendre.<br />
1. Il est important de surveiller le toaster lorsqu’il est en fonctionnement.<br />
Ne pas le laisser sans surveillance pendant l’utilisation.<br />
Attention de ne pas le placer à proximité ou sur une surface chaude<br />
(comme des plaques électriques).<br />
2. Tenir l’appareil éloigné des enfants et les empêcher de l’utiliser sans<br />
surveillance.<br />
3. Le toaster devient chaud pendant l’utilisation. Ne toucher que les<br />
parties thermo-isolées de l’appareil.<br />
4. Ne pas mettre l’appareil sous un placard mural. Le placer sur une<br />
surface plane et résistante à la chaleur.<br />
5. Ne jamais couvrir l’ouverture pendant que vous grillez du <strong>pain</strong>.<br />
6. Ne jamais introduire vos doigts ni un quelconque ustensile (comme<br />
une fourchette, un couteau…) dans l’ouverture.<br />
7. Faire attention que le cordon d’alimentation ne touche pas les surfaces<br />
chaudes de l’appareil.<br />
8. Débrancher l’appareil :<br />
- Lorsque vous ne l’utilisez pas<br />
- S’il fonctionne mal<br />
- Avant de le nettoyer.<br />
9. Ne pas débrancher l’appareil en tirant sur le cordon d’alimentation.<br />
10.Les réparations ne doivent être effectuées que par du personnel<br />
qualifié. N’essayez pas de réparer vous-même votre appareil. Si<br />
celui-ci ne fonctionne plus ou est abîmé, le porter dans l’un de nos<br />
centres agréés ou chez votre revendeur.<br />
ATTENTION<br />
Sous l’effet de la chaleur, le <strong>pain</strong> peut s’enflammer. Ce toaster ne doit<br />
pas être utilisé près ou sous des rideaux ou d’autres matériaux<br />
inflammables.<br />
2<br />
8<br />
1<br />
BEFORE USING FOR THE FIRST TIME<br />
A. Remove all packing paper <strong>and</strong> plastic unit. Check inside the bread<br />
slots to make sure that no packaging materials or paper have fallen<br />
inside. Make sure crumb tray is in correct position.<br />
B. Using a soft cloth, gently wipe away all the dust particles from<br />
outside of toaster.<br />
C. In order to remove any possible reissues from the manufacturing<br />
process, the toaster should be heated twice at the highest temperature.<br />
D. Toaster slots should be empty before you plug into wall outlet.<br />
Note : When using the toaster for the first time, a light smoke may<br />
appear. This is completely harmless <strong>and</strong> will disappear after a few uses.<br />
HOW TO USE YOUR TOASTER<br />
1. Position the toaster on a firm, level surface, away from any flammable<br />
surfaces.<br />
2. Plug the toaster into electrical wall outlet.<br />
3. Insert slices of bread in the slots.<br />
4. Select the desired temperature using the <strong>Brown</strong>ing control Knob<br />
(Position 1= being the lightest <strong>and</strong> position 7= the darkest).<br />
5. When the toasting cycle is completed, the toast will automatically<br />
pop up.<br />
6. After use, unplug the toaster from the electrical outlet <strong>and</strong> let it cool<br />
thoroughly before cleaning.<br />
DEFROST FUNCTION : This function allows to prolong the cooking for<br />
frozen bread.<br />
REHEATING<br />
REHEATING<br />
CANCEL FUNCTION : You can use this function to stop the toaster if<br />
the bread is enough toasted.<br />
7<br />
9<br />
7<br />
6<br />
2<br />
3<br />
4<br />
5
3. The toaster gets hot during use. Only touch the heat insulated<br />
plastic parts.<br />
4. Do not position the toaster underneath a wall cabinet. Operate the<br />
toaster free st<strong>and</strong>ing on a heat resistant surface.<br />
5. Never cover the bread slot while toasting.<br />
6. Never put your fingers nor any utensils (such as a fork, a knife etc…)<br />
into the bread slot.<br />
7. Take care that the mains lead does not touch the hot parts of the<br />
toaster.<br />
8. Unplug the toaster from the mains supply socket :<br />
- When it is not in use<br />
- If it malfunctions during use<br />
- Before cleaning it.<br />
9. Do not unplug the toaster by pulling on the cord.<br />
10.Repairs of electrical appliances must only be performed by skilled<br />
personnel. If the toaster does not operate properly or if it has been<br />
damaged, contact an authorized service centre for all repairs.<br />
WARNING<br />
Bread may burn. Therefore the toaster must not be used near or<br />
below curtains or other inflammable materials.<br />
SPECIAL SAFETY INSTRUCTIONS<br />
This appliance has a short cord to reduce hazards of becoming<br />
entangled or tripping over a longer cord. An extension cord may be<br />
used if the electrical rating of the extension cord is equal to or greater<br />
than the rating of the toaster. Use only an extension cord rated 15<br />
amperes or greater. Care must be taken to arrange the extension cord<br />
so that it will not drape over countertop or tabletop where it can be<br />
pulled on by children or tripped over unintentionally<br />
MAIN COMPONENTS<br />
1. Extra long variable with toasting slots<br />
2. Defrost button<br />
3. Reheat button<br />
4. Cancel button<br />
5. Electronic variable browning control<br />
6. High lift bread release<br />
7. Bread Frame control<br />
8. Full length crumb tray<br />
9. Bread Frame<br />
6<br />
RECOMMANDATION PARTICULIERE<br />
Cet appareil est équipé d’un cordon court afin d’éviter les étranglements<br />
et les chutes. Il est possible d’utiliser une rallonge si la puissance<br />
électrique de cette rallonge est égale ou supérieure à celle du toaster.<br />
Utilisez uniquement une rallonge égale ou supérieure à 15 ampères.<br />
Faites en sorte que la rallonge ne pende pas sur le bord de la table<br />
ou du plan de travail afin d’éviter que des enfants ne tirent dessus ou<br />
ne s’étranglent avec accidentellement.<br />
PRINCIPAUX PRINCIPAUX<br />
COMPOSANTS<br />
1. Fente pour le <strong>pain</strong> extra longue<br />
2. Bouton Décongélation<br />
3. Bouton Réchauffage<br />
4. Bouton d’arrêt<br />
5. Thermostat<br />
6. Levier d’introduction et d’éjection du <strong>pain</strong><br />
7. Bouton du chauffe-croissant<br />
8. Tiroir ramasse miettes<br />
9. Chauffe-croissant<br />
8<br />
1<br />
AVANT ANT LA PREMIERE UTILISATION<br />
UTILISATION<br />
A. Déballer l’appareil, enlever tous les papiers et plastiques. Vérifier qu’il<br />
ne reste pas de morceaux d’emballage ou de papier à l’intérieur des<br />
fentes. Assurez-vous que le tiroir ramasse-miettes est bien positionné.<br />
B. Utiliser un chiffon doux pour essuyer l’extérieur du toaster.<br />
C. Faire chauffer deux fois le toaster à vide à la température la plus<br />
élevée pour enlever les éventuels résidus du process de fabrication.<br />
D. Ne rien introduire dans les fentes avant de brancher le toaster.<br />
Remarque : lorsque vous utilisez le toaster pour la première fois, une<br />
légère fumée peut se produire. Elle est totalement inoffensive et<br />
disparaîtra après quelques utilisations.<br />
3<br />
9<br />
7<br />
6<br />
2<br />
3<br />
4<br />
5
COMMENT UTILISER VOTRE TOASTER<br />
1. Poser le toaster sur une surface plane et stable, loin de toutes<br />
surfaces inflammables.<br />
2. Brancher l’appareil.<br />
3. Insérer les tranches de <strong>pain</strong>.<br />
4. Sélectionner la température souhaitée avec le bouton de comm<strong>and</strong>e<br />
(Position 1 = légèrement grillé – Position 7 = extrêmement grillé).<br />
5. Lorsque le temps de chauffe est terminé, le toast remonte automatiquement.<br />
6. Vous pouvez arrêter à tout moment le grillage en appuyant sur le<br />
bouton d’arrêt.<br />
7. Après utilisation, débrancher l’appareil et le laisser refroidir complètement<br />
avant de le nettoyer ou de le ranger.<br />
Fonction Décongélation :<br />
Cette fonction permet de prolonger la cuisson pour du <strong>pain</strong> surgelé.<br />
RECHAUFFAGE<br />
RECHAUFFAGE<br />
Cette fonction permet de chauffer le toast sans le brûler.<br />
Fonction “Annulation” : Vous pouvez utiliser cette fonction pour arrêter<br />
le toaster si vous jugez que votre <strong>pain</strong> est assez grillé.<br />
1. Brancher l’appareil.<br />
2. Introduire le <strong>pain</strong> dans la (les) fente(s).<br />
3. Appuyer sur le levier jusqu’à enclenchement.<br />
4. Appuyer sur la touche de réchauffage.<br />
5. Le <strong>pain</strong> remonte automatiquement lorsque le cycle de réchauffage<br />
est terminé. Le levier peut être relevé pour attraper plus facilement<br />
les petits morceaux de <strong>pain</strong>.<br />
6. Après utilisation, débrancher l’appareil et le laisser refroidir complètement<br />
avant de le nettoyer ou de le ranger.<br />
ATTENTION : Ne jamais utiliser d’ustensiles métalliques pour retirer du<br />
<strong>pain</strong> du toaster.<br />
NETTOYAGE NETTOYAGE<br />
DU TIROIR RAMASSE-MIETTES<br />
Le tiroir ramasse-miettes doit être nettoyé toutes les 4 ou 5 utilisations.<br />
1. Débrancher l’appareil pour qu’il refroidisse.<br />
2. Tirer légèrement sur le tiroir ramasse-miettes et le retirer.<br />
3. Enlever les miettes, laver le tiroir avec du liquide vaisselle, le sécher<br />
avant de le replacer.<br />
4. Replacer le tiroir ramasse-miettes dans le toaster.<br />
4<br />
Remarque : Ne faites jamais fonctionner le toaster sans le tiroir ramasse-miettes.<br />
Ne pas couvrir le tiroir ramasse-miettes ni toute autre<br />
pièce du toaster. Pour éviter d’endommager les résistances chauffantes,<br />
ne jamais utiliser d’ustensiles pointus pour le nettoyage. Vider le<br />
tiroir ramasse-miettes régulièrement.<br />
ATTENTION : Une accumulation de miettes dans le tiroir ramasse-miettes<br />
pourrait provoquer un incendie. Le vider régulièrement.<br />
ENTRETIEN<br />
1. Débrancher l’appareil. Assurez-vous que le toaster est totalement<br />
froid avant de le nettoyer.<br />
2. Ne pas utiliser de produits détergents abrasifs. Les surfaces extérieures<br />
doivent être nettoyées avec un chiffon doux et séchées<br />
complètement. Si nécessaire, il est possible d’appliquer du produit<br />
vaisselle sur un chiffon, mais pas directement sur l’appareil.<br />
3. Ne plongez jamais l’appareil dans l’eau ou tout autre liquide.<br />
4. Veiller à ce qu’il n’y ait pas d’objets en plastique en contact avec<br />
l’appareil.<br />
ENGLISH<br />
Congratulations for having chosen this WHITE & BROWN product,<br />
<strong>and</strong> thank you for trusting us. For your comfort <strong>and</strong> safety,<br />
your appliance has been checked at every step of manufacturing <strong>and</strong><br />
has successfully gone through all our tests of quality.<br />
WHITE & BROWN creates original products to please you,<br />
as far as design <strong>and</strong> easiness to use are concerned<br />
in order to give you complete satisfaction.<br />
CONNECTION TO MAIN SUPPLY SUPPL<br />
Make sure that the supply voltage in your house is the same as the<br />
supply voltage indicated on the toaster.<br />
IMPOR<strong>TA</strong>NT IMPOR ANT SAFEGUARDS<br />
When using electrical appliances, basic safety precautions should<br />
always be followed, including the following :<br />
1. It is important that the toaster is always supervised while it is<br />
switched on. It must not be left unattended during use. Take care not<br />
to position the toaster on hot surfaces (such as hot plates of an<br />
electric stove).<br />
2. Keep the appliance away from children. Do not allow them to use<br />
this appliance without supervision.<br />
5