imagine the possibilities - ManageMyLife
imagine the possibilities - ManageMyLife
imagine the possibilities - ManageMyLife

Create successful ePaper yourself
Turn your PDF publications into a flip-book with our unique Google optimized e-Paper software.
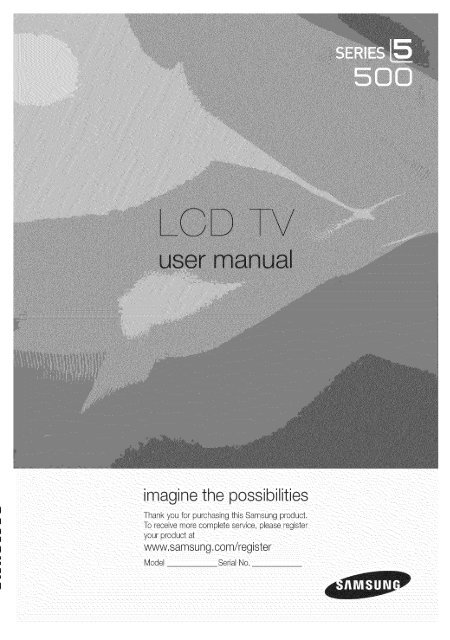
<strong>imagine</strong> <strong>the</strong> <strong>possibilities</strong><br />
Thank you for purchasing this Samsung product<br />
To receive more complete service, please register<br />
your proauct al<br />
www.samsung.comiregister<br />
Mode Serial No,
Figures and illustrations in this User Manual are provided for reference only and may differ from actual product appearance.<br />
Product design and specifications may be changed without notice,<br />
_ See <strong>the</strong> warranty card for more information on warranty terms.<br />
Wide screen format LCD Displays (16:9, <strong>the</strong> aspect ratio of <strong>the</strong> screen width to height) are primarily designed to view wide screen format full-motion video.<br />
The images displayed on <strong>the</strong>m should pdmadlybe in <strong>the</strong> wide screen 16:9 ratio format, or expanded to fill<strong>the</strong> screen if your model offers this feature and<br />
<strong>the</strong> images are constantly moving. Displayingstationary graphics and images on screen, such as <strong>the</strong> dark sidebars on no expanded standard format<br />
television video and programming, should be limited to no more than 5% of <strong>the</strong> total television viewing per week.<br />
Addkionally, viewing o<strong>the</strong>r stationary images and text such as stock market reports, video game displays, station Iogos,web sitesor computer graphics<br />
and patterns, should be limited as described above for all televisions. Displaying stationary imagesthat exceed <strong>the</strong> above guidelines can cause uneven<br />
aging of LCD Displays that leavesubtle, but permanent burned-in ghost images in <strong>the</strong> LCD picture. To avoidthis, vary <strong>the</strong> programming and images, and<br />
primarily display full screen moving images, not stationary patterns or dark bars. On LCD models that offer picture sizing features, use <strong>the</strong>se controls to<br />
view differentformats as afull screen picture.<br />
Be careful in <strong>the</strong> selection and duration of televisionformats used for viewing. Uneven LCD aging as a result of format selection and use, as well as burned<br />
in images, are not covered by your Samsung limitedwarranty.<br />
• SAMSUNG ELECTRONICSNORTHAMERICAN LIMITEDWARRANTY STATEMENT<br />
Subject to <strong>the</strong> requirements, conditions, exclusions and limitations of <strong>the</strong> original Limited Warranty supplied with Samsung Electronics (SAMSUNG)<br />
products, and <strong>the</strong> requirements, conditions, exclusions and limitations contained herein,SAMSUNG will additionally provide Warranty Repair Service<br />
in <strong>the</strong> United States on SAMSUNG products purchased in Canada, and in Canada on SAMSUNG products purchased in <strong>the</strong> United States, for <strong>the</strong><br />
warranty period originallyspecified, and to <strong>the</strong> Original Purchaseronly.<br />
The above described warranty repairs must be performed by a SAMSUNG Authorized Service (}enter. Along with this Statement <strong>the</strong> Original Limited<br />
Warranty Statement and a dated Bill of Sale as Proof of Purchase must be presented to <strong>the</strong> Service Center. Transportation to and from <strong>the</strong> Service<br />
Center is <strong>the</strong> responsibility of <strong>the</strong> purchaser.Conditions covered are limited only to manufacturing defects in materialor workmanship, and only those<br />
encountered in normal use of <strong>the</strong> product.<br />
Excluded, but not limitedto, are any originally specified provisions for, in-home or on-site services, minimum or maximum repairtimes, exchanges or<br />
replacements, accessories, options, upgrades, or consumables.<br />
For <strong>the</strong> location of a SAMSUNG Authorized Service Center, please call toll-free:<br />
- In <strong>the</strong> United States : 1-800-SAMSUNG (1-800-726-7864)<br />
- In Canada : 1-800-SAMSUNG<br />
Avoid displaying still images (such as jpeg picture files)or still imageelements (such asTV channel Iogos, panorama or 4:3 image format, stock or news<br />
bars at screen bottom etc.) on <strong>the</strong> screen. Constant displaying of still picture can cause ghosting of LCD screen, which will affect image quality. To reduce<br />
risk of this effect, please follow below recommendations:<br />
• Avoid displaying <strong>the</strong> same TV channel for long periods.<br />
• Always try to display afull screen image.<br />
• Reducing brightness and contrast will helpto avoid<strong>the</strong> appearance of after-images.<br />
• Use all TVfeatures designed to reduce image retention and screen burn, referto proper user manual section for details.<br />
Keep <strong>the</strong> required distances between <strong>the</strong> product and o<strong>the</strong>r objects (e.g. walls) to ensure proper ventilation.<br />
Failingto do so may result in fire or a problem with <strong>the</strong> product due to an increase in <strong>the</strong> internaltemperature of <strong>the</strong> product.<br />
'_bs When usinga stand or wall-mount, use parts provided by Samsung Electronicsonly.<br />
• Ifyou use parts provided by ano<strong>the</strong>r manufacturer, it may result in a problem with <strong>the</strong> product or an injurydue to <strong>the</strong> product falling.<br />
_ws The appearance may differdepending on <strong>the</strong> product.<br />
Be careful when you contact <strong>the</strong> TV because some parts carsbe somewhat hot.<br />
4 inche<br />
',<br />
t<br />
"[ 4 inches ,,<br />
inches<br />
m m<br />
English<br />
ii
Contents<br />
• List of Features ......................................................... 4<br />
• Accessories .............................................................. 4<br />
• Install<strong>the</strong> Stand ........................................................ 5<br />
• Viewing <strong>the</strong> Control Panel ......................................... 6<br />
• Viewing <strong>the</strong> Remote Control ...................................... 7<br />
• Connecting to an Antenna ........................................ 8 •<br />
• Plug & Play (Initial Setup) ........................................... 8<br />
• Connecting to an AV Device ...................................... 9<br />
• Connecting to an Audio Device ............................... 11<br />
• Connecting to a PC ..................................................<br />
• Changing <strong>the</strong> Input Source ..................................... 13<br />
• How to Navigate Menus .......................................... 13<br />
• Channel Menu ........................................................ 14<br />
Seeing Channels 14<br />
Using FavoriteChannels 14<br />
Memorizing Channels 14<br />
Editing Channels 15<br />
O<strong>the</strong>r Features 15<br />
• Picture Menu .......................................................... 16<br />
Changing <strong>the</strong> Preset Picture Mode 16<br />
Adjusting Picture Settings 16<br />
Changing <strong>the</strong> Picture Options 16<br />
Setting up <strong>the</strong> TV with your PC 18<br />
• Sound Menu ........................................................... 19<br />
Changing <strong>the</strong> Preset Sound Mode 19<br />
Adjusting sound settings 19<br />
Sound Settings 19<br />
Thisfunctioncanbe usedbypressing<strong>the</strong><br />
TOOLSbuttonon<strong>the</strong> remotecontrol.<br />
Check <strong>the</strong> Symbol!<br />
o<br />
Setup Menu ............................................................ 20<br />
Setting <strong>the</strong> Time 20<br />
Using <strong>the</strong> Sleep Timer 20<br />
Setting <strong>the</strong> On/Off Timer 20<br />
Locking Programs 21<br />
O<strong>the</strong>r Features 22<br />
Economical Solutions 23<br />
Suppo_ Menu ......................................................... 24<br />
• Media Play .............................................................. 25<br />
Connecting a USB Device 25<br />
Using <strong>the</strong> Media Play Menu 25<br />
• Installing <strong>the</strong> Wall Mount ......................................... 29<br />
• Anti-<strong>the</strong>ft Kensington Lock ...................................... 30<br />
• Securing <strong>the</strong> TV to <strong>the</strong> Wall ..................................... 31<br />
• Troubleshooting ...................................................... 32<br />
Storage and Maintenance 34<br />
• License ................................................................... 35<br />
• Specifications ......................................................... 35<br />
• Dimensions ............................................................. 36<br />
• Index ...................................................................... 37<br />
Note<br />
Indicatesadditionalinformation.<br />
®<br />
Step by Step Guide<br />
Check here for instructions on how to open<br />
<strong>the</strong> relevant submenu within <strong>the</strong> OSD (on<br />
screen display).<br />
English 3
Getting Started<br />
• Excellent Digital Interface & Networking: With a built-in HD digital tuner, nonsubscription HD broadcasts can be viewed<br />
without a cable box / STB (Set-Top-Box) satellite receiver.<br />
• Media Play: Allows you to play music files and pictures saved on a USB device (p. 25).<br />
• Self Diagnosis: You can check to make sure picture and sound operate normally (p. 24).<br />
Please make sure <strong>the</strong> following items are included with your LOD TV. If any items are missing, contact your dealer.<br />
The items' colors and shapes may vary depending on <strong>the</strong> models.<br />
Input Cables (Sold Separately)<br />
: 8+ : iDVi:: m :n+ +_T,S!: 8:+!V<br />
English
Seeseparate guide forinstalling <strong>the</strong>stand.<br />
Fellow <strong>the</strong> steps below to connect <strong>the</strong> TV to <strong>the</strong> stand.<br />
or<br />
Stand-- _-:'_ .... _<br />
Connect <strong>the</strong> Guide Stand to <strong>the</strong> Stand using four screws (M4 X L12) as shown.<br />
(M4 X L12)<br />
2. With your TV upright, connect <strong>the</strong> TV to <strong>the</strong> Stand. 3. Fasten two screws (M4 X L12) at position O, and <strong>the</strong>n<br />
fasten two screws (M4 X L12) at position O.<br />
NOTE<br />
* Make sure to distinguish between <strong>the</strong> front and back of <strong>the</strong> Stand and Guide Stand when assembling <strong>the</strong>m.<br />
* Make sure that at least two persons lift and move <strong>the</strong> LCD TV.<br />
* Stand <strong>the</strong> product up and fasten <strong>the</strong> screws. If you fasten <strong>the</strong> screws with <strong>the</strong> LCD TV placed down, it may lean to<br />
one side.<br />
English 5
Getting Started<br />
The product color and shape may vary depending on <strong>the</strong> model.<br />
Speakers<br />
Remote control sensor<br />
SOUROEE_<br />
_V_CNU<br />
--VOL+<br />
VCHA<br />
Power Indicator<br />
(b (Powert<br />
Standby mode<br />
q.• SOURCE_<br />
Remotecontrolsensor Powerindicator<br />
MENU -VOL+ v CH ,A. ,<br />
Aim <strong>the</strong> remote control towards this spot on <strong>the</strong> TV.<br />
Toggles between all <strong>the</strong> available input sources. In <strong>the</strong> on-screen menu, use this<br />
button as you would use <strong>the</strong> ENTER E_ button on <strong>the</strong> remote control.<br />
Displays an on-screen menu, <strong>the</strong> OSD (on screen display) of your TV's features,<br />
Adjusts <strong>the</strong> volume. In <strong>the</strong> OSD, use <strong>the</strong> --VOL÷ buttons as you would use <strong>the</strong><br />
4 and _, buttons on <strong>the</strong> remote control.<br />
Changes <strong>the</strong> channels. In <strong>the</strong> OSD, use <strong>the</strong> V CH A buttons as you would use <strong>the</strong><br />
and A buttons on <strong>the</strong> remote control.<br />
Blinks and turns off when <strong>the</strong> power is on and lights up in standby mode.<br />
Turns <strong>the</strong> TV on or off.<br />
Do not leave your TV in standby mode for long periods of time (when you are away on a holiday, for example). A small amount<br />
of electric power is still consumed even when <strong>the</strong> power button is turned off. It is best to unplug <strong>the</strong> power cord.<br />
English
Turns <strong>the</strong> TV on and off. Displaysand selects <strong>the</strong> availaMevideo<br />
sources (p. 13).<br />
Pressto directly access channels.<br />
Press to select additional channels<br />
(digital) being broadcasted by tile same II<br />
station. For example, to select channel I|<br />
"54-3", press "54", <strong>the</strong>n press "-" and,,3,,. I t<br />
Adjusts <strong>the</strong> volume.<br />
Displays Media Play (USB) (p. 25).<br />
Quickly select frequently used functions.<br />
Returns to <strong>the</strong> previous menu.<br />
Buttons used in <strong>the</strong> Channel List,<br />
Media Play (USB) menu, etc.<br />
Installing batteries (Battery size: AAA)<br />
\<br />
NOTE<br />
Returns to <strong>the</strong> previous channel.<br />
Cuts off <strong>the</strong> sound temporarily.<br />
Changes channels.<br />
Displays <strong>the</strong> channel list on <strong>the</strong> screen<br />
(p. 14).<br />
Displays Favorite Channel Lists on <strong>the</strong><br />
screen (p. 14).<br />
Displays information on tile TV screen.<br />
Selects <strong>the</strong> on-screen menu items and<br />
changes tile values seen on <strong>the</strong> menu.<br />
Exits tile menu.<br />
MTS: Press to choose stereo, mono<br />
or Separate Audio Program (SAP<br />
broadcast) (p.19).<br />
RSlZE: Selects <strong>the</strong> picture size (p. 17).<br />
CO: Controls <strong>the</strong> caption decoder<br />
(p. 22).<br />
* Use <strong>the</strong> remote control within 23 feet from <strong>the</strong> TV.<br />
* Bright light may affect <strong>the</strong> performance of <strong>the</strong> remote<br />
control. Avoid use when nearby fluorescent lights or neon<br />
signs.<br />
* The color and shape may vary depending on <strong>the</strong> model.<br />
English 7
Getting Started<br />
When <strong>the</strong> TV is initially powered on, basic settings proceed automatically,<br />
Connecting <strong>the</strong> power cord and antenna,<br />
ntenna a e o u _e<br />
Or<br />
VHF/UHFAntenna<br />
When <strong>the</strong> TV is initially powered on, a sequence of on-screen prompts will assist in configuring basic settings. Press <strong>the</strong><br />
POWER (b button. Plug & Play is available only when <strong>the</strong> input source is set to TV.<br />
1<br />
To return to <strong>the</strong> previous step, press <strong>the</strong> Red button.<br />
Selecting a language<br />
Selecting Store Demo<br />
or Home Use<br />
Selecting an antenr<br />
Selecung a channel<br />
Setting <strong>the</strong> Clock<br />
Mode<br />
View <strong>the</strong> HDTV<br />
Connection Guide<br />
Press <strong>the</strong> A or T button, <strong>the</strong>n press <strong>the</strong> ENTERC_ button.<br />
Select <strong>the</strong> desired OSD (On Screen Display) language.<br />
Press <strong>the</strong> 41 or I_ button, <strong>the</strong>n press <strong>the</strong> ENTERE_ button.<br />
• Select <strong>the</strong> Home Use mode. Store Demo Mode is for retail<br />
environments.<br />
• To return <strong>the</strong> unit's settings from Store Demo to Home Use<br />
(standard): Press <strong>the</strong> volume button on <strong>the</strong> TV. When you<br />
see <strong>the</strong> volume OSD, press and hold MENU for 5 sec.<br />
POWER<br />
Press <strong>the</strong> A or _r button, <strong>the</strong>n press <strong>the</strong> ENTERI_ button. Select Air, Cable or Auto.<br />
Press <strong>the</strong> A or T button, <strong>the</strong>n press <strong>the</strong> ENTERE_ button. Select <strong>the</strong> channel source<br />
to memorize. When setting <strong>the</strong> antenna source to Cable, a step appears allowing you to<br />
ass'gn numerical values (channel frequencies) to <strong>the</strong> channels. For more information, refer to<br />
Channel--_ Auto Program (p. 14).<br />
Press <strong>the</strong> ENTERI_ button at any time to interrupt <strong>the</strong> memorization process.<br />
Set <strong>the</strong> Clock Mode automatically or manually.<br />
• Auto: Allows you to select DST (Daylight Saving Time) mode and time zone.<br />
• Manual: Allows you to manually set <strong>the</strong> current date and time (p. 20).<br />
The connection method for <strong>the</strong> best HD screen quality is displayed.<br />
Enjoy <strong>the</strong> "IV. Press <strong>the</strong> ENTERI_ button.<br />
if You Want to Reset This Feature...<br />
(_ MENU rlTl _ Setup _ Plug & Play _ ENTERI_<br />
English
Connections<br />
Using an HDMI or HDMI/DVI Cable: HD connection (up to 1080p)<br />
We recommend using <strong>the</strong> HDMI connection for <strong>the</strong> best quality HD picture.<br />
Available devices: DVD, Blu-ray player, HD cable box, HD STB (Set-Top-Box) satellite receiver<br />
HDMI (DV_}_N/ DVI AUDIO _N<br />
HDM_ Cable (Not Supplied/<br />
* When using an HDMI/DVI cable connection, you must use <strong>the</strong> HDMI (DVm}_Njack for video. A DVD, Blu-ray<br />
player, HD cable box, or HD STB satellite receiver may require a DVI-HDMI (DVI to HDMI) cable or DVI-HDMI<br />
(DVI to HDMI) adapter. The DW AUDIO _Njack is required for audio.<br />
* The picture may not display normally (if at all) or <strong>the</strong> audio may not work if an external device that uses an older<br />
version of HDMI mode is connected to <strong>the</strong> TV. If such a problem occurs, ask <strong>the</strong> manufacturer of <strong>the</strong> external<br />
device about <strong>the</strong> HDMI version and, if out of date, request an upgrade.<br />
* Be sure to purchase a certified HDMI cable. O<strong>the</strong>rwise, <strong>the</strong> picture may not display or a connection error may<br />
occur,<br />
I<br />
English 9
Connections<br />
Using a Component (up to 1080p) or Audio/Video (480i only) Cable<br />
Available devices: DVD, Blu-ray player, cable box, STB satellite receiver, VCR<br />
For better picture quality, <strong>the</strong> Component connection is recommended over <strong>the</strong> A/V connection,<br />
Using an EX-Link Cable Connection<br />
Available devices: External devices that support EX-Link.<br />
0 English<br />
EX UNK: Connector for service only.
Using an Optical (Digital) Cable Connection<br />
Available devices: Digital Audio System, Amplifier, DVD home <strong>the</strong>ater<br />
DIGITAL AUDIO OUT (OPTICAL}<br />
" When a digital audio system is connected to <strong>the</strong> DIGITAL AUDIO OUT (OPTICAL} jack, decrease <strong>the</strong> volume<br />
of both <strong>the</strong> TV and <strong>the</strong> system.<br />
" 5,1 OH (channel) audio is available when <strong>the</strong> TV is connected to an external device supporting 5.1 OH.<br />
" When <strong>the</strong> receiver (amplifier or DVD home <strong>the</strong>ater) is set to on, you can hear sound output from <strong>the</strong> TV's<br />
optical jack. When <strong>the</strong> TV is receiving a DTV signal, <strong>the</strong> TV will send 5,1 OH sound to <strong>the</strong> amplifier or DVD<br />
home <strong>the</strong>ater, When <strong>the</strong> source is a digital component such as a DVD / Blu-ray player / cable box / STB<br />
(Set-Top-Box) satellite receiver and is connected to <strong>the</strong> TV via HDMI, only 2 OH audio will be heard from <strong>the</strong><br />
amplifier or DVD home <strong>the</strong>ater. If you want to hear 5,1 CH audio, connect <strong>the</strong> digital audio out jack from your<br />
DVD / Blu-ray player / cable box / STB satellite receiver directly to an amplifier or home <strong>the</strong>ater.<br />
Englishii
Connections<br />
Using an HDMI/DVI Cable or a D-sub Cable<br />
Display Modes (D-Sub and HDMI/DVl input)<br />
Optimal resolution is 1920 X 1080 @ 60 Hz,<br />
IBM<br />
MAC<br />
VESA CVT<br />
VESA DMT<br />
VESA GTF<br />
VESA DMT/DTV CEA<br />
NOTE<br />
640 x 850<br />
720 x 400<br />
640 x 480<br />
832 x 624<br />
1152 x 870<br />
720 x 576<br />
1152 x 864<br />
1280 x 720<br />
1280 x 960<br />
640 x 480<br />
640 x 480<br />
640 x 480<br />
800 x 600<br />
800 x 600<br />
800 x 600<br />
1024 x 768<br />
1024 x 768<br />
1024 x 768<br />
1152 x 864<br />
1280 x 1024<br />
1280 x 1024<br />
1280 x 720<br />
1280 x 800<br />
1280 x 800<br />
1280 x 960<br />
1360 x 768<br />
1440 x 900<br />
1440 x 900<br />
1680 x 1050<br />
1280 x 720<br />
1280 x 1024<br />
1920 x 1080p<br />
31.469<br />
31.469<br />
35.000<br />
49.726<br />
68.681<br />
35.910<br />
53.783<br />
56.456<br />
75.231<br />
31.469<br />
37.861<br />
37.500<br />
37.879<br />
48.077<br />
46.875<br />
48.363<br />
56.476<br />
60.023<br />
67.500<br />
63.981<br />
79.976<br />
45.000<br />
49.702<br />
62.795<br />
60.000<br />
47.712<br />
55.935<br />
70.635<br />
65.290<br />
52.500<br />
74.620<br />
67.500<br />
70.086<br />
70.087<br />
66.667<br />
74.551<br />
75.062<br />
59.950<br />
59.959<br />
74.777<br />
74.857<br />
59.940<br />
72.809<br />
75.000<br />
60.317<br />
72.188<br />
75.000<br />
60.004<br />
70.069<br />
75.029<br />
75.000<br />
60.020<br />
75.025<br />
60.000<br />
59.810<br />
74.934<br />
60.000<br />
60.015<br />
59.887<br />
74.984<br />
59.954<br />
70.000<br />
70.000<br />
60.000<br />
" For HDMI/DVI cable connection, you must use <strong>the</strong> HDM_ (DV_)_Njack.<br />
" The interlace mode is not supported.<br />
" The set may operate abnormally if a non-standard video format is selected.<br />
Audio Cable (Not Supplied}<br />
" Separate and Composite modes are supported. SOG(Sync On Green)is not supported.<br />
2 English<br />
25.175<br />
28.322<br />
30.240<br />
57.284<br />
100.000<br />
32.750<br />
81.750<br />
95.750<br />
130.000<br />
25.175<br />
31.500<br />
31.500<br />
40.000<br />
50.000<br />
49.500<br />
65.000<br />
75.000<br />
78.750<br />
108.000<br />
108.000<br />
135.000<br />
74.250<br />
83.500<br />
106.500<br />
108.000<br />
85.500<br />
106.500<br />
136.750<br />
146.250<br />
89.040<br />
128.943<br />
148.500<br />
+/_<br />
_/+<br />
_/+<br />
_/+<br />
_/+<br />
_/+<br />
+/+<br />
+/+<br />
+/+<br />
+/+<br />
+/+<br />
+/+<br />
+/+<br />
+/+<br />
_/+<br />
_/+<br />
+/+<br />
+/+<br />
_/+<br />
_/+<br />
_/+<br />
_/+<br />
+/+
Source List<br />
Use to select TV or an external input sources<br />
such as a DVD / Bin-ray player / cable box /<br />
STB satellite receiver.<br />
MENU rrrl -_ input _ Source List<br />
ENTER I_<br />
m IV / AV / Component / PC / HDMI/DVI<br />
You can only choose external devices that<br />
are connected to <strong>the</strong> TV. In <strong>the</strong> Source List,<br />
connected inputs will be highlighted.<br />
In <strong>the</strong> Source List, PC is always activated.<br />
Basic Features<br />
SOURCE<br />
Before using <strong>the</strong> TV, follow <strong>the</strong> steps below to learn how to<br />
navigate <strong>the</strong> menu and select and adjust different functions.<br />
@<br />
II<br />
O MENU button: Displays <strong>the</strong> main on-screen menu.<br />
O ENTERE_ / Direction button: Move <strong>the</strong> cursor and<br />
select an item. Confirm <strong>the</strong> setting.<br />
RETURN button: Returns to <strong>the</strong> previous menu.<br />
EXIT button: Exits <strong>the</strong> on-screen menu.<br />
Edit Name<br />
MENU ITTI_ Input _ Edit Name _ ENTERI_<br />
VCR / DVD / Cable STB / Satellite STB / PVR STB<br />
/ AV Receiver / Game / Camcorder / PC / DVmPC /<br />
DVm/ TV / mPrv / Bin-ray / HD DVD / DMA: Name <strong>the</strong><br />
device connected to <strong>the</strong> input jacks to make your input<br />
source selection easier.<br />
When a PC with a resolution of 1920 x 1080 @ 60Hz is<br />
connected to <strong>the</strong> HDM_ (DVl) _Nport, you should set<br />
<strong>the</strong> TV DVI PC mode under Edit Name.<br />
When connecting an HDMI/DVI cable to <strong>the</strong> HDM_<br />
(DW} _N port, you should set <strong>the</strong> TV to DVl PC or DVl<br />
mode under Edit Name.<br />
How to Operate <strong>the</strong> OSD (On Screen Display)<br />
The access step may differ depending on <strong>the</strong> selected menu.<br />
MENU rm The main menu options appear on<br />
<strong>the</strong> screen:<br />
Picture, Sound, Channel, Setup,<br />
input, Application, Support.<br />
_' (_k Select an icon with <strong>the</strong> A or T<br />
button,<br />
ENTER C_ Press ENTER I_ to access <strong>the</strong><br />
@ eub-menu.<br />
! v<br />
ii, iiii !i' il ill<br />
Select <strong>the</strong> desired eubmenu with<br />
<strong>the</strong> A or T button.<br />
Adjust <strong>the</strong> value of an item with <strong>the</strong><br />
4 or _ button. The adjustment in<br />
<strong>the</strong> OSD may differ depending on<br />
<strong>the</strong> selected menu.<br />
ENTERE_ Press ENTERI_ to confirm <strong>the</strong><br />
selection.<br />
_EXIT-_IJ Press EXIT.<br />
English 13
Basic Features<br />
Seeing Channels<br />
Channel List<br />
Add, delete or set Favorite channels and use<br />
<strong>the</strong> program guide for digital broadcasts.<br />
(_ MENU rrr] --_ Channel _ Channel List<br />
ENTERI_<br />
Select a channel in <strong>the</strong> All Channels,<br />
Added Channels, Favorite or Programmed<br />
screen by pressing <strong>the</strong> A / T and ENTERI_<br />
buttons. Then you can watch <strong>the</strong> selected channel,<br />
m _All Channels: Shows all currently available channels.<br />
m _ Added Channels: Shows all added channels.<br />
m _ Favorite: Shows all favorite channels.<br />
m _ Programmed: Shows all currently reserved<br />
programs.<br />
Using <strong>the</strong> color buttons with <strong>the</strong> Channel List<br />
* Green (Zoom): Enlarges or shrinks a channel<br />
number.<br />
* Yellow (Select): Selects multiple channel lists.<br />
Select desired channels and press <strong>the</strong> Yellow button<br />
to set all <strong>the</strong> selected channels at <strong>the</strong> same time. The<br />
_/mark appears to <strong>the</strong> left of <strong>the</strong> selected channels.<br />
* _-_ (Tools): Displays <strong>the</strong> Channel List option menu.<br />
(The options menus may differ depending on <strong>the</strong><br />
situation.)<br />
Channel Status Display icons<br />
_/ A channel selected.<br />
V A channel set as a Favorite,<br />
(_) A reserved Program,<br />
4 English<br />
Using Favorite Channels<br />
(_ MENU ITTI_ Channel --_ Channel List --_ ENTERI_<br />
Add to Favorite / Delete from Favorite<br />
Set channels you watch frequently as Favorites,<br />
1. Select a channel and press <strong>the</strong> TOOLS button.<br />
2. Add or delete a <strong>the</strong> channel using <strong>the</strong> Add to Favorite<br />
or Delete from Favorite menu respectively,<br />
I<br />
To show all Favorite channels, click on <strong>the</strong><br />
button shown on <strong>the</strong> right.<br />
Memorizing Channels<br />
(_ MENUITTI _ Channel --_ ENTERE_<br />
Antenna (Air / Cable)<br />
Before your television can begin memorizing <strong>the</strong> available<br />
channels, you must specify <strong>the</strong> type of signal source that is<br />
connected to <strong>the</strong> TV (i,e. an Air or a Cable system).<br />
Auto Program<br />
Ill Air: Air antenna signal.<br />
Ill Cable: Cable antenna signal.<br />
Ill Auto: Air and Cable antenna.
NOTE<br />
When selecting <strong>the</strong>Cable TVsystem: STD,HRC<br />
andIRCidentify various typesofcableTVsystems.<br />
Contact your local cablecompany toidentify <strong>the</strong><br />
typeofcablesystem thatexists inyourparticular<br />
area. Atthispoint, <strong>the</strong>signal source hasbeen<br />
selected.<br />
* After all<strong>the</strong>available channels arestored, itstarts<br />
toremove scrambled channels. TheAutoProgram<br />
menu <strong>the</strong>nreappears.<br />
Editing Channels<br />
MENUITTI --_ Channel _ Channel List --_ ENTER{_<br />
Channel Name Edit<br />
1. Select a channel and press <strong>the</strong> TOOLS button.<br />
2. Edit <strong>the</strong> channel name using <strong>the</strong> Channel Name Edit<br />
menu.<br />
ml Channel Name Edit (analog channels only): Assign your<br />
own channel name.<br />
O<strong>the</strong>r Features<br />
MENUITTI --_ Channel _ ENTERI_<br />
Clear Scrambled Channel<br />
This function is used to filter out scrambled channels after<br />
Auto Program is completed. This process may take up to<br />
20-30 minutes.<br />
How to Stop Searching Scrambled Channels<br />
1. Press <strong>the</strong> ENTERC_ button to select Stop.<br />
2. Press <strong>the</strong> _ button to select Yes.<br />
3. Press <strong>the</strong> ENTERI_ button.<br />
This function is only available in Cable mode.<br />
Channel List<br />
MENUITTI --_ Channel _ Channel List --_ ENTER{_<br />
Channel List Option Menu<br />
Set each channel using <strong>the</strong> Channel List menu options (Add<br />
/ Delete, Timer Viewing, Select All/Deselect All). Option<br />
menu items may differ depending on <strong>the</strong> channel status.<br />
1. Select a channel and press <strong>the</strong> TOOLS button.<br />
2. Select a function and change its settings.<br />
ml Add / Delete: Delete or add a channel to display <strong>the</strong><br />
channels you want.<br />
m<br />
m<br />
NOTE<br />
* All deleted channels will be shown on <strong>the</strong><br />
All Channels menu.<br />
* A gray-colored channel indicates <strong>the</strong> channel<br />
has been deleted.<br />
* The Add menu only appears for deleted<br />
channels.<br />
* Delete a channel from <strong>the</strong> Added Channels or<br />
Favorite menu in <strong>the</strong> same manner.<br />
Timer Viewing: You can set a desired channel to be<br />
displayed automatically at <strong>the</strong> reserved time. Set <strong>the</strong><br />
current time first to use this function.<br />
1. Press <strong>the</strong> _ / _ / A / _ buttons to select <strong>the</strong><br />
desired channel in Channel List.<br />
2. Press <strong>the</strong> TOOLS button, <strong>the</strong>n select<br />
Timer Viewing.<br />
3. Scroll up or down to adjust <strong>the</strong> settings in <strong>the</strong> box,<br />
or use <strong>the</strong> numeric buttons on your remote to enter<br />
<strong>the</strong> date and time.<br />
If you selected Once, Every Week or Everyday<br />
in Repeat, you can enter <strong>the</strong> date you want.<br />
4. Select OK, <strong>the</strong>n press <strong>the</strong> ENTERI_ button when<br />
done.<br />
NOTE<br />
* Only memorized channels can be reserved.<br />
* Reserved programs will be displayed in <strong>the</strong><br />
Programmed menu.<br />
* When a digital channel is selected, press <strong>the</strong> _,<br />
button to view <strong>the</strong> digital program.<br />
Select All: Select all <strong>the</strong> channels in <strong>the</strong> channel list.<br />
Deselect All: Deselect all <strong>the</strong> selected channels.<br />
You can only select Deselect All when one or<br />
more channels are selected.<br />
@ Programmed .................................................................<br />
(in Channel List)<br />
You can view, modify or delete a show you have reserved<br />
to watch. Programmed timer viewing is displayed here.<br />
Highlight a program and press <strong>the</strong> TOOLS button to display<br />
Options.<br />
ml Change mnfo:Change a show you have reserved to<br />
watch. Begin with step 3 of "Timer Viewing" above,<br />
ml Cancel Schedules: Cancel a show you have reserved<br />
to watch.<br />
This deletes <strong>the</strong> highlighted or selected<br />
program(s).<br />
English 15
Basic Features<br />
m<br />
m<br />
Information: Display a show you have reserved<br />
to watch. (You can also change <strong>the</strong> reservation<br />
Information.)<br />
Alternatively, you can view Information by<br />
highlighting a program and pressing <strong>the</strong><br />
ENTERI_ button.<br />
Select All / Deselect All: Select or deselect all reserved<br />
programs.<br />
Fine Tune<br />
(analog channels only)<br />
if <strong>the</strong> reception is clear, you do not have to fine tune <strong>the</strong><br />
channel, as this is done automatically during <strong>the</strong> search and<br />
store operation, if <strong>the</strong> signal is weak or distorted, fine tune<br />
<strong>the</strong> channel manually. Scroll to <strong>the</strong> left or right until <strong>the</strong> image<br />
is clear.<br />
Settings are applied to <strong>the</strong> channel you're currently<br />
watching,<br />
Fine tuned channels that have been saved are marked<br />
with an asterisk ..... on <strong>the</strong> right-hand side of <strong>the</strong><br />
channel number in <strong>the</strong> channel banner.<br />
To reset <strong>the</strong> fine-tuning, select Reset,<br />
Changing <strong>the</strong> Preset Picture Mode<br />
(_ MENUiTrl --_ Picture _ Mode --_ ENTERIZ_<br />
Mode<br />
Select your preferred picture type.<br />
Ill Dynamic: Suitable for a bright room.<br />
Ill Standard: Suitable for a normal environment.<br />
Ill Movie: Suitable for watching movies in a dark room.<br />
6 English<br />
Adjusting Picture Settings<br />
Backlight / Contrast / Brightness /<br />
Sharpness / Color / Tint (G/R)<br />
(_ MENUrlTI --_ Picture _ ENTERI_<br />
Your television has several setting options for picture quality<br />
control,<br />
NOTE<br />
* When you make changes to Backiight, Contrast,<br />
Brightness, Sharpness, Color or Tint (G/R), <strong>the</strong><br />
OSD will be adjusted accordingly.<br />
* In PC mode, you can only make changes to<br />
Backlight, Contrast and Brightness.<br />
* Settings can be adjusted and stored for each<br />
external device connected to <strong>the</strong> TV.<br />
Changing <strong>the</strong> Picture Options<br />
Advanced Settings ............................................................<br />
(_ MENUrlTI --_ Picture _ Advanced Settings --_<br />
ENTER I_<br />
(Advanced Settings are available in Standard / Movie mode)<br />
Compared to previous models, new Samsung TVs have a<br />
more precise picture.<br />
In PC mode, you can only make changes to<br />
Gamma and White Balance.
im<br />
im<br />
im<br />
im<br />
im<br />
im<br />
im<br />
BlackTone(Off / Dark / Darker / Darkest): Select <strong>the</strong><br />
black level to adjust <strong>the</strong> screen depth.<br />
Dynamic Contrast (Off / Low / Medium / High): Adjust<br />
<strong>the</strong> screen contrast.<br />
Gamma: Adjust <strong>the</strong> primary color intensity.<br />
Color Space (Auto / Native): Adjust <strong>the</strong> range of colors<br />
available to create <strong>the</strong> image.<br />
White Balance: Adjust <strong>the</strong> color temperature for a more<br />
natural picture.<br />
R-Offset / G-Offset / B-Offset: Adjust each color's<br />
(red, green, blue) darkness.<br />
R-Gain / G-Gain / B-Gain: Adjust each color's (red,<br />
green, blue) brightness.<br />
Reset: Resets <strong>the</strong> White Balance to it's default<br />
settings,<br />
Flesh Tone: Emphasize pink "Flesh Tone."<br />
Edge Enhancement<br />
boundaries.<br />
(Off/On): Emphasize object<br />
In PC mode, you can only make changes to <strong>the</strong><br />
Color Tone and Size.<br />
m Size: Your cable box/satellite receiver<br />
may have its own set of screen sizes as<br />
well. However, we highly recommend you<br />
use 16:9 mode most of <strong>the</strong> time.<br />
16:9 : Sets <strong>the</strong> picture to 16:9 wide<br />
mode.<br />
Zoom1 : Use for moderate magnification.<br />
Zoom2: Use for a stronger magnification.<br />
Wide Fit: Enlarges <strong>the</strong> aspect ratio of <strong>the</strong> picture to fit<br />
<strong>the</strong> entire screen.<br />
Available with HD 1080i / 720p signals in 16:9<br />
mode.<br />
4:3 : Sets <strong>the</strong> picture to basic (4:3) mode.<br />
Do not watch in 4:3 format for a long time. Traces<br />
of borders displayed on <strong>the</strong> left, right and center<br />
of <strong>the</strong> screen may cause image retention(screen<br />
burn) which are not covered by <strong>the</strong> warranty.<br />
Screen Fit: Displays <strong>the</strong> full image without any cut-off<br />
when HDMI (720p / 1080i / 1080p) or Component<br />
(1080i / 1080p) signals are inputted.<br />
P!cture<br />
NOTE<br />
OPtions ........................................................................................................................................................<br />
After selecting Zoom1, Zoom2 or Wide Fit:<br />
[_ MENUiTFI --_ Picture _ Picture Options --_<br />
1. Press <strong>the</strong> I_ button to select Position.<br />
ENTER I_<br />
2. Press <strong>the</strong> ENTERIZ_ button.<br />
Im Color Tone (Cool / Normal / Warm1 / Warm2)<br />
Warm1 or Warm2 will be deactivated when <strong>the</strong><br />
picture mode is Dynamic and Standard.<br />
Settings can be adjusted and stored for each<br />
external device connected to an input on <strong>the</strong> TV.<br />
3. Press <strong>the</strong> A or T button to move <strong>the</strong> picture up<br />
or down.<br />
4. Press <strong>the</strong> ENTERI_ button.<br />
5. Press <strong>the</strong> !_ button to select Reset.<br />
6. Press <strong>the</strong> ENTERIZ_ button to reset <strong>the</strong> picture<br />
to its default position.<br />
English 17
Basic Features<br />
After selecting Screen Fit in HDMI (1080i/1080p) or<br />
Component (1080i/1080p) mode, you may need to<br />
center <strong>the</strong> picture:<br />
1. Press <strong>the</strong> _ or _ button to select Position.<br />
2. Press <strong>the</strong> ENTERI_ button.<br />
3. Press <strong>the</strong> A, _r, _ or !_ button to move <strong>the</strong><br />
picture.<br />
4. Press <strong>the</strong> ENTERIZ_ button.<br />
5. Press <strong>the</strong> _ or _ button to select Reset,<br />
6. Press <strong>the</strong> ENTERI_ button.<br />
* HD (High Definition): 16:9 - 1080i/1080p (1920x1080),<br />
720p (1280x720)<br />
* Settings can be adjusted and stored for each<br />
external device you have connected to an input on<br />
<strong>the</strong> TV.<br />
ATV,AV, 16:9, Zoom1,<br />
Component (480i, 480p) Zoom2, 4:3<br />
DTV(1080i), 16:9, 4:3, Wide Fit,<br />
Component (1080i, 1080p), Screen Fit<br />
HDMI (720p, 1080i, 1080p)<br />
PC 16:9, 4:3<br />
m Digital NR (Off / Low / Medium / High / Auto): If <strong>the</strong><br />
broadcast signal received by your TV is weak, you can<br />
activate <strong>the</strong> Digital NR feature to reduce any static and<br />
ghosting that may appear on <strong>the</strong> screen.<br />
8 English<br />
When <strong>the</strong> signal is weak, try o<strong>the</strong>r options until <strong>the</strong><br />
best picture is displayed.<br />
HDMI Black Level (Normal / Low): Selects <strong>the</strong> black<br />
level on <strong>the</strong> screen to adjust <strong>the</strong> screen depth.<br />
Available only in HDMI mode.<br />
Film Mode (Off / Auto): Sets <strong>the</strong> TV to automatically<br />
sense and process film signals from all sources and<br />
adjusts <strong>the</strong> picture for optimum quality.<br />
Available in TV, AV, COMPONENT (480i/1080i)<br />
and HDMI (480i/1080i),<br />
Picture Reset (OK / Cancel)<br />
Resets your current picture mode to its default settings.<br />
Setting up <strong>the</strong> TV with your PC<br />
Set <strong>the</strong> input source to PC.<br />
(_ MENUrlTI --_ Picture _ ENTERE_<br />
Auto Adjustment .................................................................<br />
Adjust frequency values/positions and fine tune <strong>the</strong> settings<br />
automatically.<br />
Not available when connecting with an HDMI/DVI cable.<br />
Screen<br />
Ill Coarse / Fine: Removes or reduces picture noise. If <strong>the</strong><br />
noise is not removed by Fine-tuning alone, <strong>the</strong>n adjust<br />
<strong>the</strong> frequency as best as possible (Coarse) and Finetune<br />
again. After <strong>the</strong> noise has been reduced, readjust<br />
<strong>the</strong> picture so that it is aligned to <strong>the</strong> center of screen.<br />
Ill PC Position: Adjust <strong>the</strong> PC's screen positioning if it<br />
does not fit <strong>the</strong> TV screen. Press <strong>the</strong> A or T button to<br />
adjust <strong>the</strong> Vertical-Position. Press <strong>the</strong> _ or !_ button to<br />
adjust <strong>the</strong> Horizontal-Position.<br />
Ill Image Reset: Resets <strong>the</strong> image to default settings.
Using Your iV as a Computer (PC) Display<br />
Setting Up Your PC Software (Based on Windows XP)<br />
Depending on <strong>the</strong> version of Windows and <strong>the</strong> video card,<br />
<strong>the</strong> actual screens on your PC will probably look different, but<br />
<strong>the</strong> same basic set-up information will apply in most cases.<br />
(If not, contact your computer manufacturer or Samsung<br />
Dealer.)<br />
1. Click on "Control Panel" on <strong>the</strong> Windows start menu.<br />
2. Click on "Appearance and Themes" in <strong>the</strong> "Control<br />
Panel" window and a display dialog-box will appear.<br />
3. Click on "Display" and a display dialog box will appear.<br />
4. Navigate to <strong>the</strong> "Settings" tab on <strong>the</strong> display dialog-box.<br />
• The correct size setting (resolution) [Optimum: 1920 X<br />
1080 pixels]<br />
• If a vertical-frequency option exists on your display<br />
settings dialog box, <strong>the</strong> correct value is "60" or "60 Hz'.<br />
O<strong>the</strong>rwise, just click "OK" and exit <strong>the</strong> dialog box.<br />
Changing <strong>the</strong> Preset Sound Mode<br />
{_ MENU rlTI -_ Sound -_ Mode -_ ENTERE_<br />
Mode<br />
[] Standard: Selects <strong>the</strong> normal sound mode.<br />
[] Music: Emphasizes music over voices.<br />
[] Movie: Provides <strong>the</strong> best sound for movies.<br />
[] Clear Voice: Emphasizes voices over o<strong>the</strong>r sounds.<br />
[] Custom: Increase <strong>the</strong> intensity of high-frequency sound<br />
to allow a better listening experience for <strong>the</strong> hearing<br />
impaired.<br />
Adjusting sound settings<br />
(_ MENU iTrl --_ Sound -_ Equalizer -_ ENTER E_<br />
Equalizer<br />
The sound settings can be adjusted to suit your personal<br />
preference.<br />
[] Mode: Selects <strong>the</strong> sound mode among <strong>the</strong> predefined<br />
settings.<br />
[] Balance L/R: Adjusts <strong>the</strong> balance between <strong>the</strong> right and<br />
left speaker.<br />
[] 100Nz / 300Hz / 1 kNz / 3kHz / 10kHz (Bandwidth<br />
Adjustment): Adjusts <strong>the</strong> level of specific bandwidth<br />
frequencies.<br />
[] Reset: Resets <strong>the</strong> equalizer to its default settings.<br />
Sound Settings<br />
(_ MENUiTrl --_ Sound --_ ENTERI_%_<br />
SRS TruSurround HD (Off / On)......................................<br />
This function provides a virtual 5.1 channel surround sound<br />
experience through a pair of speakers using HRTF (Head<br />
Related Transfer Function) technology.<br />
Preferred Language<br />
(digital channels only)<br />
DigitaI-TV broadcasts are capable of<br />
simultaneous transmission of many audio tracks<br />
(for example, simultaneous translations of <strong>the</strong><br />
program into foreign languages).<br />
You can only select a language among <strong>the</strong><br />
ones being broadcasted.<br />
Multi-Track Sound (MTS)<br />
(analog channels only)<br />
[] Mono: Choose for channels that are<br />
broadcasting in mono or if you are having<br />
difficulty receiving a stereo signal.<br />
[] Stereo: Choose for channels that are<br />
broadcasting in stereo.<br />
[] SAP: Choose to listen to <strong>the</strong> Separate<br />
Audio Program, which is usually a foreign-language<br />
translation.<br />
Depending on <strong>the</strong> particular program being broadcast,<br />
you can listen to Mono, Stereo or SAR<br />
Auto Volume (Off / Normal) ..............................................<br />
Because each broadcasting station has its own signal<br />
conditions, <strong>the</strong> volume can vary as you switch between<br />
channels. This feature lets you automatically adjust <strong>the</strong><br />
volume of <strong>the</strong> desired channel by lowering <strong>the</strong> sound output<br />
when <strong>the</strong> modulation signal is high or by raising <strong>the</strong> sound<br />
output when <strong>the</strong> modulation signal is low,<br />
English lg
Basic Features<br />
Speaker Select (External Speaker /<br />
TV Spea ker ).............................................................<br />
A sound echo may occur due to a difference in decoding<br />
speed between <strong>the</strong> main speaker and <strong>the</strong> audio receiver, In<br />
this case, set <strong>the</strong> TV to External Speaker.<br />
When Speaker Select is set to External Speaker, <strong>the</strong><br />
volume and MUTE buttons will not operate and <strong>the</strong><br />
sound settings will be limited,<br />
When Speaker Select is set to External Speaker,<br />
* TV Speaker: Off, External Speaker: On<br />
When Speaker Select is set to TV Speaker,<br />
* TV Speaker: On, External Speaker: On<br />
If <strong>the</strong>re is no video signal, both speakers will be mute,<br />
Sound Reset (OK / Cancel)<br />
Reset all sound settings to <strong>the</strong> factory defaults.<br />
Setting <strong>the</strong> Time<br />
(_ MENUiTR _Setup--_Time--_ENTERlZ_<br />
Time<br />
Clock: Setting <strong>the</strong> clock is for using various timer<br />
features of <strong>the</strong> 7_.<br />
(_ The current time will appear every time you press<br />
<strong>the</strong> _NFO button.<br />
if you disconnect <strong>the</strong> power cord, you have to set<br />
<strong>the</strong> clock again.<br />
Clock Mode (Auto / Manual)<br />
- Auto: Set <strong>the</strong> current time automatically using <strong>the</strong><br />
time from a digital channel.<br />
The antenna must be connected in order to set<br />
<strong>the</strong> time automatically,<br />
- Manual: Set <strong>the</strong> current time manually.<br />
Depending on <strong>the</strong> broadcast station and signal,<br />
<strong>the</strong> auto time set up may not be correct, in this<br />
case, set <strong>the</strong> time manually.<br />
0 English<br />
Clock Set: Set <strong>the</strong> Month, Day, Year, Hour, Minute and<br />
am/pm manually.<br />
Available only when Clock Mode is set to<br />
Manual.<br />
You can set <strong>the</strong> Month, Day, Year, Hour and<br />
Minute directly by pressing <strong>the</strong> number buttons<br />
on <strong>the</strong> remote control.<br />
Time Zone: Select your time zone.<br />
This function is only available when <strong>the</strong><br />
Clock Mode is set to Auto.<br />
DST (Daylight Saving Time) (Off / On): Switches <strong>the</strong><br />
Daylight Saving Time function on or off.<br />
This function is only available when <strong>the</strong><br />
Clock Mode is set to Auto.<br />
Using <strong>the</strong> Sleep Timer<br />
(_ MENUiTR --_ Setup _ Time _ Sleep Timer --_<br />
ENTER IZ_<br />
Sleep Timer _: Automatically shuts off <strong>the</strong> TV<br />
after a preset period of time. (30, 60, 90, 120, 150 and<br />
180 minutes).<br />
To cancel <strong>the</strong> Sleep Timer, select Off.<br />
Setting <strong>the</strong> On/Off Timer<br />
(_ MENUE]] --_ Setup _ Time _ Timer 1 --_<br />
ENTER I_<br />
You can set <strong>the</strong> TV to turn on automatically at a preset time.<br />
Ill Timer 1 / Timer 2 / Timer 3: Three different on / off<br />
timer settings can be made. You must set <strong>the</strong> clock first.
OnTime/ Off Time: Set <strong>the</strong> hour, minute, and activate<br />
/ inactivate, (Toactivate <strong>the</strong> timer with <strong>the</strong> setting you've<br />
chosen, set to Activate,)<br />
Volume: Set <strong>the</strong> desired volume level.<br />
Contents: Select rv or USB content to be played when<br />
<strong>the</strong> TV is turned on automatically, (USB can be selected<br />
only when a USB device is connected to <strong>the</strong> TV)<br />
NOTE<br />
If <strong>the</strong>re is no music file on <strong>the</strong> USB device or <strong>the</strong><br />
folder containing a music file is not selected, <strong>the</strong><br />
Timer function does not operate correctly.<br />
When <strong>the</strong>re is only one photo file in <strong>the</strong> USB,<br />
<strong>the</strong> Slide Show will not play.<br />
If a folder name is too long, <strong>the</strong> folder cannot be<br />
selected.<br />
Each USB you use is assigned its own folder.<br />
When using more than one of <strong>the</strong> same type of<br />
USB, make sure <strong>the</strong> folders assigned to each<br />
USB have different names.<br />
Repeat: Select Once, Everyday, Mon~Fri, Mon~Sat,<br />
Sat~Sun or Manual to set at you convenience. If you<br />
select Manual, you can set up <strong>the</strong> day you want to<br />
activate <strong>the</strong> timer.<br />
The _/ mark indicates <strong>the</strong> day is selected.<br />
Auto Power Off (available only when <strong>the</strong> TV is turned<br />
on by <strong>the</strong> Timer): The TV will be automatically turned off<br />
after 3 hours of being left idle to prevent overheating.<br />
Locking Programs<br />
(_ MENUiTR -_ Setup -_ ENTERE_<br />
V-Chip<br />
The PIN input screen appears, Enter your 4 digit PIN number.<br />
The V-Chip feature automatically locks out programs that are<br />
deemed inappropriate for children. The user must enter a<br />
PIN (personal identification number) before any of <strong>the</strong> V-Chip<br />
restrictions are set up or changed.<br />
NOTE<br />
* V-Chip is not available in HDML Component or PC<br />
mode.<br />
* The default PIN number of a new TV set is "0-0-0-0".<br />
* Allow All: Press to unlock all TV ratings.<br />
* Block All: Press to lock all TV ratings.<br />
II V-Chip Lock (Off / On): You can block rated TV<br />
Programs.<br />
Ill TV Parental Guidelines: You can block TV programs<br />
depending on <strong>the</strong>ir rating. This function allows you to<br />
control what your children are watching,<br />
- TV-Y: Young children / TV-Y7: Children 7 and over /<br />
rV-G: General audience / rV-PG: Parental guidance<br />
/ TV-14: Viewers 14 and over / TV-MA: Mature<br />
audience<br />
- ALL: Lock all TV ratings. / FV: Fantasy violence /<br />
V: Violence / S: Sexual situation / L: Adult Language /<br />
D: Sexually Suggestive Dialog<br />
The V-Chip will automatically block certain<br />
categories dealing with more sensitive material.<br />
For example, if you block <strong>the</strong> TV-¥ category,<br />
<strong>the</strong>n TV-Y7 will automatically be blocked.<br />
Similarly, if you block <strong>the</strong> TV-G category, <strong>the</strong>n<br />
all <strong>the</strong> categories in <strong>the</strong> young adult group will<br />
be blocked (TV-G, TV-PG, TV-14 and TV-MA),<br />
The sub-ratings (D, L, S, V) work similarly. So,<br />
if you block <strong>the</strong> L sub-rating in TV-PG, <strong>the</strong>n<br />
<strong>the</strong> L sub-ratings in TV-14 and TV-MA will<br />
automatically be blocked.<br />
II MPAA Rating: You can block movies depending on<br />
<strong>the</strong>ir MPAA rating, The Motion Picture Association of<br />
America(MPAA) has implemented a rating system that<br />
provides parents or guardians with advanced information<br />
on which films are appropriate for children.<br />
- G: General audience (no restrictions). / PG: Parental<br />
guidance suggested. / PG-13: Parents strongly<br />
cautioned. / R: Restricted, Children under 17 should<br />
be accompanied by an adult. / NO-17: No children<br />
under age 17. / X: Adults only. / NR: Not rated.<br />
The V-Chip will automatically block any<br />
category that deals with more sensitive material.<br />
For example, if you block <strong>the</strong> PG-13 category,<br />
<strong>the</strong>n R, N0-17 and X will automatically be<br />
blocked.<br />
Canadian English: You can block TV programs<br />
depending on <strong>the</strong>ir Anglophone Canadian ratings.<br />
- C: Programming intended for children under age 8. /<br />
08+: Programming generally considered acceptable<br />
for children 8 years and over to watch on <strong>the</strong>ir own.<br />
/ G: General programming, suitable for all audiences.<br />
/ PG: Parental Guidance. / 14+: Programming<br />
contains <strong>the</strong>mes or content which may not be<br />
suitable for viewers under <strong>the</strong> age of 14. / 18+: Adult<br />
programming.<br />
The V-Chip will automatically block any<br />
category that deals with more sensitive material.<br />
For example, if you block <strong>the</strong> G category, <strong>the</strong>n<br />
PG, 14+ and 18+ will automatically be blocked.<br />
English 21
Basic Features<br />
m<br />
m<br />
m<br />
Canadian French: You can block TV programs<br />
depending on <strong>the</strong>ir French Canadian rating.<br />
- G: General / 8 ans+: Programming generally<br />
considered acceptable for children 8 years and over<br />
to watch on <strong>the</strong>ir own. / 13 arts+: Programming may<br />
not be suitable for children under <strong>the</strong> age of 13. /<br />
16 arts+: Programming is not suitable for children<br />
under <strong>the</strong> age of 16. / 18 arts+: Programming<br />
restricted to adults.<br />
The V-Chip will automatically block any<br />
category that deals with more sensitive material.<br />
For example, if you block <strong>the</strong> 8 ans+ category,<br />
<strong>the</strong>n 13 ans+, 16 arts+ and 18 ans+ will<br />
automatically be blocked also.<br />
Downloadable U.S. Rating: Parental restriction<br />
information can be used while watching DTV channels.<br />
NOTE<br />
If information is not downloaded from <strong>the</strong><br />
broadcasting station, <strong>the</strong> Downloadable U.S.<br />
Rating menu is deactivated,<br />
Parental restriction information is automatically<br />
downloaded while watching DTV channels. It<br />
may take several seconds,<br />
The Downloadable U.S. Rating menu<br />
is available for use after information is<br />
downloaded from <strong>the</strong> broadcasting station.<br />
However, depending on <strong>the</strong> information from<br />
<strong>the</strong> broadcasting station, it may not be available<br />
for use.<br />
Parental restriction levels differ depending on<br />
<strong>the</strong> broadcasting station. The default menu<br />
name and Downloadable US Rating change<br />
depending on <strong>the</strong> downloaded information.<br />
Even if you set <strong>the</strong> on-screen display to ano<strong>the</strong>r<br />
language, <strong>the</strong> Downloadable U.S. Rating<br />
menu will appear in English only.<br />
The rating will automatically block certain<br />
categories that deal with more sensitive<br />
material.<br />
The rating titles (For example: Humor Level_etc)<br />
and TV ratings (For example: DH, MH, H.,etc)<br />
may differ depending on <strong>the</strong> broadcasting<br />
station.<br />
Change PIN: The Change PIN screen will appear.<br />
Choose any 4 digits for your PIN and enter <strong>the</strong>m. As<br />
soon as <strong>the</strong> 4 digits are entered, <strong>the</strong> Confirm New<br />
PIN screen appears. Re-enter <strong>the</strong> same 4 digits. When<br />
<strong>the</strong> Confirm screen disappears, your PIN has been<br />
memorized.<br />
2 English<br />
How to watch a restricted channel<br />
If <strong>the</strong> TV is tuned to a restricted channel, <strong>the</strong> V-Chip will<br />
block it. The screen will go blank and <strong>the</strong> following message<br />
will appear:<br />
This channel is blocked by V-Chip. Please enter <strong>the</strong> PIN to<br />
unblock.<br />
If you forget <strong>the</strong> PIN, press <strong>the</strong> remote-control buttons<br />
in <strong>the</strong> following sequence, which resets <strong>the</strong> pin to<br />
"0-0-0-0:" POWER (off) _ MUTE --_ 8 --_ 2 --_4 --_<br />
POWER(on).<br />
O<strong>the</strong>r Features<br />
(_ MENUIITI --_ Setup _ ENTERE_<br />
Language<br />
Set <strong>the</strong> menu language,<br />
1. Select Language and press <strong>the</strong> ENTERE_ button.<br />
2. Choose desired language and press <strong>the</strong> ENTERI_<br />
button.<br />
Choose between English, EspaSol and Frangais.<br />
Caption ..................................................................................<br />
(On-Screen Text Messages)<br />
Ill Caption (Off / On): You can switch <strong>the</strong><br />
caption function on or off. If captions are<br />
not available, <strong>the</strong>y will not be displayed<br />
on <strong>the</strong> screen.<br />
The Caption feature doesn't work in<br />
Component, HDMI or PC modes.<br />
Ill Caption Mode: You can select <strong>the</strong><br />
desired caption mode.<br />
The availability of captions depends on <strong>the</strong><br />
program being broadcast.<br />
Default / OO1~004 / Text1 ~Text4: (analog channels<br />
only) The Analog Caption function operates in ei<strong>the</strong>r<br />
analog TV channel mode or when a signal is supplied<br />
from an external device to <strong>the</strong> T_. (Depending on <strong>the</strong><br />
broadcasting signal, <strong>the</strong> Analog Caption function may or<br />
may not work with digital channels.)<br />
Default / Service1 ~Service6 / OO1 ~004 /<br />
Text1 ~Text4: (digital channels only) The Digital Captions<br />
function works with digital channels.<br />
Service1~6 may not be available in digital caption<br />
mode depending on <strong>the</strong> broadcast.
m Digital Caption Options: (digital channels only)<br />
Size:Options include Default, Small, Standard and<br />
Large. Thedefault isStandard,<br />
FontStyle: Options include Default andStyles 0to7.<br />
Thedefault isStyle0.<br />
Foreground Color: Options include Default, White,<br />
Black, Red, Green, Blue, Yellow, Magenta andCyan, You<br />
canchange <strong>the</strong>color of<strong>the</strong>letter. Thedefault isWhite.<br />
Background Color:Options include Default, White,<br />
Black, Red, Green, Blue, Yellow, Magenta andCyan.<br />
Youcanchange <strong>the</strong>background color of<strong>the</strong>caption.<br />
Thedefault isBlack.<br />
Foreground Opacity: Thisadjusts <strong>the</strong>opacity oftext.<br />
Options include Default, Transparent, Translucent, Solid<br />
andFlashing.<br />
Background Opacity: Thisadjusts <strong>the</strong>opacity of<br />
<strong>the</strong>caption background. Options include Default,<br />
Transparent, Translucent, SolidandFlashing.<br />
Return toDefault: Thisoption setseachSize, Font<br />
Style, Foreground Color, Background Color, Foreground<br />
Opacity andBackground Opacity toitsdefault.<br />
NOTE<br />
* Digital Caption Options areavailable only<br />
whenDefault andService1 ~Service6 canbe<br />
selected inCaption Mode.<br />
* Theavailability ofcaptions depends on<strong>the</strong><br />
program beingbroadcasted.<br />
* TheDefault setting follows <strong>the</strong>standards setby<br />
<strong>the</strong>broadcaster.<br />
* TheForeground andBackground cannot beset<br />
tohave<strong>the</strong>samecolor.<br />
* Youcannot setboth<strong>the</strong>Foreground Opacity<br />
and<strong>the</strong>Background Opacity toTransparent.<br />
Game Mode (Off / On)<br />
When connecting to a game console such as PlayStation TM<br />
or Xbox TM, you can enjoy a more realistic gaming experience<br />
by selecting <strong>the</strong> game mode.<br />
NOTE<br />
* Precautions and limitations for game mode.<br />
- To disconnect <strong>the</strong> game console and connect<br />
ano<strong>the</strong>r external device, set Game Mode to Off in<br />
<strong>the</strong> setup menu.<br />
- If you display <strong>the</strong> TV menu in Game Mode, <strong>the</strong><br />
screen shakes slightly.<br />
* Game Mode is not available when <strong>the</strong> input source<br />
is set to TV or PC.<br />
* After connecting <strong>the</strong> game console, set Game Mode<br />
to On. Unfortunately, you may notice reduced picture<br />
quality.<br />
* If Game Mode is On:<br />
- Picture mode is set to Standard and Sound mode<br />
is set to Movie.<br />
- Equalizer is not available.<br />
Melody (Off / Low / Medium / High)<br />
Set so that a melody plays when <strong>the</strong> TV is turned on or off.<br />
NOTE<br />
* The Melody does not play.<br />
- When no sound is output from <strong>the</strong> TV because <strong>the</strong><br />
MUTE button has been pressed.<br />
- When no sound is output from <strong>the</strong> TV because <strong>the</strong><br />
volume has been reduced to minimum with <strong>the</strong><br />
VOL- button.<br />
- When <strong>the</strong> TV is turned off by Sleep Timer function.<br />
Economical Solutions<br />
(_ MENUITTI --_ Setup _ ENTER[_<br />
The Eco Function can be used to enhance your power<br />
savings.<br />
Energy Saving (Off / Low / Medium / High<br />
!Auto) ....................................................................................<br />
This feature adjusts <strong>the</strong> brightness of <strong>the</strong> TV in order to<br />
reduce power consumption. When watching TV at night,<br />
set <strong>the</strong> Energy Saving mode option to High to reduce eye<br />
fatigue as well as power consumption.<br />
English 23
Basic Features<br />
_} MENU[[]] _, Support _ ENTERE_<br />
Self Diagnosis<br />
Self Diagnostic might take few seconds, this is part of<br />
<strong>the</strong> normal operation of <strong>the</strong> TV,<br />
Ill Picture Test: Use to check for picture problems.<br />
Yes: If <strong>the</strong> test pattern does not appear or <strong>the</strong>re is<br />
noise in <strong>the</strong> test pattern, select Yes, There may be a<br />
problem with <strong>the</strong> TV. Contact Samsung's Call Center for<br />
assistance (1-800-SAMSUNG).<br />
No: If <strong>the</strong> test pattern is properly displayed, select No.<br />
There may be a problem with your external equipment,<br />
Please check your connections, If <strong>the</strong> problem persists,<br />
refer to <strong>the</strong> external device's user manual.<br />
Ill Sound Test: Use <strong>the</strong> built-in melody sound to check for<br />
sound problems.<br />
If you hear no sound from <strong>the</strong> TV's speakers,<br />
before performing <strong>the</strong> sound test, make sure<br />
Speaker Select is set to TV Speaker in <strong>the</strong><br />
Sound menu,<br />
The melody will be heard during <strong>the</strong> test even if<br />
Speaker Select is set to External Speaker or <strong>the</strong><br />
sound is muted by pressing <strong>the</strong> MUTE button.<br />
Yes: If you can hear sound only from one speaker or not<br />
at all during <strong>the</strong> sound test, select Yes, There may be a<br />
problem with <strong>the</strong> TV. Contact Samsung's Call Center for<br />
assistance (1-800-SAMSUNG).<br />
No: If you can hear sound from <strong>the</strong> speakers, select No.<br />
There may be a problem with your external equipment,<br />
Please check your connections, If <strong>the</strong> problem persists,<br />
refer to <strong>the</strong> external device's user manual.<br />
Ill Signal Strength: (Digital channels only) An HD channel's<br />
reception quality is ei<strong>the</strong>r perfect or <strong>the</strong> channels are<br />
unavailable. Adjust your antenna to increase signal<br />
strength.<br />
4 English<br />
Software U pgrade<br />
Samsung may offer upgrades for your TV's firmware in <strong>the</strong><br />
future. Please visit Samsung.com or contact <strong>the</strong> Samsung<br />
call center at 1-800-SAMSUNG (726-7864) to receive<br />
information about downloading upgrades and using a USB<br />
drive. Upgrades will be possible by connecting a USB drive<br />
to <strong>the</strong> USB port.<br />
When software is upgraded, video and audio settings<br />
you have made will return to <strong>the</strong>ir default (factory)<br />
settings,<br />
We recommend you write down your settings so that<br />
you can easily reset <strong>the</strong>m after <strong>the</strong> upgrade,<br />
HD Connection Guide<br />
Refer to this information when connecting external devices<br />
to <strong>the</strong> TV.<br />
Contact Samsung ..............................................................<br />
View this information when your TV does not work properly<br />
or when you want to upgrade <strong>the</strong> software. You can find<br />
information regarding our call centers and how to download<br />
products and software.
Advanced Features<br />
Enjoy photos and/or music files saved on a USB<br />
Mass Storage Class (MSO) device.<br />
{_ MENU iTrl -_ Application _ Media Play<br />
(USB) _ ENTERIZ_<br />
Connecting a USB Device<br />
1. Turn on your TV.<br />
2. Connect a USB device containing photo and/or music files to <strong>the</strong> USB jack on <strong>the</strong><br />
rear of <strong>the</strong> TV.<br />
3. When USB is connected to <strong>the</strong> TV, popup window appears. Then you can select<br />
Media Play.<br />
Using <strong>the</strong> Media Play Menu<br />
Viewing a Photo (or Slide Show)<br />
1. Press <strong>the</strong> MENU button. Press <strong>the</strong> A or T button to select<br />
Application, <strong>the</strong>n press <strong>the</strong> ENTERI_ button.<br />
2. Press <strong>the</strong> A or T button to select Media Play (USB), <strong>the</strong>n press <strong>the</strong><br />
ENTER E_ button.<br />
3. Press <strong>the</strong> A or T button to select <strong>the</strong> corresponding USB Memory<br />
Device, <strong>the</strong>n press <strong>the</strong> ENTERI_ button.<br />
The Media Play menu differs depending on <strong>the</strong> USB Memory<br />
Device connected to TV.<br />
Some devices may not be supported due to compatibility<br />
problems.<br />
4. Press <strong>the</strong> _1 or I_ button to select an icon (Photo, Music, Setup),<br />
<strong>the</strong>n press <strong>the</strong> ENTERI_ button.<br />
It might not work properly with unlicensed multimedia files.<br />
Need-to-Know List before using Media Play (USB)<br />
" Only alphanumeric characters must be used as a folder name or file name (photo, music).<br />
USB Drive<br />
TV Rear Panel<br />
" The file system only supports FAT16/32 (The NTFS file system is not supported) Certain types of USB Digital camera<br />
and audio devices may not be compatible with this TM<br />
" Media Play (USB) only supports <strong>the</strong> USB Mass Storage Class device (MSC). MSC is a Mass Storage Class Bulk-Only<br />
Transport device. Examples of MSC are Thumb drives and Flash Card Readers (Both USB HDD and HUB are not<br />
supported.)<br />
" Before connecting your device to <strong>the</strong> TV, please back up your files to prevent <strong>the</strong>m from damage or loss of data.<br />
SAMSUNG is not responsible for any data file damage or data loss.<br />
" Please connect directly to <strong>the</strong> USB port of your TV. If you are using a separate cable connection, <strong>the</strong>re may be a USB<br />
Compatibility problem.<br />
English 25
Advanced Features<br />
" Only MP3 and JPEG file formats are supported.<br />
. The Media Play (USB) mp3 format only supports music files with a high sampling frequency (32 kHz, 44.1 kHz, or 48<br />
kHz).<br />
" We recommend <strong>the</strong> sequential jpeg format.<br />
" Do not disconnect <strong>the</strong> USB device while it is loading.<br />
" MTP (Media Transfer Protocol) is not supported.<br />
" The playing duration of an mp3 file may be displayed as "00:00:00" if its playing time information is not found at <strong>the</strong><br />
start of <strong>the</strong> file.<br />
" The higher <strong>the</strong> resolution of <strong>the</strong> image, <strong>the</strong> longer it takes to display on <strong>the</strong> screen.<br />
" The Photo or Music List displays up to 300 folders or files.<br />
" Loading may take some time depending on <strong>the</strong> size of <strong>the</strong> file.<br />
" MP3 files with DRM that have been downloaded from a non-free site cannot be played.<br />
" Digital Rights Management (DRM) is a technology that supports <strong>the</strong> creation of content, distribution and management<br />
of <strong>the</strong> content in an integrated and comprehensive way, including <strong>the</strong> protection of <strong>the</strong> rights and interests of <strong>the</strong><br />
content providers, <strong>the</strong> prevention of <strong>the</strong> illegal copying of contents, as well as managing billings and settlements.<br />
" The power-saving mode of some external hard disk drives may be released automatically when connected to <strong>the</strong> TV.<br />
" If a USB extension cable is used, <strong>the</strong> USB device may not be recognized or <strong>the</strong> files on <strong>the</strong> device may not be read.<br />
" If a USB device connected to <strong>the</strong> TV is not recognized, <strong>the</strong> list of files on <strong>the</strong> device is corrupted or a file in <strong>the</strong> list is<br />
not played, connect <strong>the</strong> USB device to <strong>the</strong> PC, format <strong>the</strong> device and check <strong>the</strong> connection.<br />
" If a file deleted from <strong>the</strong> PC is still found when Media Play is run, use <strong>the</strong> "Empty <strong>the</strong> Recycle Bin" function on <strong>the</strong> PC<br />
to permanently delete <strong>the</strong> file.<br />
Photos<br />
Viewing a Photo (or Slide Show)<br />
1. Press <strong>the</strong> _NFO button to display <strong>the</strong> option View, Start Slide Show,<br />
Delete, Delete All, Deselect All.<br />
2. Press <strong>the</strong> A or T button to select Start Slide Show <strong>the</strong>n press <strong>the</strong><br />
ENTER I_ button.<br />
During <strong>the</strong> slide show, files are displayed in order from <strong>the</strong><br />
currently shown file.<br />
MP3 files can be automatically played during <strong>the</strong> Slide Show<br />
if <strong>the</strong> Default Background Music is set to On. To enable this<br />
function, MP3 files and o<strong>the</strong>r photo files must be located in <strong>the</strong><br />
same folder on <strong>the</strong> USB Memory Device.<br />
Press <strong>the</strong> _NFO button during <strong>the</strong> slide show to set <strong>the</strong> following options Slide Show Speed, Background Music,<br />
Background Music Setting, List. Press <strong>the</strong> A or T button to select <strong>the</strong> option, <strong>the</strong>n press <strong>the</strong> ENTERI_ button.<br />
- After setting <strong>the</strong> option press <strong>the</strong> ENTERE_ button to make a change.<br />
Press <strong>the</strong> INFO button during <strong>the</strong> play <strong>the</strong> photo files to set <strong>the</strong> following options Start Slide Show, Zoom, Rotate,<br />
List. Press <strong>the</strong> A or T button to select <strong>the</strong> option, <strong>the</strong>n press <strong>the</strong> ENTERI_ button.<br />
- After setting <strong>the</strong> option press <strong>the</strong> ENTERI_ button to make a change.<br />
6 English
Music<br />
Using <strong>the</strong> MP3 List<br />
Folder icon<br />
Music list icon<br />
Move to <strong>the</strong> previous folder stage icon<br />
Press _ (nEW) or _ (FF)buttons to change pages.<br />
The selected file is displayed on <strong>the</strong> top with its playing time.<br />
1. To select all files or a file, press <strong>the</strong> _NFO button to display <strong>the</strong> Music<br />
menus.<br />
Press <strong>the</strong> ENTERI:_ button to select Play (or Play Selected File),<br />
Repeat Music, Delete (or Delete Selected File), Delete All or<br />
Deselect All.<br />
2. Press <strong>the</strong> A or • button to move to an icon, <strong>the</strong>n press <strong>the</strong><br />
ENTER E_ button.<br />
Pressing <strong>the</strong> ENTERI:_ button over a musical note icon immediately<br />
plays <strong>the</strong> music file.<br />
Pressing <strong>the</strong> ENTER_ button over a folder icon shows <strong>the</strong> music<br />
files included in <strong>the</strong> folder.<br />
III Play: Select to play MP3 files.<br />
This menu only shows files with <strong>the</strong> MP3 file extension. Files with o<strong>the</strong>r file extensions are not displayed, even if<br />
<strong>the</strong>y are saved on <strong>the</strong> same USB device.<br />
To adjust <strong>the</strong> music volume, press <strong>the</strong> --VOL+ button on <strong>the</strong> remote control. To mute <strong>the</strong> sound, press <strong>the</strong><br />
MUTE button on <strong>the</strong> remote control.<br />
Ill Repeat Music (On / Off): Select to repeatedly play MP3 files in <strong>the</strong> current folder.<br />
Playing Music<br />
• Only displays files with <strong>the</strong> MP3 file extension. O<strong>the</strong>r file extensions are not displayed, even if <strong>the</strong>y are saved on <strong>the</strong> same<br />
USB device.<br />
• If <strong>the</strong> sound is strange when playing MP3 files, adjust <strong>the</strong> Equalizer and SRS TruSurround HD in <strong>the</strong> Sound menu. (An<br />
oveFmodulated MP3 file may cause a sound problem.)<br />
• Music function information icons<br />
Repeat Music is On.<br />
Repeat Music is Off.<br />
_ When pressing <strong>the</strong> Fcq (Play)/ _T1 (Pause) button on <strong>the</strong> remote control while music is playing.<br />
When press ng <strong>the</strong> _q (Stop) button on <strong>the</strong> remote control, <strong>the</strong> music stops.<br />
English 27
Advanced Features<br />
Setup ...........................................................................................................................................................................<br />
Using <strong>the</strong> Setup Menu<br />
Slide Show Speed: Select to control <strong>the</strong> slide show speed. You can<br />
select Fast, Normal or Slow.<br />
m Background Music: Select to determine whe<strong>the</strong>r to play an MP3 file<br />
during a slide show. You can select Music On or Music Off.<br />
m Background Music Setting: While a slide show is in progress, use<br />
<strong>the</strong> Background Music Setting to select a music file to listen to.<br />
Select an MP3 file as <strong>the</strong> background music.<br />
m<br />
Repeat Music: Select to determine whe<strong>the</strong>r to repeat playing <strong>the</strong><br />
music when all MP3 files in <strong>the</strong> current folder have been played.<br />
m Screen Saver: Select to set <strong>the</strong> waiting time before <strong>the</strong> screen saver appears. The screensaver will appear when no<br />
button is pressed for 4 hours, 8 hours and 10 hours.<br />
Ill Safe Remove: You can remove <strong>the</strong> device safely from <strong>the</strong> TV<br />
Playing <strong>the</strong> selected photos / music files<br />
• Press <strong>the</strong>Yellow button.<br />
• Repeat <strong>the</strong> above operation to select desired photos / music files.<br />
Selected photos or files are marked with <strong>the</strong> symbol ,,/. To cancel a selection, press <strong>the</strong> Yellow button again.<br />
• Press <strong>the</strong> FCq (Play)/ ENTERI_ button to play <strong>the</strong> selected photos or files.<br />
8 English
O<strong>the</strong>r Information<br />
Attaching <strong>the</strong> Blanking Bracket<br />
When installing <strong>the</strong> TV onto a wall, attach <strong>the</strong> Blanking Bracket as shown. .. o_oo_ooo<br />
Installing <strong>the</strong> Wall Mount Kit<br />
The wall mount kit (sold separately) allows you to mount <strong>the</strong> TV on <strong>the</strong> wall.<br />
For detailed information on installing <strong>the</strong> wall mount, see <strong>the</strong> instructions provided with <strong>the</strong> wall mount. Contact a technician for<br />
assistance when installing <strong>the</strong> wall mount bracket. Samsung Electronics is not responsible for any damage to <strong>the</strong> product or<br />
injury to yourself or o<strong>the</strong>rs if you elect to install <strong>the</strong> TV on your own.<br />
Wail Mount Kit Specifications (VESA)<br />
The wall mount kit is not supplied, but sold separately.<br />
Install your wall mount on a solid wall perpendicular to <strong>the</strong> floor. When attaching to o<strong>the</strong>r building materials, please contact<br />
your nearest dealer. If installed on a ceiling or slanted wall, it may fall and result in severe personal injury.<br />
NOTE<br />
* Standard dimensions for wall mount kits are shown in <strong>the</strong> table below.<br />
* When purchasing our wall mount kit, a detailed installation manual and all parts necessary for assembly are provided.<br />
* Do not use screws that do not comply with <strong>the</strong> VESA standard screw specifications.<br />
* Do not use screws that are longer than <strong>the</strong> standard dimension or do not comply with <strong>the</strong> VESA standard screw<br />
specifications. Screws that are too long may cause damage to <strong>the</strong> inside of <strong>the</strong> TV set.<br />
* For wall mounts that do not comply with <strong>the</strong> VESA standard screw specifications, <strong>the</strong> length of <strong>the</strong> screws may differ<br />
depending on <strong>the</strong> wall mount specifications.<br />
* Do not fasten <strong>the</strong> screws too strongly; this may damage <strong>the</strong> product or cause <strong>the</strong> product to fall, leading to personal<br />
injury. Samsung is not liable for <strong>the</strong>se kinds of accidents.<br />
* Samsung is not liable for product damage or personal injury when a non-VESA or non-specified wall mount is used or<br />
<strong>the</strong> consumer fails to follow <strong>the</strong> product installation instructions.<br />
* Do not mount <strong>the</strong> TV at more than a 15 degree tilt.<br />
* Always use two people to mount <strong>the</strong> TV to a wall.<br />
English 29
O<strong>the</strong>r Information<br />
ii_i_i _{@i_{_ _i ____ ____ __}_{_ ___i!{i _!}_ i_ {{{ @<br />
LCD-TV<br />
19-22<br />
75 X 75<br />
100X 100<br />
23-29 200 X 100<br />
30-40 200 X 200<br />
46-55 400 X 400<br />
57-65 600 X 400<br />
70-80 800 X 400<br />
80- 1400 X 800<br />
//_ Do electric not install shock. your Wall Mount Kit while your TV is turned on, It may result in personal injury due to<br />
The Kensington Lock is not supplied by Samsung. It is a device used to<br />
physically fix <strong>the</strong> system when using it in a public place. The appearance and<br />
locking method may differ from <strong>the</strong> illustration depending on <strong>the</strong> manufacturer.<br />
Refer to <strong>the</strong> manual provided with <strong>the</strong> Kensington Lock for additional<br />
information on proper use.<br />
Please find a "_" icon on <strong>the</strong> rear of <strong>the</strong> TV. A Kensington slot is beside<br />
<strong>the</strong> "_" icon,<br />
To lock <strong>the</strong> product, follow <strong>the</strong>se steps:<br />
1. Wrap <strong>the</strong> Kensington lock cable around a large, stationary object such as<br />
desk or chair.<br />
2. Slide <strong>the</strong> end of <strong>the</strong> cable with <strong>the</strong> lock attached through <strong>the</strong> looped end<br />
of <strong>the</strong> Kensington lock cable.<br />
3. Insert <strong>the</strong> locking device into <strong>the</strong> Kensington slot on <strong>the</strong> product O.<br />
4. Lock <strong>the</strong> lock.<br />
These are general instructions, For exact instructions, see <strong>the</strong> User manual supplied with <strong>the</strong> locking device.<br />
The locking device has to be purchased separately.<br />
The location of <strong>the</strong> Kensington slot may be different depending on <strong>the</strong> TV model.<br />
0 English<br />
M4<br />
M6<br />
M8<br />
Caution: Pulling, pushing, orclimbing on<strong>the</strong>TVmaycause <strong>the</strong>TVtofall.Inparticular, ensure yourchildren<br />
donothangover ordestabilize <strong>the</strong>TV.Doing somaycause <strong>the</strong>TVtotipover, causing serious injuries or<br />
death. Followallsafety precautions provided in<strong>the</strong>included Safety Flyer withyourTV,Foradded stability<br />
andsafety, youcanpurchase andinstall <strong>the</strong>anti falldevice asdescribed below,<br />
The TV-Holder Kit (Sold Separately):<br />
The parts below are included in <strong>the</strong> TV Holder kit. In addition, you need to provide a wood screw, screw and molly, or o<strong>the</strong>r screw<br />
appropriate for <strong>the</strong> wall or cabinet you intend to secure <strong>the</strong> Td-Holder string to. We recommend a size M4xL20 wood screw.<br />
Installing <strong>the</strong> rV-Holder<br />
1. Remove <strong>the</strong> screw attached to <strong>the</strong> back of your TV, and <strong>the</strong>n connect <strong>the</strong> TV-Holder to <strong>the</strong> TV with <strong>the</strong> screw included in<br />
<strong>the</strong> TV-Holder Kit that is designated for your T_.<br />
2.<br />
8,<br />
Make sure to use only <strong>the</strong> appropriate supplied screw. If you use a different screw, you can damage your TV.<br />
Firmly fasten <strong>the</strong> screw you provided (size M4xL20 or similar) to <strong>the</strong> wall or cabinet where <strong>the</strong> TV is to be installed.<br />
If you fasten <strong>the</strong> screw to <strong>the</strong> wall, we recommend you drive <strong>the</strong> screw into a stud. If that is not possible, use a<br />
molly to anchor <strong>the</strong> screw.<br />
Tie <strong>the</strong> TV-Holder cord to <strong>the</strong> screw fastened on <strong>the</strong> wall or cabinet so that <strong>the</strong> TV is fixed. See <strong>the</strong> illustrations below.<br />
Install <strong>the</strong> TV close to <strong>the</strong> wall so that it does not fall.<br />
When attaching <strong>the</strong> TV-Holder cord to <strong>the</strong> wall, tie <strong>the</strong> cord level with <strong>the</strong> ground or slanted downwards for safety<br />
purposes,<br />
Check <strong>the</strong> cord occasionally to make sure it is secure.<br />
Before moving <strong>the</strong> TV, separate <strong>the</strong> connected cord first.<br />
4. Verify all connections are properly secured, Periodically check <strong>the</strong> connections for any sign of fatigue or failure. If you have<br />
any doubt about <strong>the</strong> security of your connections, contact a professional installer.<br />
To purchase <strong>the</strong> rV-Holder Kit, contact Samsung Customer Care<br />
- In <strong>the</strong> United States: 1-800-SAMSUNG (1-800-726-7864)<br />
- In Canada: 1-800-SAMSUNG (1-800-726-7864)<br />
English 31
O<strong>the</strong>r Information<br />
if <strong>the</strong> TV seems to have a problem, first try this list of possible problems and solutions, if none of <strong>the</strong>se troubleshooting tips<br />
apply, visit "www.samsung.com," <strong>the</strong>n click on Support, or call Samsung customer service at 1-800-SAMSUNG.<br />
poor picture Eirstof all, please perform <strong>the</strong> Picture Test and confirm that your W is properly displaying <strong>the</strong> test image,<br />
(goto MENU _Support _Self Diagnosis 7Picture Test)(p. 24)<br />
If<strong>the</strong> test image is properly displayed, <strong>the</strong> poor picture may be caused by <strong>the</strong> source or signal.<br />
The TV imagedoes not look as good as it • Ifyou have an analog cable/satellite box, upgrade to an HD digital set top box. Use HDMI or<br />
did in <strong>the</strong> store. Component cables to deliver HD (highdefinition) picture quality.<br />
• Cable/Satellite subscribers: Try HD stations from <strong>the</strong> channel line up.<br />
• Antenna connection: TryHD stations after performing Auto program.<br />
Many HD channels are up scaled from SD(Standard Definition) contents.<br />
• Adjust tile Cable/Sat box video output resolution to 1080i or 720p.<br />
The picture is distorted: macro block error, • Compression of video contents may cause picture distortion, especially in fast moving pictures such<br />
small block, dots, pixelization, as sports and action movies.<br />
• Low signal levelcan cause picture distortion. Ttqis isnot aW problem.<br />
• Mobile phones used close to <strong>the</strong> TV (cca up to lm) may cause noise in picture on analog and digital<br />
T_<br />
Color is wrong or missing. • Ifyou're using Component connection, make sure tlqecomponent cables are connected to <strong>the</strong><br />
correct jacks. Incorrect or loose connections may cause color problems or a blank screen.<br />
There is poor color or brightness. • Adjust <strong>the</strong> Picture options in <strong>the</strong> TV menu. (go to Picture mode / Color / Brightness / Sharpness)<br />
(p. 16)<br />
• Adiust Energy Saving option in <strong>the</strong> Setup menu. (p. 16)<br />
• Try resetting tlqepicture to view <strong>the</strong> default picture settings. (go to MENU - Picture - Picture Reset)<br />
(p. 18)<br />
Ttlere is adotted lineon <strong>the</strong> edge of <strong>the</strong> • If<strong>the</strong> picture size is set to Screen Fit, change it to 16:9 (p. 17).<br />
screen. • Change cable/satellite box resolution.<br />
Ttle picture is black and white. • Ifyou are using an AV composite input, connect <strong>the</strong> video cable (yellow)to <strong>the</strong> Green jack of<br />
component input 1on <strong>the</strong> TM<br />
Wtlen cllanging channels, tile picture • Ifconnected to a cable box, please try to reset it. (reconnect <strong>the</strong> AC cord and wait until <strong>the</strong> cable box<br />
freezes or is distorted or delayed, reboots. It maytake up to 20 minutes)<br />
• Set <strong>the</strong> output resolution of <strong>the</strong> cable box to 1080i or 72%.<br />
Sound Rroblem Eirstof all, please perform <strong>the</strong> Sound Test to confirm that your TV audio is properly operating.<br />
(goto MENU- Suppor_- Self Diagnosis : Sound Test)(p. 24)<br />
If<strong>the</strong> audio is OK,<strong>the</strong> sound problem may caused by <strong>the</strong> source or signal.<br />
There is no sound or <strong>the</strong> sound istoo low • Pleasecheck <strong>the</strong> volume of <strong>the</strong> device (Cable/Sat Box, DVD, Blu-ray etc) connected to your T_<br />
at maximum volume.<br />
Ttqepicture is good but <strong>the</strong>re is no sound. • Set <strong>the</strong> Speaker Select option to TV Speaker in tlqe Sound menu (p. 20).<br />
• Ifyou are using an external device, make sure <strong>the</strong> audio cables are connected to <strong>the</strong> correct audio<br />
input jacks on <strong>the</strong> T_<br />
• Ifyou are using an external device, check <strong>the</strong> device's audio output option (ex. you may need to<br />
change your cable box's audio option to HDMIwhen you have a HDMI connected to your TV).<br />
• Ifyou are using a DVI to HDMI cable, a separate audio cable isrequired.<br />
• Ifyour W has a headphone jack, make sure <strong>the</strong>re is nothing plugged into it.<br />
• Reboot <strong>the</strong> connected device by reconnecting <strong>the</strong> device's power cable.<br />
Ttqespeakers are making an inappropriate • Check cable connections. Make sure a video cable is not connected to an audio input.<br />
noise. • For antenna or Cable connections, check <strong>the</strong> signal strength. Low signallevel maycause sound<br />
distorfion.<br />
2 English<br />
• Perform tlqeSound Test as explained above.
iii iiiiiii!iiiiiiiiiiiiiiiiiiiiiiiiiiiiiiiiiiiiiiiiiiiiiiiiiiiiiiiiiiiiiiiiiii<br />
No Picture, No Video<br />
The TVwon't turn on. • Make sure <strong>the</strong> AC power cord is securely plugged in to <strong>the</strong> wall outlet and <strong>the</strong> T_<br />
• Make sure <strong>the</strong> wall outlet is working.<br />
• Try pressing <strong>the</strong> POWER button on <strong>the</strong> TV to make sure <strong>the</strong> problem is not <strong>the</strong> remote. If<strong>the</strong> TV turns<br />
on, referto "Remote control does not work" below.<br />
The TVturns off automatically. • Ensure <strong>the</strong> Sleep Timer is set to Off in <strong>the</strong> Setup menu (p. 20).<br />
• Ifyour PC is connected to <strong>the</strong> T_, check your PC power settings.<br />
• Make sure <strong>the</strong> AC power cord is plugged in securelyto <strong>the</strong> wall outlet and <strong>the</strong> T_<br />
• When watching TV from an antenna or cable connection, <strong>the</strong> TVwill turn off after 10 - 15 minutes if<br />
<strong>the</strong>re is no signal.<br />
There is no picture/video. • Check cable connections (removeand reconnect al cables connected to <strong>the</strong> TVand external<br />
devices).<br />
• Set your externaldevice's (Cable/Sat Box, DVD, Blu-ray etc) video outputs to match <strong>the</strong> connections<br />
RF(Cable/Antenna)Connection<br />
to <strong>the</strong> TV input. For example, if an external device's output is HDMI, it should be connected to an<br />
HDMI input on <strong>the</strong> TV.<br />
• Make sure your connected devices are powered on.<br />
• Be sure to select <strong>the</strong> TV's correct source by pressing <strong>the</strong> SOURCE button on <strong>the</strong> remote control.<br />
• Reboot <strong>the</strong> connected device by reconnecting <strong>the</strong> device's power cable.<br />
The TV isnot receiving all channels. • Make sure <strong>the</strong> coaxial cane is connected securely.<br />
• Pleasetry Auto Program to add available channels to <strong>the</strong> channel 1st. Go to MENU - Channel -<br />
Auto Program <strong>the</strong>n select Auto and make sure <strong>the</strong> correct Cable TV signal type is set in <strong>the</strong> menu.<br />
There are 3 options (STD, HRC and IRC) (p. 14).<br />
• Verify <strong>the</strong>Antenna is positioned correctly.<br />
No Caption on digital channels. • Check Caption Setup menu. Try changing Caption Mode Service1 to OO1 (p. 22).<br />
• Some channels may not have caption data.<br />
The picture is distorted: macro block error, • Compression of video contents may cause picture distortion, especiallywith fast moving pictures<br />
smal block, dots, pixeization, such as sports and action movies.<br />
• A low signal can cause picture distortion. This is not aTV problem.<br />
PC Connection<br />
A "Mode Not Supported" message • Set your PC's output resolution so it matches <strong>the</strong> resolutions supported by <strong>the</strong> TV (p. 12).<br />
appears.<br />
"PC" isalways shown on <strong>the</strong> source list, • This is normal; "PC" is alwaysshown on <strong>the</strong> source list, regardless of whe<strong>the</strong>r a PC isconnected.<br />
even if a PC is not connected.<br />
Thevideo isOK but <strong>the</strong>re is no audio. • Ifyou are using an HDMI connection, check <strong>the</strong> audio output setting on your PC.<br />
O<strong>the</strong>rs<br />
Purple/green rolling horizontal bars and • Remove<strong>the</strong> left and right audio connections from <strong>the</strong> set-top-box. If<strong>the</strong> buzzing stops, this indicates<br />
buzzing noise from <strong>the</strong> TV speakers with that <strong>the</strong> set-top-box has a grounding issue. Replace <strong>the</strong> Component video cables with an HDMI<br />
Component cable connection, connection.<br />
The picture won't display infull screen. • HD channels will have black bars on ei<strong>the</strong>r side of <strong>the</strong> screen when displaying up scaled SD (4:3)<br />
contents.<br />
• Black bars on <strong>the</strong> Top & Bottom will be shown on movies that have aspect ratios different from your<br />
TV.<br />
• Adjust <strong>the</strong> picture size options on your external device or TV to full screen.<br />
The remote control does not work. • Replace <strong>the</strong> remote control batteries with <strong>the</strong> poles (+/-) in<strong>the</strong> right direction.<br />
• Clean <strong>the</strong> sensor's transmission window on <strong>the</strong> remote.<br />
• Try pointing <strong>the</strong> remote directly at <strong>the</strong> TV from 5--6 feet away.<br />
The cable/set top box remote control • Program <strong>the</strong> Cable/Set remote control to operate <strong>the</strong> T_ Refer to <strong>the</strong> Cable/Set user manual for <strong>the</strong><br />
doesn't turn <strong>the</strong> TV on or off, or adjust <strong>the</strong> SAMSUNG TV code.<br />
volume.<br />
English 33
O<strong>the</strong>r Information<br />
A "Mode Not Supported" message • Check <strong>the</strong> supported resolution of <strong>the</strong> T_,and adjust <strong>the</strong> external device's output resolution<br />
appears, accordingly. Refer to <strong>the</strong> resolution settings on page 12 of this manual.<br />
Caption on TV menu isgreyed out. • Caption can not be sebcted in <strong>the</strong> TV menu when connected via HDMIor Component (p. 22).<br />
• Caption must be activated on <strong>the</strong> external device (p. 22).<br />
There is a plastic smell from <strong>the</strong> T_ • This smell is normal and will dissipate over time.<br />
The TV Signal Strength isunavailable in • This function is only availablewith digital channels from an Antenna / RF / Coax connection (p. 24).<br />
<strong>the</strong> Self Diagnostic Test menu.<br />
The TV istilted to <strong>the</strong> side. • Remove<strong>the</strong> base stand from <strong>the</strong> TV and reassemble it.<br />
The channel menu is greyed out • The Channel menu is only availablewhen <strong>the</strong> TV source is selected.<br />
(unavailable).<br />
Your settings are lost after 30 minutes or • If<strong>the</strong> TV is in <strong>the</strong> Store Demo mode, it will reset audio and picture settings every 30 minutes. Change<br />
every time <strong>the</strong> TV is turned off. <strong>the</strong> settings from Store Demo mode to Home Use mode in<strong>the</strong> Plug & Play procedure. Press<strong>the</strong><br />
You have intermittent loss of audio or • Check <strong>the</strong> cable connections and reconnect <strong>the</strong>m.<br />
SOURCE button to select "IV mode, and go to MENU -_ Setup -_ Plug & Play -_ ENTER_ (p. 8).<br />
video. • Loss of audio orvideo can be caused by usingoverly rigid or thick cables. Make sure <strong>the</strong> cables are<br />
flexible enough for long term use. Ifmounting <strong>the</strong> TV to a wall, we recommend using cables with 90<br />
degree connectors.<br />
You see small particles when you look • This is part of <strong>the</strong> product's design and is not a defect.<br />
closely at <strong>the</strong> edge of <strong>the</strong> frame of <strong>the</strong> T_<br />
POP OV's internal banner ad) appears on • Select Home Use under Plug & Play mode. For details, referto Plug & Play Feature (p. 8).<br />
<strong>the</strong> screen.<br />
This TFT LCD panel uses a panel consisting of sub pixels which require sophisticated technology to produce. However,<br />
<strong>the</strong>re may be a few bright or dark pixels on <strong>the</strong> screen. These pixels will have no impact on <strong>the</strong> performance of <strong>the</strong><br />
product.<br />
! Storage and Maintenance<br />
4 English
SrS_ TruSurround HD,SRSand_ symbol aretrademarks ofSRSLabs, Inc.<br />
TruSurroundHD TruSurround HD technology is incorporatedunder license from SRS Labs, Inc,<br />
[_ DOLBY<br />
D|BITAL ]<br />
Open Source License Notice<br />
Manufactured under license from Dolby Laboratories. Dolby and <strong>the</strong> double-D symbol are<br />
trademarks of Dolby Laboratories.<br />
In <strong>the</strong> case of using open source software, Open Source Licenses are available on <strong>the</strong> product menu.<br />
Open Source License Notice is written only English.<br />
Display Resolution 1920 x 1080<br />
EnvironmentalConsiderations<br />
Operating Temperature 50°F to 104°F (10°C to 40°C)<br />
Operating Humidity 10% to 80%, non-condensing<br />
Storage Temperature -4°F to 113°F (-20°C to 45°C)<br />
Storage Humidity 5% to 95%, non-condensing<br />
Stand Swivel(Left / Right) -20°- 20°<br />
Screen Size 40 inches<br />
(Diagonal) (40.0 inches measured diagonally)<br />
Sound<br />
10WX2<br />
38.2 X 3.1 X 23.3 inches<br />
(970.0 X 78.6 X 591.3 mm)<br />
Withstand 38.2 X 9.5 X 25.7 inches<br />
(970.0 X 240.0 X 653.0 mm)<br />
Weight<br />
Without Stand 32.0 Ibs (14.5 kg)<br />
With Stand 38.4 Ibs (17.4 kg)<br />
Design and specifications are subject to change without prior notice.<br />
This device is a Class B digital apparatus.<br />
For information about power supply, and more about power consumption, refer to <strong>the</strong> label attached to <strong>the</strong> product.<br />
English 35
O<strong>the</strong>r Information<br />
m Front view / Side view<br />
m Jack panel detail / Rear view<br />
° T1 l)<br />
I*_ e I<br />
1<br />
® ® _ @ ®® [_] ..............................<br />
_.=.._ @_<br />
I--o--I<br />
(Unit: inches)<br />
(Unit: inches)<br />
NOTE: All drawings are not necessarily to scale. Some dimensions are subject to change without prior notice. Refer to <strong>the</strong><br />
dimensions prior to performing installation of your TV. Not responsible for typographical or printed errors.<br />
@ 2010 Samsung Electronics America, Inc<br />
6 English
A F R<br />
Antenna 14 FAV_CHbutton 7, 14 Remote Control 7<br />
AUDIO OUT 11 Film Mode 18 Repeat Music 27<br />
Auto Adjustment 18 Fine Tune 16 Rotate 26<br />
Auto Volume 19 Flesh Tone 17<br />
Frequency 12 S<br />
B Select All 15<br />
................................................................................................................................................................................<br />
H<br />
Background Music 28 .................................................................................................................................................................<br />
Self Diagnosis 24<br />
Balance L/R 19 HDMI 9 Sharpness 16<br />
Batteries 7 Home Theater 11 Signal Strength 24<br />
Black Tone 17 Sleep Timer 20<br />
Blanking Bracket 29 I Slide Show 25<br />
Brightness 16 Software Upgrade 24<br />
Installation Space 2<br />
Source List 13<br />
Speaker Select 20<br />
C L Specifications 35<br />
Change PIN 22<br />
Channel Menu 14 Language 22 Standby mode 6<br />
License 35 Symbol 3<br />
Clock 20<br />
Color Tone 17<br />
Component 10<br />
Connecting to a PC 12 Media Play 25 Timer 20<br />
Connecting to an Audio Device 11 Melody 23 Tools 3<br />
Memorizing Channels 14 Troubleshooting 32<br />
D Mono 19 TV Speaker 20<br />
DIGITAL AUDIO OUT 11<br />
Music 27<br />
D-sub 12 U<br />
Dynamic 16 N USB Drive 25<br />
Dynamic Contrast 17 Navigate 13<br />
E<br />
Edit Name 13<br />
Editing Channels 15<br />
Energy Saving 23<br />
Equalizer 19<br />
External Speaker 20<br />
M<br />
O<br />
ON/OFF button 7<br />
Optimal resolution 12<br />
P<br />
Photos 26<br />
Picture Size 17<br />
Plug & Play 8<br />
Power Indicator 6<br />
T<br />
V<br />
Volume<br />
W<br />
Wall Mount 29<br />
Warm 17<br />
White Balance 17<br />
English 37
Lasfigurasy las ilustracionesde esteManualdel usuariose propordonancomo referendasolamentey puedenset diferentesdel aspecto<br />
realdel producto.Eldise_oy las especifbadones del productoestan sujetosa cambios sin previo avbo.<br />
'(_ Paraobtenermasinformad6nsobrelosterminosde h garantia,consulteh tarjetade garantia.<br />
LaspantalhsLCDconformatode pantallapanoramica(16:9,h relaci6nde aspectoancho:altode lapantalla)estandise_adasprincipalmenteparavisualizarvideosde<br />
movimbntodeformatopanoramico.Lasimagenes@benestarprincipalmentenel formatopanoramicoderelaci6n16:9,o ampliadaspara bnar lapantallasid modelo<br />
tbne estaopci6ny lasimagenesestanenmovimbntoconstante.Lavisualizaci6nde imagenesy graficosestatbosen lapantalla,comehs barrasoscurashterabs en<br />
programaci6ny videosdetelevisi6nen formatoestandarno ampliados,debelimitarseano masdd 5% deltbmpo totaldevbualizaci6ndd televisorpor semana.<br />
Asimismo,lavisualizaci6ndeotrasimagenesestaticasy de texto,comoinformesbursatibs,pantallasde videojuegos, Iogotiposcomerciabs,sitiosweb o graficosy patrones<br />
de ordenador,sedebelimitarentodos lostelevisoresaltbmpo especificadomasarriba.Lavisualizaci6ndeimagenesestaticasquesupereloslimitesdelasinstrucciones<br />
anteriorespuedeproducirunenvejecimbntodesigualde laspantalhsLCD,Io que provocarauna reproducci6nsuperpuestasutilpero permanentede laimagendela LCD.<br />
Paraevitarlo,varielaprogramaci6ny lasimagenesy, sobretodo,visualiceimagenesen movimbntoatoda pantalla,no graficosestatbosnibarrasoscuras.Enmodelosde<br />
LODque ofrezcanopcionesparaeltama_iode laimagen,utiliceestoscontrobsparaver losdistintosformatoscomoimagenatoda pantalla.<br />
Tengacuidadoen lasebcci6ny duraci6ndelosformatosdetebvbi6n utilizadospara lavbualizaci6n.UnevenLODagingasa resultd formatselectionand use,aswellas<br />
burnedinimages,arenotcoveredbyyourSamsunglimitedwarranty.<br />
o DOOUMENTODEGARANTiALIMITADAPAPANORTEAMERIOADESAMSUNGELECTRONICS<br />
De acuerdocon losrequisitos,condidones,exdusionesy limitacionesde la Garantialimitadaoriginalsuministradacon los productosde SamsungElectronics<br />
(SAMSUNG),as[ como los requisitos,condidones,exdusionesy limitacionesinduidos en elpresentedocumento,SAMSUNGproporcionaraadidonalmente<br />
un serviciode reparaciOnde garantiaen EE.UU.para los productosde SAMSUNGadquiridosenCanada,yen Canadarespecto a los productosde<br />
SAMSUNGadquiridos en EE.UU.,para el periodo de garantiaespecificadooriginalmente,y s61opara elcomprador original.<br />
Las reparadonesen garantiadescritasanteriormentedeben realizarseen centrosde serviciot@nico autorizadosde SAMSUNG.Junto con estedocumento,<br />
se debepresentarun documentode garantia limitadaoriginaly una facturacon fecha como prueba decompra en elcentro de se_viciot@nico. Eltransporte<br />
a y desde elcentro de serviciot@nico esresponsabilidaddel comprador.Lascondidones cubbrtas se limitansolamentea defectosde fabricadOnen<br />
materialy mano de obra, y s61olos que se hayanproducidocon un uso normaldel producto.<br />
Exduidas,pero no limitadasa elias,se encuentranlas disposidones originabsespecificadaspara los servbiosa domidlio o enlas instaladonesde la<br />
empresa,tbmpos m_imos y minimosde reparaci6n,cambioso sustituciones,accesorios,opdones, actualizacionesoconsumibbs.<br />
Para conocerla ubicadOnde un centrode serviciot@nico autodzadode SAMSUNG,Ilameal nOmerogratuitoindicado:<br />
- In <strong>the</strong> UnitedStates : 1-800-SAMSUNG(1-800-726-7864)<br />
- In Canada : 1-800-SAMSUNG<br />
Evitemostrarenla pantallaimagenesfijas(comoarchivosde imagenesjpeg)oebmentoscon imagenesfijas(comeIogotiposdelos programasdetebvisi6nocon formato<br />
de imagen4:3,barrasde cotizacionesode notbiasenh parteinferiorde la pantalla,etc).Unavisual_zaci6n continuadade unaimagenfijapuedecrearimagenesfantasmas<br />
enla pantallaLOD,Ioc ]e afectaraa lacalidaddela imagen.Parareduciresterbsgo, sigaestasrecomendaciones:<br />
o Evitemostrarel mismocanaldetebvbi6n durantelargosperiodosdetbmpo.<br />
o Intenteversbmprelasimagenesenpantalhcompbta.<br />
o La reducci6ndelbrilloy dd contrasteayudaa prevenirlaaparici6ndela retenci6nde imagenes.<br />
o Utilicetodaslasfuncionesdd televisordise_iadasparareducirlaretenci6ndeimagenesy eldesgastedela pantalla;consulteelapartadocorrespondientedelmanual<br />
del usuarioparaobtenermasinformaci6n.<br />
Mantengaladistanciarequeridaentreelproductoy otrosobjetos(porejemplo,pare@s)paraasegurarh ventilaci6nadecuada.<br />
Encasecontrario,sepodriaproducirunincendioperun incrementode latemperaturaintemadel producto.<br />
'(_bs Ouando_ilice unsoporteo unmontajemural,uses61olaspiezasproporcionadaspor SamsungElectronics.<br />
" Siutilizapbzas proporcionadasperotrosfabrbantes,podriatenetprobbmascon elproductoo @tese podriacaercon elrbsgo de causarbsionespersonabs.<br />
'(_bs ElaspectopuedevariarsegOnelproducto.<br />
Tangacuidadoaltocareltelevisorporquealgunaspartespuedenestarcalbntes.<br />
4 pulgadas,_<br />
Espa_ol<br />
"[ 4 pulgadas<br />
I I<br />
_4 pulgadas<br />
,, [ 4 pulgadas<br />
]_4_P_Lga_dfs ......
©ontenido<br />
• Listado de caracteristicas ......................................... 4<br />
• Accesorios ................................................................ 4<br />
• Instale elsoporte ....................................................... 5<br />
• Aspecto general del panel de control ........................ 6<br />
• Aspecto general del mando a distancia ..................... 7<br />
• Conexi6n de una antena ........................................... 8<br />
• Plug & Play (configuraci6n inicial)............................... 8<br />
• Conexi6n a un dispositivo AV.................................... 9<br />
• Conexi6n a un dispositivo de audio ......................... 11<br />
• Conexi6n a un PC ................................................... 12<br />
• Cambio de la fuente de entrada .............................. 13<br />
• C6mo desplazarse pot los men0s ........................... 13<br />
• Men0 de canales .................................................... 14<br />
Visualizaci0nde canales 14<br />
Uso de los canales favorites 14<br />
Memorizaci6n de canales 14<br />
Edici0n de canales 15<br />
Otras funciones 15<br />
• Men0 de la imagen ................................................. 16<br />
Oambio del modo de imagen preseleccionado 16<br />
Ajuste de la configuraci6n de la imagen 16<br />
Oambio de las opciones de la imagen 16<br />
Ajuste del televisor con el ordenador 18<br />
• Men0 del sonido ..................................................... 19<br />
Oambio del modo de sonido preseleccionado 19<br />
Ajuste de la configuraci6n del sonido 19<br />
Oonfiguraci6n del sonido 19<br />
iCompruebe este s!mbo!o!<br />
• Men0 de configuraci6n ........................................... 20<br />
Configuraci6n de la hera 20<br />
Use del temporizador de desconexi6n 20<br />
Activaci6n y desactivaci6n del temporizador 20<br />
Programas de bloqueo 21<br />
Otras funciones 22<br />
Soluciones econ6micas 23<br />
• Men0 de asistenciatecnica ..................................... 24<br />
• Media Play .............................................................. 25<br />
Conexi6n de un dispositivo USB 25<br />
Uso del men0 Media Play 25<br />
• Instalaci6n del montaje mural .................................. 29<br />
• Bloqueo antirrobo Kensington ................................. 30<br />
• Fijaci6n del televisor a la pared ................................ 31<br />
• Soluci6n de problemas ........................................... 32<br />
Almacenamiento y mantenimiento 34<br />
• Licencia .................................................................. 35<br />
• Especificaciones ..................................................... 35<br />
• Dimensiones ........................................................... 36<br />
• [ndice ...................................................................... 37<br />
Nota<br />
Estafunci6nsepuedeutilizarpulsandoel Indicainformaci6nadicional.<br />
bot6nTOOLSdelmandoa distancia.<br />
®<br />
Guia paso a paso<br />
Consulte aqui las instrucciones para abrir el<br />
submen0 pertinente en la OSD (on screen<br />
display).<br />
Espaflol 3
IntroductiOn<br />
• Excelenteinterfazdigitaly capacidad de trabajoen red: ElsintonizadordigitalHD incorporado permitever las emisionesHD que no<br />
exigenuna suscripcionsin que sea necesariodisponer de un receptor de televisionpor cabldsatelite (decodificador),<br />
• Media Play: Permitereproduciralgunosarchivos de musicae imageriesguardadosen un dispositivoUSB(pag. 25).<br />
• Autodiagnostico: Permitecomprobarsi laimageny el sonidofuncionannormalmente(pag, 24).<br />
Aseguresede que los siguienteselementosse incluyencon eltelevisor de pantallaLOD.Si faltaalguno, pongase en contacto con su<br />
distribuidor.<br />
Elcolor y la forma de los componentes puedenvariar segon los modelos,<br />
Cables de entrada (se venden per separado)<br />
Espaflol
Oonsulte laguiapara instalar elsoporte.<br />
Siga lospasos queseindban acontinuacion paraconectar eltebvbor alsoporte.<br />
Tornillos (M4 xL12) ........ 1_ ................. ,<br />
T_ Vbta superior<br />
(M4xL12)<br />
Sopo d ..... ago a I ..............................<br />
I<br />
__f}7___ Partefrontal<br />
Soporte-- ;-_i ........ : ,<br />
1. Conecte elsoporte de laguia conel soporte mediantelos cuatrotornillos(M4 x LI 2),tal como semuestra.<br />
-- - Tornillos(M4x L12)<br />
2. Con el televisorbvantado,conectelo al soporte,tal como se 3. Atomilb los dos tomibs (M4x L12)en laposicion @ y los<br />
muestra, otrosdos tomillos (M4 x LI 2) en la posicionO<br />
NOTA<br />
" Para realizarel montajedebe tener en cuenta cual es la parte frontaly cual la posteriordel soporte y el soporte de la guia.<br />
. Aseguresede que al menos dos personasbvanten y muevanel televisor.<br />
" Levanteel producto y apriete los tornillos. Siaprieta los tornillos sin bvantar el TV LCD, estese puede indinar hacia un lado.<br />
Espaflol 5
IntroductiOn<br />
Elcolor y la forma del producto puedenvariar segun el modelo,<br />
Altavoces<br />
Sensordelmando a distan:_a<br />
SOURCEE_<br />
MENU<br />
-VOL+<br />
VCHA<br />
"alcaaor de encenalac<br />
(b (Encendido) Enciendeo apagael televisor.<br />
Modo de espera<br />
Sensordelmandoadistancia Indicador deencendido<br />
° SOURCE_ MENU -VOk+ v CH A ,<br />
Elmandoa distanciadebe dirigirsehaciaestepunto del televisor.<br />
Cambiaentre todas las fuentesde entradadisponibles,Enel menuen pantalla,utiliceeste<br />
bot6ncomo Io hariacon el bot6n ENTERI_ del mandoa distancia,<br />
Muestraun menuen pantalla,la OSD(visualizaci6nen pantalla),de las funcionesdelTV,<br />
Ajustarel volumen,Enla OSD, utilicelos botones- VOL ÷ de igualmodo que los botones<br />
4 y I_ del mandoa distancia.<br />
Cambianlos canales,En laOSD, utilicelos botones V CH A de igualmodo que los botones<br />
T y Adel mandoa distancia.<br />
Parpadeay seapaga cuandose enciendeelaparatoy se iluminaen el modoen espera.<br />
No dejeeltelevisoren modo de esperadurante per[odoslargos de tiempo (cuandoestede vacaciones,por ejemplo),Aunqueesteapagado<br />
continuaconsumiendouna pequeflacantidadde energia,Serecomiendadesenchufarelcable de alimentaci6n.<br />
EspaBol
Encbndey apagaeltebvisor.<br />
Pulseparaaccederdirectamentea los<br />
canabs.<br />
Pulseestebot6nparasebcdonar canabs<br />
adicionabs(digitabs)emitidospor lamisma<br />
emisora.Forexample,to selectchannel"54-<br />
3", press"54",<strong>the</strong>n press"-" and "3".<br />
Ajustael volumen.<br />
Haceque aparezcala OSD.<br />
MuestraMedia Play(USB)(pag.25).<br />
Selecdonar rapidamente las funciones que se<br />
usan con mayor frecuenda.<br />
Vuelveal menuanterior.<br />
Botonesqueseutilizanenlos menus<br />
Listade canales,Media Play(USB),etc.<br />
Instalaci6n de las pilas (tamaOode las pilas: AAA)<br />
NOTA<br />
Muestray sebccionalasfuentesdevideo<br />
disponibbs(pag.13).<br />
Vuelveal canalanterior.<br />
Cortatemporalment elsonido.<br />
Oambia los canabs.<br />
Muestrala listade canabsenlapantalla<br />
(pag.14).<br />
Muestrala listade canabsfavoritosen la<br />
pantalla(pag.14).<br />
Muestrainformad6nen lapantalladel<br />
televisor.<br />
Sebccionalosebmentosdel men0en<br />
pantallay cambialosvaloresqueaparecen<br />
en elmenu.<br />
Sab del men0.<br />
MTS:Pressto choosestereo,monoor<br />
SeparateAudioProgram(SAPbroadcast)<br />
(pag.19).<br />
RSIZE:Selects<strong>the</strong>picturesize(pag.17).<br />
CO:Controls<strong>the</strong>captiondecoder<br />
(pag.22).<br />
" Utilice el mandoa distanda a menos de 7 metros (23 pies)del<br />
tebvisor.<br />
" Una luz muy brillantepuedeafectar al funcionambnto del mando a<br />
distanda. No Io utilice cerca de lucesfluorescenteso de neon.<br />
" Elcolor y la forma puedenvariar segun el modelo.<br />
Espaflol 7
Introducci0n<br />
Cuandoel televisorseenciendepot primeravez, los parametrosbasicosse iniciande forma automatica.<br />
Conexi0ndel cable de alimentaciony laantena.<br />
ada de alimentacbn<br />
AntenaVHF/UHF<br />
o<br />
Cuandoel televisorseenclendepot primeravez, una secuenciade indlcacionesen pantallapermiteconfigurar los parametrosbasicos.Pulse<br />
el boton POWERLb. Plug & Play solo esta disponiblecuando la fuenteEntrada estaconfiguradacome TV.<br />
Paravolver al pasoanterior, pulseel botch rojo.<br />
Seleccionde un _a_oms<br />
Seieccon ae<br />
Demo comercio o<br />
Uso domiciliarJo<br />
Seleccion ae una antena<br />
SelecciOnoe un canal<br />
Configuraciondel<br />
Modo de reloj<br />
Consu]tela Guia _e<br />
conexiOnHD<br />
Pulselos Do_onesA c v a con_Lnuaaonoulse elbot6n ENTER_.<br />
Se]eccionee] aloma deseado Dara]aOSD on screendisplay).<br />
Pulselos begones,q c _ a contLnuacLonoulse elbOtChENTER_.<br />
• Seleccioneelmode Uso domiciliario. Elmode Demo comercio<br />
se utluzaen os en_ornoscomerclales.<br />
o Recuperelaconfiguraclonae la unidaddesde Demo comercio<br />
a Uso domiciiiario ',es_anaarl:Pulseel Dotonaelvolumenael<br />
televisor.Cuandoyea]a OSDdelvo]umenmantengapulsadoel<br />
bOtChMENU durante5 segunao._<br />
Pulselos begonesA c v<br />
o Auto.<br />
Disfrute delTV. Puls elDo_on=_,'_=_I_.<br />
Si desea reJniciaresta funci6n...<br />
POWER<br />
a con_LnuacLon oulse elbot6n ENTER_. PermiteseleccionaAJre,Cable<br />
Pulselos bo_onesA c v a con_LnuacLon oulse elbot6n ENTER_. Seleccionelafuentedel<br />
canaaa Jedesea memorizar.AI configurarla fuentede la antenaen Cable, se muestraun pasoque<br />
e _)erm@aslglar valoresnumenco,_ %cuencias de los canales)a los canales.Paraobtener mas<br />
nformacion consulteCanal _ Prog. Auto pag. 14).<br />
Pulseel bOtChENTERI_ en cualcJlermemento para interrumpirel proceso de memorizacion.<br />
}onfigure el Modo Reloj au_oma_lcao manuaamen_e<br />
MENUrlT1_ Configuraci6n _ Plug & Play _ ENTERI_<br />
Espaflol<br />
• Auto Permiteseleccionarelmode DST Horanoae verano/ y lazonahoraria..<br />
,_ Manual: Permiteconfigurarmanualmen_ela heray la fecha actuales(p% 20).<br />
Semuestrael mode de conexlor oaraoD_eneruna mejorca]idadde pantal]aHD.
Conexiones<br />
Use de un cable HDMi o HDMI/DVi: Conexi6n HD (hasta 1080p)<br />
Pareconseguiruna meiercalidadde imagen HD esaconsejabb utilizerla conexBn HDMI.<br />
Dispositivosdisponibles:DVD,reproductorBlu-ray, receptorper cable HD, receptorper sateliteHD STB (decodificador)<br />
...................... ;......................... \<br />
HDMI (DVl} IN / DVlAUDO IN<br />
Cabe t_D_vll a D\/l_ (no suministrado}<br />
Cable de audio (no sum_l_st_ado)<br />
* Ouando se usauna conexion de cable HDMI/DVl,se debe conectar en el terminal HDMI (DVl} _Npare video, Esposibb<br />
que un reproductor de DVD,Blu-ray, receptor per cable HD o receptor per satelite HD STBnecesite un cable DVI-HDMI(de<br />
DVla HDMI)o un adaptador DVPHDMI(de DVla HDMI),Se necesita el terminal DVlAUDIO IN pare el sonido,<br />
* La imagenquizas no se muestrecorrectamente(o no se muestreen absoluto)o el audio puede que no funcione si se<br />
conecta al televisor un dispositivoexterno que utilizauna versi6n masantigua del mode HDMI. Entales cases, consulte al<br />
fabricantede] dispositivo extemo acerca de ]aversi6n HDMI y,siesta es antigua, soliciteuna actualizaci6n.<br />
* Debe adquirir uncable certificado HDMI, De Io contrario,la imagen puede no mostrarse o producirse un error de conexion,<br />
Espaflol 9
Conexiones<br />
Use de un cable de componentes (hasta 1080p) o audio/video (solo 480i)<br />
Dispositivosdisponibles:Reproductorde DVD,Blu-ray,decodificador,receptor pot sateliteSTB,VOR<br />
Roio Blanco Amarillo<br />
Paraobtener la mejorcalidad de imagen,se recomiendala conexion de componentes antes que la conexionA/V. i<br />
Use de una conexion de cable EX-Link<br />
Dispositivosdisponibles:Dispositivosexternosque admiten Ex-Link.<br />
i'<br />
0 Espa_ol<br />
EX_L_ItK:Oonectorsolo para servicio.
Uso de una conexion de cable optico (digital)<br />
Dispositivosdisponibles:sistemade audio digital,amplificador,sistemaHome TheaterDVD<br />
,##,.............................................................................................................................................................<br />
ii! _;_; ::_: :: :_ ;;_ ,<br />
' Rojo Blanco<br />
DIGITALAUDIO OUT (OPT CAL}<br />
o<br />
o<br />
o<br />
Cable 0ptico Ino suministrado/<br />
Cuandoun sistema de audio digital seconecta al terminal DIGITALAUDIO OUT (OPT CAL}, se reduce elvolumendel<br />
televisor y del sistema.<br />
Elaudio de 5,1canales estadisponible cuando el televisor seconecta a un dispositivo extemo que admite audio de 5,1<br />
canales,<br />
Cuandoel receptor (amplificadoro sistema HomeTheater DVD)estaencendido, se puedeo[r lasalida de sonido del<br />
terminal 6ptico del televisor.Cuando el televisorrecibe una senal DTV,enviael sonido de 5,1 canales al amplificadoro<br />
sistema HomeTheater DVD.Ouando lafuente es un componente digital,como un reproductor DVD/Blu-ray/receptorde<br />
cable o satelite(decodificador),y estaconectada al televisora travesde HDMI,solo seoye el sonido de 2 canales del<br />
amplificador o delsistema HomeTheater DVD,Si deseao[r el audio de 5,I canales, conecte el terminalde lasalidade<br />
audio digitaldel reproductor DVD/Blu-ray/decodificado#receptorpor sateliteSTB directamenteal amplificador o al sistema<br />
HomeTheater,<br />
Espa, iio,
Conexiones<br />
Use de cables HDMI/DVI o D-sub<br />
Modes de visualizaciOn(entradas D-Sub y HDMI/DVI)<br />
La resolucionOptimaes 1920 x 1080 a 60 Hz.<br />
IBM<br />
MAC<br />
VESA CVT<br />
VESA DMT<br />
VESA GTF<br />
VESA DMT/DTV CEA<br />
NOTA<br />
640 x 350<br />
720 x 400<br />
640 x 480<br />
832 x 624<br />
1152 x 870<br />
720 x 576<br />
1152 x 864<br />
1280 x 720<br />
1280 x 960<br />
640 x 480<br />
640 x 480<br />
640 x 480<br />
800 x 600<br />
800 x 600<br />
800 x 600<br />
1024 x 768<br />
1024 x 768<br />
1024 x 768<br />
1152 x 864<br />
1280 x 1024<br />
1280 x 1024<br />
1280 x 720<br />
1280 x 800<br />
1280 x 800<br />
1280 x 960<br />
1360 x 768<br />
1440 x 900<br />
1440 x 900<br />
1680 x 1050<br />
1280 x 720<br />
1280 x 1024<br />
1920 x 1080p<br />
31,469<br />
31,469<br />
35,000<br />
49,726<br />
68,681<br />
35,910<br />
53,783<br />
56,456<br />
75,231<br />
31,469<br />
37,861<br />
37,500<br />
37,879<br />
48,077<br />
46,875<br />
48,363<br />
56,476<br />
60,023<br />
67,500<br />
63,981<br />
79,976<br />
45,000<br />
49,702<br />
62,795<br />
60,000<br />
47,712<br />
55,935<br />
70,635<br />
65,290<br />
52,500<br />
74,620<br />
67,500<br />
70,086<br />
70,087<br />
66,667<br />
74,551<br />
75,062<br />
59,950<br />
59,959<br />
74,777<br />
74,857<br />
59,940<br />
72,809<br />
75,000<br />
60,317<br />
72,188<br />
75,000<br />
60,004<br />
70,069<br />
75,029<br />
75,000<br />
60,020<br />
75,025<br />
60,000<br />
59,810<br />
74,934<br />
60,000<br />
60,015<br />
59,887<br />
74,984<br />
59,954<br />
70,000<br />
70,000<br />
60,000<br />
" En unaconexi0n de cable HDMI/DVI,se debe utilizarel terminal HDMI (DVI}IN..<br />
" No se admite el mode entrehzado.<br />
Cable D Sub (no suminist ado/<br />
Cable de audio no suminist_ado)<br />
25,175<br />
28,322<br />
30,240<br />
57,284<br />
100,000<br />
32,750<br />
81,750<br />
95,750<br />
130,000<br />
25,175<br />
31,500<br />
31,500<br />
40,000<br />
50,000<br />
49,500<br />
65,000<br />
75,000<br />
78,750<br />
108,000<br />
108,000<br />
135,000<br />
74,250<br />
83,500<br />
106,500<br />
108,000<br />
85,500<br />
106,500<br />
136,750<br />
146,250<br />
89,040<br />
128,943<br />
148,500<br />
" Esposibleque elaparato funcione incorrectamentesi seselecciona un formate de video que no sea estandar.<br />
" Los modes Independientey Oompuestono se admiten. SOG(SyncOn Green)no se admite.<br />
2 Espaflol<br />
+/-<br />
-/+<br />
-/+<br />
_/+<br />
_/+<br />
-/+<br />
+/+<br />
+/+<br />
+/+<br />
+/+<br />
+/+<br />
+/+<br />
+/+<br />
+/+<br />
_/+<br />
_/+<br />
+/+<br />
+/+<br />
-/+<br />
_/+<br />
-/+<br />
_/+<br />
+/+
Lista de Entradas<br />
Se utilizapara sebccionarTV u otrasfuentes de<br />
entradaexternascoma reproductoresde DVD/Bluray/decodifbadoreso<br />
receptorespar sateliteSTB.<br />
(_ MENUFm _ Canal _ Lista de Entradas<br />
ENTER<br />
[] TV / AV/ Component / PC / HDMI/DVI<br />
SOURCE<br />
Puedeebgir solamentedbpositivos externos que esten<br />
conectados altebvbor. En Lista de Entradas, se<br />
resaltan las entradasconectadas.<br />
EnLista de Entradas, PC sbmpre esta activado.<br />
Funcionesbasicas<br />
O MENUbot6n: Muestrael men0principal en pantalla.<br />
O ENTERI:_ / Batondireccionabs : Muevael cursory<br />
sebccione una option. Confirmela configuration.<br />
O RETURNbaton: Vuelveal men0anterior.<br />
@ EXiTbot6n: Saledel menuen pantalh.<br />
Editar hombre<br />
(_ MENUllTI _ Entrada _ Editar Nombre _ ENTER<br />
Video / DVD / Cable STB/ Satelite STB / PVRSTB /<br />
Receptor AV/ Juego / Filmadora / PC / DVIPC / DVI/ TV /<br />
IPTV / Blu-ray / HD DVD/ DMA: De un nombre aldispositivo<br />
conectadoen lastomas de entrada;de esta manerasera mas<br />
facilsebccionar el dispositivode entrada.<br />
Ouando se conecta un ordenador con una resoBdon de I920<br />
x I080 a 60 Hzal HDMI (DW}IN, se debe configurar el puerto<br />
en el modo DVl PC en Editar nombre.<br />
Ouando se conecta un cable HDMI/DVlal puerto HDMI (DW)<br />
_I'._, se debe configurar el puerto en los modos DVi PC o DVl<br />
en Editar Nombre.<br />
Funcionamiento de la OSD(On Screen Display)<br />
Elprocedimientode acceso puedevariarsegL_nel men0<br />
sebccionado.<br />
MENU rm Lasopcionesdel men0 principalse<br />
,ma0en, Sonido, Cana,,<br />
Configuracidn, muestran en_apanta,a:<br />
Entrada,<br />
Aplicaciones, Soporte tecnico.<br />
• Se_ecdone un_cono con_os botones<br />
A o T.<br />
ENTERI:_ PulseENTERI:_ para accederal<br />
@ menu secundar_o<br />
A Z_' Sebcdone un menusecundadocon los<br />
botches A o T.<br />
_1 / i_ Ajusteel valorde un ebmento con<br />
se v,sua,,=ac,0o<br />
los botones elmen0 ,o_1o<br />
enpanta,,a selecclonado<br />
_,. Elajuste puede devat,at la<br />
E_/TERI:_ PulseENTER_ para confirmaruna<br />
v semecc_0n<br />
EX[T-,EJ PulseEXIT.<br />
Espanol 13
Funcionesbasicas<br />
Visualizaci6n de canales<br />
Lista de canales<br />
A_adir,borrar o establecerloscanales favoritos<br />
y usar lagala de programasde las emisiones<br />
digitales.<br />
(_ MENUiTFI-_ Canal _ Lista de canales<br />
ENTERI_<br />
Seleccioneun canalen la pantalla<br />
Todos los canales, Canales agregados,<br />
Favoritos o Grabaci6n con temporizador mediantela pulsacion<br />
de los botones A / _' y ENTERE_. A continuacionpuedever el<br />
canalseleccionado.<br />
[] _n Todos los canales: Muestratodos los canalesdisponibles<br />
actualmente,<br />
[] _ Canales agregados: Muestratodos los canalesanadidos,<br />
[] _ Favoritos: Muestratodos los canalesfavorites.<br />
[] _, Grabacion con temporizador: Muestratodos los<br />
programasactualmenteresewados.<br />
Usede los botones de colores en la Lista de canales<br />
" [f_Verde(Zoom):Aumenta o disminuyeel n0merodel<br />
canal.<br />
" ::: Amarillo(Seleccionar): Seleccionavarias listas de<br />
canales, Seleccionelos canales que desee y pulse el botch<br />
amarillopara configurar todos los canalesseleccionadosal<br />
mismo tiempo, La marca _/aparece a laizquierdade los<br />
canales seleccionados,<br />
" _-_ (Herramientas): Muestrael men0 de opciones<br />
Lista de canales, (Los men0sde las opciones pueden<br />
cambiar,dependiendo de la situacion.)<br />
Iconos de la pantalla de estado del canal<br />
_/ Canalseleccionado.<br />
V Oanalconfiguradocome favorite,<br />
(_) Programareservado,<br />
4 EspaSol<br />
Usode los canalesfavoritos<br />
(_ MENUITTI_ Canal _ Lista de canales _ ENTERI_<br />
Agregar a Favoritos / Borrar de Favoritos.........<br />
Configureloscanales queyea con masfrecuenciacome favorites,<br />
1. Seleccioneun canaly pulseel botch TOOLS,,<br />
2. Anadao borreun canal medianteelmen0Agregar a Favoritos<br />
o Borrar de Favoritos, respectivamente.<br />
Paraque aparezcantodos los canales<br />
favoritos,hagaclic en el botch que se muestra<br />
a laderecha.<br />
Memorizaci6nde canales<br />
(_ MENUrm _CanaI_ENTERI_<br />
Antena (Aire / Cable)..............................................................<br />
Antes de empezara memorizarlos canalesdisponibles,debe<br />
indicarel tipo de origende lasenalconectadaal TV (esdecir,Aire o<br />
sistema de Cable),<br />
Prog. Auto<br />
[] Aire: SeSalde antenaaerea.<br />
[] Cable: SeSalde antenadelcable,<br />
[] Auto: Antenaaereay de cable,
NOTA<br />
" AIsebcdonar el sistema de TV de cable: STD, HRC e IRC<br />
identificanlos diversos tipos de sistemasde televisionpot<br />
cable. Pongaseen contacto con su proveedorde cable<br />
para averiguarel tipo de sistema de cable exbtente en su<br />
zona. Eneste momentoya se ha sebcdonado el odgen<br />
de la seF_al.<br />
" Unavez guardados todos los canales disponibles,se<br />
inicia laeliminacion de los canabs codificados. Vuelvea<br />
mostrarse el men0 Prog. Auto.<br />
Edici6n de canales<br />
(_ MENUITrl _ Canal _ Lista de canales _ ENTERI_<br />
EdbiOn de nombre de canal<br />
1. Sebcdone un canaly pulseel botch TOOLS..<br />
2. Editeel nombredelcanal medianteel men0Edbi0n de<br />
nombre de canal.<br />
[] EdbiOn de nombre de canal (s01ocanales analogicos):<br />
Asigneun hombre de canalpersonal.<br />
Otras funciones<br />
(_ MENUITrl _ Canal _ ENTERI_<br />
Borrar canal encriPtado ........................................................................................................................................<br />
Esta funci0nse usapara filtrarlos canabs codifbados despuesde<br />
que la programacionautomaticahayafinalizado.Puedetardarde 20<br />
a 30 minutos.<br />
Como detener la busqueda de canales codificados<br />
1. Pulseel botch ENTERIZ_ para sebccionar Detener.<br />
2. Pulseel botch _1parasebccionar SI.<br />
3. Pulseel botch ENTERIC.<br />
Estafuncion solo esta disponibb en el modeCable.<br />
Lista de canales<br />
(_ MENUITrl _ Canal _ Lista de canales _ ENTERI_<br />
Menu de opciones de Lista de canales<br />
Estabbzca cadacanal mediantelasopciones del menL]Lista de<br />
canales: (AOadir/ Borrar,Visual. tempor., Seleccionar todo /<br />
Deseleccionar todos). Losebmentos delmen0 de opciones<br />
puedenvariarsegunel estado del canal.<br />
1. Sebcdone un canaly pulseel botch TOOLS..<br />
2. Sebcdone una funciony cambie laconfiguration.<br />
[] Ahadir / Borrar : Suprima o aF/adauncanal para que se<br />
muestrenlos canabs que desee.<br />
[]<br />
[]<br />
NOTA<br />
" Todos los canabs borradosse mostraranen elmen0<br />
Todos los canales.<br />
" Un canal de color gris quieredecir que se ha<br />
suprimido.<br />
" Elmen0Ahadir solo aparececon los canabs<br />
borrados.<br />
" Suprima un canal del men0Canales agregados o<br />
Favoritos de la mismamanera.<br />
Visual. tempor.: Se puedeestabbcer queel canalque se<br />
desee se muestreautomatbamentea unahora resen/ada.Para<br />
utilizaresta funcion,en primerlugar configurelahora actual.<br />
1. Pulselos botches _ / i_ / A / T para sebccionar el<br />
canal que deseeen laLista de canabs.<br />
2. Pulseel botch TOOLSy sebccioneVisual. tempor.<br />
3. Desplacesearriba o abajo para ajustar laconfiguraci0n<br />
en lacaja o utilicelos botches numericosdel mandoa<br />
distanda para introducir lafecha y la hora.<br />
Sisebcdona Una vez, Cada semana o Cada dia en<br />
Repetir, puedeintroducir la fecha que desee.<br />
4. Sebccione Aceptar y pulseel botch ENTERI_ cuando<br />
hayaterminado.<br />
NOTA<br />
" Solo se pueden reservarlos canales memorizados.<br />
" Los programasreservadosse mostraranen el men0<br />
Grabacion con temporizador.<br />
" Cuandose ha sebccionado un canal digital, pulseel<br />
botch I_ para vet el programadigital.<br />
Seleccionar todo: Sebccione todos los canabs de laIista.<br />
Deseleccionar todos: Canceb todas las sebcciones de<br />
canabs.<br />
S01osepuede sebcdonar Deseleccionar todos si hay<br />
uno o mas canabs sebcdonados.<br />
Grabaci6n con temporizador<br />
(en Lista de canales)<br />
Puedevet,modificaro borrar un programaque hayaresen/adopara<br />
vet.La visualizacionde Grabacion con temporizador. Resalteun<br />
programay pulseel botch TOOLS para mostrar lasopciones.<br />
[] Cambiar informacion: Cambb un programaque haya<br />
resen/adopara vet.Combnce en el paso3 de "Visual.tempor."<br />
anterior.<br />
Cancelar programaciones: Canceleun programaque haya<br />
resen/adopara vet.<br />
Asi se borran los programasresaltadoso<br />
sebcdonados.<br />
Espaflol 15
Funcionesbasicas<br />
[] InformaciOn: Muestreun programaque hayareservadopara<br />
vet.Cambiense puedecambiar la informacionde reserva.)<br />
Tambionpuedevet la informacionresaltandoun<br />
programa y puBando el botch ENTERE_.<br />
[] Seleccionar todo / Deseleccionar todos: Sebccione o<br />
desebccionetodos los programasreservados.<br />
Sintonia Fina<br />
(sOlocanabs analogicos)<br />
Si lareception esclara, no tbne que realizarlasintonizadonfina<br />
del canal,yaque esta operation se hacede formaautomatica<br />
durante labosqueday la memorization. Sila sepales debiloesta<br />
distorsionada,realbe manualmentela sintonizadonfinadelcanal.<br />
Desplacesea izqubrda o derechahasta que laimagense yeaclara.<br />
Laconfiguration se aplicaal canal que se estavbndo.<br />
Loscanabs que se ban ajustadocon sintonizadon finase<br />
marcan con un asterbco "*" a laderecha del numerode canal<br />
en labanda del canal.<br />
Parareinbiar lasintonia fina, sebcdone Reiniciar.<br />
Cambio del modo de imagen preseleccionado<br />
(_ MENUITrl _ Imagen _ Modo _ ENTERI_<br />
Modo<br />
Sebcdone el tipode imagenpreferido.<br />
[] Dinamico : Adecuado para un entomo iluminado.<br />
[] Normal:Adecuado para un entorno normal.<br />
[] Cine: Adecuado paravet pel[cuhs en un entorno oscuro.<br />
6 Espaflol<br />
Ajuste de la configuraciOnde la imagen<br />
Luz de fondo / Contraste / Brillo / DefiniciOn /<br />
Color/ Tinte (V/R)<br />
(_ MENUITrl _ Imagen _ ENTERI_<br />
Eltelevisortienediferentesopciones de configuracionparacontrolar<br />
la calidadde la imagen.<br />
NOTA<br />
" Cuando hagacambios en Luz de fondo,Contraste,<br />
Brillo, Definicion, Color o Tinte (V/R), laOSDtambi@lse<br />
ajustar&<br />
" Enel modo PO,solo se puedenrealizarcambios en las<br />
opciones Luz de rondo, Contraste y Brillo.<br />
" La configuracionde cadadispositivo extemo conectado al<br />
tebvbor se puede ajustary guardar.<br />
Cambio de las opciones de la imagen<br />
ConfiguraciOn avanzada .......................................................<br />
(_ MENUiTR _ Imagen _ ConfiguraciOn avanzada<br />
ENTERI_<br />
(La configuracionavanzadaestadisponibleen los modos<br />
Normal / Cine)<br />
Sise comparan con los modelosanteriores,los nuevostelevisores<br />
de Samsungmuestranunaimagen masprecisa.<br />
En el modo PC, solo se puedencambiar Gamma y Balance<br />
de bianco.
[] Tono delnegro (Apagado<br />
/ Oscuro / Mas oscuro /<br />
Elmas oscuro): Sebccione el nivelde negro paraajustar la<br />
profundidadde la pantalla,<br />
[] Contraste Dinam. (Apagado / Bajo / Medic / Alto):<br />
Ajusteel contrastede lapantalla,<br />
[] Gamma: Ajuste laintensidaddel colorprimario.<br />
[] Gama de colores (Automatico / Original):Ajuste lagama de<br />
ooloresdisponiblespara crear la imagen.<br />
[] Balance de blanco: Ajustela temperaturadelcolor para<br />
obtener una imagenmasnatural,<br />
Bal. Rojo/ Bal. Verde/ Bal. Azul: Ajustela intensidadde<br />
oada color(rojo,verde,azul).<br />
Gan. Rojo / Gan.Verde / Gan.Azul: Ajusteel brillode cada<br />
color (rojo,verde,azul),<br />
Reiniciar: Restabbcelos valorespredeterminadosde<br />
Balance de blanco.<br />
[] Tono Piel: Mejoreel tone rosadode "TonePiel."<br />
[] Mejora de perfiles (Apagado / Encendido): Mejoralos<br />
bordesdel objeto,<br />
Opciones de imagen<br />
(_ MENUilTI _ Imagen _ Opciones de imagen<br />
ENTERI_<br />
Enel modo PC s01ose pueden cambiar Tono Color y<br />
TamaSo.<br />
[] Tono Color (Frio / Normal / Tibiol / Tibio2)<br />
Tibiol o Tibio2 se desactivancuando el modo de<br />
imagenes Dinamico e Normal,<br />
La configuration de cada dispesitive externocenectado<br />
a una entradadel televisorse puede ajustar y guardar.<br />
TamaSo:Esposbb que el receptorde satefite<br />
o cabletenga tambi@su propiagama de<br />
tamarios de pantalh, Sin embargo, esmuy<br />
aconsejabb utilizarel mode I6:9 la mayor[ade<br />
las veces,<br />
16:9: Ajustala imagenal mode basico(I6:9).<br />
Zoom1: Permite unaampliacionmoderada,<br />
Zoom2: Permite unaampliacionmas potente.<br />
Ajuste ancho: Ampliala relacionde aspecto de la imagenpara<br />
que se ajusteal ancho totalde lapantalla.<br />
Disponible para las seriales HD I080i/720p en el modo<br />
I6:9.<br />
4:3: Ajusta laimagenal modo basico(4:3),<br />
No yeala televisionen formate 4:3 durante largos<br />
periodos de tbmpo, Los rastrosde bordes a la<br />
izqubrda, derechao centre de lapantalla pueden<br />
provocar un desgastede la pantallaper laretenoionde<br />
la imagen que no esta cubierto per lagarant[a,<br />
Ajuste pantalla: Muestrala imagencompletasin cortes<br />
ouandola entradade laseriales HDMI(720p / 10801/I080p)<br />
o Componente(I 080i/ 1080p),<br />
NOTA<br />
" Despuesde sebcdenar Zoom1, Zoom2 o Ajuste ancho:<br />
1. PulseeI botch I_ para sebccionar Posicion.<br />
2. Pulseel botch ENTERIng.<br />
3. Pulselos botches A o T para desplazarla imagen<br />
haciaarriba o haciaabajo,<br />
4. PulseeI botch ENTERI]_.<br />
5. Pulseel botch I_ para sebcdonar Rein..<br />
6. Pulseel botch ENTERI]_ para devolvera laimagen<br />
su posicionpredeterminada.<br />
Espariol 17
Funcionesbasicas<br />
* Despuesde seleccionarAjuste pantalla en los modos<br />
HDMI (1080V1080p)o Componente (1080i/I080p),quiza<br />
deba centrar la imagen:<br />
1. Pulselos botones 4 o I_ para seleccionarPosicion.<br />
2. Pulseel boton ENTERIZ_.<br />
3. Pulselos botones A, T, _ o _, para moverla imagen.<br />
4. Pulseel boton ENTERIZ_.<br />
5. Pulselos botones 4 o _, para seleccionarRein..<br />
6. Pulseel boton ENTERIng.<br />
* HD (altadefinicion):16:9- 1080V1080p(1920x1080),720p<br />
(I280x720)<br />
* La configuraci0nde cada dispositivoexternoconectado a<br />
una entradadel televisorse puedeajustar y guardar.<br />
ATe,AV, 16:9, Zoom1, Zoom2,<br />
Component(480i,480p) 4:3<br />
DTV(1080i), 16:9, 4:3,<br />
Component(1080i,1080p), Ajuste ancho,<br />
HDMI (720p, 1080i, 1080p) Ajuste pantalla<br />
PC 16:9, 4:3<br />
[] Digital NR (Desactivado / Bajo / Media / Alto / Auto): Si<br />
la senalde emisi0n que redbe el televisoresdebil, puede<br />
activarsela funcionDigital NR parareducir laestaticay las<br />
imagenessuperpuestasque puedenapareceren la pantalla.<br />
8 Espaflol<br />
Cuando la sepalsea debil, intenteotras opciones hasta<br />
que se vea una imagende mejorcalidad.<br />
Nivel de negro HDMI (Normal / Bajo): Seleccionael nivelde<br />
negro en la pantallapara ajustar laprofundidadde esta.<br />
Disponibles01oen el modo HDMI.<br />
Modo pelicula (Apagado /Auto): Configuraeltelevisor<br />
para detectarautomaticamentey procesarlas seSalesde las<br />
peliculasprocedentesde todas lasfuentes,y ajustala imagen<br />
para conseguiruna calidadOptima.<br />
Disponibleen TV, AV,COMPONENT(480i/1080i)y<br />
HDMI(480i/1080i).<br />
Reinicio de la imagen (Aceptar / Cance!ar) ........................<br />
Restablecelaconfiguracionpredeterminadadel modo de la imagen<br />
actual.<br />
Ajuste del televisor con el ordenador<br />
Definala fuentede entradaal PC.<br />
(_ MENUITrl _ Imagen _ ENTER[_<br />
Ajuste Automa.tico .................................................................<br />
Ajusteautomaticamentelos valoresy las posicionesde lafrecuencia<br />
y afinelaconfiguration.<br />
No disponibleen las conexionesa traves del cable HDMI/DVI.<br />
Pantalla<br />
[] Grueso / Fino: Eliminao reduceel ruidode laimagen.Si el<br />
ruido no desapareces01ocon la sintonizaci0nfin& realicelos<br />
ajustesde frecuendahasta el maximo(Grueso)y vuelvaa<br />
realizarlasintonizaci0nfin& Despuesde reducirel ruido,vuelva<br />
a ajustarla imagenpara que quedealineadaen el centrode la<br />
pantalla.<br />
[] Posicion PC: Ajuste laposici0nde la pantalladel PCsi no<br />
se acoplaa la pantalladelTV. Pulselos botones A o T para<br />
ajustar laposici0nvertical. Pulselos botones _ o I_ para<br />
ajustar laposici0n horizontal.<br />
[] Reiniciar Imagen: Restablecela configuracionpredeterminada<br />
de la imagen.
Use del televisor como una pantaila de ordenador (PC)<br />
Configuraciondel softwaredel PC(basadoell WindowsXP)<br />
Segunlaversionde Windowsy latarjetade video, las pantallas<br />
realesdel PC puedenser diferentes,per(>seaplicaracasi siempre<br />
la mismainformacionde configuracionbasica.(Encase contrario,<br />
pongaseen contacto con el fabricantedel ordenadoro con el<br />
distribuidorde Samsung,)<br />
1. Hagaclic en "Panelde control" en el menode inioiode<br />
Windows.<br />
2. Hagaclioen "Apafienciay temas" en laventana "Panelde<br />
control"y apareceraun ouadrode dialogo.<br />
3. Hagaclioen "Pantalla"y apareceraunacuadrode dialogo<br />
sobre la pantalla,<br />
4. Seleccionela ficha "Configuracion"en elouadro de dialogo.<br />
• Configuracioncorrectadeltamaro (resoluoion)[Optima:I920<br />
x I080 pixeles]<br />
• Si existeunaopcion de frecuenoiaverticalen elouadrode<br />
dialogode configuration de la pantalla,el valorcorrectoes<br />
"60" o "60 Hz".Si no, hagaclic en "Aceptar" y salgadel ouadro<br />
de dialogo.<br />
Cambio del modo de sonido preseleccionado<br />
(_ MENUITrl _ Sonido _ Modo _ ENTERI_<br />
Modo<br />
[] Normal: Selecdonael mode de sonido normal,<br />
[] MiJsica:Refuerzalamosioaper endma de las voces.<br />
[] Cine: Ofreceel mejorsonido para peliculas,<br />
[] Voz clara: Realzalasvoces respecto de los sonidos,<br />
[] Favorito:Aumenta la intensidaddel sonido de altafrecuencia<br />
para permitiruna mejoraudioionalas personascon problemas<br />
de audicion,<br />
Ajuste de la configuraciOndel sonido<br />
(_ MENUnTI _ Sonido -> Ecualizador -_ ENTERE_<br />
Ecualizador<br />
Es posibleajustarlos parametrosdeIsonido segun las preferencias<br />
personales.<br />
[] Modo: SeieccionaeI mode de sonidoentre los valores<br />
predefinidos,<br />
[] Balance I/D: Ajustael balanceentre los altavocesizquierdoy<br />
derecho,<br />
[] 100Hz/ 300Hz/ 1kHz / 3kHz / lOkHz (ajustede ancho de<br />
banda):Ajustael nivelde frecuenoiasespecificasde ancho de<br />
banda,<br />
[] Reiniciar: Restablecela configuraciondelecualizador,<br />
Configuraci6n del sonido<br />
(_ MENUnTI _ Sonido _ ENTERI_<br />
SRS TruSurround HD (Apagado / Encendido) ............<br />
Esta funcionproporcionauna sensaoionde sonido surround<br />
virtualde 5,1 canalesa traves de un par de altavocesmediantela<br />
tecnologiaHRTF(HeadRelatedTransferFunction),<br />
idioma preferido ....................................................................<br />
(solooanalesdigitales)<br />
Elsistema de emisionde TV digitalpermitetransmitir<br />
simultaneamentemuchaspistasde audio (per<br />
ejemplo,traduccionessimultaneasdel programaen<br />
otros idiomas),<br />
Solo sepuede seleccionaruno de los idiomas<br />
que ofrece la emisora,<br />
Sonid Mu!ti4rack (MTS)........................................................<br />
(soloanalesanalogioos)<br />
[] Mono: Elija paraoanalesqueemitenen<br />
monoauralo sitienedificultades conla<br />
reception deseralesestereo,<br />
[] Est@reo:Elijapara canalesque emiten en<br />
estereo,<br />
SAP: Elijaestaopcion para escucharel programade audio<br />
independiente,que normalmenteesuna traduccionde otro<br />
idiom&<br />
En funcion del programaconcreto que se emita, puede<br />
escuohar en mode Mono, Estereo o SAP.<br />
Vo!:Auto (Apagado / Normal)................................................<br />
Debidoa que cada estacionemisoratienesus propias condiciones<br />
de serial,el volumenpuedevariarsi cambiade canal,Esta<br />
funcion permiteajustarautomaticamenteel volumende un canal<br />
disminuyendolasalidade sonido cuando laserialde modulacion<br />
es altao aumentandolasalidade sonidoouando laserialde<br />
modulaciones baja.<br />
Esparol 19
Funcionesbasicas<br />
Seleccionar altavoz (Altavoz externo /<br />
Config. Reloj: ConfiguremanualmenteMes, Dia,Afio, Hora,<br />
Altavoz de _<br />
Minuto y am/pro.<br />
..............................................................................................................................................................<br />
S01odisponiblesi Modo Reloj esta configuradocome<br />
Debidoalas diferenciasen lavelocidadde decodificacBnentre e]<br />
Manual.<br />
altavozprincipaly el receptorde audio se puedeoriginarun eco.<br />
En talescases,establezcaTV come Aitavoz extemo.<br />
Ouando Seleccionar altavoz estaestablecido come<br />
Aitavoz extemo, los botches de volumen y MUTE no<br />
funcionany selimita laconfiguracion del sonido.<br />
Oompruebe si Seleccionar altavoz esta establecidocome<br />
Aitavoz extemo.<br />
" Altavoz de TV: Apagado, Aitavoz externo: Encendido<br />
Oompruebe si Seleccionar altavozesta establecidocome<br />
Aitavoz de TV.<br />
" Altavoz de TV: Encendido, Altavoz externo: Encendido<br />
Si no hay seflalde video, ambos altavocesse silencian,<br />
Reinicio del sonido (Aceptar / Cancelar)<br />
RestabBzcatodas las configuracionesde sonido predeterminadas<br />
de fabrica,<br />
ConfiguraciOnde la hora<br />
{_ MEHUITrl _ Configuracion _ Hora _ EI/TERI_<br />
Hora<br />
[] Reloj: La configuracBndel relojse utilizaell diferentes<br />
funoionesdel temporizadordel televisor,<br />
{_ Lahera actualaparecerasiempreque se pulseel botch<br />
IHFO,<br />
Si desconecta el cable de alimentacBn, debe oonfigurar<br />
el re]ojde nuevo.<br />
Modo Reloj (Auto / Manual)<br />
- Auto: Configurelahera automaticamentecon ]a herade un<br />
canaldigital,<br />
La antenadebe estar conectada para poder ajustar<br />
la hera automaticamente.<br />
- Manual: Establezcala hera actual manualmente,<br />
0 Espaflol<br />
Segunla emisoray laseflal, la hera automaticano se<br />
puede ajustar correctamente,Eneste case, ajuste la<br />
hera manua]mente,<br />
Puedeajustar Mes, Dia, Afio, Hora y Minuto<br />
directamente pulsandolos botches numericosdel<br />
mando a distancia,<br />
Zona Tiempo: SeBccionela zonahoraria,<br />
Estafuncion s01oesta disponiblesi el Modo Reloj esta<br />
configurado come Auto.<br />
DST (Horatio de Verano) (Apagado / Encendido):Activa o<br />
desactivalafunoi0n del horatiode verano.<br />
Estafuncion s01oesta disponiblesi el Modo Reloj esta<br />
oonfigurado come Auto.<br />
Usodel temporizador de desconexiOn<br />
{_ MENUrrrl _ Configuracion _ Hora _ Temporizador<br />
ENTERI_<br />
Temporizador _: Apaga automaticamenteel<br />
televisortras un periodode tiempo establecido.(30, 60, 90,<br />
120, 150y 180 minutes),<br />
ParacanoelarTemporizador seleccioneApagado.<br />
ActivaciOny desactivaciOndel temporizador<br />
{_ MENUrrrl _ Configuracion _ Hora _ Temporizador 1<br />
ENTERI_<br />
Puedeajustarel TV paraque se enciendaautomaticamentea la<br />
hera prefijada.<br />
[] Temporizador 1 / Temporizador 2 / Temporizador 3:<br />
Laactivaci0ny desactivaci0ndel temporizadorse puede<br />
oonfigurarde tres maneras,Debeajustarel relojen primer<br />
lugar.
Horadeencendido / Horade apagado: Puedeconfigurar<br />
la hera y los minutosy activaro desactivareltemporizador.<br />
(Paraactivarel temporizadorcon laconfiguraoiondeseada,<br />
establezcaloen Activar.<br />
Volumen: Configureel nivelde volumendeseado.<br />
Contenido: Seleccioneel contenidoIV o USB que se ha de<br />
reproducircuando el televisorse enciendaautomaticamente.<br />
(USBse puedeseleccionars01ocuando el dispositivoUSB<br />
esta conectadoa]televisor)<br />
NOTA<br />
" Sino hayarohivosde m0sioaen eldispositivo USB<br />
o no se ha seleodonado la carpeta que contenga<br />
los archives de m0sica, eltempodzador no funoiona<br />
correctamente.<br />
" Sis01ohayun archive de fetesen el USB,la<br />
presentaoi0nno se reproduoir&<br />
" Siel hombre de lacarpeta es demasiadolargo,esta<br />
no se seleccionar&<br />
" Cada USBque se utilizaesta asignadoa su propia<br />
carpet& Cuando se utilizamas de un mismotipo de<br />
USB,aseguresede que lacarpeta asignadaa cada<br />
dispositivoUSB tenga un hombre diferente.<br />
Repetir: SeieccioneUna vez, Cada dia, Lun~Vie, Lun~Sab,<br />
Sab~Dom o Manual para configurarlocome masle convenga.<br />
Si seleccionaManual, puedeconfigurarel diaen que desee<br />
activarel temporizador.<br />
La marca _/indioa que se ha seleccionadoel dia.<br />
Apagado automatico (s01odisponiblecuando el televisor se<br />
ha enoendido con el temporizador):Eltelevisorse apagara<br />
automatioamente3 horasdespues de que se hayadejado<br />
inactive para prevenirun sobrecalentamiento.<br />
Programasde bloqueo<br />
(_ MENU[]]] -_ Configuracion --, ENTERE_<br />
" V-Chip no estadisponibie en los modos HDMI,<br />
Componente o PC.<br />
" Elc0digo PINpredeterminado para un televisor nuevoes<br />
"0-0-0-0".<br />
" Perm. todo: Se pulsa para desbloqueartodos los<br />
programasde television.<br />
" Bloq. todo: Se pulsa para bloqueartodos los programas<br />
de television.<br />
[] Bloqueo V-Chip (Apagado/ Encendido): Puedebloquearlos<br />
programasde TV clasificados.<br />
[] Guias pater. TV: Puedebloquearlos programasde TV segun<br />
su clasificaoi0n.Esta funoi0npermitecontrolarIoque los niflos<br />
puedenvet.<br />
- TV-Y: Niflospequeflos/ TV-Y7: Niflosde masde 7 aries/<br />
TV-G:Todoslos p0blicos/ TV-PG:Supervisionpaterna/<br />
TV-14: Mayoresde 14 aries/ TV-MA: Audienciaadulta<br />
- Todo: BIoqueatodas lasclasificacionesde T'vt/ FV:<br />
Violenciay fantasia/ V: Violencia/ S: Contenidosexual/ L:<br />
Lenguajegrosero/ D: Dialogode contenidosexual<br />
La funci0n V-Chip bloquearaautomatioamente<br />
determinadascategoriasque traten materialmas<br />
sensible.Per ejemplo,si bloquea la categoria<br />
TV-Y,automaticamentese bloquearaTV-Y7. De<br />
manerasimilar,si bloquea la categoriaTV-G, todas<br />
las categoriasdel grupo "adolescente"quedaran<br />
bloqueadas(TV-G, TV-PG, TV-14 y TV-MA). Las<br />
subclasificaciones(D, L, S, V) funcionande manera<br />
similar.Per Io tanto, si bloquea lasubolasificaci0n<br />
L en TV-PG, las subolasifioacionesL en TV-14 y<br />
TV-MA se bloquearanautomatioamente.<br />
[] Clas. MPAA: Puedebloquearlas peliculasseg@nsu<br />
clasificaci0n.LaAsooiaci0namericanade cinematogra%<br />
(MPAA)hacreado un sistemade clasificaci0nque proporciona<br />
a padresy tutoresinformaci0nsobreque peliculasson<br />
apropiadaspara los niflos.<br />
- G:Todos los publicos(sinrestricciones)./ PG: Se sugierela<br />
compaflia de un adulto./PG-13: Menoresacompaflados<br />
de un adulto. / R: Restringido.Menoresde 17<br />
acompafladosper un adulto./ N0-17: Prohibidoa menores<br />
de 17 aries./ X: S01oadultos./ NR: Sin clasifioar.<br />
La funci0n V-Chip bloquearaautomatioamente<br />
cualquiercategoriaque trate materialmas sensible.<br />
Per ejemplo,si bloquea la categoria PG-13,tambien<br />
se bloquearanautomaticamenteR, N0-17 y X.<br />
[] Ingles Canadiense: Puedebloquearlos programasde TV<br />
V-Ch!p...........................................................................................................................................................................<br />
segun la clasifioaci0nIngl#sCanadiense.<br />
Aparecela pantallapara h introducci0ndel numeroPIN. Escribasu<br />
c0digo PIN de 4 digitos.<br />
La opci0n V-Chipbloqueaautomatioamentelos programasque<br />
no se consideranapropiadospara los menores.Elusuariodebe<br />
introducirprimeroun codigo PIN(numerode identificaoi0npersonal)<br />
para configuraro cambiarlas restriccionesde V-Chip.<br />
- C: Programaci0npara niflosmenoresde 8 aries. /<br />
08+: Programaci0ngeneralmenteconsideradaaceptable<br />
para niflosmayoresde 8 ariessin acompaflamientode<br />
adultos./ G : Programaciongeneral,idealpara todas las<br />
audiencias./ PG : Supervisionpatema./<br />
14+: La programacioncontienetemas y contenidos que<br />
puedeque no seanadeouadospara menoresde I4 aries. /<br />
NOTA<br />
18+: Programaoi0npara adultos.<br />
La funci0n V-Chip bloquearaautomatioamente<br />
cualquiercategoriaque trate materialmas<br />
sensible.Per ejemplo,si bloquea la categoriaG,<br />
automatioamentetambien se bloquearaPG, 14+ y<br />
18+.<br />
Espaflol 21
Funcionesbasicas<br />
[]<br />
[]<br />
[]<br />
FrancesCanadiense: Puedebloquearlos programasde TV<br />
seg0n la clasificacbnFrancesOanadiense,<br />
- G : General/8 ans+: Programacbngeneralmente<br />
consideradaaceptablepara ni_osmayoresde 8 afrossin<br />
acompanamientode adultos,/ 13 ans+: Esposibleque<br />
la programacbnno seaadecuada para ninosmenores<br />
de I3 afros,/ 16 ans+: Laprogramacionno es adecuada<br />
para niF_osmenoresde I6 afros./ 18 ans+: Programacion<br />
restringidapara adultos.<br />
La funcionV-Chip bloquearaautomaticamente<br />
cualquiercategoria que trate material massensible.<br />
Per ejemplo,si bloquea la categoria8 arts+, tambien<br />
se bloquearanautomaticamente13 ans+, 16 ans+<br />
y 18 ans+.<br />
Clasificacion U.S. Descargabie: La informacionde la<br />
restriccionde bloqueose puedeusar mientrasseyen los<br />
canales DT'vt<br />
NOTA<br />
* Sila informaci0nno se descarga desde laemisora,<br />
el men(]Clasificaci6n U.S. Descargable esta<br />
desactivado.<br />
* La informacionde la restriccion de bloqueo se puede<br />
descargar automaticamentemientrasse yenlos<br />
canales DTV.Esto puede tardaralgunossegundos.<br />
* Elmen(] Clasificaci6n U.S. Descargable esta<br />
disponibledespues de que la informacionse haya<br />
descargadodesde la emisora.Sin embargo, segun el<br />
tipo de informacionde laemisora, el menupodria no<br />
estar disponiblepara su use.<br />
* Los nivebs de restriccion de bloqueo difierensegun<br />
la emisora,El hombrede menu predeterminadoy<br />
Clasificaci6n U.S. Descargable cambian segun la<br />
informaciondescargada.<br />
* Aunqueconfigure lavisualizacbn en pantallaen otro<br />
idioma,el men(]Clasificaci6n U.S. Descargable<br />
siempre Iovera en ingles.<br />
* La clasificacion bloquearaautomaticamente<br />
determinadascategoriasque traten materialmas<br />
sensible.<br />
* Los titulosde clasificacion (perejemplo, nivelde<br />
humor,etc,)y las clasificacionesde television(per<br />
ejemplo,DH, MH, H, etc.) puedendiferir segun la<br />
emisora.<br />
Cambiar C6digo: Aparecerala pantallaparacambiar el<br />
c6digo. Escribaun nuevoc6digo PiNde 4 digitos.En cuanto<br />
se introducenlos 4 digitos,aparecela pantalia<br />
Confirmar Nuevo C6digo. Vuelvaa escribirlos 4 digitos,<br />
Cuandodesaparezcala pantallade confirmacion,elcodigo<br />
quedara memorizado.<br />
2 EspaBol<br />
C6mo ver un canal restringido,<br />
Siel TV sesintonizaen un canal restringido,V-ChipIo bloqueara.La<br />
pantallaquedaraen blancoy aparecerael siguientemensaje:<br />
Este canalesta bloqueadoper el V-Chip.IntroduzcaPIN para<br />
desbloquear.<br />
Si olvidael codigo PiN,pulse los botones del mando a<br />
distancia en el siguienteorden para reiniciarel c6digo a<br />
"0-0-0-0": POWER(apagar)_ MUTE _ 8 _ 2 _ 4<br />
POWER(encende0<br />
Otras funciones<br />
Idioma<br />
MENUITrl _ Configuracion _ ENTERE_<br />
AjusteeJidiomade los menus.<br />
1. SeleccioneIdioma del menuy pulse el bot6n ENTERE_.<br />
2. Seleccioneel idiomaque deseey pulseel botch ENTERE_.<br />
Elijauna opci6n entre English, EspaF_oly Frangais.<br />
Subtffulo<br />
(Mensajesde textoen pantalla)<br />
[] Subtitulo (Apagado / Encendido): Puede<br />
activaro desactivarlafuncion de subtitulos.<br />
Si los subt[tulosno estan disponibles,no se<br />
mostraranen la pantalla.<br />
La funcion de subtitulosno esta<br />
disponible en los modes Componente,<br />
HDMI ni PC.<br />
Modo de SubtJtulo: Puedesebcdonar el modede subt[tulo<br />
deseado.<br />
La disponibilidad de los subtitulos depende del<br />
programa que se esteemitiendo.<br />
Programado / OO1~004 / Textol ~Texto4:(s61ocanabs<br />
analogicos)La funcbn de subtitulosanalogicosfuncionatanto<br />
en el mode de canal de televisionanabgicacome cuando la<br />
senalse dirige de un dispositivoextemo al televisor.(Seg0nla<br />
senalde transmisi6n,la funci6nde subtitulosanalogicospuede<br />
funcionarcon canabs digitabs.)<br />
Programado / Serviciol ~ServicJo6/ OO1~004 /<br />
Textol ~Texto4: (solocanabs digitabs) La funci6nde<br />
subtitulosdigitalesfuncionaconcanabs digitales.<br />
Es posibb que Servicio 1~6 no est@ldisponibles en el<br />
modo de subtitulos digitalessegun el tipo de emisi6n.
[] Opciones -Subtitulos Dig.: (solo canabs digitabs)<br />
TamaSo: Lasopdones induyen Programatic, Peque_o,<br />
Normal yGrande. Elvalor predeterminado esNormal.<br />
Estilo fuente: Lasopciones induyen Programado yEstilo del0<br />
al7.Elvalor predeterminado esEstilo0.<br />
Color deprimer piano: Lasopdones induyen Programado,<br />
Bhnoo, Negro, Rojo, Verde, Azul, Amarillo, Magenta, Oian.<br />
Puede cambiar elcolor del texto. Elvalor predeterminado es<br />
Bhnoo.<br />
Color derondo: Lasopciones induyen Programado,<br />
Bhnoo, Negro, Rojo, Verde, Azul, Amarillo, Magenta, Oian.<br />
Puede cambiar elcolor del rondo delosubtitulos. Elvalor<br />
predeterminado esNegro.<br />
Opacidad deprimer piano: Ajusta laopacidad del texto.<br />
Lasopdones induyen Programatic, Transparente, TrasBddo,<br />
S61ido eIntermitente.<br />
Opacidad defondo: Ajusta laopaddad del rondo delos<br />
subt[tulos. Lasopdones induyen Programado, Transparente,<br />
TrasBddo, Solido eIntermitente.<br />
Regresar alPredeterminado: Estaoption reajusta las<br />
opdones Tamano, Estbfuente, Color deprimer piano, Color<br />
derondo, Opaddad deprimer piano yOpaddad derondo a<br />
susvalores predeterminados.<br />
NOTA<br />
* Las Opciones - Subtitulos Dig. solo estan<br />
disponibbs cuando Programado y<br />
Servbiol ~ Servbio6 se pueden sebcdonar en el<br />
Mode de Subtitulo.<br />
* La dbponbilidad de los subt[tulos dependedel<br />
programa que se esteemitiendo.<br />
* ElvalorProgramado sigue los estandares<br />
estableddos per el ember.<br />
* Lasopdones de color de primer piano y color de<br />
fondo no se pueden ajustar con elmbmo color.<br />
* No puedeestablecerla Opacidad de primer piano<br />
y la Opacidad de fondo come Transparente.<br />
Modo Juego (Apagado / Encendido) ..................................<br />
Cuandose oonecta unavideooonsolaoomo PlayStationTM o<br />
XboxTM, se puede experimentarunasensacbn masrealbtaal<br />
seleccionarel mode de juegos.<br />
NOTA<br />
* Precaudonesy limitadonesdel modo de juego.<br />
- Si deseadesconectarsede laconsola de videojuegos<br />
y conectarsea otto dispositivoexterno,ajuste la<br />
opcion Modo Juego oomo Apagado enel menu de<br />
configuracion.<br />
- Sivisualizael menude TV en el Modo Juego, la pantalla<br />
tbmbla ligeramente.<br />
* Modo Juego no esta disponiblecuando la fuentede<br />
entradaesta en el mode TV o PC.<br />
* Tras conectar laconsola de videojuegos,configure Modo<br />
Juego come Encendido. Desgradadamente,puedeque<br />
advierta una reduction en lacalidad de la imagen.<br />
* Siel Modo Juego esta Encendido:<br />
- El modo Imagen seconfiguracome Normal y elde<br />
Sonido como Cine.<br />
- Ecualizador no estadbponible.<br />
Melodia (Apagado / Bajo / Medic / Alto)<br />
Estabbzca que una melodiase oigacuando el televisorse enobnda<br />
o seapague.<br />
NOTA<br />
, La melodia no se reproduce.<br />
- Ouando no haysalidade sonidodesde el tebvbor<br />
porque se ha acdvadoel botch MUTE.<br />
- Ouando no haysalidade sonidodesde el tebvbor<br />
porque se ha reducidoal minimocon el botch VOL -.<br />
- Ouando lafundon de temporizadorhaapagadoel<br />
tebvbor.<br />
Soluciones econ6micas<br />
(_ MENUITrl _ Configuraci6n_ ENTERI_<br />
La funcionecologioase puedeutilizarpara mejorarel ahorrode<br />
energia.<br />
Ahorro energia (Apagado / Bajo / Medic / Alto<br />
!Auto) ......................................................................................<br />
Esta fundon ajustael brillodel televisor,Io cual reduceeloonsumo<br />
de energia.Sideseaver latelevisionper lanoche, ajustela option<br />
del modeAhorro energia en Alto; sus ojos se Io agradecerany,<br />
ademas,redudra eloonsumo de energia.<br />
Espanol 23
Funcionesbasicas<br />
MENUITrl _ Soporte tecnico -_ ENTERE_<br />
Autodiagn6stico<br />
Elautodiagnostico puede tardar unossegundos;es parte del<br />
funcionamientonormaldel televisor.<br />
[] Prueba de imagen: Se utilizapara comprobarsi hay<br />
problemasell la imagen.<br />
Si: Si no se muestrael patron de prueba o Ilay ruidoen el<br />
patron de prueba,seleccioneSf. PuedeIlaberun problemaen<br />
el televisor.Pongaseen oontacto cell el centrede llamadasde<br />
Samsungpara obtenerayuda.<br />
No: Siel patron de prueba se muestracorrectamente,<br />
seleccioneNo. Puedehaber un problemaell el equipo extemo.<br />
Compruebelas conexiones.Si persisteel problem& consulte el<br />
manualdel usuariodel dispositivoextemo.<br />
[] Prueba de sonido: Utiliceel sonidode lamelodiainoorporada<br />
para comprobarsi hayproblemascon elsonido.<br />
Si no eyesonido en los altavocesdel televisor,antes<br />
de realizarla prueba de sonido, aseguresede que<br />
Seleccionar altavoz esteconfigurado come<br />
Altavoz de TV en el menu Sonido.<br />
La melodiase oira durante laprueba aunque<br />
Seleccionar altavoz esteestablecido come<br />
Altavoz externo o se hayasilenciado el sonido con el<br />
boton MUTE..<br />
Si: Sisolo puedeoir sonidode un altavozo no se eyesonido<br />
durante laprueba de sonido, seleocioneSi. Puedehaberun<br />
problemaen eltelevisor.Pongaseen contacto con el centrede<br />
Ilamadasde Samsungpara obtenerayuda.<br />
No: Si puedeoir sonidode los altavoces,seleocioneNo.<br />
Puedehaber un problemaen el equipo extemo. Compruebe<br />
las conexiones.Si persisteel problema,consulte el manualdel<br />
usuariodel dispositivoextemo.<br />
[] Intensidad sepal: (Solooanalesdigitales)La calidadde la<br />
recepcionde un canal HD es perfectao los canalesno estan<br />
disponibles.Ajustelaantena paraaumentarla intensidadde<br />
la serial.<br />
4 Espa_ol<br />
Actualizaci6n del software<br />
Samsungpuedeofreceractualizacionespara elfirmwaredel<br />
televisoren el future.VisiteSamsung.como pongaseen contacto<br />
con elcentre de Ilamadasde Samsungen 1-800-SAMSUNG<br />
(726-7864)para recibir informacionacercade ladescarga<br />
de lasactualizacionesy deluse de un oontroladorUSB.Las<br />
actualizacionesse puedenrealizaroonectando unaunidad USBal<br />
puerto USB.<br />
Ouando se actualizael software,la configuracionde video<br />
y audio que se hayaefectuado vuelvea la configuracion<br />
predeterminada(de fabrica).<br />
Esaconsejableanotar laconfiguracionpara recuperarla<br />
facilmentedespuesde la actualizacion.<br />
Guia de conexiOn HD<br />
Oonsulteestainformacioncuando conectedispositivosextemos al<br />
televisor.<br />
Contacto con Samsung ........................................................<br />
Consulteestainformacionsi eltelevisorno funciona<br />
adecuadamenteo si desea actualizarelsoftware.Puedebuscar<br />
informacionrelacionadacon nuestrocentrede Ilamadas,para<br />
descargarlos productosy el software.
Funcionesavanzadas<br />
I<br />
Disfrutede archivosde fotos, musicay almacenados<br />
en un dispositivode dase de almacenamientomasivo<br />
(MSC)USB,<br />
(_ MENUrlTl -_ Aplicaciones _ Media Play<br />
(USB) _ ENTERE_<br />
ConexiOnde un dispositivo USB<br />
1. Enciendael televisor.<br />
2. Conecte un dispositivoUSBque contengaarchivosde fotos, o m0sicaalterminalUSB que se<br />
encuentraen el lateraldel televisor.<br />
3. Cuandoel USBestaconectado altelevisor,apareceunaventana emergente.A continuacion<br />
puedeseleccionarMedia Play,<br />
Usodel men_ Media Play<br />
Visualizacion de una foto (o una presentacion)<br />
1. Pulseel botch MENU. Pulselos botches A o T paraseleccionar<br />
Aplicaciones, a continuacion,pulseel botch ENTERE_.<br />
2. Pulselos botches A o _' para seleccionarMedia Play (USB)y, a<br />
continuacion,pulse el botch ENTERI_.<br />
3. Pulselos botches A o T para seleccionarel dispositivode memoriaUSB<br />
correspondientey,a continuacion,pulse elbotch ENTERI_,<br />
Elment]Media Playpuedevadar segun el dispositivode memoriaUSB<br />
conectado al televisor,<br />
Algunosdispositivosquizas no se admitan pot problemasde<br />
compatibilidad,<br />
4. Pulselos botches ,4 o i_ para seleccionar(Photo, Music, Setup),y a<br />
continuad0n, pulse el botch ENTERIng.<br />
Puedeque no funcionecorrectamente con archivos multimediasin licencia,<br />
Listade Io que debe saber antes de utilizarMedia Play (USB)<br />
* En un hombre de carpeta o de archivo(foto, m0sica)solo se deben utilizarcaracteres alfanumericos.<br />
UnidadUSB<br />
PanellateraldelTV<br />
* Elsistema de archivos solo admite el FAT16/32,(Nose admite elsistema de archivo NTFS,)Algunostipos de dispositivosde audio<br />
y camarasdigitales USB puedenno ser compatiblescon este televisor,<br />
* Media Play(USB)solo admite eldispositivo de clase de almacenamientomasivo(MSO)USB,MSCes un dispositivode clase<br />
de almacenamientomasivosolo de transporte de gran capacidad. Ejemplosde MSOson las unidadesde almacenamientoen<br />
miniaturay los lectoresde tarjetas Flash, (Nose admite ni el HUB niel USB.)<br />
* Antes de conectar el dispositivo altelevisor, hagauna copia de seguridadde sus archivos para evitar daflos o perdidasde datos,<br />
SAMSUNGno se haceresponsablepor cualquier daflo en los archivos o perdidade datos,<br />
* Oonectedirectamenteal puerto USB deltelevisor.Si utilizauna conexion con un cable independiente,puede haber problemasde<br />
compatibilidadcon el USB.<br />
Espaflol 25
Funcionesavanzadas<br />
Photo<br />
* Solo se admiten los formatosde archivomp3 y jpeg,<br />
* Elformate rap3 del reproductor multimedia(USB)solo admite archives de musicacon unafrecuenciade muestreoalta(32 kHz,<br />
44,1kHz o 48 kHz),<br />
* Se recomiendael formatojpeg secuencial,<br />
* No desconecte el dispositivo USBmientras seeste cargando.<br />
* MTP (MediaTransfer Protocol)no se admite,<br />
* La duracion de lareproduccion de un archiverap3 puedevisualizarsecome "00:00:00" si la informaciondel tiempo de<br />
reproduccion no se encuentraen el inicio delarchive,<br />
* Ouanto mayorseala resolution de ]a imagen, mastiempo tardara en visualizarseen ]a pantaHa.<br />
* Las]istasde fotoso musicamuestranhasta 300 carpetas o archives,<br />
* Segunel tamaflo del archive,el proceso de carga puede requerircierto tiempo.<br />
* Losarchives MP3 con DRM descargados desde un sitio de page no se puedenreproducir,<br />
* La tecnolog[aGestion de derechos digitales (DRM)admite la creacion,la distribuciony lagestion de contenidosde mode<br />
integradoy general,incluidala proteccion de los derechos e interesesde los proveedores de los contenidos, la prevencionde<br />
copias ilegalesde los contenidos, as[come lagestion de cobros y acuerdos.<br />
* Elmode de ahorrode energiade algunasunidadesde disco duro extemas se puededesactivar automaticamentecuando estas se<br />
conectan a]televisor.<br />
* Sise utiliza un cable de extension USB,es posibleque el dispositivoUSB no se reconozcao que los archives del dispositivono se<br />
puedanleer.<br />
* Sino se reconoce un dispositivo USBconectado a] televisor,]a]ista de archives del dispositivoesta daflada oun archive de la ]ista<br />
no se reproduce, conecteel dispositivo USBal ordenador,formatee el dispositivoy compmebe laconexion,<br />
* Siun archiveeliminadodel ordenador se puede encontrartodav[a cuando se ejecuta Media Play,utilice lafuncion "Vaciarpapelera<br />
de reciclaje"del ordenador para eliminarlopermanentemente,<br />
VisualizaciOnde una foto (o una presentacion)<br />
1. Pulseel botch II/FO ara mostrarla opcionVet, Inic. vis. aut., Borrar, Borrar<br />
todo, Deselecc. todos.<br />
2. Pulselos botches A o _' para seleccionarInic. vis. aut. y pulse el botch<br />
ENTERI_.<br />
Enla presentacion,los archivesse muestranen orden a partir del<br />
archive que se muestraen este memento,<br />
Losarchives MP3se pueden reproducir automaticamentedurante la<br />
presentacion si Musica de fondo esta configuradacome Encendido<br />
de manerapredeterminada. Paraque esta funcionsea posible, los<br />
archives MP3y otros archives de fotos debenestar en la misma<br />
carpeta del dispositivode memoriaUSB,<br />
Pulseel botch INFO durantela presentacion para configurar las opciones siguientesVelocidad visionado automatico, Musica de<br />
rondo, ConfiguraciOn de la musica de fondo, Lista, Pulse los botches A o T para seleccionarla opcion y, a continuacion,pulse el<br />
botch ENTERE_.<br />
- Unavez configuradalaopcion, pulseel botch ENTERI_ para realizarel cambio.<br />
Pulseel botch INFO durantela presentacion para configurar las opciones siguientes Inic. vis. aut., Zoom, Girar, Lista, Pulselos<br />
botches A o T paraseleccionar laopcion y, a continuacion, pulseel botch EI/TERI_.<br />
- Unavez configuradalaopcion, pulseel botch ENTERI_ para realizarel cambio.<br />
6 Espaflol
Music<br />
Uso de la lista MP3<br />
Iconode carpeta<br />
Iconode la listade mt]sica<br />
Iconode desplazarsea carpetade nivelanterior<br />
Pulselos botones F_q(REW)o [#_q(FF)paracambiar de pagina.<br />
Elarchivo sebccionado se visualizaen la parte superior con su tiempo de<br />
reproduccion.<br />
1. Parasebccionar todos los archivoso uno solo, pulseel botch INFO para ver<br />
los menusde Musica.<br />
Pulseel botch ENTERE_ para sebccionar Reproduccion (orRepr. archivo<br />
selecc.), Repetir musica, Borrar (orBorrar archivo sel.),Borrar todo or<br />
Deselecc. todos.<br />
2. Pubelos botches A o T para ira un iconoy pulseel bot0n ENTERIng.<br />
Si sepulsa el botch ENTERE_ sobre un icono de nota musical,<br />
inmediatamentese reproduceel archivode m0sica,<br />
Pulseel botch ENTERE_ sobreel icono de una carpetapara mostrarlos<br />
archivosde musicaincluidosen dicha carpeta,<br />
[] Reproducir: Seleccionarpara reproducirarchivos MP3,<br />
EstemenL]s61omuestraarchivos con ]a extension MP3.Los archivoscon otrasextensionesno semuestran, aunquese hayan<br />
guardado en el mismo dispositivo USB.<br />
Paraajustar elvolumende la m0sica, pulse los botones --VOL+ del mandoa distanda. Parasilenciarel sonido, pulseel<br />
botch _ MUTE del mandoa distancia,<br />
[] Repetir musica (Encendido / Apagado): Sebcdone para reproducirrepetidamentetodos los archivos MP3de lacarpetaactual.<br />
Reproduccion de musica<br />
® S01ose muestranbs archivoscon laextensionMP3, Losarchivoscon otras extensionesno semuestran,aunquese hayanguardadoen<br />
el mismodispositivoUSB,<br />
• Si,al reprodudr archivosMP3,el sonido no se oyecorrectamente,ajuste Ecuaiizador y SRSTruSurround HD en el menuSonido. (Un<br />
archivoMP3 demasiadomodulado puedeocasionarprobbmas de sonido,)<br />
• Iconosde informacionde la funcionde lamusica<br />
J Repetir musica estaestabbcido como Encendido.<br />
Repetir musica estaestabbcido como Apagado,<br />
Cuandosepulsae]boton F_q (Reproducir)/ _ (Pausa)delmandoa distanciambntrasseestareproducbndomL]sica.<br />
Ouandose pusa e botch Fiq DeteneOde mandoa dstanca, a musca se detene.<br />
Espaflol 27
Funcionesavanzadas<br />
Configuraci6n<br />
Uso del menlJde configuracion<br />
[] Velocidad visionado automatico: Permiteseleccionarlavelocidadde<br />
presentacionde1visionadoautomatico.PuedeselecdonarRapido, Normal<br />
o Lento.<br />
[] Musica de fondo: Seseleccionapara determinarsi sedesea reproducirun<br />
archiveMP3 duranteelvisionadoautomatico.PuedeseleccionarMt]sica<br />
Encendido o MOsicaApagado.<br />
[] Configuraci6n de la musica de rondo: Ouandoseesta realizandouna<br />
presentacion,se puedecambiara Configuracion de la musica de fondo<br />
para selecdonarun archivode mosicay escucharlo.Seleccioneun archivo<br />
MP3 como mL]sicade fondo.<br />
[] Repetir musica: Se seleccionapara determinarsi se desea repetirla<br />
reproduccionde la mt]sicacuando se han reproducidotodos los archivos<br />
MP3 de estacarpeta.<br />
[] Salvapantallas: Puedeconfigurarel tiempo de esperanecesariopara quese ejecuteel salvapantalhs.Elsalvapantallasaparecerasi no<br />
se pulsa ningL]nboton durante4 hora, 8 hora o 10 hora.<br />
[] Retirar con seg: Se puedequitarel dispositivodeltelevisorcon seguridad.<br />
Reproduccion de archivos de musica/fotos seleccionados<br />
• Pulsarel boton amarillo.<br />
• Repitael procesoanteriorpara seleccionarlos archivosde fotos/mosicaque desee.<br />
Lasfotoso los archivosseleccionadosse marcancon el sfmbolo _z. Paracancelar laseleccion, pulse de nuevoel boton<br />
amarillo.<br />
• Pulseel boton FCq(Reprodudr)/ ENTERI_ para reproducir1asfotoso archivosselecdonados.<br />
8 Espa_ol
Inforrnad©nadidonal<br />
Montaje del soporte de proteccion<br />
AI instalarel televisorell unapared, coloqueel soportede proteccioncome se indica, ,, oo_oo_ooo<br />
Instalacion del equipo de montaje mural<br />
Elkit de montaje mural(sevende por separado)permiteinstalarel televisoren unapared, Sidesea mas informaci0nsobre lainstalacionde<br />
los componentes parael montaje mural,consulte las instruccionesque se facilitancon dichoselementos,Sinecesitaayuda con la instalacion<br />
del soportemural,p0ngaseen contacto con un tecnico. SamsungElectronicsno se haceresponsablede los daflos causadosal productoo<br />
al usuariosi este haefectuado la instalaciondel televisor.<br />
Especificaciones del equipo de montaje mural (VESA)<br />
Elkit de montaje muralse vende per separado,<br />
Instaleel montajemuralen una paredsolida,perpendicularal suelo,Paracolocarlo en otros materialesde construccion,p0ngaseen<br />
contacto con eldistribuidormascercano,Si se instalaen el techo o en una paredinclinada,puedecaersey causargraveslesiones<br />
personales.<br />
NOTA<br />
* Lasdimensionesestandarde los equipos de montajemural se muestranen latabla siguiente.<br />
* AIadquirir elequipo de montajemural,tambien sedistribuye un manualde instalaciondetalladoy todas las piezasnecesarias para<br />
el montaje.<br />
* No usetornillos que no cumplan las especificacionesde tomillos estandarVESA,<br />
* No usetornillos con una Iongitud superiora lamedida estandaro que no cumplancon las especificacionesde tornillos estandar<br />
VESA,Lostornillos que seandemasiado largos puedencausar daflos en el interiordel televisor.<br />
* Para montajesmuralesque no cumplen las especificacionesde tomillos estandarVESA,la Iongitudde estos puedevariar<br />
dependiendode las especificacionesdel montaje mural.<br />
* No aprieteexcesivamentelos tornillos, yaque podriadaflar el productoo provocar laca[da de estecon riesgo de causar lesiones<br />
personales.Samsung no se hace responsablede estetipo de accidentes.<br />
* Samsungno se hace responsablede daflos o lesionespersonalescuando se usa un montaje muralque no cumple las<br />
especificacionesVESAo si el clienteno sigue las instruccionesde instalaciondel producto.<br />
* No monteel televisorcon unainclinacionde masde 15 grades,<br />
* Son necesariasdos personas para montar el televisoren lapared,<br />
Espaflol 29
Inforrnad©nadidonal<br />
I9-22<br />
75 x 75<br />
23-29 200x I00<br />
lOOx I00 M4<br />
30-40 200x 200 M6<br />
LCD-TV 4<br />
46-55 400x 400<br />
57-65 600 x 400<br />
70-80 800 x 400<br />
80- 1400x 800<br />
M8<br />
/_ No instaleel equipo de montaje muralmientraseltelevisorestaencendido.Se podriaproduciruna descarga<br />
electrica con riesgode causarlesionespersonales,<br />
Samsungno suministraelbloqueo antirroboKensington,Esun dispositivoque<br />
se utilizapara fijarf[sicamenteelsistemacuando se utilizaen un sitio poblico, El<br />
aspectoy el metodo de bloqueo puedenset diferentesa los que se muestranen la _°°<br />
ilustraci6nsegun el fabricante.OonsuReel manualproporcionadocon el bloqueo<br />
Kensingtonpara obtener masinformacionsobreel usecorrecto.<br />
Busqueel Jcono"@" en laparte posteriordel televisor.Junto al Jcono"@" hay<br />
una ranuraKensington,<br />
Siga estos pasospara bloquearel producto:<br />
1. Enrolleelcable deJbloqueoKensingtonen un objeto estatico voluminoso,<br />
como una mesao una silla,<br />
2. DesJic el extremedeJcable que tieneel cierrea traves deJextremoenrollado<br />
del cablede bloqueo Kensington,<br />
3. Inserteeldispositivode bloqueoen la ranuraKensingtondel producto O,<br />
4. Cierreel bloqueo,<br />
Paraobtener instruccionesmas exactas, censure el manualdel usuario proporcionado con el dispositivode bloqueo,<br />
Eldispositivo de bloqueo debe adquirirseper separado,<br />
La ubicaci6nde la ranuraKensingtonpuede variarsegun el televisor,<br />
0 EspaBol<br />
B<br />
Precaucion: Tirar del tebvisor, empujarlo ocolgarse de61puede provocar sucaida. Enespecial, impida quelosni_os<br />
secuelguen del televisor oIodesestabilicen. Eltelevisor podria caerse sobre ellos ycausarles bsiones graves oincluso<br />
lamuerte. Siga lasprecauciones deseguridad del folleto deseguridad incluido coneltelevisor. Foradded stability and<br />
safety, youcanpurchase andinstall <strong>the</strong>anti falldevice asdescribed below,<br />
Kit de soporte del televisor (sevende pot separado):<br />
The parts below are included in <strong>the</strong> TV Holder kit. Ademas, debera proveerse de un tornillo para madera, un tornillo y un perno<br />
u otro tipo de tornillo adecuado para la pared o el armario donde vaya a asegurar el soporte del televisor. We recommend a size<br />
M4xL20 wood screw.<br />
Instalacion del soporte del televisor<br />
1. Remove<strong>the</strong> screw attachedto <strong>the</strong> back of your T_, and <strong>the</strong>n connect<strong>the</strong> Tv-Holder to <strong>the</strong> TV with <strong>the</strong> screw includedin <strong>the</strong>Tv-Holder<br />
Kitthat is designatedfor yourT'v(<br />
2,<br />
3,<br />
Use s01oel tornillosuministrado,Si utilizaun tornillodiferentepodria danar el tebvbor.<br />
Firmlyfasten <strong>the</strong> screwyou provided(sizeM4xL20 orsimilar)to <strong>the</strong> wall or cabinetwhere <strong>the</strong> TV is to be installed,<br />
Siva a utilizareJtornillo sobre una pared es aconsejabb montarlosobre un montante,Siesto no es posbb, utilice un perno<br />
para anclareJtornillo,<br />
Tie <strong>the</strong> Tv-Holdercord to <strong>the</strong> screwfastenedon <strong>the</strong>wall or cabinetso that <strong>the</strong> TV is fixed, See<strong>the</strong> illustrationsbelow.<br />
Instab eJtelevisor cerca de la pared para que no caiga.<br />
Cuando instab eJsoporte deJtelevisor en la pared, asegureel cable nivelado respectoal suelo o inclinadohada abajo pot<br />
motivos de seguridad,<br />
Compruebe de vez en cuando que el cable estefirme,<br />
Cuando desee moverel tebvbor, debe quitar, primero,el cable de conexion,<br />
4. Compruebeque todas lasconexionesesten bienaseguradas,Periodicallycheck <strong>the</strong> connectionsfor anysign of fatigue or failure.Si<br />
tbne dudas sobre laseguridadde lainstahci0n, pongaseen contacto con un instahdor profesional,<br />
Para adquirir el kit del soporte del televisor, pongase en contacto con el centro de atencion al cliente de Samsung.<br />
- In <strong>the</strong> UnitedStates: 1-800-SAMSUNG(I-800-726-7864)<br />
- In Canada:1-800-SAMSUNG(I-800-726-7864)<br />
Espaflo131
Inforrnad©nadidonal<br />
Si cree que el televisor tbne un problema, compruebe primero esta Iista de posibles problemas y soluciones. Si ninguno de los consqos<br />
fundona, visite "www.samsung.com" y haga clic ell Support o Ilame al centro de atencion al clbnte de Samsung al 1-800-SAMSUNG.<br />
Imagendeficiente Enprimerlugar,ejeoutelaPruebade imagen paraConfirmnar queeltelevisormuestrecorrectamentelaimagende<br />
prueba.(Vayaa MENU- Soportet_cnioo, Autodiagn6stioo _Pruebade imagen)(pag,24)<br />
Silaimagende h pruebasemuestracorrectamente,laimagendefbientepuedeprovenirde lafuenteo h serial,<br />
Laimagendel televisornosevetanbiencome o Sitbne undecodificadorper cabb/sateliteanaBgbo,cambieloperundecodificadordigitalHD.Utiliceun cable<br />
enla tbnda. HDMIode componentesparaconseguirunacalidadde imagendealta definid6n(HD).<br />
o Suscriptoresde cabb/satelite:Pruebeconestacionesde altadefinid6n(HD)enlaofertade canabs.<br />
o Conexi6ndeantena:Pruebecon emieorasdealtadefinbi6n(HD)despuesde ejecutarla programad6n<br />
aubmatba.<br />
_ Muchoscanabsde altadefinici6n(HD)mqoranlos contenidosSD(StandardDefinition).<br />
o Ajustelaresoluci6nde lasalidadevideodel decodificadordecableo sateliteen 1080io720p.<br />
Laimagensevedistorsionada:errorde o Lacompresi6ndeloscontenidosde videopuedecausarimagenesdistorsionadas,espeoialmentenlasescenas<br />
macroUoques,microUoques,puntos, demovimbntor@ido,come enlosdeportesy laspeliculasde acci6n.<br />
pixelizaci6n, o Unnivelde serialdebilpuedecausarimagenesdistorsionadas.Noesun problemadeltelevisor.<br />
o Losteldonosm6vibsque seutilizancercadel televisor(aproximadamentea I metro)puedencausarintefferencias<br />
enla imagendel televisordigitaly anal6gico.<br />
Elcoloresde malacalidadofalta, o Siutilizauna conexi6ndecomponentes,compruebeque loscablesde loscomponentesestenconectadosenlos<br />
terminabscorrectos.Lasconexionesincorrectasosueltaspuedenoriginarproblemasenel coloroque lapantalla<br />
sequedeen blaneo.<br />
Elcoloro elbrilloesdemalacalidad. , Ajustelasopcionesde Imagenen elmenudel T_ (vayaa losmodesImagen/Oolor/Brillo/Definicion)(pag.16)<br />
, Ajustelaopci6nAhorro energiaen elmen0Oonfiguracion(pag.16).<br />
o Intentereiniciarlaimagenparaverla configuraci6nde imagenpredeterminada. (vayaa MENU- Imagen -<br />
Reiniciode la imagen)(pag.18)<br />
Hayunalineade puntosenel bordela pantalla, o Sieltamariode laimagenestaestablecidoenAjuste pantalla,cambbloa 16:9(pag.17).<br />
o Cambblaresoluci6ndeldecodificadordecable/satelite.<br />
Laimagenseve s61oenblancoy negro, o Siestautilizandouna entradacompuestaAV,conecteel cabledevideo(amarillo)en elterminalverdede laentrada<br />
1de componentesdel televisor.<br />
AIcambiardecanal,la imagensecongela,seve o Siestaconectadoal receptorde cable,reinici este. (vue_aa conectarel cabledealimentaci6ny esperea que el<br />
distorsionadao apareoeconretraso, deoodificadorsereinicb.Puedetardarunos20minutes.)<br />
o Establezcala resoluci6nde salidadel decodificadordecableen1080io72%.<br />
Enp@_ne r lugar,ejecutela Pruebade sonido parac0nfirrna_que elaudiodeltelevisorfuncionacorrectamente.<br />
(VayaaMENU- Soportet_cnico ,.Autediagn6stico _Pruebade sonido)_ag. 24)<br />
Sielaudioescorrecto,elprobbmadel sonidopuedeprovenirde lafuenteola serial,<br />
Nohaysonidoose eyedemasiadobajocon el o Oompruebeelvolumendeldispositivo(deoodificadorde cabb/satelite,DVD,Blu-ray,etc.)conectadoaltelevisor.<br />
volumenal m6ximo.<br />
Laimagenesbuenaperono haysonido, o Oonfigurela opci6nSeleceionaraltavoz comeAltavoz de"IV enel menude Sonido(pag.20).<br />
o Siutilizaundispositivoextemo,compruebeque loscabbs de audioestenconectadosalosterminabsde entrada<br />
deaudiocorrectosdeltelevisor.<br />
o Siutilizaundispositivoextemo,compruebeque laopci6nde salidadeaudiodel dispositivo(perejemplo,quizas<br />
debacambiarla opci6nde audiodeldecodificadorde cablea HDMIsitbne coneotadoHDMIaltelevisor).<br />
o SiseutilizauncableDVla HDMI,senecesitauncablede audioindependiente.<br />
o Sieltelevisortbne unterminaldeauriculares,aseguresede queestosnoestenconectados.<br />
o Reinicieeldispositivoconectadovolviendoa conectarel cablede alimentaci6ndel dispositivo.<br />
Losaltavoceshacenun ruidoinapropiado, o Oompruebelasconexionesdel cableCompruebeque no hayaun cablede videoconeotadoa unaentradade<br />
audio.<br />
2 Espaflol<br />
o Parala conexiondela antenao el cable,compruebela potenciadeserial.Unnivelde serialdebilpuedecausar<br />
distorsionesenel sonido.<br />
o EjecutelaPruebade sonido comese haexplicadoanteriormente.
i ii iii!iii iiL iJJJJJJ iJJJi! JJJJJJJjJJJJJJJJJJJJJJJJJJJJJJJJJJJJJJJJJJJJJJJ .............. Lii.........................................................................<br />
i@<br />
Nohayimagen,no hayvideo<br />
Eltelevisornoseenciende, o Compruebequeel cablede alimentaci6nCAestebienconectadoen latomadela paredyen el televisoc<br />
o Compruebequela tomade laparedfuncione.<br />
o Intentepulsarel bot6nPOWERdel televisorparaasegurarsede queel problemanoestaenel mandoadistancia.<br />
Sieltelevisorseenciende,consulte"Elmandoadistancianofunciona"acontinuaci6n.<br />
Eltelevisorse apagaautomaticamente, o CompruebesilaopcionTemporizadorestaestablecidaenApagado enel men0Configuracion(_g. 20).<br />
o Sieltelevisorestaconectadoaun PC,compruebelaconfiguraci6nde laalimentaci6nde este.<br />
o Compruebequeel cablede alimentaci6nCAestebienconectadoen latomadela paredyen el televisor.<br />
o Cuandosevela televisi6ncon unaconexiondeantenao cable,eltelevisorseapagatras f0-f 5 minutossi nohay<br />
sepal.<br />
Nohayimagennivideo, o Compruebelasconexionesde loscables(desconeotey vuelvaa coneotartodos loscablesdeltelevisory delos<br />
dispositivosexternos).<br />
o Establezsalasalidadevideodeldispositivoexterno(deoodiflcadordecable/satelite,DVD,Blu-ray,etc.)de modo<br />
Conexi6nRF(Cable/Antena)<br />
quecoincidaconlasconexionesde laentradadeTV.Perejemplo,si lasalidade undispositivoexternoes HDMI,<br />
sedebeconectarauna entradaHDMIen eltelevisor.<br />
o Compruebequelosdispositivosexternosestenencendidos.<br />
o Aseguresede seleccionarlafuentecorreotadelTV pulsandoel bot6nSOURCEdel mandoadistancia.<br />
o ReinicieeldispositivoconeotadovoMendoa conectarel cablede alimentaci6ndel dispositivo.<br />
Eltelevisornorecibetodos loscanales, o Compruebequeel cablecoaxialestefirmementeconeotado.<br />
o EjecuteProg.Auto paraariadirloscanalesdisponiblesa laIistadesanales.Vayaa MENU- Canal - Prog.Auto,<br />
seleccioneAutoy asegOresede queen elmenuesteestablecidoeltipo correctodeserialde TVpotcable. Hay3<br />
opciones(STD,HRCeIRC)(pag.14)<br />
,, Compruebelaposici6ndela antena.<br />
Nohaysubtitulosenloscanalesdigitales, o Compruebeelmenude configuraci6nde lossubtitulos.IntentecambiarelModo de Subtitulo Serviciol a OO1<br />
(_g. 22).<br />
,, Algunoscanalesno tienendatesdesubtitulos.<br />
Laimagensevedistorsionada:errorde o Lacompresi6ndeloscontenidosde videopuedesausarimagenesdistorsionadasespeoialmenten lasescenas<br />
macrobloques,microbloques,puntos, demovimientorapido,como enlosdeportesy laspaliculasde acci6n.<br />
pixelizaci6n, o Unnivelde serialdebilpuedecausarimagenesdistorsionadas.Noesun problemadeltelevisor.<br />
Conexi6nde PC<br />
Apareceun mensajede "Modono compatible". ,, Establezcalareeoluci6nde salidadelPCde modoqueeoincidaconlaresoluci6nadmitidapor eltelevisor(pag.12).<br />
"PC"siempreapareoeen lalistadefuentes o Estoesnormal;"PC"siempreapareoeenla listade fuentesaunqueno hayaningOnPCconectado.<br />
aunqueel PCnoesteconectado.<br />
Laimagenesbuenaperono hayeonido, o Ifyouareusingan HDMIconnection,check<strong>the</strong>audiooutputsettingonyour PC.<br />
Otros<br />
Barrashorizontalesrodantesde color p0rpurd o Desconectelosterminalesdeaudioizquierdoy dereohodel decodifisador.Siloszumbidoscesan,estoindicaque<br />
verdey zumbidosenlosaltavocesdel televisor eldecodificadortieneunproblemaen laconexi6na tierra.Sustitwaloscablesde videode componentespot una<br />
conla conexi6ndelcabledecomponentes, conexi6nHDMI.<br />
Laimagenno semuestraenpantallacompleta, o Encada ladose muestranbarrasnegrasenloscanalesde altaddinici6n(HD)cuandosemuestrancontenidos<br />
SDmejorados(4:3).<br />
o Semuestranbarrasnegrasenlas partesinferiory superiorcuandoseyen peliculasquetienendiferenteformato<br />
queel televisor.<br />
o Ajustelaopci6ndeltama_ode imagendeldispositivoexternoo deltelevisoralmode depantallacompleta.<br />
Elmandoadistancianofunciona, o Cambielaspilasdel mandoadistancia;hagacoincidirlos polos(+/-).<br />
o Limpielaventanadetransmisi6ndel sensordel mandoadistancia.<br />
o Apuntecon elmandoa distanciadirectamenteal televisordesdeunadistanciade f ,5 -2 metros.<br />
Elmandoadistanciadel cable/deoodificador o Programeelmandoa distanciadel decodificadordecable/sateliteparaquehagafuncionareltelevisocConsulteel<br />
no enciendeniapagaeltelevisorniajustael manualdeldecodificadorde sabldsateliteparaconeoerelc6digodelTV SAMSUNG.<br />
volumen.<br />
:3:3
Inforrnaci©nadicional<br />
Apareceun mensajede "Modono compatible". ,, Compruebelaresolucionqueadmiteeltelevisory ajusteenconsecuenciala resoluci6nde salidadeldispositivo<br />
externo.Oonsultecomoconfigurarlaresolucionen lapagina12de estemanual.<br />
Subtituloen elmen0del televisoraparece o NosepuedeseleccionarSubtitulo Subtituloen elmen_]deltelevisorcuandoestaconectadoatravesde HDMIo<br />
atenuado. Component(pag.22).<br />
SedebeactivarSubtitulo enel dispositivoexterno(pag.22).<br />
Seadvierteun oloraplasticoque provbnedel _ Esteclotesnormaly desaparececoneltbmpo.<br />
televisor.<br />
La Intensidadsepaldeltelevisorno _ Estafunci6ns61oestadisponibben loscanabsdigitabsconlasconexionesdeantena/ RF/ Ooexial(pag.24).<br />
estadisponibbenel menude pruebade<br />
autodiagn6stbo.<br />
Eltelevisorestaindinadohaciaun lade. _ Retirela basedelsoportedetelevisory vuelvaamontarla.<br />
Elmen0delcanalseveatenuado(nodisponibb) _ Elmen0Canals61oestadisponibbcuandoestasebccionadalafuenteTV.<br />
Laconfiguraci6nsepbrdedespuesde 30 o Sieltelevisorestaenel modoDemo comercio, laconfiguraci6ndelaudioy la imagense restabbceracada30<br />
minutoso cadavezqueseapagaeltelevisor, minutos.Cambblaconfiguraci6ndelmodo Demo comercioal modoIJso domiciliario enel procedimbnto<br />
Plug & Play.Pulseel bot6nSOL'ROEparaseleccionarelmode "IV;vayaaMENU-_ Configuracion<br />
Plug & Play-_ ENTER_ (_g. 8).<br />
Perdidaintermitentedeaudioo video. _ Compruebelasconexionesde loscablesy vue_aaconectarlos.<br />
Laperdidadeaudioovideosepuededeberaque loscablessondemasiadorigidoso gruesos.Debeasegurarse<br />
deque loscablesseanIo suficbntementefbxibbs paraun largoperiodode use.Enunmontajemuraldel<br />
televisor,esaconsqabbutilizarcablesconconectoresde 90 grados.<br />
Puedevet pequeflasparticulassimirade cerca _ Estoesunaparticularida del diseflodel productoy noes undefecto.<br />
elhordedelmarcodeltelevisor<br />
Apareceen lapantallaPOP(anunciode r6tulo _ Sebccioneel modoUso domiciliario enel modoPlug & Play.Paraobtenerinformaci6n,consultelafunci6n<br />
internodeltelevisor). Plug & Play(pag.8).<br />
Elpanel LODTFT utiliza un panel que consta de pixebs de [nfimotamaflo que requbren de unatecnolog[aaltamente sofisticada para<br />
su fabrbadon. No obstante, puedeque exbtan unos cuantos pixebs brilhntes u oscurosen la pantalla.Estospixebs no infiuiranen<br />
el rendimientodel aparato.<br />
I Almacenamientoy mantenimiento<br />
4 Espafiol<br />
d
S[S_ TruSurroundHD, SRSand _ symbolare trademarksof SRS Labs, Inc.<br />
TruSurroundHD TruSurroundHD technology is incorporatedunder licensefrom SRSLabs, Inc.<br />
m DOLBY,<br />
D|61TAL ]<br />
Aviso de la licencia del c6digo abierto<br />
Fabricado bajolicenciade DolbyLaboratories.Dolbyy el s[mbolode ladoble D son marcascomerdalesde<br />
Dolby Laboratories.<br />
En elcaso de que se utilice un softwarede codigo abierto,la licenciasobreesteesta disponibleen el meno delproducto.<br />
Elavisode lalicenciadel codigo abiertosolo estadisponibleen ingles.<br />
Resolud6ndepantalla 1920 x 1080<br />
ConsJderacionesmedioambientales<br />
Temperaturade funcionamiento 10°C a 40°C (50°F a 104°F)<br />
Humedaddefuncionamiento 10% a180%, sin condensaoi6n<br />
Temperaturade almacenamiento -20°(} a 45°C (-4°F a 113°F)<br />
Humedaddealmacenamiento _o/<br />
o oa195%, sin condensaci6n<br />
Sopor_egiratorio(izquierda/derecha) -20°- 20°<br />
Tamaflode 3antalla 40 pulgadas<br />
Sonido<br />
(40,0 pulgadas medidas diagonalmente)<br />
/Salida 10 W X 2<br />
DimensJones IAnx Prx AI<br />
CuerDoDnncli_a 38,2 X 3,1 X 23,3 pulgadas<br />
(970,0 X 78,6 X 591,3 ram)<br />
Conel soE_r[e 38,2 X 9,5 X 25,7 pulgadas<br />
(970,0 X 240,0 X 653,0 ram)<br />
Peso<br />
Sinel scoor[e 32.0 Ibs (14.5 kg)<br />
Oonel soporte 38.4 Ibs (17.4 kg)<br />
Eldiseflo y las especificacionespueden cambiar sin previo aviso.<br />
Estedispositivo es un aparatodigital de laClase B.<br />
Paraobtener masinformacionsobre lafuente de alimentaciony el consume de energ[a,consulte la etiqueta adiqeridaal producto.<br />
Espaflol 35
Inforrnad©nadidonal<br />
[] Vista frontal/Vista lateral<br />
[] Detalle del panel de terminales / vista posterior<br />
i® ® ® ® ®i<br />
O<br />
k-e- l<br />
(Unidad:pulgadas)<br />
(Unidad:pulgadas)<br />
NOTA:No todos losdibujosestan necesariamentea escala.Algunasdimensionesestan sujetasa cambio sin previoaviso.Consultelas<br />
dimensionesantes de efectuarlainstalaciondeltelevisor.La empresano se responsabilizade los errorestipograficoso de impresion.<br />
© 2010 SamsungElectronicsAmerica,Inc.<br />
6 Espaflol
A<br />
Actualizaciondel software 24<br />
Ahorro energia 23<br />
Ajusteautomatico I8<br />
Altavozde TV 20<br />
Altavozextemo 20<br />
Antena I4<br />
AUDIOOUT 11<br />
AutodiagnOstico 24<br />
B<br />
Balancede blanco 17<br />
BalanceI/D I9<br />
Boton EAV_CH 7, I4<br />
Boton ON/OFF 7<br />
Brillo 16<br />
C<br />
CambiarCodigo 22<br />
Componente I0<br />
Conexiona un dispositivode audio 11<br />
Conexiona un PC 12<br />
ContrasteDinam. 17<br />
D<br />
Definici0n 16<br />
D GITALAUDO OUT 11<br />
Dinamico 16<br />
D-sub 12<br />
E<br />
Ecualizador I9<br />
Edicionde canales I5<br />
EditarNombre I3<br />
Espaciode instalacion 2<br />
Especificaciones 35<br />
F<br />
Fotos 26<br />
Frecuencia 12<br />
G<br />
Girar 26<br />
N<br />
HDMI 9<br />
Herrambntas 3<br />
HomeTheater 11<br />
I<br />
Idioma 22<br />
ImagenTamaflo 17<br />
Indicadorde encendido 6<br />
L<br />
Licencia 35<br />
Listade Entradas 13<br />
M<br />
Mandoa distancia 7<br />
Media Play 25<br />
Melodia 23<br />
Memorizacionde canales 14<br />
Menude canales 14<br />
Modo de espera 6<br />
Modo pelicula 18<br />
Mono 19<br />
Montajemural 29<br />
Musica 27<br />
Musicade fondo 28<br />
MusicaModo de repetici0n 27<br />
N<br />
Navegar 13<br />
P<br />
Pilas 7<br />
Plug& Play 8<br />
R<br />
Reloj 20<br />
ResolutionOptima 12<br />
S<br />
Secuencia 25<br />
Sebccionar altavoz 20<br />
Sebccionar todo I5<br />
SignalStrength 24<br />
Simbolo 3<br />
Sintonizacionfina 16<br />
Solucionde probbmas 32<br />
Soporte de protecci0n 29<br />
Temporizador 20<br />
Tibio 17<br />
Tono Color 17<br />
Tonodel negro 17<br />
Tono Piel 17<br />
U<br />
UnidadUSB 25<br />
V<br />
VoI.Auto I9<br />
Volumen 6<br />
Espaflo137
Lesfigureset les illustrationsde ce mode d'emploi ne sentfoumies qu'a titre de rderence. L'apparencereelledu produitpourrait_tre<br />
differente.Le designet les specificationsdu produitpeuvent_tre modifiessans preavis.<br />
'_bs Voir le bon de garantb pour avoir plus d'infermation sur les conditions de garantie..<br />
Le format ecran large des ecrans ACL (16:9, soit le rapport hauteur/largeur de I'image) est congu principalement pour les videos plein ecran a ecran<br />
large. Les images affichees devraient 6tre en format ecran large 16:9 ou agrandi afin de remplir I'ecran si votre modeb offre cette caracteristique et que<br />
les images sont constamment en mouvement. L'affichage de graphiques et d'images fixes, comme les barres noires des videos et des programmes de<br />
tel@ision en format standard non agrandi doit 6tre limite au maximum a 5 % du temps d'ecoute hebdomadaire.<br />
De plus, il faut IimiterI'affichage d'images et de textes fixes, comme les rapports boursiers, les affichages de jeux video, les loges des stations, les sites<br />
Web ou les images graphiques et les schemas des ordinateurs, tel qu'indique ci-dessus, et ce pour tousles tel@iseurs. L'affichage d'images fixes qui ne<br />
respecte pas les directivesci-dessus peut causer un vbillissement inegal des ecrans ACL en y creant des images fant6mes subtiles mais permanentes.<br />
Pour @iter ce probBme, faites varbr les emissions et les imageset regarder principalement des images plein ecran en mouvement et non pas des images<br />
ou des barres foncees fixes. Dans les modeles d'ecran a plasma qui offrent des caracterbtiques de format d'image, utiliserces commandes pour obtenir<br />
differents formats en plein @ran.<br />
Prendre garde au choix des formats et a bur duree d'utilbation. Un vbillissement inegal r@ultant du choix et de I'utilbation d'un formal tout comme les<br />
images remanentes, ne sent pas couverts par la garantie Iimiteede Samsung.<br />
• @NONC@DE GARANTIE LIMIT@EDE SAMSUNG ELECTRONICSPOUR L'AM@RIQUEDU NORD<br />
Assujettb aux exigences, conditions, exclusions et limitations de la garantie limiteeoriginab fournie avec les produits de Samsung Electronics<br />
(SAMSUNG)et les exigences, conditions, exclusions et limitations de la presente garantie, SAMSUNG offriraen plus un service de r@aration sous<br />
g,arantb aux @tats-Unispour les produits achet@ au Canada et un service de reparation sous garantie au Canada pour les produits achetes aux<br />
Etats-Unis pendant la periode de garantie precis6e a I'origine et pour I'acheteur initialseubment.<br />
Les r@arations sous garantie decrites ci-dessus doivent 6treeffectuees dans un centre de r@aration agre6SAMSUNG. En plus de la presente<br />
garantb, la garantie limitee originale et une facture datee en tant que preuve d'achat doivent 6tre pr@entees au centre de r@aration. Letransport<br />
de I'appareil au eta partir du centre de r@aration demeure la responsabilit6 de I'acheteur. Les conditions couvertes ne sent Iimitees qu'aux vices de<br />
materiaux et de fabrication dans des conditions d'utilisation normale.<br />
Exclues, mais non pas limitees a, sont les dispositions precis6es a I'origine pour le service _ domicile ou sur place, durees de reparation minimales et<br />
maximabs, echanges ou remplacements, accessoires, options, extensions ou preduits non durables.<br />
Pour obtenir le nom d'un centre de r@aration agre6 Samsung, composez les numeros sans frais suivants :<br />
-Aux @tats-Unis: 1-800-SAMSUNG (1-800-726-7864)<br />
- Au Canada : 1-800-SAMSUNG<br />
@vitezI'affichage d'images fixes (telles que des fichiers photo jpeg) ou d'el6ments d'image fixes (telsque les loges de canaux, le format d'image 4:3 ou<br />
panorama, barre de ddilement affichant les nouvelbs ou la bourse dans le bas de I'ecran, etc.) a I'ecran. Un affichage constant d'une image fixe peut<br />
causer I'apparition d'images remanentes sur I'ecran ACL ce qui a une incidence sur la qualite de I'image. Afin de reduire le risque que survienne un tel<br />
effet, veuillezsuivre les recommandations suivantes :<br />
• @vitezd'afficher la m6me cha_nependant de Iongues periodes.<br />
Essayez de toujours afficher une I'image en pbin @ran.<br />
Reduire la luminosite et le contraste permet d'eviter I'apparition d'images remanentes.<br />
Utilisez toutes les fonctions de votre tel@iseurconcues pour reduire la remanence d'images et la brOlured'ecran; consultez la section appropriee du<br />
manuel pour obtenir plus de details.<br />
Respectez les distances requises entre le produit et les autres objets (p. ex., bs murs)afin d'assurer une bonne ventilation.<br />
Le non-respect de ces distances pourrait faire augmenter la temperature internedu produit et causer un incendie ou endommager le produit.<br />
'_bs Lorsque vous utilisez un support ou un support mural, utilisezseulement les pieces feurnies par Samsung Electronics.<br />
" Sivous utilisezdes pieces fournies par un autre fabricanl cela pourrait endommager le produit ou causer des blessures engendrees par la chute<br />
du produit.<br />
'_bs L'aspect peut differer selon le produit.<br />
Faites attention Iorsque vous touchez le televiseur,car certaines pieces peuvent 6tre chaudes.<br />
i<br />
i<br />
4 ouces i<br />
Fran_ais<br />
"[4 pouces<br />
! !<br />
It<br />
i<br />
i<br />
',4 ouces<br />
4 pouces<br />
i
Tabledes matieres<br />
• Caract&ristiques ........................................................ 4<br />
• Accessoires .............................................................. 4<br />
• Installation de la base ................................................ 5<br />
• Presentation du panneau de commande ................... 6<br />
• Presentation de la t61ecommande ............................. 7<br />
• Branchement b.une antenne ..................................... 8<br />
• Pr_t b.I'emploi (Mise en marche initiale)..................... 8<br />
• Branchement b.un appareil audiovisuel ..................... 9<br />
• Branchement b.un appareil audio ............................ 11<br />
• Branchement d'un PC ............................................ 12<br />
• Modification de la source d'entree ........................... 13<br />
• Navigation dans les menus ..................................... 13<br />
• Menu des canaux ................................................... 14<br />
Affichagedes canaux 14<br />
Utilisationdes canaux favoris 14<br />
M6morisation des canaux 14<br />
Modification des canaux 15<br />
Autresfoncfions 15<br />
• Menu Image ............................................................ 16<br />
Modification du mode dlmage pr6r6gl6 16<br />
Ajustement des r6glages de I'image 16<br />
Changement des options de I'image 16<br />
Configuration du t616viseuravec un PC 18<br />
• Menu Son ............................................................... 19<br />
Modification du mode Son pr6r6gl6 19<br />
Ajustement des r6glages du son 19<br />
R6glage du son 19<br />
AppuyezsurlatoucheTOOLSde la<br />
tel6commandepourutilisercettefonction.<br />
V6rifiez le symbole!<br />
• Menu de configuration ............................................ 20<br />
R6glage de I'horloge 20<br />
Utilisation de la foncfion de veille 20<br />
R6glage de la raise en marche et de I'arr6t de la<br />
minuterie 20<br />
Exclusion automatique de programmes 21<br />
Autres fonctions 22<br />
Solutions 6conomiques 23<br />
• Menu Soutien technique ......................................... 24<br />
• Media Play .............................................................. 25<br />
Branchement d'un disposifif USB 25<br />
Le menu Media Play 25<br />
• Installation de rensemble de fixation murale ............ 29<br />
• Utilisation du verrou antivol Kensington ................... 30<br />
• Stabilisation du t61eviseurpar rapport au tour .......... 31<br />
• Depannage ............................................................. 32<br />
Entreposage et entretien 34<br />
• Licence ................................................................... 35<br />
• Specifications techniques ........................................ 35<br />
• Dimensions ............................................................. 36<br />
• Index ...................................................................... 37<br />
Remarque<br />
Indique des renseignements<br />
supplementaires.<br />
®<br />
Guideetape par etape<br />
Lisezlesinstructionsfiguranta cetendroit<br />
poursavoircommentouvrirlesous-menu<br />
pertinent.<br />
Francais 3
Miseenroute<br />
® Interfacenumeriqueet reseautiquede qualiteexceptionnelb:grace au syntoniseurnumeriqueHD integre,la programmationHD non<br />
payante peut6tre visionneesans cablos61ecteurou recepteursatellite.<br />
® Media Play: Lecturede certainsfichiersmusbaux, photos et filmsenregistressur un dispositifUSB(p. 25).<br />
® Autodiagnostic : Vous pouvezverifiersi b fonctionnement de Hmageet du sonest normal(p.24).<br />
Veillera ce que tous bs el6menetssuivantssobnt indus avec b t61eviseurACL Sides el6mentssont manquants,communiquez avec<br />
le detaillant.<br />
Laforme et la couleur des articlespeuvent varierselon le modele.<br />
Frangab
Reportez-vous auguide s@are pour I'installation dusupport.<br />
Suivezles etapes ci-dessouspour fixerletel6viseura la base.<br />
Fixezle guide de la basesur la basea I'aide desquatrevis (M4 X LI 2), telqu'illustre.<br />
ou (M4XL12)<br />
v!<br />
•- - Vis (M4 X L12)<br />
2. Fixezle tel6viseursur la baseen la maintenanta laverticale,tel 3. Resserrezlesdeuxvis (M4 X L12)a la position O, puis<br />
qu'illustre, resserrezles deuxvis (M4X LI 2)a laposition 0.<br />
REMARQUE<br />
* Assurez-vousde bien distinguerle devant et I'arrierede la baseet du guide de celle-ci a I'assemblage.<br />
, Assurez-vousqu'au moins deux personnessoulevent et d@lacent letel6viseur.<br />
" Placez I'appareila la verticale, puis serrezles vis. Sivous vissezles vis Iorsquele t61eviseurest en position hodzontale,il pourrait<br />
penchervers un cOte.<br />
Francais 5
Miseenroute<br />
Lacouleur et la forme du produit peuventvarieren fonctiondu modele.<br />
Haut-parleurs<br />
CaDTeurde Telecommanae<br />
SOURCE<br />
MENL<br />
--VOL+<br />
VCHA<br />
Mode veiiie<br />
-alcateur aaumental:lor<br />
(b Alirnentation/<br />
Capteur de toBcommande<br />
F- SOURCE_ MENU<br />
OrienterlateBcommandeversb capteur sur leteBviseur.<br />
-- VOL +<br />
Indicateurd'alimentation<br />
v OH A J q'_ I<br />
v I<br />
Permetde passerd'une source d'entree a Fautre.Danslemenu a I'ecran,cette touche a la<br />
mOmefonctionque la touche ENTERIZ_ de lateBcommande.<br />
Afficheb menua Fecran,OSD(OnScreenDisplay),desfonctions de votre teBviseur.<br />
Permetde reglerb volume. Dansb menu a Fecran,utilisezlestouches - VOL + de lamOme<br />
maniereque bs touches _1et I_ de lateBcommande.<br />
Changede canal.Dartsle menua I'ecran,utilisezles touches V ¢H _ de la mOmemanBre<br />
que lestouches T et A de lateBcommande.<br />
Clignotepuiss'arrOteIorsqueleteBviseurest allume.S'allumeen mode de veille.<br />
Appuyer sur cettetouche pour mettre b teBviseursous tensionou horstension.<br />
Ne laissezpar votreteBviseuren moded'attente durant de Ionguesperiodes (Iorsquevous partezen vacances,par exemple).Unepetite<br />
quantited'eiectricite estconsommee m6meIorsqueleteBviseurest eteint. IIest conseilBde debrancherlecordon d'alimentation.<br />
Fran_ais
Permetde mettre le t61eviseursous<br />
tension et hors tension.<br />
Appuyez pour acceder directement<br />
un canal<br />
Appuyezsur cette touche pour s61ectionner<br />
des canauxsuppl6mentaires(num6riques)<br />
diffus6spar unem6me station.Par<br />
exemple,pour choisirle canal54-3,<br />
appuyersur 54, puis sur- et sur 3.<br />
Permet de regler levolume.<br />
Affiche le menu OSD.<br />
Affiche Media Play (USB) (p. 25).<br />
Selectionne rapidement les fonctions<br />
frequemment utilisees.<br />
Permet de retourner au menu prec6dent.<br />
Touches du menu Liste des canaux,<br />
Media Play (USB), etc.<br />
Insertion des piles (piles AAA)<br />
z<br />
2<br />
REMARQUE<br />
Affiche et s61ectionneles sources video<br />
disponibles (p. 13).<br />
Permet d'ecouter le canal prgcedent,<br />
Coupe temporairement le son.<br />
Change de canal.<br />
Affiche la Iiste de vos canaux a 1'6cran<br />
(p. 14).<br />
Affiche la liste de vos canaux favoris<br />
I'ecran (p. 14).<br />
Affiche I'information a I'ecran.<br />
Selectionne les options de menu<br />
I'ecran et modifie les valeursaffichees.<br />
Quitte le menu.<br />
MTS: Appuyez sur cette touche pour<br />
choisir entre les modes st6reo, mono<br />
ou diffusion SAP (seconde piste audio)<br />
(p. 19).<br />
RSIZE: %lectionne le format de I'image<br />
(p. 17).<br />
CC: Permet de reglerla fonction de<br />
sous-titrage (p. 22).<br />
* Utilisezla tel6commandea une distance maximaledu televiseurd'environ<br />
7m,<br />
* Une lumierevive peut entraverle bon fonctionnement de la telecommande,<br />
Evitezde I'utiliserpres d'une source lurnineusefluorescenteou une<br />
enseigneau neon.<br />
* Lacouleur et la forme peuventvader en fonction du modele.<br />
Francais 7
Miseenroute<br />
Au momentde lapremBre miseen marchedu teBviseur,bs reglagesde bases'effectuentautomatiquement.<br />
Branchementdu cordon d'alimentation et de I'antenne.<br />
Uneseriede messagess'afficheraa I'ecranpour vousassisterpour laconfigurationdes reglagesde baselotsde lamisesous tensioninitiabde<br />
votreteBviseur.Appuyezsurla touche POWER(b. LafonctionPr_t a I'emploi n'est disponibbque Iorsquela sourceEntreeest regBea TV.<br />
Appuyezsur la touche rouge pour revenira I'etapepr@edente.<br />
%<br />
Sebctionnezlalangue d'affichagea I'ecrandesiree. S|_<br />
Selectionae la langue Appuyezsur la touche A ou _', pub sur la touche ENTERI_. POWER<br />
Selectionau moae Appuyezsur la touche _ ou _, pub sur la touche ENTERIZ_.<br />
Demo magasJnc_ • Sebctionnezle mode Util. a domicile. Le mode Demo magasin<br />
Util. a domicile ne dolt 6tre utilisequ'en magasin.<br />
Choixd'une antenne<br />
• Revenirau mode Util. a domicile a pa_ir du modeDemo magasin<br />
(standard): appuyezsur la touche de volumedu teBviseur.Lorsque<br />
le reglagedu volumeest affichea recran, appuyezsur la touche<br />
MENU du teBviseurpendant5 secondes.<br />
Appuyezsur la touche A ou _', pub sur la touche ENTERI_. SebctionnezAir, C_ble ou Auto.<br />
Cholxdun cana Appuyezsur la touche A ou _', pub sur la touche ENTERE_. Sebctionnezlasource d'antenne<br />
a memonser.Lorsquevous regbz lasource d'antennea Cable, vous pouvezegabmentregler bs<br />
/aleutsnumeriques(frequencedescanaux)auxcanaux. Pourplus de details,reportez-vousa la<br />
sectionChaine_ Prog. auto (p.14).<br />
Appuyezsur EI/TERL_ a n'importe quel moment pour interromprelamemorisation des<br />
canaux.<br />
Reglageau Mode horloge Regleb Mode horloge manuelbmentou automatiquement.<br />
• Auto: Vous permetde sebctionner b mode H. d'ete (heureavancee)ainsique b fuseauhoraire.<br />
,, Manuel: Vous permet de reglermanuelbmentI'heureet ladate actuelbs (p.20).<br />
Afllcnagedu Guide de Methodede branchementvous assurantque lameilburequalite HD s'affiche.<br />
connexion HD<br />
Enmode d ffusion, Appuyezsur la touche ENTERI_.<br />
Si vous souhaitez reinitialiser ce parametre...<br />
(_ MENUrm _ Configuration _ Pr_t a I'emploi _ ENTER[_<br />
Fran_ais
Branchements<br />
Utilisation d'un c&ble HDMI ou HDMI/DVi : Branchement HD (jusqu'a 1080p)<br />
Nous recommandonsI'utilisationde laconnexion HDMIpour obtenir uneimage HD de qualiteoptimab,<br />
Appareilsdisponibles:lecteur DVD,lecteurBlu-ray,cablos61ecteurou un recepteursatellite(boRierdecodeur)HD<br />
HDMI (DVl} IN / DVlAUDIO IN<br />
" II faut utiliserla prised'entree HDMI (DVl} IN pour levideo dans le cas d'un branchementau cable HDMI/DVI,Un lecteur<br />
DVD,lecteur Blu-ray, cablos61ecteurou un r@epteursatellite (bottlerdecodeur)HD peut necessiterun cable DVI-HDMI(de<br />
DVlvers HDMI)ou un adaptateurDVI-HDMI(de DVlvers HDMI),Une prise DV AUDIO [I'4est necessairepour I'audio.<br />
" II est possible que I'imagesoit anormale(s'ily a une image)ou que leson ne fonctionne passi un appareil exteme utilisant<br />
une ancienneversiondu mode HDMI est brancheau teBviseur.Si un tel probBme survient, renseignez-voussur laversion<br />
HDMI aupresdu fabricant de I'appareilexteme et, si elletrop ancienne,demandez une raisea niveau.<br />
" Wrifiez que vous achetez un cable HDMI certi%. Sinon, I'imagerisque de ne pas s'afficherou une erreurde connexion<br />
peut survenir,<br />
...... ,%<br />
Francais 9
Branchements<br />
Utilisation d'un c&ble composante (jusqu'a 1080p) ou audio/video (480iseulement)<br />
Appareilsdisponibbs:, bcteur de DVD, bcteur Biu-ray,c_blos61ecteuret recepteursatellite,magnetoscope<br />
Connexion avec c&ble EX-Link<br />
Appareilsdisponibbs : appareilsextemescompatiblesavec EX-Link.<br />
0 Fran_ais<br />
EX-L{ItK: Oonnecteurutilisea desfins de r@arationseubment.
Utilisation d'un c&ble optique (numerique)<br />
Appareilsdisponibles:cha_neaudio numerique,amplificateur,cinemamaisona DVD<br />
DIG TAL AUDO OUT (OPT CAL}<br />
* Lorsqu'unechaine audio numeriqueest brancheea la priseDIGITALAUDIO OUT (OPTICAL},reduisezlevolume du<br />
teBviseuret de la cha]ne,<br />
* Le son en 5,1 canauxest possibleIorsquele teBviseurest raccordea un appareil exteme dote de cette fonction audio,<br />
* Lorsque lerecepteur (amplificateurou lecteur de DVDde la chainede cinemamaison)est active,il est possibled'entendre<br />
le son provenantde la priseoptique du teBviseur. LorsqueleteBviseur regoitdes signaux numeriques,il transmet leson<br />
en 5,I canauxa I'amplificateurou lecteurde DVDde lachaine de cinema maison. Lorsquelasource est un composant<br />
numerique, comme un lecteur DVD/Blu-ray,un c_blos61ecteurou un recepteur satellite(boitierdecodeur),et que ce dernier<br />
est brancheau teBviseura I'aided'un c_ble HDMI,I'amplificateurou lecteur de DVDde lacha]ne de cinema maison nefera<br />
entendrequ'un son en deuxcanaux. Pour entendre leson en 5,I canaux, branchezdirectement laprise DigitalAudio Out<br />
du lecteur DVD/Blu-ray,c_blos61ecteurou recepteursatellitea un amplificateurou une chainede cinema maison,<br />
Frao iia,s
Branchements<br />
_, I'aide d'un c&ble HDMI/DVl ou c_bie D-sub<br />
Modes d'affichage (Entree D-Sub et HDMI/DVi)<br />
La resolutionoptimaleest I920 x 1080 a 60 Hz.<br />
IBM<br />
MAC<br />
VESA CVT<br />
VESA DMT<br />
VESA GTF<br />
VESA DMT / DTV CEA<br />
REMARQUE<br />
640 x 850<br />
720 x 400<br />
640 x 480<br />
832 x 624<br />
1152 x 870<br />
720 x 576<br />
1152 x 864<br />
1280 x 720<br />
1280 x 960<br />
640 x 480<br />
640 x 480<br />
640 x 480<br />
800 x 600<br />
800 x 600<br />
800 x 600<br />
1024 x 768<br />
1024 x 768<br />
1024 x 768<br />
1152 x 864<br />
1280 x 1024<br />
1280 x 1024<br />
1280 x 720<br />
1280 x 800<br />
1280 x 800<br />
1280 x 960<br />
1360 x 768<br />
1440 x 900<br />
1440 x 900<br />
1680 x 1050<br />
1280 x 720<br />
1280 x 1024<br />
1920 x 1080p<br />
31.469<br />
31.469<br />
35.000<br />
49.726<br />
68.681<br />
35.910<br />
53.783<br />
56.456<br />
75.231<br />
31.469<br />
37.861<br />
37.500<br />
37.879<br />
48.077<br />
46.875<br />
48.363<br />
56.476<br />
60.023<br />
67.500<br />
63.981<br />
79.976<br />
45.000<br />
49.702<br />
62.795<br />
60.000<br />
47.712<br />
55.935<br />
70.635<br />
65.290<br />
52.500<br />
74.620<br />
67.500<br />
70.086<br />
70.087<br />
66.667<br />
74.551<br />
75.062<br />
59.950<br />
59.959<br />
74.777<br />
74.857<br />
59.940<br />
72.809<br />
75.000<br />
60.317<br />
72.188<br />
75.000<br />
60.004<br />
70.069<br />
75.029<br />
75.000<br />
60.020<br />
75.025<br />
60.000<br />
59.810<br />
74.934<br />
60.000<br />
60.015<br />
59.887<br />
74.984<br />
59.954<br />
70.000<br />
70.000<br />
60.000<br />
* IIfaut utiliserlaprise d'entree HDM_(DVI)IN dans le cas d'un branchement au c&bleHDMI/DVI.<br />
* Le mode interface n'est paspris en charge.<br />
* Le t61eviseurpeut fonctionner de facon anormalesi un format video non standardest selectionn&<br />
25.175<br />
28.322<br />
30.240<br />
57.284<br />
100.000<br />
32.750<br />
81.750<br />
95.750<br />
130.000<br />
25.175<br />
31.500<br />
31.500<br />
40.000<br />
50.000<br />
49.500<br />
65.000<br />
75.000<br />
78.750<br />
108.000<br />
108.000<br />
135.000<br />
74.250<br />
83.500<br />
106.500<br />
108.000<br />
85.500<br />
106.500<br />
136.750<br />
146.250<br />
89.040<br />
128.943<br />
148.500<br />
* Lesmodes s@are et composesont pris en charge. Le mode SOG(Sync OnGreen) n'est paspris en charge.<br />
2 Fran_ais<br />
+/_<br />
_/+<br />
_/+<br />
_/+<br />
_/+<br />
_/+<br />
+/+<br />
+/+<br />
+/+<br />
+/+<br />
+/+<br />
+/+<br />
+/+<br />
+/+<br />
_/+<br />
_/+<br />
+/+<br />
+/+<br />
_/+<br />
_/+<br />
_/+<br />
_/+<br />
+/+
Liste source<br />
Selectionnerle teBviseurou une autre source SOURCE<br />
d'entree exteme comme un bcteur DVD/Blu-ray,<br />
c_blos61ecteurou recepteursatellite.<br />
MENUITrl _ Entree_ Liste source<br />
ENTER %<br />
[] TV / AV/ Component / PC / HDMI/DVl<br />
Seub bs appareib externesbranches au teBviseur<br />
peuvent 6tre sebctionn6s. Dansla Liste source, bs<br />
entreesbranchees sont en surbrillance.<br />
[:option PC est toujours activeedans la Liste source,<br />
Fonctionsde base<br />
Avantd'utiliser b tei6viseur,suivezies etapesci-dessouspour<br />
apprendrecomment naviguerdans bs menuset selectionneret<br />
ajusterdifferentesfonctions,<br />
o 11<br />
@<br />
O ToucheMENU : Affichelemenu a I'ecran principal.<br />
O ENTER_ / touche de direction: Permetde d@lacerle<br />
curseuret selectionnerun eBment. Conflrmele reglage,<br />
O ToucheRETURN: Permetde retournerau menuprec6dent.<br />
O ToucheEXT : Quittele menude I'ecran,<br />
Entrer le nom<br />
MENUITrl _ Entree _ Entrer le nom _ ENTER<br />
Magnetoscope / DVD/ C&ble STB / Satellite STB /<br />
PVR STB/ Recepteur A/V / Jeu / Camescope / PC /<br />
DVl PC / DVl/ TV / IPTV / Blu-ray / HD DVD/ DMA: Entrez<br />
I'appareilconnecteaux prisesd'entree pour faciliterlaselection<br />
de lasource d'entree,<br />
Lorsqu'un PC de resolutionde I920 x I080 a 60 Hzest<br />
branche au port HDMI (DVl) IN, reglez laconnexion<br />
DVl PC dansle menu Entrer le nom.<br />
Lorsqu'un c_ble HDMI/DVIest brancheau port d'entree<br />
RDM (DV) IN, vous devezregler le teBviseursur le mode<br />
DVl PC ou DVl dans le menuEntrer le nora<br />
Utilisation de I'affichage &I'ecran OSD (OnScreen Display)<br />
La methoded'acces varieen fonctiondu menuselectionn&<br />
_: ;;;MENUFm<br />
V ZA<br />
Lesoptionsdu menuprincipal<br />
apparaissent:<br />
Image, Son, Chaine, Configuration,<br />
Entree,Application,<br />
Support technique.<br />
SelectionnezuneicOnea I'aidede la<br />
touche A ou T,<br />
ENTER E_ Appuyezsur ENTER_ pour acceder<br />
ausous-m÷nu.<br />
S6 ect onnez sou.menu vou u<br />
I'aidede la touche A ou T.<br />
Appuyezsur la touche _ ou I_ pour<br />
OumenuO s v*urd'une lectionn*'a option. Ovar,een Rer ,age on<br />
ENTERE_ Appuyezsur la touche ENTER_ pour<br />
confirmerlasebction.<br />
EXIT-,IJ Appuyezsur la touche EXT.<br />
Frangais 13
Fonctionsde base<br />
Affichage des canaux<br />
Liste des canaux<br />
Ajoutez,supprimezou ddinbsez vos canauxfavoriset<br />
utilisezb teB-horairedesdiffusionsnumeriques, _,_.j<br />
(_ MENUrlTt _ Oha_ne_ Liste des oanaux _ __,,_[ t ,-,_<br />
ENTER_ _ }<br />
Selecdonnezuncanal clansla IisteTous ies canaux, _ I<br />
Oanaux ajoutes, Favori ou Enregistrement par<br />
minuterie en appuyant sur lestouches A / T et<br />
ENTERE_, Vouspouvezalorsvisionnerlecanal selectionn6.<br />
[] _B Tousies canaux : Affichetousles canauxactuelbment<br />
accessibbs,<br />
[] _Canaux ajoutes : Affichetous bs canauxajoutes.<br />
[] _ Favori : Affichetousles canauxfavorb,<br />
[] _ Enregistrement par minuterie : Affichagede toutes les<br />
emissionsreserv6es.<br />
Utilbationdes touchesde couleur avec la Liste des canaux<br />
" [3 Verte(Zoom): Agrandit ou rapetbse un numerode<br />
canal.<br />
" ::: Jaune (Selectionner) : Sebctionne plusburs Ibtes de<br />
canaux.Sebctionnez les canauxdesir6s,Appuyez ensuite<br />
sur la touche jaune pour regbr simultanementtous bs<br />
canaux choisb. Le symbole _/s'affiche a lagauche des<br />
canaux choisb.<br />
" _-_ (Outiis) : Affiche b menud'options Liste des canaux.<br />
(Lesmenus d'options peuventdifferer selon la situation.)<br />
ic6nes d'affichage de statut des canaux<br />
i_<br />
_/ Un canal selectionne,<br />
V Un canal ddini en tant que favori,<br />
(_) Une emissionresep/ee.<br />
4 Fran_ais<br />
Utilisation des canauxfavoris<br />
(_ MENUITrl _ Ohafne _ Liste des canaux _ ENTERE]}_<br />
aux favoris / Effacer des favoris<br />
Ddinircomme favorisbs canauxque vous regardezfrequemment.<br />
1. Sebcdonnez un canalet appuyezsur la touche TOOLS,<br />
2. Ajouterou supprimer un canala partir desmenus<br />
Ajouter aux favoris ou Effacer desfavoris.<br />
Pouraffichertousles canauxFavoris,diquez sur<br />
boutonillustrea droite,<br />
M_morisationdes canaux<br />
(_ MENUITrl _ Ohafne_ ENTERI_<br />
Antenne (Air / C&b!e)........................................<br />
Avant quevotre teBviseurne puissecommencera memoriserles<br />
canauxdisponibbs, vous devezspedfier le typede lasource de<br />
signalbrancheeau teBviseur(c'est-a-direuneAir ou le O_bie).<br />
Prog. auto<br />
[] Air : Signald'antennede typeair,<br />
[] O&bie : Signald'antennede type c_bb,<br />
[] Auto : Signauxd'antennede typeAir et C_bb,
REMARQUE<br />
* Aumoment delaselection dusysteme detel6vision<br />
parc_ble: STD, HRCetIRCdesignent differents<br />
systemes dec_blodistribution. Oommuniquez avec votre<br />
c_blodistributeur pour determiner lesysteme dec_ble<br />
devotre region, Laselection delasource designal est<br />
maintenant terminee.<br />
* Unefoistousles canaux memoris6s, leteleviseur<br />
commence aeliminer lescanaux brouilles, Puis lemenu<br />
Prog. autos'affiche denouveau.<br />
Modification des canaux<br />
(_ MENU[[]] _ Chafne _ Liste des canaux _ ENTERI]_<br />
Modifier le nom du canal<br />
1. Selectionnezun canal et appuyezsur latouche TOOLS.<br />
2. Modiflez lenora du canal a partirdu menu<br />
Modifier le nom du canal.<br />
[] Modifier le nom du canal (canauxanalogiquesseulement):<br />
assignezun nora personnaliseau canal,<br />
Autres fonctions<br />
(_ MENUITrl _ Chafne _ ENTERI]_<br />
Effacer les canaux brouill_s<br />
Cette fonctionpermet d'eliminerles canauxbrouillesapresla<br />
programmationautomatique.Cette procedurepeut prendrede 20<br />
30 minutes,<br />
Arr6ter la recherche de canaux brouilles.<br />
1. Appuyezsur ENTER[]_ pour selectionnerArr_t,<br />
2. Appuyezsur latouche _1pour selectionnerOui.<br />
3. Appuyezsur latouche ENTER[]_,<br />
Cette fonction n'est disponible qu'en mode C&ble.<br />
Liste des canaux<br />
(_ MENU[[]] _ Chafne _ Liste des canaux _ ENTERI]_<br />
Liste des canaux Menu d'options<br />
R%lez chaquecanal a I'aidedes options du menu Listede canaux<br />
(Ajouter / Supprimer, Ecoute minut., Choisir tout /<br />
Deselect. Tout), Lesoptionsdu menupeuventvarierselonle statut<br />
du canal,<br />
1. Selectionnezun canal et appuyezsur latouche TOOLS.<br />
2. Choisissezune fonctionet modifiezles parametres,<br />
[] Ajouter / Supprimer: Ajoutezou de supprimezun canal afin<br />
d'afficherseulementles canauxdesir6s,<br />
[]<br />
[]<br />
REMARQUE<br />
Tousles canaux supprimessont affiches dans le<br />
menuTous les canaux,<br />
* Un canal affiche en gris indiqueque celui-ci a ete<br />
supprim&<br />
* Le menuAjouter ne s'afficheque pour les canaux<br />
supprimes,<br />
* IIest egalement possiblede supprimer un canal du<br />
menu Canaux ajoutes ou Favori.<br />
I_coute minut. : Vous pouvezfaireafficherautomatiquement<br />
un canal a I'heurevoulue.Vous dwez reglerI'horlogeavant<br />
d'utilisercette fonction.<br />
1. Appuyer sur la touche _1/ _. / A / _' pour choisirlecanal<br />
voulu dansla Liste des canaux,<br />
2. Appuyezsur latouche TOOLS puis selectionnez<br />
Ecoute minut.,<br />
3. Faitesddiler versle hautou lebas pour ajuster les<br />
reglagesdans labo_teou appuyezsur les touches<br />
numeriquesde latel6commandespour entrerladate et<br />
I'heure,<br />
Sivous selectionnez Une lois, Hebdomadaire ou<br />
Quotld. dans Repeter, vous pouvezentrerla date<br />
que vous voulez,<br />
4. SelectionnezOK, puis appuyezsur latouche ENTER[]_<br />
unelois terrain&<br />
REMARQUE<br />
" Seulsles canaux m#morisespeuvent_tre reserves.<br />
" Lesemissions reserveess'afficherontdans le menu<br />
Enregistrement par minuterie.<br />
. Lorsqu'un canal num#riqueest selectionne,appuyez<br />
sur la touche I_ pour regarder I'emissionnumerique,<br />
Choisir tout : S#lectionnetousles canauxdansla Ilstedes<br />
canaux,<br />
Deselect. Tout : Deselectionnetousles canauxselectionnes.<br />
Uoption Deselect. Tout ne peut _tre choisie que<br />
Iorsqu'un canal ou plus est selectionn&<br />
¢ Enregistrement Par mi nuterie .......................................<br />
(dartsla Liste des canaux)<br />
Vous pouvezregarder,modifierou supprimeruneemissionreservee<br />
pour I'ecoute.L'optionEnregistrement par minuterie s'afficheici,<br />
Selectionnezun programmeet appuyezsur la touche TOOLS pour<br />
afficherles options,<br />
[] Information, modification : Modifieuneemissionreservee<br />
pour I'ecoute.Commencezpar I'etape 3 de I',,Ecouteminut.>,<br />
ci-dessus,<br />
Annuler horaires : Annuleune emissionreserveepour<br />
I'ecoute.<br />
Oette fonction permet de supprimer le ou les<br />
programmesselectionnes ou mis en surbrillance,<br />
Francais 15
Fonctionsde base<br />
[] Information : Afficheune emissionreserv6epour I'ecoute.<br />
(11est egalementpossiblede modifierI'informationrelative<br />
une emission.)<br />
IIest possible de visualiserI'informationen selectionnant<br />
un programmeet en appuyant sur la touche ENTERIC.<br />
[] Choisir Tout / Deselect. Tout : Selectionneou des61ectionne<br />
tousles programmesreserv6s.<br />
Syn. Pr@ise<br />
(canauxanalogiquesseulement)<br />
Si lareceptionest bonne,aucun reglagemanueln'est necessaire;<br />
bs reglagessont effectuesautomatiquementdurant la recherche<br />
et lamemorisation.Silesignald'un canal estfaibb ou de mauvaise<br />
qualite,effectuezun reglagemanuel.FaResddiler a gaucheou<br />
droitejusqu'a ce que I'imagesoit claire.<br />
Mode<br />
Lesparametressontappliques au canalell cours de diffusion.<br />
Lescanauxsyntonises memoris6ssont marquesd'un<br />
asterisque,, * >,a droite de bur numero, clansla zone<br />
d'affichage des canaux.<br />
Pourretablir lasyntonisationde pr@ision,sebctionnez<br />
Regler.<br />
Modification du mode d'image pr_r_gl_<br />
MENUrITI -_ Image-_ Mode-_ ENTERC_<br />
Selectionnezle typed'image quevous prderez.<br />
[] Dynamique : Oonvientaux piecesclaires.<br />
[] Standard : Oonvientaux environnementnormaux.<br />
[] Cinema : Pour regarderdesfilmsdans une piecesombre.<br />
6 Fran_ais<br />
Ajustement des r_glages de I'image<br />
Contre-jour / Contraste / Luminosit6 / Nettet6<br />
/ Couleur / Teinte (V/R)<br />
MENUrlTI _ Image_ ENTERI_<br />
Votretel6viseurest dote d'options de reglagequi vous permettent<br />
de reglerlaqualitede I'image.<br />
REMARQUE<br />
* Lorsquevous apportez des modificationsaux options<br />
Contre-jour, Contraste, Luminosite, Nettete, Couleur<br />
ou Teinte (V/R),I'images'ajuste en consequence.<br />
* En mode PC,il est possiblede modifier uniquementles<br />
fonctions Contre-jour, Contraste et Luminosit&<br />
* Ces reglagespeuvent 6tre ajusteset conserves pour<br />
chaque appareil externebrancheau tel6viseun<br />
Changement des options de I'image<br />
R_g!agesavanc6s .................................................................<br />
MENUrlTl _ Image _ Reglages avances _ ENTERI_<br />
(L'option Reglagesavaricesestdisponibleen mode Standard /<br />
Cinema)<br />
Le nouveautel6viseurSamsungpermet d'effectuerdesreglages<br />
d'imageencore plus precisque les modelesprec6dents.<br />
En mode PC, il est possible de modifieruniquement les<br />
fonctions Contraste dynam., Gamma et<br />
I_quilibrage du blanc.
[] Tonalite noire (Off<br />
/ Fonce/ Plus fonce / Le plus fonce) :<br />
Choisissezle niveaude noir a I'ecran pour reglerla profondeur<br />
de ce demier.<br />
[] Contraste dynam. (Off / Basse/ Moyen / Haute) : Reglele<br />
contraste de Hmage.<br />
[] Gamma: RegleI'intensitede lacouleur primaire.<br />
[] Espace couleur (Auto / Standard) : Reglelagammede<br />
couleursdisponiblespour creer I'image.<br />
[] I_quilibragedu blanc : Reglela temperaturede la couleur pour<br />
une image plus naturelle.<br />
Decal.-R/ Decal.-V / Decal.-B : Reglela profondeurde<br />
chaque couleur(rouge,vert, bleu).<br />
Gain-R / Gain-V / Gain-B : Reglela luminositede chaque<br />
couleur (rouge,vert, bleu).<br />
Regler: Retablittousles reglages#quilibrage du blanc aux<br />
reglagespar ddaut.<br />
[] Ton chair : Rehaussele,, ton chair,, (rose)de Hmage.<br />
[] Amelioration des bords (Off / On) : Soulignele contourdes<br />
objets.<br />
* Apres avoirselectionneZoom1, Zoom2 ou Format large:<br />
Options d,image ......................................................................................<br />
1. Appuyezsur latouche i_ pour selectionnerPosition,<br />
(_ MENUITrl _ Image _ Options d'image _ ENTERI_<br />
2. Appuyezsur latouche ENTEREd.<br />
Enmode PC, il est possible de modifier uniquementles<br />
fonctions Nuance Ooul. et Taille.<br />
[] Nuance Coul. (Froide/ Normal / Chaudel / Chaude2)<br />
Chaudel ou Chaude2 se desactiventIorsquele mode<br />
d'image est Dynamique et Standard.<br />
Ces reglages peuvent_tre ajusteset conserves pour<br />
chaque appareil externebrancheau televiseur.<br />
Taille: Votrec&blos61ecteurou recepteur<br />
satellitepeut egalementdisposerde ses<br />
proprestaillesd'ecran. Toutefois,nousvous<br />
recommandonsd'utiliserle mode 16:9 h<br />
plupart du temps.<br />
16:9 : Pour reglerI'imageen mode I6:9.<br />
Zoom1 : Pour un agrandissementmoder&<br />
Zoom2 : Pour un plus grand agrandissement.<br />
Format large : Augmentelefacteur de forme de I'imagepour<br />
qu'elle remplisseI'ecranen entier.<br />
%sponible pour le signalHD 1080i/720p en mode I6:9<br />
4:3 : PourreglerHmageen mode 4:3.<br />
Ne pas utiliserle format d'image 4:3 pendant de Iongues<br />
periodes. Les bordures a gauche, a droite et au centre<br />
de I'ecranpeuvent hisser des traces a cause de la<br />
retentiond'image sur I'ecranqui n'est pascouvert par<br />
la garantie.<br />
Plein ecran : AfficheHmageentierenon tronqueelots<br />
d'une entreede signaux HDMI(720p / I080i/1080p) ou<br />
composante(1080i/ 108Op).<br />
REMARQUE<br />
3. Appuyezsur latouche A ou T pour deplacerHmage<br />
versle hautou le bas.<br />
4. Appuyezsur latouche ENTERIng.<br />
5. Appuyezsur latouche _ pour selectionnerRegl..<br />
6. Appuyezsur latouche ENTERI_ pour replacer<br />
Hmagea sa position par defaut.<br />
Francais 17
Fonctionsde base<br />
[]<br />
" ApresavoirselectionnePlein ecran en mode HDMI<br />
(I080i/I080p) ou Composante (I080i/1080p),il est<br />
possibleque vous deviezcentrer I'image:<br />
1. Appuyezsur latouche _ ou I_ pour selectionner<br />
Position.<br />
2. Appuyezsur latouche ENTERI_.<br />
3. Appuyersur latouche A, _', _! ou _, pour d@lacer<br />
I'image.<br />
4. Appuyezsur latouche ENTERE_.<br />
5. Appuyezsur latouche _ ou I_ pour sebctionner<br />
Regl..<br />
6. Appuyezsur latouche ENTERI_.<br />
" HD (Hauteddinition) : I6:9- 1080i/1080p (I920x1080),<br />
720p (1280x720)<br />
" Lesreglages peuvent 6tre ddinis et memorisespour<br />
chacun desappareilsexternes branches a une entree sur<br />
leteBviseur.<br />
ATV,AV,Oomposante(480i, 16:9,Zoom1, Zoom2, 4:3<br />
480p)<br />
DTV(10801),Composante 16:9, 4:3, Format large,<br />
(I080i, I080p), HDMI(720p, Piein ecran<br />
I080i, 1080p)<br />
PC 16:9, 4:3<br />
Digital NR (Off/ Basse / Moyen / Haute / Auto): Si lesignal<br />
de diffusion capte par leteBviseurest faibb, il est possible<br />
d'activer la fonctionde Digital NR pour aidera eliminerbs<br />
parasiteset les imagesremanentesqui apparaissenta I'ecran,<br />
Lorsquelesignalest faibb, selectionnezune des autres<br />
options jusqu'a ce que lameilbure image soit affichee,<br />
8 Frangais<br />
Nv nr HDMI (Normal / Basse) : Choisitle niveaude noir<br />
I'ecran pour reglerla profondeurde ce dernier.<br />
Disponibleseulementen mode HDMI,<br />
Mode Film (Off / Auto) : Le teBviseurdetecte et traite<br />
automatiquementbs signaux de film provenantde toutes les<br />
sourceset regleI'imagepour obtenirune ddinition optimale,<br />
Disponibleavec les modes TV,AV,COMPOSANTE<br />
(480i/1080i) et HDMI(480i/1080i),<br />
R6initialisation de !Image (OK / Annu!er) ............................<br />
Retablitle moded'image couranta ses reglagespar defaut,<br />
Configuration du t_l@iseur avec un PC<br />
Reglelasource d'entree a PC.<br />
MENUITrl _ Image_ ENTERE_<br />
R6glage Auto ..........................................................................<br />
Regleautomatiquementbs parametres,bs frequenceset bs<br />
positions,<br />
Oette fonction n'est pas disponible Iorsqu'unc_ble HDMI/DVl<br />
est branch&<br />
I_cran<br />
[] Grain / Affine : @limineou reduitbs parasites,Si le bruit<br />
n'est paselimineen effectuantuniquementun reglageprecis,<br />
reglez lafrequencele mieuxpossible(Grain),pub procedez<br />
une syntonisationde nouveau,Une lois les parasitesreduits,<br />
reajustezI'imagepour la centrersur I'ecran.<br />
[] PC Position : Reglerlaposition de I'ecrande I'ordinateurs'il<br />
ne correspond pasa celuidu teBviseur.Appuyezsur la touche<br />
A ou T pour reglerla position verticab,Appuyezsur la touche<br />
_! ou _, pour reglerla position horizontab.<br />
[] Retablir I"image : RetablitI'imageen fonctiondes reglages<br />
par ddaut,
Utilisation du televiseur comme ecran PC<br />
Configurationdu Iogicielsur votre PC(sousWindows XP)<br />
Selon laversionde Windowset lacarte video, Bsecrans affiches<br />
peuventdifferer,mais les m6mes renseignementsde configuration<br />
de bases'ap@quentdans laplupartdes cas. (@non,communiquez<br />
avec lefaMcant de I'ordinateurou votre d@@llantSamsung.)<br />
1. Cliquezsur ,
Fonctionsde base<br />
S_lect. le haut-parleur (Haut-p. externe /<br />
Reglage Horloge : Reglezles options Mois, Jour,Annee,<br />
Heure, Minute et am/pm manuellement.<br />
Haut-par!eur TV)..........................................................................................................................................................<br />
Cette fonction n'est disponible que Iorsquela fonction<br />
Vous pourriezentendreun echodu soil en raison d'une difference<br />
Mode horloge est regleea Manuel.<br />
de vitessede decodagedu haut-parleurprincipalet du recepteur<br />
Vous pouvez reglerdirectement les valeursMois, Jour,<br />
audio. Sic'est lecas, reglezletel6viseura Haut-p. exteme.<br />
Annee, Heure ou Minute en appuyant sur les touches<br />
numeriquesde la tel6commande.<br />
LorsqueI'optionSelect. le haut-parleur est r6glee<br />
Haut-p. externe, les touches de volume et MUTE ne<br />
fonctionneront paset les reglagesdu son seront limites.<br />
Lorsquelafonction Select. le haut-parleur est r6glee<br />
Haut-p. externe.<br />
" Haut-parieur TV: Off, Haut-p. externe: On<br />
LorsquelafonctJonSelect. le haut-parleur est r6glee<br />
Haut-parleur TV,<br />
" Haut-parieur TV: On, Haut-p. exteme: On<br />
Si vous ne recevezaucun signalsonore, lesoil sera coupe<br />
dans les deux haut-parleurs.<br />
R_initialisation du son (OK/Annuler)<br />
Retablittousles reglagesde I'imageaux reglagespreddinis par<br />
defauten usine.<br />
Reglagede I'horloge<br />
(_ MENUrlTI -_ Configuration -> Heure -> ENTERE_<br />
Heure<br />
[] Horloge: Le reglagede I'horlogeestnecessairepour pouvoir<br />
utiliserlesdiverses fonctionsde minuteriedu televiseur.<br />
(_ L'heures'affichechaquelois que vous appuyezsur le<br />
bouton _NFO.<br />
Si vous debranchezle cordon d'alimentation,vous<br />
devez regler I'horlogede nouveau.<br />
Mode horloge (Auto / Manuel)<br />
- Auto : Permetde reglerrheureautomatiquementen utilisant<br />
I'heuredu signald'une cha;nenumerique.<br />
L'antennedolt 6tre brancheepour que le reglage<br />
automatiquede I'hodoges'effectue.<br />
- Manuel : ReglezI'heuremanueilement.<br />
0 Frangais<br />
Enfonction de lastation emettdce et du signal,il est<br />
possibleque la fonctJonde reglageautomatiquede<br />
I'heurene fonctionnepas correctement. Dansun tel<br />
cas, reglez rhorloge manuellement.<br />
Fuseauhot. : Ohoislssezvotre fuseauhoralre.<br />
Cette fonction n'est accessible que Iorsquela fonction<br />
Mode horloge est regleea Auto,<br />
H. d'ete (Daylight Saving Time) (Off/On) : Permetd'actlver<br />
et de desactiverlafonction de I'heureavancee.<br />
Cette fonction n'est accessible que Iorsquela fonction<br />
Mode horloge est regleea Auto,<br />
Utilisation de la fonction de veille<br />
(_ MENUrm _ Configuration _ Heure _ Mise en veiile<br />
EHTERIZ_<br />
Mise en veille _: @teintautomatiquementle<br />
tel6viseurapres ledelai choisi.(30, 60, 90, I20, I50 et I80<br />
minutes).<br />
Pourdesactiver lafonction Mise en veille, selectionnez<br />
Off.<br />
Reglagede la raiseen marche et de I'arr_t de<br />
la minuterie<br />
(_ MENurm _ Configuration _ Heure _ Minuterie 1<br />
ENTERI_<br />
Vous pouvezreglerletel6viseurde manierequ'il s'allume<br />
automatiquementa une heurepreddinie.<br />
[] Minuterie 1 / Minuterie 2 / Minuterie 3: Troisreglagesde<br />
minuterie(raiseen marchdarr6t) peuvent6tre effectues.Tout<br />
d'abord, vous devezreglerrhorloge.
Marche / Arr6t : ReglezI'heure,les minuteset activer/<br />
desactiver.(Pour activerle minuteuravec lereglagechoisi,<br />
regleza Activer,)<br />
Volume : Selectionnerle niveausonoredesir&<br />
Contenu : Selectionnelecontenu IV ou USBa life Iorsque<br />
le televiseurse met en marcheautomatiquement.(L'option<br />
USBn'est disponibleque si un dispositifUSBest brancheau<br />
tel6viseur.)<br />
REMARQUE<br />
* Sile dispositif USBne contient aucun fichier musical<br />
ou que ledossier contenant lefichier musical n'est<br />
pas s61ectionne,la fonction Timer (Veilleou Reveil)ne<br />
fonctionnerapas correctement.<br />
* IIest impossiblede creer un diaporama s'il n'y a<br />
qu'un seul fichier photo dans ledispositif USB.<br />
* Sile nora du dossierest trop long, il ne peut 6tre<br />
selectionne.<br />
* Ohaquedispositif USButilise recoit son propre<br />
dossier.Lorsquevous utilisezplus d'un dispositif<br />
USBd'un m6me type,assurez-vousque chaque<br />
dossierassigne a chaque dispositifUSB recoit un<br />
nom different.<br />
R@eter : SelectionnezUne fois, Quotid., Lun~Ven,<br />
Lun~Sam, Sam~Dim ou Manuel selonvos besoins.<br />
Selectionnezla fonction Manuel afinde choisir lejour auquel<br />
vous voulezactiver laminuterie.<br />
Lesymbole _/indique lejour selectionne.<br />
Arr6tautomatique (disponibleseulementIorsqueleteleviseur<br />
est mis sous tension par lafonction de minute@):Le<br />
televiseurse met automatiquement hors tensionapres trois<br />
heuressi aucune commande ne lul est envoyee.<br />
V-Chip<br />
Exclusionautomatique de programmes<br />
MENUITN -_ Configuration -_ ENTERE_<br />
La fen_trede saisiedu code NIPs'affiche,entrezvotre NIPde<br />
quatre chiffres.<br />
La fonctionV-Chipbloque automatiquementla diffusiond'emissions<br />
pouvant ne pasconvenirauxenfants. L'utilisateurdoit entrerun<br />
numerod'identificationpersonnel(NIP)avantde pouvoirconfigurer<br />
ou modifierles restrictionsrelativesa la fonctionV-Chip.<br />
REMARQUE<br />
* La fonction V-Chip n'est pasdisponible en mode HDMI,<br />
Composante ou PC.<br />
* Le code NIP par ddaut d'un nouveautel6viseurest ,,<br />
0-0-0-0 ,,.<br />
* Perm. tout : Deverrouilletoutes les classificationsdu<br />
tel6viseur.<br />
* Bloq. tout : Verroullletoutes les classificationsdu<br />
tel6viseur.<br />
[] Blocage V-Chip (Off / On): Vous pouvezbloquerdes<br />
emissionsselon un systemede classification.<br />
[] Cont. paten. TV:Vous pouvezbloquerdesemissionsselon<br />
leur classification.Cette fonctionvous permetde contrOlerles<br />
emissionsque vos enfants regardent.<br />
- IV-Y: Jeunesenfants/ TV-Y7: Enfantsde plus de 7<br />
ans/ IV-G: Tout public/ TV-PG: Surveillanceparentale<br />
recommandee/ TV-14: Telespectateursde plus de 14 ans/<br />
TV-MA:Adultes<br />
- Tout: Blocagede toutes lesclassifications./ FV: Fantastique<br />
et Violence/ V:Violence/ S: Scenesde sexe/ L: Langage<br />
adulte/ D: Dialoguesa caracteresexuel<br />
La fonction V-Chip permet de bloquer<br />
automatiquementcertalnes classificationsavec un<br />
contenu de nature delicate. Par exemple,si vous<br />
bloquez lacategorie TV-Y,la categorieTV-Y7 sera<br />
automatiquementbloquee. De lam_me fa_on,sl<br />
vous bloquezla categorie TV-G, toutes les categories<br />
dansle groupe des jeunesadultes serontalors<br />
bloquees(TV-G, TV-PG, TV-14 et TV-MA). Les<br />
sous-categories(D,L, S, V) fonctionnentde la m6me<br />
fa_on. Donc,si vous bloquezla sous-categorieL de<br />
la categorieTV-PG, les sous-categories L de TV-14<br />
et de TV-MA sont bloqueesautomatiquement.<br />
[] Classif. MPAA: Vous pouvezbloquerlesfilms en fonctlon<br />
de laclassificationMPAA.La Motion PictureAssociationof<br />
America(MPAA)a etabliun systemede classificationqui<br />
fournitaux parentsou adultesexercantune surveillancedes<br />
renseignementssur lesfilmsconvenantauxenfants.<br />
- G: Publicde tous&ges(aucunerestriction)./ PG:<br />
Surveillanceparentalerecommandee./ PG-13:Supervision<br />
des parentsfortementrecommandee./ R: Avec<br />
restriction.Lesenfants de moinsde 17 ans devraient_tre<br />
accompagnesd'un adulte. / N0-17: Non recommandepour<br />
les enfantsde moinsde 17ans. / X: Adultesseulement./<br />
NR: Nonclass&<br />
La fonction V-Chip permet de bloquer<br />
automatiquementtoute classificationavec un<br />
contenu de nature delicate. Par exemple,si la<br />
classificationPG-13est bloquee,les classifications<br />
R, N0-17 et X sont automatlquementbloquees.<br />
[] Anglais canadien: Vous pouvezbloquerdes emissionsselon<br />
leur classificationenanglaiscanadien.<br />
- C: Emissionsdestineesauxenfantsde moinsde 8 ans.<br />
/ 08+: Emissionsconvenantgeneralementauxenfants<br />
de 8 anset plus,sans surveillance./ G: Emissionsgrand<br />
publicconvenanta tousles audltoires./ PG: Surveillance<br />
parentale./ 14+: Emissionsdont lateneur peut ne pas<br />
convenir,en tout ou en pattie,aux enfantsde moinsde 14<br />
ans./ 18+: Emissionspour adultes.<br />
La fonction V-Chip permet de bloquer<br />
automatiquementtoute classificationavec un<br />
contenu de nature delicate. Par exemple,si la<br />
classificationG est bloquee, les classificationsPG,<br />
14+ et 18+ sont automatlquementbloquees.<br />
Francais 21
Fonctionsde base<br />
[] Frangaiscanadien: Vous pouvezbloquerdesemissionsselon<br />
bur classificationen fra%aiscanadbn.<br />
- G: General/8 ans+: Emissionsconvenantg@erabment<br />
auxenfantsde 8 ans et pBs, sans sur_/eillance. / 13 ans+:<br />
Emissionspouvant ne pasconvenirauxenfantsde moins<br />
de I3 ans,/ 16 ans+: Emissionspouvant ne pasconvenir<br />
auxenfantsde moinsde 16 ans,/ 18 ans+: Emissionspour<br />
adultes.<br />
La fonction V-Chip permet de bloquer<br />
automatiquementtoute classificationavec un<br />
contenu de naturedelicate, Par exempb, si vous<br />
bloquezla categorb 8 arts+, bs categorbs<br />
13 ans+, 16 ans+ et 18 ans+ seront<br />
automatiquementbloquees,<br />
[] Categ. americaine telechargeable: IIest possibled'utiliser<br />
de Hnformationsur b contrObparentaltout en regardantdes<br />
canauxnumeriques,<br />
REMARQUE<br />
* SiI1nformationn'estpas tel6charg6ea partir de la<br />
stationde radiodiffusion,b menu<br />
Categ. americaine telechargeable est d6sacSve.<br />
* L_informationrelativeau contrOb parentalest<br />
automatiquementt61echarg6ependant b<br />
vbionnement de canauxnumeriques.Cela peut<br />
prendre quelquessecondes.<br />
* Le menu Categ. americaine telechargeable peut<br />
6tre utilbe apres b t61echargementde I'information<br />
pardrde lastation de t61ediffusion.Cependant,selon<br />
la stationemettrbe, la foncSonpourrait ne pas 6tre<br />
accessible.<br />
* Les niveauxde contrOb parentaldifferent selon<br />
la stationde radiodiffusion,Le nora de menupar<br />
ddaut et bs modi%ations de Categ. americaine<br />
telechargeable varbnt selon bs informations<br />
tel6charg6es.<br />
* M6mesi vous regbz I'affbhage a I'ecrandans<br />
une autre langue, b menu Categ. americaine<br />
telechargeable s'affiche en anglab seubment,<br />
* Le dassement permet de bloquerautomatiquement<br />
certainesdassifbations avec un contenu de nature<br />
delbate.<br />
* Lescategorbs (par exempb: Humor Level,,etc)et bs<br />
niveauxde classification(parexempb: DH, MH, H,<br />
etc) peuventdifferer selon lastation de tel6diffusion.<br />
[] Changer NiP: L'ecranChangerNIPs'affbhe, Choisissezun<br />
code NiPa quatrechiffreset sabissez-b. Lorsquevous avez<br />
entre b code NIP a quatre chiffres,I'ecranConfirmer NiP<br />
apparaL Sabissezde nouveaubs quatrechiffres.Quand<br />
I'ecran de confirmationdispara;t,leNIP est m6morbe.<br />
2 Fran_ais<br />
Visionnement d'un canal & acces restreint<br />
Si un canala acces restreintest syntonise,la fonctionV-Chiple<br />
bloque, L'ecrandevbnt vide et b messagesuivants'affbhe:<br />
Ce canal est bloqueen modeV-Chip,Veuilbz entrerun NIPpour<br />
debloquer.<br />
Sivous avezoublie votre NIP,appuyezsur bs touches de<br />
la tel6commandedans I'ordresuivantpour retablirb code<br />
0-0-0-0, POWER(arr6t)_ MUTE _ 8 _ 2 _ 4 _ POWER<br />
(robe en march@<br />
Autres fonctions<br />
(_ MENUITrl _ Configuration _ EI/TERE]}_<br />
Langue<br />
Reglagede la hngue de menu.<br />
1. Sebctionnez laI Langue puisappuyezsur la touche<br />
ENTERE]_,<br />
2. Choisissezlalanguevoulue puisappuyezsur la touche<br />
ENTERI_%_,<br />
Vous pouvezchoisir English, Espa_ol ou Frangais,<br />
Sous-titres<br />
(textea %cran)<br />
Sous-titres (Off/ On):Vous pouvezactiver<br />
ou desactiverla fonctiondes sous-titres,Si la<br />
fonctiondes sous-titresn'est pasdisponibb, il<br />
n'y a pasd'affichagea I'ecran,<br />
L'optionSous-titres nefonctionne pas<br />
dans bs modes Composante, HDMI ou<br />
PC.<br />
Mode ss-titres codes: Vous pouvezsebctionnerb modede<br />
sous-titragesouhaite.<br />
L'optionde sous-titragedisponibled@end de I'emission<br />
diffusee,<br />
Par defaut / OO1~004 / Textel ~Texte4:(canauxanalogiques<br />
seubment) La fonctionde sous-titrageanalogiquefonctionne<br />
en modecanauxanalogiquesou Iorsqu'unsignalest fourni<br />
au tel6viseura partir d'un appareilexterne,(Selonb signal<br />
emetteur,b sous-titrageanalogiquepeut peut-_trefonctionner<br />
sur bs canauxnumeriques.)<br />
Par defaut / Service1 ~ Service6 / OO1 ~ 004 /<br />
Textel ~ Texte4:(canauxnumeriquesseubment) Lafonction<br />
des sous-titresnumeriquesfonctionneseubment sur bs<br />
canauxnumeriques.<br />
Les parametresService1 ~ 6 en mode Sous-titres<br />
numeriques ne sont pastoujours disponibbs, selon b<br />
systeme de diffusion uti%e,
[] Options desous-titrage numerique: (canaux numeriques<br />
seulement)<br />
faille: Losoptions sont :Par defaut, Petit, Standard etGrand.<br />
Lavaleur parddaut estStandard.<br />
Styledespolices: Losoptions sont :Par ddaut etStyles de0<br />
7.Lavaleur parddaut estStyleO.<br />
Couleur avant-plan: Lesoptions sont :Parddaut, Blanc,<br />
Noir, Rouge, Vert, Bleu, Jaune, Magenta etOyan. Vous pouvez<br />
modifier lacouleur descaracteres. Lacouleur parddaut est<br />
Blanc.<br />
Couleur arriere-pian: Losoptions sont :Pardefaut, Blanc,<br />
Noir, Rouge, Vert, Bleu, Jaune, Magenta etOyan. Vous pouvez<br />
modifier lacouleur deI'arrBre-plan desous-titres. Lavaleur<br />
parddaut estNoir.<br />
Opacite avant-plan: Permet deselectionner I'opacite du<br />
texte. Losoptions sont :Par defaut, Transparent, Translucide,<br />
Opaque etClignotement.<br />
Opacite arriere-plan: Ajuste I'opacite d'arrBre-plan dusoustitrage.<br />
Losoptions sont :Par ddaut, Transparent, Translucide,<br />
Opaque etClignotement.<br />
Retour pardefaut: Cette option retablit losparametres par<br />
defaut desfonctions suivantes Taille, Style despolices, Couleur<br />
avant-plan, Couleur arrBre-plan, Opacite avant-plan etOpacite<br />
arrBre-plan.<br />
REMARQUE<br />
"LesOptions desous-titrage numerique sont<br />
accessibles uniquement Iorsque losoptions<br />
Pardefaut etService1 ~Service6 peuvent _tre<br />
selectionnees enMode ss-titres codes.<br />
, Eoption desous-titrage disponible d@end de<br />
I'emission diffusee.<br />
* Eexpression Pardefaut signifie revenir auxchoix de<br />
sous-titrage initiaux determines par lediffuseur.<br />
* Eavant-plan etI'arrBre planepeuvent pas6tre<br />
configures delam_me couleur.<br />
* Vous nepouvez pasddinir Opacite avant-plan et<br />
Opacite arriere-plan aTransparent.<br />
Mode Jeu (Off !On): ..............................................................<br />
En selectionnantle mode Jeu,Iorsquevous branchezune console<br />
de jeu comme PlayStationMCou XboxMC,vous pouvezvivreune<br />
experiencede jeu plus realiste.<br />
REMARQUE<br />
* Precautionsa prendre et limites du mode Jeu.<br />
- Pour debrancherlaconsole de jeuet brancherun autre<br />
apparel]exteme, desactivez]eMode Jeu a Off dans]e<br />
menude configuration.<br />
- Sile menudu teBviseurest afficheen Mode Jeu, ]'ecran<br />
vibreBgerement.<br />
Mode Jeu n'est pasdisponibie si la source d'entree est<br />
r6gleesur TV ou PC.<br />
* Apres avoirbranche laconsole de jeu, reglezI'option Mode<br />
Jeu a On. Maiheureusement,vous pourrieznoter une<br />
alterationde I'image.<br />
* Sile Mode Jeu est regB sur On:<br />
- Le modeimage est regB sur Standard et le mode Son<br />
est regB sur Cinema.<br />
- L'option I_galiseurn'est pas disponible.<br />
M61odie (Off / Basse / Moyen / Haute)<br />
Permetall teBviseurde fairejouerune melodieIorsquevous<br />
I'aliumezet I'eteignez.<br />
REMARQUE<br />
* La melodie nejoue pas.<br />
- Lorsquele teBviseurn'emet aucun son parceque I'on a<br />
appuye sur latouche MUTE.<br />
- Lorsquele teBviseurn'emet aucun son parceque le<br />
volumea et6 reduitau minimuma I'aidede ]atouche<br />
VOL -.<br />
- Lorsquela fonctionMise en veille met leteBviseurhors<br />
tension.<br />
Solutions _conomiques<br />
MENUITrl _ Configuration _ ENTERI_<br />
Vous pouvezutiliserlafonction Eco pour augmenterleseconomies<br />
d'energie.<br />
Econ. E_nergie(Off / Basse / Moyen / Haute /<br />
Auto) ........................................................................................<br />
Cette option permet de reglerla luminositede I'ecranafinde reduire<br />
la consommationd'energie. Lorsqu'onregardela teBvisionlesol il<br />
faut reglerI'option du mode #con. #nergie a Haute pour reduirela<br />
fatigueoculaireet laconsommationd'@qergie.<br />
Fran%is 23
Fonctionsde base<br />
MENUITrl _ Assistance -_ ENTERE_<br />
Autodiagnostic<br />
Eautodiagnosticpeut prendre quelquessecondes; cela fait<br />
pattie du fonctionnementnormal du televiseur,<br />
[] Essai d'image: Utilisezcette fonctionpour verifierles<br />
problemesd'image.<br />
Oui : Sile parcoursne s'affichepasou s'il y a du bruit dansla<br />
mire,sebctionnezOui. IIest possiblequevotre tel6viseursoit<br />
defectueux,Oommuniquezavec lecentred'appel de Samsung<br />
pour obtenir de I'assistance(I -800-SAMSUNG),<br />
Non : Sila mires'affichecorrectement,sebctionnezNon. II est<br />
possiblequ'un appareilextemesoit defectueux,Veuilbz verifier<br />
bs connexions.Si le problemepersiste,consultezle guide<br />
d'utilisationde I'appareilexteme.<br />
[] Essai de son : Utilisela melodieint6greepour verifierbs<br />
problemesde son,<br />
Si les haut-parburs du televiseurn'emettentaucun son,<br />
assurez-vousque le mode Select. le haut-parleur est<br />
regle a Haut-parleur TV dans le menuSon.<br />
Vous entendrezlamelodie durant I'essaim6mesi le<br />
Select. le haut-parleur est r6gle a Naut-p. externe ou<br />
si vous avezcoupe leson avec la touche MUTE,<br />
Oui : Si,au cours de I'essaide son,un seulhaut-parbur<br />
emet du son ou si lesdeux haut-parburs n'emettentaucun<br />
son, sebctionnezOui. IIest possibleque votret61eviseursoit<br />
defectueux,Oommuniquezavec lecentred'appel de Samsung<br />
pour obtenir de I'assistance(I -800-SAMSUNG),<br />
Non : Sibs haut-parleursemettentun son normal,<br />
selectionnezNon. IIest possiblequ'un appareilexteme soit<br />
defectueux,Veuilbzverifier bs connexions,Si le probleme<br />
persiste,consultezleguide d'utilisationde I'appareilexteme.<br />
[] Puissance du signal : (canauxnumeriquesseubment) Les<br />
canaux HD ont une receptionparfaiteou ne sont pascaptes<br />
du tout, D@lacezI'antennede manierea augmenterla<br />
puissancedu signal.<br />
4 Fran_ais<br />
Mise & niveau du Iogiciel<br />
Ulterieurement,Samsungmettra a dispositiondes raisesa niveau<br />
du micrologicielpour let61eviseur.VisitezSamsung.comou<br />
communiquezavec le centred'appel Samsungen composant<br />
1-800-SAMSUNG(726-7864)pour obtenirde I'informationsur le<br />
tel6chargementdes raisesa niveauet sur I'utilisationd'une cle USB,<br />
Les raisesa joursont accessibbs en brancllant unecle USB dans<br />
le port USB,<br />
Au moment de laraisea niveaudu micrologiciel,les reglages<br />
video et audio que vous avez effectuesseront remplacespar<br />
les reglagespar ddaut (ddinis ell usine).<br />
Nous vous recommandonsde prendre en notevos reglages<br />
afin de pouvoir bs retablirfacibment apres la raisea niveau.<br />
Guide de connexion HD<br />
Reportez-vousa cette rubriqueIorsquevous branchezdes appareils<br />
extemesau televiseur,<br />
Contact Samsung ..................................................................<br />
Consultezcette rubriqueIorsquevotretel6viseurne fonctionnepas<br />
cerrectementou Iorsquevous souhaitezmettre a niveaule Iogiciel,<br />
Vousy trouverezde I'informationsur nos centresd'appel et sur la<br />
fagonde tel6chargerdes produitset Iogiciels,
Fonctionsavancees<br />
I<br />
1.<br />
2.<br />
3,<br />
musicauxou des filmsenregistressur un dispositifUSB<br />
memoirede grandecapacite (MSC).<br />
Visualisezdes photographieset Iisezdes fichiers<br />
_} MENUrlTI _ Application _ Media Play (USB)<br />
ENTERE_<br />
Branchementd'un dispositif USB<br />
Mettez le t61eviseuren marche.<br />
Branchezun dispositifUSBcontenantdes photos, de la musiqueou des fichiersvideo<br />
dans lapriseUSB, situeesur le cOtedu televiseur.<br />
Une fen6trecontextuelles'afficheIorsquevous branchezun dispositifUSBau t61eviseur.<br />
SelectionnezI'option Media Play.<br />
Lemenu Media Play<br />
Lecture d'une photo (ou d'un Diaporama)<br />
1. Appuyezsur latouche MENU.Appuyezsur latouche A ou _' pour<br />
selectionnerApplication, pub sur ENTERI_.<br />
2. Appuyezsur latouche A ou T pour sebctionner Media Play (USB), pub sur<br />
ENTERI_.<br />
3. Appuyezsur latouche A ou T pour selectionnerledispositifde memoire<br />
USBcorrespondant,pub appuyezsur latouche ENTERI_.<br />
Branchezun dispositifUSB contenant desflchiers JPEGet/ou MP3<br />
dans la priseMedia Playsituee sur lecOtedu televiseur.<br />
Certains dispositifs peuvent ne pas 6tre pris en charge en raison d'un<br />
problemede compatibilite.<br />
4. Appuyezsur latouche ,q ou _ pour passera une leone (Photo, Music,<br />
Setup), Appuyezsur ENTERI_.<br />
IIest possible que cela ne fonctionnepas correctement avec desfichiers multimediasnon autodses.<br />
A savoir avant d'utiliserMedia Play (USB)<br />
Panneau arrieredu tel6viseur<br />
Cle USB<br />
" Vous nedevez utiliserque des caracteresalphanumeriquespour nommer lesdossiers ou fichiers(photo, musique).<br />
, Le systeme de fichiersne prenden chargeque leformat FAT16/32(le systemede flchiersNTFSn'est pas prisen charge).Certain<br />
types d'appareilaudio ou d'appareilphoto numerique USB ne sont pascompatibles avecce tel6viseur.<br />
" La fonction Media Play(USB)ne prend en charge que les dispositifs USBa memoirede grande capacite (MSO).Le dispositif MSO<br />
(,,Mass StorageClass ,,)est un dispositifde memoirede grande capacite en bloc seulement.Parmiles exemples de MSC, on<br />
trouveles disques Thumb et les lecteurs de cartes Flash(USBet HUB ne sont pas pris en charge).<br />
" Avantde brancher ledispositif au t61eviseur,veillera effectuer unecopie de sauvegardedes flchiersafind'evitertoute perte ou<br />
dommage. SAMSUNGnesaurait 6tre tenueresponsabledes dommagesaux fichiersou de perte de donnees.<br />
" Veuillezvous brancherdirectement au port USB de votre t61eviseur. II peut y avoirun problemede compatibilite USBsi vous utilisez<br />
un branchement par cable distinct.<br />
Francais 25
Fonctionsavancees<br />
Photo<br />
* Seulsdes formatsde fichier MP3et JPEGsont prisen charge,<br />
* Le format MP3 Media Play(USB)ne prend en chargeque les fichiersmusicauxavec une frequenced'@chantillonnage@lev@e (32<br />
kHz, 44,I kHz, ou 48 kHz).<br />
* Nousvous recommandonsleformat JPEGs@quentiel.<br />
* Ne d@branchezpasle dispositif USBpendant sonchargement,<br />
* Le MTP (protocolede transfert de m@dia)n'est pas pris en charge,<br />
* Le temps de lecture d'un fichier rap3 peut s'afficher sous la forme "00:00:00" si I'informationrelativeau temps de lecture n'est pas<br />
d@tect@eau d@butdu fichier.<br />
* Plusla r@solutionde I'imageest @lev@e, plus elle prend du temps a s'afflcher a I'@cran.<br />
* La listede fichiersmusicauxou de photos contbnt jusqu'a 300 dossiers ou fichiers.<br />
* Le chargement peut prendre quelque secondes, selon la tailledu fichier.<br />
* Lesfichbrs MP3prot@g@spar DRM, t@l@charg@s de sites payants,ne peuvent 6tre lus.<br />
* La gestion des droits num@riques(DRM)est unetechnologie qui soutbnt lacr@ation,la distribution et lagestion du contenu de<br />
facon int@gr@eet globale,notamment par la protectiondes droits et int@rTtsdes foumisseursde contenu, la pr@ventionde la copb<br />
ill@galedu contenu, ainsique la gestionde lafacturation et des r@glements,<br />
* Le mode d'@conomied'@nergiede certains disques durs externespeut @treactiv@automatiquement Iorsqu'ilssont branch@sau<br />
t@l@viseur.<br />
* Siun cable de rallonge USBest utilis@,I'appareilUSB pourrait ne pas6tre reconnuou les fichierssur I'appareilpourraientne pas<br />
6tre lus.<br />
* Sile dispositif USBbranch@au t@l@viseur n'est pasreconnu, laliste desfichiers dansle dispositifest corrompue ou qu'un fichbr<br />
dans laliste n'est pas lu,branch@ledispositif USBa un ordinateur,formatezdeet v@rifiezla connexion.<br />
* Siun fichiersupprim@sur I'ordinateurest toujours pr@sentIorsquevous ex@cutezla fonction Media Play,supprimezlefichier de<br />
fagonpermanentesur I'ordinateura I'aidede I'option "Vider lacorbeille".<br />
Lecture d'une photo (ou d'un Diaporama)<br />
1. Appuyezsur latouche INFO pour afficherI'optionAfficher, Dem. DJaporama,<br />
Supprimer, Supprimer tout, Deselect. Tout.<br />
2. Appuyezsur latouche A ou T pour s@lectionnerDem. Diaporama, puis sur<br />
ENTERE_.<br />
Pendantle diaporama, les fichierss'affichentdarts I'ordre,a partir du<br />
fichier affich@.<br />
IIest possible de life des fichiers MP3automatiquement pendantun<br />
diaporama si lafonction Musique de fond par ddaut est r@gl@e a On,<br />
Pouractiver cettefonction, les fichiers MP3et les autresfichiers photo<br />
doivent se trouverdarts le re@medossier du dispositifa re@moireUSB,<br />
Appuyezsur la touche tfqFOpendantle diaporama pour r@glerles options suivantesVitesse du diap., Musique de fond, Selection<br />
musique de fond, Liste Appuyezsur latouche A ou T pour s@lectionnerd'options, pub sur EI/TERI_.<br />
- Apr@savoirr@gl@l'option, appuyezsurlatoucheEI/TERE__ poureffectuerla modification.<br />
Appuyezsur la touche H/FO pendantle diaporama pour r@glerles options suivantes:Dem. Diaporama, Zoom, Rotation, Liste.<br />
Appuyezsur la touche A ou _' pour s@lectionnerd'options, puis sur ENTERIng.<br />
- Apr@savoir r@gl@I'option,appuyezsur latouche ENTERI_ pour effectuerlamodification.<br />
6 Fran_ais
Musique<br />
Utilisation de la liste MP3<br />
IcOnede dossier<br />
IcOneListe de fichiersmusicaux<br />
Passera I'icOnede dossierde retape pr6cedente<br />
Appuyezsur la touche _ (REW)ou _ (FF)pour changer de page.<br />
Lefichier selectionneest affiche en t6te de listeavec sa duree de lecture,<br />
1. Pourchoisirtousles fichiersou un fichier,appuyezsur la touche [NFO pour<br />
afficherles menus Musique.<br />
Appuyezsur latouche ENTERIZ_ pour selectionnerLecture (or Life le<br />
fichier selectionne), Musique Mode de repetition, Supprimer (orEffacer<br />
fichier sel.), Supprimer tout or Deselect. tout<br />
2. Appuyezsur latouche A ou T, pour passer a une ic6ne, puisappuyersur la<br />
touche ENTER[_.<br />
Appuyezsur latouche ENTERI_ sur une ic6nede note de musiquepour life<br />
immediatement]e fichierde musique,<br />
Sivous appuyezsur la touche ENTERIZ_ pendantqu'un dossierest en<br />
surbrillance,les fichiersmusicauxqu'il contients'affichent,<br />
[] Lecture: Se]ectionnerpour ]iredes fichiersMP3,<br />
Ce menuaffiche uniquementles fichierspouwus d'une extension MP3. Lesfichierscomportant d'autres extensionsne sont pas<br />
affiches, m6mes'ils sont memoris6ssur le m6medispositif USB.<br />
Pourregler levolume de la musique,appuyezsur la touche - VOI_÷ de lat61ecommande.Pour couper le son,appuyezsur la<br />
touche _ MUTE de latelecommande.<br />
[] Musique Mode de repetition (On/ Off): Selectionnerpour rep6terlalecture desfichiersMP3dans ledossiercourant,<br />
Lecture musicale<br />
• N'affiche que les fichiersdont rextensionest MP3. Lesfichierscomportant d'autres extensionsne sont pasaffiches,m@mes'ils sont<br />
memoris6ssur le m6medispositifUSB.<br />
• Si levolumesembleetrange pendantlalecture de fichiersMP3, reglezles options #galiseur et SRSTruSurround HD dans lemenu<br />
Son. (UnfichierMP3 surmodulepeut 6trea roriginedes problemessonores)<br />
• IcOned'informationde lafonction Musique<br />
_ Reprise de la musique est reg]e a On,<br />
Reprise de la musique est reglea Off,<br />
[La toucle F_q Lecture/ _iq (Pause)de lateJ6commandeest enfonceependantlalecturede la musique.<br />
Lorsquevous appuyezsur latouche _q (Arr6t)de la telecommande,la musiques'arr@te,<br />
Francais 27
Fonctionsavancees<br />
Configuration ...............................................................................................................................................................<br />
Utilisation du menu Configuration<br />
[] Vitesse du diaporama: Selectionnezcette option pour commander lavitesse<br />
du diaporama.VouspouvezselectionnerRapide, Normal ou Lent.<br />
[] Musique de fond: Selectionnerpour determinersi un flchbr MP3 seral<br />
lu pendantun diaporama. IIest possiblede selectionnerMusiqueOn ou<br />
MusiqueOff.<br />
[] Selection musique de fond: Pendant levisionnementd'un diaporama,<br />
utilisezI'optionSelection musique de fond pour selectionnerun fichbr<br />
musicakSelectionnerun fichbr MP3comme musiquede fond.<br />
[] Reprise de la musique: Selectionnerpour determinersi vous voulezque la<br />
lecture de la musiquesoit r@et6e apresque tousles fichbrs MP3dans le<br />
dossbr courantont et6 entendus,<br />
[] I_crande veille: Choisircetteoption pour fixerle temps d'attente avant ledemarragede I'ecrande veille.L'ecrande veilleappara_trasi<br />
vous n'appuyezsur aucunetouche apres4 heures,8 heures ou 10 heures.<br />
[] Supp. s@urit& IIest possiblede retirerledispositifdu t61eviseurde facon sore.<br />
Lecture des fichier musicaux / photos selectionnes<br />
® Appuyezsur latouche jaune,<br />
• R@eterretape pr6cedentepour selectionnerlesfichbrs musicauxou photos souhaites,<br />
Lesfichierss61ectionne sent marquesdu symbole _z.Appuyez sur la touche jaune pour annulet la selection,<br />
• Appuyer sur latouche FCq(Lecture)/ ENTERI_ pour life les fichbrs ou photos selectionnes,<br />
8 Fran_ais
Autreinformation<br />
Fixation du support d'obturation<br />
Fixezlesupport d'obturation Iorsde I'installationdu tel6viseursur un mur, ,, oo_oo_ooo<br />
Installation de I'ensemble de fixation murale<br />
L'ensemblede fixationmurale(vendusepar6ment)permetde fixerletel6viseurau mur. Pourobtenirdes instructionsdetailleessur I'installation<br />
du supportmural,reportez-vousaux instructionsfoumiesavec I'ensemble,DemandezI'aided'un technicienpour I'installer.Samsung<br />
Electronicsn'est pas responsabledes dommagescausesa I'appareilni desblessuressi vous tentez d'installerlesupportvous-m6me,<br />
Specifications de I'ensemble d'installation murale (VESA)<br />
Latrousse d'lnstallatlon muralen'est paslncluse. Elleest vendue separ6ment.<br />
Installezvotresupport muralsur un tour massifperpendiculaireau plancher.Pour le fixersur d'autres types de materiaux,veuillez<br />
communiqueravec votredetaillant.Sivous I'installezau plafondou sur un tour incline,il risque de tomber et de causerdes blessures,<br />
REMARQUE<br />
" Lesdimensionsstandard pour lesensembles de fixation muralefigurentdans letableau ci-dessous.<br />
" Un manuel d'lnstallationd6tailleeet toutes les pieces necessairesa I'assemblagesent comprisesa I'achatde I'ensemble<br />
d'installationmurale,<br />
" N'utilisezpas de vis non conformes aux specificationsde vis standard VESA,<br />
" N'utilisezpas de vis plus Iongues que les dimensionsstandardou non conformes auxspecifications VESAde vis standard. Desvis<br />
trop Ionguespourraient endommagerI'interieurdu televiseur,<br />
" Ence qui a trait auxsupports muraux nonconformes aux specifications de vis de lanorme VESA,la Iongueurdesvis peut differer<br />
selon les specificationsdu support mural.<br />
" Ne serrezpas trop les vis, cela pourrait endommagerle produit ou provoquersa chute et causer des blessures, Samsungdecline<br />
toute responsabilitedans lecas o@de tels accidentsse produlsent,<br />
" Samsungne saurait 6tre tenu responsabledes dommagesau produit ou des blessuresoccasionnes par I'utilisationd'un support<br />
muralnon conforme auxspecifications VESAou non recommande,ou si le consommateurne suit pas les instructionsd'installation<br />
du produit,<br />
" Ne pas installer letel6viseura un angle d'inclinaison de plus de I5 degres.<br />
" IIfaut deuxpersonnes pour fixer let61eviseursur un tour,<br />
Francais 29
Autreinformation<br />
Ty<br />
Tel6viseurACL<br />
I9-22<br />
23-29 200 X 100<br />
75 X 75<br />
100 X 100 M4<br />
30-40 200 X 200 M6<br />
46-55 400 X 400<br />
57-65 600 X 400<br />
70-80 800 X 400<br />
80- 1400X 800<br />
M8<br />
N'installezpas lesupport muralIorsquele televiseurest sous tension.II pourraitsurvenirdes bbssures corporelles<br />
causees par un choc electrique.<br />
Le verrou Kensingtonn'est pasfoumit par Samsung.IIsert a immobiliserun appareil<br />
utilisedans un endroltpublic.L'aspect et lamethodede verrouillagepeuventdiffererde<br />
I'lllustratlonen fonction du fabrlcant.Reportez-vousau manuelfouml avecle disposltif<br />
de verroulllageKensingtonpour de plus ampbs renseignementset I'utlliserde fagon<br />
appropriee.<br />
RecherchezI'lcOne,
Misengarde: Lefaitdetirer, depousser oudemonter sur letel6viseur peut enprovoquer lachute. Assurez-vous<br />
notamment quevosenfants nesesuspendent pasautel6viseur niled6sequilibrent, car ilpourrait basculer etcauser des<br />
blessures serieuses o undeces. Suivez toutes lesmesures desecurit6 indiquees dans labrochure devotre tel6viseur. Pour<br />
unestabilite etunesecurit6 accrues, vous pouvez acheter etinstaller undispositif anti-chute telquedecrit ci-dessous.<br />
Dispositif de retenue pour televiseur (vendus@arement)<br />
Les piecesci-dessoussont inclusesdans I'ensembledu dispositifde retenuepour tel6viseur.De plus,vous aurezbesoind'une visa bois,<br />
d'une vis et d'une chevilleMollyou d'un autretypede visconvenanta I'armoireou au tour auquelvous avezI'intentionde fixer lecordon du<br />
dispositifde retenue,NousrecommandonsI'utilisationd'une visa bois M4xL20,<br />
Installation du dispositif de retenue<br />
1. Retirezlavis fixee a I'arrierede votre televiseur,puis reliezle dispositifde retenueace derniera I'aidede lavis inclusedans I'ensemble<br />
du dispositifqui convienta votreappareil.<br />
2,<br />
3,<br />
Veilleza utiliseruniquementlavis foumie appropriee.Sivous utilisezunevis differente,vous risquezd'endommagervotretel@iseur.<br />
Vissezrefinementlavis que vous avezfournie(tailleM4xL20ou similaire)a I'armoireou au tour sur lequel let61eviseurdolt 6tre installe,<br />
Si vousvissez lavis dans un mul il est prderable qu'elle penetre dans un montant.Si cela est impossible, utilisezunecheville<br />
Molly pour ancrer la vis,<br />
Attachezle cordondu dispositifde retenuea lavisfixeeau mur ou a I'armoireafind'immobiliserletel@iseur.Voirles illustrationsci-dessous.<br />
Installezle tel6viseura proximitedu tour de manierequ'il nese renversepas.<br />
Lorsquevous attachez le cordon du dispositif au tour, fixez-lede manierequ'ilsoit paralleleau sol ou inclinevers lebas pour des<br />
raisonsde securit6.<br />
Wrifiez le cordon a I'occasion pour vous assurerqu'il est bienfixe.<br />
Avant de d@lacer let61eviseur,detachez d'abord lecordon,<br />
4. VerifiezI'etat des connexions Verifiezperiodiquementles points d'ancrage afinde detecter tout signe de fatigue ou de bris En cas<br />
de doute au sujet des points d'ancrage, communiquez avec un installateurprofessionnel,<br />
Pour acheter le dispositif de retenue pour televiseur, communiquez avec le centre de service a.la clientele SAMSUNG.<br />
- Aux Etats-Unis:1-800-SAMSUNG(1-800-726-7864)<br />
- Au Canada: 1-800-SAMSUNG(1-800-726-7864)<br />
Francais 31
Autreinformation<br />
Sile televiseur semble @rouver un probleme, essayez d'abord de le corfiger a I'aide de la presente liste des problemes et solutions possibles.<br />
Si aucun de ces conseils de d@annage ne fonctionne, consultez le site ,,,puis cliquez sur Assistance ou communiquez<br />
avec le service a la clientele de Samsung en composant le 1-800-SAMSUNG,<br />
................t .......................... ..................................................................................................................<br />
Imagern_diocre Procedezd'abo[dauEssaid[image pourc0nfirmerqueratio t61@Jseur affiche9arrecfement!iimaged'gssak(allez_<br />
MENU- Supp0rt technique _Autodiagn0stia : Essaid'image)(p.24)<br />
SiI'imaged'essais'affichecorrectement, le probl_med'imagepout8trecausepar lasourceou lesignal.<br />
L'imagedu tel6viseurn'estpasaussibellequ'en o Sivousavezuncabloselecteurouun @cepteursatelliteanalogique,procurez-vousunrecepteurnum@iqueHD.<br />
magasin. UtilisezdescablesHDMIou composantespourobtenirune imagedequaliteHD(highdefinition).<br />
o Abonnesau cableou ausatellite: Essayez]es sanaaxHDde I'attributiondessanaux.<br />
o Antenne:EssayezlescanaaxHDaprBsexecutionde laprogrammationautomatique.<br />
'_ DenombreuxcanaaxHDsontsoumisaune interpolationL_parfirdu contenuSD(StandardDefinition).<br />
o Reglezla resolutionde sortievideodu cabloselecteurou recepteursatellitea 1080iou 720p.<br />
L'imageest ddormee:erreurmacrobloc,petit o Lacompressiondu contenuvideopeutcauserunedeformationde I'image,surtoutIorsquelos mouvementsent<br />
bloc,points,effetd'essalier, rapides,commedartslosfilmsdesportet d'action.<br />
o Unsignalfaiblepe_ causerunedeformationde I'image.IInes'agitpas d'un problemedutel@iseur.<br />
• L'utilisation de tel@bones cellulairesa proximite de tel6viseurs analogiques ou num@iques (jusqu'a<br />
une distance de 1 m) pout causer des parasites a I'ecran.<br />
Lescouleurssontfausseesou absentes, o Sivousavezuneconnexionavecdescablescomposantes,assurez-vousque loscablessontbranchesaux<br />
prisescorrespondantes.Desconnexionsincorrectesou lachespeuventcauserdesproblemesdecouleurou une<br />
absenced'image.<br />
Couleursouluminositemediocres, o RA:jlezlosoptionsImagedansle menudu tel6viseur.(AllezL_mode Image/ Couleur / Luminosit_/ itettet_)<br />
(p. 16)<br />
. R_lez FoptionEcon._nergie dansle menuConfiguration(p. 16)<br />
Essayezdereinitialiser]'imagepourvoir]esreglagesd'imageparddaut. (AllezL_MENU- Image-<br />
R_initialisationde I'image)(p. 18)<br />
Lignepointill@surle bardde I'@ran. _ Silataillede I'imageest r_l@ aPlein_oran, passezLN6:9(p. 17).<br />
Modifiezla resolutiondu cablos61ecteur our@epteursatellite.<br />
L'imageest enheiret blanc, o Sivous utilisezuneentr@AV composite,branchezlecablevideo(_aune) a laprisevertede Fentr@composante<br />
1du tel@iseur.<br />
L'imagefigeou est ddorm@ durantlos _ Sile televiseurest brancheL_uncabloselecteur,essayezde reinitialisercedernier.(Rebranchezlecordon<br />
changementsdecanaaxou sonaffichageest d'alimentationc.a. et attendezle redemarragedu cablos61ecteur. Oelapout prendrejusqu'L_20 minutes.)<br />
retarde. _ R_lez la resolutionde sortiedu cabloselecteura 1080iou 720p.<br />
P[obl6mede son Procedezd'abordau Essaide son pour Confirmerquele Sendevotretel@iseurfonctionnecorrectement.<br />
(allez__ENU _Support technique - Autodiagnostic _Essaide son) (p,24)<br />
Sile sonest parfait,leprobl_mepout provenirde lasourceoudu signal.<br />
IIn'ya pasdeson ou]e sonest trapbasalors _ Verifiezlevolumede Fappareil (cabloselecteur, recepteursatellite,]ecteurDVD,lecteurBlu-ray,etc.)branchea<br />
que levolumeestregleau maximum, votreteleviseur.<br />
L'imageest bonne,maispasde son. _ Reglez]'optionS_lect. le haut-parleurL_I-laut-parleur"IV darts]e menuSon (p. 20).<br />
Sivous utilisezunappareilexterne,assurez-vousqueloscablesaudiosentconnectesaaxbonnesprisesd'entree<br />
audiodu tel@iseur.<br />
Sivous utilisezunappareilexterne,v@ifiezI'optionde sortieaudiode I'appareil(p. ex.,vousdevrezpeut-@e<br />
modifierI'optionaudiodevotrecabloselecteurL_HDMIsi uncableHDMIest brancheL_votretel@iseur.)<br />
Sivous utilisezuncableDVlL_HDMI,uncableaudiodistinctestnecessaire.<br />
Sivotretel@iseurest doted'uneprisepourcasqued'@oute,assurez-vousquerien n'yest branche.<br />
Reinitialisez ]'apparel]connecteenbran@antanouveausoncordond'alimentation.<br />
Loshaut-parleursemettentdesbruits o Wfifiez lebranchementdes cables.Assurez-vousqu'uncablevideon'estpasbrancheL_uneentreeaudio.<br />
inappropries. _ Sile tel@iseurest brancheL_uneantenneou uncabloselecteur, v@ifiezI'intensitedusignal.Unsignalfaiblepeut<br />
causerune distorsionsonore.<br />
2 Frangais<br />
ProcedezL_Essaide sontelqu'expliqueci-dessus.
Pasd'image<br />
Letel6viseurnes'allumepas. o Assurez-vousque lecordond'alimentationc.a.est bienbranche5`laprisede courantmuraleet autel@iseur.<br />
o Assurez-vousque la prisede courantmuraleest soustension.<br />
o Appwez surlatouche POWERdu tel@iseurpourvousassurerque latel@ommandefonctionnecorrectement.Si<br />
letel6viseurs'allume,reportez-vousL_la section,,Latelecommandenefonctionnepas,,ci-dessous.<br />
Letel6viseurs'eteintautomatiquement, o Assurez-vousque le reglageMiseen veille est5`Off dansle menuConfiguration (p.20).<br />
o SivotrePCest brancheautel6viseur,verifiezlesreglagesde raisesoustensionde cedernier.<br />
o Assurez-vousque lecordond'alimentationc.a.est bienbranche5`laprisede courantmuraleet autel@iseuc<br />
o Lorsquevousregardezlatel@ision5`partird'uneconnexionparcs`bleou antenne,letel6viseurs'eteint<br />
automatiquement apresde 105`15minutess'ilne regoitaucunsignal.<br />
IIn'ya pasd'image. '_ V@ifiezlesconnexions(debranchezpuisbranchez5.nouveautouslesos`blesdu tel@iseuret desappareilsextemes).<br />
'_ Reglezlasortievideodevotreappareilexteme(cb.bloselecteur, lecteurDVD,lecteurBlu-ray,etc.)afinqu'elle<br />
correspondeauxbranchements5`I'entreedu tel@iseur.Parexemple,siI'appareilextemeaunesortieHDMI,ilfautle<br />
brancherauneentreeHDMIde latel6.<br />
ConnexionRF(cable/antenne)<br />
'_ Assurez-vousquelesappareilsbranchessontsoustension.<br />
'_ Assurez-vousdechoisirlasourceappropri@duteleviseurenappuyantsurlatoucheSOURCEde latelecommande.<br />
'_ Reinitialisez I'@pareilconnecteenbranchanta nouveausoncordond'alimentation.<br />
Letel6viseurneregoitpastousles canaux, o Assurez-vousque lecs`blecoaxialestbienbranche.<br />
o EssayezI'optionProg.auto pourajouterlessanauxdisponibles5`lalistedessanaux.Allez5`MENU- Canal-<br />
Prog.auto,puisselectionnezAutoet assurez-vousqueletypede signalde cs`bleapproprieest choisidartsle<br />
menu.IIexistetroisoptions: (STD,EIROet IRC)(p. 14)<br />
,, Verifiezsil'antenneest bienpositionnee.<br />
Pasde sous-titresaux sanauxnum@iques, o Verifiezlemenude configurationdessous-titres.Essayezde modifierleMode ss-titres ood_sService1L_OO1<br />
(p.22).<br />
,, IIestpossibleque certainscanauxn'aientpas desous-titres.<br />
L'imageest ddormee:erreurmacrobloc,petit o Lacompressiondu contenuvideopeutcauseruneddormationde I'image,surtoutIorsqueles mouvementsont<br />
bloc,points,effetd'escalier, rapides,commedartslesfilmsdesportet d'action.<br />
o Unsignalfaiblepeutcauseruneddormationde I'image.IInes'agitpas d'un problemedutel@iseur.<br />
Connexion au PC<br />
Lemessage,,Mode nondisponible,,s'affiche, o R6
Autreinformation<br />
Lemessage,,Mode nondisponible,,s'affiche. , Verifiezlaresolutionpriseenchargeparletel@iseuret reglezla resolutionde sortiede Fappareil externeen<br />
consequence.Consultezlesreglagesdesresolutionsa lapage12du presentguide.<br />
L'optionSous-titresdans lemenudu tel6viseur , IIest impossibledeselectionnerI'optionSous-titresdansle menudutel@iseursi cedernierest brancheau<br />
estgris@, moyendun cableHDMIou composantes(p.22).<br />
, L'optionSous-titresdoit 6treactiveesurI'appareilexterne(p. 22).<br />
Letel@iseurdegageuneodeurde plastique. , Cetteodeurest normaleet dispar_traavecletemps.<br />
L'optionPuissancesignaldu tel6viseur , Cetteoptionn'estoffertequ'aveclescanauxnum@iqueset uneantenne/ RP/ cb,blecoaxial)(p.24).<br />
n'estpasdisponibledansle menuEssai<br />
d'autodiagnostb.<br />
Letel@iseurest inclinedun c6te. o Retirezlepieddutel@iseuret assemblez-lede nouveau.<br />
Lemenudescanauxest grise(nondisponible). , LemenuChaine n'estdisponibleque Iorsquelasourcedu tel@iseurestselectionn6e.<br />
Vosreglagessontperdusapres30 minutesou , Siletel6viseurest regleaumode D_mornagasin,ilreinitialiseles rcglagesdu sonet de I'imagetoutesles30<br />
chaquelois que letel6viseuresteteint, minutes.Passezdu mode D_momagasinau modeUtil.a domicile dans laprocedurePr_t aI'emploi. Appuyez<br />
surlatoucheSOURCEpourselectionnerlemode"IVet allezL_MENU-_ Configuration-_ Pr6t a I'emploi_<br />
EN'TER_ (p.8).<br />
Perteintermittentedu sonou deI'image. , Verifiezlesconnexionsdescb,bleset refaitesles branchements.<br />
, Laperteduson oude I'imagepaut_trecauseepar Futilisationde cablestroprigidesoutrop @ais.Assurez-<br />
vousque lescablessontsuffisammentsouplespour uneutilisationL_longterme.Pourla fixationmurale,nous<br />
recommandonsI'utilisationdecb,blesavecdesconnecteursa 90degr@.<br />
Vousremarquezde petitesparticulesen<br />
examinantminutieusement le borddu cadre<br />
o Oelafar partiede laconceptiondu produitet ne construepasun ddaut.<br />
entourantFecrandutel@iseur.<br />
Unebannierepublicitaireinternedutel@iseur , SelectionnezI'optionUtil.a domicile apartirdu modePr6t a I'emploi. Pourdeplusamplesdetails,reportez-<br />
(POP)apparatta Fecran. vousL_lasectionPr6t a I'emploi(p. 8).<br />
Cet ecranTFT AOL utiliseun affichage constitue de pixels secondakesdont la production exige unetechnologie perfectionnee.II<br />
se peut toutefoisque certains pixelss'assombdssent ou soient plus lumineux a I'ecran. Oephenomene n'a aucune incidencesur la<br />
performancede I'appareik<br />
I Entreposageet entretien<br />
4 Frangais
SrS_" TruSurroundHD, SRSand _:_ symbolare trademarksof SRS Labs, Inc.<br />
TruSurreundHD TruSurroundHD technology is incorporatedunder licensefrom SRSLabs, Inc.<br />
Avis de licencerelative &I'exploitationlibre<br />
Fabriquesous licencede Dolby Laboratories.Dolbyet lesymbole double D sent des marquesde<br />
commercede DolbyLaboratories.<br />
Dansles cas ell un Iogicielde sourcelibreest utilise,les licencesrelativesa la source libresent disponiblesdansle menudes produits.<br />
L'avisde licenceconcernant I'exploitationlibren'est r6digequ'en anglais.<br />
Resolution 1920 x 1080<br />
Facteurs environnementaux<br />
Temperaturede fonctionnement 50°F a 104°F (10°C a 40°(})<br />
Niveau d'humidite en fonctionnement 10% 'a80%, sans condensation<br />
Temperatured'entrePosage d°F 'a 113°F (- 20°C a 45°C)<br />
Niveau d'humidite en entrepesage 5% a • %0, _ o/ sans condensation<br />
Support pivotant (gauche/droite) -20° - 20°<br />
Taillede I'ecran 40 pouces<br />
81agonale) (40.0 pouces en diagonale)<br />
Sor<br />
sortie 10 W X 2<br />
Dimenslor s/Lx P x H_<br />
Bdtier 38.2 X 3.1 X 23.3 pouces<br />
(970.0 X 78.6 X 591.3 mm)<br />
Avec sursr3ert 38.2 X 9.5 X 25.7 pouces<br />
Poias<br />
(970.0 X 240.0 X 653.0 ram)<br />
Sans slJDOOr'[ 32.0 ]b (14.6 kg)<br />
Avec SUDDOrI 38.4 ]b (17.4 kg)<br />
Ledesign et ]esspecifications peuventfaire Fobjetde modificationssans preavis.<br />
Cet apparei]est un apparei]numerique de categorie B.<br />
Pourles caracteristiques d'alimentationet de consommationelectrique,voir I'etiquettefixee au produit.<br />
Frangais 35
Autreinformation<br />
[] Vue avant/Vue laterale"<br />
[] Panneau des prises / vue arriere<br />
® _® ® ®i®<br />
0<br />
v<br />
I--o-4<br />
(Unite:pouces)<br />
(Unite:pouces)<br />
REMARQUE:Lesdesslnsne sont pas necessairementa I'echelle.Certainesdimensionspourraient6tre modl%essails preavls.Veriflezles<br />
dimensionsavant d'installervotre t61eviseur.Nousne sommespas responsablesdes erreursde typographieou d'impression.<br />
© 2010 SamsungElectronicsAmerica,Inc<br />
6 Frangais
A H 0<br />
Antenne I4 Haut-parleurdu tel6viseur 20 Outils<br />
AUDIOOUT 11 Haut-parleurexterne 20<br />
Autodiagnostic 24 HDMI 9 p<br />
B<br />
Horloge 20<br />
Photos<br />
Piles<br />
BackgroundMusic(Musiquede fond) 28<br />
BalanceG/D I9<br />
Branchementa un appareilaudio 11<br />
Branchementd'un PC I2<br />
C<br />
Changerde NIP 22<br />
Chaud 17<br />
Cinemamaison 11<br />
Cle USB 25<br />
Composantes 10<br />
Contrastedynamique 17<br />
D<br />
D@annage 32<br />
Diaporama 25<br />
DIG%¢LAUDIO OUT I1<br />
D-Sub I2<br />
Dynamique I6<br />
E<br />
Economiseurenergie 23<br />
Egaliseur I9<br />
Entrer lenora 13<br />
Equilibragedes blancs 17<br />
F<br />
Formatd'image 17<br />
Frequence I2<br />
I<br />
Pr@ta I'emploi<br />
indicateurd'aiimentation 6 Puissancedu signal<br />
Installationde Space 2<br />
R<br />
L<br />
.................................................................................................................................................................<br />
ReglageAutomatique<br />
I8<br />
Langue 22 Reglageautomatiquedu volume I9<br />
Licence 35 R@eterlamusique<br />
27<br />
Listesource 13 Resolutionoptimale<br />
12<br />
Luminosite 16 Rotation<br />
26<br />
M S<br />
Media Play 25 Selectionerle haut-parleur<br />
Melodie 23 Selectionnertout<br />
Memorisationdes canaux 14 Specificationstechniques<br />
Menudes canaux 14 Support d'obturation<br />
Minuterie 20 Support mural<br />
Mise_tniveaudu Iogiciel 24 Symboles<br />
Miseen veille 20 Syntonisationprecise<br />
Mode Film 18<br />
Modeveille 6 T<br />
Modificationdescanaux 15<br />
Tel6commande<br />
Mono 19<br />
Musique 27 Ton chair<br />
Tonalitenoire<br />
ToucheFAV.CH<br />
N Touclle ON/OFF<br />
Navigation 13<br />
Nettete 16<br />
Nuancecouleur 17<br />
V<br />
26<br />
7<br />
8<br />
24<br />
20<br />
I5<br />
35<br />
29<br />
29<br />
3<br />
I6<br />
I7<br />
I7<br />
7<br />
7,14<br />
7<br />
Volume 6<br />
Francais 37
Contact SAMSUNG WORLDWIDE<br />
if you have any questions or comments relating to Samsung products, please contact <strong>the</strong> SAMSUNG customer care center.<br />
Comment contacter Samsung darts le monde<br />
Si vous avez des suggestions ou des questions concernant les produits Samsung, veuillez contacter le Service Consommateurs<br />
Samsung.<br />
Comuniquese con SAMSUNG WORLDWIDE<br />
Si desea formular alguna pregunta o comentario en relaci6n con los productos de Samsung, comuniquese con el centro de<br />
atenci6n al cliente de SAMSUNG.<br />
CANADA 1-800-SAMSUNG (726-7864) www.samsung.com Samsung Electronics Canada Inc., Customer Service<br />
55 Standish Court Mississauga, Ontario L5R 4B2<br />
Canada<br />
U.S.A 1-800-SAMSUNG (726-7864) www.samsung.com Samsung Electronics America, Inc. 85 Challenger<br />
© 2010 Samsung Electronics Co., Ltd. All rights reserved.<br />
Road Ridgefield Park, NJ 07660-2112<br />
I<br />
BN68-0321gA-01<br />
t==<br />
O<br />
-"4<br />
<<br />
.=_<br />
3