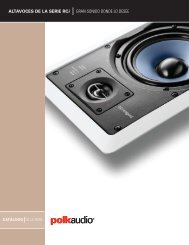
MMC5250 MM6 6.5" System - Polk Audio
MMC5250 MM6 6.5" System - Polk Audio
MMC5250 MM6 6.5" System - Polk Audio

You also want an ePaper? Increase the reach of your titles
YUMPU automatically turns print PDFs into web optimized ePapers that Google loves.
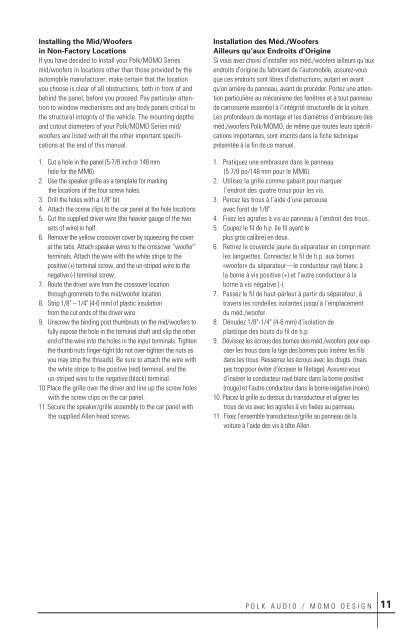
Installing the Mid/Woofers<br />
in Non-Factory Locations<br />
If you have decided to install your <strong>Polk</strong>/MOMO Series<br />
mid/woofers in locations other than those provided by the<br />
automobile manufacturer, make certain that the location<br />
you choose is clear of all obstructions, both in front of and<br />
behind the panel, before you proceed. Pay particular attention<br />
to window mechanisms and any body panels critical to<br />
the structural integrity of the vehicle. The mounting depths<br />
and cutout diameters of your <strong>Polk</strong>/MOMO Series mid/<br />
woofers are listed with all the other important specifications<br />
at the end of this manual.<br />
1. Cut a hole in the panel (5-7/8 inch or 148 mm<br />
hole for the <strong>MM6</strong>).<br />
2. Use the speaker grille as a template for marking<br />
the locations of the four screw holes.<br />
3. Drill the holes with a 1/8" bit.<br />
4. Attach the screw clips to the car panel at the hole locations.<br />
5. Cut the supplied driver wire (the heavier gauge of the two<br />
sets of wire) in half.<br />
6. Remove the yellow crossover cover by squeezing the cover<br />
at the tabs. Attach speaker wires to the crossover “woofer”<br />
terminals. Attach the wire with the white stripe to the<br />
positive (+) terminal screw, and the un-striped wire to the<br />
negative (-) terminal screw.<br />
7. Route the driver wire from the crossover location<br />
through grommets to the mid/woofer location.<br />
8. Strip 1/8" – 1/4" (4-6 mm) of plastic insulation<br />
from the cut ends of the driver wire.<br />
9. Unscrew the binding post thumbnuts on the mid/woofers to<br />
fully expose the hole in the terminal shaft and slip the other<br />
end of the wire into the holes in the input terminals. Tighten<br />
the thumb nuts finger-tight (do not over-tighten the nuts as<br />
you may strip the threads). Be sure to attach the wire with<br />
the white stripe to the positive (red) terminal, and the<br />
un-striped wire to the negative (black) terminal.<br />
10.Place the grille over the driver and line up the screw holes<br />
with the screw clips on the car panel.<br />
11.Secure the speaker/grille assembly to the car panel with<br />
the supplied Allen head screws.<br />
Installation des Méd./Woofers<br />
Ailleurs qu’aux Endroits d’Origine<br />
Si vous avez choisi d’installer vos méd./woofers ailleurs qu’aux<br />
endroits d’origine du fabricant de l’automobile, assurez-vous<br />
que ces endroits sont libres d’obstructions, autant en avant<br />
qu'en arrière du panneau, avant de procéder. Portez une attention<br />
particulière au mécanisme des fenêtres et à tout panneau<br />
de carrosserie essentiel à l’intégrité structurelle de la voiture.<br />
Les profondeurs de montage et les diamètres d’embrasure des<br />
méd./woofers <strong>Polk</strong>/MOMO, de même que toutes leurs spécifications<br />
importantes, sont inscrits dans la fiche technique<br />
présentée à la fin de ce manuel.<br />
1. Pratiquez une embrasure dans le panneau<br />
(5 7/8 po/148 mm pour le <strong>MM6</strong>).<br />
2. Utilisez la grille comme gabarit pour marquer<br />
l’endroit des quatre trous pour les vis.<br />
3. Percez les trous à l’aide d’une perceuse<br />
avec foret de 1/8".<br />
4. Fixez les agrafes à vis au panneau à l’endroit des trous.<br />
5. Coupez le fil de h.p. (le fil ayant le<br />
plus gros calibre) en deux.<br />
6. Retirez le couvercle jaune du séparateur en comprimant<br />
les languettes. Connectez le fil de h.p. aux bornes<br />
«woofer» du séparateur—le conducteur rayé blanc à<br />
la borne à vis positive (+) et l’autre conducteur à la<br />
borne à vis négative (-).<br />
7. Passez le fil de haut-parleur à partir du séparateur, à<br />
travers les rondelles isolantes jusqu’à l’emplacement<br />
du méd./woofer.<br />
8. Dénudez 1/8"-1/4" (4-6 mm) d’isolation de<br />
plastique des bouts du fil de h.p.<br />
9. Dévissez les écrous des bornes des méd./woofers pour exposer<br />
les trous dans la tige des bornes puis insérez les fils<br />
dans les trous. Resserrez les écrous avec les doigts (mais<br />
pas trop pour éviter d’écraser le filetage). Assurez-vous<br />
d’insérer le conducteur rayé blanc dans la borne positive<br />
(rouge) et l’autre conducteur dans la borne négative (noire).<br />
10. Placez la grille au dessus du transducteur et alignez les<br />
trous de vis avec les agrafes à vis fixées au panneau.<br />
11. Fixez l’ensemble transducteur/grille au panneau de la<br />
voiture à l’aide des vis à tête Allen.<br />
POLK AUDIO / MOMO DESIGN 11