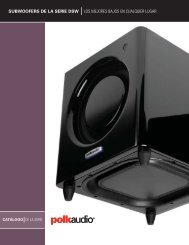
MMC5250 MM6 6.5" System - Polk Audio
MMC5250 MM6 6.5" System - Polk Audio
MMC5250 MM6 6.5" System - Polk Audio

You also want an ePaper? Increase the reach of your titles
YUMPU automatically turns print PDFs into web optimized ePapers that Google loves.
Necessary Tools<br />
• Phillips head screwdriver<br />
• 9/16" allen wrench<br />
• Flat blade screwdriver or door panel removal tool<br />
• Electric drill<br />
• 1/4" and 1/8" drill bits<br />
• Reciprocating saw or razor knife<br />
• Magic marker for marking the cutout (new location only)<br />
• Metal cutting tool (hole saw, if you intend to cut metal<br />
• Metal file<br />
• A supply of solderless connectors<br />
• Safety glasses<br />
• Wire strippers and cutters<br />
• Crimping tool<br />
Installing the Components<br />
The <strong>Polk</strong>/MOMO <strong>System</strong> Crossovers<br />
You will need to make wiring connections from your amp or<br />
radio to the crossovers and from the crossovers to your mid/<br />
woofers and tweeters (Figure 1). Choose crossover box locations<br />
that are convenient for making these connections. As<br />
there are adjustments on and in the crossover networks<br />
which you will need to access during the “fine tuning” stage<br />
of the installation, place them in a spot that’s easy to get to.<br />
Once you’re done fine-tuning the system, the crossovers can<br />
be hidden away and secured. Do not install into doors<br />
due to potential water damage. This is not covered<br />
under Manufacturer’s Warranty.<br />
Your <strong>Polk</strong>/MOMO Series crossovers have clearly marked terminals.<br />
Before making connections between your crossovers,<br />
mid/woofers and tweeters, refer to Figure 1. The wires provided<br />
with your <strong>Polk</strong>/MOMO <strong>System</strong> have one conductor with a<br />
white stripe. Use this wire as the positive (+) lead and connect<br />
it to the positive (+) terminals on your crossovers as well as to<br />
the positive (+) terminals of each speaker.<br />
Outils requis<br />
• Tournevis à tête Phillips<br />
• Clé Allen 9/16"<br />
• Tournevis à lame plate ou outil pour<br />
retirer les panneaux de porte<br />
• Perceuse électrique<br />
• Forets 1/4" et 1/8" (0,125 cm et 0,25 cm)<br />
• Scie alternative ou couteau<br />
• Marqueur pour tracer l’embrasure<br />
(nouvelle installation seulement)<br />
• Outil à couper le métal (scie-cloche—<br />
si vous devez couper du métal)<br />
• Lime pour métal<br />
• Plusieurs connecteurs sans soudure<br />
• Lunettes de sécurité<br />
• Pince à dénuder et à couper le fil<br />
• Pince à sertir<br />
Installation des composants<br />
Les filtres séparateurs<br />
du système <strong>Polk</strong>/MOMO<br />
Vous devrez raccorder votre amplificateur ou radio aux filtres<br />
séparateurs puis raccorder les filtres à vos méd./woofers et<br />
à vos tweeters (Figure 1). Vous devrez aussi régler certains<br />
contrôles situés sur et dans les séparateurs alors placez-les<br />
temporairement à un endroit où ils seront facilement accessibles.<br />
Une foisle réglage final du système terminé, les séparateurs<br />
pourront être dissimulés et fixés solidement. Ne les<br />
installez pas dans les portes où ils pourraient être endommagés<br />
par de l’eau. Ce type de dommage n’est pas<br />
couvert par la garantie du fabricant.<br />
Les bornes des séparateurs <strong>Polk</strong>/MOMO sont bien identifiées.<br />
Avant de raccorder vos séparateurs aux méd./woofers et aux<br />
tweeters, consultez la figure 1. Un des conducteurs des fils<br />
fournis avec votre Système <strong>Polk</strong>/MOMO est identifié avec une<br />
rayure blanche. Utilisez ce fil comme conducteur positif (+) et<br />
connectez-le aux bornes positives (+) de vos séparateurs et<br />
aux bornes positives (+) de vos haut-parleurs.<br />
POLK AUDIO / MOMO DESIGN 9