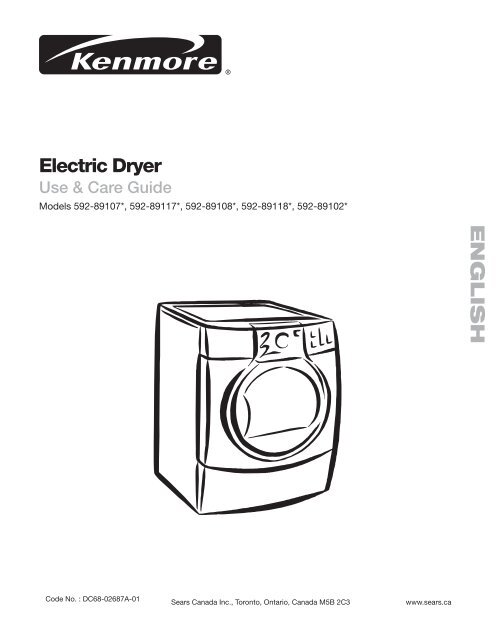
Electric Dryer ENGLISH - Sears Canada
Electric Dryer ENGLISH - Sears Canada
Electric Dryer ENGLISH - Sears Canada

You also want an ePaper? Increase the reach of your titles
YUMPU automatically turns print PDFs into web optimized ePapers that Google loves.
<strong>Electric</strong> <strong>Dryer</strong><br />
Use & Care Guide<br />
Models 592-89107*, 592-89117*, 592-89108*, 592-89118*, 592-89102*<br />
<strong>ENGLISH</strong><br />
Code No. : DC68-02687A-01<br />
<strong>Sears</strong> <strong>Canada</strong> Inc., Toronto, Ontario, <strong>Canada</strong> M5B 2C3<br />
www.sears.ca<br />
Kenmore_<strong>Dryer</strong>-Good-02687A-01_EN.indd 1 2009-07-02 ¿ÀÈÄ 3:21:07
TABLE OF CONTENTS<br />
TABLE OF CONTENTS . . . . . . . . . . . . . . . . . . . . . . . . . . . . . . . 2<br />
PROTECTION AGREEMENTS . . . . . . . . . . . . . . . . . . . . . . . . . . 2<br />
KENMORE ® APPLIANCE WARRANTY . . . . . . . . . . . . . . . . . . . 3<br />
DRYER SAFETY . . . . . . . . . . . . . . . . . . . . . . . . . . . . . . . . . . . . . 4<br />
INSTALLATION INSTRUCTIONS . . . . . . . . . . . . . . . . . . . . . . . . 5<br />
Tools and Parts . . . . . . . . . . . . . . . . . . . . . . . . . . . . . . . . . . . . 5<br />
Optional Pedestal . . . . . . . . . . . . . . . . . . . . . . . . . . . . . . . . . . . 5<br />
Location Requirements . . . . . . . . . . . . . . . . . . . . . . . . . . . . . . 6<br />
<strong>Electric</strong>al Requirements . . . . . . . . . . . . . . . . . . . . . . . . . . . . . . 8<br />
Venting Requirements . . . . . . . . . . . . . . . . . . . . . . . . . . . . . . . 9<br />
Plan Vent System . . . . . . . . . . . . . . . . . . . . . . . . . . . . . . . . . . 10<br />
Install Vent System . . . . . . . . . . . . . . . . . . . . . . . . . . . . . . . . . 11<br />
Connect Vent . . . . . . . . . . . . . . . . . . . . . . . . . . . . . . . . . . . . . 11<br />
Level <strong>Dryer</strong> . . . . . . . . . . . . . . . . . . . . . . . . . . . . . . . . . . . . . . . 11<br />
Reverse Door Swing . . . . . . . . . . . . . . . . . . . . . . . . . . . . . . . 12<br />
Complete Installation . . . . . . . . . . . . . . . . . . . . . . . . . . . . . . . 13<br />
DRYER USE . . . . . . . . . . . . . . . . . . . . . . . . . . . . . . . . . . . . . . . 14<br />
Starting Your <strong>Dryer</strong> . . . . . . . . . . . . . . . . . . . . . . . . . . . . . . . . . 14<br />
Cycles . . . . . . . . . . . . . . . . . . . . . . . . . . . . . . . . . . . . . . . . . . 15<br />
Options . . . . . . . . . . . . . . . . . . . . . . . . . . . . . . . . . . . . . . . . . 15<br />
Drying Rack . . . . . . . . . . . . . . . . . . . . . . . . . . . . . . . . . . . . . . 17<br />
DRYER CARE . . . . . . . . . . . . . . . . . . . . . . . . . . . . . . . . . . . . . . 18<br />
Cleaning the <strong>Dryer</strong> Location . . . . . . . . . . . . . . . . . . . . . . . . . 18<br />
Removing Accumulated Lint . . . . . . . . . . . . . . . . . . . . . . . . . 19<br />
SPECIAL LAUNDRY TIPS . . . . . . . . . . . . . . . . . . . . . . . . . . . . 20<br />
TROUBLESHOOTING . . . . . . . . . . . . . . . . . . . . . . . . . . . . . . . 21<br />
Information Codes . . . . . . . . . . . . . . . . . . . . . . . . . . . . . . . . . 21<br />
Check these points if your dryer… . . . . . . . . . . . . . . . . . . . . 21<br />
<strong>Dryer</strong> Results . . . . . . . . . . . . . . . . . . . . . . . . . . . . . . . . . . . . . 22<br />
SERVICE NUMBER . . . . . . . . . . . . . . . . . . . . . . . BACK COVER<br />
PROTECTION AGREEMENTS<br />
Master Protection Agreements<br />
Congratulations on making a smart purchase. Your new<br />
Kenmore ® product is designed and manufactured for years<br />
of dependable operation. But like all products, it may require<br />
preventive maintenance or repair from time to time. That’s when<br />
having a Master Protection Agreement can save you money and<br />
aggravation.<br />
The Master Protection Agreement also helps extend the life of<br />
your new product. Here’s what the Agreement* includes:<br />
✔ Parts and labor needed to help keep products operating<br />
properly under normal use, not just defects. Our coverage<br />
goes well beyond the product warranty. No deductibles,<br />
no functional failure excluded from coverage— real<br />
protection.<br />
✔ Expert service by a force of more than 10,000 authorized<br />
<strong>Sears</strong> service technicians, which means someone you can<br />
trust will be working on your product.<br />
✔ Unlimited service calls and nationwide service, as often<br />
as you want us, whenever you want us.<br />
✔ “No-lemon” guarantee – replacement of your covered<br />
product if four or more product failures occur within twelve<br />
months.<br />
✔ Product replacement if your covered product can’t be fixed.<br />
✔ Annual Preventive Maintenance Check at your request<br />
– no extra charge.<br />
✔ Fast help by phone – we call it Rapid Resolution – phone<br />
support from a <strong>Sears</strong> representative on all products. Think of<br />
us as a “talking owner’s manual.”<br />
✔ Power surge protection against electrical damage due to<br />
power fluctuations.<br />
✔ $250 Food Loss Protection annually for any food spoilage<br />
that is the result of mechanical failure of any covered<br />
refrigerator or freezer.<br />
✔ Rental reimbursement if repair of your covered product<br />
takes longer than promised.<br />
✔ 10% discount off the regular price of any non-covered repair<br />
service and related installed parts.<br />
Once you purchase the Agreement, a simple phone call is all that<br />
it takes for you to schedule service. You can call anytime day or<br />
night, or schedule a service appointment online.<br />
The Master Protection Agreement is a risk free purchase. If you<br />
cancel for any reason during the product warranty period, we<br />
will provide a full refund. Or, a prorated refund anytime after<br />
the product warranty period expires. Purchase your Master<br />
Protection Agreement today!<br />
*Coverage in <strong>Canada</strong> varies on some items. For full details<br />
call <strong>Sears</strong> <strong>Canada</strong> at 1-800-361-6665.<br />
<strong>Sears</strong> Installation Service<br />
For <strong>Sears</strong> professional installation of home appliances, garage<br />
door openers, water heaters, and other major home items, in the<br />
<strong>Canada</strong> call 1-800-4-MY-HOME ® .<br />
2<br />
Kenmore_<strong>Dryer</strong>-Good-02687A-01_EN.indd 2 2009-07-02 ¿ÀÈÄ 3:21:07
KENMORE ® APPLIANCE WARRANTY<br />
ONE YEAR LIMITED WARRANTY<br />
When installed, operated and maintained according to all<br />
instructions supplied with the product, if this appliance fails due<br />
to a defect in material or workmanship within one year from the<br />
date of purchase, call 1-800-4-MY-HOME ® to arrange for free<br />
repair.<br />
If this appliance is used for other than private family purposes,<br />
this warranty applies for only 90 days from the date of purchase.<br />
THIS WARRANTY COVERS ONLY DEFECTS IN MATERIAL<br />
AND WORKMANSHIP. SEARS WILL NOT PAY FOR:<br />
1. Expendable items that can wear out from normal use,<br />
including but not limited to filters, belts, light bulbs, and<br />
bags.<br />
2. A service technician to instruct the user in correct product<br />
installation, operation or maintenance.<br />
3. A service technician to clean or maintain this product.<br />
4. Damage to or failure of this product if it is not installed,<br />
operated or maintained according to all instructions supplied<br />
with the product.<br />
5. Damage to or failure of this product resulting from accident,<br />
abuse, misuse or use for other than its intended purpose.<br />
6. Damage to or failure of this product caused by the use of<br />
detergents, cleaners, chemicals or utensils other than those<br />
recommended in all instructions supplied with the product.<br />
7. Damage to or failure of parts or systems resulting from<br />
unauthorized modifications made to this product.<br />
DISCLAIMER OF IMPLIED WARRANTIES; LIMITATION OF<br />
REMEDIES<br />
Customer’s sole and exclusive remedy under this limited<br />
warranty shall be product repair as provided herein. Implied<br />
warranties, including warranties of merchantability or fitness<br />
for a particular purpose, are limited to one year or the shortest<br />
period allowed by law. <strong>Sears</strong> shall not be liable for incidental<br />
or consequential damages. Some states and provinces do not<br />
allow the exclusion or limitation of incidental or consequential<br />
damages, or limitations on the duration of implied warranties of<br />
merchantability or fitness, so these exclusions or limitations may<br />
not apply to you.<br />
This warranty applies only while this appliance is used in the<br />
<strong>Canada</strong>.<br />
This warranty gives you specific legal rights, and you may also<br />
have other rights which vary from state to state.<br />
<strong>Sears</strong> <strong>Canada</strong> Inc.<br />
Toronto, Ontario, <strong>Canada</strong> M5B 2C3<br />
PRODUCT RECORD<br />
In the space below, record your complete model number, serial<br />
number, and purchase date. Model plate is located on the lower<br />
part of the door opening and on the rear right side of the unit.<br />
Have this information available to help you obtain assistance or<br />
service more quickly whenever you contact <strong>Sears</strong> concerning<br />
your appliance.<br />
Model number ___ ___ ___ . ______________________________<br />
Serial number ___________________________________________<br />
Purchase date ___________________________________________<br />
Save these instructions and your sales receipt for future<br />
reference.<br />
PEDESTAL PRODUCT RECORD<br />
In the space below, record your complete model number, serial<br />
number, and purchase date. You can find this information on the<br />
model and serial number label located on the product.<br />
Have this information available to help you obtain assistance or<br />
service more quickly whenever you contact <strong>Sears</strong> concerning<br />
your pedestal.<br />
Model number ___ ___ ___ . ______________________________<br />
Serial number ___________________________________________<br />
Purchase date ___________________________________________<br />
Save these instructions and your sales receipt for future<br />
reference.<br />
<strong>ENGLISH</strong><br />
3<br />
Kenmore_<strong>Dryer</strong>-Good-02687A-01_EN.indd 3 2009-07-02 ¿ÀÈÄ 3:21:07
DRYER SAFETY<br />
Your safety and the safety of others are very important.<br />
We have provided many important safety messages in this manual and on your appliance. Always read and obey all safety<br />
messages.<br />
This is the safety alert symbol.<br />
This symbol alerts you to potential hazards that can kill or hurt you and others.<br />
All safety messages will follow the safety alert symbol and either the word “WARNING” or “CAUTION.”<br />
These words mean:<br />
WARNING<br />
CAUTION<br />
You can be killed or seriously injured if you don’t immediately<br />
follow instructions.<br />
You can be killed or seriously injured if you don’t follow<br />
instructions.<br />
All safety messages will tell you what the potential hazard is, tell you how to reduce the chance of injury, and tell you what can<br />
happen if the instructions are not followed.<br />
IMPORTANT SAFETY INSTRUCTIONS<br />
WARNING: To reduce the risk of fire, electric shock, or injury to persons when using the dryer, follow basic precautions,<br />
including the following:<br />
■ Read all instructions before using the dryer.<br />
■ Do not place items exposed to cooking oils in your dryer.<br />
Items contaminated with cooking oils may contribute to a<br />
chemical reaction that could cause a load to catch fire.<br />
■ Do not dry articles that have been previously cleaned in,<br />
washed in, soaked in, or spotted with gasoline, drycleaning<br />
solvents, or other flammable or explosive substances as<br />
they give off vapors that could ignite or explode.<br />
■ Do not allow children to play on or in the dryer. Close<br />
supervision of children is necessary when the dryer is used<br />
near children.<br />
■ Before the dryer is removed from service or discarded,<br />
remove the door to the drying compartment.<br />
■ Do not reach into the dryer if the drum is moving.<br />
■ Do not install or store the dryer where it will be exposed to<br />
the weather.<br />
■ Do not tamper with controls.<br />
■ Do not repair or replace any part of the dryer or attempt any<br />
servicing unless specifically recommended in this Use and<br />
Care Guide or in published user-repair instructions that you<br />
understand and have the skills to carry out.<br />
■ Do not use fabric softeners or products to eliminate static<br />
unless recommended by the manufacturer of the fabric<br />
softener or product.<br />
■ Do not use heat to dry articles containing foam rubber or<br />
similarly textured rubber-like materials.<br />
■ Clean lint screen before or after each load.<br />
■ Keep area around the exhaust opening and adjacent<br />
surrounding areas free from the accumulation of lint, dust,<br />
and dirt.<br />
■ The interior of the dryer and exhaust vent should be cleaned<br />
periodically by qualified service personnel.<br />
■ See installation instructions for grounding requirements.<br />
SAVE THESE INSTRUCTIONS<br />
4<br />
Kenmore_<strong>Dryer</strong>-Good-02687A-01_EN.indd 4 2009-07-02 ¿ÀÈÄ 3:21:08
INSTALLATION INSTRUCTIONS<br />
Tools and Parts<br />
Gather the required tools and parts before starting installation.<br />
Read and follow the instructions provided with any tools listed<br />
here.<br />
Pliers Cutting knife Nut drivers<br />
Mobile home installations require metal exhaust system<br />
hardware available for purchase from your local <strong>Sears</strong> store or<br />
<strong>Sears</strong> Service Center. For further information, please call 1-800-<br />
4-MY-HOME ® (1-800-469-4663).<br />
Optional Pedestal<br />
Are you placing the dryer on a pedestal? You have the option<br />
of purchasing pedestals of different heights separately for this<br />
dryer. You may select a 15" (38 cm) pedestal with a storage<br />
drawer. The pedestal will add to the total height of the dryer for a<br />
total height of approximately 46" (116.8 cm) or 51.5" (130.8 cm),<br />
respectively.<br />
The pedestals are available in several colors.<br />
Level<br />
Wrench<br />
flat-blade<br />
screwdriver<br />
Duct tape<br />
Parts supplied<br />
Remove parts package from dryer drum. Check that all parts are<br />
included.<br />
To order, call your local <strong>Sears</strong> store. For further information,<br />
please call 1-800-4-MY-HOME ® (1-800-469-4663).<br />
Pedestal Height Color Model Number<br />
15"<br />
(38 cm)<br />
15"<br />
(38 cm)<br />
Optional pedestal<br />
Tango-Red 592-190040<br />
Imperial Silver 592-190070<br />
<strong>ENGLISH</strong><br />
15"<br />
(38 cm)<br />
Blue Silver 592-190080<br />
MANUAL-BOOK<br />
(DC68-02687A)<br />
DRYING RACK<br />
(DC61-01522A)<br />
NOTE: Do not use leveling legs supplied with dryer if installing<br />
on a pedestal.<br />
15"<br />
(38 cm)<br />
Optional Stacking-Kit<br />
Night Sky Blue 592-190090<br />
Are you planning to stack your Kenmore washer and dryer?<br />
To do so , purchase an optional stack kit (Model:592-188800)<br />
from your local <strong>Sears</strong> store or <strong>Sears</strong> Service Center.<br />
Follow instructions included with the kit.<br />
5<br />
Kenmore_<strong>Dryer</strong>-Good-02687A-01_EN.indd 5 2009-07-02 ¿ÀÈÄ 3:21:11
Location Requirements<br />
WARNING<br />
<strong>Dryer</strong> Dimensions<br />
C<br />
D<br />
Explosion Hazard<br />
Keep flammable materials and vapors, such as gasoline,<br />
away from dryer.<br />
Place dryer at least 18 inches (46 cm) above the floor for<br />
a garage installation.<br />
Failure to do so can result in death, explosion, or fire.<br />
You will need<br />
■ A location that allows for proper exhaust installation. See<br />
“Venting Requirements.”<br />
■ A separate 30-amp circuit.<br />
■ If you are using a power supply cord, a grounded electrical<br />
outlet located within 2 ft (61 cm) of either side of the dryer.<br />
See “<strong>Electric</strong>al Requirements.”<br />
■ A sturdy floor to support the total dryer weight of 200 lbs<br />
(90.7 kg). The combined weight of a companion appliance<br />
should also be considered.<br />
■ A level floor with a maximum slope of 1" (2.5 cm) under entire<br />
dryer. If slope is greater than 1”, clothes may not tumble<br />
properly and automatic sensor dry cycles may not operate<br />
correctly.<br />
■ For a garage installation, you will need to place the dryer at<br />
least 18" (46 cm) above the floor. If you are using a pedestal,<br />
you will need 18" (46 cm) to the bottom of the dryer.<br />
Do not operate your dryer at temperatures below 45ºF (7ºC). At<br />
lower temperatures, the dryer might not shut off at the end of an<br />
automatic cycle. Drying times can be extended.<br />
The dryer must not be installed or stored in an area where it will<br />
be exposed to water and/or weather.<br />
Check code requirements. Some codes limit, or do not permit,<br />
installation of the dryer in garages, closets, mobile homes, or<br />
sleeping quarters. Contact your local building inspector.<br />
Installation clearances<br />
The location must be large enough to allow the dryer door to<br />
open fully.<br />
* Most installations require a minimum 5" (12.7 cm) clearance<br />
behind the dryer for the exhaust vent with elbow. See “Venting<br />
Requirements.”<br />
Installation spacing for recessed area or closet installation<br />
The following spacing dimensions are recommended for this<br />
dryer. This dryer has been tested for spacing of 0" (0 cm)<br />
clearance on the sides and rear. Recommended spacing should<br />
be considered for the following reasons:<br />
■ Additional spacing should be considered for ease of<br />
installation and servicing.<br />
■ Additional clearances might be required for wall, door and<br />
floor moldings.<br />
■ Additional spacing should be considered on all sides of the<br />
dryer to reduce noise transfer.<br />
■ For closet installation, with a door, minimum ventilation<br />
openings in the top and bottom of the door are required.<br />
Louvered doors with equivalent ventilation openings are<br />
acceptable.<br />
■ Companion appliance spacing should also be considered.<br />
Custom undercounter installation - <strong>Dryer</strong> only<br />
0 min.<br />
(0 cm)<br />
A: 38" (96.5 cm)<br />
B: 27" (68.6 cm)<br />
C: 49" (124.5 cm)<br />
D: 29.4" (74.6 cm)<br />
B<br />
A<br />
37" min.<br />
(93.9 cm)<br />
1"<br />
(2.5 cm)<br />
27"<br />
(68.6 cm)<br />
1"<br />
(2.5 cm)<br />
* Required spacing<br />
6<br />
Kenmore_<strong>Dryer</strong>-Good-02687A-01_EN.indd 6 2009-07-02 ¿ÀÈÄ 3:21:13
Closet installation - <strong>Dryer</strong> only<br />
14" max. *<br />
(35.6 cm)<br />
18" min. *<br />
(45.72 cm)<br />
48 In. 2 *<br />
(310 cm 2 )<br />
3" *<br />
(7.6 cm)<br />
Recommended installation spacing for recessed or closet<br />
installation, with stacked washer and dryer<br />
The dimensions shown are for the recommended spacing.<br />
48 In. 2 *<br />
(310 cm 2 )<br />
3" * (7.6 cm)<br />
24 In. 2 *<br />
(155 cm 2 )<br />
3" *<br />
(7.6 cm)<br />
1" *<br />
(2.5 cm)<br />
32 9 ⁄ 16<br />
"<br />
(82.65 cm)<br />
5" **<br />
(12.7 cm)<br />
A<br />
B<br />
A<br />
B<br />
A. Side view - closet or confined area<br />
B. Closet door with vents<br />
* Required spacing<br />
** For side or bottom venting, 2" (5.1 cm) spacing is allowed.<br />
Recessed or closet installation - <strong>Dryer</strong> on pedestal<br />
24 In. 2 *<br />
(155 cm 2 )<br />
* Required spacing<br />
3" * (7.6 cm)<br />
6" * (15.2 cm)<br />
1" * (2.5 cm)<br />
1"<br />
(2.5 cm)<br />
* Required spacing<br />
** For side or bottom venting, 2" (5.1 cm) spacing is allowed.<br />
Installation spacing for cabinet installation<br />
■ For cabinet installation, with a door, minimum ventilation<br />
openings in the top of the cabinet are required.<br />
7" * (17.8 cm)<br />
27"<br />
1"<br />
(68.6 cm) (2.5 cm) 1" *<br />
(2.5 cm)<br />
A<br />
A<br />
5" **<br />
(12.7 cm)<br />
7" * (17.8 cm)<br />
32 9 ⁄ 16<br />
"<br />
(82.65 cm)<br />
1" *<br />
(2.5 cm)<br />
32 9 ⁄ 16<br />
"<br />
(82.65 cm)<br />
1"<br />
(2.5 cm)<br />
27"<br />
(68.6 cm)<br />
1"<br />
(2.5 cm)<br />
9" *<br />
(22.9 cm)<br />
* Required spacing<br />
** For side or bottom venting, 2" (5.1 cm) spacing is allowed.<br />
B<br />
14" max. *<br />
(35.6 cm)<br />
18" min. *<br />
(45.72 cm)<br />
5" **<br />
(12.7 cm)<br />
A. Recessed area<br />
B. Side view - closet or confined area<br />
B<br />
5½" **<br />
(14 cm)<br />
76"<br />
(193 cm)<br />
1"<br />
(2.5 cm) 27"<br />
(68.6 cm)<br />
* Required spacing<br />
** For venting out the side, 2" (5.1 cm) spacing is allowed.<br />
Mobile home - additional installation requirements<br />
1"<br />
(2.5 cm)<br />
The installation of the <strong>Dryer</strong> in mobile homes must conform to<br />
the Manufactured Home Construction and Safety Standard Title<br />
24 CFR, Part 32-80 {formerly the Federal Standard for Mobile<br />
Home Construction and Safety, Title 24, HUD (Part 280), 1975}<br />
for the United States) or CSA Standards Z240 (for <strong>Canada</strong>).<br />
When installing a <strong>Dryer</strong> in a mobile home, provisions for<br />
anchoring the <strong>Dryer</strong> to the floor must be made. Locate an area<br />
that has adequate fresh air.<br />
A minimum of 72 in² (183 cm²) of unobstructed space is<br />
required.<br />
All mobile home installations must be exhausted to the outside<br />
with the exhaust duct termination securely fastened to the<br />
mobile home structure, using materials that will not support<br />
combustion.<br />
The exhaust duct may not terminate underneath the mobile<br />
home.<br />
See Exhausting section for more information.<br />
Mobile home installations require:<br />
■ Metal exhaust system hardware, which is available for<br />
purchase from your local <strong>Sears</strong> store or <strong>Sears</strong> Service<br />
Center.<br />
■ Special provisions must be made in mobile homes to<br />
introduce outside air into the dryer. The opening (such as a<br />
nearby window) should be at least twice as large as the dryer<br />
exhaust opening.<br />
<strong>ENGLISH</strong><br />
7<br />
Kenmore_<strong>Dryer</strong>-Good-02687A-01_EN.indd 7 2009-07-02 ¿ÀÈÄ 3:21:15
<strong>Electric</strong>al Requirements<br />
WARNING<br />
<strong>Electric</strong>al Shock Hazard<br />
Plug into a grounded 4 prong outlet.<br />
Failure to do so can result in death or electrical shock.<br />
It is your responsibility<br />
■ To contact a qualified electrical installer.<br />
■ To be sure that the electrical connection is adequate and<br />
in conformance with the Canadian <strong>Electric</strong>al Code, C22.1-<br />
latest edition and all local codes. A copy of the above<br />
codes standard may be obtained from: Canadian Standards<br />
Association, 178 Rexdale Blvd., Toronto, ON M9W 1R3<br />
<strong>Canada</strong>.<br />
■ To supply the required 4 wire, single phase, 120/240 volt, 60<br />
Hz., AC only electrical supply on a separate 30-amp circuit,<br />
fused on both sides of the line. A time-delay fuse or circuit<br />
breaker is recommended. Connect to an individual branch<br />
circuit.<br />
■ This dryer is equipped with a CSA International Certified<br />
Power Cord intended to be plugged into a standard 14-30R<br />
wall receptacle. The cord is 5 ft (1.52 m) in length. Be sure<br />
wall receptacle is within reach of dryer’s final location.<br />
GROUNDING INSTRUCTIONS<br />
■ For a grounded, cord-connected dryer:<br />
This dryer must be grounded. In the event of malfunction<br />
or breakdown, grounding will reduce the risk of electric<br />
shock by providing a path of least resistance for electric<br />
current. This dryer is equipped with a cord having an<br />
equipmentgrounding conductor and a grounding plug. The<br />
plug must be plugged into an appropriate outlet that is<br />
properly installed and grounded in accordance with all local<br />
codes and ordinances.<br />
WARNING: Improper connection of the<br />
equipmentgrounding conductor can result in a risk of<br />
electric shock. Check with a qualified electrician or service<br />
representative or personnel if you are in doubt as to whether<br />
the dryer is properly grounded. Do not modify the plug<br />
provided with the dryer: if it will not fit the outlet, have a<br />
proper outlet installed by a qualified electrician.<br />
■ For Gas Models<br />
Your <strong>Dryer</strong> has a cord with an equipment-grounding<br />
conductor and a grounding plug.<br />
The plug must be plugged into an appropriate outlet that is<br />
properly installed and grounded in accordance with all local<br />
codes and ordinances.<br />
Do not modify the plug provided with your <strong>Dryer</strong> – if it<br />
doesn’t fit the outlet, have a proper outlet installed by a<br />
qualified electrician.<br />
NEVER CONNECT GROUND WIRE TO PLASTIC PLUMBING<br />
LINES, GAS LINES, OR HOT WATER PIPES.<br />
SAVE THESE INSTRUCTIONS<br />
4-wire receptacle 14-30R<br />
■ Do not use an extension cord.<br />
If you are using a replacement power supply cord, it is<br />
recommended that you use Power Supply Cord Replacement<br />
Part Number DC96-00762A. For further information, please call<br />
1-800-4-MY-HOME® (1-800-469-4663).<br />
8<br />
Kenmore_<strong>Dryer</strong>-Good-02687A-01_EN.indd 8 2009-07-02 ¿ÀÈÄ 3:21:16
Venting Requirements<br />
Use a heavy metal vent.<br />
Do not use a plastic vent.<br />
WARNING<br />
Fire Hazard<br />
Do not use a metal foil vent.<br />
Failure to follow these instructions can result in death or<br />
fire.<br />
WARNING: To reduce the risk of fire, this dryer MUST BE<br />
EXHAUSTED OUTDOORS.<br />
IMPORTANT: Observe all governing codes and ordinances.<br />
The dryer exhaust must not be connected into any gas vent,<br />
chimney, wall, ceiling or a concealed space of a building.<br />
Please read the following instructions carefully before installing<br />
the dryer. These instructions should be kept for future reference.<br />
If using an existing vent system<br />
■ Clean lint from the entire length of the system and make sure<br />
exhaust hood is not plugged with lint.<br />
■ Replace any plastic or metal foil vent with rigid or flexible<br />
heavy metal vent.<br />
■ Review Vent system chart. Modify existing vent system if<br />
necessary to achieve the best drying performance.<br />
If this is a new vent system<br />
Vent material<br />
■ Use a heavy metal vent. Do not use plastic or metal foil vent.<br />
■ 4" (10.2 cm) heavy metal exhaust vent and clamps must be<br />
used.<br />
4" (10.2 cm) heavy metal exhaust vent<br />
Rigid metal vent<br />
■ For best drying performance, rigid metal vents are<br />
recommended.<br />
■ Rigid metal vent is recommended to avoid crushing and<br />
kinking.<br />
Flexible metal vent<br />
■ Flexible metal vents are acceptable only if accessible for<br />
cleaning.<br />
■ Flexible metal vent must be fully extended and supported<br />
when the dryer is in its final location.<br />
■ Remove excess flexible metal vent to avoid sagging<br />
and kinking that may result in reduced airflow and poor<br />
performance.<br />
■ Do not install flexible metal vent in enclosed walls, ceilings<br />
floors.<br />
Elbows<br />
45° elbows provide better airflow than 90° elbows.<br />
Good<br />
Clamps<br />
■ Use clamps to seal all joints.<br />
■ Exhaust vent must not be connected or secured with screws<br />
or other fastening devices that extend into the interior of the<br />
duct. Do not use duct tape.<br />
Exhaust<br />
Recommended hood styles are shown here.<br />
The angled hood style (shown here) is acceptable.<br />
■ An exhaust hood should cap the vent to keep rodents and<br />
insects from entering the home.<br />
4"<br />
(10.2 cm)<br />
A<br />
4"<br />
(10.2 cm)<br />
Clamp<br />
B<br />
4"<br />
(10.2 cm)<br />
Better<br />
A. Louvered hood style<br />
B. Box hood style<br />
2½"<br />
(6.4 cm)<br />
<strong>ENGLISH</strong><br />
9<br />
Kenmore_<strong>Dryer</strong>-Good-02687A-01_EN.indd 9 2009-07-02 ¿ÀÈÄ 3:21:18
■ Exhaust hood must be at least 12" (30.5 cm) from the ground<br />
or any object that may be in the path of the exhaust (such as<br />
flowers, rocks or bushes, snow line, etc.).<br />
■ Do not use an exhaust hood with a magnetic latch.<br />
Optional exhaust installations<br />
This dryer can be converted to exhaust out the right side, left<br />
side, or through the bottom. Contact your local dealer to have<br />
the dryer converted.<br />
Improper venting can cause moisture and lint to collect<br />
indoors, which may result in:<br />
■ Moisture damage to woodwork, furniture, paint,<br />
wallpaper, carpets, etc.<br />
■ Housecleaning problems and health problems.<br />
Plan Vent System<br />
LOCATION CONSIDERATIONS<br />
The dryer should be located where there is enough space at<br />
the front for loading the dryer, and enough space behind for the<br />
exhaust system. This dryer is factory-ready for rear exhaust. To<br />
exhaust out the bottom, left or right. Contact your local dealer to<br />
have the dryer converted. It’s important to make sure the room<br />
has enough fresh air. The dryer must be located where there is<br />
no air-flow obstruction.<br />
THE DRYER MUST NOT BE INSTALLED OR STORED IN<br />
AND AREA WHERE IT WILL BE EXPOSED TO WATER AND<br />
/OR WATHER. THE DRYER AREA IS TO BE KEPT CLEAR<br />
OF COMBUSTIBLE MATERIALS, GASOLINE, AND OTHER<br />
FLAMMABLE VAPORS AND LIQUIDS. A DRYER PRODUCES<br />
COMBUSTIBLE LINT. THE AREA AROUND THE DRYER<br />
SHOULD BE KEPT LINT-FREE.<br />
A B C<br />
A. Standard rear offset exhaust installation<br />
B. Left or right side exhaust installation<br />
C. Bottom exhaust installation (not an option with<br />
pedestal installations)<br />
Special provisions for mobile home installations<br />
The exhaust vent must be securely fastened to a<br />
noncombustible portion of the mobile home structure and must<br />
not terminate beneath the mobile home. Terminate the exhaust<br />
vent outside.<br />
Choose your exhaust installation type<br />
Recommended exhaust installations<br />
Typical installations vent the dryer from the rear of the dryer.<br />
Other installations are possible.<br />
B<br />
C<br />
A<br />
D<br />
E<br />
F<br />
G<br />
H<br />
A. <strong>Dryer</strong><br />
B. Elbow<br />
C. Wall<br />
D. Exhaust hood<br />
E. Clamps<br />
F. Rigid metal or flexible metal vent<br />
G. Vent length necessary to connect elbows<br />
H. Exhaust outlet<br />
10<br />
Kenmore_<strong>Dryer</strong>-Good-02687A-01_EN.indd 10 2009-07-02 ¿ÀÈÄ 3:21:19
Determine vent path<br />
■ Select the route that will provide the straightest and most<br />
direct path outdoors.<br />
■ Plan the installation to use the fewest number of elbows and<br />
turns.<br />
■ When using elbows or making turns, allow as much room as<br />
possible.<br />
■ Bend vent gradually to avoid kinking.<br />
■ Use the fewest 90° turns possible.<br />
Determine vent length and elbows needed for best drying<br />
performance<br />
■ Use the following Vent system chart to determine type of<br />
vent material and hood combinations acceptable to use.<br />
■ NOTE: Do not use vent runs longer than those specified in<br />
the Vent system chart. Exhaust systems longer than those<br />
specified will:<br />
■ Shorten the life of the dryer.<br />
■ Reduce performance, resulting in longer drying times and<br />
increased energy usage.<br />
The Vent system chart provides venting requirements that will<br />
help to achieve the best drying performance.<br />
Vent system chart<br />
NOTE: Side and bottom exhaust installations have a 90º turn<br />
inside the dryer. To determine maximum exhaust length, add one<br />
90º turn to the chart.<br />
ELECTRIC AND GAS DRYER<br />
Weather Hood Type<br />
Recommended Use only for short-run<br />
installation<br />
Install Vent System<br />
1. Install exhaust hood. Use caulking compound to seal exterior<br />
wall opening around exhaust hood.<br />
2. Connect vent to exhaust hood. Vent must fit inside exhaust<br />
hood. Secure vent to exhaust hood with 4" (10.2 cm) clamp.<br />
3. Run vent to dryer location. Use the straightest path possible.<br />
See “Determine vent path” in “Plan Vent System.” Avoid 90º<br />
turns. Use clamps to seal all joints. Do not use duct tape,<br />
screws or other fastening devices that extend into the interior<br />
of the vent to secure vent.<br />
Connect Vent<br />
1. Using a 4" (10.2 cm) clamp, connect vent to exhaust outlet<br />
in dryer. If connecting to existing vent, make sure the vent is<br />
clean. The dryer vent must fit over the dryer exhaust outlet<br />
and inside the exhaust hood. Check that the vent is secured<br />
to exhaust hood with a 4" (10.2 cm) clamp.<br />
2. Move dryer into its final location. Do not crush or kink vent.<br />
3. (On gas models) Check that there are no kinks in the flexible<br />
gas line.<br />
4. Once the exhaust vent connection is made, remove the<br />
corner posts and cardboard.<br />
Level <strong>Dryer</strong><br />
To set the dryer to the same height as the washer, fully retract<br />
the leveling feet by turning them counterclockwise, then loosen<br />
the legs by turning them clockwise<br />
<strong>ENGLISH</strong><br />
No. of 90°<br />
elbows<br />
4” (10 .16 cm) 2.5” (6.35 cm)<br />
Rigid Metallic Rigid Metallic<br />
Flexible*<br />
Flexible*<br />
0 24.4 m (80 ft.) 12.4 m (41 ft.) 22.6 m (74 ft.) 10.1 m (33 ft.)<br />
1 20.7 m (68 ft.) 11.2 m (37 ft.) 18.9 m (62 ft.) 8.8 m (29 ft.)<br />
2 17.4 m (57 ft.) 10.1 m (33 ft.) 15.5 m (51 ft.) 7.6 m (25 ft.)<br />
3 14.3m (47 ft.) 9.0 m (29 ft.) 12.5 m (41 ft.) 6.5 m (21 ft.)<br />
* Do not use non-metallic flexible duct.<br />
Retract fully<br />
Then loosen<br />
Adjust the leveling feet only as much as necessary to level the<br />
dryer. Extending the leveling feet more than necessary can<br />
cause the dryer to vibrate.<br />
11<br />
Kenmore_<strong>Dryer</strong>-Good-02687A-01_EN.indd 11 2009-07-02 ¿ÀÈÄ 3:21:19
Reverse Door Swing<br />
1. Unplug the power cord.<br />
2. Remove two door hinge screws.<br />
3. Lift the door and remove it.<br />
8. Reinsert the black screw in the other hole.<br />
9. Reinsert the screw (Step 4) on the Frame Front<br />
4. Remove a screw on the Frame Front<br />
10. Place the door on the other side and reattach it to the dryer.<br />
5. Remove the two screws on the opposite side of the door<br />
hinge.<br />
11. Reattach the holder lever.<br />
6. Remove two screws from the holder lever.<br />
12. Reattach the screws in the remaing holes.<br />
7. Remove one black screw from the door hinge.<br />
12<br />
Kenmore_<strong>Dryer</strong>-Good-02687A-01_EN.indd 12 2009-07-02 ¿ÀÈÄ 3:21:22
Complete Installation<br />
1. Check that all parts are now installed. If there is an extra part,<br />
go back through the steps to see which step was skipped.<br />
2. Check that you have all of your tools.<br />
3. Dispose of/recycle all packaging materials.<br />
4. Be sure the water faucets are on.<br />
5. Check the dryer’s final location. Be sure the vent is not<br />
crushed or kinked.<br />
6. Check that the dryer is level. See “Level <strong>Dryer</strong>.”<br />
7. For power supply cord installation, plug into an outlet.<br />
8. Remove the blue protective film on the door and any tape<br />
remaining on the dryer.<br />
9. Read “<strong>Dryer</strong> Use.”<br />
10. Wipe the dryer drum interior thoroughly with a damp cloth to<br />
remove any dust.<br />
11. Select a Timed Dry heated cycle, and start the dryer. Do not<br />
select the Air Only Temperature setting.<br />
If the dryer will not start, check the following:<br />
■ Controls are set in a running or “On” position.<br />
■ Start button has been pushed firmly.<br />
■ <strong>Dryer</strong> is plugged into an outlet and/or electrical supply is<br />
connected.<br />
■ Household fuse is intact and tight, or circuit breaker has<br />
not tripped.<br />
■ <strong>Dryer</strong> door is closed.<br />
This dryer automatically runs an installation diagnostic routine at<br />
the start of its first cycle.<br />
NOTE: You may notice a burning odor when the dryer is first<br />
heated. This odor is common when the heating element is first<br />
used. The odor will go away.<br />
<strong>ENGLISH</strong><br />
13<br />
Kenmore_<strong>Dryer</strong>-Good-02687A-01_EN.indd 13 2009-07-02 ¿ÀÈÄ 3:21:22
DRYER USE<br />
Models : 592-89107*, 592-89117*, 592-89108*, 592-89118*, 592-89102*<br />
Starting Your <strong>Dryer</strong><br />
WARNING<br />
WARNING<br />
Explosion Hazard<br />
Keep flammable materials and vapors, such as gasoline,<br />
away from dryer.<br />
Do not dry anything that has ever had anything<br />
flammable on it (even after washing).<br />
Failure to follow these instructions can result in death,<br />
explosion, or fire.<br />
Fire Hazard<br />
No washer can completely remove oil.<br />
Do not dry anything that has ever had any type of oil on it<br />
(including cooking oils).<br />
Items containing foam, rubber, or plastic must be dried<br />
on a clothesline or by using an Air Cycle.<br />
Failure to follow these instructions can result in death or<br />
fire.<br />
WARNING: To reduce the risk of fire, electric shock, or injury<br />
to persons, read the IMPORTANT SAFETY INSTRUCTIONS<br />
before operating this appliance.<br />
Follow these basic steps to start your dryer. Please refer to<br />
specific sections of this manual for more detailed information.<br />
1. Clean lint screen before each load. See “Cleaning the Lint<br />
Screen.”<br />
2. Place laundry in dryer and shut door.<br />
3. To select a cycle, rotate the Cycle Selector dial to the desired<br />
cycle. The indicator light by the cycle name will illuminate.<br />
The Normal, Heavy Duty, Perm Pres and Delicates cycles<br />
are Sensor Dry cycles. Sensor Dry automatically senses<br />
the moisture in the load and shuts the dryer off when the<br />
selected dryness level (very dry to damp dry) is reached.<br />
Under Sensor Dry, the estimated time remaining will vary<br />
depending on the following variables:<br />
- Type of fabric being dried(i.e., towels, light cottons)<br />
- Mixed loads<br />
- Wetness of the load being dried<br />
- Selected Dryness Level(i.e., More Dry, Normal Dry, Less Dry)<br />
14<br />
Kenmore_<strong>Dryer</strong>-Good-02687A-01_EN.indd 14 2009-07-02 ¿ÀÈÄ 3:21:23
Cycles<br />
Models : 592-89107*, 592-89117*, 592-89108*, 592-89118*,<br />
592-89102*<br />
Options<br />
Digital Graphic Display<br />
The display window shows the estimated time remaining in the<br />
cycle after the Start/Pause button is pressed. The estimated<br />
time remaining may fluctuate as the cycle progresses.<br />
The Drying light will illuminate and remain lit until the cycle is<br />
complete.<br />
When your <strong>Dryer</strong> is in the cool-down phase, the Cooling light will<br />
illuminate.<br />
When your <strong>Dryer</strong> is in the wrinkle prevent phase, the Wrinkle<br />
Prevent light will illuminate.<br />
When the cycle is complete, “END” will appear in the display<br />
panel until the <strong>Dryer</strong> door is opened or the Power key is pushed.<br />
If your <strong>Dryer</strong> is paused during a cycle, the indicator lights will<br />
blink until the Start/Pause button is pressed.<br />
Normal<br />
Use this cycle to dry loads such as cotton, underwear, and linen.<br />
Heavy Duty<br />
Use this cycle to get high heat for heavy fabrics such as jeans,<br />
corduroys, or work clothes.<br />
Perm Press<br />
Dry wrinkle-free cottons, synthetic fabrics, knits, and permanent<br />
press fabrics automatically. The cycle minimizes wrinkling by<br />
providing a longer unheated cool-down period at the end of the<br />
cycle.<br />
Delicates<br />
Dry Level Selection Button<br />
To select the dry level in the Normal, Heavy Duty, or other<br />
Sensor Dry cycles, press the Dry Level button. An indicator light<br />
will illuminate next to the desired dryness level.<br />
Press the button repeatedly to scroll through the settings. Larger<br />
or bulkier loads may require the More Dry setting for complete<br />
dryness.<br />
The Less Dry setting is best suited for lightweight fabrics or for<br />
leaving some moisture in the clothing at the end of the cycle.<br />
<strong>ENGLISH</strong><br />
The Delicates cycle is designed to dry heat-sensitive items at a<br />
low drying temperature.<br />
Timed Dry<br />
Time Dry allows you to select the desired cycle time in minutes.<br />
Turn the Cycle Selector dial to Time Dry, then press the Adjust<br />
Time up arrow to set the drying time.<br />
Press the arrow repeatedly to scroll through the time settings.<br />
Wrinkle Release<br />
Use for items that lay flat or hang to dry.<br />
Temp Selection Button<br />
To select the correct temperature for the load, press the Temp<br />
button. An indicator light will illuminate next to the desired<br />
temperature. Press the button repeatedly to scroll through the<br />
settings.<br />
The Wrinkle Release cycle will release wrinkles from items that<br />
are clean, dry, and only slightly wrinkled, such as clothes from<br />
a crowded closet, suitcase or items that have been in the dryer<br />
too long after the cycle has ended. Wrinkle Release can be used<br />
with any temperature selection.<br />
Air Fluff<br />
The Air Fluff cycle tumbles the load in room temperature air.<br />
■ High - For sturdy cottons or those labeled Tumble Dry.<br />
■ Medium - For permanent press, synthetics, lightweight<br />
cottons, or items labeled Tumble Dry Medium.<br />
■ Low - For heat sensitive items labeled Tumble Dry Low or<br />
Tumble Dry Warm.<br />
■ Extra Low - Provides the lowest heated dry temperature<br />
possible.<br />
15<br />
Kenmore_<strong>Dryer</strong>-Good-02687A-01_EN.indd 15 2009-07-02 ¿ÀÈÄ 3:21:25
Time Selection Button<br />
When using Manual Dry cycles, time can be adjusted by<br />
pressing the time selection button.<br />
During the Sensory Dry cycle, the time light indicator is off<br />
because exact drying times are determined by fluctuating<br />
humidity levels.<br />
Start/Pause selection Button<br />
Press to pause and restart programs.<br />
Signal Selection Button<br />
When the cycle is complete, a chime will sound.<br />
When the Wrinkle Guard option is selected, the chime will sound<br />
intermittently.<br />
Adjust the volume of the chime or turn it off by pressing the<br />
Signal button.<br />
Press the button repeatedly to scroll through the choices.<br />
Power button<br />
Press once to turn your <strong>Dryer</strong> on, press again to turn it off.<br />
If your dryer is left on for more than 10 minutes without any<br />
buttons being touched, the power automatically turns off.<br />
Child Lock<br />
A function to prevent children from playing with your dryer.<br />
Wrinkle Guard Selection Button<br />
Wrinkle Guard provides approximately 60 minutes for models<br />
592-891020 & 592-891070 & 592-891080, and 90 minutes for<br />
models 592-891170 & 592-891180 of intermittent tumbling in<br />
unheated air at the end of the cycle to reduce wrinkling. Press<br />
the Wrinkle Guard button to activate this feature.<br />
The indicator light above the pad will illuminate when Wrinkle<br />
Guard is selected.<br />
The load is dry, and can be removed at any time during the<br />
Wrinkle Guard cycle.<br />
Setting/Releasing<br />
If you want to set or release the Child Lock, press both the Time<br />
and Signal buttons simultaneously for 3 seconds.<br />
How to Set:<br />
1. It can be set while your dryer is running.<br />
2. Once you set the Child Lock function, no button, except for<br />
the Power button, will respond until you release the Child<br />
Lock function.<br />
3. The Child Lock indicator will be lit.<br />
NOTES:<br />
1. If the dryer is powered on again, the Child Lock function<br />
stays on.<br />
2. To release that function, follow the instructions above.<br />
Adjust Time<br />
Time can be added or subtracted from the automatically set<br />
times in the Manual Dry cycles (Time Dry, Delicates, Wrinkle<br />
Release, or Air Fluff cycles).<br />
NOTE: When other buttons, except for the Power button, do not<br />
respond, check the Child Lock indicator.<br />
To add or subtract time from the cycle, press the Adjust Time<br />
arrow pad up or down until the desired time is displayed.<br />
16<br />
Kenmore_<strong>Dryer</strong>-Good-02687A-01_EN.indd 16 2009-07-02 ¿ÀÈÄ 3:21:27
Installing the drying rack<br />
1. Open the <strong>Dryer</strong> door.<br />
Drying Rack<br />
2. Position drying rack in tumbler, placing the front lip of the<br />
drying rack on the top of the lint filter.<br />
3. Place the rear legs in the two recessed areas of the dryer’s<br />
back wall then push down the middle of the drying rack to<br />
fix.<br />
4. Place the items to be dried on the rack, leaving space<br />
between them so air can circulate.<br />
5. Close the <strong>Dryer</strong> door.<br />
6. Use the Time Dry cycle. Select the time according to the<br />
moisture and weight of the items. Start the <strong>Dryer</strong>. It may be<br />
necessary to reset the timer if a longer drying time is needed.<br />
SUGGESTED ITEMS<br />
SUGGESTED TEMP.<br />
SETTINGS<br />
Washable sweaters<br />
(block to shape and lay flat on<br />
rack)<br />
Stuffed toys<br />
(cotton or polyester fiberfilled)<br />
Stuffed toys<br />
(foam or rubber-filled)<br />
Foam rubber pillows<br />
Sneakers<br />
Low or Extra Low<br />
Low or Extra Low<br />
Air Fluff<br />
Air Fluff<br />
Air Fluff or Heat (Extra Low)<br />
WARNING: Drying foam rubber, plastic, or rubber on a heat<br />
setting may cause damage to the item and lead to a fire hazard.<br />
<strong>ENGLISH</strong><br />
NOTE: You must remove dryer rack for normal tumbling. To<br />
remove the dryer rack, lift it straight up and out of the dryer.<br />
17<br />
Kenmore_<strong>Dryer</strong>-Good-02687A-01_EN.indd 17 2009-07-02 ¿ÀÈÄ 3:21:27
DRYER CARE<br />
Clean the lint filter<br />
■ After each load.<br />
Cleaning the <strong>Dryer</strong> Location<br />
■ To shorten drying time.<br />
■ To operate more energy efficiently.<br />
NOTE: Do not operate your <strong>Dryer</strong> without the lint filter in place.<br />
Load the dryer properly<br />
■ Place only one washload in your <strong>Dryer</strong> at a time.<br />
■ Mixed loads of heavy and lightweight fabrics will dry<br />
differently, which may result in lightweight fabrics being dry<br />
while heavy fabrics remain damp at the end of a drying cycle.<br />
■ Add one or more similar items to your <strong>Dryer</strong> when only one<br />
or two articles of clothing need drying. This improves the<br />
tumbling action and drying efficiency.<br />
■ Overloading restricts tumbling action, resulting in uneven<br />
drying as well as excessive wrinkling of some fabrics.<br />
Getting started<br />
1. Load your <strong>Dryer</strong> loosely – DO NOT overload.<br />
2. Close the door.<br />
3. Select the appropriate cycle and options for the load.<br />
4. Press the Start/Pause button.<br />
5. The <strong>Dryer</strong> indicator light will illuminate.<br />
6. The estimated cycle time will appear in the display. The time<br />
may fluctuate to better indicate drying time remaining in the<br />
cycle.<br />
NOTES:<br />
■ When the cycle is complete, the Door Lock light will go out<br />
and “End” will appear in the display.<br />
■ Pressing Power cancels the cycle and stops your <strong>Dryer</strong>.<br />
■ The Drying, Cooling, and Wrinkle Prevent indicator lights will<br />
illuminate during those portions of the cycle.<br />
Control panel<br />
Clean with a soft, damp cloth. Do not use abrasive substances.<br />
Do not spray cleaners directly on the panel.<br />
The control panel finish may be damaged by some laundry pretreatment<br />
soil and stain remover products.<br />
Apply such products away from your <strong>Dryer</strong> and wipe up any<br />
spills or overspray immediately.<br />
Tumbler<br />
Remove any stains such as crayon, ink, or fabric dye (from new<br />
items such as towels or jeans) with an all purpose cleaner.<br />
Tumble old towels or rags to remove any excess stain or<br />
cleaning substance.<br />
Once these steps are followed, stains may still be visible, but<br />
should not transfer to subsequent loads.<br />
Stainless steel tumbler<br />
To clean the stainless steel tumbler, use a damp cloth with a<br />
mild, non-abrasive cleaner suitable for stainless steel surfaces.<br />
Remove the cleaner residue and dry with a clean cloth.<br />
<strong>Dryer</strong> exterior<br />
Clean with a soft, damp cloth. Do not use abrasive substances.<br />
Protect the surface from sharp objects.<br />
<strong>Dryer</strong> exhaust system<br />
Should be inspected and cleaned yearly to maintain optimum<br />
performance.<br />
The outside exhaust hood should be cleaned more frequently to<br />
ensure proper operation.<br />
WARNING<br />
Explosion Hazard<br />
Keep flammable materials and vapors, such as gasoline,<br />
away from dryer.<br />
Place dryer at least 18 inches (46 cm) above the floor for<br />
a garage installation.<br />
Failure to do so can result in death, explosion, or fire.<br />
18<br />
Kenmore_<strong>Dryer</strong>-Good-02687A-01_EN.indd 18 2009-07-02 ¿ÀÈÄ 3:21:28
Removing Accumulated Lint<br />
From Inside the <strong>Dryer</strong> Cabinet<br />
Lint should be removed every 2 years, or more often, depending<br />
on dryer usage. Cleaning should be done by a qualified person.<br />
From the Exhaust Vent<br />
Lint should be removed every 2 years, or more often, depending<br />
on dryer usage.<br />
Non-Use or Vacation Care<br />
Operate your dryer only when you are at home. If you will be on<br />
vacation or not using your dryer for an extended period of time,<br />
you should:<br />
1. Unplug dryer.<br />
2. Clean lint screen. See “Clean the lint filter.”<br />
Moving care<br />
For power supply cord-connected dryers:<br />
1. Unplug the power supply cord.<br />
2. Make sure leveling legs are secure in dryer base.<br />
3. Use masking tape to secure dryer door.<br />
<strong>ENGLISH</strong><br />
19<br />
Kenmore_<strong>Dryer</strong>-Good-02687A-01_EN.indd 19 2009-07-02 ¿ÀÈÄ 3:21:28
SPECIAL LAUNDRY TIPS<br />
Please follow the care label or manufacturer’s instructions for drying special items.<br />
If care label instructions are not available, use the following information as a guide.<br />
Bedspreads & Comforters<br />
■ Follow the care label instructions or dry on the Normal cycle<br />
and High temperature.<br />
■ Make sure the item is thoroughly dry before using or storing.<br />
■ May require repositioning to ensure even drying.<br />
Blankets<br />
■ Use Normal cycle and dry only one blanket at a time for best<br />
tumbling action.<br />
■ Make sure the item is thoroughly dry before using or storing.<br />
Curtains & Draperies<br />
■ Use the Perm Press cycle and Low or Extra Low temperature<br />
to help minimize wrinkling.<br />
■ Dry these in small loads for best results and remove as soon<br />
as possible.<br />
Cloth Diapers<br />
■ Use the Normal cycle and the High temperature settings for<br />
soft, fluffy diapers.<br />
Pillows<br />
■ Use the Normal cycle.<br />
■ Add a couple of dry towels to help the tumbling action and to<br />
fluff the item.<br />
■ DO NOT dry kapok or foam pillows in the <strong>Dryer</strong>.<br />
Use the Air Fluff cycle.<br />
Plastics (shower curtains, outdoor furniture covers, etc.)<br />
■ Use the Air Fluff cycle or the Time Dry cycle and the Low or<br />
Extra Low temperature settings depending on the care label<br />
instructions.<br />
Things to avoid:<br />
■ Fiberglass items (curtains, draperies, etc.).<br />
■ Woolens, unless recommended on the label.<br />
■ Vegetable or cooking oil-soaked items.<br />
Down–filled Items (jackets, sleeping bags, comforters, etc.)<br />
■ Use the Normal cycle and the Low or Extra Low temperature<br />
setting.<br />
■ Adding a couple of dry towels shortens drying time and<br />
absorbs moisture.<br />
Foam Rubber (rug backs, stuffed toys, shoulder pads, etc.)<br />
■ DO NOT dry on a heat setting. Use the Air Fluff cycle (no<br />
heat).<br />
■ WARNING – Drying a rubber item with heat may damage it or<br />
be a fire hazard.<br />
20<br />
Kenmore_<strong>Dryer</strong>-Good-02687A-01_EN.indd 20 2009-07-02 ¿ÀÈÄ 3:21:28
TROUBLESHOOTING<br />
First try the solutions suggested here and possibly avoid the cost of a service call...<br />
Information Codes<br />
<strong>Dryer</strong> displaying code message<br />
■ “tS”, “tO” - Clogged Lint Screen. Vent is restricted.<br />
Clean the screen or vent.<br />
If the problem continues call for service.<br />
■ “dO” - Door is not closed properly to run the dryer.<br />
Close the door and then restart.<br />
If the problem continues call for service.<br />
■ “dF” - Door is not closing properly.<br />
Call for service.<br />
■ “bE” - Button stuck for more than 75 secs.<br />
Make sure a button is NOT being pressed continuously. Try<br />
restarting the cycle.<br />
If the problem continues call for service.<br />
■ “oD” - Invalid Dry time.<br />
Call for service.<br />
■ “hE” - Invalid heating Temp when running the dryer.<br />
Call for service.<br />
■ “Et” - EEPROM is not communicating properly.<br />
Try restarting the cycle.<br />
If the problem continues call for service.<br />
■ “FE” - Invalid power source Frequency.<br />
Try restarting the cycle.<br />
If the problem continues call for service.<br />
Check these points if your dryer…<br />
Doesn’t run.<br />
■ Be sure the door is latched shut.<br />
■ Be sure the power cord is plugged into a live electrical outlet.<br />
■ Check the home’s circuit breaker and fuses.<br />
■ Press the Start/Pause button again if the door is opened<br />
during the cycle.<br />
Doesn’t heat.<br />
■ Check the home’s circuit breaker and fuses.<br />
■ Select a heat setting other than Air Fluff.<br />
■ On a gas dryer, check that the gas supply is on.<br />
■ Clean the lint filter and exhaust duct.<br />
■ <strong>Dryer</strong> may have moved into the cool-down phase of the<br />
cycle.<br />
Doesn’t dry.<br />
■ Check all of the above, plus...<br />
■ Be sure the exhaust hood outside the home can open and<br />
close freely.<br />
■ Check exhaust system for lint buildup. Ducting should be<br />
inspected and cleaned annually.<br />
■ Use a 4" rigid metal exhaust duct.<br />
■ Do not overload. 1 wash load = 1 dryer load.<br />
■ Sort heavy items from lightweight items.<br />
■ Large, bulky items like blankets or comforters may require<br />
repositioning to ensure even drying.<br />
■ Check that the washer is draining properly to extract<br />
adequate water from the load.<br />
■ Load may be too small to tumble properly. Add a few towels.<br />
Is noisy.<br />
<strong>ENGLISH</strong><br />
■ Check the load for objects such as coins, loose buttons,<br />
nails, etc. Remove promptly.<br />
■ It is normal to hear the dryer gas valve or heating element<br />
cycle on and off during the drying cycle.<br />
■ Be sure the <strong>Dryer</strong> is leveled properly as outlined in the<br />
installation instruction.<br />
■ It is normal for the <strong>Dryer</strong> to hum from the high velocity of air<br />
moving through the dryer drum and exhaust system.<br />
21<br />
Kenmore_<strong>Dryer</strong>-Good-02687A-01_EN.indd 21 2009-07-02 ¿ÀÈÄ 3:21:28
Dries unevenly.<br />
■ Seams, pockets, and other similarly heavy areas may not<br />
be completely dry when the rest of the load has reached the<br />
selected dryness level. This is normal. Select the More Dry<br />
setting if desired.<br />
■ If one heavy item is dried with a lightweight load, such as<br />
one towel with sheets, it is possible that the heavy item will<br />
not be completely dry when the rest of the load has reached<br />
the selected dryness level. Sort heavy items from lightweight<br />
items for best drying results.<br />
Has an odor.<br />
■ Household odors from painting, varnishing, strong cleaners,<br />
etc. may enter the dryer with the surrounding room air. This<br />
is normal as the <strong>Dryer</strong> draws the air from the room, heats it,<br />
pulls it through the tumbler, and exhausts it outside.<br />
■ When these odors linger in the air, ventilate the room<br />
completely before using the <strong>Dryer</strong>.<br />
Shuts off before load is dry<br />
■ <strong>Dryer</strong> load is too small. Add more items or a few towels and<br />
restart the cycle.<br />
■ <strong>Dryer</strong> load is too large. Remove some items and restart the<br />
dryer.<br />
<strong>Dryer</strong> Results<br />
Clothes are not drying satisfactorily, drying times are too<br />
long, or load is too hot<br />
■ Is the lint screen clogged with lint?<br />
Lint screen should be cleaned before each load.<br />
WARNING<br />
Fire Hazard<br />
Use a heavy metal vent.<br />
Do not use a plastic vent.<br />
Do not use a metal foil vent.<br />
Failure to follow these instructions can result in death or<br />
fire.<br />
■ Is the exhaust vent or outside exhaust hood clogged with<br />
lint, restricting air movement?<br />
Run the dryer for 5-10 minutes. Hold your hand under the<br />
outside exhaust hood to check air movement. If you do not<br />
feel air movement, clean exhaust system of lint or replace<br />
exhaust vent with heavy metal or flexible metal vent. See<br />
“Venting Requirements.”<br />
■ Are fabric softener sheets blocking the lint screen grille?<br />
Use only one fabric softener sheet, and use it only once.<br />
■ Is the exhaust vent the correct length?<br />
Check that the exhaust vent is not too long or has too many<br />
turns. Long venting will increase drying times. See “Plan Vent<br />
System.”<br />
■ Is the exhaust vent diameter the correct size?<br />
Use 4" (10.2 cm) diameter vent material.<br />
WARNING<br />
Explosion Hazard<br />
Keep flammable materials and vapors, such as gasoline,<br />
away from dryer.<br />
Place dryer at least 18 inches (46 cm) above the floor for<br />
a garage installation.<br />
Failure to do so can result in death, explosion, or fire.<br />
22<br />
Kenmore_<strong>Dryer</strong>-Good-02687A-01_EN.indd 22 2009-07-02 ¿ÀÈÄ 3:21:29
■ Is the dryer located in a room with temperature below<br />
45ºF (7ºC)?<br />
Proper operation of dryer cycles requires temperatures<br />
above 45ºF (7ºC).<br />
■ Is the dryer located in a closet?<br />
Closet doors must have ventilation openings at the top and<br />
bottom of the door. The front of the dryer requires a minimum<br />
of 1" (2.5 cm) of airspace, and, for most installations, the<br />
rear of the dryer requires 5" (12.7 cm). See “Installation<br />
Instructions.”<br />
■ Has an air dry cycle been selected?<br />
Select the right cycle for the types of garments being dried.<br />
See “Modifiers.”<br />
■ Is the load too large and heavy to dry quickly?<br />
Separate the load to tumble freely.<br />
■ Are clothes coming out of the Refresh cycle with damp or<br />
wet spots?<br />
Under certain environmental or installation conditions you<br />
may experience underdrying. Select the Touch Up cycle (20<br />
min. default time), which can be customized by selecting<br />
High temperature and/or additional cycle time by pressing<br />
the Timed Cycle Adjust More Time button.<br />
Cycle time too short<br />
WARNING<br />
Excessive Weight Hazard<br />
Use two or more people to move and install dryer.<br />
Failure to do so can result in back or other injury.<br />
■ Is the automatic cycle ending early?<br />
The load may not be contacting the sensor strips. Level the<br />
dryer.<br />
Change the dryness level setting on Automatic Cycles.<br />
Increasing or decreasing the dryness level will change the<br />
amount of drying time in a cycle.<br />
Do not use a dryer rack with an automatic cycle.<br />
Lint on load<br />
Loads are wrinkled<br />
■ Was the load removed from dryer at the end of the cycle?<br />
Select Touch Up Cycle to tumble the load with water and<br />
heat to help smooth out wrinkles from a load left in the dryer.<br />
■ Was the dryer overloaded?<br />
Dry smaller loads that can tumble freely. Smaller loads of<br />
1-4 garments yield best results with Refresh Cycle. Results<br />
may also vary depending on fabric type. This cycle is best<br />
for reducing wrinkles and odors from loads consisting of<br />
wrinklefree cotton, cotton polyester blends, common knits<br />
and synthetics.<br />
■ Loads are still wrinkled following SteamCare cycle?<br />
Make sure water is connected to the dryer. Check that water<br />
inlet hose is connected to both the faucet and dryer’s water<br />
inlet valve. Check that the water supply is turned on. This<br />
cycle is best for smoothing out wrinkles and reducing odors<br />
from loads consisting of wrinkle-free cotton, cotton polyester<br />
blends, common knits and synthetic garments.<br />
NOTE: Refer to garment care label instructions. Dry clean<br />
only garments are not recommended.<br />
Odors<br />
■ Have you recently been painting, staining or varnishing in<br />
the area where your dryer is located?<br />
If so, ventilate the area. When the odors or fumes are gone<br />
from the area, rewash and dry the clothing.<br />
■ Is the dryer being used for the first time?<br />
The new electric heating element may have an odor. The<br />
odor will be gone after the first cycle.<br />
■ Is water connected to the dryer?<br />
Check that water inlet hose is connected to both the faucet<br />
and dryer’s water inlet valve. Check that the water supply is<br />
turned on.<br />
■ To remove odors left in garments after wearing, select Steam<br />
Refresh for small loads of 1-4 garments. This cycle is best for<br />
reducing wrinkles and odors from loads consisting of wrinkle<br />
free cotton, cotton polyester blends, common knits and<br />
synthetics.<br />
<strong>ENGLISH</strong><br />
■ Is the lint screen clogged?<br />
Clean lint screen. Check for air movement.<br />
Stains on load or drum<br />
■ Was dryer fabric softener properly used?<br />
Add dryer fabric softener sheets at the beginning of the<br />
cycle.<br />
Fabric softener sheets added to a partially dried load can<br />
temporarily stain your garments. Do not use fabric softener<br />
sheets with SteamCare cycles.<br />
■ Drum stains are caused by dyes in clothing (usually blue<br />
jeans). This will not transfer to other clothing.<br />
23<br />
Kenmore_<strong>Dryer</strong>-Good-02687A-01_EN.indd 23 2009-07-02 ¿ÀÈÄ 3:21:29
Notes<br />
Kenmore_<strong>Dryer</strong>-Good-02687A-01_EN.indd 24 2009-07-02 ¿ÀÈÄ 3:21:29
Notes<br />
Kenmore_<strong>Dryer</strong>-Good-02687A-01_EN.indd 25 2009-07-02 ¿ÀÈÄ 3:21:29
Get it fixed, at your home or ours!<br />
Your Home<br />
For repair - in your home - of all major brand appliances,<br />
lawn and garden equipment, or heating and cooling systems,<br />
no matter who made it, no matter who sold it!<br />
For the replacement parts, accessories and owner’s manuals<br />
that you need to do-it-yourself.<br />
For <strong>Sears</strong> professional installation of home appliances and<br />
items like garage door openers and water heaters.<br />
1-800-4-MY-HOME® (1-800-469-4663)<br />
Call anytime, day or night (<strong>Canada</strong>)<br />
www.sears.ca<br />
To purchase a protection agreement (<strong>Canada</strong>)<br />
on a product serviced by <strong>Sears</strong>:<br />
1-800-361-6665 (<strong>Canada</strong>)<br />
Au <strong>Canada</strong> pour service en français:<br />
1-800-LE-FOYER MC<br />
(1-800-533-6937)<br />
www.sears.ca<br />
© 2009 <strong>Sears</strong> Brands LLC<br />
®Registered Trademark / TM Trademark / SM Service Mark of <strong>Sears</strong> Brands LLC,<br />
under licensee by <strong>Sears</strong> <strong>Canada</strong>.<br />
1/09<br />
Printed in Korea<br />
Kenmore_<strong>Dryer</strong>-Good-02687A-01_EN.indd 26 2009-07-02 ¿ÀÈÄ 3:21:29
Sèche-linge électrique<br />
Guide d’utilisation et d’entretien<br />
Modèles 592-89107*, 592-89117*, 592-89108*, 592-89118*, 592-89102*<br />
FRANÇAIS<br />
Code N° : DC68-02687A-01<br />
<strong>Sears</strong> <strong>Canada</strong> Inc., Toronto, Ontario, <strong>Canada</strong> M5B 2C3<br />
www.sears.ca<br />
Kenmore_<strong>Dryer</strong>-Good-02687A-01_CFR.indd 1 2009-07-02 ¿ÀÈÄ 3:26:00
TABLE DES MATIERES<br />
TABLE DES MATIERES . . . . . . . . . . . . . . . . . . . . . . . . . . . . . . 28<br />
CONTRATS DE PROTECTION . . . . . . . . . . . . . . . . . . . . . . . . 28<br />
GARANTIE KENMORE ® SUR LES APPAREILS<br />
ELECTROMENAGERS . . . . . . . . . . . . . . . . . . . . . . . . . . . . . . . 29<br />
SECURITE DU SECHE-LINGE . . . . . . . . . . . . . . . . . . . . . . . . 30<br />
INSTRUCTIONS D’INSTALLATION . . . . . . . . . . . . . . . . . . . . . 31<br />
Outils et pièces . . . . . . . . . . . . . . . . . . . . . . . . . . . . . . . . . . . 31<br />
Support (en option) . . . . . . . . . . . . . . . . . . . . . . . . . . . . . . . . 31<br />
Exigences relatives à l’installation . . . . . . . . . . . . . . . . . . . . . 32<br />
Spécifications électriques . . . . . . . . . . . . . . . . . . . . . . . . . . . 34<br />
Exigences en gaz . . . . . . . . . . . . . . . . . . . . . . . . . . . . . . . . . . 35<br />
Spécifications d’évacuation . . . . . . . . . . . . . . . . . . . . . . . . . . 36<br />
Planification du système d’évacuation . . . . . . . . . . . . . . . . . 37<br />
Installation du système d’évacuation . . . . . . . . . . . . . . . . . . . 39<br />
Connexion du conduit d’évacuation . . . . . . . . . . . . . . . . . . . 39<br />
Mise à niveau du sèche-linge . . . . . . . . . . . . . . . . . . . . . . . . 39<br />
Inversion de l’ouverture du hublot . . . . . . . . . . . . . . . . . . . . . 39<br />
Fin de l’installation . . . . . . . . . . . . . . . . . . . . . . . . . . . . . . . . . 40<br />
UTILISATION DU SECHE-LINGE . . . . . . . . . . . . . . . . . . . . . . 41<br />
Démarrage du sèche-linge . . . . . . . . . . . . . . . . . . . . . . . . . . . 41<br />
Programmes . . . . . . . . . . . . . . . . . . . . . . . . . . . . . . . . . . . . . . 42<br />
Options . . . . . . . . . . . . . . . . . . . . . . . . . . . . . . . . . . . . . . . . . 42<br />
Grille de séchage . . . . . . . . . . . . . . . . . . . . . . . . . . . . . . . . . . 44<br />
ENTRETIEN DU SECHE-LINGE . . . . . . . . . . . . . . . . . . . . . . . 45<br />
Nettoyage de l’emplacement du sèche-linge . . . . . . . . . . . . 45<br />
Nettoyage des peluches accumulées . . . . . . . . . . . . . . . . . . 46<br />
ASTUCES SPECIALES POUR LE LINGE . . . . . . . . . . . . . . . . 47<br />
DEPANNAGE . . . . . . . . . . . . . . . . . . . . . . . . . . . . . . . . . . . . . . 48<br />
Codes système . . . . . . . . . . . . . . . . . . . . . . . . . . . . . . . . . . . 48<br />
Vérifiez les points suivants si votre sèche-linge... . . . . . . . . . 48<br />
Résultats de séchage . . . . . . . . . . . . . . . . . . . . . . . . . . . . . . 49<br />
NUMERO DE SERVICE . . . . . . . . . . . . COUVERCLE ARRIERE<br />
CONTRATS DE PROTECTION<br />
Contrats de protection Expert<br />
Félicitations pour votre achat. Votre nouveau produit Kenmore ® a<br />
été conçu et assemblé pour fonctionner de façon fiable pendant<br />
de nombreuses années. Comme pour tous les produits, une<br />
maintenance préventive ou des réparations ponctuelles peuvent<br />
être nécessaires. Dans cette optique, la souscription d’un<br />
Contrat de protection Expert peut vous permettre de faire des<br />
économies et vous éviter des tracas.<br />
Le Contrat de protection Expert permet également de prolonger<br />
la durée de vie de votre nouveau produit. Le Contrat* couvre les<br />
aspects suivants :<br />
✔ Pièces et main-d’œuvre nécessaires pour un<br />
fonctionnement correct des produits dans des conditions<br />
d’utilisation normales, pas uniquement pour les vices.<br />
Notre couverture va au-delà de la garantie du produit.<br />
Aucune franchise n’est appliquée. Aucune défaillance<br />
fonctionnelle n’est exclue de la couverture pour vous offrir<br />
une protection réelle.<br />
✔ Service spécialisé assuré par plus de 10 000 techniciens<br />
de maintenance <strong>Sears</strong> agréés, pour garantir que l’entretien<br />
de votre produit est confié à une personne habilitée.<br />
✔ Appels de service illimités et service offert à l’échelle<br />
nationale, chaque fois que vous en avez besoin.<br />
✔ Politique « anti-citron » prévoyant le remplacement de votre<br />
produit couvert si quatre pannes (ou davantage) surviennent<br />
sur une période de douze mois.<br />
✔ Remplacement du produit si le produit couvert ne peut pas<br />
être réparé.<br />
✔ Entretien préventif annuel sur demande, sans frais<br />
supplémentaires.<br />
✔ Assistance par téléphone. Ce service de résolution rapide<br />
permet d’être mis en relation avec un représentant <strong>Sears</strong><br />
pour tous les produits, comme un « manuel d’utilisation<br />
parlant ».<br />
✔ Protection contre les surtensions, en cas de dommage<br />
électrique causé par les variations d’alimentation.<br />
✔ Garantie contre la perte d’aliments allant jusqu’à 250 $<br />
par année en cas de détérioration d’aliments due à la<br />
défaillance mécanique d’un réfrigérateur ou d’un congélateur<br />
couvert.<br />
✔ Remboursement de la location de matériel si la réparation<br />
du produit couvert prend plus de temps que prévu.<br />
✔ Remise de 10 % sur le prix normal des services de<br />
réparation non couverts et des pièces installées.<br />
Une fois le Contrat souscrit, un simple appel suffit pour<br />
programmer une visite de maintenance. Vous pouvez également<br />
programmer une visite de maintenance en ligne.<br />
Le Contrat de protection Expert est un achat sans risque. Si,<br />
pour un motif quelconque, vous annulez votre engagement<br />
pendant la période de garantie du produit, vous êtes<br />
intégralement remboursé. Un remboursement au prorata peut<br />
également intervenir à tout moment après l’expiration de la<br />
période de garantie du produit. Souscrivez un Contrat de<br />
protection Expert dès maintenant !<br />
* La couverture au <strong>Canada</strong> varie en fonction des articles.<br />
Pour plus d’informations, appelez <strong>Sears</strong> <strong>Canada</strong> au 1-800-<br />
361-6665.<br />
Service d’installation <strong>Sears</strong><br />
Pour l’installation professionnelle <strong>Sears</strong> des appareils<br />
domestiques, des ouvre-porte de garage, des chauffe-eau et<br />
des principaux équipements domestiques, appelez le 1-800-4-<br />
MY-HOME ® (<strong>Canada</strong>).<br />
2<br />
Kenmore_<strong>Dryer</strong>-Good-02687A-01_CFR.indd 2 2009-07-02 ¿ÀÈÄ 3:26:00
GARANTIE KENMORE ® SUR LES APPAREILS<br />
ELECTROMENAGERS<br />
GARANTIE LIMITEE D’UN AN<br />
Lorsque le produit est installé, utilisé et entretenu conformément<br />
aux instructions fournies, s’il vient à tomber en panne en raison<br />
d’un défaut de matériel ou de qualité d’exécution dans l’année<br />
suivant la date d’achat, appelez le 1-800-4-MY-HOME ® pour<br />
programmer une réparation gratuite.<br />
Si l’appareil est utilisé dans un cadre non privé ou non familial,<br />
cette garantie s’applique uniquement pendant 90 jours à<br />
compter de la date d’achat.<br />
CETTE GARANTIE COUVRE UNIQUEMENT LES<br />
DEFAUTS RELATIFS AUX MATERIAUX ET A LA QUALITE<br />
D’EXECUTION. SEARS N’OFFRE AUCUNE COMPENSATION<br />
FINANCIERE POUR CE QUI SUIT :<br />
1. Eléments remplaçables qui peuvent s’user dans le cadre<br />
d’une utilisation normale, y compris mais sans s’y limiter, les<br />
filtres, courroies, ampoules et sacs.<br />
2. Intervention d’un technicien pour l’information de l’utilisateur<br />
en relation avec l’installation, l’utilisation et la maintenance<br />
correctes du produit.<br />
3. Intervention d’un technicien pour le nettoyage ou l’entretien<br />
du produit.<br />
4. Dommages ou défaillances du produit si celui-ci n’est pas<br />
installé, utilisé ou entretenu conformément aux instructions<br />
fournies avec le produit.<br />
5. Dommages ou défaillances du produit causés par un<br />
accident, un abus, une mauvaise utilisation ou une utilisation<br />
autre que celle à laquelle le produit est destiné.<br />
6. Dommages ou défaillances du produit causés par l’utilisation<br />
de détergents, nettoyants, produits chimiques ou ustensiles<br />
autres que ceux recommandés dans les instructions fournies<br />
avec le produit.<br />
7. Dommages ou défaillances des pièces et systèmes causés<br />
par des modifications non autorisées du produit.<br />
DENI DE RESPONSABILITE DES GARANTIES IMPLICITES<br />
- LIMITATION DES COMPENSATIONS<br />
Le recours unique et exclusif du client sous cette garantie limitée<br />
est la réparation du produit comme indiqué dans le présent<br />
document. Les garanties implicites, y compris les garanties de<br />
commercialisation ou d’aptitude pour une utilisation particulière,<br />
sont limitées à un an ou à la période la plus courte prévue par<br />
la loi. <strong>Sears</strong> ne peut être tenu responsable des dommages<br />
accidentels ou indirects. Certains états et provinces n’autorisent<br />
pas l’exclusion ou la limitation des dommages accidentels ou<br />
indirects, ou les limitations de durée des garanties implicites de<br />
commercialisation ou d’aptitude. Dans ce cas, ces exclusions ou<br />
limitations ne s’appliquent pas à vous.<br />
Cette garantie s’applique uniquement pendant l’utilisation de<br />
l’appareil aux au <strong>Canada</strong>.<br />
Cette garantie vous octroie des droits spécifiques reconnus par<br />
la loi, ainsi que d’autres variant d’un état à un autre.<br />
<strong>Sears</strong> <strong>Canada</strong> Inc.<br />
Toronto, Ontario, <strong>Canada</strong> M5B 2C3<br />
INFORMATIONS SUR LE PRODUIT<br />
L’espace ci-après permet de noter le numéro de modèle, le<br />
numéro de série et la date d’achat. La plaque du modèle se situe<br />
sur la partie inferieure de l’ouverture de la porte et à l’arrière de<br />
l’appareil sur le côté droit.<br />
Munissez-vous de ces informations pour obtenir de l’aide ou un<br />
service plus rapidement, chaque fois que vous contactez <strong>Sears</strong><br />
pour votre appareil.<br />
Numéro de modèle ___ ___ ___ . __________________________<br />
Numéro de série _________________________________________<br />
Date d’achat ____________________________________________<br />
Conservez ces instructions et votre facture de vente pour<br />
référence ultérieure.<br />
INFORMATIONS SUR LE SUPPORT<br />
L’espace ci-après permet de noter le numéro de modèle, le<br />
numéro de série et la date d’achat. Vous pouvez trouver ces<br />
informations sur l’étiquette des numéros de modèle et de série<br />
sur le produit.<br />
Munissez-vous de ces informations pour obtenir de l’aide ou un<br />
service plus rapidement, chaque fois que vous contactez <strong>Sears</strong><br />
pour votre support.<br />
Numéro de modèle ___ ___ ___ . __________________________<br />
Numéro de série _________________________________________<br />
Date d’achat ____________________________________________<br />
Conservez ces instructions et votre facture de vente pour<br />
référence ultérieure.<br />
FRANÇAIS<br />
3<br />
Kenmore_<strong>Dryer</strong>-Good-02687A-01_CFR.indd 3 2009-07-02 ¿ÀÈÄ 3:26:00
SECURITE DU SECHE-LINGE<br />
Votre sécurité et celle des autres est très importante.<br />
Nous avons inclus divers messages de sécurité dans ce manuel et sur votre appareil. Veillez toujours à prendre connaissance des<br />
messages de sécurité et à les respecter.<br />
Ceci est le symbole d’alerte de sécurité.<br />
Il vous avertit des dangers potentiels qui peuvent tuer ou blesser les personnes.<br />
Les messages de sécurité sont précédés du symbole d’alerte de sécurité et de la mention « ATTENTION » ou<br />
« AVERTISSEMENT ».<br />
Les mentions ont la signification suivante :<br />
AVERTISSEMENT<br />
ATTENTION<br />
Risque de décès ou de blessure grave si vous ne suivez pas<br />
immédiatement les instructions.<br />
Risque de décès ou de blessure grave si vous ne suivez pas les<br />
instructions.<br />
Les messages de sécurité indiquent la teneur du danger potentiel, comment minimiser le risque de blessure et ce qui peut se<br />
produire en cas de non-respect des instructions.<br />
IMPORTANTES CONSIGNES DE SECURITE<br />
AVERTISSEMENT : pour réduire les risques d’incendie, de choc électrique ou de blessure lors de l’utilisation du sèche-linge,<br />
observez les mesures de précautions de base, qui incluent les éléments suivants :<br />
■ Lisez attentivement toutes les consignes avant d’utiliser le<br />
sèche-linge.<br />
■ N’y placez pas d’objets imprégnés d’huiles de cuisson.<br />
Les objets souillés par des huiles de cuisson peuvent<br />
déclencher une réaction chimique susceptible de provoquer<br />
la combustion.<br />
■ Ne séchez aucun article ayant été précédemment nettoyé,<br />
lavé, trempé ou taché avec de l’essence, des solvants de<br />
nettoyage à sec ou toute autre substance inflammable ou<br />
explosive.Celles-ci diffusent en effet des vapeurs pouvant<br />
s’enflammer ou exploser.<br />
■ Ne laissez pas les enfants jouer sur ou dans le sèche-linge.<br />
Une surveillanceétroite est nécessaire en cas d’utilisation du<br />
sèche-linge à proximité d’un enfant.<br />
■ Avant de mettre au rebut ou hors service votre sèche-linge,<br />
retirez le hublot du compartiment de séchage.<br />
■ N’ouvrez pas le sèche-linge lorsque le tambour est en<br />
mouvement.<br />
■ Installez ou stockez le sèche-linge dans un endroit où il ne<br />
sera pas exposé aux conditions climatiques extérieures.<br />
■ Ne manipulez pas les commandes internes de l’appareil.<br />
■ Ne tentez pas de réparer ou de remplacer une pièce du<br />
sèche-linge, quelle qu’elle soit, ou d’effectuer l’entretien<br />
de l’appareil, sauf en cas de recommandation spécifique<br />
contenue dans ce guide d’utilisation et d’entretien ou<br />
dans les instructions de réparation destinées à l’utilisateur.<br />
Dans un tel cas, vous devez comprendre parfaitement les<br />
instructions et posséder les compétences nécessaires pour<br />
les mettre en pratique.<br />
■ N’utilisez aucun adoucissant ou produit anti-statique autre<br />
que ceux dont le fabricant recommande l’usage.<br />
■ Ne séchez pas les articlesà base de caoutchouc mousse ou<br />
les matériaux dont la texture ressemble au caoutchouc.<br />
■ Nettoyez le filtre avant ou après chaqueutilisation.<br />
■ Evitez toute accumulation de peluches, poussières et<br />
saletés à proximité de l’orifice d’évacuation.<br />
■ L’intérieur du sèche-linge et du conduit d’évacuation<br />
doit être nettoyé régulièrement, par un technicien de<br />
maintenance qualifié.<br />
■ Reportez-vous aux instructions d’installation pour connaître<br />
les exigences de mise à la terre.<br />
CONSERVEZ SOIGNEUSEMENT CES INSTRUCTIONS<br />
4<br />
Kenmore_<strong>Dryer</strong>-Good-02687A-01_CFR.indd 4 2009-07-02 ¿ÀÈÄ 3:26:01
INSTRUCTIONS D’INSTALLATION<br />
Outils et pièces<br />
Regroupez et vérifiez les pièces et outils requis avant de<br />
commencer l’installation. Lisez et respectez les instructions<br />
fournies avec les outils répertoriés ici.<br />
Pince<br />
Cutter<br />
Tournevis à<br />
douille<br />
Les installations en mobile home nécessitent un système<br />
d’évacuation métallique (vendu dans votre magasin <strong>Sears</strong> ou via<br />
le Centre de services <strong>Sears</strong>). Pour plus d’informations, appelez<br />
le 1-800-4-MY-HOME ® (1-800-469-4663).<br />
Support (en option)<br />
Vous envisagez de placer le sèche-linge sur un support ?<br />
Des supports de différentes hauteurs peuvent être achetés<br />
séparément pour le sèche-linge. Vous pouvez également opter<br />
pour un support de 15” (38 cm) muni d’un tiroir de stockage. Le<br />
support vient s’ajouter à la hauteur totale du sèche-linge pour<br />
une hauteur totale d’environ 46” (116,8 cm) ou 51,5” (130,8 cm),<br />
respectivement.<br />
Niveau<br />
Clé anglaise<br />
Tournevis à lame<br />
plate<br />
Ruban adhésif<br />
Pièces fournies<br />
Retirez le sachet de pièces du tambour du sèche-linge. Vérifiez<br />
que toutes les pièces sont présentes.<br />
Les supports sont disponibles dans plusieurs couleurs.<br />
Contactez votre magasin <strong>Sears</strong> pour commander un support.<br />
Pour plus d’informations, appelez le 1-800-4-MY-HOME ® (1-<br />
800-469-4663).<br />
Hauteur du<br />
support<br />
15”<br />
(38 cm)<br />
15”<br />
(38 cm)<br />
Support (en option)<br />
Couleur<br />
Numéro du<br />
modèle<br />
Rouge tango 592-190040<br />
Argent impérial 592-190070<br />
FRANÇAIS<br />
15”<br />
(38 cm)<br />
Argent bleu 592-190080<br />
MANUEL D’UTILISATION<br />
(DC68-02687A)<br />
GRILLE DE SÉCHAGE<br />
(DC61-01522A)<br />
REMARQUE : n’utilisez pas les pieds réglables fournis avec le<br />
sèche-linge si l’appareil est installé sur un support.<br />
15”<br />
(38 cm)<br />
Kit de superposition (en option)<br />
Bleu nuit 592-190090<br />
Vous envisagez de superposer vos lave-linge et sèche-linge<br />
Kenmore ?<br />
Pour cela, achetez un kit de superposition en option (Modèle :<br />
592-188800) auprès de votre magasin <strong>Sears</strong> ou du Centre de<br />
services <strong>Sears</strong>.<br />
Suivez les instructions fournies avec le kit.<br />
5<br />
Kenmore_<strong>Dryer</strong>-Good-02687A-01_CFR.indd 5 2009-07-02 ¿ÀÈÄ 3:26:03
Exigences relatives à l’installation<br />
AVERTISSEMENT<br />
Dimensions du sèche-linge<br />
C<br />
D<br />
Danger d’explosion<br />
Eloignez du sèche-linge les matières et vapeurs<br />
inflammables, telles que l’essence.<br />
Placez le sèche-linge à 18 po (46 cm) au moins audessus<br />
du sol pour une installation dans un garage.<br />
Le non-respect de ces consignes peut entraîner la mort,<br />
une explosion ou un incendie.<br />
B<br />
A<br />
Vous devez disposer des éléments suivants :<br />
■ un emplacement permettant l’installation d’une évacuation<br />
appropriée. Reportez-vous à la section « Spécifications<br />
d’évacuation ».<br />
■ un circuit de 30 A distinct.<br />
■ si vous utilisez un cordon d’alimentation, une prise électrique<br />
avec mise à la terre située dans un rayon de 2 pi (61 cm)<br />
sur un côté du sèche-linge. Reportez-vous à la section<br />
« Spécifications électriques ».<br />
■ une surface solide pouvant supporter le poids total du<br />
sèche-linge de 200 lbs (90,7 kg). Il faut également prendre en<br />
compte le poids combiné d’un appareil voisin.<br />
■ un sol stable avec une pente maximale de 1” (2,5 cm) sous<br />
l’ensemble du sèche-linge. Si l’inclinaison dépasse 1 po, le<br />
linge pourrait ne pas culbuter adéquatement et les cycles<br />
de séchage à capteur automatiques pourraient ne pas<br />
fonctionner correctement.<br />
■ Pour une installation dans un garage, vous devez placer le<br />
sèche-linge à 18” (46 cm) au moins au-dessus du sol. Si<br />
vous utilisez un support, vous devez prévoir une hauteur de<br />
18” (46 cm) au bas du sèche-linge.<br />
Ne faites pas fonctionner le sèche-linge à des températures<br />
inférieures à 45ºF (7ºC). A des températures plus basses, il se<br />
peut que le sèche-linge ne s’arrête pas à la fin d’un programme<br />
automatique. La durée du séchage risque d’être allongée.<br />
Vous ne devez ni installer ni stocker le sèche-linge dans un<br />
endroit où il pourrait être en contact avec de l’eau et/ou exposé<br />
aux intempéries.<br />
Vérifiez les exigences des réglementations. Certaines<br />
réglementations limitent ou interdisent l’installation d’un sèchelinge<br />
dans un garage, un placard, un mobile home ou une<br />
chambre à coucher. Contactez l’inspecteur des bâtiments.<br />
A : 38” (96,5 cm)<br />
B : 27” (68,6 cm)<br />
C : 49” (124,5 cm)<br />
D : 29,4” (74,6 cm)<br />
* La plupart des installations nécessitent un dégagement<br />
minimal de 5” (12,7 cm) derrière le sèche-linge pour le<br />
conduit d’évacuation avec coude. Reportez-vous à la section<br />
« Spécifications d’évacuation ».<br />
Espacement pour une installation encastrée ou dans un<br />
placard<br />
Les dimensions d’espacement suivantes sont recommandées<br />
pour le sèche-linge. Le sèche-linge a été testé pour une<br />
installation avec un dégagement de 0” (0 cm) sur les côtés et à<br />
l’arrière. L’espacement recommandé doit être pris en compte<br />
pour les raisons suivantes :<br />
■ Un espacement supplémentaire doit être envisagé pour<br />
faciliter l’installation et l’entretien.<br />
■ Des dégagements supplémentaires peuvent être requis pour<br />
les moulures de porte et de plancher, et pour les plinthes.<br />
■ Un espacement supplémentaire doit être envisagé sur tous<br />
les côtés du sèche-linge pour minimiser le transfert du bruit.<br />
■ Pour une installation dans un placard muni d’une porte, des<br />
ouvertures de ventilation minimales en haut et en bas de<br />
la porte sont nécessaires. Les portes munies d’aérations<br />
équivalentes sont acceptables.<br />
■ L’espacement avec un appareil voisin doit également être<br />
pris en compte.<br />
Dégagements pour l’installation<br />
L’emplacement doit être suffisamment grand pour permettre<br />
l’ouverture complète du hublot.<br />
6<br />
Kenmore_<strong>Dryer</strong>-Good-02687A-01_CFR.indd 6 2009-07-02 ¿ÀÈÄ 3:26:04
Installation personnalisée sous un plan de travail - sèchelinge<br />
uniquement<br />
0 min.<br />
(0 cm)<br />
37” min.<br />
(93,9 cm)<br />
Espacement pour une installation dans une armoire<br />
■ Pour une installation dans une armoire munie d’une porte,<br />
des ouvertures de ventilation minimales en haut et en bas de<br />
l’armoire sont nécessaires.<br />
7” * (17,8 cm)<br />
7” * (17,8 cm)<br />
1”<br />
(2,5 cm)<br />
27”<br />
(68,6 cm)<br />
1”<br />
(2,5 cm)<br />
* Espacement requis<br />
Installation dans un placard - sèche-linge uniquement<br />
9” *<br />
(22,9 cm)<br />
14” max. *<br />
(35,6 cm)<br />
18” min. *<br />
(45,72 cm)<br />
48 po 2 *<br />
(310 cm 2 )<br />
3” *<br />
(7,6 cm)<br />
1” *<br />
(2,5 cm)<br />
32 9 ⁄ 16<br />
”<br />
(82,65 cm)<br />
5” **<br />
(12,7 cm)<br />
24 po 2 *<br />
(155 cm 2 )<br />
A<br />
B<br />
A<br />
B<br />
A. Vue latérale - placard ou espace clos<br />
B. Porte de placard avec des grilles<br />
* Espacement requis<br />
** En cas d’évacuation par le côté ou par le fond, un espacement<br />
de 2” (5,1 cm) est autorisé.<br />
Installation encastrée ou dans un placard - sèche-linge sur<br />
un support<br />
14” max. *<br />
(35,6 cm)<br />
3” *<br />
(7,6 cm)<br />
5” **<br />
(12,7 cm)<br />
32 9 ⁄ 16<br />
”<br />
(82,65 cm)<br />
1” *<br />
(2,5 cm)<br />
1”<br />
(2,5 cm)<br />
27”<br />
(68,6 cm)<br />
* Espacement requis<br />
** En cas d’évacuation par le côté ou par le fond, un espacement<br />
de 2” (5,1 cm) est autorisé.<br />
Espacement recommandé pour une installation encastrée<br />
ou dans un placard, avec les lave-linge et sèche-linge<br />
superposés<br />
Les dimensions indiquent l’espacement recommandé.<br />
48 po 2 *<br />
(310 cm 2 )<br />
3” * (7,6 cm)<br />
1”<br />
(2,5 cm)<br />
FRANÇAIS<br />
18” min. *<br />
(45,72 cm)<br />
3” * (7,6 cm)<br />
24 po 2 *<br />
(155 cm 2 )<br />
1” * (2,5 cm)<br />
1”<br />
(2,5 cm)<br />
27”<br />
1”<br />
(68,6 cm) (2,5 cm) 1” *<br />
(2,5 cm)<br />
A<br />
A<br />
32 9 ⁄ 16<br />
”<br />
(82,65 cm)<br />
B<br />
B<br />
5” **<br />
(12,7 cm)<br />
* Espacement requis<br />
6” * (15,2 cm)<br />
A. Espace encastré<br />
B. Vue latérale - placard ou espace clos<br />
* Espacement requis<br />
** En cas d’évacuation par le côté ou par le fond, un espacement<br />
de 2” (5,1 cm) est autorisé.<br />
76”<br />
(193 cm)<br />
5½” **<br />
(14 cm)<br />
1”<br />
(2,5 cm) 27”<br />
(68,6 cm)<br />
1”<br />
(2,5 cm)<br />
* Espacement requis<br />
** En cas d’évacuation par le côté, un espacement de 2” (5,1 cm)<br />
est autorisé.<br />
7<br />
Kenmore_<strong>Dryer</strong>-Good-02687A-01_CFR.indd 7 2009-07-02 ¿ÀÈÄ 3:26:06
Mobile home - exigences d’installation supplémentaires<br />
L’installation du sèche-linge dans un mobile home doit respecter<br />
la réglementation sur les normes de sécurité et de construction<br />
de bien manufacturé, titre 24 CFR, partie 32-80 {précédemment,<br />
norme fédérale sur la sécurité et la construction de mobile<br />
home, titre 24, HUD (partie 280), 1975} pour les Etats-Unis ou la<br />
norme CSA Standards Z240 pour le <strong>Canada</strong>.<br />
Lorsque vous installez le sèche-linge dans un mobile home, il<br />
doit être fixé au sol. Installez-le dans un endroit correctement<br />
aéré.<br />
Un espace dégagé minimum de 72 po² (183 cm²) est requis.<br />
Toutes les installations en mobile home doivent disposer d’une<br />
évacuation vers l’extérieur, l’extrémité du conduit d’évacuation<br />
étant correctement fixée à la structure du mobile home à l’aide<br />
d’accessoires ne supportant pas la combustion.<br />
Le conduit d’évacuation ne doit pas déboucher sous le mobile<br />
home.<br />
Reportez-vous à la section « Evacuation » pour plus<br />
d’informations.<br />
Les installations en mobile home requièrent :<br />
■ un système d’évacuation métallique (vendu dans votre<br />
magasin <strong>Sears</strong> ou via le Centre de services <strong>Sears</strong>).<br />
■ Dans les mobiles homes, vous devez prendre des<br />
dispositions pour l’apport d’air extérieur dans le sèche-linge.<br />
L’ouverture (par exemple, une fenêtre à proximité) doit être<br />
au moins deux fois plus grande que l’orifice d’évacuation du<br />
sèche-linge.<br />
Spécifications électriques<br />
AVERTISSEMENT<br />
Risque de choc électrique<br />
Branchez la fiche quadripolaire mise à la terre.<br />
Le non-respect de ces consignes peut entraîner la mort<br />
ou un choc électrique.<br />
Il relève de votre responsabilité :<br />
■ de contacter un électricien qualifié.<br />
■ de vous assurer que la connexion électrique est adaptée<br />
et conforme aux dernières dispositions canadiennes sur<br />
l’électricité C22.1 et aux réglementations locales. Vous<br />
pouvez obtenir une copie de la norme des réglementations<br />
mentionnées ci-avant auprès de : Canadian Standards<br />
Association, 178 Rexdale Blvd., Toronto, ON M9W 1R3<br />
<strong>Canada</strong>.<br />
■ d’alimenter l’appareil par un circuit monophasé de<br />
120/240 volts CA uniquement, 60 Hz à quatre fils, sur un<br />
circuit séparé de 30 A, avec un fusible aux deux extrémités<br />
de la ligne. L’utilisation d’un fusible temporisé ou d’un<br />
disjoncteur est recommandée. Le sèche-linge doit être<br />
raccordé à un circuit indépendant.<br />
■ Le sèche-linge est équipé d’un cordon d’alimentation<br />
certifié par CSA International à raccorder à une prise<br />
murale standard 14-30R. Le cordon mesure 5 pi (1,52 m).<br />
Assurez-vous que la prise murale est située à proximité de<br />
l’emplacement final du sèche-linge.<br />
Prise quadripolaire 14-30R<br />
■ N’utilisez pas de rallonge.<br />
Si vous utilisez un cordon d’alimentation de rechange, il est<br />
recommandé d’utiliser le cordon d’alimentation de rechange<br />
référence DC96-00762A. Pour plus d’informations, appelez le<br />
1-800-4-MY-HOME® (1-800-469-4663).<br />
8<br />
Kenmore_<strong>Dryer</strong>-Good-02687A-01_CFR.indd 8 2009-07-02 ¿ÀÈÄ 3:26:07
INSTRUCTIONS POUR LA MISE A LA TERRE<br />
■ Pour un sèche-linge mis à la terre et connecté par un<br />
cordon :<br />
Ce sèche-linge doit être mis à la terre. En cas de panne<br />
ou de défaillance, la mise à la terre réduira le risque de<br />
surtension électrique en fournissant un circuit de fuite au<br />
courant électrique. Ce sèche-linge est doté d’un cordon<br />
équipé d’un conducteur de mise à la terre de l’appareil et<br />
d’une prise de terre. La prise doit être branchée sur une prise<br />
secteur appropriée correctement installée et mise à la terre,<br />
conformément aux dispositions et réglementations locales.<br />
AVERTISSEMENT : un branchement incorrect du<br />
conducteurde mise à la terre peut représenter un risque de<br />
surtension électrique. Demandez conseil à un électricien ou<br />
à un réparateur agréé si vous avez des doutes quant à la<br />
mise à la terre correcte du sèche-linge. Ne modifiez pas la<br />
fiche fournie avec le sèche-linge : si elle n’est pas adaptée<br />
à la prise murale, faites appel à un électricien qualifié pour<br />
installer une prise appropriée.<br />
■ Pour les modèles au gaz :<br />
Votre sèche-linge est doté d’un cordon équipé d’un<br />
conducteur de mise à la terre de l’appareil et d’une prise de<br />
terre.<br />
La prise doit être branchée sur une prise secteur appropriée,<br />
correctement installée et mise à la terre conformément aux<br />
dispositions et aux réglementations en vigueur.<br />
Ne modifiez pas la prise fournie avec le sèche-linge. Si<br />
celle-ci ne correspond pas à la prise secteur, demandez à un<br />
électricien qualifié d’installer une prise adéquate.<br />
NE RELIEZ JAMAIS UN FIL DE TERRE A UNE CONDUITE<br />
DE PLOMBERIE EN PLASTIQUE, UNE CONDUITE DE GAZ<br />
OU UNE CONDUITE D’EAU CHAUDE.<br />
CONSERVEZ SOIGNEUSEMENT CES<br />
INSTRUCTIONS<br />
FRANÇAIS<br />
9<br />
Kenmore_<strong>Dryer</strong>-Good-02687A-01_CFR.indd 9 2009-07-02 ¿ÀÈÄ 3:26:07
Spécifications d’évacuation<br />
AVERTISSEMENT<br />
Risque d’incendie<br />
Utilisez un conduit d’évacuation en métal lourd.<br />
N’utilisez pas de conduit en plastique.<br />
N’utilisez pas de conduit en film métallique.<br />
Le non-respect de ces consignes peut entraîner la mort<br />
ou un incendie.<br />
AVERTISSEMENT : pour limiter le risque d’incendie,<br />
le sèche-linge DOIT DISPOSER D’UNE EVACUATION<br />
EXTERIEURE.<br />
IMPORTANT : respectez la réglementation en vigueur.<br />
L’évacuation du sèche-linge ne doit pas être reliée à un conduit<br />
d’évacuation de gaz brûlés, une cheminée, un mur, un plafond<br />
ou un espace exigu d’un bâtiment.<br />
Lisez attentivement les instructions suivantes avant d’installer<br />
le sèche-linge. Conservez soigneusement ces instructions pour<br />
référence ultérieure.<br />
Si vous utilisez un système d’évacuation existant :<br />
■ Ôtez les peluches sur toute la longueur du système et<br />
assurez-vous que la hotte n’est pas obstruée par une<br />
accumulation de peluches.<br />
■ Remplacez tout conduit en plastique ou en film métallique<br />
par un conduit en métal lourd rigide ou souple.<br />
■ Consultez le tableau Système d’évacuation. Le cas échéant,<br />
modifiez le système d’évacuation existant pour obtenir des<br />
performances de séchage optimales.<br />
S’il s’agit d’un nouveau système d’évacuation :<br />
Conduit métallique rigide<br />
■ Pour obtenir des performances de séchage optimales, il est<br />
recommandé d’utiliser des conduits métalliques rigides.<br />
■ L’utilisation d’un conduit métallique rigide permet de réduire<br />
le risque d’écrasement ou de déformation.<br />
Conduit métallique souple<br />
■ Les conduits métalliques souples ne sont acceptables que<br />
s’ils sont accessibles pour le nettoyage.<br />
■ Le conduit métallique souple doit être entièrement déployé et<br />
soutenu lorsque le sèche-linge est à son emplacement final.<br />
■ Enlevez l’excès de conduit métallique souple pour éviter<br />
tout affaissement ou déformation susceptible de réduire la<br />
circulation de l’air et les performances de séchage.<br />
■ N’installez pas le conduit métallique souple dans des cavités<br />
fermées des murs, plafonds ou planchers.<br />
Coudes<br />
Les coudes à 45° permettent une meilleure circulation de l’air<br />
que les coudes à 90°.<br />
Bon<br />
Colliers<br />
■ Utilisez des colliers pour sceller tous les joints.<br />
■ Le conduit d’évacuation ne doit pas être connecté ou fixé à<br />
l’aide de vis ou d’autres fixations protubérant à l’intérieur du<br />
conduit. N’utilisez pas de ruban adhésif.<br />
Collier<br />
Meilleur<br />
Matériel d’évacuation<br />
■ Utilisez un conduit en métal lourd. N’utilisez pas de conduit<br />
en plastique ou en film métallique.<br />
■ Utilisez un conduit d’évacuation en métal lourd de 4”<br />
(10,2 cm) et des colliers.<br />
Conduit d’évacuation en métal lourd de 4” (10,2 cm)<br />
10<br />
Kenmore_<strong>Dryer</strong>-Good-02687A-01_CFR.indd 10 2009-07-02 ¿ÀÈÄ 3:26:09
Evacuation<br />
Les types de hottes recommandés sont indiqués ici.<br />
Choix du type d’installation d’évacuation<br />
A<br />
B<br />
Installations d’évacuation recommandées<br />
Dans les installations typiques, l’évacuation est placée à l’arrière<br />
du sèche-linge. D’autres installations sont possibles.<br />
4”<br />
(10,2 cm)<br />
4”<br />
(10,2 cm)<br />
A. Hotte munie d’aérations<br />
B. Hotte de type boîte<br />
Le type de hotte inclinée (ci-dessus) est acceptable.<br />
■ Terminez le conduit d’évacuation par une hotte pour<br />
empêcher les rongeurs et insectes d’entrer dans la maison.<br />
A<br />
B<br />
C<br />
D<br />
E<br />
F<br />
G<br />
4”<br />
(10,2 cm)<br />
■ La hotte doit être placée à 12” (30,5 cm) au moins au-dessus<br />
du sol ou de tout objet sur le trajet de l’air évacué (fleurs,<br />
roches, arbustes, limite de neige, etc.).<br />
■ N’utilisez pas de hotte à fermeture magnétique.<br />
Une mauvaise évacuation peut causer de l’humidité et<br />
une accumulation de peluches à l’intérieur de la maison,<br />
ce qui peut provoquer :<br />
■ des dommages par l’humidité aux boiseries, meubles,<br />
peinture, papier peint, tapis, etc.<br />
■ des problèmes de nettoyage dans la maison et des<br />
problèmes sanitaires.<br />
Planification du système d’évacuation<br />
CHOIX D’UN EMPLACEMENT<br />
2½”<br />
(6,4 cm)<br />
Le sèche-linge doit être installé dans un endroit suffisamment<br />
spacieux, tant à l’avant pour permettre de charger l’appareil,<br />
qu’à l’arrière pour le système d’évacuation. Ce sèche-linge est<br />
équipé en usine pour une évacuation arrière. Pour l’évacuation<br />
dans la partie inférieure, vers la gauche ou vers la droite ,<br />
veuillez contacter votre concessionnaire local pour faire faire la<br />
conversion de la sécheuse. Il est important de veiller à ce que<br />
la pièce soit suffisamment aérée. Vous devez donc installer le<br />
sèche-linge dans une pièce où la ventilation n’est pas obstruée.<br />
VOUS NE DEVEZ NI INSTALLER NI STOCKER LE SECHE-<br />
LINGE DANS UN ENDROIT OU IL POURRAIT ETRE EN<br />
CONTACT AVEC DE L’EAU ET/OU EXPOSE AUX INTEMPERIES.<br />
VOUS DEVEZ MAINTENIR LE SECHE-LINGE A L’ECART DE<br />
TOUS MATERIAUX COMBUSTIBLES, ESSENCE ET AUTRES<br />
VAPEURS ET LIQUIDES INFLAMMABLES. UN SECHE-LINGE<br />
PRODUIT DES PELUCHES COMBUSTIBLES. EVITEZ DONC<br />
TOUTE ACCUMULATION DE PELUCHES AUTOUR DU SECHE-<br />
LINGE.<br />
A. Sèche-linge<br />
B. Coude<br />
C. Mur<br />
D. Hotte<br />
H<br />
E. Colliers<br />
F. Conduit d’évacuation métallique rigide ou<br />
souple<br />
G. Longueur de conduit nécessaire pour relier<br />
les coudes<br />
H. Sortie d’évacuation<br />
Installations d’évacuation facultatives<br />
Ce sèche-linge peut être converti pour une évacuation par la<br />
droite, par la gauche ou par le fond. Contactez votre revendeur<br />
pour convertir le sèche-linge.<br />
A B C<br />
A. Installation standard de l’évacuation avec décalage<br />
à l’arrière<br />
B. Installation de l’évacuation par la droite ou la gauche<br />
C. Installation de l’évacuation par le bas (option<br />
non compatible avec les installations incluant un<br />
support)<br />
FRANÇAIS<br />
11<br />
Kenmore_<strong>Dryer</strong>-Good-02687A-01_CFR.indd 11 2009-07-02 ¿ÀÈÄ 3:26:10
Dispositions spéciales pour les installations en mobile home<br />
Le conduit d’évacuation doit être solidement fixé à une partie<br />
non combustible de la structure du mobile home et ne doit pas<br />
se terminer sous le mobile home. Le conduit d’évacuation doit<br />
être acheminé vers l’extérieur.<br />
Tableau Système d’évacuation<br />
REMARQUE : les installations d’évacuation par le côté et par le<br />
fond utilisent un changement de direction à 90º à l’intérieur du<br />
sèche-linge. Pour déterminer la longueur maximale du conduit,<br />
ajoutez un changement de direction à 90° dans le tableau.<br />
SECHE-LINGE ELECTRIQUE ET A GAZ<br />
Type de hotte d’évacuation<br />
Recommandé A n’utiliser que pour<br />
les installations<br />
temporaires<br />
Choix du trajet du conduit d’évacuation<br />
■ Sélectionnez le trajet le plus rectiligne et le plus direct vers<br />
l’extérieur.<br />
■ Planifiez l’installation de façon à utiliser un nombre minimal<br />
de coudes et de changements de direction.<br />
■ Si vous utilisez des coudes ou des changements de<br />
direction, prévoyez autant d’espace que possible.<br />
■ Pliez le conduit d’évacuation graduellement pour éviter de le<br />
déformer.<br />
■ Evitez d’utiliser des changements de direction à 90°.<br />
Nbre de<br />
coudes à<br />
90°<br />
10,16 cm 6,35 cm<br />
Rigide Métallique Rigide Métallique<br />
flexible*<br />
flexible*<br />
0 24,4 m 12,4 m 22,6 m 10,1 m<br />
1 20,7 m 11,2 m 18,9 m 8,8 m<br />
2 17,4 m 10,1 m 15,5 m 7,6 m<br />
3 14,3 m 9 m 12,5 m 6,5 m<br />
* N’utilisez pas de conduits flexibles non métalliques.<br />
Choix de la longueur du conduit et des coudes pour des<br />
performances de séchage optimales<br />
■ Utilisez le tableau Système d’évacuation ci-après<br />
pour déterminer les combinaisons de type de matériel<br />
d’évacuation et de hotte acceptables.<br />
■ REMARQUE : n’utilisez pas un conduit d’une longueur<br />
supérieure aux valeurs spécifiées dans le tableau Système<br />
d’évacuation. L’utilisation de systèmes d’évacuation d’une<br />
longueur supérieure aux valeurs spécifiées :<br />
■ réduit la durée de vie du sèche-linge.<br />
■ réduit les performances (durée de séchage plus longue et<br />
consommation d’énergie accrue).<br />
Le tableau Système d’évacuation indique les spécifications<br />
d’évacuation applicables pour un séchage optimal.<br />
12<br />
Kenmore_<strong>Dryer</strong>-Good-02687A-01_CFR.indd 12 2009-07-02 ¿ÀÈÄ 3:26:10
Installation du système d’évacuation<br />
1. Installez la hotte. Calfeutrez l’ouverture murale extérieure<br />
autour de la hotte.<br />
2. Connectez le conduit d’évacuation à la hotte. Le conduit<br />
doit être inséré à l’intérieur de la hotte. Fixez le conduit<br />
d’évacuation à la hotte à l’aide d’un collier de 4” (10,2 cm).<br />
3. Acheminez le conduit d’évacuation à l’emplacement du<br />
sèche-linge. Utilisez le trajet le plus rectiligne possible.<br />
Reportez-vous à « Choix du trajet du conduit d’évacuation »<br />
dans la section « Planification du système d’évacuation ».<br />
Evitez les changements de direction à 90°. Utilisez des<br />
colliers pour sceller tous les joints. N’utilisez pas de ruban<br />
adhésif, de vis ou d’autres fixations protubérant à l’intérieur<br />
du conduit pour fixer celui-ci.<br />
Inversion de l’ouverture du hublot<br />
1. Débranchez le cordon d’alimentation.<br />
2. Retirez les deux vis de la charnière du hublot.<br />
3. Soulevez le hublot et retirez-le du sèche-linge.<br />
4. Retirez une vis de l’avant du cadre.<br />
Connexion du conduit d’évacuation<br />
1. A l’aide d’un collier de 4” (10,2 cm), reliez le conduit<br />
d’évacuation à la sortie d’évacuation du sèche-linge. Si vous<br />
utilisez un conduit d’évacuation existant, assurez-vous qu’il<br />
est propre. Le conduit d’évacuation du sèche-linge doit être<br />
fixé sur la sortie d’évacuation du sèche-linge et à l’intérieur<br />
de la hotte. Vérifiez que le conduit d’évacuation est fixé à la<br />
hotte à l’aide d’un collier de 4” (10,2 cm).<br />
2. Déplacez le sèche-linge à l’emplacement final souhaité.<br />
Veillez à ne pas plier ou emmêler le conduit d’évacuation.<br />
3. (Sur les modèles au gaz) Vérifiez que la conduite de gaz<br />
flexible n’est pas emmêlée ou pliée.<br />
4. Une fois le conduit d’évacuation connecté, enlevez les<br />
cornières et cartons.<br />
Mise à niveau du sèche-linge<br />
Pour positionner le sèche-linge à la même hauteur que le lavelinge,<br />
rétractez entièrement les pieds réglables en les tournant<br />
dans le sens anti-horaire, puis desserrez les pieds dans le sens<br />
horaire.<br />
5. Retirez les deux vis sur le côté opposé de la charnière du<br />
hublot.<br />
6. Retirez les deux vis du dispositif de fermeture.<br />
FRANÇAIS<br />
7. Retirez une vis noire de la charnière du hublot.<br />
Rétracter entièrement<br />
Puis desserrer<br />
Ajustez les pieds uniquement pour atteindre le niveau requis.<br />
En effet, si vous étendez les pieds plus que nécessaire, cela<br />
augmentera les vibrations.<br />
13<br />
Kenmore_<strong>Dryer</strong>-Good-02687A-01_CFR.indd 13 2009-07-02 ¿ÀÈÄ 3:26:12
8. Remontez les vis noires dans les autres trous.<br />
9. Remontez la vis (étape 4) à l’avant du cadre.<br />
10. Placez le hublot de l’autre côté et refixez-le sur le sèchelinge.<br />
11. Remontez le dispositif de fermeture.<br />
12. Remontez les vis dans les trous restants.<br />
Fin de l’installation<br />
1. Vérifiez que toutes les pièces sont installées. S’il reste une<br />
pièce, passez en revue les étapes pour vérifier que vous<br />
n’avez pas oublié une étape.<br />
2. Vérifiez que vous avez tous les outils nécessaires.<br />
3. Jetez les matériaux d’emballage.<br />
4. Vérifiez que les robinets d’eau sont ouverts.<br />
5. Vérifiez l’emplacement final du sèche-linge. Assurez-vous<br />
que le conduit d’évacuation n’est ni écrasé ni emmêlé.<br />
6. Vérifiez que le sèche-linge est de niveau. Reportez-vous à la<br />
section « Mise à niveau du sèche-linge ».<br />
7. Branchez le sèche-linge à une prise d’alimentation.<br />
8. Otez le film protecteur bleu du hublot et les rubans adhésifs<br />
restants sur le sèche-linge.<br />
9. Lisez la section « Utilisation du sèche-linge ».<br />
10. Essuyez soigneusement l’intérieur du tambour à l’aide d’un<br />
chiffon humide pour enlever la poussière.<br />
11. Sélectionnez un programme de séchage avec chaleur<br />
minuté et démarrez le sèche-linge. Ne sélectionnez pas la<br />
température Air Froid.<br />
Si le sèche-linge ne démarre pas, vérifiez ce qui suit :<br />
■ Les commandes sont réglées sur la position de<br />
fonctionnement ou de marche.<br />
■ Le bouton Mise en marche a été enfoncé fermement.<br />
■ Le sèche-linge est branché à une prise et/ou<br />
l’alimentation électrique est connectée.<br />
■ Les fusibles sont intacts et serrés. Le disjoncteur n’est<br />
pas déclenché.<br />
■ Le hublot du sèche-linge est fermé.<br />
Le sèche-linge exécute un diagnostic de l’installation au<br />
démarrage du premier programme.<br />
REMARQUE : il est possible que le sèche-linge dégage une<br />
odeur de brûlé lors du chauffage initial. Cette odeur est normale<br />
lors de la première utilisation de l’élément chauffant. L’odeur<br />
disparaît d’elle même.<br />
14<br />
Kenmore_<strong>Dryer</strong>-Good-02687A-01_CFR.indd 14 2009-07-02 ¿ÀÈÄ 3:26:13
UTILISATION DU SECHE-LINGE<br />
Modèles : 592-89107*, 592-89117*, 592-89108*, 592-89118*, 592-89102*<br />
AVERTISSEMENT<br />
Danger d’explosion<br />
Eloignez du sèche-linge les matières et vapeurs<br />
inflammables, telles que l’essence.<br />
Ne séchez jamais des articles ayant été en contact avec<br />
une matière inflammable (même après les avoir lavés).<br />
Le non-respect de ces consignes peut entraîner la mort,<br />
une explosion ou un incendie.<br />
Démarrage du sèche-linge<br />
AVERTISSEMENT<br />
Risque d’incendie<br />
Aucun lave-linge ne peut complètement enlever l’huile.<br />
Ne séchez jamais des articles souillés par une huile<br />
quelconque (y compris les huiles de cuisson).<br />
Les articles contenant de la mousse, du caoutchouc ou<br />
du plastique doivent être séchés sur une corde à linge ou<br />
par un programme de séchage à l’air.<br />
Le non-respect de ces consignes peut entraîner la mort<br />
ou un incendie.<br />
FRANÇAIS<br />
AVERTISSEMENT : pour réduire les risques d’incendie,<br />
de choc électrique ou de blessure, consultez la section<br />
« IMPORTANTES CONSIGNES DE SECURITE » avant d’utiliser<br />
cet appareil.<br />
Suivez les étapes de base suivantes pour démarrer le sèchelinge.<br />
Reportez-vous aux sections spécifiques de ce manuel<br />
pour obtenir des informations détaillées.<br />
1. Nettoyez le filtre à peluches avant chaque charge. Reportezvous<br />
à la section « Nettoyage du filtre à peluches ».<br />
2. Placez le linge dans le sèche-linge et fermez le hublot.<br />
3. Pour choisir le programme, positionnez le sélecteur<br />
Sélection du programme sur le programme de votre choix.<br />
Le témoin lumineux s’allume en regard du programme. Les<br />
programmes Normale, Grande Rendement, Perm Press et<br />
Délicats sont des programmes fonctionnant avec détecteur<br />
de séchage. La fonction Détecteur de séchage détecte<br />
automatiquement l’humidité du linge et éteint le sèche-linge<br />
une fois que le niveau de séchage (très sec à légèrement<br />
humide) est atteint.<br />
Sur les cycles de détection d’humidité auto, le temps restant<br />
estimé peut varier en fonction de les variables suivantes:<br />
- Types de tissue dans le tambour (ex. serviettes de bain, linge en<br />
coton)<br />
- Charges du linge mélanger<br />
- Charges du linge trempé<br />
- Niveau du séchage sélectionner - plus sec séchage normal ou<br />
moins sec<br />
15<br />
Kenmore_<strong>Dryer</strong>-Good-02687A-01_CFR.indd 15 2009-07-02 ¿ÀÈÄ 3:26:14
Programmes<br />
Modèles : 592-89107*, 592-89117*, 592-89108*, 592-89118*,<br />
592-89102*<br />
Normale<br />
Options<br />
Ecran à affichage numérique<br />
La fenêtre d’affichage montre la durée estimée restante du<br />
programme une fois que vous avez appuyé sur le bouton<br />
Démarrer / Pause. La durée estimée restante peut varier au fur et<br />
à mesure de la progression du programme.<br />
Le voyant Drying s’allume et reste allumé jusqu’à la fin du<br />
programme.<br />
Lorsque le sèche-linge entre en phase de refroidissement, le<br />
voyant Cooling s’allume.<br />
Lorsque le sèche-linge entre en phase de rotation infroissable, le<br />
voyant Anti-Froissement s’allume.<br />
Lorsque le programme est terminé, la mention « FIN » s’affiche<br />
sur l’écran, jusqu’à ce que vous ouvriez le hublot du sèche-linge<br />
ou que vous appuyiez sur le bouton Mise en marche.<br />
Si votre sèche-linge est en pause pendant un programme, les<br />
voyants clignotent jusqu’à ce que vous appuyiez sur Démarrer /<br />
Pause.<br />
Ce programme permet de sécher du coton, des sous-vêtements<br />
et du linge de table.<br />
Grande Rendement<br />
Ce programme permet d’appliquer des températures élevées<br />
pour sécher des tissus épais comme le jeans, du velours côtelé<br />
ou des vêtements de travail.<br />
Perm Press<br />
Ce programme permet de sécher automatiquement des tissus<br />
infroissables en coton, synthétique et lainage. Il a un effet antifroissage<br />
car il rallonge le cycle de refroidissement en fin de<br />
programme.<br />
Bouton Degré de séchage<br />
Pour sélectionner le niveau de séchage en mode Normale,<br />
Grande Rendement ou avec les autres programmes Détecteur<br />
de séchage, appuyez sur le bouton Degré de séchage. Un<br />
voyant s’allume à côté du niveau de séchage souhaité.<br />
Appuyez plusieurs fois sur le bouton pour faire défiler les<br />
différents paramètres. Pour le séchage des quantités de linge les<br />
plus importantes, vous devrez peut-être choisir le réglage Plus<br />
de séchage.<br />
Le réglage Moins de séchage convient mieux aux tissus légers<br />
ou pour faire disparaître les traces d’humidité des vêtements en<br />
Délicats<br />
Ce programme est conçu pour le séchage à basse température<br />
des articles fragiles.<br />
Durée de séchage<br />
Ce programme permet de sélectionner la durée de programme<br />
souhaitée en minutes.<br />
Placez la molette du sélecteur de programme sur Durée de<br />
séchage, puis appuyez sur la flèche vers le haut D’ajustement du<br />
Programme minuté pour définir la durée du séchage.<br />
Appuyez plusieurs fois sur la flèche pour faire défiler les réglages<br />
de durée.<br />
fin de programme.<br />
Utilisez-le pour les articles qui doivent finir de sécher à plat ou<br />
en suspension.<br />
16<br />
Antifroissage<br />
Ce programme défroisse les articles propres, secs et légèrement<br />
froissés, comme les vêtements d’une armoire trop remplie, d’une<br />
valise ou restés trop longtemps dans le sèche-linge une fois<br />
le programme de séchage terminé. Vous pouvez appliquer au<br />
programme Antifroissage la température que vous voulez.<br />
Air Froid<br />
Ce programme refroidit le linge à la température de la pièce.<br />
Kenmore_<strong>Dryer</strong>-Good-02687A-01_CFR.indd 16 2009-07-02 ¿ÀÈÄ 3:26:15
Bouton Température<br />
Appuyez sur le bouton Température pour sélectionner la<br />
température appropriée en fonction de la charge de linge. Un<br />
voyant s’allume à côté de la température souhaitée. Appuyez<br />
plusieurs fois sur le bouton pour faire défiler les différents<br />
paramètres.<br />
Bouton Anti-Froissement<br />
Cette fonction assure 60 minutes for models 592-891020 &<br />
592-891070 & 592-891080, and 90 minutes for models 592-<br />
891170 & 592-891180 de rotation à froid par intermittence à la<br />
fin du programme pour éviter de froisser le linge. Appuyez sur le<br />
bouton Anti-Froissement pour activer cette fonction.<br />
Le voyant situé au-dessus du bouton s’allume lorsque la<br />
fonction Anti-Froissement est sélectionnée.<br />
Une fois que le linge est sec, vous pouvez le retirer à tout<br />
moment du sèche-linge pendant le cycle Anti-Froissement.<br />
■ Élevé : pour le linge en coton résistant ou portant l’étiquette<br />
Séchage en machine autorisé.<br />
■ Moyen : pour les tissus infroissables, le synthétique, les<br />
cotons légers et le linge portant l’étiquette Séchage en<br />
machine température moyenne.<br />
■ Bas : pour les articles sensibles à la chaleur, dont l’étiquette<br />
indique Séchage en machine froid ou tiède.<br />
■ Très bas : séchage à la plus basse température possible.<br />
Bouton Temps<br />
Ce bouton vous permet de définir la durée de cycle, lorsque<br />
vous utilisez des programmes en séchage manuel.<br />
Lors d’un programme Détecteur de séchage, le voyant de durée<br />
est éteint car le temps de séchage est déterminé par le niveau<br />
d’humidité.<br />
Bouton Signal de programme<br />
Un signal sonore retentit à la fin du programme.<br />
Lorsque l’option Anti-Froissement est activée, le signal retentit<br />
par intermittence.<br />
Réglez le volume du signal sonore ou désactivez-le en appuyant<br />
sur le bouton Signal de programme.<br />
Appuyez plusieurs fois sur le bouton pour faire défiler les<br />
différents paramètres.<br />
D’ajustement du Programme minuté<br />
Vous pouvez allonger ou raccourcir la durée de séchage<br />
automatiquement préconfigurée des programmes Séchage<br />
manuel (Durée de séchage, Délicats, Antifroissage ou Air Froid).<br />
Pour ce faire, appuyez sur la flèche D’ajustement du Programme<br />
minuté vers le haut ou vers le bas, jusqu’à ce que la durée<br />
souhaitée s’affiche.<br />
Bouton Démarrer / Pause<br />
Appuyez sur ce bouton pour interrompre et relancer les<br />
programmes.<br />
Bouton Mise en marche<br />
FRANÇAIS<br />
Appuyez une fois sur ce bouton pour allumer le sèche-linge.<br />
Réappuyez dessus pour l’éteindre. Si le sèche-linge reste allumé<br />
pendant plus de 10 minutes sans qu’aucun bouton ne soit<br />
actionné, il s’éteint automatiquement.<br />
17<br />
Kenmore_<strong>Dryer</strong>-Good-02687A-01_CFR.indd 17 2009-07-02 ¿ÀÈÄ 3:26:16
Sécurité enfant<br />
Cette fonction empêche les enfants de jouer avec le sèche-linge.<br />
Activation/Désactivation<br />
Si vous souhaitez activer ou désactiver la fonction Sécurité<br />
enfant, appuyez simultanément sur les boutons Temps et Signal<br />
de programme pendant 3 secondes.<br />
Activation :<br />
1. Vous pouvez activer cette fonction alors que le sèche-linge<br />
fonctionne.<br />
2. Lorsque la sécurité enfant est activée, aucun bouton ne<br />
peut-être utilisé à l’exception du bouton d’alimentation (Mise<br />
en marche). Pour utiliser les autres boutons, vous devez<br />
désactiver la fonction de sécurité enfant.<br />
3. Le voyant Sécurité enfant s’allume.<br />
REMARQUES :<br />
1. Si le sèche-linge est remis en marche, la sécurité enfant reste<br />
activée.<br />
2. Pour la désactiver, observez les instructions ci-dessus.<br />
Grille de séchage<br />
Installation du support de séchage<br />
1. Ouvrez le hublot du sèche-linge.<br />
2. Placez le support de séchage dans le tambour, en<br />
positionnant le bord avant du support de séchage en haut du<br />
filtre à peluches.<br />
3. Encastrez les deux pieds arrière dans les orifices prévus à<br />
cet effet au niveau de la paroi arrière du sèche-linge, puis<br />
appuyez sur la partie centrale du support de séchage pour le<br />
fixer.<br />
4. Posez les articles à sécher sur le support en laissant<br />
suffisamment d’espace entre eux de manière à ce que l’air<br />
puisse circuler correctement.<br />
5. Fermez le hublot du sèche-linge.<br />
6. Utilisez le programme Durée de séchage. Sélectionnez la<br />
durée en fonction de l’humidité et du poids du linge. Allumez<br />
le sèche-linge. Il peut être nécessaire de réinitialiser le<br />
minuteur si la durée de séchage doit être prolongée.<br />
ARTICLES TEMP. SUGGEREES -<br />
REGLAGES<br />
REMARQUE : si les boutons, à l’exception du bouton Mise en<br />
marche, ne répondent pas, vérifiez le voyant Sécurité enfant.<br />
Pulls lavables<br />
(mettre en forme et poser à plat<br />
sur le support)<br />
Peluches<br />
(remplies de fibres coton ou<br />
polyester)<br />
Peluches<br />
(remplies de mousse ou de<br />
caoutchouc)<br />
Bas ou Très bas<br />
Bas ou Très bas<br />
Air Froid<br />
Oreillers à base de caoutchouc<br />
mousse<br />
Baskets<br />
Air Froid<br />
Air Froid ou Chaleur (Très<br />
bas)<br />
AVERTISSEMENT : sécher des matières plastiques,<br />
en caoutchouc ou en caoutchouc mousse à chaud peut<br />
endommager l’article et engendrer un risque d’incendie.<br />
REMARQUE : vous devez ôter le support de séchage si vous<br />
utilisez un programme de séchage normal. Pour cela, soulevez le<br />
support de séchage et sortez-le du sèche-linge.<br />
18<br />
Kenmore_<strong>Dryer</strong>-Good-02687A-01_CFR.indd 18 2009-07-02 ¿ÀÈÄ 3:26:16
ENTRETIEN DU SECHE-LINGE<br />
Nettoyage de l’emplacement du sèchelinge<br />
Nettoyage du filtre à peluches<br />
■ Après chaque séchage.<br />
■ Pour réduire la durée de séchage.<br />
■ Pour un meilleur rendement énergétique.<br />
REMARQUE : ne faites pas fonctionner votre sèche-linge si le<br />
filtre à peluches n’est pas remis en place.<br />
Chargement du sèche-linge<br />
■ N’introduisez qu’une seule charge de linge lavé à la fois dans<br />
votre sèche-linge.<br />
■ Un mélange de textiles épais et légers sèchera différemment.<br />
Par conséquent, les textiles légers risquent d’être secs alors<br />
que les textiles épais seront encore humides, à la fin du<br />
programme de séchage.<br />
■ Ajoutez un ou plusieurs articles similaires dans votre sèchelinge<br />
lorsque seuls un ou deux articles ont besoin d’être<br />
séchés. Ceci améliore l’action du tambour et l’efficacité du<br />
séchage.<br />
■ Une surcharge de linge réduit l’action du tambour et induit<br />
un séchage non uniforme, ainsi qu’un froissage excessif de<br />
certains tissus.<br />
Mise en route<br />
1. Chargez votre sèche-linge sans tasser le linge. Surtout, NE le<br />
surchargez PAS.<br />
2. Fermez le hublot.<br />
3. Sélectionnez les options et le programme appropriés à la<br />
charge de linge.<br />
4. Appuyez sur le bouton Démarrer / Pause.<br />
5. Le voyant du sèche-linge s’allume.<br />
6. La durée estimée du programme apparaît à l’écran. La<br />
durée peut varier pour offrir un meilleur aperçu du temps de<br />
séchage restant du programme en cours.<br />
REMARQUES :<br />
■ Une fois le cycle terminé, le voyant de verrouillage du hublot<br />
s’éteint et le message « Fin » apparaît à l’écran.<br />
■ Appuyer sur le bouton Mise en marche annule le programme<br />
et arrête le sèche-linge.<br />
■ Les voyants Drying, Cooling et Anti-Froissement s’allument<br />
lorsque le programme entame ces cycles de séchage.<br />
Panneau de commande<br />
Nettoyez avec un chiffon doux et humide. N’utilisez pas de<br />
produits abrasifs.<br />
Ne vaporisez aucun produit d’entretien directement sur le<br />
panneau de commande.<br />
Certains détachants pour tissu peuvent endommager le<br />
revêtement du panneau de commande.<br />
Appliquez ces produits à l’écart de votre sèche-linge et essuyez<br />
immédiatement toute éclaboussure ou vaporisation en excès.<br />
Tambour<br />
Retirez les taches de crayon, d’encre ou de teinture (sur les<br />
articles neufs comme les serviettes ou les jeans), à l’aide d’un<br />
détachant universel.<br />
Frottez ensuite avec une vieille serviette ou un chiffon, pour<br />
retirer toute substance en excès (tache ou détachant).<br />
Une fois ces étapes terminées, il est possible que les taches<br />
soient encore visibles mais elles ne devraient pas salir le reste<br />
du linge.<br />
Tambour en acier inoxydable<br />
Pour nettoyer un tambour en acier inoxydable, utilisez un chiffon<br />
humide imprégné d’un détergent doux et non abrasif adapté aux<br />
surfaces en acier inoxydable.<br />
Retirez les résidus de détergent et essuyez avec un chiffon<br />
propre.<br />
Extérieur du sèche-linge<br />
Nettoyez avec un chiffon doux et humide. N’utilisez pas de<br />
produits abrasifs.<br />
Protégez la surface des objets pointus.<br />
Système d’évacuation du sèche-linge<br />
Vous devez l’inspecter et le nettoyer une fois par an pour<br />
garantir des performances optimales.<br />
Nettoyez l’extérieur de la hotte plus fréquemment pour garantir<br />
son bon fonctionnement.<br />
AVERTISSEMENT<br />
Danger d’explosion<br />
Eloignez du sèche-linge les matières et vapeurs<br />
inflammables, telles que l’essence.<br />
Placez le sèche-linge à 18 po (46 cm) au moins audessus<br />
du sol pour une installation dans un garage.<br />
Le non-respect de ces consignes peut entraîner la mort,<br />
une explosion ou un incendie.<br />
19<br />
FRANÇAIS<br />
Kenmore_<strong>Dryer</strong>-Good-02687A-01_CFR.indd 19 2009-07-02 ¿ÀÈÄ 3:26:17
Nettoyage des peluches accumulées<br />
A l’intérieur de l’armoire du sèche-linge<br />
Les peluches doivent être enlevées tous les deux ans, ou plus<br />
souvent, en fonction de l’utilisation du sèche-linge. Le nettoyage<br />
doit être effectué par une personne qualifiée.<br />
A l’intérieur du conduit d’évacuation<br />
Les peluches doivent être enlevées tous les deux ans, ou plus<br />
souvent, en fonction de l’utilisation du sèche-linge.<br />
Entretien en cas de non-utilisation ou d’absence prolongée<br />
Vous ne devez faire fonctionner le sèche-linge que lorsque vous<br />
êtes présent. Si vous prévoyez de vous absenter ou de ne pas<br />
utiliser le sèche-linge pendant une période prolongée :<br />
1. Débranchez le sèche-linge.<br />
2. Nettoyez le filtre à peluches. Reportez-vous à la section<br />
« Nettoyage du filtre à peluches ».<br />
Entretien avant un déménagement<br />
Pour les sèche-linge connectés par un cordon<br />
d’alimentation :<br />
1. Débranchez le cordon d’alimentation.<br />
2. Vérifiez que les pieds réglables sont solidement fixés à la<br />
base du sèche-linge.<br />
3. Utilisez du ruban isolant pour fixer le hublot du sèche-linge.<br />
20<br />
Kenmore_<strong>Dryer</strong>-Good-02687A-01_CFR.indd 20 2009-07-02 ¿ÀÈÄ 3:26:17
ASTUCES SPECIALES POUR LE LINGE<br />
Respectez les symboles textiles ou les consignes du fabricant concernant le séchage des articles spéciaux.<br />
Si aucun symbole textile n’est fourni, observez les consignes suivantes.<br />
Couvre-lits et couettes<br />
■ Observez les symboles de l’étiquette ou sélectionnez le<br />
programme de séchage Normale et la température Élevé.<br />
■ Vérifiez que l’article est complètement sec avant de l’utiliser<br />
ou de le ranger.<br />
■ Il est parfois nécessaire de repositionner l’article dans le<br />
sèche-linge pour assurer un séchage homogène.<br />
Couvertures<br />
■ Sélectionnez le programme Normale et ne séchez qu’une<br />
couverture à la fois pour garantir un séchage optimal.<br />
■ Vérifiez que l’article est complètement sec avant de l’utiliser<br />
ou de le ranger.<br />
Rideaux et tentures<br />
■ Sélectionnez le programme Perm Press et la température<br />
Bas ou Très bas pour réduire le froissage.<br />
■ Séchez ce type de linge par petits volumes pour obtenir de<br />
meilleurs résultats et sortez-le dès que possible.<br />
Couches en tissu<br />
■ Sélectionnez le programme Normale et le réglage de<br />
température Élevé pour les couches ouatées et duveteuses.<br />
Articles garnis de duvet (vestes, sacs de couchage,<br />
couettes, etc.)<br />
■ Sélectionnez le programme Normale et la température Bas<br />
ou Très bas.<br />
■ Ajoutez deux serviettes sèches pour réduire la durée de<br />
séchage et absorber l’humidité.<br />
Caoutchouc mousse (tapis, peluches, épaulettes, etc.)<br />
■ NE séchez PAS ces articles à chaud. Servez-vous du<br />
programme Air Froid.<br />
■ AVERTISSEMENT : sécher un article à base de caoutchouc à<br />
chaud risque de l’endommager ou de provoquer un incendie.<br />
Oreillers<br />
■ Sélectionnez le programme Normale.<br />
■ Ajoutez deux serviettes sèches pour favoriser l’action du<br />
tambour et dé-pelucher l’article.<br />
■ NE séchez PAS des oreillers à base de capoc ou de mousse<br />
dans le sèche-linge.<br />
Servez-vous du programme Air Froid.<br />
Plastiques (rideaux de douche, bâches, etc.)<br />
■ Sélectionnez le programme Air Froid ou Durée de séchage<br />
et la température Bas ou Très bas, en fonction des symboles<br />
figurant sur l’étiquette.<br />
Articles à ne pas sécher dans le sèche-linge :<br />
■ Articles en fibre de verre (rideaux, tentures, etc.).<br />
■ Lainages, sauf indication contraire sur l’étiquette.<br />
■ Articles imprégnés d’huile végétale ou alimentaire.<br />
FRANÇAIS<br />
21<br />
Kenmore_<strong>Dryer</strong>-Good-02687A-01_CFR.indd 21 2009-07-02 ¿ÀÈÄ 3:26:17
DEPANNAGE<br />
Commencez par essayer les solutions suggérées ci-après. Elles vous permettront peut-être d’économiser le coût d’un appel<br />
du service de dépannage.<br />
Codes système<br />
Le sèche-linge affiche un message de code.<br />
■ « tS », « tO » - Filtre à peluches obstrué. Ventilation<br />
restreinte.<br />
Nettoyez le filtre ou la ventilation.<br />
Si le problème persiste, appelez le service de dépannage.<br />
■ « dO » - La porte n’est pas fermée adéquatement pour le<br />
fonctionnement de la sécheuse.<br />
Fermez le hublot, puis redémarrez.<br />
Si le problème persiste, appelez le service de dépannage.<br />
■ « dF » -Le hublot ne se ferme pas correctement.<br />
Appelez le service de dépannage.<br />
■ « bE » - Bouton enfoncé pendant plus de 75 secondes.<br />
Vérifiez qu’aucun bouton NE reste enfoncé de façon<br />
continue. Essayez de relancer le programme.<br />
Si le problème persiste, appelez le service de dépannage.<br />
■ « oD » - Durée de séchage non valide.<br />
Appelez le service de dépannage.<br />
■ « hE » - Température de chauffage inadaptée lors du<br />
fonctionnement du sèche-linge.<br />
Appelez le service de dépannage.<br />
■ « Et » - Communication incorrecte de l’EEPROM.<br />
Essayez de relancer le programme.<br />
Si le problème persiste, appelez le service de dépannage.<br />
■ « FE » -Fréquence de source d’alimentation non valide.<br />
Essayez de relancer le programme.<br />
Si le problème persiste, appelez le service de dépannage.<br />
Vérifiez les points suivants si votre sèchelinge...<br />
Ne fonctionne pas correctement.<br />
■ Assurez-vous que le hublot est bien fermé.<br />
■ Vérifiez que le cordon d’alimentation est branché sur une<br />
prise électrique opérationnelle.<br />
■ Vérifiez le disjoncteur et les fusibles de votre domicile.<br />
■ Appuyez de nouveau sur le bouton Démarrage / Pause en<br />
cas d’ouverture du hublot en cours de programme.<br />
Ne chauffe pas.<br />
■ Vérifiez le disjoncteur et les fusibles de votre domicile.<br />
■ Sélectionnez une autre température que Air Froid.<br />
■ Sur un sèche-linge à gaz, vérifiez que l’alimentation en gaz<br />
est ouverte.<br />
■ Nettoyez le filtre à peluches et le conduit d’évacuation.<br />
■ Le sèche-linge est peut-être en phase de refroidissement du<br />
programme.<br />
Ne sèche pas.<br />
■ Vérifiez tous les points susmentionnés, plus...<br />
■ Vérifiez que la hotte extérieure peut s’ouvrir et se fermer sans<br />
problème.<br />
■ Vérifiez que des peluches ne se sont pas accumulées dans<br />
le système d’évacuation. Le conduit doit être inspecté et<br />
nettoyé une fois par an.<br />
■ Utilisez un conduit d’évacuation métallique rigide de 4”<br />
(10,2 cm).<br />
■ Evitez de surcharger le tambour 1 charge de linge lavé = 1<br />
charge de linge à sécher.<br />
■ Triez les articles : légers d’un côté, épais de l’autre.<br />
■ Il peut s’avérer nécessaire d’enlever et remettre autrement<br />
les articles grands et volumineux, comme les couvertures ou<br />
les couettes, dans le sèche-linge pour assurer un séchage<br />
régulier.<br />
■ Vérifiez que le lave-linge essore correctement le linge pour<br />
évacuer la quantité d’eau adéquate.<br />
■ La charge de linge est peut-être insuffisante pour que l’action<br />
du tambour soit efficace. Ajoutez quelques serviettes.<br />
22<br />
Kenmore_<strong>Dryer</strong>-Good-02687A-01_CFR.indd 22 2009-07-02 ¿ÀÈÄ 3:26:17
Fait du bruit.<br />
■ Vérifiez le linge à la recherche de pièces de monnaie, de<br />
boutons décousus, de clous, etc. Retirez aussitôt ces objets.<br />
■ Il est normal d’entendre la mise en marche et l’arrêt du<br />
robinet de gaz du sèche-linge (le cas échéant) ou du système<br />
de chauffage, tout au long du programme de séchage.<br />
■ Vérifiez que le sèche-linge est correctement surélevé comme<br />
indiqué dans les instructions d’installation.<br />
■ Il est normal que le sèche-linge vrombisse du fait de la<br />
grande vitesse de déplacement de l’air à travers le tambour<br />
du sèche-linge et le système d’évacuation.<br />
Résultats de séchage<br />
Séchage des vêtements non satisfaisant. Durée de<br />
séchage trop longue. Charge trop chaude.<br />
■ Le filtre à peluches est-il obstrué ?<br />
Le filtre à peluches doit être nettoyé avant chaque charge.<br />
AVERTISSEMENT<br />
Ne sèche pas le linge uniformément.<br />
■ Les coutures, les poches et les autres zones épaisses<br />
peuvent ne pas sécher complètement alors que le reste<br />
du linge a atteint le niveau de séchage sélectionné. Cette<br />
situation est normale. Sélectionnez le programme Plus de<br />
séchage, au besoin.<br />
■ Si vous séchez un article épais avec une charge de textile<br />
léger, telle une serviette de toilette avec des draps, il est<br />
possible que l’article ne soit pas complètement sec lorsque<br />
le reste du linge atteint le niveau de séchage souhaité. Triez<br />
les articles, légers d’un côté, épais de l’autre, pour obtenir<br />
des résultats de séchage homogènes.<br />
Dégage une odeur.<br />
■ Les odeurs ménagères (peinture, vernis, détachant, etc.)<br />
peuvent entrer dans le sèche-linge via l’air ambiant de la<br />
pièce. Cette situation est normale puisque le sèche-linge<br />
aspire l’air de la pièce, le chauffe, l’introduit dans le tambour,<br />
puis l’éjecte à l’extérieur.<br />
■ Lorsque ces odeurs persistent dans l’air, ventilez<br />
complètement la pièce avant d’utiliser le sèche-linge.<br />
S’arrête avant que le linge ne soit sec.<br />
■ Il n’y a pas assez de linge dans le sèche-linge. Ajoutez du<br />
linge ou quelques serviettes et relancez le programme.<br />
■ Il y a trop de linge dans le sèche-linge. Retirez du linge et<br />
relancez le sèche-linge.<br />
Risque d’incendie<br />
Utilisez un conduit d’évacuation en métal lourd.<br />
N’utilisez pas de conduit en plastique.<br />
N’utilisez pas de conduit en film métallique.<br />
Le non-respect de ces consignes peut entraîner la mort<br />
ou un incendie.<br />
■ Le conduit d’évacuation ou la hotte extérieure est-il/elle<br />
obstrué(e), ce qui entrave la circulation de l’air ?<br />
Faites fonctionner le sèche-linge pendant 5 à 10 minutes.<br />
Placez votre main sous la hotte extérieure pour vérifier<br />
la circulation de l’air. Si vous ne sentez pas l’air circuler,<br />
nettoyez le système d’évacuation ou remplacez le conduit<br />
d’évacuation par un conduit en métal lourd ou souple.<br />
Reportez-vous à la section « Spécifications d’évacuation ».<br />
■ Des lingettes adoucissantes bloquent-elles la grille du<br />
filtre à peluches ?<br />
N’utilisez qu’une lingette adoucissante par charge et ne<br />
l’utilisez qu’une seule fois.<br />
■ Le conduit d’évacuation a-t-il la longueur appropriée ?<br />
Vérifiez que le conduit d’évacuation n’est pas trop long ou ne<br />
comporte pas trop de changements de direction. Un conduit<br />
long augmente la durée de séchage. Reportez-vous à la<br />
section « Planification du système d’évacuation ».<br />
■ Le diamètre du conduit d’évacuation a-t-il la taille<br />
appropriée ?<br />
Utilisez un conduit de 4” (10,2 cm) de diamètre.<br />
AVERTISSEMENT<br />
FRANÇAIS<br />
Danger d’explosion<br />
Eloignez du sèche-linge les matières et vapeurs<br />
inflammables, telles que l’essence.<br />
Placez le sèche-linge à 18 po (46 cm) au moins audessus<br />
du sol pour une installation dans un garage.<br />
Le non-respect de ces consignes peut entraîner la mort,<br />
une explosion ou un incendie.<br />
23<br />
Kenmore_<strong>Dryer</strong>-Good-02687A-01_CFR.indd 23 2009-07-02 ¿ÀÈÄ 3:26:18
■ Le sèche-linge est-il placé dans une pièce dont la<br />
température est inférieure à 45ºF (7ºC) ?<br />
Le bon fonctionnement des programmes de séchage requiert<br />
une température ambiante supérieure à 45ºF (7ºC).<br />
■ Le sèche-linge est-il installé dans un placard ?<br />
Les portes du placard doivent être munies d’ouvertures<br />
d’aération en haut et en bas de la porte. Un espace minimal<br />
de 1” (2,5 cm) est nécessaire à l’avant du sèche-linge et,<br />
pour la plupart des installations, un espace minimal de 5”<br />
(12,7 cm) est nécessaire à l’arrière du sèche-linge. Reportezvous<br />
à la section « Instructions d’installation ».<br />
■ Un programme de séchage à l’air a-t-il été sélectionné ?<br />
Sélectionnez le programme approprié pour les types<br />
de vêtements à sécher. Reportez-vous à la section<br />
« Modification du programme ».<br />
■ La charge est-elle trop volumineuse ou trop lourde pour<br />
sécher rapidement ?<br />
Séparez la charge pour qu’elle tourne librement dans le<br />
tambour.<br />
■ Les vêtements séchés à l’aide du programme Rafraîchir<br />
ressortent-ils avec des traces d’humidité ?<br />
Certaines conditions liées à l’environnement ou à<br />
l’installation peuvent réduire la qualité du séchage.<br />
Sélectionnez le programme Retouche (durée par défaut de<br />
20 minutes). Vous pouvez personnaliser le programme en<br />
sélectionnant la température Élevé et/ou une autre durée de<br />
cycle en appuyant sur le bouton Prolonger (D’ajustement du<br />
Programme minuté).<br />
Durée de programme trop courte<br />
AVERTISSEMENT<br />
Risque de poids excessif<br />
Le déplacement et l’installation de l’appareil nécessitent<br />
au moins deux personnes.<br />
Le non-respect de cette consigne peut entraîner des<br />
blessures du dos ou autres.<br />
■ Le programme automatique se termine-t-il trop tôt ?<br />
La charge n’est peut-être pas en contact avec les bandes de<br />
détection. Mettez le sèche-linge à niveau.<br />
Modifiez le réglage du niveau de séchage pour les<br />
programmes automatiques.<br />
L’augmentation ou la diminution du niveau de séchage<br />
modifie la durée de séchage d’un programme.<br />
N’utilisez pas de support de séchage avec un programme<br />
automatique.<br />
Peluches sur la charge<br />
■ Le filtre à peluches est-il obstrué ?<br />
Nettoyez le filtre à peluches. Vérifiez la circulation de l’air.<br />
Taches sur la charge ou le tambour<br />
■ La lingette adoucissante a-t-elle été utilisée<br />
correctement ?<br />
Ajoutez la lingette adoucissante au début du programme.<br />
Les lingettes adoucissantes ajoutées à une charge<br />
partiellement séchée peuvent tacher les vêtements. N’utilisez<br />
pas de lingette adoucissante avec le programme Vapeur.<br />
■ Les taches sur le tambour sont dues aux teintures contenues<br />
dans les vêtements (généralement, les jeans). Il n’y a pas de<br />
transfert sur les autres vêtements.<br />
Charges froissées<br />
■ La charge a-t-elle été enlevée du sèche-linge à la fin du<br />
programme ?<br />
Sélectionnez le programme Retouche pour faire tourner une<br />
charge oubliée dans le sèche-linge avec de l’eau et de la<br />
chaleur afin de la défroisser.<br />
■ Le sèche-linge a-t-il été surchargé ?<br />
Séchez des charges plus petites qui peuvent tourner<br />
librement. Le cycle Rafraîchir permet d’obtenir de meilleurs<br />
résultats avec les charges d’un à quatre vêtements. Les<br />
résultats peuvent également varier en fonction du type<br />
de tissu. Ce programme est conçu pour défroisser et<br />
désodoriser les charges de tissus infroissables en coton, en<br />
coton/polyester, lainage et synthétique.<br />
■ Les charges sont-elles toujours froissées après<br />
l’utilisation du programme Vapeur ?<br />
Assurez-vous que l’eau est raccordée au sèche-linge.<br />
Vérifiez que le tuyau d’arrivée d’eau est raccordé au robinet<br />
et à la soupape d’admission d’eau du sèche-linge. Vérifiez<br />
que l’arrivée d’eau est ouverte. Le programme Vapeur<br />
est conçu pour défroisser et désodoriser les charges de<br />
tissus infroissables en coton, en coton/polyester, lainage et<br />
synthétique.<br />
REMARQUE : reportez-vous aux symboles textiles sur les<br />
vêtements. Il est recommandé de ne pas utiliser le sèchelinge<br />
avec les vêtements présentant le symbole Nettoyage à<br />
sec uniquement.<br />
Odeurs<br />
■ Avez-vous récemment utilisé de la peinture, de la teinture<br />
ou du vernis dans la pièce dans laquelle se trouve le<br />
sèche-linge ?<br />
Si c’est le cas, aérez la pièce. Une fois les odeurs ou vapeurs<br />
dissipées, lavez à nouveau le linge et faites-le sécher.<br />
■ Le sèche-linge est-il utilisé pour la première fois ?<br />
Le nouvel élément chauffant électrique peut dégager une<br />
odeur qui disparaît après le premier programme.<br />
■ L’eau est-elle raccordée au sèche-linge ?<br />
Vérifiez que le tuyau d’arrivée d’eau est raccordé au robinet<br />
et à la soupape d’admission d’eau du sèche-linge. Vérifiez<br />
que l’arrivée d’eau est ouverte.<br />
■ Pour faire disparaître les odeurs imprégnant les vêtements<br />
portés, sélectionnez le programme Rafraîchir pour des<br />
petites charges d’un à quatre vêtements. Ce programme<br />
est conçu pour défroisser et désodoriser les charges de<br />
tissus infroissables en coton, en coton/polyester, lainage et<br />
synthétique.<br />
24<br />
Kenmore_<strong>Dryer</strong>-Good-02687A-01_CFR.indd 24 2009-07-02 ¿ÀÈÄ 3:26:18
Notes<br />
FRANÇAIS<br />
25<br />
Kenmore_<strong>Dryer</strong>-Good-02687A-01_CFR.indd 25 2009-07-02 ¿ÀÈÄ 3:26:18
Faites réparer votre appareil à<br />
domicile ou dans nos locaux !<br />
À domicile<br />
Réparation à domicile des appareils, équipements de jardin,<br />
ou systèmes de refroidissement et de chauffage, pour toutes<br />
les grandes marques, quels que soient le fabricant et le lieu<br />
d’achat.<br />
Pour bénéficier des pièces de rechange, accessoires<br />
et manuels d’utilisation dont vous avez besoin pour les<br />
réparations que vous pouvez faire vous-même.<br />
Pour faire installer vos appareils par des professionnels <strong>Sears</strong><br />
(systèmes d’ouverture automatique de porte de garage ou<br />
chauffe-eau).<br />
1-800-4-MY-HOME® (1-800-469-4663)<br />
Disponible à toute heure du jour ou de la nuit (<strong>Canada</strong>)<br />
www.sears.ca<br />
Pour souscrire un accord de maintenance (<strong>Canada</strong>)<br />
sur un produit dont l’entretien est pris en charge par <strong>Sears</strong> :<br />
1-800-361-6665 (<strong>Canada</strong>)<br />
Au <strong>Canada</strong> pour service en français :<br />
1-800-LE-FOYER MC<br />
(1-800-533-6937)<br />
www.sears.ca<br />
© 2009 <strong>Sears</strong> Brands LLC<br />
®Marque déposée / TM Marque commerciale / SM Marque de service de <strong>Sears</strong> Brands LLC,<br />
sous licence de <strong>Sears</strong> <strong>Canada</strong>.<br />
1/09<br />
Imprimé en Corée<br />
Kenmore_<strong>Dryer</strong>-Good-02687A-01_CFR.indd 26 2009-07-02 ¿ÀÈÄ 3:26:19