4 - SURFERS ISLAND
4 - SURFERS ISLAND
4 - SURFERS ISLAND

Create successful ePaper yourself
Turn your PDF publications into a flip-book with our unique Google optimized e-Paper software.
2-Notice CO ANG.qxd 13/09/10 9:12 Page 17<br />
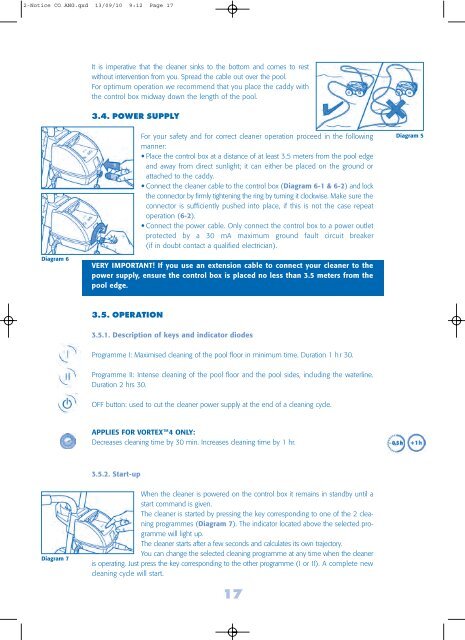
It is imperative that the cleaner sinks to the bottom and comes to rest<br />
without intervention from you. Spread the cable out over the pool.<br />
For optimum operation we recommend that you place the caddy with<br />
the control box midway down the length of the pool.<br />
3.4. POWER SUPPLY<br />
For your safety and for correct cleaner operation proceed in the following<br />
manner:<br />
• Place the control box at a distance of at least 3.5 meters from the pool edge<br />
and away from direct sunlight; it can either be placed on the ground or<br />
attached to the caddy.<br />
• Connect the cleaner cable to the control box (Diagram 6-1 & 6-2) and lock<br />
the connector by firmly tightening the ring by turning it clockwise. Make sure the<br />
connector is sufficiently pushed into place, if this is not the case repeat<br />
operation (6-2).<br />
• Connect the power cable. Only connect the control box to a power outlet<br />
protected by a 30 mA maximum ground fault circuit breaker<br />
(if in doubt contact a qualified electrician).<br />
Diagram 5<br />
Diagram 6<br />
VERY IMPORTANT! If you use an extension cable to connect your cleaner to the<br />
power supply, ensure the control box is placed no less than 3.5 meters from the<br />
pool edge.<br />
3.5. OPERATION<br />
3.5.1. Description of keys and indicator diodes<br />
Programme I: Maximised cleaning of the pool floor in minimum time. Duration 1 hr 30.<br />
Programme II: Intense cleaning of the pool floor and the pool sides, including the waterline.<br />
Duration 2 hrs 30.<br />
OFF button: used to cut the cleaner power supply at the end of a cleaning cycle.<br />
APPLIES FOR VORTEX TM 4 ONLY:<br />
Decreases cleaning time by 30 min. Increases cleaning time by 1 hr.<br />
3.5.2. Start-up<br />
Diagram 7<br />
When the cleaner is powered on the control box it remains in standby until a<br />
start command is given.<br />
The cleaner is started by pressing the key corresponding to one of the 2 cleaning<br />
programmes (Diagram 7). The indicator located above the selected programme<br />
will light up.<br />
The cleaner starts after a few seconds and calculates its own trajectory.<br />
You can change the selected cleaning programme at any time when the cleaner<br />
is operating. Just press the key corresponding to the other programme (I or II). A complete new<br />
cleaning cycle will start.<br />
17