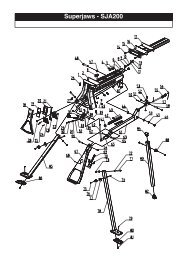
Dual Mode Precision Plunge Router - Highland Woodworking
Dual Mode Precision Plunge Router - Highland Woodworking
Dual Mode Precision Plunge Router - Highland Woodworking

You also want an ePaper? Increase the reach of your titles
YUMPU automatically turns print PDFs into web optimized ePapers that Google loves.
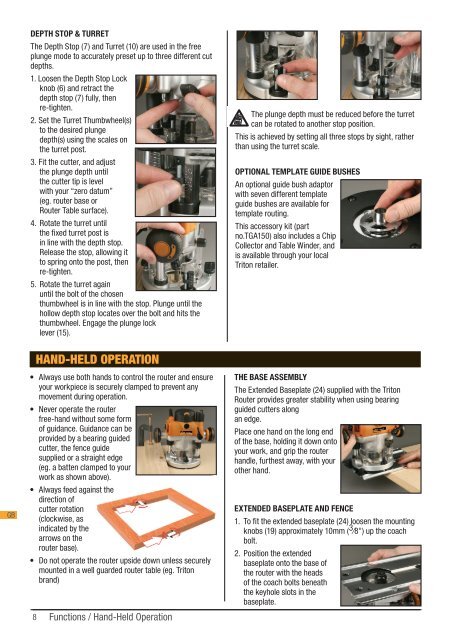
DEPTH STOP & TURRET<br />
The Depth Stop (7) and Turret (10) are used in the free<br />
plunge mode to accurately preset up to three different cut<br />
depths.<br />
1. Loosen the Depth Stop Lock<br />
knob (6) and retract the<br />
depth stop (7) fully, then<br />
re-tighten.<br />
2. Set the Turret Thumbwheel(s)<br />
to the desired plunge<br />
depth(s) using the scales on<br />
the turret post.<br />
3. Fit the cutter, and adjust<br />
the plunge depth until<br />
the cutter tip is level<br />
with your “zero datum”<br />
(eg. router base or<br />
<strong>Router</strong> Table surface).<br />
4. Rotate the turret until<br />
the fixed turret post is<br />
in line with the depth stop.<br />
Release the stop, allowing it<br />
to spring onto the post, then<br />
re-tighten.<br />
5. Rotate the turret again<br />
until the bolt of the chosen<br />
thumbwheel is in line with the stop. <strong>Plunge</strong> until the<br />
hollow depth stop locates over the bolt and hits the<br />
thumbwheel. Engage the plunge lock<br />
lever (15).<br />
The plunge depth must be reduced before the turret<br />
can be rotated to another stop position.<br />
This is achieved by setting all three stops by sight, rather<br />
than using the turret scale.<br />
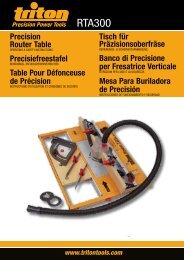
OPTIONAL TEMPLATE GUIDE BUSHES<br />
An optional guide bush adaptor<br />
with seven different template<br />
guide bushes are available for<br />
template routing.<br />
This accessory kit (part<br />
no.TGA150) also includes a Chip<br />
Collector and Table Winder, and<br />
is available through your local<br />
Triton retailer.<br />
GB<br />
HAND-HELD OPERATION<br />
• Always use both hands to control the router and ensure<br />
your workpiece is securely clamped to prevent any<br />
movement during operation.<br />
• Never operate the router<br />
free-hand without some form<br />
of guidance. Guidance can be<br />
provided by a bearing guided<br />
cutter, the fence guide<br />
supplied or a straight edge<br />
(eg. a batten clamped to your<br />
work as shown above).<br />
• Always feed against the<br />
direction of<br />
cutter rotation<br />
(clockwise, as<br />
indicated by the<br />
arrows on the<br />
router base).<br />
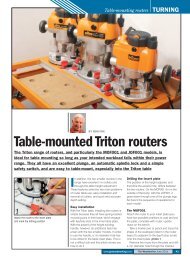
• Do not operate the router upside down unless securely<br />
mounted in a well guarded router table (eg. Triton<br />
brand)<br />
8<br />
Functions / Hand-Held Operation<br />
THE BASE ASSEMBLY<br />
The Extended Baseplate (24) supplied with the Triton<br />
<strong>Router</strong> provides greater stability when using bearing<br />
guided cutters along<br />
an edge.<br />
Place one hand on the long end<br />
of the base, holding it down onto<br />
your work, and grip the router<br />
handle, furthest away, with your<br />
other hand.<br />
EXTENDED BASEPLATE AND FENCE<br />
1. To fit the extended baseplate (24) loosen the mounting<br />
knobs (19) approximately 10mm ( 3 ⁄8") up the coach<br />
bolt.<br />
2. Position the extended<br />
baseplate onto the base of<br />
the router with the heads<br />
of the coach bolts beneath<br />
the keyhole slots in the<br />
baseplate.