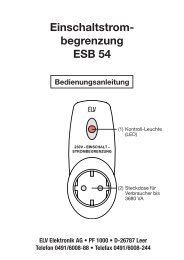
EUROLITE LED FX PAR-100 RGB DMX Spot User Manual - ELV
EUROLITE LED FX PAR-100 RGB DMX Spot User Manual - ELV
EUROLITE LED FX PAR-100 RGB DMX Spot User Manual - ELV

Create successful ePaper yourself
Turn your PDF publications into a flip-book with our unique Google optimized e-Paper software.
Before rigging make sure that the installation area can hold a minimum point load of 10 times the projector's<br />
weight.<br />
DANGER OF FIRE!<br />
When installing the device, make sure there is no highly-inflammable<br />
material (decoration articles, etc.) within a distance of min. 0.5 m.<br />
Mount the projector with the mounting-bracket to your trussing system using an appropriate clamp.<br />
For overhead use, always install an appropriate safety bond.<br />
You must only use safety bonds complying with DIN 56927, quick links complying with DIN 56926, shackles<br />
complying with DIN EN 1677-1 and BGV C1 carbines. The safety bonds, quick links, shackles and the<br />
carbines must be sufficiently dimensioned and used correctly in accordance with the latest industrial safety<br />
regulations (e. g. BGV C1, BGI 810-3).<br />
Please note: for overhead rigging in public or industrial areas, a series of safety instructions have to be<br />
followed that this manual can only give in part. The operator must therefore inform himself on the current<br />
safety instructions and consider them.<br />
The manufacturer cannot be made liable for damages caused by incorrect installations or insufficient safety<br />
precautions!<br />
Pull the safety bond through the hole in the mounting-bracket and over the trussing system or a safe fixation<br />
spot. Insert the end in the quick link and tighten the safety screw.<br />
The maximum drop distance must never exceed 20 cm.<br />
A safety bond which already held the strain of a crash or which is defective must not be used again.<br />
Adjust the desired inclination-angle via the mounting-bracket and tighten the fixation screws.<br />
DANGER TO LIFE!<br />
Before taking into operation for the first time, the installation has to be approved by an expert!<br />
<strong>DMX</strong>-512 connection / connection between fixtures<br />
The wires must not come into contact with each other, otherwise<br />
the fixtures will not work at all, or will not work properly.<br />
Please note, the starting address depends upon which controller is being used.<br />
Only use a stereo shielded cable and 3-pin XLR-plugs and connectors in order to connect the controller with<br />
the fixture or one fixture with another.<br />
18/43<br />
00030174.DOC, Version 1.0