Kompresor HL 275/25 HL 275/50 - VRB Friesland BV
Kompresor HL 275/25 HL 275/50 - VRB Friesland BV
Kompresor HL 275/25 HL 275/50 - VRB Friesland BV

You also want an ePaper? Increase the reach of your titles
YUMPU automatically turns print PDFs into web optimized ePapers that Google loves.
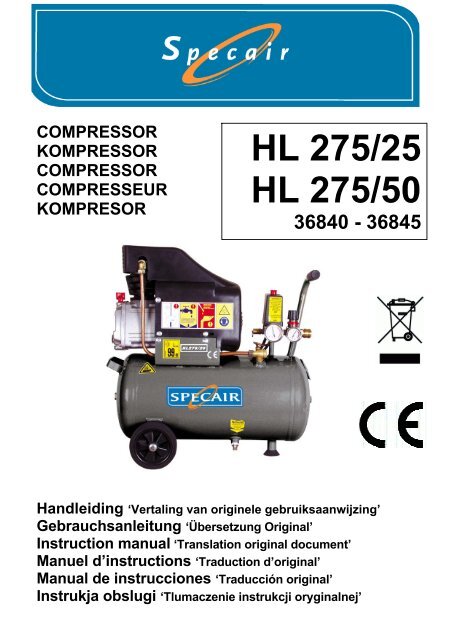
COMPRESSOR<br />
KOMPRESSOR<br />
COMPRESSOR<br />
COMPRESSEUR<br />
KOMPRESOR<br />
<strong>HL</strong> <strong>275</strong>/<strong>25</strong><br />
<strong>HL</strong> <strong>275</strong>/<strong>50</strong><br />
36840 - 36845<br />
Handleiding ‘Vertaling van originele gebruiksaanwijzing’<br />
Gebrauchsanleitung ‘Übersetzung Original’<br />
Instruction manual ‘Translation original document’<br />
Manuel d’instructions ‘Traduction d’original’<br />
Manual de instrucciones ‘Traducción original’<br />
Instrukja obslugi ‘Tlumaczenie instrukcji oryginalnej’
Versie 11.2010<br />
NEDERLANDS ................................................................................ 2<br />
DEUTSCH ........................................................................................ 9<br />
ENGLISH .......................................................................................... 16<br />
FRANÇAIS ....................................................................................... 23<br />
ESPAÑOL ........................................................................................ 31<br />
POLSKI ............................................................................................ 39<br />
Lees deze handleiding voor ingebruikname aandachtig door.<br />
Bitte lesen Sie diese Gebrauchsanweisung sorgfältig vor<br />
Gebrauch durch.<br />
Please read this instruction manual carefully before use.<br />
Avant toute utilisation de l’appareil, lire avec attention le présent<br />
manuel d’instructions.<br />
Antes de usar esta compresor, leer atentamente las instrucciones<br />
de empleo.<br />
Informacje przedstawione w poniższych punktach pozwolą<br />
Państwu stać się zadowolonymi użytkownikami urządzenia.<br />
Importeur <strong>VRB</strong> <strong>Friesland</strong> B.V., P.O. Box 114, NL-8900 AC Leeuwarden
Versie 11.2010<br />
Fig. A<br />
1
NEDERLANDS<br />
INHOUDSOPGAVE<br />
1.0 Voorwoord pagina 2<br />
2.0 Veiligheidsvoorschriften pagina 3<br />
3.0 Opstelling pagina 5<br />
3.1 Elektrische aansluitingen pagina 5<br />
3.2 Luchtaansluitingen pagina 5<br />
4.0 Ingebruikname pagina 6<br />
5.0 Bediening pagina 6<br />
6.0 Onderhoud pagina 7<br />
7.0 Storingsmogelijkheden pagina 8<br />
8.0 Technische gegevens pagina 8<br />
Onderdelentekening pagina 61/62<br />
ATTENTIE<br />
Voordat de compressorinstallatie mag draaien, moet eerst een aantal<br />
noodzakelijke handelingen worden verricht. Lees daarom voor de<br />
ingebruikname eerst aandachtig deze handleiding door.<br />
1.0 VOORWOORD<br />
Met de aankoop van uw Specair compressorinstallatie bent u eigenaar geworden<br />
van een compressorinstallatie met een hoog prestatie- en<br />
betrouwbaarheidsniveau. Bij correct gebruik en goed onderhoud zal de machine<br />
dit vele jaren kunnen handhaven. In deze handleiding vindt u gebruiks- en<br />
onderhoudsvoorschriften. Lees het aandachtig door en bewaar het als vraagbaak<br />
bij uw compressor.<br />
De compressor is ontworpen voor het leveren van perslucht. De gecomprimeerde<br />
lucht is niet geschikt om in te ademen en mag niet in direkt contact komen met<br />
levensmiddelen. De machine mag alleen worden gebruikt voor het doel waarvoor<br />
hij is ontworpen en bedoeld; alle andere toepassingen zijn niet juist.<br />
De fabrikant is niet verantwoordelijk voor enige schade aan personen en zaken,<br />
veroorzaakt door onzorgvuldigheid of het niet opvolgen van de aangegeven<br />
voorschriften tijdens de werking van de machine of onderhoudswerkzaamheden.<br />
Deze machine is niet geschikt om buiten te worden opgesteld.<br />
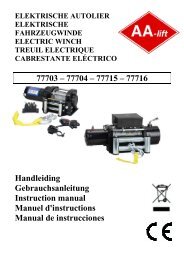
Legenda (fig. A)<br />
1 Luchtfilter (achterzijde) 8 Manometer keteldruk<br />
2 Terugslagklep 9 Plug<br />
3 Veiligheidsventiel 10 Condenswateraftapkraan<br />
4 Drukschakelaar 11 Aftapplug<br />
5 Reduceerventiel 12 Oliepeilglas<br />
6 Snelkoppeling 13 Olievulplug<br />
7 Manometer gereduceerde druk<br />
2
2.0 VEILIGHEIDSVOORSCHRIFTEN<br />
Attentie: lees onderstaande veiligheidsvoorschriften voor ingebruikname<br />
aandachtig door.<br />
• Let erop dat anderen, die de compressor gebruiken, deze handleiding<br />
aandachtig hebben doorgelezen en de nodige voorzorgsmaatregelen hebben<br />
genomen.<br />
• Het apparaat mag alleen door volwassen personen worden bediend.<br />
• Houd kinderen en bezoekers uit de buurt van de compressor tijdens gebruik.<br />
• Wees voorzichtig bij het gebruik van perslucht. Richt de luchtstroom nooit op<br />
mensen of dieren. Gebruik de perslucht niet om kleding schoon te maken.<br />
• Perslucht is niet geschikt om in te ademen.<br />
• Draag geen wijde, loshangende kleding die in de bewegende delen vast kan<br />
komen te zitten. Draag tijdens gebruik bij voorkeur een veiligheidsbril,<br />
veiligheidsschoenen of schoenen met profielzolen en bedek lang haar met een<br />
haarnet om te voorkomen dat het haar in de machine vast komt te zitten.<br />
• Gebruik de compressor uitsluitend in een droge, goed geventileerde omgeving<br />
en stel de machine niet bloot aan regen.<br />
• Plaats de compressor op een voldoende draagkrachtige, vlakke vloer, zodat<br />
alle daartoe bestemde punten ook werkelijk dragen. Eventueel kan ter<br />
vermindering van trillingen, de machine op trillingdempers worden geplaatst.<br />
• Deze compressor is niet geschikt voor continugebruik. De pomp moet<br />
tussendoor voldoende tijd krijgen om af te koelen. De machine heeft een<br />
inschakelduur van 30% per 60 minuten.<br />
• Zorg voor een goede verlichting in de werkruimte.<br />
• Gebruik het apparaat niet in een omgeving waar gas, benzine of andere<br />
ontvlambare stoffen aanwezig zijn.<br />
• Overschrijd de maximum werkdruk niet en gebruik de machine uitsluitend bij<br />
een omgevingstemperatuur tussen +5ºC en +40ºC.<br />
• Het is niet toegestaan om de beschermings- en veiligheidsinstrumenten te<br />
verwijderen of de instellingen te wijzigen.<br />
• De werkende onderdelen van de machine kunnen tijdens gebruik heet worden.<br />
Laat de compressor na gebruik afkoelen.<br />
• Na elk gebruik dient de tank te worden ontlucht en het condenswater dat zich in<br />
de tank heeft verzameld te worden afgetapt.<br />
• Controleer of de elektrische installatie goed gezekerd is en of deze<br />
overeenkomt met het vermogen, het voltage en de frequentie van de motor.<br />
Controleer of de elektrische installatie geaard is en of er een aardlekschakelaar<br />
in de meterkast zit.<br />
• Gebruik verlengkabels van voldoende capaciteit en vermijd het gebruik van<br />
onvoldoende geïsoleerde aansluitingen.<br />
• Open nooit de schakelkast op de motor: alleen een erkende vakman mag deze<br />
openmaken.<br />
• De machine en de kabel mogen nooit met water in contact komen.<br />
• Wees voorzichtig met de stroomkabel. Trek niet aan de stroomkabel om de<br />
3
machine te verplaatsen of de stekker uit het stopcontact te halen. Houd de<br />
kabel uit de buurt van buitengewone hitte, olie en scherpe objecten.<br />
• Trek altijd de stekker uit het stopcontact indien:<br />
- u even weg moet<br />
- de machine niet wordt gebruikt<br />
- u onderhoudswerkzaamheden gaat uitvoeren<br />
- u hulpstukken gaat omwisselen<br />
- u de machine wilt verplaatsen<br />
Laat de compressor nooit onbeheerd lopen!<br />
• WAARSCHUWING: de waarschuwingen, veiligheidsvoorschriften en aanwijzingen<br />
in deze handleiding kunnen niet alle mogelijke omstandigheden en<br />
situaties omvatten. De gebruiker dient te begrijpen dat gezond verstand en<br />
voorzichtigheid factoren zijn die niet in dit product kunnen worden<br />
ingebouwd, maar door de gebruiker zelf moeten worden ingevuld.<br />
• Laat alleen personen die door het lezen van deze gebruiksaanwijzing op de<br />
hoogte zijn van het gebruik van deze compressor, er gebruik van maken.<br />
Onoordeelkundig gebruik is gevaarlijk.<br />
Waarschuwingstekens<br />
De stickers op de compressorunit maken deel uit van de machine; zij zijn<br />
aangebracht voor de veiligheid en mogen niet worden verwijderd of beschadigd.<br />
A Pas op voor hete delen<br />
B Vorstvrij opstellen<br />
C Regelmatig condenswater aftappen<br />
D Regelmatig oliepeil controleren<br />
E Pas op voor draaiende onderdelen<br />
F Gehoorbeschermer<br />
4
3.0 OPSTELLING<br />
Plaats de compressor op een voldoende draagkrachtige, vlakke vloer, zodat alle<br />
daartoe bestemde punten ook werkelijk dragen. Eventueel kan ter vermindering<br />
van trillingen, de machine op trillingdempers worden geplaatst.<br />
De compressor dient in een goed geventileerde en zoveel mogelijk stofvrije ruimte<br />
te worden opgesteld. Plaats de machine nooit in een ruimte waar gespoten wordt.<br />
Goede ventilatie is nodig voor de afvoer van koellucht. Let erop dat de<br />
condenswateraftapkraan (10) en de olie-aftapplug (11) goed bereikbaar blijven,<br />
evenals de olievulplug (13). Aanbevolen wordt een ruimte van minimaal 30<br />
centimeter rondom de machine vrij te laten voor ventilatie en onderhoudswerkzaamheden.<br />
In het algemeen geldt dat onvoldoende luchtaanvoer, een te hoge<br />
temperatuur en vervuiling van het luchtfilter het rendement van de<br />
compressor aanzienlijk verlagen.<br />
3.1 ELEKTRISCHE AANSLUITINGEN<br />
In de fabriek is de machine al geheel van bedrading voorzien. De compressor<br />
moet echter nog aan uw elektrisch net worden aangesloten. Dit dient te<br />
geschieden op een aparte groep. Let erop dat het voltage en het ampèrage van<br />
uw elektrische installatie overeenkomt met dat van de motor. Ook de diameter van<br />
de gebruikte kabels is hierbij van belang. Aangeraden wordt kabels te gebruiken<br />
van tenminste 2,5 mm 2 .<br />
N.B. Lees voor u de machine inschakelt eerst de hoofdstukken 3.2 en 4.0.<br />
3.2 LUCHTAANSLUITINGEN<br />
Gebruik voor de aansluiting van de compressor op het luchtleidingnet een flexibele<br />
slang om trillingen van de machine te isoleren. Koppeling nr. 6 is een<br />
Orion/Airpress snelkoppeling.<br />
5
4.0 INGEBRUIKNAME<br />
1. Controleer of rekening is gehouden met de onder "Opstelling" gegeven<br />
aanwijzingen.<br />
2. De compressor is voor aflevering meestal niet gevuld met olie. Vul bij met<br />
ongeveer 0,24 liter compressorolie tot aan de rode cirkel op het oliepeilglas<br />
(12).<br />
3. Monteer het luchtfilter (1) in de cilinderkop (verwijder daarvoor eerst de<br />
kunststof- plug).<br />
4. Monteer de olievulplug (13) op het carterdeksel (verwijder daarvoor eerst de<br />
kunststofplug).<br />
5. Vermijd verlengsnoeren. Is dit niet mogelijk, gebruik dan snoeren van voldoende<br />
capaciteit en rol ze geheel af. Tabel verlengsnoeren:<br />
0 - 10 meter: 3 x 1,5 mm 2 en 10 - <strong>25</strong> meter: 3 x 2,5 mm 2<br />
• Schakel met de handbediening van de drukschakelaar (4) de compressor in<br />
(knop uittrekken).<br />
• De compressor zal nu gaan draaien, tenzij de ketel nog op druk staat (zie<br />
manometer nr. 8).<br />
• Schakel de machine tijdens het draaien uitsluitend uit door de knop in te<br />
drukken op de automatische drukschakelaar (4). Hierdoor wordt de persleiding<br />
ontlucht en kan de compressor weer onbelast aanlopen.<br />
5.0 BEDIENING<br />
1. De automatisch werkende compressor zal bij een keteldruk (8) van 8 bar<br />
stoppen. Wanneer weer lucht gebruikt wordt en de druk in de tank daalt tot 6<br />
bar, zal de compressor opnieuw gaan draaien.<br />
2. De meeste persluchtwerktuigen zijn berekend op een werkdruk van ongeveer 6<br />
bar. Voor sommige toepassingen ligt deze druk nog lager. Om de juiste druk in<br />
te kunnen stellen is de compressor voorzien van een reduceerventiel (5). Dit<br />
ventiel kan de druk aan koppeling (6) instellen onafhankelijk van de keteldruk.<br />
3. De instelling van het reduceerventiel gaat als volgt: draai de knop om de juiste<br />
druk in te stellen (linksom geeft een lagere druk, rechtsom een hogere). De<br />
ingestelde druk is af te lezen op manometer (7).<br />
4. Aan de tank zijn twee extra pluggen aangebracht (9) die gebruikt kunnen<br />
worden om een extra aftappunt te maken.<br />
6
6.0 ONDERHOUD<br />
Voordat men met zijn werkzaamheden aan de machine mag beginnen, moet<br />
eerst de stroom worden uitgeschakeld (let erop dat deze niet per ongeluk<br />
weer kan worden ingeschakeld) en moet de ketel ontlucht worden d.m.v. het<br />
openen van de condenswateraftapkraan (10).<br />
Het onderhoud aan de machine betreft de volgende punten:<br />
1. Na de eerste <strong>50</strong> bedrijfsuren en daarna iedere <strong>25</strong>0 bedrijfsuren dient de olie te<br />
worden afgetapt en ververst. Draai hiertoe de aftapplug (11) eruit en verwijder<br />
de vuldop (13). Vang de afgewerkte olie op. Als geen olie meer uitloopt, de<br />
aftapplug (11) weer indraaien en olie bijvullen.<br />
Het juiste oliepeil ligt op de rode cirkel op het oliepeilglas (12).<br />
Afgewerkte olie afvoeren volgens de voorschriften!<br />
2. Tap regelmatig het condenswater af. Door afkoeling van warme lucht in de<br />
tank verzamelt zich daar condensvocht. Dit kan worden afgetapt met de<br />
aftapkraan (10) aan de onderzijde van de tank. Aftappen kan het beste onder<br />
druk geschieden. Het condensaat afvoeren volgens de voorschriften (dus<br />
niet in het riool!). U kunt ook een condensaatreiniger plaatsen.<br />
3. Het oliepeil moet regelmatig worden gecontroleerd.<br />
Vul zonodig bij met compressorolie, bestelnr. 36398 (1/2 l) of bestelnr. 36380<br />
(2 l). Dagelijkse controle kan veel narigheid voorkomen!<br />
Altijd dezelfde olie gebruiken als die in de machine zit; verschillende<br />
minerale oliën mogen beslist niet worden gemixt!<br />
4. Regelmatig dient het luchtfilterelement (1) te worden schoongeblazen of<br />
vervangen. Verwijder daartoe het plastic filterhuis en neem het element uit. Stof<br />
kan met een blaaspistool uit het filter worden verwijderd. Hardnekkig vuil als<br />
bijvoorbeeld verfnevel noopt tot vervanging.<br />
De frequentie van schoonmaken is afhankelijk van de mate van vervuiling van<br />
de lucht in de werkomgeving van de compressor. Schone lucht is daarom erg<br />
belangrijk.<br />
N.B. Bedenk dat regelmatig onderhoud het rendement van uw machine ten<br />
goede komt en het behoud van uw machine is!<br />
ONDERHOUDSTABEL<br />
werkzaamheden dagelijks wekelijks iedere iedere<br />
condenswater<br />
aftappen<br />
oliepeil<br />
controleren<br />
luchtfilter<br />
reinigen<br />
olie verversen<br />
(1 e keer na <strong>50</strong> uur)<br />
▀<br />
▀<br />
7<br />
▀<br />
<strong>25</strong>0 uur 1000 uur<br />
▀
7.0 STORINGSMOGELIJKHEDEN<br />
1 Compressor doet niets bij inschakelen drukschakelaar:<br />
* netzekering defect - vernieuwen<br />
* tank is op druk - ontlasten<br />
* motor defect - repareren of vernieuwen<br />
* drukschakelaar defect - repareren of vernieuwen<br />
2 Compressor valt steeds thermisch uit:<br />
* fase uitgevallen - netzekering vernieuwen<br />
* draad los - opsporen en verhelpen<br />
* drukschakelaar ontlast persleiding niet - afblaasventiel repareren/vervangen<br />
* onderspanning - verlengsnoeren verwijderen/<br />
verzwaren<br />
* overbelasting - minder belasten<br />
3 Compressor blijft afblazen:<br />
* terugslagklep defect - repareren of vernieuwen<br />
4 Te weinig luchtopbrengst:<br />
* luchtfilter vervuild - reinigen of vernieuwen<br />
* kleppen defect - vernieuwen<br />
5 Veiligheidsventiel lekt:<br />
* druk te hoog - drukschakelaar bijstellen<br />
* veiligheidsventiel defect - vernieuwen<br />
8.0 TECHNISCHE GEGEVENS<br />
Type <strong>HL</strong> <strong>275</strong>/<strong>25</strong> <strong>HL</strong> <strong>275</strong>/<strong>50</strong><br />
Bestelnummer 36840 36845<br />
Aantal cilinders 1 1<br />
Aantal trappen 1 1<br />
Motorvermogen 2 pk/1,5 kW 2 pk/1,5 kW<br />
Voltage 230 V/<strong>50</strong> Hz 230 V/<strong>50</strong> Hz<br />
Inhoud persluchttank <strong>25</strong> liter <strong>50</strong> liter<br />
Inhoud olietank 0,24 liter 0,24 liter<br />
Inschakeldruk 6 bar 6 bar<br />
Maximale druk 8 bar 8 bar<br />
Geluidsniveau op 7 m 78 dB(A) 78 dB(A)<br />
Aanzuigcapaciteit <strong>275</strong> l/min. <strong>275</strong> l/min.<br />
Afzekeren met 16 amp. 16 amp.<br />
Inschakelduur 30% per 60 minuten 30% per 60 minuten<br />
Gewicht 28 kg 38 kg<br />
Afmetingen (lxbxh) 580x<strong>25</strong>5x580 mm 760x330x715 mm<br />
Modelwijzigingen voorbehouden.<br />
Alle compressoren zijn voorzien van Euro-Norm (CE-keur).<br />
8
DEUTSCH<br />
INHALTSANGABE<br />
1.0 Vorwort Seite 9<br />
2.0 Sicherheitshinweise Seite 10<br />
3.0 Aufstellung Seite 12<br />
3.1 Elektrischer Anschluß Seite 12<br />
3.2 Preßluft Anschluß Seite 12<br />
4.0 Erster Gebrauch Seite 13<br />
5.0 Bedienung Seite 13<br />
6.0 Wartung Seite 14<br />
7.0 Mögliche Störungen Seite 15<br />
8.0 Technische Daten Seite 15<br />
Ersatzteile Seite 61/62<br />
ACHTUNG<br />
Bevor der Kompressor funktionieren darf, müssen zuerst einige notwendige<br />
Maßnahmen beachtet werden. Lesen Sie diese Betriebsanleitung aufmerksam<br />
durch.<br />
1.0 VORWORT<br />
Mit dem Kauf Ihres Specair Kompressors sind Sie Besitzer eines Kompressors<br />
mit einer hohen Leistung und Zuverlässigkeit geworden. Bei einem korrekten<br />
Gebrauch und regelmäßiger Wartung wird die Maschine eine lange Lebensdauer<br />
haben. Diese Betriebsanleitung enthält Gebrauchs- und Wartungsvorschriften.<br />
Lesen Sie es aufmerksam durch und bewahren Sie es als eine Anleitung zu Ihrem<br />
Kompressor auf.<br />
Der Kompressor dient zur Erzeugung von Druckluft. Die vom Gerät erzeugte Luft<br />
darf weder eingeatmet werden, noch direkt in Kontakt mit Lebensmittel kommen.<br />
Dieses Gerät wurde für einen bestimmten Gebrauch konzipiert und darf deshalb<br />
nicht zweckentfremdet werden. Der Hersteller kann für eventuelle Schäden durch<br />
unsachgemäßen oder irrtümlichen Gebrauch nicht zur Haftung gezogen werden<br />
Das Gerät eignet sich nicht für die Aussen-Installation.<br />
Erklärung (Fig. A)<br />
1 Luftfilter (hinterseite) 8 Manometer für Kesseldruck<br />
2 Rückschlagventil 9 Pfropfen<br />
3 Sicherheitsventil 10 Kondenzwasserablaß<br />
4 Druckschalter 11 Ölablaß<br />
5 Reduzierventil 12 Ölschauglas<br />
6 Schnelkupplung 13 Ölfüllpfropfen<br />
7 Manometer reduzierter Druck<br />
9
2.0 SICHERHEITSMASSNAHMEN<br />
Achtung: lesen Sie diese Sicherheitsmaßnahmen aufmerksam durch, bevor<br />
Sie die Maschine in Betrieb setzen.<br />
• Achten Sie darauf daß andere Leute die mit dem Apparat arbeiten auch die<br />
Vorschriften gelesen und die notwendigen Maßnahmen getroffen haben.<br />
• Das Apparat darf nur durch Erwachsenen bedient werden.<br />
• Halten Sie Kinder und Besucher fern.<br />
• Vorsicht beim Umgang mit Druckluft. Richten Sie den Luftstrom niemals auf<br />
Personen oder Tiere. Verwenden Sie keine Druckluft zur Reinigung von<br />
Kleidung.<br />
• Druckluft is nicht zum Einatmen.<br />
• Tragen Sie keine weiten, frei hängenden Kleider oder Schmuck; diese können<br />
sich in den bewegenden Teilen verhaken. Tragen Sie unbedingt eine<br />
Schutzbrille und rutschfeste Schuhe und bedecken Sie langes Haar mit einem<br />
Haarnetz.<br />
• Verwenden Sie das Gerät nur im Freien und in trockener, gut belüfteter<br />
Umgebung und benutzen Sie den Kompressor nicht im Regen.<br />
• Der Kompressor soll so aufgestellt werden, daß alle Punkte die dafür<br />
vorgesehen sind, tatsächlich auf dem Boden Stehen. Sorgen Sie für eine<br />
horizontale Aufstellung.<br />
• Der Kompressor ist nicht geeignet für Dauerbetrieb, aber hat ein Aussetzbetrieb<br />
von 30% pro 60 Minuten.<br />
• Sorgen Sie für eine gute Beleichtung in das Arbeitsraum.<br />
• Die Maschine darf auf keinen Fall in explosions- oder brandgefährdeten<br />
Räumen bzw. an Arbeitsplätzen aufgestellt werden, wo gefährliche Stoffe wie<br />
z.B Gas, Benzin, entzündbare Dämpfe, Lösemittel usw. Entweichen.<br />
• Überschreiten Sie niemals den maximalen Betriebsdruck und verwenden Sie<br />
das Gerät nur bei Umgebungstemperaturen zwischen +5ºC und +40ºC.<br />
• Es ist nicht gestattet um die Schutz- und Sicherheitsinstrumente zu entfernen<br />
oder die Einstellungen zu ändern.<br />
• Die arbeitenden Teile des Geräts können beim Betrieb heiß werden. Lassen<br />
Sie das Gerät nach dem Gebrauch abkühlen.<br />
• Nach jedem Gebrauch muß der Tank belüftet und die im Tank gesammelte<br />
Feuchtigkeit abgelassen werden. Wird der Tank nicht entleert, so kann dies zu<br />
Leckbildung und dadurch gefährlichen Situationen führen.<br />
• Beachten Sie daß die benötigte Spannung tatsächlich vorhanden ist. Anschluß<br />
soll nur an eine geerdete Steckdose erfolgen.<br />
• Benutzen Sie nur Verlängerungskabel mit einem genügenden Durchmesser<br />
und vermeiden Sie die Verwendung von unzureichend isolierten Anschlüssen.<br />
• Öffnen Sie nie der Schaltkasten auf dem Motor; nur ein anerkannter Fachman<br />
darf den Schaltkasten öffnen.<br />
• Die Maschine und der Kabel darfen nie Kontakt machen mit Wasser.<br />
• Ziehen Sie nicht am Stromkabel um die Maschine umzustellen oder den<br />
Stecker aus der Steckdose zu holen. Halten Sie den Kabel fern von<br />
10
außergewöhnlicher Hitze, Öl oder scharfen Objekten.<br />
• Ziehen Sie immer den Stecker aus der Steckdose:<br />
- bevor Sie weglaufen vom Apparat<br />
- wenn die Maschine nicht gebraucht wird<br />
- vor jedem Wartungseingriff<br />
- bevor Sie Zubehörteile wechseln<br />
- bevor Sie die Machine umstellen<br />
Lassen Sie den Kompressor nie unbeaufsichtigt drehen!<br />
• WARNHINWEISE: die Warnhinweise und Sicherheitsvorschrifte sowie die<br />
Anweisungen, die in dieser Gebrauchsanweisung behandelt werden, können<br />
nicht alle möglichen Bedingungen und Situationen umfassen, die auftreten<br />
können. Der Bediener muss verstehen, dass gesunder Menschenverstand<br />
und Vorsicht Faktoren sind, welche nicht in das Produkt eingebaut werden<br />
können, aber vom Bediener selbst zur Verfügung gestellt werden müssen.<br />
• Die Betriebsanleitung ist von jedem Benutzer vor dem ersten Gebrauch<br />
sorgfältig zu lesen. Unverständiger Gebrauch ist lebensgefährlich.<br />
Gefahrenschilder<br />
Die Schilder die sich auf der Kompressor befinden, sind Teil der Maschine. Sie<br />
sind aus Sicherheitsgründen angebracht und dürfen auf keinen Fall entfernt oder<br />
beschädigt werden.<br />
A Heisse Teile<br />
B Frostfrei aufstellen<br />
C Regelmäßig Kondenswasser ablassen<br />
D Regelmäßig Ölstand kontrollieren<br />
E Teile in Bewegung<br />
F Gehörschutz<br />
11
3.0 AUFSTELLUNG<br />
Der Kompressor soll so aufgestellt werden, daß alle Punkte die dafür vorgesehen<br />
sind, tatsächlich auf dem Boden Stehen. Sorgen Sie für eine horizontale<br />
Aufstellung. Der Motor soll genügend Kühlluft bekommen, also niemals die<br />
Ventilationsöffnungen abdecken.<br />
Den Kompressor in einen kühlen staubfreien Raum stellen wo nie gespritzt wird.<br />
Lacknebel verstopft nämlich den Luftfilter und schlägt auch auf den Kompressor<br />
nieder. Darauf achten, daß der Kondenzwasserablaß (10), der Öllablaß (11) und<br />
der Ölfüllpfropfen (13) immer zu erreichen sind. Darum empfehlen wir einen Raum<br />
von ca. 30 cm für Ventilation und Wartung zu lassen. Schützen Sie die Maschine<br />
für Frost und Regen.<br />
Bemerkung: ungenügende Luftzufuhr, zu hohe Temperaturen und<br />
Verschmutzung, verringern den Nutzeffekt.<br />
3.1 ELEKTRISCHER ANSC<strong>HL</strong>Uß<br />
Der Kompressor ist schon vom Hersteller verkabelt und funktionsfähig. Beachten<br />
Sie, daß die benötigte Spannung tatsächlich vorhanden ist. Anschluß soll nur an<br />
eine geerdete Steckdose erfolgen. Vermeiden Sie Verlängerungskabel. Soll das<br />
unvermeidlich sein, rollen Sie diese ganz ab. Benützen Sie nur kabel mit dem<br />
richtigen Durchmesser. Der Hersteller empfiehlt Kabel von mindestens 2.5 qmm.<br />
Achtung: lesen Sie vor Gebrauch Kapitel 3.2 und 4.0.<br />
3.2 PRESSLUFT ANSC<strong>HL</strong>Uß<br />
Am besten benützen Sie zur Anschließung des Kompressors an ein Luftsystem<br />
einen flexiblen Schlauch. Hierdurch wird die Durchgabe der Fibrationen der<br />
Maschine an dem Lufsystem vermeidet. Die Kupplung Nr. 6 ist eine Orion/Airpress<br />
Schnellkupplung.<br />
12
4.0 ERSTER GEBRAUCH<br />
1. Kontrollieren Sie ob alle o.g. Punkte beachtet sind.<br />
2. Der Kompressor ist für Ablieferung meistens nicht mit Öl gefüllt. Etwa<br />
0,24 Liter Kompressorenöl nachfüllen bis dem roten Kreis auf dem<br />
Ölschauglas (12).<br />
3. Montieren Sie den Luftfilter (1) in den Zylinderkopf (dafür zuerst den<br />
Kunststoffpfropfen entfernen).<br />
4. Montieren Sie den Füllpfropfen (13) auf den Kurbelgehäusedeckel (dafür zuerst<br />
den Kunststoffpfropfen entfernen).<br />
5. Vermeiden Sie Verlängerungskabel. Soll das unvermeidlich sein, rollen Sie<br />
diese ganz aus. Tabelle für Verlängerungskabel:<br />
0 - 10 Meter: 3 x 1,5 mm 2 und 10 - <strong>25</strong> Meter: 3 x 2,5 mm 2<br />
• Den Kompressor mit der Handbedienung des Druckschalters (4) einschalten<br />
(Knopf wegziehen).<br />
• Der Kompressor arbeitet nun, es sei denn der Kessel hat noch genügend<br />
Druck (Manometer Nr. 8).<br />
• Schalten Sie den Kompressor während des Gebrauches nur mit dem Knopf am<br />
automatischen Druckschalter (4) aus (Knopf eindrücken). Auf diese Weise wird<br />
die Preßluftleitung entlüftet und der Kompressor kann wieder unbelastet<br />
anlaufen.<br />
• Nach Gebrauch den Kompressor ausschalten am automatischen Druckschalter<br />
(4) und danach der Stecker aus die Stromzufuhr entfernen.<br />
5.0 BEDIENUNG<br />
1. Der automatisch funktionierende Kompressor wird bei einem Kesseldruck (8)<br />
von 8 bar ausschalten. Wenn wieder Pressluft verbraucht wird und der Druck<br />
im Tank fällt ab auf 6 bar, wird der Kompressor wieder einschalten.<br />
2. Die meisten Pressluftgeräte arbeiten mit einem Arbeitsdruck von ca. 6 bar. Für<br />
einige Anwendungen liegt dieser Druck noch niedriger. Um den richtigen Druck<br />
einzustellen, ist der Kompressor mit einem Reduzierventil (5) versehen. Mit<br />
diesem Ventil kann der Druck an der Kupplung (6) eingestellt werden,<br />
unabhängich vom Druck im Kessel.<br />
3. Die Einstellung des Reduzierventils geschieht wie folgt: drehe den Knopf zum<br />
Einstellen des gewünschten Drucks (nach links für ein niedrigeren Druck, nach<br />
rechts für ein höheren Druck). Den eingestellten Druck können Sie ablesen am<br />
Manometer (7).<br />
4. Am Kessel sind zwei zusätzliche Pfropfen (9) montiert, deshalb ist es möglich<br />
noch zwei Anschlüsse vorzunehmen.<br />
13
6.0 WARTUNG<br />
Vor jedem Wartungseingriff muß die Maschine angehalten und<br />
spannungslos gesetzt werden und muß der Tankdruck abgelassen werden<br />
mittels den Kondenswasserablaß (10) zu öffnen.<br />
1. Das erste Mal soll das Öl schon nach etwa <strong>50</strong> Arbeitsstunden gewechselt<br />
werden und danch alle <strong>25</strong>0 Arbeitsstunden. Dazu Ölablaß (11) abdrehen und<br />
Füllpfropfen (13) entfernen. Das Altöl auffangen. Wenn kein Öl mehr ausläuft,<br />
Ölablaß (11) wieder eindrehen und Öl einfüllen.<br />
Der richtige Ölspiegel liegt auf den roten Kreis auf das Ölschauglas (12).<br />
Bitte halten Sie sich an die einschlägigen Bestimmungen für die<br />
Entsorgung von Altöl!<br />
2. Regelmäßig Kondenswasser ablassen. Der Ablaß (10) befindet sich an der<br />
unteren Seite des Kessels. Ablaß mit noch ein wenig Druck im Kessel geht am<br />
Besten. Das abgelassene Kondenswasser muß vorschriftsmäßig entsorgt<br />
werden (nicht im Abzugskanal!).<br />
Auch können Sie einen Kondensatreiniger montieren.<br />
3. Der Ölstand soll regelmäßig kontrolliert werden. Wenn nötig nachfüllen mit<br />
Kompressorenöl, Bestellnr. 36398 (1/2 L) oder Bestellnr. 36380 (2 L). Am<br />
besten kontrollieren Sie den Ölstand jeden Tag.<br />
Es muß unbedingt die gleiche Ölsorte verwendet werden, die sich in der<br />
Maschine befindet. Das Öl darf nicht mit anderen Sorten vermischt<br />
werden.<br />
4. Der Luftfilter (1) soll auch regelmäßig erneuert werden. Die Erneuerung ist<br />
abhängig von der Verschmutzung und soll dementsprechend erfolgen. Zur<br />
Reinigung des Luftfilters, Filterkappe mit Filter abdrehen. So können Sie den<br />
Filter mit Druckluft ausblasen.<br />
Achtung: Regelmäßige Wartung verlängert die Leistung und Lebensdauer.<br />
WARTUNGSTABELLE<br />
Arbeiten Täglich Wöchent- Alle <strong>25</strong>0 Alle 1000<br />
Kondenswasser<br />
ablassen<br />
Ölstand<br />
kontrollieren<br />
Luftfilter<br />
reinigen<br />
Öl erneuern (1 e Mal nach<br />
<strong>50</strong> Arbeitsstunden)<br />
▀<br />
▀<br />
14<br />
lich Stunden Stunden<br />
▀<br />
▀
7.0 MÖGLICHE STÖRUNGEN<br />
1 Kompressor läuft nicht beim Einschalten:<br />
* defekte Sicherung - erneuern<br />
* Draht los - reparieren<br />
* Tank auf Druck - Luft entnehmen<br />
* defekter Motor - reparieren/erneuern<br />
* defekter Druckschalter - reparieren/erneuern<br />
2 Kompressor fällt ständig thermisch aus:<br />
* Druckschalter entlüftet nicht - Ablaßventil erneuern/reparieren<br />
* Unterspannung - Verlängerungskabel entfernen<br />
* Phase ausgefallen - Sicherung erneuern<br />
* Draht los - reparieren<br />
* Überlastung - Belastung reduzieren<br />
3 Luft bläst ständig ab:<br />
* Rückschlagventil defekt - reparieren/erneuern<br />
4 Zu wenig Kapazität:<br />
* Luftfilter verschmutzt - reinigen/erneuern<br />
* Ventile defekt - erneuern<br />
5 Sicherheitsventil ist undicht:<br />
* Druck zu hoch - Druckschalter nachstellen<br />
* defektes Sicherheitsventil - erneuern<br />
8.0 TECHNISCHE DATEN<br />
Typ <strong>HL</strong> <strong>275</strong>/<strong>25</strong> <strong>HL</strong> <strong>275</strong>/<strong>50</strong><br />
Bestellnummer 36840 36845<br />
Zylinderzahl 1 1<br />
Stufenzahl 1 1<br />
Motorleistung 2 Ps/1,5 kW 2 Ps/1,5 kW<br />
Spannung 230 V/<strong>50</strong> Hz 230 V/<strong>50</strong> Hz<br />
Inhalt Preßluftbehälter <strong>25</strong> Liter <strong>50</strong> Liter<br />
Inhalt Ölbehälter 0,24 Liter 0,24 Liter<br />
Arbeitsdruck 6 Bar 6 Bar<br />
Maximaler Druck 8 Bar 8 Bar<br />
Schallpegel 78 dB(A) 78 dB(A)<br />
Ansaugleistung <strong>275</strong> L/Min. <strong>275</strong> L/Min.<br />
Sichern mit 16 Amp. 16 Amp.<br />
Aussetzbetrieb 30% pro 60 Minuten 30% pro 60 Minuten<br />
Gewicht 28 Kg 38 Kg<br />
Abmessung (LxBxH) 580x<strong>25</strong>5x580 mm 760x330x715 mm<br />
Modelländerungen vorbehalten.<br />
Alle Kompressoren sind mit Euro-Norm (CE-Wahl) versehen<br />
16
ENGLISH<br />
TABLE OF CONTENTS<br />
1.0 Prefatory note page 16<br />
2.0 Safety instructions page 17<br />
3.0 Placing page 19<br />
3.1 Electric connection page 19<br />
3.2 Air connection page 19<br />
4.0 First use page 20<br />
5.0 Operation page 20<br />
6.0 Maintenance page 21<br />
7.0 Possibilities of failure page 22<br />
8.0 Technical details page 22<br />
Spare parts page 61/62<br />
ATTENTION<br />
To be able to use this compressor installation properly, a number of measurements<br />
must be taken. The following points will contribute to making you a<br />
satisfied user of this installation.<br />
1.0 PREFATORY NOTES<br />
Buying your Specair compressor installation, you have become the owner of a<br />
compressor installation with a high performance and reliability level. Correct use<br />
and regular maintenance will increase the life of the compressor.<br />
In this manual you will find operation and maintenance instructions. Read it<br />
carefully and keep it as a guide to your compressor.<br />
The compressor has been designed to supply compressed air. In particular the<br />
appliance cannot be used to produce air to be breathed by humans or used on<br />
direct contact with foodstuffs. The appliance must be used only for the purpose for<br />
which it was specifically designed. All other uses are to be considered incorrect<br />
and therefore unreasonable. The manufacturer cannot be held responsible for any<br />
damage resulting from improper, incorrect or unreasonable use. This machine is<br />
not suitable for external installation.<br />
Legend (fig. A)<br />
1 Air filter ( on the back) 8 Pressure gauge for pressure of air<br />
2 Non return valve 9 Plug<br />
3 Safety valve 10 Draintap for condensation water<br />
4 Pressure switch 11 Oil drain plug<br />
5 Reducing valve 12 Oil inspection glass<br />
6 Quick coupling 13 Oil plug<br />
7 Gauge reduced pressure<br />
17
2.0 SAFETY INSTRUCTIONS<br />
Important: please read and observe the following safety instructions before<br />
using the machine.<br />
• Nobody must be allowed to use the compressor unless they have read the<br />
instruction manual and have been instructed in the regulations to follow for<br />
correct and safe use.<br />
• The machine must be used by adults only. Use of the compressor by<br />
apprentices of not less than 16 years of age must be supervised by an adult<br />
authorised to use the machine.<br />
• Keep children and visitors away from the working area.<br />
• Be cautious when using compressed air. Never aim the air flow at people or<br />
animals. Do not use compressed air to clean clothing.<br />
• Compressed air is not suitable to inhale.<br />
• Do not wear loose clothing or neckties that can get caught in moving parts.<br />
Preferably wear safety goggles, nonslip footwear and Wear protective hair<br />
covering to contain long hair.<br />
• Only use the machine outside in dry, well-ventilated surroundings and do not<br />
expose the machine to rain.<br />
• The compressor should be placed in such way that all points, destined to carry<br />
it will really do so. Take also care of a horizontal position.<br />
• This machine is not fit for continuous running, but service for 30% per 60<br />
minutes.<br />
• Keep your work area clean and well lighted.<br />
• Do not use the machine in areas where fumes from paint, solvents or<br />
flammable liquids pose a potential hazard.<br />
• Do not exceed the maximum operating pressure and only use the machine in<br />
an ambient temperature between +5ºC and +40ºC.<br />
• Never attempt to tamper with the protections of the log splitter or to operate the<br />
machine without these.<br />
• The working parts of the machine can become hot during operation. Let the<br />
machine cool down after use.<br />
• After each use the tank must be vented and the moisture collected in the tank<br />
must be bled. Not bleeding the tank can lead to leakage and may cause a<br />
dangerous situation.<br />
• Check that the electric circuit is adequately protected and that it corresponds<br />
with the power, voltage and frequency of the motor. Check that there is a<br />
ground connection and a regulation differential switch upstream.<br />
• Use cables with an adequate section and avoid use of free and inadequately<br />
insulated connections.<br />
• Never open the pushbutton box on the motor. Should this be necessary,<br />
contact a qualified electrician.<br />
• Make sure that the machine and the cable never come in contact with water.<br />
• Treat the power cable with care. Do not attempt to move the machine by pulling<br />
the cable. Do not yank the cable to unplug it; keep the cable away from<br />
18
excessive heat, oil and sharp objects.<br />
• Never leave the machine unattended with the power supply "on". Also<br />
disconnect the power cable when:<br />
- you leave the machine, even for a short time<br />
- not in use<br />
- carrying out maintenance work<br />
- changing attachment or moving the machine.<br />
• WARNING: the warnings, cautions and instructions discussed in this<br />
instruction manual cannot cover all possible conditions and situations that<br />
may occur. It must be understood by the operator that common sense and<br />
caution are factors which cannot be built into this product, but must be<br />
supplied by the operator.<br />
• Only those persons who are aware of how to use the compressor by having<br />
read this manual, should use the machine. Injudicious use may cause danger.<br />
Danger plates<br />
The plates fitted on the compressor unit are part of the machine; they have been<br />
applied for safety purposes and must not be removed or spoiled for any reason.<br />
A Beware of hot parts<br />
B Frost-proof installation<br />
C Regularly drain condensation water<br />
D Regularly check oil level<br />
E Beware of moving parts<br />
F Protect the hearing<br />
19
3.0 PLACING<br />
The compressor should be placed in such way that all points, destined to carry it<br />
will really do so. Take also care of a horizontal position. The engine should get<br />
sufficient cooling air; so never cover the ventilating openings.<br />
Place the compressor in a cool dustfree space. Never place the compressor in a<br />
room where will be sprayed. Paint spray will clog the air filter and will also deposit<br />
on the compressor.<br />
Mind that the draintap for condensation water (10), the oil drain plug (11) and the<br />
oil plug (13) will always remain attainable. We suggest to leave a space of<br />
aproximately 30 cm for ventilation and maintenance.<br />
Notice: Insufficient air supply, too high temperature and fouling of the air<br />
filter reduce the efficiency of the compressor considerably.<br />
3.1 ELECTRIC CONNECTION<br />
At the factory the machine is already fully equipped with cables. The machine now<br />
has to be connected to your own electricity supply. Connect the machine to a<br />
separate group. Beware that voltage and amperage of your electric circuit meet<br />
the needs of the motor. Use only cables with the right diameter. The factory<br />
suggests to use cables of at least 2.5 qmm.<br />
Before first use first read chapters 3.2 and 4.0.<br />
3.2 AIR CONNECTION<br />
Best use for connection of the compressor to an air circuit a flexible hose, to<br />
isolate fibrations from the machine. The coupling No 6 is an Orion/Airpress quick<br />
coupling.<br />
20
4.0 FIRST USE<br />
1. Check if the instructions mentioned above have been executed.<br />
2. On delivery the compressor mostly is not filled with oil. Fill about 0,24<br />
litres compressor oil until the red circle on the oil inspection glas (12).<br />
3. Install the air filter (1) in the cylinder head (first remove the synthetic plug).<br />
4. Install the oil filler cap (13) on the crank case lid (first remove the synthetic<br />
plug).<br />
5. Avoid the use of extension cables. If you use them, unroll them completely and<br />
use cables of sufficient capacity. Tabel for extension cables:<br />
0 - 10 meter: 3 x 1,5 mm 2 and 10 - <strong>25</strong> meter: 3 x 2,5 mm 2<br />
• Switch on the compressor by means of pulling the pressure switch (4).<br />
• The compressor will now operate, unless the air receiver is still under pressure<br />
(pressure gauge 8).<br />
• Switch the machine, during operation, exclusively off by means of pushing the<br />
button on the automatic pressure switch (4); the pressure circuit will be vented<br />
and the compressor can start again uncharged.<br />
• After use shut down the compressor by pushing the button on the automatic<br />
pressure switch (4) and then pull the plug from the power supply.<br />
5.0 OPERATION<br />
1. The automatically operating compressor will stop at a pressure of 8 bar (8).<br />
When air is used again and the pressure in the tank falls to 6 bar, the<br />
compressor will start again.<br />
2. Most pneumatic machines are suitable for an operating pressure of about 6<br />
bar. For some applications this pressure is even lower. To be able to set the<br />
right pressure, the compressor is provided with a reducing valve (5). This valve<br />
can set the pressure of the air receiver (of course never higher than the<br />
pressure in the air receiver).<br />
3. The setting of the reducing valve is done as follows: switch the button to set the<br />
right pressure (to the left to lower the pressure, to the right to increase it). The<br />
setting pressure is shown at the gauge (7).<br />
4. Two extra plugs (9) are fitted to the tank, which can be used to get an extra<br />
pressure connection.<br />
21
6.0 MAINTENANCE<br />
Before carrying out any maintenance jobs it is obligatory to stop the<br />
machine, disconnect it from the power mains and make sure that the tank<br />
is pressure free by opening the condensation draintap (10).<br />
1. After the first <strong>50</strong> operating hours and then every <strong>25</strong>0 operation hours the oil<br />
should be refreshed. Turn off the oil drain plug (11) and also remove the filler<br />
cap (13). Collect the oil. If the oil does not come out any longer, switch on the<br />
drainplug again and refill the oil (through fillercap) until the oil has reached the<br />
correct level.<br />
The right oil level is on the red circle on the oil leveler (12).<br />
Always respect the regulations in force for disposing of old oil!<br />
2. Regularly drain condensation water. The draintap is situated at the bottom of<br />
the tank (10). Draining with pressure in the tank is the easiest way. Some<br />
compressors have an aftercooler with its own drainplug. Also from this device<br />
the condensationwater should be drained regularly.<br />
Condensate must be disposed of in conformity with the local regulations<br />
in force (not in the sewer!).<br />
As an alternative you can place an oil/water separator.<br />
3. The oil level should also be checked regularly. For the right oil level see point 1.<br />
If necessary refill with compressor oil, order No 36398 (1/2 l) or order No<br />
36380 (2 l). Checking daily can prevent a lot of troubles!<br />
Use oil of the same type as that already in the machine; do not mix<br />
different types of oil!<br />
4. The air filter element (1) should be cleaned or changed regularly. This change<br />
depends on the amount of fouling and should be done more often in dusty<br />
situations and less often in a clean situation. For cleaning the filterelement, take<br />
out the filtercontainer with the filter. Then clean the filter by blowing off the dust.<br />
Note: Regular maintenance of your compressor will increase durability and<br />
reliability.<br />
MAINTENANCE TABLE<br />
works daily weekly every every<br />
draining<br />
condensation water<br />
check<br />
oil level<br />
clean<br />
air filter<br />
refresh oil (first time<br />
after <strong>50</strong> hours)<br />
▀<br />
▀<br />
▀<br />
<strong>25</strong>0 hours 1000 hours<br />
▀<br />
22
7.0 POSSIBILIBIES OF FAILURE<br />
1 Compressor does not run at starting pressure:<br />
* blown fuse - renew the fuse<br />
* tank at pressure - discharge<br />
* motor broken - repair/renew<br />
* defective pressure switch - repair/renew<br />
2 Repeating thermal failure:<br />
* blown fuse - renew fuse<br />
* loose wire - repair<br />
* pressure switch does not releave - repair/renew valve<br />
air circuit<br />
* too low voltage - remove extension cable or use heavier<br />
* overloading - reduce loading<br />
3 Compressor keeps blowing off air:<br />
* defective non-return valve - repair/renew<br />
4 Too little air production:<br />
* dirty air filter - clean/renew filter<br />
* defective valves - renew<br />
5 Leaking safety valve:<br />
* pressure too high - set pressure switch<br />
* defective safety valve - renew<br />
8.0 TECHNICAL DETAILS<br />
Type <strong>HL</strong> <strong>275</strong>/<strong>25</strong> <strong>HL</strong> <strong>275</strong>/<strong>50</strong><br />
Order number 36840 36845<br />
Number of cylinders 1 1<br />
Number of stages 1 1<br />
Motorpower 2 Hp/1,5 kW 2 Hp/1,5 kW<br />
Volt 230 V/<strong>50</strong> Hz 230 V/<strong>50</strong> Hz<br />
Air tank <strong>25</strong> litres <strong>50</strong> litres<br />
Oil tank 0,24 litres 0,24 litres<br />
Operating pressure 6 bar 6 bar<br />
Maximum pressure 8 bar 8 bar<br />
Sound pressure level 78 dB(A) 78 dB(A)<br />
Air intake capacity <strong>275</strong> l/min. <strong>275</strong> l/min.<br />
Protected with 16 amp. 16 amp.<br />
Service 30%-60 min. 30%-60 min.<br />
Weight 28 kg 38 kg<br />
Dimensions (lxwxh) 580x<strong>25</strong>5x580 mm 760x330x715 mm<br />
Modelchanges reserved.<br />
All compressors are provided with Euro-Norm (CE-Choice)<br />
23
FRANÇAIS<br />
TABLE DES MATIERES<br />
1.0 Introduction page 23<br />
2.0 Consignes de sécurité page 24<br />
3.0 Installation page 26<br />
3.1 Installations électriques page 26<br />
3.2 Installation de la conduction d'air page 26<br />
4.0 Mise en service page 27<br />
5.0 Commande page 27<br />
6.0 Entretien page 28<br />
7.0 Possibilités de pannes page 29<br />
8.0 Données techniques page 30<br />
Pièces de rechange page 61/62<br />
ATTENTION<br />
Avant la mise en route du compresseur, il est nécessaire de prendre certaines<br />
mesures. A cet effet lisez attentivement cette manuel d’instructions.<br />
1.0 INTRODUCTION<br />
Avec l'achat de votre compresseur Specair vous êtes devenu propriétaire d'un<br />
compresseur extrêmement rentable et fiable. Une utilisation correcte et un<br />
entretien régulier vous permettront de profiter de cet appareil pendant de<br />
nombreuses années. Vous trouverez dans ce livret les instructions nécessaires à<br />
l'usage et à l'entretien de votre compresseur. Lisez-le attentivement et rangez-le à<br />
proximité du compresseur afin de le consulter en cas de nécessité.<br />
Le compresseur a été réalisé pour fournir de l’air comprimé. L’appareil ne peut pas<br />
être utilisé pour produire de l’air destiné à la respiration humaine ou utilisé en<br />
contact direct avec des substances alimentaires. Cet appareil devra être destiné<br />
uniquement à l’usage pour lequel il a été expressément conçu. Toute autre<br />
utilisation doit être considéré comme impropre et donc déraisonnable. Le<br />
constructeur ne peut pas être tenu pour responsable des éventuels dommages<br />
causés par des utilisations impropres, erronées et déraisonnables.<br />
Cet appareil n’est pas adapté pour l’installation à l’extérieur.<br />
Legende (fig. A)<br />
1 Filtre à air (derrière) 8 Manomètre pour pression chaudière<br />
2 Soupape de retenue 9 Tampon<br />
3 Soupape de sûreté 10 Robinet de vidange de l’eau de<br />
condensation<br />
4 L’interrupteur à pression 11 Bouchon de vidange de l’huile<br />
5 Réducteur de pression 12 L’indicateur de niveau d’huile<br />
6 Raccord rapide 13 Bouchon de remplissage d’huile<br />
7 Manomètre de la pression réduite<br />
24
2.0 CONSIGNES DE SECURITE<br />
Attention: respectez toujours ces intructions de sécurité et réfléchissez bien<br />
à ce que vous faites.<br />
• Lors d’emploi de la machine, observez toujours scrupuleusement les<br />
consignes de sécurité fournies.<br />
• L‘opérateur doit avoir au moins 18 ans. Des apprentis doivent avoir au moins<br />
16 ans, ils doivent toutefois toujours travailler sous surveillance sur la<br />
machine.<br />
• Tenez les enfants et d’autres personnes éloignés de votre lieu de travail.<br />
• Soyez prudent lorsque vous utilisez de l’air comprimé. Ne pointez jamais<br />
l’outil en direction de personnes ou d’animaux. N’utilisez pas d’air comprimé<br />
pour nettoyer des vêtements.<br />
• L’air comprimé ne doit pas être inhalé.<br />
• Ne portez ni vêtements amples ni bijoux. Ils pourraient être happés par les<br />
pièces en mouvement. Portez de préférence des lunettes protectrices. Lors<br />
de travaux à l’air libre, il est recommandé de porter des gants en caoutchouc<br />
et des chaussures à semelle antidérapante. Coiffez-vous d’un filet à cheveux<br />
si ces derniers sont longs.<br />
• N’utilisez pas le compresseur dans un environnement humide ou mouillé.<br />
• Placez le compresseur sur un sol suffisamment plat et solide, de façon à ce<br />
que tous les points qui lui sont destinés soient à une portée effective. Afin de<br />
diminuer l'effet d'éventuelles vibrations, la machine peut être placée sur des<br />
amortisseurs de vibrations.<br />
• Cette machine n’est pas apte à utilisation continu, mais a une service de<br />
30% par 60 minutes.<br />
• Veillez à ce que le lieu de travail soit bien éclairé.<br />
• N’utilisez pas la machine à proximité de liquides ou de gaz inflammables.<br />
• N’excédez pas la pression maximale d’opération et utilisez le compresseur<br />
dans une température ambiante entre +5ºC et +40ºC.<br />
• Ne pas démonter ni ponter le fonctionnement des dispositifs de sécurité<br />
prévus sur la machine.<br />
• Les pièces actives de la machine peuvent devenir chaudes pendant<br />
l’opération. Faites refroidir la machine après utilisation.<br />
• Après chaque usage le réservoir doit être évacuée.<br />
• Le courant présente un risque en cas d‘utilisation de lignes de branchement<br />
électrique non-conformes.<br />
• A l’extérieur n’utilisez que des câbles de rallonge homologués avec le<br />
marquage correspondant.<br />
• N’exposez pas les outils électriques à la pluie.<br />
• Le moteur doit toujours être à l’arrêt pour effectuer des travaux de<br />
changement d’outillage, de réglage, de mesure et de nettoyage. Débrancher<br />
le cordon d’alimentation.<br />
<strong>25</strong>
• Ne portez pas l’outil par le câble et ne tirez pas sur celui-ci pour débrancher<br />
la fiche de la prise. Préservez le câble de la chaleur, de l’huile et des arêtes<br />
vives.<br />
• Assurez-vous que la machine est mise hors service et débranchée et<br />
que le réservoir est sans pression<br />
- en cas de non utilisation<br />
- avant de résoudre des problèmes<br />
- avant de faire de l’entretien<br />
- lorsque la machine n’est pas utilisée.<br />
• ATTENTION : les instructions, précautions et avertissements présentés<br />
dans ce manuel ne sauraient traiter toutes les conditions et situations<br />
possibles. Il est de la responsabilité de l’utilisateur qu’il fasse preuve de bon<br />
sens, de prudence et d’attention lors de l’utilisation du compresseur.<br />
• N’autorisez l’usage du compresseur qu’aux seules personnes qui ont pris<br />
connaissance de ce mode d’emploi. L’emploi du compresseur par des<br />
personnes non initiées est dangereux.<br />
Plaques de signalisation de danger<br />
Les plaques qui sont appliquées sur le compresseur font partie de la machine ;<br />
elles ont été appliquées pour des raisons de sécurité et ne doivent être enlevées<br />
ou détériorées sous aucun prétexte.<br />
A Attention: parties chaudes<br />
B Installer à l’abri du gel<br />
C Vidanger régulièrement l’eau de condensation<br />
D Contrôler régulièrement le niveau d’huile<br />
E Attention: parties en rotation<br />
F Des lunettes protectrices<br />
26
3.0 INSTALLATION<br />
Placez le compresseur sur un sol suffisamment plat et solide, de façon à ce que<br />
tous les points qui lui sont destinés soient à une portée effective. Afin de diminuer<br />
l'effet d'éventuelles vibrations, la machine peut être placée sur des amortisseurs<br />
de vibrations.<br />
Le compresseur doit être placé dans un endroit bien ventilé et le moins<br />
poussiéreux possible. Ne placez jamais la machine dans un lieu où l'on peint au<br />
pistolet. Une bonne ventilation est nécessaire à l'échappement d'air froid. Assurezvous<br />
que le robinet de vidange de l'eau de condensation (10) et le bouchon de<br />
vidange de l'huile (11) soient toujours à portée de la main, ainsi que le bouchon de<br />
remplissage du réservoir d’huile (13). Il est recommandé de garder un espace libre<br />
d'environ 30 cm autour de la machine pour la ventilation et l'entretien.<br />
Un apport d'air insuffisant, une température trop élevée et l'encrassement du<br />
filtre à air peuvent diminuer considérablement le rendement du<br />
compresseur.<br />
3.1 INSTALLATIONS ELECTRIQUES<br />
La machine a été munie d'un câblage complet à l'usine. Il vous appartient<br />
cependant d'installer le compresseur sur votre réseau électrique. Cette installation<br />
doit être effectuée sur un groupe indépendant. Assurez-vous que le voltage et<br />
l'ampèremètrage de votre réseau correspond à celui du moteur. A cet effet, le diamètre<br />
des câbles utilisés est également important. Il est conseillé d'utiliser des<br />
câbles d'au moins 2,5 mm ² .<br />
N.B. Lisez les rubriques 3.2 et 4.0 avant de mettre la machine en route.<br />
3.2 INSTALLATION DE LA CONDUCTION D'AIR<br />
Pour relier le compresseur au réseau de conduite d'air, utilisez un tuyau flexible,<br />
afin d'isoler les vibrations de la machine. No 6 est un raccord rapide<br />
Orion/Airpress.<br />
27
4.0 MISE EN SERVICE<br />
1. Assurez-vous que toutes les recommandations faites dans la rubrique "Installation"<br />
aient été prises en compte.<br />
2. En livraison le compresseur généralement n’est pas rempli avec d’huile.<br />
Complétez avec environ 0,24 litres d’huile pour compresseur jusqu’à le<br />
cercle rouge dans l’indicateur de niveau d’huile (12).<br />
3. Montez le filtre à air (1) dans la tête du cylindre (d’abord enlevez le bouchon<br />
synthétique).<br />
4. Montez le bouchon de remplissage d’huile (13) dans le couvercle du carter<br />
(d’abord enlevez le bouchon synthétique).<br />
5. Evitez les rallonges. Si vous ne pouvez pas faire autrement, utilisez un fil ayant<br />
une capacité suffisante, et déroulez-le complètement.<br />
0 - 10 meter: 3 x 1,5 mm 2 et 10 - <strong>25</strong> meter: 3 x 2,5 mm 2<br />
• Mettez le compresseur en route par tirer la commande manuelle de<br />
l'interrupteur à pression manuel (4).<br />
• Le compresseur est prêt à tourner, à moins que la chaudière ne soit encore<br />
sous pression (8).<br />
• Lorsque la machine tourne, éteignez-la seulement par pousser le bouton sur<br />
l'interrupteur à pression automatique (4). La conduite de refoulement est ainsi<br />
désaérée et le compresseur pourra de nouveau démarrer à vide.<br />
• Couper le pressostat avant de retirer la prise de courant.<br />
5.0 COMMANDE<br />
1. Le compresseur automatique s'arrêtera lors d'une pression de 8 bars dans la<br />
chaudière (8). Lorsque de l'air est utilisé et que la pression dans le réservoir<br />
descend jusque'à 6 bars, le compresseur se remet automatiquement en route.<br />
2. La plupart des outils pneumatiques sont calculés pour functionner sous une<br />
pression d'environ 6 bars. Cette pression est même inférieure pour certaines<br />
applications. Le compresseur est muni d'un réducteur de pression (59) afin de<br />
pouvoir obtenir la pression désirée. Ce réducteur peut régler la pression au<br />
couplage (6) indépendamment de la pression à la chaudière.<br />
3. La mise en marche du réducteur de pression s'effectue comme suit: tournez le<br />
bouton afin d'obtenir la pression désirée (à gauche pour une pression inférieur,<br />
à droite pour une pression plus élevée). Vous pouvez lire la pression obtenue<br />
sur la manomètre (7).<br />
4. Deux bouchons de vidange supplémentaires (9) ont été installés sur le<br />
réservoir, afin de pouvoir installer un point de vidange supplémentaire.<br />
28
6.0 ENTRETIEN<br />
Avant de commencer les activités d'entretien de la machine, il est nécessaire<br />
au préalable de couper le courant (veillez à ce qu'il ne puisse être rebranché<br />
par accident) et assurez-vous que le réservoir est sans pression par ouvrir le<br />
robinet de vidange (10).<br />
L'entretien de la machine concerne les points suivants:<br />
1. Au bout des <strong>50</strong> premières heures et après toutes les <strong>25</strong>0 heures de service<br />
l'huile doit être vidangée et remplacée. Dévissez à cet effet le bouchon de<br />
vidange (11) et retirez également le bouchon de remplissage (13). Laissez<br />
l'huile usagée s'écouler dans un récipient. Lorsque l’huile cesse de s’écouler,<br />
revissez le bouchon de vidange (11) et remettez de l’huile propre.<br />
Le juste niveau ‘d’huile se situe sur le cercle rouge dans l’indicateur de<br />
niveau d’huile (12).<br />
Nous recommandons vivement de suivre les normes en vigueur pour le<br />
recyclage des huiles usées !<br />
2. Vidangez régulièrement l'eau de condensation. Du fait du refroidissement de<br />
l'air chaud dans le réservoir à air comprimé, un phénomène de condensation<br />
se produit. L'eau ainsi apparue peut être vidangée à l'aide du robinet de<br />
vidange (10) situé sous le réservoir. Cette vidange s'effectuera le plus<br />
aisément sous pression. L’eau de condensation doit être évacuée dans le<br />
respect des normes locales en vigueur (ne versez pas dans l’égout !).<br />
C’est aussi possible d’installer un séparateur de condensat.<br />
3. Le niveau d'huile doit être contrôlé régulièrement.<br />
Si nécessaire, rajoutez un peu d'huile, réf. 36398 (1/2 l) ou réf. 36380 (2 l). Un<br />
contrôle quotidien peut éviter des incidents graves!<br />
Utiliser de l’huile du même type que celle qui est présente dans la<br />
machine ; ne pas mélanger des huiles de type différent.<br />
4. L'élément filtre à air (1) doit être nettoyé régulièrement par soufflage. Retirez à<br />
cet effet le corps en plastique du filtre et sortez l'élément. La poussière peut<br />
être éliminée à l'aide d'un pistolet à air comprimé. En cas d'encrassement<br />
persistant, dû par exemple au brouillard de peinture, il est nécessaire de<br />
changer le filtre. La fréquence des nettoyages dépend du degré de pollution de<br />
l'air dans l'environnement du compresseur. Un air propre est donc<br />
extrêmement important.<br />
N.B. Un entretien régulier favorise un bon rendement et garantit une longue<br />
durée de votre machine. Tenez-en compte!<br />
29
TABLEAU D'ENTRETIEN<br />
activités tous chaque toutes les toutes les<br />
vidanger l’eau de<br />
condensation<br />
contrôler le niveau<br />
d’huile<br />
nettoyer le filtre<br />
à air<br />
changer l’huile<br />
(au bout des <strong>50</strong><br />
premières heures)<br />
les jours semaine <strong>25</strong>0 heures 1000 hours<br />
▀<br />
▀<br />
▀<br />
▀<br />
7.0 POSSIBILITES DE PANNES<br />
1 Le compresseur ne réagit pas lors de l’actionnement de<br />
l’interupteur à pression:<br />
* fusible de secteur hors service - à changer<br />
* réservoir sous pression - décharger<br />
* panne de moteur - réparer/remplacer<br />
* interrupteur à pression défectueux - réparer/remplacer<br />
2 Arrêts répétés du dispositif thermique du compresseur :<br />
* panne de l’une des phases - changer le fusible de secteur<br />
* fil lâche - rechercher et replacer<br />
* interrupteur à pression ne décharge - réparer/remplacer la valve<br />
pas la conduite<br />
magnétique<br />
* sous-tension - retirer la rallonge/la remplacer par<br />
une plus lourde<br />
* surcharge - réduire charge<br />
3 Continue d’évacuer:<br />
* soupape de retenue défectueuse - réparer/remplacer<br />
4 Apport d’air insuffisant:<br />
* filtre à air défectueux - nettoyer/changer<br />
* soupapes défectueuses - remplacer<br />
5 Fuites de la soupape de sûreté :<br />
* pression trop élevée - régler l’interrupteur à pression<br />
* soupape de sûreté défectueuse - remplacer<br />
30
8.0 DONNEES TECHNIQUES<br />
Type <strong>HL</strong> <strong>275</strong>/<strong>25</strong> <strong>HL</strong> <strong>275</strong>/<strong>50</strong><br />
Référence 36840 36845<br />
Nombre de cylindres 1 1<br />
Nombre d’étages 1 1<br />
Puissance de moteur 2 CV/1,5 kW 2 CV/1,5 kW<br />
Type de courant 230 V/<strong>50</strong> Hz 230 V/<strong>50</strong> Hz<br />
Cuve <strong>25</strong> litres <strong>50</strong> litres<br />
Contenu du carter 0,24 litres 0,24 litres<br />
Pression de service 6 bar 6 bar<br />
Pression maximale 8 bar 8 bar<br />
Niveau sonore 78 dB(A) 78 dB(A)<br />
Débit <strong>275</strong> l/min. <strong>275</strong> l/min.<br />
Protégé par 16 amp. 16 amp.<br />
Service 30%-60 min. 30%-60 min.<br />
Poids 28 kg 38 kg<br />
Dimensions (lxlxh) 580x<strong>25</strong>5x580 mm 760x330x715 mm<br />
Sous reserve de modifications.<br />
Tous les compresseurs ont l'Euro-Norme (Poinçon CE)<br />
31
ESPAGÑOL<br />
ÍNDICE<br />
1.0 Prólogo página 31<br />
2.0 Normas de seguridad página 32<br />
3.0 Colocación página 34<br />
3.1 Conexiones eléctricas página 34<br />
3.2 Conexiones de aire página 34<br />
4.0 Puesta en marcha página 35<br />
5.0 Manejo página 35<br />
6.0 Mantenimiento página 36<br />
7.0 Averías página 37<br />
8.0 Datos técnicos página 38<br />
Piezas página 61/62<br />
ATENCIÓN<br />
Antes de poner en marcha el compresor se deben llevar a cabo una serie de<br />
pasos imprescindibles Por ello, lea previamente con atención las instrucciones<br />
de empleo.<br />
1.0 PRÓLOGO<br />
Con la compra de la instalación Specair se ha hecho usted propietario de una<br />
instalación de compresión de alto nivel de prestaciones y de alta fiabilidad. Si lo<br />
utiliza y mantiene correctamente podrá conservar esta máquina durante muchos<br />
años. En este manual de instrucciones se exponen las prescripciones de uso y<br />
mantenimiento. Léala atentamente y consérvelo junto a su compresor para su<br />
consulta en caso necesario.<br />
El compresor sirve para el aporte de aire comprimido. El aire comprimido no es<br />
respirable y no se debe poner en contacto directo con alimentos. La máquina sólo<br />
se puede utilizar para el propósito para el que ha sido fabricada; cualquier otra<br />
aplicación será incorrecta. El fabricante no será responsable de cualquier daño<br />
que se cause a personas o bienes por negligencia o por no cumplir las<br />
prescripciones correspondientes durante el uso o el mantenimiento de la máquina.<br />
Esta máquina no es apta para su uso en exteriores.<br />
Leyenda (fig. A)<br />
1 Filtro de aire (detrás de) 8 Manómetro de presion del tanque<br />
2 Válvula de retención 9 Tapón<br />
3 Válvula de seguridad 10 Grifo de vaciado agua condensada<br />
4 Interruptor de botón 11 Clavija de vaciado<br />
5 Válvula reguladora de presión 12 Lector de nivel de aceite<br />
6 Acceso directo 13 Clavija de aceite<br />
7 Manómetro de presion reductora<br />
32
2.0 NORMAS DE SEGURIDAD<br />
Atendiendo a su propia seguridad, lea atentamente este manual de uso<br />
antes de usar la máquina.<br />
• Al usar la máquina, observe siempre las normas de seguridad y guarde este<br />
manual con el compresor.<br />
• Mantenga a niños y a personas no autorizadas lejos durante el<br />
funcionamiento. Permanezca lejos de partes moviles si el compresor está<br />
funcionando.<br />
• Tome precauciones cuando use aire comprimido. Nunca apunte el flujo del aire<br />
hacia personas ni animales. No utilice el aire comprimido para limpiar la ropa.<br />
• No es adecuado inhalar aire comprimido.<br />
• No vista ropa floja ni lleve joyas. Podrían quedar enganchadas en las partes<br />
móviles. Cuando trabaje al aire libre, use guantes de goma y zapatos de suela<br />
antideslizante. Póngase une redecilla para el pelo si lo tiene largo. Utilice gafas<br />
de protección.<br />
• No exponga las herramientas eléctricas a la lluvia. No utilice herramientas<br />
eléctricas en un ambiente húmedo o mojade.<br />
• Coloque el compresor sobre una superficie firme y lisa, de modo que se apoye<br />
en todos los puntos de apoyo de la máquina. Para evitar vibraciones se podrá<br />
colocar la máquina sobre amortiguadores.<br />
• El compresor no sirve para operación continuo, servicio 30% por hora.<br />
• Procure que el lugar de trabajo esté bien iluminado.<br />
• No utilice herramientas eléctricas cerca de líquidos o gases inflamables.<br />
• No sobrepase la presión máxima de trabajo y utilice la máquina con una<br />
temperatura ambiente entre +5ºC y +40ºC.<br />
• No realice ajuste alguno a la máquina a consecuencia del cual se pueda<br />
sobrepasar la presión de aire.<br />
• Durante su funcionamiento, las piezas de trabajo de la máquina pueden llegar<br />
a calentarse. Deje enfriar la máquina después de haberla utilizado.<br />
• Después de usar la máquina, es necesario ventilar el tanque y drenar la<br />
humedad que se haya podido formar en el tanque.<br />
• Los enchufes deben estar conforme a las normas de seguridad. De no ser<br />
así,exija que los examine un electricista capacitado para tal acción. La clavija<br />
de su base de enchufe tie absolutamente que ser conectada a la puesta a<br />
tierra,su sistema eléctrico teniendo que ir provisto con disyuntor automático<br />
magnetotérmico (protección personal).<br />
• En el exterior, utilice solamente cables de alargue homologados e identificados<br />
como tales.<br />
• Mueva la máquina levantándola por el mango únicamente. No tire nunca de la<br />
manguera de aire acoplada para mover la máquina. Proteja el cable del calor,<br />
del aceite y de las aristas.<br />
• Nunca habrá de sacarse la clavija tirando por el cable eléctrico.<br />
• Asegúrese de apagar la máquina, de desenchufarla y de que el tanque esté sin<br />
presión antes de proceder a realizar pequeñas reparaciones u operaciones de<br />
33
servicio o cuando la máquina no esté en uso.<br />
• ADVERTENCIA: las advertencia, normas de seguridad y consejos de este<br />
manual no pueden abarcar odas las posibles circunstancias y situaciones<br />
posibles. El usuario tiene que comprender que el sentido común y la<br />
prudencia no van incorporados con el producto sino que tienen que ser<br />
puestos por el usuario.<br />
• Deje utilizar este compresor sólo a las personas que han leido estas<br />
instrucciones y están enteradas de su manejo. Un uso poco juicioso puede<br />
ser peligroso.<br />
Las placas de peligro<br />
Las places aplicadas en la compresor forman parte de la máquina, han sido<br />
aplicades por motivos de seguridad y por ningoen motivo tienen que ser quitadas<br />
o deterioradas.<br />
A Tenga cuidado con las piezas calientes<br />
B Instalacion a prueba de heladas<br />
C Elimine regularmente el agua de condensación<br />
D Controlare regularmente el nivel de aceite<br />
E Esté atento a las piezas giratorias<br />
F Adopte medidas de protection auditiva<br />
34
3.0 COLOCACIÓN<br />
Coloque el compresor sobre una superficie firme y lisa, de modo que se apoye en<br />
todos los puntos de apoyo de la máquina. Para evitar vibraciones se podrá<br />
colocar la máquina sobre amortiguadores.<br />
El compresor se deberá colocar en un lugar bien ventilado y libre de polvo en la<br />
medida de lo posible. Nunca coloque la máquina en un lugar donde se esté<br />
pintando con pistola. Para la entrega de aire fresco es necesaria una buena<br />
ventilación.<br />
Haga todo lo posible para que el grifo de extracción de agua de condensación<br />
(10), la clavija de extracción de aceite (11) y la clavija de rellenado de aceite (13)<br />
se alcancen fácilmente. Se recomienda mantener un espacio libre de 30<br />
centímetros alrededor de la máquina para facilitar su ventilación y los trabajos de<br />
mantenimiento.<br />
En general, un aporte insuficiente de aire, las temperaturas altas y la<br />
suciedad del filtro de aire disminuirán notablemente el rendimiento del<br />
compresor.<br />
3.1 CONEXIONES ELÉCTRICAS<br />
La máquina sale de fábrica con todo el cableado necesario. Sin embargo, el<br />
compresor se deberá conectar a su instalación eléctrica. Lo cual se deberá hacer<br />
en un grupo aparte. Compruebe que el amperaje y el voltaje de su instalación<br />
eléctrica coinciden con los del motor del compresor. A este respecto también es<br />
importante el diámetro de los cables utilizados. Se recomienda utilizar cables de<br />
2,5 mm 2 como mínimo.<br />
Nota: Antes de conectar la máquina, lea atentamente los capítulos 3.2 y 4.0.<br />
3.2 CONEXIONES DE AIRE<br />
Para la conexión del compresor a la red de ventilación utilice un tubo flexible para<br />
aislar las vibraciones de la máquina. La conexión nº. 6 es de tipo Orión/Airpress.<br />
35
4.0 PUESTA EN MARCHA<br />
1. Compruebe que se han cumplido las indicaciones del capítulo “Colocación”.<br />
2. El compresor no suele entregarse con aceite. Llene el depósito de aceite<br />
(± 0,24 l) hasta el círculo rojo del marcador del nivel de aceite (12).<br />
6. Monte el filtro de aire (1) en la cabeza del cilindro (para ello, elimine antes la<br />
clavija de plástico).<br />
7. Monte la clavija de aceite (13) sobre la tapa del cárter (deberá haber quitado<br />
previamente la clavija de plástico).<br />
8. Evite el uso de cables alargadores. Si no se puede evitar su uso, utilice cables<br />
de capacidad suficiente y desenrolle el carrete totalmente. Tabla de cables<br />
alargadores: 0 - 10 metros: 3 x 1,5 mm 2 y 10 - <strong>25</strong> metros: 3 x 2,5 mm 2<br />
• Conecte el compresor con el mando manual del conmutador de presión (4)<br />
(tirar).<br />
• En ese momento, el compresor empezará a funcionar, salvo que la caldera<br />
aún esté bajo presión (véase el manómetro nº 8).<br />
• Durante el funcionamiento la máquina sólo se podrá apagar con el botón<br />
situado en el conmutador de presión automático (4) (oprimir). De esa forma, se<br />
purga la conducción de aire a presión y el compresor puede funcionar de<br />
nuevo sin cargas.<br />
• Cortar el interruptor de puesta en marcha antes de desconectar el enchufe<br />
de la toma de corriente.<br />
5.0 MANEJO<br />
1. El compresor de funcionamiento automático se parará al alcanzar la caldera<br />
(8) una presión de 8 bares. Cuando se utilice aire de nuevo y el aire del tanque<br />
baje hasta 6 bares, el compresor se pondrá de nuevo en marcha.<br />
2. La mayoría de las máquinas de aire comprimido están diseñadas para<br />
soportar una presión de trabajo de 6 bares aproximadamente. Para<br />
determinadas aplicaciones esa presión puede ser aún más baja. Para poder<br />
ajustar la presión adecuada, el compresor está provisto de una válvula<br />
reductora de presión (5). Con esa válvula se puede ajustar la presión de la<br />
conexión (6) independientemente de la presión de la caldera.<br />
3. El ajuste de la válvula reductora de presión se hace del modo siguiente: gire el<br />
botón hasta llegar a la presión correcta (hacia la izquierda se baja la presión y<br />
hacia la derecha se sube). La presión seleccionada se puede leer en el<br />
manómetro (7).<br />
4. En el tanque hay dos clavijas adicionales (9) que se pueden utilizar para hacer<br />
un punto de vaciado extra.<br />
36
6.0 MANTENIMIENTO<br />
Antes de empezar con las tareas de mantenimiento de la máquina se deberá<br />
desconectar de la red eléctrica (compruebe que no se pueda volver a<br />
conectar por accidente) y asegúrese que el tanque esté sin presión por abrir<br />
el grifo de vaciado (10).<br />
El mantenimiento de la máquina abarca los siguientes puntos:<br />
1. Después de las primeras <strong>50</strong> horas de funcionamiento y, a continuación, cada<br />
<strong>25</strong>0 horas de funcionamiento, se deberá cambiar el aceite. Para ello, gire la<br />
clavija de vaciado (11) y quite el tapón de llenado (13). Saque el aceite usado y<br />
recójalo en un recipiente. Cuando ya no salga más aceite, vuelva a colocar la<br />
clavija de vaciado (11) y proceda al rellenado de aceite.<br />
El nivel de aceite correcto lo marca el círculo rojo del lector de nivel de<br />
aceite (12). ¡El aceite usado se deberá eliminar según las prescripciones<br />
al respecto!<br />
2. Elimine regularmente el agua de condensación. La humedad de condensación<br />
se produce por el enfriamiento del aire caliente dentro del tanque. La humedad<br />
de condensación se puede eliminar con el grifo de vaciado (10) situado en la<br />
parte inferior del tanque. El mejor momento para proceder al vaciado es<br />
cuando la máquina está a presión.<br />
¡El agua de condensación se deberá eliminar según las prescripciones al<br />
respecto (por tanto, no en la alcantarilla)! También pede colocar un<br />
limpiador de humedad de condensación.<br />
3. Se deberá controlar regularmente el nivel de aceite. Cuando sea necesario,<br />
rellene el aceite del compresor, nº de pedido 36398 (1/2 l) o nº de pedido.<br />
36380 (2 l). ¡El control diario de la máquina puede evitar muchas<br />
incomodidades! Utilice siempre el mismo aceite; ¡nunca mezcle diferentes<br />
aceites minerales!<br />
4. El filtro de aire (1) se deberá limpiar regularmente o se deberá sustituir por uno<br />
nuevo. Para ello, saque la carcasa de plástico y extraiga el filtro. El polvo del<br />
filtro se puede eliminar con una pistola de aire. La suciedad resistente, tal<br />
como la pintura pulverizada obligará a la sustitución del filtro. La frecuencia de<br />
la limpieza dependerá del nivel de suciedad del aire donde se encuentre el<br />
compresor. Por ello, es de gran importancia que el aire esté limpio.<br />
Nota: ¡Tenga en cuenta que un mantenimiento regular redundará en<br />
beneficio del rendimiento y de la vida útil de su máquina!<br />
37
TABLA DE MANTENIMIENTO<br />
Tareas diarias semanales cada cada<br />
agua de condensación<br />
vaciado<br />
controlar<br />
nivel de aceite<br />
limpiar<br />
filtro de aire<br />
renovar el aceite<br />
(La 1ª vez, después de <strong>50</strong><br />
horas de funcionamiento)<br />
▀<br />
▀<br />
▀<br />
<strong>25</strong>0 horas 1000 horas<br />
▀<br />
7.0 AVERÍAS<br />
1 El compresor no responde cuando se activa el conmutador de presión:<br />
* fusible averiado - cambiar<br />
* el tanque está a presión - descargar presión<br />
* motor averiado - repararlo o cambiarlo<br />
* el conmutador de presión está averiado - repararlo o cambiarlo<br />
2 El compresor pierde temperatura constantemente:<br />
* la fase no funciona - cambiar el fusible<br />
* el cable está suelto - comprobar y sujetar el cable<br />
* el conmutador de presión no descarga - reparar/cambiar la válvula de purga<br />
la presión de las conducciones<br />
* baja tensión - eliminar los cables alargadores<br />
* sobrecarga - reducir la carga<br />
3 El compresor no para de soltar vapor:<br />
* la válvula de retorno está averiada - repararlo o cambiarlo<br />
4 Poca aportación de aire:<br />
* filtro de aire sucio - limpiarlo o cambiarlo<br />
* Válvulas averiadas - cambiar<br />
5 La válvula de seguridad tiene fugas:<br />
* presión demasiado alta - ajustar el conmutador de presión<br />
* válvula de seguridad averiada - cambiar<br />
38
8.0 DATOS TÉCNICOS<br />
Modelo <strong>HL</strong> <strong>275</strong>/<strong>25</strong> <strong>HL</strong> <strong>275</strong>/<strong>50</strong><br />
Número de pedido 36840 36845<br />
Número de cilindros 1 1<br />
Número de escaleras 1 1<br />
Potencia del motor 2 CV/1,5 kW 2 CV/1,5 kW<br />
Voltaje 230 V/<strong>50</strong> Hz 230 V/<strong>50</strong> Hz<br />
Capacidad de la caldera <strong>25</strong> ltrs <strong>50</strong> ltrs<br />
Capacidad de aceite 0,24 ltrs 0,24 ltrs<br />
Presión de conexión 6 bares 6 bares<br />
Presión máxima 8 bares 8 bares<br />
Nivel de sonido 78 dB(A) 78 dB(A)<br />
Capacidad de aspiración <strong>275</strong> ltr./min. <strong>275</strong> ltr./min.<br />
Seguro fusible 16 amp. 16 amp.<br />
Servicio 30%/hora 30%/hora<br />
Peso 28 kg 38 kg<br />
Medidas (hxaxp) 580x<strong>25</strong>5x580 mm 760x330x715 mm<br />
Queda reservado el derecho de introducir modificaciones. Todos los<br />
compresores tienen el marchamo Euronorma (Marchamo CE).<br />
39
POLSKI<br />
„Tłumaczenie instrukcji oryginalnej”<br />
Instrukcja obsługi<br />
Rys. A<br />
Legenda (Rys. A)<br />
1 filtr powietrza (z tyłu). 8 wskaźnik ciśnienia<br />
atmosferycznego<br />
2 zawór zwrotny 9 zaślepka<br />
3 zawór bezpieczeństwa 10. kurek spustowy<br />
4 przełącznik regulujący ciśnienie 11. kurek spustowy oleju<br />
5 zawór redukcyjny 12. wskaźnik oleju<br />
6 szybkozłącze 13. korek zbiornika oleju<br />
7 wskaźnik ciśnienia<br />
zredukowanego<br />
40
SPIS TREŚCI<br />
1.0 Informacje wstępne str. 40<br />
2.0 Informacje dotyczące bezpieczeństwa str. 41<br />
3.0 Ustawienie i lokalizacja urządzenia str. 44<br />
3.1 Podłączenie elektryczne str. 44<br />
3.2 Podłączenie powietrza str. 44<br />
4.0 Pierwsze uruchomienie urządzenia str. 45<br />
5.0 Obsługa urządzenia str. 45<br />
6.0 Konserwacja i utrzymanie str. 46<br />
7.0 Rozwiązywanie problemów str. 47<br />
8.0 Szczegółowe dane techniczne str. 48<br />
8.1 Części zamienne str. 49-<strong>50</strong><br />
9.0 Karta gwarancyjna str. 53<br />
Instrukcja zbiornika str. 56<br />
Instrukcja zaworu bezpieczeństwa str. 57<br />
Deklaracja zgodności CE<br />
okladka tyl<br />
UWAGA<br />
W celu prawidłowego korzystania z kompresora należy przestrzegać kilku<br />
zasad. Informacje przedstawione w poniższych punktach pozwolą Państwu stać<br />
się zadowolonymi użytkownikami tego urządzenia.<br />
1.0 INFORMACJE WSTĘPNE<br />
Dzięki zakupowi kompresora Specair, stali się Państwo właścicielami<br />
urządzenia charakteryzującego się wysoką wydajnością i wysokim poziomem<br />
niezawodności. Odpowiedni sposób korzystania z urządzenia oraz<br />
przeprowadzanie regularnej konserwacji pozwoli przedłużyć żywotność<br />
urządzenia.<br />
Niniejsza instrukcja zawiera informacje dot. obsługi i konserwacji urządzenia.<br />
Proszę przeczytać je dokładnie i zachować, jako przewodnik, zawierający<br />
informacje dotyczące zakupionego przez Państwa urządzenia.<br />
<strong>Kompresor</strong> został zaprojektowany w celu dostarczania sprężonego powietrza.<br />
W szczególności, urządzenie nie może być wykorzystywane do wytwarzania<br />
powietrza, które będzie wdychane przez ludzi lub znajdzie się w bezpośrednim<br />
kontakcie z artykułami spożywczymi. Urządzenie musi być używane wyłącznie<br />
do celów, dla których zostało odpowiednio zaprojektowane. Każde inne<br />
41
wykorzystanie urządzenia będzie uznane za nieprawidłowe i tym samym<br />
nierozsądne. Producent urządzenia nie ponosi odpowiedzialności za wszelkie<br />
szkody, które powstały na skutek nieodpowiedniego, niewłaściwego lub<br />
lekkomyślnego korzystania z urządzenia. Nie nadaje się ono również do<br />
instalacji na zewnątrz.<br />
2.0 INFORMACJE DOTYCZĄCE BEZPIECZEŃSTWA<br />
Ważne: przed rozpoczęciem korzystania z urządzenia<br />
należy przeczytać<br />
i przestrzegać poniższych informacji dotyczących<br />
bezpieczeństwa.<br />
• Nikomu nie wolno pozwolić używać kompresora przed zapoznaniem się z<br />
instrukcją obsługi i udzieleniem informacji odnośnie przepisów, których<br />
należy przestrzegać w celu umożliwienia prawidłowego i bezpiecznego<br />
korzystania z urządzenia.<br />
• Urządzenie musi być obsługiwane wyłącznie przez osoby dorosłe.<br />
Używanie kompresora przez uczniów, będących w wieku poniżej 18 lat,<br />
musi przebiegać pod nadzorem osoby dorosłej, upoważnionej do obsługi<br />
tego urządzenia.<br />
• Dzieci i osoby odwiedzające powinny znajdować się z dala od miejsca<br />
pracy.<br />
• Należy zachować ostrożność przy korzystaniu ze sprężonego powietrza.<br />
Nigdy nie kierować strumienia powietrza na ludzi lub zwierzęta. Nie<br />
używać sprężonego powietrza do czyszczenia odzieży.<br />
• Sprężone powietrze nie nadaje się do wdychania.<br />
• Nie nosić luźnej odzieży lub krawatów, które mogą zaplątać się w części<br />
ruchome urządzenia. Najlepiej ubierać gogle ochronne, bezpoślizgowe<br />
obuwie oraz zabezpieczające nakrycie głowy, okrywające długie włosy.<br />
• Urządzenia można używać na zewnątrz jedynie w suchym, dobrze<br />
wentylowanym otoczeniu i nie można wystawiać go na deszcz.<br />
• <strong>Kompresor</strong> powinien zostać ustawiony na podłożu w taki sposób, aby<br />
urządzenie wspierało się na wszystkich punktach, zaprojektowanych do<br />
dźwigania jego ciężaru. Należy również zadbać o umieszczenie maszyny<br />
w pozycji poziomej.<br />
• Maszyna nie jest przystosowana do ciągłej, nieprzerwanej pracy, powinna<br />
działać przez 30% czasu na każde 60 minut.<br />
• Należy utrzymywać miejsce pracy w czystości i zadbać o dobre<br />
oświetlenie<br />
42
• Nie używać urządzenia w miejscach, gdzie opary farby, rozpuszczalniki<br />
lub łatwopalne ciecze mogą stanowić potencjalne zagrożenie.<br />
• Nie przekraczać maksymalnego ciśnienia roboczego i używać maszyny<br />
wyłącznie<br />
w temperaturze otoczenia, mieszczącej się w granicach od +5°C do<br />
+40°C.<br />
• W żadnym wypadku nie próbować manipulować przy elementach<br />
zabezpieczających łuparek do drewna, ani nie obsługiwać maszyny bez<br />
takich zabezpieczeń.<br />
• Części robocze urządzenia mogą stać się gorące w trakcie pracy. Po<br />
użyciu należy pozostawić urządzenie aby ostygło.<br />
• Po każdym użyciu, ze zbiornika musi zostać spuszczone powietrze, a<br />
wilgoć<br />
zgromadzona<br />
w zbiorniku musi zostać odprowadzona. Nieodprowadzona woda może<br />
powodować powstawanie wycieków, co może stwarzać zagrożenie.<br />
• Proszę sprawdzić, czy obwód elektryczny jest odpowiednio<br />
zabezpieczony i czy odpowiada mocy, napięciu i częstotliwości silnika.<br />
Proszę sprawdzić, czy instalacja posiada odpowiednie uziemienie i czy<br />
obwód jest zabezpieczony wyłącznikiem różnicowym.<br />
• Używać kabli o odpowiednim przekroju i unikać korzystania z luźnych lub<br />
nieodpowiednio zaizolowanych połączeń.<br />
• Nigdy nie otwierać obudowy guzika przyciskowego na silniku. Jeśli będzie<br />
to konieczne, proszę skorzystać z pomocy wykwalifikowanego elektryka.<br />
• Proszę upewnić się, że maszyna ani kable nigdy nie mają kontaktu z<br />
wodą.<br />
• Ostrożnie obchodzić się z kablem zasilającym. Nie próbować przesuwać<br />
maszyny poprzez ciągnięcie za kabel zasilający. Nie szarpać za kabel w<br />
celu wyłączenia urządzenia z gniazdka. Trzymać kabel z dala od źródła<br />
nadmiernego ciepła, oleju i ostrych przedmiotów.<br />
• Nigdy nie pozostawiać maszyny bez dozoru przy włączonym zasilaniu.<br />
Należy też odłączyć kabel zasilający, jeśli:<br />
- odchodzimy od maszyny, nawet na krótki czas.<br />
- maszyna nie pracuje<br />
- przeprowadzamy prace konserwacyjne<br />
- zmieniamy urządzenia dodatkowe lub przyłącza, lub też przesuwamy<br />
maszynę w inne miejsce<br />
• OSTRZEŻENIE: ostrzeżenia, środki ostrożności, instrukcje i zalecenia<br />
przedstawione w tej instrukcji obsługi nie wyczerpują wszystkich<br />
możliwych sytuacji, jakie mogą zdarzyć się<br />
w trakcie pracy z urządzeniem. Osoba obsługująca kompresor musi<br />
43
zdawać sobie sprawę, że zdrowy rozsądek i środki ostrożności są<br />
czynnikami, w które nie da się wyposażyć urządzenia, a które musi<br />
posiadać operator takiej maszyny.<br />
• Urządzenia powinny używać jedynie osoby, które zapoznały się z<br />
informacjami przedstawionymi w niniejszej instrukcji obsługi i wiedzą, jak<br />
obsługiwać kompresor. Lekkomyślne korzystanie z urządzenia może<br />
stwarzać zagrożenie.<br />
TABLICZKI OSTRZEGAWCZE<br />
Tabliczki ostrzegawcze umieszczone na kompresorze stanowią część tego<br />
urządzenia; zastosowano je ze względów bezpieczeństwa i nie wolno ich<br />
usuwać, ani niszczyć z jakichkolwiek powodów.<br />
A Uwaga: gorące elementy<br />
B Instalacja mrozoodporna<br />
C Regularnie usuwać wodę kondensacyjną<br />
D Regularnie sprawdzać poziom oleju<br />
E Uwaga na części ruchome<br />
F Proszę chronić słuch<br />
44
3.0 USTAWIENIE I LOKALIZACJA URZĄDZENIA<br />
<strong>Kompresor</strong> powinien zostać ustawiony na podłożu w taki sposób, aby opierał się<br />
na wszystkich punktach, zaprojektowanych do dźwigania jego ciężaru. Należy<br />
również zadbać o ustawienie urządzenia w pozycji poziomej. Do silnika powinna<br />
dostawać się odpowiednio duża ilość powietrza chłodzącego, dlatego też nigdy<br />
nie należy zakrywać otworów wentylacyjnych.<br />
<strong>Kompresor</strong> należy umieścić w miejscu wolnym od pyłu i kurzu. Nigdy nie<br />
stawiać kompresora<br />
w pomieszczeniu, w którym przeprowadzane będzie malowanie natryskowe.<br />
Rozpylona farba zatka filtr powietrza i osadzi się na kompresorze.<br />
Proszę pamiętać o tym, aby umożliwić dostęp do kurka spustowego służącego<br />
do odprowadzania zgromadzonej wody kondensacyjnej (10), kurka spustowego<br />
zbiornika oleju (11) i korka zbiornika oleju (13). Zaleca się pozostawienie ok.<br />
30cm wolnej przestrzeni, umożliwiającej wentylację<br />
i przeprowadzenie prac związanych z konserwacją urządzenia.<br />
Uwaga: Niedostateczne doprowadzenie powietrza, zbyt wysoka<br />
temperatura lub zanieczyszczenie filtra powietrza znacząco obniżają<br />
wydajność kompresora.<br />
3.1 PODŁĄCZENIE ELEKTRYCZNE<br />
Urządzenie wyposażone jest fabrycznie w pełny zestaw kabli. Urządzenie<br />
należy następnie podłączyć do sieci elektrycznej. Proszę podłączyć maszynę do<br />
oddzielnej grupy. Upewnić się, że napięcie<br />
i wartość prądu w amperach odpowiadają wymaganiom silnika. Proszę używać<br />
wyłącznie<br />
kabli<br />
o właściwej średnicy. Fabryka zaleca zastosowanie kabli o grubości<br />
przynajmniej 2.5 qmm.<br />
Przed pierwszym użyciem, proszę przeczytać informacje zawarte w<br />
rozdziałach 3.2 i 4.0<br />
3.2 PODŁĄCZENIE POWIETRZA<br />
W celu podłączenia kompresora do obiegu powietrza, najlepiej użyć<br />
elastycznego węża, aby zminimalizować wpływ wibracji maszyny. Złączka nr 6<br />
to złączka typu Orion/Airpress..<br />
45
4.0 PIERWSZE URUCHOMIENIE URZĄDZENIA<br />
1. Proszę upewnić się, że wykonano powyższe instrukcje.<br />
2. W momencie dostawy zbiornik oleju w kompresorze przeważnie nie<br />
zawiera oleju. Proszę wlać ok. 024 litra oleju kompresorowego, aż do<br />
poziomu czerwonego kółeczka, zaznaczonego na wskaźniku oleju (12).<br />
3. Proszę zainstalować filtr powietrzna (1) na głowicy cylindra (proszę najpierw<br />
wyjąć zatyczkę)<br />
4. Założyć nakrywkę wlewu oleju (13), na pokrywie skrzyni korbowej (proszę<br />
najpierw usunąć zatyczkę).<br />
5. Proszę unikać stosowania przedłużaczy. Jeśli korzystamy z nich, proszę<br />
rozwinąć je do końca i używać kabli o wystarczającej pojemności. Zestawienie<br />
parametrów przedłużaczy:<br />
0-10 metrów: 3x1,5mm 2 oraz 10-<strong>25</strong> metrów: 3x2,5 mm 2 .<br />
• Włączyć kompresor przez pociągnięcie przełącznika ciśnienia (4).<br />
• <strong>Kompresor</strong> będzie teraz działać, dopóki odbiornik powietrza nie będzie<br />
znajdować się pod ciśnieniem (wskaźnik ciśnienia 8).<br />
• Wyłączyć maszynę, w trakcie pracy, przez naciśnięcie guzika na<br />
automatycznym przełączniku ciśnieniowym (4); z obwodu zostanie<br />
spuszczone sprężone powietrze i kompresor może wznowić pracę z<br />
pustym zbiornikiem.<br />
5.0 OBSŁUGA<br />
1.Pracujący kompresor zatrzyma się automatycznie przy ciśnieniu 8 barów (8).<br />
Po ponownym użyciu powietrza, kiedy ciśnienie spadnie do 6 barów, kompresor<br />
wznowi pracę.<br />
2. Wiele urządzeń pneumatycznych pracuje pod ciśnieniem ok. 6 barów. Dla<br />
niektórych zastosowań, wykorzystuje się jeszcze niższe ciśnienie. Aby móc<br />
ustawić odpowiednie ciśnienie, kompresor dostarczany jest wraz z zaworem<br />
redukcyjnym (5). Zawór ten umożliwia ustawienie ciśnienia odbiornika powietrza<br />
(oczywiście, nigdy wyższe niż ciśnienie w odbiorniku powietrza).<br />
3. Stan zaworu redukcyjnego należy ustalić w następujący sposób: ustawić<br />
przełącznik w celu wyboru właściwego ciśnienia (w lewo, w celu obniżenia<br />
ciśnienia, w prawo w celu zwiększenia ciśnienia). Wartość ustawionego<br />
ciśnienia jest widoczna na wskaźniku (7).<br />
4. Zbiornik posiada dwa dodatkowe wyjścia (9), dzięki którym można korzystać<br />
z dodatkowych przyłączy.<br />
46
6.0 UTRZYMANIE I KONSERWACJA<br />
Przed przystąpieniem do jakichkolwiek prac związanych z konserwacją<br />
urządzenia, obowiązkowo należy wcześniej zatrzymać maszynę, odłączyć<br />
ją od źródła zasilania i upewnić się poprzez otwarcie kurka spustowego<br />
(10), że w zbiorniku nie znajduje się sprężone powietrze.<br />
1. Po pierwszych <strong>50</strong> godzinach pracy urządzenia, a później po każdych<br />
następnych <strong>25</strong>0 godzinach pracy urządzenia należy zmienić olej. W tym celu,<br />
proszę wyjąć korek spustowy zbiornika oleju (11)<br />
i zdjąć nakrywkę wlewu (13). Zlać olej. Po tym, jak olej przestanie wypływać,<br />
założyć korek<br />
i ponownie napełnić zbiornik oleju (poprzez nakrywkę wlewu), aż do<br />
odpowiedniego poziomu oleju.<br />
Prawidłowy poziom oleju zaznaczony jest czerwonym kółeczkiem na<br />
wskaźniku poziomu oleju (12).<br />
Zawsze należy przestrzegać obowiązujących przepisów dot. usuwania<br />
starego oleju!<br />
2. Należy regularnie wypuszczać zbierającą się wodę kondensacyjną. Kurek<br />
spustowy znajduje się na spodzie zbiornika (10). Najłatwiej wypuszcza się wodę<br />
kiedy w baku znajduje się sprężone powietrze. Niektóre urządzenia posiadają<br />
chłodnice końcowe, wyposażone w korek spustowy. Z takich urządzeń również<br />
należy regularnie wypuszczać zbierającą się wodę kondensacyjną.<br />
Skropliny należy usunąć zgodnie z obowiązującymi w danym miejscu<br />
przepisami (nie wylewać do ścieków!). Zamiast takiego rozwiązania,<br />
można skorzystać z oddzielacza oleju/wody.<br />
3. Należy również regularnie sprawdzać poziom oleju. Informacje dot.<br />
prawidłowego poziomu oleju zostały przedstawione w punkcie 1. W razie<br />
potrzeby, należy ponownie napełnić zbiornik oleju olejem kompresorowym, nr<br />
zamówienia 36398 (1/2 l) lub nr zamówienia 36380 (2 l). Codzienne<br />
sprawdzanie może zapobiec wielu problemom!<br />
Proszę używać tego samego rodzaju oleju, jaki znajduje się już w<br />
urządzeniu; proszę nie mieszać różnych rodzajów olejów.<br />
4. Filtr powietrza (1) powinien być czyszczony i wymieniany regularnie. Czas, po<br />
którym należy wymienić filtr zależy od ilości zanieczyszczeń. Filtr należy<br />
wymieniać częściej przy dużym zapyleniu, rzadziej przy korzystaniu z powietrza<br />
wolnego od zanieczyszczeń W celu wyczyszczenia filtra, proszę wyjąć pojemnik<br />
z filtrem, następnie oczyścić filtr poprzez zdmuchnięcie kurzu.<br />
Uwaga: przeprowadzana regularnie konserwacja kompresora zwiększy<br />
jego trwałość i niezawodność.<br />
47
TABELA KONSERWACJI<br />
czynności codziennie Co tydzień<br />
Wypuszczenie<br />
zgromadzonej<br />
wody<br />
kondensacyjnej<br />
Sprawdzenie<br />
poziomu oleju<br />
Czyszczenie<br />
filtra powietrza<br />
Zmiana oleju<br />
(pierwszym<br />
razem po <strong>50</strong><br />
godzinach)<br />
•<br />
•<br />
•<br />
co każde<br />
<strong>25</strong>0 godzin<br />
•<br />
Co 1000<br />
godzin<br />
7.0 ROZWIĄZYWANIE PROBLEMÓW<br />
1. Przy ciśnieniu początkowym kompresor nie pracuje:<br />
* stopiony bezpiecznik - wymienić bezpiecznik<br />
* w zbiorniku znajduje się powietrze pod ciśnieniem - wypuścić powietrze<br />
* zepsuty silnik - naprawić/wymienić<br />
* wadliwy przełącznik ciśnienia - naprawić/wymienić<br />
2. Powtarzające się awarie z powodu przegrzania<br />
* stopiony bezpiecznik - wymienić bezpiecznik<br />
* poluzowane przewody - naprawić<br />
* przełącznik ciśnieniowy nie wraca do poprzedniej pozycji -<br />
naprawić/wymienić zawór<br />
* zbyt niskie napięcie - wymienić przedłużacz lub skorzystać z grubszego<br />
* przeciążenie - zmniejszyć obciążenie urządzenia<br />
3. <strong>Kompresor</strong> ciągle wydmuchuje powietrze:<br />
* wadliwy zawór zwrotny - naprawić/wymienić<br />
4. Zbyt mała ilość wytwarzanego powietrza<br />
* zabrudzony filtr powietrza - ustawić przełącznik<br />
ciśnienia<br />
* wadliwe zawory - wymienić na nowe<br />
5 Nieszczelny zawór bezpieczeństwa<br />
* zbyt wysokie ciśnienie - ustawić ciśnienie przy pomocy przełącznika<br />
ciśnienia<br />
* uszkodzony zawór bezpieczeństwa - wymienić na nowy<br />
48
8.0 SZCZEGÓŁOWE DANE TECHNICZNE<br />
Typ <strong>HL</strong> <strong>275</strong>/<strong>25</strong> <strong>HL</strong> <strong>275</strong>/<strong>50</strong><br />
Nr katalogowy 36840 36845<br />
Ilość cylindrów 1 1<br />
stopień 1 1<br />
Moc silnika 2 KM/1,5 kW 2 KM/1,5 kW<br />
Volt 230 V/<strong>50</strong> Hz 230 V/<strong>50</strong> Hz<br />
Zbiornik powietrza <strong>25</strong> litrów <strong>50</strong> litrów<br />
Zbiornik oleju 0,24 litra 0,24 litra<br />
Ciśnienie robocze 6 barów 6 barów<br />
Ciśnienie maksymalne 8 barów<br />
8 barów<br />
Poziom ciśnienia 98 dB(A) 98 dB(A)<br />
akustycznego<br />
Pojemność wlotu <strong>275</strong> l/min <strong>275</strong> l/min<br />
powietrza<br />
zabezpieczone przez 16 amp. 16 amp.<br />
Czas pracy 30%-60 min 30%-60 min<br />
waga 28 kg 38 kg<br />
Wymiary (dł. x szer. x<br />
wys.)<br />
580x<strong>25</strong>5x580 mm 760x330x715 mm<br />
Poziom ciśnienia akustycznego sprężarek <strong>HL</strong><strong>275</strong>/<strong>25</strong> oraz <strong>HL</strong> <strong>275</strong>/<strong>50</strong> wynosi<br />
98 dB i jest zgodny z dyrektywą 2000/14/EC oraz z pozostałymi normami<br />
(patrz deklaracja zgodności str 17)<br />
49
8.1 Części zamienne<br />
WYKAZ CZĘŚCI PRZEDSTAWIONYCH NA RYSUNKU<br />
nr oznaczenie ilość nr oznaczenie ilość<br />
1 Śruba M8x105 4 33 Pokrywa silnika 1<br />
2 Głowica cylindra 1 34 Śruba M5x103 4<br />
3 Filtr powietrza 1 35 wiatrak 1<br />
4 Uszczelka pod<br />
36 Pierścień zabezpieczający<br />
1<br />
głowicę cylindra<br />
1<br />
5 Płytka pośrednia 1 37 złączka 1<br />
6 Uszczelka 1 38 Obudowa wentylatora 1<br />
7 Element<br />
zamykający 1<br />
39 Nakrętka M8<br />
1<br />
zaworu<br />
8 Kołki ustalające 2 40 Podkładka ø8 1<br />
9 cylinder 1 41 kondensator 1<br />
10 Uszczelka pod<br />
42 Nakrętka M8<br />
1<br />
cylinder<br />
4<br />
11 Pierścień tłokowy 1 43 przyłączka 1<br />
12 tłok 1 44 Rurka zwalniająca 1<br />
13 Sworzeń tłokowy 1 45 Śruby M8x30 4<br />
14 Pierścienie<br />
sprężynujące 2<br />
46 Rura odprowadzająca<br />
1<br />
zabezpieczające<br />
15 Zawór ssący 1 47 Nakrętka M10 2<br />
16 Śruba M5x16 4 48 Podkładka sprężynująca ø8 2<br />
17 Pokrywa skrzyni<br />
49 Podkładka ø10<br />
1<br />
korbowej<br />
2<br />
18 Uszczelka<br />
<strong>50</strong> koło<br />
regulatora<br />
1<br />
2<br />
poziomu oleju<br />
19 Regulator<br />
51 Śruba M10<br />
1<br />
poziomu oleju<br />
2<br />
20 Śruba M6x10 1 52 nóżka 1<br />
21 Uszczelniający 1 53 zbiornik 1<br />
22 pierścień O<br />
ø5.6xø1.8<br />
Gumowa<br />
1<br />
54 korek (tworzywo sztuczne)1/2<br />
2<br />
uszczelka<br />
23 korbowód 1 55 Nakrętka (tworzywo sztuczne) 1/2 1<br />
24 Śruba z łbem<br />
sześciokątnym 1<br />
56 Kabel zasilający<br />
1<br />
M8x22(l)<br />
<strong>25</strong> Sworzeń wału<br />
57 Przewód wewnętrzny<br />
1<br />
korbowego<br />
1<br />
26 Skrzynia korbowa 1 58 Zawór bezpieczeństwa 1<br />
27 Pierścień<br />
59 Regulator ciśnienia<br />
1<br />
uszczelniający<br />
1<br />
28 Łożysko 6204 1 60 manometr 2<br />
29 stojan 1 61 Szybko złącze 1<br />
30 Rotor 1 62 Regulator ciśnienia 1<br />
31 Łożysko 6202 1<br />
32 Podkładka falista 1<br />
<strong>50</strong>
KARTA GWARANCYJNA<br />
…/Wyrób/……sprężarka tłokowa olejowa………………....……………………<br />
…/Model/……SPECAIR...<strong>HL</strong> <strong>275</strong>/<strong>25</strong>…<strong>HL</strong> <strong>275</strong>/<strong>50</strong>…...………………………….<br />
.../Nr katalogowy/……36840……36845.…………….……………………………<br />
…/Data zakupu/……………………………………………………………………..<br />
(uzupełnia sprzedawca)<br />
Podpis i pieczęć sprzedawcy<br />
…..…………………………………<br />
W przypadku roszczeń wynikających z tytułu niniejszej gwarancji, proszę<br />
przysłać nam nieodpłatnie maszynę/urządzenie wraz z kompletnym<br />
certyfikatem gwarancyjnym i fakturą.<br />
Importer:<br />
FRIPOL Sp. z o.o.<br />
Grupa AIRPRESS<br />
Wiąg 108 A<br />
86-100 Świecie<br />
Dział Obsługi Klienta<br />
tel.: 52 38 01 307<br />
fax: 52 33 12 043 / 52 38 01 306<br />
Dział Serwis<br />
tel.: 602 421 709<br />
52
Uwagi<br />
Wymienione<br />
części<br />
Ewentualne<br />
usterki<br />
Data<br />
53
9.0 WARUNKI GWARANCYJNE<br />
Dostarczona maszyna/urządzenie posiada 12 miesięczną gwarancję, okres<br />
gwarancji rozpoczyna się od daty zakupu. Jeśli w tym czasie wystąpią<br />
jakiekolwiek awarie spowodowane wadami materiałowymi lub strukturalnymi,<br />
niniejsza gwarancja będzie obejmować części oraz koszty robocizny.<br />
Roszczenia nie będą objęte niniejszą gwarancją, jeśli:<br />
- Nie przestrzegano zaleceń zawartych w instrukcji obsługi<br />
- Maszyna/urządzenie zostały zmodyfikowane w taki sposób, że nie funkcjonuje<br />
dłużej prawidłowo, nawet wówczas, gdy uszkodzone części zostaną zastąpione<br />
właściwymi elementami.<br />
- Uszkodzenie powstało na skutek działania mrozu, upadku lub upuszczenia<br />
urządzenia, uderzenia, nieautoryzowanego demontażu, niewłaściwego<br />
podłączenia do sieci elektrycznej, itp.<br />
- Uszkodzenie powstało na skutek korzystania z przedłużaczy, cieńszych niż 2,5<br />
mm (wyłącznie 230 V).<br />
W przypadku zaakceptowania roszczenia gwarancyjnego, maszyna/urządzenie<br />
zostanie bezpłatnie naprawione i zwrócone. Nie przewiduje się pokrycia strat<br />
wynikających z wszelkich innych szkód.<br />
Naprawy których nie obejmuje gwarancja wykonywane będą odpłatnie wraz z<br />
kosztami transportu.<br />
54
<strong>Kompresor</strong><br />
<strong>HL</strong> <strong>275</strong>/<strong>25</strong><br />
<strong>HL</strong> <strong>275</strong>/<strong>50</strong><br />
KOMPRESORY<br />
do:<br />
• 30% malowania natryskowego<br />
• Nadmuchiwania opon<br />
• Smarowania<br />
• Dmuchania<br />
• Rozpylania wody<br />
• Narzędzi pneumatycznych<br />
Odpady elektryczne nie mogą być usuwane wraz z odpadami domowymi.<br />
Powinny być poddane procesowi recyclingu w miejscach<br />
specjalnie do tego celu przeznaczonych. Informacje dotyczące<br />
recyklingu uzyskają państwo w odpowiednich instytucjach<br />
władzy lokalnej lub u sprzedawcy.<br />
55
INSTRUKCJA ZBIORNIKA CIŚNIENIOWEGO<br />
Zbiornik ciśnieniowy jest przeznaczony do magazynowania powietrza sprężonego i powinien<br />
być eksploatowany przede wszystkim w trybie statycznym. Prawidłowe użytkowanie zbiornika<br />
jest podstawowym<br />
warunkiem zapewniającym bezpieczeństwo. W związku z tym użytkownik powinien działać<br />
następująco:<br />
1) eksploatować zbiornik w sposób właściwy w ustalonych granicach wielkości ciśnienia i<br />
temperatury, podanych przez wytwórcę na tabliczce znamionowej i w sprawozdaniu<br />
próbnym, które należy starannie<br />
przechowywać;<br />
2) nie spawać części pod ciśnieniem;<br />
3) zapewnić wyposażenie zbiornika w dostateczną ilość sprawnie działających urządzeń<br />
zabezpieczających i regulacyjnych; w razie potrzeby wymieniać je na nowe o takich<br />
samych charakterystykach uzyskawszy<br />
uprzednio zgodę wytwórcy. Szczególnie ważny jest zawór bezpieczeństwa, który ma być<br />
zainstalowany bezpośrednio na zbiorniku bez możliwości interpozycjonowania, powinien mieć<br />
przepustowość wyższą niż wlot<br />
powietrza oraz być nastawiony i zaplombowany na ciśnienie (A) bar. Wskaźnik ciśnienia (A)<br />
na ciśnieniomierzu powinien być oznaczony na czerwono;<br />
4) w miarę możliwości unikać eksploatowania zbiornika w pomieszczeniach niedostatecznie<br />
wentylowanych; unikać instalowania zbiornika w pobliżu źródeł ciepła czy też substancji<br />
łatwopalnych;<br />
5) wyposażyć zbiornik w tłumik drgań, aby uniknąć pęknięć zmęczeniowych spowodowanych<br />
drganiami zbiornika podczas eksploatacji; nie przymocowywać zbiornika ani zainstalowanych<br />
na nim części do podłoża<br />
czy też innych konstrukcji stałych (kolumny,...)<br />
6) zapobiegać korozji: w zależności od warunków roboczych w zbiorniku może zbierać się<br />
kondensat, który musi być codziennie usuwany. Czynność tę można wykonywać w trybie<br />
ręcznym otwierając kurek<br />
spustowy lub posługując się automatycznym urządzeniem do usuwania kondensatu, jeśli jest<br />
ono zainstalowane na zbiorniku.<br />
W zakresie konserwacji: co roku użytkownik, lub specjalista z ośrodka pomocy technicznej<br />
powinien sprawdzać czy w zbiorniku nie wytwarza się ewentualnie kondensat wewnętrzny<br />
oraz przeprowadzać kontrolę<br />
wizualną zewnętrznego stanu zbiornika. Jeśli zbiornik jest użytkowany ze sprężarką<br />
bezolejową, lub w środowiskach o wysokim stopniu wilgotności czy też w warunkach<br />
niesprzyjających (niedostateczna wentylacja,<br />
czynniki agresywne...) sprawdziany te powinny być przeprowadzane częściej.<br />
Faktyczna grubość ścianek zbiornika po korozji nie powinna być mniejsza niż mm (B)<br />
dla płaszcza i mm (C) dla dennicy;<br />
Przewidziane przez przepisy kontrole powinny być przeprowadzane zgodnie z prawami i<br />
normami obowiązującymi na terenie kraju, w którym zbiornik jest eksploatowany.<br />
7) działać racjonalnie i rozważnie zgodnie z istniejącymi przepisami.<br />
SUROWO ZAKAZUJE SIĘ SAMOWOLNEGO MANIPULOWANIA PRZEZ OSOBY<br />
NIEPOWOŁANE ORAZ UŻYTKOWANIA ZBIORNIKA W SPOSÓB NIEWŁAŚCIWY.<br />
Użytkownik musi przestrzegać przepisów prawnych o użytkowaniu urządzeń ciśnieniowych,<br />
które obowiązują na terenie kraju eksploatowania zbiornika.<br />
56
INSTRUKCJA OBSŁUGI I KONSERWACJI<br />
ZAWORU BEZPIECZEŃSTWA<br />
Na wstępie proszę o dokładne zaznajomienie się z danymi technicznymi zaworu<br />
bezpieczeństwa. Układ rur i złączek powinien być odpowiedni, by wytrzymać ustawione<br />
ciśnienie zaworu bezpieczeństwa. Ustawione ciśnienie powinno być proporcjonalne do<br />
wydajności spustu zaworu/zaworów bezpieczeństwa. Dane ciśnienie nie powinno<br />
przewyższać założonego ciśnienia sprzętu chronionego. Producent nie będzie<br />
odpowiedzialny za jakiekolwiek uszkodzenia w przypadku niewłaściwego użytkowania lub<br />
nieprawidłowej instalacji spowodowanej zaniedbaniem, rozłączaniem oraz dokonywaniem<br />
niedozwolonych zmian lub samowolnego naruszania sprzętu.<br />
1. Instalacja<br />
Przed dopasowaniem zaworów należy upewnić się, czy w otworze nie znajdują się<br />
jakiekolwiek zanieczyszczenia (ciało obce-brud będzie wyrzucone przy pierwszym spuście<br />
zaworu powodując zagrożenie dla osób, zwierząt i całego otoczenia).<br />
Zawór bezpieczeństwa powinien być umiejscowiony w górnej części zbiornika; jeżeli<br />
jest to możliwe w prostopadłej pozycji.<br />
Nie należy umieszczać zaworu bezpieczeństwa na spodzie odbiornika.<br />
Złączka pomiędzy odbiornikiem oraz zaworem bezpieczeństwa powinna być możliwie<br />
krótka. W danym miejscu powinna także istnieć odpowiednia ilość wolnego miejsca, by<br />
spuścić powietrze z zaworu.<br />
Każdy zawór bezpieczeństwa należy owinąć teflonem wokół gwintu, by uszczelnić go i<br />
nie dopuścić do przecieków powietrza nawet w najmniejszych jednostkach w obszarze wylotu<br />
zaworu.<br />
Należy dokręcić zawór używając klucza do nakrętek. Klucz powinno się zawsze<br />
odpowiednio dopasować do rozmiaru zaworu i umocować poniżej spustu odpowietrzającego.<br />
Nie należy dokręcać zaworu zbyt mocno, by nie dopuścić do jego deformacji.<br />
2. Operacje i użytkowanie<br />
Nie należy podważać wylotu zaworu śrubokrętem lub jakimkolwiek innym narzędziem,<br />
by nie uszkodzić go. Dany zawór może znieść maksymalne obciążenie boczne w ilości 1000<br />
N.<br />
3. Utrzymanie i testowanie<br />
Zalecane jest sprawdzanie użyteczności i skuteczności pracy zaworu przez<br />
wykwalifikowany personel przynajmniej raz w roku. Może być to dokonane przez zwiększenie<br />
ciśnienia ponad ustawione ciśnienie na zaworze lub też przez pociągnięcie rdzenia/trzonu<br />
zaworu.<br />
Ryzyko związane z testami funkcjonalnymi zaworów musi być podejmowane. W<br />
przypadku dokonywania testów funkcjonalnych wymagane są środki ostrożności w postaci<br />
użycia korków dousznych oraz zachowania odpowiedniej, bezpiecznej odległości<br />
przebywania względem zaworu ( przynajmniej 2 metry od danego zaworu).<br />
4. Maksymalny czas przechowywania<br />
12 miesięcy dla zaworów wyposażonych w gumową uszczelkę typu NBR<br />
6 miesięcy dla zaworów wyposażonych w gumową uszczelkę typu VITON<br />
Po upłynięciu powyższych terminów przechowywania; firma nie będzie odpowiedzialna<br />
za uszkodzenia/ubytki w ustawionym ciśnieniu oraz nie będzie zdolna wymienić zużyte<br />
materiały.<br />
5. Gwarancja<br />
Gwarancja obejmuje 12 miesięcy od daty dostarczenia (dla wad w<br />
budowie/oznaczeniu, uszkodzeniach materiału).<br />
Wymiana oraz naprawy danych zaworów bezpieczeństwa powinny być wykonywane<br />
tylko przez wykwalifikowany personel.<br />
57
(NL)<br />
Afval geproduceerd door elektrische machines mag niet behandeld worden als<br />
normaal huishoudelijk afval. Zorg voor recycling daar waar passende installaties<br />
bestaan. Raadpleeg de plaatselijke instanties of de verkoper voor adviezen over<br />
inzameling en verwerking.<br />
(D)<br />
Die von den elektrischen Maschinen erzeugten Abfälle dürfen nicht mit dem<br />
normalen Hausmüll entsorgt, sondern müssen in zugelassenen Anlagen<br />
umweltgerecht recycelt werden. Bitte erkundigen Sie sich bei der örtlichen<br />
Behörde oder beim Vertragshändler über Müllsammlung und -entsorgung.<br />
(GB)<br />
Waste electrical products should not be disposed of with household waste.<br />
Please recycle where facilities exist. Check with your Local Authority or retailer<br />
for recycling advice.<br />
(F)<br />
Les déchets électriques ne peuvent être traités de la même manière que les<br />
ordures ménagères ordinaires. Procéder à leur recyclage, là où il existe des<br />
installations adéquates. S'adresser aux autorités locales compétentes ou à un<br />
revendeur agréé pour se renseigner à propos des procédés de collecte et de<br />
traitement.<br />
(E)<br />
Los desechos producidos por las máquinas eléctricas no se pueden tratar como<br />
desechos domésticos comunes. Hay que reciclarlos allí donde existan las<br />
instalaciones apropiadas. Consultar al organismo local o al revendedor para<br />
solicitar información acerca de su recogida y eliminación.<br />
(P)<br />
Odpady elektryczne nie mogą być usuwane wraz z odpadami domowymi.<br />
Powinny być poddane procesowi recyclingu w miejscach specjalnie do tego celu<br />
przeznaczonych. Informacje dotyczące recyklingu uzyskają państwo w<br />
odpowiednich instytucjach władzy lokalnej lub u sprzedawcy.<br />
60
- - - - - - - - - - - - - - - - - - - - - - - - - - - - - - - - - - - - - - - - - - - - - - - - - -<br />
GARANTIEBEWIJS 12 MAANDEN<br />
GARANTIESCHEIN 12 MONATE<br />
GUARANTEE CERTIFICATE 12 MONTHS<br />
CERTIFICAT DE GARANTIE 12 MOlS<br />
CERTIFICADO DE GARANTIA 12 MESES<br />
Artikel/Artikel/Article/Article/Artìculo ..........................................................................................<br />
Model/Modell/Model/Modèle/Modelo .........................................................................................<br />
Serie nr./Seriennr./Series no./No. série/ N° de serie ..................................................................<br />
Aankoopdatum/Kaufdatum/Date of purchase/Date d'achat/ Fecha de compra ..........................<br />
Handtekening verkoper<br />
Signatur Verkaufer<br />
Seller's signature<br />
Signature du vendeur<br />
Firma del vendedor<br />
61<br />
Firmastempel verkoper<br />
Firmenstempel Verkaufer<br />
Firmstamp seller<br />
Timbre du vendeur<br />
Sello del vendedor<br />
Alleen geldig met stempel / Nur gültig mit Stempel / Only valid with stamp /<br />
Seulement valide avec timbre/ Válido solamente con sello<br />
Bij garantieaanspraken de machine/het apparaat met ingevuld garantiebewijs en<br />
aankoopfactuur franco toezenden.<br />
Bei Garantieansprüchen die Maschine / der Apparat mit ausgefülltem Garantieschein<br />
und Rechnung franko einsenden.<br />
For claims against the guarantee, please send us the machine/the apparatus<br />
with the completed guarantee certificate and invoice free of charge.<br />
En cas de réclamation, retourner la machine/l'appareil pourvu(e) du certificat de<br />
garantie dûment rempli et de la facture franc de port.<br />
En caso de reclamación, retornar la máquina / el aparato con el certificado de<br />
garantía relleno y la factura de compra libre de gastos de envío.<br />
Naam/Name/Name/Nom/Nombre : ................................................................<br />
Adres/Adresse/Address/Adresse/Dirección : ................................................................<br />
Plaats/Ort/Place/Ville/ Ciudad : ................................................................<br />
Land/Land/Country/Pays/País : ................................................................
GARANTIEBEPALINGEN<br />
De garantie van de geleverde machine/het apparaat bedraagt 12 maanden, ingaande<br />
op de aankoopdatum. Indien zich binnen deze tijd storingen voordoen, die te wijten<br />
zijn aan materiaal- of constructiefouten, geldt de garantie voor zowel onderdelen als<br />
arbeidsloon. Garantieaanspraken worden niet erkend indien:<br />
- De aanwijzingen in deze handleiding niet zijn nageleefd.<br />
- De machine/het apparaat zodanig is gewijzigd dat deze niet meer naar behoren kan<br />
functioneren, ook niet wanneer de juiste onderdelen ter vervanging werden gebruikt.<br />
- Schade ontstaat door bevriezing, vallen, stoten, onbevoegd demonteren, foutief<br />
aansluiten op het elektriciteitsnet e.d.<br />
- Schade ontstaat door gebruik van verlengsnoeren dunner dan 2,5 mm² (alleen bij<br />
230 V).<br />
Indien de garantieclaim wordt erkend zal de machine/het apparaat na reparatie franco<br />
worden teruggezonden. Een verdere schadevergoeding wordt niet verleend.<br />
GARANTIEBESTIMMUNGEN<br />
Die Garantiefrist der gelieferten Maschine/des Apparats beträgt 12 Monate, mit<br />
Wirkung vom Kaufdatum. Wenn es innerhalb dieser Frist Störungen gibt, die auf<br />
Material- oder Konstruktionsfehler zurückzuführen sind, gilt die Garantie für sowohl<br />
Teile wie auch Arbeitslohn. Garantieansprüche werden nicht anerkannt, wenn:<br />
- Die Hinweise in dieser Gebrauchsanweisung nicht eingehalten worden sind.<br />
- Die Maschine / der Apparat derart geändert ist, dass dieser nicht mehr<br />
gebührendermassen funktionieren kann, auch nicht, wenn die richtigen Teile zum<br />
Auswechseln eingesetzt wurden.<br />
- Schäden durch Erfrieren, Fallen, Stösse, unbefugtes Demontieren, fehlerhaften<br />
Anschluss an das Stromnetz usw. entstehen.<br />
- Schaden durch Benutzung von Verlängerungskabeln dünner als 2,5 mm² entstehen.<br />
Gilt nur bei 230 Volt.<br />
Wenn der Garantieanspruch anerkannt wird, wird die Maschine/der Apparat nach der<br />
Reparatur franko zurückgesandt. Ein weiterer Schadenersatz wird nicht gewährt.<br />
GUARANTEE PROVISIONS<br />
The machine/apparatus supplied carries a 12 month guarantee, starting trom the day<br />
of purchase. If any breakdowns occur within this period, caused by material or<br />
structural defects, this guarantee will cover parts as well as labour costs. This<br />
guarantee will not cover claims if:<br />
- The instructions in this manual have not been observed.<br />
- The machine / apparatus has been modified in such a way that it no longer functions<br />
properly, not even when damaged parts are replaced with the proper components.<br />
- Damage is due to frost, dropping, impact, unauthorized disassembly, improper<br />
connection to the electricity grid etc.<br />
- Damage is due to the use of extension leads thinner than 2,5 mm² (only 230 volts).<br />
If the guarantee claim is accepted, the machine/apparatus will be repaired and<br />
returned free of charge. No other damages will be paid.<br />
62
CONDITIONS DE GARANTIE<br />
Le délai de garantie de la machine/de I'appareil est de 12 mois, à compter de la date<br />
d'acquisition. Au cas ou des difficultés techniques dues à des défauts de matériau ou<br />
de construction se présenteraient pendant ce délai, la garantie concernera tant les<br />
pièces détachées qua la main-d'oeuvre. On ne pourra prétendre à aucune garantie<br />
dans les cas suivants:<br />
- Les instructions prévues par la notice n'ont pas été respectées.<br />
- La modification de la machine/de I'appareil empêche son fonctionnement, même si<br />
les pièces appropriées ont été utilisées.<br />
- Dégáts matériels dus au fait que la machine/l'appareil est tombé(e), a gelé(e),<br />
heurté(e) quelque chose ou qu'elle (qu'il) a été mal démonté(e), branché(e)<br />
incorrectement sur le réseau etc.<br />
- Dégáts matériels dus à I'emploi de rallonges faisant moins de 2,5 qmm. Seulement<br />
en cas de 230V.<br />
Au cas ou la réclamation serait retenue, la machine/l'appareil sera renvoyé(e) franc de<br />
port à I'issue des travaux de réparation. Il ne sera accordé aucun dédommagement<br />
ultérieur.<br />
GARANTÍA<br />
El plazo de garantía de la máquina / aparato es de 12 meses, a partir de la fecha de<br />
adquisición.<br />
Durante este plazo, la garantía concernirá tanto a las piezas de recambio como a la<br />
mano de obra, para todos los problemas técnicos que sean debidos a defectos de<br />
material o de construcción.<br />
No se podrá aspirar a ninguna garantía en los casos siguientes:<br />
- No han sido respetadas las instrucciones que se dan en este manual.<br />
- La máquina / el aparato ha sido modificado de tal modo que ya no funciona<br />
correctamente, incluso cuando las partes dañadas hayan sido substituidas por<br />
piezas apropiadas.<br />
- El daño es debido a la helada, la caída, el impacto, el desmontaje no autorizado, la<br />
conexión inapropiada a la red eléctrica, etc.<br />
- El daño es debido al empleo de un cable alargardor más delgado de 2,5 mm ². (Se<br />
aplica sólo a 230 voltios).<br />
Si la reclamación de garantía es aceptada, la máquina / aparato será reparada y<br />
devuelta sin gastos. Ningun daño posterior será pagado.<br />
- - - - - - - - - - - - - - - - - - - - - - - - - - - - - - - - - - - - - - - - - - - - - - - - - -<br />
63
EG-verklaring van overeenstemming<br />
Wij, V. R. B. FRIESLAND B.V., postbus 114, 8900 AC Leeuwarden, Nederland, verklaren geheel onder eigen<br />
verantwoordelijkheid dat de producten<br />
compressoren <strong>HL</strong> <strong>275</strong>/<strong>25</strong>, <strong>HL</strong> <strong>275</strong>/<strong>50</strong>, <strong>HL</strong> 360/<strong>50</strong> SPECAIR<br />
waarop deze verklaring betrekking heeft, in overeenstemming zijn met de machinerichtlijn 98/37/EG, de EMC<br />
richtlijn 89/336/EC, 97/23/WE, EN 1012-1 – EN 60204-1 – EN 60335-1 – EN 5<strong>50</strong>14-1 – EN 5<strong>50</strong>14-2 – EN<br />
61000-3-2 – EN 61000-3-3, de laagspanningsrichtlijn 73/23/EG en de richtlijnen 87/404/EG en 2006/42/EC -<br />
2004/108/EC - 2006/95/EC - 2009/105/EC - 2000/14/CE.<br />
Nederland, Leeuwarden, 24.03.2010<br />
CE-Deklaracja zgodności<br />
My, V. R. B. FRIESLAND B.V., JUNOKADE 1, 8900 AC Leeuwarden, Holandia oświadczamy na własną<br />
odpowiedzialność , że:<br />
modele sprężarek: <strong>HL</strong> <strong>275</strong>/<strong>25</strong>, <strong>HL</strong> <strong>275</strong>/<strong>50</strong>, <strong>HL</strong> 360/<strong>50</strong> SPECAIR<br />
których dotyczy niniejsza deklaracja, są zgodne z dyrektywą maszynową 98/37/CE, dyrektywą EMC 89/336/CE,<br />
dyrektywą 97/23/WE dyrektywą niskonapięciową 73/23/CE, dyrektywami 2006/42/CE - 2004/108/CE -<br />
2006/95/CE - 2009/105/CE - 2000/14/CE oraz normami EN 1012-1 – EN 60204-1 – EN 60335-1 – EN 5<strong>50</strong>14-1<br />
– EN 5<strong>50</strong>14-2 – EN 61000-3-2 – EN 61000-3-3.<br />
Poziom ciśnienia akustycznego urządzenia <strong>HL</strong> <strong>275</strong>/<strong>25</strong>; <strong>HL</strong><strong>275</strong>/<strong>50</strong> wynosi 98 dB i jest zgodny z powyższymi<br />
normami.<br />
Królestwo Niderlandów, Leeuwarden, 24.03.2010<br />
EC-declaration of conformity<br />
We, V. R. B. FRIESLAND B.V., P.O. Box 114, 8900 AC Leeuwarden, The Netherlands, taking full responsibility,<br />
declare that the products<br />
Compressors <strong>HL</strong> <strong>275</strong>/<strong>25</strong>, <strong>HL</strong> <strong>275</strong>/<strong>50</strong>, <strong>HL</strong> 360/<strong>50</strong> SPECAIR<br />
to which this declaration refers, comply with the machinery directive 98/37/EC, 97/23/WE, the EMC<br />
directive89/336/EC, EN 1012-1 – EN 60204-1 – EN 60335-1 – EN 5<strong>50</strong>14-1 – EN 5<strong>50</strong>14-2 – EN 61000-3-2 – EN<br />
61000-3-3, the low tension directive 73/23/EC, the pressure equipment directive 87/404/EC and the directive<br />
2006/42/EC - 2004/108/EC - 2006/95/EC - 2009/105/EC - 2000/14/CE.<br />
The Netherlands, Leeuwarden, 24.03.2010<br />
Déclaration CE de conformité<br />
Nous, V. R. B. FRIESLAND B.V., P.O. Box 114, 8900 AC Leeuwarden, Pays Bas, déclarons entièrement sous<br />
notre propre responsabilité que les produits<br />
compresseurs <strong>HL</strong> <strong>275</strong>/<strong>25</strong>, <strong>HL</strong> <strong>275</strong>/<strong>50</strong>, <strong>HL</strong> 360/<strong>50</strong> SPECAIR<br />
auquel cette déclaration a trait sont conformes à la directive machines 98/37/EC, 97/23/WE, la directive EMC<br />
89/336/EC, EN 1012-1 – EN 60204-1 – EN 60335-1 – EN 5<strong>50</strong>14-1 – EN 5<strong>50</strong>14-2 – EN 61000-3-2 – EN 61000-<br />
3-3, la directive basse tension 73/23/EC et les directives 87/404/EC et 2006/42/EC - 2004/108/EC - 2006/95/EC<br />
- 2009/105/EC - 2000/14/CE.<br />
Pays Bas, Leeuwarden, le 24.03.2010<br />
Declaracíon CE de conformidad<br />
V. R. B. FRIESLAND B.V., C.P. 114, 8900 AC Leeuwarden, Paises Bajos, declaramos bajo nuestra exclusive<br />
responsabilidad la conformidad del producto<br />
Compressor <strong>HL</strong> <strong>275</strong>/<strong>25</strong>, <strong>HL</strong> <strong>275</strong>/<strong>50</strong>, <strong>HL</strong> 360/<strong>50</strong> SPECAIR<br />
al que se refiere esta declaración, con las disposiciones de la Directiva Directivas para maquinas 98/37/CE,<br />
97/23/WE, 89/336/EC, EN 1012-1 – EN 60204-1 – EN 60335-1 – EN 5<strong>50</strong>14-1 – EN 5<strong>50</strong>14-2 – EN 61000-3-2 –<br />
EN 61000-3-3, 73/23/CE, 87/404/CE y 2006/42/CE - 2004/108/CE - 2006/95/CE - 2009/105/CE - 2000/14/CE.<br />
Paises Bajos, Leeuwarden, el 24.03.2010<br />
Dichiarazione di conformità CE<br />
La sottoscritta, V. R. B. FRIESLAND B.V., P.O. Box 114, 8900 AC Leeuwarden, Paese Bassi, dichiara sotto la<br />
propria responsabilità che i prodotti<br />
Compressore <strong>HL</strong> <strong>275</strong>/<strong>25</strong>, <strong>HL</strong> <strong>275</strong>/<strong>50</strong>, <strong>HL</strong> 360/<strong>50</strong> SPECAIR<br />
Per le quali con questa dichiarazione si porta a conosenza che le stesse sono conformi alle seguenti norme<br />
Direttiva per macchine 98/37/CEE, 89/336/EC, 97/23/WE, EN 1012-1 – EN 60204-1 – EN 60335-1 – EN<br />
5<strong>50</strong>14-1 – EN 5<strong>50</strong>14-2 – EN 61000-3-2 – EN 61000-3-3, 73/23/CE, 87/404/CE e 2006/42/CE - 2004/108/CE -<br />
2006/95/CE - 2009/105/CE - 2000/14/CE.<br />
Paese Bassi, Leeuwarden, 24.03.2010<br />
E.J. de Vries<br />
Directeur/Geschäftsführer/Managing director/<br />
Directeur général/Director gerente/Dyrektor
COMPRESSOR<br />
KOMPRESSOR<br />
COMPRESSOR<br />
COMPRESSEUR<br />
COMPRESOR<br />
KOMPRESOR<br />
<strong>HL</strong> <strong>275</strong>/<strong>25</strong><br />
<strong>HL</strong> <strong>275</strong>/<strong>50</strong>