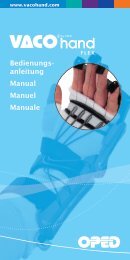
Bedienungs- anleitung Manual Manuel Manuale - VACO®hand
Bedienungs- anleitung Manual Manuel Manuale - VACO®hand
Bedienungs- anleitung Manual Manuel Manuale - VACO®hand

Create successful ePaper yourself
Turn your PDF publications into a flip-book with our unique Google optimized e-Paper software.
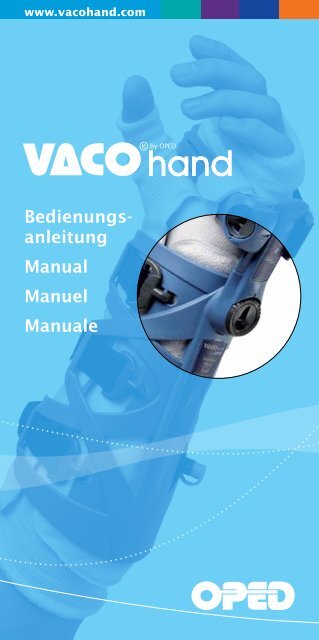
www.vacohand.com<br />
<strong>Bedienungs</strong><strong>anleitung</strong><br />
<strong>Manual</strong><br />
<strong>Manuel</strong><br />
<strong>Manual</strong>e
www.vacohand.com<br />
Bestandteile<br />
Components<br />
Pièces constitutives<br />
Componenti<br />
Vorbereitung<br />
Preparation<br />
Préparation<br />
Preparazione<br />
Clip<br />
Clip<br />
Clip<br />
Clip<br />
Montageschlüssel<br />
Assembly key<br />
Clé de montage<br />
Chiave di<br />
montaggio<br />
Hartschale<br />
Hard shell<br />
Coquille rigide<br />
Guscio rigido<br />
D Schale vorbereiten<br />
• Gurte der Schale öffnen<br />
• Obere Kissenhälfte aufklappen<br />
E<br />
Tipp: Gurte zu einer Schlaufe zusammen<br />
kletten, damit sie später nicht stören<br />
Preparing the shell<br />
• Open the shell straps<br />
• Fold out the top half of the cushion<br />
Tip: Fasten together the velcro straps<br />
into a loop so that they are not in the<br />
way later on<br />
F<br />
Préparation de la coquille<br />
• Ouvrir les sangles de la coquille<br />
• Rabattre la moitié supérieure du coussin<br />
Conseil: Veiller à passer la sangle dans<br />
un passant pour éviter qu‘elle ne gêne<br />
par la suite<br />
I Preparare il guscio<br />
• Aprire le cinghie del guscio<br />
• Aprire la metà superiore del cuscino<br />
Pollex<br />
(optional)<br />
Pollex<br />
(optional)<br />
Pollex<br />
(optionnel)<br />
Pollex<br />
(optionale)<br />
Siegel<br />
Seal<br />
Fermoir<br />
Sigillo di<br />
sicurezza<br />
Vakuumkissen<br />
Vacuum<br />
cushion<br />
Coussin à<br />
vide d‘air<br />
Cuscino<br />
sottovuoto<br />
Vakuumpumpe<br />
Pump<br />
Pompe<br />
Pompa<br />
Armbezug<br />
(Stoff)<br />
Arm cover<br />
(fabric)<br />
Revêtement<br />
du bras<br />
(tissu)<br />
Rivestimento<br />
per<br />
il braccio<br />
(tessuto)<br />
Consiglio: Fissare le cinghie con il velcro<br />
in modo che non intralcino.<br />
Für linken Arm<br />
For the left arm<br />
Bras gauche<br />
Per il braccio<br />
sinistro<br />
Für rechten Arm<br />
For the right arm<br />
Bras droit<br />
Per il braccio<br />
destro
www.vacohand.com<br />
Vorbereitung<br />
Preparation<br />
Préparation<br />
Preparazione<br />
Vorbereitung<br />
Preparation<br />
Préparation<br />
Preparazione<br />
D<br />
Schraube für Handbreite öffnen, auf<br />
größte Breite einstellen und anschließend<br />
die Schraube wieder schließen.<br />
Achtung: Höhe vom Griff muss<br />
auf mittlerer Stellung bleiben!<br />
E<br />
Open screw for hand width, set to<br />
the largest width possible and<br />
retighten the screw.<br />
Caution: Height of grip must<br />
remain in middle position!<br />
F<br />
Ouvrir la vis servant au réglage de<br />
la largeur de la partie main, régler<br />
sur la plus grande largeur et refermer<br />
ensuite la vis.<br />
Attention: la hauteur de la poignée<br />
doit rester sur le réglage moyen!<br />
I<br />
Svitare la vite per la larghezza della<br />
mano, regolarla sulla larghezza<br />
massima e riavvitarla.<br />
Attenzione: L’altezza dell’impugnatura<br />
deve rimanere in posizione<br />
intermedia!<br />
D Kissen vorbereiten<br />
Bei ungleichmäßiger Kugelverteilung<br />
Kissenfüllung gleichmäßig verstreichen:<br />
hierzu siehe „Ventilfunktion“<br />
E<br />
Preparing the cushion<br />
If the beads are distributed unevenly,<br />
spread out the cushion contents smoothly:<br />
To do this, see „Valve function“<br />
F<br />
Préparation du coussin<br />
Si la répartition des billes présente des<br />
irrégularités, veiller à répartir la garniture<br />
du coussin de manière uniforme: pour ce<br />
faire, consulter la section « Fonctionnement<br />
de la soupape »<br />
I Preparare il cuscino<br />
In caso di distribuzione irregolare delle<br />
microsfere, adattare in maniera uniforme<br />
l’imbottitura del cuscino: a questo scopo<br />
si rimanda a “Funzioni della valvola”<br />
D Armbezug (Stoff) anlegen<br />
Auf möglichst faltenfreien Sitz achten<br />
E<br />
Applying arm (fabric) cover<br />
Ensure that the cover is crease-free<br />
F<br />
Mettre l‘enveloppe du bras<br />
(en tissu) en position<br />
Veiller dans la mesure du possible<br />
à ce qu‘elle ne forme aucun pli<br />
I Applicare il rivestimento in tessuto<br />
Evitare quanto più possibile la<br />
formazione di pieghe
www.vacohand.com<br />
Anlegevorgang<br />
Application procedure<br />
Processus de mise en place<br />
Procedura applicativa<br />
Anlegevorgang<br />
Application procedure<br />
Processus de mise en place<br />
Procedura applicativa<br />
D Unterarm in der Schale platzieren<br />
• Handgriff mit der Hand fest<br />
umschließen (Faustschluss)<br />
• Oder: Griff muss bis zum Anschlag des<br />
Daumengelenkes, hierzu nehmen sie<br />
den Ellenbogen und führen die verletzte<br />
Hand zur richtigen Position<br />
E Position the lower arm in the shell<br />
• Hold the hand grip firmly in the hand<br />
(clenched fist)<br />
• Or: Grip must be level with the thumb joint.<br />
To do this, take hold of the elbow and<br />
move the injured hand to the correct<br />
position<br />
F Placer l‘avant-bras dans la coquille<br />
• Maintenir la poignée fermement de la<br />
main (fermeture du poing)<br />
• Ou: Placer la poignée jusqu‘à la butée<br />
de l‘articulation du pouce, prendre alors<br />
le coude et guider la main blessée dans<br />
la position qui convient<br />
I Introdurre l’avambraccio nel guscio<br />
• Stringere saldamente con la mano<br />
l’impugnatura (chiusura a pugno)<br />
• Oppure: L’impugnatura deve essere<br />
calzata fino all’articolazione trapeziometacarpale<br />
del pollice; per questo<br />
afferrare il gomito e sistemare la mano<br />
infortunata nella giusta posizione.<br />
D Gurte schließen<br />
• Obere Kissenhälfte in die Schale einlegen<br />
(Kissenränder müssen sich immer unter<br />
der Schale befinden)<br />
• Als erstes Handgelenksgurt ( 1 ) durch<br />
die zweifache Gurtführungen ziehen und<br />
schließen<br />
• Reihenfolge zum Schließen der<br />
Gurtbänder beachten<br />
E Closing straps<br />
• Place the top half of the cushion into<br />
the shell (the edges of the cushion must<br />
always be underneath the shell)<br />
• First, pull the wrist strap ( 1 ) through<br />
the two strap guides and close it<br />
• Follow the correct order when closing<br />
the straps<br />
F Fermer la sangles<br />
• Insérer la partie supérieure du coussin<br />
dans la coquille (en veillant à ce que<br />
les bords du coussin se trouvent<br />
toujours sous la coquille)<br />
• Fermer en premier la sangle du poignet<br />
( 1 ) en la guidant dans les deux passants<br />
prévus à cet effet<br />
• Procéder ensuite à la fermeture des<br />
sangles en respectant l‘ordre indiqué<br />
I Chiudere il cinghie<br />
• Infilare la metà superiore del cuscino<br />
nel guscio (i bordi del cuscino devono<br />
essere sempre all’interno del guscio).<br />
• Innanzitutto far scorrere la cinghia<br />
all’altezza dell’articolazione trapeziometacarpale<br />
( 1 ) attraverso i due rollini<br />
guida-cinghia e quindi chiuderla.<br />
• Chiudere le cinghie<br />
nell’ordine indicato<br />
4<br />
1 3 2
www.vacohand.com<br />
Anlegevorgang<br />
Application procedure<br />
Processus de mise en place<br />
Procedura applicativa<br />
Ventilfunktionen<br />
Valve functions<br />
Fonctionnement de la soupape<br />
Funzioni della valvola<br />
D Handgriff<br />
Vor dem Schließen des Handgurtes,<br />
Schraube für Handbreite öffnen, auf die<br />
passende Breite einstellen ggf. Höhe<br />
verstellen und anschließend die Schraube<br />
wieder schließen<br />
E<br />
Hand grip<br />
Before closing the hand strap,<br />
open the screw for the hand width,<br />
set to a suitable width, adjust the<br />
height if necessary and close the screw<br />
again<br />
F<br />
Poignée<br />
Avant de fermer la sangle au niveau de<br />
la main, ouvrir la vis servant au réglage<br />
de la largeur de la main, ajuster à la<br />
largeur requise, procéder au besoin<br />
au réglage de la hauteur et refermer<br />
ensuite la vis<br />
I Impugnatura<br />
Prima di chiudere la cinghia all’altezza<br />
della mano, svitare la vite per regolare<br />
la larghezza della mano, regolare la<br />
larghezza ed eventualmente l’altezza,<br />
e quindi riavvitarla.<br />
Vakuumkissen wird weich | The vacuum cushion becomes soft<br />
Le coussin à vide d’air devient mou<br />
Il cuscino sottovuoto diventa morbido<br />
D Ventilring nach oben ziehen<br />
und seitlich bewegen,<br />
damit Luft einströmen kann.<br />
E Pull the valve ring upwards and<br />
move it laterally to allow air to enter.<br />
F Tirer l’anneau de soupape vers le<br />
haut et le déplacer latéralement<br />
afin que l’air puisse entrer.<br />
I Tirare l‘anello della valvola verso<br />
l‘alto e muoverlo lateralmente,<br />
per permettere l‘afflusso dell‘aria.<br />
Vakuumkissen wird fest | The vacuum cushion becomes hard<br />
Le coussin à vide d’air devient dur | Il cuscino diventa rigido<br />
D Ventilring nach unten drücken<br />
und mit der Pumpe Vakuum ziehen.<br />
Anpassung fixieren.<br />
E Press the valve ring down and draw<br />
in the vacuum with the pump.<br />
Fasten the adjustment.<br />
F Pousser l’anneau de soupape<br />
vers le bas et faire le vide avec<br />
la pompe. Fixer l’adaptation.<br />
I Premere l‘anello della valvola<br />
verso il basso, creando il vuoto<br />
con la pompa. Fissare la regolazione.<br />
Ventikappe schließen<br />
Closing the valve cap<br />
Fermer le bouchon de la soupape<br />
Chiudere il cappuccio della valvola<br />
D Sichern des Vakuumzustandes<br />
E Securing the vacuum status<br />
F Verrouiller l’état de vide<br />
I Assicurare lo stato di vuoto
www.vacohand.com<br />
Anlegevorgang<br />
Application procedure<br />
Processus de mise en place<br />
Procedura applicativa<br />
Anlegevorgang<br />
Application procedure<br />
Processus de mise en place<br />
Procedura applicativa<br />
D Alle Gurte noch einmal nachziehen<br />
E Re-tighten all straps<br />
F Resserrer de nouveau toutes<br />
les sangles<br />
I Serrare di nuovo tutte le cinghie<br />
D Winkeleinstellung<br />
• Einstellung für FIX in 12° Schritten<br />
• Einstellung im Bereich von 120° beweglich (ROM)<br />
E Angle adjustment<br />
• Adjustment for FIX in steps of 12°<br />
• Adjustment possible in a range of 120° (ROM)<br />
F Réglage de l‘angle<br />
• Réglage en position FIX par incrément de 12°<br />
• Réglage en position avec un champ de<br />
mouvement de 120° (ROM)<br />
I Regolazione dell’angolo<br />
• Angolo di abduzione fisso (FIX) regolabile<br />
a intervalli di 12°<br />
• Angolo di abduzione con libertà di<br />
movimento in un range di 120° (ROM)<br />
beweglich (ROM)<br />
can be moved freely (ROM)<br />
mobile (ROM)<br />
Con libertà di movimento (ROM)<br />
36°<br />
24°<br />
12°<br />
0°<br />
12°<br />
24°<br />
36°<br />
36°<br />
36°<br />
FIX<br />
D Ggf. Frottee über die Enden der<br />
VACOhand drüber stülpen<br />
E If required, pull a terry cloth<br />
cover over the ends of the VACOhand<br />
F Replier au besoin le tissu éponge<br />
sur le rebord extérieur de chaque<br />
extrémité du VACOhand<br />
I Eventualmente ripiegare il tessuto<br />
sopra le estremità di VACOhand<br />
D Kontrolle<br />
• Alle Fingergrundgelenke müssen sichtbar<br />
und frei beweglich sein.<br />
• Wenn dies nicht gegeben ist, siehe<br />
„Unterarm in der Schale platzieren“<br />
E Check<br />
• All finger base joints must be visible<br />
and freely movable.<br />
• If this is not the case, see<br />
„Placing lower arm in shell“<br />
F Contrôle<br />
• Toutes les articulations des doigts<br />
doivent être visibles et se mouvoir<br />
librement.<br />
• Si ce n‘est pas le cas, se reporter<br />
à la section « Placer l‘avant-bras<br />
dans la coquille »<br />
I Controllo<br />
• Tutte le articolazioni metacarpo-falangee<br />
devono essere visibili e libere di muoversi.<br />
• In caso contrario, si rimanda al capitolo<br />
“Introdurre l’avambraccio nel guscio”
www.vacohand.com<br />
Vorgang bei Anwendung mit Pollex<br />
Procedure when using Pollex<br />
Processus d‘utilisation avec<br />
dispositif Pollex<br />
Procedura in caso di impiego di Pollex<br />
Vorgang bei Anwendung mit Pollex<br />
Procedure when using Pollex<br />
Processus d‘utilisation avec<br />
dispositif Pollex<br />
Procedura in caso di impiego di Pollex<br />
D Vorgang bei Anwendung mit Pollex<br />
• Bei der Verwendung der VACOhand + Pollex,<br />
folgen sie zuerst der <strong>Bedienungs</strong><strong>anleitung</strong><br />
für den Pollex<br />
• Montieren sie den roten Clip an die VACOhand<br />
(<strong>Bedienungs</strong><strong>anleitung</strong> ist am Clip angebracht)<br />
• Anschließend folgen sie der <strong>Bedienungs</strong><strong>anleitung</strong><br />
der VACOhand mit „Vorbereitung“<br />
E Procedure when using Pollex<br />
• When the VACOhand is used together with<br />
Pollex, first read the instructions for the Pollex<br />
• Fasten the red clip to the VACOhand<br />
(instructions are attached to the clip)<br />
• Then follow the instructions for the<br />
VACOhand, starting with „Preparation“<br />
F Processus d‘utilisation avec dispositif Pollex<br />
• Lors de l‘utilisation des dispositifs<br />
VACOhand + Pollex, suivre dans un<br />
premier temps les instructions pour le<br />
dispositif Pollex<br />
• Monter le clip rouge sur le dispositif<br />
VACOhand (le mode d‘emploi se trouve<br />
sur le clip)<br />
• Suivre ensuite les instructions du<br />
dispositif VACOhand en commençant<br />
par l‘étape « Préparation »<br />
I Procedura in caso di impiego di Pollex<br />
• Se si utilizza VACOhand insieme a Pollex,<br />
attenersi innanzitutto alle istruzioni per<br />
l’utilizzo di Pollex<br />
• Montare la clip rossa sul tutore VACOhand<br />
(le istruzioni per l’uso sono riportate sulla clip)<br />
• Quindi seguire le istruzioni per l’uso di<br />
VACOhand riportate al capitolo “Applicazione”
www.vacohand.com<br />
Kleingedrucktes<br />
Reinigung und Pflege<br />
l Schale und Gurte:<br />
Schale Spülmaschine 90° C, Gurte Waschmaschine 40° C<br />
l Frotteebezüge: Waschmaschine 40° C<br />
l Vakuumkissen: Wischdesinfektion<br />
l Lagerung: trocken lagern<br />
Produkteigenschaften<br />
l 3 Größen: Small, Medium und Large<br />
jeweils für die linke oder rechte Hand erhältlich<br />
für Pollex:<br />
l 2 Größen: S und M/L<br />
jeweils für die linke oder rechte Hand erhältlich<br />
Indikationen / Einsatzorte<br />
l Radiusfrakturen<br />
l Frakturen im handgelenksnahen Bereich<br />
l Distorsionen des Handgelenks<br />
l Ruhigstellung und Stabilisierung des Handgelenks bei voller<br />
Beweglichkeit der Finger<br />
mit Pollex:<br />
l Scaphoidfrakturen Rhizarthrose-OP<br />
Problem & Lösung<br />
Druckstellen oder Schmerzen<br />
l Kissen auf faltenfreien Sitz kontrollieren<br />
l Ventilfunktion und ggf. Anpassvorgang wiederholen<br />
l Kissenfüllung an der Druckstelle gleichmäßig verstreichen<br />
Sollten sich Schmerzen oder Druckstellen bei starker Schwellung<br />
nicht durch wiederholtes Anpassen beseitigen, gehen Sie sofort<br />
zum Arzt! Hier ist eine medizinische Nachsorge notwendig!<br />
Zahlreiche Tipps und Tricks finden Sie unter www.vacohand.com<br />
Sicherheitshinweise / Kontraindikationen<br />
l Bauteile und Schale dürfen keine Beschädigungen aufweisen<br />
l Kontraindikationen sind keine bekannt.<br />
Technische Daten / Parameter<br />
Verwendete Materialien<br />
Hartschalen (POM); Bezüge (Synthetic); Kissen-Hülle (PVC), Füllmaterial<br />
(EPS-Kugeln); Gurte (PA-Gewebe)<br />
l Gewicht ca. 0,350 kg<br />
l Abmessungen 30 x 20 x 13 cm<br />
Garantie<br />
Die Produktgarantien entsprechen den gesetzlichen Vorschriften.<br />
Useful Details<br />
Cleaning and maintenance<br />
l<br />
l<br />
l<br />
l<br />
Shell and straps:<br />
Shell in the dish washer at 90°C, strap in the<br />
washing machine at 40°C.<br />
Terry cloth covers: Washing machine, at 40° C<br />
Vacuum cushion: Wipe disinfection<br />
Storage: Store in a dry place.<br />
Product features<br />
l<br />
3 sizes: small, medium and large<br />
each available for the left or right hand<br />
for Pollex:<br />
l<br />
2 sizes: S and M/L<br />
each available for the left or right hand<br />
Indications / applications<br />
l<br />
l<br />
l<br />
l<br />
Radial fractures<br />
Fractures in the vicinity of the wrist<br />
Distorsions of the wrist<br />
Immobilization and stabilization of the wrist<br />
while fingers retain full movement<br />
with Pollex:<br />
l<br />
Scaphoid fractures, rhizarthritis surgery<br />
Problem & solution<br />
Pressure points or pains<br />
l Check for crease-free position of the cushion<br />
l Repeat valve function and adjustment procedure, if necessary.<br />
l Distribute the cushion filling evenly over the pressure point.<br />
If the pains or pressure points do not go away with repeated adjustment<br />
if you have strong swelling, see a physician immediately! In this<br />
case, medical supervision is necessary!<br />
You can find numerous tips and tricks at www.vacohand.com<br />
Safety notes / contraindications<br />
l Components and shell must not show any signs of damage<br />
l No contraindications are known.<br />
Technical data / parameters<br />
Materials used<br />
Hard shells (POM); covers (synthetic); cushion cover (PVC), filler<br />
material (EPS beads); straps (PA tissue)<br />
l Weight approx. 0.350 kg<br />
l Dimensions 30 x 20 x 13 cm<br />
Warranty<br />
The product warranties comply with all legal regulations.
www.vacohand.com<br />
Notice<br />
Nettoyage et entretien<br />
l Coquille et sangles: lavage en lave-vaisselle<br />
à 90 ºC pour la coquille, lavage en machine<br />
à 40 ºC pour les sangles.<br />
l Housses en tissu éponge: lavage en machine à 40 ºC<br />
l Coussin à vide d‘air: désinfection par essuyage<br />
l Entreposage: conserver dans un endroit sec.<br />
Caractéristiques du produit<br />
l 3 tailles: petit, moyen et grand modèles main<br />
droite/main gauche disponibles<br />
Pollex:<br />
l 2 tailles : S et M/L<br />
modèles main droite/main gauche disponibles<br />
Indications / usages<br />
l Fractures du radius<br />
l Fractures dans la région du poignet<br />
l Entorses du poignet<br />
l Mise au repos et stabilisation du poignet tout en<br />
conservant la pleine mobilité des doigts<br />
avec Pollex:<br />
l Fractures du scaphoïde, chirurgie de la main - rhizarthrose<br />
Problème & solution<br />
Points de pression ou douleurs<br />
l Vérifier que le coussin ne présente aucun pli<br />
l Renouveler le processus relatif au fonctionnement de<br />
la soupape et à l‘ajustement<br />
l Répartir la garniture du coussin de manière uniforme<br />
sur le point de pression<br />
Si la mise en œuvre d‘un nouveau processus d‘ajustement ne permet<br />
pas de remédier aux douleurs ou aux points de pression dans le cas<br />
d‘enflure importante, consulter immédiatement un médecin! Un suivi<br />
médical est alors impératif! De nombreux conseils et astuces sont<br />
proposés sur le site www.vacohand.com.<br />
Consignes de sécurité / contre-indications<br />
l Les parties du dispositif et la coquille ne doivent<br />
présenter aucun signe de détérioration.<br />
l Aucune contre-indication connue.<br />
Éléments techniques / paramètres<br />
Matières employées<br />
Coquilles rigides (POM); housse (synthétique); enveloppe de coussin<br />
(PVC), garniture (billes EPS); sangles (tissu PA)<br />
l Poids environ 0,350 kg<br />
l Dimensions 30 x 20 x 13 cm<br />
Garantie<br />
Les garanties produit sont conformes aux prescriptions légales.<br />
Dettagli utili<br />
Pulizia e manutenzione<br />
l<br />
l<br />
l<br />
l<br />
Guscio e cinghie: guscio lavabile a 90° C<br />
in lavastoviglie, cinghie lavabili a 40° C in lavatrice<br />
Rivestimenti in spugna:<br />
lavabili in lavatrice a 40° C<br />
Cuscino sottovuoto<br />
Conservazione: in luogo asciutto<br />
Caratteristiche prodotto<br />
l<br />
Small, Medium e Large in due modelli (destro o sinistro)<br />
per Pollex:<br />
l<br />
2 misure: S e M/L in due modelli (destro o sinistro)<br />
Indicazioni / siti di applicazione<br />
l<br />
l<br />
l<br />
l<br />
Fratture del radio<br />
Fratture del polso ai vari livelli<br />
Distorsioni del polso<br />
Immobilizzazione e stabilizzazione del polso<br />
mantenendo la piena libertà di movimento delle dita<br />
con Pollex:<br />
l<br />
Fratture dello scafoide, chirurgia articolare (rizoartrosi)<br />
Problemi e soluzioni<br />
Punti di compressione o dolore<br />
l Verificare che l’adattamento del cuscino sia uniforme e<br />
senza pieghe<br />
l Controllare la funzione della valvola ed eventualmente<br />
ripetere la procedura di adattamento<br />
l Adattare in maniera uniforme l’imbottitura del cuscino in<br />
particolare nei punti di compressione<br />
Se, nonostante ripetuti adattamenti, non è possibile eliminare il<br />
dolore o i punti di compressione e il gonfiore è notevole, recarsi<br />
immediatamente dal medico! In questo caso occorre un immediato<br />
intervento medico!<br />
Per ulteriori consigli e raccomandazioni consultare il sito<br />
www.vacohand.com<br />
Avvertenze per la sicurezza / Controindicazioni<br />
l I componenti strutturali e il guscio devono essere liberi da difetti<br />
l Non si conoscono controindicazioni.<br />
Specifiche / parametri tecnici<br />
Materiali utilizzati<br />
Guscio rigido (POM); rivestimento (tessuto sintetico); involucro del<br />
cuscino (PVC), riempimento (microsfere in EPS); cinghie (tessuto di PA)<br />
l Peso circa 0,350 kg<br />
l Dimensioni 30 x 20 x 13 cm<br />
Garanzia<br />
Le garanzie del prodotto sono conformi alle disposizioni di legge.
www.vacohand.com
OPED – damit Sie beweglich<br />
bleiben<br />
OPED ist spezialisiert auf Medizintechnik,<br />
die Verletzte schnell wieder<br />
auf die Beine kommen lasst.<br />
Wir versorgen Patienten mit einer<br />
ganzen Palette von orthopadischen<br />
Rehabilitationsprodukten.<br />
OPED – we help you to stay in<br />
movement<br />
OPED is specialised in medical technology<br />
that gets injured people back<br />
on track again quickly. We provide<br />
patients with a wide range of orthopaedic<br />
rehabilitation products.<br />
OPED – afin que vous conserviez<br />
votre mobilité<br />
OPED est spécialisé en technique<br />
médicale afin que les personnes ayant<br />
subi une lésion puissent rapidement<br />
recouvrir leur mobilité.<br />
Nous proposons aux patients toute<br />
une série de produits de réhabilitation<br />
orthopédique.<br />
WM-TEVP-01-2 | 11/2010 | artraction | Fuchs Druck<br />
OPED – perchè possiate rimanere<br />
agili e in movimento<br />
OPED è specializzata nella tecnologia<br />
medica e in un recupero post-operatorio<br />
più veloce per i pazienti.<br />
Ci prendiamo cura dei pazienti con<br />
un vasto assortimento di prodotti<br />
per la riabilitazione<br />
ortopedica.<br />
OPED GmbH<br />
Medizinpark 1<br />
83626 Valley/Oberlaindern<br />
Germany<br />
Fon +49 (0) 80 24/60 81 82-10<br />
Fax +49 (0) 80 24/60 81 82-99<br />
mail@oped.de<br />
www.oped.de<br />
OPED AG<br />
Hinterbergstrasse 26<br />
6330 Cham<br />
Switzerland<br />
Fon +41 (0) 41/7485335˘35 3535ttt435<br />
Fax +41 (0) 41/748 53 40<br />
contact@oped.ch<br />
www.oped.ch<br />
OPED Inc.<br />
47 Loring Drive<br />
Framingham, MA 01702<br />
USA<br />
Fon +1/ 508/879 076235<br />
Fax +1/ 508/879 0769<br />
contact@opedinc.com<br />
www.opedinc.com