EIT 810 - Multimetrix
EIT 810 - Multimetrix
EIT 810 - Multimetrix
- No tags were found...

Create successful ePaper yourself
Turn your PDF publications into a flip-book with our unique Google optimized e-Paper software.
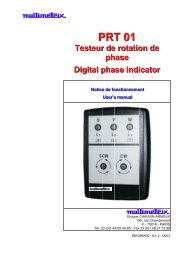
EnglishMaintenanceStorageUnpacking andrepackagingReplacing thebatteriesFrom time to time, clean your tester using a damp cloth and soapy water. Do notuse abrasive materials or products containing solvents.If you leave your tester unused for a period of longer than 60 days, remove thebatteries and store them separately.All equipment has undergone mechanical and electrical testing prior todispatching.However, we recommend you carry out a rapid check for any deterioration thatmay have occurred during transportation. If any deterioration is found,immediately indicate this in due form to the carrier.In the case of return of goods, use the original packaging and state the reasonsfor return in a note enclosed with the apparatus.The battery power level is measured by setting the switch to the BATT.CHECKposition.-if the needle is deflected to the BAT.OK part of the scale, the battery level issufficient to carry out measurements,-if however the needle is deflected to the BAT.LOW part of the scale, it isnecessary to replace the power supply batteries:■ Disconnect all measurement cables and switch the instrument off (OFFposition).■ Using a screwdriver, remove the 2 screws from the battery compartment cover(on the underside of the instrument)■ Put new batteries in place: 8 x 1.5 V batteries (AA or equivalent).■ Replace the battery compartment cover.■ Replace the 2 battery compartment cover screws.Replacing a fuse There is a fuse fitted in the battery compartment of the apparatus.To replace it with an equivalent fuse (1 A / 250 V 0.2 Ω),■ switch the instrument OFF■ remove the 2 screws from the battery compartment cover on the undersideof the instrument,■ the fuse is on the right-hand side, under a plastic cap; replace the defectivefuse with an equivalent new fuse,■ replace the plastic cap, close the battery compartment cover, and put thescrews back in place.To avoid electric shock or damage to your tester, do not allow water tocome into contact with the inside of the tester.Functional descriptionMain functions ■ Measurement of the voltage on the earth of the installation.■ Measurement of the resistance of the earth electrode using 1 or 2 auxiliaryrods (2P or 3P method) with a current of 2mA.■ AC voltage measurement up to 600VAC■ Insulation measurement at 250 or 500 VDC up to 100 MΩ or 200 MΩ■ Instantaneous measurement or stabilised measurement (longermeasurement time) by blocking the button used to start the test■ Measurement of the battery charge level (1.5 V batteries)■ Protected by safety fuseFront PanelDescription1 – 6-position rotary switch for selecting the measurement to be made:■ OFF: instrument is switched off■ BATT.CHECK: measurement of battery power level■ EARTH VOLTAGE: measurement of earth voltage■ EARTH RESISTANCE: measurement of earth electrode resistance■ ACV: measurement of AC voltage■ MΩ: measurement of insulation resistance2 – measurement terminals:■ E,P,C: inputs for the earth resistance measurement: E/ Earth, P/ Potential, C/Current and the earth voltage measurement (between E and P)■ EARTH, LINE: inputs for the insulation resistance and AC voltagemeasurementAnalog earth & insulation tester