Chauffe-biberon Turbo Vapeur maison/voiture - Babymoov
Chauffe-biberon Turbo Vapeur maison/voiture - Babymoov
Chauffe-biberon Turbo Vapeur maison/voiture - Babymoov
- No tags were found...

You also want an ePaper? Increase the reach of your titles
YUMPU automatically turns print PDFs into web optimized ePapers that Google loves.
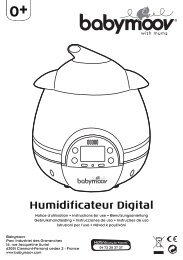
abcdfgedhcCHAUFFE-BIBERONS - BOTTLE WARMER - FLÄSCHCHENWÄRMERFLESSENWARMER - CALIENTABIBERONES - AQUECEDOR DE BIBERÕESSCALDA-BIBERON - OHŘÍVAČ KOJENECKÝCH LÁHVÍ1 2 3 42
56 789 1011 12 13 14BIP...BIP...BIP...3
STÉRILISATEUR - STERILISER - STERILISATOR - STERILISATORESTERILIZADOR - ESTERILIZADOR - STERILIZZATORE - STERILIZÁTOR1 2 3 45 6 78 9 10 114
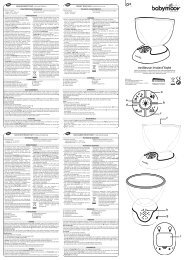
✂0+<strong>Chauffe</strong>-<strong>biberon</strong> <strong>Turbo</strong> <strong>Vapeur</strong><strong>maison</strong>/<strong>voiture</strong>Réf. : A002051• Guide de démarrage rapide• Quick start guide• Kurzanleitung• Handleiding voor snel gebruik• Guía de inicio rápido• Início rápido• Guida di riferimento rapido• Rychlý přehledA B C DE F G5
CHAUFFE-BIBERONS - BOTTLE WARMER - FLÄSCHCHENWÄRMERFLESSENWARMER - CALIENTABIBERONES - AQUECEDOR DE BIBERÕESSCALDA-BIBERON - OHŘÍVAČ KOJENECKÝCH LÁHVÍSTÉRILISATEUR - STERILISERSTERILISATOR - STERILISATORESTERILIZADOR - ESTERILIZADORSTERILIZZATORE - STERILIZÁTORH IH’JI’FR. Pour plus d'informations, consultez la notice complète - EN. For more information, refer to the complete user guide<strong>Babymoov</strong>Parc Industriel des Gravanches16, rue Jacqueline Auriol63051 Clermont-Ferrand cedex 2 - Francewww.babymoov.com6Designed and engineeredby <strong>Babymoov</strong> in France✂
FRNous vous remercions d’avoir choisi le chauffe-<strong>biberon</strong> <strong>Turbo</strong> <strong>Vapeur</strong> <strong>maison</strong>/<strong>voiture</strong> et nousvous invitons à lire attentivement cette notice pour une meilleure utilisation du produit.Nous vous conseillons de la conserver comme référence en cas de besoin ultérieur.• Réchauffe tout type de <strong>biberon</strong>s et petits pots grâce à sonsystème exclusif : la vapeur sort de la languette sur la hauteurdu <strong>biberon</strong> pour assurer une température homogène.• 2 en 1 : chauffe-<strong>biberon</strong>s et stérilisateur.FONCTIONS• Puissant :- À la <strong>maison</strong> : 320 W / 230 V.- En <strong>voiture</strong> : 100 W / 12 V.• Universel : pour tous les types de <strong>biberon</strong>s.• Sûr : arrêt automatique à la fin du cycle.• Ne laissez pas votre enfant sans surveillance pendant lefonctionnement de l’appareil.• Vérifiez que la tension de votre installation électrique soit compatibleavec l’appareil (voir les valeurs indiquées sous l’appareil).• Utilisez l’appareil uniquement pour réchauffer des <strong>biberon</strong>s etpetits pots et pour stériliser des <strong>biberon</strong>s et leurs accessoires.Toute autre utilisation pourrait s’avérer dangereuse.• Ne mettez jamais l’appareil en marche sans eau. Ne démarrerjamais l’appareil sans avoir versé une quantité d’eau suffisante.• N’ajoutez aucun autre produit (eau salée, médicaments,détergents) à l’eau car cela abîme l’appareil.• Lavez-vous toujours les mains avant de préparer un <strong>biberon</strong>.• N’utilisez pas le chauffe-<strong>biberon</strong> dans des conditions humideset ne le placez pas directement sous l’eau.• Ne laissez pas l’appareil prés des sources de chaleur commeradiateurs, fenêtres ensoleillées…• Utilisez le chauffe-<strong>biberon</strong> sur une surface totalement planeet sèche.• Ce chauffe-<strong>biberon</strong> est à utiliser en intérieur seulement. N’utilisezpas le chauffe-<strong>biberon</strong> à l’extérieur.• Ne laissez pas vos <strong>biberon</strong>s ou petits pots chauffertrop longtemps.• Les <strong>biberon</strong>s sont très chauds à la sortie du chauffe-<strong>biberon</strong>.Retirez-les avec précaution.• Ne déplacez pas l’appareil en cours de fonctionnement.CONSIGNES DE SÉCURITÉ• En marche, l’appareil peut devenir très chaud. Ne touchez quela poignée et l’interrupteur.• Débranchez toujours l’appareil avant de le nettoyer ou dele remplir.• Débranchez l’appareil après chaque utilisation pour éviter toutemise en marche accidentelle.• Laissez-le hors de portée des enfants car cet appareil contientde la vapeur extrêmement chaude. Vérifiez que le câble soithors d’atteinte.• Surveillez vos enfants pour qu’ils ne jouent pas avec l’appareil.• N’utilisez pas la poignée de la cloche pour soulever l’appareil.• Placez toujours les <strong>biberon</strong>s ouverts (sans tétine ni capuchon)dans l’appareil. Retirez toujours le couvercle des petits pots.Utilisation en <strong>voiture</strong> :• N’utilisez jamais le chauffe-<strong>biberon</strong> lorsque le véhicule est enmouvement. Lorsque vous utilisez le chauffe-<strong>biberon</strong>, laissezle moteur de votre véhicule tourner afin de ne pas déchargervotre batterie.• L’adaptateur pour allume-cigare est spécialement conçu pource chauffe-<strong>biberon</strong>: ne l’utilisez pas avec d’autres appareils.• Vérifiez régulièrement l’allume-cigare de votre véhicule. Nettoyezlesi nécessaire.• Si vous venez d’utiliser votre allume-cigare, laissez-le refroidirpendant cinq minutes en position ouverte avant d’y brancher lechauffe-<strong>biberon</strong>.• Cet appareil est destiné à être utilisé dans des applicationsdomestiques et analogues telles que :- des coins cuisines réservés au personnel dans les magasins,bureaux et autres environnements professionnels,- des fermes,- l'utilisation par les clients des hôtels, motels et autresenvironnements à caractère résidentiel,- des environnements du type de chambres d'hôtes.• Si le câble d’alimentation est endommagé, il doit être remplacépar le fabricant, son service après vente ou des personnes dequalification similaire afin d’éviter un danger.• Les dosages du tableau sont à titres indicatifs, si vous considérezque cela est trop chaud ou pas assez chaud pour votre bébé,n’hésitez pas à diminuer ou à augmenter les quantités d’eau.N.B. : la matière et l’épaisseur du <strong>biberon</strong> ; la présence d’unfond amovible sont des éléments qui peuvent influer sur latempérature du <strong>biberon</strong>.• ATTENTION : pour éviter tous risques de brûlure, toujours s’assurerde la température de la nourriture avant de la donner à votre bébé.Pour un <strong>biberon</strong>, bien agiter ce dernier pour mélanger le lait. Versezune goutte sur l’intérieur du poignet pour vérifier sa température.AVERTISSEMENTSPour un petit pot, mélangez son contenu et vérifiez qu’il n’estpas chaud en le goûtant.• Cet appareil n’est pas prévu pour être utilisé par des personnes(y compris les enfants) dont les capacités physiques, sensoriellesou mentales sont réduites, ou par des personnes dénuéesd’expérience ou de connaissance sauf si elles ont pu bénéficier,par l’intermédiaire d’une personne responsable de leur sécurité,d’une surveillance ou d’instructions préalables concernantl’utilisation de l’appareil.• Les équipements électriques et électroniques font l’objet d’unecollecte sélective. Ne pas se débarrasser des déchetsd’équipements électriques et électroniques avec les déchetsmunicipaux non triés, mais procéder à leur collecte sélective.Ce symbole indique à travers l’Union Européenne quece produit ne doit pas être jeté à la poubelle oumélangé aux ordures ménagères, mais faire l’objetd’une collecte sélective.CHAUFFE-BIBERON TURBO VAPEUR MAISON/VOITURE • Notice d’utilisation 7
a. Poignée de la clocheb. Clochec. Support des <strong>biberon</strong>sCOMPOSITIONd. Dosette d’eau / languette vapeure. Bouton “ON”f. Grilleg. Poignée de la grilleh. Adaptateur pour allume-cigareMODE D’UTILISATIONCHAUFFE-BIBERONSÀ la <strong>maison</strong>1. Retirez la cloche (b) en saisissant sa poignée (a).2. Sortez la dosette d’eau (d). Remplissez-la en suivant les quantités indiquées ci-dessous.Quantité de laitdans le <strong>biberon</strong>Quantité d’eau àmettre dans la dosettepour un <strong>biberon</strong>préparé avec del’eau tempéréeQuantité d’eau àmettre dans la dosettepour un <strong>biberon</strong>préparé et placéau réfrigérateur60 ml 6 ml 11 ml90 ml 8 ml 12 ml120 ml 9 ml 13 ml150 ml 9.5 ml 14 ml180 ml 10 ml 15 ml210 ml 11 ml 15.5 ml240 ml 12 ml 16 ml270 ml 13 ml 16.5 ml300 ml 14 ml 17 ml330 ml 15 ml 18 mlPetit potQuantité d’eau àmettre dansla dosette pourun petit potQuantité d’eau àmettre dans la dosettepour un petit potplacé auréfrigérateur3. Retirez le support (c).4. Retirez la grille (f).5. Versez l’eau dans la cuve.6. Replacez la grille (f) sur la plaque de chauffe.7. Faites pivotez la grille grâce à sa poignée (g) dans le sens inverse des aiguilles d’une montre pour la FERMER. Cela permettra à lavapeur de sortir de la languette vapeur (d).8. Placez le support (c) dans le chauffe-<strong>biberon</strong>.9. Insérez la dosette d’eau / languette vapeur (d).10. Placez le <strong>biberon</strong> à l’intérieur du support, sans tétine ni capuchon.11. Fermez la cloche (b).12. Verrouillez-la en la faisant pivoter dans le sens inverse des aiguilles d’une montre.13. Branchez l’appareil sur secteur et appuyez sur le bouton « On » (e) pour lancer le cycle. Un témoin lumineux indiquera que l’appareilest en marche. L’appareil s’éteindra automatiquement et une alarme sonore vous préviendra que le cycle est terminé.14. Tenez la poignée de la cloche (a) et tournez-la dans le sens des aiguilles d’une montre pour la déverrouiller.15. Retirez le <strong>biberon</strong> / petit pot avec prudence : il sera chaud.16. Dans le cas d’un <strong>biberon</strong>, ajoutez la poudre de lait, et placez la tétine et le capuchon. Secouez le <strong>biberon</strong> pour bien mélanger l’eauet le lait et obtenir une température homogène.17. Vérifiez toujours la température de la nourriture avant de la donner à votre bébé.En <strong>voiture</strong>- Arrêtez le véhicule et laissez le moteur tourner.- Posez le chauffe-<strong>biberon</strong> sur une surface plane et stable à l’intérieur de votre véhicule.- Suivez ensuite les tâches 1 à 17 décrites ci-dessus en prenant soin de diminuer la quantité d’eau de la dosette de quelques millilitres(entre 2 et 4 ml) et en remplaçant l’étape 13 par les instructions suivantes :13. Branchez l’adaptateur pour allume-cigare (h) sur le cordon d’alimentation du chauffe-<strong>biberon</strong>. Branchez l’adaptateur dans l’allumecigare.Appuyez sur le bouton « On » (e) pour lancer le cycle. Un témoin lumineux indiquera que l’appareil est en marche. L’appareils’éteindra automatiquement et une alarme sonore vous préviendra que le cycle est terminé.La durée du cycle de chauffe sera plus longue que pour une utilisation à la <strong>maison</strong> (durée moyenne : 10 minutes).8120 g 10 ml 16 ml200 g 13 ml 18 ml250 g 18 ml 25 mlCHAUFFE-BIBERON TURBO VAPEUR MAISON/VOITURE • Notice d’utilisation
STÉRILISATEURPoints à respecter pour une parfaite stérilisation :- Toujours se laver les mains avant de préparer un <strong>biberon</strong>.- Une totale stérilisation n’est garantie que si le processus n’est pas interrompu.- Utiliser l’eau du robinet sans aucun additif.- Avant toute stérilisation, il est important de laver, de rincer à l’eau froide et de vider tous les <strong>biberon</strong>s et accessoires.- De simples traces de lait peuvent entraîner la propagation des bactéries.À la <strong>maison</strong>1. Ouvrez la cloche (b) grâce à sa poignée (a).2. Retirez la dosette d’eau (d).3. Retirez le support (c).4. Retirez la grille (f).5. Versez 30 ml d’eau dans la cuve, en vous aidant de la dosette (1 dosette 1/2) ou d’un <strong>biberon</strong>.6. Replacez la grille (f) sur la plaque de chauffe.7. Faites pivotez la grille grâce à sa poignée (g) dans le sens des aiguilles d’une montre pour l’OUVRIR. Cela permettra à la vapeur desortir du fond de la cuve, directement à l’intérieur du <strong>biberon</strong>.8. Posez le <strong>biberon</strong> tête en bas sur la grille (f). Placez ses accessoires autour de lui.9. Fermez la cloche (b) et verrouillez-la en la faisant pivoter dans le sens inverse des aiguilles d’une montre.10. Branchez l’appareil sur secteur et appuyez sur le bouton « On » (e) pour lancer le cycle. Un témoin lumineux indiquera que l’appareilest en marche. L’appareil s’éteindra automatiquement et une alarme sonore vous préviendra que le cycle est terminé.11. Tenez la poignée de la cloche (a) et tournez-la dans le sens des aiguilles d’une montre pour la déverrouiller.12. Retirez le <strong>biberon</strong> avec prudence : il sera chaud.13. Pour une stérilisation optimale, nous vous conseillons de réaliser un deuxième cycle de stérilisation.En <strong>voiture</strong>- Arrêtez le véhicule et laissez le moteur tourner.- Posez le chauffe-<strong>biberon</strong> sur une surface plane et stable à l’intérieur de votre véhicule.- Suivez ensuite les tâches 1 à 13 décrites ci-dessus en remplaçant l’étape 10 par les instructions suivantes :10. Branchez l’adaptateur pour allume-cigare (h) sur le cordon d’alimentation du chauffe-<strong>biberon</strong>. Branchez l’adaptateur dans l’allumecigare.Appuyez sur le bouton « On » (e) pour lancer le cycle. Un témoin lumineux indiquera que l’appareil est en marche. L’appareils’éteindra automatiquement et une alarme sonore vous préviendra que le cycle est terminé.ENTRETIENNettoyage- Ne plongez jamais l’appareil dans l’eau, et ne le remplissez pas complètement d’eau.- Utilisez un tissu légèrement humide pour nettoyer l’intérieur et l’extérieur. N’utilisez aucun produit détergent pour nettoyer l’intérieur oul’extérieur de l’appareil.- La dosette d’eau et le support peuvent être lavés au lave-vaisselle.DétartrageN’utilisez pas de produits détartrants.Au fil des utilisations et selon la dureté de l’eau utilisée, une couche de calcaire peut recouvrir la cuve. Pour le bon fonctionnement del’appareil, cette cuve doit être détartrée régulièrement.Procédez de la façon suivante : mélangez 100 ml d’eau chaude avec 100 ml de vinaigre blanc et versez le tout dans la cuve. Laissez agir30 minutes et videz l’appareil. Utilisez ensuite un chiffon humide pour le nettoyer.PETITS SOUCISLe chauffe-<strong>biberon</strong> ne chauffe pas :- Vérifiez que le bouton de mise en marche est activé.- Vérifiez que l’appareil est branché.- Vérifiez qu’il n’y a pas de tartre dans la cuve, et détartrez-la si nécessaire.Les cycles de chauffe sont trop courts ou trop longs :Il y a trop peu ou trop d’eau : adaptez la quantité d’eau.CHAUFFE-BIBERON TURBO VAPEUR MAISON/VOITURE • Notice d’utilisation 9
ENThank you for choosing our <strong>Turbo</strong> Steam car/home bottle warmer; we recommend you readthese instructions carefully in order to use it to best advantage.We also suggest you keep them in case they are needed for reference later.• Warms efficiently any kind of bottles and jars thanks to its exclusivesystem : steam comes from the tongue in order to ensure anhomogeneous temperature.• 2 in 1: bottle warmer and steriliser.FEATURES• Powerful- At home: 320 W / 230 V.- In car: 100 W / 12 V.• Universal: for all types of baby bottles.• Safe: automatic stop when the cycle is complete.• Never leave your child without supervision while the applianceis working.• Check that your electrical power supply voltage is compatible withthe appliance (see the details indicated beneath the appliance).• Only use the appliance to heat baby bottles jars and sterilize babybottles and accessories. Any other use might prove dangerous.• Never start the appliance without water. Never switch on theappliance before pouring in a sufficient quantity of water.• Never add any product of any kind (salt water, medication,detergents) to the water: this will damage the appliance.• Always wash your hands before preparing a bottle.• Never use the bottle warmer in damp surroundings and do notplace directly under the tap. Never immerse the appliance inwater or any other liquid.• Never leave the appliance close to any source of heat such asradiators, sunny windows, etc.• Always use the bottle warmer on a completely flat and dry surface.• Use this bottle warmer in household only. Do not use the bottlewarmer outdoor.• Don't leave the bottle or jar to heat too long.• The bottles will be very hot when they come out of the warmer.Take care when removing them.• Never move the appliance while it is working or if it containshot water.• During the heating process the appliance can get very hot. Apartfrom the handle and switch, do not touch it.SAFETY INSTRUCTIONS• Always unplug the appliance before cleaning or filling it.• Unplug the appliance after use every time, to avoid any risk ofstarting it accidentally.• Keep it out of reach of children because during and after operationit contains extremely hot steam. Check that the power cable isout of reach too.• Children should be supervised to ensure that they do not playwith the appliance.• Do not use the lid’s knob to lift up the appliance.• Always place uncovered bottles (without teat or cap) inside theappliance. Always remove the lid from jars.For using in car:• Never use the bottle warmer while the vehicle is in motion.Leave your engine running when using the bottle warmer toavoid draining your battery.• The car adapter cord is specially designed for this bottle warmer:never use it with other appliances.• Regularly check that the cigarette lighter socket in your car.Clean it if necessary.• If you have just used your car’s cigarette lighter, allow it to coolfor five minutes in the open position before plugging in withthe bottle warmer.• This appliance is designed to be used for domestic and suchlikeapplications such as:- kitchen areas reserved for personnel in stores, offices and otherprofessional environments,- farms,- use by hotel, motel customers and other accommodationenvironments,- bed and breakfast environments.• If the power supply cable gets damaged it must be replaced bythe manufacturer, the after-sales service or people with similarqualifications, in order to avoid any risk of danger.• The quantities given in the table are an indication only; if youthink the result is too hot or not hot enough for your baby, don'thesitate to reduce or increase the quantities of water.N.B.: the material and the thickness of the bottle and thepresence of a removable base are elements that can affect thebottle’s temperature.10WARNINGS• ATTENTION: to eliminate the risk of burns, always check thetemperature of the food before giving it to your baby. For a bottle,shake it well to mix the milk. Pour a drop onto the inside of yourwrist to check its temperature. For a jar, mix the contents and tryit in order to check it is not too hot.• This appliance is not intended for use by persons (includingchildren) with impaired physical, mental, or sensory abilities, orby persons lacking in experience or knowledge, unless the personresponsible for their safety has supervised and instructed themin the use of this appliance.• Waste Electrical and Electronic Equipment should be disposed ofby selective collection. Do not throw electrical and electronicequipment away with un-sorted household waste, but disposeof it at a selective collection point.• This marking indicates that this product should not bedisposed with other household wastes throughoutthe EU.CAR/HOME TURBO STEAM BOTTLE WARMER • Instuctions for use
a. Lid’s handleb. Lidc. Bottles standCOMPOSITIONd. Measuring cup / steam tonguee. « On » buttonf. Grilleg. Grille’s handleh. Car adaptor plugHOW TO USEBOTTLE WARMERAt home1. Open the lid (b) thanks to its handle (a).2. Take out the measuring cup (d). Fill it with water, following the quantities instructions below.Amount of milkin the bottleAmount of waterto be put in themeasuring cup for BWfor bottle content inroom temperatureAmount of waterto be put in themeasuring cup for BWfor bottle content infridge temperature60 ml 6 ml 11 ml90 ml 8 ml 12 ml120 ml 9 ml 13 ml150 ml 9.5 ml 14 ml180 ml 10 ml 15 ml210 ml 11 ml 15.5 ml240 ml 12 ml 16 ml270 ml 13 ml 16.5 ml300 ml 14 ml 17 ml330 ml 15 ml 18 mlJarAmount of water to beput in the measuringcup for BW for baby jarin room temperatureAmount of waterto be put in themeasuring cupfor BW for baby jarinfridge temperature120 g 10 ml 16 ml200 g 13 ml 18 ml250 g 18 ml 25 ml3. Remove the stand (c).4. Remove the grille (f) from the bottle warmer.5. Pour the water into the water tank.6. Put the grille (f) back on the tank.7. Hold the grille’s handle (g) to CLOSE the grill by turning it anti-clockwise. This will ensure that the steam goes through the steam“steam tongue” (d).8. Put the stand (c) in the bottle warmer.9. Insert the measuring cup/steam tongue (d).10. Place the bottle inside the stand, without teat and cap.11. Close the lid (b).12. Lock it by turning it anti-clockwise.13. Plug the appliance into mains. Press the “On” button (e) to start the cycle. The lamp will illuminate to show that the appliance isworking. It will go out automatically and an audible alarm will tell you that the cycle is complete.14. Hold the lid’s handle (a) and turn it clockwise to unlock the lid.15. Remove the bottle or jar carefully; it will be hot.16. For a bottle, add the milk powder, and place the teat and cap on the bottle. Shake it to ensure an even temperature and to mix themilk with the water.17. Always check the temperature of the food before giving it to your baby.In car- Stop the car / vehicle and keep the engine running.- Place the Bottle Warmer on a flat and stable surface inside your car and vehicle.- Then carry out steps 1 to 17 described above, taking care to reduce the amount of water in the measure by a few millilitres (between 2and 4ml), and replacing step 13 by the following instructions:13. Connect the Car Adaptor Plug (h) on to the power cord of the bottle warmer. Plug the Car Adaptor Plug into the cigarette socket.Press the “On” button (e) to start the cycle. The lamp will illuminate to show that the appliance is working. It will go out automaticallyand an audible alarm will tell you that the cycle is complete.The heating cycle will take longer than when using at home (average time: 10 minutes).CAR/HOME TURBO STEAM BOTTLE WARMER • Instuctions for use 11
STERILISERIn order to sterilize perfectly, the following points are essential:- Always wash your hands before preparing a bottle.- Complete sanitization is only guaranteed when the process has not been interrupted.- Use tap water with no added product.- Before any sterilization process, it is important to wash all the bottles and accessories, rinse them with cold water then empty them.- Even the slightest trace of milk provides a breeding ground for bacteria.At home1. Open the lid (b) thanks to its handle (a).2. Take out the measuring cup (d).3. Remove the stand (c).4. Remove the grille (f) from the bottle warmer.5. Pour 30 ml of water into the basin, using the measuring spoon (½ 1 measuring spoon) or a feeding bottle.6. Put the grille (f) back on the tank.7. Hold the grille’s handle (g) to OPEN the grill by turning it clockwise. This will ensure that the steam comes out from the bottom of theappliance, directly inside the bottle.8. Place the bottle upside-down on the grille (f). Arrange the accessories around the bottle.9. Close the lid (b) and lock it by turning it anti-clockwise.10. Plug the appliance into mains. Press the “On” button (e) o start the cycle. The lamp will illuminate to show that the appliance isworking. It will go out automatically and an audible alarm will tell you that the cycle is complete.11. Hold the lid’s handle (a) and turn it clockwise to unlock the lid.12. Remove the bottle carefully; it will be hot.13. For optimum sterilisation, we would advise carrying out a second sterilisation cycle.In car- Stop the car / vehicle and keep the engine running.- Place the Bottle Warmer on a flat and stable surface inside your car and vehicle.- Repeat steps 1 – 13 as above, replacing step 10 by the following instructions :10. Connect the Car Adaptor Plug (h) on to the power cord of the bottle warmer. Plug the Car Adaptor Plug into the cigarette socket.Press the “On” button (e) to start the cycle. The lamp will illuminate to show that the appliance is working. It will go out automaticallyand an audible alarm will tell you that the cycle is complete.MAINTENANCECleaning- Never submerge the appliance in water, and don't fill it right up with water.- Use a slightly damp cloth to clean the inside and outside. Never use any kind of detergent to clean the inside and outside.- The measuring cup and stand can be washed in the dishwasher.De-scalingDo not use any de-scaling products.Depending on how hard the water used is and after a certain period of time, a layer of scale may build up in the tank. In order for theappliance to work properly, the tank needs to be de-scaled regularly.Proceed as follows: mix 100 ml hot water with 100 ml white vinegar and pour it all into the tank. Leave to act for 30 minutes then emptythe appliance. Then use a damp cloth to clean it.IN CASE OF ANY LITTLE PROBLEMThe bottle warmer doesn't heat up:- check the "On" button to make sure it is properly switched on,- check that the appliance is properly plugged in,- check that there is not too much scale in the tank, and de-scale if necessary.The warming cycles are too short or too long:There is not enough or too much water: adapt the amount of water in the tank.12CAR/HOME TURBO STEAM BOTTLE WARMER • Instuctions for use
DEWir danken Ihnen für Ihre Wahl zu unserem <strong>Turbo</strong> Dampf-Fläschchenwärmer für Heim & Autound fordern Sie zum aufmerksamen Lesen dieser Anleitung für eine optimale Nutzung desProdukts auf.Wir empfehlen weiterhin, die Anleitung für spätere Zwecke aufzubewahren.• Wärmt alle Fläschchen- und Gläschen arten anhand einesexklusiven Systems: Auf Höhe des Fläschchens tritt Dampf ausder Leiste, um eine einheitliche Temperatur zu gewährleisten.• 2 in 1 Funktion : Fläschchenwärmer und Sterilisator.FUNKTIONS• Leistungsstark:- Zuhause: 320 W / 230 V.- Im Auto : 100 W / 12 V.• Universell: für alle Arten von Fläschchen.• Sicher: automatisches Ausschalten nach Zyklusende..• Ihr Kind während des Betriebs des Geräts nichtunbeaufsichtigt lassen.• Prüfen, ob die Spannung Ihrer elektrischen Einrichtung mit demGerät übereinstimmt (siehe Angaben unter dem Gerät).• Das Gerät nur zum Wärmen und Sterilisation von Fläschchenoder Wärmen Töpfchen benutzen. Alle anderen Verwendungenkönnen gefährlich sein.• Das Gerät nie ohne Wasser betreiben. Das Gerät nie einschalten,bevor eine ausreichendeWassermenge eingefüllt ist.• Keine anderen Stoffe (Salzwasser, Medikamente, Reinigungsmittel)als Wasser benutzen, sie können das Gerät beschädigen.• Vor dem Vorbereiten eines Fläschchens immer die Hände waschen.• Den Fläschchenwärmer nicht in feuchten Umgebungen benutzen,nicht direkt unter Wasser halten.• Das Gerät nicht in der Nähe von Wärmequellen wie Heizkörpern,Fenstern in der prallen Sonne, usw. lassen.• Den Fläschchenwärmer auf einer völlig glatten, trockenenOberfläche benutzen.• Dieser Fläschchenwärmer ist nur drinnen zu benutzen. DenFläschchenwärmer nicht im Freien benutzen.• Das Fläschchen oder Töpfchen nicht zulange wärmen.• Die Fläschchen sind sehr heiß, wenn sie aus demFläschchenwärmer genommen werden. Vorsichtig entnehmen.• Das Gerät während des Betriebs oder wenn es heißes Wasserenthält nicht transportieren.• Während des Betriebs kann sich das Gerät stark erhitzen. Nurden Griff und den Taster berühren.SICHERHEITSVORSCHRIFTEN• Vor dem Reinigen oder befüllen des Geräts immer denNetzstecker ziehen.• Nach jedem Einsatz des Geräts den Netzstecker ziehen, um einunbeabsichtigtes Einschalten zu vermeiden.• Das Gerät außer Reichweite von Kindern aufbewahren, währendund nach dem Betrieb enthält das Gerät extrem heißen Dampf.Sicherstellen, dass das Kabel außer Reichweite ist.• Kinder sollten beaufsichtigt werden, damit sie nicht mit demGerät spielen.• Benutzen Sie den Griff der Haube bitte nicht, um dasGeräts hochzuheben.• Stellen Sie die Fläschchen stets geöffnet (ohne Sauger und Kappe)ins Gerät. Entfernen Sie stets den Gläschen deckel.Autogebrauch:• Nie den Fläschchenwärmer während der Fahrt benutzen. DenMotor während des Betriebs des Fläschchenwärmers laufenlassen, um die Batterie nicht zu stark zu belasten.• Das Kabel des Autoadapters ist speziell l für denFläschchenwärmer entwickelt: nie mit anderen Geräten benutzen.• Den Zigarettenanzünder Ihres Fahrzeugs regelmäßig kontrollieren.Falls notwendig, reinigen.• Wenn Sie Ihren Zigarettenanzünder gerade erst benutzt haben,fünf Minuten in offenem Zustand abkühlen lassen, bevor derFläschchenwärmer angeschlossen wird.• Das Gerät ist für häusliche und ähnliche Anwendungenvorgesehen, zum Beispiel:- Küchenecken für das Personal in Geschäften, Büros undähnlichen beruflichen Umfeldern,- Bauernhöfe,- den Gebrauch durch Kunden von Hotels, Motels und sonstigenBeherbergungsstätten,- Gästezimmer und ähnliche.• Wenn das Stromkabel beschädigt ist, muss es vom Hersteller,seinem Kundendienst oder gleichwertig qualifizierten Personenersetzt werden, um jegliche Gefahr auszuschließen.• Die Dosierungen der Tabelle sind als Richtwerte zu verstehen;wenn Sie glauben, die Nahrung ist zu heiß oder zu kalt für IhrBaby, ohne Bedenken die Wassermenge ändern.Hinweis: Werkstoff und Stärke des Fläschchens sowie dasVorhandensein eines herausnehmbaren Bodens sind Faktoren,die die Temperatur des Fläschchens beeinflussen können.WARNHINWEIS• ACHTUNG: Um Verbrennungen zu vermeiden, immer vor demVerfüttern an Baby die Temperatur der Nahrung prüfen. Fläschchenimmer gut schütteln, um die Milch zu vermischen. Einen Tropfenauf die Innenseite des Handgelenks träufeln, um die Temperaturzu prüfen. Bei einem Töpfchen den Inhalt verrühren und durchProbieren kontrollieren, ob er nicht zu heiß ist.• Das Gerät ist nicht für einen Gebrauch durch körperlich, sensorischoder geistig behinderte Personen (einschließlich Kinder) sowiedurch Personen ohne Erfahrung oder Wissen vorgesehen, es seidenn, diese werden von einer für ihre Sicherheit zuständigenPerson beaufsichtigt und auf den Einsatz des Geräts eingewiesen.• Elektro- und Elektronikgeräte werden getrennt gesammelt. Alt-Elektro- und Elektronikgeräte nicht mit umsortiertem Hausmüllentsorgen, sondern einer Mülltrennung unterziehen.Dieses Symbol weist in der Europäischen Union daraufhin, dass das Produkt nicht in den Mülleimer geworfenoder zu anderen Hausabfällen gegeben werden darf,sondern im Mülltrennungsverfahren entsorgt werden muss.TURBO DAMPF-FLÄSCHCHENWÄRMER FÜR HEIM & AUTO • Benutzungsanleitung 13
a. Haubengriffb. Haubec. FläschchenhalterungZUSAMMENSETZUNGd. Wasser-Messbecher / Dampfleistee. „ON“ Schalterf. GitterEINSATZWEISEFLÄSCHCHENWÄRMERg. Griff des Gittersh. Adapter fürs AutoHausgebrauch1. Entfernen Sie die Haube (b) anhand des Griffs (a).2. Nehmen Sie den Wasser-Messbecher heraus (d). Füllen Sie ihn gemäß den weiter unten angegebenen Mengen.Milchmenge imFläschchenIn den Maßbecher zugebendeWassermenge für denFW bei mittlerenTemperaturenIn den Maßbecher zugebende Wassermengefür Babynahrung ausdem Glas bei kühlenTemperature60 ml 6 ml 11 ml90 ml 8 ml 12 ml120 ml 9 ml 13 ml150 ml 9.5 ml 14 ml180 ml 10 ml 15 ml210 ml 11 ml 15.5 ml240 ml 12 ml 16 ml270 ml 13 ml 16.5 ml300 ml 14 ml 17 ml330 ml 15 ml 18 mlTöpfchenIn den Maßbecher zugebendeWassermenge fürBabynahrung aus demGlasIn den Maßbecher zugebende Wassermengefür Babynahrung ausdem Glas bei kühlenTemperature3. Entfernen Sie die Halterung (c).4. Entfernen Sie das Gitter (f).5. Wasser in die Kammer des Fläschchenwärmers geben.6. Setzen Sie das Gitter (f) auf die Heizplatte.7. Drehen Sie das Gitter anhand seines Griffs (g) gegen den Uhrzeigersinn, um es zu SCHLIESSEN. Dies ermöglicht dem Dampf, aus derDampfleiste auszutreten (d).8. Setzen Sie die Halterung (c) in den Fläschchenwärmer.9. Setzen Sie den Wasser-Messbecher / die Dampfleiste ein (d).10. Stellen Sie das Fläschchen ohne Sauger und Kappe in die Halterung.11. Schließen Sie die Haube (b).12. Verriegeln Sie die Haube, indem Sie sie gegen den Uhrzeigersinn drehen.13. Schließen Sie das Gerät ans Stromnetz an und drücken Sie auf den „ON“ -Schalter (e), um den Zyklus zu starten. Eine Kontrollleuchtesignalisiert, dass das Gerät eingeschaltet ist. Das Gerät schaltet sich automatisch aus und ein akustischer Alarm informiert Siedarüber, dass der Zyklus beendet ist.14. Halten Sie den Griff der Haube (a) fest und drehen Sie ihn im Uhrzeigersinn, um sie zu entriegeln.15. Nehmen Sie das Fläschchen / Gläschen vorsichtig heraus: es ist heiß.16. Im Falle eines Fläschchens geben Sie das Milchpulver hinzu und setzen Sauger und Kappe auf. Schütteln Sie das Fläschchen, umWasser und Milch gut zu vermischen und eine homogene Temperatur zu erhalten.17. Vor dem Füttern von Baby sollte die Temperatur der Nahrungsmittel stets kontrolliert werden.Autogebrauch- Das Auto / Fahrzeug stoppen und den Motor laufen lassen.- Den Fläschchenwärmer auf einer glatten, stabilen Oberfläche innerhalb des Autos oder Fahrzeugs platzieren.- Befolgen Sie anschließend die nachstehend beschriebenen Tätigkeiten 1 bis 17. Achten Sie dabei darauf, die Wassermenge imDosierbecher um einige Milliliter (zwischen 2 und 4ml) zu verringern und Schritt 13 durch die folgenden Anweisungen zu ersetzen:13. Schließen Sie den Adapter für Zigarettenanzünder (h) an die Anschlussschnur des Fläschchenwärmers an. Stecken Sie den Adapterin den Zigarettenanzünder. Drücken Sie auf die „On-Taste“ (e), um den Zyklus zu starten. Eine Kontrollleuchte signalisiert, dass dasGerät eingeschaltet ist. Das Gerät schaltet sich automatisch aus und ein akustischer Alarm informiert Sie darüber, dass der Zyklusbeendet ist.Die Dauer des Heizzyklus ist bei einer Benutzung zuhause etwas länger (mittlere Dauer: 10 Minuten).14120 g 10 ml 16 ml200 g 13 ml 18 ml250 g 18 ml 25 mlTURBO DAMPF-FLÄSCHCHENWÄRMER FÜR HEIM & AUTO • Benutzungsanleitung
STERILISATORUm eine ideale Desinfektion zu gewährleisten:- Vor dem Vorbereiten eines Fläschchens immer die Hände waschen.- Eine völlige Desinfektion ist nur gewährleistet, wenn der Vorgang nicht unterbrochen wird.- Immer Leitungswasser ohne Zusätze benutzen.- Vor jeder Sterilisation ist es wichtig, die Fläschchen samt Zubehör zu waschen, unter kaltem Wasser abzuspülen und zu leeren. KleineMilchspuren können bereits zur Entwicklung von Bakterien führen.Hausgebrauch1. Entfernen Sie die Haube (b) anhand des Griffs (a).2. Entfernen Sie den Wasser-Messbecher (d).3. Entfernen Sie die Halterung (c).4. Entfernen Sie das Gitter (f).5. 30 ml Wasser in die Kammer geben, dazu den Messbecher (1,5 Messbecher) oder ein Fläschchen benutzen.6. Setzen Sie das Gitter (f) wieder auf die Heizplatte.7. Drehen Sie das Gitter anhand seines Griffs (g) im Uhrzeigersinn, um es zu ÖFFNEN. Dies ermöglicht dem Dampf, direkt aus demKammerboden ins Fläschchen zu strömen.8. Stellen Sie das Fläschchen Kopf nach unten aufs Gitter (f). Legen Sie das Zubehör rundherum.9. Schließen Sie die Haube (b) und verriegeln Sie sie, indem Sie sie gegen den Uhrzeigersinn drehen.10. Das Gerät an die Spannungsversorgung anschließen und den EIN-Taster (e) drücken, um die Sterilisation zu beginnen. EineKontrollleuchte signalisiert, dass das Gerät eingeschaltet ist. Das Gerät schaltet sich automatisch aus und ein akustischer Alarminformiert Sie darüber, dass der Zyklus beendet ist.11. Halten Sie den Griff der Haube (a) fest und drehen Sie ihn im Uhrzeigersinn, um sie zu entriegeln.12. Nehmen Sie das Fläschchen vorsichtig heraus: es ist heiß.13. Für ein optimales Sterilisieren empfehlen wir das Durchführen eines zweiten Sterilisierzyklus.Autogebrauch- Das Auto / Fahrzeug stoppen und den Motor laufen lassen.- Den Fläschchenwärmer auf einer glatten, stabilen Oberfläche innerhalb des Autos oder Fahrzeugs platzieren.- Befolgen Sie anschließend die weiter oben beschriebenen Arbeitsgänge 1-13, wobei Sie die untenstehende Tabelle befolgen und denSchritt 10 durch die folgenden Anweisungen ersetzen:10. Schließen Sie den Adapter für Zigarettenanzünder (h) an die Anschlussschnur des Fläschchenwärmers an. Stecken Sie den Adapterin den Zigarettenanzünder. Drücken Sie auf die „On-Taste“ (e), um den Zyklus zu starten. Eine Kontrollleuchte signalisiert, dass dasGerät eingeschaltet ist. Das Gerät schaltet sich automatisch aus und ein akustischer Alarm informiert Sie darüber, dass der Zyklusbeendet ist.PFLEGEReinigung- Das Gerät nie in Wasser tauchen, es nie vollständig mit Wasser füllen.- Zum Reinigen von innen und außen ein angefeuchtetes Tuch verwenden. Benutzen Sie zur inneren und äußeren Reinigung des Geräteskeine Reinigungsmittel.- Der Wasser-Messbecher und die Halterung können im Geschirrspüler gewaschen werden.EntkalkenKeine Entkalkungsmittel benutzen.Im Laufe der Verwendungen und abhängig von der Härte des verwendeten Wassers, kann sich eine Kalkschicht an der Kammerfestsetzen. Die Kammer muss regelmäßig entkalkt werden, damit das Gerät ordnungsgemäß funktioniert.Vorgehensweise: 100 ml heißes Wasser mit 100 ml Weißweinessig mischen und in die Kammer geben. 30 Minuten wirken lassen unddas Gerät leeren. Anschließend einen feuchten Lappen zum Reinigen verwenden.KLEINE PROBLEMEDer Fläschchenwärmer erwärmt sich nicht:- Prüfen, ob der Stecker des Geräts richtig eingesteckt ist,- Prüfen, ob der EIN-Taster gedrückt ist,- Prüfen, ob die Kammer verkalkt ist und ggf. entkalken.Die Heizzyklen sind zu kurz oder zu lang:Zu wenig oder zuviel Wasser: Passen Sie die Wassermenge an.TURBO DAMPF-FLÄSCHCHENWÄRMER FÜR HEIM & AUTO • Benutzungsanleitung 15
NLU hebt zojuist onze turbo stoom flessenwarmer thuis of in de auto aangeschaft en wij dankenu voor uw vertrouwen. Wij verzoeken u deze handleiding aandachtig te lezen voor eenoptimaal gebruik van het product. Wij raden u eveneens aan deze handleiding te bewarenzodat u hem eventueel later kunt raadplegen.• Verwarmt alle soorten zuigflessen en potjes dankzij hetexclusieve systeem : stoom komt uit het tongetje op de hoogtevan de zuigfles en zorgt voor een homogene temperatuur.• 2 in 1: flessenwarmer en sterilisator.FUNCTIES• Krachtig:- Thuis: 320 W / 230 V.- In de auto: 100 W / 12 V.• Universeel: voor alle soorten flessen.• Veilig: stopt automatisch aan het eind van de cyclus.• Laat uw kind niet onbewaakt als het apparaat in werking is.• Controleren of de spanning van uw elektrische installatiecompatibel is met het apparaat (zie de waarden vermeld onderaan het apparaat).• Gebruik het apparaat enkel voor het opwarmen van zuigflessenen kleine potjes. Elke andere gebruik kan gevaarlijk zijn.• Het apparaat nooit en te nimmer zonder water aanzetten. Plaatshet apparaat nooit onder spanning alvorens een voldoendehoeveelheid water ingebracht te hebben.• Geen andere producten toevoegen (zoutwater, medicijnen,reinigingsmiddelen) aan het water, dit zal schade aan hetapparaat berokkenen.• Altijd de handen wassen voordat men een flesje gaat maken.• De flessenwarmer niet in een vochtige omgeving gebruiken enhem niet rechtstreeks onder de kraan zetten.• Het apparaat niet in de buurt van warmtebronnen zetten zoalsradiatoren, vensters waar de zon op staat …• De flessenwarmer gebruiken op een goed vlakke endroge oppervlakte.• Deze flessenwarmer mag alleen binnenshuis gebruikt worden.De flessenwarmer niet buiten gebruiken.• Laat de zuigfles of het kleine potje niet te lang opwarmen.• De zuigflessen zijn heel warm wanneer u ze uit de flessenwarmerneemt. Neem ze er voorzichtig uit.• Het apparaat niet verplaatsen als het in werking is.VEILIGHEIDSVOORSCHRIFTEN• Tijdens de werking kan het apparaat heel warm worden. Komalleen aan het handvat en de schakelaar.• Altijd eerst de steker uit de contactdoos halen voordat men hetapparaat gaat schoonmaken of vullen.• De steker na ieder gebruik uit de contactdoos halen om tevoorkomen dat het apparaat per ongeluk aangezet wordt.• Buiten bereik van kinderen houden aangezien dit apparaat tijdensen na het gebruik bijzonder hete stoom produceert. Controlerenof ze ook niet bij de kabel kunnen komen. Kinderen moetenonder toezicht geplaatst worden om ervoor te zorgen dat ze nietspelen met het apparaat.• Het apparaat niet optillen met behulp van het handvat van de stolp.• Altijd de zuigflessen open (zonder speen en zonder dop) in hetapparaat plaatsen. Van de potjes alleen het dekseltje verwijderen.Gebruik in de auto:• Nooit de flessenopwarmer gebruiken als de auto rijdt. Laat demotor draaien bij gebruik van de flessenwarmer om te voorkomendat de accu leegloopt.• De auto adapter is speciaal ontworpen voor deze flessenwarmer,u mag hem niet gebruiken voor of met andere apparaten.• Controleer regelmatige de sigarettenaansteker in uw auto, maakhem zonodig schoon.• Als u net de sigarettenaansteker hebt gebruikt,moet u hemvijf minuten laten afkoelen alvorens de flessenwarmer eropaan te sluiten.• Dit apparaat is bestemd voor gebruik thuis en dergelijke zoals:- keukenvoorzieningen bestemd voor het personeel in winkels,op kantoren en overige professionele omgevingen,- boerderijen,- gebruik door klanten in hotels, motels en overige accommodatiesvan residentiële aard,- accommodaties van het type B&B.• Indien de voedingskabel is beschadigd, moet hij door de fabrikant,zijn servicedienst of een vakman vervangen worden om iedergevaar te voorkomen.• De doseringen in de tabel zijn louter indicatief, als u vindt dathet te warmof niet warm genoeg is voor uw baby, aarzel danniet de hoeveelheden water te verlagen of te verhogen.P.S.: het materiaal en de dikte van de zuigfles; de aanwezigheidvan een afneembare bodem zijn elementen die een invloedkunnen hebben op de temperatuur van de zuigfles.WAARSCHUWING• OPGELET: om het risico op brandwonden te vermijden, controleerde temperatuur van de voeding altijd alvorens het te geven aanuw baby. Voor een zuigfles, schud deze laatste goed om de melkte mengen. Giet een druppel op de binnenkant van de pols omde temperatuur te controleren. Voor een klein potje, meng deinhoud en controleer of het niet te warm is.• Dit apparaat is niet voorzien omgebruikt te worden door personen(inclusief kinderen) met verminderde fysieke, sensorische ofmentale vaardigheden, of door personen zonder ervaring ofkennis behalve als ze onder toezicht staan van een persoon dieverantwoordelijk is voor hun veiligheid of als ze op voorhandinstructies gekregen hebben over het gebruik van het apparaat.• De elektronische en elektrische uitrustingen moeten gesorteerdworden voordat ze worden afgevoerd. Afgedane elektronischeen elektrische uitrustingen niet afvoeren in het huisvuil, dezevooraf sorteren en naar de juiste plaats brengen.16Dit symbool geeft aan voor heel Europa dat dit productniet bij het huisvuil weggegooid mag worden, het moetop selectieve wijze afgevoerd worden.TURBO STOOM FLESSENWARMER THUIS OF IN DE AUTO • Gebruikshandleiding
a. Handvat stolpb. Stolpc. Zuigfles houderSAMENSTELLINGd. Doseerdop voor het water /stoom tongetjee. „ON“ SchakelaarGEBRUIKSAANWIJZINGFLESSENWARMERf. Roosterg. Handvat van het roosterh. Auto adapterThuis1. De stolp (b) verwijderen door hem bij zijn handvat (a) vast te pakken.2. Het doseerdopje voor het water nemen (d) en het vullen met inachtneming van de hier aangegeven hoeveelheden.Hoeveelheid melkin de flesHoeveelheid waternodig in de meetbekervoor een FW bereidmet gematigd waterHoeveelheid waternodig in de meetbekervoor een al gereedgemaakte enkoude FW60 ml 6 ml 11 ml90 ml 8 ml 12 ml120 ml 9 ml 13 ml150 ml 9.5 ml 14 ml180 ml 10 ml 15 ml210 ml 11 ml 15.5 ml240 ml 12 ml 16 ml270 ml 13 ml 16.5 ml300 ml 14 ml 17 ml330 ml 15 ml 18 mlPotjeHoeveelheid waternodig in de meetbekervoor een potjeHoeveelheid waternodig in de meetbekervoor een koud potje120 g 10 ml 16 ml200 g 13 ml 18 ml250 g 18 ml 25 ml3. De houder (c) verwijderen.4. Het rooster (f) verwijderen.5. Het water gieten in de bak van de flessenwarmer.6. Het rooster (f) terugzetten op de verwarmingsplaat.7. Het rooster laten draaien met behulp van zijn handvat (g) tegen de klok in om het te SLUITEN. Op deze manier kan de stoom uit hettongetje (d) komen.8. De houder (c) in de flessenwarmer plaatsen.9. Het doseerdopje met het water / stoom tongetje (d) op zijn plaats brengen.10. De zuigfles in de houder zetten, zonder speen en zonder dop.11. De stolp (b) dicht doen.12. De stolp vergrendelen door hem tegen de klok in te draaien.13. Het apparaat op het stroomnet aansluiten en drukken op de knop « On » (e) om een cyclus op te starten. Een controlelampje gaataan om te laten zien dat het apparaat aan staat. Het apparaat gaat automatisch uit en een geluidsalarm waarschuwt u om tezeggen dat de cyclus beëindigd is.14. Neem het handvat van de stolp beet (a) en draai hem met de klok mee om hem te ontgrendelen.15. Haal de fles / het potje er heel voorzichtig uit : ze zijn heel warm.16. Bij flessen kunt u nu de melkpoeder toevoegen en de speen en de dop op hun plaats brengen. Goed schudden om het water en demelk goed te mengen en om een homogene temperatuur te krijgen.17. Altijd de temperatuur van het eten controleren voordat u de baby gaat voeren.In de auto- Stop de auto maar laat de motor draaien.- Zet de flessenwarmer op een vlakke en stabiele plaats in de auto.- Dan de instructies 1 t/m 17 uitvoeren zoals beschreven maar de hoeveelheid water van de doseerdop hier met enkele millilitersverminderen (tussen 2 en 4 ml) door stap 13 te vervangen door de volgende instructies:13. Sluit de sigarettenaansteker adapter (h) aan op de voedingskabel van de flessenwarmer en steek de adapter in de sigarettenaansteker.Druk op de knop « On » (e) om een cyclus op te starten. Een lichtgevende verklikker geeft aan dat het apparaat in werking is. Hetapparaat gaat automatisch uit en een geluidssignaal wordt gegeven als de cyclus is beëindigd.De tijdsduur van de verwarmingscyclus zal langer zijn dan bij gebruik thuis (gemiddelde tijdsduur: 10 minutes).TURBO STOOM FLESSENWARMER THUIS OF IN DE AUTO • Gebruikshandleiding 17
STERILISATORDe volgende punten moeten in acht genomen worden voor een perfecte ontsmetting:- Altijd de handen wassen voordat men een flesje gaat maken.- De volledige ontsmetting is alleen gegarandeerd als het proces niet wordt onderbroken.- Gebruik kraanwater zonder additieven.- Voor het steriliseren, is het absoluut noodzakelijk alle zuigflessen met toebehoren te wassen, af te spoelen met koud water en te legen.- Melksporen kunnen voortplanting van bacteriën veroorzaken.Thuis1. De stolp (b) openen door hem bij het handvat beet te pakken (a).2. Haal de doseerdop van het water eruit (d).3. Haal de houder eruit (c).4. Verwijder het rooster (f).5. Giet 30 ml water in de bak met behulp van de doseerdop (1 ½ doseerdop) of een zuigfles.6. Het rooster (f) terugzetten op de verwarmingsplaat.7. Het rooster laten draaien met behulp van zijn handvat (g) met de klok mee om hem te OPENEN. Op deze manier kan de stoom uit debodem van de kuip komen, rechtstreeks in de zuigfles.8. Plaats de zuigfles onderste boven op het rooster (f) en zet de toebehoren erom heen.9. Doe de stolp (b) dicht en vergrendel hem door hem tegen de klok in te draaien.10. Sluit nu het apparaat aan op het stroomnet en zet de knop « aan » (e) naar beneden toe om het steriliseren van start te doen gaan.Een controlelampje gaat aan om te laten zien dat het apparaat aan staat. Het apparaat gaat automatisch uit en een geluidsalarmwaarschuwt u om te zeggen dat de cyclus beëindigd is.11. Neem het handvat van de stolp beet (a) en draai hem met de klok mee om hem te ontgrendelen.12. Haal de zuigfles er voorzichtig uit, hij is heel warm.13. Voor een optimale sterilisatie raden wij u aan een tweede sterilisatie cyclus uit te voeren.In de Auto- Stop de auto maar laat de motor draaien.- Zet de flessenwarmer op een vlakke en stabiele plaats in de auto.- Volg dan de instructies 1 t/m 13 zoals hierboven gegeven op volgens de hieronder staande tabel en vervang instructie nummer 10door de volgende:10. Sluit de sigarettenaansteker adapter (h) aan op de voedingskabel van de flessenwarmer en steek de adapter in de sigarettenaansteker.Druk op de knop « On » (e) om een cyclus op te starten. Een lichtgevende verklikker geeft aan dat het apparaat in werking is. Hetapparaat gaat automatisch uit en een geluidssignaal wordt gegeven als de cyclus is beëindigd.ONDERHOUDSchoonmaken- Het apparaat niet in water onderdompelen en het niet tot aan de rand met water vullen.- De binnenkant en buitenkant met een iets vochtige doek schoonmaken. Voor het schoonmaken van de binnenkant en de buitenkantgeen detergens gebruiken.- De doseerdop voor het water en de houder mogen in de vaatwasser gereinigd worden.KetelsteenverwijderingGeen antiketelsteen middelen gebruiken.Naar gelang het gebruik en de hardheidsgraad van het gebruikte water, kan er zich een kalklaag afzetten op de bak. Met het oog opde goede werking van het apparaat, moet de bak regelmatig van ketelsteen ontdaan worden.Ga hiervoor als volgt te werk: meng 100 ml warm water met 100 ml witte azijn en giet dit mengsel in de bak. 30 minuten laten intrekkenen het apparaat legen. Dan de bak schoonmaken met een vochtige doek.KLEINE PROBLEMENDe flessenwarmer warmt niet op:- Controleren of de steker wel naar behoren in de contactdoos is gestoken,- Controleren of de knop aan wel is ingedrukt,- Controleren of bak niet vol kalkaanslag zit en deze zonodig verwijderen.De opwarmcycli zijn te kort of te lang:Er is te weinig of te veel water : pas de hoeveelheid water aan.18TURBO STOOM FLESSENWARMER THUIS OF IN DE AUTO • Gebruikshandleiding
ESMuchas gracias por haber elegido nuestra calienta<strong>biberon</strong>es turbo vapor para casa o parael coche. Le invitamos a leer detenidamente estas instrucciones para un mejor uso del producto.Le recomendamos igualmente que las conserve como referencia ya que podría necesitarlasmás adelante.• Calienta todo tipo de <strong>biberon</strong>es y potitos gracias a su sistemaexclusivo: el vapor sale por la lengüeta por encima del biberónpara garantizar una temperatura homogénea.• 2 en 1: calienta<strong>biberon</strong>es y esterilizador.FUNCIONES• Potente:- En casa: 320 W / 230 V.- En el coche: 100 W / 12 V.• Universal: para todo tipo de <strong>biberon</strong>es.• Seguro: parada automática al final del ciclo.• No deje a su hijo sin supervisión durante el funcionamientodel aparato.• Compruebe que la tensión de su instalación eléctrica es compatiblecon el aparato (vea los valores indicados bajo el aparato).• Utilice el aparato únicamente para calentar <strong>biberon</strong>es y potitosY para esterilizar <strong>biberon</strong>es y accesorios. Cualquier otro usopodría resultar peligroso.• Nunca ponga el aparato en marcha sin agua. No enciendanunca el aparato antes de haberlo llenado con la cantidad deagua suficiente.• No añada ningún otro producto (agua salada, medicamentos,detergentes) al agua, pues estropearía el aparato.• Lávese siempre las manos antes de preparar un biberón.• No utilice el calienta<strong>biberon</strong>e en un ambiente húmedo y no loponga directamente bajo el agua.• No deje el aparato cerca de fuentes de calor como radiadores,ventanas al sol, etc.• Utilice el calienta<strong>biberon</strong>e sobre una superficie completamenteplana y seca.• Este calienta<strong>biberon</strong>es debe utilizarse únicamente en el interior.No utilice el calienta<strong>biberon</strong>e al aire libre.• No deje el biberón o el potito calentarse durante demasiado tiempo.• Los <strong>biberon</strong>es pueden quemar al salir del calienta<strong>biberon</strong>e.Retírelos con precaución.• No desplace el aparato mientras se encuentra en funcionamiento.• En marcha, el aparato puede calentarse mucho. No toque nadamás que el asa y el interruptor.• Este aparato ha sido concebido para utilizarse en aplicacionesdomésticas y similares, como:- puntos de cocina reservados para el personal de tiendas,oficinas y demás lugares de trabajo,- granjas,- la utilización por parte de clientes de hoteles, moteles y demáslugares de caracter residencial,- entornos de tipo casa de huéspedes.• Si el cable de alimentación está estropeado, debe ser sustituidopor el fabricante, su servicio posventa o una persona concualificación similar para evitar todo peligro.• Las dosis de la tabla se dan a título indicativo, si usted consideraque el contenido está demasiado caliente o demasiado frío parasu bebé, no dude en disminuir o aumentar las cantidades de agua.NOTA: el material y el grosor del biberón, o la presencia de unfondo de quita y pon son elementos que pueden afectar a latemperatura del biberón.INSTRUCCIONES DE SEGURIDADADVERTENCIAS• Desenchufe siempre el aparato antes de limpiarlo ode rellenarlo.• Desenchufe el aparato después de cada utilización para evitarponerlo en marcha de forma accidental.• Manténgalo fuera del alcance de los niños, pues este aparatocontiene durante y después de su utilización un vaporextremadamente caliente. Compruebe que el cable se encuentrafuera de alcance.• Conviene supervisar a los niños para asegurarse de que nojueguen con el aparato.• No trate de levantar el aparato tirando del asa dela campana.• Coloque siempre los <strong>biberon</strong>es abiertos (sin tetina ni tapa) en elaparato. Retire siempre la tapa de los potitos.Para utilizarlo en el coche:• No utilice nunca el calentador de biberón cuando el vehículoesté en movimiento. El motor debe permanecer en marchamientras utiliza el calentador de biberón para evitar que se gastela batería.• El adaptador de coche ha sido especialmente diseñado paraeste calentador de biberón: no lo utilice nunca con otros aparatos.• Compruebe periódicamente el botón para encender cigarrillosdel coche. Límpielo si es necesario.• Si acaba de utilizar el encendedor de cigarrillos del coche, dejeque se enfríe durante unos cinco minutos en la posición abiertaantes de enchufar el calentador de biberón.• ATENCIÓN: para evitar todo riesgo de quemaduras, compruebesiempre la temperatura de los alimentos antes de dárselos albebé. Cuando caliente un biberón, agítelo bien para mezclarbien la leche. Vierta una gota en la cara interior de su muñecapara comprobar la temperatura. Cuando caliente un potito,mezcle bien el contenido y pruébelo para comprobar que noesté demasiado caliente.• Este aparato no ha sido previsto para ser utilizado por personas(incluidos niños) con capacidades físicas, sensoriales o mentalesreducidas, ni por personas sin experiencia o conocimientos,salvo si éstas pueden ser supervisadas o recibir instruccionesprevias sobre la utilización del aparato por parte de una personaresponsable de su seguridad.• Los equipos eléctricos y electrónicos deben ser reciclados. Nose deshaga de los desechos de equipos eléctricos y electrónicosjunto con los desechos municipales sin separar, debe procedera su recogida selectiva.Este símbolo indica, en toda la Unión Europea, que esteproducto no debe tirarse a la basura ni mezclarse conresiduos domésticos, sino que debe ser objeto de unarecogida selectiva.CALIENTABIBERONES TURBO VAPOR PARA CASA O PARA EL COCHE • Instrucciones de uso 19
a. Asa de la campanab. Campanac. Soporte de biberónCOMPOSICIÓNd. Dosificador de agua / lengüetadel vapore. Botón «ON»INSTRUCCIONES DE USOCALIENTABIBERONESf. Rejillag. Asa de la rejillah. Adaptador para cocheEn casa1. Retire la campana (b) sujetándola por el asa (a).2. Saque el dosificador de agua (d). Rellénelo siguiendo las cantidades indicadas a continuación.Cantidad de leche enel biberónCantidad de aguaque se introducirá enel recipiente medidorpara calentadorpreparado conagua templadaCantidad de aguaque se introducirá enel recipiente medidorpara calentador yapreparado y contemperatura fría60 ml 6 ml 11 ml90 ml 8 ml 12 ml120 ml 9 ml 13 ml150 ml 9.5 ml 14 ml180 ml 10 ml 15 ml210 ml 11 ml 15.5 ml240 ml 12 ml 16 ml270 ml 13 ml 16.5 ml300 ml 14 ml 17 ml330 ml 15 ml 18 mlPotitoCantidad de agua quese introducirá en elrecipiente medidorpara potitoCantidad de agua quese introducirá en elrecipiente medidorpara potito contemperatura fría3. Retire el soporte (c).4. Retire la rejilla (f).5. Vierta el agua en la cuba del calienta<strong>biberon</strong>es.6. Vuelva a colocar la rejilla (f) en la placade calentamiento.7. Gire la rejilla sujetándola por el asa (g) en el sentido inverso al de las agujas del reloj para CERRARLA. Eso permitirá que el vaporsalga por la lengüeta del vapor (d).8. Coloque el soporte (c) en el calienta<strong>biberon</strong>es.9. Introduzca el dosificador de agua / lengüeta del vapor (d).10. Coloque el biberón dentro del soporte, sin tetina ni tapa.11. Cierre la campana (b).12. Bloquéela girándola en el sentido inverso al de las agujas del reloj.13. Enchufe el aparato a la red y pulse el botón “ON” (e) para comenzar el ciclo. Un piloto indicará que el aparato está en marcha. Elaparato se apagará automáticamente y una alarma sonora le avisará de que el ciclo ha terminado.14. Sujete el asa de la campana (a) y giréla en el sentido de las agujas del reloj para desbloquearla.15. Retire el biberón / potito con cuidado: estará caliente.16. En el caso de un biberón, añada la leche en polvo, y coloque la tetina y la tapa. Agite el biberón para mezclar bien el agua y la lechey obtener una temperatura homogénea.17. Compruebe siempre la temperatura de los alimentos antes de dárselos al bebé.En el coche- Detenga el vehículo y deje el motor encendido.- Coloque el calienta<strong>biberon</strong>es sobre una superficie plana y estable dentro del vehículo.- A continuación, siga los pasos 1 a 17 descritos más arriba, asegurándose de reducir la cantidad de agua del dosificador en unosmililitros (entre 2 y 4 ml), y sustituyendo la etapa 13 por las siguientes instrucciones:13. Enchufe el adaptador para encendedor de cigarrillos (h) al cable de alimentación del calienta<strong>biberon</strong>es. Enchufe el adaptador alencendedor de cigarrillos. Pulse el botón “ON” (e) para comenzar un ciclo. Un piloto indicará que el aparato está en marcha. Elaparato se apagará automáticamente y una alarma sonora le avisará de que el ciclo ha terminado.La duración del ciclo de calentamiento será mayor que para una utilización en casa (duración media: 10 minutos).20120 g 10 ml 16 ml200 g 13 ml 18 ml250 g 18 ml 25 mlCALIENTABIBERONES TURBO VAPOR PARA CASA O PARA EL COCHE • Instrucciones de uso
ESTERILIZADORAspectos que hay que respetar para una perfecta desinfección:- Lávese siempre las manos antes de preparar un biberón.- Sólo se garantiza una desinfección total si no se interrumpe el proceso.- Utilizar agua del grifo sin ningún aditivo.- Antes de proceder a la esterilización, es importante vaciar y lavar con agua fría todos los <strong>biberon</strong>es y los accesorios.- Un simple resto de leche puede provocar la propagación de las bacterias.En casa1. Abra la campana (b) sujetándola por el asa (a).2. Retire el dosificador de agua (d).3. Retire el soporte (c).4. Retire la rejilla (f).5. Ponga 30 ml de agua en el depósito con ayuda del dosificador (1 dosis ½) o de un <strong>biberon</strong>.6. Vuelva a colocar la rejilla (f) en la placa de calentamiento.7. Gire la rejilla sujetándola por el asa (g) en el sentido de las agujas del reloj para ABRIRLA. Eso permitirá al vapor salir desde el fondode la cuba, directamente al interior del biberón.8. Coloque el biberón boca abajo sobre la rejilla (f). Coloque los accesorios a su alrededor.9. Cierre la campana (b) y bloquéela girándola en el sentido inverso al de las agujas del reloj.10. Un piloto indicará que el aparato está en marcha. El aparato se apagará automáticamente y una alarma sonora le avisará de queel ciclo ha terminado.11. Sujete el asa de la campana (a) y giréla en el sentido de las agujas del reloj para desbloquearla.12. Retire el biberón con cuidado: estará caliente.13. Para una esterilización óptima le aconsejamos realizar un segundo ciclo de esterilización.En el coche- Detenga el vehículo y deje el motor encendido.- Coloque el calienta<strong>biberon</strong>es sobre una superficie plana y estable dentro del vehículo.- A continuación siga los pasos 1 a 13 descritos más arriba, siguiendo la tabla inferior, pero sustituya el paso 10 por las siguientes instrucciones:10. Enchufe el adaptador para encendedor de cigarrillos (h) al cable de alimentación del calienta<strong>biberon</strong>es. Enchufe el adaptador alencendedor de cigarrillos. Pulse el botón “ON” (e) para comenzar un ciclo. Un piloto indicará que el aparato está en marcha. Elaparato se apagará automáticamente y una alarma sonora le avisará de que el ciclo ha terminado.MANTENIMIENTOLimpieza- Nunca sumerja el aparato en el agua, y no lo llene completamente de agua.- Utilice un tejido humedecido ligeramente para limpiar el interior y el exterior. No utilice ningún producto detergente para limpiar elinterior o el exterior del aparato.- El dosificador de agua y el soporte pueden lavarse en el lavavajillas.DesincrustaciónNo utilice productos desincrustantes.Al cabo del tiempo, y según la dureza del agua utilizada, una capa de caliza puede recubrir la cuba. Para que el aparato funcionecorrectamente, la cuba deberá desincrustarse con regularidad.Proceda de la siguiente manera: Mezcle 100 ml de agua caliente con 100 ml de vinagre blanco y vierta la mezcla en la cuba. Dejeactuar durante 30 minutos y vacíe el aparato. A continuación, utilice un paño húmedo para limpiarlo.PROBLEMASEl calienta<strong>biberon</strong>es no calienta:- compruebe que el botón de puesta en marcha esté activado,- compruebe que el aparato esté bien enchufado,- compruebe que la cuba no esté incrustada y si es necesario, proceda a una desincrustación.Los ciclos de calentamiento son demasiado cortos o largos:Hay poca o demasiada agua: adapte la cantidad de agua.CALIENTABIBERONES TURBO VAPOR PARA CASA O PARA EL COCHE • Instrucciones de uso 21
PTAgradecemos-lhe por ter escolhido o nosso aquecedor turbo vapor para casa o caro epedimos-lhe que leia atentamente estas instruções para melhor utilização do produto.Também recomendamos que conserve estas instruções para consulta sempre que necessário.• Aquece todos os tipos de biberões e boiões graças ao seusistema exclusivo: o vapor sai à altura do biberão paraassegurar uma temperatura homogénea.• 2 em 1: aquecedor de biberões e esterilizador.FUNÇÕES• Potência:- Em casa: 320 W / 230 V.- No automóvel: 100 W / 12 V.• Universal: Para todos os tipos de biberões.• Segurança: paragem automática no fim do ciclo.• Não deixe a criança sem vigilância durante o funcionamentodo aparelho.• Verifique se a tensão da sua instalação eléctrica é compatívelcomo aparelho (veja os valores indicados por baixo do aparelho).• Utilize o aparelho exclusivamente para aquecer os biberões epequenos boiões e para a esterilização dos biberões e seusacessórios. Qualquer outra utilização poderá ser perigosa.• Nunca ponha o aparelho a funcionar debaixo de água. Nuncaligue o aparelho antes de ter introduzido uma quantidade deágua suficiente.• Nunca adicione qualquer outro produto (água comsal,medicamentos, detergentes) à água porque o aparelhosofreria danos.• Lave sempre as mãos antes de preparar um biberão.• Não utilize o esterilizador em condições de humidade e não ocoloque directamente debaixo de água.• Não deixe o aparelho perto de fontes de calor, tais comoradiadores, janelas por onde entre o sol, etc.• Utilize o aparelho sobre uma superfície totalmente plana e seca.• Este aquecedor de biberões destina-se a ser utilizado dentro decasa, exclusivamente. Não utilize o aquecedor de biberões no exterior.• Não deixe o biberão nemo boião aquecer durantemuito tempo.• Os biberões estão muito quentes à saída do aparelho. Retirecom precaução.• Não desloque o aparelho durante o seu funcionamento.NORMAS DE SEGURANÇA• Durante o funcionamento, o aparelho pode aquecer muito. Toqueapenas na pega e no interruptor.• Desligue sempre o aparelho antes de o limpar ou de o encher.• Desligue o aparelho após cada utilização para evitar que ligueacidentalmente.• Deixe o aparelho fora do alcance das crianças porque oaparelho contém vapor de água extremamente quente durantee após a sua utilização. Assegure-se de que o cabo fica forade alcance. É conveniente vigiar as crianças para que nãobrinquem com o aparelho.• Não utilize a pega da campânula para levantar o aparelho.• Coloque no aparelho os biberões sempre abertos (sem tetinanem tampa). Retire sempre a tampa dos boiões.Utilização no carro:• Nunca use o aquecedor de garrafas durante amarcha do veículo.Estacione, mas deixe o motor a trabalhar para evitar o consumoda bateria.• O cabo de adaptação para carro foi construído especialmentepara este aquecedor de garrafas. Por isso, não o use comquaisquer outros aparelhos.• Inspeccione periodicamente a tomada do isqueiro do carro,limpando-a se necessário.• Se tiver usado o isqueiro do carro, deixe a tomada arrefeceraberta durante cinco minutos antes de introduzir a ficha doaquecedor de garrafas.• Este aparelho destina-se a ser utilizado em aplicações domésticase análogas, tais como:- pequenas cozinhas reservadas ao pessoal em lojas, escritóriose outros ambientes profissionais,- quintas,- clientes de hotéis, motéis e outros ambientes decarácter residencial,- ambientes do tipo de quartos de hóspedes.• Se o cabo de alimentação estiver danificado, temde ser substituídopelo fabricante, pelo seu serviço após a venda, ou por pessoasde qualificação semelhante, a fim de não haver perigo.• As doses indicadas na tabela são a título indicativo; se o biberãoficar muito quente ou pouco quente para o seu bebé, não hesiteem, respectivamente, reduzir ou aumentar as quantidades de água.N.B.: O material e a espessura do biberão e a presença defundo amovível são elementos que podem influenciar atemperatura do biberão.22AVISOS• ATENÇÃO: Para evitar riscos de queimadura, verifique semprea temperatura dos alimentos antes de os dar ao bebé. Para umbiberão, agite bem para misturar o leite. Deite uma gota no ladode dentro do seu pulso para verificar a temperatura. Paraumboião pequeno,misture o conteúdo e verifique que não estádemasiado quente, provando-o.• Este aparelho não foi construído para ser utilizado por pessoas(incluindo crianças) cujas capacidades físicas, sensoriais oumentais sejam reduzidas, ou por pessoas sem experiência ouconhecimentos, excepto no caso de haver pessoas responsáveispela sua segurança, de haver vigilância, ou de serem dadasinstruções prévias sobre a utilização do aparelho.• Os equipamentos eléctricos e electrónicos são objecto de recolhaespecial. Não devemser deitados fora juntamente como lixodoméstico não seleccionado; a sua recolha deve ser selectiva.Na União Europeia, este símbolo indica que este produtonão deve ser deitado no lixo nem misturado com o lixodoméstico; deve ser objecto de recolha selectiva.AQUECEDOR TURBO VAPOR PARA CASA O CARO • Manual de Instruções
a. Pega da campânulab. Campânulac. Suporte do biberãoCOMPOSIÇÃOd. Doseador de água / lingueta de vapore. Interruptor „ON“f. GrelhaMODO DE UTILIZAÇÃOAQUECEDOR DE BIBERÕESg. Pega da grelhah. Adaptador para o carroEm casa1. Retire a campânula (b) pela pega (a).2. Retire o doseador de água (d) e encha-o segundo as quantidades indicadas mais abaixo.Quantidadede leite no biberãoQuantidade de água aintroduzir na medidapara o aquecedor degarrafas preparadocom algumaágua temperadaQuantidade de águaa introduzir na medidapara o aquecedorde garrafas jápreparado e frio60 ml 6 ml 11 ml90 ml 8 ml 12 ml120 ml 9 ml 13 ml150 ml 9.5 ml 14 ml180 ml 10 ml 15 ml210 ml 11 ml 15.5 ml240 ml 12 ml 16 ml270 ml 13 ml 16.5 ml300 ml 14 ml 17 ml330 ml 15 ml 18 mlBoiãoQuantidade de água aintroduzir na medidapara boião de bebéQuantidade de águaa introduzir na medidapara boiãode bebé frio120 g 10 ml 16 ml200 g 13 ml 18 ml250 g 18 ml 25 ml3. Retire o suporte (c).4. Retire a grelha (f).5. Deitar água na cuba do aquecedor do biberão.6. Volte a colocar a grelha (f) na placa de aquecimento.7. Faça rodar a grelha com a pega (g) no sentido contrário ao do movimento dos ponteiros do relógio para FECHAR. Isso vai permitirque o vapor saia da lingueta (d).8. Coloque o suporte (c) no aquecedor do biberão.9. Introduza o doseador de água / a lingueta de vapor (d).10. Coloque o biberão no interior do suporte, mas sem tetina nem tampa.11. Feche a campânula (b).12. Aperte-a, rodando-a no sentido contrário ao do movimento dos ponteiros do relógio.13. Ligue o aparelho à corrente eléctrica e carregue no botão « On » (e) para iniciar o ciclo. Uma lâmpada acesa indica que o aparelhoestá a funcionar. O aparelho desliga automaticamente e ouve-se um alarme sonoro logo que o ciclo termina.14. Segure na pega da campânula (a) e rode-a no sentido do movimento dos ponteiros do relógio para desapertar.15. Retire o biberão / o boião com cuidado, pois estão quentes.16. No caso de um biberão, acrescente leite em pó e coloque a tetina e a tampa. Agite o biberão para misturar bem a água e o leite etambém para obter uma temperatura homogénea.17. Verifique sempre a temperatura do alimento antes de o dar ao bebé.No automóvel- Pare o automóvel e deixe o motor a trabalhar.- Coloque o aquecedor de biberão numa superfície plana e estável no interior do veículo.- Siga depois os passos 1 a 17 descritas acima, tendo o cuidado de reduzir a quantidade de água do doseador em alguns mililitros(entre 2 e 4 ml) e de substituir o passo 13 pelo seguinte:13. Ligue o adaptador para isqueiro (h) no cabo de alimentação do aquecedor de biberão. Ligue o adaptador no isqueiro. Carregueno botão « On » (e) para iniciar o ciclo. A lâmpada acende, indicando que o aparelho está a funcionar. O aparelho desligaautomaticamente e é disparado um alarme sonoro avisando que o ciclo terminou.O ciclo de aquecimento será mais longo do que numa utilização em casa (duração média: 10 minutos).AQUECEDOR TURBO VAPOR PARA CASA O CARO • Manual de Instruções 23
ESTERILIZADORAspectos a respeitar para uma desinfecção perfeita:- Lave sempre as mãos antes de preparar um biberão.- A desinfecção total só é garantida se o processo não for interrompido.- Utilize água da torneira sem qualquer aditivo.- Antes da esterilização, é importante lavar, passar por água fria e esvaziar todos os biberões e acessórios.- Os mais leves traços de leite podem provocar a propagação das bactérias.Em casa1. Abra a campânula (b) pela pega (a).2. Retire o doseador de água (d).3. Retire o suporte (c).4. Retire a grelha (f).5. Deite 30 ml de água na cuba, usando o doseador (1 dose ½) ou um biberão.6. Volte a colocar a grelha (f) na placa de aquecimento.7. Rode a grelha por meio da pega (g) no sentido do movimento dos ponteiros do relógio para ABRIR. Isso vai permitir que o vapor saiado fundo da cuba e directamente para o interior do biberão.8. Coloque o biberão com a abertura para baixo na grelha (f). Coloque os acessórios à volta do biberão.9. Feche a campânula (b) e aperte-a, rodando-a no sentido contrário ao do movimento dos ponteiros do relógio.10. Uma lâmpada acesa indica que o aparelho está a funcionar. O aparelho desliga automaticamente e ouve-se um alarme sonorologo que o ciclo termina.11. Segure na pega da campânula (a) e rode-a no sentido do movimento dos ponteiros do relógio para desapertar.12. Retire o biberão com cuidado, pois está quente.13. Para uma esterilização perfeita, aconselhamos um segundo ciclo de esterilização.No automóvel- Pare o automóvel e deixe o motor a trabalhar.- Coloque o aquecedor de biberão numa superfície plana e estável no interior do veículo.- Siga as instruções 1 a 13 acima descritas, seguindo o quadro abaixo e substituindo o passo 10 pelas instruções seguintes:10. Ligue o adaptador para isqueiro (h) no cabo de alimentação do aquecedor de biberão. Ligue o adaptador no isqueiro. Carregueno botão « On » (e) para iniciar o ciclo. A lâmpada acende, indicando que o aparelho está a funcionar. O aparelho desligaautomaticamente e é disparado um alarme sonoro avisando que o ciclo terminou.MANUTENÇÃOLimpeza- Nunca mergulhe o aparelho em água e não o encha completamente com água.- Use um pano ligeiramente humedecido para limpar o interior e o exterior. Não utilize produtos detergentes para lavar o interior ou oexterior do aparelho.- O doseador de água e o suporte podem ser lavados na máquina.DestartarizaçãoNão use produtos destartarizantes. Ao longo das utilizações e segundo o grau de dureza da água utilizada, é possível que a cubavenha a ficar revestida com uma camada calcária. Para o bom funcionamento do aparelho, esta cuba deve ser destartarizadaperiodicamente. Para isso, proceda como a seguir se indica: Misture 100 ml de água quente com 100 ml de vinagre branco e deite amistura na cuba. Deixe actuar durante 30 minutos e esvazie o aparelho. Utilize seguidamente um pano húmido para limpar.PEQUENAS AVARIASO aquecedor para o biberão não aquece:- verificar se a ficha do aparelho está bem ligada,- verificar se o botão está ligado,- verificar se a cuba tem depósitos calcários; se necessário, destartarizar.Os ciclos de aquecimento são demasiado curtos ou demasiado longos:Havendo água em quantidade insuficiente ou excessiva, adapte a quantidade de água.24AQUECEDOR TURBO VAPOR PARA CASA O CARO • Manual de Instruções
ITVi ringraziamo per aver scelto il nostro scalda <strong>biberon</strong> turbo vapore da casa o auto e viinvitiamo a leggere attentamente queste istruzioni per un miglior utilizzo del prodotto.Vi consigliamo altresì di conservarle come futuro riferimento in caso di ulteriore bisogno.• Riscalda tutti i tipi di <strong>biberon</strong> e vasetti grazie al suo sistemaesclusivo: il vapore esce dal beccuccio su tutta l'altezza del<strong>biberon</strong> per assicurare una temperatura omogenea.• 2 in 1: scalda <strong>biberon</strong> e sterilizzatore.FUNZIONI• Potente:- In casa: 320 W / 230 V.- In auto: 100 W / 12 V.• Universale: per tutti i tipi di <strong>biberon</strong>.• Sicuro: arresto automatico a fine ciclo.• Non lasciaee il bambino incustodito vicino all’apparecchioin funzione.• Accertarsi che la tensione dell’impianto elettrico sia compatibilecon l’apparecchio (vedere indicazioni sull’apparecchio).• Utilizzare l'apparecchio esclusivamente per riscaldare <strong>biberon</strong>e Vasetti e per la sterilizzazione dei <strong>biberon</strong> ed accessori. Qualsiasialtro utilizzo potrebbe essere pericoloso.• Non avviate mai l'apparecchio senza acqua. Non collegaremail’apparecchio alla rete elettrica prima di avervi introdotto unquantitativo d’acqua sufficiente.• Non aggiungete alcun prodotto (acqua salata, farmaci, detergenti)all'acqua, poiché ciò rovina l'apparecchio.• Lavarsi sempre le mani prima di preparare un <strong>biberon</strong>.• Non utilizzate lo sterilizzatore in condizioni umide e non ponetelodirettamente sotto ad un getto d'acqua.• Non lasciate l'apparecchio vicino a fonti di calore come radiatori,finestre assolate...• Utilizzare lo sterilizzatore su una superficie totalmente piattaed asciutta.• Questo scalda-<strong>biberon</strong> è da usare esclusivamente in ambientichiusi. Non utilizzate lo scalda-<strong>biberon</strong> all'esterno.• Non lasciare troppo a lungo il <strong>biberon</strong> o il vasettonell’apparecchio riscaldato.• I <strong>biberon</strong> sono molto caldi in uscita dallo sterilizzatore. Maneggiarlocon cura.• Non spostate mai l'apparecchio mentre sta funzionando.ISTRUZIONI DI SICUREZZA• Mentre è in funzione, l'apparecchio può diventare molto caldo.Toccate esclusivamente la maniglia e l'interruttore.• Scollegate sempre l'apparecchio prima di pulirlo o di riempirlo.• Scollegate l'apparecchio dopo ogni utilizzo per evitarel'avvio accidentale.• Lasciatelo fuori dalla portata dei bambini poiché questoapparecchio contiene durante e dopo ogni utilizzo del vaporeestremamente caldo. Verificate che il cavo sia fuori portata.Accertarsi sempre che il bambino non giochi con l’apparecchio.• Non sollevare mai l'apparecchio dall'impugnatura della calotta.• Posizionare sempre i <strong>biberon</strong> aperti (senza tettarella né cappuccio)all'interno dell'apparecchio. Togliere sempre il coperchio dei vasetti.Utilizzo in auto:• Non usare mai lo scalda<strong>biberon</strong> mentre il veicolo è in moto.Lasciare acceso il motore quando si usa lo scalda<strong>biberon</strong> perevitare che la batteria si scarichi.• Il cavo dell'adattatore per auto è stato studiato appositamenteper questo scalda<strong>biberon</strong>: non utilizzarlo mai con altri apparecchi.• Controllare regolarmente la presa dell'accendisigari dell'auto e,se necessario, pulirla.• Nel caso in cui l'accendisigari sia appena stato utilizzato, lasciarloraffreddare per cinqueminuti in posizione aperta prima di inserirela spina dello scalda<strong>biberon</strong>.• Questo apparecchio è destinato a essere utilizzato in strutturedomestiche o analoghe come:- angoli cucina riservati al personale di negozi, uffici e altriambienti professionali,- cascinali,- l’uso da parte di clienti di hotel, motel e altri ambienti acarattere residenziale,- ambienti del tipo di camere per gli ospiti.• Se il cavo di alimentazione è danneggiato, esso deve esseresostituito dal produttore, dal suo servizio post vendita o da personedi pari qualifica, in modo da evitare ogni pericolo.• Le dosi indicate nella tabella sono indicative, se si ha l’impressioneche la temperatura sia troppo alta o troppo bassa per le sigenzedel bambino non esitare a diminuire o aumentare la quantitàd’acqua.N.B.: il materiale e lo spessore del <strong>biberon</strong> e l’eventuale presenzadi fondo rimovibile, sono elementi che possono influire sullatemperatura del <strong>biberon</strong>.AVVERTENZE• ATTENZIONE: onde evitare qualsiasi rischio di ustione controllaresempre la temperatura della pappa prima di offrirla al bambino.Agitare sempre il <strong>biberon</strong> per mescolare il latte. Versare unagoccia di liquido all’interno del polso per verificarne la temperatura.Quando si scalda un vasetto,mescolare il contenuto e verificarnela temperatura assaggiandolo.• L’apparecchio non è previsto per l’impiego da parte di persone(bambini compresi) con capacità fisiche, sensoriali o mentaliridotte, o di persone prive di esperienza o conoscenza, a menoche queste non siano state sottoposte, tramite personaresponsabile della loro sicurezza, a controllo o istruzioni riguardantiil corretto utilizzo dell’apparecchio stesso.• Gli apparecchi elettrici ed elettronici sono soggetti a raccoltadifferenziata. Non smaltire i rifiuti di apparecchi elettrici edelettronici assieme ai rifiuti municipali non differenziati, bensìprocedere alla loro raccolta differenziata.Questo simbolo indica, nell'Unione europea, che questoprodotto non deve essere gettato tra i rifiuti comuni onella spazzatura domestica, ma deve esseresmaltito separatamente.SCALDA BIBERON TURBO VAPORE DE CASA O AUTO • Istruzioni per l’uso 25
a. Manico della calottab. Calottac. Supporto del <strong>biberon</strong>COMPOSIZIONEd. Dosatore d'acqua / beccuccio vaporee. Interruttore « On »f. Grigliag. Manico della grigliah. Spina adattatore per autoMODALITA' DI UTILIZZOSCALDA-BIBERONIn casa1. Togliere la calotta (b) sollevandola dall'impugnatura (a).2. Estrarre il dosatore dell'acqua (d). Riempirlo secondo le quantità di seguito indicate.Quantità di lattenel <strong>biberon</strong>Quantità di acqua daversare nel misurinoper lo scalda<strong>biberon</strong>,preparato con acquatiepidaQuantità di acquada versare nelmisurino per loscalda<strong>biberon</strong>, giàpreparato e freddo60 ml 6 ml 11 ml90 ml 8 ml 12 ml120 ml 9 ml 13 ml150 ml 9.5 ml 14 ml180 ml 10 ml 15 ml210 ml 11 ml 15.5 ml240 ml 12 ml 16 ml270 ml 13 ml 16.5 ml300 ml 14 ml 17 ml330 ml 15 ml 18 mlVasettoQuantità di acqua daversare nel misurinoper il vasetto diomogeneizzatoQuantità di acquada versare nelmisurino per ilvasettodi omogeneizzatoa freddo120 g 10 ml 16 ml200 g 13 ml 18 ml250 g 18 ml 25 ml3. Togliere il supporto (c).4. Togliere la griglia (f).5. Versate l'acqua nella vaschetta dello scalda <strong>biberon</strong>.6. Rimettere la grigli (f) sulla piastra di riscaldamento.7. Far girare la griglia mediante il suo manico (g) in senso antiorario per CHIUDERLA. Ciò permetterà al vapore di uscire dal beccuccio (d).8. Sistemare il supporto (c) nello scalda-<strong>biberon</strong>.9. Inserire il dosatore dell'acqua / beccuccio vapore (d).10. Sistemare il <strong>biberon</strong> all'interno del supporto, senza tettarella né cappuccio.11. Chiudere la calotta (b).12. Bloccarla facendola girare in senso antiorario.13. Collegare l'apparecchio all'alimentazione elettrica e premere il tasto "On" (e) per avviare il ciclo. Una spia luminosa indicherà chel'apparecchio è in funzione. L'apparecchio si spegnerà automaticamente e un allarme sonoro avvertirà che il ciclo è terminato.14. Afferrare l'impugnatura della calotta (a) e girarla in senso orario per sbloccarla.15. Estrarre il <strong>biberon</strong> / il vasetto con cautela: sarà caldo.16. In caso di <strong>biberon</strong>, aggiungere il latte in polvere e chiudere con tettarella e cappuccio. Scuotere il <strong>biberon</strong> per miscelare bene l'acquae il latte e per ottenere una temperatura omogenea.17. Verificare sempre la temperatura dell'alimento prima di presentarlo al bambino.In auto- Fermare il veicolo e lasciare acceso il motore.- Appoggiare lo scalda-<strong>biberon</strong> su una superficie piana e stabile all'interno del veicolo.- Seguire quindi i passaggi da 1 a 17 sopra descritti avendo cura di diminuire la quantità d’acqua del dosatore di qualche millilitro(tra 2 e 4ml) e sostituendo il passaggio 13 con le seguenti indicazioni:13. Collegare l'adattatore per accendisigari (h) al cavo di alimentazione dello scalda-<strong>biberon</strong>. Collegare l'adattatore all’accendisigari.Premere il tasto "On" (e) per avviare il ciclo. Una spia luminosa indicherà che l'apparecchio è in funzione. L'apparecchio si spegneràautomaticamente e un allarme sonoro avvertirà che il ciclo è terminato.La durata del ciclo di riscaldamento sarà più lunga rispetto all’utilizzo in casa (durata media: 10 minuti).26SCALDA BIBERON TURBO VAPORE DE CASA O AUTO • Istruzioni per l’uso
STERILIZZATOREPunti da rispettare per una disinfezione perfetta:- Lavarsi sempre le mani prima di preparare un <strong>biberon</strong>.- Una disinfezione totale viene garantita solo se il processo non è stato interrotto.- Utilizzare acqua del rubinetto senza alcun additivo.- Prima di ogni sterilizzazione è importante lavare, sciacquare con acqua fredda e vuotare tutti i <strong>biberon</strong> ed accessori.- Delle semplici tracce di latte possono comportare la propagazione di batteri.In casa1. Aprire la calotta (b) sollevandola dall'impugnatura (a).2. Estrarre il dosatore dell'acqua (d).3. Togliere il supporto (c).4. Togliere la griglia (f).5. Versare 30 ml di acqua nella vaschetta aiutandosi con il dosatore (1 dosatore e ½) o con un <strong>biberon</strong>.6. Rimettere la griglia (f) sulla piastra di riscaldamento.7. Far girare la griglia mediante il suo manico (g) in senso orario per APRIRLA. In questo modo si permette al vapore di uscire dal fondodella vaschetta, direttamente all'interno del <strong>biberon</strong>.8. Sistemare il <strong>biberon</strong> a testa in giù sulla griglia (f). Sistemarvi intorno gli accessori.9. Chiudere la calotta (b) e bloccarla facendola girare in senso antiorario.10. Collegare l'apparecchio all'alimentazione elettrica e premere il tasto "On" (e) per avviare il ciclo. Una spia luminosa indicherà chel'apparecchio è in funzione. L'apparecchio si spegnerà automaticamente e un allarme sonoro avvertirà che il ciclo è terminato.11. Afferrare l'impugnatura della calotta (a) e girarla in senso orario per sbloccarla.12. Estrarre il <strong>biberon</strong> con cautela: sarà caldo.13. Per una sterilizzazione ottimale, si consiglia di effettuare un secondo ciclo di sterilizzazione.In auto- Fermare il veicolo e lasciare acceso il motore.- Appoggiare lo scalda-<strong>biberon</strong> su una superficie piana e stabile all'interno del veicolo.- Seguire quindi i passaggi da 1 a 13 sopra descritti rispettando la tabella che segue e sostituendo i punto 10 con le seguenti istruzioni:10. Collegare l'adattatore per accendisigari (h) al cavo di alimentazione dello scalda-<strong>biberon</strong>. Collegare l'adattatore all’accendisigari.Premere il tasto "On" (e) per avviare il ciclo. Una spia luminosa indicherà che l'apparecchio è in funzione. L'apparecchio si spegneràautomaticamente e un allarme sonoro avvertirà che il ciclo è terminato.MANUTENZIONEPulizia- Non immergete mai l'apparecchio in acqua e non riempitelo completamente d'acqua.- Utilizzate un tessuto leggermente umido per pulire l'interno e l'esterno. Non utilizzare prodotti detergenti per pulire l'interno o l'esternodell'apparecchio.- Il dosatore d'acqua e il supporto possono essere lavati in lavastoviglie.Rimozione del calcareNon utilizzate dei prodotti per la rimozione del calcare.Dopo molti usi ed in base alla durezza dell'acqua utilizzata, uno strato di calcare potrebbe ricoprire la vaschetta. Per il buon funzionamentodell'apparecchio, si deve rimuovere il calcare da questa vaschetta regolarmente.Procedete nel modo seguente: Mescolate 100 ml di acqua calda con 100 ml di aceto bianco e versate il tutto nella vaschetta. Lasciateagire 30 minuti e svuotate l'apparecchio. Utilizzate poi un panno umido per pulirlo.PICCOLI PROBLEMILo scalda <strong>biberon</strong> non riscalda:- verificate che l'apparecchio sia ben collegato,- verificate che il pulsante di avvio sia attivato,- verificate che la vaschetta non abbia del calcare e se necessario procedete alla rimozione del calcare.I cicli di riscaldamento sono troppo corti o troppo lunghi:Livello dell'acqua troppo basso: regolare la quantità d'acqua.SCALDA BIBERON TURBO VAPORE DE CASA O AUTO • Istruzioni per l’uso 27
CZDěkujeme vám za zakoupení parního ohřívače kojeneckých láhví značky <strong>Babymoov</strong>. Prosprávné používání výrobku si pozorně prostudujte tento návod k použití. Návod k použitípečlivě uschovejte pro případ další potřeby.• Ohřívání všech typů kojeneckých láhví a nádobek s dětskou výživoudíky jedinečnému systému: pára vychází z jazýčku po celé výšce láhvepro zajištění rovnoměrné teploty ohřívaného mléka či přesnídávky.• Systém 2 v 1: ohřívač kojeneckých láhví a sterilizátor.FUNKCE• Vysoký výkon:- Použití v domácnosti: 320 W / 230 V.- Použití v automobilu: 100 W / 12 V.• Univerzální výrobek: vhodný pro všechny typy kojeneckých láhví.• Bezpečnost: automatické vypnutí po skončení cyklu.• Během fungování přístroje nenechávejte dítě bez dohledu.• Zkontrolujte, zda napětí elektrické sítě odpovídá napětí přístroje(hodnoty jsou uvedené na spodní straně přístroje).• Přístroj používejte pouze pro ohřívání kojeneckých láhví a nádobeks dětskou výživou a pro sterilizaci kojeneckých láhví a jejichpříslušenství. Používání přístroje za jakýmkoliv jiným účelem můžebýt nebezpečné.• Přístroj zásadně nezapínejte, pokud v něm není voda. Přístroj spouštějtepouze v případě, že jste do něj nalili dostatečné množství vody.• Do vody nepřidávejte žádné přísady (slanou vodu, léky, detergenty),jinak hrozí nebezpečí poškození přístroje.• Před přípravou láhve si pečlivě umyjte ruce.• Ohřívač kojeneckých láhví nepoužívejte ve vlhkém prostředí anemyjte ho přímo ve vodě nebo pod proudem vody.• Přístroj neumísťujte v blízkosti zdrojů tepla, jako jsou napříkladradiátory topení, okna, do nichž svítí prudké slunce, atp.• Přístroj používejte na dokonale rovné a suché ploše.• Tento ohřívač kojeneckých láhví je určený pouze pro používání vmístnosti. Ohřívač kojeneckých láhví nepoužívejte venku.• Láhve ani nádobky s dětskou výživou neohřívejte příliš dlouho.• Po skončení ohřevu jsou láhve velmi horké. Při vyjímání láhví zpřístroje buďte velmi opatrní.• Přístroj se spuštěným cyklem zásadně nepřemísťujte.BEZPEČNOSTNÍ POKYNY• Během provozu se přístroj může zahřát na velmi vysokou teplotu.Sahejte pouze na držadlo a spínač.• Před čištěním nebo plněním vody přístroj vždy vytáhněte ze zásuvky.• Po každém použití přístroj vytáhněte ze zásuvky, abyste zabránilisamovolnému spuštění.• Přístroj umístěte mimo dosah dětí, protože obsahuje velmi horkoupáru. Zkontrolujte, zda je napájecí šňůra umístěná mimo dosah dětí.• Dohlížejte na děti, aby si s přístrojem nehrály.• Přístroj zásadně nezvedejte uchopením za držadlo poklopu.• Do přístroje vkládejte pouze otevřené láhve (bez dudlíku a víčka).Z nádobek s dětskou výživou vždy odšroubujte víčko.Použití v automobilu:• Ohřívač kojeneckých láhví zásadně nepoužívejte za jízdy. Připoužívání ohřívače kojeneckých láhví nechte běžet motorautomobilu, aby se nevybíjela baterie.• Adaptér do zapalovače cigaret v automobilu je speciálně vyvinutýpro tento ohřívač kojeneckých láhví. Nepoužívejte adaptér sjinými přístroji.• Zapalovač cigaret ve vašem voze pravidelně kontrolujte. V případěpotřeby ho vyčistěte.• Pokud jste právě použili automobilový zapalovač cigaret, nechteho pět minut ochladit v otevřené poloze, než do něj zapojíteohřívač láhví.• Tento přístroj je určený pouze pro použití v domácnosti či v jinýchpodobných zařízeních, jako jsou například:- kuchyňské kouty vyhrazené pro zaměstnance prodejen, kancelářía jiných pracovišť,- zemědělské usedlosti,- používání klienty, kteří jsou ubytovaní v hotelích, motelech ajiných ubytovacích zařízeních,- používání v hotelových pokojích a podobnýchubytovacích prostorách.• Je-li napájecí kabel poškozený, je třeba ho vyměnit. Výměnu můžeprovést výrobce, pracovník autorizovaného servisu nebo jinákvalifikovaná osoba, aby se zabránilo jakémukoliv nebezpečí.• Dávkování vody uvedená v tabulce jsou pouze informativní. Pokudse domníváte, že teplota výživy je pro vaše dítě příliš vysoká nebopříliš nízká, použijte menší nebo větší množství vody.Poznámka: materiál, tloušťka kojenecké láhve a snímatelné dnokojenecké láhve jsou prvky, které mohou mít vliv na teplotu láhve.UPOZORNĚNÍ• DŮLEŽITÉ UPOZORNĚNÍ: abyste zabránili nebezpečí popálení,provádějte systematicky kontrolu teploty výživy, než ji podátedítěti. Před podáním láhev s mlékem dobře protřepejte, aby semléko dobře promíchalo. Kápněte kapku mléka na vnitřní stranuzápěstí, abyste zkontrolovali teplotu výživy. Po ohřátí nádobky sdětskou výživou její obsah promíchejte a ochutnáním zkontrolujte,zda výživa není příliš horká.• Tento přístroj není určený pro používání osobami (či dětmi) sesníženými fyzickými, smyslovými nebo duševními schopnostminebo osobami, které nemají zkušenosti s používáním přístrojenebo které s ním nebyly obeznámeny, s výjimkou případů, kdyjsou pod dohledem osoby, která odpovídá za jejich bezpečnostnebo na ně dozírá nebo je předem poučila o používání přístroje.• Elektrické a elektronické přístroje je třeba odkládat do speciálníchodpadových nádob na tříděný odpad. Elektrické a elektronicképřístroje nevyhazuje do směsného komunálního odpadu, ale dospeciálních nádob na tříděný odpad.28Tento symbol označuje v celé Evropské unii, že daný výrobeknelze vyhodit do popelnice nebo do směsného komunálníhodopadu, ale do speciální nádoby na tříděný odpad.OHŘÍVAČ KOJENECKÝCH LÁHVÍ PRO POUŽITÍ V DOMÁCNOSTI I V AUTOMOBILU • Návod k použití
a. Držadlo poklopub. Poklopc. Držák kojeneckých láhvíSLOŽENÍd. Dávkovač vody/parní jazýčeke. Tlačítko „ON“f. MřížkaNÁVOD K POUŽITÍOHŘÍVAČ KOJENECKÝCH LÁHVÍg. Držadlo mřížkyh. Szivargyújtóhoz csatlakozóPoužití v domácnosti1. Sejměte poklop (b) uchopením za držadlo (a).2. Vyjměte dávkovač vody (d). Do dávkovače nalijte vodu, viz níže uvedená množství.Množství mlékav láhviMnožství vody, které jenutno odměřit doodměrky, pokudpřipravujete mléko svlažnou vodouMnožství vody, které jenutno odměřit doodměrky, pokudpřipravujete mléko svodou, která bylapředtím v ledničce60 ml 6 ml 11 ml90 ml 8 ml 12 ml120 ml 9 ml 13 ml150 ml 9.5 ml 14 ml180 ml 10 ml 15 ml210 ml 11 ml 15.5 ml240 ml 12 ml 16 ml270 ml 13 ml 16.5 ml300 ml 14 ml 17 ml330 ml 15 ml 18 mlMalá nádobkaMnožství vody, které jenutno odměřit doodměrky v případěnádobky s výživouuchovávané přiokolní teplotěMnožství vody, které jenutno odměřit doodměrky v případěnádobky s výživouuchovávané v ledničce120 g 10 ml 16 ml200 g 13 ml 18 ml250 g 18 ml 25 ml3. Vyjměte držák (c).4. Vyjměte mřížku (f).5. Do nádržky nalijte vodu.6. Ustavte mřížku (f) na ohřívací desku.7. Pomocí držadla (g) otáčejte mřížkou po směru hodinových ručiček, abyste ji ZAVŘELI. Tato manipulace umožní výstup páry z parníhojazýčku (d).8. Umístěte držák (c) do ohřívače kojeneckých láhví.9. Zasuňte dávkovač vody/parní jazýček (d).10. Vložte láhev bez dudlíku a bez víčka do držáku.11. Uzavřete poklop (b).12. Poklop zablokujte otočením proti směruhodinových ručiček.13. Zapojte přístroj do sítě a stiskněte tlačítko „ON“ (e) pro spuštění cyklu. Světelná kontrolka informuje o tom, že je přístroj v chodu. Poskončení cyklu se přístroj automaticky vypne a zvuková signalizace vás bude informovat o skončení cyklu.14. Uchopte držadlo poklopu (a) a otáčejte jím po směru hodinových ručiček, abyste poklop odblokovali.15. Při vyjímání kojenecké láhve nebo nádobky s dětskou výživou buďte velmi opatrní. Láhev nebo nádobka bude horká.16. Do láhve s ohřátou vodou přidejte mléko v prášku, nasaďte dudlík a víčko. Obsah láhve dobře protřepejte, aby se mléko dobřesmíchalo s vodou a abyste dosáhli rovnoměrné teploty.17. Před podáním výživy dítěti vždy zkontrolujte její teplotu.Použití v automobilu- Vozidlo zastavte a nechte běžet motor.- Ohřívač kojeneckých láhví ustavte na vodorovnou stabilní plochu ve voze.- Dále postupujte podle výše popsaných etap 1 až 17, přičemž snižte množství vody v odměrce o několik mililitr (o 2 až 4 ml), a místoetapy 13 postupujte následovně:13. Zapojte adaptér automobilového zapalovače cigaret (h) do napájecí šňůry ohřívače kojeneckých láhví. Zapojte adaptér do zapalovačecigaret. Stiskněte tlačítko „ON“ (e) pro spuštění cyklu. Světelná kontrolka informuje o tom, že je přístroj v chodu. Přístroj se automatickyvypne a zvuková signalizace vás bude informovat o skončení cyklu.Cyklus ohřevu bude delší než při používání v domácnosti (průměrná délka cyklu: 10 minut).OHŘÍVAČ KOJENECKÝCH LÁHVÍ PRO POUŽITÍ V DOMÁCNOSTI I V AUTOMOBILU • Návod k použití 29
STERILIZÁTORPředpisy, které je nutno dodržovat pro dokonalou sterilizaci:- Před přípravou láhví si pečlivě umyjte ruce.- Dokonalá sterilizace je zaručená pouze v případě nepřerušení sterilizačního cyklu.- Používejte výhradně kohoutkovou vodu bez jakýchkoliv přísad.- Před každou sterilizací kojenecké láhve a příslušenství vyprázdněte, umyjte a opláchněte studenou vodou.- Zbytky mléka mohou způsobit bakteriální bujení.Použití v domácnosti1. Otevřete poklop (b) uchopením za držadlo (a).2. Vyjměte dávkovač vody (d).3. Vyjměte držák (c).4. Vyjměte mřížku (f).5. Pomocí odměrky (1,5 odměrky) nebo kojenecké láhve odměřte 30 ml vody a nalijte ji do nádržky.6. Ustavte mřížku (f) na ohřívací desku.7. Pomocí držadla (g) otáčejte mřížkou po směru hodinových ručiček, abyste ji OTEVŘELI. Tato operace umožní výstup páry ze dnanádržky, přičemž pára půjde přímo do láhve.8. Ustavte kojeneckou láhev hrdlem dolů na mřížku (f). Kolem láhve umístěte její příslušenství.9. Uzavřete poklop (b) a zablokujte ho otočením proti směru hodinových ručiček.10. Zapojte přístroj do sítě a stiskněte tlačítko „ON“ (e) pro spuštění cyklu. Světelná kontrolka informuje o tom, že je přístroj v chodu. Poskončení cyklu se přístroj automaticky vypne a zvuková signalizace vás bude informovat o skončení cyklu.11. Uchopte držadlo poklopu (a) a otáčejte jím po směru hodinových ručiček, abyste poklop odblokovali.12. Při vyndávání láhve buďte velmi opatrní. Láhev bude horká.13. Pro dosažení optimální sterilizace doporučujeme provést druhý sterilizační cyklus.Použití v automobilu- Vozidlo zastavte a nechte běžet motor.- Ohřívač kojeneckých láhví ustavte na vodorovnou stabilní plochu ve voze.- Postupujte podle instrukcí 1 až 13 a podle pokynů v tabulce, místo etapy 10 postupujte následovně:10. Zapojte adaptér automobilového zapalovače cigaret (h) do napájecí šňůry ohřívače kojeneckých láhví. Zapojte adaptér dozapalovače cigaret. Stiskněte tlačítko „ON“ (e) pro spuštění cyklu. Světelná kontrolka informuje o tom, že je přístroj v chodu. Přístrojse automaticky vypne a zvuková signalizace vás bude informovat o skončení cyklu.ÚDRŽBAČištění- Přístroj zásadně neponořujte do vody a nenaplňujte ho úplně vodou.- Vnější a vnitřní části přístroje čistěte navlhčeným hadříkem. Pro čištění vnitřní či vnější části přístroje nepoužívejte detergenty.- Dávkovač a držák je možno mýt v myčce.Odstraňování vodního kameneNepoužívejte přípravky na odstraňování vodního kamene.Během používání přístroje a v závislosti na tvrdosti používané vody se na nádrži může vytvořit usazenina vodního kamene. Aby mohlpřístroj správně fungovat, je třeba z nádrže pravidelně odstraňovat vodní kámen.Postupujte následujícím způsobem: smíchejte 100 ml horké vody s 100 ml octa a směs nalijte do nádrže. Nechejte 30 minut působit apotom vodu s octem vylijte z přístroje. Přístroj potom vyčistěte vlhkým hadříkem.DROBNÉ ZÁVADYOhřívač kojenecké láhve nehřeje- Zkontrolujte, zda je tlačítko „Zapnuto“ zapnuté.- Zkontrolujte, zda je přístroj zapojený do sítě.- Zkontrolujte, zda není nádržka zanesená vodním kamenem. V případě potřeby odstraňte vodní kámen.Cyklus ohřevu je příliš krátký nebo příliš dlouhýNalili jste příliš mnoho nebo příliš málo vody. Upravte množství vody.30OHŘÍVAČ KOJENECKÝCH LÁHVÍ PRO POUŽITÍ V DOMÁCNOSTI I V AUTOMOBILU • Návod k použití
Bon de garantie à vie(à renvoyer dans les 15 jours suivant l’achat)❐ Oui, je souhaite garantir à vie mon produit <strong>Babymoov</strong> et je vous joins une copie de monticket de caisse (OBLIGATOIRE). Sans cela, nous ne pourrons garantir à vie votre achat.❐ Oui, je souhaite recevoir la Moovletter, lettre d’information électronique surles nouveautés et la société <strong>Babymoov</strong>. Merci de bien remplir votre adresse e-mail.Nom des parents : . . . . . . . . . . . . . . . . . . . . . . . . . . . . . . . . . . . . . . . . . . . . . . . . . . . . . . . . . . . . . . . . . . . . .Prénoms des parents : . . . . . . . . . . . . . . . . . . . . . . . . . . . . . . . . . . . . . . . . . . . . . . . . . . . . . . . . . . . . . . . . . .Adresse : . . . . . . . . . . . . . . . . . . . . . . . . . . . . . . . . . . . . . . . . . . . . . . . . . . . . . . . . . . . . . . . . . . . . . . . . . . . .. . . . . . . . . . . . . . . . . . . . . . . . . . . . . . . . . . . . . . . . . . . . . . . . . . . . . . . . . . . . . . . . . . . . . . . . . . . . . . . . . . . .Code Postal / Ville : . . . . . . . . . . . . . . . . . . . . . . . . . . . . . . . . . . . . . . . . . . . . . . . . . . . . . . . . . . . . . . . . . . . .N° de téléphone : . . . . . . . . . . . . . . . . . . . . . . . . . . . . . . . . . . . . . . . . . . . . . . . . . . . . . . . . . . . . . . . . . . . . . .E-mail : . . . . . . . . . . . . . . . . . . . . . . . . . . . . . . . . . . . . . . . . . . . . . . . . . . . . . . . . . . . . . . . . . . . . . . . . . . . . . .Prénoms de vos enfants : . . . . . . . . . . . . . . . . . . . . . . . . . . . . . . . . . . . . . . . . . . . . . . . . . . . . . . . . . . . . . . .Dates de naissance : . . . . . . . . . . . . . . . . . . . . . . . . . . . . . . . . . . . . . . . . . . . . . . . . . . . . . . . . . . . . . . . . . . .Nom du produit acheté : . . . . . . . . . . . . . . . . . . . . . . . . . . . . . . . . . . . . . . . . . . . . . . . . . . . . . . . . . . . . . . . .Référence : . . . . . . . . . . . . . . . . . . . . . . . . . . . . . . . . . . . . . . . . . . . . . . . . . . . . . . . . . . . . . . . . . . . . . . . . . . .N° de code barre (obligatoire) : . . . . . . . . . . . . . . . . . . . . . . . . . . . . . . . . . . . . . . . . . . . . . . . . . . . . . . . . . . .Date de l’achat : . . . . . . . . . . . . . . . . . . . . . . . . . . . . . . . . . . . . . . . . . . . . . . . . . . . . . . . . . . . . . . . . . . . . . .Lieu de l’achat : . . . . . . . . . . . . . . . . . . . . . . . . . . . . . . . . . . . . . . . . . . . . . . . . . . . . . . . . . . . . . . . . . . . . . . .Votre opinion sur la qualité du produit : Mauvaise 1 2 3 4 5 très bonneCombien de produits <strong>Babymoov</strong> avez-vous déjà acheté ?1 2 3 4 5 6 7 8 autre : . . . . . . . . . . . . . . . . . . . . . . . . . . . . . . . . . . . . . . . . . . . . . . . . . . . . . . . . . . . . . . .Avez-vous des commentaires sur ce produit ?. . . . . . . . . . . . . . . . . . . . . . . . . . . . . . . . . . . . . . . . . . . . . . .. . . . . . . . . . . . . . . . . . . . . . . . . . . . . . . . . . . . . . . . . . . . . . .Avez-vous une idée d’un produit génialà créer pour bébé ?. . . . . . . . . . . . . . . . . . . . . . . . . . . . . . . . . . . . . . . . . . . . . . .. . . . . . . . . . . . . . . . . . . . . . . . . . . . . . . . . . . . . . . . . . . . . . . * Garantie à vie. Cette garantie est soumise àconditions. Valable en France. Liste des autres. . . . . . . . . . . . . . . . . . . . . . . . . . . . . . . . . . . . . . . . . . . . . . .pays concernés, activation et renseignementsen ligne à l'adresse suivante :. . . . . . . . . . . . . . . . . . . . . . . . . . . . . . . . . . . . . . . . . . . . . . .www.service-babymoov.comPhotographies et illustrations non contractuelles A002051-Manual-Artwork-02* sous réserve d’une utilisation conforme à la notice. La garantie à vie ne couvre pas les détériorations dues à une utilisation anormale, le textile, les consommables(sucettes, ampoules…), la sérigraphie, l’usure normale de certains éléments comme le plastique, le roulant...• Nous vous rappelons que vous disposez d'un droit d'accès, de modification, de rectification et de suppression des données qui vous concernent (art. 34 de la loi "Informatiqueet Libertés" du 6 janvier 1978). Pour exercer ce droit, adressez-vous à <strong>Babymoov</strong> - 16, rue Jacqueline Auriol - 63100 Clermont-Ferrand.• Les informations qui vous concernent sont destinées à <strong>Babymoov</strong>. Nous pouvons être amenés à les transmettre à des tiers (partenaires commerciaux, etc).Le souhaitez-vous ? Oui ❒ Non ❒