Télécharger la notice au format pdf (36ko) - Babymoov
Télécharger la notice au format pdf (36ko) - Babymoov
Télécharger la notice au format pdf (36ko) - Babymoov

You also want an ePaper? Increase the reach of your titles
YUMPU automatically turns print PDFs into web optimized ePapers that Google loves.
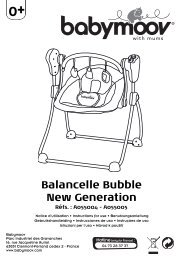
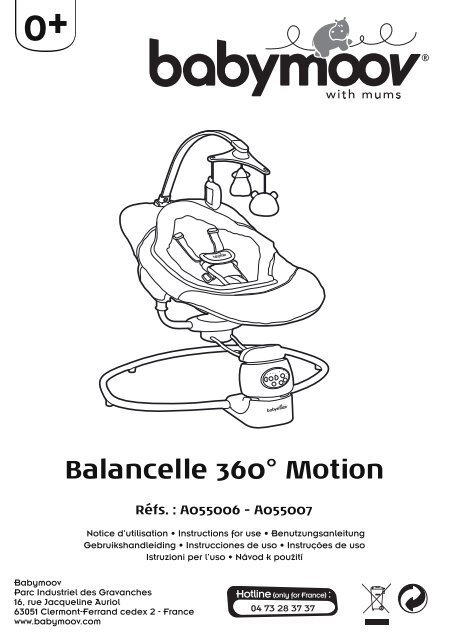
0+Ba<strong>la</strong>ncelle 360° MotionNotice d’utilisation • Instructions for use • BenutzungsanleitungGebruikshandleiding • Instrucciones de uso • Instruções de usoIstruzioni per l’uso • Návod k použití<strong>Babymoov</strong>Parc Industriel des Gravanches16, rue Jacqueline Auriol63051 Clermont-Ferrand cedex 2 - Francewww.babymoov.comRéfs. : A055006 - A055007
COMPOSITION - ZUSAMMENSETZUNG - SAMENSTELLING - COMPOSICIÓN -COMPOSIÇÃO - COMPOSIZIONE - SLOŽENÍ VÝROBKUabdce2
fghijk3
MONTAGE - ASSEMBLY - MONTAGE - MONTAGE - MONTAJE - MONTAGEM -ASSEMBLAGGIO - MONTÁŽ1 23 45674
8 91011125
13 1415 16171819 206
A1 2 3B11 2 3B27
C2 32 328
D1142 359
FRMerci d’avoir choisi <strong>la</strong> Ba<strong>la</strong>ncelle BABYMOOV. Pour <strong>la</strong> sécurité de votre bébé, veuillez lire attentivementce manuel d’instruction et le conserver soigneusement pour vous y référer ultérieurement.Conforme <strong>au</strong>x exigences de sécurité. Conforme <strong>au</strong>x exigences de <strong>la</strong> norme PR EN 16232 : 2011IMPORTANT - LIRE ATTENTIVEMENT LESINSTRUCTIONS AVANT TOUTE UTILISATIONET LES CONSERVER POURTOUTE RÉFÈRENCE ULTÉRIEURELes équipements électriques font l’objet d’une collecte sélective. Ne pas se débarrasser des déchetsd’équipements électriques et électroniques avec les déchets municip<strong>au</strong>x non triés, mais procéder à leurcollecte sélective. Ce symbole indique à travers l’Union Européenne que ce produit ne doit pas être jeté à<strong>la</strong> poubelle ou mé<strong>la</strong>ngé <strong>au</strong>x ordures ménagères, mais faire l’objet d’une collecte sélective.• Ne jamais <strong>la</strong>isser l’enfant sans surveil<strong>la</strong>nce.• Il est dangereux d’utiliser ce produit sur une surface en h<strong>au</strong>teur (parexemple, une table).• Ce produit n’est pas prévu pour de longues périodes de sommeil.• Toujours utiliser le système de retenue.• Ne pas dép<strong>la</strong>cer et ne pas soulever ce produit quand le bébéest à l’intérieur.• Le montage doit être réalisé par un adulte.• Ne pas utiliser <strong>la</strong> ba<strong>la</strong>ncelle si elle est endommagée ou cassée.• Tenir les petites pièces hors de portée des enfants.• Ce produit ne remp<strong>la</strong>ce pas un couffin ou un lit pour bébé. Si votreenfant a besoin de dormir, il convient de le p<strong>la</strong>cer dans un couffin ouun lit adapté.• Ne pas utiliser le produit si un ou plusieurs éléments sont cassésou manquants.• Ne pas utiliser d’accessoires ou de pièces de rechange <strong>au</strong>tres queceux approuvés par le fabricant.• Avant l’utilisation, vérifier que les mécanismes de verrouil<strong>la</strong>ge soientbien enclenchés et correctement ajustés.• Utiliser votre ba<strong>la</strong>ncelle uniquement sur le sol.• Vérifier régulièrement le système de suspension de <strong>la</strong> ba<strong>la</strong>ncelle.• Utiliser toujours un harnais 5 points de sécurité.• Ne pas utiliser <strong>la</strong> ba<strong>la</strong>ncelle sans sa housse de protection.AVERTISSEMENTSCONSIGNES DE SECURITÉ À RESPECTERFonctionnement avec piles (non fournies) :Dévissez le capot de verrouil<strong>la</strong>ge pour accéder <strong>au</strong> logement des piles situé en dessous du pied de <strong>la</strong> ba<strong>la</strong>ncelle. Insérez 4 piles « D » 1.5V.Respectez les indications de po<strong>la</strong>rité (+/ -).ATTENTION• Ne pas utiliser ce produit si votre enfant tient assis tout seul ou s’ilpèse plus de 9kg.• Pour éviter les blessures, s’assurer que les enfants ne sont pas àproximité lors du pliage et du dépliage du produit.• Ne pas <strong>la</strong>isser les enfants jouer avec ce produit.• Ne jamais utiliser le mobile d’éveil pour soulever ou dép<strong>la</strong>cerce produit.• Ne pas utiliser toujours <strong>la</strong> ba<strong>la</strong>ncelle sur une surface molle (lit, canapé,coussin) ; le siège pourrait basculer et provoquer un danger pourvotre enfant.• Eloigner <strong>la</strong> ba<strong>la</strong>ncelle de toute f<strong>la</strong>mme, des sources de chaleur intenses,des prises électriques, rallonges, cuisinières etc. ou objets pouvantêtre à <strong>la</strong> portée de l’enfant.• Pour éviter tout risque d’étouffement, conserver les sacs p<strong>la</strong>stiquesde l’embal<strong>la</strong>ge hors de portée des bébés et des jeunes enfants.• Ne jamais ajouter d’oreiller, de couverture ou de rembourrage ; utiliserseulement le cale-tête fourni avec votre ba<strong>la</strong>ncelle.• Ne pas p<strong>la</strong>cer d’objets, avec des ficelles, <strong>au</strong>tour du cou de l’enfant ;ne pas suspendre des ficelles à <strong>la</strong> ba<strong>la</strong>ncelle et ne pas accrocher deficelles <strong>au</strong>x jouets. Ces pratiques pourraient c<strong>au</strong>ser l’étranglement dubébé.• Ne pas p<strong>la</strong>cer <strong>la</strong> ba<strong>la</strong>ncelle près d’une fenêtre où les cordons d’unstore ou de ride<strong>au</strong>x pourraient étrangler l’enfant.• Ne pas attacher d’<strong>au</strong>tres jouets que ceux fournis par <strong>Babymoov</strong>.• Ne pas <strong>la</strong>isser l’enfant jouer avec <strong>la</strong> ba<strong>la</strong>ncelle pliée.• Les piles non rechargeables ne doivent pas être rechargées. Dans le cas contraire celles-ci pourraient exploser ou fuir.• Il ne f<strong>au</strong>t pas mé<strong>la</strong>nger différentes sortes de piles, ni mé<strong>la</strong>nger des piles neuves et usagées.• Les piles doivent être insérées avec <strong>la</strong> po<strong>la</strong>rité correcte.• Les piles déchargées doivent être retirées de <strong>la</strong> ba<strong>la</strong>ncelle.• Conserver les piles hors de portée des enfants.• Changer les piles lorsque <strong>la</strong> ba<strong>la</strong>ncelle cesse de fonctionner de manière satisfaisante.• Enlever les piles avant de ranger votre ba<strong>la</strong>ncelle pour une longue période.• Jeter les piles dans le conteneur prévu à cet effet.• Remp<strong>la</strong>cer et recharger toutes les piles en même temps.• Les piles rechargeables doivent être chargées sous <strong>la</strong> surveil<strong>la</strong>nce d’un adulte.• Ne pas recharger une pile rechargeable dans un chargeur différent.• Les bornes d’alimentation ne doivent pas être court-circuitées.• Ne pas jeter les piles <strong>au</strong> feu car elles pourraient éc<strong>la</strong>ter ou dégager des substances novices.BALANCELLE 360° MOTION • Notice d’utilisation 11
ATTENTIONBranchement sur secteur (adaptateur fourni) :• La ba<strong>la</strong>ncelle ne doit être utilisée qu’avec l’adaptateur recommandé.• IMPORTANT : avant toutes opérations veillez à ce que votre ba<strong>la</strong>ncelle soit éteinte. La ba<strong>la</strong>ncelle peut fonctionner sur une prise secteur à l’aidede l’adaptateur fourni. Input : 240 V / 60 Hz - Output : 6 V / 1000 mA.• Brancher l’embout de l’adaptateur dans l’orifice prévu à cet effet et l’<strong>au</strong>tre partie dans <strong>la</strong> prise secteur.• Les adaptateurs doivent être régulièrement examinés afin de déceler d’éventuels dommages sur le cordon, <strong>la</strong> prise, le boîtier et les <strong>au</strong>tresparties. En cas de dommage(s) constaté(s), ne pas utiliser l’appareil.COMPOSITION DE LA BALANCELLEAVERTISSEMENT : avant l’assemb<strong>la</strong>ge, retirer tous les éléments de <strong>la</strong> boîte et les identifier.a. Partie avant assiseb. Bras rotatif assisec. Coussind. Mobile d’éveile. Pied avantf. Pied arrièreg. Moteurh. Partie arrière assisei. Pièces <strong>la</strong>térales de l’assisej. Coussin morphologiquek. AdaptateurUTILISATION ET CARACTÉRISTIQUES DE LA BALANCELLEA. POSITIONS DE LA BALANCELLLEInclinaison du dossier (3 positions)En maintenant appuyés les deux boutons situés sur les côtés du dossier, sélectionner <strong>la</strong> position souhaitée, puis relâcher. Veiller à ce que <strong>la</strong>position d’inclinaison du dossier soit bien bloquée.B. ROTATION DE L’ASSISE (B1 et B2)L’assise peut pivoter sur 360° en tenant fermement le cadre de l’assise et en le faisant tourner dans <strong>la</strong> position voulue. Il existe un loquet quipermet de bloquer <strong>la</strong> ba<strong>la</strong>ncelle dans une position.C. MISE EN PLACE DU HARNAISGlisser <strong>la</strong> partie droite et g<strong>au</strong>che de <strong>la</strong> ceinture dans le harnais jusqu’à entendre un « clic ». Régler <strong>la</strong> position de <strong>la</strong> ceinture en <strong>la</strong> faisant coulisser.Pour détacher le harnais, appuyer sur le bouton central du harnais.ATTENTION ! Veillez à bien ajuster <strong>la</strong> ceinture de sécurité en fonction de votre enfant et bien bloquer le harnais de sécurité 5 points.D. MUSIQUE ET BALANCEMENT• Le bouton power permet de mettre en marche et d’éteindre <strong>la</strong> ba<strong>la</strong>ncelle.• Les boutons + et – (1) permettent de contrôler <strong>la</strong> vitesse du ba<strong>la</strong>ncement. Appuyer sur + pour <strong>au</strong>gmenter <strong>la</strong> vitesse de ba<strong>la</strong>ncement et sur – pour<strong>la</strong> diminuer. 4 vitesses de ba<strong>la</strong>ncement sont disponibles, un indicateur lumineux LED vous indique quelle vitesse est activée.• On/Off (2), ce bouton permet de mettre en route <strong>la</strong> musique et de l’arrêter.• Le bouton Volume/Select (3) permet de choisir <strong>la</strong> musique ainsi que son volume. Appuyer sur le bouton rapidement pour passer à <strong>la</strong> musiquesuivante. Appuyer plus longuement pour régler le volume.• Le bouton Timer (4) sert à régler <strong>la</strong> minuterie. Il est possible de programmer le ba<strong>la</strong>ncement pour 10, 20 ou 30 minutes. Un indicateur LED indiquesi <strong>la</strong> minuterie est activée et sur quelle durée. Par déf<strong>au</strong>t, <strong>la</strong> minuterie n’est pas activée, <strong>au</strong>cun voyant ne doit être activé et le ba<strong>la</strong>ncementcontinuera tant que vous ne l’<strong>au</strong>rez pas arrêté.• Lorsque le mécanisme de verrouil<strong>la</strong>ge est en position h<strong>au</strong>te, l’assise sera bloquée et ne pourra pas se ba<strong>la</strong>ncer. S’il est en position basse, lesba<strong>la</strong>ncements sont possibles.• Le bouton détecteur de mouvement (5) permet de déclencher les ba<strong>la</strong>ncements lorsque bébé bouge. Vous pouvez activer cette fonction enappuyant sur le bouton (5), un voyant on/off s’illumine lorsque le mode détecteur de mouvement est activé.Si <strong>la</strong> minuterie n’est pas activée, <strong>la</strong> vitesse de ba<strong>la</strong>ncement est immédiatement remise <strong>au</strong> nive<strong>au</strong> 0. Si le bébé se réveille, les ba<strong>la</strong>ncementsreprendront pour 5 minutes.Si <strong>la</strong> minuterie est activée, <strong>au</strong> terme de cette dernière <strong>la</strong> vitesse de ba<strong>la</strong>ncement sera remise à 0. Les ba<strong>la</strong>ncements recommenceront dès que lebébé se réveille pour une durée de 5 minutes.ENTRETIEN ET INSTRUCTIONS DE LAVAGE• Vérifier souvent <strong>la</strong> ba<strong>la</strong>ncelle pour s’assurer qu’il n’y ait pas de vis desserrées, de pièces usées, de tissus déchirés, ou de points décousus.• Faire remp<strong>la</strong>cer ou réparer les pièces si nécessaire. N’utiliser que des pièces détachées conseillées par <strong>Babymoov</strong>.• La housse de protection amovible et le cale-tête amovible sont <strong>la</strong>vables en surface. Pour ce<strong>la</strong>, utiliser un chiffon humide ainsi que du savon.• Pour nettoyer le cadre du transat, utiliser exclusivement du savon domestique ou un détergent et de l’e<strong>au</strong> tiède. Ne pas utiliser d’e<strong>au</strong> de javel.• Une exposition excessive <strong>au</strong> soleil ou à <strong>la</strong> chaleur peut provoquer <strong>la</strong> décoloration ou le voi<strong>la</strong>ge des pièces.100 % polyesterrnaj12BALANCELLE 360° MOTION • Notice d’utilisation
ENThank you for choosing the BABYMOOV Baby Rocker. For your baby’s safety please read theseinstructions carefully and make sure you keep it in a safe p<strong>la</strong>ce for future reference.Meets safety requirements. Meets the requirements of the PR EN 16232: 2011 standardIMPORTANT- ALWAYS READ THEINSTRUCTIONS CAREFULLY BEFORE USE ANDKEEP THEM FOR FUTURE REFERENCEElectric appliances are subject to selective collection. Do not throw away electric and electronicequipment with the unsorted municipal refuse, but follow the selective collection. Throughout theEuropean Union this symbol indicates this product must not be thrown in the bin or mixed with domesticwaste but be sorted for recycling.• Never leave the child unsupervised.• It is dangerous to use this product on a high surface (a table forinstance).• This product is not designed for long periods of sleep.• Always use the safety harness.• Never move or raise this product when the baby is inside.WARNINGS• Do not use this product if your child can sit up by himself or if heweighs more than 9kg.• To avoid injuries make sure the children are not nearby when foldingor unfolding the product.• Do not allow children to p<strong>la</strong>y with this product.• Never use the p<strong>la</strong>y arch to lift or move this product.• To be assembled by an adult only.• Do not use the baby rocker if it is damaged or broken.• Keep the small parts out of children’s reach.• This product does not rep<strong>la</strong>ce a cradle or cot. If your baby needs tosleep he should be p<strong>la</strong>ced in a cradle or suitable cot.• Never use the product if one or more items are broken or missing.• Do not use accessories or spare parts other than those approved bythe manufacturer.• Check before using the locking mechanisms are well engaged andcorrectly adjusted.• Use only your baby rocker on the ground• Check the baby rocker suspension system regu<strong>la</strong>rly.• Always use a 5 point safety harness.• Never use the baby rocker without its protective cover.• Do not use the baby rocker on a soft surface (bed, couch, cushion);the seat may tip over and be a danger for your child.SAFETY INSTRUCTIONS TO FOLLOW• Keep the baby rocker away from any f<strong>la</strong>me, intense heat sources,electric plugs, leads, cookers etc., or objects that may be within thechild’s reach.• To avoid any risk of suffocation keep p<strong>la</strong>stic packing bags out of babies’and young children’s reach.• Never add a pillow, b<strong>la</strong>nket, or padding; only use the headrest suppliedwith your baby rocker.• Never put objects with strings around your child’s neck; do not hangstrings from the baby rocker and do not tie strings to the toys. Doingso could strangle your baby.• Never p<strong>la</strong>ce the baby rocker by a window with blind or curtain cords:they could strangle your child.• Do not attach toys other than those supplied by <strong>Babymoov</strong>.• Do not let the child p<strong>la</strong>y with the folded baby rocker.Running on batteries (not supplied):Unscrew the locking cover to gain access to the battery housing underneath the foot of the baby rocker. Insert 4 1.5V “D” batteries. Respect thepo<strong>la</strong>rity indications (+/ -).WARNING• The non-rechargeable batteries must not be recharged; otherwise they could explode or leak.• Different sorts of batteries must not be mixed, nor new and used batteries.• The batteries must be inserted with the correct po<strong>la</strong>rity.• The exh<strong>au</strong>sted batteries must be removed from the baby rocker.• Keep the batteries out of children’s reach.• Change the batteries when the baby rocker stops working satisfactorily.• Remove the batteries before storing your baby rocker for a long time.• Throw the batteries away in the container provided for the purpose.• Rep<strong>la</strong>ce and recharge all the batteries at the same time.• The rechargeable batteries must be charged with an adult’s supervision.• Do not recharge a rechargeable battery in a different charger.• The power supply terminals must not be short-circuited.• Do not throw batteries in the fire as they could burst or give off noxious substances.360° MOTION BABY SWING • Instructions for use 13
WARNINGConnecting to the mains (adapter supplied):• Only use the baby rocker with the recommended adapter.• IMPORTANT: before any operation make sure your baby swing is switched off. The baby swing can function connected to a mains socket withthe aid of the adapter supplied. Input: 240 V / 60 Hz - Output: 6 V / 1000 mA• Connect the adapter to the dedicated orifice and the other end in the mains socket.• The adapters must be examined regu<strong>la</strong>rly so as to detect eventual damage to the lead, plug, case and other parts. Do not use the appliance ifyou detect any damage.COMPOSITION OF THE BABY SWINGa. Seat front partb. Seat rotating armc. Cushiond. Early learning mobilee. Front legf. Back legg. Motorh. Seat back parti. Seat side componentsj. Morphological cushionk. AdapterUSE AND FEATURES OF THE BABY SWINGA. POSITIONS OF THE BABY SWINGInclination of the back (3 positions)Keep pressing on the two buttons on the sides of the back to select the position desired and then release. Make sure the inclination position is welllocked.B. ROTATION OF THE SEAT (B1 et B2)The seat can be rotated through 360° by holding the seat frame firmly and turning it to the position desired. A <strong>la</strong>tch exists to block the baby rockerin position.C. FITTING THE HARNESSPosition the baby as in the image opposite. Slide the right and left parts of the harness belt until you hear a “click”. Adjust the position of the beltby sliding it along.To detach the harness – press the central button in the harness.WARNING! Be careful to adjust the safety belt for your child and block the 5 point safety harness well.D. MUSIC AND ROCKING• The power button switches the baby rocker on and off.• The buttons + and – (1) control the speed of the rocking. Press on + to increase the speed of the rocking and on – to decrease it. 4 rocking speedsare avai<strong>la</strong>ble; a LED indicator light tells you which speed is activated.• On/Off (2), this button starts the music and stops it.• The Volume / Select (3) button lets you select the music as well as its volume. Press the button quickly to change the music. Press for a longertime to adjust the volume.• The Timer button (4) is for setting the timer. It is possible to program the rocking for 10, 20, or 30 minutes. A LED indicator shows whether the timeris activated and for what time. By def<strong>au</strong>lt the timer is not activated, no light should be on, and the rocking will continue until you stop it.• When the locking mechanism is in the up position, the seat is blocked and cannot rock. If it is in the down position, rocking is possible.• The movement detector button (5) enables the rocking to be start when the baby moves. You can activate this function by pressing the button (5);an on/off light comes on when the movement detector is activated.If the timer is not activated the rocking speed is immediately reset to level 0. If the baby wakes up the rocking starts again for 5 minutes.If the timer is on, at the end of this period the rocking speed is reset to 0. The rocking will start again as soon as the baby wakes up for 5 minutes.MAINTENANCE AND WASHING INSTRUCTIONS• Check the baby rocker frequently to make sure there are no loose screws, worn out parts, torn fabric, or unstitching.• Have the parts rep<strong>la</strong>ced or repaired if necessary. Only use spare parts recommended by <strong>Babymoov</strong>.• Clean the baby rocker regu<strong>la</strong>rly.• The baby rocker headrest and cover are surface washable. This means they can be washed with a damp cloth and soap.• To clean the frame of the baby rocker, use household soap or detergent and warm water exclusively. Do not use bleach.• Heat or excessive exposure to the sun can c<strong>au</strong>se the parts to fade or warp.100 % polyesterrnaj14360° MOTION BABY SWING • Instructions for use
DEWir danken Ihnen, dass Sie sich für die BABYMOOV-Sch<strong>au</strong>kel entschieden haben. Für die Sicherheit IhresKindes empfehlen wir, diese Anleitung <strong>au</strong>fmerksam zu lesen und sie für späteres Nachsch<strong>la</strong>gen sorgfältig<strong>au</strong>fzubewahren.Entspricht den Sicherheitsanforderungen. Entspricht den Anforderungen der Norm PR EN 16232: 2011WICHTIG – DIE ANWEISUNGEN VOR DEMEINSATZ DER SCHAUKEL AUFMERKSAMLESEN UND FÜR SPÄTERES NACHLESENAUFBEWAHRENElektro<strong>au</strong>sstattung wird getrennt vom häuslichen Abfall gesammelt. Entsorgen Sie keine Abfälle vonElektrogeräten und elektronischen Geräten mit dem unsortierten H<strong>au</strong>smüll, sondern entsorgen Sie sieordnungsgemäß. EU-weit zeigt dieses Symbol an, dass dieses Produkt nicht in den H<strong>au</strong>smüll gehört,sondern getrennt zu entsorgen ist.WARNHINWEISE• Lassen Sie Ihr Kind nie unbe<strong>au</strong>fsichtigt.• Es ist gefährlich, dieses Produkt <strong>au</strong>f einer höher gelegenen Fläche (z.B. einem Tisch) <strong>au</strong>fzustellen.• Dieses Produkt ist nicht für längere Sch<strong>la</strong>fperioden gedacht.• Immer den Gurt anlegen.• Das Produkt weder versetzen, noch anheben, wenn das Kind in derSch<strong>au</strong>kel liegt.ZU BERÜCKSICHTIGENDE SICHERHEITSHINWEISE• Dieses Produkt ist nicht für Kinder geeignet, die selbständig sitzenkönnen oder deren Körpergewicht 9 kg überschreitet.• Um Verletzungen zu vermeiden sicherstellen, dass die Kinder sichbeim Zusammen- und Auseinanderfalten des Produktes nicht inunmittelbarer Nähe <strong>au</strong>fhalten.• Kinder nicht mit diesem Produkt spielen <strong>la</strong>ssen.• Das Produkt nie an dem Mobile anheben oder verschieben.• Die Montage ist von Erwachsenen vorzunehmen.• Sch<strong>au</strong>kel nicht verwenden, wenn sie beschädigt oder kaputt ist.• Kleinteile für Kinder unerreichbar <strong>au</strong>fbewahren.• Dieses Produkt ersetzt weder eine Babytrage, noch ein Babybett. WennIhr Kind sch<strong>la</strong>fen soll, sollte es in eine geeignete Babytrage oder einBett gelegt werden.• Produkt nicht verwenden, wenn ein oder mehrere Elemente kaputtsind oder fehlen.• Nur von dem Hersteller anerkanntes Zubehör oder Ersatzteileverwenden.• Vor dem Einsatz prüfen, dass die Verriegelungsmechanismen korrekteingerastet und eingestellt sind.• Die Sch<strong>au</strong>kel nur <strong>au</strong>f dem Boden stehend verwenden.• Regelmäßig die Aufhängung der Sch<strong>au</strong>kel prüfen.• Immer einen 5-Punkt Sicherheitsgurt verwenden.• Nie die Sch<strong>au</strong>kel ohne den Schutzbezug verwenden.• Sch<strong>au</strong>kel nicht <strong>au</strong>f einer weichen Unter<strong>la</strong>ge (Bett, Sofa, Kissen)<strong>au</strong>fstellen; der Sitz könnte kippen und Ihr Kind gefährden.• Sch<strong>au</strong>kel von offenem Feuer, Hitzequellen, Steckdosen, Stromkabeln,Küchenherd usw. oder Gegenständen fern halten, die das Kinderreichen könnte.• Zur Vermeidung von Erstickungsgefahr die P<strong>la</strong>stiktüten der Verpackungfür Babys und Kleinkinder unerreichbar <strong>au</strong>fbewahren.• Nie Kissen, Decke oder Polstermaterial in die Sch<strong>au</strong>kel legen; nur dasmit der Sch<strong>au</strong>kel gelieferte Kopfstützenkissen verwenden.• Um den Hals des Kindes keine an einem Band befestigtenGegenstände anbringen; keine Bänder an die Sch<strong>au</strong>kel hängen unddas Spielzeug nicht mit Bändern befestigen. Das Baby könnte dadurcherdrosselt werden.• Sch<strong>au</strong>kel nicht in der Nähe eines Fensters <strong>au</strong>fstellen, wo Bänder vonJalousien oder Gardinen das Kind erdrosseln könnten.• Nur das von <strong>Babymoov</strong> gelieferte Spielzeug verwenden.• Das Kind nicht mit der zusammengelegten Sch<strong>au</strong>kel spielen <strong>la</strong>ssen..Batteriebetrieb (Batterien nicht im Lieferumfang inbegriffen) :Verriegelungskappe zum Batteriefach unter dem Sch<strong>au</strong>kelfuß <strong>au</strong>fschr<strong>au</strong>ben. 4 „D“ 1,5 V Batterien einlegen. Auf die korrekte Po<strong>la</strong>rität (+/-) achten.ACHTUNG!• Keine normalen Batterien wieder <strong>au</strong>f<strong>la</strong>den. Ein Auf<strong>la</strong>deversuch normaler Batterien kann zu Explosion oder Leckage der Batterien führen.• Verschiedene Batterietypen oder alte und neue Batterien dürfen nicht gleichzeitig verwendet werden.• Beim Einlegen der Batterien <strong>au</strong>f die richtige Ausrichtung (Po<strong>la</strong>rität) achten.• Leere Batterien sind <strong>au</strong>s der Sch<strong>au</strong>kel zu entfernen.• Batterien für Kinder unzugänglich <strong>au</strong>fbewahren.• Batterien <strong>au</strong>st<strong>au</strong>schen, sobald die Sch<strong>au</strong>kel unzureichend mit Strom versorgt wird.• Bitte nehmen Sie die Batterien <strong>au</strong>s dem Batteriefach, bevor Sie die Sch<strong>au</strong>kel für längere Zeit <strong>au</strong>ßer Betrieb nehmen.• Bitte entsorgen Sie die Batterien in entsprechenden Sammelvorrichtungen.• Alle Batterien müssen gleichzeitig <strong>au</strong>sget<strong>au</strong>scht oder <strong>au</strong>fge<strong>la</strong>den werden.• Akkus sind unter Aufsicht eines Erwachsenen <strong>au</strong>fzu<strong>la</strong>den.• Kein anderes Auf<strong>la</strong>degerät zum Auf<strong>la</strong>den eines Akkus verwenden.• Keinen Kurzschluss an den Zuleitungsklemmen herstellen.• Batterien nicht ins Feuer werfen, sie könnten p<strong>la</strong>tzen oder Schadstoffe freisetzen.360° MOTION SCHAUKEL • Benutzungsanleitung 15
Anschluss an die Stromversorgung (Adapter im Lieferumfang enthalten):• Die Sch<strong>au</strong>kel darf nur mit dem empfohlenen Adapter verwendet werden.• WICHTIG: Prüfen Sie zunächst, dass die Sch<strong>au</strong>kel <strong>au</strong>sgeschaltet ist. Die Sch<strong>au</strong>kel kann mit dem Adapter an eine Steckdose angeschlossenwerden. Input : 240 V / 60 Hz - Output : 6 V / 1000 mA.• Adapter-Ansatzstück in die entsprechende Öffnung einführen und den Netzstecker einführen.• Die Adapter sind regelmäßig <strong>au</strong>f eventuelle Schäden am Kabel, Stecker, Gehäuse und den anderen Teilen zu prüfen. Bei Schäden die Sch<strong>au</strong>kelnicht verwenden.BESTANDTEILE DER SCHAUKELa. Vorderteil Sitzb. Schwenkarm Sitzc. Kissend. Mobilee. Vorderfußf. Hinterer Fußg. Motorh. Hinterer Teil des Sitzesi. Seitenteile des Sitzesj. Dem Körperb<strong>au</strong>angepasstes Kissenk. AdapterNUTZUNG UND MERKMALE DER SCHAUKELA. SCHAUKELPOSITIONENNeigungswinkel der Rückenlehne (3 Positionen)Die beiden Knöpfe beidseitig der Rückenlehne drücken, die gewünschte Position <strong>au</strong>swählen und Knöpfe wieder los<strong>la</strong>ssen. Sicherstellen, dass dieRückenlehne eingerastet ist.B. DREHUNG DER SITZFLÄCHE (B1 et B2)Der Sitz kann um 360° gedreht werden. Dazu den Sitzrahmen festhalten und in die gewünschte Position drehen. Die Position der Sch<strong>au</strong>kel kanndurch Einrasten eines Schnappschlosses arretiert werden.C. ANLEGEN DES GURTESDas Baby wie nebenstehend gezeigt in die Sch<strong>au</strong>kel legen. Den rechten und linken Teil des Gurtes in die Schnalle einführen, bis ein „Klicken“ zuhören ist. Gurtposition anschließend einstellen.Den Gurt durch Druck <strong>au</strong>f die Mitte der Gurtschnalle lösen.Achtung! Dar<strong>au</strong>f achten, den Gurt gut an das Kind anzupassen und die 5-Punkt-Gurtschnalle richtig zu arretieren.D. MUSIK UND SCHAUKELBEWEGUNG• Die Sch<strong>au</strong>kel wird über die Taste „Power“ ein- und <strong>au</strong>sgestellt.• Die Sch<strong>au</strong>kelgeschwindigkeit kann über die Tasten + und – (1) eingestellt werden. Durch Druck <strong>au</strong>f + wird schneller, durch Druck <strong>au</strong>f - <strong>la</strong>ngsamergesch<strong>au</strong>kelt. Es gibt 4 Sch<strong>au</strong>kelgeschwindigkeiten, wobei eine LED-Anzeige die gewählte Geschwindigkeit angibt.• Über die Taste On/Off (2) wird die Musik ein- und <strong>au</strong>sgestellt.• Musik und L<strong>au</strong>tstärke können über die Taste Volume / Select (3) <strong>au</strong>sgewählt werden. Durch schnellen Druckimpuls wechselt man zur nächstenMelodie. Ein <strong>la</strong>nger Druck regelt die L<strong>au</strong>tstärke.• Mit der Taste Timer (4) wird die Sch<strong>au</strong>kelzeit eingestellt. Sie kann <strong>au</strong>f 10, 20 oder 30 Minuten programmiert werden. Eine LED-Anzeige zeigt an,ob und welche Sch<strong>au</strong>kelzeit eingestellt wurde. Standardmäßig ist keine Sch<strong>au</strong>kelzeit eingestellt, die LED leuchtet nicht und das Baby wird so<strong>la</strong>nge gesch<strong>au</strong>kelt, bis Sie die Sch<strong>au</strong>kel <strong>au</strong>sstellen.• Wenn in oberer Position verriegelt wurde, wird der Sitz arretiert und kann nicht sch<strong>au</strong>keln. In der unteren Position kann gesch<strong>au</strong>kelt werden.• Über die Taste „Bewegungsermittlung“ (5) können Sch<strong>au</strong>kelbewegungen <strong>au</strong>sgelöst werden, wenn das Baby sich bewegt. Diese Funktion wirddurch Betätigung der Taste (5) eingeschaltet und eine Anzeige On/Off leuchtet, wenn die Funktion eingeschaltet wurde. If the timer is on, at theend of this period the rocking speed is reset to 0. The rocking will start again as soon as the baby wakes up for 5 minutes.Wenn keine Sch<strong>au</strong>kelzeit eingestellt wurde, wird die Sch<strong>au</strong>kelgeschwindigkeit sofort <strong>au</strong>f 0 zurückgestellt. Wenn das Baby <strong>au</strong>fwacht, wird es 5Minuten <strong>la</strong>ng wieder gesch<strong>au</strong>kelt.Wenn Sch<strong>au</strong>kelzeit eingestellt wurde, fällt die Sch<strong>au</strong>kelgeschwindigkeit am Ende der eingestellten Zeit <strong>au</strong>f 0 zurück. Wenn das Baby <strong>au</strong>fwacht,wird es 5 Minuten <strong>la</strong>ng wieder gesch<strong>au</strong>kelt.PFLEGE UND WASCHANLEITUNG• Sch<strong>au</strong>kel häufig <strong>au</strong>f lockere Schr<strong>au</strong>ben, verschlissene Teile, zerrissenen Stoff oder gep<strong>la</strong>tzte Nähte überprüfen.• Teile bei Bedarf <strong>au</strong>st<strong>au</strong>schen oder reparieren <strong>la</strong>ssen. Nur von <strong>Babymoov</strong> empfohlene Ersatzteile verwenden.• Die Oberfläche des abnehmbaren Schutzbezugs und des abnehmbaren Kopfstützenkissens können mit einem feuchten Tuch und Seifeabgewaschen werden.• Den Rahmen der Sch<strong>au</strong>kel nur mit H<strong>au</strong>shaltsseife oder Reinigungsmittel und <strong>la</strong>uwarmem Wasser reinigen. Kein Chlorwasser verwenden.• Starke Sonnen- oder Hitzeeinwirkung können zu Verfärbungen oder Schleierbildung <strong>au</strong>f den Teilen führen.100 % polyesterrnaj16360° MOTION SCHAUKEL • Benutzungsanleitung
NLBedankt dat u voor het BABYMOOV schommelstoeltje heeft gekozen. Voor de veiligheid van uw babywordt u verzocht deze gebruiksaanwijzing aandachtig te lezen, en te bewaren voor <strong>la</strong>tere nas<strong>la</strong>g.In overeenstemming met de veiligheidseisen. In overeenstemming met de norm PR EN 16232: 2011BELANGRIJK- VÒÒR GEBRUIK EERST DEGEBRUIKSAANWIJZING LEZEN, EN DEZEBEWAREN VOOR LATERE NASLAG.Elektrisch afval, waaronder elektrische apparaten moeten gescheiden ingezameld worden. Dit symboolgeldt voor de hele Europese Gemeenschap, en geeft aan dat dit product niet in de vuilnisbak of bijhuisvuil gegooid mag worden, maar gescheiden ingezameld moet worden.WAARSCHUWINGENE• Een kind nooit zonder toezicht <strong>la</strong>ten.• Het is gevaarlijk om dit product ergens op te zetten (een tafel,bijvoorbeeld).• Dit product is niet geschikt om <strong>la</strong>ng in te s<strong>la</strong>pen.• Altijd het bevestigingssysteem gebruiken.• Dit product niet met de baby erin verp<strong>la</strong>atsen of optillen.• Dit product niet gebruiken als uw baby kan zitten, of meer dan 9kgweegt.• Om verwondingen te voorkomen moet dit product uit de buurt vankinderen ingek<strong>la</strong>pt en uitgek<strong>la</strong>pt worden.• Kinderen niet met dit product <strong>la</strong>ten spelen.• Dit product nooit bij het speelmobiel optillen of verp<strong>la</strong>atsen.• De montage moet uitgevoerd worden door een volwassene.• Het schommelstoeltje niet gebruiken wanneer deze beschadigd ofgebroken is.• De kleine onderdeeltjes buiten bereik van kinderen houden.• Dit product is geen vervanging voor een reiswieg of ledikantje. Als ubaby s<strong>la</strong>perig wordt kunt u hem beter in een reiswieg, of in zijn bedjeleggen. Dit product niet gebruiken wanneer één of meerdereonderdelen ontbreken, of beschadigd zijn.• Geen andere accessoires of reserve-onderdelen gebruiken danaangeraden door de fabrikant.• Voor gebruik controleren of het vergrendelingssysteem goedvergrendeld en afgesteld is.• Het schommelstoeltje alléén op de grond gebruiken.• Regelmatig het veringsysteem van het schommelstoeltje controleren.• Altijd een 5 punts veiligheidsgordel gebruiken.• Het schommelstoeltje niet zonder zijn beschermingshoes gebruiken.• Het schommelstoeltje nooit op een zachte ondergrond p<strong>la</strong>atsen (bed,zitbank, kussen); het zou kunnen kantelen en uw baby in gevaarbrengen.TE RESPECTEREN VEILIGHEIDSINSTRUCTIES• Het schommelstoeltje uit de buurt houden van v<strong>la</strong>mmen, hittebronnen,stekkers, verlengsnoeren, kookfornuis enz. houden, of van voorwerpendat het baby zou kunnen pakken.• Om verstikking te voorkomen moeten de p<strong>la</strong>stic zakken van deverpakking buiten bereik van baby’s en jonge kinderen gehoudenworden.• Alleen het hoofdsteuntje geleverd met uw schommelstoeltje gebruiken;geen kussen, dekens of opvulling toevoegen.• Geen voorwerpen met touwtjes om de nek van uw baby p<strong>la</strong>atsen;geen touwtjes aan het schommelstoeltje hangen, en geen touwtjesaan speelgoed bevestigen. Dit kan verstikkingsgevaar voor uw babybetekenen. Het schommelstoeltje niet bij een raam zetten waar dekoorden van een rolgordijn of gordijnen verstikkingsgevaar voor uwbaby zouden kunnen betekenen.• Alleen de door <strong>Babymoov</strong> bijgeleverde speelgoed bevestigen.• Kinderen niet met het ingek<strong>la</strong>pte schommelstoeltje <strong>la</strong>ten spelen.Werkt op batterijen (niet bijgeleverd) :Het vergrendelingsklepje losschroeven om bij het batterijvak onder de poot van het schommelstoeltje te kunnen komen. P<strong>la</strong>ats 4 « D » batterijen1.5V. De po<strong>la</strong>riteit (+/ -) respecteren.PAS OP!• Niet op<strong>la</strong>adbaar batterijen mogen niet opge<strong>la</strong>den worden. De batterijen kunnen dan ontploffen, of gaan lekken.• Gebruik geen verschillende type batterijen, of nieuwe en oude batterijen door elkaar.• Bij het p<strong>la</strong>atsen van de batterijen de po<strong>la</strong>riteit respecteren.• Lege batterijen moeten uit het schommelstoeltje verwijderd worden.• Batterijen buiten bereik van kinderen bewaren.• De batterijen vervangen wanneer het schommelstoeltje niet goed meer werkt.• De batterijen uit het schommelstoeltje verwijderen wanneer deze voor <strong>la</strong>ngere tijd niet gebruikt wordt.• Lege batterijen als KCA inleveren.• Alle batterijen tegelijk op<strong>la</strong>den of vervangen.• De op<strong>la</strong>adbare batterijen moeten onder toezicht van een volwassene opge<strong>la</strong>den worden.• Op<strong>la</strong>adbare batterijen niet in verschillende op<strong>la</strong>ders op<strong>la</strong>den.• Zorg ervoor dat er geen kortsluiting bij de batterijpolen ontstaat.• Batterijen niet in het vuur gooien; de batterijen kunnen dan ontploffen, of gaan lekken.Aansluiting op het stopcontact (bijgeleverde adapter):• Het schommelstoeltje mag alleen met de aanbevolen adapter gebruikt worden.• BELANGRIJK: bij iedere handeling op het schommelstoeltje moet deze uitgeschakeld zijn. Dankzij de bijgeleverde adapter kan het schommelstoeltjegewoon op het stopcontact aangesloten worden. Input: 240 V / 60 Hz - Output: 6 V / 1000 Ma360° MOTION SCHOMMELSTOELTJE • Gebruikshandleiding 17
• De stekker van de adapter op het stopcontact aansluiten.• De adapters moeten regelmatig gecontroleerd worden op beschadigingen van het koord, de stekker, de behuizing en andere onderdelen. Ingeval van schade het apparaat niet meer gebruiken.a. Voorzijde zittingb. Roterende arm zittingc. Kussend. SpeelmobielONDERDELEN VAN HET SCHOMMELSTOELTJEe. Voorpootf. Achterpootg. Motorh. Achterzijde zittingi. Zijstukken van de zittingj. Ondersteunend kussenk. AdapterGEBRUIK EN KENMERKEN VAN HET SCHOMMELSTOELTJEA. STANDEN VAN HET SCHOMMELSTOELTJEVerstelbare rugleuning (3 standen)Selecteer de gewenste stand door de twee knoppen aan de zijkant van de rugleuning ingedrukt te houden, en weer los te <strong>la</strong>ten. Controleren ofde rugleuning goed vergrendeld is.B. HET DRAAIEN VAN DE ZITTING (B1 et B2)De zitting kan 360° gedraaid worden door het frame van de zitting goed vast te houden, en in de gewenste stand te draaien. Er is een hendelwaarmee het schommelstoeltje in een stand vast gezet kan worden.C. DE GORDEL VASTZETTENDe baby p<strong>la</strong>atsen zoals op de onderstaande foto. De linker- en rechterband van de gordel in de sluiting glijden tot u een «klik» hoort. De gordel opmaat verstellen.Om de gordel weer los te maken, moet op de knop van de sluiting gedrukt worden.Pas op! De gordel moet op de baby versteld worden; vervolgens de 5 punts veiligheidsgordel goed vastklikken.D. MUZIEK EN SCHOMMELING• Het schommelstoeltje kan met de power knop aan- en uit gezet worden.• Met de knoppen + en – (1) kunnen de schommelsnelheid geregeld worden: Op + drukken om de schommelsnelheid te verhogen, op – drukkenom te ver<strong>la</strong>gen. Er zijn 4 schommelsnelheden beschikbaar; een LED lichtje geeft de geactiveerde snelheid aan.• On/Off (2): met deze knop kan de muziek aan- of uit gezet worden.• Met de knop Volume / Select (3) kan de muziek en het volume gekozen worden. Voor het volgende muziekje kort op de knop drukken. Om hetvolume te regelen moet <strong>la</strong>ng op de knop gedrukt worden.• Met de knop Timer (4) kan de tijdschake<strong>la</strong>ar ingesteld worden. Het is mogelijk om het schommelprogramma op 10, 20, of 30 minuten in testellen. Een LED disp<strong>la</strong>y geeft aan of de tijdschake<strong>la</strong>ar ingeschakeld is, en de duur. De tijdschake<strong>la</strong>ar heeft geen fabrieksinstelling: deze is nietgeactiveerd, er branden dus geen <strong>la</strong>mpjes en het stoeltje blijft schommelen totdat u hem uitzet.• Wanneer de vergrendeling omhoog staat, is de zitting vergrendeld en zal niet schommelen. Wanneer deze om<strong>la</strong>ag staat, kan geschommeldworden.• De bewegingssensor (5) maakt het mogelijk het schommelen te starten wanneer de baby beweegt. U kunt deze functie activeren door op deknop (5) te drukken, een on/off lichtje gaat aan wanneer de bewegingssensor geactiveerd is.Wanneer de tijdschake<strong>la</strong>ar niet ingesteld is, gaat de schommelsnelheid meteen naar nive<strong>au</strong> 0. Als baby wakker wordt, gaat het apparaat 5minuten schommelen.Wanneer de tijdschake<strong>la</strong>ar ingesteld is, gaat de schommelsnelheid na de ingestelde tijd weer naar nive<strong>au</strong> 0. Zo g<strong>au</strong>w baby wakker wordt, gaathet apparaat weer 5 minuten schommelen.ONDERHOUD EN WASVOORSCHRIFTEN• Regelmatig het schommelstoeltje controleren of er geen schroeven los zitten, op versleten onderdelen, gescheurde of losse bekleding.• Indien nodig onderdelen <strong>la</strong>ten vervangen of repareren. Alleen de door <strong>Babymoov</strong> aanbevolen reserve-onderdelen gebruiken.• Het opperv<strong>la</strong>k van de afneembare beschermingshoes en de afneembare hoofdsteun kunnen gereinigd worden. Gebruik hiervoor een vochtigdoekje en wat zeep.• Voor de reiniging van het frame van het schommelstoeltje mag alléén huishoud- zeep of reinigingsmiddel, en <strong>la</strong>uw water gebruikt worden.Geen bleekmiddel gebruiken.• Een te intensieve blootstelling aan zon en warmte kan verkleuring of kleurverlies van de onderdelen veroorzaken.100 % polyesterrnaj18360° MOTION SCHOMMELSTOELTJE • Gebruikshandleiding
ESGracias por haber elegido el Ba<strong>la</strong>ncín BABYMOOV. Para <strong>la</strong> seguridad del bebé, sírvase leer atentamenteeste manual de instrucción y conservarlo cuidadosamente para consultarlo ulteriormente.Conforme a <strong>la</strong>s exigencias de seguridad. Conforme a <strong>la</strong>s exigencias de <strong>la</strong> normativa PR EN 16232: 2011IMPORTANTE - LEER ATENTAMENTE LASINSTRUCCIONES ANTES DE CUALQUIERUTILIZACIÓN Y CONSERVARLAS PARA TODAREFERENCIA ULTERIORLos equipamientos eléctricos deberán recic<strong>la</strong>rse en un centro de recogida selectiva. No deshacerse delos residuos de equipamientos eléctricos y electrónicos con los residuos municipales no c<strong>la</strong>sificados, sinoque se procederá a una recogida selectiva. Este símbolo indica en toda <strong>la</strong> Unión Europea que esteproducto no debe echarse al cubo de basura ni mezc<strong>la</strong>rse con <strong>la</strong>s basuras domésticas, sino que deberárecic<strong>la</strong>rse en un centro de recogida selectiva.• No dejar nunca al niño sin vigi<strong>la</strong>ncia.• Es peligroso utilizar este producto en una superficie en altura (porejemplo, una mesa).• Este producto no está previsto para <strong>la</strong>rgos períodos de sueño.• Utilizar siempre el sistema de retención.• No desp<strong>la</strong>zar ni levantar este producto cuando el bebé está dentro.• No utilizar este producto si su niño se mantiene sentado solo o sipesa más de 9kg.ADVERTENCIAS• Para evitar heridas, asegurarse que los niños no estén cerca cuandose pliega y despliega el producto.• No dejar que los niños jueguen con este producto.• No utilizar nunca el aro de juego para levantar o desp<strong>la</strong>zar esteproducto.CONSIGNAS DE SEGURIDAD QUE DEBEN RESPETARSE• El montaje debe realizarlo un adulto.• No utilizar el ba<strong>la</strong>ncín si está estropeado o roto.• Mantener <strong>la</strong>s pequeñas piezas fuera del alcance de los niños.• Este producto no remp<strong>la</strong>za una cuna o una cama para bebé. Si suniño necesita dormir, conviene colocarlo en una cuna o una camaadaptada.• No utilizar el producto si uno o varios elementos estuviesen rotos ofaltasen.• No utilizar accesorios ni piezas de repuesto otros que aquéllosaprobados por el fabricante.• Antes de <strong>la</strong> utilización, comprobar que los mecanismos de bloqueoestén bien enganchados y correctamente ajustados.• Utilizar siempre el ba<strong>la</strong>ncín únicamente en el suelo.• Comprobar regu<strong>la</strong>rmente el sistema de suspensión del ba<strong>la</strong>ncín.• Utilizar siempre un arnés con 5 puntos de seguridad.• No utilizar el ba<strong>la</strong>ncín sin su funda de protección.• No utilizar el ba<strong>la</strong>ncín sobre una superficie b<strong>la</strong>nda (cama, sofá, cojín);el asiento podría volcarse y representar un peligro para su niño.• Alejar el ba<strong>la</strong>ncín de <strong>la</strong>s l<strong>la</strong>mas, fuentes de calor intensas, enchufes,a<strong>la</strong>rgaderas, cocinas etc. u objetos que puedan estar al alcance delniño.• Para evitar todo riesgo de asfixia, conservar <strong>la</strong>s bolsas de plásticodel emba<strong>la</strong>je fuera del alcance de los bebés y niños pequeños.• No añadir nunca una almohada, manta o material de relleno; utilizarso<strong>la</strong>mente el accesorio para ca<strong>la</strong>r <strong>la</strong> cabeza, que se entrega con elba<strong>la</strong>ncín.• No colocar objetos, con cuerdas, alrededor del cuello del niño; nocolgar cuerdas del ba<strong>la</strong>ncín ni enganchar cuerdas a los juguetes.Estas prácticas podrían ocasionar el estrangu<strong>la</strong>miento del bebé.• No colocar el ba<strong>la</strong>ncín cerca de una ventana donde los cordones deuna persiana o de cortinas pudiesen estrangu<strong>la</strong>r al niño.• No sujetar otros juguetes que aquéllos proporcionados por <strong>Babymoov</strong>.• No dejar que el niño juegue con el ba<strong>la</strong>ncín plegado.Funcionamiento con pi<strong>la</strong>s (no proporcionadas)Desatornille <strong>la</strong> tapa de bloqueo para acceder al alojamiento de <strong>la</strong>s pi<strong>la</strong>s situado por debajo del pie del ba<strong>la</strong>ncín. Introduzca 4 pi<strong>la</strong>s «D» 1.5V.Respete <strong>la</strong>s indicaciones de po<strong>la</strong>ridad (+ -).¡Atención!• Las pi<strong>la</strong>s no recargables no deben recargarse. En caso contrario <strong>la</strong>s pi<strong>la</strong>s podrían estal<strong>la</strong>r o tener fugas.• No deben mezc<strong>la</strong>rse distintos tipos de pi<strong>la</strong>s, ni mezc<strong>la</strong>rse pi<strong>la</strong>s nuevas con pi<strong>la</strong>s usadas.• Las pi<strong>la</strong>s deben introducirse enfrente de <strong>la</strong> po<strong>la</strong>ridad correspondiente.• Las pi<strong>la</strong>s descargadas deben retirarse del ba<strong>la</strong>ncín.• Conservar <strong>la</strong>s pi<strong>la</strong>s fuera del alcance de los niños.• Cambiar <strong>la</strong>s pi<strong>la</strong>s cuando el ba<strong>la</strong>ncín deja de funcionar satisfactoriamente.• Retirar <strong>la</strong>s pi<strong>la</strong>s antes de guardar el ba<strong>la</strong>ncín durante un <strong>la</strong>rgo período.• Desechar <strong>la</strong>s pi<strong>la</strong>s en el contenedor previsto a tal efecto.• Sustituir y recargar todas <strong>la</strong>s pi<strong>la</strong>s al mismo tiempo.• Las pi<strong>la</strong>s recargables deben cargarse bajo <strong>la</strong> vigi<strong>la</strong>ncia de un adulto.• No recargar una pi<strong>la</strong> recargable en un cargador diferente.• Los terminales de alimentación no deben ponerse en cortocircuito.• No desechar <strong>la</strong>s pi<strong>la</strong>s al fuego ya que podrían estal<strong>la</strong>r o desprender sustancias nocivas.BALANCÍN 360° MOTION • Instrucciones de uso 19
¡Atención!Conexión al sector (adaptador proporcionado):• El ba<strong>la</strong>ncín sólo debe utilizarse con el adaptador recomendado.• IMPORTANTE: antes de efectuar cualquier operación, asegúrese de que el ba<strong>la</strong>ncín esté apagado. El ba<strong>la</strong>ncín puede funcionar en una tomasector empleando el adaptador proporcionado. Entrada: 240V/60Hz - Salida: 6V/1000mA.• El ba<strong>la</strong>ncín sólo debe utilizarse con el adaptador recomendado.• Los adaptadores deben examinarse regu<strong>la</strong>rmente con el fin de detectar eventuales daños en el cordón, el enchufe, <strong>la</strong> caja y <strong>la</strong>s otras partes.En caso de daño (s) constatado (s), no utilizar el aparato.a. Parte de<strong>la</strong>ntera asientob. Brazo giratorio asientoc. Cojínd. Móvil de estimu<strong>la</strong>ciónCOMPOSICIÓN DEL BALANCÍNe. Pie de<strong>la</strong>nterof. Pie posteriorg. Motorh. Parte posterior asientoUTILIZACIÓN Y CARACTERÍSTICAS DEL BALANCÍNA. POSICIONES DEL BALANCÍNInclinación del respaldo (3 posiciones)Manteniendo pulsados los dos botones situados en los <strong>la</strong>terales del respaldo, seleccionar <strong>la</strong> posición deseada, luego soltar los botones. Ve<strong>la</strong>rpor que <strong>la</strong> posición de inclinación del respaldo quede correctamente bloqueada.B. ROTATION OF THE SEAT (B1 et B2)El asiento puede girar a 360° manteniendo firmemente el marco del asiento y girándolo en <strong>la</strong> posición deseada. Existe un pestillo que permitebloquear el ba<strong>la</strong>ncín en una posición.C. INSTALACIÓN DEL ARNÉSColocar el bebé como se indica en <strong>la</strong> imagen adjunta. Deslizar <strong>la</strong> parte derecha e izquierda del cinturón por el arnés hasta oír un «clic». Regu<strong>la</strong>r<strong>la</strong> posición del cinturón haciéndolo deslizar.Para soltar el arnés, pulsar el botón central del arnés.¡Atención! Vele por ajustar debidamente el cinturón de seguridad en función de su niño y bloquear bien el arnés de seguridad 5 puntos.D. MÚSICA Y BALANCEOi. Partes <strong>la</strong>terales del asientoj. Cojín morfológicok. Adaptador• El botón power permite poner en marcha y apagar el ba<strong>la</strong>ncín.• Los botones + y - (1) permiten contro<strong>la</strong>r <strong>la</strong> velocidad del ba<strong>la</strong>nceo. Pulsar + para <strong>au</strong>mentar <strong>la</strong> velocidad de ba<strong>la</strong>nceo y - para disminuir<strong>la</strong>. Estándisponibles 4 velocidades de ba<strong>la</strong>nceo, un indicador luminoso LED le indica qué velocidad está activada.• On/Off (2), este botón permite poner en marcha <strong>la</strong> música y parar<strong>la</strong>.• El botón Volume/Select (3) permite elegir <strong>la</strong> música, así como su volumen. Pulsar rápidamente el botón para pasar a <strong>la</strong> música siguiente. Pulsarmás despacio para regu<strong>la</strong>r el volumen.• El botón Timer (4) sirve para regu<strong>la</strong>r el minutero. Cabe <strong>la</strong> posibilidad de programar el ba<strong>la</strong>nceo para 10, 20 ó 30 minutos. Un indicador luminosoLED indica si el minutero está activado y durante cuánto tiempo. Por defecto, el minutero no está activado, ningún indicador luminoso debeestar activado y el ba<strong>la</strong>nceo continuará hasta que lo pare.• Cuando el mecanismo de bloqueo está en posición alta, el asiento se bloqueará y no podrá ba<strong>la</strong>ncearse. Si está en posición baja, los ba<strong>la</strong>nceosson posibles.• El botón detector de movimiento (5) permite activar los ba<strong>la</strong>nceos cuando el bebé se mueve. Puede activar esta función pulsando el botón (5),un indicador on/off se enciende cuando se activa el modo detector de movimiento.Si el minutero no está activado, <strong>la</strong> velocidad de ba<strong>la</strong>nceo se vuelve a poner inmediatamente al nivel 0. Si el bebé se despierta, los ba<strong>la</strong>nceoscontinuarán durante 5 minutos.Si el minutero está activado, <strong>la</strong> velocidad de ba<strong>la</strong>nceo se volverá a poner a 0 cuando se termine el tiempo programado. Los ba<strong>la</strong>nceos sereiniciarán en cuanto el bebé se despierte durante un período de tiempo de 5 minutos.MANTENIMIENTO E INSTRUCCIONES DE LAVADO• Comprobar a menudo el ba<strong>la</strong>ncín para asegurarse de que no haya tornillos flojos, piezas usadas, tejidos rasgados, o puntos descosidos.• Mandar cambiar o reparar <strong>la</strong>s piezas si fuera necesario. Utilizar so<strong>la</strong>mente piezas de recambio aconsejadas por <strong>Babymoov</strong>.• La funda de protección amovible y el sistema amovible para ca<strong>la</strong>r <strong>la</strong> cabeza pueden <strong>la</strong>varse en superficie. Para ello, utilizar un paño húmedo yjabón.• Para limpiar el marco de <strong>la</strong> tumbona, utilizar exclusivamente jabón doméstico o un detergente y agua tibia. No utilizar lejía.• Una exposición excesiva al sol o al calor puede c<strong>au</strong>sar <strong>la</strong> decoloración o el a<strong>la</strong>beo de <strong>la</strong>s piezas.100 % Poliésterrnaj20BALANCÍN 360° MOTION • Instrucciones de uso
PTGratos pe<strong>la</strong> escolha da nossa Cadeira de Ba<strong>la</strong>nço BABYMOOV. Para a segurança de seu bebê. Leia comatenção as presentes instruções e guarde para consulta posterior.Conforme às exigências de segurança. Conforme às exigências da norma PR EN 16232 : 2011IMPORTANTE- LEIA COM ATENÇÃO ASPRESENTES INSTRUÇÕES ANTES DEQUALQUER UTILIZAÇÃO E GUARDE PARAPOSTERIOR CONSULTA.Os equipamentos elétricos são objeto de recolha seletiva. Não elimine equipamentos elétricos eeletrônicos com resíduos domésticos não selecionados mas sim proceda à uma recolha seletiva. Estesímbolo indica na União Européia que o produto não deve ser eliminado no lixo ou junto de resíduosdomésticos mas sim ser eliminado num circuito de recolha específico.• Nunca deixe uma criança sem vigilância.• É perigoso utilizar este produto numa superfície alta (por exemplo,em cima de uma mesa).• Este produto não está previsto para períodos de sono prolongado.• Utilizar sempre o sistema de travagem.• Não deslocar ou levantar este produto quando o bebê estiver insta<strong>la</strong>do.• A montagem deve ser realizada por pessoa adulta..• Não utilizar a cadeira de ba<strong>la</strong>nço se estiver danificada ou partida• Manter afastadas das crianças as peças de tamanho reduzido.• Este produto não substitui o berço ou a cama para bebê. Se a criançaprecisar de dormir, é conveniente ser insta<strong>la</strong>da em berço ou camaadaptada. .• Não utilizar o produto se um ou mais elementos estiverem partidosou faltarem.• Não utilizar acessórios ou peças de substituição que não tenhamsido aprovadas pelo fabricante.• Antes de qualquer utilização verificar sempre que os mecanismos detravagem estejam armados e corretamente ajustados.• Utilizar a cadeira de ba<strong>la</strong>nço apenas no chão.• Verificar com regu<strong>la</strong>ridade o sistema de suspensão da cadeira deba<strong>la</strong>nço.• Utilizar sempre um cinto de segurança com 5 pontos.• Não utilizar a cadeira de ba<strong>la</strong>nço sem o forro de proteção.• Nunca utilizar a cadeira de ba<strong>la</strong>nço em superfície mole (cama, sofá,ADVERTÊNCIASINSTRUÇÕES DE SEGURANÇA• Não utilizar este produto se a criança se mantiver sentada sozinhaou se tiver peso superior a 9kg.• Para evitar lesões, verificar que as crianças não estejam por pertodurante o fecho ou a abertura do produto.• Não deixe crianças brincar com este produto.• Nunca utilizar o móbile de estimu<strong>la</strong>ção para levantar ou deslocaro produto.almofada); o assento pode verter e ser perigoso para a criança.• Afastar a cadeira de ba<strong>la</strong>nço de qualquer chama, fontes de calorintenso, tomadas elétricas, extensões elétricas, fogão etc... ou objetosque possam ficar ao alcance da criança.• Para evitar qualquer risco de asfixia, mantenha os sacos plásticosda emba<strong>la</strong>gem fora do alcance dos bebês e de crianças com poucaidade.• Não acrescentar nenhuma almofada, cobertor ou enchimento; utilizarapenas o descanso de cabeça fornecido com a cadeira de ba<strong>la</strong>nço.• Não pôr objetos com cordões no pescoço da criança; não suspendercordões na cadeira de ba<strong>la</strong>nço nem nos brinquedos. Estas práticaspodem estrangu<strong>la</strong>r o bebê.• Não colocar a cadeira de ba<strong>la</strong>nço junto de uma jane<strong>la</strong> onde oscordões dos estores ou das cortinas possam estrangu<strong>la</strong>r a criança.• Não amarrar outros brinquedos que os fornecidos por <strong>Babymoov</strong>.• Não deixar crianças brincar com a cadeira de ba<strong>la</strong>nço se esta estiverdobrada.Funcionamento com pilhas (não disponibilizadas)Abrir a tampa de travagem para aceder ò compartimento das pilhas situado por baixo do pé da cadeira de ba<strong>la</strong>nço. Inserir 4 pilhas « D » 1.5V.respeitar as indicações de po<strong>la</strong>ridade (+/ -).Atenção!• Não carregar pilhas não recarregáveis. Recarregar pilha não recarregável pode levar à sua explosão ou extravasamento• Não devem ser misturadas vários tipos de pilhas ou pilhas novas e usadas.• Inserir as pilhas respeitando a po<strong>la</strong>ridade indicada.• As pilhas descarregadas devem ser removidas da cadeira de ba<strong>la</strong>nço.• Conservar as pilhas fora do alcance das crianças.• Mudar as pilhas sempre que a cadeira de ba<strong>la</strong>nço deixe de funcionar corretamente.• Remover as pilhas sempre que a cadeira de ba<strong>la</strong>nço não for usada por tempo prolongado.• Eliminar as pilhas no contentor previsto para o efeito• Substituir e carregar a totalidade das pilhas ao mesmo tempo.• O carregamento de pilhas recarregáveis deve ser supervisionado por um adulto responsável.• Não carregar uma pilha recarregável em carregador diferente• Não colocar os terminais das pilhas em curto-circuito• Não eliminar as pilhas no fogo, estas podem explodir ou emitir substâncias nocivas.CADEIRA DE BALANÇO 360° MOTION • Instruções de uso 21
Atenção!Ligação ao setor (adaptador disponibilizado):• A cadeira de ba<strong>la</strong>nço só deve utilizada com o adaptador recomendado.• IMPORTANTE: antes de qualquer manipu<strong>la</strong>ção verificar que a cadeira de ba<strong>la</strong>nço esteja desligada. A cadeira de ba<strong>la</strong>nço pode funcionar numatomada de setor com o adaptador fornecido. Input : 240 V / 60 Hz - Output : 6V / 1000 mA.• Ligar a extremidade do adaptador no orifício previsto para o efeito e a outra extremidade na tomada de setor• Os adaptadores devem ser examinados com regu<strong>la</strong>ridade com o fim de verificar a existências de danos no cordão, na tomada, no compartimentoou nas outras partes. No caso de danos verificados, não utilizar o aparelho.COMPOSIÇÃO DA CADEIRA DE BALANÇOa. Parte dianteira assentob. Braço rotativo assentoc. Almofadad. Móbile de estimu<strong>la</strong>çãoe. Pé dianteirof. Pé traseirog. Motorh. Parte traseira assentoi. Elementos <strong>la</strong>terais do assentoj. Almofada morfológicak. AdaptadorUTILIZAÇÃO E CARACTERÍSTICAS DA CADEIRA DE BALANÇOA. POSIÇÕES DA CADEIRA DE BALANÇOInclinação do encosto (3 posições)Mantendo os dois botões situados nos <strong>la</strong>dos do encosto, selecionar a posição desejada, e <strong>la</strong>rgar. Verificar que a posição de inclinação do encostoesteja corretamente bloqueada.B. ROTAÇÃO DO ASSENTO (B1 et B2)O assento pode girar a 360° mantendo com firmeza o quadro do assento, girar até a posição desejada. Existe uma mo<strong>la</strong> que permite bloqueara cadeira de ba<strong>la</strong>nço numa determinada posição.C. INSTALAÇÃO DO CINTOInsta<strong>la</strong>r o bebê como indicado na imagem. Inserir a parte direita e esquerda do cinto na mo<strong>la</strong> até ouvir um « clic ». Ajustar a posição do cintodeslizando.Para desapertar o cinto, carregar no botão central.Atenção ! Ajuste corretamente o cinto de segurança em função da criança e bloquear de forma correta o cinto de 5 pontos.D. MÚSICA E BALANÇO• O botão power permite ligar e desligar a cadeira de ba<strong>la</strong>nço.• Os botões + e – (1) permitem contro<strong>la</strong>r a velocidade do ba<strong>la</strong>nço. Pressionar o + para <strong>au</strong>mentar a velocidade de ba<strong>la</strong>nço e no – para diminuir.Existem 4 velocidades de ba<strong>la</strong>nço, um indicador luminoso LED indica a velocidade ativada.• On/Off (2), este botão permite ligar e desligar a música.• O botão Volume / Select (3) permite escolher a música assim como o volume. Carregar de forma rápida no botão para mudar para a músicaseguinte. Carregar de forma prolongada para regu<strong>la</strong>r o volume.• O botão Timer (4) serve para regu<strong>la</strong>r o temporizador. É possível programar o ba<strong>la</strong>nço em 10, 20 ou 30 minutos. Um indicador LED indica se estáligado o temporizador e a duração selecionada. Por defeito, o temporizador não está ativado, não está ligada nenhuma luz e o ba<strong>la</strong>nçocontinua enquanto não for desligado.• Enquanto o mecanismo de travagem estiver para cima, o assento fica bloqueado e não há ba<strong>la</strong>nço. Se estiver para baixo, pode ser iniciado oba<strong>la</strong>nço• O botão detector de movimento (5) permite iniciar os ba<strong>la</strong>nços quando o bebê se mover. Pode ativar essa função carregando no botão (5), umluz on/off acende quando o modo detector de movimento estiver ligado.Se não estiver ativado o temporizador, a velocidade de ba<strong>la</strong>nço é imediatamente reinicializada para o nível 0. Se o bébê acordar, os ba<strong>la</strong>nçosretomam durante 5 minutos.Se estiver ativado o temporizador, no fim da duração a velocidade de ba<strong>la</strong>nço é reinicializada par 0. Os ba<strong>la</strong>nço retomam logo que acorde obebê e durante 5 minutos.MANUTENÇÃO E INSTRUÇÕES DE LAVAGEM• Verificar com regu<strong>la</strong>ridade a cadeira de ba<strong>la</strong>nço para eliminar a eventualidade de parafusos desapertados, de peças usadas, de tecidosrasgados s ou de pontos descosidos.• Substituir ou reparar as peças se for necessário. Apenas utilizar peças de substituição aconselhadas por <strong>Babymoov</strong>.• O forro de proteção e o descanso de cabeço são <strong>la</strong>váveis em superfície. Para tal, utilize um pano úmido e sabão.• Para limpar o quadro da cadeira, utilizar exclusivamente sabão doméstico ou detergente com água tépida. Não utilizar lixívia.• Uma exposição excessiva ao sol ou ao calor pode provocar a descoloração ou o empenar das peças.100 % poliésterrnaj22CADEIRA DE BALANÇO 360° MOTION • Instruções de uso
ITVi ringraziamo per aver scelto il SEGGIOLINO DONDOLO BABYMOOV. Per <strong>la</strong> sicurezza del vostro bebé, vipreghiamo di leggere attentamente il foglio illustrativo con le spiegazioni e di conservarlo in modo dapoterlo utilizzare quando ne avrete necessità.Conforme alle esigenze di sicurezza. Conforme alle esigenze delle norme PR EN 16232 : 2011IMPORTANTE – LEGGERE ATTENTAMENTE LEISTRUZIONI PRIMA DI QUALSIASIUTILIZZAZIONE E DI CONSERVARLE PEREVENTUALI ULTERIORI RIFERIMENTILe instal<strong>la</strong>zioni elettriche fanno parte del programma di raccolta differenziata. Non buttare i rifiuti delleinstal<strong>la</strong>zioni elettriche ed elettroniche nello stesso contenitore dei rifiuti municipali non selezionati, maprocedere al<strong>la</strong> raccolta differenziata. Questo simbolo indica in tutta l’Unione Europea che il prodotto nondeve essere buttato nel<strong>la</strong> spazzatura né nei rifiuti casalinghi, ma deve essere posto negli appositicontenitori del<strong>la</strong> raccolta differenziata.• Non <strong>la</strong>sciare al<strong>la</strong> portata dei bambini senza sorveglianza.• Attenzione l’uso di questo articolo su delle superfici in altezza èpericoloso (per esempio un tavolo).• Questo articolo non è concepito per dei periodi di sonno lunghi.• Utilizzare sempre il sistema di bloccaggio.• Non spostare né sollevare l’articolo se c’è il bebé dentro.• Non utilizzare questo articolo se il bambino è capace di stare seduto• Il montaggio deve essere fatto da un adulto.• Non utilizzare il Seggiolino Dondolo se è rotto o non funziona bene.• Tenere i pezzi di misura picco<strong>la</strong> fuori dal<strong>la</strong> portata dei bambini.• Questo articolo non sostituisce una cul<strong>la</strong> o un lettino per bebé.• Se il/<strong>la</strong> bimbo/a ha bisogno di dormire è importante metterlo/<strong>la</strong> nel<strong>la</strong>cul<strong>la</strong> o in un lettino appropriato.• Non utilizzare l’articolo se uno o più pezzi sono rotti o mancanti.• Non utilizzare accessori o pezzi di ricambio che non siano quelliapprovati dal fabbricante.• Prima dell’uso verificare che i meccanismi di blocco siano benagganciati e correttamente posizionati.• Utilizzare il Seggiolino Dondolo solo appoggiato sul pavimento.• Verificare rego<strong>la</strong>rmente il sistema di sospensione del SeggiolinoDondolo.• Utilizzare sempre un’imbragatura 5 punti di sicurezza.• Non usare il Seggiolino Dondolo senza <strong>la</strong> sua protezione.• Non usare mai il Seggiolino Dondolo su di una superficie molle (letto,divano, cuscino) ; il seggiolino potrebbe rovesciarsi o capovolgersidiventando un pericolo per il bebé.AVVERTENZEDISPOSIZIONI DI SICUREZZA DA RISPETTAREda solo o se pesa più di 9kg.• Per evitare qualsiasi tipo di ferita, dovete assicurarvi che non ci sianobambini vicino al momento del<strong>la</strong> chiusura o apertura del SeggiolinoDondolo.• Evitare che i bambini giochino con questo articolo.• Non usare mai l’arco stimo<strong>la</strong>tore per sollevare o spostare l’articolo.• Tenere il seggiolino lontano da qualsiasi fonte di calore intenso, difiamme, da prese elettriche, da prolunghe, cucine a gas o elettriche,ecc. o da oggettiche potrebbero essere al<strong>la</strong> portata dei bebé.• Per evitare qualsiasi rischio di soffocamento, mettere tutti i sacchettidi p<strong>la</strong>stica dell’imbal<strong>la</strong>ggio fuori dal<strong>la</strong> portata dei bebé o di bambinipiccoli.• Mai aggiungere dei cuscini, delle coperte o imbottitura di qualsiasitipo; utilizzare so<strong>la</strong>mente il poggia testa fornito con il SeggiolinoDondolo.• Mai mettere degli oggetti con cordine o nastrini intorno al collo deibebé; non sospendere corde al Seggiolino Dondolo e non metteredelle cordicelle ai giocattoli. Queste modalità potrebbero c<strong>au</strong>sare lostrango<strong>la</strong>mento del bebé.• Non mettere il Seggiolino Dondolo vicino ad una finestra dove ci sianocinghie o cordoni per tapparelle e tende che potrebbero strango<strong>la</strong>reil bebé.• Non attaccare altri giochi oltre a quelli forniti da <strong>Babymoov</strong>.• Non <strong>la</strong>sciare giocare il bebé con il Seggiolino Dondolo piegato.Funzionamento con le pile (non fornite)Svitare <strong>la</strong> calotta di chiusura per accedere al posto dove sono le pile situato sotto l’appoggio del Seggiolino Dondolo. Inserire 4 pile « D » 1.5V.Rispettare le indicazioni di po<strong>la</strong>rità (+/-).Attenzione !• Le pile non ricaricabili non devono essere ricaricate. Nel caso contrario queste potrebbero esplodere o avere delle perdite.• Non bisogna mettere insieme diversi tipi di pile, né pile usate con pile nuove.• Le pile devono essere inserite con <strong>la</strong> po<strong>la</strong>rità nel verso giusto.• Le pile scariche devono essere tolte dal Seggiolino Dondolo.• Conservare le pile fuori dal<strong>la</strong> portata dei bambini.• Cambiare le pile quando il Seggiolino Dondolo non funziona più normalmente.• Estrarre le pile prima di mettere il Seggiolino Dondolo a riposo per un lungo periodo.• Buttare le pile nel contenitore previsto a questo scopo.• Sostituire e ricaricare tutte le pile nello stesso tempo.• Le pile ricaricabili devono essere messe in carica sotto sorveglianza di un adulto.SEGGIOLINO DONDOLO 360° MOTION • Istruzioni per l’uso 23
• Non ricaricare una pi<strong>la</strong> ricaricabile in un caricatore diverso.• I morsetti di alimentazione non devono essere sottoposti a cortocircuito.• Non buttare le pile nel fuoco in quanto potrebbero scoppiare o esa<strong>la</strong>re sostanze nocive.Collegamento al<strong>la</strong> rete elettrica (adattatore fornito e incluso):• Il Seggiolino Dondolo deve essere utilizzato solo con l’adattatore raccomandato.• IMPORTANTE: prima di iniziare qualsiasi operazione fare attenzione che l’apparecchio sia spento. Il Seggiolino Dondolo può funzionare su diuna presa elettrica con l’adattatore fornito. Input : 240V / 60Hz - Output : 6V/ 1000mA• Collegare <strong>la</strong> punta dell’adattatore nell’orifizio previsto a questo scopo e l’altra parte nel<strong>la</strong> presa elettrica.• Gli adattatori devono essere rego<strong>la</strong>rmente esaminati per poter verificare eventuali danni sul cordone, <strong>la</strong> presa, <strong>la</strong> scato<strong>la</strong> e le altre parti. Qualorafossero constatati uno o più danni non utilizzare l’apparecchio.a. Parte anteriore sedutab. Braccio girevole sedutac. Cuscinod. GiostrinaCOMPOSIZIONE DEL SEGGIOLINO DONDOLOe. Piede anterioref. Piede posterioreg. Motoreh. Parte posteriore sedutai. Parti <strong>la</strong>terali sedutaj. Cuscino morfologicok. AdattatoreUSO E CARATTERISTICHE DEL SEGGIOLINO DONDOLOA. POSIZIONE DEL SEGGIOLINO DONDOLOInclinazione dello schienale (3 posizioni)Ed ora premere i due pulsanti situati ai <strong>la</strong>ti dello schienale, selezionare <strong>la</strong> posizione desiderata, e <strong>la</strong>sciare. Fare attenzione in modo che <strong>la</strong> posizioned’inclinazione dello schienale sia bloccata correttamente.B. ROTAZIONE DELLA BASE (B1 et B2)La base può girare su 360° tenendo ben fermo il quadro del<strong>la</strong> base e facendolo girare nel<strong>la</strong> posizione voluta. Esiste un chiavistello che permettedi bloccare il Seggiolino Dondolo in una data posizione.C. INSTALLAZIONE DELL’IMBRAGATURAMettere il bebé come da immagine qui a fianco. Portare <strong>la</strong> parte destra e sinistra del<strong>la</strong> cintura nell’imbragatura sino ad udire un « clic ». Rego<strong>la</strong>re<strong>la</strong> posizione del<strong>la</strong> cintura facendo<strong>la</strong> scivo<strong>la</strong>re.Per sganciare l’imbragatura, appoggiare sul pulsante centrale.Attenzione ! Fare attenzione ad al<strong>la</strong>cciare <strong>la</strong> cintura di sicurezza del vostro bambino e di bloccare l’imbragatura di sicurezza 5 punti.D. MUSICA E DONDOLAMENTO• Il pulsante power permette di mettere in moto e di spegnere il Seggiolino Dondolo.• I pulsanti + e – (1) permettono di control<strong>la</strong>re <strong>la</strong> velocità del dondo<strong>la</strong>mento. Premere su + per <strong>au</strong>mentare <strong>la</strong> velocità di dondo<strong>la</strong>mento e su – perridur<strong>la</strong>. Ci sono 4 velocità di dondo<strong>la</strong>mento, un indicatore luminoso LED indica quale velocità è stata scelta.• On/Off (2), questo pulsante permette di azionare <strong>la</strong> musica e di spegner<strong>la</strong>.• Il pulsante Volume / Select (3) permette di scegliere <strong>la</strong> musica e il volume. Premere il pulsante rapidamente per passare al<strong>la</strong> musica seguente.Premere più a lungo per rego<strong>la</strong>re il volume.• Il pulsante Timer (4) serve a rego<strong>la</strong>re il tempo. É possibile programmare il dondo<strong>la</strong>mento per 10, 20 o 30 minuti. Un indicatore LED indica se iltempo è stato attivato e per quale durata. Se per caso il temporizzatore non fosse attivato, non si accenderà nessuna spia e il dondo<strong>la</strong>mentocontinuerà sino a che qualcuno non lo fermerà.• Quando il meccanismo di blocco è in posizione alta, <strong>la</strong> base sarà bloccata e non potrà dondo<strong>la</strong>re. Se è in posizione bassa, il dondo<strong>la</strong>mento èpossibile.• Il pulsante indicatore di movimento (5) permette di azionare il dondo<strong>la</strong>mento quando il bebé si muove. É possibile attivare questa funzionepremendo sul pulsante (5), una spia on/off si accende nel momento in cui <strong>la</strong> funzione indicatore di movimento è attivata.Se il temporizzatore non è attivato, <strong>la</strong> velocità di dondo<strong>la</strong>mento ritorna immediatamente a livello 0. Se il bebé si sveglia, il dondo<strong>la</strong>mento riprendedopo 5 minuti.Se il temporizzatore è in azione, al termine <strong>la</strong> velocità di dondo<strong>la</strong>mento ritornerà a 0. Il dondo<strong>la</strong>mento riprenderà non appena il bebé si svegliaper una durata di 5 minuti.MANUTENZIONE E ISTRUZIONI PER IL LAVAGGIO• Verificare spesso il dondo<strong>la</strong>mento assicurandosi che non ci siano viti non ben avvitate, pezzi usati, stoffa strappata o dei punti scuciti.• Fare sostituire o riparare i pezzi se necessario. Usare soltanto pezzi di ricambio consigliati da <strong>Babymoov</strong>.• Il poggia testa e <strong>la</strong> protezione amovibile hanno le superficii <strong>la</strong>vabili. Usare un panno umido con un poco di sapone.• Per pulire il quadro del Seggiolino Dondolo, usare solo sapone domestico o un detergente neutro e acqua tiepida. Non usare candeggina.• Un’eccessiva esposizione al sole o a fonti di calore possono provocare una decolorazione o <strong>la</strong> ve<strong>la</strong>tura dei pezzi.100 % Polyesterrnaj24SEGGIOLINO DONDOLO 360° MOTION • Istruzioni per l’uso
CZDěkujeme Vám, že jste si vybrali houpačku BABYMOOV. Pro bezpečnost Vašeho dítěte si pozorněpřečtěte tento návod a pečlivě jej uschovejte pro případ budoucího použití.Odpovídá bezpečnostním požadavkům. Odpovídá požadavkům normy PR EN 16232 : 2011DŮLEŽITÉ UPOZORNĚNÍ - DŘÍVE, NEŽZAČNETE VÝROBEK POUŽÍVAT, PŘEČTĚTE SIPOZORNĚ NÁVOD K OBSLUZE AUSCHOVEJTE JEJ PRO DALŠÍ POTŘEBU.Elektrické zařízení musí být shromažďovány odděleně. Vyřazené elektrické a elektronické zařízení senesmí vyhazovat do netříděného komunálního odpadu, ale musí být odevzdány do sběrného místaelektroodpadu. Symbol přeškrtnuté popelničky vyjadřuje v celé Evropské unii, že toto elektrozařízenínesmí být vyhozeno do komunálního odpadu, ale má být sbíráno odděleně.• Nikdy nenechávejte dítě v houpačce bez dozoru.• Je nebezpečné umístit houpačku na vyvýšenou plochu (napřík<strong>la</strong>d nastůl).• Houpačka není určena k dlouhodobému spaní.• Vždy použijte zádržný systém.• Nikdy nepřenášejte a nezvedejte houpačku spolu s dítětem.• Montáž houpačky musí provádět dospělá osoba.• Nepoužívejte houpačku je-li polámaná či jakkoliv poškozená.• Malé součásti uchovávejte mimo dosah dětí.• Houpačka nenahrazuje postýlku ani přenosnou korbičku. Pokud Vašedítě potřebuje spát, uložte jej do vhodné korbičky nebo dětské postýlky.• Nikdy nepoužívejte houpačku, pokud některé díly chybí nebo jsoupoškozeny.• Nepoužívejte jiné příslušenství nebo náhradní díly, než ty, které schválilvýrobce.• Před použitím zkontrolujte, zda zajišťovací mechanismy jsou správněuzavřeny a přizpůsobeny.• Houpačku pokládejte výlučně na pod<strong>la</strong>hu.• Pravidelně kontrolujte systém zavěšení na houpačce.• Vždy použijte 5-ti bodový bezpečnostní pás.• Houpačku nikdy nepoužívejte bez správně nataženého potahu.• Nikdy nepoužívejte houpačku na měkké ploše (lůžko, pohovka, polštář),sedadlo se může převrhnout dopředu a vystavit Vaše dítě nebezpečí.UPOZORNĚNÍDŮLEŽITÉ BEZPEČNOSTNÍ POKYNYProvoz na baterie (nejsou součástí balení)Odšroubujte zajišťovací kryt pro přístup k baterii umístěné pod nohami houpačky. Vložte 4 baterie typu D 1,5V. Dbejte na správnou po<strong>la</strong>ritu(značky +/ -).Pozor!• Nenabíjecí baterie se nesmí nabíjet. V opačném případě může dojít k výbuchu nebo k úniku elektrolytu.• Nemíchejte různé typy baterií nebo vybité a nové baterie.• Baterie musí být vloženy se správnou po<strong>la</strong>ritou.• Vybité baterie musí být z houpačky odstraněny.• Baterie uchovávejte mimo dosah dětí.• Vyměňte baterie, když houpačka přestane fungovat uspokojivě.• Před dlouhodobým usk<strong>la</strong>dněním vyberte baterie z houpačky .• Vyhoďte použité baterie do příslušného kontejneru.• Vyměňte a dobíjejte všechny baterie najednou.• Akumulátory se mají dobíjet pod dohledem dospělé osoby.• Nenabíjejte dobíjecí baterie v jiné nabíječce.• Napájecí svorky se nesmí zkratovat.• Nevhazujte baterie do ohně, protože mohou explodovat nebo uvolňovat škodlivé látky.• Houpačka není určena pro samostatně sedící dítě nebo pro dítě sváhou větší než 9 kg.• Aby nedošlo ke zranění, skládejte a rozkládejte výrobek mimo dosahdětí.• Nedovolte dětem hrát si s houpačkou.• Nepřenášejte a nezvedejte houpačku za hrazdičku.• Nikdy nestavte houpačku do blízkosti otevřeného ohně, intenzivníchzdrojů tep<strong>la</strong>, elektrických zásuvek, prodlužovacích šňůr, sporáků atd.nebo předmětů, které mohou být v dosahu dětí.• Aby se předešlo nebezpečí udušení, uschovejte igelitové pytle z obalumimo dosah kojenců a malých dětí.• Nikdy pod dítě nevkládejte další polštářky či deky, používejte jenpřiložený podh<strong>la</strong>vníček.• Nedávejte dítěti kolem krku hračky s dlouhými provázky, nezavěšujtešňúry na hrazdičku ani je neuvazujte na hračky. Šňůry představují proděti nebezpečí uškrcení.• Nedávejte houpačku do blízkosti oken, kde dítěti hrozí nebezpečízardoušení šňůrou žaluzie nebo záclony.• Nezavěšujte na hrazdičku jiné hračky, než ty, které byly dodány firmou<strong>Babymoov</strong>.• Nedovolte dětem hrát si se složenou houpačkou.HOUPAČKA 360° MOTION • Návod k použití 25
Zapojení do elektrické sítě (adaptér dodán v balení):• Houpačka se může používat jenom s doporučeným adaptérem.• DŮLEŽITÉ: Před jakýmkoliv zásahem ověřte, zda je houpačka vypnutá. Houpačku je možné pomocí dodaného adaptéru zapojit do elektrickésítě. Vstup: 240 V / 60 Hz - Výstup: 6 V / 1000 mA.• Zapojte adaptér do příslušného otvoru a druhou stranu do zásuvky.• Adaptéry se musí pravidelně kontrolovat, aby se zjistilo případné poškození šňůry, zástrčky, pouzdra a dalších částí. V případě poškozenípřístroj nepoužívejte.a. Přední část sedačkyb. Rotační rameno sedačkyc. Polštářd. Didaktický mobilPOPIS HOUPAČKYe. Přední nohaf. Zadní nohag. Motorh. Zadní část sedačkyi. Boční části sedačkyj. Ergonomický polštářk. AdaptérOBSLUHA A POPIS HOUPAČKYA. POLOHY HOUPAČKYNastavení sklonu opěrad<strong>la</strong> (3 polohy)Stiskněte obě t<strong>la</strong>čítka na stranách opěrad<strong>la</strong>, současně nastavte do požadované polohy a uvolněte t<strong>la</strong>čítka. Dbejte, aby poloha opěrad<strong>la</strong> by<strong>la</strong>bezpečně zablokována.B. OTÁČENÍ SEDAČKYSedačka se dá otáčet o 360°: pevně uchopte okraj sedačky a otočte do žádané polohy. Západkou zablokujete houpačku v žádané poloze.C. NASTAVENÍ BEZPEČNOSTNÍHO POSTROJEUložte dítě jak vidíte na obrázku. Zasuňte pravou a levou část opasku do postroje, až uslyšíte zacvaknutí. Posouváním upravte polohu pásku.Postroj sundáte stisknutím středního t<strong>la</strong>čítka na postroji.Pozor! Ověřte nastavení bezpečnostního pásu zodpovídající Vašemu dítěti a správné zablokování 5-ti bodového bezpečnostního postroje.D. HUDBA A HOUPÁNÍ• Houpačka se zapíná a vypíná t<strong>la</strong>čítkem Power.• T<strong>la</strong>čítky + a – (1) se nastavuje rychlost houpání. Stisknutím t<strong>la</strong>čítka + zvýšíte rychlost houpání a t<strong>la</strong>čítkem – ji snížíte. Houpačka má 4 rychlostihoupání a světélkující LED dioda vám označí aktivovanou rychlost.• T<strong>la</strong>čítko On/Off (2) zapíná a vypíná hudbu.• T<strong>la</strong>čítko Volume / Select (3) Vám umožní vybrat melodii a nastavit její h<strong>la</strong>sitost. Krátkým stisknutím t<strong>la</strong>čítka nastavíte další melodii. Delším stisknutímt<strong>la</strong>čítka nastavíte h<strong>la</strong>sitost hudby.• T<strong>la</strong>čítko Timer (4) nastavuje časový spínač. Je možné naprogramovat houpání na 10, 20 nebo 30 minut. Světélkující LED dioda označí nastaveníčasového spínače a zvolenou dobu houpání. Ve výchozím nastavení nejsou časový spínač a kontrolné světlo v chodu a houpání bude pokračovatpokud jej nezastavíte.• Je-li zajišťovací mechanismus v horní poloze, sedačka je zablokována a nedá se houpat. Je-li v dolní poloze, houpání je možné.• T<strong>la</strong>čítko detekce pohybu (5) zahájí houpání, když se dítě pohne. Funkce se aktivuje stisknutím t<strong>la</strong>čítka (5), a kontrolní světlo on/off se rozsvítí, jelidetektor pohybu v chodu.Není-li časový spínač v chodu, rychlost houpáni se okamžitě nastaví na 0. Když se děťátko vzbudí, houpání začne znovu na 5 minut.Pokud je časový spínač v chodu, po jeho vypnutí se rychlost houpání nastaví na 0. Houpání začne znovu na 5 minut jakmile se děťátko probudí.ÚDRŽBA A ČIŠTĚNÍ• Houpačku často kontrolujete a ubezpečte se, že žádné šrouby nejsou uvolněné, díly opotřebované, látky potrhané, nebo švy rozpárané.• V případě potřeby vadné či poškozené části spravte, příp. vyměňte. Používejte pouze díly doporučené značkou <strong>Babymoov</strong>.• Odnímatelný ochranný potah a podh<strong>la</strong>vníček mají omyvatelný povrch. Použijte vlhký hadřík a mýdlo.• Konstrukci houpačky čistěte výlučně domácím mýdlem nebo jemnými čistícími prostředky a v<strong>la</strong>žnou vodou. Nepoužívejte žádné chlorové bělidlo.• Nadměrné vystavení slunečnímu záření nebo vysoké teplotě může způsobit odbarvení nebo deformování částí.100 % Polyesterrnaj26HOUPAČKA 360° MOTION • Návod k použití
Bon de garantie à vie(à renvoyer dans les 15 jours suivant l’achat)❐ Oui, je souhaite garantir à vie mon produit <strong>Babymoov</strong> et je vous joins une copie demon ticket de caisse (OBLIGATOIRE). Sans ce<strong>la</strong>, nous ne pourrons garantir à vievotre achat.❐ Oui, je souhaite recevoir <strong>la</strong> Moovletter, lettre d’in<strong>format</strong>ion électronique sur lesnouve<strong>au</strong>tés et <strong>la</strong> société <strong>Babymoov</strong>. Merci de bien remplir votre adresse e-mail.Nom des parents : . . . . . . . . . . . . . . . . . . . . . . . . . . . . . . . . . . . . . . . . . . . . . . . . . . . . . . . . . . . . . . . . . . . . . . .Prénoms des parents : . . . . . . . . . . . . . . . . . . . . . . . . . . . . . . . . . . . . . . . . . . . . . . . . . . . . . . . . . . . . . . . . . . . .Adresse : . . . . . . . . . . . . . . . . . . . . . . . . . . . . . . . . . . . . . . . . . . . . . . . . . . . . . . . . . . . . . . . . . . . . . . . . . . . . . .. . . . . . . . . . . . . . . . . . . . . . . . . . . . . . . . . . . . . . . . . . . . . . . . . . . . . . . . . . . . . . . . . . . . . . . . . . . . . . . . . . . . . .Code Postal / Ville : . . . . . . . . . . . . . . . . . . . . . . . . . . . . . . . . . . . . . . . . . . . . . . . . . . . . . . . . . . . . . . . . . . . . . .N° de téléphone : . . . . . . . . . . . . . . . . . . . . . . . . . . . . . . . . . . . . . . . . . . . . . . . . . . . . . . . . . . . . . . . . . . . . . . . .E-mail : . . . . . . . . . . . . . . . . . . . . . . . . . . . . . . . . . . . . . . . . . . . . . . . . . . . . . . . . . . . . . . . . . . . . . . . . . . . . . . . .Prénoms de vos enfants : . . . . . . . . . . . . . . . . . . . . . . . . . . . . . . . . . . . . . . . . . . . . . . . . . . . . . . . . . . . . . . . . .Dates de naissance : . . . . . . . . . . . . . . . . . . . . . . . . . . . . . . . . . . . . . . . . . . . . . . . . . . . . . . . . . . . . . . . . . . . . .Nom du produit acheté : . . . . . . . . . . . . . . . . . . . . . . . . . . . . . . . . . . . . . . . . . . . . . . . . . . . . . . . . . . . . . . . . . .Référence : . . . . . . . . . . . . . . . . . . . . . . . . . . . . . . . . . . . . . . . . . . . . . . . . . . . . . . . . . . . . . . . . . . . . . . . . . . . . .N° de code barre (obligatoire) : . . . . . . . . . . . . . . . . . . . . . . . . . . . . . . . . . . . . . . . . . . . . . . . . . . . . . . . . . . . . .Date de l’achat : . . . . . . . . . . . . . . . . . . . . . . . . . . . . . . . . . . . . . . . . . . . . . . . . . . . . . . . . . . . . . . . . . . . . . . . .Lieu de l’achat : . . . . . . . . . . . . . . . . . . . . . . . . . . . . . . . . . . . . . . . . . . . . . . . . . . . . . . . . . . . . . . . . . . . . . . . . .Votre opinion sur <strong>la</strong> qualité du produit : M<strong>au</strong>vaise 1 2 3 4 5 très bonneCombien de produits <strong>Babymoov</strong> avez-vous déjà acheté ?1 2 3 4 5 6 7 8 <strong>au</strong>tre : . . . . . . . . . . . . . . . . . . . . . . . . . . . . . . . . . . . . . . . . . . . . . . . . . . . . . . . . . . . . . . . . .Avez-vous des commentaires sur ce produit ?. . . . . . . . . . . . . . . . . . . . . . . . . . . . . . . . . . . . . . . . . . . . . . . . . . . . . . . . . . . .. . . . . . . . . . . . . . . . . . . . . . . . . . . . . . . . . . . . . . . . . . . . . . . . . . . . . . . . . . . .Avez-vous une idée d’un produit génialà créer pour bébé ?. . . . . . . . . . . . . . . . . . . . . . . . . . . . . . . . . . . . . . . . . . . . . . . . . . . . .. . . . . . . . . . . . . . . . . . . . . . . . . . . . . . . . . . . . . . . . . . . . . . . . . . . . .. . . . . . . . . . . . . . . . . . . . . . . . . . . . . . . . . . . . . . . . . . . . . . . . . . . . .* Garantie à vie. Cette garantie est soumise àconditions. Va<strong>la</strong>ble en France. Liste des <strong>au</strong>trespays concernés, activation et renseignementsen ligne à l'adresse suivante :www.service-babymoov.comPhotographies et illustrations non contractuelles A055006-Manual-Artwork-02* sous réserve d’une utilisation conforme à <strong>la</strong> <strong>notice</strong>. La garantie à vie ne couvre pas les détériorations dues à une utilisation anormale, le textile, les consommables(sucettes, ampoules…), <strong>la</strong> sérigraphie, l’usure normale de certains éléments comme le p<strong>la</strong>stique, le rou<strong>la</strong>nt...• Nous vous rappelons que vous disposez d'un droit d'accès, de modification, de rectification et de suppression des données qui vous concernent (art. 34 de <strong>la</strong> loi "In<strong>format</strong>iqueet Libertés" du 6 janvier 1978). Pour exercer ce droit, adressez-vous à <strong>Babymoov</strong> - Parc Industriel des Gravanches - 16, rue Jacqueline Auriol - 63051 Clermont-Ferrand cedex 2.• Les in<strong>format</strong>ions qui vous concernent sont destinées à <strong>Babymoov</strong>. Nous pouvons être amenés à les transmettre à des tiers (partenaires commerci<strong>au</strong>x, etc).Le souhaitez-vous ? Oui ❒ Non ❒