LP-380 Owner's Manual - Korg
LP-380 Owner's Manual - Korg
LP-380 Owner's Manual - Korg
- No tags were found...

Create successful ePaper yourself
Turn your PDF publications into a flip-book with our unique Google optimized e-Paper software.
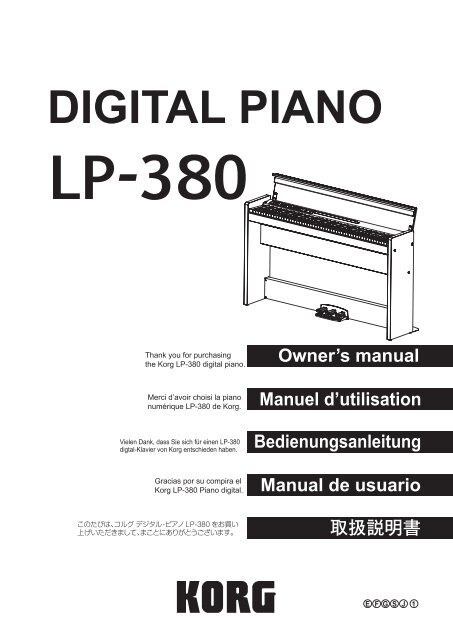
DIGITAL PIANOThank you for purchasingthe <strong>Korg</strong> <strong>LP</strong>-<strong>380</strong> digital piano.Owner’s manualMerci d’avoir choisi la pianonumérique <strong>LP</strong>-<strong>380</strong> de <strong>Korg</strong>.Manuel d’utilisationVielen Dank, dass Sie sich für einen <strong>LP</strong>-<strong>380</strong>digtal-Klavier von <strong>Korg</strong> entschieden haben.BedienungsanleitungGracias por su compira el<strong>Korg</strong> <strong>LP</strong>-<strong>380</strong> Piano digital. <strong>Manual</strong> de usuarioE F G S J 1
PrecautionsLocationUsing the unit in the following locations can resultin a malfunction.• In direct sunlight• Locations of extreme temperature or humidity• Excessively dusty or dirty locations• Locations of excessive vibration• Close to magnetic fieldsPower supplyPlease connect the designated AC adapter to an ACoutlet of the correct voltage. Do not connect it to anAC outlet of voltage other than that for which yourunit is intended.Interference with other electricaldevicesRadios and televisions placed nearby may experiencereception interference. Operate this unit at a suitabledistance from radios and televisions.HandlingTo avoid breakage, do not apply excessive force to theswitches or controls.CareIf the exterior becomes dirty, wipe it with a clean,dry cloth. Do not use liquid cleaners such as benzeneor thinner, or cleaning compounds or flammable polishes.Keep this manualAfter reading this manual, please keep it for later reference.Keeping foreign matter out of yourequipmentNever set any container with liquid in it near thisequipment. If liquid gets into the equipment, it couldcause a breakdown, fire, or electrical shock.Be careful not to let metal objects get into the equipment.If something does slip into the equipment,unplug the AC adapter from the wall outlet. Thencontact your nearest <strong>Korg</strong> dealer or the store wherethe equipment was purchased.* All product names and company names are the trademarksor registered trademarks of their respective owners.THE FCC REGULATION WARNING (for USA)NOTE: This equipment has been tested and found to complywith the limits for a Class B digital device, pursuant to Part 15of the FCC Rules. These limits are designed to provide reasonableprotection against harmful interference in a residentialinstallation. This equipment generates, uses, and can radiateradio frequency energy and, if not installed and used in accordancewith the instructions, may cause harmful interferenceto radio communications. However, there is no guaranteethat interference will not occur in a particular installation.If this equipment does cause harmful interference to radio ortelevision reception, which can be determined by turning theequipment off and on, the user is encouraged to try to correctthe interference by one or more of the following measures:• Reorient or relocate the receiving antenna.• Increase the separation between the equipment and receiver.• Connect the equipment into an outlet on a circuit differentfrom that to which the receiver is connected.• Consult the dealer or an experienced radio/TV technicianfor help.If items such as cables are included with this equipment, youmust use those included items.Unauthorized changes or modification to this system can voidthe user’s authority to operate this equipment.Notice regarding disposal (EU only)When this “crossed-out wheeled bin” symbol is displayedon the product, owner’s manual, battery, or batterypackage, it signifies that when you wish to disposeof this product, manual, package or battery youmust do so in an approved manner. Do not discardthis product, manual, package or battery along withordinary household waste. Disposing in the correctmanner will prevent harm to human health and potentialdamage to the environment. Since the correct methodof disposal will depend on the applicable laws and regulationsin your locality, please contact your local administrativebody for details. If the battery contains heavy metals in excessof the regulated amount, a chemical symbol is displayed belowthe “crossed-out wheeled bin” symbol on the battery orbattery package.IMPORTANT NOTICE TO CONSUMERSThis product has been manufactured according to strictspecifications and voltage requirements that are applicable inthe country in which it is intended that this product shouldbe used. If you have purchased this product via the internet,through mail order, and/or via a telephone sale, you mustverify that this product is intended to be used in the countryin which you reside.WARNING: Use of this product in any country other thanthat for which it is intended could be dangerous and couldinvalidate the manufacturer’s or distributor’s warranty.Please also retain your receipt as proof of purchase otherwiseyour product may be disqualified from the manufacturer’s ordistributor’s warranty.2
Table of ContentsIntroductionIntroduction----------------------------------------3Main features------------------------------------------3Parts and their functions----------------------4Preparation and demo performances-----5Before you begin playing----------------------------5Listening to demo performances-----------------7Playing the <strong>LP</strong>-<strong>380</strong>-------------------------------8Playing a single sound (Single mode)-----------8Playing two sounds at the same time(Layer mode)----------------------------------8Performing with another person(Partner mode)--------------------------------9Using pedals-------------------------------------------9Effects---------------------------------------------------9The metronome------------------------------------- 10Other functions--------------------------------- 11Touch settings--------------------------------------- 11Transpose--------------------------------------------- 11Function mode--------------------------------------- 11MIDI------------------------------------------------- 14What is MIDI?---------------------------------------- 14What can you do with MIDI?--------------------- 14Connections------------------------------------------ 14MIDI function mode-------------------------------- 14Appendix----------------------------------------- 16Troubleshooting------------------------------------- 16Specifications---------------------------------------- 16Assembling the Stand------------------------ 17Caution during assembly------------------------- 17Other cautions--------------------------------------- 17Assembly procedure------------------------------- 17Check following assembly------------------------ 18MIDI implementation chart----------------- 87Main featuresThirty high-quality soundsThe <strong>LP</strong>-<strong>380</strong> provides 30 built-in expressive high-qualitysounds, including a stereo concert grand piano. You canuse Layer mode to simultaneously play two sounds atonce, or you can use Partner mode, which allows twopeople to play the same range, one on each half of the keyboard.EffectsThe <strong>LP</strong>-<strong>380</strong> provides 3 built-in digital effects. These effectscan adjust the brightness of the tone (Brilliance), simulatethe natural ambience of a concert hall (Reverb) and addrichness to the sound (Chorus).Pedal effectsAs on an acoustic piano, the <strong>LP</strong>-<strong>380</strong> has three pedals thatcontrol the damper, sostenuto and soft effects. The damperpedal and soft pedal will respond to half-pedaling, allowingyou to vary the depth of the effect by how far you’repressing the pedal. When pressing the damper pedal, youcan also add the damper resonance to the classic pianoand the grand piano tone (bank 1 and 2 of Piano1).MetronomeThe built-in metronome allows you to select the time signature,tempo, and volume, and you can even choose abell sound as the accent.Touch controlYou can choose from three different settings to adjust howthe sound will respond to your keyboard playing dynamics.TemperamentsFor authentic performance of a wide range of music, the<strong>LP</strong>-<strong>380</strong> allows you to select from nine temperaments, includingthe equal temperament, pure temperaments (majorand minor), classical temperaments (Kirnberger andWerckmeister) as well as temperaments used with MiddleEastern and Indian folk music. When an acoustic pianosound is selected, the stretched tuning used on pianos isautomatically selected.Adjustable pitchThe Transpose function lets you change the pitch of thepiano, and the Pitch Control function allows you to makefinely tuned adjustments.Two headphone jacksTwo headphone jacks are provided, allowing two peopleto listen simultaneously.LINE OUT jackAn amplified speaker or recording equipment can be connectedby using the LINE OUT jack.MIDI capabilitiesThe <strong>LP</strong>-<strong>380</strong> supports the MIDI protocol, the standardthat allows music data to be transferred between musicalinstruments and computers. MIDI allows two or moredevices to control or be controlled by each other, and alsoallows you to use the <strong>LP</strong>-<strong>380</strong> as a 16-part multitimbral tonegenerator.3
Parts and their functionsControl panelConnector box(on the back)4 5 612Connector box37 8 9 10 1112 13 141516 17 18 19 201. Headphone ( ) jacks (Front of the conector box):Two stereo mini plugs for headphones can be insertedhere. When the headphone plug is inserted, the internalspeaker will not produce sound.2. Power button:This button turns the <strong>LP</strong>-<strong>380</strong> on or off.3. VOLUME Knob:This knob adjusts the volume for the speakers, the Outputand the Phones connectors.4. PIANO SONG button:This button is used to enter the Piano song mode, afterwhich the button lights up. Simultaneously pressingthis button and the TRANSPOSE button enters theSound demo song mode.5. TRANSPOSE button:This button is used to adjust transposition. While transposing,the button lights up. Simultaneously pressingthis button and the PIANO SONG button enters theSound demo song mode.6. FUNCTION button:This button is used to enter the Function mode, wherepitch, temperament and other settings can be specified.Hold down the button to enter the MIDI functionmode, where MIDI settings can be specified. The buttonlights up when the <strong>LP</strong>-<strong>380</strong> enters the Function modeand blinks when it enters the MIDI function mode.7. TOUCH button:This button lets you select the keyboard sensitivity.8. BRILLIANCE button:This button is used to adjust the brightness of the tone.9. REVERB button:This button is used to turn on/off the reverb, whichadds ambience to the sound. When this effect is on, thebutton will be lit up.10. CHORUS button:This button is used to turn on/off the chorus, whichadds richness to the sound. When this effect is on, thebutton will be lit up.11. BANK button/LEDs:This button is used to select the desired sound bank.The LED for the bank that’s currently selected willlight up.12. Sound buttons:This button is used to select from 30 sounds (10 × 3banks). Two buttons can be pressed to play two soundssimultaneously (Layer mode).13. Display:The display shows settings, for example, for the Functionmode and the metronome.14. UP/DOWN buttons:These buttons are used to select a value for the varioussettings.15. METRONOME button:This button is used to start/stop the metronome. Whilethe metronome is being used, the button lights up. Inaddition, hold down the button to enter the Metronomesettings mode, where various metronome settings canbe specified.16. MIDI (IN, OUT)connectors:These are jacks that are used to connect other MIDI devices(sequencer, keyboards, etc.).OUT: Data output(to be connected to the MIDI IN connector of anotherMIDI device).IN: Data input(to be connected to the MIDI OUT connector of anotherMIDI device).17. LINE OUT jack:This is the main audio output jack, where a stereo miniplug can be connected to the input jack of an amplifieror powered speakers, or to the AUX In jack of othergear.Use the VOLUME knob to set the output volume.18. DC 19V jack:Connect the included AC adapter here.19. Speaker connector:Connect the cable from the speaker box here (cf. Assemblingthe stand).20. Pedal connector:Connect the cable from the pedal unit here (cf. Assemblingthe stand).4
Preparation and demo performancesBefore you begin playingAbout the included standThe <strong>LP</strong>-<strong>380</strong> is used with the included stand.Make sure that you read the “Assembling the stand” section that can be found on page 17before proceeding.Connecting the PowerConnect the supplied AC adapter to the power cord. Insert the DC plug end into theDC19V jack on the rear of the conector box. Next, plug the power cord into an AC outlet.Pass the AC adapter cord through the cord hook so that the plug won’t beremoved from the jack accidentally (Fig. 1). When you unhook the cord,don’t pull on the cord with force.Be sure to use the AC adapter that came with your unit. Using other ACadapters may cause the malfunctions or other unforeseen events.Be sure to plug the unit into an AC outlet of the appropriate voltage.Opening or closing the key coverOpening the key cover1. Using both hands, gently lift the key cover to open it.Fig. 1Cord hookBe careful notto bend this parttoo much whenyou insert thepower cord.DC plugAC adapterPower cord forthe AC adapterto AC outlet2. Fold down the edge on the end of the key cover.Closing the key cover1. Raise the edge, and gently pull the key cover toward yourself.2. When the key cover begins to close on its own, release it.The key cover is designed to close softly on its own from about mid-way down.Do not forcibly pull the key cover when closing this. In addition,do not forcibly close the key cover by applying strong pressure.Doing so will damage the unit.Be careful not to pinch your fingers or hands when closing the keycover.The temperature and humidity will affect how fast the key covercloses.The key cover may make a faint clicking sound when it’s beingclosed slowly. This is normal behavior for the unit.5
Using the headphonesUse stereo headphones with a stereo 1/8” mini plug.Since there are two headphone jacks on the lower left side of the <strong>LP</strong>-<strong>380</strong> keyboard,two people can enjoy the sound.If headphones are plugged into the headphone jack, the <strong>LP</strong>-<strong>380</strong>’s speakers will notproduce sound.Use headphones at night or when you don’t want disturb others.If your headphones feature a standard-to-mini adapter plug, be sure to hold theadapter plug when you connect or disconnect the headphones.To protect your hearing, do not listen to loud, high-volume sounds for extendedperiods of time through headphones.Using the music standThe key cover serves as a convenient music stand. (Fig. 2)When placing opened music, do not apply strong pressure onto the key cover.Fig. 2Turning the instrument onPress the power button to turn on the <strong>LP</strong>-<strong>380</strong>. (Fig. 3)When the instrument is turned on, the buttons on the control panel will light up.To turn the instrument off, press the power button again.When the instrument is turned off, all functions and parameters, except theauto power off function return to their factory default settings.Auto power off functionWhen 30 minutes have passed without user input or demo performance, the instrumentwill be automatically turned off. To disable this function, turn off theauto power off function (see page 13).Fig. 3SofterLouderAdjust the volumeRotate the VOLUME knob that’s located next to the power switch toward “MAX” toraise the volume level.Rotate it left toward “MIN” to lower the level. (Fig. 3)The VOLUME knob controls the output level of the built-in speakers, the headphonesjacks and the LINE OUT jacks.It is always better to start with a low volume and then increase gradually.Using the LINE OUT jackUse the LINE OUT jack, if you want to connect your <strong>LP</strong>-<strong>380</strong> to a mixer, stereo hi-fi,or a couple of active monitors. When using a stereo hi-fi, connect the LINE OUTs tothe AUX or LINE inputs.You must only connect devices with the power turned off. Careless operationmay damage the <strong>LP</strong>-<strong>380</strong> or the device where it’s connected, or malfunctionsmay be caused.Connection cables are sold separately. You will need to obtain the appropriatecommercially-available cables for your equipment.6
Listening to demo performancesThe <strong>LP</strong>-<strong>380</strong> contains a total of 30 demo performances (10demo songs using 10 high-quality sounds and 20 familiarpiano songs using the piano sounds).During playback of a sound demo song, you can playusing the keyboard; however, the sound cannot bechanged by using the sound buttons.During playback of a sound demo song, the settingsfor effects (reverb and chorus) cannot be changed.Listening to a demo song1. Simultaneously press the PIANO SONG button andthe TRANSPOSE button.The PIANO SONG button blinks, and the sound buttonsblink sequentially.In addition, the number for the sound demo song (d01)appears in the display.1,312. After about 3 seconds, the PIANO1 button will blink,and playback of the demo song corresponding to thatbutton will begin.When playback of the PIANO1 demo song is finished,playback continues sequentially with PIANO2,E.PIANO1, etc. When playback of the CHOIR demosong is finished, playback begins again with the PIA-NO1 demo song.Listening to a specific sound demo songWhen the sound buttons are blinking sequentially,press the sound button for the demo song that youwant to hear.If a different sound button is pressed, even while asong is being played, playback of the correspondingdemo song will begin after a few seconds.In addition, a song can be selected by pressing the UPor DOWN button beside the display.3. To stop playback of a demo song, press the PIANOSONG button again.Sound demo song listdisplay Sound button Song titleComposerd01 PIANO1 Jardins sous la pluie C.Debussyd02 PIANO2 Danny boy Irish Folk Songd03 E.PIANO1 Jam Session N. Nishid04 E.PIANO2 In Memory M.Gieseld05d06HARPSI/CLAV Invention No.8 J.S.BachVIBES/GUITARJazz in SpainKORGoriginald07 ORGAN1 Improvisation M.Geiseld08 ORGAN2 Toccata in D moll J.S.Bachd09 STRINGS Scoring Interlude M.Geiseld10 CHOIR Autumn Flares M.GeiselListening to a piano song1. Press the PIANO SONG button.The PIANO SONG and PIANO1 buttons will light up,and the number for the piano song (001) will appear inthe display.1,32. After about 3 seconds, the PIANO1 button will blink,and playback of the piano song will begin.When playback of the first piano song is finished, playbackcontinues sequentially with second, third, etc.When playback of the twentieth piano song is finished,playback begins again with the first piano song.Listening to a specific piano songThe number for the song that you want to hear can beselected by pressing the UP or DOWN button besidethe display. If a different number is selected by pressingthe buttons, even while a song is being played,playback of the corresponding song will begin after afew seconds.3. To stop playback of a piano song, press the PIANOSONG button again.Piano song listNo. display Song titleComposer1 001 Etude Op.10-12 F.Chopin2 002 Claire de lune C.Debussy3 003 Fantaisie-Impromptu Op.66 F.Chopin4 004 Waltz No.6 Db-major Op.64-1 F.Chopin5 005“Prelude 1” The Well-TemperedClavier, Book 1J.S.Bach6 006 “Turkish March” Sonata K.331 W.A.Mozart7 007 Arabesque No.1 C.Debussy8 008 Für Elise L.v.Beethoven9 009 Liebesträume Nr.3 F.Liszt10 010 La Campanella F.Liszt11 011 Nocturne Op.9-2 F.Chopin12 012 Spring Song Op.62-6 F.Mendelssohn13 013 Reflets dans I'eau C.Debussy14 014 Gymnopédie No.1 E.Satie15 015 Etude Op.10-3 F.Chopin16 016 Old Feather Blues KORG original17 017 La fille aux cheveux de lin C.Debussy18 018 The Entertainer S.Joplin19 019 Sunflowers KORG original20 020 Amazing Grace Hymn7
Playing the <strong>LP</strong>-<strong>380</strong>Playing a single sound (Single mode)You can select a sound from the thirty sounds suppliedwith the instrument (10 sounds x 3 banks).Sound button Bank Sound name #PIANO1 1 Classic Piano 32 Grand Piano 33 Jazz Piano 2PIANO2 1 Live Piano 22 Honky-Tonk 23 Elec.Grand 1E.PIANO1 1 Stage E.piano 12 Bright E.Piano 23 Tremolo EP 3E.PIANO2 1 Dig.E.Piano1 22 60's E.Piano 13 Dig.E.Piano2 2HARPSI/CLAV 1 Harpsichord 22 Clav 13 Synth Clav 2VIBES/GUITAR 1 Vibraphone 12 Marimba 13 Acoustic Guitar 2ORGAN1 1 Jazz Organ1 22 Jazz Organ2 23 Jazz Organ3 2ORGAN2 1 Pipe Organ1 22 Pipe Organ2 23 Positive Organ 2STRINGS 1 Strings 22 Cinema Strings 23 Analog Strings 2CHOIR 1 Aah Choir 22 Ooh Voices 23 Classical Choir 3(#) These columns show the number of oscillators per voicethat are used by each sound. (refer to “About maximumpolyphony” on page 16.)1. Press the sound button for the sound that you wantto play.The selected button will light up.2. Press the BANK button to select one of the threesounds.Each press of the BANK button switches the bank inthe order 1, 2, 3, 1, ..., and the corresponding LED to theright of the BANK button will light up.For example, to select the electric grand piano sound,press the PIANO2 button, after which its button lightsup.Then, press the BANK button twice to select bank 3(electric grand piano); the LED below and to the rightof the BANK button will light up.In addition, the bank selected for a sound button remainsthe same, even if a different sound button ispressed.2Each time the <strong>LP</strong>-<strong>380</strong> is turned on, the sound in bank1 is selected for all sound buttons.Playing two sounds at the same time(Layer mode)You can play two sounds at the same time on the keyboard.This is called the Layer mode.Simultaneously press the two sound buttons for thesounds to be played at the same time.The two selected sound buttons will light up.The leftmost or uppermost selected sound button is layer 1,and the other (rightmost or lowermost) one is layer 2 (seethe diagram at the below).Layer 1For example, if E.PIANO1 and ORGAN1 are selected,E.PIANO1 is layer 1 and ORGAN1 is layer 2. In order touse sounds in different banks, first select the banks in theSingle mode for the sound buttons to be pressed.For example, to play by layering the grand piano andjazz organ 2 sounds, select bank 1 (grand piano) for thePIANO1 button and bank 2 (jazz organ 2) for the ORGAN1button, and then press both buttons simultaneously.When selecting Layer mode, the total number of voicesthat can play at the same time is reduced, dependingon the total number of oscillators used by the selectedsounds. (refer to “About maximum polyphony”on page 16.)Sounds in different banks for the same sound button(grand piano and jazz piano for the PIANO1 button)cannot be selected.Returning to the Single modeTo return to Single mode, just press a single sound selectionbutton.Layer mode settingsIn Layer mode, the volume balance between soundscan be adjusted, the octave for each sound can be shifted,and the damper pedal can be enabled or disabledfor each sound. (refer to “Function mode” on page 11.)1Layer 28
Performing with another person(Partner mode)Two people can play in the same range with the keyboarddivided in half between them. This is called the Partnermode.1. Press the FUNCTION button.The FUNCTION and PIANO1 buttons will light up.2. Press the E.PIANO1 button.The E.PIANO1 sound button lights up, and oFF appearsin the display.1,5234Partner mode indication3. Press the UP button beside the display to select on.Partner mode is turned on, and the PIANO1 sound isused for both the left and right sides of the keyboard.While the Partner mode is ON, a dot in the lower rightof the display appears.The right side of the keyboard, from E4 to C8, producessounds in a range two octaves lower (E2–C6).The left side of the keyboard, from A0 to Eb 4, producessounds in a range two octaves higher (A2–Eb 6).A0 E♭ 4 E4 C8Pitches A2 to E♭ 6 for the playeron the left side4. To exit Partner mode, press the DOWN button besidethe display to select oFF.5. Press the FUNCTION button.The FUNCTION button turns off.In Partner mode, the sound for the left and right sides canbe changed, and the volume can be adjusted. For details,refer to “Partner mode settings” on page 12.Using pedalsPitches E2 to C6 for the playeron the right sideSoft pedalDamper pedalThe <strong>LP</strong>-<strong>380</strong> has three pedals; damper,sostenuto, and soft.You can use the pedals to make yourplaying more expressive and realistic. Sostenuto pedalSoft pedal (left)Pressing this pedal will make the tone softer. You can controlthe softness of the tone by how far down you press theon pedal (“half-pedaling”).Sostenuto pedal (center)Pressing this pedal will apply the damper effect only to thenotes that are already being held down on the keyboard,and will sustain only those notes. The damper effect willnot be applied to any additional notes that you play whileholding down the Sostenuto pedal.Damper pedal (right)Pressing this pedal will sustain the sound, producing arichly resonant decay. You can also add the damper resonanceto the classic piano and the grand piano tone (bank1 and 2 of Piano1). You can also use halfpedalling, with agradual resonance effect depending on the depth of thepedal pressure (“half-pedaling”).In Layer mode, you can select the sound(s) where youwant to apply the pedal. (refer to “Specifying layerpedals” on page 13)In Partner mode (see page 12), the damper effect can beapplied independently by both players.EffectsBrillianceThis effect changes the brightness of the tone.The setting can be changed by holding down the BRIL-LIANCE button and pressing the UP or DOWN buttonbeside the display.The setting appears in the display with 3 producing abrighter sound and 1 producing a less bright sound.The same setting is applied to all sounds and remains applieduntil the <strong>LP</strong>-<strong>380</strong> is turned off. When the instrumentis turned on, the default setting 2 is selected.Brilliance cannot be turned off.ReverbThis effect adds ambience and depth to the sound, producingthe sense of performing in a concert hall. As a factorydefault, the on/off setting for this effect as well as this effect’ssetting are saved with each sound.Each press of the REVERB button turns the reverb on(button lights up) or off (button turns off).To change this setting, hold down the REVERB buttonand press the UP or DOWN button beside the display.The setting appears in the display with 3 producing a deepreverb effect and 1 producing a light reverb effect.If a different sound is selected or if the <strong>LP</strong>-<strong>380</strong> is turnedoff, the on/off setting for this effect as well as this effect’ssetting return to their factory defaults (default settings).ChorusChorus adds modulation to the sound, producing an expansivelyrich sound. As a factory default, the on/off settingfor this effect as well as this effect’s setting are savedwith each sound.Each press of the CHORUS button turns the Chorus effecton (button lights up) or off (button turns off).To change this setting, hold down the CHORUS buttonand press the UP or DOWN button beside the display.The setting appears in the display with 3 producing a deepchorus effect and 1 producing a light chorus effect.If a different sound is selected or if the <strong>LP</strong>-<strong>380</strong> is turnedoff, the on/off setting for this effect as well as this effect’ssetting return to their factory defaults (default settings).9
The metronomeThe <strong>LP</strong>-<strong>380</strong> is equipped with a metronome, which can bechanged to a bell sound, which is convenient for practicing.Turning on/off the metronomePress the METRONOME button. Thebutton lights up, and the metronomestarts.To stop the metronome, press the METRONOME buttonagain. The button turns off.Specifying the tempoWhen the tempo appears in the display(default setting of 120), regardlessof whether the metronome is turnedon or off, the tempo can be specifiedwith the UP and DOWN buttons beside the display.The setting range is q = 40–240.To return to the default setting, simultaneously press theUP and DOWN buttons.Selecting the time signature1. Hold down the METRONOME button until the Metronomesettings mode is entered.The METRONOME button blinks, the PIANO1 soundbutton lights up, and the time signature (04) appears inthe display.When the Metronome settings mode is entered, thetime signature setting normally appears.2. To select the time signature after changing othersettings in the Metronome settings mode, press thePIANO1 button.3. Select the setting with the UP or DOWN button besidethe display.The setting range consists of 02 (2/4), 03 (3/4), 04 (4/4)and 06 (6/4); the default setting is 04.To return to the default setting, simultaneously pressthe UP and DOWN buttons.24. Press the METRONOME button to exit the Metronomesettings mode.Adjusting the metronome volume1. Hold down the METRONOME button until the Metronomesettings mode is entered.2. Press the PIANO2 button, and the volume will appearin the display.3. Specify the setting with the UP or DOWN buttonthat’s located beside the display.The setting range is 1–13; the default setting is 10.To return to the default setting, simultaneously pressthe UP and DOWN buttons.331,4Selecting a bell for the accent1. Hold down the METRONOME button until the Metronomesettings mode is entered.2. Press the E.PIANO1 button, and the accent sound settingwill appear in the display.3. Select the setting with the UP or DOWN button besidethe display.The setting range consists of oFF (no accent sound), on1(emphasized sound for the accent beat) and on2 (bellsound for the accent beat); the default setting is oFF.24. Press the METRONOME button to exit the Metronomesettings mode.Specifying the tempo (Metronome settings mode)1. Hold down the METRONOME button until the Metronomesettings mode is entered.2. Press the E.PIANO2 button, and the tempo will appearin the display.3. Specify the setting with the UP or DOWN buttonthat’s located beside the display.The setting range is q = 40–240; the default setting is 120.To return to the default setting, simultaneously pressthe UP and DOWN buttons.24. Press the METRONOME button to exit the Metronomesettings mode.Selecting the Metronome Sound1. Hold down the METRONOME button until the Metronomesettings mode is entered.2. Press the HARPSI/CLAV button, and the metronomesound setting will appear in the display.3. Specify the setting with the UP or DOWN buttonthat’s located beside the display.The setting range consists of 1 (acoustic) and 2 (electronicsound); the default setting is 1.24. Press the METRONOME button to exit the Metronomesettings mode.3333331,41,41,42331,44. Press the METRONOME button to exit the Metronomesettings mode.10
Other functionsTouch settingsThe keyboard sensitivity, or touch, can be programmed.To change the setting, hold down the TOUCH button andpress the UP or DOWN button beside the display.LoudLoudnessQuietQuietLightNormalPlayingstrengthHeavyLoudDisplay Touch sensitivity1 Light. Loud notes can be produced even byplaying lightly.2 Normal. Normal piano touch.3 Heavy. Loud notes can be produced only byplaying very hard.When the instrument is turned on, the touch setting isreset to Normal.The settings are applied to all sounds.TransposeIn some cases, a song may be written in a difficult key (e.g.,many black keys), or you may wish to shift the pitch tomatch another instrument or vocalist. In such cases, youcan transpose (shift the pitch) so that you can use an easierfingering, or use the same familiar fingering to play at adifferent pitch. This is called the Transpose function.For example if you transpose upward by one semitone,playing the notes shown at the lower left will produce thepitches shown at the right.When the instrument is turned on, the transposing isreset.While holding down the TRANSPOSE button, press thekeyboard key (F # 6–F7) for the desired transposition.If a keyboard key other than C7 is pressed, the TRANS-POSE button lights up to indicate that the keyboard istransposed.The pitch of the entire keyboard is transposed accordingto the pitch of the pressed keyboard key in relation to C7.To return to the original pitches, hold down the TRANS-POSE button and press the C7 key. The TRANSPOSE buttonturns off, and transposition is canceled.keyF # 6–B6C7C # 7–F7Function modeEffect6–1 semitones belowStandard pitch1–5 semitones higherThe temperament as well as other pitch settings can bespecified from the Function mode.Setting procedure for functions in the Function mode.1. Press the FUNCTION button.The FUNCTION and PIANO1 buttons light up.2. Press the sound button corresponding to the desiredfunction.The current setting appears in the display.3. Specify the desired setting.4. After specifying the desired settings, press theFUNCTION button to return to the mode for playing.The FUNCTION button turns off.1,4When the <strong>LP</strong>-<strong>380</strong> is turned off, all functions, exceptthe auto power off function, return to their default settings.The settings are applied to all sounds.Fine tuningIn order to adapt the <strong>LP</strong>-<strong>380</strong> pitch to that of another instrument,you can adjust the pitch in steps of 0.5 Hz over arange of A4 = 427.5–452.5 Hz.27.5–52.5 appears in the display.The standard pitch is A = 440 Hz, and the default setting is40.0.1. When you enter the Function mode, the PIANO1sound button lights up.When the Function mode is entered, the pitch settingnormally appears.2. To specify the pitch after changing other settings inthe Function mode, press the PIANO1 button.3. Specify the setting with the UP or DOWN button besidethe display.Simultaneously press the UP and DOWN buttons toreturn to 440 Hz.1223333C4F 6C7 F711
Selecting a temperamentYou can select from nine temperaments, including theequal temperament, pure temperaments (major and minor),classical temperaments (Kirnberger and Werckmeister)as well as temperaments used with Middle Easternand Indian folk music.DisplayTemperament00 Equal temperament (default setting):Spacing all semitones at equal pitch intervals,this temperament is the most widely used.01 Pure temperament [major]: Major chords in theselected key are perfectly tuned.02 Pure temperament [minor]: Minor chords inthe selected key are perfectly tuned.03 Arabic: This scale includes the quarter‐tone intervalsused in Arabic music.04 Pythagorean: This ancient Greek scale is especiallyeffective for playing melodies. It consistsof perfect fifths; however, other intervals – themajor third in particular – is out of tune.05 Werckmeister: The Werckmeister III scale wascreated in the later Baroque period to allowrelatively free transposition.06 Kirnberger: The Kirnberger III scale is usedmainly for tuning harpsichords.07 Slendro scale: This is an Indonesian gamelanscale with five notes per octave.08 Pelog scale: This is an Indonesian gamelanscale with seven notes per octave.1. Enter the Function mode, and then press the PIANO2button.The PIANO2 sound button lights up, and the temperamentsetting (00) appears in the display.2. Select the setting with the UP or DOWN button besidethe display.About stretched tuningIn order to produce the most natural resonance, PIANO1and PIANO2 sounds use a “stretched tuning” that makesthe notes of the lower range slightly flatter than equal temperament,and the upper range slightly sharper. This ishow an acoustic piano is normally tuned by professionaltuners.Partner mode settings1. Enter the Function mode, and then press theE.PIANO1 button.The E.PIANO1 sound button lights up, and the on/offsetting appears in the display.2. Each press of the UP or DOWN button beside the displayturns the mode on (on) or off (oFF).122When the Partner mode is turned on, the PIANO1 soundis used for both the left and right sides of the keyboard,and the PIANO1 button lights up.Simultaneously, a dot on the lower right of thedisplay appears (Partner mode indication).12122The right side of the keyboard, from E4 to C8, producessounds in a range two octaves lower (E2–C6). The left sideof the keyboard, from A0 to Eb 4, produces sounds in arange two octaves higher (A2–Eb 6).The division for the left and right sides of the keyboardas well as the range (pitches) cannot be changed.In the Partner mode, the transposition settings areignored. In addition, keyboard information (Note Onand Note Off) is not sent with MIDI.Selecting the sound for the left sideExit the Function mode, and then press the sound buttonfor the sound to be used with the left side of thekeyboard. The right side of the keyboard remains set tothe PIANO1 sound.In this case, only the sound button for the left side ofthe keyboard will light up.Selecting sounds for the left and right sidesExit the Function mode, and then simultaneously pressthe two sound buttons for the sounds to be used.The two selected sound buttons light up.Sound for left side of keyboardSound for right side of keyboardThe leftmost or uppermost selected sound button is forthe left side of the keyboard, and the other (rightmostor lowermost) one is for the right side of the keyboard.For example, if E.PIANO1 and ORGAN1 are selected,E.PIANO1 is for the left side of the keyboard and OR-GAN1 for the right side of the keyboard.In order to use sounds in different banks, first selectthe banks in the Single mode for the sound buttons tobe pressed.If the Partner mode is turned off and the Functionmode is exited with the left and right sides of the keyboardset to different sounds, the sounds whose buttonsare lit will be selected.Using the same sound (other than PIANO1) for both theleft and right sidesExit the Function mode, and then simultaneously presstwo sound buttons, making sure that the rightmostone is for the sound to be used. Then, press the rightmostselected sound button again. For example, afterpressing the PIANO2 and ORGAN1 buttons, press theORGAN1 button again to use the ORGAN1 sound withboth the left and right sides of the keyboard.Changing the volume for the left and right sidesIf the sounds for the left and right sides of the keyboardhave been changed, the volume can be specifiedfor each sound. refer to “Specifying the volume balancefor layers” on page 13.Using dampersThe damper pedal and the soft pedal can be used asseparate damper pedals for the right and left sides ofthe keyboard respectively.Damper: Used as a damper pedal for the player on theright side of the keyboard.Sostenuto: Not usedSoft: Used as a damper pedal for the player on the leftside of the keyboard.
Specifying the volume balance for layersThe volume balance for sounds in the Layer mode (or thePartner mode) can be adjusted. The setting range is 1 – 9...9 – 9...9 – 1, with the number on the left for layer 1 (or theleft side of the keyboard) and the number on the right forlayer 2 (or the right side of the keyboard).The default setting is 9 – 9.1. Enter the Function mode, and then press the E.PIANO2button.The E.PIANO2 sound button lights up, and the balancesetting (9 – 9) appears in the display.2. Specify the volume balance setting with the UP orDOWN button beside the display.To return to the default setting, simultaneously pressthe UP and DOWN buttons.If the sound is in the Single mode, – – – appears in thedisplay, and a setting cannot be specified.Specifying layer octavesIn the Layer mode, the octave for each sound can be specified.The setting range is ±1 octave for each sound, and –01,00 and 01 appear in the display. The default setting is 00.1. Enter the Function mode, and then press the HARP-SI/CLAV button.The HARPSI/CLAV sound button lights up, and thelayer (L1) whose octave is to be specified appears in thedisplay.2. Select the layer with the UP or DOWN button besidethe display.L1 appears for layer 1, and L2 appears for layer 2.3. Press the BANK button.The octave setting (00) appears in the display.4. Select the octave setting with the UP or DOWN buttonbeside the display.To return to the default setting, simultaneously pressthe UP and DOWN buttons.To select the octave for the other layer, press the HARPSI/CLAV button to select the layer.122Specifying layer pedalsIn the Layer mode, a damper setting can be specified foreach sound.The settings are only for the layer 1 sound (o – –), only forthe layer 2 sound (– – o) and for both sounds (o – o).The default setting is o – o.1. Enter the Function mode, and then press the VIBES/GUITAR button.The VIBES/GUITAR sound button lights up, and thedamper setting (o – o) appears in the display.2. Select the damper setting with the UP or DOWN buttonbeside the display.1If the sound is in the Single mode, – – – appears in thedisplay, and a setting cannot be specified.Specifying the auto power off functionWhen 30 minutes have passed without a key pressed onthe keyboard or without an automatic performance played,the instrument is automatically turned off. To disable thisfunction, turn off (oFF) this function. The default setting isthis function turned on. If this setting is changed, the newsetting is saved and remains selected, even if the <strong>LP</strong>-<strong>380</strong> isturned off.1. Enter the Function mode, and then press the OR-GAN1 button.The ORGAN1 sound button lights up, and the setting(on) appears in the display.2. Select the on/off setting with the UP or DOWN buttonbeside the display.12222312,42,4If the sound is in the Single mode, – – – appears in thedisplay, and a setting cannot be specified.13
MIDIWhat is MIDI?MIDI, is the abbreviation of Musical Instrument DigitalInterface. It is an international standard that was createdto connect and transfer data between electronic musicalinstruments, computers and other devices.What can you do with MIDI?Thanks to MIDI, you can use the <strong>LP</strong>-<strong>380</strong> to control otherinstruments, use other instruments to control the <strong>LP</strong>-<strong>380</strong>,and use a sequencer to create complex musical pieces.When you use the <strong>LP</strong>-<strong>380</strong> keyboard or pedal, or select asound, the notes, pedal activation and change in sound aretransmitted to another instrument, or are recorded by asequencer.ConnectionsCommercially available MIDI cables are used to transferMIDI data. Connect these cables from the MIDI connectorsof the <strong>LP</strong>-<strong>380</strong> to the MIDI connectors of the external MIDIdevice that you want to exchange data with. There are twotypes of MIDI connector.MIDI IN connectorThis connector receives MIDI messages.The MIDI IN connector lets you play the <strong>LP</strong>-<strong>380</strong>’s soundsfrom an external MIDI device (e.g., MIDI keyboard or sequencer).Use a MIDI cable to connect the <strong>LP</strong>-<strong>380</strong>’s MIDIIN connector to your external MIDI device’s MIDI OUTconnector.MIDI OUT connectorThis connector transmits MIDI messages.The MIDI OUT connector lets you control an externalMIDI device using the MIDI messages transmitted fromthe <strong>LP</strong>-<strong>380</strong>. Use a MIDI cable to connect the <strong>LP</strong>-<strong>380</strong>’s MIDIOUT connector to your external MIDI device’s MIDI INconnector.MIDI function modeWhen the <strong>LP</strong>-<strong>380</strong> is turned on, the MIDI parameters areset to transmission channel 1, all reception channels (1–16),Local On and Omni Off.These settings can be changed from the MIDI functionmode.Setting procedure for parameters in the MIDIfunction mode1. Hold down the FUNCTION button with the functionmode not established.The PIANO 1 button lights up, and the MIDI channelsetting (C01) appears in the display. The FUNCTIONbutton is blinking.4. After specifying the desired settings, press theFUNCTION button to return to the mode for playing.The FUNCTION button turns off.1,4When the <strong>LP</strong>-<strong>380</strong> is turned off, all parameters returnto their default settings.Changing the MIDI channelsData can be transmitted and received on MIDI channels 1through 16 (C01–C16).When the <strong>LP</strong>-<strong>380</strong> is turned on, transmission channel 1 (C01)is automatically selected.• When you enter the MIDI function mode, the PIA-NO1 sound button lights up.When the MIDI function mode is entered, the MIDIchannel setting normally appears.To specify the MIDI channel setting after changingother settings in the MIDI function mode, press thePIANO1 button.In the Layer mode, selecting the transmission channelspecifies the channel for layer 1. The transmission channelfor layer 2 will automatically be set to the followingchannel. For example, if MIDI channel 7 is selected for thesound of layer 1, MIDI channel 8 will automatically bespecified for the sound of layer 2. If MIDI channel 16 is selectedfor the sound of layer 1, channel 1 will be specifiedfor the sound of layer 2.Local On/OffWith the Local On setting, playing the <strong>LP</strong>-<strong>380</strong>’s keyboardproduces the sounds of the performance as well as transmitsMIDI data. With the Local Off setting, playing the<strong>LP</strong>-<strong>380</strong>’s keyboard does not produce the sounds of theperformance; MIDI data is only transmitted. Normally thisparameter is set to Local On (default setting: on).The Local Off setting should be selected when using the<strong>LP</strong>-<strong>380</strong> as a master keyboard, for example, to play soundsfrom a connected MIDI device (a keyboard, sound module,etc.). The <strong>LP</strong>-<strong>380</strong> will not produce sound, but the performancewill be played by the connected MIDI device.Select the Local Off setting (oFF) when using the <strong>LP</strong>-<strong>380</strong>as a sound module, for example, when the <strong>LP</strong>-<strong>380</strong> is connectedto a sequencer with its Echo Back setting (functionthat sends back data that the sequencer received) selectedin order to prevent echoing of returned data.• Enter the MIDI function mode, and then press thePIANO2 button.The PIANO2 sound button lights up, and the Local On/Off setting (on) appears in the display.2332. Press the sound button corresponding to the desiredparameter.The current setting appears in the display.3. Specify the desired setting.14
Enabling/disabling program change transmission/receptionfilteringThe programs on a connected MIDI device can be changedby sending a MIDI change number from the <strong>LP</strong>-<strong>380</strong>. Inaddition, the programs on the <strong>LP</strong>-<strong>380</strong> can be changed byreceiving a MIDI change number from a connected MIDIdevice.For program change numbers and their correspondingsounds, refer to “Table of sounds and corresponding programchange numbers” below.To transmit/receive program change messages, disable thisfunction (oFF: default setting). To not transmit/receive themessages, enable this function (on).• Enter the MIDI function mode, and then press theE.PIANO1 button.The E.PIANO1 sound button lights up, and the setting(oFF) appears in the display.Transmitting program changesWhen a sound is selected using the sound buttons andBANK button on the <strong>LP</strong>-<strong>380</strong>, the corresponding MIDI programchange number is transmitted.Receiving program changesWhen the <strong>LP</strong>-<strong>380</strong> receives a MIDI program change number,the sound is changed to the corresponding number.If an incompatible program change number is received,the <strong>LP</strong>-<strong>380</strong> sound is not changed.Table of sounds and corresponding program changenumbersCC0: Bank Select (MSB) for all sounds is set to 121.Sound Button Bank CC32 PC SoundPIANO1 1 1 0 Classic Piano2 0 0 Grand Piano3 0 1 Jazz PianoPIANO2 1 2 0 Live Piano2 0 3 Honky-Tonk3 0 2 Elec.GrandE.PIANO1 1 0 4 Club E.piano2 1 4 Vintage E.Piano3 3 4 Tremoro EPE.PIANO2 1 0 5 Dig.E.Piano12 2 4 60's E.Piano3 1 5 Dig.E.Piano2HARPSI/CLAV 1 0 6 Harpsichord2 0 7 Clav3 1 7 Synth ClavVIBES/1 0 11 VibraphoneGUITAR2 0 12 Marimba3 0 24 Acoustic GuitarORGAN1 1 0 16 Jazz Organ12 1 16 Jazz Organ23 0 17 Jazz Organ3ORGAN2 1 0 19 Pipe Organ12 1 19 Pipe Organ23 2 19 Positive OrganSTRINGS 1 0 48 Strings2 0 50 Cinema Strings3 1 50 Analog StringsCHOIR 1 0 52 Aah Choir2 1 52 Ooh Voices3 2 52 Classical ChoirEnabling/disabling control change transmission/reception filteringMessages, such as usage of the <strong>LP</strong>-<strong>380</strong>’s damper pedal, canbe transmitted to a connected external MIDI device to controlit, and these messages can be received from the externalMIDI device to control the <strong>LP</strong>-<strong>380</strong>.To transmit/receive control change messages, disable thisfunction (oFF: default setting). To not transmit/receive themessages, enable this function (on).• Enter the MIDI function mode, and then press theE.PIANO2 button.The E.PIANO2 sound button lights up, and the setting(oFF) appears in the display.Using the <strong>LP</strong>-<strong>380</strong> as a multi-timbral sound moduleThe <strong>LP</strong>-<strong>380</strong> can operate as a 16-part multi-timbral soundmodule when an external MIDI device is used to controlits internal sound generator.1. Connect a MIDI cable to the <strong>LP</strong>-<strong>380</strong>’s MIDI IN connectorand to the MIDI OUT connector of a sequenceror other MIDI device.2. Transmit MIDI data from the connected sequencer orother MIDI device.For details on transmitting data from the connectedsequencer or other MIDI device, refer to its user’s manual.3. When the <strong>LP</strong>-<strong>380</strong> receives the program change messagealong with the performance data, it will play with thesound corresponding to that program number.If the <strong>LP</strong>-<strong>380</strong> is not to be used as a multi-timbral soundmodule, disable this function (oFF).• Enter the MIDI function mode, and then press theHARPSI/CLAV button.The HARPSI/CLAV sound button lights up, and thesetting (on: default setting) appears in the display.15
AppendixTroubleshootingIf during use any of the following problems should occur,carefully examine the instrument to see if you can find outwhat the problem is, and try resolving it by following thesuggestions below. If the instrument will still not functionproperly refer to your dealer.The instrument will not turn on• Check that the AC adapter is correctly connected to thepiano and the outlet.No sound• Is the speaker cord of the speaker box on the stand connectedwith the speaker connector on the <strong>LP</strong>-<strong>380</strong> correctly?• Make sure that the volume is not set on MIN. If it is,bring it up to an adequate level.• Make sure that the MIDI Local function is not set onOFF. If it is, set it to ON (or turn the instrument off andthen on again).• Make sure there is not a jack plugged into one of theHeadphones jacks. This would turn the internal speakersoff. if so, unplug the jack.Notes are interrupted• You have exceeded the maximum polyphony. see“About maximum polyphony.”The pitch or tone of the piano sounds wrong in somekey regions• The <strong>LP</strong>-<strong>380</strong>’s piano sounds replicate the sound of anactual piano as faithfully as possible. This means thatin some regions of the keyboard, you may feel thatthe overtones seem stronger, or that the tone or pitchseems wrong. This is not a malfunction.The connected MIDI device does not respond to transmittedMIDI data• Make sure that all MIDI cables are correctly connected.Make sure that the <strong>LP</strong>-<strong>380</strong> is receiving MIDI data onthe same channel as the MIDI device.About maximum polyphonyIf the number of notes being played simultaneously exceedsthe maximum polyphony, some notes will be lostsince the <strong>LP</strong>-<strong>380</strong> is equipped with a mechanism that stopsthe first note being played to give priority to notes playedwith keys pressed later. Some <strong>LP</strong>-<strong>380</strong> sounds, althoughthey may be a single sound, are generated by two or moreoscillators (one note of a sound-generating circuit). Soundsusing just one oscillator, such as those in banks 1 and 2 ofVIBES/GUITAR, have a maximum polyphony of 120 notes.Sounds using two oscillators, such as those in banks 1 and2 of PIANO2 and in banks 1 and 3 of E.PIANO2, have amaximum polyphony of 60 notes.120 ÷ Number of sound oscillators = Maximum polyphonyKeep the maximum polyphony in mind and carefullychoose sounds when using Layer mode to play two soundssimultaneously or when using the damper pedal.SpecificationsKeyboard RH3 (Real weighted hammer action 3)keyboard: 88 note (A0–C8)Touch selection Light, Normal, HeavyPitchTemperamentTranspose, Fine tuningNine kindsSound generation Stereo PCM SystemPolyphonySoundsEffects120 notes (max)30 sounds (10 x 3 banks)Brilliance, Reverb, Chorus (3 levels each)Demo 30 (Sound demo song x 10, Piano Song x 20)MetronomeTempo, Time signature, Accent, sound and VolumecontrolsPedalDamper*, Sostenute, Soft* (*half-pedaling supported)ConnectionsLINE OUT, MIDI (IN, OUT), Headphones×2, PEDAL,SPEAKERControlsPower, VOLUME, PIANO SONG, TRANSPOSE,FUNCTION, TOUCH, BRILLIANCE, REVERB,CHORUS, BANK, Sound × 10, UP, DOWN,METRONOMEAmplification 22 W × 2Sperkers 10 cm x 2Power supplyPower consumptionDC 19 V, AC adapter (included)15 WDimensions (W × D × H)1355 × 351 × 772 mm / 53.35 × 13.82 × 30.39 inches1355 × 351 × 936 mm / 53.35 × 13.82 × 36.85 inches(with the key cover opened)Weight37 kg / 81.57 lbs. (including Stand)Included accessories AC adapter ( ), Power cord,Stand- Specifications and appearance are subject to changewithout notice for improvement.16
Assembling the StandWarning● At least one other person must help you assemblethe stand.2. Make sure that all of the following parts are available.Side panel (left)Side panel (right)Speaker boxCaution during assemblyIn order to assemble the stand safely, please observe thefollowing points.• Make sure that you have the correct part in the correctorientation, and perform the assembly in the ordergiven.Other cautionsPlease check the following points after assembly.• Loosened screwsThe screws may loosen as time passes after assembly.You should periodically check whether any screwshave become loose. If you feel that the stand vibratesexcessively, it is possible that screws have come loose.If so, re-tighten them.• When moving the digital piano to another locationTo move the assembled stand, remove the AC adaptercord from the stand, close the key cover, and then moveit slowly with at least two people keeping it as level aspossible.• DisassemblyIf you need to disassemble the stand, do so by reversingthe steps of the assembly procedure. After disassembly,keep the screws and other parts in a safe placeso that they are not lost.The <strong>LP</strong>-<strong>380</strong> should always be laid down before disassembled.Assembly procedureYou’ll need a Phillips (+) screwdriver.1. Put the protective sheet, which had covered the <strong>LP</strong>-<strong>380</strong>, on a flat floor, and place the <strong>LP</strong>-<strong>380</strong> on that sheetwith its rear facing the floor.In addition, place cloths or magazines so that you mayeasily put your hands under the <strong>LP</strong>-<strong>380</strong> when assemblingand raising the stand.Ensure that the <strong>LP</strong>-<strong>380</strong>’s key cover will not to openuntil the end of the assembly.Anti-tipping Bracket (left)Pedal cordPedal boardPedal unitAnti-tipping Bracket (right)Screws (M6) x 6 pcs. Screws (M4) x 8 pcs. Caps x 6 pcs.Push rivet x 1 pc.Cord holder x 1 pc.3. Fasten the <strong>LP</strong>-<strong>380</strong> and the speaker box to the rightand left side panels using eight screws (M6).Position the speaker box so that the speaker cord is onthe left side. In this position, the speaker (the side coveredwith cloth) faces you.First temporarily tighten* the screws on the right sidepanel, and then temporarily tighten* the screws on theleft side panel.* To temporarily tighten the screws is to tighten themleaving a clearance of about 2 mm.Screws(M6)Side panel (left)the side covered with clothSpeaker box<strong>LP</strong>-<strong>380</strong>Positioning tabScrews(M6)Side panel (right)Be careful not to pinch your fingers.4. Connect the attached pedal cord, observing the correct orientation,to the connector on the reverse side of the pedalunit, and then engage it with a slot in the pedal unit.The pedal cord can be attached to or detached from theconnector with its locking tab held down.<strong>LP</strong>-<strong>380</strong>LockingtabProtective sheet17
5. Insert the pedal unit into the pedal board, and thenfasten it by pressing a push rivet into the hole (abovethe cutout) at the rear of the pedal board.After pressing it into there, lift the pedal board to checkthat the pedals do not drop.The push rivet will prevent the pedal unit from fallingout. Therefore, it cannot be fully fastened to the pedalboard.10. Ensure that the stand has no gaps and is not tilted,and that all the screws are tightened firmly.11. Put caps on the screw heads on the right and left sidepanels.CapsFront of pedal boardFrontRearPushRear of pedal boardPush rivet12. Connect the pedal cord and the speaker cord to theconnectors on the rear of the <strong>LP</strong>-<strong>380</strong>’s connector box.When connecting the pedal cord and the speaker cord,observe the correct orientations of the connectors.The pedal cord or the speaker cord can be detachedfrom the connector with its locking tab held down.6. Temporarily tighten the pedal board, with the pedalunit fastened, to the hardware inside the side panelsof the stand, using four screws (M4).Locking tabScrews(M4)Speaker cordScrews(M4)Pedal cordCordholder13. Use the cord holder to hold the pedal cord.After securing the cord with the cord holder, ensurethat excess pressure is not applied to the connectors.7. Raise the assembled stand slowly with two people.8. Make sure to attach the anti-tipping brackets behindboth side panels. And the anti-tipping bracket fastenedto the left of the code holder at this time.Joints between the side panels and the attached antitippingbrackets should be even (with no level differenceleft).14. Connect the dedicated cord to the AC adapter. Then,plug the AC adapter into the DC IN connector, andwrap the cord around the cord hook of the piano. Fordetails, refer to “Connecting the Power” on page 5.15. Place the <strong>LP</strong>-<strong>380</strong> where you intend to use it. Makesure to place it in a safe location where the floor is flatand stable.When setting the digital piano in place, makesure that the stand does not rest on the AC adaptercable or pedal cable.Anti-tippingBracketFor greater safety, be sure to attach the anti-tippingbrackets to the rear of the left and right sidepanels.ReverseScrews (M4)Cord holderReverseScrews (M4)9. Then, firmly tighten all the screws that are temporarilytightened in step 3 and 6.When tightening the screws on the <strong>LP</strong>-<strong>380</strong>, adjust theup/down and front/rear positions on the left and rightside panels so that they are equal.Check following assembly□ Are any parts left over?If any parts are left over, carefully review the assemblyprocedure to see where those parts should have beenused.□ Make sure that all screws are tight.18
PrécautionsEmplacementL’utilisation de cet instrument dans les endroits suivantspeut en entraîner le mauvais fonctionnement.• En plein soleil• Endroits très chauds ou très humides• Endroits sales ou fort poussiéreux• Endroits soumis à de fortes vibrations• A proximité de champs magnétiquesAlimentationBranchez l’adaptateur secteur mentionné à une prisesecteur de tension appropriée. Evitez de brancherl’adaptateur à une prise de courant dont la tensionne correspond pas à celle pour laquelle l’appareil estconçu.Interférences avec d’autres appareilsélectriquesLes postes de radio et de télévision situés à proximitépeuvent par conséquent souffrir d’interférences à laréception. Veuillez dès lors faire fonctionner cet appareilà une distance raisonnable de postes de radioet de télévision.ManiementPour éviter de les endommager, manipulez les commandeset les boutons de cet instrument avec soin.Note concernant les dispositions (Seulement EU)Quand un symbole avec une poubelle barrée d’unecroix apparait sur le produit, le mode d’emploi, les pilesou le pack de piles, cela signifie que ce produit, manuelou piles doit être déposé chez un représentant compétent,et non pas dans une poubelle ou toute autre déchetterieconventionnelle. Disposer de cette manière, deprévenir les dommages pour la santé humaine et les dommagespotentiels pour l’environnement. La bonne méthoded’élimination dépendra des lois et règlements applicablesdans votre localité, s’il vous plaît, contactez votre organismeadministratif pour plus de détails. Si la pile contient des métauxlourds au-delà du seuil réglementé, un symbole chimiqueest affiché en dessous du symbole de la poubelle barrée d’unecroix sur la pile ou le pack de piles.REMARQUE IMPORTANTE POUR LES CLIENTSCe produit a été fabriqué suivant des spécifications sévères etdes besoins en tension applicables dans le pays où ce produitdoit être utilisé. Si vous avez acheté ce produit via l’internet,par vente par correspondance ou/et vente par téléphone, vousdevez vérifier que ce produit est bien utilisable dans le paysoù vous résidez.ATTENTION: L’utilisation de ce produit dans un pays autreque celui pour lequel il a été conçu peut être dangereuse etannulera la garantie du fabricant ou du distributeur. Conservezbien votre récépissé qui est la preuve de votre achat, fautede quoi votre produit ne risque de ne plus être couvert par lagarantie du fabricant ou du distributeur.EntretienLorsque l’instrument se salit, nettoyez-le avec unchiffon propre et sec. Ne vous servez pas d’agentsde nettoyage liquides tels que du benzène ou du diluant,voire des produits inflammables.Conservez ce manuelAprès avoir lu ce manuel, veuillez le conserver soigneusementpour toute référence ultérieure.Evitez toute intrusion d’objets oude liquideNe placez jamais de récipient contenant du liquideprès de l’instrument. Si le liquide se renverse oucoule, il risque de provoquer des dommages, uncourt-circuit ou une électrocution.Veillez à ne pas laisser tomber des objets métalliquesdans le boîtier (trombones, par ex.). Si cela se produit,débranchez l’alimentation de la prise de courant etcontactez votre revendeur korg le plus proche ou lasurface où vous avez acheté l’instrument.* Tous les noms de produits et de sociétés sont desmarques commerciales ou déposées de leur détenteurrespectif.19
Table des matièresIntroduction------------------------------------- 20Principales caractéristiques--------------------- 20Parties et leurs fonctions------------------ 21Préparatifs et écoute des morceaux dedémonstration-------------------------- 22Avant de commencer à jouer------------------- 22Écoute des morceaux de démonstration---- 24Utilisation du <strong>LP</strong>-<strong>380</strong> pour la lecture--- 25Jouer un timbre (mode Single)----------------- 25Jouer deux timbres à la fois (mode Layer)-- 25Jouer à deux (mode Partner)------------------- 26Utilisation de pédales----------------------------- 26Effets-------------------------------------------------- 26Le métronome-------------------------------------- 27Fonctionnalités supplémentaires------- 28Réglage du toucher------------------------------- 28Fonction Transpose------------------------------- 28Mode de fonctions--------------------------------- 28MIDI ----------------------------------------------- 31Le MIDI, qu’est-ce que c’est ?------------------ 31Que peut-on faire avec le MIDI?--------------- 31Connexions------------------------------------------ 31Mode MIDI------------------------------------------- 31Appendice--------------------------------------- 33Problèmes et solutions--------------------------- 33Spécifications--------------------------------------- 33Montage du pied------------------------------ 34Prudence durant le montage-------------------- 34Autres précautions-------------------------------- 34Procédure de montage--------------------------- 34À vérifier après le montage---------------------- 35Tableau d’implémentation MIDI---------- 8720IntroductionPrincipales caractéristiquesTrente timbres de qualité superbeLe <strong>LP</strong>-<strong>380</strong> offre 30 sons (ou “timbres”) pleins d’expressionet de qualité époustouflante, dont un son stéréo de pianoà queue de concert. Le mode Layer permet de jouer simultanémentdeux timbres et le mode Partner permet à deuxpersonnes de jouer sur une moitié du clavier en utilisant lamême plage de notes.EffetsLe <strong>LP</strong>-<strong>380</strong> comporte 3 effets numériques. Ces effets permettentde régler la brillance du son (Brilliance), de simulerl’environnement acoustique d’une salle de concert (Reverb)et de rendre le son plus ample (Chorus).Pédale d’effetsComme tout piano acoustique, le <strong>LP</strong>-<strong>380</strong> dispose de troispédales contrôlant les effets de pédale forte (maintien), depédale de soutien (sostenuto) et de pédale douce (sourdine).La fonction mi-pédale est disponible pour la pédale forte etla pédale douce, ce qui permet de doser l’intensité de l’effeten appuyant plus ou moins fort sur la pédale. L’utilisationde la pédale forte permet d’ajouter un effet de résonanceau son de piano classique et de piano à queue (banque 1 etbanque 2 de Piano1).MétronomeLe métronome intégré vous permet de spécifier la mesure,le tempo et le volume, et vous permet aussi d’employer leson d’une cloche comme accent.Fonction de réglage du toucherLa réponse dynamique du clavier est une des caractéristiquesles plus importantes d’un piano, et le <strong>LP</strong>-<strong>380</strong> vous permet dechoisir parmi trois types différents de réponse dynamique.TempéramentsAfin de garantir un jeu authentique dans un vaste éventailde styles musicaux, le <strong>LP</strong>-<strong>380</strong> vous permet de choisir parmineuf tempéraments, comprenant la gamme tempérée, lestempéraments purs (majeur et mineur), les tempéramentsclassiques (Kirnberger et Werckmeister) ainsi que des tempéramentsutilisés dans la musique traditionnelle d’Inde etdu Moyen-Orient. Quand vous choisissez un son de pianoacoustique, l’accord étendu utilisé sur les pianos est automatiquementsélectionné.Réglage de la hauteurLa fonction Transpose permet de modifier la hauteur dutimbre, tandis que la fonction Pitch Control permet d’effectuerun accordage fin.Deux prises pour casqueLes deux prises pour casque (une sur la face avant et unesur la face arrière du <strong>LP</strong>-<strong>380</strong>) permettent à deux personnesl’écoute simultanée.Prise LINE OUTVous pouvez brancher une enceinte active ou un du matérield’enregistrement à la prise LINE OUT.Caractéristiques MIDILe <strong>LP</strong>-<strong>380</strong> supporte le protocole MIDI, c’est à dire un protocolestandard qui permet d’échanger des données musicalesentre instruments musicaux et ordinateurs. Le protocoleMIDI permet à deux dispositifs (ou plus) de piloter oud’être pilotés l’un l’autre ; le <strong>LP</strong>-<strong>380</strong> peut ainsi fonctionnercomme un générateur sonore à 16 parties multitimbres.
Parties et leurs fonctionsPanneau avantPanneau desconnecteurs(en face arrière)4 5 612 3Panneau des connecteurs7 8 9 10 1112 13 141516 17 18 19 201. Prises pour casque ( )(à l’avant du panneau des connecteurs):Permettent de brancher deux casques à fiche minijackstéréo. Quand vous branchez un casque, le son deshaut-parleurs internes du <strong>LP</strong>-<strong>380</strong> est coupé.2. Interrupteur d’alimentation:Cet interrupteur permet de mettre le <strong>LP</strong>-<strong>380</strong> sous tensionet hors tension.3. Commande VOLUME:Règle le volume des haut-parleurs, et des bornes Outputet Phones.4. Bouton PIANO SONG button:Ce bouton permet d’activer le mode de morceau depiano; le bouton s’allume quand ce mode est actif. Vouspouvez enfoncer simultanément ce bouton et le boutonTRANSPOSE pour activer le mode des morceaux dedémonstration de timbres.5. Bouton TRANSPOSE button:Ce bouton permet de régler la fonction de transposition.Ce bouton s’allume quand la fonction de transpositionest active. Vous pouvez enfoncer simultanémentce bouton et le bouton PIANO SONG pour activer lemode des morceaux de démonstration de timbres.6. Bouton et FUNCTION:Ce bouton permet d’activer le mode de fonctions (Function)et de régler la hauteur, le tempérament et d’autresparamètres. Maintenez ce bouton enfoncé pour activerle mode MIDI et régler les paramètres MIDI. Le boutons’allume quand le mode de fonctions du <strong>LP</strong>-<strong>380</strong> est actifet clignote quand l’instrument passe en mode MIDI.7. Bouton TOUCH:Sélectionne la courbe de dynamique du toucher duclavier.8. Bouton BRILLIANCE:Ce bouton permet de régler la brillance du son.9. Bouton et REVERB:Ce bouton sert à activer/couper l’effet de réverbération,utilisé pour recréer divers environnements acoustiques.Quand cet effet est actif, le bouton est allumé.10. Bouton et CHORUS:Ce bouton sert à activer/couper l’effet de chorus, utilisépour rendre le son plus ample. Quand cet effet est actif,le bouton est allumé.11. Bouton et témoin BANK:Ce bouton permet de choisir la banque de timbres voulue.Le témoin de la banque active s’allume.12. Boutons de timbres:Ces boutons permettent de choisir parmi les 30 timbresdisponibles (10 × 3 banques). Vous pouvez enfoncerdeux boutons pour jouer simultanément deux timbres(en mode Layer, aussi appelé “mode de superposition”).13. Écran:Affiche les réglages, comme par exemple ceux du modede fonctions et du métronome.14. Boutons UP/DOWN:Ces boutons permettent de régler les valeurs des diversparamètres.15. Bouton et METRONOME:Ce bouton sert à activer/arrêter le métronome. Ce boutonest allumé quand vous utilisez le métronome. Enoutre, vous pouvez maintenir ce bouton enfoncé pouractiver le mode de réglage du métronome et régler diversparamètres.16. Prises MIDI (IN, OUT):Bornes pour connecter des dispositifs tels que séquenceurs,claviers, etc.OUT: Sortie des données(à connecter à la borne MIDI IN d’un autre dispositifMIDI)IN: Entrée de données(à connecter la borne MIDI OUT d’un autre dispositifMIDI).17. Prise LINE OUT:Cette sortie principale permet de relier l‘instrument viaune fiche minijack stéréo à l‘entrée d‘un amplificateurou d‘enceintes actives, ou encore à la prise AUX INd‘autres dispositifs. Pour réglez le volume de sortie, utilisezle commande VOLUME.18. Prise DC 19V:Branchez ici l’adaptateur secteur fourni.19. Prise SPEAKER:Branchez-y le câble du boîtier des haut-parleurs (voyez“Montage du pied”).20. Prise PEDAL:Branchez-y le câble du pédalier (voyez “Montage dupied”).21
Préparatifs et écoute des morceaux de démonstrationAvant de commencer à jouerÀ propos du stand fourniLe <strong>LP</strong>-<strong>380</strong> doit être utilisé avec le pied fourni.Veillez à lire la section “Montage du pied” à la page 34 avant d’effectuer le montage.Connexion au secteurPour commencer, le <strong>LP</strong>-<strong>380</strong> est hors tension. Branchez le câble d’alimentation à l’adaptateursecteur. Branchez la fiche de CC à la prise DC19V panneau des connecteurs en facearrière. Branchez ensuite le câble d’alimentation à une prise secteur.Faites passer le câble de l’adaptateur par le crochet prévu à cet effet pour éviter quela fiche ne se débranche accidentellement (Illus. 1). Lorsque vous retirez le câble ducrochet, évitez de tirer sur le câble avec une force excessive.Utilisez uniquement l’adaptateur secteur fourni. L’utilisation d’un autre adaptateurrisque d’entraîner des dysfonctionnements.Illustration 1Crochet pourcâbleVeillez à ne pasplier cette partieexcessivement Fiche CClorsque vousfixez le câble aucrochet.Adaptateur secteurVeillez à brancher le produit à une prise secteur d’une tension adéquate.Ouverture et fermeture du couvercle du clavierOuverture du couvercle du clavier1. Ouvrez le couvercle du clavier en le soulevant doucement des deux mains.Câble de l’adaptateursecteurA une prise de courant2. Repliez le bord sur l’extrémité du couvercle.Fermeture du couvercle du clavier1. Relevez le bord et tirez doucement le couvercle du clavier vers vous.222. Quand le couvercle du clavier commence à se fermer de lui-même, lâchez-le.Le couvercle du clavier se ferme doucement de lui-même à mi-course vers le bas.Ne tirez jamais fort sur le couvercle du clavier pour le fermer. Demême, n’appuyez jamais avec force sur le couvercle du clavierpour le fermer. Cela endommagerait l’instrument.Veillez à ne pas vous coincer les doigts ou la main en fermant lecouvercle.La température et l’humidité ambiantes ont une influence sur lavitesse de fermeture du couvercle.Vous pourriez remarquer un faible clic lors de la fermeture ducouvercle du clavier. Ce bruit de fonctionnement est tout à fait normal.
Utilisation de casquesUtilisez des casques à fiche minijack stéréo de 3,5 mm.Le <strong>LP</strong>-<strong>380</strong> comporte deux prises pour casque en face avant (sur son bord inférieurgauche), ce qui permet à deux personnes de jouer sur l‘instrument en toute quiétude.Quand un casque est branché, le son des haut-parleurs du <strong>LP</strong>-<strong>380</strong> est coupé.Utilisez un casque pour jouer en soirée ou éviter de déranger votre entourage.Si votre casque est doté d’une fiche adaptatrice jack standard/mini-jack, veillez à tenirla fiche adaptatrice lorsque vous branchez ou débranchez le casque.Pour protéger votre ouïe, évitez une écoute au casque prolongée à volume élevé.Illustration 2Utilisation du pupitreLe couvercle du clavier se transforme en pupitre bien pratique. (Illus. 2)Veillez à ne jamais exercer de pression forte quand vous posez un livre departitions sur le pupitre.Mise sous tension de l’instrumentAppuyez sur l’interrupteur d’alimentation pour mettre le <strong>LP</strong>-<strong>380</strong> sous tension. (Illus. 3)Quand vous mettez l’instrument sous tension, les boutons de son panneau de commandes’allument.Pour mettre l’instrument hors tension, appuyez à nouveau sur son interrupteur d’alimentation.Quand vous mettez l’instrument hors tension, toutes ses fonctions et paramètres, àl’exception de la fonction de coupure automatique d’alimentation, retrouvent leursréglages par défaut.Fonction de coupure automatique d’alimentationQuand 30 minutes se sont écoulées depuis la dernière manipulation de l’instrumentou la dernière écoute d’une démo, cette fonction coupe automatiquement l’alimentationde l’instrument. Si vous ne comptez pas utiliser la fonction de coupure automatiqued’alimentation, désactivez-la (voir page 30).Réglage du volumeTournez la commande VOLUME à droite vers “MAX” pour augmenter le volume. Tournez-laà gauche vers “MIN” pour diminuer le volume. (Illus. 3)La commande VOLUME règle le volume des haut-parleurs internes, des prises pourcasques et des prises LINE OUT.On conseille de toujours commencer à jouer à faible volume et de l’augmenter par lasuite.Illustration 3MoinsfortPlusfortUtilisation des prise LINE OUTUtilisez les bornes LINE OUT pour brancher une table de mixage de qualité élevée, un hifistéréo ou une paire de retours de scène à votre <strong>LP</strong>-<strong>380</strong>. Si vous utilisez un hi-fi stéréo,branchez les bornes LINE OUT de l’appareil aux bornes d’entrée AUX ou LINE de votre<strong>LP</strong>-<strong>380</strong> (ne jamais utiliser les entrées PHONO).Vous devez effectuer tous les raccordements avec les appareils hors tension. Si vousne faites pas attention, vous risquez d’endommager le <strong>LP</strong>-<strong>380</strong> ou le périphérique auquelil est raccordé, ou provoquer un dysfonctionnement.Les câbles de raccordement sont vendus séparément. Vous devez obtenir des câblesappropriés pour votre équipement, disponibles dans le commerce.23
Écoute des morceaux de démonstrationLe <strong>LP</strong>-<strong>380</strong> propose 30 morceaux de démonstration (10 morceauxillustrant 10 timbres de haute qualité et 20 morceauxde piano bien connus utilisant les timbres de piano del’instrument).Durant la lecture d’un morceau de démonstration detimbres, vous pouvez jouer sur le clavier; notez toutefoisque les boutons de timbres ne permettent pas dechanger de timbre pendant la démo.Durant la lecture d’un morceau de démonstration detimbres, les réglages d’effets (réverbération et chorus)ne peuvent pas être modifiés.Écoute d’un morceau de démonstration1. Appuyez simultanément sur les boutons PIANOSONG et TRANSPOSELe bouton PIANO SONG clignote et les boutons detimbres clignotent l’un après l’autre.Le numéro du morceau de démonstration de timbres(d01) s’affiche sur l’écran.1,312. Après environ 3 secondes, le bouton PIANO1 clignoteet la lecture du morceau de démonstration correspondantà ce bouton démarre.Quand la lecture du morceau de démonstration PIA-NO1 est terminée, la démo continue dans l’ordre avecles morceaux PIANO2, E.PIANO1, etc. Quand le morceauCHOIR est fini, la lecture reprend avec le morceaude démonstration PIANO1.Écoute du morceau de démonstration souhaitéPendant que les boutons de timbres clignotent tour àtour, appuyez sur le bouton de timbres du morceau dedémonstration que vous voulez écouter.Si, en cours de démo, vous appuyez sur un autre boutonde timbres, la lecture du morceau de démonstrationcorrespondant démarre après quelques secondes.En outre, vous pouvez choisir un morceau avec les boutonsUP et DOWN à côté de l’écran.3. Pour arrêter la lecture du morceau de démonstration,appuyez à nouveau sur le bouton PIANO SONG.Liste des morceaux de démonstration de timbresAffichage Sonorit Titre du morceau Compositeurd01 PIANO1 Jardins sous la pluie C.Debussyd02 PIANO2 Danny boy Irish Folk Songd03 E.PIANO1 Jam Session N. Nishid04 E.PIANO2 In Memory M.Gieseld05d06HARPSI/CLAV Invention No.8 J.S.BachVIBES/GUITARJazz in SpainoriginalKORGd07 ORGAN1 Improvisation M.Geiseld08 ORGAN2 Toccata in D moll J.S.Bachd09 STRINGS Scoring Interlude M.Geiseld10 CHOIR Autumn Flares M.GeiselÉcoute d’un morceau de piano1. Appuyez sur le bouton PIANO SONG.Les boutons PIANO SONG et PIANO1 s’allument et lenuméro du morceau de piano (001) apparaît sur l’affichage.1,32. Après environ 3 secondes, le bouton PIANO1 se metà clignoter et la lecture du morceau de piano commence.Quand la lecture du premier morceau de piano est terminée,la démo continue dans l’ordre avec le deuxièmemorceau, puis le troisième, etc. Quand le vingtièmemorceau de piano est fini, la lecture reprend avec lepremier morceau de piano.Écoute du morceau de piano souhaitéVous pouvez sélectionner le morceau de piano quevous voulez écouter avec les boutons UP et DOWN àcôté de l’écran. Si, en cours de démo, vous choisissez unautre morceau en appuyant sur ces boutons, la lecturedu morceau de piano correspondant démarre aprèsquelques secondes.3. Pour arrêter la lecture du morceau de démonstration,appuyez à nouveau sur le bouton PIANO SONG.Liste de morceaux de pianoNo. Affichage Titre du morceauCompositeur1 001 Etude Op.10-12 F.Chopin2 002 Claire de lune C.Debussy3 003 Fantaisie-Impromptu Op.66 F.Chopin4 004 Waltz No.6 Db-major Op.64-1 F.Chopin5 005“Prelude 1” The Well-TemperedClavier, Book 1J.S.Bach6 006 “Turkish March” Sonata K.331 W.A.Mozart7 007 Arabesque No.1 C.Debussy8 008 Für Elise L.v.Beethoven9 009 Liebesträume Nr.3 F.Liszt10 010 La Campanella F.Liszt11 011 Nocturne Op.9-2 F.Chopin12 012 Spring Song Op.62-6 F.Mendelssohn13 013 Reflets dans I'eau C.Debussy14 014 Gymnopédie No.1 E.Satie15 015 Etude Op.10-3 F.Chopin16 016 Old Feather Blues original KORG17 017 La fille aux cheveux de lin C.Debussy18 018 The Entertainer S.Joplin19 019 Sunflowers original KORG20 020 Amazing Grace Hymn24
Utilisation du <strong>LP</strong>-<strong>380</strong> pour la lectureJouer un timbre (mode Single)Sélectionner l’un des trente timbres à disposition (10 x 3sons banques).Bouton Banque Sonorit #PIANO1 1 Piano classique 32 Piano à queue 33 Piano jazz 2PIANO2 1 Piano de concert 22 Piano Honky-Tonk 23 Piano à queue électrique 1E.PIANO1 1 Piano électrique de stade 12 Piano électrique brillant 23 Piano électrique trémolo 3E.PIANO2 1 Piano électrique numérique 1 22 Piano électrique des années 60 13 Piano électrique numérique 2 2HARPSI/ 1 Clavecin 2CLAV2 Clav. 13 Synthé Clav. 2VIBES/ 1 Vibraphone 1GUITAR2 Marimba 13 Guitare acoustique 2ORGAN1 1 Orgue jazz 1 22 Orgue jazz 2 23 Orgue jazz 3 2ORGAN2 1 Grandes orgues 1 22 Grandes orgues 2 23 Orgue positif 2STRINGS 1 Cordes 22 Cordes de cinéma 23 Cordes analogiques 2CHOIR 1 Chœur aah 22 Voix ooh 23 Chœur classique 3(#) Cette colonne détaille le nombre d’oscillateurs par voixexploités par chaque timbre (voir “Au sujet de la polyphoniemaximum” à la page 33).1. Appuyez sur le bouton de timbres du son que vousvoulez jouer.Le bouton enfoncé s’allume.2. Appuyez sur le bouton BANK pour sélectionner undes trois timbres.Chaque pression sur le bouton BANK change debanque (1, 2, 3, 1, ...) et le témoin correspondant s’allumeà droite du bouton BANK.Pour sélectionner le timbre de piano à queue électrique,par exemple, appuyez sur le bouton PIANO2. Son témoins’allume.Appuyez ensuite deux fois sur le bouton BANK pourchoisir la banque 3 (piano à queue électrique); les témoinsen dessous et à droite du bouton BANK s’allument.En outre, la banque sélectionnée pour un bouton detimbres reste en vigueur, même si un autre bouton detimbres est enfoncé.2Chaque fois que vous mettez le <strong>LP</strong>-<strong>380</strong> sous tension, letimbre de la banque 1 est assigné à tous les boutons detimbres.Jouer deux timbres à la fois (mode Layer)Vous pouvez jouer simultanément deux timbres sur leclavier. C’est ce que nous appelons le mode Layer (ou desuperposition).Appuyez simultanément sur les deux boutons des timbresque vous voulez superposer. Les deux boutons de timbresenfoncés s’allument.Le bouton de timbres le plus à gauche ou le plus haut quevous avez enfoncé correspond au timbre de la couche 1, etl’autre (plus à droite ou plus bas) correspond au timbre dela couche 2 (voyez l’illustration ci-dessous).Couche 1Par exemple, si vous appuyez sur les boutons E.PIANO1 etORGAN1, le timbre E.PIANO1 correspond à la couche 1 etle timbre ORGAN1 à la couche 2. Pour utiliser des timbresd’autres banques, choisissez d’abord les banques en modeSingle (un seul timbre) pour les boutons de timbres visés.Exemple: pour jouer en superposant le timbre de piano àqueue et le timbre d’orgue jazz 2, sélectionnez la banque1 (piano à queue) pour le bouton PIANO1 et la banque 2(orgue jazz 2) pour le bouton ORGAN1, puis enfoncez simultanémentles deux boutons.Lorsque le mode Layer est sélectionné, le nombre totalde voix pouvant jouer simultanément est réduit, enfonction du nombre total d’oscillateurs exploités parles timbres sélectionnés (voir “Au sujet de la polyphoniemaximum” à la page 33).Vous ne pouvez pas sélectionner des timbres debanques différentes pour le même bouton de timbres(comme par exemple piano à queue et piano classiquepour le bouton PIANO1).Rétablir le mode SinglePour rétablir le mode Single, il suffit d’appuyer sur unseul bouton de sélection des timbres.Réglages du mode LayerEn mode Layer, vous pouvez régler l’équilibre de volumeentre les deux timbres, décaler l’octave de chaquetimbre et activer/désactiver la pédale Damper pourchaque timbre (voir “Mode de fonctions” à la page 28).1Couche 225
Jouer à deux (mode Partner)Ce mode partage le clavier en deux moitiés de sorte quedeux personnes jouent dans la même plage de notes desdeux côtés. C’est ce que nous appelons le mode Partner.1. Appuyez sur le bouton FUNCTION.Les boutons FUNCTION et PIANO1 s’allument.2. Appuyez sur le bouton E.PIANO1.Le bouton de timbres E.PIANO1 s’allume et “oFF” apparaîtsur l’affichage.1,523témoin de mode Partner43. Appuyez sur le bouton UP à côté de l’écran pour afficher“on”.Le mode Partner est actif et le timbre PIANO1 est utilisé àla fois pour la moitié gauche et la moitié droite du clavier.Quand le mode Partner est activé, un point apparaîtdans le coin inférieur droit de l’affichage.Le côté droit du clavier (de Mi4 à Do8) est transposé dedeux octaves vers le bas (Mi2 à Do6).Le côté gauche du clavier (de La0 à Mib 4) est transposéde deux octaves vers le haut (La2 à Mib 6).La0 Mi ♭ 4 Mi4 Do8Plage de notes de La2 à Mi ♭ 6pour la personne du côté gauchePlage de notes de Mi2 à Do6pour la personne du côté droit4. Pour quitter le mode Partner, appuyez sur le boutonDOWN à côté de l’écran pour sélectionner “oFF”.5. Appuyez sur le bouton FUNCTION.Le bouton FUNCTION s’éteint.En mode Partner, vous pouvez changer le timbre et le volumedes moitiés droite et gauche du clavier. Pour plus dedétails, voir “Réglages du mode Partner” à la page 29.En mode Layer, vous sélectionnez le(s) timbre(s) auxquelsla pédale est affectée. (voir “Régler la fonction depédale forte des timbres superposés” à la page 30)En mode Partner (voir page 29), l’effet de pédale forte(Damper) peut être utilisé indépendamment par lesdeux personnes.EffetsBrillanceCet effet change la brillance du timbre.Vous pouvez effectuer ce réglage en maintenant enfoncéle bouton BRILLIANCE et en utilisant les boutons UP etDOWN à côté de l’écran.Le réglage s’affiche à l’écran; “3” produit un son plusbrillant et “1” un son plus sourd.Le réglage de brillance est appliqué à tous les timbres etreste en vigueur jusqu’à la mise hors tension du <strong>LP</strong>-<strong>380</strong>. Àla mise sous tension de l’instrument, le réglage par défaut(“2”) est actif.Le paramètre de brillance ne peut pas être désactivé.RéverbérationCet effet confère de la profondeur au son et recrée l'impressionque vous jouez dans une salle de concert. Par défaut,le réglage actif/coupé ainsi que le niveau de cet effet sontsauvegardés pour chaque timbre.Chaque pression sur le bouton REVERB active (le boutons’allume) et coupe (le bouton s’éteint) tour à tour l’effetde réverbération.Pour changer le niveau de l'effet, maintenez enfoncé lebouton REVERB et appuyez sur le bouton UP ou DOWNà côté de l'écran.Utilisation de pédalesLe <strong>LP</strong>-<strong>380</strong> dispose de trois pédales: forte,sostenuto (prolongement) et douce.Ces pédales permettent de rendre votrejeu plus expressif et plus réaliste.Pédale de soutienPédale douce (‘soft’) [gauche]Appuyez sur cette pédale pour adoucir le son. Vous pouvezcontrôler le degré d’atténuation du son en enfonçantplus ou moins la pédale douce (effet “mi-pédale”).Pédale de soutien (‘sostenuto’) [centre]L’effet de soutien s’applique uniquement aux notes dont lestouches sont déjà enfoncées au moment où vous appuyezsur la pédale; seules ces notes continuent de résonner tantque la pédale de soutien est enfoncée. L’effet de soutien nes’applique pas aux notes que vous jouez après l’enfoncementde la pédale de soutien.Pédale de résonance (‘damper’) [droit]Appuyer sur cette pédale permet de soutenir le son et deproduire une chute du son pleine de résonance.Vous pouvez aussi appliquer la résonance de la pédaleforte au son de piano classique et de piano à queue (banque1 et banque 2 de Piano1). La fonction mi-pédale permet enoutre d’appliquer un effet de résonance graduel dosé via laforce d’enfoncement de la pédale.26Pédale doucePédale derésonanceLe réglage s’affiche à l’écran; “3” produit une réverbérationprononcée et “1” un effet léger.Quand vous choisissez un autre timbre ou mettez le <strong>LP</strong>-<strong>380</strong>hors tension, le réglage actif/coupé ainsi que le niveau de ceteffet retrouvent leurs valeurs d'usine (réglages par défaut).ChorusL’effet de Chorus module le signal et produit un son richeet ample. Par défaut, le réglage actif/coupé ainsi que le niveaude cet effet sont sauvegardés pour chaque timbre.Chaque pression sur le bouton CHORUS active (le boutons’allume) et coupe (le bouton s’éteint) tour à tour l’effetde Chorus.Pour changer le niveau de l’effet, maintenez enfoncéle bouton CHORUS et appuyez sur le bouton UP ouDOWN à côté de l’écran.Le réglage s’affiche à l’écran; “3” produit un effet de chorusprononcé et “1” un effet léger.Quand vous choisissez un autre timbre ou mettez le <strong>LP</strong>-<strong>380</strong>hors tension, le réglage actif/coupé ainsi que le niveau de ceteffet retrouvent leurs valeurs d’usine (réglages par défaut).
Le métronomeLe <strong>LP</strong>-<strong>380</strong> est doté d’un métronome qui vous permet d’activerun son de clochette quand vous vous entraînez.Lancer/arrêter le métronomeAppuyez sur le bouton METRONOME.Le bouton s’allume et le métronome démarre.Appuyez de nouveau sur le bouton METRONOME pourarrêter le métronome. Le bouton s’éteint.Régler le tempoQuand le tempo est affiché à l’écran (leréglage par défaut est de 120), et celaque le métronome soit activé ou non, vous pouvez régler sontempo avec les boutons UP et DOWN à côté de l’écran. Plagede réglage du métronome: q = 40 ~ 240.Pour retrouver le réglage de tempo par défaut, appuyezsimultanément sur les boutons UP et DOWN.Sélectionner la mesure1. Maintenez enfoncé le bouton METRONOME jusqu’àce que le mode de réglage du métronome soit actif.Le bouton METRONOME clignote, le bouton detimbres PIANO1 s’allume et le type de mesure (04) apparaîtsur l’afficheur.La mesure s’affiche quand vous activez le mode de réglagedu métronome.2. Pour choisir la mesure après avoir modifié d'autresparamètres du métronome, appuyez sur le boutonPIANO1.3. Choisissez le type de mesure voulu avec les boutonsUP et DOWN à côté de l’écran.Vous disposez des mesures suivantes: 02 (2/4), 03 (3/4),04 (4/4) et 06 (6/4). Par défaut, le réglage 04 est actif.Pour retrouver le réglage de mesure par défaut, appuyezsimultanément sur les boutons UP et DOWN.24. Appuyez sur le bouton METRONOME pour quitterle mode de réglage du métronome.Modification du volume1. Maintenez enfoncé le bouton METRONOME jusqu’àce que le mode de réglage du métronome soit actif.2. Appuyez sur le bouton PIANO2 pour afficher le volumeà l’écran.3. Choisissez le réglage de volume avec les boutons UPet DOWN à côté de l’écran.La plage de volume s’étend de 1 à 13; le réglage de volumepar défaut est de 10.Pour retrouver le réglage de mesure par défaut, appuyezsimultanément sur les boutons UP et DOWN.331,4Modification de l’accent1. Maintenez enfoncé le bouton METRONOME jusqu’àce que le mode de réglage du métronome soit actif.2. Appuyez sur le bouton E.PIANO1 pour afficher le réglagedu son de l’accent à l’écran.3. Choisissez le son voulu pour l’accent avec les boutonsUP et DOWN à côté de l’écran.Vous disposez des réglages suivants: “oFF” (aucun accent),“on1” (battement initial accentué) et “on2” (son declochette pour le battement initial accentué); par défaut,le réglage “oFF” est actif.24. Appuyez sur le bouton METRONOME pour quitterle mode de réglage du métronome.Régler le tempo (mode de réglage du métronome)1. Maintenez enfoncé le bouton METRONOME jusqu’àce que le mode de réglage du métronome soit actif.2. Appuyez sur le bouton E.PIANO2; le réglage de tempos’affiche à l’écran.3. Choisissez le réglage de tempo avec les boutons UPet DOWN à côté de l’écran.La plage de tempo s’étend de q = 40 ~ 240; le réglage detempo par défaut est de 120.Pour retrouver le réglage de mesure par défaut, appuyezsimultanément sur les boutons UP et DOWN.24. Appuyez sur le bouton METRONOME pour quitterle mode de réglage du métronome.Modification du son du métronome1. Maintenez enfoncé le bouton METRONOME jusqu’àce que le mode de réglage du métronome soit actif.2. Appuyez sur le bouton HARPSI/CLAV pour afficherle réglage de son du métronome à l’écran.3. Choisissez le son voulu avec les boutons UP etDOWN à côté de l’écran.Vous disposez des réglages 1 (son acoustique) et 2 (sonélectronique); le son acoustique (réglage 1) est activépar défaut.24. Appuyez sur le bouton METRONOME pour quitterle mode de réglage du métronome.3333331,41,41,42331,44. Appuyez sur le bouton METRONOME pour quitterle mode de réglage du métronome.27
Fonctionnalités supplémentairesRéglage du toucherVous pouvez régler la sensibilité du clavier ou réponse autoucher.Pour changer la sensibilité du clavier, maintenez enfoncéle bouton TOUCH et appuyez sur le bouton UP ou DOWNà côté de l’écran.AffichageRéglage du toucherFortPuissancesonoreCalmeCalmeLégerNormalForce du jeuLourdFort1 Léger. même un jeu léger peut produire desson forts.2 Normal. le toucher d’un piano typique.3 Lourd. vous devez jouer fortement pourproduire des sons puissants.Lors de la mise sous tension de l’instrument, le toucherest réglé à Normal.Ces réglages s’appliquent à tous les timbres.Fonction TransposeParfois, la clé d’écriture d’un morceau est particulièrementdifficile (par ex. beaucoup de bémols) ou vous désirez modifierla hauteur pour insérer un autre instrument ou voix.Dans ce cas, vous pouvez transposer (décaler, modifierla hauteur) de manière à faciliter le jeu ou jouer avec unehauteur différente. C’est la fonction “Transpose”.Par exemple, si vous transposez les notes d’un demi-ton versl’aiguë, lorsque vous jouerez les notes illustrées à gauche,elles seront reproduites à la hauteur représentée à droite.Lors de la mise sous tension de l’instrument, la transpositionest réglée à ses valeurs d’usine.Maintenez enfoncé le bouton TRANSPOSE et enfoncez latouche du clavier (Fa # 6 ~ Fa7) correspondant à la transpositionvoulue. Si vous enfoncez une touche autre que Do7, lebouton TRANSPOSE s’allume pour indiquer que le clavierest transposé.La plage de notes entière du clavier est transposée de l’intervalleentre Do7 et la touche enfoncée.Pour retrouver la hauteur normale du clavier, maintenez lebouton TRANSPOSE enfoncé et appuyez sur la touche Do7.Le bouton TRANSPOSE s’éteint et la fonction de transpositionest désactivée.ToucheFa # 6 ~ Si6Do7Do # 7 ~ Fa7Mode de fonctionsEffet6 ~ 1 demi-tons plus gravesAccordage standard1 ~ 5 demi-tons plus aigusLe mode de fonctions permet de régler le tempérament etd’autres paramètres de hauteur.Travail en mode de fonctions1. Appuyez sur le bouton FUNCTION.Les boutons FUNCTION et PIANO1 s’allument.2. Appuyez sur le bouton de timbres correspondant à lafonction voulue.Le réglage actif s’affiche à l’écran.3. Réglez le paramètre comme bon vous semble.4. Après avoir effectué les réglages voulus, appuyez surle bouton FUNCTION pour retourner en mode dejeu.Le bouton FUNCTION s’éteint.1,4Quand vous mettez le <strong>LP</strong>-<strong>380</strong> hors tension, toutes sesfonctions, à l’exception de la fonction de mise hors tensionautomatique, retrouvent leurs réglages par défaut.Ces réglages s’appliquent à tous les timbres.Accordage finPour adapter la hauteur de votre <strong>LP</strong>-<strong>380</strong> à celle d’un autreinstrument, vous pouvez la régler par pas de 0.5 Hz, dansla plage La4 = 427.5 ~ 452.5 Hz.27.5 ~ 52.5 apparaît sur l’afficheur.La = 440 Hz correspond à l’accordage standard et 40.0 auréglage par défaut.1. Quand vous activez le mode de fonctions, le boutonde timbres PIANO1 s’allume.Quand le mode de fonctions est activé, l’écran affiche leréglage de hauteur.2. Pour régler la hauteur après avoir modifié d’autresparamètres du mode de fonctions, appuyez sur lebouton PIANO1.3. Choisissez le réglage de hauteur avec les boutons UPet DOWN à côté de l’écran.Enfoncez simultanément les boutons UP et DOWNpour retrouver le réglage par défaut (440 Hz).1223333Fa 6Do4 Do7 Fa728
Sélectionner un tempéramentVous pouvez choisir parmi neuf tempéraments, comprenantla gamme tempérée, les tempéraments purs (majeuret mineur), les tempéraments classiques (Kirnberger etWerckmeister) ainsi que des tempéraments utilisés dans lamusique traditionnelle d’Inde et du Moyen-Orient.AffichageTempérament00 Gamme tempérée (réglage par défaut): Cettegamme produit un intervalle égal entre tous lesdemi-tons; c’est le tempérament le plus courant.01 Tempérament pur [majeur]: Les accords majeursdans la tonalité sélectionnée sont parfaitementaccordés.02 Tempérament pur [mineur]: Les accords mineursdans la tonalité sélectionnée sont parfaitementaccordés.03 Gamme arabe: Cette gamme comporte les intervallesde quart de ton typiques de la musiquearabe.04 Gamme Pythagoricienne: Cette gamme de laGrèce Antique produit d’excellents résultatsavec des mélodies. Elle comporte des intervallesde quinte juste; toutefois, d’autres intervalles –tout particulièrement la tierce majeure – sontfaux.05 Gamme Werckmeister: La gamme WerckmeisterIII a été créée à la fin de la période baroquepour permettre une transposition relativementlibre.06 Gamme Kirnberger: La gamme Kirnberger IIIsert principalement à l’accordage des clavecins.07 Gamme Slendro: Cette gamme de gamelan indonésiencomporte cinq notes par octave.08 Gamme de Pelog: Cette gamme de gamelan indonésiencomporte sept notes par octave.1. Activez le mode de fonctions puis appuyez sur lebouton PIANO2.Le bouton de timbres PIANO2 s’allume et le réglage detempérament (00) apparaît sur l’affichage.2. Choisissez le réglage de hauteur avec les boutons UPet DOWN à côté de l’écran.Strechted Tuning (cordes “pincées”).Afin de reproduire la résonance la plus naturelle, lestimbres PIANO 1 et PIANO 2 utilisent la technique des“cordes pincées” : les notes graves seront légèrement plusaltérées vers la grave que dans le tempérament égal, tandisque celles plus aiguës seront légèrement plus altérées versl’aiguë. C’est ainsi que les accordeurs professionnels règlentnormalement les pianos acoustiques.Réglages du mode Partner1. Activez le mode de fonctions et appuyez sur le boutonE.PIANO1.Le bouton de timbres E.PIANO1 s’allume et le réglage“on/oFF” apparaît sur l’affichage.1222. Chaque pression du bouton UP ou DOWN à côté del’écran active (on) et coupe (oFF) alternativement lemode Partner.Quand le mode Partner est activé, le timbre PIANO1 estutilisé pour les côtés gauche et droit du clavier, et le boutonPIANO1 est allumé.Un point apparaît simultanément dans le coininférieur droit de l’affichage (témoin de modePartner).Le côté droit du clavier (de Mi4 à Do8) est transposé dedeux octaves vers le bas (Mi2 à Do6). Le côté gauche duclavier (de La0 à Mib 4) est transposé de deux octaves versle haut (La2 à Mib 6).Le point de partage du clavier et la plage de hauteurne peuvent pas être modifiés.En mode Partner, les réglages de transposition sontignorés. En outre, les messages MIDI de note (“NoteOn” et “Note Off”) ne sont pas transmis.Choix du timbre pour la moitié gaucheQuittez le mode de fonctions et appuyez sur le boutondu timbre avec lequel vous voulez jouer du côté gauchedu clavier. Le timbre PIANO1 reste assigné à la moitiédroite du clavier.Dans ce cas, seul le bouton de timbres du côté gauchedu clavier s’allume.Choix des timbres pour les moitiés gauche et droiteQuittez le mode de fonctions et appuyez simultanémentsur les deux boutons des timbres visés. Les deuxboutons de timbres enfoncés s’allument.Timbre de la moitié gauche du clavierTimbre de la moitié droite du clavierLe bouton de timbres le plus à gauche ou le plus hautque vous avez enfoncé correspond à la moitié gauchedu clavier, et l’autre (plus à droite ou plus bas) à sa moitiédroite.Si, par exemple, vous choisissez les timbres E.PIANO1et ORGAN1, E.PIANO1 est utilisé pour la moitiégauche du clavier et ORGAN1 pour sa moitié droite.Pour utiliser des timbres d’autres banques, choisissezd’abord les banques en mode Single (un seul timbre)pour les boutons de timbres visés.Lorsque le mode Partner est désactivé et que vous quittezle mode de fonctions quand des timbres différentssont affectés aux côtés gauche et droit du clavier, lestimbres dont les boutons sont allumés sont sélectionnés.Utilisation du même timbre (autre que PIANO1) pourles deux moitiés du clavierQuittez le mode de fonctions et appuyez simultanémentsur deux boutons de timbres, en veillant à ceque celui le plus à droite est le bouton du timbre visé.Appuyez ensuite à nouveau sur le bouton de timbresle plus à droite enfoncé précédemment. Exemple: sivous avez enfoncé les boutons de timbres PIANO2 etORGAN1, appuyez à nouveau sur le bouton ORGAN1pour utiliser le timbre ORGAN1 sur les deux moitiésdu clavier.12229
Changer le volume des moitiés gauche et droiteUne fois que vous avez assigné des timbres différentsaux moitiés droite et gauche du clavier, vous pouvezrégler le volume de chaque timbre. Voir “Régler le volumedes timbres superposés.”Utilisation de pédales DamperLa pédale forte et la pédale douce peuvent être utiliséescomme pédales fortes individuelles respectivementpour les côtés droit et gauche du clavier.Pédale forte (Damper):Disponible pour la personne jouant sur la moitiédroite du clavier; produit un effet de pédale forte.Pédale de soutien (Sostenuto): Pas disponiblePédale douce (Soft):Disponible pour la personne jouant sur la moitiégauche du clavier; produit un effet de pédale forte.Régler le volume des timbres superposésVous pouvez régler le volume des timbres utilisés en modeLayer (ou en mode Partner). Plage de réglage: 1 – 9... 9 – 9...9– 1; le nombre de gauche correspondant à la couche 1 (ouà la moitié gauche du clavier) et le nombre de droite à lacouche 2 (ou à la moitié droite du clavier).“9 – 9” est le réglage par défaut de ce paramètre.1. Activez le mode de fonctions et appuyez sur le boutonE.PIANO2.Le bouton de timbres PIANO2 s’allume et le réglage debalance (9 – 9) s’affiche à l’écran.2. Réglez l’équilibre de volume des timbres avec lesboutons UP et DOWN à côté de l’écran.Pour retrouver le réglage par défaut, appuyez simultanémentsur les boutons UP et DOWN.En mode monotimbre (Single), l’écran affiche “– – –” etce réglage n’est pas disponible.Régler l’octave des timbres superposésEn mode Layer, vous pouvez définir l’octave pour chaquetimbre.La plage de réglage est de ±1 octave pour chaque timbre etl’écran affiche “–01”, “00” et “01”. “00” correspond au réglagepar défaut.1. Activez le mode de fonctions puis appuyez sur lebouton HARPSI/CLAV.Le bouton HARPSI/CLAV s’allume et l’écran affiche lacouche (L1) dont vous pouvez régler l’octave.2. Choisissez la couche voulue avec les boutons UP etDOWN à côté de l’écran.“L1” désigne le timbre de la couche 1 et “L2” le timbrede la couche 2.3. Appuyez sur le bouton BANK.Le réglage d’octave (00) s’affiche à l’écran.4. Choisissez l’octave voulu avec les boutons UP etDOWN à côté de l’écran.Pour retrouver le réglage par défaut, appuyez simultanémentsur les boutons UP et DOWN.122Pour choisir l’octave du timbre de l’autre couche, appuyezsur le bouton HARPSI/CLAV afin de sélectionner cettecouche.312,42,4En mode monotimbre (Single), l’écran affiche “– – –” etce réglage n’est pas disponible.Régler la fonction de pédale forte des timbressuperposésEn mode Layer, vous pouvez régler le paramètre de pédaleforte (Damper) pour chaque timbre.Vous pouvez effectuer ce réglage pour le timbre de lacouche 1 uniquement (o – –), pour le timbre de la couche 2uniquement (– – o) et pour les deux timbres (o – o).“o – o” est le réglage par défaut de ce paramètre.1. Activez le mode de fonctions puis appuyez sur lebouton VIBES/GUITAR.Le bouton de timbres VIBES/GUITAR s’allume et le réglagede pédale forte (o – o) s’affiche à l’écran2. Choisissez le réglage de pédale forte voulu avec lesboutons UP et DOWN à côté de l’écran.1En mode monotimbre (Single), l’écran affiche “– – –” etce réglage n’est pas disponible.Régler la fonction de coupure automatique d’alimentationCette fonction coupe automatiquement l’alimentation del’instrument quand vous n’enfoncez aucune touche de sonclavier et n’utilisez aucune de ses fonctions pendant 30 minutes.Vous pouvez désactiver cette fonction en choisissantle réglage “oFF”. Cette fonction est active par défaut. Leréglage de cette fonction est sauvegardé et conservé mêmeaprès la mise hors tension du <strong>LP</strong>-<strong>380</strong>.1. Activez le mode de fonctions puis appuyez sur lebouton ORGAN1.Le bouton de timbres ORGAN1 s’allume et le réglage(on) s’affiche à l’écran.2. Choisissez le réglage voulu (on/off) avec les boutonsUP et DOWN à côté de l’écran.1222230
MIDILe MIDI, qu’est-ce que c’est ?MIDI est l’abréviation de Musical Instrument Digital Interface(interface numérique pour instruments musicaux).C’est un standard international conçu pour connecter ettransférer des données entre instruments musicaux électroniques,ordinateurs et dispositifs divers.Que peut-on faire avec le MIDI?Le MIDI vous permet d’utiliser votre <strong>LP</strong>-<strong>380</strong> pour piloterd’autres instruments ou d’utiliser d’autres instrumentspour piloter votre <strong>LP</strong>-<strong>380</strong>, ainsi que d’utiliser un séquenceurpour composer des morceaux musicaux complexes.Lorsque vous jouez sur le clavier de votre <strong>LP</strong>-<strong>380</strong>, ou vousappuyez sur la pédale, ou vous sélectionnez un timbre, lesnotes, l’activation de la pédale et le changement de timbressont transmis à l’instrument connecté ou enregistré par leséquenceur.ConnexionsDes câbles MIDI disponibles dans le commerce sont utiliséspour transférer les données MIDI. Raccordez ces câblesdes prises MIDI du <strong>LP</strong>-<strong>380</strong> aux prises MIDI du périphériqueMIDI avec lequel vous souhaitez échanger des données.Il y a deux types de prises MIDI.Prise MIDI INElle reçoit les messages MIDI.La prise MIDI IN vous permet de jouer les sons du <strong>LP</strong>-<strong>380</strong>sur un périphérique MIDI (e.g., un clavier ou séquenceurMIDI). Utilisez un câble MIDI pour r elier la prise MIDIIN du <strong>LP</strong>-<strong>380</strong> à la prise MIDI OUT de votre périphériqueMIDI.Prise MIDI OUTElle transmet les messages MIDI.La prise MIDI OUT vous permet de contrôler La priseMIDI OUT d’un périphérique MIDI en utilisant les messagesMIDI transmis par le <strong>LP</strong>-<strong>380</strong>. Utilisez un câble MIDIpour relier la prise MIDI OUT du <strong>LP</strong>-<strong>380</strong> à la prise MIDIIN de votre périphérique MIDI.Mode MIDIÀ la mise sous tension du <strong>LP</strong>-<strong>380</strong>, ses paramètres MIDIsont réglés comme suit: transmission via le canal 1, réceptionsur tous les canaux (1 ~ 16), fonction Local On et fonctionOmni Off.Vous pouvez modifier ces réglages en mode MIDI.Réglage des paramètres en mode MIDI1. Maintenez le bouton FUNCTION enfoncé quand lemode de fonctions n’est pas actif.Le bouton PIANO 1 s’allume et le réglage de canalMIDI (C01) apparaît sur l’affichage. Le bouton FUNC-TION clignote.4. Après avoir effectué les réglages voulus, appuyez surle bouton FUNCTION pour retourner en mode dejeu.Le bouton FUNCTION s’éteint.1,4Quand vous mettez le <strong>LP</strong>-<strong>380</strong> hors tension, tous les paramètresretrouvent leur valeur par défaut.Changer de canaux MIDILes messages peuvent être transmis et reçus via les canauxMIDI 1 à 16 (C01 ~ C16).À la mise sous tension du <strong>LP</strong>-<strong>380</strong>, son canal 1 (C01) est automatiquementchoisi pour la transmission.• Quand vous activez le mode MIDI, le bouton detimbres PIANO1 s’allume.Quand le mode MIDI est activé, l’écran affiche le réglagede canaux MIDI.Pour régler le canal MIDI après avoir modifié d’autresparamètres du mode MIDI, appuyez sur le boutonPIANO1.En mode de superposition, le choix du canal de transmissiondétermine le canal de la couche (et donc du son) 1. Lecanal de transmission du son 2 est automatiquement réglésur le canal suivant. Voici un exemple: si vous choisissezle canal MIDI 7 pour le son de la couche 1, le canal MIDI 8est automatiquement assigné au son de la couche 2. Si vouschoisissez le canal MIDI 16 pour le son de la couche 1, lecanal 1 est assigné au son de la couche 2.Paramètre Local (On/Off)Quand le paramètre Local est sur “On” et que vous jouezsur le clavier du <strong>LP</strong>-<strong>380</strong>, l’instrument produit les sons jouéset transmet des messages MIDI. Quand le paramètre Localest sur “Off”, jouer sur le clavier.du <strong>LP</strong>-<strong>380</strong> ne produit pas de son; en revanche, l’instrumenttransmet des messages MIDI. En principe, le paramètreLocal est réglé sur “On” (réglage par défaut: On).Vous pouvez régler le paramètre Local sur “Off” quandvous voulez utiliser le <strong>LP</strong>-<strong>380</strong> comme clavier maître, parexemple, afin de jouer les sons d’un instrument MIDIconnecté (clavier, module de sons, etc.). Dans ce cas, le <strong>LP</strong>-<strong>380</strong> ne produit pas de son; c’est l’autre instrument MIDIqui produit les sons que vous jouez.Choisissez aussi le réglage “oFF” du paramètre Localquand vous utilisez le <strong>LP</strong>-<strong>380</strong> comme module de sons,cela afin d’éviter la production de doubles notes. Exemple:quand le <strong>LP</strong>-<strong>380</strong> est relié à un séquenceur dont vous avezactivé la fonction Echo Back (renvoyant au <strong>LP</strong>-<strong>380</strong> les messagesreçus par le séquenceur).• Activez le mode MIDI puis appuyez sur le boutonPIANO2.Le bouton de timbres PIANO2 s’allume et le réglageLocal (on) s’affiche à l’écran.2332. Appuyez sur le bouton de timbres correspondant auparamètre voulu.Le réglage actif s’affiche à l’écran.3. Réglez le paramètre comme bon vous semble.31
Activer/désactiver le filtre de transmission/réceptiondes changements de programmeCe type de message permet au <strong>LP</strong>-<strong>380</strong> de changer de programmesur un dispositif MIDI connecté. Il est aussi possiblede changer de Program sur le <strong>LP</strong>-<strong>380</strong> en lui envoyantun changement de programme depuis le dispositif MIDIconnecté.Les numéros de changement de programme et les timbresassociés sont repris dans le“Tableau des timbres et des numérosde changement de programme associés” ci-dessous.Si vous comptez transmettre/recevoir des changementsde programme, désactivez cette fonction (“oFF”: réglagepar défaut). Si vous ne voulez pas transmettre/recevoir cesmessages, activez cette fonction (on).• Activez le mode MIDI puis appuyez sur le boutonE.PIANO1.Le bouton de timbres E.PIANO1 s’allume et le réglage(oFF) s’affiche à l’écran.Transmettre des changements de programmeQuand vous sélectionnez un timbre avec les boutons detimbres et le bouton BANK du <strong>LP</strong>-<strong>380</strong>, le numéro de changementde programme correspondant est transmis via MIDI.Recevoir des changements de programmeQuand le <strong>LP</strong>-<strong>380</strong> reçoit un numéro de changement de programmeMIDI, il active le timbre correspondant.Si le numéro de changement de programme reçu estincompatible, le <strong>LP</strong>-<strong>380</strong> ne change pas de timbre.Tableau des timbres et des numéros de changement deprogramme associésCC0: le paramètre Bank Select (sélection de banque, MSB)est réglé sur 121 pour tous les timbres.Bouton Banque CC32 PC TimbrePIANO1 1 1 0 Piano classique2 0 0 Piano à queue3 0 1 Piano jazzPIANO2 1 2 0 Piano de concert2 0 3 Piano Honky-Tonk3 0 2 Piano à queue électriqueE.PIANO1 1 0 4 Piano électrique de stade2 1 4 Piano électrique brillant3 3 4 Piano électrique trémoloE.PIANO2 1 0 5 Piano électrique numérique 12 2 4 Piano électrique des années 603 1 5 Piano électrique numérique 2HARPSI/CLAV 1 0 6 Clavecin2 0 7 Clav.3 1 7 Synthé Clav.VIBES/1 0 11 VibraphoneGUITAR 2 0 12 Marimba3 0 24 Guitare acoustiqueORGAN1 1 0 16 Orgue jazz 12 1 16 Orgue jazz 23 0 17 Orgue jazz 3ORGAN2 1 0 19 Grandes orgues 12 1 19 Grandes orgues 23 2 19 Orgue positifSTRINGS 1 0 48 Cordes2 0 50 Cordes de cinéma3 1 50 Cordes analogiquesCHOIR 1 0 52 Chœur aah2 1 52 Voix ooh3 2 52 Chœur classiqueActiver/désactiver le filtre de transmission/réceptiondes changements de commandeVous pouvez transmettre les messages générés quand, parexemple, vous actionnez la pédale Damper du <strong>LP</strong>-<strong>380</strong> àun dispositif MIDI externe connecté afin de le piloter. Cesmessages peuvent en outre être envoyés au <strong>LP</strong>-<strong>380</strong> par ledispositif MIDI externe pour piloter le <strong>LP</strong>-<strong>380</strong>.Si vous comptez transmettre/recevoir des changementsde commande, désactivez cette fonction (“oFF”: réglagepar défaut). Si vous ne voulez pas transmettre/recevoir cesmessages, activez cette fonction (on).• Activez le mode MIDI puis appuyez sur le boutonE.PIANO2.Le bouton de timbres E.PIANO2 s’allume et le réglage(oFF) s’affiche à l’écran.Utiliser le <strong>LP</strong>-<strong>380</strong> comme module de sons multitimbreLe <strong>LP</strong>-<strong>380</strong> peut faire office de module de sons multitimbreà 16 parties; dans ce cas, le dispositif MIDI externe connectépilote le générateur de sons interne du <strong>LP</strong>-<strong>380</strong>.1. Reliez la prise MIDI IN du <strong>LP</strong>-<strong>380</strong> à la prise MIDIOUT du séquenceur ou de tout autre dispositif MIDIavec un câble MIDI.2. Transmettez les données MIDI depuis le séquenceurconnecté (ou tout autre dispositif MIDI).Pour en savoir plus sur la transmission des messagesMIDI depuis le séquenceur ou tout autre dispositifMIDI connecté, voir la notice de l’appareil en question.3. Quand le <strong>LP</strong>-<strong>380</strong> reçoit un message de changement deprogramme ainsi que des données de jeu, il joue letimbre correspondant à ce numéro de programme.Si vous ne comptez pas utiliser le <strong>LP</strong>-<strong>380</strong> comme modulede sons multitimbre, désactivez (oFF) cette fonction.• Activez le mode MIDI puis appuyez sur le boutonHARPSI/CLAV.Le bouton de timbres HARPSI/CLAV s’allume et le réglage(par défaut: on) s’affiche à l’écran.32
AppendiceProblèmes et solutionsSi lors de l’utilisation vous détectez les problèmes décrits,examinez l’instrument pour comprendre le problème et essayezde le résoudre en recourant aux conseils proposés. Sil’instrument continue à ne pas fonctionner correctement,adressez-vous à votre revendeur de confiance.L’instrument ne s’active pas lors de la mise sous tension.• Vérifiez que l’adaptateur AC est correctement connectéau piano et à la prise secteur.L’instrument n’émet aucun son.• Le cordon du boîtier des haut-parleurs du pied est-ilcorrectement connecté à la prise Speaker du <strong>LP</strong>-<strong>380</strong>?• Contrôlez que le réglage du volume n’est pas à MIN.Dans cette éventualité, réglez-le à un niveau approprié.• Contrôlez que la fonction MIDI Local n’est pas réglée àOFF, sinon réglez-la à ON (ou mettre hors tension et denouveau sous tension l’instrument).• Vérifiez qu’aucun jack n’est inséré dans l’une desbornes PHONES car ceci coupe les haut-parleurs intégrés.Si c’est le cas, enlevez le jack.Les notes sont coupées• Le <strong>LP</strong>-<strong>380</strong> est conçu pour donner la priorité aux notesjouées le plus récemment. Voir “Au sujet de la polyphoniemaximum.”La hauteur tonale ou tonalité du piano semble incorrectedans certaines zones du clavier• Les sonorités de piano du <strong>LP</strong>-<strong>380</strong> reproduisent aussifidèlement que possible celles d’un piano réel. Cela signifieque dans certaines régions du clavier, il est possibleque le son semble plus fort, ou que la tonalité ouhauteur tonale semble incorrecte. C’est un phénomènenormal.Le dispositif MIDI connecté ne répond pas aux messagesMIDI transmis• Vérifiez que tous les câbles MIDI sont correctementconnectés. Assurez-vous que le <strong>LP</strong>-<strong>380</strong> reçoit les messagesMIDI sur le même canal que celui utilisé par ledispositif externe.Au sujet de la polyphonie maximumSi le nombre de notes jouées simultanément dépasse lapolyphonie maximum, il se pourrait que certaines notesne soient pas jouées par l’instrument. En effet, le <strong>LP</strong>-<strong>380</strong>est doté d’un mécanisme coupant une note produite pourdonner la priorité aux notes suivantes (et donc aux touchesenfoncées ultérieurement). Certains timbres du <strong>LP</strong>-<strong>380</strong>,bien qu’ils correspondent à un son unique, sont en fait généréspar deux oscillateurs ou plus (une note d’un circuitde génération de sons). Pour les timbres utilisant un seuloscillateur, comme ceux des banques 1 et 2 sous VIBES/GUITAR, la polyphonie maximum est de 120 notes.Les timbres utilisant deux oscillateurs, comme ceux desbanques 1 et 2 sous PIANO2 et des banques 1 et 3 sousE.PIANO2, ont une polyphonie maximum de 60 notes.120 ÷ nombre d’oscillateurs de son = polyphonie maximumTenez donc compte de la polyphonie maximum et choisissezles timbres avec soin quand vous comptez les superposeren mode Layer ou utiliser la pédale Damper.SpécificationsClavierRéglage du toucheHauteurTempéramentsGénération de sonsPolyphonieTimbresEffetsRH3 (“Real Weighted Hammer 3”) Clavier:88 notes (La0 ~ Do8)léger, normal, lourdTransposition, accordage fin9 typesSystème PCM stéréo120 notes (maximum)30 timbres (10 x 3 banques)Brillance, Réverbération, Chorus(chacun avec 3 niveaux)Démonstrations 30 (morceaux de démonstration detimbres x 10, morceaux de piano x 20)MétronomePédaleRéglages du tempo, de la mesure, de l’accentdu son et du volume Commandesrésonance*, soutien, douce*(*prenant en charge la fonction mi-pédale)ConnexionsLINE OUT , MIDI (IN, OUT), Casque × 2,PEDAL, SPEAKERCommandesInterrupteur d'alimentation, VOLUME, PIANO SONG,TRANSPOSE, FUNCTION, TOUCH, BRILLIANCE, RE-VERB, CHORUS, BANK, boutons de timbres × 10, UP,DOWN, METRONOMEAmplification 22 W × 2Haut-parleurs 10 cm x 2Alimentation DC 19 V,Adaptateur secteur (inclus)Consommation15 WDimensions (L x P x H) 1355 × 351 × 772 mm1355 × 351 × 936 mm(quand le couvercle du clavier est ouvert)Poids37 kg (y compris le pied)Accessoires inclus Adaptateur secteur ( ),Câble d’alimentation, Pied- Les caractéristiques et l’aspect du produit sont susceptiblesd’être modifiés sans avis préalable en vue d’uneamélioration.33
Montage du piedAvertissement● Il faut au moins une autre personne pourvous aider à monter le pied.2. Veillez à ce que tous les éléments suivants soient disponibles.Panneau latéral (gauche)Boîtier des haut-parleursPanneau latéral (droit)Prudence durant le montageObservez les points suivants pour veiller à la sécurité durantle montage.• Vérifiez que vous tenez toujours la pièce indiquée dansle bon sens et effectuez le montage selon l’ordre indiqué.Cordon du pédalierMontant du pédalierPédalierCale (gauche)Cale (droite)Autres précautionsVérifiez les points suivants après le montage.• Vis desserréesLes vis peuvent se desserrer avec le temps.Vérifiez régulièrement si des vis se sont dévissées. Sivous avez l’impression que le pied vibre excessivement,il est possible que des vis soient desserrées. Dans cecas, resserrez-les.• Quand vous déplacez le piano numériqueSi vous devez déplacer le piano monté sur son pied, débranchezet retirez le cordon de l’adaptateur secteur dupied, refermez le couvercle du clavier et soulevez lentementl’instrument (faites-vous aider d’une personne);déplacez-le en le maintenant aussi droit que possible.• DémontagePour démonter le pied, inversez les opérations de montage.Après le démontage, conservez les vis et autrespièces dans un endroit sûr pour ne pas les égarer.Séparez toujours le <strong>LP</strong>-<strong>380</strong> de son pied avant dedémonter ce dernier.Vis (M6) x 6 pcs. Vis (M4) x 8 pcs. Capuchons x 6 pcs.Rivet à pression x 1 pc.Support de cordon x 1 pc.3. Fixez le <strong>LP</strong>-<strong>380</strong> et le boîtier des haut-parleurs auxpanneaux latéraux droit et gauche à l’aide de huit vis(M6).Placez le boîtier des haut-parleurs de sorte que le cordondes haut-parleurs soit du côté gauche. Les hautparleurs(la face recouverte de feutre) sont alors tournésvers vous.Serrez*d’abord temporairement les vis sur le panneaulatéral droit, puis serrez* temporairement celles sur lepanneau latéral gauche.* Un “serrage provisoire” signifie que vous serrez lesvis en veillant à garder un jeu d’environ 2 mm.Vis (M6)<strong>LP</strong>-<strong>380</strong>Procédure de montageIl vous faut un tournevis cruciforme (+).1. Placez le cellophane de protection fourni avec le <strong>LP</strong>-<strong>380</strong> à plat sur le sol et posez le <strong>LP</strong>-<strong>380</strong> sur le cellophaneen orientant sa face arrière vers le sol.Veillez en outre à poser des couvertures ou des magazinesde sorte à pouvoir aisément glisser les mains sousle <strong>LP</strong>-<strong>380</strong> pour le montage et la mise en place du pied.Veillez à ce que le couvercle du clavier du <strong>LP</strong>-<strong>380</strong>ne risque pas de s’ouvrir pendant le montage.<strong>LP</strong>-<strong>380</strong>la face recouverte de feutreBoîtier des haut-parleursOnglet de positionnementPanneau latéral (gauche)Vis(M6)Panneau latéral (droit)Veillez à ne pas vous coincer les doigts.4. Branchez le cordon du pédalier au connecteur sur le dos dupédalier, en veillant à orienter correctement le connecteur,puis acheminez le cordon dans la fente du pédalier.Pour brancher et débrancher le cordon du pédalier,glissez son onglet de blocage vers le bas.Cellophane de protectionOnglet deblocage34
5. Insérez le pédalier dans son montant et fixez le pédalieren enfonçant un rivet à pression dans l’orifice (audessusde la découpe) au dos du montant de pédalier.Après avoir inséré le cordon en place, levez le montant dupédalier pour vérifier que les pédales ne tombent pas.Le rivet à pression empêche le pédalier de tomber. Il nepeut donc pas être entièrement fixé au montant de pédalier.10. Vérifiez à nouveau que le pied est de niveau, qu’il necomporte pas de jeu et que toutes les vis sont correctementserrées.11. Couvrez les têtes des vis d’un capuchon sur les panneauxlatéraux gauche et droit.Avant du montantde pédalierCapuchonsArrièreAvantEnfoncerArrière du montantde pédalierRivet à pression6. Serrez temporairement l’ensemble montant de pédalieret pédalier aux panneaux latéraux du pied à l’aidede quatre vis (M4).12. Branchez le cordon du pédalier et le cordon des hautparleursaux prises sur le panneau des connecteursen face arrière du <strong>LP</strong>-<strong>380</strong>.Veillez à orienter correctement la fiche de chaque cordonlors du branchement.Pour débrancher le cordon du pédalier ou le cordon deshaut-parleurs, glissez son onglet de blocage vers le bas.Vis(M4)Onglet de blocageVis(M4)Cordon des haut-parleursCordon du pédalierSupportde cordon7. Relevez doucement l’ensemble pied et instrument envous faisant aider par une personne.8. Veillez à fixer une cale au dos de chaque panneau latéral.Et le cale fixé à la gauche du support de cordonà ce moment.Veillez à ce qu’après le montage, les cales soient aumême niveau de chaque côté de l’instrument.Cale13. Utilisez le support de cordon pour maintenir le cordondu pédalier.Une fois que le cordon est en place et retenu par le supportde cordon, vérifiez qu’il n’y a pas de pression tropforte au niveau des fiches du cordon.14. Branchez le cordon d’alimentation à l’adaptateursecteur. Branchez ensuite l’adaptateur secteur à laprise DC IN et enroulez le câble de l’adaptateur autourdu crochet prévu à cet effet sur le piano. Voyez“Connexion au secteur” à la page 22.15. Placez le <strong>LP</strong>-<strong>380</strong> à l’endroit où vous avez l’intentionde l’utiliser. Placez-le dans un endroit sûr où le solest plat et solide.DosSupportde cordonDosQuand vous installez le piano numérique, vérifiezque le pied n’est pas posé sur le câble de l’adaptateurou du pédalier.Par mesure de sécurité, nous vous recommandonsd’installer les cales à l’arrière des panneaux latérauxgauche et droit.Vis (M4)Vis (M4)9. Serrez fermement toutes les vis serrées temporairementà l’étape 3 et 6.Lors du serrage des vis du <strong>LP</strong>-<strong>380</strong>, vérifiez que les panneauxlatéraux gauche et droit sont de niveau et ajustezleur position si nécessaire.À vérifier après le montage• Reste-t-il des pièces?S’il reste des pièces, relisez soigneusement la procédurede montage pour voir où ces pièces devraient se trouver.• Vérifiez que toutes les vis sont bien serrées.35
VorsichtsmaßnahmenAufstellungsortVermeiden Sie das Aufstellen des Geräts an Orten, andenen• es direkter Sonneneinstrahlung ausgesetzt ist;• hohe Feuchtigkeit oder Extremtemperaturen auftretenkönnen;• Staub oder Schmutz in großen Mengen vorhandensind;• das Gerät Erschütterungen ausgesetzt sein kann.• in der Nähe eines Magnetfeldes.StromversorgungSchließen Sie das optionale Netzteil nur an eine geeigneteSteckdose an. Verbinden Sie es niemals miteiner Steckdose einer anderen Spannung.Störeinflüsse auf andere ElektrogeräteDieser kann bei in der Nähe aufgestellten Rundfunkempfängernoder Fernsehgeräten Empfangsstörungenhervorrufen. Betreiben Sie solche Geräte nurin einem geeigneten Abstand von diesem Erzeugnis.BedienungVermeiden Sie bei der Bedienung von Schaltern undReglern unangemessenen Kraftaufwand.ReinigungBei auftretender Verschmutzung können Sie dasGehäuse mit einem trockenen, sauberen Tuch abwischen.Verwenden Sie keinerlei Flüssigreiniger wiebeispielsweise Reinigungsbenzin, VerdünnungsoderSpülmittel. Verwenden Sie niemals brennbareReiniger.BedienungsanleitungBewahren Sie diese Bedienungsanleitung gut auf,falls Sie sie später noch einmal benötigen.Hinweis zur Entsorgung (Nur EU)Wenn Sie das Symbol mit der „durchgekreuzten Mülltonne“auf Ihrem Produkt, der dazugehörigen Bedienungsanleitung,der Batterie oder dem Batteriefach sehen,müssen Sie das Produkt in der vorgeschriebenenArt und Weise entsorgen. Dies bedeutet, dass diesesProdukt mit elektrischen und elektronischen Komponentennicht mit dem normalen Hausmüll entsorgtwerden darf. Für Produkte dieser Art existiert ein separates,gesetzlich festgelegtes Entsorgungssystem. Gebrauchte elektrischeund elektronische Geräte müssen separat entsorgt werden,um ein umweltgerechtes Recycling sicherzustellen. DieseProdukte müssen bei benannten Sammelstellen abgegebenwerden. Die Entsorgung ist für den Endverbraucher kostenfrei!Bitte erkundigen sie sich bei ihrer zuständigen Behörde,wo sie diese Produkte zur fachgerechten Entsorgung abgebenkönnen. Falls ihr Produkt mit Batterien oder Akkumulatorenausgerüstet ist, müssen sie diese vor Abgabe des Produktesentfernen und separat entsorgen (siehe oben). Die Abgabe diesesProduktes bei einer zuständigen Stelle hilft ihnen, dassdas Produkt umweltgerecht entsorgt wird. Damit leisten siepersönlich einen nicht unerheblichen Beitrag zum Schutz derUmwelt und der menschlichen Gesundheit vor möglichen negativenEffekten durch unsachgemäße Entsorgung von Müll.Batterien oder Akkus, die Schadstoffe enthalten, sind auch mitdem Symbol einer durchgekreuzten Mülltonne gekennzeichnet.In der Nähe zum Mülltonnensymbol befindet sich diechemische Bezeichnung des Schadstoffes.Cd oder NiCd steht für Cadmium, Pb für Blei und Hg fürQuecksilber.WICHTIGER HINWEIS FÜR KUNDENDieses Produkt wurde unter strenger Beachtung von Spezifikationenund Spannungsanforderungen hergestellt, die imBestimmungsland gelten. Wenn Sie dieses Produkt über dasInternet, per Postversand und/oder mit telefonischer Bestellunggekauft haben, müssen Sie bestätigen, dass dieses Produktfür Ihr Wohngebiet ausgelegt ist.WARNUNG: Verwendung dieses Produkts in einem anderenLand als dem, für das es bestimmt ist, verwendet wird,kann gefährlich sein und die Garantie des Herstellers oderImporteurs hinfällig lassen werden. Bitte bewahren Sie dieseQuittung als Kaufbeleg auf, da andernfalls das Produkt vonder Garantie des Herstellers oder Importeurs ausgeschlossenwerden kann.Flüssigkeiten und FremdkörperStellen Sie niemals Behältnisse mit Flüssigkeiten inder Nähe des Geräts auf. Wenn Flüssigkeit in das Gerätgelangt, können Beschädigung des Geräts, Feueroder ein elek-trischer Schlag die Folge sein.Beachten Sie, daß keinerlei Fremdkörper in das Gerätgelangen. Sollte ein Fremdkörper in das Gerätgelangt sein, so trennen Sie es sofort vom Netz. WendenSie sich dann an Ihren KORG-Fachhändler.* Alle Produkt- und Firmennamen sind Warenzeichenoder eingetragene Warenzeichen der betreffendenEigentümer.36
InhaltEinführungEinführung--------------------------------------- 37Hauptfunktionen-------------------------------------37Teile und Funktionen------------------------- 38Vorbereitung sowieDemos und Soundbeispiele--------- 39Bevor Sie mit dem Spielen beginnen----------39Demo-Vorführungen abspielen----------------- 41Spielen des <strong>LP</strong>-<strong>380</strong>---------------------------- 42Mit nur einem Klang spielen -(Single-Modus)------------------------------42Mit zwei Klängen gleichzeitig spielen -(Layer-Modus)-------------------------------42Spielen zu zweit (Partnermodus)---------------43Verwendung der Pedale--------------------------43Effekte-------------------------------------------------43Das Metronom---------------------------------------44Weitere Funktionen--------------------------- 45Einstellung des Anschlags-----------------------45Transponierung--------------------------------------45Funktionsmodus-------------------------------------45MIDI------------------------------------------------- 48Was ist MIDI?----------------------------------------48Was leistet MIDI?-----------------------------------48Anschlüsse-------------------------------------------48MIDI-Funktionsmodus-----------------------------48Anhang-------------------------------------------- 50Fehlerbeseitigung-----------------------------------50Technische Daten-----------------------------------50Montage des Ständers----------------------- 51Vorsicht beim Zusammenbau-------------------- 51Weitere Vorsichtsmaßnahmen------------------ 51Montageschritte------------------------------------- 51Überprüfung nach Montage----------------------52MIDI-Implementierunstabelle-------------- 87HauptfunktionenDreißig SpitzensoundsDas <strong>LP</strong>-<strong>380</strong> bietet 30 interne ausdrucksstarke Spitzensounds,darunter auch einen Stereo-Konzertflügel. Dankdem Layer-Modus können Sie zwei Sounds gleichzeitigspielen. Der Partnermodus hingegen erlaubt zwei Musikern,im gleichen Bereich zu spielen, der jeweils einerHälfte der Tastatur zugewiesen ist.EffekteDas <strong>LP</strong>-<strong>380</strong> bietet 3 interne digitale Effekte: Brilliance dientder Regulierung der Tonbrillanz, Reverb simuliert dennatürlichen Raumhall einer Konzerthalle und Chorus verleihtdem Sound Fülle.Pedal-EffekteWie ein akustisches Klavier bietet auch das <strong>LP</strong>-<strong>380</strong> drei Pedale(Dämpfer-, Sostenuto-, und Softpedal). Dämpfer- undSoftpedal arbeiten stufenlos, so dass Sie den Effekt exaktdosieren können, indem Sie das betreffende Pedal entsprechendweit hinunterdrücken. Durch Drücken des Dämpferpedalskönnen Sie die Dämpferresonanz auch dem klassischenKlavier-Sound und dem Flügel-Sound (Bank 1 und2 von Piano1) hinzufügen.MetronomBeim eingebauten Metronom können Sie die Taktunterteilung,das Tempo und die Lautstärke einstellen und darüberhinaus einen Glockenton zur Akzentuierung einsetzen.AnschlagsteuerungSie können drei verschiedene Einstellungen wählen,mit denen Sie festlegen, wie der Klang sich mit der Anschlagstärkeverändern soll.TemperierungenFür authentisches Spielen eines weitgefächerten Spektrumsan Musikstilen bietet Ihnen das <strong>LP</strong>-<strong>380</strong> neun Stimmungen,darunter die wohltemperierte Stimmung, reine Stimmungen(Dur und Moll), klassische Stimmungen (Kirnbergerund Werckmeister) sowie Stimmungen für orientalischeund indische Musik. Wenn Sie einen Akustik-Piano-Soundauswählen, wird automatisch eine Stimmung mit Spreizungausgewählt.Einstellbare TonhöheDie Transpose Funktion ermöglicht es, die Tonhöhe desKlaviers zu ändern, während die Pitch Control Funktionzur Feinabstimmung dient.Zwei KopfhörerbuchsenDank der beiden Kopfhörerbuchsen (jeweils eine auf derVorder- und Rückseite des <strong>LP</strong>-<strong>380</strong>) können zwei Spielergleichzeitig zuhören.LINE OUT-BuchseÜber die LINE OUT-Buchse kann ein Aktivlautsprecheroder ein Aufnahmegerät angeschlossen werden.MIDI-FunktionenDas <strong>LP</strong>-<strong>380</strong> unterstützt das MIDI Protokoll, ein Standard,mit welchem Musikdaten zwischen Musikinstrumentenund Computern ausgetauscht werden können Mit MIDIkönnen zwei oder mehr Instrumente gesteuert werdenoder zur Steuerung eingesetzt werden; das <strong>LP</strong>-<strong>380</strong> kannals 16-Part multitimbraler Tongenerator eingesetzt werden.37
Teile und FunktionenOberseiteAnschlussfeld(Rückseite)4 5 61Anschlussfeld237 8 9 10 1112 13 141516 17 18 19 201. Kopfhörer ( )-Buchse [Vor Anschlussfeld]:Zwei Stereo-Miniklinkenbuchsen zum Anschluss vonKopfhörern. Bei angeschlossenem Kopfhörer ist der interneLautsprecher stumm geschaltet.2. Einschalttaste:Zum Ein- und Ausschalten des <strong>LP</strong>-<strong>380</strong>.3. VOLUME-Knopf:Regelt die Lautstärke an den Ausgängen und Kopfhörerbuchsen.4. PIANO SONG-Taste:Taste zum Aufrufen des Piano-Song-Modus. Bei aktiviertemModus leuchtet die Taste auf. Durch gleichzeitigesDrücken dieser Taste und der TRANSPOSE-Tastegelangen Sie in den Demosongmodus.5. TRANSPOSE-Taste:Taste zum Einstellen der Transposition. Während derTransposition leuchtet die Taste auf. Durch gleichzeitigesDrücken dieser Taste und der PIANO SONG-Tastegelangen Sie in den Demosongmodus.6. FUNCTION-Taste:Zur Aktivierung des Funktionsmodus, in dem Sie Tonhöheund Stimmung angeben und weitere Einstellungenvornehmen können. Durch längeres Drücken derTaste gelangen Sie in den MIDI-Funktionsmodus, woSie MIDI-Einstellungen vornehmen können. Die Tasteleuchtet auf, wenn das <strong>LP</strong>-<strong>380</strong> in den Funktionsmodusschaltet und blinkt, wenn es in den MIDI-Funktionsmodusschaltet.7. TOUCH-Taste:Dient zur Einstellung der Anschlagdynamik.8. BRILLIANCE-Taste:Zur Einstellung der Tonbrillanz.9. REVERB-Taste:Zum Ein-/Ausschalten des Halls, der dem Klang Räumlichkeitverleiht. Bei aktiviertem Effekt leuchtet dieTaste auf.10. CHORUS-Taste:Zum Ein-/Ausschalten des Chorus, der dem Klang Fülleverleiht. Bei aktiviertem Effekt leuchtet die Taste auf.11. BANK-Taste/LEDs:Zur Auswahl der gewünschten Sound-Bank. Die deraktuell angewählten Bank zugewiesene LED leuchtet.12. Sound-Tasten:Zur Auswahl der 30 Sounds (10 x 3 Bänke). Sie könnenzwei Tasten drücken, um zwei Sounds gleichzeitig zuspielen (Layer-Modus).13. Display:Zeigt Einstellungen an, beispielsweise des Funktionsmodus’oder des Metronoms.14. UP/DOWN-Tasten:Zur Auswahl der Werte diverser Einstellungen.15. METRONOME-Taste:Zum Ein-/Ausschalten des Metronoms. Während dasMetronom verwendet wird, leuchtet die Taste auf.Durch längeres Drücken der Taste gelangen Sie in denMetronom-Einstellungsmodus, wo sie diverse Einstellungenam Metronom vornehmen können.16. MIDI (IN, OUT) Buchsen:Buchsen für den Anschluss anderer MIDI Geräte (Sequenzer,Keyboards usw.).OUT: Datenausgang(muss an die MIDI IN Buchse des anderen MIDIGeräts angeschlossen werden).IN: Dateneingang(muss an die MIDI OUT Buchse des anderenMIDI Geräts angeschlossen werden).17. LINE OUT Buchse:Haupt-Audioausgang in Stereo-Miniklinken-Ausführungzum Anschluss eines Verstärkers, Aktivlautsprechernoder der AUX-In-Buchse eines anderen Geräts.Mit dem VOLUME-Knopf wird die Ausgangslautstärkereguliert.18. DC 19V-Buchse:Schließen Sie den mitgelieferten Netzteil an diese Buchsean.19. Speaker-Buchse:Schließen Sie hier das Kabel der Lautsprecherbox an(siehe: Montage des Ständers).20. Pedal-Buchse:Schließen Sie hier das Kabel der Pedaleinheit an (siehe:Montage des Ständers).38
Vorbereitung sowie Demos und SoundbeispieleBevor Sie mit dem Spielen beginnenHinweise zum beigefügten StänderDas <strong>LP</strong>-<strong>380</strong> wird mit einem Ständer geliefert.Lesen Sie dazu bitte den Abschnitt „Montage des Ständers“ auf Seite 51, bevor sie fortfahren.Anschließen ans NetzSchalten Sie das <strong>LP</strong>-<strong>380</strong> bei Bedarf AUS. Verbinden Sie das beiliegende Netzteil mit demNetzkabel. Verbinden Sie die Netzteilbuchse mit der DC19V-Buchse der Anschlussfeldsauf der Rückseite. Verbinden Sie das Netzkabel mit einer Steckdose.Wickeln Sie das Netzteilkabel um den Kabelhaken, um zu verhindern, dass sich derNetzanschluss aus Versehen löst (Abb. 1). Beim Entfernen des Kabels dürfen Sie niemit Gewalt daran ziehen.Verwenden Sie nur das beiliegende Netzteil. Bei Verwendung eines anderen Netzteilswird das Gerät eventuell beschädigt.Verbinden Sie das Instrument ausschließlich mit einer Steckdose der geeignetenNetzspannung.Öffnen und Schließen des TastaturdeckelsÖffnen des Tastaturdeckels1. Heben Sie den Tastaturdeckel mit beiden Händen an.Abbildung 1KabelhakenDiese Partie darfbeim Arretierendes Netzteilkabelsnicht zu starkstrapaziertwerden.Zu einer SteckdoseNetzteilbuchseNetzteilNetzkabel für das Netzteil2. Klappen Sie den Rand am Ende des Tastaturdeckels nach unten.Schließen des Tastaturdeckels1. Heben Sie den Deckel leicht an und ziehen Sie ihn zu sich hin.2. Geben Sie den Deckel frei, sobald er von allein zuklappt.Der Tastaturdeckel ist so konzipiert, dass er sich ungefähr ab der Mitte sanftschließt.Ziehen Sie beim Schließen den Tastaturdeckel nicht wieder hoch. Üben Sie zudembeim Schließen des Tastaturdeckels keinen unnötig starken Druck aus.Sonst beschädigen Sie den Mechanismus des Tastaturdeckels.Achten Sie darauf, sich beim Schließen des Deckels nicht die Fingerzu klemmen.Raumtemperatur und Luftfeuchtigkeit beeinflussen die Geschwindigkeit,mit der sich der Tastaturdeckel schließt.Beim langsamen Schließen klickt der Tastaturdeckel eventuell leise.Dies ist völlig normal.39
KopfhörerbetriebVerwenden Sie Stereokopfhörer mit einem 1/8“ Stereo-Miniklinkenstecker.Da das <strong>LP</strong>-<strong>380</strong> zwei Kopfhörerausgänge vorne links unter der Tastatur aufweist, könnenSie den Klang des Instruments auch zu zweit über Kopfhörer genießen.Wenn Sie einen Kopfhörer anschließen, werden die Lautsprecher des <strong>LP</strong>-<strong>380</strong> stummgeschaltet.Spielen Sie nachts oder wenn Sie andere nicht stören wollen mit Kopfhörer.Wenn Ihr Kopfhörer mit einem Standard–Miniklinken-Adapter versehen ist, müssenSie zum Anschließen oder Lösen der Verbindung jeweils den Adapter festhalten.Bedenken Sie, dass ein hoher Wiedergabepegel im Kopfhörer schon nach kurzerZeit zu Hörschäden führen kann.Abbildung 2Notenpult aufstellenDer Tastaturdeckel dient aufgeklappt als praktischer Notenständer (Abb. 2).Üben Sie beim Aufstellen von Notenblättern oder Notenheften keinen starkenDruck auf den Tastaturdeckel auf.Instrument einschaltenDrücken Sie die Einschalttaste, um das <strong>LP</strong>-<strong>380</strong> einzuschalten. (Abb. 3)Wenn das Instrument eingeschaltet wird, leuchten die Tasten im Bedienfeld auf.Zum Ausschalten des Instruments drücken Sie erneut die Einschalttaste.Wenn das Instrument ausgeschaltet wird, kehren alle Funktionen mit Ausnahmeder Energiesparfunktion zur Standardeinstellung zurück.EnergiesparfunktionNach 30 Minuten ohne Eingaben des Nutzers oder ohne Demo-Wiedergabe schaltetsich das Instrument automatisch aus. Sie können dies verhindern, indem Sie dieEnergiesparfunktion deaktivieren (siehe Seite 47).Einstellen der LautstärkeDrehen Sie den VOLUME-Regler neben dem Netzschalter in Richtung „MAX“, um dieLautstärke anzuheben. Drehen Sie ihn nach links (zu „MIN“), um die Lautstärke zu verringern.(Abb. 3)Der VOLUME-Regler bestimmt den Pegel der internen Lautsprecher, Kopfhörerbuchsenund LINE OUT-Buchsen.Beim Ausschalten des Instruments werden alle Parameter zurückgesetzt.Abbildung 3LeiserLauterDie LINE OUT-BuchseZur Verstärkung schließen Sie die LINE OUT Ausgänge Ihres <strong>LP</strong>-<strong>380</strong> an einen hochwertigenMixer, eine Stereo-HiFi-Anlage oder aktive Bühnenlautsprecher an. Wenn Sie einStereo-HiFi benutzen, schließen Sie die OUTPUT Ausgänge an die AUX oder TAPE Eingängean (benutzen Sie keinesfalls die PHONO Eingänge).Sie müssen alle Verbindungen bei ausgeschalteten Geräten herstellen. UnvorsichtigeHandhabung kann das <strong>LP</strong>-<strong>380</strong> oder angeschlossene Geräte beschädigen oder Fehlfunktionenverursachen.Verbindungskabel sind getrennt erhältlich. Sie müssen die geeigneten handelsüblichenKabel für Ihre Ausrüstung besorgen.40
Demo-Vorführungen abspielenDas <strong>LP</strong>-<strong>380</strong> hat insgesamt 30 Demos und Soundbeispiele(10 Demosongs mit 10 ausdrucksstarken Sounds und 20bekannte Pianosongs zur Vorstellung der Pianosounds).Während der Wiedergabe eines Demosongs könnenSie diesen auf der Tastatur begleiten, allerdings könnenSie den Sound mit den Sound-Tasten nicht ändern.Während der Wiedergabe eines Demosongs könnendie Einstellungen der Effekte (Reverb und Chorus)nicht geändert werden.Demosongs anhören1. Drücken Sie gleichzeitig die PIANO SONG-Tasteund die TRANSPOSE-Taste.Die PIANO SONG-Taste blinkt und die Soundtastenblinken der Reihe nach.Zusätzlich wird die Nummer des Demosongs (d01) imDisplay angezeigt.1,312. Nach etwa 3 Sekunden blinkt die PIANO1-Taste unddie Wiedergabe des dieser Taste entsprechendenSongs beginnt.Wenn die Wiedergabe des PIANO1-Demosongs endet,werden der Reihe nach PIANO2, E.PIANO1 etc.wiedergegeben. Endet die Wiedergabe des CHOIR-Demosongs, beginnt die Wiedergabe von vorne mitdem PIANO1 Song.Einen bestimmten Demosong anhörenWenn die Soundtasten der Reihe nach blinken, könnenSie durch Drücken der entsprechenden Soundtaste dengewünschten Demosong wiedergeben. Wird währendder Wiedergabe eines Demosongs eine andere Sound-Taste gedrückt, beginnt nach wenigen Sekunden dieWiedergabe des entsprechenden Demosongs.Sie können zudem auch mit den UP und DOWN-Tastenneben dem Display einen Song auswählen.3. Zum Anhalten der Wiedergabe eines Demosongsdrücken Sie die PIANO SONG-Taste erneut.Liste der DemosongsDisplay Taster Songtitel Komponistd01 PIANO1 Jardins sous la pluie C.Debussyd02 PIANO2 Danny boy Irish FolkSongd03 E.PIANO1 Jam Session N. Nishid04 E.PIANO2 In Memory M.Gieseld05d06HARPSI/CLAV Invention No.8 J.S.BachVIBES/GUITARJazz in SpainKORG-Originald07 ORGAN1 Improvisation M.Geiseld08 ORGAN2 Toccata in D moll J.S.Bachd09 STRINGS Scoring Interlude M.Geiseld10 CHOIR Autumn Flares M.GeiselPiano-Songs anhören1. Drücken Sie die PIANO SONG-Taste.Die PIANO SONG-Taste und die PIANO1-Taste leuchtenauf, und im Display erscheint die Nummer des Pianosongs(001).1,32. Nach etwa 3 Sekunden blinkt die PIANO1-Taste, unddie Wiedergabe des Pianosongs beginnt.Wenn die Wiedergabe des ersten Piano-Songs endet,werden der Reihe nach der zweite, dritte, usw. wiedergegeben.Endet die Wiedergabe des zwanzigstenPiano-Songs, beginnt die Wiedergabe von vorne mitdem ersten Piano-Song.Einen bestimmten Piano-Song anhörenMit den UP und DOWN-Tasten neben dem Displaykönnen Sie die Nummer des Songs auswählen, den Siehören möchten. Wird während der Wiedergabe einesPiano-Songs eine andere Nummer gewählt, beginntnach wenigen Sekunden die Wiedergabe des entsprechendenSongs.3. Zum Anhalten der Wiedergabe eines Demosongsdrücken Sie die PIANO SONG-Taste erneut.Piano-Song-GruppenNr. Display SongtitelKomponist1 001 Etude Op.10-12 F.Chopin2 002 Claire de lune C.Debussy3 003 Fantaisie-Impromptu Op.66 F.Chopin4 004 Waltz No.6 Db-major Op.64-1 F.Chopin5 005„Prelude 1“ The Well-TemperedClavier, Book 1J.S.Bach6 006 „Turkish March“ Sonata K.331 W.A.Mozart7 007 Arabesque No.1 C.Debussy8 008 Für Elise L.v.Beethoven9 009 Liebesträume Nr.3 F.Liszt10 010 La Campanella F.Liszt11 011 Nocturne Op.9-2 F.Chopin12 012 Spring Song Op.62-6 F.Mendelssohn13 013 Reflets dans I'eau C.Debussy14 014 Gymnopédie No.1 E.Satie15 015 Etude Op.10-3 F.Chopin16 016 Old Feather Blues KORG-Original17 017 La fille aux cheveux de lin C.Debussy18 018 The Entertainer S.Joplin19 019 Sunflowers KORG-Original20 020 Amazing Grace Hymn41
Spielen des <strong>LP</strong>-<strong>380</strong>Mit nur einem Klang spielen(Single-Modus)Sie können einen der dreißig im Instrument enthaltenenKlänge auswählen (10 x 3 Sounds Banken).Taster Bank Klang #PIANO1 1 Klassisches Piano 32 Flügel 33 Jazz Piano 2PIANO2 1 Live Piano 22 Honky-Tonk 23 Elektr. Flügel 1E.PIANO1 1 Stage E-Piano 12 Bright E-Piano 23 Tremolo EP 3E.PIANO2 1 Dig. E-Piano 22 60's E-Piano 13 Dig.E-Piano2 2HARPSI/ 1 Harpsichord 2CLAV2 Clav. 13 Synth Clav 2VIBES/1 Vibraphon 1GUITAR 2 Marimba 13 Akustikgitarre 2ORGAN1 1 Jazzorgel 1 22 Jazzorgel 2 23 Jazzorgel 3 2ORGAN2 1 Pfeifenorgel 1 22 Pfeifenorgel 2 23 Positivorgel 2STRINGS 1 Streicher 22 Kinostreicher 23 Analoge Streicher 2CHOIR 1 Aah Chor 22 Ooh Stimmen 23 Klassischer Chor 3(#) In diesen Spalten ist die Anzahl der Oszillatoren proStimme angegeben, die von den einzelnen Klängen benutztwerden (siehe auch „Hinweise zur maximalen Polyphonie“auf Seite 50).1. Drücken Sie die Sound-Taste des Sounds, den Siespielen möchten.Die gewählte Taste leuchtet auf.2. Drücken Sie die BANK-Taste, um einen der dreiSounds auszuwählen.Mit jedem Druck auf die BANK-Taste geraten Sie in derReihenfolge 1, 2, 3, 1, ... zur nächsten Bank, wobei dieentsprechende LED rechts der BANK-Taste aufleuchtet.Wollen Sie beispielsweise den elektrischen Flügelsound,drücken Sie erst die PIANO 2-Taste: deren Tastenun leuchtetAnschließend drücken Sie zweimal die BANK-Taste,um Bank 3 (elektrischer Flügel) auszuwählen: die untersteLED rechts neben der BANK-Taste leuchtet.42Die für die jeweilige Sound-Taste gewählte Bank bleibtbestehen, auch wenn Sie eine andere Sound-Taste drücken.2Bei jedem Einschalten des <strong>LP</strong>-<strong>380</strong> wird für alle Sound-Tasten Bank 1 ausgewählt.Mit zwei Klängen gleichzeitig spielen(Layer-Modus)Sie können zwei Sounds gleichzeitig auf der Tastatur spielen.Diese Spielweise wird Layer-Modus genannt.Drücken Sie gleichzeitig die beiden Sound-Tasten derSounds, die Sie gleichzeitig spielen möchten. Die beidengewählten Soundtasten leuchten auf.Die am weitesten links oder oben liegende Taste ist Layer 1,die andere (am weitesten rechts oder unten) ist Layer 2(siehe Diagramm unten).Layer 1Sind zum Beispiel E.PIANO1 und ORGAN1 ausgewählt,ist E.PIANO1 Layer 1 und ORGAN1 Layer 2. Um Soundsin verschiedenen Bänken zu verwenden, wählen Sie zuerstim Single-Modus die Bänke der entsprechenden Sound-Tasten.Um beispielweise den Flügel und die Jazzorgel 2 zu layern,wählen Sie Bank 1 (Flügel) für die PIANO 1-Taste undBank 2 (Jazzorgel 2) für die ORGAN1-Taste. Drücken Sieanschließende beide Tasten gleichzeitig.Wenn Sie den Layer Modus selektieren, ist die Anzahlder Stimmen, die gleichzeitig spielen können, herabgesetzt.Dies hängt von der Gesamtzahl der vom selektiertenKlang benutzten Oszillatoren ab (siehe auch„Hinweise zur maximalen Polyphonie“ auf Seite 50).Es ist nicht möglich, zwei Sounds in unterschiedlichenBänken derselben Sound-Taste auszuwählen (z. B. Flügelund Klassisches Piano der PIANO1-Taste).Zum Single Modus zurückkehrenUm zum Single-Modus zurückzukehren, drücken Sieeinfach einen beliebigen Klangauswahltaster.Layer-Modus-EinstellungenIm Layer-Modus kann das Lautstärkeverhältnis zwischenden Sounds eingestellt werden, die Oktave jedesSounds kann verschoben werden, und für jeden Soundkann das Dämpferpedal aktiviert oder deaktiviert werden(siehe auch „Funktionsmodus“ auf Seite 45).1Layer 2
Spielen zu zweit (Partnermodus)Es können zwei Personen im gleichen Bereich auf der Tastaturspielen, die zu diesem Zweck in der Mitte geteilt ist.Diese Spielweise wird Partnermodus genannt.1. Drücken Sie die FUNCTION-Taste.Die FUNCTION-Taste und die PIANO1-Taste leuchten auf.2. Drücken Sie die E.PIANO1-Taste.Die E.PIANO1-Soundtaste leuchtet auf, und im Displayerscheint oFF.1,5234Partnermodus-Anzeige3. Drücken Sie die UP-Taste neben dem Display, um onauszzwählen.Der Partnermodus ist nun aktiviert, und der PIANO1-Sound ist den beiden Hälften der Tastatur zugewiesen.Bei aktiviertem Partnermodus (ON) erscheint untenrechts im Display ein Punkt.Die rechte Hälfte der Tastatur von E4 bis C8 ist nunzwei Oktaven tiefer gestimmt (E2–C6).Die linke Hälfte der Tastatur von A0 bis Eb 4 ist nunzwei Oktaven höher gestimmt (A2-Eb 6).A0 E ♭ 4 E4 C8Töne A2 bis E ♭ 6 für denSpieler links4. Um den Partner-Modus wieder zu verlassen, drückenSie die DOWN-Taste neben dem Display, um oFFauszuwählen.5. Drücken Sie die FUNCTION-Taste.Die FUNCTION-Taste erlischt.Im Partnermodus können Sie die Sounds für die linkeund rechte Seite ändern und in der Lautstärke anpassen.Genaueres dazu finden Sie im Abschnitt „Partnermodus-Einstellungen“ auf Seite 46.Verwendung der PedaleTöne E2 bis C6 für denSpieler rechtsSoftpedalHaltepedalDas <strong>LP</strong>-<strong>380</strong> bietet drei Pedale: Dämpfer-,Sostenuto- und LeisepedalMit den Pedalen können Sie Ihr Spiel Sostenutopedalnoch lebendiger und expressiver gestalten.Softpedal (Linke)Durch Betätigen dieses Pedals wird der Ton sanfter. DieSänfte des Tons hängt davon ab, wie tief das Pedal betätigtwird („half-pedaling“).Sostenutopedal (Zentrum)Durch Betätigen dieses Pedals werden nur diejenigenNoten, deren Tasten bereits gedrückt sind, dämpft und gehalten.Bei betätigtem Sostenutopedal zusätzlich gespielteNoten werden nicht gedämpft.Haltepedal (Rechte)Durch Drücken dieses Pedals wird der Klang gehaltenund klingt mit einem satten Nachhall aus. Sie können dieDämpferresonanz auch dem klassischen Klavier-Soundund dem Flügel-Sound (Bank 1 und 2 von Piano1) hinzufügen.Sie können zudem stufenlos arbeiten und das Ausklingengraduell steuern, indem Sie das Pedal mehr oderweniger tief herunterdrücken („half-pedaling“).Im Layer Modus können Sie den Klang bzw. die Klängeselektieren, die dem Pedal zugewiesen werden sollen(siehe auch „Pedalzuweisung für Layer“ auf Seite 47).Im Partnermodus (siehe Seite 46) können beide Spielerden Dämpfungseffekt unabhängig bedienen.EffekteBrillianceDieser Effekt ändert die Brillanz des Tons.Durch Gedrückthalten der BRILLIANCE-Taste bei gleichzeitigemDrücken der UP oder DOWN-Taste neben demDsiplay ändern Sie die Einstellungen dieses Effekts.Die jeweilige Einstellung wird im Display angezeigt: 3 produzierteinen brillanten, höhenbetonten Sound, bei 1 ist derKlang weniger brillant.Die gewählte Einstellung gilt für alle Sounds und bleibt aktiviert,bis das <strong>LP</strong>-<strong>380</strong> ausgeschaltet wird. Beim Einschaltendes Instruments ist werksseitig die 2 voreingestellt.Brilliance kann nicht deaktiviert werden.ReverbDieser Effekt verleiht dem Sound Raum und Tiefe und vermitteltdas Gefühl, in einer Konzerthalle zu spielen. Werksseitigist für jeden einzelnen Sound gespeichert, ob dieserEffekt ein- oder ausgeschaltet ist und in welcher Einstellunger sich befindet.Durch Drücken der REVERB-Taste schalten Sie den Halleffektein (Taste leuchtet auf) bzw. aus (Taste erlischt).Zum Ändern der Einstellungen halten Sie die REVERB-Taste gedrückt und drücken Sie gleichzeitig die UP oderDOWN-Taste neben dem Display.Die jeweilige Einstellung wird im Display angezeigt: 3 produzierteinen starken, 1 einen leichten Halleffekt.Falls ein anderer Sound ausgewählt oder das <strong>LP</strong>-<strong>380</strong> ausgeschaltetwird, werden die vorgenommenen Änderungen(ein/aus, Einstellung) auf die werksseitigen Einstellungenzurückgesetzt.ChorusChorus fügt dem Sound Modulation hinzu und macht denKlang fülliger. Werksseitig wird für jeden einzelnen Soundgespeichert, ob dieser Effekt ein- oder ausgeschaltet ist undin welcher Einstellung er sich befindet.Durch Drücken der CHORUS-Taste schalten Sie den Choruseffektein (Taste leuchtet auf) bzw. aus (Taste erlischt).Zum Ändern der Einstellungen halten Sie die CHORUS-Taste gedrückt und drücken Sie gleichzeitig die UP oderDOWN-Taste neben dem Display.Die jeweilige Einstellung wird im Display angezeigt: 3 produzierteinen starken, 1 einen leichten Choruseffekt.Falls ein anderer Sound ausgewählt oder das <strong>LP</strong>-<strong>380</strong> ausgeschaltetwird, werden die vorgenommenen Änderungen(ein/aus, Einstellung) auf die werksseitigen Einstellungenzurückgesetzt.43
Das MetronomDas <strong>LP</strong>-<strong>380</strong> ist mit einem Metronom ausgestattet, das fürein angenehmeres Üben zu einem Glockenton umgeschaltetwerden kann.Metronom ein-/ausschaltenDrücken Sie die METRONOME-Taste. Die Taste leuchtet auf, und dasMetronom beginnt zu laufen.Drücken Sie die METRONOME-Taste erneut, um das Metronomanzuhalten. Die Taste erlischt.Tempo einstellenWenn im Display das Tempo angezeigtwird (Standardeinstellung 120)kann das Tempo sowohl bei eingeschaltetemals auch bei ausgeschaltetem Metronom mitden UP und DOWN-Tasten neben dem Display eingestelltwerden. Der Einstellbereich beträgt q = 40–120Um zur Standardeinstellung zurückzugelangen, drückenSie die UP und DOWN-Tasten gleichzeitig.Taktart auswählen1. Halten Sie die METRONOME-Taste gedrückt, bisdas Instrument in den Metronom-Einstellungsmoduswechselt.Die METRONOME-Taste blinkt, die PIANO1 Soundtasteleuchtet auf, und im Display erscheint die Taktart (04).Wenn das Instrument in den Metronom-Einstellungsmoduswechselt, erscheint normalerweise die eingestellteTaktart.2. Wenn Sie die Taktart ändern wollen, nachdem Siebereits andere Einstellungen im Metronom-Einstellungsmodusvorgenommen haben, drücken Sie diePIANO1-Taste.3. Wählen Sie die Taktart mit der UP oder DOWN-Tasteneben dem DisplayEs können folgende Taktarten gewählt werden 02 (2/4),03 (3/4), 04 (4/4) und 06 (6/4): Standardeinstellung ist 04.Um zur Standardeinstellung zurückzugelangen, drückenSie die UP und DOWN-Tasten gleichzeitig.24. Drücken Sie die METRONOME-Taste, um den Metronom-Einstellungsmoduszu verlassen.Ändern der Lautstärke1. Halten Sie die METRONOME-Taste gedrückt, bisdas Instrument in den Metronom-Einstellungsmoduswechselt.2. Drücken Sie die PIANO2-Taste – im Display erscheintdie Lautstärke.3. Wählen Sie die Lautstärke mit der UP oder DOWN-Taste neben dem Display.Der Einstellbereich beträgt 1–13: Standardeinstellungist 10.Um zur Standardeinstellung zurückzugelangen, drückenSie die UP und DOWN-Tasten gleichzeitig.331,44. Drücken Sie die METRONOME-Taste, um den Metronom-Einstellungsmoduszu verlassen.Ändern der Betonung1. Halten Sie die METRONOME-Taste gedrückt, bisdas Instrument in den Metronom-Einstellungsmoduswechselt.2. Drücken Sie die E.PIANO1-Taste – im Display erscheintdie Akzentuierungs-Einstellung.3. Wählen Sie die Akzentuierung mit der UP oderDOWN-Taste neben dem Display.Es stehen drei Alternativen zur Auswahl: -oFF (keineAkzentuierung), on1 (Akzentuierung des ersten Taktschlags)und on2 (Glockenklang für den ersten Taktschlag):Standardeinstellung ist oFF.24. Drücken Sie die METRONOME-Taste, um den Metronom-Einstellungsmoduszu verlassen.Tempo einstellen (Metronom-Einstellungsmodus)1. Halten Sie die METRONOME-Taste gedrückt, bisdas Instrument in den Metronom-Einstellungsmoduswechselt.2. Drücken Sie die E.PIANO2-Taste – im Display erscheintdas Tempo.3. Wählen Sie das Tempo mit der UP oder DOWN-Tasteneben dem Display.Der Einstellbereich beträgt q = 40–240: Standardeinstellungist 120.Um zur Standardeinstellung zurückzugelangen, drückenSie die UP und DOWN-Tasten gleichzeitig.24. Drücken Sie die METRONOME-Taste, um den Metronom-Einstellungsmoduszu verlassen.Ändern des Metronomklangs1. Halten Sie die METRONOME-Taste gedrückt, bisdas Instrument in den Metronom-Einstellungsmoduswechselt.2. Drücken Sie die HARPSI/CLAV-Taste – im Displayerscheint der eingestellte Metronomsound.3. Wählen Sie den Metronomsound mit der UP oderDOWN-Taste neben dem Display.Sie haben die Auswahl zwischen 1 (akustisch) und 2(elektronischer Sound): Standardeinstellung ist 1.24. Drücken Sie die METRONOME-Taste, um den Metronom-Einstellungsmoduszu verlassen.3333331,41,41,42331,444
Weitere FunktionenEinstellung des AnschlagsDie Anschlagempfindlichkeit der Tastatur kann verändertwerden.Zum Ändern der Einstelllungen halten Sie die TOUCH-Taste gedrückt und drücken Sie gleichzeitig die UP oderDOWN-Taste neben dem Display.LautLeichtLoudnessRuhigRuhigNormalSpielstärkeSchwerLautDisplay Anschlagempfindlichkeit1 Leicht. Selbst bei leichtem Anschlag könnenlaute Noten gespielt werden.2 Normal. Normaler Klavieranschlag.3 Schwer. Nur bei sehr starkem Anschlag werdenlaute Noten gespielt.Beim Ausschalten des Instruments wird wieder dienormale Anschlagempfindlichkeit eingestellt.Die Einstellungen gelten für alle Sounds.TransponierungBisweilen kommt es vor, dass Stücke in einer schwierig zuspielenden Tonart geschrieben sind (z.B. mit vielen schwarzenTasten) oder die Tonhöhe zur Abstimmung auf einanderes Instrument oder einen Sänger verändert werdenmuss. In diesen Fällen können Sie transponieren (Tonhöheverändern), um die Fingerläufe zu vereinfachen oder mitdenselben Fingerläufen in einer anderen Tonhöhe zu spielen.Diese Funktion wird Transponierung genannt.Wenn Sie beispielsweise um einen Halbton nach obentransponieren, erklingen beim Spielen der links unten angezeigtenNoten die rechts angezeigten Tonhöhen.Beim Ausschalten des Instruments wird die Transponierungwieder aufgehoben.Halten Sie die TRANSPOSE-Taste gedrückt und drückenSie eine Taste der Tastatur (F # 6–F7) für die gewünschteTransposition. Wird eine andere Klaviaturtaste als C7 gedrückt,leuchtet die TRANSPOSE-Taste auf und zeigt an,dass die Tastatur transponiert worden ist.Die Transponierung der Tastatur erfolgt gemäß des Verhältnissesder gedrückten Tastaturtaste zu C7.Um zur normalen Tonhöhe zurückzukehren, halten Sie dieTRANSPOSE-Taste gedrückt und drücken Sie auf der Tastaturdie C7. Die TRANSPOSE-Taste erlischt, und dieTransposition ist zurückgesetzt.NoteF # 6–B6C7C # 7–F7FunktionsmodusEffekt6–1 Halbtöne nach untenStandardstimmung1–5 Halbtöne nach obenDie Stimmung sowie andere Tonhöhen-Einstellungen könnenim Funktionsmodus geändert werden.Einstellen von Funktionen im Funktionsmodus1. Drücken Sie die FUNCTION-Taste.Die FUNCTION-Taste und die PIANO1-Taste leuchtenauf.2. Drücken Sie die Sound-Taste, die der gewünschtenFunktion zugewiesen ist.Im Display erscheinen die aktuellen Einstellungen.3. Nehmen Sie die gewünschten Einstellungen vor.4. Nachdem Sie die gewünschten Einstellungen vorgenommenhaben, drücken Sie die FUNCTION-Taste,um zum Spielmodus zurückzukehren.Die FUNCTION-Taste erlischt.1,4Wenn das <strong>LP</strong>-<strong>380</strong> ausgeschaltet wird, kehren alleFunktionen mit Ausnahme der Energiesparfunktionzur Standardeinstellung zurück.Die Einstellungen gelten für alle Sounds.FeinstimmungUm die Stimmung des <strong>LP</strong>-<strong>380</strong> der eines anderen Instrumentsanzupassen, können Sie die Stimmung in Intervallenvon 0.5 Hz im Bereich von A4 = 427.5–452.5 Hz einstellen.27,5–52,5 erscheint im Display. Standardtonhöhe ist A = 440Hz, die Standardeinstellung lautet 40.0.1. Wenn Sie den Funktionsmodus aufrufen, leuchtetdie PIANO1-Soundtaste auf.Nach dem Aufrufen des Funktionsmodus erscheintnormalerweise die eingestellte Tonhöhe.2. Wenn Sie die Tonhöhe ändern wollen, nachdem Siebereits andere Einstellungen im Funktionsmodusvorgenommen haben, drücken Sie die PIANO1-Taste.3. Wählen Sie die Tonhöhe mit der UP oder DOWN-Taste neben dem Display.Drücken Sie gleichzeitig die UP und DOWN-Tasten,um zu 440 Hz zurückzukehren.1223333C4F 6C7 F745
Stimmung auswählenSie haben die Auswahl unter neun Stimmungen, darunterdie wohltemperierte Stimmung, reine Stimmungen(Dur und Moll), klassische Stimmungen (Kirnberger undWerckmeister) sowie Stimmungen für orientalische undindische Musik.DisplayStimmung00 Wohltemperierte Stimmung (Standardeinstellung):Meistübliche Stimmung, bei der alle Halbtönein gleiche Tonhöhenintervalle aufgeteilt sind.01 Reine Stimmung [Dur]: Die Durtöne der entsprechendenTasten sind perfekt gestimmt.02 Reine Stimmung [Moll]: Die Molltöne der entsprechendenTasten sind perfekt gestimmt.03 Orientalisch: Stimmung nach Vierteltonintervallenfür orientalische Musik.04 Pythagoreisch: Antike griechische Stimmung,die sehr effektiv zum Spielen von Melodien ist.Sie ist absolut quintenrein, andere Intervalle hingegen– vor allem die Dur-Terz – sind unrein.05 Werckmeister: Die Werckmeister III Tonleiterentstand in der Zeit des Spätbarocks zur Ermöglichungrelativ freier Transponierungen.06 Kirnberger: Die Kirnberger III Tonleiter dienthauptsächlich zum Stimmen von Cembali.07 Slendro Tonleiter: Indonesische Gamelan-Tonleitermit fünf Noten pro Oktave.08 Pelog Tonleiter: Indonesische Gamelan-Tonleitermit sieben Noten pro Oktave.1. Rufen Sie den Funktionsmodus auf und drücken Siedie PIANO2-Taste.Die PIANO2-Soundtaste leuchtet auf, und im Displayerscheint die aktuelle Stimmung (00).2. Wählen Sie die Einstellung mit der UP-oder DOWN-Taste neben dem Display.Zum Thema “gedehnte Stimmung”Zur Erzielung möglichst natürlicher Resonanzen wird beiden Klängen PIANO 1 und PIANO 2 eine “gedehnte Stimmung”verwendet, um die Noten in den tiefen Bereichenetwas dunkler und in den hohen Bereichen heller klingenzu lassen. Akustische Klaviere werden von professionellenKlavierstimmern normalerweise auf diese Weise gestimmt.Partnermodus-Einstellungen1. Rufen Sie den Funktionsmodus auf und drücken Siedie E.PIANO1-Taste.Die E.PIANO1-Soundtaste leuchtet auf, und im Displayerscheint die gewählte Einstellung (ein/aus).2. Mit jedem Drücken der UP oder DOWN-Taste nebendem Display schalten Sie den Modus ein (on) oderaus (oFF).112222Bei aktiviertem Partnermodus ist der PIANO1-Klang sowohlder rechten als auch der linken Tastaturhälfte zugewiesen,und die PIANO1-Taste leuchtet auf.Gleichzeitig erscheint unten rechts im Displayein Punkt (Partnermodus-Anzeige).Die rechte Hälfte der Tastatur von E4 bis C8 ist nun zweiOktaven tiefer gestimmt (E2–C6). Die linke Hälfte der Tastaturvon A0 bis Eb 4 ist nun zwei Oktaven höher gestimmt(A2–Eb 6).Die Unterteilung für rechte und linke Hälfte der Tastatursowie der Tonhöhenbereich können nicht geändertwerden.Im Partnermodus bleiben die Transpositionseinstellungenunwirksam. Zusätzlich werden Tastaturinformationen(Note On und Note Off) nicht durch MIDIübertragen.Den Sound der linken Seite auswählenVerlassen Sie den Funktionsmodus und drücken Sie dieSoundtaste für den Sound, den Sie der linken Tastaturhälftezuweisen möchten. Die rechte Hälfte der Tastaturbleibt auf PIANO1-Sound eingestellt.In diesem Fall leuchtet nur die Soundtaste der linkenTastaturseite auf.Sounds für rechte und linke Hälfte auswählen.Verlassen Sie den Funktionsmodus und drücken Siegleichzeitig die beiden Sound-Tasten der gewünschtenSounds. Die beiden gewählten Soundtasten leuchtenauf.Sound für linke TastaturhälfteSound für rechte TastaturhälfteDie am weitesten links oder oben liegende Sound-Tastewird der linken Seite der Tastatur zugewiesen, die andere(am weitesten rechts oder unten) der rechten.Haben Sie beispielsweise E.PIANO1 und ORGAN1 ausgewählt,wird E.PIANO1 der linken und ORGAN1 derrechten Tastaturhälfte zugewiesen.Um Sounds in verschiedenen Bänken zu verwenden,wählen Sie zuerst im Single-Modus die Bänke der entsprechendenSound-Tasten.Wird der Partnermodus deaktiviert und der Funktionsmodusverlassen, während linker und rechter Tastaturhälfteunterschiedliche Sounds zugewiesen sind,werden die Sounds ausgewählt, die den leuchtendenTasten zugewiesen sind.Den gleichen Sound (mit Ausnahme von PIANO1) denbeiden Tastaturhälften zuweisen.Verlassen Sie den Funktionsmodus und drücken Siegleichzeitig zwei Soundtasten, wobei die weiter rechtsliegende den gewünschten Sound bezeichnen soll.Drücken Sie anschließend die weiter rechts liegendeTaste erneut. Wenn Sie beispielsweise die PIANO2und ORGAN1-Tasten gedrückt haben, drücken Sie dieORGAN1-Taste erneut, um denORGAN1-Sound beidenHälften der Tastatur zuzuweisen.Die Laustärke von rechter und linker Hälfte einstellenWenn Sie die Sounds für linke und rechte Tastaturhälftegeändert haben, können Sie die Lautstärke des jeweiligenSounds einstellen. Genaueres dazu finden Sie imAbschnitt „Lautstärkeverhältnis der Layer einstellen“auf Seite 47.46
Mit Dämpfer spielenDas Dämpferpedal und das Softpedal können als separateDämpferpedale für die rechte bzw. linke Tastaturhälfteverwendet werden.Dämpfer: Dient als Dämpferpedal für den Spieler ander rechten Hälfte der Tastatur.Sostenuto: Nicht verwendetSoft: Dient als Dämpferpedal für den Spieler an derlinken Hälfte der Tastatur.Lautstärkeverhältnis der Layer einstellenSie können das Lautstärkeverhältnis der Sounds im Layer-Modus (oder im Partnermodus) einstellen. Der Einstellbereichbeträgt 1 – 9 ... 9 – 9... 9 – 1, wobei die Zahl links fürLayer 1 (oder die linke Tastaturhälfte) und die Nummerrechts für Layer 2 (oder die rechte Tastaturhälfte) gilt.Standardeinstellung ist 9 – 9.1. Rufen Sie den Funktionsmodus auf und drücken Siedie E.PIANO2-Taste.Die E.PIANO2-Soundtaste leuchtet auf, und im Displayerscheint das eingestellte Lautstärkeverhältnis (9 – 9).2. Stellen Sie das Lautstärkeverhältnis mit der UP oderDOWN-Taste neben dem Display ein.Um zur Standardeinstellung zurückzugelangen, drückenSie die UP und DOWN-Tasten gleichzeitig.Falls der Single-Modus eingestellt ist, erscheint imDisplay – – –, und es kann keine Einstellung vorgenommenwerden.Die Oktaven der Layer einstellenIm Layer-Modus können Sie die Oktaven für jeden Soundeinstellen. Der Einstellbereich für jeden Sound beträgt ±1Oktave, im Display angezeigt durch –01, 00 und 01, Standardeinstellungist 00.1. Rufen Sie den Funktionsmodus auf und drücken Siedie HARPSI/CLAV-Taste.Die HARPSI/CLAV-Soundtaste leuchtet auf, und derLayer (L1), dessen Oktave eingestellt werden soll, erscheintim Display.2. Wählen Sie den Layer mit der UP oder DOWN-Tasteneben dem Display.L1 bezeichnet Layer 1, L2 bezeichnet Layer 2.3. Drücken Sie die BANK-Taste.Im Display erscheint die aktuell eingestellte Oktave(00).4. Wählen Sie eine andere Oktave mit der UP oderDOWN-Taste neben dem Display.Um zur Standardeinstellung zurückzugelangen, drückenSie die UP und DOWN-Tasten gleichzeitig.Um die Oktave des anderen Layers zu ändern, drücken Siedie HARPSI/CLAV-Taste, um den entsprechenden Layerauszuwählen.122Pedalzuweisung für LayerIm Layer-Modus können Sie einstellen, auf welchen Sounddas Dämpferpedal wirkt.Folgende Einstellungen sind möglich: nur auf den Soundvon Layer 1 (o – –), nur auf den Sound von Layer 2 (– – o) ,auf beide Sounds (o – o).Standardeinstellung ist o – o.1. Rufen Sie den Funktionsmodus auf und drücken Siedie VIBES/GUITAR-Taste.Die VIBES/GUITAR-Soundtaste leuchtet auf, und imDisplay erscheint die Dämpfereinstellung (o – o).2. Wählen Sie den Dämpfereinstellung mit der UP oderDOWN-Taste neben dem Display.1Falls der Single-Modus eingestellt ist, erscheint imDisplay – – –, und es kann keine Einstellung vorgenommenwerden.Energiesparfunktion deaktivieren und aktivierenFalls 30 Minuten lang keine Taste gedrückt wird oder fallssolange keine automatische Wiedergabe erfolgt, schaltetsich das Instrument automatisch aus. Sie können dieseFunktion deaktivieren (oFF). Werksseitig ist diese Funktionaktiviert. Falls Sie diese Einstellung ändern, wird dieneue Einstellung gespeichert und bleibt auch nach demAusschalten des <strong>LP</strong>-<strong>380</strong> gültig.1. Rufen Sie den Funktionsmodus auf und drücken Siedie ORGAN1-Taste.Die ORGAN1-Soundtaste leuchtet auf, und im Displayerscheint die Einstellung (on).2. Schalten Sie die Funktion mit der UP oder DOWN-Taste neben dem Display aus bzw. ein, falls Sie diesewieder aktivieren wollen.12222312,42,4Falls der Single-Modus eingestellt ist, erscheint imDisplay – – –, und es kann keine Einstellung vorgenommenwerden.47
MIDIWas ist MIDI?MIDI ist die Abkürzung für Musical Instrument DigitalInterface. Dies ist ein internationaler Standard für die Verbindungund die Datenübertragung zwischen elektronischenInstrumenten, Computern und anderen Geräten.Was leistet MIDI?Dank MIDI können Sie das <strong>LP</strong>-<strong>380</strong> zur Steuerung andererInstrumente, oder umgekehrt, andere Instrumente zurSteuerung des <strong>LP</strong>-<strong>380</strong> einsetzen und einen Sequenzer zurKreation komplexer Musikstücke benutzen.Wenn Sie die Tastatur oder das Pedal des <strong>LP</strong>-<strong>380</strong> benutzenoder einen Klang selektieren, werden die Noten, die Pedalaktivierungund die Klangänderungen an ein anderesInstrument übertragen oder von einem Sequenzer aufgenommen.AnschlüsseIm Fachhandel erhältliche MIDI-Kabel dienen zur Übertragungvon MIDI-Daten. Verbinden Sie mit diesen Kabelndie MIDI-Anschlüsse am <strong>LP</strong>-<strong>380</strong> mit den MIDI-Anschlüssendes externen MIDI-Geräts, mit dem MIDI-Daten ausgetauschtwerden sollen. Es gibt zwei Typen von MIDI-Anschlüssen.MIDI IN-AnschlussDieser Anschluss empfängt MIDI-Meldungen.Der MIDI IN-Anschluss erlaubt es Ihnen, Sounds vom <strong>LP</strong>-<strong>380</strong> von einem externen MIDI-Gerät zu spielen (z.B. MIDI-Keyboard oder Sequenzer). Verwenden Sie ein MIDI-Kabelzum Verbinden des MIDI IN-Anschlusses des <strong>LP</strong>-<strong>380</strong> mitdem MIDI OUT-Anschluss des externen MIDI-Geräts.MIDI OUT-AnschlussDieser Anschluss gibt MIDI-Meldungen aus.Der MIDI OUT-Anschluss erlaubt Steuerung eines externenMIDI-Geräts mit vom <strong>LP</strong>-<strong>380</strong> ausgegebenen MIDI-Meldungen. Verwenden Sie ein MIDI-Kabel zum Verbindendes MIDI OUT-Anschlusses des <strong>LP</strong>-<strong>380</strong> mit dem MIDIINAnschluss des externen MIDI-Geräts.MIDI-FunktionsmodusBeim Einschalten des <strong>LP</strong>-<strong>380</strong> sind die MIDI-Parameter aufSendekanal 1, sämtliche Empfangskanäle (1–16), Local Onund Omni Off eingestellt.Sie können diese Einstellungen im MIDI-Funktionsmodusändern.Einstellen von Parametern im MIDI-Funktionsmodus1. Halten Sie die FUNCTION-Taste bei nicht aktiviertemFunktionsmodus gedrückt.Die PIANO1-Taste leuchtet auf, und im Display erscheintder aktuell eingestellte MIDI-Kanal (C01). DieFUNCTION-Taste blinkt.4. Nachdem Sie die gewünschten Einstellungen vorgenommenhaben, drücken Sie die FUNCTION-Taste,um zum Spielmodus zurückzukehren.Die FUNCTION-Taste erlischt.1,4Beim Ausschalten des <strong>LP</strong>-<strong>380</strong> werden sämtliche Parameterauf ihre Standardeinstellungen zurückgestellt.Die MIDI-Kanäle ändernDaten können über die MIDI-Kanäle 1 bis 16 (C01–C16) gesendetund empfangen werden.Beim Einschalten des <strong>LP</strong>-<strong>380</strong> wird automatisch Sendekanal1 (C01) ausgewählt.• Wenn Sie den MIDI-Funktionsmodus aufrufen,leuchtet die PIANO1-Soundtaste auf.Nach dem Aufrufen des MIDI-Funktionsmodus erscheintnormalerweise die MIDI-Kanaleinstellung.Wenn Sie die MIDI-Kanaleinstellung ändern wollen,nachdem Sie bereits andere Einstellungen im MIDI-Funktionsmodus vorgenommen haben, drücken Sie diePIANO1-Taste.Im Layer-Modus bestimmen Sie durch Auswahl des Sendekanalsden Kanal für Layer 1. Als Sendekanal für Layer2 wird automatisch der nächste Kanal eingestellt. HabenSie beispielsweise MIDI-Kanal 7 für den Sound von Layer1 ausgewählt, wird automatisch MIDI-Kanal 8 dem Soundvon Layer 2 zugewiesen. Haben Sie den MIDI-Kanal 16für den Sound von Layer 1 ausgewählt, wird Kanal 1 demSound von Layer 2 zugewiesen.Local On/OffIst Local On eingestellt, werden beim Spielen der Tastaturdes <strong>LP</strong>-<strong>380</strong> sowohl ein Sound wiedergegeben als auch MI-DI-Daten gesendet. Ist Local Off eingestellt, ist beim Spielender Tastatur des <strong>LP</strong>-<strong>380</strong> nichts zu hören – es werden alleinMIDI-Daten gesendet. Normalerweise ist dieser Parameterauf Local On eingestellt (Standardeinstellung: on).Wenn Sie das <strong>LP</strong>-<strong>380</strong> als Master-Keyboard nutzen möchten,beispielsweise um ein angeschlossenes MIDI-Instrument(Keyboard, Soundmodul etc.) zu spielen, sollten Sie LocalOff einstellen. In diesem Fall bleibt das <strong>LP</strong>-<strong>380</strong> stumm undder Sound kommt vom angeschlossenen MIDI-Instrument.Wählen Sie die Einstellung Local Off (oFF), wenn Sie das<strong>LP</strong>-<strong>380</strong> als Soundmodul nutzen, beispielsweise wenndas <strong>LP</strong>-<strong>380</strong> an einen Sequencer angeschlossen wird, beidem Echo Back eingestellt ist (eine Funktion, die die vomSequencer empfangenen Daten zurücksendet), um Rückkopplungenzu vermeiden.• Rufen Sie den MIDI-Funktionsmodus auf und drückenSie die PIANO2-Taste.Die PIANO2-Soundtaste leuchtet auf, und im Displayerscheint die Einstellung für Local On/Off (on).2332. Drücken Sie die Sound-Taste, die dem gewünschtenParameter zugewiesen ist.Im Display erscheinen die aktuellen Einstellungen.3. Nehmen Sie die gewünschten Einstellungen vor.48
Aktivieren/Deaktivieren des Program-Change-Filters (Senden/Empfangen)Durch Senden einer MIDI-Change-Nummer können Sievon Ihrem <strong>LP</strong>-<strong>380</strong> aus zwischen Programmen angeschlossenerMIDI-Instrumente wechseln.Umgekehrt können Sieauch durch Empfangen einer MIDI-Change-Nummer vomangeschlossenen MIDI-Instrument zwischen ProgrammenIhres <strong>LP</strong>-<strong>380</strong> wechseln.Mehr zu den Program-Change-Nummern und den entsprechendenSounds finden Sie weiter unten in der „Tabelleder Sounds und der entsprechenden Program-Change-Nummern“. Um Program-Change-Befehle zu senden/empfangen, müssen Sie diese Funktion deaktivieren (oFF:Standardeinstellung). Um die Befehle nicht zu senden/empfangen, aktivieren Sie diese Funktion (on).• Rufen Sie den MIDI-Funktionsmodus auf und drückenSie die E.PIANO1-Taste.Die E.PIANO1-Soundtaste leuchtet auf, und im Displayerscheint die Einstellung (oFF).Program-Change-Befehle sendenWenn Sie mit den Sound- und BANK-Tasten des <strong>LP</strong>-<strong>380</strong>einen Sound auswählen, wird die entsprechende MIDI-Program-Change-Nummer gesendet.Program-Change-Befehle empfangenWenn das <strong>LP</strong>-<strong>380</strong> einen Program-Change-Befehl empfängt,ändert sich der Sound gemäß der empfangenen MIDI-Program-Change-Nummer.Wird eine inkompatible Program-Change-Nummerempfangen, ändert sich der Sound des <strong>LP</strong>-<strong>380</strong> nicht.Tabelle der Sounds und der entsprechenden Program-Change-NummernCC0: Bank Select (MSB) für alle Sounds ist eingestellt auf 121.Taster Bank CC32 PC KlangPIANO1 1 1 0 Klassisches Piano2 0 0 Flügel3 0 1 Jazz PianoPIANO2 1 2 0 Live Piano2 0 3 Honky-Tonk3 0 2 Elektr. FlügelE.PIANO1 1 0 4 Stage E-Piano2 1 4 Bright E-Piano3 3 4 Tremolo EPE.PIANO2 1 0 5 Dig. E-Piano2 2 4 60's E-Piano3 1 5 Dig.E-Piano2HARPSI/CLAV 1 0 6 Harpsichord2 0 7 Clav.3 1 7 Synth ClavVIBES/GUITAR1 0 11 Vibraphon2 0 12 Marimba3 0 24 AkustikgitarreORGAN1 1 0 16 Jazzorgel 12 1 16 Jazzorgel 23 0 17 Jazzorgel 3ORGAN2 1 0 19 Pfeifenorgel 12 1 19 Pfeifenorgel 23 2 19 PositivorgelSTRINGS 1 0 48 Streicher2 0 50 Kinostreicher3 1 50 Analoge StreicherCHOIR 1 0 52 Aah Chor2 1 52 Ooh Stimmen3 2 52 Klassischer ChorAktivieren/Deaktivieren des Control-Change-Filters (Senden/Empfangen)Es können auch Steuerungsbefehle, beispielsweise durchBedienung des Dämpferpedals des <strong>LP</strong>-<strong>380</strong> an ein angeschlossenesexternes MIDI-Instrument gesendet werden;umgekehrt können Sie auch das <strong>LP</strong>-<strong>380</strong> vom externenMIDI-Instrument aus steuern.Um Control-Change-Befehle zu senden/empfangen, müssenSie diese Funktion deaktivieren (oFF: Standardeinstellung).Um die Befehle nicht zu senden/empfangen, aktivierenSie diese Funktion (on).• Rufen Sie den MIDI-Funktionsmodus auf und drückenSie die E.PIANO2-Taste.Die E.PIANO2-Soundtaste leuchtet auf, und im Displayerscheint die Einstellung (oFF).Das <strong>LP</strong>-<strong>380</strong> als multitimbrales Soundmodul verwendenSie können das <strong>LP</strong>-<strong>380</strong> als 16-teiliges multitimbralesSoundmodul nutzen, indem Sie seinen internen Klanggeneratorvon einem externen MIDI-Instrument aus steuern.1. Verbinden Sie mit einem MIDI-Kabel den MIDI IN-Anschluss des <strong>LP</strong>-<strong>380</strong> mit dem MIDI OUT-Anschlusseines Sequencers oder eines anderen MIDI-Instruments.2. Senden Sie MIDI-Daten vom angeschlossenen Sequenzeroder einem anderen MIDI-Instrument.Hinweise zum Senden von Daten finden Sie in derBedieungsanleitung Ihres Sequencers oder des ensprechendenMIDI-Instruments.3. Wenn das <strong>LP</strong>-<strong>380</strong> neben den Performance-Daten einenProgram-Change-Befehl empfängt, spielt es imSound, der der empfangenen Programmnummer entspricht.Falls Sie das <strong>LP</strong>-<strong>380</strong> nicht als multitimbrales Soundmodulnutzen wollen, deaktiveren Sie diese Funktion (oFF).• Rufen Sie den MIDI-Funktionsmodus auf und drückenSie die HARPSI/CLAV-Taste.Die HARPSI/CLAV-Soundtaste leuchtet auf, und imDisplay erscheint die Einstellung (on = Standardeinstellung).49
AnhangFehlerbeseitigungSollte während des Gebrauchs des Instruments eines dernachfolgend beschriebenen Probleme auftreten, kontrollierenSie es sorgfältig und versuchen Sie, die Störunganhand der Vorschläge und Tipps zu beseitigen. Wenndas Instrument weiterhin nicht einwandfrei funktionierensollte, wenden Sie sich bitte an Ihren Händler.Das Instrument kann nicht eingeschaltet werden• Schließen Sie das Netzteil ordnungsgemäß an das <strong>LP</strong>-<strong>380</strong> und die Steckdose an.Instrument bleibt stumm• Ist das Lautsprecherkabel der Lautsprecherbox auf demStänder korrekt an die Lautsprecherbuchse am <strong>LP</strong>-<strong>380</strong>angeschlossen?• Versichern Sie sich, dass die Lautstärke nicht auf MINeingestellt ist. Regulieren Sie die Lautstärke ggf. auf einangemessenes Niveau.• Versichern Sie sich, dass die MIDI Local Funktion nichtauf OFF eingestellt ist. Sollte dies der Fall sein, stellenSie ON ein (oder schalten Sie das Instrument aus undanschließend wieder ein).• Schauen Sie nach, ob eventuell ein Stecker mit einerPHONES-Buchse verbunden ist. Dann sind die Lautsprechernämlich stummgeschaltet. Ziehen Sie den Steckeralso aus der Buchse.Noten sind unterbrochen• Sie haben die maximale Polyphonie überschritten. Sieim Abschnitt „Hinweise zur maximalen Polyphonie.“Die Tonlage oder der Ton des Klavies klingt in manchenTonalregionen falsch• Die Piano-Sounds des <strong>LP</strong>-<strong>380</strong> replizieren den Sound einesechten Klaviers so treu wie möglich. Das bedeutet, dassin manchen Regionen der Tastatur das Gefühl entstehenkan, dass die Obertöne stärker erscheinen oder Ton oderTonlage falsch wirkt. Dies ist keine Fehlfunktion.Das angeschlossene MIDI-Instrument reagiert nichtauf gesendete MIDI-Daten.• Überprüfen Sie, ob alle MIDI-Kabel korrekt angeschlossensind. Überprüfen Sie, ob das <strong>LP</strong>-<strong>380</strong> die MIDI-Daten aufdem gleichen Kanal empfängt, wie das MIDI-Instrument.Hinweise zur maximalen PolyphonieFalls die Anzahl der gleichzeitig gespielten Noten die maximalePolyphonie überschreitet, gehen einige Noten verloren,da das <strong>LP</strong>-<strong>380</strong> mit einem Algorithmus ausgestattet ist, derdie erste gespielte Note stoppt, um den später gespielten NotenPrioriät einzuräumen. Manche Einzelsounds des <strong>LP</strong>-<strong>380</strong>werden von zwei oder mehreren Oszillatoren generiert (diezur Klangerzeugung einer Note zusammengeschaltet sind).Sounds, die von nur einem Oszillator generiert werden, beispielsweisedie Sounds in den Bänken 1 und 2 von VIBES/GUITAR, haben eine maximale Polyphonie von 120 Noten.Sounds, die von zwei Oszillatoren generiert werden, beispielsweisedie Sounds in den Bänken 1 und 2 von PIA-NO2 sowie in den Bänken 1 und 3 von E.PIANO2, habeneine maximale Polyphonie von 60 Noten.120 ÷ Anzahl der Soundoszillatoren = Maximale PolyphonieSie sollten sich der maximalen Polyphonie stets bewusst seinund vor allem im Layer-Modus oder bei der Verwendung einesDämpferpedals die Sounds dementsprechend auswählen.Technische DatenTastatur RH3 (gewichtete Hammertastatur 3) Tastatur:88 Tasten (A0–C8)Anschlagempfindlichkeit Leicht, normal, schwerTonhöheStimmungKlangerzeugungPolyphonieSoundsEffekteTransponierung, FeinstimmungNeun StimmartenStereo PCM System120 Noten (max.)30 Sounds (10 x 3 Bänke)Brilliance, Reverb, Chorus (jeweils 3 Stufen)Demo 30 (Sound-Demosong x 10, Piano-Song x 20)MetronomRegler für Tempo, Taktart, Metronomklangs,Betonung und LautstärkePedalHaltepedal*, Sostenutopedal, Softpedal*(half-pedaling unterstützt)AnschlüsseLINE OUT, MIDI (IN, OUT), Kopfhörer x 2, PEDAL,SPEAKERReglerNetzschalter, VOLUME, PIANO SONG, TRANSPOSE,FUNCTION, TOUCH, BRILLIANCE, REVERB,CHORUS, BANK, Sound × 10, UP, DOWN,METRONOMEAusgangleistung 22 W × 2Lautsprecher 10 cm x 2StromversorgungLeistungsaufnahmeDC 19 V(Netzteil mitgeliefert)15 WAbmessungen (B x T x H) 1355 × 351 × 772 mm1355 × 351 × 936 mm(mit geöffnetem Tastaturdeckel)Gewicht37 kg (inklusive Ständer)Included accessories Netzteil ( ), Netzkabel,Ständer- Änderungen der technischen Daten und des Designsohne vorherige Ankündigung vorbehalten.50
Montage des StändersVorsicht● Bitten Sie mindestens eine Person, Ihnen bei der Montagedes Ständers zu helfen.Vorsicht beim ZusammenbauIm Sinne eines ordnungsgemäßen und sicheren Zusammenbausmüssen Sie folgende Punkte beachten.• Führen Sie die Montageschritte in der angegebenenReihenfolge aus und sorgen Sie dafür, dass alle Teilerichtig herum miteinander verbunden werden.Weitere VorsichtsmaßnahmenBitte überprüfen Sie nach dem Zusammenbau folgendes.• Lockere SchraubenNach und nach löst sich die eine oder andere Schraubeeventuell ein wenig.Deshalb sollten Sie regelmäßig überprüfen, ob alleSchrauben noch gut festsitzen. Wenn Sie den Eindruckhaben, dass der Ständer wacklig wird, haben sich eventuellein paar Schrauben gelöst. Diese müssen Sie dannfestdrehen.• Wenn Sie das Digitale Piano transportieren wollenUm das Instrument samt Ständer zu transportieren,ziehen Sie erst das Netzkabel ab und schließen Sie denTastaturdeckel. Heben Sie das Instrument nun mindestenszu zweit an und achten sie darauf, es beim Transportmöglichst waagrecht zu halten.• DemontageWenn Sie den Ständer demontieren müssen, verfahrenSie bitte in umgekehrter Reihenfolge wie beim Zusammenbau.Bewahren Sie alle Schrauben und anderen Teilean einem sicheren Ort auf, um sie nicht zu verlieren.Legen Sie das <strong>LP</strong>-<strong>380</strong> vor der Demontage des Ständersimmer auf den Boden.2. Überprüfen Sie zuerst, ob folgende Teile alle vorhandensind.Seitenplatte (links)Stützböckchen (links)Schrauben (M6): 6 StückDruckniet: 1 StückLautsprecherboxPedalkabelPedalbrettPedaleinheitSchrauben (M4):6 StückSeitenplatte (rechts)Stützböckchen (rechts)Kabelhalter: 1 StückKappen:6 Stück3. Befestigen Sie das <strong>LP</strong>-<strong>380</strong> und die Lautsprecherboxmit acht M6-Schrauben an den linken und rechtenSeitenplatten.Stellen Sie die Lautsprecherbox so auf, dass das Lautsprecherkabelsich an der linken Seite befindet. In dieserPosition zeigen die Lautsprecher zu Ihnen hin (undSie blicken auf die mit Stoff bezogene Seite).Schrauben Sie nun zuerst die rechte und anschließenddie linke Seitenplatte locker an*.* Ziehen Sie die Schrauben nur leicht an und lassen Sieetwa 2 mm Spiel.Schrauben(M6)mit Stoff bezogene Seite<strong>LP</strong>-<strong>380</strong>MontageschritteSie benötigen einen Kreuzschlitzschraubenzieher (+).1. Legen Sie die Schutzhülle, mit der das <strong>LP</strong>-<strong>380</strong> umhülltwar auf den Boden und legen Sie das <strong>LP</strong>-<strong>380</strong>mit der Rückseite auf die Hülle.Legen Sie außerdem Lappen, Tücher, Zeitungen o. Ä.unter den Ständer, um bei der Montage und dem anschließendenAufstellen mit den Händen leichter unterdas <strong>LP</strong>-<strong>380</strong> greifen zu können.Achten Sie darauf, dass der Tastaturdeckel des <strong>LP</strong>-<strong>380</strong> sich bei der Montage nicht öffnet.<strong>LP</strong>-<strong>380</strong>Seitenplatte (links)LautsprecherboxPositionierungshilfeSchrauben(M6)Seitenplatte (rechts)Achten Sie darauf, sich nicht die Finger zu klemmen.4. Schließen Sie das Pedalkabel in der richtigen Polungan den Anschluss an der Unterseite der Pedaleinheitan und klemmen Sie es in den Schlitz an der Pedaleinheit.Drücken Sie beim Anschließen oder Abziehen den Sicherungsriegeldes Pedalkabelsteckers.SchutzhülleSicherungsriegel51
5. Schieben Sie die Pedaleinheit in die Aussparung desPedalbretts und befestigen Sie diese, indem Sie denDruckniet in das Loch (oberhalb der Aussparung)auf der Rückseite des Pedalbretts drücken.Nachdem Sie das Pedalkabel eingeklemmt haben, hebenSie das Pedalbrett an, um sicherzustellen, dass diePedale nicht herunterfallen.Der Druckniet verhindert, dass die Pedaleinheit sichunbeabsichtigt vom Pedalbrett löst. Er kann nicht wieeine Schraube festgezogen werden.9. Ziehen Sie nun alle in Schritt 3 und 6 nur leicht angezogenenSchrauben fest.Positionieren Sie die linken und rechten Seitenplattenhorizontal und vertikal gleich, bevor Sie die Schraubenan Ihrem <strong>LP</strong>-<strong>380</strong> fest anziehen.10. Vergewissern Sie sich erneut, dass der Ständer pressanliegt und gerade steht und dass alle Schrauben festangezogen sind.11. Versehen Sie die Schraubköpfe an der rechten undlinken Seitenplatte mit Kappen.VorneHintenDrückenVorderseite desPedalbrettsKappenRückseite desPedalbrettsDruckniet6. Befestigen Sie das Pedalbrett mitsamt der daran befestigtenPedaleinheit mit vier M4-Schrauben an denHalterungen an der Innenseite der Seitenplatten lockeran.12. Schließen Sie das Pedalkabel und das Lautsprecherkabelan den entsprechenden Buchsen der Anschlussfeldsauf der Rückseite des <strong>LP</strong>-<strong>380</strong> an.Achten Sie beim Anschluss des Pedalkabels und desLautsprecherkabels auf die richtige Polung der Stecker.Drücken Sie beim Anschließen oder Abziehen denSicherungsriegel des Pedalkabelsteckers oder Lautsprecherkabels.Schrauben(M4)Schrauben(M4)SicherungsriegelLautsprecherkabelPedalkabelKabelhalter7. Stellen Sie zu zweit das Instrument mit montiertemStänder auf.8. Sollten Sie in jedem Fall die beiliegenden Stützböckchenan beiden Seitenplatten montieren. Und derStützböckchen an der linken Seite des Kabelhalterzu diesem Zeitpunkt befestigt.Achten Sie darauf, dass die Unterseite der Seitenplattenund der montierten Stützböckchen auf gleicher Höheliegen.13. Sichern Sie das Pedalkabel mit dem Kabelhalter.Achten Sie beim Sichern des Kabels am Kabelhalter, dassdie Stecker keiner zu hohen Zugbelastung ausgesetzt sind.14. Schließen Sie das Netzkabel an das Netzteil an. VerbindenSie das Netzteilkabel anschließend mit derDC IN-Buchse und wickeln Sie das Kabel um denKabelhaken am Piano. Siehe „Anschließen ans Netz“auf Seite 39.15. Stellen Sie das <strong>LP</strong>-<strong>380</strong> an den gewünschten Ort. WählenSie einen ebenen und stabilen Aufstellungsort.RückseiteSchrauben (M4)KabelhalterStützböckchenRückseiteSchrauben (M4)Achten Sie beim Aufstellen des Instruments darauf,dass weder das Netzteilkabel noch das Pedalkabelgequetscht werden.Im Sinne einer optimalen Standfestigkeit solltenSie unbedingt die beiliegenden Stützböckchen verwenden.Überprüfung nach Montage• Sind bestimmte Teile übrig geblieben?Wenn noch Dinge übrig sind, müssen Sie nachschauen,an welchen Stellen Sie etwas vergessen haben. AllesZubehör muss angebracht werden.• Alle Schrauben müssen festgedreht werden.52
PrecaucionesUbicaciónEl uso de la unidad en las siguientes ubicacionespuede dar como resultado un mal funcionamiento:• Expuesto a la luz directa del sol• Zonas de extremada temperatura o humedad• Zonas con exceso de suciedad o polvo• Zonas con excesiva vibración• Cercano a campos magnéticosFuente de alimentaciónPor favor, conecte el adaptador de corriente designadoa una toma de corriente con el voltaje adecuado.No lo conecte a una toma de corriente con voltaje diferenteal indicado.Interferencias con otros aparatosLas radios y televisores situados cerca pueden experimentarinterferencias en la recepción. Opere estedispositivo a una distancia prudencial de radios ytelevisores.ManejoPara evitar una rotura, no aplique excesiva fuerza alos conmutadores o controles.CuidadoSi exterior se ensucia, límpiese con un trapo seco. Nouse líquidos limpiadores como disolvente, ni compuestosinflamables.Nota respecto a residuos y deshechos (solo UE)Cuando aparezca el símbolo del cubo de basura tachadosobre un producto, su manual de usuario, la batería,o el embalaje de cualquiera de éstos, significa quecuando quiere tire dichos artículos a la basura, ha dehacerlo en acuerdo con la normativa vigente de laUnión Europea. No debe verter dichos artículos juntocon la basura de casa. Verter este producto de maneraadecuada ayudará a evitar daños a su salud pública yposibles daños al medioambiente. Cada país tiene una normativaespecífica acerca de cómo verter productos potencialmentetóxicos, por tanto le rogamos que se ponga en contacto consu oficina o ministerio de medioambiente para más detalles.Si la batería contiene metales pesados por encima del límitepermitido, habrá un símbolo de un material químico, debajodel símbolo del cubo de basura tachado.NOTA IMPORTANTE PARA EL CONSUMIDOREste producto ha sido fabricado de acuerdo a estrictas especificacionesy requerimientos de voltaje aplicables en el paíspara el cual está destinado. Si ha comprado este producto porinternet, a través de correo, y/o venta telefónica, debe ustedverificar que el uso de este producto está destinado al país enel cual reside.AVISO: El uso de este producto en un país distinto al cual estádestinado podría resultar peligroso y podría invalidar la garantíadel fabricante o distribuidor.Por favor guarde su recibo como prueba de compra ya que deotro modo el producto puede verse privado de la garantía delfabricante o distribuidor.Guarde este manualDespués de leer este manual, guárdelo para futurasconsultas.Mantenga los elementos externosalejados del equipoNunca coloque ningún recipiente con líquido cercadeeste equipo, podría causar un cortocircuito, fueroo descarga eléctrica. Cuide de que no caiga ningúnobjeto metálico dentro del equipo.* Todos los nombres de productos y compañías son marcascomerciales o marcas registradas de sus respectivos propietarios.53
Tabla de contenidosIntroducciónIntroducción------------------------------------- 54Características principales-----------------------54Partes y sus funciones---------------------- 55Preparativos e interpretacionesde demostración------------------------ 56Antes de comenzar a tocar-----------------------56Escucha deinterpretaciones de demostración-----58Toque del <strong>LP</strong>-<strong>380</strong>------------------------------- 59Toque de un solo sonido (Modo Simple)------59Toque de dos sonidos almismo tiempo (Modo de Capas)-------59Interpretación con otra persona(Modo de Pareja)---------------------------60Utilización de pedales-----------------------------60Efectos-------------------------------------------------60Metrónomo------------------------------------------- 61Otras funciones-------------------------------- 62Ajustes de toque------------------------------------62Transposición----------------------------------------62Modo de Función-----------------------------------62MIDI------------------------------------------------- 65¿Qué es MIDI?--------------------------------------65¿Qué puedo hacer con MIDI?-------------------65Conexiones-------------------------------------------65Modo de función MIDI-----------------------------65Apéndice------------------------------------------ 67Solución de problemas----------------------------67Especificaciones------------------------------------67Ensamblaje del pedestal-------------------- 68Precaución durante el ensamblaje-------------68Otras precauciones--------------------------------68Procedimiento de ensamblaje-------------------68Comprobación después del ensamblaje------69Tabla de implementación MIDI------------ 87Características principalesTreinta sonidos de alta calidadEl <strong>LP</strong>-<strong>380</strong> dispone de 30 sonidos expresivos de alta calidadincorporados, incluyendo un piano de cola de concierto estéreo.Puede utilizar el modo de Capas para jugar simultáneamentedos sonidos a la vez, o puede utilizar el modo dePareja, que permite a dos personas tocar la misma gama,una en cada mitad del teclado.EfectosEl <strong>LP</strong>-<strong>380</strong> dispone de 3 efectos digitales incorporados.Estos efectos pueden ajustar el brillo del tono (Brillantez),simular el ambiente natural de una sala de conciertos (Reverberación)y añadir riqueza al sonido (Coro).Efectos de los pedalesAl igual que en un piano acústico, el <strong>LP</strong>-<strong>380</strong> tiene trespedales que controlan los efectos de resonancia, tonal yceleste. El pedal de resonancia y el pedal celeste responderána medio recorrido del pedal, lo que le permite variarla profundidad del efecto en la medida que esté pisando elpedal. Pisando el pedal de resonancia, podrá añadir tambiénresonancia de amortiguación al tono de piano clásicoy de piano de cola (bancos 1 y 2 de PIANO1).MetrónomoEl metrónomo incorporado le permite seleccionar la signaturade compás, el tempo y el volumen, e incluso elegir unsonido de la campana como el acento.Control de toquePuede elegir entre tres ajustes diferentes para ajustar cómoresponderá el sonido a su dinámica de tocar el teclado.TemperamentosPara la auténtica interpretación de una amplia gama demúsica, <strong>LP</strong>-<strong>380</strong> le permite seleccionar entre nueve temperamentos,incluyendo el temperamento igual, temperamentospuros (mayores y menores), temperamentosclásicos (Kirnberger y Werckmeister) así como los temperamentosutilizados con música folclórica del MedioOriente e India. Cuando se elige un sonido de piano acústico,se selecciona automáticamente la afinación extendidautilizada en pianos.Tonalidad ajustableLa función de transposición le permite cambiar la tonalidaddel piano, y la función Control de tonalidad le permitehacer ajustes afinados con precisión.Dos tomas para auricularesHay dos tomas para auriculares, para permitir que dospersonas puedan escuchar simultáneamente.Tomas LINE OUTLa toma LINE OUT permite conectar un altavoz activo oun equipo de grabación.Capacidades MIDIEl <strong>LP</strong>-<strong>380</strong> admite el protocolo MIDI, la norma que permitela transferencia de datos de música entre instrumentosmusicales y ordenadores. MIDI permite que dos o másdispositivos controlen o sean controlados por los demás, ytambién le permite utilizar el <strong>LP</strong>-<strong>380</strong> como un generadorde sonido multitímbrico de 16 partes.54
Partes y sus funcionesPanel de controlCaja de conectores(en la parte posterior)4 5 612Caja de conectores37 8 9 10 1112 13 141516 17 18 19 201. Tomas para auriculares ( )(Frente del caja de conectores):Aquí puede insertar dos auriculares con miniclavija estéreo.Cuando inserte la clavija de unos auriculares, losaltavoces internos no emitirán sonido.2. Botón de alimentación:Este botón conecta y desconecta la alimentación del<strong>LP</strong>-<strong>380</strong>.3. Mando VOLUME:Este mando ajusta el volumen de los altavoces y de lastomas de salida y de auriculares.4. Botón PIANO SONG:Este botón se utiliza para entrar en el modo de cancionesde piano, después de lo cual el botón se iluminará.Si pulsa simultáneamente este botón y el botónTRANSPOSE, entrará en el modo de canción de demostraciónde sonido.5. Botón TRANSPOSE:Este botón se utiliza para ajustar la transposición. Durantela transposición, el, botón estará iluminado. Sipulsa simultáneamente este botón y el botón PIANOSONG, entrará en el modo de canción de demostraciónde sonido.6. Botón FUNCTION:Este botón se utiliza para entrar en el modo de Función,en el que podrá especificar la tonalidad, el temperamentoy otros ajustes. Mantenga pulsado este botónpara entrar en el modo de función MIDI, en el que podráespecificar ajustes de MIDI. El botón se iluminarácuando el <strong>LP</strong>-<strong>380</strong> entre en el modo de Función, y parpadearácuando entre en el modo de función MIDI.7. Botón TOUCH:Este botón le permite seleccionar la sensibilidad delteclado.8. Botón BRILLIANCE:Este botón se utiliza para ajustar el brillo del tono.9. Botón REVERB:Este botón se utiliza para activar/desactivar la reverberación,que añade ambiente al sonido.Cuando active este efecto, el botón se iluminará.10. Botón CHORUS:Este botón se utiliza para activar/desactivar el coro, queañade riqueza al sonido.Cuando active este efecto, el botón se iluminará.11. Botón/LEDs BANK:Este botón se utiliza para seleccionar el banco de sonidodeseado. El LED para el banco seleccionado actualmentese iluminará.12. Botones de sonido:Estos botones se utilizan para seleccionar entre 30 sonidos(10 × 3 bancos). Pueden pulsarse dos botones paratocar simultáneamente dos sonidos (modo de Capas).13. Visualizador:El visualizador muestra ajustes, por ejemplo, para elmodo de Función y el metrónomo.14. Botones UP/DOWN:Estos botones se utilizan para seleccionar un valor paralos diversos ajustes.15. Botón METRONOME:Este botón se utiliza para iniciar/parar el metrónomo.Mientras esté utilizándose el metrónomo, el botón estaráiluminado. Además, mantenga pulsado este botónpara entrar en el modo de ajuste de Metrónomo, en elque podrá especificar varios ajustes del metrónomo.16. Conectores MIDI (IN, OUT):Éstas son tomas utilizadas para conectar otros dispositivosMIDI (secuenciador, teclados, etc.).OUT: Salida de datos(para conectarse al conector MIDI IN de otro dispositivoMIDI).IN: Entrada de datos(para conectarse al conector MIDI OUT de otro dispositivoMIDI).17. Toma LINE OUT:Ésta es la toma de salida de audio principal , que permitela conexión de una miniclavija estéreo a la tomade entrada de un amplificador o altavoces activos, o ala toma de entrada AUX de otro equipo.Utilice el mando VOLUME para ajustar el volumen desalida.18. Toma DC 19V:Conecte el adaptador de CA incluido aquí.19. Conector de altavoz:Conecte el cable de la caja del altavoz aquí (consulteEnsamblaje del pedestal).20. Conector de pedales:Conecte el cable de la unidad de pedales aquí (consulteEnsamblaje del pedestal).55
Preparativos e interpretaciones de demostraciónAntes de comenzar a tocarAcerca del pedestal incluidoEl <strong>LP</strong>-<strong>380</strong> se utiliza con el pedestal incluido.Antes de seguir, lea la sección “Ensamblaje del pedestal” que se encuentra en la página 68.Conexión de la alimentaciónConecte el adaptador de CA suministrado al cable de alimentación. Conecte el extremode la clavija de CC en la toma DC9V de la parte posterior de la caja de conectores. Después,conecte el cable de alimentación a una toma de CA.Para evitar que el cable del adaptador de CA se desenchufe accidentalmente de latoma, páselo a través del gancho para cable (Fig. 1). Cuando desenganche el cable,no tire de él con fuerza.Cerciórese de utilizar el adaptador de CA que viene con su unidad. El uso de otrosadaptadores de CA podría provocar fallos de funcionamiento u otros acontecimientosimprevistos.Cerciórese de enchufar la unidad en una toma de CA de la tensión apropiada.Apertura o cierre de la tapa del tecladoApertura de la tapa del teclado1. Utilizando ambas manos, levante suavemente la tapa del teclado para abrirla.Fig. 1Ganchopara cableTenga cuidadode no doblardemasiado estaparte cuandoinserte el cablede alimentación.a la toma de CAClavijade CCAdaptador de CACable de alimentaciónpara adaptador de CA2. Doble el borde del extremo de la tapa del teclado.Cierre de la tapa del teclado1. Levante el borde, y tire suavemente de la tapa del teclado hacia usted.2. Cuando la tapa del teclado comience a cerrarse por sí misma, suéltela.La tapa del teclado ha sido diseñada para cerrarse suavemente por sí misma desdeaproximadamente la mitad del recorrido de descenso.No tire a la fuerza de la tapa del teclado cuando se esté cerrando.Además, no cierre a la fuerza la tapa del teclado aplicándole unafuerte presión. Si lo hiciese, podría dañar la unidad.Tenga cuidado de no pillarse los dedos o las manos cuando cierrela tapa del teclado.La temperatura y la humedad afectarán la rapidez con la tapa delteclado se cierra.La tapa del teclado puede hacer un sonido tenue de clic cuando se esté cerrandolentamente. Éste es el comportamiento normal de la unidad.56
Utilización de auricularesUtilice auriculares estéreo con miniclavija estéreo de 1/8”.Como en la parte inferior izquierda del teclado <strong>LP</strong>-<strong>380</strong> hay dos tomas para auriculares,dos personas podrán disfrutar del sonido.Cuando conecte unos auriculares a la toma para auriculares, los altavoces del <strong>LP</strong>-<strong>380</strong> noemitirán sonido.Utilice auriculares por la noche, o cuando no desee molestar a otras personas.Si sus auriculares disponen de adaptador de clavija estándar a miniclavija, cercióresede sujetar el adaptador de clavija cuando conecte o desconecte los auricularesPara proteger sus oídos, no escuche sonidos fuertes de alto volumen durante períodosprolongados de tiempo a través de los auriculares.Acerca del posapartiturasLa tapa del teclado sirve como conveniente posapartituras. (Fig. 2)Cuando coloque partituras abiertas, no aplique presión fuerte sobre la tapa delteclado.Fig. 2Encendido del instrumentoPulse el botón de alimentación para encender el <strong>LP</strong>-<strong>380</strong>. (Fig. 3)Cuando encienda el instrumento, los botones del panel de control se iluminarán.Para apagar el instrumento, vuelva a pulsar el botón de alimentación.Cuando apague el instrumento, todas las funciones y parámetros, excepto la funciónde apagado automático, volverán a los ajustes predeterminados de fábrica.Apagado automáticoCuando hayan transcurrido 30 minutos sin actuación del usuario o interpretación dedemostración, el instrumento se apagará automáticamente. Para inhabilitar esta función,desactive la función de apagado automático (consulte la página 64).Fig. 3MássuaveMásfuerteAjuste del volumenPara aumentar el nivel del volumen, gire el mando VOLUME que está situado al ladodel interruptor de alimentación hacia “MAX”.Para reducir el nivel, gírelo hacia “MIN”. (Fig. 3)El mando VOLUME controla el nivel de salida de los altavoces incorporados, las tomaspara auriculares, y las tomas LINE OUT.Siempre es mejor comenzar con un volumen bajo y después aumentarlo gradualmente.Utilización de la toma LINE OUTUtilice la toma LINE OUT, si desea conectar su <strong>LP</strong>-<strong>380</strong> a un mezclador, a un equipo estéreode alta fidelidad, o a un par de monitores activos. Cuando desee utilizar un equipoestéreo de alta fidelidad, LINE OUT a las entradas AUX o LINE.Solamente deberá conectar dispositivos con la alimentación desconectada. La operacióndescuidada puede dañar el <strong>LP</strong>-<strong>380</strong> o el dispositivo al que esté conectado, ocausar un mal funcionamiento.Los cables conectores se venden por separado. Tendrá que obtener los cables apropiadosdisponibles en el mercado para su equipo.57
Escucha de interpretaciones de demostraciónEl <strong>LP</strong>-<strong>380</strong> contiene un total de 30 interpretaciones de demostración(10 canciones de demostración utilizando 10sonidos de alta calidad y 20 canciones de piano familiaresutilizando sonidos de piano).Durante la reproducción de una canción de demostraciónde sonido, puede tocar utilizando el teclado, pero elsonido no podrá cambiarse con los botones de sonido.Durante la reproducción de una canción de demostraciónde sonido, los ajustes para efectos (reverberacióny coro) no podrán cambiarse.Escucha de una canción de demostración1. Pulse simultáneamente el botón PIANO SONG y elbotón TRANSPOSE.El botón PIANO SONG parpadeará, y los botones desonido parpadearán secuencialmente.Además, el número para la canción de demostración desonido (d01) aparecerá en el visualizador.1,312. Después de unos 3 segundos, el botón PIANO1 parpadeará,y se iniciará la reproducción de la canciónde demostración correspondiente a tal botón.Cuando finalice la reproducción de la canción de demostraciónde PIANO1, la reproducción continuarásecuencialmente con PIANO2, E.PIANO1, etc. Cuandofinalice la reproducción de demostración de CHOIR,volverá a iniciarse la reproducción con la canción dedemostración de PIANO1.Escucha de una canción de demostración específicaCuando los botones de sonido estén parpadeandosecuencialmente, pulse el botón de sonido para la canciónde demostración que desee escuchar.Si pulsa un botón de sonido diferente, incluso mientrasesté reproduciéndose una canción, después de algunossegundos se iniciará la reproducción de la canción dedemostración correspondiente.Además, es posible seleccionar una canción pulsandoel botón UP o DOWN situado al lado del visualizador.3. Para detener la reproducción de una canción de demostración,pulse de nuevo el botón PIANO SONG.Lista de canciones de demostración de sonidoVisualizadorBotón desonidoTítulo de la canción Compositord01 PIANO1 Jardins sous la pluie C.Debussyd02 PIANO2 Danny boy Irish Folk Songd03 E.PIANO1 Jam Session N. Nishid04 E.PIANO2 In Memory M.Gieseld05d06HARPSI/CLAV Invention No.8 J.S.BachVIBES/GUITARJazz in SpainKORGoriginald07 ORGAN1 Improvisation M.Geiseld08 ORGAN2 Toccata in D moll J.S.Bachd09 STRINGS Scoring Interlude M.Geiseld10 CHOIR Autumn Flares M.GeiselEscucha de una canción de piano1. Pulse el botón PIANO SONG.Los botones PIANO SONG and PIANO1 se iluminarán,el número para la canción de piano (001) aparecerá enel visualizador.1,32. Después de unos 3 segundos, el botón PIANO1 parpadeará,y se iniciará la reproducción de la canciónde piano.Cuando finalice la reproducción de la primera canciónde piano, la reproducción continuará secuencialmentecon la segunda, tercera, etc. Cuando finalice la reproducciónde la vigésima canción de piano, volverá a iniciarsela reproducción con la primera canción de piano.Escucha de una canción de piano específicaEl número de la canción que desee escuchar podrá seleccionarlopulsando el botón UP o DOWN situado allado del visualizador. Si selecciona un número diferentepulsando los botones, incluso mientras esté reproduciéndoseuna canción, después de algunos segundos seiniciará la reproducción de la canción correspondiente.3. Para detener la reproducción de una canción de piano,pulse de nuevo el botón PIANO SONG.Lista de canciones de pianoNúm. VisualizadorTítulo de la canción Compositor1 001 Etude Op.10-12 F.Chopin2 002 Claire de lune C.Debussy3 003 Fantaisie-Impromptu Op.66 F.Chopin4 004 Waltz No.6 Db-major Op.64-1 F.Chopin5 005“Prelude 1” The Well-TemperedClavier, Book 1J.S.Bach6 006 “Turkish March” Sonata K.331 W.A.Mozart7 007 Arabesque No.1 C.Debussy8 008 Für Elise L.v.Beethoven9 009 Liebesträume Nr.3 F.Liszt10 010 La Campanella F.Liszt11 011 Nocturne Op.9-2 F.Chopin12 012 Spring Song Op.62-6 F.Mendelssohn13 013 Reflets dans I'eau C.Debussy14 014 Gymnopédie No.1 E.Satie15 015 Etude Op.10-3 F.Chopin16 016 Old Feather Blues KORG original17 017 La fille aux cheveux de lin C.Debussy18 018 The Entertainer S.Joplin19 019 Sunflowers KORG original20 020 Amazing Grace Hymn58
Toque del <strong>LP</strong>-<strong>380</strong>Toque de un solo sonido (Modo Simple)Puede seleccionar un sonido entre los treinta sonidos suministradoscon el instrumento (10 sonidos x 3 bancos).Botón de sonido Banco Sonido #PIANO1 1 Piano clásico 32 Piano de cola 33 Piano de jazz 2PIANO2 1 Piano en vivo 22 Honky-Tonk 23 Piano de cola eléctrico 1E.PIANO1 1 Piano eléctrico de escenario 12 Piano eléctrico brillante 23 Trémolo EP 3E.PIANO2 1 Piano eléctrico digital 1 22 Piano eléctrico de los 60 13 Piano eléctrico digital 2 2HARPSI/CLAV 1 Clavecín 22 Clavicordio 13 Clavicordio de sintetizador 2VIBES/GUITAR 1 Vibráfono 12 Marimba 13 Guitarra acústica 2ORGAN1 1 Órgano de jazz 1 22 Órgano de jazz 2 23 Órgano de jazz 3 2ORGAN2 1 Órgano de tubos 1 22 Órgano de tubos 2 23 Órgano positivo 2STRINGS 1 Cuerdas 22 Cuerdas de cine 23 Cuerdas analógicas 2CHOIR 1 Coro Aah 22 Voces Ooh 23 Coro clásico 3(#) Estas columnas muestran el número de osciladores porvoz que se utilizan para cada sonido. (Consulte “Acerca depolifonía máxima” en la página 67.)1. Pulse el botón de sonido correspondiente al sonidoque desee tocar.El botón seleccionado se iluminará.2. Pulse el botón BANK para seleccionar uno de los tressonidos.Cada vez que pulse el botón BANK, el banco cambiaráen el orden de 1, 2, 3, 1, ..., y el LED correspondiente situadoa la derecha del botón BANK se iluminará.Por ejemplo, para seleccionar el sonido de piano de colaeléctrico, pulse el botón PIANO2, y su botón se iluminará.Después, pulse dos veces el botón BANK para seleccionarel banco 3 (piano de cola eléctrico), y el LED situadodebajo y a la derecha del botón BANK se iluminará.Además, el banco seleccionado para un botón de sonidopermanecerá igual, incluso aunque pulse un botónde sonido diferente.2Cada vez que encienda el <strong>LP</strong>-<strong>380</strong>, el sonido del banco 1se seleccionará para todos los botones de sonido.Toque de dos sonidos al mismo tiempo(Modo de Capas)Puede tocar dos sonidos al mismo tiempo en el teclado.Esto se denomina modo de Capas.Pulse simultáneamente los dos botones de sonido para lossonidos que desee tocar al mismo tiempo.Los dos botones de sonido seleccionados se iluminarán.El botón de sonido del extremo izquierdo o superior seleccionadoes la capa 1, y el otro (situado en el extremo derechoo inferior) es la capa 2 (consulte el diagrama de la siguiente).Capa 1Por ejemplo, si selecciona E.PIANO1 y ORGAN1, E.PIANO1será la capa 1 y ORGAN1 la capa 2.Para utilizar sonidos de bancos diferentes, seleccione enprimer los bancos en el modo Simple para los botones desonido que vaya a pulsar.Por ejemplo, para tocar por capas sonidos del piano decola y el órgano jazz 2, seleccione el banco 1 (piano de cola)para el botón PIANO1 y banco 2 (órgano de jazz 2) para elbotón ORGAN1, y después pulse simultáneamente los dosbotones.Cuando seleccione el modo de Capas, el número totalde voces que podrán tocarse al mismo tiempo se reducirá,dependiendo del número total de osciladoresutilizados por los sonidos seleccionados. (Consulte“Acerca de polifonía máxima” en la página 67.)No podrán seleccionarse sonidos de diferentes bancospara el mismo botón de sonido (piano de cola y de jazzpara el botón PIANO1)Vuelta al modo SimplePara volver al modo Simple, pulse simplemente un botónde selección de un solo sonido.Ajustes del modo de CapasEn el modo de Capas, podrá ajustarse el equilibrio devolumen entre los sonidos, la octava para cada sonidopodrá desplazarse, y el pedal de resonancia podrá activaro desactivarse para cada sonido. (Consulte “Modode Función” en la página 62.)1Capa 259
Interpretación con otra persona(Modo de Pareja)Dos personas pueden tocar en la misma gama con el tecladodividido por la mitad entre ambas. Esto se denominamodo de Pareja.1. Pulse el botón FUNCTION.Los botones FUNCTION y PIANO1 se iluminarán.2. Pulse el botón E.PIANO1.El botón de sonido de E.PIANO1 se iluminará, y en elvisualizador aparecerá oFF.1,5234indicación de modo de Pareja3. Pulse el botón UP situado al lado del visualizadorpara seleccionar on.El modo de Pareja se activará, y el sonido de PIANO1 se utilizarápara ambas partes, izquierda y derecha, del teclado.Mientras el modo de Pareja esté activado, en la parteinferior derecha del visualizador se mostrará un punto.La parte derecha del teclado, de E4 a C8, produce sonidosen una gama dos octavas más baja (E2–C6).La parte izquierda del teclado, de A0 a Eb 4, produce sonidosen una gama dos octavas más alta (A2–Eb 6).E ♭ 4A0 E4 C8Tonalidades A2 a E ♭ 6 para elintérprete de la parte izquierdaTonalidades E2 a C6 para elintérprete de la parte derecha4. Para salir del modo de Pareja, pulse el botón DOWNsituado al lado del visualizador para seleccionar oFF.5. Pulse el botón FUNCTION.El botón FUNCTION se apagará.En el modo de Pareja, el sonido para las partes izquierday derecha podrá cambiarse, y podrá ajustarse el volumen.Con respecto a los detalles, cconsulte “Ajustes del modo dePareja” en la página 63.En el modo de Capas podrá seleccionar el sonido osonidos donde desee aplicar al pedal. (Consulte “Especificaciónde pedales de capas” en la página 64.)En el modo de Pareja (consulte la página 63), el efecto deresonancia podrán aplicarlo independientemente ambosintérpretes.EfectosBrillantezEste efecto cambia el brillo del tono.El ajuste podrá cambiarse manteniendo pulsado el botónBRILLIANCE y pulsando el botón UP o DOWN situadoal lado del visualizador.El ajuste aparecerá en el visualizador como 3, que produceun sonido más brillante, y 1, que produce sonido menosbrillante.El mismo ajuste se aplicará a todos los sonidos, y permaneceráaplicado hasta que se apague el <strong>LP</strong>-<strong>380</strong>. Cuandoencienda el instrumento, se seleccionará el ajuste predeterminado2.La brillantez no puede desactivarse.ReverberaciónEste efecto añade ambiente y profundidad al sonido, produciendola sensación de interpretación en una sala deconciertos. De forma predeterminada en fábrica, el ajustede activación/desactivación para este efecto así como elajuste de este efecto se guardan con cada sonido.Cada vez que pulse el botón REVERB, la reverberaciónse activará (el botón se iluminará) y desactivará (el botónse apagará).Para cambiar este ajuste, mantenga pulsado el botón RE-VERB y pulse el botón UP o DOWN situado al lado delvisualizador.Utilización de pedalesEl <strong>LP</strong>-<strong>380</strong> dispone de tres pedales, resonancia,tonal y celeste.Puede utilizar los pedales para hacersu juego más expresivo y realista.Pedal tonalPedal celeste (izquierdo)Al pisar este pedal, el tono se volverá más suave. Podrácontrolar la suavidad del tono dependiendo de cuánto piseel pedal (“pisado a medio recorrido”).Pedal tonal (central)Al pisar este pedal se aplicará el efecto de amortiguaciónsólo a las notas que ya se mantienen pulsadas en el teclado,y sólo se sostendrán tales notas. El efecto de amortiguaciónno se aplicará a ninguna nota que se toque mientrasse mantenga pisado el pedal tonal.Pedal de resonancia (derecho)Al pisar este pedal el sonido se sostendrá, produciendo undecaimiento ricamente resonante. También puede añadirresonancia de amortiguación al tono de piano clásico y pianode cola (bancos 1 y 2 de PIANO1). También puede pisar hastala mitad, con un efecto de la resonancia gradual según la profundidadde presión del pedal (“pisado a medio recorrido”).60Pedal celestePedal deresonanciaEl ajuste aparecerá en el visualizador como 3, que produceun efecto de reverberación profundo, y 1, que produce unefecto de reverberación ligero.Si se selecciona un sonido diferente, o si se apaga el <strong>LP</strong>-<strong>380</strong>,el ajuste de activación/desactivación para este efecto asícomo el ajuste de este efecto volverán a los predeterminadosen fábrica (ajustes predeterminados).CoroEl Coro agrega modulación al sonido, produciendo un sonidoexpansivamente rico. De forma predeterminada en fábrica,el ajuste de activación/desactivación para este efecto asícomo el ajuste de este efecto se guardan con cada sonido.Cada vez que pulse el botón CHORUS, el efecto de corose activará (el botón se iluminará) y desactivará (el botónse apagará).Para cambiar este ajuste, mantenga pulsado el botónCHORUS y pulse el botón UP o DOWN situado al ladodel visualizador.
El ajuste aparecerá en el visualizador como 3, que produceun efecto de coro profundo, y 1, que produce un efecto decoro ligero.Si se selecciona un sonido diferente, o si se apaga el <strong>LP</strong>-<strong>380</strong>,el ajuste de activación/desactivación para este efecto asícomo el ajuste de este efecto volverán a los predeterminadosen fábrica (ajustes predeterminados).MetrónomoEl <strong>LP</strong>-<strong>380</strong> está equipado con un metrónomo, que se puedecambiar a un sonido de campana, que resulta muy convenientepara practicar.Activación/desactivación del metrónomoPulse el botón METRONOME. Elbotón se iluminará, y se iniciará elmetrónomo.Para detener el metrónomo, vuelva a pulsar el botón ME-TRONOME. El botón se apagará.Especificación del tempoCuando el tempo aparece en la pantalla(ajuste predeterminado de 120),independientemente de si el metrónomo esté activado odesactivado, el tempo podrá especificarse con los botonesUP y DOWN situados al lado del visualizador.La gama de ajuste es q = 40–240.Para volver al ajuste predeterminado, pulse simultáneamentelos botones UP Y DOWN.Selección de una signatura de compás1. Mantenga pulsado el botón METRONOME hasta entraren el modo de ajustes del metrónomo.El botón METRONOME parpadeará, el botón de sonidode PIANO1 se iluminará, y en el visualizador aparecerála signatura de compás (04).Cuando se entre en el modo de ajustes del metrónomo,normalmente aparecerá la signatura de compás.2. Para seleccionar la signatura de compás después dehaber cambiado otros ajustes en el modo de ajustes delmetrónomo, pulse el botón PIANO1.3. Seleccione el ajuste con el botón UP o DOWN situadoal lado del visualizador.La gama de ajuste se compone de 02 (2/4), 03 (3/4), 04 (4/4)y 06 (6/4), y el ajuste predeterminado es 04.Para volver al ajuste predeterminado, pulse simultáneamentelos botones UP y DOWN.231,434. Para salir del modo de ajustes del metrónomo, pulseel botón METRONOME.Ajuste del volumen del metrónomo1. Mantenga pulsado el botón para entrar en el modo deajustes del metrónomo.2. Pulse el botón PIANO2, y el volumen aparecerá en elvisualizador.3. Especifique el ajuste con el botón UP o DOWN situadoal lado del visualizador.La gama de ajuste es 1-13, y el ajuste predeterminado es 10.Para volver al ajuste predeterminado, pulse simultáneamentelos botones UP y DOWN.231,434. Para salir del modo de ajustes del metrónomo, pulseel botón METRONOME.Selección de una campana para el acento1. Mantenga pulsado el botón para entrar en el modo deajustes del metrónomo.2. Pulse el botón E.PIANO1, y el ajuste del sonido deacento aparecerá en el visualizador.3. Seleccione el ajuste con el botón UP o DOWN situadoal lado del visualizador.La gama de ajuste se compone de oFF (sonido sin acento),on1 (sonido enfatizado por ritmo de acento) y on2(sonido de campana para el ritmo de acento), y el ajustepredeterminado es oFF.231,434. Para salir del modo de ajustes del metrónomo, pulseel botón METRONOME.Especificación del tempo(Modo de ajustes del metrónomo)1. Mantenga pulsado el botón para entrar en el modo deajustes del metrónomo.2. Pulse el botón E.PIANO2, y el tempo aparecerá en elvisualizador.3. Especifique el ajuste con el botón UP o DOWN situadoal lado del visualizador.La gama de ajuste es q = 40–240, y el ajuste predeterminadoes 120.Para volver al ajuste predeterminado, pulse simultáneamentelos botones UP y DOWN.231,434. Para salir del modo de ajustes del metrónomo, pulseel botón METRONOME.Selección del sonido del metrónomo1. Mantenga pulsado el botón para entrar en el modo deajustes del metrónomo.2. Pulse el botón HARPSI/CLAV, y el ajuste del sonidodel metrónomo aparecerá en el visualizador.3. Especifique el ajuste con el botón UP o DOWN situadoal lado del visualizador.La gama de ajuste consta de 1 (sonido acústico) y 2 (sonidoelectrónico), y el ajuste predeterminado es 1.231,434. Para salir del modo de ajustes del metrónomo, pulseel botón METRONOME.61
Otras funcionesAjustes de toqueLa sensibilidad, o toque, del teclado puede programarse.Para cambiar el ajuste, mantenga pulsado el botón TOUCH ypulse el botón UP o DOWN situado al lado del visualizador.FuerteLigeroSonoridadSilenciosoSilenciosoNormalIntensidadde toquePesadoFuerteVisualizador Sensibilidad de toque1 Ligero. Pueden producirse notas fuertesincluso tocando ligeramente.2 Normal. Toque de piano normal.3 Pesado. Las notas fuertes sólo podrán producirsetocando muy duro.Cuando encienda el instrumento, el ajuste de toque serepondrá a Normal.Los ajustes se aplican a todos los sonidos.TransposiciónEn algunos casos, una canción puede estar escrita en unaclave difícil (por ejemplo, muchas claves de negras), o puedeque se desee desplazar la tonalidad para que coincidacon otro instrumento o cantante. En tales casos, puedetransponer (desplazar la tonalidad) para poder utilizar unadigitación más fácil, o utilizar la misma digitación familiarpara tocar en una tonalidad diferente. Esto se denominafunción de transposición.Por ejemplo si transpone hacia arriba un semitono, al tocarlas notas mostradas en la parte inferior izquierda se produciránlas tonalidades mostradas a la derecha.F # 6–F7Cuando encienda el instrumento, el ajuste de transposiciónse repondrá.Mientras mantenga pulsado el botón TRANSPOSE, pulsela tecla del teclado (F # 6–F7) para la transposición deseada.Si pulsa una tecla del teclado que no sea C7, el botónTRANSPOSE se iluminará para indicar que el teclado estátranspuesto.La tonalidad de todo el teclado se transpone de acuerdocon la tonalidad de la tecla del teclado pulsada en relacióncon C7. Para volver a las tonalidades originales, mantengapulsado el botón TRANSPOSE y pulse la tecla C7. El botónTRANSPOSE se apagará, y la transposición se cancelará.TeclaF # 6–B6C7C # 7–F7Modo de FunciónEfecto6–1 semitonos más bajaTonalidad estándar1–5 semitonos más altaDesde el modo de Función podrán especificarse el temperamentoasí como otros ajustes de tonalidad.Procedimiento de ajuste para funciones en el modo deFunción.1. Pulse el botón FUNCTION.Los botones FUNCTION y PIANO1 se iluminarán.2. Pulse el botón de sonido correspondiente a la funcióndeseada.En el visualizador aparecerá el ajuste actual.3. Especifique el ajuste deseado.4. Después de especificar los ajustes deseados, pulse elbotón FUNCTION para volver al modo para tocar.El botón FUNCTION se apagará.1,4Cuando apague el <strong>LP</strong>-<strong>380</strong>, todas las funciones, exceptola función de apagado automático, volverán a los ajustespredeterminados.Los ajustes se aplican a todos los sonidos.Afinación precisaCon el fin de adaptar la tonalidad del <strong>LP</strong>-<strong>380</strong> a la de otroinstrumento, puede ajustar la tonalidad en pasos de 0,5 Hzen una gama de A4 = 427,5–452,5 Hz.En el visualizador aparecerá 27.5–52.5.La tonalidad estándar es A = 440 Hz, y el ajuste predeterminadoes 40.0.1. Cuando entre en el modo de Función, el botón de sonidoPIANO1 se iluminará.Cuando se entre en el modo de Función, normalmenteaparecerá el ajuste de tonalidad.2. Para especificar la tonalidad después de haber cambiadootros ajustes en el modo de Función, pulse elbotón PIANO1.3. Especifique el ajuste con el botón UP o DOWN situadoal lado del visualizador.Para volver a 440 Hz, pulse simultáneamente los botonesUP y DOWN.1223333C4F 6C7 F762
Selección de un temperamentoPuede seleccionar entre nueve temperamentos, incluyendoel temperamento igual, temperamentos puros (mayores ymenores), temperamentos clásicos (Kirnberger y Werckmeister)así como los temperamentos utilizados con músicafolclórica del Medio Oriente e India.VisualizaTemperamento00 Temperamento igual (ajuste predeterminado):Espaciando todos los semitonos a intervalos detonalidad iguales, este temperamento es el másampliamente utilizado.01 Temperamento puro [mayor]: Los acordes mayoresen la clave seleccionada se afinan perfectamente.02 Temperamento puro [menor]: Los acordes menoresen la clave seleccionada se afinan perfectamente.03 Árabe: Esta escala incluye intervalos de cuartosde tonos utilizados en la música árabe.04 Pitagórico: Esta escala griega antigua es especialmenteefectiva para tocar melodías. Se componede quintas; sin embargo, otros intervalos –la tercera mayor en particular – no está afinada.05 Werckmeister: La escala de Werckmeister III secreó en el último período barroco para permitiruna transposición relativamente libre.06 Kirnberger: La escala de Kirnberger III se utilizaprincipalmente para afinar clavicordios.07 Escala Slendro: Ésta es una escala gamelan deIndonesia con cinco notas por octava.08 Escala Pelog: Ésta es una escala gamelan de Indonesiacon siete notas por octava.1. Entre en el modo de Función, y después pulse el botónPIANO2.El botón de sonido de PIANO2 se iluminará, y en el visualizadoraparecerá el ajuste de temperamento (00).2. Seleccione el ajuste con el botón UP o DOWN situadoal lado del visualizador.Acerca de la afinación extendidaPara producir la resonancia más natural, los sonidos dePIANO1 y PIANO2 utilizan una “afinación extendida” quehace que las notas de la gama inferior sean ligeramentemás planas que en el temperamento igual, y la gama superiorligeramente más nítida. Así es como los afinadoresprofesionales afinan normalmente un piano acústico.Ajustes del modo de Pareja1. Entre en el modo de Función, y después pulse el botónE.PIANO1.El botón de sonido de E.PIANO1 se iluminará, y en elvisualizador aparecerá el ajuste de activación/desactivación.2. Cada vez que pulse el botón UP o DOWN situado allado del visualizador el modo se activará (on) o desactivará(oFF).112222Cuando se active el modo de Pareja, el sonido de PIANO1se utilizará para ambos lados, izquierdo y derecho, del teclado,y el botón PIANO1 se iluminará.Simultáneamente, en la parte inferior derechadel visualizador se mostrará un punto (indicaciónde modo de Pareja).La parte derecha del teclado, de E4 a C8, produce sonidosen una gama dos octavas más baja (E2–C6). La parte izquierdadel teclado, de A0 a Eb 4, produce sonidos en unagama dos octavas más alta (A2–Eb 6).La división para las partes izquierda y derecha delteclado, así como la gama (tonalidades) no puede cambiarse.En el modo de Pareja, los ajustes de transposición seignorarán. Además, la información del teclado (NotaOn y Nota Off) no se envía con MIDI.Selección del sonido para la parte izquierdaSalga del modo de Función, y después pulse el botónde sonido para el sonido que desee utilizar en la parteizquierda del teclado. La parte izquierda del tecladopermanecerá ajustada al sonido de PIANO1.En este caso, solamente se iluminará el botón para laparte izquierda del teclado.Selección de sonidos para las partes izquierda y derechaSalga del modo de Función, y después pulse simultáneamentelos dos botones de sonido para los sonidosque desee utilizar.Los dos botones de sonido seleccionados se iluminarán.Sonido para la parte izquierda del tecladoSonido para la parte derecha del tecladoEl botón de sonido del extremo izquierdo o superiorseleccionado es para la parte izquierda del teclado, y elotro (situado en el extremo derecho o inferior) es parala parte derecha del teclado. Por ejemplo, si seleccionaE.PIANO1 y ORGAN1, E.PIANO1 será para la parteizquierda del teclado, y ORGAN1 para la parte derechadel teclado.Para utilizar sonidos de bancos diferentes, seleccioneen primer los bancos en el modo Simple para los botonesde sonido que vaya a pulsar.Si desactiva el modo de Pareja y sale del modo de Funcióncon las partes izquierda y derecha del teclado ajustadasa sonidos diferentes, se seleccionarán los sonidoscuyos botones estén encendidos.Utilización del mismo sonido (excepto PIANO1) paraambas partes, izquierda y derechaSalga del modo de Función, y después pulse simultáneamentedos botones de sonido, asegurándose de queel del extremo derecho sea para el sonido que deseeutilizar. Después, vuelva a pulsar el botón de sonidoseleccionado del extremo derecho. Por ejemplo, despuésde pulsar los botones PIANO2 y ORGAN1, vuelvaa pulsar el botón ORGAN1 para utilizar el sonido deORGAN1 en ambas partes, izquierda y derecha, del teclado.Cambio del volumen para las partes izquierda y derechaSi los sonidos para las partes izquierda y derecha delteclado se han cambiado, el volumen podrá especificarsepara cada sonido. Consulte “Especificación del equilibriode volumen para capas” en la página 64.63
Utilización de pedales de resonanciaEl pedal de resonancia y el pedal celeste pueden utilizarsecomo pedales de resonancia separados para laspartes derecha e izquierda del teclado, respectivamente.Resonancia: Utilizado como pedal de resonancia parael intérprete de la parte derecha del teclado.Tonal: No se utilizaCeleste: Utilizado como pedal de resonancia para elintérprete de la parte izquierda del teclado.Especificación del equilibrio de volumen paracapasEl equilibrio de volumen para sonidos en el modo de Capas(o el modo de Pareja) puede ajustarse. La gama de ajustees 1 – 9...9 – 9...9 – 1, con el número de la izquierda parala capa 1 (o la parte izquierda del teclado) y el número dela derecha para la capa 2 (o parte derecha del teclado).El ajuste predeterminado es 9 – 9.1. Entre en el modo de Función, y después pulse el botónE.PIANO2.El botón de sonido de E.PIANO2 se iluminará, y en elvisualizador aparecerá el ajuste de equilibrio (9 – 9).2. Especifique el ajuste de equilibrio de volumen con elbotón UP o DOWN situado al lado del visualizador.Para volver al ajuste predeterminado, pulse simultáneamentelos botones UP y DOWN.Si el sonido está en el modo Simple, y en el visualizadoraparecerá, – – –, y el ajuste no podrá especificarse.Especificación de octavas de capasEn el modo de Capas, podrá especificarse la octava paracada sonido. La gama de ajuste es ±1 octava para cada sonido,y en el visualizador aparecerán –01, 00 y 01. El ajustepredeterminado es 00.122Especificación de pedales de capasEn el modo de Capas, podrá especificarse un ajuste de resonanciapara cada sonido.Los ajustes son sólo para el sonido de la capa 1 (o – –), sólopara el sonido de la capa 2 (– – o), y para ambos sonidos (o – o).El ajuste predeterminado es o – o.1. Entre en el modo de Función, y después pulse el botónVIBES/ GUITAR.El botón de sonido de VIBES/ GUITAR se iluminará, y enel visualizador aparecerá el ajuste de resonancia (o – o).2. Seleccione el ajuste de resonancia con el botón UP oDOWN situado al lado del visualizador.1Si el sonido está en el modo Simple, en el visualizadoraparecerá, – – –, y no podrá especificarse un ajuste.Especificación de la función de apagado automáticoCuando hayan transcurrido 30 minutos sin que se toqueuna tecla del teclado o sin que se reproduzca una interpretaciónautomática, el instrumento se apagará automáticamente.Para inhabilitar esta función, desactive (oFF) estafunción. El ajuste predeterminado es función activada. Sicambia este ajuste, el nuevo ajuste se almacenará y permaneceráseleccionad, incluso aunque se apague el <strong>LP</strong>-<strong>380</strong>.1. Entre en el modo de Función, y después pulse el botónORGAN1.El botón de sonido de ORGAN1 se iluminará, y en elvisualizador aparecerá el ajuste (on).2. Seleccione el ajuste de activación/desactivación con elbotón UP o DOWN situado al lado del visualizador.122221. Entre en el modo de Función, y después pulse el botónHARPSI/CLAV.El botón de sonido de HARPSI/CLAV se iluminará, yen el visualizador aparecerá la capa (1) cuya octava deseaespecificarse.2. Seleccione la capa con el botón UP o DOWN situadoal lado del visualizador.L1 aparecerá para la capa 1, y L2 aparecerá para la capa 2.3. Pulse el botón BANK.En el visualizador aparecerá el ajuste de octava (00).4. Seleccione el ajuste de octava con el botón UP oDOWN situado al lado del visualizador.Para volver al ajuste predeterminado, pulse simultáneamentelos botones UP y DOWN.Para seleccionar la octava para otra capa, pulse el botónHARPSI/CLAV para seleccionar la capa.312,42,4Si el sonido está en el modo Simple, y en el visualizadoraparecerá, – – –, y el ajuste no podrá especificarse.64
MIDI¿Qué es MIDI?MIDI, son las siglas de Musical Instrument Digital Interface(Interfaz Digital de Instrumentos Musicales). Esuna norma internacional que fue creada para conectar ytransferir datos entre instrumentos musicales electrónicos,ordenadores y otros dispositivos.¿Qué puedo hacer con MIDI?Gracias a MIDI, puede usar el <strong>LP</strong>-<strong>380</strong> para controlar otrosinstrumentos, usar otros instrumentos para controlar el<strong>LP</strong>-<strong>380</strong>, y usar un secuenciador para crear piezas musicalescomplejas. Cuando utilice el teclado o los pedales del <strong>LP</strong>-<strong>380</strong>, o seleccionar un sonido, las notas, activación de pedalesy cambio en el sonido se transmiten a otro instrumento,o se graban mediante secuenciador.ConexionesPara transferir datos MIDI se utilizan cables MIDI comercialmentedisponibles. Conecte estos cables de los conectoresMIDI del <strong>LP</strong>-<strong>380</strong> a los conectores MIDI del dispositivoMIDI externo con el que desee intercambiar datos. Hay dostipos de conector MIDI.Conector MIDI INEste conector recibe mensajes MIDI.El conector MIDI IN le permite tocar sonidos del <strong>LP</strong>-<strong>380</strong>desde un dispositivo MIDI externo (por ejemplo, un tecladoo un secuenciador MIDI). Utilice un cable MIDI paraconectar el conector MIDI IN del <strong>LP</strong>-<strong>380</strong> al conector MIDIOUT de su dispositivo MIDI externo.Conector MIDI OUTEste conector transmite mensajes MIDI.El conector MIDI OUT le permite controlar un dispositivoMIDI externo utilizando los mensajes MIDI transmitidosdesde el <strong>LP</strong>-<strong>380</strong>. Utilice un cable MIDI para conectar elconector MIDI OUT del <strong>LP</strong>-<strong>380</strong> al conector MIDI IN de sudispositivo MIDI externo.Modo de función MIDICuando encienda el <strong>LP</strong>-<strong>380</strong>, los parámetros MIDI se establecerána canal de transmisión 1, todos los canales derecepción (1–16), Local On y Omni Off.Estos ajustes podrán cambiarse desde el modo de funciónMIDI.Procedimiento de ajuste para parámetros en elmodo de función MIDI1. Mantenga pulsado el botón FUNCTION con el modode función no establecido.El botón de sonido de PIANO 1 se iluminará, y en el visualizadoraparecerá el ajuste del canal MIDI (C01). Elbotón FUNCTION parpadeará.3. Especifique el ajuste deseado.4. Después de especificar los ajustes deseados, pulse elbotón FUNCTION para volver al modo para tocar.El botón FUNCTION se apagará.1,4Cuando apague el <strong>LP</strong>-<strong>380</strong>, todos los parámetros volverána los ajustes predeterminados.Cambio de los canales MIDILos datos pueden transmitir y recibirse en los canalesMIDI 1 a 16 (C01–C16).Cuando encienda el <strong>LP</strong>-<strong>380</strong>, se seleccionará automáticamenteel canal de transmisión 1 (C01).• Cuando entre en el modo de función MIDI, el botónde sonido PIANO1 se iluminará.Cuando se entre en el modo de Función, normalmenteaparecerá el ajuste de tonalidad.Para especificar el ajuste del canal MIDI después dehaber cambiado otros ajustes en el modo de funciónMIDI, pulse el botón PIANO1.En el modo de Capas, la selección del canal de transmisiónespecifica el canal para la capa 1. El canal de transmisiónpara la capa 2 se ajustará automáticamente al canal siguiente.Por ejemplo, si se selecciona el canal MIDI 7 parael sonido de la capa 1, el canal MIDI 8 se especificará automáticamentepara el sonido de la capa 2. Si se seleccionael canal MIDI 16 para el sonido de la capa 1, el canal 1 seespecificará para el sonido de la capa 2.Local On/OffCon el ajuste Local On, al tocar con el teclado del <strong>LP</strong>-<strong>380</strong> seproducirán los sonidos de la interpretación y también setransmitirán datos MIDI. Con el ajuste Local Off, al tocarcon el teclado del <strong>LP</strong>-<strong>380</strong> no se producirán los sonidos dela interpretación, sino que sólo se transmitirán datos MIDI.Normalmente este parámetro está ajustado a Local On(ajuste predeterminado: on).El ajuste Local Off deberá seleccionarse cuando se utiliceel <strong>LP</strong>-<strong>380</strong> como teclado maestro, por ejemplo, para tocarsonidos desde un dispositivo MIDI conectado (un teclado,un módulo de sonido, etc.). El <strong>LP</strong>-<strong>380</strong> no producirá sonido,pero la interpretación la reproducirá el dispositivo MIDIconectado.Seleccione el ajuste Local Off (oFF) cuando utilice el <strong>LP</strong>-<strong>380</strong> como un módulo de sonido, por ejemplo, cuando el <strong>LP</strong>-<strong>380</strong> esté conectado a un secuenciador con su ajuste de EchoBack (función que devuelve datos que el secuenciadorrecibió) seleccionado a fin de evitar la repetición de datosdevueltos.• Entre en el modo de función MIDI, y después pulseel botón PIANO2.El botón de sonido de PIANO2 se iluminará, y en el visualizadoraparecerá el ajuste de Local On/Off.2332. Pulse el botón de sonido correspondiente al parámetrodeseado.En el visualizador aparecerá el ajuste actual.65
Habilitación/inhabilitación de filtrado de transmisión/recepciónde cambio de programaLos programas en un dispositivo MIDI conectado se puedencambiar enviando un número del cambio MIDI desdeel <strong>LP</strong>-<strong>380</strong>. Además, los programas en el <strong>LP</strong>-<strong>380</strong> se puedencambiar recibiendo un número del cambio MIDI desde undispositivo MIDI conectado.Para los números de cambio de programa y sus sonidoscorrespondientes, consulte la “Tabla de sonidos y númerosde cambio de programa correspondientes” ofrecida másabajo.Para transmitir/recibir mensajes de cambio de programa,inhabilite esta función (oFF: ajuste predeterminado). Parano transmitir/recibir mensajes de cambio de programa, habiliteesta función (on).• Entre en el modo de función MIDI, y después pulseel botón E.PIANO1.El botón de sonido de E.PIANO1 se iluminará, y en elvisualizador aparecerá el ajuste (oFF).Transmisión de cambios de programaCuando seleccione un sonido utilizando los botones de sonidoy el botón BANK del <strong>LP</strong>-<strong>380</strong>, se transmitirá el númerode cambio de programa MIDI correspondiente.Recepción de cambios de programaCuando el <strong>LP</strong>-<strong>380</strong> reciba un número de cambio de programaMIDI, el sonido cambiará de acuerdo con el númerocorrespondiente.Si se recibe un número de cambio de programa incompatible,el sonido del <strong>LP</strong>-<strong>380</strong> no cambiará.Tabla de sonidos y números de cambio de programa correspondientesCC0: Bank Select (Selección de banco) (MSB) para todos lossonidos está ajustado a 121.Botón de sonido Banco CC32 PC SonidoPIANO1 1 1 0 Piano clásico2 0 0 Piano de cola3 0 1 Piano de jazzPIANO2 1 2 0 Piano en vivo2 0 3 Honky-Tonk3 0 2 Piano de cola eléctricoE.PIANO1 1 0 4 Piano eléctrico de escenario2 1 4 Piano eléctrico brillante3 3 4 Trémolo EPE.PIANO2 1 0 5 Piano eléctrico digital 12 2 4 Piano eléctrico de los 603 1 5 Piano eléctrico digital 2HARPSI/CLAVVIBES/GUITAR1 0 6 Clavecín2 0 7 Clavicordio3 1 7 Clavicordio de sintetizador1 0 11 Vibráfono2 0 12 Marimba3 0 24 Guitarra acústicaORGAN1 1 0 16 Órgano de jazz 12 1 16 Órgano de jazz 23 0 17 Órgano de jazz 3ORGAN2 1 0 19 Órgano de tubos 12 1 19 Órgano de tubos 23 2 19 Órgano positivoSTRINGS 1 0 48 Cuerdas2 0 50 Cuerdas de cine3 1 50 Cuerdas analógicasCHOIR 1 0 52 Coro Aah2 1 52 Voces Ooh3 2 52 Coro clásicoHabilitación/inhabilitación de filtrado de transmisión/recepciónde cambio de controlPueden transmitirse mensajes, como el de utilización delpedal de resonancia del <strong>LP</strong>-<strong>380</strong>, a un dispositivo MIDI externoconectado para controlarlo, y estos mensajes puedenrecibirse de un dispositivo MIDI externo conectado paracontrolar el <strong>LP</strong>-<strong>380</strong>.Para transmitir/recibir mensajes de cambio de control, inhabiliteesta función (oFF: ajuste predeterminado). Para notransmitir/recibir mensajes de cambio de programa, habiliteesta función (on).• Entre en el modo de función MIDI, y después pulseel botón E.PIANO2.El botón de sonido de E.PIANO2 se iluminará, y en elvisualizador aparecerá el ajuste (oFF).Utilización del <strong>LP</strong>-<strong>380</strong> como un módulo de sonidomultitímbricoEl <strong>LP</strong>-<strong>380</strong> puede funcionar como un módulo del sonidomultitímbrico de 16 partes cuando se utilice un dispositivoMIDI externo para controlar su generador de sonido interno1. Conecte un cable MIDI al conector MIDI IN del <strong>LP</strong>-<strong>380</strong> y al conector MIDI OUT de un secuenciador uotro dispositivo MIDI.2. Transmita datos MIDI desde el secuenciador u otrodispositivo MIDI conectado.Con respecto a los detalles sobre la transmisión dedatos desde el secuenciador u otro dispositivo MIDIconectado, consulte el manual de instrucciones delmismo.3. Cuando el <strong>LP</strong>-<strong>380</strong> el mensaje de cambio de programajunto con los datos de interpretación, reproducirá elsonido correspondiente al número de programa encuestión.Cuando no vaya a utilizar el <strong>LP</strong>-<strong>380</strong> como módulo de sonidomultitímbrico, inhabilite esta función (oFF).• Entre en el modo de función MIDI, y después pulseel HARPSI/CLAV.El botón de sonido de HARPSI/CLAV se iluminará, yen el visualizador aparecerá el ajuste (on: ajuste predeterminado).66
ApéndiceSolución de problemasSi durante el uso se produce alguno de los problemas siguientes,examine cuidadosamente el instrumento paraver si puede averiguar cuál es el problema y tratar deresolverlo siguiendo las sugerencias indicadas a continuación.Si el instrumento sigue sin funcionar adecuadamente,consulte a su proveedor.El instrumento no se enciende.• Compruebe si el adaptador de CA está correctamenteconectado al piano y a la toma de corriente.No hay sonido• ¿Está correctamente conectado el cable de altavoz de lacaja del altavoz del pedestal al conector del altavoz del<strong>LP</strong>-<strong>380</strong>?• Cerciórese de que el volumen no esté ajustado a MIN.Si lo está auméntelo hasta el nivel adecuado.• Cerciórese de que la función MIDI Local no esté ajustadaa OFF. Si lo está, ajústela a ON (apague y vuelva aencender el instrumento).• Cerciórese de que no haya ninguna clavija enchufadaen las tomas para auriculares. Si enchufa una clavija,los altavoces internos se desactivarán. Desenchufe laclavija.Las notas se oyen interrumpidas• Ha sobrepasado la polifonía máxima. Consulte “Acercade polifonía máxima”.La tonalidad o el tono del piano suenan mal en algunaszonas del teclado• Los sonidos de piano del <strong>LP</strong>-<strong>380</strong> reproducen el sonidode un piano real lo más fielmente posible. Esto significaque en algunas regiones del teclado, usted puede sentirque los armónicos parecen más fuertes, o que la tonalidado el tono me parecen incorrectos. Esto no significamal funcionamiento.El dispositivo MIDI conectado no responde a los datosMIDI transmitidos• Cerciórese de que todos los cables MIDI estén correctamenteconectados. Cerciórese de que <strong>LP</strong>-<strong>380</strong> esté recibiendodatos MIDI por el mismo canal que el dispositivoMIDI.Acerca de polifonía máximaSi el número de notas que se estén tocando simultáneamenteexcede la polifonía máxima, algunas notas puedenperderse porque el <strong>LP</strong>-<strong>380</strong> está equipado con un mecanismoque detiene la primera nota que se esté tocando paradar prioridad a las notas tocadas con las teclas pulsadasposteriormente. Algunos sonidos del <strong>LP</strong>-<strong>380</strong>, aunquepuedan ser un solo sonido, se generan mediante dos omás osciladores (una nota de un circuito de generaciónde sonido). Los sonidos que usan un oscilador solamente,como los de los bancos 1 y 2 de VIBES/GUITAR, tienen unapolifonía máxima de 120 notas. Los sonidos que usan dososciladores, como los de los bancos 1 y 2 de PIANO2 y losbancos 1 y 3 de E.PIANO2, tienen una polifonía máximade 60 notas.120 ÷ Número de osciladores de sonido = Polifonía máximaTenga en cuenta la polifonía máxima y elija con cuidadosonidos utilizando el modo de Capas para tocar dos sonidossimultáneamente o usando el pedal de resonancia.EspecificacionesTeclado Teclado RH3 “Real Weighted Hammer 3”:88 notas (A0–C8)Selección de toqueTonalidadTemperamentoGeneración de sonidoPolifoníaSonidosEfectosLigero, Normal, PesadoTransposición, Afinación precisaNueve clasesSistema PCM estéreo120 notas (máx)30 sonidos (10 x 3 bancos)Brillantez, Reverberación, Coro(3 niveles de cada)Demostración30 (10 canciones de demostración de sonido, 20 cancionesde piano)MetrónomoControles de Tempo, Signatura de compás, Acento,Sonido, y VolumenPedalesCeleste*, Tonal, Resonancia* (*admite medio pedal)ConexionesLINE OUT, MIDI (IN, OUT), Auriculares ×2, PEDAL,SPEAKERControlesAlimentación, VOLUME, PIANO SONG, TRANSPOSE,FUNCTION, TOUCH, BRILLIANCE, REVERB,CHORUS, BANK, Sonido × 10, UP, DOWN,METRONOMEAmplificación 22 W × 2Altavoces 10 cm x 2Fuente de alimentaciónConsumo eléctrico19 V CC,Adaptador de CA (incluido)15 WDimensiones (Anch. x Prof. x Alt.)1355 × 351 × 772 mm1355 × 351 × 936 mm (con la tapa del teclado abierta)Peso37 kg (incluyendo el pedestal)Accesorios incluidos Adaptador de CA ( ),Cable de alimentación, Pedestal- Las especificaciones y el aspecto están sujetas a cambiossin previo aviso por mejora.67
Ensamblaje del pedestalAdvertencia● Otra persona por lo menos deberá ayudarlea ensamblar el pedestal.2. Cerciórese de que dispone de todas las piezas siguientes.Panel lateral (izquierdo)Caja de altavozPanel lateral (derecho)Precaución durante el ensamblajePara ensamblar con seguridad el pedestal, tenga en cuentalos puntos siguientes.• Cerciórese de que tiene la pieza correcta en la orientacióncorrecta, y realice el ensamblaje en el orden indicado.Otras precaucionesDespués del ensamblaje, tenga en cuenta los puntos siguientes.• Tornillos aflojadosLos tornillos pueden aflojarse con el tiempo despuésdel ensamblaje.Deberá comprobar periódicamente si los tornillos serhan aflojado. Si nota que el pedestal vibra excesivamente,es posible que los tornillos se hayan aflojado.En tal caso, vuelva a apretarlos.• Traslado del piano digital a otro lugarPara mover el pedestal ensamblado, desenchufe el cabledel adaptador de CA del pedestal, cierre la tapa delteclado, y muévalo lentamente entre dos personas porlo menos manteniéndolo lo más nivelado posible.• DesmontajeCuando necesite desmontar el pedestal, hágalo invirtiendolos pasos del procedimiento de ensamblaje.Después del desmontaje, guarde los tornillos y demáspiezas en un lugar seguro para que no se pierdan.El <strong>LP</strong>-<strong>380</strong> deberá posarse siempre antes del desmontaje.Ménsula antivuelco(izquierdo)Cable de pedalesTablero de pedalesUnidad de pedalesMénsula antivuelco(derecho)Tornillos (M6) x 6 piezas Tornillos (M4) x 8 piezas Tapas x 6 piezasRemache de empujex 1 piezaAbrazadera de cablesx 1 pieza3. Fije el <strong>LP</strong>-<strong>380</strong> y la caja de altavoz a los paneles lateralesizquierdo y derecho utilizando ocho tornillos (M6).Coloque la caja de altavoz de forma que el cable del altavozquede al lado izquierdo. En esta posición, el altavoz(lado cubierto con un paño) quedará encarado hacia usted.En primer lugar, apriete temporalmente* los tornillosdel panel lateral derecho, y después apriete temporalmente*los tornillos del panel lateral izquierdo.* Apretar temporalmente los tornillos es dejarlos conuna holgura de unos 2 mm.Tornillos(M6)lado cubierto con un paño<strong>LP</strong>-<strong>380</strong>Procedimiento de ensamblajeNecesitará un destornillador Phillips (+).1. Coloque la lámina protectora, que cubría el <strong>LP</strong>-<strong>380</strong>,sobre un suelo plano, y coloque el <strong>LP</strong>-<strong>380</strong> sobre tallámina con su parte posterior encarada hacia el suelo.Además, coloque paños o revistas para poder introducirfácilmente sus manos debajo del <strong>LP</strong>-<strong>380</strong> cuandoensamble y levante el pedestal.Cerciórese de que la tapa del teclado no se abrahasta el fin del ensamblaje.<strong>LP</strong>-<strong>380</strong>Caja de altavozPestaña de posicionamientoPanel lateral (izquierdo)Tornillos(M6)Panel lateral (derecho)Tenga cuidado para no pillarse los dedos.4. Conecte el cable de pedales fijado, teniendo en cuentala orientación correcta, al conector del lado opuestoa la unidad de pedales, y después engánchelo en unaranura de la unidad de pedales.El cable de pedales podrá fijarse o desprenderse del conectormanteniendo presionada su pestaña de bloqueo.Lámina protectoraPestaña debloqueo68
5. Inserte la unidad de pedales en el tablero de pedales,y apriétela presionando el remache de empuje en elorificio (sobre el corte) de la parte posterior del tablerode pedales.Después de presionarlo allí, levante el tablero de pedalespara comprobar que los pedales no se caigan.El remache de empuje evitará que se caiga la unidad depedales. Por lo tanto, no podrá fijarse completamente altablero de pedales.Parte frontal del tablerode pedales10. Cerciórese de nuevo de que no haya holguras en elpedestal, de que no esté inclinado, y de que todos lostornillos estén firmemente apretados.11. Coloque tapas en las cabezas de los tornillos de lospaneles laterales izquierdo y derecho.TapasPartefrontalParte posteriorEmpujeParte posterior deltablero de pedalesRemache de empuje6. Apretar temporalmente el tablero de pedales, con launidad de pedales instalada, en las piezas metálicasdel interior de los paneles laterales del soporte utilizandocuatro tornillos (M4).12. Conecte el cable de pedales y el cable de altavoz a losconectores de la parte posterior de la caja de conectoresdel <strong>LP</strong>-<strong>380</strong>.Cuando conecte el cable de pedales y el cable de altavoz,tenga en cuenta las orientaciones correctas de losconectores.El cable de pedales o el cable de altavoz podría desprendersedel conector manteniendo presionada supestaña de bloqueo.Tornillos(M4)Tornillos(M4)Pestaña de bloqueoCable de altavozCable de pedalesAbrazaderade cables7. Levante el pedestal ensamblado lentamente entre dospersonas.8. Cerciórese de fijarle las ménsulas antivuelco detrás delos paneles laterales. Y el ménsula antivuelco fijado ala izquierda del abrazadera de cables en este momento.Las uniones entre los paneles laterales y las ménsulasantivuelco fijadas deberán estar niveladas (sin que quedediferencia de nivel).Lado puestoTornillos (M4)Abrazaderade cablesMénsulaantivuelcoLado puestoTornillos (M4)9. Después, apriete firmemente todos los tornillos quehabía apretado temporalmente en el paso 3 y 6.Cuando apriete los tornillos del <strong>LP</strong>-<strong>380</strong>, ajuste las posicionesde arriba/abajo y frontal/posterior de los paneleslaterales izquierdo y derecho de forma que sean iguales.13. Utilice la abrazadera de cables para sujetar el cable depedales.Después de asegurar el cable con la abrazadera decables, cerciórese de no aplicar excesiva presión a losconectores.14. Conecte el cable dedicado al adaptador de CA. Después,enchufe el adaptador de CA en el conector DCIN, y enrolle el cable alrededor del gancho para cabledel piano. Con respecto a los detalles, consulte “Conexiónde la alimentación” en la página 56.15. Coloque el <strong>LP</strong>-<strong>380</strong> donde vaya a utilizarlo. Cercióresede colocarlo en un lugar seguro donde el piso esté niveladoy sea estable.Cuando cloque el piano en su lugar, cercióresede que el pedestal no descanse sobre el cable deladaptador de CA ni el cable de pedales.Para mayor seguridad, cerciórese de fijar las ménsulasantivuelco en la parte posterior de los paneleslaterales izquierdo y derecho.Comprobación después del ensamblaje□ ¿Ha sobrado alguna pieza?Si ha sobrado alguna pieza, revise cuidadosamente elprocedimiento de ensamblaje para ver dónde debenutilizarse tales piezas sobrantes.□ Cerciórese de que todos los tornillos estén apretados.69
安 全 上 のご 注 意ご 使 用 になる 前 に 必 ずお 読 みくださいここに 記 載 した 注 意 事 項 は、 製 品 を 安 全 に 正 しくご 使 用 いただき、あなたや 他 の 方 々への 危 害 や 損 害 を 未 然 に 防 ぐためのものです。注 意 事 項 は 誤 った 取 り 扱 いで 生 じる 危 害 や 損 害 の 大 きさ、または切 迫 の 程 度 によって、 内 容 を「 警 告 」、「 注 意 」の2つに 分 けています。これらは、あなたや 他 の 方 々の 安 全 や 機 器 の 保 全 に 関 わる 重 要 な内 容 ですので、よく 理 解 した 上 で 必 ずお 守 りください。火 災 ・ 感 電 ・ 人 身 障 害 の 危 険 を 防 止 するには図 記 号 の 例記 号 は、 注 意 ( 危 険 、 警 告 を 含 む)を 示 しています。 記号 の 中 には、 具 体 的 な 注 意 内 容 が 描 かれています。 左 の図 は「 一 般 的 な 注 意 、 警 告 、 危 険 」を 表 しています。記 号 は、 禁 止 (してはいけないこと)を 示 しています。記 号 の 中 には、 具 体 的 な 注 意 内 容 が 描 かれることがあります。 左 の 図 は「 分 解 禁 止 」を 表 しています。記 号 は、 強 制 ( 必 ず 行 うこと)を 示 しています。 記 号 の中 には、 具 体 的 な 注 意 内 容 が 描 かれることがあります。左 の 図 は「 電 源 プラグをコンセントから 抜 くこと」を 表 しています。70以 下 の 指 示 を 守 ってくださいデジタル・ピアノは、ご 家 庭 の 中 で 身 近 において、お 子 さまから 専門 家 の 方 まで 幅 広 くご 愛 用 いただけます。デジタル・ピアノは 大きくて 非 常 に 重 いものです。 安 全 に 使 用 していただくためにも、室 内 での 設 置 場 所 や 日 常 の 取 り 扱 いについては、 十 分 に 注 意 してください。また、 設 置 や 移 動 の 際 は 必 ず2 人 で 行 ってください。 小さなお 子 様 がご 使 用 になる 場 合 は、ご 家 族 の 方 が 最 初 に 教 えてあげてください。警 告この 注 意 事 項 を 無 視 した 取 り 扱 いをすると、死 亡 や 重 傷 を 負 う 可 能 性 があります。・ ACアダプターの 電 源 コードのプラグは、 必 ずAC100Vの 電 源コンセントに 差 し 込 む。・ ACアダプターの 電 源 コードのプラグにほこりが 付 着 している場 合 は、ほこりを 拭 き 取 る。感 電 やショートの 恐 れがあります。・ 本 製 品 はコンセントの 近 くに 設 置 し、 電 源 コードのプラグへ 容易 に 手 が 届 くようにする。・ 次 のような 場 合 には、 直 ちに 電 源 を 切 って 電 源 コードのプラグをコンセントから 抜 く。○ ACアダプター、 電 源 コードやプラグが 破 損 したとき○ 異 物 が 内 部 に 入 ったとき○ 製 品 に 異 常 や 故 障 が 生 じたとき修 理 が 必 要 なときは、コルグお 客 様 相 談 窓 口 へ 依 頼 してください。・ 本 製 品 を 分 解 したり 改 造 したりしない。・ 修 理 、 部 品 の 交 換 などで、 取 扱 説 明 書 に 書 かれている 以 外 のことは 絶 対 にしない。・ ACアダプターのコードを 無 理 に 曲 げたり、 発 熱 する 機 器 に 近 づけない。また、ACアダプターのコードの 上 に 重 いものをのせない。コードが 破 損 し、 感 電 や 火 災 の 原 因 になります。・ 大 音 量 や 不 快 な 程 度 の 音 量 で 長 時 間 使 用 しない。大 音 量 で 長 時 間 使 用 すると、 難 聴 になる 可 能 性 があります。万 一 、 聴 力 低 下 や 耳 鳴 りを 感 じたら、 専 門 の 医 師 に 相 談 してください。・ 本 製 品 に 異 物 ( 燃 えやすいもの、 硬 貨 、 針 金 など)を 入 れない。・ 温 度 が 極 端 に 高 い 場 所 ( 直 射 日 光 の 当 たる 場 所 、 暖 房 機 器 の 近く、 発 熱 する 機 器 の 上 など)で 使 用 や 保 管 はしない。・ 振 動 の 多 い 場 所 で 使 用 や 保 管 はしない。・ ホコリの 多 い 場 所 で 使 用 や 保 管 はしない。・ 風 呂 場 、シャワー 室 で 使 用 や 保 管 はしない。・ 雨 天 時 の 野 外 のように、 湿 気 の 多 い 場 所 や 水 滴 のかかる 場 所 で、使 用 や 保 管 はしない。・ 本 製 品 の 上 に、 花 瓶 のような 液 体 が 入 ったものを 置 かない。・ 本 製 品 に 液 体 をこぼさない。・ 濡 れた 手 で 本 製 品 を 使 用 しない。注 意この 注 意 事 項 を 無 視 した 取 り 扱 いをすると、傷 害 を 負 う 可 能 性 または 物 理 的 損 害 が 発 生 する 可 能 性 があります。・ 正 常 な 通 気 が 妨 げられない 所 に 設 置 して 使 用 する。・ ラジオ、テレビ、 電 子 機 器 などから 十 分 に 離 して 使 用 する。ラジオやテレビ 等 に 接 近 して 使 用 すると、 本 製 品 が 雑 音 を 受 けて 誤 動 作 する 場 合 があります。また、ラジオ、テレビ 等 に 雑 音が 入 ることがあります。本 製 品 をテレビ 等 の 横 に 設 置 すると、 本 製 品 の 磁 場 によってテレビ 等 の 故 障 の 原 因 になることがあります。・ 外 装 のお 手 入 れは、 乾 いた 柔 らかい 布 を 使 って 軽 く 拭 く。・ ACアダプターの 電 源 コードをコンセントから 抜 き 差 しするときは、 必 ずプラグを 持 つ。・ 本 製 品 の 移 動 時 は、 必 ず2 人 以 上 で 持 ち 上 げる。・ 長 時 間 使 用 しないときは、ACアダプターをコンセントから 抜 く。・ 付 属 のACアダプターや 電 源 コードは 他 の 電 気 機 器 で 使 用 しない。付 属 のACアダプターや 電 源 コードは 本 製 品 専 用 です。 他 の 機器 では 使 用 できません。・ 他 の 電 気 機 器 の 電 源 コードと 一 緒 にタコ 足 配 線 をしない。本 製 品 の 定 格 消 費 電 力 に 合 ったコンセントに 接 続 してください。・ スイッチやツマミなどに 必 要 以 上 の 力 を 加 えない。故 障 の 原 因 になります。・ 外 装 のお 手 入 れに、ベンジンやシンナー 系 の 液 体 、コンパウンド 質 、 強 燃 性 のポリッシャーは 使 用 しない。・ 不 安 定 な 場 所 に 置 かない。本 製 品 が 転 倒 してお 客 様 がけがをしたり、 本 製 品 が 破 損 する 恐れがあります。・ 本 製 品 の 上 に 乗 ったり、 重 いものをのせたりしない。本 製 品 が 転 倒 または 損 傷 してお 客 様 がけがをしたり、 本 製 品 が破 損 する 恐 れがあります。・ 本 製 品 の 隙 間 に 指 などを 入 れない。お 客 様 がけがをしたり、 本 製 品 が 破 損 する 恐 れがあります。・ 地 震 時 は 本 製 品 に 近 づかない。・ 本 製 品 に 前 後 方 向 から 無 理 な 力 を 加 えない。本 製 品 が 転 倒 してお 客 様 がけがをしたり、 本 製 品 が 破 損 する 恐れがあります。*すべての 製 品 名 および 会 社 名 は、 各 社 の 商 標 または 登 録 商 標 です。演 奏 を 楽 しむためのエチケット音 楽 を 楽 しむときには、 周 囲 への 音 の 配 慮 も 大 切 です。 演 奏 する時 間 によって、 音 量 調 節 をしたり、ヘッドホンを 使 用 しましょう。また、ヘッドホン 使 用 時 、または 小 さな 音 量 での 演 奏 時 に、 鍵 盤の 機 構 上 若 干 のメカニズム 音 が 聞 こえます。あらかじめご 了 承ください。
目 次はじめに------------------------------------- 71おもな 特 長 -------------------------------------- 71各 部 の 名 称 とその 機 能 --------------------- 72準 備 と 自 動 演 奏 ----------------------------- 73演 奏 する 前 の 準 備 ------------------------------ 73自 動 演 奏 を 聴 く--------------------------------- 75弾 いてみましょう--------------------------- 76音 色 を 選 ぶ(シングル・モード)-------------- 762つの 音 色 を 重 ねて 演 奏 する(レイヤー・モード)-------------------- 762 人 で 演 奏 する(パートナー・モード)------- 77ペダルを 使 う----------------------------------- 77エフェクト-------------------------------------- 77メトロノーム----------------------------------- 78その 他 の 機 能 -------------------------------- 79鍵 盤 タッチ・コントロールの 設 定 ------------ 79トランスポーズ--------------------------------- 79ファンクション・モード---------------------- 79MIDI------------------------------------------ 82MIDI(ミディ)とは?-------------------------- 82MIDIでなにができるの?--------------------- 82MIDIの 接 続 ------------------------------------- 82MIDIファンクション・モード---------------- 82付 録 ------------------------------------------- 84故 障 かな?とお 思 いになる 前 に-------------- 84仕 様 ----------------------------------------------84スタンドの 組 み 立 て------------------------ 85組 み 立 て 時 の 注 意 ------------------------------ 85その 他 の 注 意 ----------------------------------- 85組 み 立 て 方 法 ----------------------------------- 85組 み 立 て 後 のチェック------------------------ 86MIDIインプリメンテーション・チャート---- 87おもな 特 長30 種 類 の 高 品 位 サウンドはじめにステレオ・コンサート・グランド・ピアノを 含 む、 表 現 力 豊かな 高 品 質 の 音 色 を、30 種 類 内 蔵 しています。また、 同 時に2つの 音 を 重 ねて 演 奏 できるレイヤー・モードや、 鍵 盤を 左 右 で 分 けて 同 じ 音 域 を、2 人 で 演 奏 できるパートナー・モードも 搭 載 しています。エフェクト音 色 の 明 るさを 調 整 できるブリリアンス、コンサート・ホールの 自 然 な 雰 囲 気 をシミュレーションすることができるリバーブや、 音 の 広 がりを 加 えることができるコーラスの、3つのエフェクトを 搭 載 しています。ペダル 効 果アコースティック・ピアノと 同 じように3つのペダルを 装備 し、それぞれ、ダンパー、ソステヌート、ソフト 効 果 が 得られます。また、ダンパー・ペダルとソフト・ペダルはハーフ・ペダルとして 機 能 し、ペダルを 踏 み 込 む 深 さで 効 果 のかかり 具 合 を 変 化 させることができます。なおクラシック・ピアノとグランド・ピアノ 音 色 ( Piano1のバンク1と2)ではダンパー・ペダルを 踏 むと、ダンパー・レゾナンス 音 が 追加 されます。メトロノーム拍 子 、テンポ、 音 量 を 変 えることができ、さらにアクセント音 にベル 音 を 使 用 できるメトロノームを 内 蔵 しています。タッチ・コントロール 機 能鍵 盤 を 弾 く 強 さによる 音 の 強 弱 の 度 合 いを、3 種 類 の 中 から 選 択 できます。音 律平 均 律 の 他 に、 純 正 律 ( 長 調 、 短 調 )、 古 典 音 律 (キルンベルガー、ヴェルクマイスター)、 中 東 やインドの 民 族 音 楽で 使 われている 音 律 など、9つの 音 律 から 選 択 することによって、 幅 広 い 音 楽 の 再 現 も 可 能 になります。また、 音 色にアコースティック・ピアノを 選 んだときは、ストレッチ・チューニングが 自 動 的 に 選 ばれます。音 の 高 さの 調 節トランスポーズ 機 能 により 移 調 を、ピッチ・コントロール機 能 により 音 の 高 さの 微 調 整 を 行 うことができます。2つのヘッドホン 端 子ヘッドホン 端 子 を2つ 装 備 しているので、2 人 で 演 奏 を 楽 しむことができます。LINE OUT 端 子LINE OUT 端 子 を 使 って、アンプ 付 きスピーカーや 録 音 機器 などに 接 続 することができます。MIDIの 装 備電 子 楽 器 やコンピューターの 間 で、 演 奏 情 報 のやりとりを行 う 統 一 規 格 MIDIを 装 備 しています。MIDIを 使 うと、 接 続した 機 器 間 で 相 互 にコントロールすることができ、 本 機 を16パート・マルチ・ティンバー 音 源 としても 使 用 することができます。71
各 部 の 名 称 とその 機 能4 5 61237 8 9 10 1112 13 141516 17 18 19 201. ヘッドホン( ) 端 子 (コネクター・ボックス 前 面 ):ステレオ・ミニ・プラグのヘッドホンを2つ 接 続 することができます。ヘッドホンのプラグを 差 し 込 むと、スピーカーからは 音 が 出 なくなります。2. 電 源 ボタン:押 すたびに 電 源 が 入 る、 切 るを 繰 り 返 します。3. VOLUMEツマミ:内 蔵 スピーカー、ヘッドホン 端 子 、およびLINE OUT 端子 からの 音 量 をコントロールします。4. PIANO SONGボタン:ピアノ・ソング 演 奏 に 入 ります。このときボタンが 点 灯します。TRANSPOSEボタンを 一 緒 に 押 すと、 音 色 デモ 演 奏 に 入 ります。5. TRANSPOSEボタン:移 調 するときに 使 います。 移 調 中 はボタンが 点 灯 します。PIANO SONGボタンを 一 緒 に 押 したときは、 音色 デモ 演 奏 に 入 ります。6. FUNCTIONボタン:ピッチ、 音 律 などの 設 定 を 行 うファンクション・モードに 入 ります。 長 押 ししたときは、MIDI 関 連 の 設 定 を 行うMIDIファンクション・モードに 入 ります。ファンクション・モードのときはボタンが 点 灯 し、MIDIファンクション・モードのときはボタンが 点 滅 します。7. TOUCHボタン:鍵 盤 のタッチ( 感 度 )を 選 びます。8. BRILLIANCEボタン:音 の 明 るさを 選 びます。9. REVERBボタン:音 に 残 響 を 加 えるリバーブをオン、オフします。オンにするとボタンが 点 灯 します。10. CHORUSボタン:音 に 広 がりを 与 えるコーラスをオン、オフします。オンにするとボタンが 点 灯 します。11. BANKボタン、LED:使 用 する 音 色 のバンクを 選 びます。 現 在 選 んでいるバンクのLEDが 点 灯 します。12. 音 色 ボタン:30(10×3バンク) 音 色 から 選 択 します。 同 時 に2つの音 色 で 演 奏 (レイヤー・モード)することもできます。13. ディスプレイ:ファンクション・モード 時 やメトロノームなどの 設 定を 表 示 します。14. UP/DOWNボタン:各 種 設 定 の 値 を 選 びます。15. METRONOMEボタン:メトロノームをスタート、ストップします。メトロノーム 使 用 中 はボタンが 点 灯 します。また、 長 押 ししたときは、メトロノームの 各 種 設 定 をするメトロノーム 設定 モードに 入 ります。16. MIDI(IN、OUT) 端 子 :他 のMIDI 機 器 (シーケンサー、キーボードなど)を 接 続するときに 使 用 します。OUT: MIDI 情 報 を 送 信 します。( 本 機 からコントロールする 外 部 MIDI 機 器 のMIDI IN 端 子 と 接 続 します)IN: MIDI 情 報 を 受 信 します。( 本 機 をコントロールする 外 部 MIDI 機 器 のMIDIOUT 端 子 と 接 続 します)17. LINE OUT 端 子 :音 声 の 出 力 端 子 です。ステレオ・ミニ・プラグのオーディオ・コードで、アンプ 付 きスピーカーの 入 力 端 子や 音 響 機 器 のAUX INなどに 接 続 してください。LINE OUT 端 子 の 出 力 音 量 はVOLUMEツマミで 調 整してください。18. DC 19V 端 子 :付 属 のACアダプターのDCプラグを 接 続 します。19. スピーカー 端 子 :スピーカー・コードを 接 続 します(スタンドの 組 み 立て 方 参 照 )。20. ペダル 端 子 :ペダル・コードを 接 続 します(スタンドの 組 み 立 て 方参 照 )。72
準 備 と 自 動 演 奏演 奏 する 前 の 準 備付 属 のスタンドについて本 機 は 付 属 のスタンドに 取 り 付 けて 使 用 します。ACアダプターの 取 り 付 けや 演 奏 をする 前 に、 必 ず85ページの「スタンドの 組 み 立 て」にしたがって 設 置 してください。付 属 のACアダプターの 接 続ACアダプターにACアダプター 用 電 源 コードを 取 付 け、DCプラグをコネクター・ボックス( 後 面 )のDC19V 端 子 に 接 続 します。ACアダプターのコードを 必 ずコード・フックに 引 っかけてください( 図 1)。コードをフックから 外 すときは、 無 理 に 引 っ 張 らないでください。プラグ 破 損 の 原 因になります。ACアダプターは 必 ず 付 属 のものをお 使 いください。 他 のACアダプターを 使 用した 場 合 、 故 障 などの 原 因 となります。電 源 は 必 ずAC100Vを 使 用 してください。ACアダプター 用 電 源 コードのプラグには、アース 端 子 が 付 いています。 感 電 と 機 器の 損 傷 を 防 ぐために、アース 接 続 を 確 実 に 行 って、コンセントに 接 続 します。接 地 極 付 きコンセントに 接 続 する 場 合 ( 図 2)接 地 極 付 きコンセントにACアダプター 用 電 源 コードのプラグをそのまま 差 し 込んでください。アース 端 子 付 きコンセントに 接 続 する 場 合 ( 図 3)ACアダプター 用 電 源 コードのプラグに、2P-3P 変 換 器 を 取 り 付 けます。そして、コンセントのアース 端 子 にアース 線 を 接 続 し、2P-3P 変 換 器 のプラグを 差 し 込 みます。警 告 アース 接 続 は、コンセントにプラグを 差 し 込 む 前 に 行 ってください。また、アース 接 続 を 外 すときは、コンセントからプラグを 抜 いてから 行 ってください。 2P-3P 変 換 器 のアース 線 のU 字 端 子 にカバーが 付 いている 場 合 は、カバーをはずして 使 用 してください。キー・カバーの 開 閉 のしかたキー・カバーの 開 け 方1. キー・カバーを 両 手 で 持 ち 上 げて、 静 かに 開 けます。2. キー・カバー 先 端 のふちを 下 げます。キー・カバーの 閉 じ 方1. ふちを 引 き 上 げ、キー・カバーを 手 前 に 軽 く 引 きます。2. キー・カバーが 自 然 と 閉 じるようになったら、キー・カバーから 手 を 離 します。キー・カバーは、 途 中 から 自 然 に 閉 まる 構 造 です。73
キー・カバーを 閉 じるときは、 無 理 に 引 っ 張 って 閉 じようとしないでください。また、キー・カバーの 上 から 強 い 力 で 押 さえて、 無 理 に 閉 じようとしないでください。 故 障 の 原 因 になります。キー・カバーを 閉 じるときは、 指 や 手 を 挟 まないように 十 分 注 意 してください。キー・カバーが 閉 じるときにかかる 時 間 は、 使 用 時 の 温 度 や 湿 度 により、 若 干 変化 します。キー・カバーがゆっくりと 閉 じるときに、「カチッ」と 音 がする 場 合 があります。これはキー・カバーの 構 造 上 発 生 するもので、 不 良 ではありません。ヘッドホンを 使 うときはステレオ・ヘッドホンは、ステレオ・ミニ・プラグのものをお 使 いください。ヘッドホン 端 子 は 本 体 鍵 盤 左 側 の 下 に2つあるので、お 二 人 で 演 奏 を 楽 しむことができます。ヘッドホン 端 子 にヘッドホンのプラグを 差 し 込 むと、 本 機 のスピーカーからは 音 が 出なくなります。 夜 間 などの 周 囲 へ 伝 わる 音 量 が 気 になるときはヘッドホンをお 使 いください。「 標 準 →ミニ」の 変 換 プラグのついたヘッドホンをご 使 用 の 場 合 、プラグの 抜 き 差 しは 変 換 プラグを 持 って 行 ってください。ヘッドホンを 使 用 する 際 は、 耳 の 保 護 のために 大 きな 音 量 で 長 い 時 間 聴 かないでください。譜 面 立 てを 使 うときはキー・カバーが 譜 面 を 置 く 譜 面 立 てになります( 図 4)。譜 面 を 開 いたまま 置 くときに、キー・カバーに 強 い 力 を 加 えないでください。電 源 を 入 れる電 源 ボタンを 押 して、 本 体 の 電 源 を 入 れます( 図 5)。電 源 を 入 れると、コントロール・パネルの 音 色 ボタンが 点 灯 します。電 源 を 切 るときは、もう 一 度 電 源 ボタンを 押 してください。電 源 をオフにすると、オート・パワー・オフ 機 能 の 設 定 以 外 は 工 場 出 荷 時 の 設 定 ( 初期 設 定 )に 戻 ります。オート・パワー・オフ 機 能 について本 機 は30 分 以 上 鍵 盤 を 弾 かない 場 合 や、 自 動 演 奏 を 再 生 していない 場 合 に、 自 動 的 に電 源 が 切 れます。この 機 能 を 解 除 する 場 合 は、オート・パワー・オフの 設 定 (→p.81)をオフにしてください。音 量 の 調 節VOLUMEツマミを 動 かして 音 量 を 調 整 します( 図 5)。音 量 を 小 さくするときは 左 側 (MIN)へ、 大 きくするときは 右 側 ( MAX)へツマミを 回 します。 内 蔵 スピーカー、ヘッドホン 端 子 、およびLINE OUT 端 子 の 音 量 を 調 整 できます。VOLUMEツマミはMINの 位 置 から 徐 々に 音 量 を 上 げてください。LINE OUT 端 子 の 使 い 方LINE OUT 端 子 は、 内 蔵 スピーカー 以 外 の 音 響 機 器 で 演 奏 を 聞 くときや、 録 音 機 材 に 録音 するときに 使 用 します。アンプ 付 きスピーカーや 音 響 、 録 音 機 器 等 の 入 力 端 子 に、オーディオ・コードを 差 し 込 み接 続 してください。各 接 続 は 必 ず 本 機 、および 接 続 機 器 の 電 源 を 切 った 状 態 で 行 ってください。 不 注 意な 操 作 を 行 うと、 本 機 や 接 続 した 機 器 等 を 破 損 したり、 誤 動 作 を 起 こす 原 因 となりますので 十 分 に 注 意 してください。接 続 するオーディオ・コードは 別 売 品 です。 接 続 する 機 器 に 合 わせて 市 販 品 をお 求めください。74
自 動 演 奏 を 聴 く本 機 には、 高 品 位 な10 種 類 の 音 色 を 使 った 音 色 デモ・ソングが10 曲 と、ピアノ 音 色 を 使 い、なじみのあるピアノ 曲 などをあつかったピアノ・ソングが20 曲 、 合 計 30 曲 の 自 動 演奏 が 入 っています。音 色 デモ・ソングの 演 奏 中 に 鍵 盤 を 弾 いて 音 色 を 出 すことはできますが、 音 色 ボタンで 本 機 の 音 色 を 変 えることはできません。音 色 デモ・ソングの 演 奏 中 はエフェクト(リバーブ、コーラス)の 設 定 を 変 えることはできません。音 色 デモ・ソングを 聴 く1. PIANO SONGボタンとTRANSPOSEボタンを 同 時に 押 します。PIANO SONGボタンが 点 滅 して、 音 色 ボタンが 順 番に 点 滅 します。このときディスプレイに 音 色 デモ・ソング 番 号 が 表 示 (d01)されます。1,312. 約 3 秒 後 、PIANO1ボタンが 点 滅 に 変 り、 音 色 デモ・ソングの 演 奏 が 始 まります。PIANO1の 音 色 デ モ・ ソ ン グ の 演 奏 が 終 わ る とPIANO2、E.PIANO1と 順 番 に 演 奏 が 続 き、CHOIRの演 奏 が 終 わると、 再 びPIANO1から 演 奏 を 始 めます。任 意 の 音 色 デモ・ソングを 聴 くときは音 色 ボタンが 順 番 に 点 滅 しているときに、 聞 きたい 音 色ボタンを 押 します。 演 奏 途 中 でも、 聞 きたい 音 色 ボタンを 押 すと 数 秒 後 にデモ・ソングが 切 り 替 わります。なお、ディスプレイ 横 のUP/DOWNボタンでソングを選 ぶこともできます。ピアノ・ソングを 聴 く1. PIANO SONGボタンを 押 します。PIANO SONGボタンとPIANO1ボタンが 点 灯 し、ディスプレイにピアノ・ソング 番 号 (001)が 表 示 されます。1,32. 約 3 秒 後 、PIANO1ボタンが 点 滅 に 変 り、ピアノ・ソングの 演 奏 が 始 まります。1 番 のピアノ・ソングの 演 奏 が 終 わると2 番 、3 番 と 順 番に 演 奏 が 続 き、20 番 の 演 奏 が 終 わると、 再 び1 番 から 演奏 を 始 めます。任 意 のピアノ・ソングを 聴 くときは聞 きたいソングの 番 号 をディスプレイ 横 のUP/DOWNボタンで 選 びます。 演 奏 途 中 でも、 同 様 にUP/DOWNボタンで 番 号 を 選 ぶと 数 秒 後 にピアノ・ソングが 切 り 替わります。3. ピアノ・ソングの 演 奏 を 止 めるときは、PIANO SONGボタンをもう 一 度 押 します。ピアノ・ソング・リスト番 号 表 示 曲 名 作 者1 001 革 命 のエチュード F.ショパン2 002 月 の 光 C.ドビュッシー3 003 幻 想 即 興 曲 Op.66 F.ショパンワルツ 第 6 番 変 ニ 長 調4 004 「 小 犬 」Op.64-1 F. ショパンプレリュード5 005 ( 平 均 律 第 1 巻 第 1 番 より) J.S.バッハ3. 音 色 デ モ・ソ ン グ の 演 奏 を 止 め る と き は、PIANOSONGボタンをもう 一 度 押 します。トルコ 行 進 曲6 006 (ソナタ K.331より)W.A.モーツァルト音 色 デモ・ソング・リスト表 示 音 色 ボタン 曲 名 作 者d01 PIANO1 雨 の 庭 C.ドビュッシーd02 PIANO2 ダニー・ボーイ アイルランド 民 謡d03 E.PIANO1 Jam Session N. Nishid04 E.PIANO2 In Memory M.Geiseld05d06HARPSI/CLAVVIBES/GUITARインヴェンション第 8 番Jazz in SpainJ.S.バッハKORGオリジナルd07 ORGAN1 Improvisation M.Geiseld08 ORGAN2 トッカータ ニ 短 調 J.S.バッハd09 STRINGS Scoring Interlude M.Geiseld10 CHOIR Autumn Flares M.Geisel7 007 アラベスク 第 1 番 C.ドビュッシー8 008 エリーゼのために L.v. ベートーヴェン9 009 愛 の 夢 第 3 番 F.リスト10 010 カンパネラ F.リスト11 011 ノクターン 第 2 番 Op.9-2 F.ショパン12 012 春 の 歌 Op.62-6 F.メンデルスゾーン13 013 水 の 反 映 C.ドビュッシー14 014 ジムノペディ 第 1 番 E.サティ15 015 別 れの 曲 Op.10-3 F.ショパン16 016 Old Feather Blues KORG オリジナル17 017 亜 麻 色 の 髪 の 乙 女 C.ドビュッシー18 018 エンターティナー S.ジョプリン19 019 Sunflowers KORG オリジナル20 020 アメイジング・グレイス 賛 美 歌75
弾 いてみましょう音 色 を 選 ぶ(シングル・モード)本 機 は 高 品 位 な 音 色 を30(10×3バンク) 種 類 の 中 から 選 ぶことができます。音 色 ボタン バンク 音 色 名PIANO1 1 クラシック・ピアノ 32 グランド・ピアノ 33 ジャズ・ピアノ 2PIANO2 1 ライブ・ピアノ 22 ホンキートンク・ピアノ 23 エレクトリック・グランド・ピアノ 1E.PIANO1 1 ステージ・エレクトリック・ピアノ 12 ブライト・エレクトリック・ピアノ 23 トレモロ・エレクトリック・ピアノ 3E.PIANO2 1 デジタル・エレクトリック・ピアノ1 22 60’s エレクトリック・ピアノ 1#たとえば、エレクトリック・グランド・ピアノの 音 色 を選 ぶには、 音 色 ボタンのPIANO2を 押 してボタンを 点灯 させます。そのあとBANKボタンを2 回 押 してバンク3(エレクトリック・グランド・ピアノ)を 選 びBANKボタンの 右 下 のLEDを 点 灯 させます。なお、それぞれの 音 色 ボタンで 選 んだバンクは、 他 の 音色 に 切 り 替 えても 記 憶 されます。2電 源 を 入 れるたびに、 各 音 色 ボタンにはバンク1の 音 色が 選 択 されます。2つの 音 色 を 重 ねて 演 奏 する(レイヤー・モード)2つの 音 色 を 重 ねた 音 で 演 奏 することができます。これを、レイヤー・モードと 呼 びます。重 ねる 音 色 の 音 色 ボタンを2つ 同 時 に 押 してください。 選ばれた2つの 音 色 のボタンが 点 灯 します。1HARPSI/CLAVVIBES/GUITAR3 デジタル・エレクトリック・ピアノ2 21 ハープシコード 22 クラビ 13 シン・クラビ 21 ビブラフォン 12 マリンバ 1選 んだ2つの 音 色 のボタンの 位 置 関 係 が 左 側 で 上 段 にあるほうがレイヤー 1、 他 方 がレイヤー 2になります( 下 図 参 照 )。3 アコースティック・ギター 2ORGAN1 1 ジャズ・オルガン1 22 ジャズ・オルガン2 23 ジャズ・オルガン3 2ORGAN2 1 パイプ・オルガン1 22 パイプ・オルガン2 23 ポジティフ・オルガン 2STRINGS 1 ストリングス 22 シネマ・ストリングス 23 アナログ・ストリングス 2CHOIR 1 クワイア Aah 22 ボイス Ooh 23 クラシカル・クワイア 3#は 音 色 が 使 用 しているオシレーターの 数 (84ページの「 最 大発 音 数 について」 参 照 )1. 弾 きたい 音 色 の 音 色 ボタンを1つ 選 びます。選 んだボタンが 点 灯 します。2. BANKボタンを 押 して3 種 類 の 中 から 音 色 を 選 びます。押 すたびにBANKボタンの 右 のLEDが 上 から 順 に 点 灯し、1、2、3、1...とバンク( 音 色 )が 切 り 替 わります。た と え ば、E.PIANO1とORGAN1を 選 ん だ 場 合 は、E.PIANO1がレイヤー 1、ORGAN1がレイヤー 2になります。また、バンクを 変 えた 音 色 を 使 うときは、シングル・モードで 各 音 色 ボタンを 押 したときのバンク( 音 色 )を 前もって 選 んでください。たとえば、グランド・ピアノとジャズ・オルガン2の 音 色 を重 ねて 演 奏 するときは、PIANO1にはバンク1(グランド・ピアノ)を、またORGAN1にはバンク2(ジャズ・オルガン2)を 選 んだ 後 、 両 方 のボタンを 同 時 に 押 してください。レイヤー・モードを 選 ぶと、 選 んだ 音 色 のオシレーター数 によって 同 時 発 音 数 が 制 限 されます(84ページの「 最 大発 音 数 について」 参 照 )。同 じ 音 色 ボタンに 割 り 振 られたバンクが 違 う 音 色(PIANO1のグランド・ピアノとジャズ・ピアノなど)を 選 ぶことはできません。シングル・モードに 戻 るには音 色 ボタンで1つだけ 音 色 を 選 ぶとシングル・モードに戻 ります。レイヤー・モードの 各 種 設 定レイヤー・モードでは 音 色 間 の 音 量 バランスをとったり、 音 色 ごとにオクターブをずらしたり、 音 色 ごとのダンパー・ペダルの 有 効 、 無 効 を 設 定 できます(79ページの「ファンクション・モード」 参 照 )。76
2 人 で 演 奏 する(パートナー・モード)鍵 盤 を 左 側 と 右 側 で 分 けて、2 人 の 演 奏 者 が 同 様 の 音 域 で演 奏 をすることができます。これをパートナー・モードとよびます。1. FUNCTIONボタンを 押 します。FUNCTIONボタンとPIANO1ボタンが 点 灯 します。2. E.PIANO1ボタンを 押 します。音 色 ボタンのE.PIANO1ボタンが 点 灯 し、ディスプレイにoFFと 表 示 されます。1,53. ディスプレイ 横 のUPボタンを 押 してonにします。パートナー・モードがオンになり、 鍵 盤 の 左 側 も 右 側 もPIANO1の 音 色 になります。パートナー・モードがオンのときは、ディスプレイ 内 右 下 のドットが 表 示 されます。右 側 の 鍵 盤 はE4 ~C8で2オクターブ 低 い 音 域 (E2 ~C6)の 音 色 が 出 ます。 左 側 の 鍵 盤 はA0 ~ Eb 4で2オクターブ 高 い 音 域 (A2 ~ Eb 6)の 音 色 が 出 ます。2 ♭ 34レイヤー・モードでは、ダンパー・ペダルの 効 果 をどちらかの 音 色 だけにすることもできます(81ページの「レイヤー・ペダルの 設 定 」 参 照 )。パートナー・モード(→p.80)では、 左 右 で 独 立 してダンパーをかけることもできます。エフェクトブリリアンス音 色 の 明 るさを 変 えるエフェクトです。BRILLIANCEボタンを 押 しながら、ディスプレイ 横 のUP/DOWNボタンを 押 すことで 設 定 を 変 更 します。設 定 はディスプレイに 表 示 され、 音 色 は3にするとより 明るく、1にするとやや 控 えめの 明 るさになります。設 定 はすべての 音 色 に 共 通 で 電 源 を 切 るまで 維 持 されますが、 電 源 を 入 れると2の 標 準 設 定 になります。ブリリアンスはオフにできません。 ♭ リバーブ音 に 残 響 と 深 みを 加 え、コンサート・ホールで 演 奏 しているような 臨 場 感 のあるサウンドにするエフェクトです。 工 場出 荷 時 は 音 色 ごとにオン、オフや 設 定 が 記 憶 されています。4. パートナー・モードを 止 めるときは、ディスプレイ 横 のDOWNボタンを 押 してoFFにします。5. FUNCTIONボタンを 押 します。FUNCTIONボタンが 消 灯 します。パートナー・モードでは 左 側 と 右 側 の 音 色 の 変 更 や、 音 量の 調 整 などができます。 詳 しくは80ページの「パートナー・モードの 設 定 」をご 覧 ください。ペダルを 使 うダンパー、ソステヌート、ソフトの3 種 類 のペダルがあります。これらを 使 って、 演 奏 をより 効 果 的に 表 現 することができます。ソフト・ペダル( 左 )ペダルを 踏 んでいる 間 は、 音 が 柔 らかくおとなしい 感 じになります。ペダルを 踏 み 込 む 深 さで 音 のやわらかさを 変 化させることができます(ハーフ・ペダル 効 果 )。ソステヌ-ト・ペダル( 中 央 )任 意 の 音 に 対 してのみダンパー 効 果 をかけます。ペダルを踏 んだときに、 押 えられていた 鍵 盤 の 音 だけにダンパー 効果 がかかり、 踏 んでいる 間 はその 音 だけが 長 く 伸 びます。ペダルを 踏 んでいる 間 に 新 たに 弾 いた 音 に 対 しては、ダンパー 効 果 はかかりません。ダンパ-・ペダル( 右 )ペダルを 踏 んでいる 間 は 音 が 長 く 伸 び、 余 韻 のある 豊 かな響 きになります。また、クラシック・ピアノとグランド・ピアノ 音 色 (Piano1のバンク1と2)ではダンパー・レゾナンス 音 が 追 加 されます。なお、ペダルを 踏 み 込 む 深 さでダンパーのかかり 具 合 を 変 化 させることができます(ハーフ・ペダル 効 果 )。REVERBボタンを 押 すたびにリバーブのオン(ボタン 点灯 )、オフ(ボタン 消 灯 )を 繰 り 返 します。設 定 の 変 更 をするときは、REVERBボタンを 押 しながら、ディスプレイ 横 のUP/DOWNボタンを 押 します。設 定 はディスプレイに 表 示 され、3にするとリバーブの 効果 が 深 く、1にするとリバーブの 効 果 が 浅 くなります。ここでのオン、オフや 設 定 は、 音 色 を 切 り 替 えたり、 電 源 を切 ると 工 場 出 荷 時 の 状 態 ( 初 期 設 定 )に 戻 ります。コーラスコーラスは、 音 にうねりを 加 え、 広 がりのある 豊 かなサウンドにします。 工 場 出 荷 時 は 音 色 ごとにオン、オフや 設 定が 記 憶 されています。CHORUSボタンを 押 すたびにコーラスのオン(ボタン 点灯 )、オフ(ボタン 消 灯 )を 繰 り 返 します。設 定 の 変 更 をするときは、CHORUSボタンを 押 しながら、ディスプレイ 横 のUP/DOWNボタンを 押 します。設 定 はディスプレイに 表 示 され、 音 色 は3にするとコーラスの 効 果 が 深 く、1にするとコーラスの 効 果 が 浅 くなります。ここでのオン、オフの 設 定 は、 音 色 を 切 り 替 えたり、 電 源 を切 ると 工 場 出 荷 時 の 状 態 ( 初 期 設 定 )に 戻 ります。77
メトロノーム練 習 に 便 利 なベル 音 や 音 量 などをかえることができるメトロノームを 内 蔵 しています。メトロノームのオン、オフMETRONOMEボタンを 押 すと、ボタンが 点 灯 しメトロノームがスタートします。メトロノームを 止 めるときは、もう 一 度 METRONOMEボタンを 押 してボタンを 消 灯 します。テンポの 設 定メトロノームのテンポは、メトロノームのオン、オフに 関 係 なく、ディスプレイにテンポの 値 が 表 示 ( 初 期 設 定 は120)されているときに、ディスプレイ 横 のUP/DOWNボタンで 設 定 できます。なお、 設 定 範 囲 はq = 40 ~ 240です。初 期 設 定 に 戻 すときはUP/DOWNボタンを 同 時 に 押 します。拍 子 の 設 定1. METRONOMEボタンを 長 押 しして、メトロノーム 設定 モードに 入 ります。音 色 ボタンのPIANO1が 点 灯 し、ディスプレイに 拍 子(04)が 表 示 されます。このときMETRONOMEボタンが 点 滅 に 変 わります。メトロノーム 設 定 モードに 入 った 時 は、 常 に 拍 子 の 設 定になります。2. メトロノーム 設 定 モードの 他 の 設 定 をした 後 に 拍 子 の設 定 をするときは、PIANO1ボタンを 押 します。3. ディスプレイ 横 のUP/DOWNボタンで 値 を 設 定 します。設 定 範 囲 は4 種 類 で02(2/4)、03(3/4)、04(4/4)、06(6/4)で、 初 期 設 定 は04です。初 期 設 定 に 戻 すときはUP/DOWNボタンを 同 時 に 押 します。24. METRONOMEボタンを 押 して、メトロノーム 設 定モードから 出 ます。音 量 の 設 定1. METRONOMEボタンを 長 押 しして、メトロノーム 設定 モードに 入 ります。音 色 ボタンのPIANO1が 点 灯 し、ディスプレイに 拍 子(04)が 表 示 されます。このときMETRONOMEボタンが 点 滅 に 変 わります。2. PIANO2ボタンを 押 すと、ディスプレイに 音 量 が 表 示されます。3. ディスプレイ 横 のUP/DOWNボタンで 値 を 設 定 します。設 定 範 囲 は1 ~ 13で、 初 期 設 定 は10です。初 期 設 定 に 戻 すときはUP/DOWNボタンを 同 時 に 押 します。331,4アクセント 音 の 選 択1. METRONOMEボタンを 長 押 しして、メトロノーム 設定 モードに 入 ります。音 色 ボタンのPIANO1が 点 灯 し、ディスプレイに 拍 子(04)が 表 示 されます。このときMETRONOMEボタンが 点 滅 に 変 わります。2. E.PIANO1ボタンを 押 すと、ディスプレイにアクセント 音 設 定 が 表 示 されます。3. ディスプレイ 横 のUP/DOWNボタンで 値 を 設 定 します。設 定 は3 種 類 でoFF(アクセント 音 なし.)、on1( 強 拍 が強 調 音 )、on2( 強 拍 がベル 音 )で、 初 期 設 定 はoFFです。24. METRONOMEボタンを 押 して、メトロノーム 設 定モードから 出 ます。テンポの 設 定 (メトロノーム 設 定 モード 時 )1. METRONOMEボタンを 長 押 しして、メトロノーム 設定 モードに 入 ります。音 色 ボタンのPIANO1が 点 灯 し、ディスプレイに 拍 子(04)が 表 示 されます。このときMETRONOMEボタンが 点 滅 に 変 わります。2. E.PIANO2ボタンを 押 すと、ディスプレイにテンポが表 示 されます。3. ディスプレイ 横 のUP/DOWNボタンで 値 を 設 定 します。設 定 範 囲 はq = 40 ~ 240で、 初 期 設 定 は120です。初 期 設 定 に 戻 すときはUP/DOWNボタンを 同 時 に 押 します。24. METRONOMEボタンを 押 して、メトロノーム 設 定モードから 出 ます。メトロノーム 音 の 選 択1. METRONOMEボタンを 長 押 しして、メトロノーム 設定 モードに 入 ります。音 色 ボタンのPIANO1が 点 灯 し、ディスプレイに 拍 子(04)が 表 示 されます。このときMETRONOMEボタンが 点 滅 に 変 わります。2. HARPSI/CLAVボタンを 押 すと、ディスプレイにメトロノーム 音 設 定 が 表 示 されます。3. ディスプレイ 横 のUP/DOWNボタンで 値 を 設 定 します。設 定 は2 種 類 で1(アコースティック.)、2( 電 子 音 )で、 初期 設 定 は1です。23333331,41,41,42331,44. METRONOMEボタンを 押 して、メトロノーム 設 定モードから 出 ます。4. METRONOMEボタンを 押 して、メトロノーム 設 定モードから 出 ます。78
その 他 の 機 能鍵 盤 タッチ・コントロールの 設 定鍵 盤 を 弾 く 強 さによる 音 の 強 弱 の 変 化 の 度 合 いを 設 定 します。設 定 を 変 えるときは、TOUCHボタンを 押 しながら、ディスプレイの 横 のUP/DOWNボタンを 押 して 設 定 します。 表 示 タッチ・コントロールの 設 定1 軽 め、 弱 く 弾 いても 強 音 が 出 せるタッチ2 標 準 、 普 通 のピアノ・タッチ3 重 め、 強 く 弾 かないと 強 音 が 出 せないタッチ電 源 をオフにすると2( 標 準 )の 設 定 に 戻 ります。全 音 色 共 通 の 設 定 になります。トランスポーズキーを 変 える( 移 調 する)ことによって、 黒 鍵 をあまり 使 わない 指 使 いで 演 奏 したり、 覚 えたそのままの 指 使 いで、 他の 楽 器 や 歌 に 演 奏 を 合 わせることができます。これをトランスポーズ 機 能 といいます。11 半 音 の 範 囲 でずらすことができ、1 半 音 上 げた 場 合 、 下 図 の 左 の 楽 譜 を 弾 くと、 右 の 楽譜 のように 鳴 ります。電 源 をオフにするとトランスポーズは 解 除 されます。TRANSPOSEボタンを 押 しながら、F♯6 ~ F7 中 から 移 調するキーの 鍵 盤 を 押 します。C7 以 外 の 鍵 盤 を 押 えるとTRANSPOSEボタンが 点 灯 し、トランスポーズされたことを 示 します。押 さえた 鍵 盤 の 音 の 高 さがC7の 位 置 に 対 応 するように、 鍵盤 全 体 の 音 の 高 さが 移 調 します。もとの 設 定 に 戻 すときは、TRANSPOSEボタンを 押 しながら、C7の 鍵 盤 を 押 します。このとき、TRANSPOSEボタンが 消 灯 し、トランスポーズが 解 除 されます。ファンクション・モードここまでで 設 定 していないピッチや 音 律 設 定 などをする 場合 は、ファンクション・モードで 行 います。ファンクション・モードでの 各 種 機 能 の 設 定 手 順1. FUNCTIONボタンを 押 します。FUNCTIONボタンとPIANO1ボタンが 点 灯 します。2. 機 能 が 割 り 振 られた 音 色 ボタンを 押 します。現 在 の 設 定 がディスプレイに 表 示 されます。3. 値 を 設 定 します。4. 設 定 が 終 わったらFUNCTIONボタンを 押 して、 演 奏 できる 状 態 に 戻 ります。このとき、FUNCTIONボタンが 消 灯 します。1,4323オート・パワー・オフの 設 定 以 外 は 電 源 をオフにすると 初 期 設 定 に 戻 ります。全 音 色 共 通 の 設 定 になります。ファイン・チューニング(ピッチ・コントロール)ピッチ( 音 の 高 さ)の 微 調 整 を 行 ないます。 他 の 楽 器 と 合 奏をするときなどに、 楽 器 間 の 微 妙 なピッチのずれを 調 整 します。0.5Hzステップで427.5Hz ~ 452.5Hzまでずらすことができます。 表 示 は27.5 ~ 52.5になります。基 準 ピッチはA=440Hzで、 初 期 設 定 は40.0です。1. フ ァ ン ク シ ョ ン・モ ー ド に 入 る と、 音 色 ボ タ ン のPIANO1が 点 灯 します。ファンクション・モードに 入 った 時 は、 常 にピッチ・コントロール 設 定 になります。2. ファンクション・モードの 他 の 設 定 をした 後 にピッチ・コントロール 設 定 をするときは、PIANO1ボタンを 押します。3. ディスプレイ 横 のUP/DOWNボタンで 値 を 設 定 します。UP/DOWNボタンを 同 時 に 押 すと440Hzに 戻 ります。1233C4F 6C7 F7鍵 盤F♯6 ~ B6C7C♯7 ~ F7キーの 高 さ6 ~ 1 半 音 下 げる標 準 (トランスポーズなし)1 ~ 5 半 音 上 げる79
音 律 を 選 ぶ平 均 律 の 他 に、 純 正 律 ( 長 調 、 短 調 )、 古 典 音 律 (キルンベルガー、ヴェルクマイスター)、 中 東 やインドの 民 族 音 楽 で 使われている 音 律 など、9つの 音 律 から 選 択 します。表 示音 律00 平 均 律 ( 初 期 設 定 ): 一 般 的 に 広 く 使 われている 音律 で、 各 半 音 のピッチの 変 化 幅 が 同 じになっています。01 純 正 律 [ 長 調 ]: 選 択 した 主 調 和 音 のメジャー・コードが 完 全 に 調 和 する 音 階 です。02 純 正 律 [ 短 調 ]: 選 択 した 主 調 和 音 のマイナー・コードが 完 全 に 調 和 する 音 階 です03 アラビック:アラビア 音 楽 の1/4トーン・スケールを 含 む 音 階 です。04 ピタゴラス: 古 代 ギリシャの 音 階 で、 特 にメロディー 演 奏 に 効 果 的 です。5 度 は 純 正 ですが、その他 の 音 程 、 特 に 長 3 度 が 純 正 ではありせん。05 ヴェルクマイスター:ヴェルクマイスター IIIスケールです。これはバロック 時 代 後 期 に 比 較 的 自 由 な 移調 を 目 的 として 考 案 されたものです。06 キルンベルガー:キルンベルガー IIIスケールです。これは 主 にハープシコードのチューニングに 使 用されます。07 スレンドロ 音 階 :1オクターブを5 音 で 構 成 するインドネシアのガムラン 音 階 です。08 ペログ 音 階 :1オクターブを7 音 で 構 成 するインドネシアのガムラン 音 階 です。1. ファンクション・モードに 入 り、PIANO2ボタンを 押 します。音 色 ボタンのPIANO2が 点 灯 し、ディスプレイに 音 律の 設 定 (00)が 表 示 されます。2. ディスプレイ 横 のUP/DOWNボタンで 設 定 を 選 択 します。ストレッチ・チューニングについてPIANO1、PIANO2の 音 色 は、ストレッチ・チューニングを 用 いています。ストレッチ・チューニングは、より 自 然 な 響 きを 得 るために、 平 均 律 のピッチに 対 して 低 音 域 は 低 く、 高 音 域 は 高 くピッチを 調 整 したものです。これは、アコースティック・ピアノが 通 常 調 律 される 方 法 です。パートナー・モードの 設 定11. ファンクション・モードに 入 り、E.PIANO1ボタンを 押します。音 色 ボタンのE.PIANO1が 点 灯 し、ディスプレイにオン、オフが 表 示 されます。2. ディスプレイ 横 のUP/DOWNボタンを 押 すたびにオン(on)、オフ(oFF)が 切 り 替 わります。12222パートナー・モードをオンにすると、 鍵 盤 の 右 側 も 左 側 もPIANO1 音 色 になり、PIANO1ボタンが 点 灯 します。このとき、ディスプレイ 内 右 下 のドットが 表 示 されます(パートナー・モード 表 示 )。右 側 の 鍵 盤 はE4 ~C8で2オクターブ 低 い 音 域 (E2 ~C6)の 音 色 が 出 ます。 左 側 の 鍵 盤 はA0 ~ Eb 4で2オクターブ 高い 音 域 (A2 ~ Eb 6)の 音 色 が 出 ます。鍵 盤 の 右 側 と 左 側 の 分 割 位 置 や 発 音 音 域 ( 音 の 高 さ)を 変 えることはできません。パートナー・モードのときは、トランスポーズの 設 定 は無 視 されます。また、 鍵 盤 情 報 (Note On、Note Off)のMIDI 送 信 はしません。左 側 の 音 色 を 変 えたいときはファンクション・モードを 出 て、 左 側 の 鍵 盤 で 使 用 する 音 色 の 音 色 ボタンを 押 します。 右 側 の 鍵 盤 の 音 はPIANO1 音 色 のままになります。この 場 合 は、 左 側 の 鍵 盤 の 音 色 のボタンだけが 点 灯 します。左 側 と 右 側 で 任 意 の 音 色 に 変 えたいときはファンクション・モードを 出 て、 使 用 する 音 色 の 音 色 ボタンを2つ 同 時 に 押 してください。 選 ばれた2つの 音 色のボタンが 点 灯 します。選 んだ2つの 音 色 のボタンの 位 置 関 係 が 左 側 で 上 段 にあるほうが 左 側 の 鍵 盤 の、 他 方 が 右 側 の 鍵 盤 の 音 色 になります。たとえば、E.PIANO1とORGAN1を 選 んだ 場 合は、E.PIANO1が 左 側 の 鍵 盤 、ORGAN1が 右 側 の 鍵 盤の 音 色 になります。また、バンクを 変 えた 音 色 を 使 うときは、シングル・モードで 各 音 色 ボタンを 押 したときのバンク( 音 色 )を 前もって 選 んでください。左 側 と 右 側 で 任 意 の 音 色 に 変 えたまま、パートナー・モードをオフにしてファンクション・モードを 出 た 場 合は、ボタンが 点 灯 している 音 色 が 選 択 されます。左 側 と 右 側 でPIANO1 以 外 の 同 じ 音 色 を 使 いたいときはファンクション・モードを 出 て、 使 用 したい 音 色 の 音 色ボタンが 右 側 になるように2つ 同 時 に 押 してください。そのあと、 右 側 に 選 んだ 音 色 のボタンをもう 一 度 押します。たとえば、PIANO2とORGAN1を 選 んだあと、もう 一 度 ORGAN1ボタンを 押 すと 左 右 どちらもORGAN1の 音 色 になります。左 側 と 右 側 で 音 量 を 変 えたいときは左 側 と 右 側 で 音 色 を 変 えた 時 はそれぞれの 音 色 の 音 量設 定 をすることができます。81ページの「レイヤー 音 量バランスの 設 定 」をご 覧 ください。ダンパーを 使 うときはダンパー・ペダルとソフト・ペダルで 右 側 、 左 側 が 独 立したダンパー・ペダルとして 使 用 できます。ダンパー: 右 側 演 奏 者 用 のダンパー・ペダルとして 動 作します。ソステヌート: 動 作 しないようになりますソフト: 左 側 演 奏 者 用 のダンパー・ペダルとして 動 作 します。80
レイヤー 音 量 バランスの 設 定レイヤー・モード(またはパートナー・モード)のときの 音色 の 音 量 バランスの 調 整 を 行 います。 調 整 範 囲 は1-9...9-9...9-1で、レイヤー 1( 左 側 の 鍵 盤 )が 左 の 値 、レイヤー2( 右 側 の 鍵 盤 )が 右 の 値 になります。初 期 設 定 は9-9です。1. ファンクション・モードに 入 り、E.PIANO2ボタンを 押します。音 色 ボタンのE.PIANO2ボタンが 点 灯 し、ディスプレイにバランスの 設 定 (9-9)が 表 示 されます。2. ディスプレイ 横 のUP/DOWNボタンで 音 量 バランスの設 定 を 選 択 します。初 期 設 定 に 戻 すときはUP/DOWNボタンを 同 時 に 押 します。音 色 を 替 えると 初 期 設 定 に 戻 ります。音 色 がシングル・モードのときは 表 示 が---となり設 定 できません。レイヤー・オクターブの 設 定レイヤー・モードのときの 音 色 ごとのオクターブ 設 定 を 行います。 調 整 範 囲 は 各 音 色 ±1オクターブで 表 示 は-01、00、01になります。 初 期 設 定 は00です。1. ファンクション・モードに 入 り、HARPSI/CLAVボタンを 押 します。音 色 ボタンのHARPSI/CLAVボタンが 点 灯 し、ディスプレイにオクターブの 設 定 をするレイヤー(L1)が 表 示 されます。2. ディスプレイ 横 のUP/DOWNボタンでレイヤーを 切 り替 えます。レイヤー 1はL1、レイヤー 2はL2と 表 示 されます。122レイヤー・ペダルの 設 定レイヤー・モードのときの 音 色 ごとのダンパー 設 定 を 行 います。設 定 はレイヤー 1の 音 色 のみ(o--)、レイヤー 2の 音 色 のみ(--o)、 両 方 の 音 色 (o-o)の3 種 類 です初 期 設 定 はo-oです。1. ファンクション・モードに 入 り、VIBES/GUITARボタンを 押 します。音 色 ボタンのVIBES/GUITARボタンが 点 灯 し、ディスプレイにダンパーの 設 定 (o-o)が 表 示 されます。2. ディスプレイ 横 のUP/DOWNボタンでダンパーの 設 定を 選 択 します。1音 色 がシングル・モードのときは 表 示 が---となり設 定 できません。オート・パワー・オフの 設 定本 機 は30 分 以 上 鍵 盤 を 弾 かない 場 合 や、 自 動 演 奏 を 再 生 していない 場 合 に、 自 動 的 に 電 源 が 切 れます。この 設 定 はオフ(oFF)にして 解 除 することができます。 初 期 設 定 はオンですが、 設 定 は 選 択 した 時 点 で 記 憶 され、 電 源 を 切 っても設 定 は 保 持 されます。1. ファンクション・モードに 入 り、ORGAN1ボタンを 押します。音 色 ボタンのORGANボタンが 点 灯 し、ディスプレイに 設 定 (on)が 表 示 されます。2. ディスプレイ 横 のUP/DOWNボタンでオン、オフを 選択 します。122223. BANKボタンを 押 します。ディスプレイにオクターブの 設 定 (00)が 表 示 されます。4. ディスプレイ 横 のUP/DOWNボタンでオクターブの 値を 設 定 します。初 期 設 定 に 戻 すときはUP/DOWNボタンを 同 時 に 押 します。続 けてもう 片 方 のレイヤーのオクターブを 設 定 するときは、HARPSI/CLAVボタンを 押 して、レイヤーを 選 び 直 します。312,42,4音 色 がシングル・モードのときは 表 示 が---となり設 定 できません。81
MIDIMIDI(ミディ)とは?MIDI(Musical Instrument Digital Interface)は、 電 子 楽器 やコンピュ-ターの 間 で、 演 奏 に 関 するさまざまな 情 報をやりとりするための 世 界 共 通 の 規 格 です。MIDIでなにができるの?MIDIを 利 用 すると 本 機 から 他 のMIDI 機 器 をコントロールしたり、 他 のMIDI 機 器 から 本 機 の 音 源 を 鳴 らしたりすることができます。また、シーケンサーや 複 数 のMIDI 機 器 を 組み 合 わせることで、 複 雑 なアンサンブルを 楽 しむこともできます。MIDIの 接 続MIDI 情 報 をやりとりするには、MIDIケ-ブル( 別 売 )を 使 います。このケ-ブルを、 本 機 のMIDI 端 子 と 情 報 をやりとりする 外 部 MIDI 機 器 のMIDI 端 子 に 接 続 します。このMIDI 端子 は2 種 類 あります。MIDI INMIDI 情 報 を 受 信 します。 外 部 MIDI 機 器 (MIDIキ-ボ-ドやシ-ケンサ-など)で、 本 機 の 音 を 鳴 らすなどのコントロールをすることができます。本 機 のMIDI IN 端 子 と 外 部 MIDI 機 器 のMIDI OUT 端 子 をMIDIケ-ブルで 接 続 します。MIDI OUTMIDI 情 報 を 送 信 します。 本 機 の 鍵 盤 を 弾 いたときに 出 力 されるMIDI 情 報 で、 外 部 MIDI 機 器 の 音 を 鳴 らすなどのコントロールをすることができます。本 機 のMIDI OUT 端 子 と 外 部 MIDI 機 器 のMIDI IN 端 子 をMIDIケ-ブルで 接 続 します。MIDIファンクション・モード電 源 をオンにしたときは、 本 機 のMIDIパラメータが 送 信チャンネル1、 受 信 チャンネルすべて 受 信 (1-16)、ローカル・オン、オムニ・オフになっています。これらの 設 定 を 変 更 するときは、MIDIファンクション・モードで 設 定 変 更 を 行 います。MIDIファンクション・モードでの 各 種 機 能 の 設 定 手 順1. ファンクション・モードに 入 ってない 状 態 で、FUNCTIONボタンを 長 押 しします。PIANO1ボタンが 点 灯 し、ディスプレイにMIDIチャンネルの 設 定 ( C01)が 表 示 されます。このときFUNCTIONボタンは 点 滅 します。4. 設 定 が 終 わったらFUNCTIONボタンを 押 して、 演 奏 できる 状 態 に 戻 ります。このとき、FUNCTIONボタンは 消 灯 します。電 源 をオフにすると 初 期 設 定 に 戻 ります。MIDIチャンネルの 変 更MIDIには、データのやりとりが 可 能 なMIDIチャンネル1 ~16(C01 ~ C16)があります。電 源 をオンにしたときは、 送 信 チャンネルには 自 動 的 に1(C01)が 割 り 当 てられます。○ MIDIファンクション・モードに 入 ると、 音 色 ボタンのPIANO1が 点 灯 します。MIDIファンクション・モードに 入 った 時 は、 常 にMIDIチャンネルの 設 定 になります。MIDIファンクション・モードの 他 の 設 定 をした 後 にMIDIチャンネルの 設 定 をするときは、PIANO1ボタンを 押 します。レイヤー・モードの 場 合 、 送 信 チャンネルを 選 ぶと、レイヤー 1のチャンネルが 設 定 されることになります。レイヤー 2の 送 信 チャンネルは、 自 動 的 に 連 続 したチャンネルが 割 り 当 てられます。たとえば、レイヤー 1の 音 色 にMIDIチャンネル7を 割 り 当 てたときは、レイヤー 2の 音 色 は 自 動的 にMIDIチャンネル8が 選 ばれます。レイヤー 1の 音 色 にMIDIチャンネル16を 割 り 当 てたときは、レイヤー 2の 音 色はチャンネル1が 選 ばれます。ローカル・オン/オフローカル・オンでは、 本 機 の 鍵 盤 を 弾 くと 演 奏 の 音 が 鳴 り、同 時 にMIDIデータを 送 信 します。ローカル・オフでは、 本機 を 弾 いても 演 奏 の 音 は 鳴 らず、データだけを 送 信 します。通 常 はローカル・オン( 初 期 設 定 :on)に 設 定 します。本 機 をマスター・キーボードとして 使 用 する 場 合 、たとえば 本 機 を 接 続 したMIDI 機 器 (キーボード、 音 源 モジュール等 )の 音 色 で 演 奏 するときは、 本 機 をローカル・オフに 設 定します。 本 機 は 鳴 りませんが、 接 続 したMIDI 機 器 の 音 色 で演 奏 されます。また、 本 機 を 音 源 として 使 用 する 場 合 、たとえば 本 機 をシーケンサーと 接 続 して、シーケンサー 側 でエコーバック(シーケンサーが 受 信 したデータを 送 り 返 す 動 作 )を 設 定 していて、 戻 ってきたデータで 二 重 に 鳴 るのを 防 ぐときは、ローカル・オフ(oFF)に 設 定 します。○ MIDIファンクション・モードに 入 り、PIANO2ボタンを 押 します。PIANO2ボタンが 点 灯 し、ディスプレイにローカル・オン/オフの 設 定 (on)が 表 示 されます。2. 機 能 が 割 り 振 られた 音 色 ボタンを 押 します。現 在 の 設 定 がディスプレイに 表 示 されます。3. 値 を 設 定 します。1,423382
プログラム・チェンジ 送 受 信 フィルターのオン、オフ本 機 からMIDIプログラム・チェンジ・ナンバーを 送 信 し、接 続 したMIDI 機 器 のプログラムを 切 り 替 えることができます。また、 接 続 したMIDI 機 器 からのMIDIプログラム・チェンジ・ナンバーを 受 信 し、 本 機 のプログラムを 切 り 替 えることができます。プログラム・チェンジ・ナンバーと 音 色 の 対 応 については、下 表 の「 音 色 、プログラム・チェンジ・ナンバー 対 応 表 」を 参照 してください。プログラム・チェンジの 情 報 を 送 受 信 するときはオフ(oFF:初 期 設 定 )に、 送 受 信 しないときはオン(on)に 設 定 します。○ MIDIファンクション・モードに 入 り、E.PIANO1ボタンを 押 します。E.PIANO1ボタンが 点 灯 し、ディスプレイに 設 定 (oFF)が 表 示 されます。プログラム・チェンジの 送 信本 機 で 音 色 ボタンとBANKボタンで 音 色 を 選 ぶと、 対 応 するMIDIプログラム・チェンジ・ナンバ-を 送 信 します。プログラム・チェンジの 受 信本 機 でMIDIプログラム・チェンジ・ナンバーを 受 信 すると、対 応 する 音 色 へ 切 り 替 わります。対 応 していないプログラム・チェンジ・ナンバーを 受信 しても、 本 機 の 音 色 は 切 り 替 わりません。音 色 、プログラム・チェンジ・ナンバー 対 応 表CC0: 音 色 のバンクセレクト(MSB)はすべて121音 色 ボタン バンク CC32 PC 音 色PIANO1 1 1 0 クラシック・ピアノ2 0 0 グランド・ピアノ3 0 1 ジャズ・ピアノPIANO2 1 2 0 ライブ・ピアノ2 0 3 ホンキートンク・ピアノ3 0 2 E.グランド・ピアノE.PIANO1 1 0 4 ステージE.ピアノ2 1 4 ブライトE.ピアノ3 3 4 トレモロE.ピアノE.PIANO2 1 0 5 デジタルE.ピアノ12 2 4 60’s E.ピアノ3 1 5 デジタルE.ピアノ2HARPSI/ 1 0 6 ハープシコードCLAV 2 0 7 クラビ3 1 7 シン・クラビVIBES/ 1 0 11 ビブラフォンGUITAR 2 0 12 マリンバ3 0 24 アコースティック・ギターORGAN1 1 0 16 ジャズ・オルガン12 1 16 ジャズ・オルガン23 0 17 ジャズ・オルガン3ORGAN2 1 0 19 パイプ・オルガン12 1 19 パイプ・オルガン23 2 19 ポジティフ・オルガンSTRINGS 1 0 48 ストリングス2 0 50 シネマ・ストリングス3 1 50 アナログ・ストリングスCHOIR 1 0 52 クワイア Aah2 1 52 ボイス Ooh3 2 52 クラシカル・クワイアコントロール・チェンジ 送 受 信 フィルターのオン、オフ本 機 のダンパー・ペダルなどの 情 報 を 接 続 した 外 部 MIDI 機器 に 送 信 してコントロールしたり、 外 部 MIDI 機 器 からこれらの 情 報 を 受 信 して 本 機 をコントロールします。コントロール・チェンジの 情 報 を 送 受 信 するときはオフ(oFF: 初 期 設 定 )に、 送 受 信 しないときはオン(on)に 設 定します。○ MIDIファンクション・モードに 入 り、E.PIANO2ボタンを 押 します。E.PIANO2ボタンが 点 灯 し、ディスプレイに 設 定 (oFF)が 表 示 されます。マルチ・ティンバー 音 源 として 使 う本 機 は、 内 蔵 音 源 を 外 部 MIDI 機 器 からコントロールして 鳴らすことができる16パート・マルチ・ティンバ- 音 源 として 動 作 することができます。1. 本 機 のMIDI IN 端 子 とシーケンサーなどのMIDI OUT端 子 をMIDIケーブルで 接 続 します。2. 接 続 したシーケンサーなどからMIDIデータを 送 信 します。接 続 するシーケンサーなどからの 送 信 方 法 はそれぞれの 取 扱 説 明 書 をご 覧 ください。3. 演 奏 データと 一 緒 にプログラム・チェンジ・メッセージを 受 信 すると、そのプログラム・ナンバーに 対 応 する 本機 の 音 色 で 演 奏 されます。マルチ・ティンバー 音 源 として 使 用 しないときはオフ(oFF)に 設 定 します。○ MIDIファンクション・モードに 入 り、HARPSI/CLAVボタンを 押 します。HARPSI/CLAVボタンが 点 灯 し、ディスプレイに 設 定(on: 初 期 設 定 )が 表 示 されます。83
付 録故 障 かな?とお 思 いになる 前 にご 使 用 中 に 問 題 が 起 こった 場 合 は 次 の 事 項 を 確 認 してください。それでも 本 製 品 が 正 しく 動 作 しない 場 合 は、コルグお 客 様 相 談 窓 口 へお 問 い 合 わせください。電 源 が 入 らない。・ ACアダプターが 本 機 とコンセントに 正 しく 接 続 されていることを 確 認 してください。音 が 出 ない。・ スタンドのスピーカー・ボックスのスピーカー・コードが本 体 のスピーカー 端 子 に 正 しく 接 続 されていますか?・ 本 機 のVOLUMEツマミがMINになっていないか 確 認 してください。MINになっていたら、 適 切 なレベルまで 音量 をあげてください。・ MIDIのローカル・コントロールがオフになっていないか 確 認 してください。ローカル・コントロールがオフならば、オンにしてください。・ ヘッドホン 端 子 にプラグが 接 続 されている 場 合 はスピーカーから 音 が 出 ません。ヘッドホン 端 子 にプラグが 接 続 されているときは、プラグを 抜 いてください。音 が 途 切 れる。・ 最 大 同 時 発 音 数 を 越 えています。「 最 大 発 音 数 について」をご 覧 ください。特 定 の 音 域 でピアノ 音 色 の 音 程 、 音 質 がおかしい。・ ピアノ 音 色 では、ピアノ 本 体 の 音 をできるかぎり 忠 実 に再 現 しようとしています。その 結 果 、 音 域 により 倍 音 が強 調 されて 聞 こえるなど、 音 程 や 音 質 が 異 質 に 感 じる 場合 がありますが、 本 機 の 不 良 ではありません。接 続 したMIDI 機 器 が 送 信 したMIDIデータに 応 答 しない。・ MIDIケーブルがすべて 正 しく 接 続 されていることを 確認 してください。MIDI 機 器 と 同 じチャンネルで、 本 機 がMIDIデータを 受 信 していることを 確 認 してください。最 大 発 音 数 について本 機 は 前 に 鳴 っている 音 を 消 して、 後 で 押 さえた 音 を 優 先的 にならす 仕 組 みになっているため、 最 大 同 時 発 音 数 を 越えると 音 が 切 れてしまいます。 本 機 の 音 色 の 中 には1つの 音色 でも2つ 以 上 のオシレーター( 音 源 回 路 の1 音 分 )から、 構成 されている 音 色 もあります。オシレーターが1つから 構成 されているVIBES/GUITARのバンク1や2などの 音 色 は最 大 同 時 発 音 数 が120 音 です。データが2つから 構 成 されているPIANO2のバンク1、2やE.PIANO2のバンク1、3などの 音 色 は 最 大 同 時 発 音 数 が60 音 です。120÷ 音 色 オシレーター 数 = 使 用 可 能 最 大 発 音 数レイヤーにして2つの 音 色 を 鳴 らすとき、ダンパー・ペダルを 使 用 するときなどは、 最 大 同 時 発 音 数 を 考 えて 音 色 を 上手 に 選 んでください。仕 様鍵 盤RH3(リアル・ウェイテッド・ハンマー・アクション3) 鍵 盤 :88 鍵 (A0 ~ C8)タッチ・コントロールライト( 軽 め)、ノーマル( 標 準 )、ヘビー( 重 め)ピッチ音 律音 源トランスポーズ、ファイン・チューニング9 種 類ステレオPCM 音 源同 時 発 音 数 120( 最 大 )音 色30(10×3バンク)エフェクトブリリアンス、リバーブ、コーラス( 各 3 段 階 )デモ・ソング30( 音 色 デモ・ソング10、ピアノ・ソング20)メトロノームテンポ、 拍 子 、アクセント、 音 量 、 音 色ペダルダンパー *、ソステヌート、ソフト**はハーフ・ペダル 対 応接 続 端 子LINE OUT、MIDI(IN、OUT)、ヘッドホン×2、ペダル、スピーカーコントロール電 源 、ボリューム、ピアノ・ソング、トランスポーズ、ファンクション、タッチ、ブリリアンス、リバーブ、コーラス、バンク、 音 色 ×10、アップ、ダウン、メトロノームアンプ 出 力 22W×2スピーカー10cm×2電 源 DC 19V、ACアダプター( 付 属 )消 費 電 力15W外 形 寸 法 (W×D×H)1355×351×772mm1355×351×936mm(キー・カバーを 開 けた 状 態 )質 量 37kg( 専 用 スタンド 込 み)付 属 品 ACアダプター、ACコード、ヘッドホン、専 用 スタンド※ 仕 様 および 外 装 は、 改 良 のため 予 告 なく 変 更 することがあります。84
スタンドの 組 み 立 て警 告● スタンドの 組 み 立 ては 必 ず2 人 以 上 で 行 ってください。組 み 立 て 時 の 注 意正 しく 安 全 に 組 み 立 てるためには、 以 下 の 項 目 に 注 意 して作 業 を 行 ってください。・ 部 品 の 種 類 や 向 きを 間 違 わないように 注 意 して、 手 順 通りに 組 み 立 ててください。2. 下 記 の 部 品 がすべてそろっていることを 確 認 してください。その 他 の 注 意組 み 立 てた 後 は、 以 下 の 項 目 に 注 意 してください。・ ネジの 緩 みについて組 み 立 て 後 、 時 間 が 経 過 すると、 各 部 のネジが 緩 むことがありますので、ネジが 緩 んでいないかを 定 期 的 に 確 認することをおすすめします。また、スタンドの 揺 れが 激しいと 感 じる 場 合 は、ネジが 緩 んでいる 可 能 性 があります。そのときは、ネジを 締 め 直 してください。・ 設 置 場 所 を 移 動 するときスタンドの 組 み 立 て 後 に 移 動 するときは、ACアダプターのコードをスタンドから 取 り 外 し、キー・カバーを 閉 じて、必 ず2 人 以 上 で 水 平 を 保 ちながらゆっくり 移 動 して 下 さい。3. 左 右 の 側 板 に、ネジ(M6)6 本 で 本 体 とスピーカー・ボックスを 固 定 します。スピーカー・コードが 左 側 になるようにスピーカー・ボックスを 置 きます。このときスピーカー( 布 が 貼 ってある 面 )は 手 前 になります。最 初 に 右 側 の 側 板 のネジを 仮 止 め*してから、 左 側 の 側板 のネジも 仮 止 め*します。* 仮 止 めとは、2mm 程 度 隙 間 が 空 くようにネジを 締 めることです。・ 分 解 についてスタンドを 分 解 するときは、 組 み 立 て 時 の 逆 の 順 番 で行 ってください。 取 り 外 し 後 は、ネジなどの 部 品 をなくさないように 保 管 してください。必 ず 本 体 を 横 に 寝 かせて 分 解 を 行 ってください。組 み 立 て 方 法お 手 持 ちのプラスのドライバーを 用 意 してください。1. 本 体 を 包 んでいた 保 護 シートを 平 らな 床 に 敷 き、 後 面 が床 側 になるように 本 体 をその 上 に 置 きます。このとき、スタンドを 組 み 立 てて、 起 こすときに 手 が 本体 の 下 に 入 りやすくするため 布 や 雑 誌 を 置 きます。組 み 立 てが 終 わるまで、 本 体 のキー・カバーが 開 かないよう 注 意 してください。指 などを 挟 まないように 注 意 してください。4. ペダル・ユニットの 裏 にあるコネクターに 向 きを 間 違 えないように 付 属 のペダル・コードを 接 続 して、ペダル・ユニットの 溝 にはめ 込 んで 固 定 します。ペダル・コードのコネクターの 脱 着 は、ロック 爪 を 押 しながら 行 ってください。85
5. ペダル 板 にペダル・ユニットをはめ 込 み、ペダル 板 裏 側の 切 り 欠 きの 上 の 穴 にプッシュ・リベットを 押 し 込 み 固定 します。押 し 込 んだ 後 にペダル 板 を 持 ち 上 げ、ペダルが 落 ちないことを 確 認 してください。プッシュ・リベットはペダル・ユニットの 脱 落 を 防 止 するためのものです。そのため、パネル 板 に 完 全 に 固 定 することはできません。10. もう 一 度 スタンドに 隙 間 や 傾 きが 無 いことを 確 認 し、すべてのネジをしっかりと 締 まっていることを 確 認 します。11. 左 右 の 側 板 のネジ 頭 に、キャップをかぶせます。12. 本 体 のコネクター・ボックス 後 面 にある 接 続 端 子 に、ペダル・コード、スピーカー・コードを 接 続 します。ペダル・コード、スピーカー・コードを 接 続 するときは、コネクターの 向 きに 注 意 してください。ペダル・コード、スピーカー・コードを 外 すときは、コネクターのロック 爪 を 押 しながら 行 ってください。6. ペダル・ユニットを 固 定 したペダル 板 をスタンドの 側 板内 側 の 金 具 にネジ(M4)4 本 で 仮 止 めします。7. 組 み 立 てたスタンドを2 人 でゆっくりとおこします。8. 左 右 の 側 板 の 後 ろに、 転 倒 防 止 金 具 を 必 ず 取 り 付 けてください。このときコード・ホルダーを 左 側 の 転 倒 防 止 金具 と 共 締 めにします。このとき、 側 板 と 転 倒 防 止 金 具 の 接 続 部 分 が 平 らになるように( 段 差 が 生 じないように) 取 り 付 けてください。13. ペダル・コードをコード・ホルダーで 固 定 します。固 定 後 コネクターに 無 理 な 力 がかからないようにしてください。14. ACアダプター 本 体 に 専 用 コードを 接 続 します。そして、ACアダプターのプラグをDC IN 端 子 と 接 続 し、コードをピアノ 本 体 のコード・フックに 引 っかけて 固定 します。 詳 しくは、73ページの「 付 属 のACアダプターの 接 続 」を 参 照 してください。15. 本 機 を 設 置 してください。このときは、 平 らで 安 定 した 床 かどうかを 確 認 し、 安 全 な 場 所 へ 置 いてください。本 機 を 設 置 するときは、ACアダプターのコードやペダル・コードの 上 にスタンドが 乗 らないように 注 意 してください。安 全 性 を 高 めるため、 左 右 の 側 板 の 後 ろには、 必ず 転 倒 防 止 金 具 を 取 り 付 けて 使 用 してください。9. この 状 態 で 手 順 3と6で 仮 止 めしたすべてのネジをしっかりと 固 定 します。本 体 を 固 定 する 際 は、 側 板 との 上 下 、 前 後 の 段 差 を 左 右均 等 になるように 調 整 してください。組 み 立 て 後 のチェック□ 部 品 は 余 っていませんか?部 品 が 余 ったときは、 組 み 立 て 手 順 をよく 見 て、それらがどこで 使 用 される 部 品 なのかを 確 認 してください。□ すべてのネジが 緩 んでいないかを 確 認 してください。86
[Digtal piano]Model: <strong>LP</strong>-<strong>380</strong>MIDIインプリメンテーション・チャートMIDI implementation chartFunction... Transmitted Received RemarksDate: Aug. 31. 2012Version: 1.0BasicChannelDefaultChanged11—1611—16ModeDefaultMessagesAlteredX**************3XNoteNumberTrue Voice3—125**************0—1270—127Reception range differs depending on sound.VelocityNote OnNote OffO 9n, V=1—127X V= 64O 9n, V=1—127XAfterTouchKey’sChannelXXXOPitch BendXOControlChangeProgramChangeTrue Number0, 3216385657111091, 9364, 66, 677172, 737475, 76, 77, 78100, 101120121OXXXXXOXXXOXXXXXXOO**************OOOOOOOOOOOOOOOOOOOXBank Select (MSB, LSB)ModulationData Entry MSBData Entry LSBPortamento TimePortamento On/OffVolumeExpressionPanReverb Send, Chorus SendDamper, Sostenuto, SoftResonanceEG Time (Release, Attack)BrightnessDecay Time, Vibrato Rate, Depth, DelayRPN (LSB, MSB)All Sounds OffReset All Controllers*1*1*1*1*1*1*1*1*1*1*1*1*1*1*1*1*1*1*1System ExclusiveO O*2SystemCommonSystemReal TimeAuxMeassagesNotesSong PositionSong SelectTune RequestClockCommandsLocal On/OffAll Notes OffActive SenseSystem ResetXXXXXXOOX*1: Transmitted and received when the MIDI filter is disabled.XXXXXOO (123—125)OX*1*1*2: Includes Inquiry and GM Mode On. Received when GM Mode On, but all GM sounds are unsupported.Mode 1: Omni On, PolyMode 3: Omni Off, PolyMode 2: Omni On, MonoMode 4: Omni Off, MonoConsult your local <strong>Korg</strong> distributor for more information on MIDI IMPLEMENTATION.O: YesX: No87
保 証 規 定 ( 必 ずお 読 みください)本 保 証 書 は、 保 証 期 間 中 に 本 製 品 を 保 証 するもので、 付 属 品 類 (ヘッドホンなど)は 保 証 の 対 象 になりません。 保 証 期 間 内 に 本 製 品 が 故障 した 場 合 は、 保 証 規 定 によって 無 償 修 理 いたします。1. 本 保 証 書 の 有 効 期 間 はお 買 い 上 げ 日 より1か 年 です。2. 次 の 修 理 等 は 保 証 期 間 内 であっても 有 料 となります。・ 消 耗 部 品 ( 電 池 、スピーカー、 真 空 管 、フェーダーなど)の 交 換 。・ お 取 扱 い 方 法 が 不 適 当 のために 生 じた 故 障 。・ 天 災 ( 火 災 、 浸 水 等 )によって 生 じた 故 障 。・ 故 障 の 原 因 が 本 製 品 以 外 の 他 の 機 器 にある 場 合 。・ 不 当 な 改 造 、 調 整 、 部 品 交 換 などにより 生 じた 故 障 または 損 傷 。・ 保 証 書 にお 買 い 上 げ 日 、 販 売 店 名 が 未 記 入 の 場 合 、または 字 句が 書 き 替 えられている 場 合 。・ 本 保 証 書 の 提 示 がない 場 合 。尚 、 当 社 が 修 理 した 部 分 が 再 度 故 障 した 場 合 は、 保 証 期 間 外 であっても、 修 理 した 日 より3か 月 以 内 に 限 り 無 償 修 理 いたします。3. 本 保 証 書 は 日 本 国 内 においてのみ 有 効 です。This warranty is valid only in Japan.4. お 客 様 が 保 証 期 間 中 に 移 転 された 場 合 でも、 保 証 は 引 き 続 きお 使いいただけます。 詳 しくは、お 客 様 相 談 窓 口 までお 問 い 合 わせください。5. 修 理 、 運 送 費 用 が 製 品 の 価 格 より 高 くなることがありますので、あらかじめお 客 様 相 談 窓 口 へご 相 談 ください。 発 送 にかかる 費 用は、お 客 様 の 負 担 とさせていただきます。6. 修 理 中 の 代 替 品 、 商 品 の 貸 し 出 し 等 は、いかなる 場 合 においても一 切 行 っておりません。本 製 品 の 故 障 、または 使 用 上 生 じたお 客 様 の 直 接 、 間 接 の 損 害 につきましては、 弊 社 は 一 切 の 責 任 を 負 いかねますのでご 了 承 ください。本 保 証 書 は、 保 証 規 定 により 無 償 修 理 をお 約 束 するためのもので、これよりお 客 様 の 法 律 上 の 権 利 を 制 限 するものではありません。■ お 願 い1. 保 証 書 に 販 売 年 月 日 等 の 記 入 がない 場 合 は 無 効 となります。 記 入できないときは、お 買 い 上 げ 年 月 日 を 証 明 できる 領 収 書 等 と 一 緒に 保 管 してください。2. 保 証 書 は 再 発 行 致 しませんので、 紛 失 しないように 大 切 に 保 管 してください。コルグ <strong>LP</strong>-<strong>380</strong> 保 証 書本 保 証 書 は、 保 証 規 定 により 無 償 修 理 をお 約 束 するものです。お 買 い 上 げ 日 年 月 日販 売 店 名アフターサービス■ 保 証 書本 製 品 には、 保 証 書 が 添 付 されています。お 買 い 求 めの 際 に、 販 売 店 が 所 定 事 項 を 記 入 いたしますので、「お 買い 上 げ 日 」、「 販 売 店 」 等 の 記 入 をご 確 認 ください。 記 入 がないものは無 効 となります。なお、 保 証 書 は 再 発 行 致 しませんので、 紛 失 しないように 大 切 に 保 管してください。■ 保 証 期 間お 買 い 上 げいただいた 日 より1 年 間 です。■ 保 証 期 間 中 の 修 理保 証 規 定 に 基 づいて 修 理 いたします。 詳 しくは 保 証 書 をご 覧 ください。本 製 品 と 共 に 保 証 書 を 必 ずご 持 参 の 上 、 修 理 を 依 頼 してください。■ 保 証 期 間 経 過 後 の 修 理修 理 することによって 性 能 が 維 持 できる 場 合 は、お 客 様 のご 要 望 により、 有 料 で 修 理 させていただきます。ただし、 補 修 用 性 能 部 品 ( 電 子回 路 などのように 機 能 維 持 のために 必 要 な 部 品 )の 入 手 が 困 難 な 場 合は、 修 理 をお 受 けすることができませんのでご 了 承 ください。また、外 装 部 品 (パネルなど)の 修 理 、 交 換 は、 類 似 の 代 替 品 を 使 用 することもありますので、あらかじめお 客 様 相 談 窓 口 へお 問 い 合 わせください。■ 修 理 を 依 頼 される 前 に故 障 かな?とお 思 いになったら、まず 取 扱 説 明 書 をよくお 読 みのうえ、もう 一 度 ご 確 認 ください。それでも 異 常 があるときは、お 客 様 相 談 窓 口 へお 問 い 合 わせください。■ 修 理 時 のお 願 い修 理 に 出 す 際 は、 輸 送 時 の 損 傷 等 を 防 ぐため、ご 購 入 されたときの箱 と 梱 包 材 をご 使 用 ください。■ ご 質 問 、ご 相 談 について修 理 または 商 品 のお 取 り 扱 いについてのご 質 問 、ご 相 談 は、お 客 様相 談 窓 口 へお 問 い 合 わせください。WARNING!この 英 文 は 日 本 国 内 で 購 入 された 外 国 人 のお 客 様 のための 注 意 事 項 ですThis Product is only suitable for sale in Japan. Properly qualifiedservice is not available for this product if purchased elsewhere.Any unauthorised modification or removal of original serialnumber will disqualify this product from warranty protection.お 客 様 相 談 窓 口 0570 - 666 - 569PHS 等 一 部 の 電 話 ではご 利 用 できません。 固 定 電 話 または 携 帯 電話 からおかけください。受 付 時 間 月 曜 ~ 金 曜 10:00 ~ 17:00 ( 祝 祭 日 、 窓 口 休 業 日 を 除 く)●サービス・センター : 〒168ー0073東 京 都 杉 並 区 下 高 井 戸 1ー15ー12DIGITAL PIANO E F G S J 14015-2 Yanokuchi, Inagi-city, Tokyo 206-0812 Japan© 2013 KORG INC.