10049006-040510 CONTOURA Shower door.qxd - Maax
10049006-040510 CONTOURA Shower door.qxd - Maax
10049006-040510 CONTOURA Shower door.qxd - Maax

You also want an ePaper? Increase the reach of your titles
YUMPU automatically turns print PDFs into web optimized ePapers that Google loves.
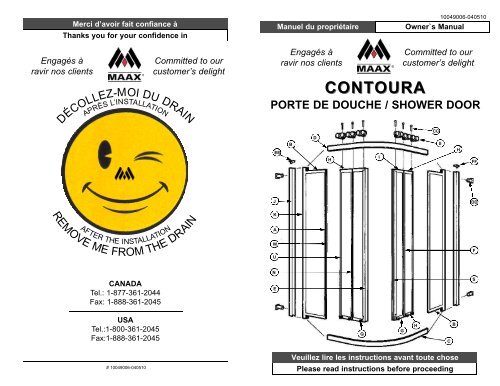
Merci d’avoir fait confiance àThanks you for your confidence inManuel du propriétaire<strong>10049006</strong>-<strong>040510</strong>Owner`s ManualEngagés àravir nos clientsAPRÈSL’INSTALLATIONCommitted to ourcustomer’s delightDÉCOLLEZ-MOI DU DRAINEngagés àravir nos clients<strong>CONTOURA</strong>PORTE DE DOUCHE / SHOWER DOOREEBDHICommitted to ourcustomer’s delightCCIIHFFREMOAFTER THE INSTALLATIONVE MEFROM THE DRAINJKAWUDDFCANADATel.: 1-877-361-2044Fax: 1-888-361-2045NESUSATel.:1-800-361-2045Fax:1-888-361-2045QGHCB# <strong>10049006</strong>-<strong>040510</strong>Veuillez lire les instructions avant toute chosePlease read instructions before proceeding
ILLUSTRATION DES PIÈCESILLUSTRATION OF COMPONENTSMAAX is not liable for personal injuries or death to any person or for any direct, special, incidental or consequentialdamage, loss of time, loss of profits, inconvenience, incidental expenses, labor or material charges, or anyother costs resulting from the use of the product or equipment or pertaining to the application of the present warranty,or resulting from the removal or replacement of any product or element or part covered by this warranty.EXCEPT AS OTHERWISE PROVIDED ABOVE, MAAX MAKES NO WARRANTIES, EXPRESS OR IMPLIED,INCLUDING WARRANTIES OF MERCHANTABILITY AND FITNESS FOR A PARTICULAR PURPOSE ORCOMPLIANCE WITH ANY CODE.A 61252 B 61285 C 61286 D 61287E 61288In any case, MAAX cannot be liable for any amount over and above the purchase price paid for the product bythe owner/end-user, contractor or builder.Commercial LimitationsIn addition to the above conditions and limitations, the warranty period for products installed for commercial applicationsor used in commercial ventures is of one (1) year from the initial date of purchase by the owner/end-user,contractor or builder from an authorized dealer. MAAX is not responsible for loss of use or profit under any circumstances.If the product is used as a display, the warranty period begins when the product is placed on display.F 61289G 61290-XX-01H 69290-XX-02I 69290-XX-03J 61291This warranty gives the owner/end-user specific legal rights. The owner/end-user may also have other rightswhich vary from one state and/or province to another.Warranty serviceIn order to obtain service provided under this warranty during regular business hours, contact the dealer or distributorwho sold the unit, or MAAX directly.K 61292 L 47009 M 47223N 48012 O 48017P 48018 Q 48022 R 48025 S 48026 T 48029U 48050 W 48265 X 68024MAAX will provide the warranty service described above when the following conditions have been met: the failureis of the nature or type covered by the warranty; the user has informed an authorized MAAX Agent or WarrantyService Department representative of the nature of the problem during the warranty period; conclusive evidence(e.g., proof of purchase or installation) is provided to the foregoing by the user proving that the failure occurred orwas discovered within the warranty period; an authorized independent service person or company representativehas been permitted to inspect the product during regular business hours within a reasonable time after the problemwas reported by the user.MAAX’s warranty obligation shall be discharged upon tender of replacement or repair. The customer’s refusal toaccept the tender terminates MAAX’s warranty obligation.MAAX products are certified by one or more of the following certification agencies:- CSA - UL- IAPMO - ULI- INTERTEK (ETL) - WARNOCK HERSEY- US TESTING - NAHBSAC DE QUINCAILLERIEHARDWARE BAGAA 47001 BB 47010 CC 47036 DD 48016 EE 48030Certain models are pending approval. Certification may be ended by MAAX or certification agencies withoutnotice.qDessin non à l’échelleFF 48031 GG 48201 HH 68023qDrawings not to scale2# <strong>10049006</strong>-<strong>040510</strong># <strong>10049006</strong>-<strong>040510</strong> 15
WARRANTYDes changements peuvent être apportés aux produits sans préavis. Veuillez utiliserle manuel fourni avec le produit.Limited warrantyMAAX offers the following express limited warranty on each of its products. This warranty extends only to theoriginal owner/end-user for personal household use. For commercial uses, additional limitations apply.MAAX warrants acrylic units to be free from defects in workmanship and materials under normal use and servicefor a period of twenty (20) years from the initial date of purchase by the owner/end-user, contractor or builderfrom an authorized dealer.Product specifications are subject to change without notice. Use owner’s manualinstructions supplied with product.DESCRIPTION DES PIÈCESPARTS DESCRIPTIONMAAX warrants mirrors and electrical components to be free from defects in workmanship and materials undernormal use and service for a period of two (2) years from the initial date of purchase by the owner/end-user,contractor or builder from an authorized dealer.MAAX warrants shower <strong>door</strong>s to be free from defects in workmanship and materials under normal use andservice for a period of ten (10) years from the initial date of purchase by the owner/end-user, contractor orbuilder from an authorized dealer.MAAX warrants medicine cabinets to be free from defects in workmanship and materials under normal use andservice for a period of ten (10) years from the initial date of purchase by the owner/end-user, contractor or builderfrom an authorized dealer.Any product reported to the authorized dealer or to MAAX as being defective within the warranty period will berepaired or replaced (with a product of equal value) at the option of MAAX. This warranty extends to the originalowner/end-user and is not transferable to a subsequent owner.Neither the distributor, authorized MAAX dealer nor or any other person has been authorized to make anyaffirmation, representation or warranty other than those contained in this warranty; any affirmation, representationor warranty other than those contained in this warranty shall not be enforceable against MAAX or any otherperson.MAAX reserves the right to modify this warranty at any time, it being understood that such modification will notalter the warranty conditions applicable at the time of the sale of the products in question.EFFECTIVE JANUARY 1, 2004LimitationsITEMABCDEFGHIJKLMNOPQRSTUWXDESCRIPTION DES PIÈCESCADRE DU PANNEAU FIXECADRE SUPÉRIEUR ET INFÉRIEURRAIL INFÉRIEURRAIL SUPÉRIEURPOIGNÉE GAUCHE OU DROITECADRE DU PANNEAU MOBILECADRE HAUT / BAS GAUCHECADRE HAUT / BAS DOUBLECADRE HAUT / BAS DROITMONTANT MURALMONTANT EXTENSIBLEVIS #6 X 1 1/4’’ FLAT, QUADREXVIS #6 X 1’’ PAN, QUADREXJOINT FLEXIBLECAPUCHON MONTANT EXTENSIBLE GAUCHECAPUCHON MONTANT EXTENSIBLE DROITGUIDE DE GLISSEMENTOBTURATEUR D’AIMANTJOINT MAGNÉTIQUEVIS D’AJUSTEMENT HORIZONTALBUTTOIRJOINT D’ÉTANCHÉITÉENSEMBLE DE ROULETTESPARTS DESCRIPTIONFIXED PANEL SIDE FRAMETOP / BOTTOM FRAMEBOTTOM TRACKTOP TRACKLEFT OR RIGHT PULL FRAMESIDE FRAMELEFT TOP / BOTTOM FRAMEDOUBLE TOP / BOTTOM FRAMERIGHT TOP / BOTTOM FRAMEWALL JAMBEXPANDING JAMBSCREW #6 X 1 1/4’’ FLAT, QUADREXSCREW #6 X 1’’ PAN, QUADREXFLEXIBLE JOINTLEFT EXPANDING JAMB CAPRIGHT EXPANDING JAMB CAPRETAINERMAGNET STOPPERMAGNETIC DOOR STRIPHORIZONTAL ADJUSTING SCREWBUMPER SEALGASKETROLLER SUPPORT ASSEMBLYQUANT.241126242228162226424226# PIECE #61252612856128661287612886128961290-XX-0161290-XX-0261290-XX-036129161292470094722348012480174801848022480254802648029480504826568024This warranty shall not apply following incorrect operating procedures, breakage or damages caused by fault,carelessness, abuse, misuse, misapplication, improper maintenance, alteration or modification of the unit, as wellas chemical or natural corrosion, accident, fire, flood, act of God or any other casualty.The owner/end-user of the product covered by the present warranty is entirely responsible for its properinstallation and electrical wiring. MAAX neither installs nor supervises the installation, nor hires a contractor forthis purpose, and consequently cannot be held responsible for any default, breakage or damages caused therebyor resulting thereof, either directly or indirectly. The owner/end-user must provide access to the components ofthe product as described in the installation guide, so that MAAX can execute the warranty specified herein. Ifsuch access is not available, all expenses to provide said access will be the responsibility of the owner/end-user.ITEMAABBCCDDEEFFGGHHSAC DE QUINCAILLERIEVIS #6 X 3/8’’ TRUSS, QUADREXVIS #8 X 1” TRUSS, QUADREXVIS 1/4-20 X 1 3/4” FILLISTER, QUADREXVIS D’AJUSTEMENT FEMELLECAPUCHON DE MONTANT GAUCHECAPUCHON DE MONTANT DROITECHEVILLE DE PLASTIQUEENSEMBLE DE ROULETTE CENTRALEHARDWARE BAGSCREW #6 X 3/8’’ TRUSS, QUADREXSCREW #8 X 1” TRUSS, QUADREXSCREW 1/4-20 X 1 3/4” FILLISTER, QUADREXADJUSTABLE SCREW FEMALELEFT WALL JAMB CAPRIGHT WALL JAMB CAPPLASTIC PLUGCENTRAL ROLLER ASSEMBLYQUANT.86641166# PIECE #4700147010470364801648030480314820168023This warranty does not apply to products or equipment not installed or operated in accordance with instructionssupplied by MAAX and all applicable rules, regulations and legislation pertaining to such installations.MAAX strongly recommends that its products—for example, but without limitation, shower <strong>door</strong>s and otheritems—be installed by professionals with experience in bathroom products. Installation of shower <strong>door</strong>s by aninexperienced person may result in glass breakage and, consequently, cause personal injury.MAAX is not liable for any costs, damages or claims resulting from the purchase of products that do not fitthrough openings or existing structures. MAAX is not liable for any costs, damages or claims resulting fromdefects that could have been discovered, repaired or avoided by inspection and testing prior to installation.Les commandes pour les pièces de remplacement doivent inclure leurs numéros,description, dimensions et couleur.When ordering replacement parts, please refer to part number, description,dimensions and color.14# <strong>10049006</strong>-<strong>040510</strong># <strong>10049006</strong>-<strong>040510</strong> 3
AVANT DE DÉBUTERLors de la réception, vérifiez si votre porte dedouche ou de bain est en bonne condition et sitoutes les pièces sont incluses dans le sac dequincaillerie. Si il y a un problème, signalez-leimmédiatement à votre distributeur.Équipement requis:q Tournevis plat, carré ou étoile #1 et #2q Crayonq Perceuseq Ruban à mesurerq Mêche 1/8”, 3/16” ou 7/32”(selon le mur)q Gallon à mesurerq Niveauq Calfeutrant au silicone clairq Lime à métalATTENTION:Pour un fonctionnement optimal, il est importantque la porte de douche soit installée de niveausur des murs également de niveau.Manipulez les pièces de métal avec soin.BEFORE STARTINGUpon reception, verify if your shower or tub <strong>door</strong>is in good condition and make sure that all partsare included in the hardware bag. If you have aproblem, please contact your distributor immediately.Required equipment:q Flat, square or Phillips #1 and #2 screwdriverq Pencilq Drillq Masking tapeq 1/8”, 3/16” or 7/32” drill bit (According to wall)q Measuring tapeq Levelq Clear silicone caulkingq fileWARNING:For optimum operation, it is important that theshower <strong>door</strong> be installed perfectly levelled onwalls that are also perfectly leveled.Manipulate metal parts with care.MAAX n’est pas responsable des coûts, dommages ou réclamations résultant de l’achat de produits qui neconviendraient pas aux ouvertures ou aux structures existantes. MAAX n’est pas responsable des coûts,dommages ou réclamations résultant de vices qui auraient pu être découverts, réparés ou évités dans le cadred’une inspection ou d’une vérification antérieure à l’installation.MAAX n’est aucunement responsable des blessures corporelles, du décès d’une personne, des dommagesdirects, particuliers, accessoires ou indirects, de la perte de temps ou de profit, des inconvénients, des fraisaccessoires, des coûts de maind’œuvre ou de matériel ou de tout autre coût résultant de l’utilisation du produitou de l’équipement ou relatif à l’application de la présente garantie ou résultant du retrait ou du remplacement detout produit, élément ou pièce faisant l’objet de la présente garantie.À MOINS D’INDICATION CONTRAIRE AUX PRÉSENTES, MAAX N’OFFRE AUCUNE GARANTIE EXPRESSEOU IMPLICITE, NI AUCUNE GARANTIE DE QUALITÉ MARCHANDE OU D’ADAPTABILITÉ À UN USAGEPARTICULIER OU DE CONFORMITÉ À UN CODE.Dans tous les cas, MAAX ne peut être tenue responsable de tout montant excédant le prix d’achat du produitdéboursé par le propriétaire/utilisateur, l’entrepreneur ou le constructeur.Restrictions commercialesEn plus des conditions et restrictions mentionnées ci-dessus, la période de garantie relative à tout produit installédans le cadre d’une application commerciale ou utilisé dans le cadre d’une entreprise commerciale est de un (1)an à compter de la date d’achat originale par le propriétaire/utilisateur, l’entrepreneur ou le constructeur auprèsd’un détaillant autorisé. MAAX n’est pas responsable de la perte d’usage ou de profit dans aucune circonstance.Si le produit est utilisé dans le cadre d’un étalage, la période de garantie commence au moment où le produit estmis en montre.La présente garantie accorde des droits spécifiques au propriétaire/utilisateur, et le propriétaire/utilisateur peutjouir d’autres droits pouvant varier d’un État ou d’une province à l’autre.Garantie de serviceINSTRUCTIONS SPÉCIALSSPECIAL INSTRUCTIONSINSTRUCTIONS SPÉCIALES POUR INSTALLATION SUR DES ENCLOS PRÉFABRIQUÉS.Des structures de fibre de verre ou d'acrylique peuvent ne pas avoir la résistance nécessairepour supporter votre porte de douche. Pour obtenir une installation sécuritaire de votre porte,il est important d'utiliser un cadrage de bois à l'arrière du rebord de votre enclos.AVANT L'INSTALLATION : assurez-vous qu'un joint de silicone a été tiré entre les murs et labase.SPECIAL INSTRUCTIONS FOR INSTALLATION IN PREFABRICATED STALLS.Fiberglass or acrylic construction may not be of sufficient strength to support your shower<strong>door</strong> enclosure. To provide for a secure mounting of this <strong>door</strong> it is important that youuse wood framing behind the face edge of your stall. Apply a bead of silicone betweenwalls and base of stall.Pour se prévaloir du service offert en vertu de la présente garantie pendant les heures normales d’ouverture,communiquer avec le détaillant ou le distributeur qui a vendu le produit, ou encore avec MAAX directement.MAAX honorera la garantie de service décrite ci-dessus aux conditions suivantes : la défaillance est d’une natureou d’un type couvert par la garantie; l’utilisateur a informé un agent autorisé de MAAX ou un représentant duservice de la garantie de la nature du problème durant la période de la garantie; une preuve concluante(p. ex., une preuve d’achat ou d’installation) de ce qui précède est fournie par l’utilisateur, démontrant que ladéfaillance est survenue ou a été découverte pendant la période de garantie; une personne autorisée d’un serviceindépendant ou un représentant de la compagnie a eu la permission d’inspecter le produit pendant les heuresnormales d’ouverture, dans un délai raisonnable après le signalement du problème par l’utilisateur.L’obligation de MAAX en vertu de la garantie cesse au moment où MAAX fournit le remplacement ou la réparation.Le refus du client d’accepter cette mesure met unterme à l’obligation de MAAX en vertu de la garantie.Les produits MAAX sont certifiés par un ou plusieurs des organismes de certification suivants :- CSA - UL- IAPMO - ULI- INTERTEK (ETL) - WARNOCK HERSEY- US TESTING - NAHBBEFORE INSTALLATION : Wall and base joints must be siliconed properly.Certains modèles sont en attente de certification.MAAX ou un organisme de certification peut annuler une certification sans préavis.4# <strong>10049006</strong>-<strong>040510</strong># <strong>10049006</strong>-<strong>040510</strong> 13
GARANTIEGUIDE D’INSTALLATIONINSTALLATION INSTRUCTIONGarantie limitéeMAAX offre la garantie limitée expresse suivante sur chacun de ses produits. Cette garantie s’adresse uniquementau propriétaire/utilisateur original pour un usage personnel domestique. Des restrictions additionnelless’appliquent aux utilisations commerciales.MAAX garantit les produits en acrylique contre tout défaut de matériel ou de fabrication dans des conditionsnormales d’utilisation et d’entretien pour une période de vingt (20) ans à compter de la date d’achat originale duproduit par le propriétaire/utilisateur, l’entrepreneur ou le constructeur auprès d’un détaillant autorisé.MAAX garantit les miroirs et les composantes électriques contre tout défaut de matériel ou de fabricationdans des conditions normales d’utilisation et d’entretien pour une période de deux (2) ans à compter de la dated’achat originale du produit par le propriétaire/utilisateur, l’entrepreneur ou le constructeur auprès d’un détaillantautorisé.MAAX garantit les portes de douches contre tout défaut de matériel ou de fabrication dans des conditions normalesd’utilisation et d’entretien pour une période de dix (10) ans à compter de la date d’achat originale du produitpar le propriétaire/utilisateur, l’entrepreneur ou le constructeur auprès d’un détaillant autorisé.MAAX garantit les pharmacies contre tout défaut de matériel ou de fabrication dans des conditions normalesd’utilisation et d’entretien pour une période de dix (10) ans à compter de la date d’achat originale du produit parle propriétaire/utilisateur, l’entrepreneur ou le constructeur auprès d’un détaillant autorisé.MAAX procédera à la réparation ou au remplacement (avec un produit de même valeur), à sa discrétion, de toutproduit dont le défaut sera rapporté au détaillant autorisé ou à MAAX durant la période de garantie. Cettegarantie s’applique au propriétaire/utilisateur original et n’est pas transférable à un propriétaire subséquent.ÉTAPE 1 - Montant mural / capuchonI. Insérez les manchons (DD) aux deux extrémités des montantsmuraux (J) 2 par montants.II.Posez le capuchon (FF) au haut du montant gauche (J).III. Posez le capuchon (EE) au haut du montant droit (J).STEP 1 - Wall jamb / cap assemblyI. Insert threaded bushing (DD) through the rear holes on thetop and bottom of each wall jamb (J)II.Clip right wall jamb cap (FF) on top of left wall jamb (J).III. Clip left wall jamb cap (EE) on top of right wall jamb (J).JEEFFDDNi le distributeur, ni le concessionnaire autorisé MAAX ni personne d’autre n’est autorisé à faire d’affirmations, dereprésentations ou de garanties autres que celles stipulées aux présentes; les affirmations, représentations etgaranties contrevenant à cette interdiction ne sauraient s’appliquer à MAAX ni à personne d’autre.MAAX se réserve le droit de modifier cette garantie en tout temps; il est entendu que de telles modifications nechangeront pas les conditions de la garantie applicable au moment de la vente des produits en cause.EN VIGUEUR LE 1er JANVIER 2004RESTRICTIONSLa présente garantie ne s’applique pas dans le cas d’utilisations ou d’opérations non conformes ou incorrectes,de bris ou de dommages causés par la faute, la négligence, l’abus, le mauvais emploi, le mauvais usage, lemauvais entretien, l’altération ou lamodification du produit, de même que par la corrosion chimique ou naturelle,le feu, l’inondation, les catastrophes naturelles ou tout autre cas fortuit.ÉTAPE 2 - Positions des trousI. Notez que les manchons (DD) sont décentrés.Placez-les du côté intérieur de la douche.II.Placez les montants (J) sur la base de douche.III. Nivelez verticalement puis marquez le mur (3 trous parmontant) au centre de la fente.Note pour unité acrylique 1 pièce:Limer le bas du montant mural pour qu’il s’appuiecorrectment dans le coin arrondie de l’unité d’acryliqueCôté intérieurInside of shower stallDDLe propriétaire/utilisateur du produit visé par la présente garantie est entièrement responsable de l’installation etdu branchement approprié de l’appareil. MAAX ne procède pas à l’installation, n’engage pas d’entrepreneur à ceteffet ni ne supervise l’installation et, conséquemment, ne peut être tenue responsable de tout défaut, bris oudommage causé directement ou indirectement de l’installation du produit ou résultant de celle-ci. Lepropriétaire/utilisateur doit assurer un accès aux composantes du produit tel que le décrit le guide d’installationafin que MAAX puisse exécuter la garantie spécifiée aux présentes. Si un tel accès n’existe pas, tous les coûtsinhérents à son aménagement seront la responsabilité du propriétaire/utilisateur.La présente garantie ne s’applique pas aux produits qui n’auraient pas été installés ou utilisés conformément auxinstructions fournies par MAAX ainsi qu’à tout règlement ou loi applicable à de telles installations.MAAX recommande fortement que ses produits, par exemple ses portes de douches, soient installés par desprofessionnels spécialisés en produits de salles de bains. L’installation d’une porte de douche par une personneinexpérimentée peut entraîner le bris d’une vitre et, par conséquent, des blessures.STEP 2 - Marking hole positionsI. Note that the adjusting bolts (DD) are positioned off center.Place them towards the inside of the shower stall.II.Place the wall jambs (J) on the shower base.III. Level vertically then mark holes and side locations withpencil ( 3 holes per wall jamb ) in the middle of the slot.Note for acrylic 1 piece unit:File the bottom of the wall jamb to fit correctly at the bottomcorner of the acrylic unit.J12# <strong>10049006</strong>-<strong>040510</strong># <strong>10049006</strong>-<strong>040510</strong> 5
ÉTAPE 3 - Installation des montants murauxÉTAPE 16 - Application du siliconeI. Percez les six trous dans les murs.Mèches : -pour céramique : 7/32" (5,5mm) au carbure-pour plastique : 1/8" (3,2mm)-pour mur préfabriqué: 3/16’’ (4,8mm)II.Insérez les chevilles de plastique (GG), sauf dans un murpréfabriqué.III. Vissez les six vis (BB).STEP 3 - Securing wall jambI. Drill the six holes into the walls using the appropriatedrill bit: -ceramic tile wall : 7/32" carbide bit-plastic wall : 1/8" (3,2mm)-plastic wall: 3/16’’ (4,8mm)IntérieurInsideJBBExtérieurOutsideGGI. Appliquez le silicone à l'extérieur seulement.II.Laissez sècher le silicone pendant 24 heures avant l’utilisation.STEP 16 - Silicone applicationI. Apply silicone to exterior only of unit.II.Allow 24 hours for silicone to set before using.SiliconeII.Insert plastic plugs (GG) except for prefab walls.III. Fasten six screws (BB) in place.NETTOYAGETO CLEANÉTAPE 4 - Application du siliconeI. Appliquer le silicone au bas des deux montants muraux (J)comme sur le dessin.JSILICONELes nettoyeurs ménagers liquides doux sontsuffisants pour garder la surface propre etbrillante (par exemple: IVORY LIQUIDE ®).Rincez à fond et asséchez avec un chiffonpropre.Mild liquid household cleaners will keep themetal surface bright and clean (for example:LIQUID IVORY ®). Rinse well and dry witha clean cloth.STEP 4 - Application of siliconeI. Apply silicone at bottom of both wall jambs (J) as shown indiagram.ÉTAPE 5 - Installation des panneaux fixesI. Aligner les vis d’ajustement femelle (DD) des montantsmuraux (J) et les vis d’ajustement horizontal (T) des panneauxfixes.II.Insérez les panneaux fixes dans les montants muraux (J).STEP 5 - Fixed panels installationTJATTENTION: les détergents en poudre ouliquide abrasifs peuvent endommager lessurfaces.Ne jamais mettre une surface en contactavec des produits contenant de l'acétone(nettoyant de polis à ongle), des solvants,des décapants, de l'essence, etc.Enlevez la poussière grâce à un linge douxet humide.Utilisez l'alcool à friction pour enlever lestaches de peinture, encre ou graisse. Celavous aidera aussi à enlever la pellicule deplastique.Les égratignures et marques sont rarementvisibles sur la surface et si elles devaientparaître, il serait facile de les enlever grâceà un polisseur liquide pour automobile.CAUTION: powder detergents and liquidabrasive cleaners may damage surfaces.Do not allow the surface to come into contactwith products such as acetone (nail polishremover), dry cleaning solution, lacquerthinner, gasoline, etc.Remove dust with a soft, damp cloth.Clean grease, oil, paint and ink with rubbingalcohol. It will also help to remove the protectivefilm on the acrylic.Accidental scratches or water stains willrarely show, and if they do they can be easilyremoved with a liquid automobile polish.I. Align the ajustable female screw (DD) of the wall jamb (J)on the horizontal ajusting screw (T).II.Insert the fixed panels in the wall jambs (J).DD6# <strong>10049006</strong>-<strong>040510</strong># <strong>10049006</strong>-<strong>040510</strong> 11
ÉTAPE 14 - Ajustement des roulettesI. Alignez les ensembles de roulettes (HH) au support (X) despanneaux mobiles.II.Insérez les vis d'ajustements (CC) 6 vis au total.CCÉTAPE 6 - Ajustement du panneau fixeI. Vissez presqu'au maximum l'ajustement du haut de la visd’ajustement (T).II.Vissez la vis d’ajustement (T) de quelques tours au bas.JTIII. Simultanément, vissez et appliquez une pression au bas dupanneau pour accrocher les guides de glissement (Q).HHIII. Le panneau fixe doit être incliné pour faciliter la pose du railinférieur.IV. Ne pas trop serrer.XSTEP 6 - Adjustement of the fixed panelI. Tighten top adjusting screw completely.STEP 14 - Roller ajustementI. Identify sliding panels and align supports (X) with rollerassemblies (HH).II.Tighten bottom adjusting screw three (3) turns.III. The fixed panel must be inclined for easy installation of thebottom track.II.Insert cap screws (CC) through roller assemblies into panels(6 screws).ÉTAPE 7 - Application du siliconeIII. When fastening cap screws, apply pressure below to panelso as to hook retainers (Q) in place.IV. Do not tighten.QI. Appliquez le silicone à l'intérieur des pièces de plastique(O) et (P), de chaque côté au bas des panneaux.STEP 7 - Application of siliconeI. Apply silicone inside the plastic caps (O) and (P) at the bottomof each panel.SiliconeOPÉTAPE 15 - Ajustement finalÉTAPE 8 - Installation du rail inférieur courbéI. Vérifiez l'alignement des panneaux coulissants.II. Ajustez les panneaux avec les vis d'ajustements verticales (CC).I. Attention de bien différencier le rail inférieur (C) du railsupérieur (D).CDII.Insérez le rail inférieur courbé (C) dans les joints de plastique(O) (P).STEP 15 - Final ajustementI. Check alignment of sliding panels.III. Essuyer l'excès de silicone.STEP 8 - Curved bottom track installationII.Adjust alignment of sliding panels using the cap screws (CC).CCI. Differentiate bottom track (C) from top track (D).II.Insert curved bottom track (C) into plastic joints (O) (P).OPIII. Remove excess silicone.C10# <strong>10049006</strong>-<strong>040510</strong># <strong>10049006</strong>-<strong>040510</strong> 7
ÉTAPE 9 - Position de la porteI. Ajustez le rail inférieur (C) parallèle au bord de la base entournant les vis d'ajustements du bas (T).ÉTAPE 11 - Ensembles de roulettesI. Insérez les 6 ensembles de roulettes (HH) dans le railcourbé (D).DII.Assurez-vous que le rail intérieur soit bien à plat sur labase en tournant les vis d'ajustements du haut (T).CSTEP 11 - Roller assembliesI. Insert all six roller assemblies (HH) on curved track (D).HHSTEP 9 - Positioning of shower <strong>door</strong>I. Adjust bottom track (C) parallel to ledge of base bytightening bottom adjusting screws (T).II.Set bottom track to rest flat on base by turning topadjusting screws (T)ÉTAPE 12 - Installation du rail supérieurI. Insérez le rail supérieur (D) dans les joints deplastique (O) (P).DOPTSTEP 12 - Curved top track installationI. Insert curved top track (D) into plastic joints (O) (P).ÉTAPE 10 - Visser les panneauxI. Visser les panneaux fixes au rail (C) avec les vis (AA).II.Utiliser (2) vis (AA) par panneau.ÉTAPE 13 - Ajustement de la porteDSTEP 10 - Fixed panelsI. Vissez les panneaux fixes au rail supérieur (D) en utlilisant(2) vis (AA) par panneau.AAI. Fasten fixed panels to bottom track (C) with screws (AA).CII.Use two (2) screw (AA) per panel.STEP 13 - Door adjustementI. Screw fixed panels to top track (D) using 2 screws (AA) perpanel.AA8# <strong>10049006</strong>-<strong>040510</strong># <strong>10049006</strong>-<strong>040510</strong> 9