
Create successful ePaper yourself
Turn your PDF publications into a flip-book with our unique Google optimized e-Paper software.
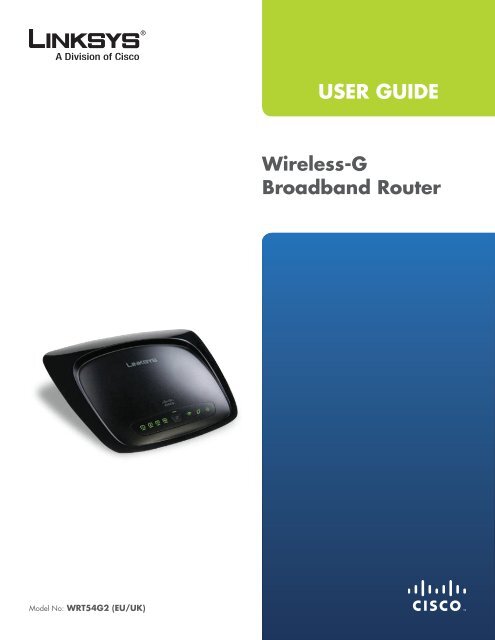
USER GUIDEWir<strong>el</strong>ess-GBroadband RouterMod<strong>el</strong> No: WRT54G2 (EU/UK)
About This GuideAbout This GuideIcon DescriptionsWhile reading through the User Guide you may seevarious icons that call attention to specific items. B<strong>el</strong>ow isa description of these icons:NOTE: This check mark indicates that there isa note of interest and is something that youshould pay special attention to while using theproduct.WARNING: This exclamation point indicatesthat there is a caution or warning and it issomething that could damage your property orproduct.WEB: This globe icon indicates a noteworthywebsite address or e-mail address.Online ResourcesMost web browsers allow you to enter the web addresswithout adding the http:// in front of the address. ThisUser Guide will refer to websites without including http://in front of the address. Some older web browsers mayrequire you to add it.ResourceLinksysLinksys InternationalGlossaryNetwork SecurityWebsitewww.linksys.comwww.linksys.com/internationalwww.linksys.com/glossarywww.linksys.com/securityCopyright and TrademarksLinksys is a registered trademark ortrademark of Cisco Systems, Inc. and/or its affiliates in the U.S. and certainother countries. Copyright © 2008Cisco Systems, Inc. All rights reserved.Other brands and product names aretrademarks or registered trademarksof their respective holders.Wir<strong>el</strong>ess-G Broadband Router
Table of ContentsIndustry Canada Statement . . . . . . . . . . . . . . . . . . . . . . . . . . . . . . . . . . . . . . .27Avis d’Industrie Canada. . . . . . . . . . . . . . . . . . . . . . . . . . . . . . . . . . . . . . . . . 27Wir<strong>el</strong>ess Disclaimer . . . . . . . . . . . . . . . . . . . . . . . . . . . . . . . . . . . . . . . . . . . .28Avis de non-responsabilité concernant les appareils sans fil . . . . . . . . . . . . . . . . . .28Declaration of Conformity with Regard to EU Directive 1999/5/EC (R&TTE Directive) . .29CE Marking . . . . . . . . . . . . . . . . . . . . . . . . . . . . . . . . . . . . . . . . . . . . . . . . .30National Restrictions . . . . . . . . . . . . . . . . . . . . . . . . . . . . . . . . . . . . . . . . . . .30Product Usage Restrictions . . . . . . . . . . . . . . . . . . . . . . . . . . . . . . . . . . . . . . .31Technical Documents on www.linksys.com/international . . . . . . . . . . . . . . . . . . . .31User Information for Consumer Products Covered by EU Directive 2002/96/EC on WasteElectric and Electronic Equipment (WEEE) . . . . . . . . . . . . . . . . . . . . . . . . . . . . . 32Wir<strong>el</strong>ess-G Broadband Routeriii
Chapter 1Product OverviewChapter 1:Product OverviewThank you for choosing the Linksys Wir<strong>el</strong>ess-G BroadbandRouter. The Router lets you access the Internet via awir<strong>el</strong>ess connection, broadcast at up to 54 Mbps, orthrough one of its four switched ports. You can also usethe Router to share resources such as computers, printersand files. A variety of security features h<strong>el</strong>p to protectyour data and your privacy while online. Security featuresinclude WPA2 security, a Stateful Packet Inspection (SPI)firewall and NAT technology. Configuring the Router iseasy using the provided browser-based utilityFront Pan<strong>el</strong>Back Pan<strong>el</strong>Wir<strong>el</strong>ess (Green) The Wir<strong>el</strong>ess LED lights upwhen the wir<strong>el</strong>ess feature is enabled. If the LEDis flashing, the Router is activ<strong>el</strong>y sending orreceiving data over the network.Internet (Green) The Internet LED lights upwhen there is a connection made through theInternet port. A flashing LED indicates networkactivity over the Internet port.Power (Green) The Power LED lights upand will stay on while the Router is poweredon. When the Router goes through its s<strong>el</strong>fdiagnosticmode during every boot-up, thisLED will flash. When the diagnostic is complete,the LED will be solidly lit.1, 2, 3, 4 (Green) These numbered LEDs,corresponding with the numbered ports on theRouter’s back pan<strong>el</strong>, serve two purposes. If theLED is continuously lit, the Router is successfullyconnected to a device through that port. Aflashing LED indicates network activity overthat port.Wi-Fi Protected Setup Button If you haveclient devices, such as wir<strong>el</strong>ess adapters, thatsupport Wi-Fi Protected Setup, then you canuse Wi-Fi Protected Setup to automaticallyconfigure wir<strong>el</strong>ess security for your wir<strong>el</strong>essnetwork(s).To use Wi-Fi Protected Setup, run the SetupWizard, or refer to the “Wir<strong>el</strong>ess > Basic Wir<strong>el</strong>essSettings” section of “Chapter 3: AdvancedConfiguration”.Wi-Fi Protected Setup LED (Green/Amber) It lights up green when wir<strong>el</strong>esssecurity is enabled. The LED flashes green fortwo minutes during Wi-Fi Protected Setup.The LED lights up amber if there is an errorduring the Wi‐Fi Protected Setup process. Makesure the client device supports Wi‐Fi ProtectedSetup. Wait until the LED is off, and then try again.Internet The Internet port is where you willconnect your cable or DSL Internet connection.1, 2, 3, 4 These Ethernet ports (1, 2, 3, 4) connectthe Router to PCs on your wired network andother Ethernet network devices.Reset There are two ways to reset the Router’sfactory defaults. Either press and hold the ResetButton for approximat<strong>el</strong>y five seconds, or restorethe defaults from Administration > FactoryDefaults in the Router’s web-based utility.Power The Power port is where you willconnect the power adapter.Placement PositionsThere are two ways to physically install the Router. Thefirst way is to place the Router horizontally on a surface.The second way is to mount the Router on a wall.Horizontal PlacementThe Router has four rubber feet on its bottom pan<strong>el</strong>. Placethe Router on a lev<strong>el</strong> surface near an <strong>el</strong>ectrical outlet.The LED flashes amber when a Wi‐Fi ProtectedSetup session is active, and a second sessionbegins. The Router supports one session at atime. Wait until the LED is off before starting thenext Wi-Fi Protected Setup session.Wir<strong>el</strong>ess-G Broadband Router
Chapter 1Product OverviewWall-Mounting PlacementThe Router has two wall-mount slots on its bottompan<strong>el</strong>. The distance between the slots is 152 mm(6 inches).Two screws are needed to mount the Router.Suggested Mounting Hardware4-5 mm 1-1.5 mm2.5-3.0 mm† Note: Mounting hardware illustrations are nottrue to scale.Follow these instructions:1.2.3.4.5.Determine where you want to mount the Router. Makesure that the wall you use is smooth, flat, dry, andsturdy. Also make sure the location is within reach ofan <strong>el</strong>ectrical outlet.Drill two holes into the wall. Make sure the holes are152 mm (6 inches) apart.Insert a screw into each hole and leave 3 mm(0.12 inches) of its head exposed.Maneuver the Router so the wall-mount slots line upwith the two screws.Place the wall-mount slots over the screws and slidethe Router down until the screws fit snugly into thewall-mount slots.NOTE: Linksys is not responsible for damagesincurred by insecure wall-mounting hardware.152 mmPrint this page at 100% size.Cut along the dotted line, and place on the wall to drill precise spacing.Wall Mounting TemplateWir<strong>el</strong>ess-G Broadband Router
Chapter 2Wir<strong>el</strong>ess Security ChecklistChapter 2:Wir<strong>el</strong>ess Security ChecklistWir<strong>el</strong>ess networks are convenient and easy to install, sohomes with high-speed Internet access are adopting themat a rapid pace. Because wir<strong>el</strong>ess networking operates bysending information over radio waves, it can be morevulnerable to intruders than a traditional wired network.Like signals from your c<strong>el</strong>lular or cordless phones, signalsfrom your wir<strong>el</strong>ess network can also be intercepted. Sinceyou cannot physically prevent someone from connectingto your wir<strong>el</strong>ess network, you need to take some additionalsteps to keep your network secure.1. Change the default wir<strong>el</strong>essnetwork name or SSIDWir<strong>el</strong>ess devices have a default wir<strong>el</strong>ess network nameor Service Set Identifier (SSID) set by the factory. Thisis the name of your wir<strong>el</strong>ess network, and can be upto 32 characters in length. Linksys wir<strong>el</strong>ess productsuse linksys as the default wir<strong>el</strong>ess network name. Youshould change the wir<strong>el</strong>ess network name to somethingunique to distinguish your wir<strong>el</strong>ess network from otherwir<strong>el</strong>ess networks that may exist around you, but do notuse personal information (such as your Social Securitynumber) because this information may be available foranyone to see when browsing for wir<strong>el</strong>ess networks.2. Change the default passwordFor wir<strong>el</strong>ess products such as access points and routers,you will be asked for a password when you want to changetheir settings. These devices have a default password setby the factory. The Linksys default password is admin.Hackers know these defaults and may try to use themto access your wir<strong>el</strong>ess device and change your networksettings. To thwart any unauthorized changes, customizethe device’s password so it will be hard to guess.3. Enable MAC address filteringLinksys routers give you the ability to enable Media AccessControl (MAC) address filtering. The MAC address is aunique series of numbers and letters assigned to everynetworking device. With MAC address filtering enabled,wir<strong>el</strong>ess network access is provided sol<strong>el</strong>y for wir<strong>el</strong>essdevices with specific MAC addresses. For example, you canspecify the MAC address of each computer in your homeso that only those computers can access your wir<strong>el</strong>essnetwork.4. Enable encryptionEncryption protects data transmitted over a wir<strong>el</strong>essnetwork. Wi-Fi Protected Access (WPA/WPA2) and WiredEquivalency Privacy (WEP) offer different lev<strong>el</strong>s of securityfor wir<strong>el</strong>ess communication. Currently, devices that areWi-Fi certified are required to support WPA2, but are notrequired to support WEP.A network encrypted with WPA/WPA2 is more securethan a network encrypted with WEP, because WPA/WPA2uses dynamic key encryption. To protect the informationas it passes over the airwaves, you should enable thehighest lev<strong>el</strong> of encryption supported by your networkequipment.WEP is an older encryption standard and may be theonly option available on some older devices that do notsupport WPA.General Network Security Guid<strong>el</strong>inesWir<strong>el</strong>ess network security is us<strong>el</strong>ess if the underlyingnetwork is not secure.• Password protect all computers on the network andindividually password protect sensitive files.• Change passwords on a regular basis.• Install anti-virus software and personal firewallsoftware.• Disable file sharing (peer-to-peer). Some applicationsmay open file sharing without your consent and/orknowledge.Additional Security Tips• Keep wir<strong>el</strong>ess routers, access points, or gateways awayfrom exterior walls and windows.• Turn wir<strong>el</strong>ess routers, access points, or gatewaysoff when they are not being used (at night, duringvacations).• Use strong passphrases that are at least eight charactersin length. Combine letters and numbers to avoid usingstandard words that can be found in the dictionary.WEB: For more information on wir<strong>el</strong>esssecurity, visit www.linksys.com/securityWir<strong>el</strong>ess-G Broadband Router
Chapter 3Advanced ConfigurationChapter 3:Advanced ConfigurationSetup > Basic SetupThe first screen that appears is the Basic Setup screen. Thisallows you to change the Router’s general settings.After setting up the Router with the Setup Wizard (locatedon the CD-ROM), the Router will be ready for use. However,if you’d like to change its advanced settings, use theRouter’s web-based utility. This chapter describes eachweb page of the utility and each page’s key functions. Youcan access the utility via a web browser on a computerconnected to the Router.The web-based utility has these main tabs: Setup,Wir<strong>el</strong>ess, Security, Access Restrictions, Applications &Gaming, Administration, and Status. Additional tabs willbe available after you click one of the main tabs.NOTE: When first installing the Router, youshould use the Setup Wizard on the SetupCD-ROM. If you want to configure advancedsettings, use this chapter to learn about theweb-based utility.How to Access the Web-Based UtilityTo access the web-based utility, launch the web browser onyour computer, and enter the Router’s default IP address,192.168.1.1, in the Address fi<strong>el</strong>d. Then, press Enter.A password request screen will appear. (Non-Windows XPusers will see a similar screen.) Leave the User name fi<strong>el</strong>dblank. The first time you open the Web-based utility, usethe default password admin. (You can set a new passwordfrom the Administration tab’s Management screen.) ClickOK to continue.Password ScreenInternet SetupSetup > Basic SetupThe Internet Setup section configures the Router to yourInternet connection. Most of this information can beobtained through your ISP.Internet Connection TypeS<strong>el</strong>ect the type of Internet connection your ISP providesfrom the drop-down menu. The available types are:• Automatic Configuration - DHCP• Static IP• PPPoE• PPTP• L2TP• T<strong>el</strong>stra CableAutomatic Configuration - DHCPBy default, the Router’s Internet Connection Type is setto Automatic Configuration - DHCP, which should bekept only if your ISP supports DHCP or you are connectingthrough a dynamic IP address. (This option usually appliesto cable connections.)Internet Connection Type > Automatic Configuration - DHCPWir<strong>el</strong>ess-G Broadband Router
Chapter 3Advanced ConfigurationStatic IPIf you are required to use a permanent IP address toconnect to the Internet, s<strong>el</strong>ect Static IP.will automatically re-establish your connection. To usethis option, s<strong>el</strong>ect Keep Alive. In the Redial Period fi<strong>el</strong>d,you specify how often you want the Router to checkthe Internet connection. The default Redial Period is30 seconds.PPTPPoint-to-Point Tunn<strong>el</strong>ing Protocol (PPTP) is a service thatapplies to connections in Europe only.Internet Connection Type > Static IPInternet IP Address This is the Router’s IP address, whenseen from the Internet. Your ISP will provide you with theIP Address you need to specify here.Subnet Mask This is the Router’s Subnet Mask, as seenby users on the Internet (including your ISP). Your ISP willprovide you with the Subnet Mask.Gateway Your ISP will provide you with the GatewayAddress, which is the ISP server’s IP address.DNS Your ISP will provide you with at least one DNS(Domain Name System) Server IP Address.PPPoESome DSL-based ISPs use PPPoE (Point-to-Point Protocolover Ethernet) to establish Internet connections. If you areconnected to the Internet through a DSL line, check withyour ISP to see if they use PPPoE. If they do, you will haveto enable PPPoE.Internet Connection Type > PPPoEUser Name and Password Enter the User Name andPassword provided by your ISP.Connect on Demand: Max Idle Time You can configurethe Router to cut the Internet connection after it has beeninactive for a specified period of time (Max Idle Time). Ifyour Internet connection has been terminated due toinactivity, Connect on Demand enables the Router toautomatically re-establish your connection as soon as youattempt to access the Internet again. To use this option,s<strong>el</strong>ect Connect on Demand. In the Max Idle Time fi<strong>el</strong>d,enter the number of minutes you want to have <strong>el</strong>apsedbefore your Internet connection terminates. The defaultMax Idle Time is 5 minutes.Keep Alive: Redial Period If you s<strong>el</strong>ect this option,the Router will periodically check your Internetconnection. If you are disconnected, then the RouterInternet Connection Type > PPTPInternet IP Address This is the Router’s IP address, asseen from the Internet. Your ISP will provide you with theIP Address you need to specify here.Subnet Mask This is the Router’s Subnet Mask, as seenby users on the Internet (including your ISP). Your ISP willprovide you with the Subnet Mask.Gateway Your ISP will provide you with the GatewayAddress.User Name and Password Enter the User Name andPassword provided by your ISP.Connect on Demand: Max Idle Time You can configurethe Router to cut the Internet connection after it has beeninactive for a specified period of time (Max Idle Time). Ifyour Internet connection has been terminated due toinactivity, Connect on Demand enables the Router toautomatically re-establish your connection as soon as youattempt to access the Internet again. To use this option,s<strong>el</strong>ect Connect on Demand. In the Max Idle Time fi<strong>el</strong>d,enter the number of minutes you want to have <strong>el</strong>apsedbefore your Internet connection terminates. The defaultMax Idle Time is 5 minutes.Keep Alive: Redial Period If you s<strong>el</strong>ect this option, theRouter will periodically check your Internet connection. Ifyou are disconnected, then the Router will automaticallyre-establish your connection. To use this option, s<strong>el</strong>ectKeep Alive. In the Redial Period fi<strong>el</strong>d, you specify how oftenyou want the Router to check the Internet connection. Thedefault value is 30 seconds.Wir<strong>el</strong>ess-G Broadband Router
Chapter 3Advanced ConfigurationL2TPL2TP is a service that applies to connections in Isra<strong>el</strong> only.Internet Connection Type > L2TPUser Name and Password Enter the User Name andPassword provided by your ISP.L2TP Server This is the IP address of the L2TP Server.Your ISP will provide you with the IP Address you need tospecify here.Connect on Demand: Max Idle Time You can configurethe Router to cut the Internet connection after it has beeninactive for a specified period of time (Max Idle Time). Ifyour Internet connection has been terminated due toinactivity, Connect on Demand enables the Router toautomatically re-establish your connection as soon as youattempt to access the Internet again. To use this option,s<strong>el</strong>ect Connect on Demand. In the Max Idle Time fi<strong>el</strong>d,enter the number of minutes you want to have <strong>el</strong>apsedbefore your Internet connection terminates. The defaultMax Idle Time is 5 minutesKeep Alive: Redial Period If you s<strong>el</strong>ect this option,the Router will periodically check your Internetconnection. If you are disconnected, then the Routerwill automatically re-establish your connection. To usethis option, s<strong>el</strong>ect Keep Alive. In the Redial Period fi<strong>el</strong>d,you specify how often you want the Router to checkthe Internet connection. The default Redial Period is30 seconds.T<strong>el</strong>stra CableT<strong>el</strong>stra Cable is a service that applies to connections inAustralia only. If your ISP uses HeartBeat Signal (HBS), thens<strong>el</strong>ect T<strong>el</strong>stra.Internet Connection Type > T<strong>el</strong>stra CableUser Name and Password Enter the User Name andPassword provided by your ISP.Heart Beat Server This is the IP address of the HeartbeatServer. Your ISP will provide you with the IP Address youneed to specify here.Connect on Demand: Max Idle Time You can configurethe Router to cut the Internet connection after it has beeninactive for a specified period of time (Max Idle Time). Ifyour Internet connection has been terminated due toinactivity, Connect on Demand enables the Router toautomatically re-establish your connection as soon as youattempt to access the Internet again. To use this option,s<strong>el</strong>ect Connect on Demand. In the Max Idle Time fi<strong>el</strong>d,enter the number of minutes you want to have <strong>el</strong>apsedbefore your Internet connection terminates. The defaultMax Idle Time is 5 minutesKeep Alive: Redial Period If you s<strong>el</strong>ect this option,the Router will periodically check your Internetconnection. If you are disconnected, then the Routerwill automatically re-establish your connection. To usethis option, s<strong>el</strong>ect Keep Alive. In the Redial Period fi<strong>el</strong>d,you specify how often you want the Router to checkthe Internet connection. The default Redial Period is30 seconds.Optional SettingsSome of these settings may be required by your ISP. Verifywith your ISP before making any changes.Optional SettingsRouter Name In this fi<strong>el</strong>d, you can enter a name of up to39 characters to represent the Router.Host Name/Domain Name These fi<strong>el</strong>ds allow you tosupply a host and domain name for the Router. Some ISPs,usually cable ISPs, require these names as identification.You may have to check with your ISP to see if yourbroadband Internet service has been configured with ahost and domain name. In most cases, leaving these fi<strong>el</strong>dsblank will work.MTU MTU is the Maximum Transmission Unit. It specifiesthe largest packet size permitted for Internet transmission.S<strong>el</strong>ect Manual if you want to manually enter the largestpacket size that is transmitted. To have the Router s<strong>el</strong>ectthe best MTU for your Internet connection, keep thedefault setting, Auto.Size When Manual is s<strong>el</strong>ected in the MTU fi<strong>el</strong>d, this optionis enabled. Leave this value in the 1200 to 1500 range. Thedefault size depends on the Internet Connection Type:• DHCP, Static IP, or T<strong>el</strong>stra: 1500• PPPoE: 1492• PPTP or L2TP: 1460Wir<strong>el</strong>ess-G Broadband Router
Chapter 3Advanced ConfigurationNetwork SetupThe Network Setup section changes the settings on thenetwork connected to the Router’s Ethernet ports. Wir<strong>el</strong>essSetup is performed through the Wir<strong>el</strong>ess tab.Router IPThis presents both the Router’s IP Address and SubnetMask as seen by your network.Wir<strong>el</strong>ess-G Broadband RouterRouter IP AddressNetwork Address Server Settings (DHCP)The settings allow you to configure the Router’s DynamicHost Configuration Protocol (DHCP) server function. TheRouter can be used as a DHCP server for your network. ADHCP server automatically assigns an IP address to eachcomputer on your network. If you choose to enable theRouter’s DHCP server option, make sure there is no otherDHCP server on your network.Network Address Server Settings (DHCP)DHCP Server DHCP is enabled by factory default. If youalready have a DHCP server on your network, or you don’twant a DHCP server, then s<strong>el</strong>ect Disable (no other DHCPfeatures will be available).Starting IP Address Enter a value for the DHCP server tostart with when issuing IP addresses. Because the Router’sdefault IP address is 192.168.1.1, the Starting IP Address mustbe 192.168.1.2 or greater, but smaller than 192.168.1.253.The default Starting IP Address is 192.168.1.100.Maximum Number of DHCP Users Enter the maximumnumber of PCs that you want the DHCP server to assignIP addresses to. This number cannot be greater than 253.The default is 50.Client Lease Time The Client Lease Time is the amountof time a network user will be allowed connection to theRouter with their current dynamic IP address. Enter theamount of time, in minutes, that the user will be “leased”this dynamic IP address. After the time is up, the user willbe automatically assigned a new dynamic IP address. Thedefault is 0 minutes, which means one day.Static DNS (1-3) The Domain Name System (DNS) is howthe Internet translates domain or website names intoInternet addresses or URLs. Your ISP will provide you with atleast one DNS Server IP Address. If you wish to use another,enter that IP Address in one of these fi<strong>el</strong>ds. You can enter upto three DNS Server IP Addresses here. The Router will usethese for quicker access to functioning DNS servers.WINS The Windows Internet Naming Service (WINS)manages each PC’s interaction with the Internet. If youuse a WINS server, enter that server’s IP Address here.Otherwise, leave this blank.Time SettingS<strong>el</strong>ect the time zone in which your network functionsfrom this drop-down menu. (You can even automaticallyadjust for daylight saving time.)Time SettingClick Save Settings to apply your changes, or click Canc<strong>el</strong>Changes to canc<strong>el</strong> your changes.Setup > DDNSThe Router offers a Dynamic Domain Name System (DDNS)feature. DDNS lets you assign a fixed host and domainname to a dynamic Internet IP address. It is useful whenyou are hosting your own website, FTP server, or otherserver behind the Router.Before you can use this feature, you need to signup for DDNS service with a DDNS service provider,www.dyndns.org or www.TZO.com. If you do not want touse this feature, keep the default setting, Disable.DDNSThe Router offers a Dynamic Domain Name System (DDNS)feature. DDNS lets you assign a fixed host and domainname to a dynamic Internet IP address. It is useful whenyou are hosting your own website, FTP server, or otherserver behind the Router.Before you can use this feature, you need to sign up forDDNS service at one of two DDNS service providers,DynDNS.org or TZO.com. If you do not want to use thisfeature, keep the default setting, Disable.DDNS ServiceIf your DDNS service is provided by DynDNS.org, thens<strong>el</strong>ect DynDNS.org from the drop-down menu. If yourDDNS service is provided by TZO, then s<strong>el</strong>ect TZO.com.The features available on the DDNS screen will vary,depending on which DDNS service provider you use.
Chapter 3Advanced ConfigurationDynDNS.orgSetup > MAC Address CloneA MAC address is a 12-digit code assigned to a uniquepiece of hardware for identification. Some ISPs will requireyou to register a MAC address in order to access theInternet. If you do not wish to re-register the MAC addresswith your ISP, you may assign the MAC address you havecurrently registered with your ISP to the Router with theMAC Address Clone feature.Setup > DDNS > DynDNSUser Name Enter the User Name for your DDNS account.Password Enter the Password for your DDNS account.Host Name The is the DDNS URL assigned by the DDNSservice.Internet IP Address The Router’s Internet IP address isdisplayed here. Because it is dynamic, it will change.Status The status of the DDNS service connection isdisplayed here.Click Save Settings to apply your changes, or click Canc<strong>el</strong>Changes to canc<strong>el</strong> your changes.TZO.comMAC Address CloneSetup > MAC Address CloneEnable/Disable To have the MAC Address cloned, s<strong>el</strong>ectEnable.User Defined Entry Enter the MAC Address registeredwith your ISP here.Clone Your PC’s MAC Clicking this button will clone theMAC address of the computer you are using.Click Save Settings to apply your changes, or click Canc<strong>el</strong>Changes to canc<strong>el</strong> your changes.Setup > Advanced RoutingThis screen is used to set up the Router’s advanced routingfunctions. NAT routes the host Router‘s network connectionto the Internet. Dynamic Routing automatically adjustshow packets trav<strong>el</strong> on your network. Static Routing setsup a fixed route to another network destination.Setup > DDNS > TZOE-mail Address, TZO Key, and Domain Name Enter thesettings of the account you set up with TZO.Internet IP Address The Router’s Internet IP address isdisplayed here. Because it is dynamic, it will change.Status The status of the DDNS service connection isdisplayed here.Click Save Settings to apply your changes, or click Canc<strong>el</strong>Changes to canc<strong>el</strong> your changes.Setup > Advanced Routing (Gateway)Wir<strong>el</strong>ess-G Broadband Router
Chapter 3Advanced ConfigurationAdvanced RoutingSetup > Advanced Routing (Router )Operating Mode S<strong>el</strong>ect the mode in which this Routerwill function. If this Router is hosting your network’sconnection to the Internet, s<strong>el</strong>ect Gateway. If anotherRouter exists on your network, s<strong>el</strong>ect Router. WhenRouter is chosen, Dynamic Routing will be available asan option.Dynamic RoutingRIP This feature enables the Router to automaticallyadjust to physical changes in the network’s layout andexchange routing tables with the other router(s). TheRouter determines the network packets’ route based onthe fewest number of hops between the source and thedestination. This feature is Disabled by default. From thedrop-down menu, you can also s<strong>el</strong>ect LAN & Wir<strong>el</strong>ess,which performs dynamic routing over your Ethernet andwir<strong>el</strong>ess networks. You can also s<strong>el</strong>ect WAN (Internet),which performs dynamic routing with data coming fromthe Internet. Finally, s<strong>el</strong>ecting Both enables dynamicrouting for both networks, as w<strong>el</strong>l as data from theInternet.S<strong>el</strong>ect set number To set up a static route between theRouter and another network, s<strong>el</strong>ect a number from theStatic Routing drop-down list. (A static route is a predeterminedpathway that network information must trav<strong>el</strong>to reach a specific host or network.) Enter the informationdescribed b<strong>el</strong>ow to set up a new static route. (Click theD<strong>el</strong>ete This Entry button to d<strong>el</strong>ete a static route.)Enter Route Name Enter a name for the Route here,using a maximum of 25 alphanumeric characters.Destination LAN IP The Destination LAN IP is the addressof the remote network or host to which you want to assigna static route.Subnet Mask The Subnet Mask determines whichportion of a Destination LAN IP address is the networkportion, and which portion is the host portion.Default Gateway This is the IP address of the gatewaydevice that allows for contact between the Router and theremote network or host.Interface This interface t<strong>el</strong>ls you whether the DestinationIP Address is on the LAN & Wir<strong>el</strong>ess (Ethernet and wir<strong>el</strong>essnetworks) or the WAN (Internet).D<strong>el</strong>ete This Entry To d<strong>el</strong>ete a route, s<strong>el</strong>ect its numberfrom the drop-down menu, and click this button.Show Routing Table Click Show Routing Table to opena screen displaying how data is routed through your localnetwork. For each route, the Destination LAN IP address,Subnet Mask, Gateway, and Interface are displayed. ClickRefresh to update the information. Click Close to exit thisscreen.Routing TableClick Save Settings to apply your changes, or click Canc<strong>el</strong>Changes to canc<strong>el</strong> your changes.Wir<strong>el</strong>ess > Basic Wir<strong>el</strong>ess SettingsThe basic settings for wir<strong>el</strong>ess networking are set on thisscreen.There are two ways to configure the Router’s wir<strong>el</strong>essnetwork(s), manual and Wi-Fi Protected Setup.Wi-Fi Protected Setup is a feature that makes it easy to setup your wir<strong>el</strong>ess network. If you have client devices, suchas wir<strong>el</strong>ess adapters, that support Wi-Fi Protected Setup,then you can use Wi-Fi Protected Setup.Wir<strong>el</strong>ess Configuration To manually configure yourwir<strong>el</strong>ess network, s<strong>el</strong>ect Manual. Proceed to the “BasicWir<strong>el</strong>ess Settings” section. To use Wi-Fi Protected Setup,s<strong>el</strong>ect Wi-Fi Protected Setup. Proceed to the “Wi-FiProtected Setup” section.Wir<strong>el</strong>ess-G Broadband Router
Chapter 3Advanced ConfigurationBasic Wir<strong>el</strong>ess SettingsWi-Fi Protected SetupThere are three methods available. Use the method thatapplies to the client device you are configuring.Wir<strong>el</strong>ess > Basic Wir<strong>el</strong>ess Settings (Manual Setup)Wir<strong>el</strong>ess Network Mode From this drop-down menu,you can s<strong>el</strong>ect the wir<strong>el</strong>ess standards running on yournetwork. If you have Wir<strong>el</strong>ess-N, Wir<strong>el</strong>ess-G, and Wir<strong>el</strong>ess-Bdevices in your network, keep the default setting, Mixed.If you have only Wir<strong>el</strong>ess-G and Wir<strong>el</strong>ess-B devices in yournetwork, s<strong>el</strong>ect BG-Mixed. If you have only Wir<strong>el</strong>ess-Ndevices, s<strong>el</strong>ect Wir<strong>el</strong>ess-N Only. If you have only Wir<strong>el</strong>ess-Gdevices, s<strong>el</strong>ect Wir<strong>el</strong>ess-G Only. If you have only Wir<strong>el</strong>ess-B devices, s<strong>el</strong>ect Wir<strong>el</strong>ess-B Only. If you do not have anywir<strong>el</strong>ess devices in your network, s<strong>el</strong>ect Disabled.Wir<strong>el</strong>ess Network Name (SSID) The SSID is the networkname shared among all points in a wir<strong>el</strong>ess network.The SSID must be identical for all devices in the wir<strong>el</strong>essnetwork. It is case-sensitive and must not exceed32 characters (use any of the characters on the keyboard).Make sure this setting is the same for all points in yourwir<strong>el</strong>ess network. For added security, you should changethe default SSID (linksys) to a unique name.Wir<strong>el</strong>ess Chann<strong>el</strong> S<strong>el</strong>ect the chann<strong>el</strong> from the listprovided to correspond with your network settings. Alldevices in your wir<strong>el</strong>ess network must be broadcast onthe same chann<strong>el</strong> in order to function correctly.Wir<strong>el</strong>ess SSID Broadcast When wir<strong>el</strong>ess clients surveythe local area for wir<strong>el</strong>ess networks to associate with, theywill detect the SSID broadcast by the Router. To broadcastthe Router’s SSID, keep the default setting, Enabled. If youdo not want to broadcast the Router’s SSID, then s<strong>el</strong>ectDisabled.Click Save Settings to apply your changes, or click Canc<strong>el</strong>Changes to canc<strong>el</strong> your changes.Method #1Wir<strong>el</strong>ess > Basic Wir<strong>el</strong>ess Settings (Wi-Fi Protected Setup)Wi-Fi Protected Setup > CongratulationsNOTE: Wi-Fi Protected Setup configures oneclient device at a time. Repeat the instructionsfor each client device that supports Wi-FiProtected Setup.Use this method if your client device has a Wi-Fi ProtectedSetup button.1.2.Click or press the Wi-Fi Protected Setup button onthe client device.Click the Wi‐Fi Protected Setup button on thisscreen.Wir<strong>el</strong>ess-G Broadband Router10
Chapter 3Advanced Configuration3.After the client device has been configured, clickOK. Then refer back to your client device or itsdocumentation for further instructions.Method #2Use this method if your client device has a Wi-Fi ProtectedSetup PIN number.1.2.3.Enter the PIN number in the fi<strong>el</strong>d on this screen.Click Register.After the client device has been configured, clickOK. Then refer back to your client device or itsdocumentation for further instructions.Method #3Use this method if your client device asks for the Router’sPIN number.1.2.Enter the PIN number listed on this screen. (It is alsolisted on the lab<strong>el</strong> on the bottom of the Router.)After the client device has been configured, clickOK. Then refer back to your client device or itsdocumentation for further instructions.The Wi-Fi Protected Setup Status, Network Name (SSID),Security, Encryption, and Passphrase are displayed at thebottom of the screen.NOTE: If you have client devices that do notsupport Wi-Fi Protected Setup, note the wir<strong>el</strong>esssettings, and then manually configure thoseclient devices.Wir<strong>el</strong>ess > Wir<strong>el</strong>ess SecurityThe Wir<strong>el</strong>ess Security settings configure the security ofyour wir<strong>el</strong>ess network. There are six wir<strong>el</strong>ess securitymode options supported by the Router: WPA Personal,WPA Enterprise, WPA2 Personal, WPA2 Enterprise, RADIUS,and WEP. (WPA stands for Wi-Fi Protected Access, which isa security standard stronger than WEP encryption. WPA2is a more advanced, more secure version of WPA. WEPstands for Wired Equivalent Privacy, and RADIUS standsfor Remote Authentication Dial-In User Service.) Thesesix are briefly discussed here. For detailed instructionson configuring wir<strong>el</strong>ess security for the Router, refer to“Chapter 2: Wir<strong>el</strong>ess Security.”Wir<strong>el</strong>ess SecuritySecurity ModeS<strong>el</strong>ect the security method for your wir<strong>el</strong>ess network. Ifyou do not want to use wir<strong>el</strong>ess security, keep the default,Disabled.WPA PersonalNOTE: If you are using WPA, always rememberthat each device in your wir<strong>el</strong>ess network MUSTuse the same WPA method and shared key, or<strong>el</strong>se the network will not function properly.Security Mode > WPA PersonalWPA Algorithm WPA supports two encryption methods,TKIP and AES, with dynamic encryption keys. S<strong>el</strong>ectthe type of algorithm, TKIP or AES. (AES is a strongerencryption method than TKIP.)WPA Shared Key Enter the key shared by the Router andyour other network devices. It must have 8-63 characters.Group Key Renewal Enter a Key Renewal period, whicht<strong>el</strong>ls the Router how often it should change the encryptionkeys. The default Group Key Renewal period is 3600seconds.WPA EnterpriseThis option features WPA used in coordination with aRADIUS server. (This should only be used when a RADIUSserver is connected to the Router.)Security Mode > WPA EnterpriseWPA Algorithm WPA supports two encryption methods,TKIP and AES, with dynamic encryption keys. S<strong>el</strong>ectthe type of algorithm, TKIP or AES. (AES is a strongerencryption method than TKIP.)Wir<strong>el</strong>ess-G Broadband Router11
Chapter 3Advanced ConfigurationRADIUS Server Address Enter the IP Address of theRADIUS server.RADIUS Port Enter the port number of the RADIUSserver. The default value is 1812.Shared Key Enter the key shared between the Routerand the server.Key Renewal Timeout Enter a Key Renewal Timeoutperiod, which instructs the Router how often it shouldchange the encryption keys. The default Key RenewalTimeout period is 3600 seconds.WPA2 PersonalWPA Algorithm WPA2 supports two encryptionmethods, TKIP and AES, with dynamic encryption keys.S<strong>el</strong>ect the type of algorithm, AES, or TKIP + AES. Thedefault s<strong>el</strong>ection is AESRADIUS Server Address Enter the IP Address of theRADIUS server.RADIUS Port Enter the port number of the RADIUSserver. The default value is 1812.Shared Key Enter the key shared between the Routerand the server.Key Renewal Timeout Enter a Key Renewal Timeoutperiod, which instructs the Router how often it shouldchange the encryption keys. The default Key RenewalTimeout period is 3600 seconds.RADIUSThis option features WEP used in coordination with aRADIUS server. (This should only be used when a RADIUSserver is connected to the Router.)Security Mode > WPA2 PersonalWPA Algorithm WPA2 supports two encryptionmethods, TKIP and AES, with dynamic encryption keys.S<strong>el</strong>ect the type of algorithm, AES, or TKIP + AES. Thedefault s<strong>el</strong>ection is AES.WPA Shared Key Enter a WPA Shared Key of 8-63characters.Group Key Renewal Enter a Group Key Renewal period,which instructs the Router how often it should change theencryption keys. The default Group Key Renewal period is3600 seconds.WPA2 EnterpriseThis option features WPA2 used in coordination with aRADIUS server. (This should only be used when a RADIUSserver is connected to the Router.Wir<strong>el</strong>ess-G Broadband RouterSecurity Mode > WPA2 EnterpriseSecurity Mode > RADIUSIMPORTANT: If you are using WEP encryption,always remember that each device in yourwir<strong>el</strong>ess network MUST use the same WEPencryption method and encryption key, or <strong>el</strong>seyour wir<strong>el</strong>ess network will not function properly.RADIUS Server Address Enter the IP Address of theRADIUS server.RADIUS Port Enter the port number of the RADIUSserver. The default value is 1812.Shared Key Enter the key shared between the Routerand the server.Default Transmit Key S<strong>el</strong>ect a Default Transmit Key(choose which Key to use). The default is 1.WEP Encryption S<strong>el</strong>ect a lev<strong>el</strong> of WEP encryption,64 bits 10 hex digits or 128 bits 26 hex digits. Thedefault is 64 bits 10 hex digits.12
Chapter 3Advanced ConfigurationPassphrase Enter a Passphrase to automatically generateWEP keys. Then click Generate.Key 1-4 If you did not enter a Passphrase, enter the WEPkey(s) manually.WEPWEP is a basic encryption method, which is not as secureas WPA.Wir<strong>el</strong>ess MAC FilterWir<strong>el</strong>ess MAC Filter To filter wir<strong>el</strong>ess users by MAC Address,either permitting or blocking access, click Enable. If you donot wish to filter users by MAC Address, keep the defaultsetting, Disable.Prevent S<strong>el</strong>ect this to block wir<strong>el</strong>ess access by MACAddress. This button is s<strong>el</strong>ected by default.Permit Only S<strong>el</strong>ect this to allow wir<strong>el</strong>ess access by MACAddress. This button is not s<strong>el</strong>ected by default.Edit MAC Filter List Click this to open the MAC AddressFilter List screen. On this screen, you can list users, by MACAddress, to whom you wish to provide or block access. Foreasy reference, click Wir<strong>el</strong>ess Client MAC List to display a listof network users by MAC Address.Security Mode > WEPDefault Transmit Key S<strong>el</strong>ect a Default Transmit Key(choose which Key to use). The default is 1.WEP Encryption S<strong>el</strong>ect a lev<strong>el</strong> of WEP encryption, 64 bits10 hex digits or 128 bits 26 hex digits. The default is64 bits 10 hex digits.Passphrase Enter a Passphrase to automatically generateWEP keys. Then click Generate.Key 1-4 If you did not enter a Passphrase, enter the WEPkey(s) manually.Click Save Settings to apply your changes, or click Canc<strong>el</strong>Changes to canc<strong>el</strong> your changes.Wir<strong>el</strong>ess > Wir<strong>el</strong>ess MAC FilterWir<strong>el</strong>ess access can be filtered by using the MAC addressesof the wir<strong>el</strong>ess devices transmitting within your network’sradius.MAC Address Filter ListClick Save Settings to apply your changes, or click Canc<strong>el</strong>Changes to canc<strong>el</strong> your changes.Wir<strong>el</strong>ess > Advanced Wir<strong>el</strong>ess SettingsThis Wir<strong>el</strong>ess > Advanced Wir<strong>el</strong>ess Settings screen is usedto set up the Router’s advanced wir<strong>el</strong>ess functions. Thesesettings should only be adjusted by an expert administratoras incorrect settings can reduce wir<strong>el</strong>ess performance.Wir<strong>el</strong>ess > Wir<strong>el</strong>ess MAC FilterWir<strong>el</strong>ess-G Broadband Router13
Chapter 3Advanced ConfigurationAdvanced Wir<strong>el</strong>essWir<strong>el</strong>ess-G Broadband RouterWir<strong>el</strong>ess > Advanced Wir<strong>el</strong>ess SettingsAuthentication Type The default is set to Auto, whichallows either Open System or Shared Key authenticationto be used. With Open System authentication, the senderand the recipient do NOT use a WEP key for authentication.With Shared Key authentication, the sender and recipientuse a WEP key for authentication.Basic Rate The Basic Rate setting is not actually one rateof transmission but a series of rates at which the Routercan transmit. The Router will advertise its Basic Rate to theother wir<strong>el</strong>ess devices in your network, so they know whichrates will be used. The Router will also advertise that it willautomatically s<strong>el</strong>ect the best rate for transmission. Thedefault setting is Default, when the Router can transmitat all standard wir<strong>el</strong>ess rates (1-2Mbps, 5.5Mbps, 11Mbps,18Mbps, and 24Mbps). Other options are 1-2Mbps, foruse with older wir<strong>el</strong>ess technology, and All, when theRouter can transmit at all wir<strong>el</strong>ess rates. The Basic Rateis not the actual rate of data transmission. If you want tospecify the Router’s rate of data transmission, configurethe Transmission Rate setting.Transmission Rate The rate of data transmission shouldbe set depending on the speed of your wir<strong>el</strong>ess network.You can s<strong>el</strong>ect from a range of transmission speeds, or youcan s<strong>el</strong>ect Auto to have the Router automatically use thefastest possible data rate and enable the Auto-Fallbackfeature. Auto-Fallback will negotiate the best possibleconnection speed between the Router and a wir<strong>el</strong>essclient. The default value is Auto.CTS Protection Mode CTS (Clear-To-Send) ProtectionMode should remain disabled unless you are having severeproblems with your Wir<strong>el</strong>ess-G products not being ableto transmit to the Router in an environment with heavy802.11b traffic. This function boosts the Router’s abilityto catch all Wir<strong>el</strong>ess-G transmissions but will sever<strong>el</strong>ydecrease performance.Frame Burst Enabling this option should provide yournetwork with greater performance, depending on themanufacturer of your wir<strong>el</strong>ess products. To turn on theFrame Burst option, s<strong>el</strong>ect Enable. The default is Disable.Beacon Interval The default value is 100. Enter a valuebetween 1 and 65,535 milliseconds. The Beacon Intervalvalue indicates the frequency interval of the beacon. Abeacon is a packet broadcast by the Router to synchronizethe wir<strong>el</strong>ess network.DTIM Interval This value, between 1 and 255, indicatesthe interval of the D<strong>el</strong>ivery Traffic Indication Message(DTIM). A DTIM fi<strong>el</strong>d is a countdown fi<strong>el</strong>d informingclients of the next window for listening to broadcastand multicast messages. When the Router has bufferedbroadcast or multicast messages for associated clients, itsends the next DTIM with a DTIM Interval value. Its clientshear the beacons and awaken to receive the broadcastand multicast messages. The default value is 1.Fragmentation Threshold This value specifies themaximum size for a packet before data is fragmentedinto multiple packets. If you experience a high packeterror rate, you may slightly increase the FragmentationThreshold. Setting the Fragmentation Threshold too lowmay result in poor network performance. Only minorreduction of the default value is recommended. In mostcases, it should remain at its default value of 2346.RTS Threshold Should you encounter inconsistent dataflow, only minor reduction of the default value, 2347, isrecommended. If a network packet is smaller than thepreset RTS threshold size, the RTS/CTS mechanism willnot be enabled. The Router sends Request to Send (RTS)frames to a particular receiving station and negotiatesthe sending of a data frame. After receiving an RTS, thewir<strong>el</strong>ess station responds with a Clear to Send (CTS) frameto acknowledge the right to begin transmission. The RTSThreshold value should remain at its default value of2347.AP Isolation This isolates all wir<strong>el</strong>ess clients and wir<strong>el</strong>essdevices on your network from each other. Wir<strong>el</strong>ess deviceswill be able to communicate with the Router but not witheach other. To use this function, s<strong>el</strong>ect On. AP Isolation isturned Off by default.SecureEasySetup This feature allows you to enable ordisable the SecureEasySetup feature. S<strong>el</strong>ect Disabled todisable the feature and turn off the button’s light. Thefeature is Enabled by default.Click Save Settings to apply your changes, or click Canc<strong>el</strong>Changes to canc<strong>el</strong> your changes.14
Chapter 3Advanced ConfigurationSecurity > FirewallThe Security > Firewall screen is used to configure a firewallthat can filter out various types of unwanted traffic on theRouter’s local network.Security > VPN PassthroughThe Security > VPN Passthrough screen allows you to enableVPN tunn<strong>el</strong>s using IPSec, PPTP, or L2TP protocols to passthrough the Router’s firewall.FirewallSecurity > FirewallFirewall Protection To use firewall protection, keep thedefault s<strong>el</strong>ection, Enable. To turn off firewall protection,s<strong>el</strong>ect Disable.Block WAN RequestsBlock Anonymous Internet Requests This featuremakes it more difficult for outside users to work theirway into your network. This feature is s<strong>el</strong>ected by default.Des<strong>el</strong>ect the feature to allow anonymous Internetrequests.Filter Multicast Multicasting allows for multipletransmissions to specific recipients at the same time. Ifmulticasting is permitted, then the Router will allow IPmulticast packets to be forwarded to the appropriatecomputers. This feature is s<strong>el</strong>ected by default. Des<strong>el</strong>ectthis feature to disable it.Filter Internet NAT Redirection This feature usesport forwarding to block access to local servers fromlocal networked computers. S<strong>el</strong>ect Filter Internet NATRedirection to filter Internet NAT redirection. This featureis not s<strong>el</strong>ected by default.Filter IDENT (Port 113) This feature keeps port 113 frombeing scanned by devices outside of your local network.This feature is s<strong>el</strong>ected by default. Des<strong>el</strong>ect this feature todisable it.Click Save Settings to apply your changes, or click Canc<strong>el</strong>Changes to canc<strong>el</strong> your changes.VPN PassthroughSecurity > VPN PassthroughIPSec Passthrough Internet Protocol Security (IPSec) isa suite of protocols used to implement secure exchangeof packets at the IP layer. To allow IPSec tunn<strong>el</strong>s to passthrough the Router, keep the default, Enable.PPTP Passthrough Point-to-Point Tunn<strong>el</strong>ing Protocol(PPTP) allows the Point-to-Point Protocol (PPP) to betunn<strong>el</strong>ed through an IP network. To allow PPTP tunn<strong>el</strong>s topass through the Router, keep the default, Enable.L2TP Passthrough Layer 2 Tunn<strong>el</strong>ing Protocol is themethod used to enable Point-to-Point sessions via theInternet on the Layer 2 lev<strong>el</strong>. To allow L2TP tunn<strong>el</strong>s to passthrough the Router, keep the default, Enable.Click Save Settings to apply your changes, or click Canc<strong>el</strong>Changes to canc<strong>el</strong> your changes.Access Restrictions > Internet AccessThe Access Restrictions > Internet Access screen allows youto block or allow specific kinds of Internet usage andtraffic, such as Internet access, designated services, andwebsites during specific days and times.Wir<strong>el</strong>ess-G Broadband Router15
Chapter 3Advanced Configurations<strong>el</strong>ect a PC by MAC Address or IP Address. You can alsoenter a range of IP Addresses if you want this policyto affect a group of PCs. After making your changes,click Save Settings to apply your changes or Canc<strong>el</strong>Changes to canc<strong>el</strong> your changes. Then click Close.List of PCsInternet AccessAccess Restrictions > Internet AccessInternet Access Policy Access can be managed by apolicy. Use the settings on this screen to establish anaccess policy (after Save Settings is clicked). S<strong>el</strong>ecting apolicy from the drop-down menu will display that policy’ssettings. To d<strong>el</strong>ete a policy, s<strong>el</strong>ect that policy’s numberand click D<strong>el</strong>ete. To view all the policies, click Summary.(Policies can be d<strong>el</strong>eted from the Summary screen bys<strong>el</strong>ecting the policy or policies and clicking D<strong>el</strong>ete. Toreturn to the Internet Access tab, click Close.)Internet Policy Summary5.6.7.8.S<strong>el</strong>ect the appropriate option, Deny or Allow,depending on whether you want to block or allowInternet access for the PCs you listed on the List of PCsscreen.Decide which days and what times you want this policyto be enforced. S<strong>el</strong>ect the individual days during whichthe policy will be in effect, or s<strong>el</strong>ect Everyday. Thenenter a range of hours and minutes during which thepolicy will be in effect, or s<strong>el</strong>ect 24 Hours.S<strong>el</strong>ect any Blocked Services or Website Blocking youwish to use.Click Save Settings to save the policy’s settings, orclick Canc<strong>el</strong> Changes to canc<strong>el</strong> the policy’s settings.Blocked ServicesYou can filter access to various services accessed over theInternet, such as FTP or t<strong>el</strong>net, by s<strong>el</strong>ecting services fromthe drop-down menus next to Blocked Services. (You canblock up to 20 services.) Then enter the range of ports youwant to filter.If the service you want to block is not listed or you want toedit a service’s settings, then click Add/Edit Service. Thenthe Port Services screen will appear.Status Policies are disabled by default. To enable a policy,s<strong>el</strong>ect the policy number from the drop-down menu, ands<strong>el</strong>ect Enable.To create an Internet Access policy:1.2.3.4.S<strong>el</strong>ect a number from the Internet Access Policy dropdownmenu.To enable this policy, s<strong>el</strong>ect Enable.Enter a Policy Name in the fi<strong>el</strong>d provided.Click Edit List of PCs to s<strong>el</strong>ect which PCs will be affectedby the policy. The List of PCs screen appears. You canPort ServicesTo add a service, enter the service’s name in the ServiceName fi<strong>el</strong>d. S<strong>el</strong>ect its protocol from the Protocol dropdownmenu, and enter its range in the Port Range fi<strong>el</strong>ds.Then click Add.Wir<strong>el</strong>ess-G Broadband Router16
Chapter 3Advanced ConfigurationTo modify a service, s<strong>el</strong>ect it from the list on the right.Change its name, protocol setting, or port range. Thenclick Modify.To d<strong>el</strong>ete a service, s<strong>el</strong>ect it from the list on the right. Thenclick D<strong>el</strong>ete.When you are finished making changes on the PortServices screen, click Apply to save the changes. If youwant to canc<strong>el</strong> your changes, click Canc<strong>el</strong>. To close thePort Services screen and return to the Access Restrictionsscreen, click Close.Website Blocking by URL AddressIf you want to block websites with specific URL addresses,enter each URL in a separate fi<strong>el</strong>d next to Website Blockingby URL Address.Website Blocking by KeywordIf you want to block websites using specific keywords,enter each keyword in a separate fi<strong>el</strong>d next to WebsiteBlocking by Keyword.Click Save Settings to apply your changes, or click Canc<strong>el</strong>Changes to canc<strong>el</strong> your changes.Applications and Gaming > Port RangeForwardThe Applications & Gaming > Port Range Forward screenallows you to set up public services on your network, such asweb servers, ftp servers, e-mail servers, or other specializedInternet applications. (Specialized Internet applications areany applications that use Internet access to perform functionssuch as videoconferencing or online gaming. Some Internetapplications may not require any forwarding.)Application In this fi<strong>el</strong>d, enter the name you wish to givethe application. Each name can be up to 12 characters.Start/End This is the port range. Enter the number thatstarts the port range in the Start column and the numberthat ends the range in the End column.Protocol S<strong>el</strong>ect the protocol used for this application,either TCP or UDP, or Both.IP Address For each application, enter the IP Address ofthe PC running the specific application.Enable S<strong>el</strong>ect Enable to enable port forwarding for ther<strong>el</strong>evant application.Click Save Settings to apply your changes, or click Canc<strong>el</strong>Changes to canc<strong>el</strong> your changes.Applications & Gaming > Port TriggeringThe Applications & Gaming > Port Triggering screen allowsthe Router to watch outgoing data for specific portnumbers. The IP address of the computer that sends thematching data is remembered by the Router, so that whenthe requested data returns through the Router, the data ispulled back to the proper computer by way of IP addressand port mapping rules.Applications and Gaming > Port TriggeringApplications and Gaming > Port Range ForwardPort Range ForwardTo forward a port, enter the information on each line forthe criteria required.Wir<strong>el</strong>ess-G Broadband RouterPort TriggeringApplication Enter the application name of the trigger.Triggered RangeFor each application, list the triggered port number range.Check with the Internet application documentation forthe port number(s) needed.Start Port Enter the starting port number of the TriggeredRange.End Port Enter the ending port number of the TriggeredRange.17
Chapter 3Advanced ConfigurationForwarded RangeFor each application, list the forwarded port numberrange. Check with the Internet application documentationfor the port number(s) needed.Start Port Enter the starting port number of theForwarded Range.End Port Enter the ending port number of the ForwardedRange.Enable S<strong>el</strong>ect Enable to enable port triggering for theapplicable application.Click Save Settings to apply your changes, or click Canc<strong>el</strong>Changes to canc<strong>el</strong> your changes.Applications and Gaming > DMZThe DMZ feature allows one network computer to beexposed to the Internet for use of a special-purposeservice such as Internet gaming or videoconferencing.DMZ hosting forwards all the ports at the same time toone PC. The Port Range Forward feature is more securebecause it only opens the ports you want to have opened,while DMZ hosting opens all the ports of one computer,exposing the computer to the Internet.QoSEnable/Disable To enable QoS, s<strong>el</strong>ect Enable. Otherwise,s<strong>el</strong>ect Disable. QoS is disabled by default.Upstream Bandwidth S<strong>el</strong>ect Auto or Manual fromthe drop-down menu. Manual allows you to specify themaximum outgoing bandwidth that applications canutilize.Applications and Gaming > QoSDMZWir<strong>el</strong>ess-G Broadband RouterApplications and Gaming > DMZAny PC whose port is being forwarded must have its DHCPclient function disabled and should have a new static IPaddress assigned to it because its IP address may changewhen using the DHCP function.To expose one PC, s<strong>el</strong>ect Enable. Then, enter thecomputer’s IP address in the DMZ Host IP Address fi<strong>el</strong>d. Thisfeature is disabled by default.Click Save Settings to apply your changes, or click Canc<strong>el</strong>Changes to canc<strong>el</strong> your changes.Applications and Gaming > QoSQuality of Service (QoS) ensures better service tohigh-priority types of network traffic, which mayinvolve demanding, real-time applications, such asvideoconferencing.There are three types of QoS available: Device Priority,Ethernet Port Priority, and Application Priority.Device PriorityEnter the name of your network device in the Device namefi<strong>el</strong>d, enter its MAC Address, and then s<strong>el</strong>ect its priorityfrom the drop-down menu.Ethernet Port PriorityEthernet Port Priority QoS allows you to prioritizeperformance for the Router’s four ports, LAN Ports 1-4. Foreach port, s<strong>el</strong>ect the priority and flow control setting.Priority S<strong>el</strong>ect High or Low in the Priority column. TheRouter’s four ports have been assigned low priority bydefault.Flow Control If you want the Router to control thetransmission of data between network devices, s<strong>el</strong>ectEnabled. To disable this feature, s<strong>el</strong>ect Disabled. EthernetPort Priority QoS does not require support from your ISPbecause the prioritized ports LAN ports 1-4 are in yournetwork. This feature is enabled by default.18
Chapter 3Advanced ConfigurationApplication PriorityApplication Priority QoS manages information as it istransmitted and received. Depending on the settings ofthe QoS screen, this feature will assign information a highor low priority for the applications that you specify.Optimize Gaming Applications S<strong>el</strong>ect this toautomatically allow common game application portsto have a higher priority. These games include, but arenot limited to: Counter-Strike, Half-Life, Age of Empires,Everquest, Quake2/Quake3, and Diablo II. The defaultsetting is uns<strong>el</strong>ected.Application Name Enter the name you wish to give theapplication in the Application Name fi<strong>el</strong>d.Priority S<strong>el</strong>ect High or Low to assign priority to theapplication. The default s<strong>el</strong>ection is Low.Specific Port # Enter the port number for theapplication.Wir<strong>el</strong>ess QoSWMM Support Wi-Fi Multimedia (WMM), formerlyknown as Wir<strong>el</strong>ess Multimedia Extensions (WME), isa Wi-Fi Alliance certified feature, based on the IEEE802.11e standard. This feature provides QoS to wir<strong>el</strong>essnetworks. It is especially suitable for voice, music andvideo applications; for example, Voice over IP (VoIP), videostreaming, and interactive gaming. If you have otherdevices on your wir<strong>el</strong>ess network that support WMM,s<strong>el</strong>ect Enabled. Otherwise, keep the default, Disabled.No Acknowledgement This feature prevents the Routerfrom re-sending data if an error occurs. To use this feature,s<strong>el</strong>ect Enabled. Otherwise, keep the default setting,Disabled.Click Save Settings to apply your changes, or click Canc<strong>el</strong>Changes to canc<strong>el</strong> your changes.Administration > ManagementThe Administration > Management screen allows thenetwork’s administrator to manage specific Routerfunctions for access and security.Router PasswordLocal Router AccessAdministration > ManagementRouter Password Enter a new Password for the Router.Re-enter to confirm Enter the Password again to confirm.Web AccessAccess Server HTTP (HyperText Transport Protocol) isthe communications protocol used to connect to serverson the World Wide Web. HTTPS uses SSL (Secured SocketLayer) to encrypt data transmitted for higher security.S<strong>el</strong>ect HTTP or HTTPS. The default s<strong>el</strong>ection is HTTP.Wir<strong>el</strong>ess Access Web If you are using the Router ina public domain where you are giving wir<strong>el</strong>ess accessto your guests, you can disable wir<strong>el</strong>ess access to theRouter’s web-based utility. You will only be able to accessthe web-based utility via a wired connection if you disablethe setting. Keep the default, Enable, to enable wir<strong>el</strong>essaccess to the Router’s web-based utility, or s<strong>el</strong>ect Disableto disable wir<strong>el</strong>ess access to the utility.Remote Router AccessRemote Management To access the Router remot<strong>el</strong>y,from outside the network, s<strong>el</strong>ect Enable.Management Port Enter the port number that will beopen to outside access. You will need to enter the Router’spassword when accessing the Router this way, as usual.Use https To require the use of HTTPS for remote access,s<strong>el</strong>ect this feature.UPnPUPnP Keep the default, Enable to enable the UPnPfeature; otherwise, s<strong>el</strong>ect Disable.Click Save Settings to apply your changes, or click Canc<strong>el</strong>Changes to canc<strong>el</strong> your changes.Wir<strong>el</strong>ess-G Broadband Router19
Chapter 3Advanced ConfigurationAdministration > LogThe Router can keep logs of all traffic for your Internetconnection.The Ping TestLogAdministration > LogLog To disable the Log function, keep the default setting,Disable. To monitor traffic between the network and theInternet, s<strong>el</strong>ect Enable.When you wish to view the logs, click Incoming Log orOutgoing Log, depending on which you wish to view.Click Save Settings to apply your changes, or click Canc<strong>el</strong>Changes to canc<strong>el</strong> your changes.Administration > DiagnosticsThe diagnostic tests (Ping and Traceroute) allow you tocheck the connections of your network components.Traceroute TestTraceroute To test the performance of a connection,click Traceroute to open the Traceroute Test screen. Enterthe address of the PC whose connection you wish to testand click Traceroute. The Traceroute Test screen will showif the test was successful. To stop the test, click Stop. ClickClear Log to clear the screen. Click Close to return to theDiagnostics screen.The Traceroute TestPing TestAdministration > DiagnosticsPing The Ping test checks the status of a connection.Click Ping to open the Ping Test screen. Enter the addressof the PC whose connection you wish to test and howmany times you wish to test it. Then, click Ping. The PingTest screen will show if the test was successful. To stop thetest, click Stop. Click Clear Log to clear the screen. ClickClose to return to the Diagnostics screen.Administration > Factory DefaultsThe Administration > Factory Defaults screen allows youto restore the Router’s configuration to its factory defaultsettings.Factory DefaultsRestore Factory Defaults To reset the Router’s settingsto the default values, s<strong>el</strong>ect Yes, and then click SaveSettings. Any settings you have saved will be lost whenthe default settings are restored.Administration > Factory DefaultsWir<strong>el</strong>ess-G Broadband Router20
Chapter 3Advanced ConfigurationAdministration > Upgrade FirmwareThe Administration > Upgrade Firmware screen allows youto upgrade the Router’s firmware. Do not upgrade thefirmware unless you are experiencing problems with theRouter or the new firmware has a feature you want to use.Status > RouterThe Status > Router screen displays the Router’s currentstatus.Administration > Upgrade FirmwareBefore upgrading the firmware, download the Router’sfirmware upgrade file from the Linksys website, www.linksys.com. Then extract the file.Upgrade FirmwarePlease s<strong>el</strong>ect a file to upgrade Click Browse and s<strong>el</strong>ectthe extracted firmware upgrade file. Then click Upgradeand follow the on-screen instructions.Administration > Config ManagementThis screen is used to back up or restore the Router’sconfiguration file.Backup ConfigurationAdministration > Config ManagementTo back up the Router’s configuration file, click Backup.Then follow the on-screen instructions.Restore ConfigurationPlease s<strong>el</strong>ect a file to restore Click Browse and s<strong>el</strong>ectthe configuration file. Then click Restore.Router InformationStatus > RouterFirmware Version This is the Router’s current firmware.Current Time This shows the time, as you set on theSetup tab.MAC Address This is the Router’s MAC Address, as seenby your ISP.Router Name This is the specific name for the Router,which you set on the Setup tab.Host Name If required by your ISP, this would have beenentered on the Setup tab.Domain Name If required by your ISP, this would havebeen entered on the Setup tab.InternetConfiguration TypeThis section shows the current network informationstored in the Router. The information varies depending onthe Internet connection type s<strong>el</strong>ected on the Setup > BasicSetup screen.Click Refresh to update the on-screen information.Wir<strong>el</strong>ess-G Broadband Router21
Chapter 3Advanced ConfigurationStatus > Local NetworkThe Status > Local Network screen displays the status ofyour network.Status > Wir<strong>el</strong>essThe Status > Wir<strong>el</strong>ess screen displays the status of yourwir<strong>el</strong>ess network.Status > Local NetworkLocal NetworkMAC Address This is the Router’s MAC Address, as seenon your local, Ethernet network.IP Address This shows the Router’s IP Address, as itappears on your local, Ethernet network.Subnet Mask This shows the current subnet mask beingconfigured for your local network.DHCP Server If you are using the Router as a DHCP server,that will be displayed here.Start IP Address For the range of IP Addresses used bydevices on your local, Ethernet network, the beginning ofthat range is shown here.End IP Address For the range of IP Addresses used bydevices on your local, Ethernet network, the end of thatrange is shown here.DHCP Clients Table Clicking this button will open ascreen to show you which PCs are utilizing the Router as aDHCP server. You can d<strong>el</strong>ete PCs from that list, and severtheir connections, by checking a D<strong>el</strong>ete box and clickingthe D<strong>el</strong>ete button.Wir<strong>el</strong>essStatus > Wir<strong>el</strong>essMAC Address This is the Router’s MAC Address, as seenon your local, wir<strong>el</strong>ess network.Mode As s<strong>el</strong>ected from the Wir<strong>el</strong>ess > Basic Wir<strong>el</strong>essSettings screen, this displays the wir<strong>el</strong>ess mode (Mixed,G‐Only, or Disabled) used by the network.SSID As entered on the Wir<strong>el</strong>ess > Basic Wir<strong>el</strong>ess Settingsscreen, this displays the wir<strong>el</strong>ess network name or SSID.DHCP Server The status of the DHCP server function isdisplayed here.Chann<strong>el</strong> As entered on the Wir<strong>el</strong>ess > Basic Wir<strong>el</strong>essSettings screen, this displays the chann<strong>el</strong> on which yourwir<strong>el</strong>ess network is broadcasting.Encryption Function As s<strong>el</strong>ected on the Wir<strong>el</strong>ess >Wir<strong>el</strong>ess Security screen, this displays the status of theRouter’s wir<strong>el</strong>ess security.Click Refresh to update the on-screen information.DHCP Clients TableClick Refresh to update the on-screen information.Wir<strong>el</strong>ess-G Broadband Router22
Appendix ATroubleshootingAppendix A:TroubleshootingYour computer cannot connect to the Internet.Follow these instructions until your computer can connectto the Internet:• Make sure that the Router is powered on. The PowerLED should be green and not flashing.• If the Power LED is flashing, then power off all ofyour network devices, including the modem, Router,and computers. Then power on each device in thefollowing order:1. Cable or DSL modem2.3.RouterComputer• Check the cable connections. The computer shouldbe connected to one of the ports numbered 1-4 onthe Router, and the modem must be connected to theInternet port on the Router.The modem does not have an Ethernet port.The modem is a dial-up modem for traditional dial-upservice. To use the Router, you need a cable/DSL modemand high-speed Internet connection.You cannot use the DSL service to connect manually tothe Internet.After you have installed the Router, it will automaticallyconnect to your Internet Service Provider (ISP), so you nolonger need to connect manually.The DSL t<strong>el</strong>ephone line does not fit into the Router’sInternet port.The Router does not replace your modem. You still needyour DSL modem in order to use the Router. Connectthe t<strong>el</strong>ephone line to the DSL modem, insert the setupCD into your computer, and then follow the on‐screeninstructions.When you double-click the web browser, you areprompted for a username and password. If you want toget rid of the prompt, follow these instructions.Launch the web browser and perform the following steps(these steps are specific to Internet Explorer but are similarfor other browsers):1.2.3.4.S<strong>el</strong>ect Tools > Internet Options.Click the Connections tab.S<strong>el</strong>ect Never dial a connection.Click OK.The Router does not have a coaxial port for the cableconnection.The Router does not replace your modem. You still needyour cable modem in order to use the Router. Connect yourcable connection to the cable modem, insert the setupCD into your computer, and then follow the on‐screeninstructions.The computer cannot connect wir<strong>el</strong>essly to the network.Make sure the wir<strong>el</strong>ess network name or SSID is the sameon both the computer and the Router. If you have enabledwir<strong>el</strong>ess security, then make sure the same securitymethod and key are used by both the computer and theRouter.You need to modify the settings on the Router.Open the web browser (for example, Internet Explorer orFirefox), and enter the Router’s IP address in the addressfi<strong>el</strong>d (the default IP address is 192.168.1.1). Whenprompted, leave the User name fi<strong>el</strong>d blank and enter thepassword to the Router (the default is admin). Click theappropriate tab to change the settings.WEB: If your questions are not addressed here,refer to the Linksys website, www.linksys.com.Wir<strong>el</strong>ess-G Broadband Router23
Appendix BSpecificationsAppendix B:SpecificationsMod<strong>el</strong>StandardsPortsButtonLEDsCabling TypeWRT54G2IEEE 802.3, IEEE 802.3u,IEEE 802.11g, IEEE 802.11bInternet: One 10/100 RJ-45 PortLAN: Four 10/100 RJ-45Switched PortsOne Power PortOne Reset ButtonOne WPS ButtonPower, Wir<strong>el</strong>ess, LAN (1-4), Internet,Wi-Fi Protected Setup (WPS)CAT5# of Antennas 2 Internal AntennasRF Power OutputUPnP able/certSecurity FeaturesWir<strong>el</strong>ess SecurityEnvironmentalDimensionsWeight18 dBmAbleStateful Packet Inspection (SPI)Firewall, Internet PolicyWi-Fi Protected Access2 (WPA2),WEP, Wir<strong>el</strong>ess MAC Filtering203 x 35 x 160 mm280 gPower External, 12V DC, 0.5ACertificationsOperating Temp. 0 to 40ºCStorage Temp. -20 to 60ºCFCC, CE, IC-UL Wi-Fi (802.11b,802.11g), WPA2, WMMOperating Humidity 10 to 85%, NoncondensingStorage Humidity5 to 90%, NoncondensingWir<strong>el</strong>ess-G Broadband Router24
Appendix CWarranty InformationAppendix C:Warranty InformationLimited WarrantyLinksys warrants that this Linksys hardware product will besubstantially free of defects in materials and workmanshiparising under normal use during the Warranty Period,which begins on the date of purchase by the original enduserpurchaser and lasts for the period specified b<strong>el</strong>ow:• Two (2) years for new product• Ninety (90) days for refurbished productThis limited warranty is non-transferable and extends onlyto the original end-user purchaser. Your exclusive remedyand Linksys’ entire liability under this limited warrantywill be for Linksys, at its option, to (a) repair the productwith new or refurbished parts, (b) replace the productwith a reasonably available equivalent new or refurbishedLinksys product, or (c) refund the purchase price of theproduct less any rebates. Any repaired or replacementproducts will be warranted for the remainder of theoriginal Warranty Period or thirty (30) days, whichever islonger. All products and/or parts that are replaced becomethe property of Linksys.This limited warranty shall apply in addition to anystatutory or other rights which you may have under acontract of sale.Exclusions and LimitationsThis limited warranty does not apply if: (a) the productassembly seal has been removed or damaged, (b) theproduct has been altered or modified, except by Linksys,(c) the product damage was caused by use with non-Linksys products, (d) the product has not been installed,operated, repaired, or maintained in accordance withinstructions supplied by Linksys, (e) the product hasbeen subjected to abnormal physical or <strong>el</strong>ectrical stress,misuse, negligence, or accident, (f) the serial number onthe Product has been altered, defaced, or removed, or (g)the product is supplied or licensed for beta, evaluation,testing or demonstration purposes for which Linksys doesnot charge a purchase price or license fee.ALL SOFTWARE PROVIDED BY LINKSYS WITH THE PRODUCT,WHETHER FACTORY LOADED ON THE PRODUCT ORCONTAINED ON MEDIA ACCOMPANYING THE PRODUCT,IS PROVIDED “AS IS” WITHOUT ANY WARRANTY OF ANYKIND. Without limiting the foregoing, Linksys does notwarrant that the operation of the product or software willbe uninterrupted or error free. Also, due to the continualdev<strong>el</strong>opment of new techniques for intruding upon andattacking networks, Linksys does not warrant that theproduct, service, software or any equipment, system orWir<strong>el</strong>ess-G Broadband Routernetwork on which the product or software is used will befree of vulnerability to intrusion or attack. The productmay include or be bundled with third party software orservice offerings. This limited warranty shall not apply tosuch third party software or service offerings. This limitedwarranty does not guarantee any continued availabilityof a third party’s service for which this product’s use oroperation may require.TO THE EXTENT NOT PROHIBITED BY LAW, ALL IMPLIEDWARRANTIES AND CONDITIONS OF MERCHANTABILITY,SATISFACTORY QUALITY OR FITNESS FOR A PARTICULARPURPOSE ARE LIMITED TO THE DURATION OF THEWARRANTY PERIOD. ALL OTHER EXPRESS OR IMPLIEDCONDITIONS, REPRESENTATIONS AND WARRANTIES,INCLUDING, BUT NOT LIMITED TO, ANY IMPLIEDWARRANTY OF NON-INFRINGEMENT, ARE DISCLAIMED.Some jurisdictions do not allow limitations on how longan implied warranty lasts, so the above limitation may notapply to you. This limited warranty gives you specific legalrights, and you may also have other rights which vary byjurisdiction.TO THE EXTENT NOT PROHIBITED BY LAW, IN NO EVENTWILL LINKSYS BE LIABLE FOR ANY LOST DATA, REVENUEOR PROFIT, OR FOR SPECIAL, INDIRECT, CONSEQUENTIAL,INCIDENTAL OR PUNITIVE DAMAGES, REGARDLESS OF THETHEORY OF LIABILITY (INCLUDING NEGLIGENCE), ARISINGOUT OF OR RELATED TO THE USE OF OR INABILITY TOUSE THE PRODUCT (INCLUDING ANY SOFTWARE), EVENIF LINKSYS HAS BEEN ADVISED OF THE POSSIBILITY OFSUCH DAMAGES. IN NO EVENT WILL LINKSYS’ LIABILITYEXCEED THE AMOUNT PAID BY YOU FOR THE PRODUCT.The foregoing limitations will apply even if any warrantyor remedy provided under this limited warranty fails ofits essential purpose. Some jurisdictions do not allowthe exclusion or limitation of incidental or consequentialdamages, so the above limitation or exclusion may notapply to you.Obtaining Warranty ServiceIf you have a question about your product or experience aproblem with it, please go to www.linksys.com/supportwhere you will find a variety of online support tools andinformation to assist you with your product. If the productproves defective during the Warranty Period, contactLinksys Technical Support for instructions on how toobtain warranty service. The t<strong>el</strong>ephone number for LinksysTechnical Support in your area can be found in the productUser Guide and at www.linksys.com. Have your productserial number and proof of purchase on hand when calling.A DATED PROOF OF ORIGINAL PURCHASE IS REQUIREDTO PROCESS WARRANTY CLAIMS. If you are requested toreturn your product, you will be given a Return MaterialsAuthorization (RMA) number. You are responsible forproperly packaging and shipping your product to Linksysat your cost and risk. You must include the RMA number25
Appendix CWarranty Informationand a copy of your dated proof of original purchase whenreturning your product. Products received without a RMAnumber and dated proof of original purchase will berejected. Do not include any other items with the productyou are returning to Linksys. Defective product coveredby this limited warranty will be repaired or replaced andreturned to you without charge. Customers outside ofthe United States of America and Canada are responsiblefor all shipping and handling charges, custom duties,VAT and other associated taxes and charges. Repairs orreplacements not covered under this limited warranty willbe subject to charge at Linksys’ then-current rates.Technical SupportThis limited warranty is neither a service nor asupport contract. Information about Linksys’ currenttechnical support offerings and policies (includingany fees for support services) can be found atwww.linksys.com/supportGeneralThis limited warranty is governed by the laws of thejurisdiction in which the Product was purchased by you.If any portion of this limited warranty is found to be voidor unenforceable, its remaining provisions shall remain infull force and effect.Please direct all inquiries to: Linksys, P.O. Box 18558, Irvine,CA 92623.For more information, please contact uswww.linksys.comS<strong>el</strong>ect your country, and then s<strong>el</strong>ect SUPPORT/TECHNICALFor product returns:S<strong>el</strong>ect your country and then s<strong>el</strong>ect CUSTOMER SUPPORTWir<strong>el</strong>ess-G Broadband Router26
Appendix DRegulatory InformationAppendix D:Regulatory InformationFCC StatementThis product has been tested and complies with thespecifications for a Class B digital device, pursuant to Part15 of the FCC Rules. These limits are designed to providereasonable protection against harmful interference ina residential installation. This equipment generates,uses, and can radiate radio frequency energy and, if notinstalled and used according to the instructions, maycause harmful interference to radio communications.However, there is no guarantee that interference will notoccur in a particular installation. If this equipment doescause harmful interference to radio or t<strong>el</strong>evision reception,which is found by turning the equipment off and on, theuser is encouraged to try to correct the interference byone or more of the following measures:• Reorient or r<strong>el</strong>ocate the receiving antenna• Increase the separation between the equipment ordevices• Connect the equipment to an outlet other than thereceiver’s• Consult a dealer or an experienced radio/TV technicianfor assistanceFCC Radiation Exposure StatementThis equipment complies with FCC radiation exposur<strong>el</strong>imits set forth for an uncontrolled environment. Thisequipment should be installed and operated withminimum distance 20 cm between the radiator and yourbody.Safety Notices• Caution: To reduce the risk of fire, use only No.26 AWGor larger t<strong>el</strong>ecommunication line cord.• Do not use this product near water, for example, in awet basement or near a swimming pool.• Avoid using this product during an <strong>el</strong>ectrical storm.There may be a remote risk of <strong>el</strong>ectric shock fromlightning.Industry Canada StatementThis Class B digital apparatus complies with CanadianICES-003 and RSS210.Operation is subject to the following two conditions:1.2.This device may not cause interference andThis device must accept any interference, includinginterference that may cause undesired operationof the device.To reduce potential radio interference to other users,the antenna type and its gain should be so chosenthat the EIRP is not more than required for successfulcommunication.Industry Canada Radiation Exposure StatementThis equipment complies with IC radiation exposure limitsset forth for an uncontrolled environment. This equipmentshould be installed and operated with minimum distance20 cm between the radiator & your body.This transmitter must not be co-located or operating inconjunction with any other antenna or transmitter.Avis d’Industrie CanadaCet appareil numérique de la classe B est conforme auxnormes NMB-003 et RSS210 du Canada.L’utilisation de ce dispositif est autorisée seulement auxconditions suivantes :1. il ne doit pas produire de brouillage et2. il doit accepter tout brouillage radioélectrique reçu,même si ce brouillage est susceptible de compromettre lefonctionnement du dispositif.Afin de réduire le risque d’interférence aux autresutilisateurs, le type d’antenne et son gain doiventêtre choisis de façon à ce que la puissance isotroperayonnée équivalente (p.i.r.e.) ne soit pas supérieureau niveau requis pour obtenir une communicationsatisfaisante.Avis d’Industrie Canada concernant l’expositionaux radiofréquencesCe matéri<strong>el</strong> est conforme aux limites établies par ICen matière d’exposition aux radiofréquences dans unenvironnement non contrôlé. Ce matéri<strong>el</strong> doit être installéet utilisé à une distance d’au moins 20 cm entre l’antenneet le corps de l’utilisateur.L’émetteur ne doit pas être placé près d’une autre antenneou d’un autre émetteur, ou fonctionner avec une autreantenne ou un autre émetteur.Wir<strong>el</strong>ess-G Broadband Router27
Appendix DRegulatory InformationWir<strong>el</strong>ess DisclaimerThe maximum performance for wir<strong>el</strong>ess is derived fromIEEE Standard 802.11 specifications. Actual performancecan vary, including lower wir<strong>el</strong>ess network capacity,data throughput rate, range and coverage. Performancedepends on many factors, conditions and variables,including distance from the access point, volume ofnetwork traffic, building materials and construction,operating system used, mix of wir<strong>el</strong>ess products used,interference and other adverse conditions.Avis de non-responsabilité concernant lesappareils sans filLes performances maximales pour les réseaux sans filsont tirées des spécifications de la norme IEEE 802.11.Les performances ré<strong>el</strong>les peuvent varier, notammenten fonction de la capacité du réseau sans fil, du débitde la transmission de données, de la portée et de lacouverture. Les performances dépendent de facteurs,conditions et variables multiples, en particulier de ladistance par rapport au point d’accès, du volume du traficréseau, des matériaux utilisés dans le bâtiment et dutype de construction, du système d’exploitation et de lacombinaison de produits sans fil utilisés, des interférenceset de toute autre condition défavorable.Wir<strong>el</strong>ess-G Broadband Router28
Appendix DRegulatory InformationDeclaration of Conformity with Regard toEU Directive 1999/5/EC (R&TTE Directive)Compliance Information for 2,4-GHz and 5-GHz Wir<strong>el</strong>essProducts R<strong>el</strong>evant to the EU and Other Countries Followingthe EU Directive 1999/5/EC (R&TTE Directive)Б ъ л г а р с к и[Bulgarian]Česky[Czech]:Dansk[Danish]:Deutsch[German]:Това оборудване отговаря на същественитеизисквания и приложими клаузи наДиректива 1999/5/ЕС.Toto zařízení je v souladu se základnímipožadavky a ostatními odpovídajícímiustanoveními Směrnice 1999/5/EC.Dette udstyr er i overensstemm<strong>el</strong>se medde væsentlige krav og andre r<strong>el</strong>evantebestemm<strong>el</strong>ser i Direktiv 1999/5/EF.Dieses Gerät entspricht den grundlegendenAnforderungen und den weiterenentsprechenden Vorgaben der Richtlinie1999/5/EU.Nederlands[Dutch]:Malti[Maltese]:Magyar[Hungarian]:Norsk[Norwegian]:Polski[Polish]:Português[Portuguese]:Dit apparaat voldoet aan de essenti<strong>el</strong>e eisenen andere van toepassing zijnde bepalingenvan de Richtlijn 1999/5/EC.Dan l-apparat huwa konformi mal-ħtiġietessenzjali u l-provedimenti l-oħra rilevantitad-Direttiva 1999/5/EC.Ez a készülék t<strong>el</strong>jesíti az alapvetőkövet<strong>el</strong>ményeket és más 1999/5/EKirány<strong>el</strong>vben meghatározott vonatkozórend<strong>el</strong>kezéseket.Dette utstyret er i samsvar med degrunnleggende krav og andre r<strong>el</strong>evantebestemm<strong>el</strong>ser i EU-direktiv 1999/5/EF.Urządzenie jest zgodne z ogólnymiwymaganiami oraz szczególnymi warunkamiokreślonymi Dyrektywą UE: 1999/5/EC.Este equipamento está em conformidade comos requisitos essenciais e outras provisõesr<strong>el</strong>evantes da Directiva 1999/5/EC.Eesti[Estonian]:English:Español[Spanish]:Ελληνική[Greek]:Français[French]:Íslenska[Ic<strong>el</strong>andic]:Italiano[Italian]:Latviski[Latvian]:Lietuvių[Lithuanian]:See seade vastab direktiivi 1999/5/EÜ olulist<strong>el</strong>enõuet<strong>el</strong>e ja teist<strong>el</strong>e asjakohast<strong>el</strong>e sätet<strong>el</strong>e.This equipment is in compliance with theessential requirements and other r<strong>el</strong>evantprovisions of Directive 1999/5/EC.Este equipo cumple con los requisitosesenciales asi como con otras disposicionesde la Directiva 1999/5/CE.Αυτός ο εξοπλισµός είναι σε συµµόρφωση µετις ουσιώδεις απαιτήσεις και άλλες σχετικέςδιατάξεις της Οδηγίας 1999/5/EC.Cet appareil est conforme aux exigencesessenti<strong>el</strong>les et aux autres dispositionspertinentes de la Directive 1999/5/EC.Þetta tæki er samkvæmt grunnkröfum ogöðrum viðeigandi ákvæðum Tilskipunar1999/5/EC.Questo apparato é conforme ai requisitiessenziali ed agli altri principi sanciti dallaDirettiva 1999/5/CE.Šī iekārta atbilst Direktīvas 1999/5/EKbūtiskajām prasībām un citiem ar tosaistītajiem noteikumiem.Šis įrenginys tenkina 1999/5/EB Direktyvosesminius reikalavimus ir kitas šios direktyvosnuostatas.Română[Romanian]Slovensko[Slovenian]:Slovensky[Slovak]:Suomi[Finnish]:Svenska[Swedish]:Acest echipament este in conformitatecu cerint<strong>el</strong>e esentiale si cu alte prevederir<strong>el</strong>evante ale Directivei 1999/5/EC.Ta naprava je skladna z bistvenimi zahtevamiin ostalimi r<strong>el</strong>evantnimi pogoji Direktive1999/5/EC.Toto zariadenie je v zhode so základnýmipožiadavkami a inými príslušnými nariadeniamidirektív: 1999/5/EC.Tämä laite täyttää direktiivin 1999/5/EYolennaiset vaatimukset ja on siinä asetettujenmuiden laitetta koskevien määräystenmukainen.Denna utrustning är i överensstämm<strong>el</strong>se medde väsentliga kraven och andra r<strong>el</strong>evantabestämm<strong>el</strong>ser i Direktiv 1999/5/EC.For all products, the Declaration of Conformity (DofC) isavailable through one or more of these options:• A pdf file is included on the product’s CD.• A print copy is included with the product.• A pdf file is available on the product’s webpage.Visit www.linksys.com/international and s<strong>el</strong>ect yourcountry or region. Then s<strong>el</strong>ect your product.If you need any other technical documentation, see the“Technical Documents on www.linksys.com/international”section, as shown later in this appendix.Wir<strong>el</strong>ess-G Broadband Router29
Appendix DRegulatory InformationThe following standards were applied during theassessment of the product against the requirements ofthe Directive 1999/5/EC:• Radio: EN 300 328 and/or EN 301 893 as applicable• EMC: EN 301 489-1, EN 301 489-17• Safety: EN 60950 and either EN 50385 or EN 50371Dynamic Frequency S<strong>el</strong>ection (DFS) and Transmit PowerControl (TPC) are required for operation in the 5 GHzband.DFS: The equipment meets the DFS requirements asdefined in ETSI EN 301 893. This feature is required bythe regulations to avoid interference with Radio LocationServices (radars).TPC: For operation in the 5 GHz band, the maximum powerlev<strong>el</strong> is 3 dB or more b<strong>el</strong>ow the applicable limit. As such,TPC is not required.CE MarkingFor the Linksys Wir<strong>el</strong>ess-N, -G, -B, and/or -A products,the following CE mark, notified body number (whereapplicable), and class 2 identifier are added to theequipment.orororCheck the CE lab<strong>el</strong> on the product to find out whichnotified body was involved during the assessment.National RestrictionsThis product may be used in all EU countries (and othercountries following the EU directive 1999/5/EC) withoutany limitation except for the countries mentioned b<strong>el</strong>ow:Ce produit peut être utilisé dans tous les pays de l’UE (et danstous les pays ayant transposés la directive 1999/5/CE) sansaucune limitation, excepté pour les pays mentionnés cidessous:Questo prodotto è utilizzabile in tutte i paesi EU (ed in tuttigli altri paesi che seguono le direttive EU 1999/5/EC) senzanessuna limitazione, eccetto per i paesii menzionati diseguito:Das Produkt kann in allen EU Staaten ohne Einschränkungeneingesetzt werden (sowie in anderen Staaten die der EUDirektive 1999/5/CE folgen) mit Außnahme der folgendenaufgeführten Staaten:In the majority of the EU and other European countries,the 2,4- and 5-GHz bands have been made availablefor the use of wir<strong>el</strong>ess local area networks (LANs). Thetable lab<strong>el</strong>ed “Overview of Regulatory Requirements forWir<strong>el</strong>ess LANs” provides an overview of the regulatoryrequirements applicable for the 2,4‐ and 5-GHz bands.Later in this document you will find an overview ofcountries in which additional restrictions or requirementsor both are applicable.The requirements for any country may evolve. Linksysrecommends that you check with the local authorities forthe latest status of their national regulations for both the2,4- and 5-GHz wir<strong>el</strong>ess LANs.Overview of Regulatory Requirements for Wir<strong>el</strong>ess LANsFrequencyBand (MHz)Max Power Lev<strong>el</strong>(EIRP) (mW)IndoorONLYIndoor &Outdoor2400-2483.5 100 X5150-5350 † 200 X5470-5725 † 1000 X† Dynamic Frequency S<strong>el</strong>ection and Transmit Power Control arerequired in the frequency ranges of 5250-5350 MHz and 5470-5725MHz.The following countries have restrictions and/orrequirements in addition to those given in the tabl<strong>el</strong>ab<strong>el</strong>ed “Overview of Regulatory Requirements forWir<strong>el</strong>ess LANs”:DenmarkIn Denmark, the band 5150 - 5350 MHz is also allowed foroutdoor usage.I Danmark må frekvensbåndet 5150 - 5350 også anvendesudendørs.Wir<strong>el</strong>ess-G Broadband Router30
Appendix DRegulatory InformationFranceFor 2,4 GHz, the product should not be used outdoorsin the band 2454 - 2483,5 MHz. There are no restrictionswhen used in other parts of the 2,4 GHz band when usedindoors. Check http://www.arcep.fr/ for more details.Pour la bande 2,4 GHz, l’ équipement ne doit pas être utiliséen extérieur dans la bande 2454 - 2483,5 MHz. Il n’y a pas derestrictions pour des utilisations en intérieur dans d’autresparties de la bande 2,4GHz. Consultez http://www.arcep.fr/pour de plus amples détails.LocationIndoor(No restrictions)ItalyOutdoorApplicable Power Lev<strong>el</strong>s in FranceWir<strong>el</strong>ess-G Broadband RouterFrequencyRange (MHz)Power (EIRP)2400-2483.5 100 mW (20 dBm)2400-24542454-2483.5100 mW (20 dBm)10 mW (10 dBm)This product meets the National Radio Interface andthe requirements specified in the National FrequencyAllocation Table for Italy. Unless this 2,4-GHz wir<strong>el</strong>ess LANproduct is operating within the boundaries of the owner’sproperty, its use requires a “general authorization”. Pleasecheck http://www.comunicazioni.it/it/ for more details.Questo prodotto è conforme alla specifiche di InterfacciaRadio Nazionali e rispetta il Piano Nazionale di ripartizioned<strong>el</strong>le frequenze in Italia. Se non viene installato all’internod<strong>el</strong> proprio fondo, l’utilizzo di prodotti Wir<strong>el</strong>ess LAN a2,4 GHz richiede una “Autorizzazione Generale”. Consultarehttp://www.comunicazioni.it/it/ per maggiori dettagli.LatviaThe outdoor usage of the 2,4 GHz band requires anauthorization from the Electronic Communications Office.Please check http://www.esd.lv for more details.2,4 GHz frekveču joslas izmantošanai ārpus t<strong>el</strong>pāmnepieciešama atļauja no Elektronisko sakaru direkcijas.Vairāk informācijas: http://www.esd.lv.Notes:1.2.Although Norway, Switzerland and Liechtenstein arenot EU member states, the EU Directive 1999/5/EC hasalso been implemented in those countries.The regulatory limits for maximum output power arespecified in EIRP. The EIRP lev<strong>el</strong> of a device can becalculated by adding the gain of the antenna used(specified in dBi) to the output power available at theconnector (specified in dBm).Product Usage RestrictionsThis product is designed for indoor usage only. Outdoorusage is not recommended, unless otherwise noted.2,4 GHz RestrictionsThis product is designed for use with the standard, integralor dedicated (external) antenna(s) that is/are shippedtogether with the equipment. However, some applicationsmay require the antenna(s), if removable, to be separatedfrom the product and installed remot<strong>el</strong>y from the deviceby using extension cables. For these applications, Linksysoffers an R‐SMA extension cable (AC9SMA) and an R-TNCextension cable (AC9TNC). Both of these cables are 9meters long and have a cable loss (attenuation) of 5 dB. Tocompensate for the attenuation, Linksys also offers highergain antennas, the HGA7S (with R-SMA connector) andHGA7T (with R-TNC connector). These antennas have again of 7 dBi and may only be used with either the R-SMAor R-TNC extension cable.Combinations of extension cables and antennas resultingin a radiated power lev<strong>el</strong> exceeding 100 mW EIRP areillegal.Third-Party Software or FirmwareThe use of software or firmware not supported/providedby Linksys may result that the equipment is no longercompliant with the regulatory requirements.Technical Documents onwww.linksys.com/internationalFollow these steps to access technical documents:1.2.3.4.5.6.7.Enter http://www.linksys.com/international in yourweb browser.S<strong>el</strong>ect the country or region in which you live.Click the Products tab.S<strong>el</strong>ect the appropriate product category.S<strong>el</strong>ect the product sub-category, if necessary.S<strong>el</strong>ect the product.S<strong>el</strong>ect the type of documentation you want from theMore Information section. The document will openin PDF format if you have Adobe Acrobat installed onyour computer.NOTE: If you have questions regardingthe compliance of this product or youcannot find the information you need,please contact your local sales office or visitwww.linksys.com/international31
Appendix DRegulatory InformationUser Information for Consumer ProductsCovered by EU Directive 2002/96/EC onWaste Electric and Electronic Equipment(WEEE)This document contains important information for userswith regards to the proper disposal and recycling ofLinksys products. Consumers are required to comply withthis notice for all <strong>el</strong>ectronic products bearing the followingsymbol:Ceština (Czech) - Informace o ochraně životníhoprostředí pro zákazníky v zemích Evropské unieEvropská směrnice 2002/96/ES zakazuje, aby zařízení označenétímto symbolem na produktu anebo na obalu bylo likvidovános netříděným komunálním odpadem. Tento symbol udává,že daný produkt musí být likvidován odděleně od běžnéhokomunálního odpadu. Odpovídáte za likvidaci tohoto produktua dalších <strong>el</strong>ektrických a <strong>el</strong>ektronických zařízení prostřednictvímurčených sběrných míst stanovených vládou nebo místnímiúřady. Správná likvidace a recyklace pomáhá předcházetpotenciálním negativním dopadům na životní prostředí a lidskézdraví. Podrobnější informace o likvidaci starého vybavení silaskavě vyžádejte od místních úřadů, podniku zabývajícího s<strong>el</strong>ikvidací komunálních odpadů nebo obchodu, kde jste produktzakoupili.English - Environmental Information for Customers inthe European UnionEuropean Directive 2002/96/EC requires that the equipmentbearing this symbol on the product and/or its packaging mustnot be disposed of with unsorted municipal waste. The symbolindicates that this product should be disposed of separat<strong>el</strong>yfrom regular household waste streams. It is your responsibility todispose of this and other <strong>el</strong>ectric and <strong>el</strong>ectronic equipment viadesignated collection facilities appointed by the government orlocal authorities. Correct disposal and recycling will h<strong>el</strong>p preventpotential negative consequences to the environment andhuman health. For more detailed information about the disposalof your old equipment, please contact your local authorities,waste disposal service, or the shop where you purchased theproduct.Български (Bulgarian) - Информация относноопазването на околната среда за потребители вЕвропейския съюзЕвропейска директива 2002/96/EC изисква уредите, носещитози символ върху изделието и/или опаковката му, да несе изхвърля т с несортирани битови отпадъци. Символътобозначава, че изделието трябва да се изхвърля отделно отсметосъбирането на обикновените битови отпадъци. Вашае отговорността този и другите електрически и електронниуреди да се изхвърлят в предварително определени отдържавните или общински органи специализирани пунктовеза събиране. Правилното изхвърляне и рециклиранеще спомогнат да се предотвратят евентуални вредни заоколната среда и здравето на населението последствия. Запо-подробна информация относно изхвърлянето на вашитестари уреди се обърнете към местните власти, службите засметосъбиране или магазина, от който сте закупили уреда.Dansk (Danish) - Miljøinformation for kunder i EUEU-direktiv 2002/96/EF kræver, at udstyr der bærer dette symbolpå produktet og/<strong>el</strong>ler emballagen ikke må bortskaffes somusorteret kommunalt affald. Symbolet betyder, at dette produktskal bortskaffes adskilt fra det almind<strong>el</strong>ige husholdningsaffald.Det er dit ansvar at bortskaffe dette og andet <strong>el</strong>ektrisk og<strong>el</strong>ektronisk udstyr via bestemte indsamlingssteder udpegetaf staten <strong>el</strong>ler de lokale myndigheder. Korrekt bortskaff<strong>el</strong>seog genvinding vil hjælpe med til at undgå mulige skader formiljøet og menneskers sundhed. Kontakt venligst de lokalemyndigheder, renovationstjenesten <strong>el</strong>ler den butik, hvor duhar købt produktet, angående mere detaljeret information ombortskaff<strong>el</strong>se af dit gamle udstyr.Deutsch (German) - Umw<strong>el</strong>tinformation für Kundeninnerhalb der Europäischen UnionDie Europäische Richtlinie 2002/96/EC verlangt, dass technischeAusrüstung, die direkt am Gerät und/oder an der Verpackung mitdiesem Symbol versehen ist , nicht zusammen mit unsortiertemGemeindeabfall entsorgt werden darf. Das Symbol weist daraufhin, dass das Produkt von regulärem Haushaltmüll getrenntentsorgt werden sollte. Es liegt in Ihrer Verantwortung, diesesGerät und andere <strong>el</strong>ektrische und <strong>el</strong>ektronische Geräte überdie dafür zuständigen und von der Regierung oder örtlichenBehörden dazu bestimmten Samm<strong>el</strong>st<strong>el</strong>len zu entsorgen.Ordnungsgemäßes Entsorgen und Recyc<strong>el</strong>n trägt dazu bei,potenti<strong>el</strong>le negative Folgen für Umw<strong>el</strong>t und die menschlicheGesundheit zu vermeiden. Wenn Sie weitere Informationen zurEntsorgung Ihrer Altgeräte benötigen, wenden Sie sich bitte andie örtlichen Behörden oder städtischen Entsorgungsdiensteoder an den Händler, bei dem Sie das Produkt erworben haben.Wir<strong>el</strong>ess-G Broadband Router32
Appendix DRegulatory InformationEesti (Estonian) - Keskkonnaalane informatsioonEuroopa Liidus asuvat<strong>el</strong>e klientid<strong>el</strong>eEuroopa Liidu direktiivi 2002/96/EÜ nõuete kohas<strong>el</strong>t onseadmeid, mill<strong>el</strong> on toot<strong>el</strong> või pakendil käesolev sümbol ,ke<strong>el</strong>atud kõrvaldada koos sorteerimata olmejäätmetega. Seesümbol näitab, et toode tuleks kõrvaldada eraldi tavalistestolmejäätmevoogudest. Olete kohustatud kõrvaldama käesolevaja ka muud <strong>el</strong>ektri- ja <strong>el</strong>ektroonikaseadmed riigi või kohalikeametiasutuste poolt ette nähtud kogumispunktide kaudu.Seadmete korrektne kõrvaldamine ja ringlussevõtt aitab vältidavõimalikke negatiivseid tagajärgi keskkonnale ning inimestetervis<strong>el</strong>e. Vanade seadmete kõrvaldamise kohta täpsemainformatsiooni saamiseks võtke palun ühendust kohalikeametiasutustega, jäätmekäitlusfirmaga või kauplusega, kust tetoote ostsite.Español (Spanish) - Información medioambiental paraclientes de la Unión EuropeaLa Directiva 2002/96/CE de la UE exige que los equipos qu<strong>el</strong>leven este símbolo en <strong>el</strong> propio aparato y/o en su embalajeno deben <strong>el</strong>iminarse junto con otros residuos urbanos nos<strong>el</strong>eccionados. El símbolo indica que <strong>el</strong> producto en cuestióndebe separarse de los residuos domésticos convencionales convistas a su <strong>el</strong>iminación. Es responsabilidad suya desechar este ycualesquiera otros aparatos <strong>el</strong>éctricos y <strong>el</strong>ectrónicos a través d<strong>el</strong>os puntos de recogida que ponen a su disposición <strong>el</strong> gobierno ylas autoridades locales. Al desechar y reciclar correctamente estosaparatos estará contribuyendo a evitar posibles consecuenciasnegativas para <strong>el</strong> medio ambiente y la salud de las personas. Sidesea obtener información más detallada sobre la <strong>el</strong>iminaciónsegura de su aparato usado, consulte a las autoridades locales,al servicio de recogida y <strong>el</strong>iminación de residuos de su zona opregunte en la tienda donde adquirió <strong>el</strong> producto.ξλληνικά (Greek) - Στοιχεία περιβαλλοντικήςπροστασίας για πελάτες εντός της ΕυρωπαϊκήςΈνωσηςΗ Κοινοτική Οδηγία 2002/96/EC απαιτεί ότι ο εξοπλισμός ο οποίοςφέρει αυτό το σύμβολο στο προϊόν και/ή στη συσκευασίατου δεν πρέπει να απορρίπτεται μαζί με τα μικτά κοινοτικάαπορρίμματα. Το σύμβολο υποδεικνύει ότι αυτό το προϊόν θαπρέπει να απορρίπτεται ξεχωριστά από τα συνήθη οικιακάαπορρίμματα. Είστε υπεύθυνος για την απόρριψη του παρόντοςκαι άλλου ηλεκτρικού και ηλεκτρονικού εξοπλισμού μέσω τωνκαθορισμένων εγκαταστάσεων συγκέντρωσης απορριμμάτων οιοποίες παρέχονται από το κράτος ή τις αρμόδιες τοπικές αρχές.Η σωστή απόρριψη και ανακύκλωση συμβάλλει στην πρόληψηπιθανών αρνητικών συνεπειών για το περιβάλλον και την υγεία.Για περισσότερες πληροφορίες σχετικά με την απόρριψη τουπαλιού σας εξοπλισμού, παρακαλώ επικοινωνήστε με τις τοπικέςαρχές, τις υπηρεσίες απόρριψης ή το κατάστημα από το οποίοαγοράσατε το προϊόν.Français (French) - Informations environnementalespour les clients de l’Union européenneLa directive européenne 2002/96/CE exige que l’équipementsur lequ<strong>el</strong> est apposé ce symbole sur le produit et/ou sonemballage ne soit pas jeté avec les autres ordures ménagères. Cesymbole indique que le produit doit être éliminé dans un circuitdistinct de c<strong>el</strong>ui pour les déchets des ménages. Il est de votreresponsabilité de jeter ce matéri<strong>el</strong> ainsi que tout autre matéri<strong>el</strong>électrique ou électronique par les moyens de collecte indiquéspar le gouvernement et les pouvoirs publics des collectivitésterritoriales. L’élimination et le recyclage en bonne et due formeont pour but de lutter contre l’impact néfaste potenti<strong>el</strong> de cetype de produits sur l’environnement et la santé publique. Pourplus d’informations sur le mode d’élimination de votre ancienéquipement, veuillez prendre contact avec les pouvoirs publicslocaux, le service de traitement des déchets, ou l’endroit où vousavez acheté le produit.Italiano (Italian) - Informazioni r<strong>el</strong>ative all’ambienteper i clienti residenti n<strong>el</strong>l’Unione EuropeaLa direttiva europea 2002/96/EC richiede che le apparecchiaturecontrassegnate con questo simbolo sul prodotto e/osull’imballaggio non siano smaltite insieme ai rifiuti urbaninon differenziati. Il simbolo indica che questo prodotto nondeve essere smaltito insieme ai normali rifiuti domestici. Èresponsabilità d<strong>el</strong> proprietario smaltire sia questi prodotti siale altre apparecchiature <strong>el</strong>ettriche ed <strong>el</strong>ettroniche mediant<strong>el</strong>e specifiche strutture di raccolta indicate dal governo o daglienti pubblici locali. Il corretto smaltimento ed il riciclaggioaiuteranno a prevenire conseguenze potenzialmente negativeper l’ambiente e per la salute d<strong>el</strong>l’essere umano. Per ricevereinformazioni più dettagliate circa lo smaltimento d<strong>el</strong>le vecchieapparecchiature in Vostro possesso, Vi invitiamo a contattare glienti pubblici di competenza, il servizio di smaltimento rifiuti o ilnegozio n<strong>el</strong> quale avete acquistato il prodotto.Latviešu valoda (Latvian) - Ekoloģiska informācijaklientiem Eiropas Savienības jurisdikcijāDirektīvā 2002/96/EK ir prasība, ka aprīkojumu, kam pievienotazīme uz paša izstrādājuma vai uz tā iesaiņojuma, nedrīkstizmest nešķirotā veidā kopā ar komunālajiem atkritumiem(tiem, ko rada vietēji iedzīvotāji un uzņēmumi). Šī zīme nozīmēto, ka šī ierīce ir jāizmet atkritumos tā, lai tā nenonāktu kopā arparastiem mājsaimniecības atkritumiem. Jūsu pienākums ir šoun citas <strong>el</strong>ektriskas un <strong>el</strong>ektroniskas ierīces izmest atkritumos,izmantojot īpašus atkritumu savākšanas veidus un līdzekļus, konodrošina valsts un pašvaldību iestādes. Ja izmešana atkritumosun pārstrāde tiek veikta pareizi, tad mazinās iespējamaiskaitējums dabai un cilvēku ves<strong>el</strong>ībai. Sīkākas ziņas parnovecojuša aprīkojuma izmešanu atkritumos jūs varat saņemtvietējā pašvaldībā, atkritumu savākšanas dienestā, kā arī veikalā,kur iegādājāties šo izstrādājumu.Wir<strong>el</strong>ess-G Broadband Router33
Appendix DRegulatory InformationLietuvškai (Lithuanian) - Aplinkosaugos informacija,skirta Europos Sąjungos vartotojamsEuropos direktyva 2002/96/EC numato, kad įrangos, kuri irkurios pakuotė yra pažymėta šiuo simboliu (įveskite simbolį),negalima šalinti kartu su nerūšiuotomis komunalinėmisatliekomis. Šis simbolis rodo, kad gaminį reikia šalinti atskirainuo bendro buitinių atliekų srauto. Jūs privalote užtikrinti, kadši ir kita <strong>el</strong>ektros ar <strong>el</strong>ektroninė įranga būtų šalinama per tamtikras nacionalinės ar vietinės valdžios nustatytas atliekų rinkimosistemas. Tinkamai šalinant ir perdirbant atliekas, bus išvengtagalimos žalos aplinkai ir žmonių sveikatai. Daugiau informacijosapie jūsų senos įrangos šalinimą gali pateikti vietinės valdžiosinstitucijos, atliekų šalinimo tarnybos arba parduotuvės, kurioseįsigijote tą gaminį.Malti (Maltese) - Informazzjoni Ambjentali għal Klijentifl-Unjoni EwropeaId-Direttiva Ewropea 2002/96/KE titlob li t-tagħmir li jkun fih issimbolufuq il-prodott u/jew fuq l-ippakkjar ma jistax jintremama’ skart muniċipali li ma ġiex isseparat. Is-simbolu jindikali dan il-prodott għandu jintrema separatament minn ma’ l-iskart domestiku regolari. Hija responsabbiltà tiegħek li tarmidan it-tagħmir u kull tagħmir ieħor ta’ l-<strong>el</strong>ettriku u <strong>el</strong>ettronikupermezz ta’ faċilitajiet ta’ ġbir appuntati apposta mill-gvern jewmill-awtoritajiet lokali. Ir-rimi b’mod korrett u r-riċiklaġġ jgħinjipprevjeni konsegwenzi negattivi potenzjali għall-ambjent ugħas-saħħa tal-bniedem. Għal aktar informazzjoni dettaljatadwar ir-rimi tat-tagħmir antik tiegħek, jekk jogħġbok ikkuntattjalill-awtoritajiet lokali tiegħek, is-servizzi għar-rimi ta’ l-iskart, jewil-ħanut minn fejn xtrajt il-prodott.Magyar (Hungarian) - Környezetvéd<strong>el</strong>mi információ azeurópai uniós vásárlók számáraA 2002/96/EC számú európai uniós irány<strong>el</strong>v megkívánja, hogyazokat a termékeket, am<strong>el</strong>yeken, és/vagy am<strong>el</strong>yek csomagolásánaz alábbi címke megj<strong>el</strong>enik, tilos a többi sz<strong>el</strong>ektálatlan lakosságihulladékkal együtt kidobni. A címke azt j<strong>el</strong>öli, hogy az adotttermék kidobásakor a szokványos háztartási hulladék<strong>el</strong>szállításirendszerektõl <strong>el</strong>különített <strong>el</strong>járást k<strong>el</strong>l alkalmazni. Az Önf<strong>el</strong><strong>el</strong>õssége, hogy ezt, és más <strong>el</strong>ektromos és <strong>el</strong>ektronikusberendezéseit a kormányzati vagy a h<strong>el</strong>yi hatóságok általkij<strong>el</strong>ölt gyűjtõredszereken keresztül számolja f<strong>el</strong>. A megf<strong>el</strong><strong>el</strong>õhulladékf<strong>el</strong>dolgozás segít a környezetre és az emberi egészségrepotenciálisan ártalmas negatív hatások meg<strong>el</strong>õzésében. Ha<strong>el</strong>avult berendezéseinek f<strong>el</strong>számolásához további részletesinformációra van szüksége, kérjük, lépjen kapcsolatba a h<strong>el</strong>yihatóságokkal, a hulladékf<strong>el</strong>dolgozási szolgálattal, vagy azzalüzlett<strong>el</strong>, ahol a terméket vásárolta.Nederlands (Dutch) - Milieu-informatie voor klantenin de Europese UnieDe Europese Richtlijn 2002/96/EC schrijft voor dat apparatuur dieis voorzien van dit symbool op het product of de verpakking,niet mag worden ingezam<strong>el</strong>d met niet-gescheiden huishoud<strong>el</strong>ijkafval. Dit symbool geeft aan dat het product apart moet wordeningezam<strong>el</strong>d. U bent z<strong>el</strong>f verantwoord<strong>el</strong>ijk voor de vernietigingvan deze en andere <strong>el</strong>ektrische en <strong>el</strong>ektronische apparatuur via dedaarvoor door de land<strong>el</strong>ijke of plaats<strong>el</strong>ijke overheid aangewezeninzam<strong>el</strong>ingskanalen. De juiste vernietiging en recycling vandeze apparatuur voorkomt mog<strong>el</strong>ijke negatieve gevolgen voorhet milieu en de gezondheid. Voor meer informatie over hetvernietigen van uw oude apparatuur neemt u contact op metde plaats<strong>el</strong>ijke autoriteiten of afvalverwerkingsdienst, of met dewink<strong>el</strong> waar u het product hebt aangeschaft.Norsk (Norwegian) - Miljøinformasjon for kunder i EUEU-direktiv 2002/96/EF krever at utstyr med følgende symbolavbildet på produktet og/<strong>el</strong>ler pakningen, ikke må kastessammen med usortert avfall. Symbolet indikerer at detteproduktet skal håndteres atskilt fra ordinær avfallsinnsamlingfor husholdningsavfall. Det er ditt ansvar å kvitte deg meddette produktet og annet <strong>el</strong>ektrisk og <strong>el</strong>ektronisk avfall via egneinnsamlingsordninger slik myndighetene <strong>el</strong>ler kommunenebestemmer. Korrekt avfallshåndtering og gjenvinning vilvære med på å forhindre mulige negative konsekvenser formiljø og h<strong>el</strong>se. For nærmere informasjon om håndtering avdet kasserte utstyret ditt, kan du ta kontakt med kommunen,en innsamlingsstasjon for avfall <strong>el</strong>ler butikken der du kjøpteproduktet.Polski (Polish) - Informacja dla klientów w UniiEuropejskiej o przepisach dotyczących ochronyśrodowiskaDyrektywa Europejska 2002/96/EC wymaga, aby sprzętoznaczony symbolem znajdującym się na produkcie i/lub jegoopakowaniu nie był wyrzucany razem z innymi niesortowanymiodpadami komunalnymi. Symbol ten wskazuje, że produktnie powinien być usuwany razem ze zwykłymi odpadami zgospodarstw domowych. Na Państwu spoczywa obowiązekwyrzucania tego i innych urządzeń <strong>el</strong>ektrycznych oraz<strong>el</strong>ektronicznych w punktach odbioru wyznaczonych przez władzekrajowe lub lokalne. Pozbywanie się sprzętu we właściwy sposóbi jego recykling pomogą zapobiec potencjalnie negatywnymkonsekwencjom dla środowiska i zdrowia ludzkiego. W c<strong>el</strong>uuzyskania szczegółowych informacji o usuwaniu starego sprzętu,prosimy zwrócić się do lokalnych władz, służb oczyszczaniamiasta lub sklepu, w którym produkt został nabyty.Wir<strong>el</strong>ess-G Broadband Router34
Appendix DRegulatory InformationPortuguês (Portuguese) - Informação ambiental paraclientes da União EuropeiaA Directiva Europeia 2002/96/CE exige que o equipamentoque exibe este símbolo no produto e/ou na sua embalagemnão seja <strong>el</strong>iminado junto com os resíduos municipais nãoseparados. O símbolo indica que este produto deve ser<strong>el</strong>iminado separadamente dos resíduos domésticos regulares.É da sua responsabilidade <strong>el</strong>iminar este e qualquer outroequipamento <strong>el</strong>éctrico e <strong>el</strong>ectrónico através das instalaçõesde recolha designadas p<strong>el</strong>as autoridades governamentais oulocais. A <strong>el</strong>iminação e reciclagem correctas ajudarão a preveniras consequências negativas para o ambiente e para a saúdehumana. Para obter informações mais detalhadas sobre aforma de <strong>el</strong>iminar o seu equipamento antigo, contacte asautoridades locais, os serviços de <strong>el</strong>iminação de resíduos ou oestab<strong>el</strong>ecimento comercial onde adquiriu o produto.Română (Romanian) - Informaţii de mediu pentruclienţii din Uniunea EuropeanăDirectiva europeană 2002/96/CE impune ca echipament<strong>el</strong>e careprezintă acest simbol pe produs şi/sau pe ambalajul acestuia sănu fie casate împreună cu gunoiul menajer municipal. Simbolulindică faptul că acest produs trebuie să fie casat separat degunoiul menajer obişnuit. Este responsabilitatea dvs. să casaţiacest produs şi alte echipamente <strong>el</strong>ectrice şi <strong>el</strong>ectronice prinintermediul unităţilor de colectare special desemnate de guvernsau de autorităţile locale. Casarea şi reciclarea corecte vor ajutala prevenirea potenţial<strong>el</strong>or consecinţe negative asupra sănătăţiimediului şi a oamenilor. Pentru mai multe informaţii detaliatecu privire la casarea acestui echipament vechi, contactaţiautorităţile locale, serviciul de salubrizare sau magazinul de lacare aţi achiziţionat produsul.Slovenčina (Slovak) - Informácie o ochrane životnéhoprostredia pre zákazníkov v Európskej úniiPodľa európskej smernice 2002/96/ES zariadenie s týmtosymbolom na produkte a/alebo jeho balení nesmie byťlikvidované spolu s netriedeným komunálnym odpadom.Symbol znamená, že produkt by sa mal likvidovať odd<strong>el</strong>eneod bežného odpadu z domácností. Je vašou povinnosťoulikvidovať toto i ostatné <strong>el</strong>ektrické a <strong>el</strong>ektronické zariadeniaprostredníctvom špecializovaných zberných zariadení určenýchvládou alebo miestnymi orgánmi. Správna likvidácia a recykláciapomôže zabrániť prípadným negatívnym dopadom na životnéprostredie a zdravie ľudí. Ak máte záujem o podrobnejšieinformácie o likvidácii starého zariadenia, obráťte sa, prosím, namiestne orgány, organizácie zaoberajúce sa likvidáciou odpadovalebo obchod, v ktorom ste si produkt zakúpili.Slovenčina (Slovene) - Okoljske informacije za strankev Evropski unijiEvropska direktiva 2002/96/EC prepoveduje odlaganje opreme,označene s tem simbolom – na izd<strong>el</strong>ku in/ali na embalaži – medobičajne, nerazvrščene odpadke. Ta simbol opozarja, da je trebaizd<strong>el</strong>ek odvreči ločeno od preostalih gospodinjskih odpadkov.Vaša odgovornost je, da to in preostalo <strong>el</strong>ektrično in <strong>el</strong>ektronskoopremo odnesete na posebna zbirališča, ki jih določijodržavne ustanove ali lokalna uprava. S pravilnim odlaganjemin recikliranjem boste preprečili morebitne škodljive vplive naokolje in zdravje ljudi. Če ž<strong>el</strong>ite izvedeti več o odlaganju stareopreme, se obrnite na lokalno upravo, odpad ali trgovino, kjerste izd<strong>el</strong>ek kupili.Suomi (Finnish) - Ympäristöä koskevia tietoja EUalueenasiakkailleEU-direktiivi 2002/96/EY ed<strong>el</strong>lyttää, että jos laitteistossa on tämäsymboli itse tuotteessa ja/tai sen pakkauksessa, laitteistoaei saa hävittää lajitt<strong>el</strong>emattoman yhdyskuntajätteen mukana.Symboli merkitsee sitä, että tämä tuote on hävitettävä erillääntavallisesta kotitalousjätteestä. Sinun vastuullasi on hävittäätämä <strong>el</strong>ektroniikkatuote ja muut vastaavat <strong>el</strong>ektroniikkatuotteetviemällä tuote tai tuotteet viranomaisten määräämäänkeräyspisteeseen. Laitteiston oikea hävittäminen estäämahdolliset ki<strong>el</strong>teiset vaikutukset ympäristöön ja ihmistenterveyteen. Lisätietoja vanhan laitteiston oikeasta hävitystavastasaa paikallisilta viranomaisilta, jätteenhävityspalv<strong>el</strong>usta tai siitämyymälästä, josta ostit tuotteen.Svenska (Swedish) - Miljöinformation för kunder iEuropeiska unionenDet europeiska direktivet 2002/96/EC kräver att utrustning meddenna symbol på produkten och/<strong>el</strong>ler förpackningen inte fårkastas med osorterat kommunalt avfall. Symbolen visar att dennaprodukt bör kastas efter att den avskiljts från vanligt hushållsavfall.Det faller på ditt ansvar att kasta denna och annan <strong>el</strong>ektrisk och<strong>el</strong>ektronisk utrustning på fastställda insamlingsplatser utseddaav regeringen <strong>el</strong>ler lokala myndigheter. Korrekt kassering ochåtervinning skyddar mot eventu<strong>el</strong>la negativa konsekvenserför miljön och personhälsa. För mer detaljerad information omkassering av din gamla utrustning kontaktar du dina lokalamyndigheter, avfallshanteringen <strong>el</strong>ler butiken där du köpteprodukten.WEB: For additional information, please visitwww.linksys.com/internationalWir<strong>el</strong>ess-G Broadband Router8020710NC-JL35
BENUTZERHANDBUCHWir<strong>el</strong>ess-GBroadband-RouterMod<strong>el</strong>l-Nr.: WRT54G2 (DE)
Info zu diesem HandbuchInfo zu diesem HandbuchBeschreibung der SymboleIm.Benutzerhandbuch.finden.Sie.verschiedene.Symbole,.die. auf. bestimmte. Elemente. hinweisen . Nachfolgend.finden.Sie.eine.Beschreibung.dieser.Symbole:HINWEIS:.Dieses.Häkchen.kennzeichnet.einen.Hinweis,.den.Sie.bei.Verwendung.des.Produkts.besonders.beachten.sollten.WARNUNG:. Dieses. Ausrufezeichen.kennzeichnet. eine. Warnung. und. weist. darauf.hin,. dass. unter. bestimmten. Umständen.Schäden. an. Ihrem. Eigentum. oder. am. Produkt.verursacht.werden.könnenINTERNET:.Dieses.Globussymbol.kennzeichnet.eine.interessante.Website-.oder.E-Mail-AdresseOnline-RessourcenIn.den.meisten.Web-Browsern.können.Sie.die.Webadresse.eingeben,. ohne. http://. voranzust<strong>el</strong>len . In. diesem.Benutzerhandbuch. werden. Website-Adressen. ohne.http://. angegeben . In. einigen. älteren. Web-Browsern.müssen.Sie.http://.möglicherweise.hinzufügenRessourceLinksysLinksys.International.GlossarNetzwerksicherheitWebsitewww linksys comwww linksys com/internationalwww linksys com/glossarywww linksys com/securityCopyright und MarkenLinksys. ist. eine. eingetragene.Marke. bzw . eine. Marke. von. Cisco.Systems,. Inc . und/oder. deren.Zweigunternehmen.in.den.USA.und.anderen. Ländern . Copyright. ©.2008.Cisco. Systems,. Inc . Alle. Rechte.vorbehalten .Andere.Hand<strong>el</strong>smarken.und.Produktnamen.sind.Marken.bzw .eingetragene.Marken.der.jeweiligen.InhaberWir<strong>el</strong>ess-G Broadband-Routeri
InhaltKapit<strong>el</strong> 1: Produktüberblick 1Vorderseite . . . . . . . . . . . . . . . . . . . . . . . . . . . . . . . . . . . . . . . . . . . . . . . . . . 1Rückseite . . . . . . . . . . . . . . . . . . . . . . . . . . . . . . . . . . . . . . . . . . . . . . . . . . . 1Aufbaumöglichkeiten . . . . . . . . . . . . . . . . . . . . . . . . . . . . . . . . . . . . . . . . . . . 2Kapit<strong>el</strong> 2: Checkliste für die Wir<strong>el</strong>ess-Sicherheit 3Allgemeine Richtlinien für die Netzwerksicherheit . . . . . . . . . . . . . . . . . . . . . . . . . 3Weitere Sicherheitstipps. . . . . . . . . . . . . . . . . . . . . . . . . . . . . . . . . . . . . . . . . . 3Kapit<strong>el</strong> 3: Erweiterte Konfiguration 4Einrichtung > Grundlegende Einrichtung. . . . . . . . . . . . . . . . . . . . . . . . . . . . . . . 4Einrichtung > DDNS . . . . . . . . . . . . . . . . . . . . . . . . . . . . . . . . . . . . . . . . . . . . 7Einrichtung > MAC-Adresse kopieren . . . . . . . . . . . . . . . . . . . . . . . . . . . . . . . . . 8Einrichtung > Erweitertes Routing . . . . . . . . . . . . . . . . . . . . . . . . . . . . . . . . . . . 8Wir<strong>el</strong>ess > Grundlegende Wir<strong>el</strong>ess-Einst<strong>el</strong>lungen . . . . . . . . . . . . . . . . . . . . . . . . . 9Wir<strong>el</strong>ess > Wir<strong>el</strong>ess-Sicherheit. . . . . . . . . . . . . . . . . . . . . . . . . . . . . . . . . . . . . 11Wir<strong>el</strong>ess > Wir<strong>el</strong>ess-MAC-Filter. . . . . . . . . . . . . . . . . . . . . . . . . . . . . . . . . . . . . 13Wir<strong>el</strong>ess > Erweiterte Wir<strong>el</strong>ess-Einst<strong>el</strong>lungen. . . . . . . . . . . . . . . . . . . . . . . . . . . . 13Sicherheit > Firewall . . . . . . . . . . . . . . . . . . . . . . . . . . . . . . . . . . . . . . . . . . . 15Firewall. . . . . . . . . . . . . . . . . . . . . . . . . . . . . . . . . . . . . . . . . . . . . . . . . . . . 15Sicherheit > VPN-Passthrough. . . . . . . . . . . . . . . . . . . . . . . . . . . . . . . . . . . . . 15Zugriffsbeschränkungen > Internetzugriff . . . . . . . . . . . . . . . . . . . . . . . . . . . . . 15Anwendungen und Spi<strong>el</strong>e > Port-Bereich-Weiterleitung . . . . . . . . . . . . . . . . . . . . 17Anwendungen und Spi<strong>el</strong>e > Port-Triggering. . . . . . . . . . . . . . . . . . . . . . . . . . . . 17Anwendungen und Spi<strong>el</strong>e > DMZ. . . . . . . . . . . . . . . . . . . . . . . . . . . . . . . . . . . 18Anwendungen und Spi<strong>el</strong>e > Quality of Service (QoS) . . . . . . . . . . . . . . . . . . . . . . 18Verwaltung > Verwaltungsfunktionen. . . . . . . . . . . . . . . . . . . . . . . . . . . . . . . . 19Verwaltung > Protokoll . . . . . . . . . . . . . . . . . . . . . . . . . . . . . . . . . . . . . . . . . 20Verwaltung > Diagnose . . . . . . . . . . . . . . . . . . . . . . . . . . . . . . . . . . . . . . . . . 20Verwaltung > Werkseinst<strong>el</strong>lungen . . . . . . . . . . . . . . . . . . . . . . . . . . . . . . . . . . 20Verwaltung > Aktualisieren der Firmware. . . . . . . . . . . . . . . . . . . . . . . . . . . . . . 21Verwaltung > Konfigurationsverwaltung . . . . . . . . . . . . . . . . . . . . . . . . . . . . . . 21Status > Router. . . . . . . . . . . . . . . . . . . . . . . . . . . . . . . . . . . . . . . . . . . . . . . 21Status > Lokales Netzwerk . . . . . . . . . . . . . . . . . . . . . . . . . . . . . . . . . . . . . . . 22Status > Wir<strong>el</strong>ess. . . . . . . . . . . . . . . . . . . . . . . . . . . . . . . . . . . . . . . . . . . . . . 22Anhang A: Fehlerbehebung 23Anhang B: Spezifikationen 24Wir<strong>el</strong>ess-G Broadband-Routerii
InhaltAnhang C: Garantieinformationen 25EINGESCHRÄNKTE GEWÄHRLEISTUNG. . . . . . . . . . . . . . . . . . . . . . . . . . . . . . . . 25AUSSCHLÜSSE UND EINSCHRÄNKUNGEN. . . . . . . . . . . . . . . . . . . . . . . . . . . . . . 25KUNDENDIENST IM RAHMEN DER GEWÄHRLEISTUNG. . . . . . . . . . . . . . . . . . . . . . 26TECHNISCHER SUPPORT. . . . . . . . . . . . . . . . . . . . . . . . . . . . . . . . . . . . . . . . . 26ALLGEMEINE INFORMATIONEN . . . . . . . . . . . . . . . . . . . . . . . . . . . . . . . . . . . . 26Anhang D: Zulassungsinformationen 27FCC Statement. . . . . . . . . . . . . . . . . . . . . . . . . . . . . . . . . . . . . . . . . . . . . . . 27Safety Notices . . . . . . . . . . . . . . . . . . . . . . . . . . . . . . . . . . . . . . . . . . . . . . . 27Industry Canada Statement. . . . . . . . . . . . . . . . . . . . . . . . . . . . . . . . . . . . . . . 27Avis d’Industrie Canada . . . . . . . . . . . . . . . . . . . . . . . . . . . . . . . . . . . . . . . . . 27Wir<strong>el</strong>ess Disclaimer. . . . . . . . . . . . . . . . . . . . . . . . . . . . . . . . . . . . . . . . . . . . 28Avis de non-responsabilité concernant les appareils sans fil . . . . . . . . . . . . . . . . . . 28Konformitätserklärung zur EU-Richtlinie 1999/5/EG (R&TTE-Richtlinie) . . . . . . . . . . . 29CE-Kennzeichnung . . . . . . . . . . . . . . . . . . . . . . . . . . . . . . . . . . . . . . . . . . . . 30Nationale Beschränkungen. . . . . . . . . . . . . . . . . . . . . . . . . . . . . . . . . . . . . . . 30Beschränkungen hinsichtlich der Verwendung des Produkts . . . . . . . . . . . . . . . . . 31Technische Dokumente unter www.linksys.com/international . . . . . . . . . . . . . . . . 31Benutzerinformationen für Konsumgüter, die der EU-Richtlinie 2002/96/EG .über Elektro- und Elektronik-Altgeräte (WEEE, Waste Electric and Electronic Equipment)unterliegen. . . . . . . . . . . . . . . . . . . . . . . . . . . . . . . . . . . . . . . . . . . . . . . . . 32Wir<strong>el</strong>ess-G Broadband-Routeriii
Kapit<strong>el</strong>1ProduktüberblickKapit<strong>el</strong> 1:ProduktüberblickVi<strong>el</strong>en. Dank,. dass. Sie. sich. für. einen. Wir<strong>el</strong>ess-G. Broadband-Router. von. Linksys. entschieden. haben . Der. Router.ermöglicht. Ihnen. den. Zugriff. auf. das. Internet,. entweder. über.eine. Wir<strong>el</strong>ess-Verbindung. mit. einer. Übertragung. von. bis. zu.54.Mbit/s,. oder. über. einen. der. vier. Switched. Ports . Weiterhin.können. Sie. mithilfe. des. Routers. Ressourcen. wie. Computer,.Drucker. und. Dateien. gemeinsam. nutzen . Während. Sie.online. sind,. tragen. eine. Reihe. von. Sicherheitsmerkmalen.zur. Sicherheit. Ihrer. Daten. sowie. zu. Ihrem. Datenschutz. bei .Die. Sicherheitsmerkmale. umfassen. WPA2-Sicherheit,. eine.SPI-Firewall. (Stateful Packet Inspection). sowie. NAT-Technologie .Über. das. bereitgest<strong>el</strong>lte. browserbasierte. Dienstprogramm.lässt.sich.der.Router.problemlos.konfigurierenVorderseite1, 2, 3, 4 (Grün):. Diese. nummerierten. LEDs.entsprechen. den. nummerierten. Ports. auf. der.Rückseite. des. Routers. und. dienen. den. beiden.folgenden. Zwecken:. Wenn. die. betreffende. LED.konstant. leuchtet,. ist. der. Router. über. diesen. Port.erfolgreich. mit. einem. Gerät. verbunden . Wenn.die. betreffende. LED. blinkt,. findet. an. diesem. Port.Netzwerkaktivität.stattWi-Fi Protected Setup Button (Wi-Fi.Protected. Setup-Taste):. Wenn. Sie. Clientgeräte.haben,. beispi<strong>el</strong>sweise. Wir<strong>el</strong>ess-Adapter,. die.Wi-Fi. Protected. Setup. unterstützen,. können.Sie. Wi-Fi. Protected. Setup. verwenden,. um. die.Wir<strong>el</strong>ess-Sicherheit. für. Ihr(e). Wir<strong>el</strong>ess-Netzwerk(e).automatisch. zu. konfigurierenWeitere. Informationen. zur. Verwendung. von. Wi-Fi.Protected. Setup. finden. Sie. in.„Kapit<strong>el</strong>.3:. Erweiterte.Konfiguration“. unter. „Wir<strong>el</strong>ess. >. Grundlegende.Wir<strong>el</strong>ess-Einst<strong>el</strong>lungen“.oder.starten Sie den.Setup-AssistentenRückseiteWi-Fi Protected Setup LED (Grün/G<strong>el</strong>b):.Leuchtet,. wenn. die. Wir<strong>el</strong>ess-Sicherheitsfunktion.aktiviert. ist . Die. LED. blinkt. während. des.Wi-Fi. Protected. Setups. zwei. Minuten. lang. grün .Die. LED. leuchtet. g<strong>el</strong>b,. wenn. während. des. WPS-Prozesses. ein. Fehler. auftritt . Vergewissern.Sie. sich,. dass. das. Clientgerät. Wi-Fi. Protected.Setup. unterstützt . Bitte. warten. Sie,. bis. die. LED.erlischt,. und. versuchen. Sie. es. dann. erneut .Die. LED. blinkt. orange,. wenn. eine. Wi-Fi. Protected.Setup-Session. aktiv. ist. und. eine. zweitebeginnt . Der. Router. unterstützt. jeweilsnur. eine. Session . Bitte. warten. Sie,. bis. die.LED. erlischt,. bevor. Sie. eine. neue. Wi-Fi. Protected.Setup-Session.beginnenWir<strong>el</strong>ess (Grün):. Die. Wir<strong>el</strong>ess-LED. leuchtet,.wenn. die. Wir<strong>el</strong>ess-Funktion. aktiviert. ist .Wenn. die. LED. blinkt,. sendet. oder. empfängt.der. Router. aktiv.Daten.über. das.Wir<strong>el</strong>ess-NetzwerkInternet (Grün):. Die. Internet-LED. leuchtet. auf,.wenn. eine. Verbindung. über. den. Internet-Port.hergest<strong>el</strong>lt. wird . Wenn. die. betreffende. LED. blinkt,.findet. an. diesem.Port. Netzwerkaktivität. stattPower (Grün):. Die. POWER-LED. leuchtet.so. lange,. wie. der. Router. eingeschaltet. ist . Wenn.der. Router. beim. Hochfahren. eine. S<strong>el</strong>bstdiagnose.durchführt,. blinkt. die. LED . Nach. Abschluss. der.Diagnose. leuchtet. die. LED. konstantInternet: Der. Internet-Port. dient. zum. Anschließen.Ihrer.Kab<strong>el</strong>-.oder.DSL-Internetverbindung .1, 2, 3, 4: Diese.Ethernet-Ports.(1,.2,.3,.4).verbinden.den. Router. mit. PCs. in. Wired-Netzwerken. und.anderen.Ethernet-Netzwerkgeräten .Reset: Es. gibt. zwei. Möglichkeiten,. den. Router.auf. die. Werkseinst<strong>el</strong>lungen. zurückzusetzenHalten. Sie. entweder. die. Reset-Taste. ungefähr.fünf. Sekunden. lang. gedrückt,. oder. st<strong>el</strong>len. Sie.die. Standardeinst<strong>el</strong>lungen. im. webbasierten.Dienstprogramm. des. Routers. unter.„Administration“. (Verwaltung).>.„Factory. Defaults“.(Werkseinst<strong>el</strong>lungen). wieder. her .Power: Der.Power-Port.dient.zum.Anschließen.des.NetzteilsWir<strong>el</strong>ess-G Broadband-Router1
Kapit<strong>el</strong>1ProduktüberblickAufbaumöglichkeitenDer. Router. kann. auf. zwei. verschiedene. Arten. installiert.werden . Die. erste. Möglichkeit. besteht. darin,. den. Router.horizontal. auf. einer. Fläche. aufzust<strong>el</strong>len . Die. zweite.Möglichkeit. besteht. darin,. den. Router. an. einer. Wand. zu.befestigenHorizontale InstallationAn. der. Unterseite. des. Routers. befinden. sich. vier. Gummifüße .Positionieren. Sie. den. Router. auf. einer. ebenen. Fläche. in.Nähe.einer. SteckdoseWandmontageAn.der.Unterseite.des.Routers.befinden.sich.zwei.Aussparungen.für. die. Wandmontage . Der. Abstand. zwischen. den. Löchern.beträgt.152.mmHINWEIS:.Linksys. übernimmt. keine.Verantwortung.für. Schäden,. die. auf. für. die. Wandmontage.ungeeignetes. Zubehör. zurückzuführen. sind .Befolgen.Sie.diese.Anweisungen:12345Legen. Sie. eine. St<strong>el</strong>le. fest,. an. der. Sie. den. Router.anbringen. möchten . Die. Wand,. an. der. Sie. den. Router.befestigen,. muss. glatt,. flach,. trocken. und. fest. sein .Außerdem. muss. die. Montageposition. so. gewählt.werden,. dass. sie. sich. in. der. Nähe. einer. Steckdose.befindetBohren. Sie. zwei. Löcher. in. die. Wand . Die. Löcher. müssen.einen.Abstand.von.152.mm.aufweisenDrehen.Sie.in.jedes.Loch.eine.Schraube,.wobei.die.Köpfe.der.Schrauben.jeweils.3.mm.herausstehen.solltenHalten. Sie. den. Router. so,. dass. sich. die. beiden.Aussparungen. für. die. Wandmontage. über. den. zwei.Schrauben.befindenPlatzieren. Sie. die. Aussparungen. für. die. Wandmontage.auf. den. Schrauben,. und. schieben. Sie. den. Router. nach.unten,.bis.die.Schrauben.fest.in.den.Aussparungen.für.die.Wandmontage.sitzenZur. Befestigung. des. Routers. sind. zwei. Schrauben.erforderlichEmpfohlenes Montagezubehör4.-.5.mm1.-.1,5.mm2,5.-.3,0.mm† Hinweis:.Die.Darst<strong>el</strong>lung.des.Montagezubehörs.ist.nicht.maßstabsgerecht152.mmDrucken.Sie.diese.Seite.in.Originalgröße.(100.%).aus .Schneiden. Sie. die. Schablone. entlang. der. gestrich<strong>el</strong>ten. Linie. aus,. und. positionieren. Sie. sie. auf.der. Wand,. damit. Sie. die. Bohrlöcher. im. richtigen. Abstand. voneinander. setzen. könnenSchablone. für.WandmontageWir<strong>el</strong>ess-G Broadband-Router2
Kapit<strong>el</strong>2Checkliste für die Wir<strong>el</strong>ess-SicherheitKapit<strong>el</strong> 2:Checkliste für dieWir<strong>el</strong>ess-SicherheitWir<strong>el</strong>ess-Netzwerke. sind. praktisch. und. einfach. zu. installieren,.folglich. greifen. immer. mehr. Privatanwender. mit. Highspeed-Internetzugriff. darauf. zurück . Da. die. Daten. bei. Wir<strong>el</strong>ess-Netzwerken. per. Funk. übertragen. werden,. ist. diese. Art. von.Netzwerk. anfälliger. für. unberechtigte. Zugriffe. als. ein.herkömmliches. Kab<strong>el</strong>-Netzwerk . Wie. Signale. von. mobilen.oder. kab<strong>el</strong>losen. T<strong>el</strong>efonen. können. auch. Signale. aus.Wir<strong>el</strong>ess-Netzwerken. abgefangen. werden . Da. Sie.unberechtigte. Personen. nicht. physisch. daran. hindern.können,. eine. Verbindung. mit. Ihrem. Wir<strong>el</strong>ess-Netzwerk.herzust<strong>el</strong>len,. müssen. Sie. einige. zusätzliche. Maßnahmen. zu.seinem.Schutz.ergreifen .1. Ändern des Standardnamensfür das Wir<strong>el</strong>ess-Netzwerkbzw. die SSIDWir<strong>el</strong>ess-Geräten. wird. werkseitig. ein. Standard-Wir<strong>el</strong>ess-Netzwerkname. bzw . eine. SSID. (Service Set Identifier).zugewiesen . Dies. ist. der. Name. Ihres. Wir<strong>el</strong>ess-Netzwerks,.der. bis. zu. 32.Zeichen. umfassen. darf . Wir<strong>el</strong>ess-Produkte.von. Linksys. verwenden. linksys. als. Standardnamen. für. das.Wir<strong>el</strong>ess-Netzwerk . Sie. sollten. den. Wir<strong>el</strong>ess-Netzwerknamen.in. einen. eindeutigen. Namen. ändern,. um. ihn. von. anderen.Netzwerken. zu. unterscheiden,. die. möglicherweise. in.Ihrer. Umgebung. vorhanden. sind . Verwenden. Sie. jedoch.keine. personenbezogenen. Informationen. (wie. etwa. Ihre.Kontonummer),. da. diese. Informationen. bei. der. Suche. nach.Wir<strong>el</strong>ess-Netzwerken.für.jeden.sichtbar.sind .2. Ändern des StandardpasswortsWenn. Sie. die. Einst<strong>el</strong>lungen. von. Wir<strong>el</strong>ess-Geräten. wie. Access.Points.und.Routern.ändern.möchten,.werden.Sie.zur.Eingabe.des.Passworts.aufgefordert .Für.diese.Geräte.wurde.werkseitig.ein. Standardpasswort. festg<strong>el</strong>egt . Das. Standardpasswort. von.Linksys. lautet. admin . Hacker. kennen. diese. Passwörter. und.könnten. versuchen,. damit. auf. Ihr. Wir<strong>el</strong>ess-Gerät. zuzugreifen.und. Ihre. Netzwerkeinst<strong>el</strong>lungen. zu. ändern . Um. jegliche.unberechtigten. Änderungen. zu. verhindern,. sollten. Sie. das.Gerätepasswort.so.anpassen,.dass.es.schwer.zu.erraten.ist3. Aktivieren der MAC-AdressfilterungRouter. von. Linksys. bieten. Ihnen. die. Möglichkeit,. die.MAC-Adressfilterung. (Media Access Control). zu. aktivieren . Eine.MAC-Adresse. ist. eine. eindeutige. Reihe. von. Nummern. und.Buchstaben,. die. dem. jeweiligen. Netzwerkgerät. zugewiesen.wird . Wenn. die. MAC-Adressfilterung. aktiviert. ist,. können.nur. Wir<strong>el</strong>ess-Geräte. mit. bestimmten. MAC-Adressen. auf.das. Wir<strong>el</strong>ess-Netzwerk. zugreifen . Beispi<strong>el</strong>sweise. können. Sie.die. MAC-Adressen. der. verschiedenen. Computer. bei. sich. zu.Wir<strong>el</strong>ess-G Broadband-RouterHause.angeben,.so.dass.nur.diese.Computer.Zugang.zu.Ihrem.Wir<strong>el</strong>ess-Netzwerk.haben .4. Aktivieren der Verschlüss<strong>el</strong>ungMit. der. Verschlüss<strong>el</strong>ung. werden. die. über. ein. Wir<strong>el</strong>ess-Netzwerk. gesendeten. Daten. geschützt . WPA/WPA2.(Wi-Fi Protected Access). und. WEP. (Wired Equivalency Privacy).bieten. verschiedene. Sicherheitsstufen. für. die. Wir<strong>el</strong>ess-Kommunikation . Derzeit. sind. Wi-Fi-zertifizierte. Geräte. zur.Unterstützung. von. WPA2,. jedoch. nicht. zur. Unterstützung.von.WEP,.erforderlichEin. mit. WPA/WPA2. verschlüss<strong>el</strong>tes. Netzwerk. ist. sicherer. als.ein. Netzwerk,. das. mit. WEP. verschlüss<strong>el</strong>t. ist,. da. bei.WPA/WPA2. eine. Verschlüss<strong>el</strong>ung. mit. dynamischen.Schlüss<strong>el</strong>n. verwendet. wird . Um. Daten. zu. schützen,.während. diese. per. Funk. übertragen. werden,. sollten. Sie.die. höchste. Verschlüss<strong>el</strong>ungsstufe. einsetzen,. die. von. Ihren.Netzwerkgeräten. unterstützt. wird .WEP. ist. ein. älterer. Verschlüss<strong>el</strong>ungsstandard,. der. eventu<strong>el</strong>l.auf. bestimmten. älteren. Geräten,. die. WPA. nicht. unterstützen,.die. einzig. verfügbare. Möglichkeit.istAllgemeine Richtlinien für dieNetzwerksicherheitSämtliche. Sicherheitsmaßnahmen. für. Ihr. Wir<strong>el</strong>ess-Netzwerk.sind. jedoch. zwecklos,. wenn. das. zugrunde. liegende. Netzwerk.nicht.sicher.ist .• Schützen.Sie.alle.Computer.im.Netzwerk.sowie.vertrauliche.Dateien.durch.Passwörter• Ändern.Sie.die.Passwörter.reg<strong>el</strong>mäßig• Installieren. Sie. Software. für. den. Virenschutz. und. eine.persönliche.Firewall• Deaktivieren. Sie. die. Dateifreigabe. für. Peer-to-Peer-Netzwerke,. die. gemeinsam. auf. Dateien. zugreifen .Manche. Anwendungen. aktivieren. die. Dateifreigabe.möglicherweise. ohne. Ihr.Wissen. bzw . Ihre. ZustimmungWeitere Sicherheitstipps• Halten. Sie. Wir<strong>el</strong>ess-Geräte. wie. Router,. Access. Points.oder.Gateways.von.Außenwänden.und.Fenstern.fern• Schalten. Sie. Wir<strong>el</strong>ess-Router,. Access. Points. oder.Gateways. aus,. wenn. sie. nicht. genutzt. werden.(nachts,.im.Urlaub)• Verwenden. Sie. sichere. Passwörter,. die. mindestens.acht. Zeichen. lang. sind . Kombinieren. Sie. Zahlen. und.Buchstaben,. um. keine. Standardwörter. zu. verwenden,.die. in.Wörterbüchern. zu. finden. sind .WEB:.Weitere.Informationen.zur.Wir<strong>el</strong>ess-Sicherheit.finden.Sie.unter.www.linksys.com/security3
Kapit<strong>el</strong>3Erweiterte KonfigurationKapit<strong>el</strong> 3:Erweiterte KonfigurationDer. Router. steht. direkt. nach. der. Installation. mit. dem.Setup-Assistenten. (auf. der. CD-ROM). zur. Verfügung .Sie. können. jedoch. die. erweiterten. Einst<strong>el</strong>lungen. mithilfe.des. webbasierten. Dienstprogramms. ändern . In. diesem.Kapit<strong>el</strong>. werden. alle. Webseiten. des. Dienstprogramms. und.deren. Hauptfunktionen. beschrieben . Sie. können. das.Dienstprogramm. über. einen. Webbrowser. auf. einem.Computer. aufrufen,. der. an. den. Router. angeschlossenen. istDas. webbasierte. Dienstprogramm. verfügt. über. sieben.Hauptregisterkarten:. Das. webbasierte. Dienstprogramm.verfügt. über. sieben. Hauptregisterkarten:. Setup. (Einrichtung),.Wir<strong>el</strong>ess,. Security,. (Sicherheit),. Access Restrictions,.(Zugriffsbeschränkungen),. Applications & Gaming.(Anwendungen€und. Spi<strong>el</strong>e),. Administration. (Verwaltung).und. Status . Durch. Anklicken. der. Hauptregisterkarten. werden.zusätzliche.Registerkarten.verfügbarHINWEIS:. Wenn. Sie. den. Router. erstmals.installieren,. sollten. Sie. unbedingt. den.Setup-Assistenten. auf. der. Installations-CD-ROM. verwenden . Wenn. Sie. die. erweiterten.Einst<strong>el</strong>lungen. konfigurieren. möchten,. erhalten.Sie. in. diesem. Kapit<strong>el</strong>. Informationen. über. das.webbasierte DienstprogrammHinweis zum Zugriff auf das webbasierteDienstprogrammUm. das. webbasierte. Dienstprogramm. aufzurufen,. starten.Sie. Ihren. Webbrowser. und. geben. die. standardmäßige.IP-Adresse. des. Routers,. 192.168.1.1,. in. das. F<strong>el</strong>dAddress. (Adresse). ein . Drücken. Sie. anschließend. die.EingabetasteDas. Fenster. zur. Eingabe. des. Kennworts. wird. angezeigt .(Unter. anderen. Betriebssystemen. als. Windows.XP. wird.ein. ähnliches. Fenster. angezeigt ). Lassen. Sie. das. F<strong>el</strong>d Username. (Benutzername). leer . Wenn. Sie. das. webbasierte.Dienstprogramm. zum. ersten. Mal. öffnen,. verwenden. Sie.das. Standardpasswort. admin . (Über. die. Registerkarte.Administration. (Verwaltung). können. Sie. im. FensterManagement. (Verwaltungsfunktionen). ein. neues. Passwort.festlegen . Klicken. Sie. auf. OK,. um. fortzufahrenEinrichtung > Grundlegende EinrichtungIm.ersten.geöffneten.Fenster.wird.die.Registerkarte.Basic Setup(Grundlegende. Einrichtung). angezeigt . Hier. können. Sie. die.allgemeinen. Einst<strong>el</strong>lungen. des. Routers.ändern .„ Setup“.(Einrichtung).>.„Basic.Setup“.(Grundlegende.Einrichtung)Internet-EinrichtungIm. Bereich. Internet Setup. (Internet-Einrichtung). wird. der.Router. für. Ihre. Internetverbindung. konfiguriert . Die. meisten.Informationen. hierzu. erhalten. Sie.von.Ihrem.ISPInternet-VerbindungstypWählen. Sie. aus. dem. Dropdown-Menü. den. von. Ihrem. ISP.bereitgest<strong>el</strong>lten. Internetverbindungstyp. aus . Folgende. Typen.sind.verfügbar:••••••Automatic Configuration – DHCP. (Automatische.Konfiguration.–.DHCP)Static IP Adress.(Statische.IP-Adresse)PPPoEPPTPL2TPT<strong>el</strong>stra Cable.(T<strong>el</strong>stra-Kab<strong>el</strong>)Automatische Konfiguration – DHCPStandardmäßig. ist. für. den. Router. der. Internetverbindungstyp.Automatic Configuration - DHCP. (Automatische.Konfiguration.–. DHCP). ausgewählt . Behalten. Sie. diese.Einst<strong>el</strong>lung. nur. bei,. wenn. DHCP. von. Ihrem. ISP. unterstützt.wird,. oder. wenn. Sie. über. eine. dynamische. IP-Adressemit. dem. Internet. verbunden. sind . (Diese. Option. gilt. meist. nur. für. Kab<strong>el</strong>verbindungen )„Internet.Connection.Type“.(Internetverbindungstyp).>.„Automatic.Configuration.-.DHCP“.(Automatische.Konfiguration.-.DHCP)Wir<strong>el</strong>ess-G Broadband-RouterFenster zur.Kennworteingabe4
Kapit<strong>el</strong>3Erweiterte KonfigurationStatische IP-AdresseWenn. Sie. für. die. Internetverbindung. eine. permanente.IP-Adresse.verwenden.müssen,.wählen.Sie.die.Option.Static IP.(Statische.IP-Adresse).ausRouter. die. Internetverbindung. in. reg<strong>el</strong>mäßigen. Abständen .Wenn. die. Verbindung. getrennt. wird,. st<strong>el</strong>lt. der. Router. Ihre.Verbindung. automatisch. wieder. her . Aktivieren. Sie. zur.Verwendung. dieser. Option. Keep Alive. (Verbindung. aufrecht.halten) . Im. F<strong>el</strong>d Redial Period. (Wahlwiederholung). legen. Sie.fest,. wie. oft. der. Router. Ihre. Internetverbindung. überprüfen.soll . Der. Standardwert. für. die. Wahlwiederholung. beträgt.30.SekundenPPTPPPTP. (Point-to-Point Tunn<strong>el</strong>ing Protocol). ist. ein. Dienst,.der.nur.für.Verbindungen.in.Europa.gültig.ist„Internet.Connection.Type“.(Internet-Verbindungstyp).>.„Static.IP“.Wir<strong>el</strong>ess-G Broadband-Router(Statische.IP-Adresse)Internet IP Address (Internet-IP-Adresse):. Hierbei.hand<strong>el</strong>t. es. sich. um. die. IP-Adresse. des. Routers,.vom. Standpunkt. der. Internetbenutzer. aus. gesehen.Sie.erhalten. die. hier. anzugebende. IP-Adresse. von. Ihrem.ISPSubnet Mask (Subnetzmaske):. Hierbei. hand<strong>el</strong>t. es. sich. um.die. vom. Standpunkt. der. Internetbenutzer. (einschließlich. Ihres.ISPs). aus. gesehene. Subnetzmaske. des. Routers . Sie. erhalten.die. Subnetzmaske. von. Ihrem. ISPGateway: Sie. erhalten. die. Gateway-Adresse. von. Ihrem. ISP . Bei.dieser.Adresse.hand<strong>el</strong>t.es.sich.um.die.IP-Adresse.des.ISP-ServersDNS: Sie. erhalten. von. Ihrem. ISP. mindestens. eine.Server-IP-Adresse.für.das.DNS.(Domain.Name System)PPPoEEinige. ISPs. mit. DSL-Option. verwenden. PPPoE. (Point-to-Point Protocol over Ethernet). zur. Herst<strong>el</strong>lung. von.Internetverbindungen .Wenn.die.Verbindung.mit.dem.Internet.über. eine. DSL-Leitung. hergest<strong>el</strong>lt. wird,. klären. Sie. mit. dem.ISP,. ob. PPPoE. verwendet. wird . Falls. ja,. aktivieren. Sie. die.Option.PPPoE„Internet.Connection.Type“.(Internet-Verbindungstyp).>.„PPPoE“User Name and Password (Benutzername.und.Passwort): Geben.Sie.den.Benutzernamen.und.das.Passwort.ein,.die.Sie.von.Ihrem.ISP.erhalten.haben .Connect on Demand: Max Idle Time (Bei. Bedarf. verbinden:.Max .Leerlaufzeit):.Sie.können.den.Router.so.konfigurieren,.dass.er. die. Internetverbindung. nach. einer. bestimmten. Leerlaufzeit.(Max Idle Time;. Max . Leerlaufzeit). trennt . Wenn. Ihre.Internetverbindung.wegen.Leerlaufs.getrennt.wurde,.kann.der.Router. mit. Hilfe. der. Option. Connect on Demand. (Bei. Bedarf.verbinden). Ihre. Verbindung. automatisch. wiederherst<strong>el</strong>len,.sobald. Sie. erneut. auf. das. Internet. zugreifen . Aktivieren. Sie.zur. Verwendung. dieser. Option. Connect on Demand (Bei.Bedarf. verbinden) . Geben. Sie. im. F<strong>el</strong>d. Max Idle Time (Max .Leerlaufzeit).die.Anzahl.der.Minuten.ein,.nach.deren.Ablauf.die.Internetverbindung.getrennt.werden.soll .Der.Standardwert.für.die.maximale.Leerlaufzeit.beträgt.5.MinutenKeep Alive: Redial Period . (Verbindung. aufrecht. halten:.Wahlwiederholung):. Bei. Auswahl. dieser. Option. überprüft. der.„Internet.Connection.Type“.(Internet-Verbindungstyp).>.„PPTP“Internet IP Address (Internet-IP-Adresse):. Hierbei. hand<strong>el</strong>t.es. sich. um. die. IP-Adresse. des. Routers,. vom. Standpunkt.der. Internetbenutzer. aus. gesehen. Sie. erhalten. die. hier.anzugebende.IP-Adresse.von.Ihrem.ISPSubnet Mask (Subnetzmaske):. Hierbei. hand<strong>el</strong>t. es. sich.um. die. vom. Standpunkt. der. Internetbenutzer. (einschließlich.Ihres. ISPs). aus. gesehene. Subnetzmaske. des. Routers .Sie.erhalten.die.Subnetzmaske.von.Ihrem.ISPGateway: Sie.erhalten.die.Gateway-Adresse.von.Ihrem.ISPUser Name and Password (Benutzername. und. Passwort)Geben. Sie. den. Benutzernamen. und. das. Passwort. ein,die. Sie. von. Ihrem. ISP. erhalten. habenConnect on Demand: Max Idle Time (Bei. Bedarf. verbinden:.Max . Leerlaufzeit):. Sie. können. den. Router. so. konfigurieren,.dass. er. die. Internetverbindung. nach. einer. bestimmten.Leerlaufzeit.(Max Idle Time;.Max .Leerlaufzeit).trennt .Wenn.Ihre.Internetverbindung. wegen. Leerlaufs. getrennt. wurde,. kann.der.Router.mit.Hilfe.der.Option.Connect on Demand (Bei.Bedarf.verbinden). Ihre. Verbindung. automatisch. wiederherst<strong>el</strong>len,.sobald.Sie.erneut.auf.das.Internet.zugreifen .Aktivieren.Sie.zur.Verwendung. dieser. Option. Connect on Demand. (Bei. Bedarf.verbinden) .Geben.Sie.im.F<strong>el</strong>d. Max. Leerlaufzeit.die.Anzahl.der.Minuten.ein,.nach.deren.Ablauf.die.Internetverbindung.getrennt.werden. soll . Der. Standardwert. für. die. maximale. Leerlaufzeit.beträgt.5.MinutenKeep Alive: Redial Period . (Verbindung. aufrecht. halten:.Wahlwiederholung):. Bei. Auswahl. dieser. Option. überprüft. der.Router.die.Internetverbindung.in.reg<strong>el</strong>mäßigen.Abständen .Wenn.die.Verbindung. getrennt. wird,. st<strong>el</strong>lt. der. Router. Ihre.Verbindung.automatisch. wieder. her . Aktivieren. Sie. zur. Verwendung.dieser. Option. Keep Alive. (Verbindung. aufrecht. halten) .Im. F<strong>el</strong>d Redial Period. (Wahlwiederholung). legen. Sie. fest,.wie. oft. der. Router. Ihre. Internetverbindung. überprüfen. soll .Der.Standardwert.lautet.30.SekundenL2TPL2TP.ist.ein.Dienst,.der.nur.für.Verbindungen.in.Isra<strong>el</strong>.gültig.ist5
Kapit<strong>el</strong>3Erweiterte Konfiguration„Internet.Connection.Type“.(Internet-Verbindungstyp).>.„L2TP“User Name and Password (Benutzername. und. Passwort):.Geben. Sie. den. Benutzernamen. und. das. Passwort. ein,. die.Sie.von.Ihrem.ISP.erhalten.habenL2TP-Server: Dies. ist. die. IP-Adresse. des. L2TP-Servers .Sie.erhalten.die.hier.anzugebende.IP-Adresse.von.Ihrem.ISPConnect on Demand: Max Idle Time (Bei. Bedarf. verbinden:.Max . Leerlaufzeit):. Sie. können. den. Router. so. konfigurieren,.dass. er. die. Internetverbindung. nach. einer. bestimmten.Leerlaufzeit. (Max Idle Time;. Max . Leerlaufzeit). trennt . Wenn.Ihre. Internetverbindung. wegen. Leerlaufs. getrennt. wurde,.kann. der. Router. mit. Hilfe. der. Option. Connect. on. Demand.(Bei. Bedarf. verbinden). Ihre. Verbindung. automatisch.wiederherst<strong>el</strong>len,. sobald. Sie. erneut. auf. das. Internet.zugreifen . Aktivieren. Sie. zur. Verwendung. dieser. Option.Connect on Demand. (Bei. Bedarf. verbinden) . Geben. Sie.im. F<strong>el</strong>d. Max. Idle Time. (Max . Leerlaufzeit). die. Anzahl.der. Minuten. ein,. nach. deren. Ablauf. die. Internetverbindung.getrennt. werden. soll . Der. Standardwert. für. die. maximale.Leerlaufzeit.beträgt.5.MinutenKeep Alive: Redial Period (Verbindung. aufrecht. halten:.Wahlwiederholung):. Bei. Auswahl. dieser. Option. überprüft. der.Router. die. Internetverbindung. in. reg<strong>el</strong>mäßigen. Abständen .Wenn. die. Verbindung. getrennt. wird,. st<strong>el</strong>lt. der. Router. Ihre.Verbindung. automatisch. wieder. her . Aktivieren. Sie. zur.Verwendung. dieser. Option. Keep Alive. (Verbindung. aufrecht.halten) . Im. F<strong>el</strong>d Redial Period. (Wahlwiederholung). legen. Sie.fest,. wie. oft. der. Router. Ihre. Internetverbindung. überprüfen.soll . Der. Standardwert. für. die. Wahlwiederholung. beträgt.30.SekundenT<strong>el</strong>stra-Kab<strong>el</strong>T<strong>el</strong>stra-Kab<strong>el</strong>. ist. ein. Dienst,. der. nur. für. Verbindungen. in.Australien. gültig. ist . Wählen. Sie. T<strong>el</strong>stra. aus,. wenn. Ihr. ISP.HeartBeat.Signal.(HBS).verwendet„Internet.Connection.Type“.(Internet-Verbindungstyp).>.„T<strong>el</strong>stra.Cable“.(T<strong>el</strong>stra-Kab<strong>el</strong>)User Name and Password (Benutzername. und. Passwort):.Geben. Sie. den. Benutzernamen. und. das. Passwort. ein,. die.Sie.von.Ihrem.ISP.erhalten.habenHeart Beat Server (Heart. Beat-Server):. Dies. ist. die. IP-Adresse.des. Heart. Beat-Servers . Sie. erhalten. die. hier. anzugebende.IP-Adresse.von.Ihrem.ISPConnect on Demand: Max Idle Time (Bei. Bedarf. verbinden:.Max . Leerlaufzeit):. Sie. können. den. Router. so. konfigurieren,.dass. er. die. Internetverbindung. nach. einer. bestimmten.Wir<strong>el</strong>ess-G Broadband-Router.Leerlaufzeit.(Max Idle Time;.Max .Leerlaufzeit).trennt .Wenn.Ihre.Internetverbindung.wegen.Leerlaufs.getrennt.wurde,.kann.der.Router. mit. Hilfe. der. Option. Connect on Demand. (Bei. Bedarf.verbinden). Ihre. Verbindung. automatisch. wiederherst<strong>el</strong>len,.sobald. Sie. erneut. auf. das. Internet. zugreifen . Aktivieren. Sie.zur. Verwendung. dieser. Option. Connect on Demand (Bei.Bedarf. verbinden) . Geben. Sie. im. F<strong>el</strong>d. Max. Idle Time (Max .Leerlaufzeit).die.Anzahl.der.Minuten.ein,.nach.deren.Ablauf.die.Internetverbindung.getrennt.werden.soll .Der.Standardwert.für.die.maximale.Leerlaufzeit.beträgt.5.MinutenKeep Alive: Redial Period (Verbindung. aufrecht. halten:.Wahlwiederholung):. Bei. Auswahl. dieser. Option. überprüft. der.Router. die. Internetverbindung. in. reg<strong>el</strong>mäßigen. Abständen .Wenn. die. Verbindung. getrennt. wird,. st<strong>el</strong>lt. der. Router. Ihre.Verbindung. automatisch. wieder. her . Aktivieren. Sie. zur.Verwendung. dieser. Option. Keep Alive. (Verbindung. aufrecht.halten) . Im. F<strong>el</strong>d Redial Period. (Wahlwiederholung). legen. Sie.fest,. wie. oft. der. Router. Ihre. Internetverbindung. überprüfen.soll . Der. Standardwert. für. die. Wahlwiederholung. beträgt.30.Sekunden„Optional Settings“ (Optionale Einst<strong>el</strong>lungen)Einige.dieser.Einst<strong>el</strong>lungen.sind.unter.Umständen.für.Ihren.ISP.erforderlich .Klären.Sie.jegliche.Änderungen.mit.Ihrem.ISP.ab„Optional.Settings“.(Optionale.Einst<strong>el</strong>lungen)Router Name (Routername):. In. dieses. F<strong>el</strong>d. können. Sie. einen.Namen.mit.bis.zu.39.Zeichen.für.den.Router.eingeben .Host Name/Domain Name (Hostname/Domänenname):.In. diese. F<strong>el</strong>der. können. Sie. einen. Hostnamen. und. einen.Domänennamen.für.den.Router.eingeben .Für.einige.ISPs,.in.der.Reg<strong>el</strong>. Kab<strong>el</strong>-ISPs,. sind. diese. Namen. zu. Identifikationszwecken.erforderlich . Erfragen. Sie. bei. Ihrem. ISP,. ob. Ihr. Breitband-Internetdienst. mit. einem. Host-. und. Domänennamen.konfiguriert.wurde .In.den.meisten.Fällen.können.diese.F<strong>el</strong>der.leer.g<strong>el</strong>assen.werden .MTU: MTU. steht. für. Maximum Transmission Unit. (maximale.Übertragungseinheit) . Hiermit. wird. die. größte. zulässige.Paketgröße.für.Internetübertragungen.angegeben .Wählen.Sie.Manu<strong>el</strong>l,.wenn.Sie.die.größte.zu.übertragende.Paketgröße.von.Hand. eingeben. möchten . Um. den. Router. die. beste. MTU. für.Ihre.Internetverbindung.auswählen.zu.lassen,.behalten.Sie.die.Standardauswahl.Auto.(Automatisch).beiSize (Größe):.Diese.Option.ist.aktiviert,.wenn.im F<strong>el</strong>d. MTU.die.Option. Manual (Manu<strong>el</strong>l). aktiviert. wurde . B<strong>el</strong>assen. Sie. diesen.Wert. im. Bereich. 1200. bis.1500 . Die. Standardgröße. hängt. vom.Internet-Verbindungstyp.ab:•••DHCP,.Static.IP.(Statische.IP-Adresse).oder.T<strong>el</strong>stra:.1500PPPoE:.1492PPTP.oder.L2TP:.1460NetzwerkeinrichtungIm. Bereich. Network Setup. (Netzwerkeinrichtung). werden.die. Einst<strong>el</strong>lungen. des. Netzwerks. geändert,. das. an. die.Ethernet-Ports. des. Routers. angeschlossen. ist . Die. Wir<strong>el</strong>ess-Einrichtung. erfolgt. über. die. Registerkarte. Wir<strong>el</strong>ess6
Kapit<strong>el</strong>3Erweiterte KonfigurationIP-Adresse des RoutersHierbei. hand<strong>el</strong>t. es. sich. sowohl. um. die. IP-Adresse. als. auch. die.Subnetzmaske.des.Routers,.vom.Standpunkt.des.Netzwerks.aus.gesehenWir<strong>el</strong>ess-G Broadband-Router„Router.IP.Address“.(Router-IP-Adresse)Einst<strong>el</strong>lungen des Netzwerkadressenservers (DHCP)Mit. diesen. Einst<strong>el</strong>lungen. können. Sie. die. DHCP-Serverfunktion. (Dynamic Host Configuration Protocol). des.Routers. konfigurieren . Der. Router. kann. als. DHCP-Server. für.Ihr. Netzwerk. verwendet. werden . Ein. DHCP-Server. weist.jedem. Computer. im. Netzwerk. automatisch. eine. IP-Adresse. zu . Wenn. Sie. die. DHCP-Serverfunktion. des. Routers.aktivieren,. müssen. Sie. dafür. sorgen,. dass. kein. anderer.DHCP-Server. in. Ihrem. Netzwerk. vorhanden. ist .„Network.Address.Server.Settings.(DHCP)“.(Einst<strong>el</strong>lungen.des.Netzwerkadressenservers.(DHCP))DHCP Server . (DHCP-Server):. Die. DHCP-Option. ist.standardmäßig. aktiviert . Wenn. in. Ihrem. Netzwerk. bereits.ein. DHCP-Server. vorhanden. ist. oder. kein. DHCP-Server.eingerichtet.werden.soll,.wählen.Sie.Disable.(Deaktivieren).aus.(daraufhin.sind.keine.weiteren.DHCP-Funktionen.verfügbar)Starting IP Address (Start-IP-Adresse):. Geben. Sie. einen.Wert. ein,. mit. dem. der. DHCP-Server. beim. Zuweisen. von. IP-Adressen.beginnen.soll .Da.die.Standard-IP-Adresse.des.Routers.192 168 1 1. ist,. muss. die. Start-IP-Adresse. 192 168 1 2. oder.höher.lauten;.sie.darf.192 168 1 253.jedoch.nicht.überschreiten .Die.standardmäßige.Start-IP-Adresse.lautet.192.168.1.100Maximum Number of DHCP Users (Maximale. Anzahl. der.DHCP-Benutzer):. Geben. Sie. die. maximale. Anzahl. der. PCs.ein,. denen. der. DHCP-Server. IP-Adressen. zuweisen. soll . Diese.Zahl. darf. nicht. größer. als. 253. sein . Die. Standardeinst<strong>el</strong>lung.lautet.50Client Lease Time (Client-Leasedauer):. Bei. der. Client-Leasedauer. hand<strong>el</strong>t. es. sich. um. den. Zeitraum,. über. den.ein. Netzwerkgerät. mithilfe. seiner. aktu<strong>el</strong>len. dynamischen.IP-Adresse. eine. Verbindung. mit. dem. Router. herst<strong>el</strong>len. darf .Geben. Sie. den. Zeitraum. in. Minuten. ein,. über. den. dem.Benutzer. diese. dynamische. IP-Adresse. gewährt. wird . Nach.Ablauf. dieses. Zeitraums. wird. dem. Benutzer. automatisch. eine.neue. dynamische. IP-Adresse. zugewiesen . Der. Standardwert.beträgt.0.Minuten,.was.einen.Tag.bedeutetStatic DNS (1-3) (Statisches. DNS. 1-3):. Mit. dem. DNS. (Domain.Name. System). übersetzt. das. Internet. Domänen-. oder. Website-Namen. in. Internetadressen. oder. URLs . Sie. erhalten. von. Ihrem.ISP. mindestens. eine. IP-Adresse. für. den. DNS-Server . Wenn.Sie.eine.andere.IP-Adresse.verwenden.möchten,.geben.Sie.diese.in. eines. der. F<strong>el</strong>der. ein . Hier. können. Sie. bis. zu. drei. IP-Adressen.für. den. DNS-Server. eingeben . Der. Router. verwendet. diese.für. einen. schn<strong>el</strong>leren. Zugriff. auf. laufende. DNS-ServerWINS: Mit. dem. WINS. (Windows. Internet. Naming. Service).wird.der.Datenaustausch.jedes.PCs.mit.dem.Internet.verwaltet .Wenn. Sie. einen. WINS-Server. verwenden,. geben. Sie. hier. die.IP-Adresse. dieses. Servers. ein . Andernfalls. lassen. Sie. dieses.F<strong>el</strong>d.leerZeiteinst<strong>el</strong>lungWählen. Sie. die. Zeitzone,. in. der. sich. Ihr. Netzwerk. befindet,.aus. diesem. Dropdown-Menü. aus . (Sie. können. die. Zeitzone.sogar. automatisch. an. die. Sommerzeit. anpassen )„Time.Setting“.(Zeiteinst<strong>el</strong>lung)Klicken. Sie. auf. Save. Settings. (Einst<strong>el</strong>lungen. speichern),. um.die. Änderungen. zu. speichern,. bzw . auf Canc<strong>el</strong> Changes(Änderungen.verwerfen),.um.Ihre.Änderungen.zu.verwerfenEinrichtung > DDNSDer.Router.verfügt.über.die.Funktion.DDNS.(Dynamic DomainName System) . Mit. DDNS. können. Sie. einer. dynamischen.Internet-IP-Adresse. einen. festen. Host-. und. Domänennamen.zuweisen .DDNS.kann.sich.für.das.Hosting.Ihrer.eigenen.Website,.Ihres. FTP-Servers. oder. anderer. Server. hinter. dem. Router. als.nützlich.erweisen .Bevor. Sie. diese. Funktion. verwenden. können,. müssen. Sie.sich. auf. einer. der. beiden. folgenden. Websites. bei. einem.DDNS-Dienstanbieter. für. den. DDNS-Dienst. anm<strong>el</strong>den:.www dyndns org. oder. www TZO com . Wenn. Sie. diese.Funktion. nicht. verwenden. möchten,. behalten. Sie. die.Standardeinst<strong>el</strong>lung.Disable. (Deaktivieren). beiDDNSDer.Router.verfügt.über.die.Funktion.DDNS.(Dynamic DomainName System) . Mit. DDNS. können. Sie. einer. dynamischen.Internet-IP-Adresse. einen. festen. Host-. und. Domänennamen.zuweisen .DDNS.kann.sich.für.das.Hosting.Ihrer.eigenen.Website,.Ihres. FTP-Servers. oder. anderer. Server. hinter. dem. Router. als.nützlich.erweisenBevor. Sie. diese. Funktion. verwenden. können,. müssen. Sie. sich.bei. einem. der. beiden. DDNS-Dienstanbieter. DynDNSorg. oder. TZO com. für. den. DDNS-Dienst. anm<strong>el</strong>den . Wenn.Sie.diese.Funktion.nicht.verwenden.möchten,.behalten.Sie.die.Standardeinst<strong>el</strong>lung,. Disable. (Deaktivieren),. beiDDNS-DienstWenn. der. verwendete. DDNS-Dienst. von. DynDNS org. zur.Verfügung. gest<strong>el</strong>lt. wird,. wählen. Sie. im. Dropdown-Menü.die. Option. DynDNS.org. aus . Wenn. der. verwendete.DDNS-Dienst. von. TZO com. zur. Verfügung. gest<strong>el</strong>lt. wird,.wählen. Sie. TZO.com. aus . Die. im Fenster. DDNS. verfügbaren.Funktionen. hängen. davon. ab,. w<strong>el</strong>chen. DDNS-Dienstanbieter.Sie.verwenden .7
Kapit<strong>el</strong>3Erweiterte KonfigurationDynDNS.orgEinrichtung > MAC-Adresse kopierenEine.MAC-Adresse.ist.ein.12-st<strong>el</strong>liger.Code,.der.einem.einzigen.Hardwareobjekt. zu. Identifikationszwecken. zugewiesen. wird .Bei. einigen. ISPs. (Internet Service Provider). ist. für. den.Internetzugang. die. Registrierung. einer. MAC-Adresse.erforderlich . Wenn. Sie. die. MAC-Adresse. nicht. erneut. bei.Ihrem. ISP. registrieren. möchten,. können. Sie. dem. Router.die. aktu<strong>el</strong>l. bei. Ihrem. ISP. registrierte. MAC-Adresse. mit. der.Funktion zum.Kopieren.von.MAC-Adressen.zuweisen„Setup“.(Einrichtung).>.„DDNS“.>.„DynDNS“User Name (Benutzername):. Geben. Sie. den. Benutzernamen.für.Ihr.DDNS-Konto.einPassword (Passwort):. Geben. Sie. das. Passwort. für. Ihr.DDNS-Konto.einHost Name . (Hostname):. Hierbei. hand<strong>el</strong>t. es. sich. um. die. vom.DDNS-Dienst.zugewiesene.DDNS-URLInternet IP Address . (Internet-IP-Adresse):. Die. Internet-IP-Adresse. des. Routers. wird. hier. angezeigt . Da. es. sich. hierbei.um.eine.dynamische.Adresse.hand<strong>el</strong>t,.kann.sie.sich.ändernStatus: Hier.wird.der.Status.der.Verbindung.zum.DDNS-Dienst.angezeigtKlicken. Sie. auf. Save Settings. (Einst<strong>el</strong>lungen. speichern),. um.die. Änderungen. zu. speichern,. bzw . auf. Canc<strong>el</strong> Changes.(Änderungen.verwerfen),.um.Ihre.Änderungen.zu.verwerfenTZO.com.„Setup“.(Einrichtung).>.„MAC.Address.Clone“.(MAC-Adresse.kopieren)MAC-Adresse kopierenEnable/Disable (Aktivieren/Deaktivieren):. Um.die.MAC-Adresse.zu. kopieren,. wählen. Sie. die. Option. Enable. (Aktivieren). ausUser Defined Entry (Benutzerdefinierter. Eintrag):. Geben. Sie.hier.die.bei.Ihrem.ISP.registrierte.MAC-Adresse.einClone Your PC’s MAC (MAC-Adresse. des. PCs. kopieren):.Klicken. Sie. auf. diese. Schaltfläche,. um. die. MAC-Adresse. des.von.Ihnen.verwendeten.Computers.zu.kopierenKlicken. Sie. auf. Save Settings. (Einst<strong>el</strong>lungen. speichern),. um.die. Änderungen. zu. speichern,. bzw . auf. Canc<strong>el</strong> Changes(Änderungen.verwerfen),.um.Ihre.Änderungen.zu.verwerfenEinrichtung > Erweitertes RoutingIn. diesem. Fenster. werden. die. erweiterten. Routing-Funktionen. des. Routers. eingerichtet . Mit. NAT. wird. die.Internetverbindung. des. Host-Routers. geroutet . Mit DynamicRouting. (Dynamisches. Routing). wird. die. Paketübertragung.in. Ihrem. Netzwerk. automatisch. angepasst . Mit StaticRouting. (Statisches. Routing). wird. eine. feste. Route. zu. einem.anderen.Netzwerkzi<strong>el</strong>.festg<strong>el</strong>egtWir<strong>el</strong>ess-G Broadband-Router„Setup“.(Einrichtung).>.„DDNS“.>.„TZO“E-Mail Address, TZO Key, Domain Name (E-Mail-Adresse,.TZO-Schlüss<strong>el</strong>,. Domänenname):. Geben. Sie. die. Einst<strong>el</strong>lungen.des.bei.TZO.eingerichteten.Kontos.einInternet IP Address . (Internet-IP-Adresse):. Die. Internet-IP-Adresse.des.Routers.wird.hier.angezeigt .Da.es.sich.hierbei.um.eine.dynamische.Adresse.hand<strong>el</strong>t,.kann.sie.sich.ändernStatus: Hier.wird.der.Status.der.Verbindung.zum.DDNS-Dienst.angezeigtKlicken. Sie. auf. Save Settings. (Einst<strong>el</strong>lungen. speichern),. um.die. Änderungen. zu. speichern,. bzw . auf. Canc<strong>el</strong> Changes.(Änderungen.verwerfen),.um.Ihre.Änderungen.zu.verwerfen„Setup“.(Einrichtung).>.„Advanced.Routing“.(Erweitertes.Routing).(Gateway)8
Kapit<strong>el</strong>3Erweiterte Konfiguration„Setup“.(Einrichtung).>.„Advanced.Routing“.(Erweitertes.Routing).(Router)Erweitertes RoutingOperating Mode (Betriebsmodus):. Wählen. Sie. den.Betriebsmodus. des. Routers. aus . Wenn. der. Router. Host. der.Internetverbindung. Ihres. Netzwerks. ist,. wählen. Sie. Gateway.aus .Wenn.sich.ein.weiterer.Router.in.Ihrem.Netzwerk.befindet,.wählen.Sie.Router.aus .Wenn.Sie.den.Router.auswählen,.ist.die.Option.Dynamic Routing.(Dynamisches.Routing).verfügbarDynamisches RoutingRIP: Mit. dieser. Funktion. kann. sich. der. Router. automatisch.an. Änderungen. in. der. physischen. Anordnung. des. Netzwerks.anpassen. und. Routing-Tab<strong>el</strong>len. mit. weiteren. Routern.austauschen .Der.Router.legt.die.Route.der.Netzwerkpakete.auf.der. Grundlage. der. geringsten. Anzahl. an. so. genannten. Hops.(Sprüngen). zwischen. Qu<strong>el</strong>le. und. Zi<strong>el</strong>. fest . Diese. Funktion. ist.standardmäßig. deaktiviert . Sie. können. aus. dem. Dropdown-Menü. auch. die. Option. LAN & Wir<strong>el</strong>ess auswählen,. mit.der. dynamisches. Routing. in. Ihrem. Ethernet-. und. Wir<strong>el</strong>ess-Netzwerk. ausgeführt. wird . Außerdem. können. Sie. die. Option.WAN (Internet). auswählen,. mit. der. dynamisches. Routing. bei.aus. dem. Internet. eingehenden. Daten. ausgeführt. wird .Bei. Auswahl. der. Option. Both. (Beide). wird. dynamisches.Routing. für. beide. Netzwerktypen. sowie. für. aus. dem. Internet.eingehende.Daten.aktiviertS<strong>el</strong>ect set number (Set-Nummer. auswählen):. Um. eine.statische. Route. zwischen. dem. Router. und. einem. anderen.Netzwerk. einzurichten,. wählen. Sie. aus. der. Dropdown-Liste. Static Routing (Statisches. Routing).. eine. Zahl. aus .(Eine. statische. Route. ist. ein. vordefinierter. Pfad,. über.den. Netzwerkinformationen. an. einen. bestimmten. Host.oder. ein. bestimmtes. Netzwerk. übertragen. werden) .Geben. Sie. die. unten. beschriebenen. Informationen. ein,. um.eine. neue. statische. Route. einzurichten . (Klicken. Sie. auf. die.Schaltfläche. D<strong>el</strong>ete This Entry. (Diesen. Eintrag. löschen),. um.eine.statische.Route.zu.löschen )Enter Route Name . (Routennamen. eingeben):. Geben. Sie.hier. einen. Namen. für. die. Route. mit. maximal.25.alphanumerischen.Zeichen.einDestination LAN IP . (IP-Adresse. des. Zi<strong>el</strong>-LANs):. Bei. der.IP-Adresse. des. Zi<strong>el</strong>-LANs. hand<strong>el</strong>t. es. sich. um. die. Adresse.des. entfernten. Netzwerks. oder. Hosts,. dem. Sie. eine. statische.Route.zuweisen.möchtenSubnet Mask (Subnetzmaske):. Die. Subnetzmaske. bestimmt,.w<strong>el</strong>cher. Teil. einer. Zi<strong>el</strong>-LAN-IP-Adresse. den. Netzwerkbereich.und.w<strong>el</strong>cher.Teil.den.Hostbereich.darst<strong>el</strong>lt .Default Gateway (Standard-Gateway):. Hierbei. hand<strong>el</strong>t. es.sich. um. die. IP-Adresse. des. Gateway-Geräts,. das. eine.Verbindung.zwischen.dem.Router.und.dem.Remote-Netzwerk.bzw .-Host.ermöglichtInterface (Schnittst<strong>el</strong>le):. Diese. Schnittst<strong>el</strong>le. gibt. an,. ob.sich. die. Zi<strong>el</strong>-IP-Adresse. im. LAN & Wir<strong>el</strong>ess. (Ethernet-. und.Wir<strong>el</strong>ess-Netzwerke).oder.WAN.(Internet).befindetD<strong>el</strong>ete This Entry (Diesen. Eintrag. löschen):. Wenn. Sie. eine.Route. löschen. möchten,. wählen. Sie. im. Dropdown-Menü.ihre. Nummer. aus,. und. klicken. Sie. anschließend. auf. diese.SchaltflächeShow Routing Table (Routing-Tab<strong>el</strong>le. anzeigen):. Klicken.Sie. auf. die. Schaltfläche. Show Routing Table. (Routing-Tab<strong>el</strong>le.anzeigen),. um. ein. Fenster. zu. öffnen,. in. dem. die.Weiterleitung.von. Daten. im. lokalen. Netzwerk. angezeigt. wird . Für. jede.Route. werden. die. IP-Adresse. des. Zi<strong>el</strong>-LAN,. die. Subnetzmaske,.das. Gateway. und. die. Schnittst<strong>el</strong>le. angezeigt . Klicken. Sie. auf.Refresh. (Aktualisieren),. um. die. angezeigten. Informationen. zu.aktualisieren .Klicken.Sie.zum.Schließen.dieses.Fensters.auf.die.Schaltfläche.Close.(Schließen)Routing-Tab<strong>el</strong>leKlicken. Sie. auf. Save Settings. (Einst<strong>el</strong>lungen. speichern),. um.die. Änderungen. zu. speichern,. bzw . auf. Canc<strong>el</strong> Changes(Änderungen.verwerfen),.um.Ihre.Änderungen.zu.verwerfenWir<strong>el</strong>ess > Grundlegende Wir<strong>el</strong>ess-Einst<strong>el</strong>lungenIn.diesem.Fenster.werden.die.grundlegenden.Einst<strong>el</strong>lungen.für.den.Wir<strong>el</strong>ess-Netzwerkbetrieb.festg<strong>el</strong>egtEs. gibt. zwei. Möglichkeiten. zur. Konfiguration. der. Wir<strong>el</strong>ess-Netzwerke. eines. Routers,. manu<strong>el</strong>l. und. WPS. (Wi-Fi ProtectedSetup)Bei.Wi-Fi.Protected.Setup.hand<strong>el</strong>t.es.sich.um.eine.Funktion,.mit.der. Sie. auf. einfache. Weise. das. Wir<strong>el</strong>ess-Netzwerk. einrichten.können .Wenn.Sie.Clientgeräte.haben,.beispi<strong>el</strong>sweise.Wir<strong>el</strong>ess-Adapter,.die.Wi-Fi.Protected.Setup.unterstützen,.können.Sie.Wi-Fi.Protected.Setup.verwendenWir<strong>el</strong>ess Configuration (Wir<strong>el</strong>ess-Konfiguration):. Wenn. Sie.Ihr. Wir<strong>el</strong>ess-Netzwerk. manu<strong>el</strong>l. konfigurieren. möchten,.wählen. Sie. Manual. (Manu<strong>el</strong>l) . Fahren. Sie. mit. dem. Abschnitt.„Basic.Wir<strong>el</strong>ess.Settings“.(Grundlegende.Wir<strong>el</strong>ess-Einst<strong>el</strong>lungen).fort . Wenn. Sie. Wi-Fi. Protected. Setup. verwenden. möchten,.wählen. Sie. Wi-Fi Protected Setup . Fahren. Sie. mit. dem.Abschnitt.„Wi-Fi.Protected.Setup“.fortWir<strong>el</strong>ess-G Broadband-Router9
Kapit<strong>el</strong>3Erweiterte KonfigurationGrundlegende Wir<strong>el</strong>ess-Einst<strong>el</strong>lungen„Wir<strong>el</strong>ess“.>.„Basic.Wir<strong>el</strong>ess.Settings“.(Grundlegende.Wir<strong>el</strong>ess-Einst<strong>el</strong>lungen.(Manu<strong>el</strong>le.Einrichtung))Wir<strong>el</strong>ess Network Mode (Wir<strong>el</strong>ess-Netzwerkmodus):.In.diesem.Dropdown-Menü.können.Sie.die.Wir<strong>el</strong>ess-Standards.auswählen,. die. in. Ihrem. Netzwerk. ausgeführt. werden . Wenn.Ihr. Netzwerk. Wir<strong>el</strong>ess-N-,. Wir<strong>el</strong>ess-G-. und. Wir<strong>el</strong>ess-B-Geräte.enthält,.behalten.Sie.die.Standardeinst<strong>el</strong>lung.Mixed.(Gemischt).bei . Wenn. Ihr. Netzwerk. Wir<strong>el</strong>ess-G-. und. Wir<strong>el</strong>ess-B-Geräte.enthält,. wählen. Sie. die. Option. BG-Mixed. (BG-Gemischt). aus .Wenn.ausschließlich.Wir<strong>el</strong>ess-N-Geräte.vorhanden.sind,.wählen.Sie.Wir<strong>el</strong>ess-N Only.(Nur.Wir<strong>el</strong>ess-N).aus .Wenn.ausschließlich.Wir<strong>el</strong>ess-G-Geräte. vorhanden. sind,. wählen. Sie. Wir<strong>el</strong>ess-GOnly. (Nur. Wir<strong>el</strong>ess-G) . Wenn. ausschließlich. Wir<strong>el</strong>ess-B-Geräte.vorhanden. sind,. wählen. Sie. Wir<strong>el</strong>ess-B Only. (Nur.Wir<strong>el</strong>ess-B) .Wenn. sich. in. Ihrem. Netzwerk. keine. Wir<strong>el</strong>ess-Geräte. befinden,.wählen.Sie.Disabled.(Deaktiviert).ausWir<strong>el</strong>ess Network Name (SSID) (Wir<strong>el</strong>ess-Netzwerkname.(SSID)):. Bei. der. SSID. hand<strong>el</strong>t. es. sich. um. den.Netzwerknamen,. der. von. allen. Punkten. im. Wir<strong>el</strong>ess-Netzwerk. verwendet. wird . Die. SSID. muss. für. alle. Geräte.im. Wir<strong>el</strong>ess-Netzwerk. identisch. sein . Es. wird. zwischen.Groß-. und. Kleinschreibung. unterschieden. und. der. Name.darf. 32.Zeichen. nicht. überschreiten . (Alle. Zeichen. der.Tastatur.dürfen. verwendet. werden ). St<strong>el</strong>len. Sie. sicher,. dass. diese.Einst<strong>el</strong>lung. für. alle. Punkte. im. Wir<strong>el</strong>ess-Netzwerk. dies<strong>el</strong>be. ist .Um. die. Sicherheit. zu. erhöhen,. sollten. Sie. die. Standard-SSID.(linksys).in.einen.eindeutigen.Namen.ändernWir<strong>el</strong>ess Chann<strong>el</strong> (Wir<strong>el</strong>ess-Kanal):. Wählen. Sie. aus. der. Liste.den. Ihren. Netzwerkeinst<strong>el</strong>lungen. entsprechenden. Kanal.aus . Eine. korrekte. Funktion. Ihres. Wir<strong>el</strong>ess-Netzwerks. ist. nur.gewährleistet,. wenn. die. Übertragung. für. alle. Geräte. über.dens<strong>el</strong>ben.Kanal.erfolgtWir<strong>el</strong>ess SSID Broadcast (Wir<strong>el</strong>ess-SSID-Übertragung):.Wenn. Wir<strong>el</strong>ess-Clients. im. lokalen. Netzwerk. nach. einer.Verbindung. zu. Wir<strong>el</strong>ess-Netzwerken. suchen,. erkennen. sie. die.Übertragung. der. SSID. über. den. Router . Zur. Übertragung. der.SSID.des.Routers.behalten.Sie.die.Standardeinst<strong>el</strong>lung.Enabled.(Aktiviert).bei .Wenn.Sie.die.SSID.des.Routers.nicht.übertragen.möchten,.wählen.Sie.Disabled.(Deaktiviert).ausKlicken. Sie. auf. Save Settings. (Einst<strong>el</strong>lungen. speichern),. um.die. Änderungen. zu. speichern,. bzw . auf. Canc<strong>el</strong> Changes.(Änderungen.verwerfen),.um.Ihre.Änderungen.zu.verwerfenWi-Fi Protected Setup (WPS)Sie. können. aus. drei. Methoden. auswählen .Verwenden. Sie. die.Methode,.die.auf.das.Clientgerät.zutrifft,.das.Sie.konfigurieren.möchtenWir<strong>el</strong>ess-G Broadband-Router„Wir<strong>el</strong>ess“.>.„Basic.Wir<strong>el</strong>ess.Settings“.(Grundlegende.Wir<strong>el</strong>ess-Einst<strong>el</strong>lungen.(Wi-Fi.Protected.Setup))1. Methode„Wi-Fi.Protected.Setup“.>.„Congratulations“.(Gratulation)HINWEIS:. Wi-Fi. Protected. Setup. kann. jeweils. nur.ein. Clientgerät. konfigurieren . Wiederholen. Sie.die. Anweisungen. für. jedes. Clientgerät,. das. Wi-Fi.Protected.Setup.unterstütztVerwenden.Sie.diese.Methode,.wenn.das.Clientgerät.über.eine.Wi-Fi.Protected.Setup-Taste.verfügt1 Drücken.Sie.auf.dem.Clientgerät.die.Taste Wi-Fi ProtectedSetup2 Klicken. Sie. auf. diesem. Bildschirm. auf. die. Schaltfläche.Wi-Fi Protected Setup3 Wenn. die. Konfiguration. des. Clientgeräts. beendet. ist,.klicken. Sie. auf. OK . Weitere. Anweisungen. finden. Sie. in.der.Dokumentation.oder.erhalten.Sie.von.dem.Clientgerät2. MethodeVerwenden. Sie. diese. Methode,. wenn. das. Clientgerät. über.einen.Wi-Fi.Protected.Setup-PIN.verfügt10
Kapit<strong>el</strong>3Erweiterte Konfiguration123Geben. Sie. die. PIN-Nummer. in. das. dafür. vorgeseheneF<strong>el</strong>d.auf.diesem.Bildschirm.einKlicken.Sie.dann.auf.Register.(Registrieren)Wenn. die. Konfiguration. des. Clientgeräts. beendet. ist,.klicken. Sie. auf. OK .Weitere. Anweisungen. finden. Sie. in. der.Dokumentation.oder.erhalten.Sie.von.dem.Clientgerät3. MethodeVerwenden.Sie.diese.Methode,.wenn.das.Clientgerät.die.PIN.des.Routers.abfragt .1 Geben. Sie. die. PIN-Nummer. ein,. die. auf. diesem. Bildschirm.angegeben.ist .(Sie.finden.die.Nummer.auch.auf.dem.Etikett.auf.der.Unterseite.des.Routers )2 Wenn. die. Konfiguration. des. Clientgeräts. beendet. ist,.klicken. Sie. auf. OK .Weitere. Anweisungen. finden. Sie. in. der.Dokumentation.oder.erhalten.Sie.von.dem.ClientgerätWi-Fi Protected Setup Status. (Wi-Fi. Protected. Setup-Status),.Network Name (SSID). (Netzwerkname. (SSID)),. Security.(Sicherheit),. Encryption. (Verschlüss<strong>el</strong>ung). und. Passphrase.werden.im.unteren.Fensterbereich.angezeigtHINWEIS:. Wenn. Sie. Clientgeräte. haben,. die. Wi-Fi.Protected. Setup. nicht. unterstützen,. konfigurieren.Sie.diese.unter.Beachtung.der.Wir<strong>el</strong>ess-Einst<strong>el</strong>lungen.manu<strong>el</strong>lWir<strong>el</strong>ess > Wir<strong>el</strong>ess-SicherheitDie. Wir<strong>el</strong>ess-Sicherheitseinst<strong>el</strong>lungen. bestimmen. die.Sicherheit. des. Wir<strong>el</strong>ess-Netzwerks . Der. Router. unterstützt.sechs. Optionen. für. den. Wir<strong>el</strong>ess-Sicherheitsmodus:. WPAPersonal,. WPA Enterprise,. WPA2 Personal,. WPA2Enterprise,. RADIUS. und. WEP . (WPA. steht. für. Wi-Fi ProtectedAccess . Dies. ist. ein. höherer. Sicherheitsstandard. als. die.WEP-Verschlüss<strong>el</strong>ung .WPA2.ist.eine.komplexere,.sicherere.Version.von. WPA . WEP. steht. für. Wired Equivalent Privacy. und. RADIUS.für. Remote Authentication Dial-In User Service . Im. Folgenden.werden. diese. sechs. Sicherheitsstandards. kurz. erläutert .Genauere. Anweisungen. zur. Konfiguration. der. Sicherheit.im. Wir<strong>el</strong>ess-Netzwerkbetrieb. des. Routers. erhalten. Sie. in.„Kapit<strong>el</strong>.2:.Wir<strong>el</strong>ess-Sicherheit“Wir<strong>el</strong>ess-SicherheitSecurity Mode (Sicherheitsmodus):Wählen. Sie. die. Sicherheitsmethode. für. Ihr. Wir<strong>el</strong>ess-Netzwerk.aus . Wenn. Sie. keine. Wir<strong>el</strong>ess-Sicherheit. verwenden. möchten,.behalten. Sie. die. Standardeinst<strong>el</strong>lung. Disabled. (Deaktiviert).beiWPA-Personal.HINWEIS:.Wenn. Sie.WPA. verwenden,. MUSS. jedes.Gerät. im.Wir<strong>el</strong>ess-Netzwerk. dies<strong>el</strong>be.WPA-Methode.und.dens<strong>el</strong>ben.gemeinsamen.Schlüss<strong>el</strong>.verwenden,.damit. das. Wir<strong>el</strong>ess-Netzwerk. ordnungsgemäß.funktioniert„ Security.Mode“.(Sicherheitsmodus).>.„WPA-Personal“.(WPA-Personal)WPA Algorithm (WPA-Algorithmus):. WPA. unterstützt. zwei.Verschlüss<strong>el</strong>ungsmethoden. (TKIP. und. AES). mit. dynamischen.Verschlüss<strong>el</strong>ungsschlüss<strong>el</strong>n . Wählen. Sie. den. gewünschten.Algorithmus,. TKIP. oder. AES,. aus . (AES. bietet. eine. stärkere.Verschlüss<strong>el</strong>ung.als.TKIP )WPA Shared Key (WPA. Gemeinsamer. Schlüss<strong>el</strong>):. Geben.Sie. den. Schlüss<strong>el</strong>. ein,. der. vom. Router. und. von. den. anderen.Netzwerkgeräten.gemeinsam.verwendet.wird .Dieser.muss.aus.8.bis.63.Zeichen.bestehenGroup Key Renewal (Erneuerung. Gruppenschlüss<strong>el</strong>):. Legen.Sie. den. Zeitraum. für. die. Erneuerung. des. Gruppenschlüss<strong>el</strong>s.fest . Diese. Zeitangabe. teilt. dem. Router. mit,. wie. oft. er. die.Verschlüss<strong>el</strong>ungsschlüss<strong>el</strong>. ändern. soll . Der. standardmäßige.Zeitraum. für. die. Erneuerung. des. Gruppenschlüss<strong>el</strong>s. liegt. bei.3600.SekundenWPA-EnterpriseBei. dieser. Option. wird. WPA. in. Kombination. mit. einem.RADIUS-Server. verwendet . (Diese. Vorgehensweise. sollte.nur. verwendet. werden,. wenn. ein. RADIUS-Server. mit. dem.Router.verbunden.ist )„Security.Mode“.(Sicherheitsmodus).>.„WPA-Enterprise“.(WPA-Enterprise)WPA Algorithm (WPA-Algorithmus):. WPA. unterstützt. zwei.Verschlüss<strong>el</strong>ungsmethoden. (TKIP. und. AES). mit. dynamischen.Verschlüss<strong>el</strong>ungsschlüss<strong>el</strong>n . Wählen. Sie. den. gewünschten.Algorithmus,. TKIP. oder. AES,. aus . (AES. bietet. eine. stärkere.Verschlüss<strong>el</strong>ung.als.TKIP )RADIUS Server Address (RADIUS-Server-Adresse):. Geben. Sie.die.IP-Adresse.des.RADIUS-Servers.einRADIUS Port (RADIUS-Port):. Geben. Sie. die. Port-Nummer. des.RADIUS-Servers.ein .Der.Standardwert.lautet.1812Wir<strong>el</strong>ess-G Broadband-Router11
Kapit<strong>el</strong>3Erweiterte KonfigurationShared Key (Gemeinsamer.Schlüss<strong>el</strong>):.Geben.Sie.den.Schlüss<strong>el</strong>.ein,.der.vom.Router.und.vom.Server.verwendet.wirdKey Renewal Timeout (Wartezeit. für. Schlüss<strong>el</strong>erneuerung):.Legen. Sie. eine. Wartezeit. für. die. Schlüss<strong>el</strong>erneuerung.fest . Diese. Zeitangabe. teilt. dem. Router. mit,. wie. oft. er. die.Verschlüss<strong>el</strong>ungsschlüss<strong>el</strong>. ändern. soll . Die. standardmäßige.Wartezeit.für.die.Schlüss<strong>el</strong>erneuerung.liegt.bei.3600.SekundenWPA2-PersonalRADIUS Server Address (RADIUS-Server-Adresse):. Geben. Sie.die.IP-Adresse.des.RADIUS-Servers.einRADIUS Port (RADIUS-Port):. Geben. Sie. die. Port-Nummer. des.RADIUS-Servers.ein .Der.Standardwert.lautet.1812Shared Key (Gemeinsamer.Schlüss<strong>el</strong>):.Geben.Sie.den.Schlüss<strong>el</strong>.ein,.der.vom.Router.und.vom.Server.verwendet.wirdKey Renewal Timeout (Wartezeit. für. Schlüss<strong>el</strong>erneuerung):.Legen. Sie. eine. Wartezeit. für. die. Schlüss<strong>el</strong>erneuerung.fest . Diese. Zeitangabe. teilt. dem. Router. mit,. wie. oft. er. die.Verschlüss<strong>el</strong>ungsschlüss<strong>el</strong>. ändern. soll . Die. standardmäßige.Wartezeit.für.die.Schlüss<strong>el</strong>erneuerung.liegt.bei.3600.SekundenRADIUSBei. dieser. Option. wird. WEP. in. Kombination. mit. einem.RADIUS-Server. verwendet . (Diese. Vorgehensweise. sollte.nur. verwendet. werden,. wenn. ein. RADIUS-Server. mit. dem.Router.verbunden.ist )„ Security.Mode“.(Sicherheitsmodus).>.„WPA2-Personal“.(WPA2-Personal)WPA Algorithm (WPA-Algorithmus):. WPA2. unterstützt. zwei.Verschlüss<strong>el</strong>ungsmethoden. (TKIP. und. AES). mit. dynamischen.Verschlüss<strong>el</strong>ungsschlüss<strong>el</strong>n . Wählen. Sie. den. Algorithmus. aus:.AES.oder.TKIP+AES .Die.Standardauswahl.ist.AESWPA Shared Key (WPA. Gemeinsamer. Schlüss<strong>el</strong>):. Geben. Sie.einen.gemeinsamen.WPA-Schlüss<strong>el</strong>.mit.8-63.Zeichen.ein .Group Key Renewal (Erneuerung. Gruppenschlüss<strong>el</strong>):. Legen.Sie. den. Zeitraum. für. die. Erneuerung. des. Gruppenschlüss<strong>el</strong>s.fest . Diese. Zeitangabe. teilt. dem. Router. mit,. wie. oft. er. die.Verschlüss<strong>el</strong>ungsschlüss<strong>el</strong>. ändern. soll . Der. standardmäßige.Zeitraum. für. die. Erneuerung. des. Gruppenschlüss<strong>el</strong>s. liegt. bei.3600.SekundenWPA2-EnterpriseBei. dieser. Option. wird. WPA2. in. Kombination. mit. einem.RADIUS-Server. verwendet . (Diese. Vorgehensweise. sollte.nur. verwendet. werden,. wenn. ein. RADIUS-Server. mit. dem.Router.verbunden.ist ).„Security.Mode“.(Sicherheitsmodus).>.„WPA2-Enterprise“.Wir<strong>el</strong>ess-G Broadband-Router(WPA2-Enterprise)WPA Algorithm (WPA-Algorithmus):. WPA2. unterstützt. zwei.Verschlüss<strong>el</strong>ungsmethoden. (TKIP. und. AES). mit. dynamischen.Verschlüss<strong>el</strong>ungsschlüss<strong>el</strong>n . Wählen. Sie. den. Algorithmus. aus:.AES.oder.TKIP+AES .Die.Standardauswahl.ist.AES„Security.Mode“.(Sicherheitsmodus).>.„RADIUS“WICHTIG:. Wenn. Sie. die. WEP-Verschlüss<strong>el</strong>ung.verwenden,. MUSS. jedes. Gerät. im. Wir<strong>el</strong>ess-Netzwerk.dass<strong>el</strong>be. WEP-Verschlüss<strong>el</strong>ungsverfahren. und.dens<strong>el</strong>ben.WEP-Verschlüss<strong>el</strong>ungsschlüss<strong>el</strong>.verwenden,.damit. das. Wir<strong>el</strong>ess-Netzwerk. ordnungsgemäß.funktioniertRADIUS Server Address (RADIUS-Server-Adresse):. Geben. Sie.die.IP-Adresse.des.RADIUS-Servers.einRADIUS Port (RADIUS-Port):. Geben. Sie. die. Port-Nummer. des.RADIUS-Servers.ein .Der.Standardwert.lautet.1812Shared Key (Gemeinsamer.Schlüss<strong>el</strong>):.Geben.Sie.den.Schlüss<strong>el</strong>.ein,.der.vom.Router.und.vom.Server.verwendet.wirdDefault Transmit Key (Standardübertragungsschlüss<strong>el</strong>):.Wählen. Sie. einen. Standardübertragungsschlüss<strong>el</strong> .Der.Standardwert.ist.1WEP Encryption (WEP-Verschlüss<strong>el</strong>ung):. Wählen. Sie. eine.WEP-Verschlüss<strong>el</strong>ungsstufe.aus:.64 bits 10 hex digits.(64.Bits.(10.Hexadezimalziffern)).oder. 128 bits 26 hex digits (128.Bits.(26. Hexadezimalziffern)) . Der. Standardwert. ist. 64 bits 10 hexdigits.(64.Bits.(10.Hexadezimalziffern))Passphrase: Geben. Sie. eine. Passphrase. zur. automatischen.Erst<strong>el</strong>lung. von. WEP-Schlüss<strong>el</strong>n. ein . Klicken. Sie. anschließend.auf Generate (Generieren)12
Kapit<strong>el</strong>3Erweiterte KonfigurationKey 1-4 (Schlüss<strong>el</strong>. 1-4):. Wenn. Sie. keine. Passphrase.eingegeben. haben,. geben. Sie. den. bzw . die. Schlüss<strong>el</strong>.manu<strong>el</strong>l.einWEPWEP. ist. eine. einfache. Verschlüss<strong>el</strong>ungsmethode,. die. nicht. so.sicher.wie.WPA.ist .„Security.Mode“.(Sicherheitsmodus).>.„WEP“Default Transmit Key (Standardübertragungsschlüss<strong>el</strong>):. Wählen. Sie. einen. Standardübertragungsschlüss<strong>el</strong> .Der.Standardwert.ist.1WEP-Encryption (WEP-Verschlüss<strong>el</strong>ung):. Wählen. Sie. eine.WEP-Verschlüss<strong>el</strong>ungsstufe. aus: 64 bits 10 hex digits. (64. Bits.(10.Hexadezimalziffern)).oder. 128 bits 26 hex digits.(128.Bits.(26. Hexadezimalziffern)) . Der. Standardwert. ist. 64 bits 10 hexdigits.(64.Bits.(10.Hexadezimalziffern))Passphrase: Geben. Sie. eine. Passphrase. zur. automatischen.Erst<strong>el</strong>lung.von.WEP-Schlüss<strong>el</strong>n.ein .Klicken.Sie.anschließend.auf.GenerierenKey 1-4 (Schlüss<strong>el</strong>.1-4):.Wenn.Sie.keine.Passphrase.eingegeben.haben,.geben.Sie.den.bzw .die.Schlüss<strong>el</strong>.manu<strong>el</strong>l.einKlicken. Sie. auf. Save Settings (Einst<strong>el</strong>lungen. speichern),. um.die. Änderungen. zu. speichern,. bzw . auf. Canc<strong>el</strong> Changes(Änderungen.verwerfen),.um.Ihre.Änderungen.zu.verwerfenWir<strong>el</strong>ess > Wir<strong>el</strong>ess-MAC-FilterDer.Wir<strong>el</strong>ess-Zugriff. kann. mit. den. MAC-Adressen. der.Wir<strong>el</strong>ess-Geräte. innerhalb. des. Übertragungsbereichs. Ihres. Netzwerks.gefiltert.werden ........„Wir<strong>el</strong>ess“.>.„Wir<strong>el</strong>ess-MAC-Filter“Wir<strong>el</strong>ess-MAC-FilterWir<strong>el</strong>ess MAC Filter (Wir<strong>el</strong>ess-MAC-Filter):. Wenn. Sie.Wir<strong>el</strong>ess-Benutzer. nach. MAC-Adresse. filtern. und. für. diese. den.Zugriff. freigeben. oder. sperren. möchten,. wählen. Sie. Enable(Aktivieren).aus .Wenn.Sie.die.Benutzer.nicht.nach.der.MAC-Adresse.filtern. möchten,. behalten. Sie. die. Standardeinst<strong>el</strong>lung. Disable(Deaktivieren).beiPrevent (Verweigern):. Aktivieren Sie. diese. Option,. um. den.Wir<strong>el</strong>ess-Zugriff. nach. MAC-Adresse. zu. verweigern . Diese.Funktion.ist.standardmäßig.aktiviertPermit Only (Nur. zulassen):. Aktivieren. Sie. diese. Option,.um. den. Wir<strong>el</strong>ess-Zugriff. nach. MAC-Adresse. zuzulassen .Diese.Funktion.ist.standardmäßig.nicht.aktiviertEdit MAC Filter List (MAC-Adressen-Filterliste. bearbeiten):.Klicken. Sie. hierauf,. um. das. Fenster MAC Address Filter List(MAC-Adressen-Filterliste). zu. öffnen . In. diesem. Fenster. können.Sie. die. Benutzer,. denen. Sie. Zugriff. gewähren. oder. verweigern.möchten,. anhand. ihrer. MAC-Adresse. festlegen . Klicken. Sie.zum. Vergleich. auf. die. Schaltfläche. Wir<strong>el</strong>ess Client MAC List(MAC-Liste. der. Wir<strong>el</strong>ess-Clients),. um. eine. Liste. der.Netzwerkbenutzer. anhand.ihrer. MAC-Adresse. anzuzeigen„MAC.Address.Filter.List“.(MAC-Adressen-Filterliste)Klicken. Sie. auf. Save Settings. (Einst<strong>el</strong>lungen. speichern),. um.die. Änderungen. zu. speichern,. bzw . auf. Canc<strong>el</strong> Changes(Änderungen.verwerfen),.um.Ihre.Änderungen.zu.verwerfenWir<strong>el</strong>ess > Erweiterte Wir<strong>el</strong>ess-Einst<strong>el</strong>lungenIm. Fenster. Wir<strong>el</strong>ess > Advanced Wir<strong>el</strong>ess Settings. (Erweiterte.Wir<strong>el</strong>ess-Einst<strong>el</strong>lungen).werden.erweiterte.Wir<strong>el</strong>ess-Funktionen.für.den.Router.eingest<strong>el</strong>lt .Diese.Einst<strong>el</strong>lungen.sollten.nur.von.einem. erfahrenen. Administrator. angepasst. werden,. da. falsche.Einst<strong>el</strong>lungen. die. Leistung. des. Gateways. im. Wir<strong>el</strong>ess-Betrieb.beeinträchtigen.könnenWir<strong>el</strong>ess-G Broadband-Router13
Kapit<strong>el</strong>3Erweiterte Konfiguration„Wir<strong>el</strong>ess“.>.Erweiterte.Wir<strong>el</strong>ess-Einst<strong>el</strong>lungenErweitertes Wir<strong>el</strong>essAuthentication Type (Authentifizierungstyp):. Standardmäßig.ist. die. Option. Auto. ausgewählt,. mit. der. sowohl. der.Authentifizierungstyp. Open System. (Offenes. System). als. auch.Shared Key. (Gemeinsamer. Schlüss<strong>el</strong>). verwendet. werden. kann .Beim. Authentifizierungstyp. Open System. (Offenes. System).verwenden. der. Absender. und. der. Empfänger. KEINEN. WEP-Schlüss<strong>el</strong>. zur. Authentifizierung . Beim. Authentifizierungstyp.Shared Key. (Gemeinsamer. Schlüss<strong>el</strong>). verwenden. Absender.und.Empfänger.einen.WEP-Schlüss<strong>el</strong>.zur.AuthentifizierungBasic Rate (Grundrate):. Diese. Einst<strong>el</strong>lung. verkörpert. keine.einz<strong>el</strong>ne.Übertragungsrate,.sondern.eine.Reihe.von.Raten,.mit.denen. der. Router. übertragen. kann . Der. Router. teilt. anderen.Wir<strong>el</strong>ess-Geräten. im. Netzwerk. seine. Grundrate. mit,. sodass.bekannt. ist,. w<strong>el</strong>che. Raten. verwendet. werden . Der. Router.gibt. außerdem. bekannt,. dass. automatisch. die. optimale.Übertragungsrate.ausgewählt.wird .Die.Standardeinst<strong>el</strong>lung.ist.Default.(Standard),.wenn.der.Router.bei.allen.standardmäßigen.Wir<strong>el</strong>ess-Raten.(1.-.2.Mbit/s,.5,5.Mbit/s,.11.Mbit/s,.18.Mbit/s.und.24.Mbit/s).Übertragungen.ausführen.kann .Weitere.verfügbare.Optionen. sind. 1-2Mbps. (1.-.2.Mbit/s). für. die.Verwendung. mit.älterer. Wir<strong>el</strong>ess-Technologie. und. All. (Alle),. wenn. der. Router.bei. allen. Wir<strong>el</strong>ess-Raten. Übertragungen. ausführen. kann . Die.Grundrate. st<strong>el</strong>lt. nicht. die. tatsächliche. Datenübertragungsrate.dar .Wenn.Sie.die.Datenübertragungsrate.des.Routers.festlegen.möchten,. konfigurieren. Sie. die. Einst<strong>el</strong>lung. Transmission Rate.(Übertragungsrate)Transmission Rate (Übertragungsrate): Die. Datenübertragungsrate.sollte.gemäß.der.Geschwindigkeit.des.Wir<strong>el</strong>ess-Netzwerks.eingest<strong>el</strong>lt.werden . Sie. können. aus. einer. Reihe. von.Übertragungsgeschwindigkeiten. oder. die. Option. Auto. auswählen,.mit. der. der. Router. automatisch. die. schn<strong>el</strong>lstmögliche. Datenrate.verwendet. und. die. Funktion. für. automatisches. Fallback. aktiviert.wird .Mit.der.Funktion.für.automatisches.Fallback.wird.die.optimale.Verbindungsgeschwindigkeit. zwischen. dem. Router. und. einem.Wir<strong>el</strong>ess-Client.ermitt<strong>el</strong>t .Der.Standardwert.ist.Auto.(Automatisch)CTS Protection Mode (CTS-Schutzmodus):. Lassen. Sie. die.Option. CTS. Protection. Mode. (CTS-Schutzmodus;. CTS. =. Clear-To-Send). deaktiviert;. es. sei. denn,. Ihre. Wir<strong>el</strong>ess-G-Produkte.können.in. einer.Umgebung. mit. hohem. 802 11b-Datenverkehr.keine.Übertragungen.an.den.Router.ausführen .Diese.Funktion.verbessert. zwar. die. Fähigkeit. des. Routers,. alle. Wir<strong>el</strong>ess-G-Übertragungen. zu. empfangen,. verringert. jedoch. auch.beträchtlich.seine.LeistungFrame Burst (Rahmen-Burst):. Durch. Aktivieren. dieser. Option.wird. die. Leistung. Ihres. Netzwerks. gesteigert . Dies. hängt.jedoch. vom. Herst<strong>el</strong>ler. Ihrer. Wir<strong>el</strong>ess-Produkte. ab . Wählen. Sie.Enable. (Aktivieren),. um. die. Option. Frame. Burst. (Rahmen-Burst). zu. aktivieren . Die. Standardeinst<strong>el</strong>lung. lautet. Disable(Deaktivieren)Beacon Interval (Beacon-Intervall):. Der. Standardwert. ist. 100 .Geben. Sie. einen. Wert. zwischen. 1. und. 65 535.Millisekunden.ein .Der.Wert.des.Beacon-Intervalls.gibt.das.Sendeintervall.des.Beacons.an .Ein.Beacon.ist.eine.Paketübertragung.des.Routers.zur.Synchronisierung.des.Wir<strong>el</strong>ess-NetzwerksDTIM Interval (DTIM-Intervall): Dieser.Wert.(zwischen.1.und.255).gibt.das.Intervall.der.DTIM.(D<strong>el</strong>ivery Traffic Indication Message).an .Ein. DTIM-F<strong>el</strong>d. ist. ein. Zeitkontrollf<strong>el</strong>d,. das. die. Clients. über.das. nächste. Fenster. informiert,. in. dem. nach. Broadcast-. und.Multicast-M<strong>el</strong>dungen. gesucht. wird . Wenn. der. Router.Broadcast-. oder. Multicast-M<strong>el</strong>dungen. für. die. zugewiesenen.Clients. gepuffert. hat,. sendet. er. die. nächste. DTIM. mit. einem.DTIM-Intervallwert . Die. zugewiesenen. Clients. empfangen. das.Beacon-Signal. und. sind. zum. Empfang. der. Broadcast-. und.Multicast-M<strong>el</strong>dungen.bereit .Der.Standardwert.lautet.1Fragmentation Threshold (Fragmentierungsschw<strong>el</strong>le): Dieser.Wert. gibt. die. maximale. Größe. eines. Pakets. an,. bevor.die. Daten. in. mehrere. Pakete. unterteilt. werden . Wenn.Sie. eine. hohe. Paketfehlerrate. wahrnehmen,. können. Sie.die. Fragmentierungsschw<strong>el</strong>le. leicht. anheben . Liegt. die.Fragmentierungsschw<strong>el</strong>le. zu. niedrig,. kann. dies. zu. einer.Herabsetzung.der.Netzwerkleistung.führen .Es.wird.empfohlen,.den. Standardwert. nur. geringfügig. zu. senken . In. den. meisten.Fällen. sollte. der. Standardwert. der. Fragmentierungsschw<strong>el</strong>le.von.2346.beibehalten.werdenRTS Threshold (RTS-Schw<strong>el</strong>le):. Bei. einem. schwankenden.Datenfluss. wird. nur. eine. geringfügige. Senkung. des.Standardwerts.2347. empfohlen . Ist. ein. Netzwerkpaket. kleiner.als. die. voreingest<strong>el</strong>lte. RTS-Schw<strong>el</strong>lengröße. (Request to Send),.wird. der. RTS/CTS-Mechanismus. nicht. aktiviert . Der. Router.sendet. RTS-Blöcke. (RTS = Request to Send). an. eine. bestimmte.Empfangsstation. und. hand<strong>el</strong>t. das. Senden. eines. Datenblocks.aus . Nach. dem. Empfang. eines. RTS-Blocks. antwortet. die.Wir<strong>el</strong>ess-Station. mit. einem. CTS-Block. (Clear to Send),. um. das.Recht,.mit.der.Übertragung.zu.beginnen,.zu.bestätigen .Der.RTS-Schw<strong>el</strong>lenwert. sollte. bei. seinem. Standardwert. 2347. b<strong>el</strong>assen.werdenAP Isolation (AP-Isolierung):. Alle. Wir<strong>el</strong>ess-Clients. und.Wir<strong>el</strong>ess-Geräte.in.Ihrem.Netzwerk.werden.voneinander.isoliert .Wir<strong>el</strong>ess-Geräte. können. zwar. mit. dem. Router. kommunizieren,.aber.nicht.miteinander .Soll.diese.Funktion.verwendet.werden,.wählen. Sie. die. Option. On. (Ein). aus . Die. Standardeinst<strong>el</strong>lung.für.die.AP-Isolierungen.lautet.Off.(Aus) .SecureEasySetup: Mit. dieser. Funktion. können. Sie.SecureEasySetup. aktivieren. oder. deaktivieren . Wählen. Sie.Disabled. (Deaktiviert). aus,. um. die. Funktion. zu. deaktivieren .Die.Taste.leuchtet.dann.nicht.mehr .Die.Standardeinst<strong>el</strong>lung.für.diese.Funktion.lautet.Enabled.(Aktiviert)Klicken. Sie. auf. Save Settings. (Einst<strong>el</strong>lungen. speichern),. um.die. Änderungen. zu. speichern,. bzw . auf. Canc<strong>el</strong> Changes(Änderungen.verwerfen),.um.Ihre.Änderungen.zu.verwerfenWir<strong>el</strong>ess-G Broadband-Router14
Kapit<strong>el</strong>3Erweiterte KonfigurationSicherheit > FirewallDas. Fenster. Security > Firewall (Sicherheit. >. Firewall). dient.zum. Konfigurieren. einer. Firewall,. die. verschiedene. Arten.unerwünschten. Datenverkehrs. im. lokalen. Netzwerk. des.Routers. herausfiltern. kannFirewallWir<strong>el</strong>ess-G Broadband-Router„Security“.(Sicherheit).>.Firewall.Firewall Protection (Firewall-Schutz):.Wenn.Sie.Firewall-Schutz.verwenden. möchten,. behalten. Sie. die. Standardeinst<strong>el</strong>lung.Enable.(Aktivieren).bei .Wählen.Sie.Disable.(Deaktivier),.um.den.Firewall-Schutz.zu.deaktivierenWAN-Anfragen blockierenBlock Anonymous Internet Requests (Anonyme.Internet-Anfragen. blockieren):. Diese. Funktion.macht. es. schwieriger,. von. außen. in. Ihr. Netzwerk.einzudringen . Diese. Funktion. ist. standardmäßig aktiviert .Deaktivieren. Sie. die. Funktion,. um. anonyme.Internetanforderungen.zuzulassenFilter Multicast (Multicast. filtern):. Multicasting. ermöglicht.mehrere. gleichzeitige. Übertragungen. an. bestimmte.Empfänger . Wenn. Multicasting. zug<strong>el</strong>assen. ist,. können.IP-Multicast-Pakete. über. den. Router. an. die. entsprechenden.Computer. weiterg<strong>el</strong>eitet. werden . Diese. Funktion.ist. standardmäßig. aktiviert . Wählen. Sie. diese. Funktion. ab,.um.sie.zu.deaktivierenFilter Internet NAT Redirection (Internet-NAT-Umleitung.filtern):.Mit.dieser.Funktion.wird.mithilfe.der.Port-Weiterleitung.der. Zugriff. auf. lokale. Server. von. Computern. in. einem.lokalen. Netzwerk. blockiert . Wählen. Sie. die. Option.Filter Internet NAT Redirection. (Internet-NAT-Umleitung.filtern),. um. Internet-NAT-Umleitungen. zu. filtern . Diese.Funktion.ist.standardmäßig.nicht.aktiviertFilter IDENT (Port 113) (IDENT-Port.113. filtern):. Mit. dieser.Funktion. wird. verhindert,. dass. der. Port.113. von. Geräten.außerhalb. Ihres. lokalen. Netzwerks. abgefragt. wird . Diese.Funktion.ist.standardmäßig.aktiviert .Wählen.Sie.diese.Funktion.ab,.um.sie.zu.deaktivierenKlicken. Sie. auf. Save Settings. (Einst<strong>el</strong>lungen. speichern),. um.die. Änderungen. zu. speichern,. bzw . auf. Canc<strong>el</strong> Changes(Änderungen.verwerfen),.um.Ihre.Änderungen.zu.verwerfenSicherheit > VPN-PassthroughMithilfe. des. Fensters. Security > VPN Passthrough. (Sicherheit. >.VPN-Passthrough).können.Sie.VPN-Tunn<strong>el</strong>.zulassen,.die.Daten.mit.Hilfe.der.Protokolle.IPSec,.PPTP.oder.L2TP.durch.die.Firewall.des.Routers.leiten..„Security“.(Sicherheit).>.“VPN.Passthrough“VPN-PassthroughIPSec-Passthrough: IPSec. (Internet Protocol Security). ist.ein. Protokollsatz,. der. zur. Implementierung. eines. sicheren.Paketaustauschs. auf. der. IP-Ebene. verwendet. wird . Um.IPSec-Tunn<strong>el</strong>. durch. den. Router. zuzulassen,. behalten. Sie. die.Standardeinst<strong>el</strong>lung.Enable.(Aktivieren).bei .PPTP-Passthrough: Mit.PPTP.(Point-to-Point Tunn<strong>el</strong>ing Protocol).kann.das.Point-to-Point.Protocol.(PPP).über.einen.Tunn<strong>el</strong>.durch.ein. IP-Netzwerk. g<strong>el</strong>eitet. werden . Um. PPTP-Tunn<strong>el</strong>. durch. den.Router.zuzulassen,.behalten.Sie.die.Standardeinst<strong>el</strong>lung.Enable(Aktivieren).bei .L2TP-Passthrough: Mit.der.Methode.L2TP.(Layer.2.Tunn<strong>el</strong>ing.Protocol). werden. Point-to-Point-Sitzungen. über. das. Internet.auf. der. Ebene.2. aktiviert . Um. L2TP-Tunn<strong>el</strong>. durch. den. Router.zuzulassen,. behalten. Sie. die. Standardeinst<strong>el</strong>lung. Enable(Aktivieren).beiKlicken. Sie. auf. Save Settings (Einst<strong>el</strong>lungen. speichern),. um.die. Änderungen. zu. speichern,. bzw . auf. Canc<strong>el</strong> Changes(Änderungen.verwerfen),.um.Ihre.Änderungen.zu.verwerfenZugriffsbeschränkungen > InternetzugriffIm. Fenster. Access Restrictions > Internet Access(Zugriffsbeschränkungen. >. Internetzugriff). können. Sie.bestimmte. Arten. von. Internetnutzung. und. -verkehr. während.bestimmter.Tage. und. Uhrzeiten. blockieren. bzw . zulassen,. wie.z .B .Internetzugriffe,.designierte.Dienste.und.Websites„Access.Restrictions“.(Zugriffsbeschränkungen).>.„Internet.Access“.(Internetzugriff)15
Kapit<strong>el</strong>3Erweiterte KonfigurationInternetzugriffInternet Access Policy. (Richtlinien. für. Internetzugriff): Der.Zugriff. kann. über. Richtlinien. gesteuert. werden . Mithilfe. der.Einst<strong>el</strong>lungen.in.diesem.Fenster.können.Sie.eine.Zugriffsrichtlinie.aufst<strong>el</strong>len. (nachdem. Sie. auf. Save Settings (Einst<strong>el</strong>lungen.speichern). geklickt. haben) . Wenn. Sie. im. Dropdown-Menü.eine. Richtlinie. auswählen,. werden. die. Einst<strong>el</strong>lungen. dieser.Richtlinie.angezeigt .Wenn.Sie.eine.Richtlinie.löschen.möchten,.wählen. Sie. die. Nummer. dieser. Richtlinie. aus. und. klicken. auf.D<strong>el</strong>ete. (Löschen) . Klicken. Sie. zum. Anzeigen. aller. Richtlinien.auf. Summary (Zusammenfassung) . (Sie. können. Richtlinien. im.Fenster. Summary. (Zusammenfassung). löschen,. indem. Sie. die.entsprechende. Richtlinie. auswählen. und. auf. die. Schaltfläche.D<strong>el</strong>ete. (Löschen). klicken . Um. zur. Registerkarte. Internet Access.(Internetzugriff).zurückzukehren,.klicken.Sie.auf.die.Schaltfläche.Close.(Schließen) )„Internet.Policy.Summary“.(Zusammenfassung.der.Internetrichtlinien)Status Richtlinien. sind. standardmäßig. deaktiviert. Wenn.Sie. eine. Richtlinie. aktivieren. möchten,. wählen. Sie. im.Dropdown-Menü. zunächst. die. Nummer. der. Richtlinie. aus,.und.wählen.Sie.dann.Enable.(Aktivieren)So erst<strong>el</strong>len Sie eine Richtlinie für den Internetzugriff:1234Wählen. Sie. im. Dropdown-Menü. Richtlinien fürInternetzugriff.eine.Nummer.ausUm. diese. Richtlinie. zu. aktivieren,. wählen. Sie. Enable.(Aktivieren)Geben.Sie.in.das.vorgesehene.F<strong>el</strong>d.einen.Richtliniennamen.ein .Klicken. Sie. auf. Edit List of PCs. (PC-Liste. bearbeiten),. um.die. PCs. auszuwählen,. für. die. die. Richtlinie. g<strong>el</strong>ten. soll . Der.Bildschirm. List of PCs. (PC-Liste). erscheint . Sie. können. einen.PC.nach.MAC-Adresse.oder.IP-Adresse.auswählen .Sie.können.auch.eine.Reihe.von.IP-Adressen.eingeben,.wenn.die.jeweilige.Richtlinie.für.eine.Gruppe.von.PCs.g<strong>el</strong>ten.soll .Klicken.Sie.auf.Save Settings.(Einst<strong>el</strong>lungen.speichern),.um.die.Änderungen.zu. speichern,. bzw . auf Canc<strong>el</strong> Changes. (Änderungen.verwerfen),. um. Ihre. Änderungen. zu. verwerfen . Klicken. Sie.anschließend.auf.Close.(Schließen) .Wir<strong>el</strong>ess-G Broadband-Router„List.of.PCs“.(PC-Liste)5678Wählen. Sie. die. entsprechende. Option,. Deny. (Verweigern).oder. Allow. (Zulassen),. aus,. je. nachdem,. ob. Sie. den.Internetzugriff. für. die. im. Fenster List of PCs. (PC-Liste).aufgeführten.Computer.blockieren.oder.zulassen.möchtenLegen.Sie.fest,.an.w<strong>el</strong>chen.Tagen.und.zu.w<strong>el</strong>chen.Uhrzeiten.diese. Richtlinie. g<strong>el</strong>ten. soll . Wählen. Sie. die. einz<strong>el</strong>nen. Tage.aus,. an. denen. die. Richtlinie. gültig. sein. soll,. oder. wählen.Sie. die. Option. Everyday. (An. allen. Tagen). aus . Geben. Sie.anschließend. den. Gültigkeitszeitraum. in. Stunden. und.Minuten. für. die. Richtlinie. ein,. oder. wählen. Sie. die. Option.24 Hours.(24.Stunden).ausWählen.Sie.die.blockierten.Dienste.oder.Website-Sperrungen.aus,.die.Sie.verwenden.möchtenKlicken. Sie. auf. Save Settings. (Einst<strong>el</strong>lungen. speichern),.um. die. Einst<strong>el</strong>lungen. der. Richtlinie. zu. speichern. oder.auf. Canc<strong>el</strong> Changes. (Änderungen. verwerfen),. um. die.Einst<strong>el</strong>lungen.der.Richtlinie.zu.verwerfenBlockierte DiensteSie.können.den.Zugang.zu.verschiedenen.Diensten.filtern,.auf.die. über. das. Internet. zugegriffen. werden. kann,. beispi<strong>el</strong>sweise.FTP. oder. T<strong>el</strong>net,. indem. Sie. diese. Dienste. in. den. Dropdown-Menüs. neben. Blocked Services. (Blockierte. Dienste). auswählen .(Sie. können. bis. zu. 20.Dienste. blockieren ). Geben.Sie. anschließend. den. Bereich. der. Ports. ein,. die. Sie. filtern.möchtenWenn.der.Dienst,.den.Sie.blockieren.möchten,.nicht.in.der.Liste.aufgeführt. ist,. oder. wenn. Sie. die. Einst<strong>el</strong>lungen. eines. Diensts.bearbeiten.möchten,.klicken.Sie.auf.die.Schaltfläche.Add/EditService (Dienst. hinzufügen/bearbeiten) . Daraufhin. wird. das.Fenster.Port Services.(Anschlussdienste).angezeigt„Port.Services“.(Anschlussdienste)Um. einen. Dienst. hinzuzufügen,. geben. Sie. den. Namen. des.Diensts.in.das.F<strong>el</strong>d. Service Name.(Dienstname).ein .Wählen.Sie.im. Dropdown-Menü. Protocol. (Protokoll). das. entsprechende.Protokoll.aus,.und.geben.Sie.den.entsprechenden.Bereich.in.den.F<strong>el</strong>dern. Port Range (Port-Bereich).ein .Klicken.Sie.anschließend.auf.Add.(Hinzufügen)Um. einen. Dienst. zu. bearbeiten,. wählen. Sie. diesen. aus. der.Liste. auf. der. rechten. Seite. aus . Ändern. Sie. den. Namen,.die. Protokolleinst<strong>el</strong>lung. oder. den. Port-Bereich . Klicken. Sie.anschließend.auf.die.Schaltfläche.Modify.(Bearbeiten)Um.einen.Dienst.zu.löschen,.wählen.Sie.diesen.aus.der.Liste.auf.der.rechten.Seite.aus .Klicken.Sie.anschließend.auf D<strong>el</strong>ete.(Löschen)Wenn. Sie. die. gewünschten. Änderungen. im. Fenster. PortServices. (Anschlussdienste). vorgenommen. haben,. klicken. Sie.auf. die. Schaltfläche. Apply. (Anwenden),. um. die. Änderungen.zu. speichern . Wenn. Sie. Ihre. Änderungen. verwerfen. möchten,.klicken. Sie. auf. die. Schaltfläche. Canc<strong>el</strong>. (Abbrechen) . Um. das.Fenster. Port Services. (Anschlussdienste). zu. schließen. und.zum. Fenster. Access Restrictions (Zugriffsbeschränkungen).16
Kapit<strong>el</strong>3Erweiterte Konfigurationzurückzukehren,. klicken. Sie. auf. die. Schaltfläche. Close.(Schließen)Website nach URL-Adresse blockierenWenn. Sie. Websites. mit. bestimmten. URL-Adressen. blockieren.möchten,. geben. Sie. jede. URL. in. einem. separaten. F<strong>el</strong>d. neben.Website Blocking by URL Address (Website. nach. URL-Adresse.blockieren).einWebsite nach Schlüss<strong>el</strong>wort blockierenWenn. Sie. Websites. mithilfe. bestimmter. Schlüss<strong>el</strong>wörter.blockieren. möchten,. geben. Sie. jedes. Schlüss<strong>el</strong>wort. in. einem.separaten. F<strong>el</strong>d. neben. Website Blocking by Keyword. (Website.nach.Schlüss<strong>el</strong>wort.blockieren).einKlicken. Sie. auf. Save Settings (Einst<strong>el</strong>lungen. speichern),. um.die. Änderungen. zu. speichern,. bzw . auf. Canc<strong>el</strong> Changes(Änderungen.verwerfen),.um.Ihre.Änderungen.zu.verwerfenAnwendungen und Spi<strong>el</strong>e > Port-Bereich-WeiterleitungIm. Fenster. Applications & Gaming > Port Range Forward.(Anwendungen. &. Spi<strong>el</strong>e. >. Port-Bereich-Weiterleitung). können.Sie. öffentliche. Dienste. in. Ihrem. Netzwerk. einrichten,. wie.beispi<strong>el</strong>sweise. Webserver,. FTP-Server,. E-Mail-Server. oder.andere. spezi<strong>el</strong>le. Internetanwendungen . (Unter. spezi<strong>el</strong>len.Internetanwendungen.versteht.man.alle.Anwendungen,.die.über.den. Internetzugang. Funktionen. wie. z .B . Videokonferenzen. oder.Online-Spi<strong>el</strong>e. ausführen . Bei. einigen. Internetanwendungen. ist.keine.Weiterleitung.erforderlich )jeweils. die. Nummer. ein,. mit. der. der. Bereich. beginnt. bzw .endetProtokoll: Wählen. Sie. das. Protokoll. für. die. jeweilige.Anwendung.aus:.TCP,.UDP.oder.Both (Beide)IP Address (IP-Adresse):. Geben.Sie.die.IP-Adresse.des.PCs.ein,.auf.dem.die.jeweilige.Anwendung.ausgeführt.wirdEnable (Aktivieren):. Wählen. Sie. Enable. (Aktivieren). aus,. um.die. Port-Weiterleitung. für. die. betreffende. Anwendung. zu.aktivierenKlicken. Sie. auf. Save Settings (Einst<strong>el</strong>lungen. speichern),. um.die. Änderungen. zu. speichern,. bzw . auf. Canc<strong>el</strong> Changes(Änderungen.verwerfen),.um.Ihre.Änderungen.zu.verwerfenAnwendungen und Spi<strong>el</strong>e > Port-TriggeringIm. Fenster Applications & Gaming > Port Triggering(Anwendungen. und. Spi<strong>el</strong>e. >. Port-Triggering). kann. der. Router.so.eingest<strong>el</strong>lt.werden,.dass.er.ausgehende.Daten.für.bestimmte.Port-Nummern. überwacht . Die. IP-Adresse. des. Computers,.der. die. übereinstimmenden. Daten. sendet,. wird. vom. Router.gespeichert . Wenn. die. abgerufenen. Daten. über. den. Router.übertragen.werden,.werden.die.Daten.über.IP-Adresse.und.Port-Mapping-Reg<strong>el</strong>n.an.den.richtigen.Computer.weiterg<strong>el</strong>eitet„Applications.and.Gaming“.(Anwendungen.und.Spi<strong>el</strong>e).>.„Port.Range.Forward“.(Port-Bereich-Weiterleitung )Port-Bereich-WeiterleitungGeben.Sie.zur.Port-Weiterleitung.in.jeder.Zeile.die.Informationen.für.die.erforderlichen.Kriterien.einApplication (Anwendung):. Geben. Sie. den. gewünschten.Namen. für. die. Anwendung. ein . Jeder. Name. kann. maximal. 12.Zeichen.lang.seinStart/End (Start/Ende):. Hierbei. hand<strong>el</strong>t. es. sich. um. denPort-Bereich . Geben. Sie. unter. Start. (Start). und. End. (Ende).„Applications.and.Gaming“.(Anwendungen.und.Spi<strong>el</strong>e).>.„Port-Triggering“Port-TriggeringApplication (Anwendung):. Geben. Sie. den. Namen. des.Triggers.einTriggering-BereichGeben. Sie. für. jede. Anwendung. den. Port-Nummernbereich.für. das. Triggering. an . Die. benötigten. Port-Nummern. finden.Sie.in.der.Dokumentation.der.InternetanwendungStart Port (Start-Port):. Geben. Sie. hier. die. Nummer. des. Start-Ports.für.den.Triggering-Bereich.einEnd Port (End-Port):.Geben.Sie.hier.die.Nummer.des.End-Ports.für.den.Triggering-Bereich.einWir<strong>el</strong>ess-G Broadband-Router17
Kapit<strong>el</strong>3Erweiterte KonfigurationWeiterleitungsbereichGeben. Sie. für. jede. Anwendung. den. Port-Nummernbereich.für.die.Weiterleitung.an .Die.benötigten.Port-Nummern.finden.Sie.in.der.Dokumentation.der.InternetanwendungStart Port (Start-Port):. Geben. Sie. hier. die. Nummer. des. Start-Ports.für.den.Weiterleitungsbereich.einEnd Port (End-Port):.Geben.Sie.hier.die.Nummer.des.End-Ports.für.den.Weiterleitungsbereich.einEnable (Aktivieren):. Wählen. Sie. Enable. (Aktivieren). aus,. um.Port-Triggering. für. die. entsprechende. Anwendung. zu.aktivierenKlicken. Sie. auf. Save Settings (Einst<strong>el</strong>lungen. speichern),. um.die. Änderungen. zu. speichern,. bzw . auf. Canc<strong>el</strong> Changes.(Änderungen.verwerfen),.um.Ihre.Änderungen.zu.verwerfenAnwendungen und Spi<strong>el</strong>e > DMZAnwendungen und Spi<strong>el</strong>e > Quality ofService (QoS)QoS. (Quality of Service). sorgt. bei. Netzwerkverkehr. mit.hoher. Priorität,. beispi<strong>el</strong>sweise. bei. anspruchsvollen.Echtzeitanwendungen. wie. Videokonferenzen,. für. besseren.Service .Es. stehen. drei. Arten. von. QoS. zur. Verfügung:.Device. Priority. (Gerätepriorität),. Ethernet. Port. Priority.(Ethernet-Port-Priorität). und. Application. Priority.(Anwendungspriorität)QoS:Enable/Disable (Aktivieren/Deaktivieren):.Um.QoS.zu.aktivieren,.wählen. Sie. Enable (Aktivieren). aus . Andernfalls. wählen. Sie.Deaktivieren.aus .QoS.ist.standardmäßig.deaktiviertUpstream Bandwidth (Upstream-Bandbreite):. Wählen. Sie.aus. dem. Dropdown-Menü. Auto. (Automatisch). oder. Manual(Manu<strong>el</strong>l). aus . Mit. der. letztgenannten. Funktion. können. Sie.die. maximale. ausgehende. Bandbreite. festlegen,. die. von.Anwendungen.genutzt.werden.darfDMZ„Applications.and.Gaming“.(Anwendungen.und.Spi<strong>el</strong>e).>.„DMZ“Mit. der. Funktion. DMZ. (DMZ. =. Demilitarized Zone;.Entmilitarisierte. Zone). kann. für. einen. Netzwerkcomputer. eine.Verbindung. zum. Internet. hergest<strong>el</strong>lt. werden,. damit. dieser.einen. spezi<strong>el</strong>len. Dienst,. wie. z .B . Internetspi<strong>el</strong>e. oder.Videokonferenzen,. nutzen. kann . Mit. DMZ-Hosting. werden. alle.Ports. gleichzeitig. an. einen. PC. weiterg<strong>el</strong>eitet . Die. Funktion. zur.Port-Bereich-Weiterleitung. ist. sicherer,. da. durch. sie. nur. die.gewünschten. Ports. geöffnet. werden,. während. durch. DMZ-Hosting.alle.Ports.eines.Computers.geöffnet.werden.und.dieser.Computer. mit. dem. Internet. verbunden. wird .Auf.jedem.PC,.dessen.Port.weiterg<strong>el</strong>eitet.wird,.muss.die.DHCP-Client-Funktion. deaktiviert. sein;. darüber. hinaus. sollte. jedem.PC. eine. neue. statische. IP-Adresse. zugewiesen. werden,. da. die.IP-Adresse. bei.Verwendung. der. DHCP-Funktion. u .U . geändert.wirdUm. einen. PC. mit. dem. Internet. zu. verbinden,. wählen. Sie. die.Option. Enable. (Aktivieren). aus . Geben. Sie. anschließend. im.F<strong>el</strong>d. DMZ Host IP Address. (IP-Adresse. des. DMZ-Hosts). die.IP-Adresse.des.Computers.ein .Diese.Funktion.ist.standardmäßig.deaktiviertKlicken. Sie. auf. Save Settings. (Einst<strong>el</strong>lungen. speichern),. um.die. Änderungen. zu. speichern,. bzw . auf. Canc<strong>el</strong> Changes.(Änderungen.verwerfen),.um.Ihre.Änderungen.zu.verwerfenWir<strong>el</strong>ess-G Broadband-Router„Applications.&.Gaming“.(Anwendungen.und.Spi<strong>el</strong>e).>.„Quality.of.Service“.(QoS)GeräteprioritätGeben. Sie. im. F<strong>el</strong>d. Device name (Gerätename). den. Namen.Ihres. Netzwerkgeräts. ein,. geben. Sie. dessen. MAC-Adresse. ein,.und. wählen. Sie. anschließend. aus. dem. Dropdown-Menü. die.gewünschte.Priorität.ausEthernet-Port-PrioritätBei. Auswahl. von. QoS. mit. Ethernet-Port-Priorität. können. Sie.die.Leistung.der.vier.Ports.des.Routers.(LAN-Ports.1.bis.4).nach.18
Kapit<strong>el</strong>3Erweiterte KonfigurationPriorität.staff<strong>el</strong>n ..Wählen.Sie.für.jeden.Port.die.Einst<strong>el</strong>lungen.der.Priorität.und.der.Flusskontrolle.ausPriority (Priorität):. Wählen. Sie. unter. Priority. (Priorität). High.(Hoch). oder. Low. (Niedrig). aus . Den. vier. Ports. des. Routers. ist.standardmäßig.eine.niedrige.Priorität.zugewiesen .Flow Control (Flusskontrolle):. Wählen. Sie. die. Option.Enabled.(Aktiviert).aus,.wenn.der.Router.die.Datenübertragung.zwischen.Netzwerkgeräten.steuern.soll .Wenn.Sie.die.Funktion.deaktivieren. möchten,. wählen. Sie. Disabled. (Deaktiviert).aus . QoS. mit. Ethernet-Port-Priorität. muss. nicht. von. Ihrem.ISP.unterstützt.werden,.da.die.nach.Priorität.gestaff<strong>el</strong>ten.LAN-Ports.1. -. 4. zu. Ihrem. Netzwerk. gehören . Diese. Funktion. ist.standardmäßig.aktiviertAnwendungsprioritätÜber.Application Priority QoS.(anwendungsbasierte.QoS).werden.Informationen. beim. Übertragen. und. Empfangen. verwaltet .Je. nach. den. Einst<strong>el</strong>lungen. im. Fenster. QoS. wird. über. diese.Funktion.Informationen.eine.hohe.oder.niedrige.Priorität.für.die.von.Ihnen.festg<strong>el</strong>egten.Anwendungen.zugewiesenOptimize Gaming Applications (Spi<strong>el</strong>eanwendungen.optimieren):. Wählen. Sie. diese. Option. aus,. um. den. üblichen.Anwendungs-Ports.für.Spi<strong>el</strong>e.automatisch.eine.höhere.Priorität.zuzuweisen .Zu.diesen.Spi<strong>el</strong>en.gehören.unter.anderem:.CounterStrike, Half-Life, Age of Empires, Everquest, Quake 2/Quake 3 und.Diablo II. Standardmäßig.ist.diese.Option.nicht.ausgewähltApplication Name (Name. der. Anwendung):. Geben. Sie. den.gewünschten.Namen.für.die.Anwendung.in.das.F<strong>el</strong>d.ApplicationName (Name.der.Anwendung).einPriority (Priorität): Wählen. Sie. High. (Hoch). oder. Low.(Niedrig). aus,. um. der. Anwendung. eine. Priorität. zuzuweisen .Die.Standardauswahl.ist.Low.(Niedrig)Specific Port # (Bestimmte.Port-Nummer):.Geben.Sie.die.Port-Nummer.für.die.Anwendung.einWir<strong>el</strong>ess QoSWMM Support (WMM-Unterstützung):. Bei. Wi-Fi. Multimedia.(WMM),.früher.Wir<strong>el</strong>ess.Multimedia.Extensions.(WME).genannt,.hand<strong>el</strong>t. es. sich. um. eine. von. der. Wi-Fi. Alliance. zertifizierte.Funktion. auf. der. Basis. des. Standards. IEEE.802 11e . Diese.Funktion. bietet. QoS. für. Wir<strong>el</strong>ess-Netzwerke . Sie. eignet. sich.besonders. für. Sprach-,. Musik-. und. Videoanwendungen,. z .B .Voice. Over. IP. (VoIP),. Video-Streaming. und. interaktive. Spi<strong>el</strong>e .Wenn. weitere. Geräte. im. Netzwerk. installiert. sind,. die. WMM.unterstützen,. wählen. Sie. Enabled. (Aktiviert). aus . Andernfalls.behalten.Sie.die.Standardeinst<strong>el</strong>lung.Disabled.(Deaktiviert).beiNo Acknowledgement (Keine. Bestätigung):. Diese. Funktion.verhindert,. dass. der. Router. bei. Fehlern. Daten. erneut. sendet .Klicken. Sie. auf. Enabled. (Aktiviert),. um. diese. Funktion. zu.verwenden . Andernfalls. behalten. Sie. die. Standardeinst<strong>el</strong>lung.Disabled.(Deaktiviert).beiKlicken. Sie. auf. Save Settings (Einst<strong>el</strong>lungen. speichern),. um.die. Änderungen. zu. speichern,. bzw . auf. Canc<strong>el</strong> Changes.(Änderungen.verwerfen),.um.Ihre.Änderungen.zu.verwerfenVerwaltung > VerwaltungsfunktionenIm. Fenster Administration > Management. (Verwaltung. >.Verwaltungsfunktionen). kann. der. Netzwerkadministrator.spezi<strong>el</strong>le. Router-Funktionen. für. Zugriff. und. Sicherheit.verwaltenWir<strong>el</strong>ess-G Broadband-RouterRouter-Passwort:Lokaler Routerzugriff„Verwaltung“.>.„Verwaltungsfunktionen“Router Password (Router-Passwort):. Geben. Sie. ein. neues.Passwort.für.den.Router.einRe-enter to confirm (Zur.Bestätigung.erneut.eingeben):.Geben.Sie.das.Passwort.zur.Bestätigung.erneut.einWeb-ZugriffAccess Server (Zugriffsserver):. HTTP. (HyperText TransportProtocol). ist. das. Kommunikationsprotokoll,. das. zur.Verbindungsherst<strong>el</strong>lung. zu. Servern. im. World. Wide. Web.verwendet. wird . HTTPS. verwendet. SSL. (Secured SocketLayer),. um. die. Datenübertragung. aus. Sicherheitsgründen. zu.verschlüss<strong>el</strong>n .Wählen.Sie.die.Option.HTTP.oder.HTTPS.aus ..Die.Standardauswahl.ist.HTTP.Wir<strong>el</strong>ess Access Web (Wir<strong>el</strong>ess. Web-Zugriff):. Wenn. Sie. den.Router. in. einer. öffentlichen. Domäne. verwenden,. für. die. Ihre.Gäste.über.Wir<strong>el</strong>ess-Zugriff.verfügen,.können.Sie.den.Wir<strong>el</strong>ess-Zugriff. auf. das. webbasierte. Dienstprogramm. des. Routers.deaktivieren . Sie. können. nur. über. eine. Wired-Verbindung. auf.das. webbasierte. Dienstprogramm. zugreifen,. wenn. Sie. die.Einst<strong>el</strong>lung.deaktivieren .Behalten.Sie.den.Standardwert.Enable.(Aktiviert). bei,. um. den. Wir<strong>el</strong>ess-Zugriff. auf. das. webbasierte.Dienstprogramm. des. Routers. zu. aktivieren,. oder. wählen.Sie. Disable. (Deaktivieren),. um. den. Wir<strong>el</strong>ess-Zugriff. auf. das.Dienstprogramm.zu.deaktivierenEntfernter RouterzugriffRemote Management (Remote-Verwaltung):.Um.den.Remote-Zugriff.auf.den.Router.von.außerhalb.des.lokalen.Netzwerks.zu.ermöglichen,.wählen.Sie.Enable.(Aktivieren).aus .Management-Port: Geben.Sie.anschließend.die.Port-Nummer.ein,. auf. die. von. außerhalb. des. Netzwerks. zugegriffen. werden.kann . Sie. müssen. wie. gewöhnlich. das. Passwort. des. Routers.eingeben,.wenn.Sie.auf.diese.Weise.auf.den.Router.zugreifenUse https (https. verwenden):. Wählen. Sie. diese. Funktion,. um.HTTPS.für.den.Remote-Zugriff.zu.verwendenUPnPUPnP: Behalten. Sie. die. Standardeinst<strong>el</strong>lung. Enable.(Aktivieren).bei,.um.die.UPnP-Funktion.zu.aktivieren;.andernfalls.wählen. Sie. Disable. (Deaktivieren). aus19
Kapit<strong>el</strong>3Erweiterte KonfigurationKlicken. Sie. auf. Save Settings (Einst<strong>el</strong>lungen. speichern),. um.die. Änderungen. zu. speichern,. bzw . auf. Canc<strong>el</strong> Changes(Änderungen.verwerfen),.um.Ihre.Änderungen.zu.verwerfenVerwaltung > ProtokollDer. Router. kann. Protokolle. über. Datenverkehr. und. Ereignisse.für.Ihre.Internetverbindung.protokollierenKlicken. Sie. auf. Close. (Schließen),. um. zum. Fenster DiagnosezurückzukehrenPing-TestProtokoll„Administration“.(Verwaltung).>.ProtokollLog (Protokoll):. Um. die. Protokollfunktion. zu. deaktivieren,.behalten. Sie. die. Standardeinst<strong>el</strong>lung. Disable. (Deaktivieren).bei .Um.den.Datenverkehr.zwischen.Netzwerk.und.Internet.zu.überwachen,.wählen.Sie.die.Option.Enable.(Aktiviert).ausWenn.Sie.Protokolle.anzeigen.möchten,.klicken.Sie.auf.IncomingLog. (Protokoll.–. eingehend). oder. Outgoing Log (Protokoll.–.ausgehend),.je.nachdem,.w<strong>el</strong>ches.Sie.anzeigen.möchtenKlicken. Sie. auf. Save Settings (Einst<strong>el</strong>lungen. speichern),. um.die. Änderungen. zu. speichern,. bzw . auf. Canc<strong>el</strong> Changes(Änderungen.verwerfen),.um.Ihre.Änderungen.zu.verwerfenVerwaltung > DiagnoseMit.den.Diagnosetests.Ping.und.Traceroute.(Routenverfolgung).können. Sie. die. Verbindungen. Ihrer. Netzwerkkomponenten.überprüfenTest zur RoutenverfolgungTraceroute (Routenverfolgung):. Um. die. Leistung. einer.Verbindung. zu. überprüfen,. klicken. Sie. auf. die. Schaltfläche.Traceroute.(Routenverfolgung),.um.das.Fenster.Traceroute Test(Test.zur.Routenverfolgung).zu.öffnen .Geben.Sie.die.IP-Adresse.des. PCs. ein,. dessen.Verbindung. Sie. überprüfen. möchten,. und.klicken.Sie.auf.die.Schaltfläche.Traceroute (Routenverfolgung) .Im. Fenster. Traceroute Test. (Test. zur. Routenverfolgung). wird.angegeben,.ob.der.Test.erfolgreich.war .Um.den.Test.anzuhalten,.klicken.Sie.auf.die.Schaltfläche.Stop (Anhalten) .Klicken.Sie.auf.die.Schaltfläche.Clear Log.(Protokoll.löschen),.um.die.Anzeige.im.Fenster.zu.löschen .Klicken.Sie.auf.Close (Schließen),.um.zum.Fenster. Diagnose. zurückzukehren„Traceroute.Test“.(Test.zur.Routenverfolgung)Ping-Test„Administration“.(Verwaltung).>.DiagnosePing: Mit. dem. Ping-Test. wird. der. Status. einer. Verbindung.überprüft . Klicken. Sie. auf. die. Schaltfläche. Ping,. um. das.Fenster. Ping-Test. zu. öffnen . Geben. Sie. die. IP-Adresse. des. PCs,.dessen.Verbindung.Sie.überprüfen.möchten,.und.die.Häufigkeit.der. Überprüfung. ein . Klicken. Sie. anschließend. auf. Ping .Im. Fenster Ping-Test. wird. angegeben,. ob. der. Test. erfolgreich.war . Um. den. Test. anzuhalten,. klicken. Sie. auf. die. Schaltfläche.Stop (Anhalten) . Klicken. Sie. auf. die. Schaltfläche. Clear Log.(Protokoll. löschen),. um. die. Anzeige. im. Fenster. zu. löschen .Verwaltung > Werkseinst<strong>el</strong>lungenIm. Fenster. Administration > Factory Defaults. (Verwaltung.>.Werkseinst<strong>el</strong>lungen). können. Sie. die. Werkseinst<strong>el</strong>lungen. des.Routers.wiederherst<strong>el</strong>len .Werkseinst<strong>el</strong>lungenRestore Factory Defaults (Werkseinst<strong>el</strong>lungen.wiederherst<strong>el</strong>len):. Um. die.Werkseinst<strong>el</strong>lungen. des. Routers. auf.die.Standardwerte.zurückzusetzen,.wählen.Sie.Yes.(Ja).aus,.und.klicken. Sie. anschließend. auf. die. Schaltfläche. Save Settings(Einst<strong>el</strong>lungen. speichern) . Alle. von. Ihnen. gespeicherten.Einst<strong>el</strong>lungen.gehen.verloren,.wenn.die.Standardeinst<strong>el</strong>lungen.wiederhergest<strong>el</strong>lt.werdenWir<strong>el</strong>ess-G Broadband-Router20
Kapit<strong>el</strong>3Erweiterte Konfiguration„Administration“.(Verwaltung).>.Werkseinst<strong>el</strong>lungenVerwaltung > Aktualisieren der FirmwareIm. Fenster. Administration > Upgrade. Firmware (Verwaltung. >.Aktualisieren.der.Firmware).können.Sie.die.Firmware.des.Routers.aktualisieren. Aktualisieren. Sie. die. Firmware. nur. dann,. wenn.Probleme.mit.dem.Router.auftreten.oder.die.Firmware.eine.neue.Funktion.enthält,.die.Sie.verwenden.möchten .Konfiguration sichernKlicken. Sie. zum. Erst<strong>el</strong>len. einer. Sicherungskopie. der.Konfigurationsdatei. des. Routers. auf. die. Schaltfläche. Backup(Sichern) . Befolgen. Sie. dann. die. Anweisungen. auf. dem.BildschirmKonfiguration wiederherst<strong>el</strong>lenPlease s<strong>el</strong>ect a file to restore (Wählen. Sie. die. Datei. aus,. die.wiederhergest<strong>el</strong>lt.werden.soll):.Klicken.Sie.auf.die.Schaltfläche.Browse. (Durchsuchen),. um. die. Konfigurationsdatei. des.Routers. auszuwählen . Klicken. Sie. anschließend. auf. Restore(Wiederherst<strong>el</strong>len)Status > RouterIm.Fenster.Status > Router.wird.der.aktu<strong>el</strong>le.Status.des.Routers.angezeigt.„Administration“.(Verwaltung).>.Aktualisieren.der.Firmware..Laden. Sie. vor. Aktualisierung. der. Firmware. die.Aktualisierungsdatei. für. die. Router-Firmware. von. der. Linksys.Website. unter. www linksys com. herunter . Extrahieren. Sie.anschließend.die.DateiFirmware aktualisierenPlease s<strong>el</strong>ect a file to upgrade (Wählen. Sie. eine. Datei. für.die.Aktualisierung.aus):.Klicken.Sie.auf.Browse.(Durchsuchen),.und. wählen. Sie. die. dekomprimierte. Firmware-Aktualisierungsdatei. aus . Klicken. Sie. auf. die. Schaltfläche.Upgrade.(Aktualisieren),.und.befolgen.Sie.die.Anweisungen.auf.dem.BildschirmVerwaltung > KonfigurationsverwaltungIn. diesem. Fenster. wird. die. Konfigurationsdatei. des. Routers.gesichert.bzw .wiederhergest<strong>el</strong>ltRouter-InformationenStatus.>.RouterFirmware Version (Firmware-Version):. Hierbei. hand<strong>el</strong>t. es. sich.um.die.aktu<strong>el</strong>le.Firmware-Version.des.RoutersCurrent Time (Aktu<strong>el</strong>le. Uhrzeit):. Hier. wird. die. Uhrzeit. so.angezeigt,.wie.Sie.sie.auf.der.Registerkarte.Setup.(Einrichtung).festg<strong>el</strong>egt.habenMAC Address (MAC-Adresse):. Hierbei. hand<strong>el</strong>t. es. sich. um. die.dem.ISP.angezeigte.MAC-Adresse.des.RoutersRouter Name (Routername):. Hierbei. hand<strong>el</strong>t. es. sich. um. den.Namen. für. den. Router,. den. Sie. auf. der. Registerkarte. Setup(Einrichtung).festg<strong>el</strong>egt.habenHost Name (Hostname):. Wenn. Ihr. ISP. dies. erfordert,. müssen.Sie. diesen. Namen. auf. der. Registerkarte. Setup. (Einrichtung).eingebenDomain Name (Domänenname):. Wenn. Ihr. ISP. dies. erfordert,.müssen. Sie. diesen. Namen. auf. der. Registerkarte. Setup(Einrichtung).eingeben„Administration“.(Verwaltung).>.„Config.Management“.(Konfigurationsverwaltung)Wir<strong>el</strong>ess-G Broadband-Router21
Kapit<strong>el</strong>3Erweiterte KonfigurationInternetKonfigurationstypIn.diesem.Bereich.werden.die.aktu<strong>el</strong>l.im.Router.gespeicherten.Netzwerkinformationen. angezeigt . Die. Informationen. sind.vom. Typ. der. Internetverbindung. abhängig,. der. im. Fenster.Setup > Basic Setup (Einrichtung. >. Grundlegende. Einrichtung).ausgewählt.istKlicken. Sie. auf. Refresh. (Aktualisieren),. um. die. angezeigten.Informationen.neu.zu.ladenStatus > Lokales NetzwerkIm. Fenster. Status > Local Network. (Status. >. Lokales. Netzwerk).wird.der.Status.Ihres.lokalen.Netzwerks.angezeigtDHCP-Client-Tab<strong>el</strong>leKlicken. Sie. auf. Refresh. (Aktualisieren),. um. die. angezeigten.Informationen. neu. zu. ladenStatus > Wir<strong>el</strong>essIm. Fenster Status > Wir<strong>el</strong>ess. wird. der. Status. Ihres. Wir<strong>el</strong>ess-Netzwerks.angezeigt..Lokales Netzwerk„Status“.>.„Lokales.Netzwerk“MAC Address (MAC-Adresse):. Hierbei. hand<strong>el</strong>t. es. sich. um. die.MAC-Adresse. des. Routers,. wie. sie. in. Ihrem. lokalen. Ethernet-Netzwerk.angezeigt.wirdIP Address (IP-Adresse):. Hierbei. hand<strong>el</strong>t. es. sich. um. die. IP-Adresse.des.Routers,.wie.sie.in.Ihrem.lokalen.Ethernet-Netzwerk.angezeigt.wirdSubnet Mask (Subnetzmaske):. Hier. wird. die. aktu<strong>el</strong>le.Subnetzmaske. angezeigt,. die. für. Ihr. lokales. Netzwerk.konfiguriert.wirdDHCP Server: Wenn.Sie.den.Router.als.DHCP-Server.verwenden,.wird.dies.hier.angezeigtStart IP Address (Start-IP-Adresse):. Der. Beginn. des. Bereichs.der.IP-Adressen,.die.von.den.Geräten.in.Ihrem.lokalen.Ethernet-Netzwerk.verwendet.werden,.wird.hier.angezeigtEnd IP Address (End-IP-Adresse):. Das. Ende. des. Bereichs. der.IP-Adressen,. die. von. den. Geräten. in. Ihrem. lokalen. Ethernet-Netzwerk.verwendet.werden,.wird.hier.angezeigtDHCP Clients Table (DHCP-Client-Tab<strong>el</strong>le):.Wenn.Sie.auf.diese.Schaltfläche. klicken,. wird. ein. Fenster. mit. den. PCs. angezeigt,.die.den.Router.als.DHCP-Server.verwenden .Sie.können.PCs.aus.dieser.Liste.löschen.und.ihre.Verbindungen.trennen,.indem.Sie.das. Kontrollkästchen. D<strong>el</strong>ete. (Löschen). aktivieren. und. auf. die.Schaltfläche.D<strong>el</strong>ete.(Löschen).klickenWir<strong>el</strong>ess„Status“.>.„Wir<strong>el</strong>ess“MAC Address (MAC-Adresse):. Hierbei. hand<strong>el</strong>t. es. sich. um. die.MAC-Adresse. des. Routers,. wie. sie. in. Ihrem. lokalen. Netzwerk.angezeigt.wirdMode (Modus):.Hier.wird.der.im.Fenster.Wir<strong>el</strong>ess > Basic Wir<strong>el</strong>essSettings. (Wir<strong>el</strong>ess. >. Grundlegende. Wir<strong>el</strong>ess-Einst<strong>el</strong>lungen).ausgewählte. und. im. Netzwerk. verwendete. Wir<strong>el</strong>ess-Modus.(Gemischt,.Nur.G.oder.Deaktiviert).angezeigtSSID: Hier.wird.der.im.Fenster.Wir<strong>el</strong>ess > Basic Wir<strong>el</strong>ess Settings(Wir<strong>el</strong>ess.>.Grundlegende.Wir<strong>el</strong>ess-Einst<strong>el</strong>lungen).eingegebene.Wir<strong>el</strong>ess-Netzwerkname.bzw .die.SSID.angezeigtDHCP Server (DHCP-Server):. Hier. wird. der. Status. der. DHCP-Serverfunktion. angezeigtChann<strong>el</strong> (Kanal):. Hier. wird. der. im. Fenster. Wir<strong>el</strong>ess > BasicWir<strong>el</strong>ess Settings. (Wir<strong>el</strong>ess. >. Grundlegende. Wir<strong>el</strong>ess-Einst<strong>el</strong>lungen). eingegebene. Kanal. angezeigt,. auf. dem. die.Datenübertragung. Ihres.Wir<strong>el</strong>ess-Netzwerks. erfolgtEncryption Function (Verschlüss<strong>el</strong>ungsfunktion):. Hier. wird.der.im.Fenster. Wir<strong>el</strong>ess > Wir<strong>el</strong>ess Security.(Wir<strong>el</strong>ess.>.Wir<strong>el</strong>ess-Sicherheit). ausgewählte. Status. der. Sicherheitsfunktion. des.Routers.ausgewähltKlicken. Sie. auf. Refresh. (Aktualisieren),. um. die. angezeigten.Informationen. neu. zu. ladenWir<strong>el</strong>ess-G Broadband-Router22
AnhangAFehlerbehebungAnhang A:FehlerbehebungDer Computer kann keine Internetverbindungherst<strong>el</strong>len.Folgen. Sie. diesen. Anweisungen,. bis. der. Computer. eine.Verbindung.zum.Internet.herst<strong>el</strong>len.kann:• St<strong>el</strong>len. Sie. sicher,. dass. der. Router. eingeschaltet. ist .Die. Netzstrom-LED. sollte. grün. leuchten. und. nicht.blinken• Falls.die.Netzstrom-LED.blinkt,.schalten.Sie.sämtliche.Netzwerkgeräte. aus,. einschließlich. Modem,. Router.und. Computer . Schalten. Sie. die. einz<strong>el</strong>nen. Geräte.dann.in.der.folgenden.Reihenfolge.wieder.ein:123Kab<strong>el</strong>-.oder.DSL-ModemRouterComputer• Überprüfen. Sie. die. Kab<strong>el</strong>anschlüsse . Der. Computer.sollte.an.einen.der.Ports.angeschlossen.sein,.die.auf.dem.Router.mit.den.Ziffern.1.bis.4.nummeriert.sind .Das. Modem. muss. an. den. Internet-Port. des. Routers.angeschlossen.seinDas Modem besitzt keinen Ethernet-Port.Das. Modem. ist. ein. Einwahlmodem. für. den.herkömmlichen. Einwahldienst . Um. den. Router.verwenden. zu. können,. brauchen. Sie. ein. Kab<strong>el</strong>-/DSL-Modem.und.eine.Highspeed-InternetverbindungSie können mit dem DSL-Service keine manu<strong>el</strong>leInternetverbindung herst<strong>el</strong>len.Nachdem. Sie. den. Router. installiert. haben,. wählt. dieser.sich. automatisch. bei. Ihrem. Internet-Dienstanbieter.(ISP). ein . Aus. diesem. Grund. müssen. Sie. sich. nicht. mehr.manu<strong>el</strong>l.einwählenDas DSL-T<strong>el</strong>efonkab<strong>el</strong> passt nicht in den Internet-Portdes Routers.Der. Router. ersetzt. nicht. das. Modem . Um. den. Router.verwenden. zu. können,. benötigen. Sie. nach. wie. vor. das.DSL-Modem . Verbinden. Sie. das. T<strong>el</strong>efonkab<strong>el</strong>. mit. dem.DSL-Modem,. legen. Sie. die. Installations-CD-ROM. in. das.CD-ROM-Laufwerk.des.Computers.ein,.und.folgen.Sie.den.Anweisungen.auf.dem.BildschirmWenn Sie auf den Browser dopp<strong>el</strong>klicken, werden Siezur Eingabe von Benutzername und Passwortaufgefordert. Gehen Sie wie folgt vor, wenn dieseEingabeaufforderung nicht mehr angezeigt werdensoll.Starten.Sie.den.Webbrowser,.und.führen.Sie.die.folgenden.Schritte. aus. (die. hier. aufgeführten. Schritte. g<strong>el</strong>ten.für. Internet. Explorer,. sind. jedoch. für. andere. Browser.ähnlich):1234Wählen.Sie.Extras.>.Internetoptionen .Klicken.Sie.auf.die.Registerkarte.VerbindungenAktivieren.Sie.Keine Verbindung wählen .Klicken.Sie.auf.OKDer Router besitzt keinen Koaxial-Port für dieKab<strong>el</strong>verbindung.Der. Router. ersetzt. nicht. das. Modem . Um. den. Router.verwenden. zu. können,. benötigen. Sie. nach. wie. vor. das.Kab<strong>el</strong>modem . Verbinden. Sie. das. T<strong>el</strong>efonkab<strong>el</strong>. mit. dem.Kab<strong>el</strong>modem,. legen. Sie. die. Installations-CD-ROM. in. das.CD-ROM-Laufwerk.des.Computers.ein,.und.folgen.Sie.den.Anweisungen.auf.dem.BildschirmDer Computer kann keine Wir<strong>el</strong>ess-Verbindung zumNetzwerk herst<strong>el</strong>len.St<strong>el</strong>len. Sie. sicher,. dass. der.Wir<strong>el</strong>ess-Netzwerkname. bzw .die.SSID.sowohl.auf.dem.Computer.als.auch.dem.Router.gleich. lautet . Wenn. Sie. Wir<strong>el</strong>ess-Sicherheit. aktiviert.haben,.vergewissern.Sie.sich,.dass.auf.dem.Computer.und.dem. Router. dies<strong>el</strong>be. Sicherheitsmethode. und. ders<strong>el</strong>be.Schlüss<strong>el</strong>.verwendet.werdenSie müssen die Einst<strong>el</strong>lungen auf dem Router ändern.Öffnen. Sie. den. Webbrowser. (z .B . Internet. Explorer.oder. Firefox),. und. geben. Sie. die. IP-Adresse. des. Routers.in. das. Adressf<strong>el</strong>d. ein. (die. Standard-IP-Adresse. lautet.192.168.1.1) .Wenn.Sie.dazu.aufgefordert.werden,.lassen.Sie.das.F<strong>el</strong>d.Benutzername.leer,.und.geben.Sie.dann.das.Passwort.für.den.Router.ein .(Das.Standardpasswort.lautet.admin) .Klicken.Sie.auf.die.entsprechende.Registerkarte,.um.die.Einst<strong>el</strong>lungen.zu.ändernWEB:. Wenn. Ihre. Fragen. hier. nicht.beantwortet. wurden,. besuchen. Sie. die.Linksys.Website.unter.www.linksys.com.Wir<strong>el</strong>ess-G Broadband-Router23
AnhangBSpezifikationenAnhang B:SpezifikationenMod<strong>el</strong>l.WRT54G2Standards. IEEE.802 3,.IEEE.802 3u,. IEEE.802 11g,.IEEE.802 11bPorts.Internet:.ein.10/100.RJ-45.Port. LAN:.Vier.10/100-RJ-45.. Switched.Ports. ein.StromanschlussTaste.Eine.Reset-Taste. Eine.WPS-TasteLEDs.Netzstrom,.Wir<strong>el</strong>ess,.LAN.(1.-.4),.. Internet,.. Wi-Fi.Protected.Setup.(WPS),Kab<strong>el</strong>typ. Kat .5Anzahl.der.Antennen.HF-Ausgangsleistung.2.interne.Antennen18.dBm.UPnP-fähig/-zertifi.ziert. fähigSicherheitsmerkmale. SPI.(Stateful.Packet.Inspection). Firewall,.InternetrichtlinienWir<strong>el</strong>ess-Sicherheit. Wi-Fi.Protected.Access2.(WPA2),. WEP,.Wir<strong>el</strong>ess-MAC-FilteringBetriebsbedingungenAbmessungen.Gewicht. 280.gStromversorgung.203.x.35.x.160.mmExtern,.12.V.GS,.0,5.AZertifi.zierungen. FCC,.CE,.IC-UL,.Wi-Fi.(802 11b,.. .. 802 11g),.WPA2,.WMMBetriebstemperatur.Lagertemperatur.Luftfeuchtigkeit..Luftfeuchtigkeit..0.bis.40.ºC-20.bis.60.ºC10.bis.85.%.nichtkondensierendbei.Betrieb5.bis.90.%.nicht.kondensierendbei.LagerungWir<strong>el</strong>ess-G Broadband-Router24
AnhangCGarantieinformationenAnhang C:GarantieinformationenEINGESCHRÄNKTE GEWÄHRLEISTUNGLinksys. sichert. Ihnen. innerhalb. der. Gewährleistungsfrist.zu,. dass. dieses. Linksys. Hardwareprodukt. bei. normaler.Verwendung. keine. Material-. oder. Verarbeitungsfehler.aufweist . Die. Gewährleistungsfrist. beginnt. mit. dem.Kaufdatum. des. ursprünglichen. Käufers. und. endet. wie.unten.angegeben:• Nach.zwei.(2).Jahren.für.neue.Produkte• Nach.neunzig.(90).Tagen.für.überholte.ProdukteDiese. eingeschränkte. Gewährleistung. ist. nicht.übertragbar. und. gilt. nur. für. den. ursprünglichen. Käufer .Im. Rahmen. dieser. Gewährleistung. beschränken. sich.Ihre. Rechtsmitt<strong>el</strong>. und. der. Haftungsumfang. von. Linksys.wie. folgt:. Linksys. kann. nach. eigener. Wahl. das. Produkt.(a). mit. einem. neuen. oder. überholten. Teil. reparieren,.(b). gegen. ein. verfügbares. gleichwertiges. neues. oder.überholtes. Linksys. Produkt. austauschen. oder. (c). den.Kaufpreis. abzüglich. etwaiger. Nachlässe. zurückerstatten .Die. Gewährleistung. gilt. für. jedes. reparierte. oder.Ersatzprodukt. für. die. Dauer. der. ursprünglichen.Gewährleistungsfrist,. aber. mindestens. 30.Tage . Alle.Produkte.und/oder.Teile,.die.ausgetauscht.werden,.gehen.in.das.Eigentum.von.Linksys.über .Diese.Gewährleistung.gilt.zusätzlich.zu.den.gesetzlichen.oder. anderen. Rechten,. die. Ihnen. gemäß. einem.Kaufvertrag.zustehenAUSSCHLÜSSE UND EINSCHRÄNKUNGENDiese. Gewährleistung. gilt. nicht,. wenn. (a). das.Montagesieg<strong>el</strong>. des. Produkts. entfernt. oder. beschädigt.wurde,. (b). das. Produkt. von. einer. anderen. Partei. als.Linksys. verändert. wurde,. (c). die. Beschädigung. des.Produkts. auf. die. Verwendung. von. Produkten. anderer.Anbieter.zurückzuführen.ist,.(d).das.Produkt.nicht.gemäß.den.von.Linksys.bereitgest<strong>el</strong>lten.Anweisungen.installiert,.betrieben,.repariert.oder.gewartet.wurde,.(e).das.Produkt.unüblichen. physischen. oder. <strong>el</strong>ektrischen. B<strong>el</strong>astungen.ausgesetzt. wurde. bzw . Gegenstand. von. Missbrauch,.Nachlässigkeit. oder. Unfällen. war,. (f). die. Seriennummer.des.Produkts.geändert,.unleserlich.gemacht.oder.entfernt.wurde. oder. (g). das. Produkt. von. Linksys. kosten-. bzw .lizenzgebührenfrei.zur.Beta-Evaluierung.oder.zu.Test-.oder.Vorführzwecken. zur. Verfügung. gest<strong>el</strong>lt. oder. lizenziert.wurdeJEDE.VON.LINKSYS.MIT.DEM.PRODUKT.ZUR.VERFÜGUNG.GESTELLTE.SOFTWARE,.OB.AB.WERK.AUF.DEM.PRODUKT.VORINSTALLIERT.ODER.IM.LIEFERUMFANG.DES.PRODUKTS.ENTHALTEN,. WIRD. OHNE. MÄNGELGEWÄHR. UND. OHNE.Wir<strong>el</strong>ess-G Broadband RouterIRGENDEINE. GEWÄHRLEISTUNG. ZUR. VERFÜGUNG.GESTELLT . Ohne. das. Vorangegangene. einzuschränken,.gewährleistet. Linksys. keinen. dauerhaften. oder.fehlerfreien. Betrieb. des. Produkts. oder. der. Software .Darüber. hinaus. kann. Linksys. angesichts. der. ständigen.Weiterentwicklung. der. Methoden. zum. unerlaubten.Zugriff. und. Angriff. auf. Netzwerke. nicht. gewährleisten,.dass.das.Produkt,.der.Dienst,.die.Software.oder.jegliches.Gerät,. System. oder. Netzwerk,. in. dem. das. Produkt. oder.die.Software.eingesetzt.wird,.keinerlei.Schwachst<strong>el</strong>len.für.unbefugte. Zugriffe. oder. Angriffe. bietet . Dieses. Produkt.enthält. möglicherweise. Software. von. Drittanbietern.oder. wird. in. Kombination. mit. dieser. Software. oder. mit.entsprechenden. Serviceangeboten. ausg<strong>el</strong>iefert . Diese.eingeschränkte. Gewährleistung. bezieht. sich. nicht. auf.diese.Software.von.Drittanbietern.oder.Serviceangebote .Diese. eingeschränkte. Gewährleistung. beinhaltet.nicht. die. dauerhafte. Verfügbarkeit. des. Dienstes. eines.Drittanbieters,.der.eventu<strong>el</strong>l.für.die.Verwendung.oder.den.Betrieb.dieses.Produkts.benötigt.wirdSOWEIT. NICHT. GESETZLICH. UNTERSAGT. SIND.ALLE. IMPLIZIERTEN. GARANTIEERKLÄRUNGEN. DER.HANDELSÜBLICHEN. QUALITÄT. UND. DER. EIGNUNG.FÜR. EINEN. BESTIMMTEN. ZWECK. AUF. DIE. DAUER. DER.GEWÄHRLEISTUNGSFRIST. BESCHRÄNKT . JEGLICHE.WEITEREN. BEDINGUNGEN,. ZUSICHERUNGEN. UND.GEWÄHRLEISTUNGEN. SOWOHL. AUSDRÜCKLICHER. ALS.AUCH. STILLSCHWEIGENDER. ART,. EINSCHLIESSLICH,.ABER.NICHT.BESCHRÄNKT.AUF,.JEGLICHER.IMPLIZIERTER.GEWÄHRLEISTUNG. DER. GESETZMÄSSIGKEIT,. WERDEN.AUSGESCHLOSSEN . Einige. Gerichtsbarkeiten. gestatten.keine. Beschränkungen. hinsichtlich. der. Gültigkeitsdauer.einer. stillschweigenden. Gewährleistung;. die. oben.genannte. Beschränkung. findet. daher. unter. Umständen.auf. Sie. keine. Anwendung . Diese. eingeschränkte.Gewährleistung. sichert. Ihnen. bestimmte. gesetzlich.verankerte. Rechte. zu . Darüber. hinaus. stehen. Ihnen. je.nach. Gerichtsbarkeit. unter. Umständen. weitere. Rechte.zuSOWEIT. NICHT. GESETZLICH. UNTERSAGT,. SCHLIESST.LINKSYS.JEGLICHE.HAFTUNG.FÜR.VERLOREN.GEGANGENE.DATEN,. EINKOMMENS-. BZW . GEWINNVERLUSTE. ODER.SONSTIGE. SCHÄDEN. BESONDERER,. INDIREKTER,.MITTELBARER,. ZUFÄLLIGER. ODER. BESTRAFENDER.ART. AUS,. DIE. SICH. AUS. DER. VERWENDUNG. BZW .DER. NICHTVERWENDBARKEIT. DES. PRODUKTS.(AUCH. DER. SOFTWARE). ERGEBEN. ODER. MIT. DIESER.ZUSAMMENHÄNGEN,. UNABHÄNGIG. VON. DER.HAFTUNGSTHEORIE.(EINSCHLIESSLICH.NACHLÄSSIGKEIT),.AUCH. WENN. LINKSYS. ÜBER. DIE. MÖGLICHKEIT.SOLCHER. SCHÄDEN. INFORMIERT.WURDE . DIE. HAFTUNG.VON. LINKSYS. IST. STETS. AUF. DEN. FÜR. DAS. PRODUKT.GEZAHLTEN. BETRAG. BESCHRÄNKT . Die. oben. genannten.Beschränkungen. kommen. auch. dann. zur. Anwendung,.wenn. eine. in. dieser. eingeschränkten. Gewährleistung.aufgeführte. Gewährleistung. oder. Zusicherung. ihren.25
AnhangCGarantieinformationenwesentlichen. Zweck. verfehlt . Einige. Gerichtsbarkeiten.gestatten. keinen. Ausschluss. von. bzw . keine.Beschränkungen. auf. zufällige. oder. Folgeschäden;. die.oben. genannte. Beschränkung. oder. der. oben. genannte.Ausschluss. finden. daher. unter. Umständen. auf. Sie. keine.AnwendungKUNDENDIENST IM RAHMEN DERGEWÄHRLEISTUNGBei. Fragen. zum. Produkt. oder. Problemen. finden. Sie.unter. . www.linksys.com/support. eine. Reihe. von.Online-Support-Tools. sowie. Informationen,. die. Ihnen.weiterh<strong>el</strong>fen. können . Wenn. das. Gerät. während. der.Gewährleistungsfrist. einen. Defekt. aufweist,. wenden.Sie. sich. an. den. technischen. Support. von. Linksys . Hier.erhalten. Sie. Informationen. zur. Inanspruchnahme. des.Kundendiensts . Die. T<strong>el</strong>efonnummer. des. technischen.Supports. von. Linksys. in. Ihrem. Land. finden. Sie.im. Benutzerhandbuch. des. Produkts. sowie. unter.www.linksys.com . Für. den. T<strong>el</strong>efonanruf. sollten. Sie.die. Seriennummer. des. Produkts. und. Ihren. Kaufb<strong>el</strong>eg.zur. Hand. haben . EIN. DATIERTER. KAUFBELEG. IST.ERFORDERLICH,.UM.ANSPRÜCHE.AUF.KUNDENDIENST.IM.RAHMEN. DER. GEWÄHRLEISTUNG. ZU. BEARBEITEN .Wenn.Sie. zur. Rückgabe. des. Produkts. aufgefordert. werden,.erhalten.Sie.eine.Nummer.zur.berechtigten.Rücksendung .Sie. sind. für. die. ordnungsgemäße. Verpackung. und. den.Versand. Ihres. Produkts. an. Linksys. verantwortlich. und.tragen. die. Kosten. und. das. damit. verbundene. Risiko .Wenn. das. Produkt. eingesendet. wird,. muss. die. Nummer.zur. berechtigten. Rücksendung. und. eine. Kopie. des.datierten. Kaufb<strong>el</strong>egs. beig<strong>el</strong>egt. werden . Produkte. ohne.Nummer. zur. berechtigten. Rücksendung. und. ohne.datierten. Kaufb<strong>el</strong>eg. werden. nicht. angenommen . Legen.Sie. bei. der. Rücksendung. des. Produkts. an. Linksys. keine.weiteren.Objekte.bei .Fehlerhafte.Produkte,.für.die.diese.eingeschränkte. Gewährleistung. gilt,. werden. repariert.oder. ausgetauscht. und. an. Sie. zurückgesendet,. ohne.dass.Kosten.für.Sie.entstehen .Bei.Kunden.außerhalb.der.USA. und. Kanadas. sind. sämtliche. Versandkosten,.Bearbeitungs-. und. Zollgebühren. sowie. Mehrwertsteuer.durch. die. Kunden. s<strong>el</strong>bst. zu. tragen . Für. Reparaturen.oder. Ersatzprodukte,. für. die. diese. eingeschränkte.Gewährleistung. nicht. gilt,. berechnet. Linksys. die. jeweils.aktu<strong>el</strong>len.PreiseTECHNISCHER SUPPORTDiese. eingeschränkte. Gewährleistung. ist. weder. ein.Dienstleistungs-. noch. ein. Supportvertrag . Aktu<strong>el</strong>le.Informationen. zum. Leistungsumfang. sowie. Richtlinien.(inklusive. Preise. der. Support-Dienstleistungen). des.technischen.Supports.von.Linksys.finden.Sie.unter....www.linksys.com/supportALLGEMEINE INFORMATIONENDiese. eingeschränkte. Gewährleistung. unterliegt. den.Gesetzen. des. Landes,. in. dem. das. Produkt. erworben.wurdeSollte. ein. Teil. dieser. Gewährleistung. nichtig. oder. nicht.durchsetzbar.sein,.bleiben.die.übrigen.Bestimmungen.in.vollem.Umfang.gültigWeitere Informationen erhalten Sie unterwww linksys comWählen.Sie.zuerst.Ihr.Land.und.dann.TECHNISCHER.SUPPORTFür Produktrücksendungen:Wählen.Sie.zuerst.Ihr.Land.und.dann.KUNDENDIENSTRichten. Sie.alle.Anfragen.direkt.an:.Linksys,.P O .Box.18558,.Irvine,.CA.92623,.USAWir<strong>el</strong>ess-G Broadband Router26
AnhangDZulassungsinformationenAnhang D:ZulassungsinformationenFCC StatementThis. product. has. been. tested. and. complies. with. the.specifications.for.a.Class.B.digital.device,.pursuant.to.Part.15.of.the.FCC.Rules .These.limits.are.designed.to.provide.reasonable. protection. against. harmful. interference. in.a. residential. installation . This. equipment. generates,.uses,.and.can.radiate.radio.frequency.energy.and,.if.not.installed. and. used. according. to. the. instructions,. may.cause. harmful. interference. to. radio. communications .However,.there.is.no.guarantee.that.interference.will.not.occur. in. a. particular. installation . If. this. equipment. does.cause.harmful.interference.to.radio.or.t<strong>el</strong>evision.reception,.which.is.found.by.turning.the.equipment.off.and.on,.the.user. is. encouraged. to. try. to. correct. the. interference. by.one.or.more.of.the.following.measures:• Reorient.or.r<strong>el</strong>ocate.the.receiving.antenna• Increase. the. separation. between. the. equipment. or.devices• Connect. the. equipment. to. an. outlet. other. than. the.receiver’s• Consult.a.dealer.or.an.experienced.radio/TV.technician.for.assistanceFCC Radiation Exposure StatementThis. equipment. complies. with. FCC. radiation. exposure.limits. set. forth. for. an. uncontrolled. environment . This.equipment. should. be. installed. and. operated. with.minimum.distance.20.cm.between.the.radiator.and.your.bodySafety Notices• Caution:.To.reduce.the.risk.of.fire,.use.only.No 26.AWG.or.larger.t<strong>el</strong>ecommunication.line.cord• Do.not.use.this.product.near.water,.for.example,.in.a.wet.basement.or.near.a.swimming.pool• Avoid. using. this. product. during. an. <strong>el</strong>ectrical. storm .There. may. be. a. remote. risk. of. <strong>el</strong>ectric. shock. from.lightningIndustry Canada StatementThis. Class. B. digital. apparatus. complies. with. Canadian.ICES-003.and.RSS210Operation.is.subject.to.the.following.two.conditions:12This.device.may.not.cause.interference.andThis. device. must. accept. any. interference,. including.interference. that. may. cause. undesired. operation.of.the.device .. . . .To.reduce.potential.radio.interference.to.other.users,.the. antenna. type. and. its. gain. should. be. so. chosen.that.the.EIRP.is.not.more.than.required.for.successful.communicationIndustry Canada Radiation Exposure StatementThis.equipment.complies.with.IC.radiation.exposure.limits.set.forth.for.an.uncontrolled.environment .This.equipment.should.be.installed.and.operated.with.minimum.distance.20.cm.between.the.radiator.&.your.bodyThis. transmitter. must. not. be. co-located. or. operating. in.conjunction.with.any.other.antenna.or.transmitterAvis d’Industrie CanadaCet. appareil. numérique. de. la. classe. B. est. conforme. aux.normes.NMB-003.et.RSS210.du.CanadaL’utilisation. de. ce. dispositif. est. autorisée. seulement. aux.conditions.suivantes.:12il.ne.doit.pas.produire.de.brouillage.et.il. doit. accepter. tout. brouillage. radioélectrique. reçu,.même.si.ce.brouillage.est.susceptible.de.compromettre.le.fonctionnement.du.dispositif .. . .Afin. de. réduire. le. risque. d’interférence. aux. autres.utilisateurs,. le. type. d’antenne. et. son. gain. doivent.être. choisis. de. façon. à. ce. que. la. puissance. isotrope.rayonnée. équivalente. (p i r e ). ne. soit. pas. supérieure.au. niveau. requis. pour. obtenir. une. communication.satisfaisanteAvis d’Industrie Canada concernant l’expositionaux radiofréquencesCe. matéri<strong>el</strong>. est. conforme. aux. limites. établies. par. IC.en. matière. d’exposition. aux. radiofréquences. dans. un.environnement.non.contrôlé .Ce.matéri<strong>el</strong>.doit.être.installé.et.utilisé.à.une.distance.d’au.moins.20.cm.entre.l’antenne.et.le.corps.de.l’utilisateurL’émetteur.ne.doit.pas.être.placé.près.d’une.autre.antenne.ou. d’un. autre. émetteur,. ou. fonctionner. avec. une. autre.antenne.ou.un.autre.émetteurWir<strong>el</strong>ess-G Broadband-Router27
AnhangDZulassungsinformationenWir<strong>el</strong>ess DisclaimerThe. maximum. performance. for. wir<strong>el</strong>ess. is. derived. from.IEEE. Standard. 802 11. specifications . Actual. performance.can. vary,. including. lower. wir<strong>el</strong>ess. network. capacity,.data. throughput. rate,. range. and. coverage . Performance.depends. on. many. factors,. conditions. and. variables,.including. distance. from. the. access. point,. volume. of.network. traffic,. building. materials. and. construction,.operating. system. used,. mix. of. wir<strong>el</strong>ess. products. used,.interference.and.other.adverse.conditionsAvis de non-responsabilité concernant lesappareils sans filLes. performances. maximales. pour. les. réseaux. sans. fil.sont. tirées. des. spécifications. de. la. norme. IEEE. 802 11 .Les. performances. ré<strong>el</strong>les. peuvent. varier,. notamment.en. fonction. de. la. capacité. du. réseau. sans. fil,. du. débit.de. la. transmission. de. données,. de. la. portée. et. de. la.couverture . Les. performances. dépendent. de. facteurs,.conditions. et. variables. multiples,. en. particulier. de. la.distance.par.rapport.au.point.d’accès,.du.volume.du.trafic.réseau,. des. matériaux. utilisés. dans. le. bâtiment. et. du.type.de.construction,.du.système.d’exploitation.et.de.la.combinaison.de.produits.sans.fil.utilisés,.des.interférences.et.de.toute.autre.condition.défavorableWir<strong>el</strong>ess-G Broadband-Router28
AnhangDZulassungsinformationenKonformitätserklärung zurEU-Richtlinie 1999/5/EG (R&TTE-Richtlinie)Informationen.zur.Einhaltung.gesetzlicher.Vorschriften.bei.2,4-GHz-.und.5-GHz-Wir<strong>el</strong>ess-Produkten.für.den.Bereich.der.EU. und. anderer. Länder. gemäß. der. EU-Richtlinie.1999/5/EG.(R&TTE-Richtlinie,.auch.FTEG-Richtlinie)Б ъ л г а р с к и.[Bulgarian]Това.оборудване.отговаря.на.съществените.изисквания. и. приложими. клаузи. на.Директива.1999/5/ЕСLietuvių.[Lithuanian]:Nederlands[Dutch]:Malti.[Maltese]:Šis. įrenginys. tenkina. 1999/5/EB. Direktyvos.esminius. reikalavimus. ir. kitas. šios. direktyvos.nuostatasDit. apparaat. voldoet. aan. de. essenti<strong>el</strong>e. eisen.en. andere. van. toepassing. zijnde. bepalingen.van.de.Richtlijn.1999/5/ECDan. l-apparat. huwa. konformi. mal-ħtiġiet.essenzjali. u. l-provedimenti. l-oħra. rilevanti.tad-Direttiva.1999/5/ECČesky.[Czech]:Toto. zařízení. je. v. souladu. se. základními.požadavky. a. ostatními. odpovídajícími.ustanoveními.Směrnice.1999/5/ECMagyar[Hungarian]:Ez. a. készülék. t<strong>el</strong>jesíti. az. alapvető.követ<strong>el</strong>ményeket. és. más. 1999/5/EK.irány<strong>el</strong>vben. meghatározott. vonatkozó.rend<strong>el</strong>kezéseketDansk.[Danish]:Dette. udstyr. er. i. overensstemm<strong>el</strong>se. med.de. væsentlige. krav. og. andre. r<strong>el</strong>evante.bestemm<strong>el</strong>ser.i.Direktiv.1999/5/EFNorsk[Norwegian]:Dette. utstyret. er. i. samsvar. med. de.grunnleggende. krav. og. andre. r<strong>el</strong>evante.bestemm<strong>el</strong>ser.i.EU-direktiv.1999/5/EFDeutsch.[German]:Dieses. Gerät. entspricht. den. grundlegenden.Anforderungen. und. den. weiteren.entsprechenden. Vorgaben. der. Richtlinie.1999/5/EUPolski.[Polish]:Urządzenie. jest. zgodne. z. ogólnymi.wymaganiami. oraz. szczególnymi. warunkami.określonymi.Dyrektywą.UE:.1999/5/EC.Eesti.[Estonian]:See.seade.vastab.direktiivi.1999/5/EÜ.olulist<strong>el</strong>e.nõuet<strong>el</strong>e.ja.teist<strong>el</strong>e.asjakohast<strong>el</strong>e.sätet<strong>el</strong>ePortuguês.[Portuguese]:Este.equipamento.está.em.conformidade.com.os. requisitos. essenciais. e. outras. provisões.r<strong>el</strong>evantes.da.Directiva.1999/5/ECEnglish:This. equipment. is. in. compliance. with. the.essential. requirements. and. other. r<strong>el</strong>evant.provisions.of.Directive.1999/5/ECRomână.[Romanian]Acest. echipament. este. in. conformitate.cu. cerint<strong>el</strong>e. esentiale. si. cu. alte. prevederi.r<strong>el</strong>evante.ale.Directivei.1999/5/ECEspañol.[Spanish]:Este. equipo. cumple. con. los. requisitos.esenciales. asi. como. con. otras. disposiciones.de.la.Directiva.1999/5/CESlovensko.[Slovenian]:Ta.naprava.je.skladna.z.bistvenimi.zahtevami.in. ostalimi. r<strong>el</strong>evantnimi. pogoji. Direktive.1999/5/ECΕλληνική.[Greek]:Αυτός.ο.εξοπλισµός.είναι.σε.συµµόρφωση.µε.τις. ουσιώδεις. απαιτήσεις. και. άλλες. σχετικές.διατάξεις.της.Οδηγίας.1999/5/ECSlovensky.[Slovak]:Toto. zariadenie. je. v. zhode. so. základnými.požiadavkami.a.inými.príslušnými.nariadeniami.direktív:.1999/5/EC .Français.[French]:Íslenska.[Ic<strong>el</strong>andic]:Italiano.[Italian]:Latviski.[Latvian]:Cet. appareil. est. conforme. aux. exigences.essenti<strong>el</strong>les. et. aux. autres. dispositions.pertinentes.de.la.Directive.1999/5/ECÞetta. tæki. er. samkvæmt. grunnkröfum. og.öðrum. viðeigandi. ákvæðum. Tilskipunar.1999/5/ECQuesto. apparato. é. conforme. ai. requisiti.essenziali. ed. agli. altri. principi. sanciti. dalla.Direttiva.1999/5/CEŠī. iekārta. atbilst. Direktīvas. 1999/5/EK.būtiskajām. prasībām. un. citiem. ar. to.saistītajiem.noteikumiemSuomi.[Finnish]:Svenska.[Swedish]:Tämä. laite. täyttää. direktiivin. 1999/5/EY.olennaiset.vaatimukset.ja.on.siinä.asetettujen.muiden. laitetta. koskevien. määräysten.mukainenDenna.utrustning.är.i.överensstämm<strong>el</strong>se.med.de. väsentliga. kraven. och. andra. r<strong>el</strong>evanta.bestämm<strong>el</strong>ser.i.Direktiv.1999/5/ECFür. alle. Produkte. ist. die. Konformitätserklärung. in.folgender.Form.verfügbar:.• PDF-Datei.auf.der.Produkt-CD• Druckversion.im.Lieferumfang.des.Produkts• PDF-Datei. auf. der. Produkt-Webseite .Wählen. Sie.auf. der.Website. www.linksys.com/internationaldas.für.Sie.zutreffende.Land.bzw .die.entsprechende.Region.aus .Wählen.Sie.dann.Ihr.Produkt.ausWir<strong>el</strong>ess-G Broadband-Router29
AnhangDZulassungsinformationenWeiteren.technischen.Dokumenten.finden.Sie.im.Abschnitt.„Technische.Dokumente.unter.www linksys com/international“.weiter.hinten.in.diesem.AnhangBei.der.Bewertung.des.Produkts.hinsichtlich.der.Anforderung.der.Richtlinie.1999/5/EG.kamen.die.folgenden.Standards.zur.Anwendung:• Radio:.EN.300.328.und/oder.EN.301.893• EMV:.EN.301.489-1,.EN.301.489-17• Sicherheit:.EN.60950.und.EN.50385.oder.EN.50371Für. den. Betrieb. im. 5-GHz-Frequenzbereich. ist. die. dynamische.Frequenzkanalwahl. (DFS). und. eine. Send<strong>el</strong>eistungssteuerung.(TPC).erforderlichDFS:. Die. Geräte. erfüllen. die. DFS-Anforderungen. wie. in. ETSI.EN.301.893.festg<strong>el</strong>egt .Diese.Funktion.ist.gemäß.den.Richtlinien.erforderlich,. um. Interferenzen. mit. Funkortungsdiensten.(Radarstationen).zu.verhindernTPC:. Für. den. Betrieb. im. 5-GHz-Frequenzbereich. beträgt. der.maximale. Leistungspeg<strong>el</strong>. 3.dB. oder. mehr. unterhalb. der.g<strong>el</strong>tenden.Grenze .TCP.ist.deshalb.nicht.erforderlich .CE-KennzeichnungDie. Wir<strong>el</strong>ess-N-,. Wir<strong>el</strong>ess-G-,. Wir<strong>el</strong>ess-B-. und/oder. Wir<strong>el</strong>ess-A-Produkte.von.Linksys.sind.mit.der.folgenden.CE-Kennzeichnung,.der.Nummer.der.Überwachungs-.und.Zertifizierungsst<strong>el</strong>le.(sofern.zutreffend).und.der.Kennung.der.Klasse.2.versehenoderoderoderInformationen. darüber,. w<strong>el</strong>che. Überwachungs-. und.Zertifizierungsst<strong>el</strong>le.die.Bewertung.durchgeführt.hat,.finden.Sie.auf.dem.CE-Etikett.auf.dem.ProduktNationale BeschränkungenDas. Produkt. kann. in. allen. EU-Staaten. ohne. Einschränkungen.eingesetzt. werden. (sowie. in. anderen. Staaten,. die. der. EU-Richtlinie.1999/5/EG. folgen),. mit. Ausnahme. der. unten.aufgeführten.Staaten:Ce produit peut être utilisé dans tous les pays de l’UE (et dans tousles pays ayant transposés la directive 1999/5/CE) sans aucun<strong>el</strong>imitation, excepté pour les pays mentionnés ci-dessous:Questo prodotto è utilizzabile in tutte i paesi EU (ed in tutti glialtri paesi che seguono le direttive EU 1999/5/EC) senza nessunalimitazione, eccetto per i paesii menzionati di seguito:Das Produkt kann in allen EU Staaten ohne Einschränkungeneingesetzt werden (sowie in anderen Staaten die der EU Direktive1999/5/CE folgen) mit Außnahme der folgenden aufgeführtenStaaten:In. the. majority. of. the. EU. and. other. European. countries,. the.2,4-.and.5-GHz.bands.have.been.made.available.for.the.use.of.wir<strong>el</strong>ess.local.area.networks.(LANs) .The.table.lab<strong>el</strong>ed.“Overview.of. Regulatory. Requirements. for. Wir<strong>el</strong>ess. LANs”. provides. an.overview. of. the. regulatory. requirements. applicable. for. the.2,4-.and.5-GHz.bandsWeiter. unten. in. diesem. Dokument. finden. Sie. eine. Übersicht.der. Länder,. in. denen. zusätzliche. Beschränkungen. oder.Richtlinien.g<strong>el</strong>tenDie. Bestimmungen. für. ein. Land. können. sich. von. Zeit. zu.Zeit. ändern . Linksys. empfiehlt,. dass. Sie. sich. bei. den.lokalen. Behörden. über. den. aktu<strong>el</strong>len. Stand. der. nationalen.Bestimmungen.für.2,4-.und.5-GHz-Wir<strong>el</strong>ess-LANs.erkundigenÜbersicht über die gesetzlichen Anforderungen fürWir<strong>el</strong>ess-LANsFrequenzband(MHz)MaximalerLeistungspeg<strong>el</strong>(EIRP) (mW)NUR inGebäudenInGebäudenund imFreien2400-2483,5 100 X5150-5350 † 200 X5470-5725 † 1000 X††.Dynamische.Frequenzkanalwahl.und.Send<strong>el</strong>eistungssteuerung.sind.in.den.Frequenzbereichen.5250-5350.MHz.und.5470-5725.MHz.erforderlichIn.den.folgenden.Ländern.g<strong>el</strong>ten.zusätzliche.Beschränkungen.und/oder.Richtlinien,.die.nicht.in.der.Tab<strong>el</strong>le.„Übersicht.über.die.gesetzlichen.Anforderungen.für.Wir<strong>el</strong>ess-LANs“.aufgeführt.sind:DenmarkIn. Denmark,. the. band. 5150. -. 5350. MHz. is. also. allowed. for.outdoor.usageI Danmark må frekvensbåndet 5150 - 5350 også anvendesudendørs.Wir<strong>el</strong>ess-G Broadband-Router30
AnhangDZulassungsinformationenFranceFor.2,4.GHz,.the.product.should.not.be.used.outdoors.in.the.band.2454.-.2483,5.MHz .There.are.no.restrictions.when.used.in. other. parts. of. the. 2,4. GHz. band. when. used. indoors . Check.http://www arcep fr/.for.more.detailsPour la bande 2,4 GHz, l’ équipement ne doit pas être utilisé enextérieur dans la bande 2454 - 2483,5 MHz. Il n’y a pas de restrictionspour des utilisations en intérieur dans d’autres parties de la bande2,4GHz. Consultez http://www.arcep.fr/ pour de plus amplesdétails.LocationIndoor(No.restrictions)ItalyOutdoorApplicable Power Lev<strong>el</strong>s in FranceFrequencyRange (MHz)Power (EIRP)2400-2483 5 100.mW.(20.dBm)2400-24542454-2483 5100.mW.(20.dBm)10.mW.(10.dBm)This. product. meets. the. National. Radio. Interface. and. the.requirements. specified. in. the. National. Frequency. Allocation.Table. for. Italy . Unless. this. 2,4-GHz. wir<strong>el</strong>ess. LAN. product. is.operating. within. the. boundaries. of. the. owner’s. property,. its.use.requires.a.“general.authorization” .Please.check.http://wwwcomunicazioni it/it/.for.more.detailsQuesto prodotto è conforme alla specifiche di InterfacciaRadio Nazionali e rispetta il Piano Nazionale di ripartizioned<strong>el</strong>le frequenze in Italia. Se non viene installato all’internod<strong>el</strong> proprio fondo, l’utilizzo di prodotti Wir<strong>el</strong>ess LAN a2,4 GHz richiede una “Autorizzazione Generale”. Consultarehttp://www.comunicazioni.it/it/ per maggiori dettagli.LatviaThe. outdoor. usage. of. the. 2,4. GHz. band. requires. an.authorization. from. the. Electronic. Communications. Office .Please.check.http://www esd lv.for.more.details2,4 GHz frekveču joslas izmantošanai ārpus t<strong>el</strong>pāmnepieciešama atļauja no Elektronisko sakaru direkcijas.Vairāk informācijas: http://www.esd.lv.Notes:.12Although.Norway,.Switzerland.and.Liechtenstein.are.not.EU.member. states,. the. EU. Directive. 1999/5/EC. has. also. been.implemented.in.those.countriesThe. regulatory. limits. for. maximum. output. power. are.specified.in.EIRP .The.EIRP.lev<strong>el</strong>.of.a.device.can.be.calculated.by.adding.the.gain.of.the.antenna.used.(specified.in.dBi).to.the. output. power. available. at. the. connector. (specified. in.dBm)Beschränkungen hinsichtlich derVerwendung des ProduktsDieses.Produkt.wurde.ausschließlich.für.die.Verwendung.in.Gebäuden.entwick<strong>el</strong>t .Die.Verwendung.im.Freien.wird,.sofern.nicht.anders.angegeben,.nicht.empfohlen2,4-GHz-BeschränkungenDieses. Produkt. wurde. für. die. Verwendung. mit. der. im.Lieferumfang. enthaltenen. standardmäßigen,. integrierten.bzw . externen. (spezi<strong>el</strong>l. für. diesen. Zweck. vorgesehenen).Antenne.entwick<strong>el</strong>t .Manche.Anwendungen.setzen.jedoch.unter.Umständen.voraus,.dass.Sie.die.Antenne(n).vom.Produkt.trennen.(sofern.abnehmbar).und.mit.einem.Verlängerungskab<strong>el</strong>.getrennt.vom.Gerät.installieren .Für.diese.Anwendungen.bietet.Linksys. ein. R-SMA-Verlängerungskab<strong>el</strong>. (AC9SMA). und. ein.R-TNC-Verlängerungskab<strong>el</strong>.(AC9TNC) .Beide.Kab<strong>el</strong>.sind.neun.Meter.lang .Der.Verlust.durch.das.Kab<strong>el</strong>.(Abschwächung).liegt.bei.5.dB .Zur.Kompensation.der.Abschwächung.bietet.Linksys.außerdem. die. Hochleistungsantennen. HGA7S.(mit.R-SMA-Stecker). und. HGA7T. (mit. R-TNC-Stecker) . Diese. Antennen.verfügen.über.einen.Antennengewinn.von.7.dBi.und.dürfen.nur.mit.dem.R-SMA-.oder.R-TNC-Verlängerungskab<strong>el</strong>.eingesetzt.werdenKombinationen.von.Verlängerungskab<strong>el</strong>n.und.Antennen,.die.zu.einem.ausgestrahlten.Leistungspeg<strong>el</strong>.von.mehr.als.100.mW.EIRP.(Effective Isotropic Radiated Power).führen,.sind.unzulässigSoft- und Firmware von DrittanbieternDie.Verwendung.von.Software.oder.Firmware,.die.nicht.von.Linksys. zur.Verfügung. gest<strong>el</strong>lt. oder. unterstützt.wird,.kann.zur. Aufhebung. der. Produktkonformität. mit. bestehenden.Richtlinien.führenTechnische Dokumente unterwww.linksys.com/internationalFühren.Sie.die.folgenden.Schritte.aus,.um.auf.die.gewünschten.technischen.Dokumente.zuzugreifen:1234567Geben.Sie.http://www linksys com/international.in.Ihren.Web-Browser.einWählen.Sie.das.Land.bzw .die.Region.aus,.in.dem.bzw .der.Sie.lebenKlicken.Sie.auf.die.Registerkarte.Products.(Produkte)Wählen.Sie.die.entsprechende.Produktkategorie.ausWählen.Sie.gegebenenfalls.die.Produktunterkategorie.ausWählen.Sie.das.Produkt.ausWählen.Sie.aus.dem.Bereich.More Information.(Weitere.Informationen).den.gewünschten.Dokumentationstyp.aus .Wenn.Adobe.Acrobat.auf.Ihrem.Computer.installiert.ist,.wird.das.Dokument.als.PDF-Datei.geöffnetHINWEIS:. Wenn. Sie. Fragen. zur. Einhaltung.gesetzlicher. Vorschriften. in. Bezug. auf. dieses.Produkt. haben. oder. die. gewünschten.Informationen. nicht. finden. können,. wenden.Sie. sich. an. die. Vertriebsniederlassung. vor.Ort . Weitere. Informationen. finden. Sie. unter.www.linksys.com/international.Wir<strong>el</strong>ess-G Broadband-Router31
AnhangDZulassungsinformationenBenutzerinformationen für Konsumgüter,die der EU-Richtlinie 2002/96/EG überElektro- und Elektronik-Altgeräte (WEEE,Waste Electric and Electronic Equipment)unterliegenDieses.Dokument.enthält.wichtige.Informationen.für.Benutzer.in. Bezug. auf. die. korrekte. Entsorgung. und. Wiederverwertung.von. Linksys. Produkten . Verbraucher. sind. angehalten,.diesen. Anweisungen. bei. allen. <strong>el</strong>ektronischen. Produkten.nachzukommen,.die.folgendes.Symbol.tragen:Ceština (Czech). -. Informace o ochraně životníhoprostředí pro zákazníky v zemích Evropské unieEvropská.směrnice.2002/96/ES.zakazuje,.aby.zařízení.označené.tímto.symbolem. .na.produktu.anebo.na.obalu.bylo.likvidováno.s. netříděným. komunálním. odpadem . Tento. symbol. udává,.že. daný. produkt. musí. být. likvidován. odděleně. od. běžného.komunálního.odpadu .Odpovídáte.za.likvidaci.tohoto.produktu.a.dalších.<strong>el</strong>ektrických.a.<strong>el</strong>ektronických.zařízení.prostřednictvím.určených. sběrných. míst. stanovených. vládou. nebo. místními.úřady . Správná. likvidace. a. recyklace. pomáhá. předcházet.potenciálním.negativním.dopadům.na.životní.prostředí.a.lidské.zdraví . Podrobnější. informace. o. likvidaci. starého. vybavení. si.laskavě. vyžádejte. od. místních. úřadů,. podniku. zabývajícího. se.likvidací.komunálních.odpadů.nebo.obchodu,.kde.jste.produkt.zakoupiliEnglish - Environmental Information for Customers inthe European UnionEuropean. Directive. 2002/96/EC. requires. that. the. equipment.bearing.this.symbol. .on.the.product.and/or.its.packaging.must.not.be.disposed.of.with.unsorted.municipal.waste .The.symbol.indicates. that. this. product. should. be. disposed. of. separat<strong>el</strong>y.from.regular.household.waste.streams .It.is.your.responsibility.to.dispose.of.this.and.other.<strong>el</strong>ectric.and.<strong>el</strong>ectronic.equipment.via.designated.collection.facilities.appointed.by.the.government.or.local.authorities .Correct.disposal.and.recycling.will.h<strong>el</strong>p.prevent.potential. negative. consequences. to. the. environment. and.human.health .For.more.detailed.information.about.the.disposal.of. your. old. equipment,. please. contact. your. local. authorities,.waste. disposal. service,. or. the. shop. where. you. purchased. the.productБългарски (Bulgarian) - Информация относноопазването на околната среда за потребители вЕвропейския съюзЕвропейска.директива.2002/96/EC.изисква.уредите,.носещи.този. символ. . върху. изделието. и/или. опаковката. му,. да. не.се. изхвърля. т. с. несортирани. битови. отпадъци . Символът.обозначава,.че.изделието.трябва.да.се.изхвърля.отделно.от.сметосъбирането. на. обикновените. битови. отпадъци . Ваша.е.отговорността.този.и.другите.електрически.и.електронни.уреди. да. се. изхвърлят. в. предварително. определени. от.държавните.или.общински.органи.специализирани.пунктове.за. събиране . Правилното. изхвърляне. и. рециклиране.ще. спомогнат. да. се. предотвратят. евентуални. вредни. за.околната. среда. и. здравето. на. населението. последствия . За.по-подробна.информация.относно.изхвърлянето.на.вашите.стари.уреди.се.обърнете.към.местните.власти,.службите.за.сметосъбиране.или.магазина,.от.който.сте.закупили.уредаDansk (Danish) - Miljøinformation for kunder i EUEU-direktiv.2002/96/EF.kræver,.at.udstyr.der.bærer.dette.symbol.. på. produktet. og/<strong>el</strong>ler. emballagen. ikke. må. bortskaffes. som.usorteret.kommunalt.affald .Symbolet.betyder,.at.dette.produkt.skal.bortskaffes.adskilt.fra.det.almind<strong>el</strong>ige.husholdningsaffald .Det. er. dit. ansvar. at. bortskaffe. dette. og. andet. <strong>el</strong>ektrisk. og.<strong>el</strong>ektronisk. udstyr. via. bestemte. indsamlingssteder. udpeget.af. staten. <strong>el</strong>ler. de. lokale. myndigheder . Korrekt. bortskaff<strong>el</strong>se.og. genvinding. vil. hjælpe. med. til. at. undgå. mulige. skader. for.miljøet. og. menneskers. sundhed . Kontakt. venligst. de. lokale.myndigheder,. renovationstjenesten. <strong>el</strong>ler. den. butik,. hvor. du.har.købt.produktet,.angående.mere.detaljeret.information.om.bortskaff<strong>el</strong>se.af.dit.gamle.udstyrDeutsch (German) - Umw<strong>el</strong>tinformation für Kundeninnerhalb der Europäischen UnionDie.Europäische.Richtlinie.2002/96/EC.verlangt,.dass.technische.Ausrüstung,.die.direkt.am.Gerät.und/oder.an.der.Verpackung.mit.diesem.Symbol.versehen.ist. ,.nicht.zusammen.mit.unsortiertem.Gemeindeabfall.entsorgt.werden.darf .Das.Symbol.weist.darauf.hin,. dass. das. Produkt. von. regulärem. Haushaltmüll. getrennt.entsorgt. werden. sollte . Es. liegt. in. Ihrer.Verantwortung,. dieses.Gerät. und. andere. <strong>el</strong>ektrische. und. <strong>el</strong>ektronische. Geräte. über.die. dafür. zuständigen. und. von. der. Regierung. oder. örtlichen.Behörden. dazu. bestimmten. Samm<strong>el</strong>st<strong>el</strong>len. zu. entsorgen .Ordnungsgemäßes. Entsorgen. und. Recyc<strong>el</strong>n. trägt. dazu. bei,.potenti<strong>el</strong>le. negative. Folgen. für. Umw<strong>el</strong>t. und. die. menschliche.Gesundheit.zu.vermeiden .Wenn.Sie.weitere.Informationen.zur.Entsorgung.Ihrer.Altgeräte.benötigen,.wenden.Sie.sich.bitte.an.die. örtlichen. Behörden. oder. städtischen. Entsorgungsdienste.oder.an.den.Händler,.bei.dem.Sie.das.Produkt.erworben.habenWir<strong>el</strong>ess-G Broadband-Router32
AnhangDZulassungsinformationenEesti (Estonian) - Keskkonnaalane informatsioonEuroopa Liidus asuvat<strong>el</strong>e klientid<strong>el</strong>eEuroopa. Liidu. direktiivi. 2002/96/EÜ. nõuete. kohas<strong>el</strong>t. on.seadmeid,. mill<strong>el</strong>. on. toot<strong>el</strong>. või. pakendil. käesolev. sümbol. ,.ke<strong>el</strong>atud. kõrvaldada. koos. sorteerimata. olmejäätmetega . See.sümbol. näitab,. et. toode. tuleks. kõrvaldada. eraldi. tavalistest.olmejäätmevoogudest .Olete.kohustatud.kõrvaldama.käesoleva.ja. ka. muud. <strong>el</strong>ektri-. ja. <strong>el</strong>ektroonikaseadmed. riigi. või. kohalike.ametiasutuste. poolt. ette. nähtud. kogumispunktide. kaudu .Seadmete.korrektne.kõrvaldamine.ja.ringlussevõtt.aitab.vältida.võimalikke. negatiivseid. tagajärgi. keskkonnale. ning. inimeste.tervis<strong>el</strong>e . Vanade. seadmete. kõrvaldamise. kohta. täpsema.informatsiooni. saamiseks. võtke. palun. ühendust. kohalike.ametiasutustega,. jäätmekäitlusfirmaga. või. kauplusega,. kust. te.toote.ostsiteEspañol (Spanish) - Información medioambiental paraclientes de la Unión EuropeaLa. Directiva. 2002/96/CE. de. la. UE. exige. que. los. equipos. que.lleven.este.símbolo. .en.<strong>el</strong>.propio.aparato.y/o.en.su.embalaje.no. deben. <strong>el</strong>iminarse. junto. con. otros. residuos. urbanos. no.s<strong>el</strong>eccionados . El. símbolo. indica. que. <strong>el</strong>. producto. en. cuestión.debe.separarse.de.los.residuos.domésticos.convencionales.con.vistas.a.su.<strong>el</strong>iminación .Es.responsabilidad.suya.desechar.este.y.cualesquiera.otros.aparatos.<strong>el</strong>éctricos.y.<strong>el</strong>ectrónicos.a.través.de.los.puntos.de.recogida.que.ponen.a.su.disposición.<strong>el</strong>.gobierno.y.las.autoridades.locales .Al.desechar.y.reciclar.correctamente.estos.aparatos.estará.contribuyendo.a.evitar.posibles.consecuencias.negativas.para.<strong>el</strong>.medio.ambiente.y.la.salud.de.las.personas .Si.desea.obtener.información.más.detallada.sobre.la.<strong>el</strong>iminación.segura.de.su.aparato.usado,.consulte.a.las.autoridades.locales,.al.servicio.de.recogida.y.<strong>el</strong>iminación.de.residuos.de.su.zona.o.pregunte.en.la.tienda.donde.adquirió.<strong>el</strong>.productoξλληνικά (Greek) - Στοιχεία περιβαλλοντικήςπροστασίας για πελάτες εντός της ΕυρωπαϊκήςΈνωσηςΗ.Κοινοτική.Οδηγία.2002/96/EC.απαιτεί.ότι.ο.εξοπλισμός.ο.οποίος.φέρει. αυτό. το. σύμβολο. . στο. προϊόν. και/ή. στη. συσκευασία.του. δεν. πρέπει. να. απορρίπτεται. μαζί. με. τα. μικτά. κοινοτικά.απορρίμματα .Το. σύμβολο. υποδεικνύει. ότι. αυτό. το. προϊόν. θα.πρέπει. να. απορρίπτεται. ξεχωριστά. από. τα. συνήθη. οικιακά.απορρίμματα .Είστε.υπεύθυνος.για.την.απόρριψη.του.παρόντος.και. άλλου. ηλεκτρικού. και. ηλεκτρονικού. εξοπλισμού. μέσω. των.καθορισμένων.εγκαταστάσεων.συγκέντρωσης.απορριμμάτων.οι.οποίες.παρέχονται.από.το.κράτος.ή.τις.αρμόδιες.τοπικές.αρχές .Η.σωστή.απόρριψη.και.ανακύκλωση.συμβάλλει.στην.πρόληψη.πιθανών.αρνητικών.συνεπειών.για.το.περιβάλλον.και.την.υγεία .Για. περισσότερες. πληροφορίες. σχετικά. με. την. απόρριψη. του.παλιού.σας.εξοπλισμού,.παρακαλώ.επικοινωνήστε.με.τις.τοπικές.αρχές,.τις.υπηρεσίες.απόρριψης.ή.το.κατάστημα.από.το.οποίο.αγοράσατε.το.προϊόνFrançais (French) - Informations environnementalespour les clients de l’Union européenneLa. directive. européenne. 2002/96/CE. exige. que. l’équipement.sur. lequ<strong>el</strong>. est. apposé. ce. symbole. . sur. le. produit. et/ou. son.emballage.ne.soit.pas.jeté.avec.les.autres.ordures.ménagères .Ce.symbole.indique.que.le.produit.doit.être.éliminé.dans.un.circuit.distinct. de. c<strong>el</strong>ui. pour. les. déchets. des. ménages . Il. est. de. votre.responsabilité.de.jeter.ce.matéri<strong>el</strong>.ainsi.que.tout.autre.matéri<strong>el</strong>.électrique.ou.électronique.par.les.moyens.de.collecte.indiqués.par. le. gouvernement. et. les. pouvoirs. publics. des. collectivités.territoriales .L’élimination.et.le.recyclage.en.bonne.et.due.forme.ont. pour. but. de. lutter. contre. l’impact. néfaste. potenti<strong>el</strong>. de. ce.type.de.produits.sur.l’environnement.et.la.santé.publique .Pour.plus. d’informations. sur. le. mode. d’élimination. de. votre. ancien.équipement,.veuillez.prendre.contact.avec.les.pouvoirs.publics.locaux,.le.service.de.traitement.des.déchets,.ou.l’endroit.où.vous.avez.acheté.le.produitItaliano (Italian) - Informazioni r<strong>el</strong>ative all’ambienteper i clienti residenti n<strong>el</strong>l’Unione EuropeaLa.direttiva.europea.2002/96/EC.richiede.che.le.apparecchiature.contrassegnate. con. questo. simbolo. . sul. prodotto. e/o.sull’imballaggio. non. siano. smaltite. insieme. ai. rifiuti. urbani.non. differenziati . Il. simbolo. indica. che. questo. prodotto. non.deve. essere. smaltito. insieme. ai. normali. rifiuti. domestici . È.responsabilità. d<strong>el</strong>. proprietario. smaltire. sia. questi. prodotti. sia.le. altre. apparecchiature. <strong>el</strong>ettriche. ed. <strong>el</strong>ettroniche. mediante.le. specifiche. strutture. di. raccolta. indicate. dal. governo. o. dagli.enti. pubblici. locali . Il. corretto. smaltimento. ed. il. riciclaggio.aiuteranno. a. prevenire. conseguenze. potenzialmente. negative.per. l’ambiente. e. per. la. salute. d<strong>el</strong>l’essere. umano . Per. ricevere.informazioni.più.dettagliate.circa.lo.smaltimento.d<strong>el</strong>le.vecchie.apparecchiature.in.Vostro.possesso,.Vi.invitiamo.a.contattare.gli.enti.pubblici.di.competenza,.il.servizio.di.smaltimento.rifiuti.o.il.negozio.n<strong>el</strong>.quale.avete.acquistato.il.prodottoLatviešu valoda (Latvian) - Ekoloģiska informācijaklientiem Eiropas Savienības jurisdikcijāDirektīvā.2002/96/EK.ir.prasība,.ka.aprīkojumu,.kam.pievienota.zīme. . uz. paša. izstrādājuma. vai. uz. tā. iesaiņojuma,. nedrīkst.izmest. nešķirotā. veidā. kopā. ar. komunālajiem. atkritumiem.(tiem,.ko.rada.vietēji.iedzīvotāji.un.uzņēmumi) .Šī.zīme.nozīmē.to,.ka.šī.ierīce.ir.jāizmet.atkritumos.tā,.lai.tā.nenonāktu.kopā.ar.parastiem. mājsaimniecības. atkritumiem . Jūsu. pienākums. ir. šo.un. citas. <strong>el</strong>ektriskas. un. <strong>el</strong>ektroniskas. ierīces. izmest. atkritumos,.izmantojot.īpašus.atkritumu.savākšanas.veidus.un.līdzekļus,.ko.nodrošina.valsts.un.pašvaldību.iestādes .Ja.izmešana.atkritumos.un. pārstrāde. tiek. veikta. pareizi,. tad. mazinās. iespējamais.kaitējums. dabai. un. cilvēku. ves<strong>el</strong>ībai . Sīkākas. ziņas. par.novecojuša. aprīkojuma. izmešanu. atkritumos. jūs. varat. saņemt.vietējā.pašvaldībā,.atkritumu.savākšanas.dienestā,.kā.arī.veikalā,.kur.iegādājāties.šo.izstrādājumuWir<strong>el</strong>ess-G Broadband-Router33
AnhangDZulassungsinformationenLietuvškai (Lithuanian) - Aplinkosaugos informacija,skirta Europos Sąjungos vartotojamsEuropos. direktyva. 2002/96/EC. numato,. kad. įrangos,. kuri. ir. .kurios. pakuotė. yra. pažymėta. šiuo. simboliu. (įveskite. simbolį),.negalima. šalinti. kartu. su. nerūšiuotomis. komunalinėmis.atliekomis . Šis. simbolis. rodo,. kad. gaminį. reikia. šalinti. atskirai.nuo.bendro.buitinių.atliekų.srauto .Jūs.privalote.užtikrinti,.kad.ši. ir. kita. <strong>el</strong>ektros. ar. <strong>el</strong>ektroninė. įranga. būtų. šalinama. per. tam.tikras.nacionalinės.ar.vietinės.valdžios.nustatytas.atliekų.rinkimo.sistemas .Tinkamai. šalinant. ir. perdirbant. atliekas,. bus. išvengta.galimos.žalos.aplinkai.ir.žmonių.sveikatai .Daugiau.informacijos.apie. jūsų. senos. įrangos. šalinimą. gali. pateikti. vietinės. valdžios.institucijos,.atliekų.šalinimo.tarnybos.arba.parduotuvės,.kuriose.įsigijote.tą.gaminįMalti (Maltese) - Informazzjoni Ambjentali għal Klijentifl-Unjoni EwropeaId-Direttiva.Ewropea.2002/96/KE.titlob.li.t-tagħmir.li.jkun.fih.issimbolu..fuq.il-prodott.u/jew.fuq.l-ippakkjar.ma.jistax.jintrema.ma’. skart. muniċipali. li. ma. ġiex. isseparat . Is-simbolu. jindika.li. dan. il-prodott. għandu. jintrema. separatament. minn. ma’. l-iskart. domestiku. regolari . Hija. responsabbiltà. tiegħek. li. tarmi.dan. it-tagħmir. u. kull. tagħmir. ieħor. ta’. l-<strong>el</strong>ettriku. u. <strong>el</strong>ettroniku.permezz.ta’.faċilitajiet.ta’.ġbir.appuntati.apposta.mill-gvern.jew.mill-awtoritajiet. lokali . Ir-rimi. b’mod. korrett. u. r-riċiklaġġ. jgħin.jipprevjeni. konsegwenzi. negattivi. potenzjali. għall-ambjent. u.għas-saħħa. tal-bniedem . Għal. aktar. informazzjoni. dettaljata.dwar.ir-rimi.tat-tagħmir.antik.tiegħek,.jekk.jogħġbok.ikkuntattja.lill-awtoritajiet.lokali.tiegħek,.is-servizzi.għar-rimi.ta’.l-iskart,.jew.il-ħanut.minn.fejn.xtrajt.il-prodottNederlands (Dutch) - Milieu-informatie voor klantenin de Europese UnieDe.Europese.Richtlijn.2002/96/EC.schrijft.voor.dat.apparatuur.die.is.voorzien.van.dit.symbool. .op.het.product.of.de.verpakking,.niet.mag.worden.ingezam<strong>el</strong>d.met.niet-gescheiden.huishoud<strong>el</strong>ijk.afval .Dit.symbool.geeft.aan.dat.het.product.apart.moet.worden.ingezam<strong>el</strong>d . U. bent. z<strong>el</strong>f. verantwoord<strong>el</strong>ijk. voor. de. vernietiging.van.deze.en.andere.<strong>el</strong>ektrische.en.<strong>el</strong>ektronische.apparatuur.via.de.daarvoor.door.de.land<strong>el</strong>ijke.of.plaats<strong>el</strong>ijke.overheid.aangewezen.inzam<strong>el</strong>ingskanalen . De. juiste. vernietiging. en. recycling. van.deze.apparatuur.voorkomt.mog<strong>el</strong>ijke.negatieve.gevolgen.voor.het. milieu. en. de. gezondheid . Voor. meer. informatie. over. het.vernietigen. van. uw. oude. apparatuur. neemt. u. contact. op. met.de.plaats<strong>el</strong>ijke.autoriteiten.of.afvalverwerkingsdienst,.of.met.de.wink<strong>el</strong>.waar.u.het.product.hebt.aangeschaftNorsk (Norwegian) - Miljøinformasjon for kunder i EUEU-direktiv. 2002/96/EF. krever. at. utstyr. med. følgende. symbol.. avbildet. på. produktet. og/<strong>el</strong>ler. pakningen,. ikke. må. kastes.sammen. med. usortert. avfall . Symbolet. indikerer. at. dette.produktet. skal. håndteres. atskilt. fra. ordinær. avfallsinnsamling.for. husholdningsavfall . Det. er. ditt. ansvar. å. kvitte. deg. med.dette.produktet.og.annet.<strong>el</strong>ektrisk.og.<strong>el</strong>ektronisk.avfall.via.egne.innsamlingsordninger. slik. myndighetene. <strong>el</strong>ler. kommunene.bestemmer . Korrekt. avfallshåndtering. og. gjenvinning. vil.være. med. på. å. forhindre. mulige. negative. konsekvenser. for.miljø. og. h<strong>el</strong>se . For. nærmere. informasjon. om. håndtering. av.det. kasserte. utstyret. ditt,. kan. du. ta. kontakt. med. kommunen,.en. innsamlingsstasjon. for. avfall. <strong>el</strong>ler. butikken. der. du. kjøpte.produktetMagyar (Hungarian) - Környezetvéd<strong>el</strong>mi információ azeurópai uniós vásárlók számáraA. 2002/96/EC. számú. európai. uniós. irány<strong>el</strong>v. megkívánja,. hogy.azokat.a.termékeket,.am<strong>el</strong>yeken,.és/vagy.am<strong>el</strong>yek.csomagolásán.az.alábbi.címke. .megj<strong>el</strong>enik,.tilos.a.többi.sz<strong>el</strong>ektálatlan.lakossági.hulladékkal. együtt. kidobni . A. címke. azt. j<strong>el</strong>öli,. hogy. az. adott.termék.kidobásakor.a.szokványos.háztartási.hulladék<strong>el</strong>szállítási.rendszerektõl. <strong>el</strong>különített. <strong>el</strong>járást. k<strong>el</strong>l. alkalmazni . Az. Ön.f<strong>el</strong><strong>el</strong>õssége,. hogy. ezt,. és. más. <strong>el</strong>ektromos. és. <strong>el</strong>ektronikus.berendezéseit. a. kormányzati. vagy. a. h<strong>el</strong>yi. hatóságok. által.kij<strong>el</strong>ölt. gyűjtõredszereken. keresztül. számolja. f<strong>el</strong> . A. megf<strong>el</strong><strong>el</strong>õ.hulladékf<strong>el</strong>dolgozás.segít.a.környezetre.és.az.emberi.egészségre.potenciálisan. ártalmas. negatív. hatások. meg<strong>el</strong>õzésében . Ha.<strong>el</strong>avult. berendezéseinek. f<strong>el</strong>számolásához. további. részletes.információra. van. szüksége,. kérjük,. lépjen. kapcsolatba. a. h<strong>el</strong>yi.hatóságokkal,. a. hulladékf<strong>el</strong>dolgozási. szolgálattal,. vagy. azzal.üzlett<strong>el</strong>,.ahol.a.terméket.vásároltaPolski (Polish) - Informacja dla klientów w UniiEuropejskiej o przepisach dotyczących ochronyśrodowiskaDyrektywa. Europejska. 2002/96/EC. wymaga,. aby. sprzęt.oznaczony.symbolem. .znajdującym.się.na.produkcie.i/lub.jego.opakowaniu.nie.był.wyrzucany.razem.z.innymi.niesortowanymi.odpadami. komunalnymi . Symbol. ten. wskazuje,. że. produkt.nie. powinien. być. usuwany. razem. ze. zwykłymi. odpadami. z.gospodarstw. domowych . Na. Państwu. spoczywa. obowiązek.wyrzucania. tego. i. innych. urządzeń. <strong>el</strong>ektrycznych. oraz.<strong>el</strong>ektronicznych.w.punktach.odbioru.wyznaczonych.przez.władze.krajowe.lub.lokalne .Pozbywanie.się.sprzętu.we.właściwy.sposób.i. jego. recykling. pomogą. zapobiec. potencjalnie. negatywnym.konsekwencjom. dla. środowiska. i. zdrowia. ludzkiego . W. c<strong>el</strong>u.uzyskania.szczegółowych.informacji.o.usuwaniu.starego.sprzętu,.prosimy. zwrócić. się. do. lokalnych. władz,. służb. oczyszczania.miasta.lub.sklepu,.w.którym.produkt.został.nabytyWir<strong>el</strong>ess-G Broadband-Router34
AnhangDZulassungsinformationenPortuguês (Portuguese) - Informação ambiental paraclientes da União EuropeiaA. Directiva. Europeia. 2002/96/CE. exige. que. o. equipamento.que.exibe.este.símbolo. .no.produto.e/ou.na.sua.embalagem.não. seja. <strong>el</strong>iminado. junto. com. os. resíduos. municipais. não.separados . O. símbolo. indica. que. este. produto. deve. ser.<strong>el</strong>iminado. separadamente. dos. resíduos. domésticos. regulares .É. da. sua. responsabilidade. <strong>el</strong>iminar. este. e. qualquer. outro.equipamento. <strong>el</strong>éctrico. e. <strong>el</strong>ectrónico. através. das. instalações.de. recolha. designadas. p<strong>el</strong>as. autoridades. governamentais. ou.locais .A.<strong>el</strong>iminação.e.reciclagem.correctas.ajudarão.a.prevenir.as. consequências. negativas. para. o. ambiente. e. para. a. saúde.humana . Para. obter. informações. mais. detalhadas. sobre. a.forma. de. <strong>el</strong>iminar. o. seu. equipamento. antigo,. contacte. as.autoridades.locais,.os.serviços.de.<strong>el</strong>iminação.de.resíduos.ou.o.estab<strong>el</strong>ecimento.comercial.onde.adquiriu.o.produtoRomână (Romanian) - Informaţii de mediu pentruclienţii din Uniunea EuropeanăDirectiva.europeană.2002/96/CE.impune.ca.echipament<strong>el</strong>e.care.prezintă.acest.simbol. .pe.produs.şi/sau.pe.ambalajul.acestuia.să.nu.fie.casate.împreună.cu.gunoiul.menajer.municipal .Simbolul.indică. faptul. că. acest. produs. trebuie. să. fie. casat. separat. de.gunoiul. menajer. obişnuit . Este. responsabilitatea. dvs . să. casaţi.acest. produs. şi. alte. echipamente. <strong>el</strong>ectrice. şi. <strong>el</strong>ectronice. prin.intermediul.unităţilor.de.colectare.special.desemnate.de.guvern.sau.de.autorităţile.locale .Casarea.şi.reciclarea.corecte.vor.ajuta.la.prevenirea.potenţial<strong>el</strong>or.consecinţe.negative.asupra.sănătăţii.mediului. şi. a. oamenilor . Pentru. mai. multe. informaţii. detaliate.cu. privire. la. casarea. acestui. echipament. vechi,. contactaţi.autorităţile. locale,. serviciul. de. salubrizare. sau. magazinul. de. la.care.aţi.achiziţionat.produsulSlovenčina (Slovak) - Informácie o ochrane životnéhoprostredia pre zákazníkov v Európskej úniiPodľa. európskej. smernice. 2002/96/ES. zariadenie. s. týmto.symbolom. . na. produkte. a/alebo. jeho. balení. nesmie. byť.likvidované. spolu. s. netriedeným. komunálnym. odpadom .Symbol. znamená,. že. produkt. by. sa. mal. likvidovať. odd<strong>el</strong>ene.od. bežného. odpadu. z. domácností . Je. vašou. povinnosťou.likvidovať. toto. i. ostatné. <strong>el</strong>ektrické. a. <strong>el</strong>ektronické. zariadenia.prostredníctvom.špecializovaných.zberných.zariadení.určených.vládou.alebo.miestnymi.orgánmi .Správna.likvidácia.a.recyklácia.pomôže.zabrániť.prípadným.negatívnym.dopadom.na.životné.prostredie. a. zdravie. ľudí . Ak. máte. záujem. o. podrobnejšie.informácie.o.likvidácii.starého.zariadenia,.obráťte.sa,.prosím,.na.miestne.orgány,.organizácie.zaoberajúce.sa.likvidáciou.odpadov.alebo.obchod,.v.ktorom.ste.si.produkt.zakúpiliSlovenčina (Slovene) - Okoljske informacije za strankev Evropski unijiEvropska.direktiva.2002/96/EC.prepoveduje.odlaganje.opreme,.označene.s.tem.simbolom. .–.na.izd<strong>el</strong>ku.in/ali.na.embalaži.–.med.običajne,.nerazvrščene.odpadke .Ta.simbol.opozarja,.da.je.treba.izd<strong>el</strong>ek. odvreči. ločeno. od. preostalih. gospodinjskih. odpadkov .Vaša.odgovornost.je,.da.to.in.preostalo.<strong>el</strong>ektrično.in.<strong>el</strong>ektronsko.opremo. odnesete. na. posebna. zbirališča,. ki. jih. določijo.državne. ustanove. ali. lokalna. uprava . S. pravilnim. odlaganjem.in. recikliranjem. boste. preprečili. morebitne. škodljive. vplive. na.okolje. in. zdravje. ljudi . Če. ž<strong>el</strong>ite. izvedeti. več. o. odlaganju. stare.opreme,.se.obrnite.na.lokalno.upravo,.odpad.ali.trgovino,.kjer.ste.izd<strong>el</strong>ek.kupiliSuomi (Finnish) - Ympäristöä koskevia tietoja EUalueenasiakkailleEU-direktiivi.2002/96/EY.ed<strong>el</strong>lyttää,.että.jos.laitteistossa.on.tämä.symboli. . itse. tuotteessa. ja/tai. sen. pakkauksessa,. laitteistoa.ei. saa. hävittää. lajitt<strong>el</strong>emattoman. yhdyskuntajätteen. mukana .Symboli.merkitsee.sitä,.että.tämä.tuote.on.hävitettävä.erillään.tavallisesta. kotitalousjätteestä . Sinun. vastuullasi. on. hävittää.tämä.<strong>el</strong>ektroniikkatuote.ja.muut.vastaavat.<strong>el</strong>ektroniikkatuotteet.viemällä. tuote. tai. tuotteet. viranomaisten. määräämään.keräyspisteeseen . Laitteiston. oikea. hävittäminen. estää.mahdolliset. ki<strong>el</strong>teiset. vaikutukset. ympäristöön. ja. ihmisten.terveyteen .Lisätietoja.vanhan.laitteiston.oikeasta.hävitystavasta.saa.paikallisilta.viranomaisilta,.jätteenhävityspalv<strong>el</strong>usta.tai.siitä.myymälästä,.josta.ostit.tuotteenSvenska (Swedish) - Miljöinformation för kunder iEuropeiska unionenDet.europeiska.direktivet.2002/96/EC.kräver.att.utrustning.med.denna.symbol. .på.produkten.och/<strong>el</strong>ler.förpackningen.inte.får.kastas.med.osorterat.kommunalt.avfall .Symbolen.visar.att.denna.produkt.bör.kastas.efter.att.den.avskiljts.från.vanligt.hushållsavfall .Det.faller.på.ditt.ansvar.att.kasta.denna.och.annan.<strong>el</strong>ektrisk.och.<strong>el</strong>ektronisk.utrustning.på.fastställda.insamlingsplatser.utsedda.av. regeringen. <strong>el</strong>ler. lokala. myndigheter . Korrekt. kassering. och.återvinning. skyddar. mot. eventu<strong>el</strong>la. negativa. konsekvenser.för.miljön.och.personhälsa .För.mer.detaljerad.information.om.kassering. av. din. gamla. utrustning. kontaktar. du. dina. lokala.myndigheter,. avfallshanteringen. <strong>el</strong>ler. butiken. där. du. köpte.produktenWEB:. Weitere. Informationen. finden. Sie. unter.www.linksys.com/internationalWir<strong>el</strong>ess-G Broadband-Router8013010NC-JL35
GUÍA DEL USUARIORouter de bandaancha Wir<strong>el</strong>ess-GNº de mod<strong>el</strong>o: WRT54G2 (ES)
Acerca de esta guíaAcerca de esta guíaDescripciones de los iconosAl leer la Guía d<strong>el</strong> usuario pueden aparecer variosiconos que llaman la atención sobre ciertos aspectos. Acontinuación se describen dichos iconos:NOTA: Esta marca de verificación indica quehay una nota útil a la que se debe prestaruna atención especial mientras se utiliza <strong>el</strong>producto.ADVERTENCIA: Este signo de exclamaciónindica que hay una precaución o advertencia yque algún <strong>el</strong>emento podría provocar daños enlas instalaciones o en <strong>el</strong> producto.WEB: Este icono con forma de globo terráqueoindica que se trata de una dirección de correo<strong>el</strong>ectrónico o una dirección Web de interés.Recursos en líneaLa mayoría de los exploradores Web le permiten introduciruna dirección Web sin escribir http:// d<strong>el</strong>ante de la misma.Esta guía d<strong>el</strong> usuario hará referencia a los sitios Web sinincluir http:// d<strong>el</strong>ante de la dirección. Es posible quealgunos exploradores Web antiguos le pidan que añadahttp://.RecursoLinksysLinksys InternationalGlosarioSeguridad de la redSitio Webwww.linksys.eswww.linksys.com/internationalwww.linksys.com/glossarywww.linksys.com/securityCopyright y marcas comercialesLinksys es una marca registrada omarca comercial de Cisco Systems,Inc. o sus filiales en EE.UU. y otrospaíses. Copyright © 2008 CiscoSystems, Inc. Todos los derechosreservados. Otras marcas ynombres de productos son marcascomerciales o marcas registradas desus respectivos propietarios.Router de banda ancha Wir<strong>el</strong>ess-G
ContenidoCapítulo 1: Descripción d<strong>el</strong> producto 1Pan<strong>el</strong> frontal. . . . . . . . . . . . . . . . . . . . . . . . . . . . . . . . . . . . . . . . . . . . . . . . . 1Pan<strong>el</strong> posterior . . . . . . . . . . . . . . . . . . . . . . . . . . . . . . . . . . . . . . . . . . . . . . . 1Posiciones de colocación. . . . . . . . . . . . . . . . . . . . . . . . . . . . . . . . . . . . . . . . . 1Capítulo 2: Lista de comprobación de seguridad inalámbrica 3Directrices generales de seguridad de la red . . . . . . . . . . . . . . . . . . . . . . . . . . . . 3Sugerencias de seguridad adicionales . . . . . . . . . . . . . . . . . . . . . . . . . . . . . . . . 3Capítulo 3: Configuración avanzada 4Setup (Configuración) > Basic Setup (Configuración básica) . . . . . . . . . . . . . . . . . . 4Setup (Configuración) > DDNS . . . . . . . . . . . . . . . . . . . . . . . . . . . . . . . . . . . . . 7Setup (Configuración) > MAC Address Clone (Clonación de direcciones MAC) . . . . . . . 8Setup (Configuración) > Advanced Routing (Enrutamiento avanzado) . . . . . . . . . . . . 8Wir<strong>el</strong>ess (Inalámbrico) > Basic Wir<strong>el</strong>ess Settings (Parámetros inalámbricos básicos) . . . 9Wir<strong>el</strong>ess (Inalámbrico) > Wir<strong>el</strong>ess Security (Seguridad inalámbrica) . . . . . . . . . . . . . 11Wir<strong>el</strong>ess (Inalámbrico) > Wir<strong>el</strong>ess MAC Filter (Filtro de MAC inalámbrico) . . . . . . . . . .13Wir<strong>el</strong>ess (Inalámbrico) > Advanced Wir<strong>el</strong>ess Settings(Parámetros inalámbricos avanzados) . . . . . . . . . . . . . . . . . . . . . . . . . . . . . . . . . . . . . . 13Security (Seguridad) > Firewall . . . . . . . . . . . . . . . . . . . . . . . . . . . . . . . . . . . . .14Firewall . . . . . . . . . . . . . . . . . . . . . . . . . . . . . . . . . . . . . . . . . . . . . . . . . . . .15Security (Seguridad) > VPN Passthrough (Paso a través de VPN) . . . . . . . . . . . . . . . .15Access Restrictions (Restricciones de acceso) > Acceso a Internet . . . . . . . . . . . . . . .15Applications and Gaming (Aplicaciones y juegos) > Port Range Forward(Reenvío de intervalos de puertos) . . . . . . . . . . . . . . . . . . . . . . . . . . . . . . . . . .17Applications & Gaming (Aplicaciones y juegos) > Port Triggering(Desencadenado de puertos) . . . . . . . . . . . . . . . . . . . . . . . . . . . . . . . . . . . . . .17Applications and Gaming (Aplicaciones y juegos) > DMZ . . . . . . . . . . . . . . . . . . . .18Applications and Gaming (Aplicaciones y juegos) > QoS . . . . . . . . . . . . . . . . . . . .18Administration (Administración) > Management (Gestión) . . . . . . . . . . . . . . . . . . .19Administration (Administración) > Log (Registro) . . . . . . . . . . . . . . . . . . . . . . . . .19Administration (Administración) > Diagnostics (Diagnóstico) . . . . . . . . . . . . . . . . .20Administration (Administración) > Factory Defaults(Parámetros predeterminados de fábrica) . . . . . . . . . . . . . . . . . . . . . . . . . . . . . .20Administration (Administración) > Upgrade Firmware (Actualizar <strong>el</strong> firmware). . . . . . 20Administration (Administración) > Config Management(Administración de la configuración) . . . . . . . . . . . . . . . . . . . . . . . . . . . . . . . . .21Status (Estado) > Router . . . . . . . . . . . . . . . . . . . . . . . . . . . . . . . . . . . . . . . . .21Status (Estado) > Local Network (Red local) . . . . . . . . . . . . . . . . . . . . . . . . . . . . .21Status (Estado) > Wir<strong>el</strong>ess (Inalámbrica) . . . . . . . . . . . . . . . . . . . . . . . . . . . . . . .22Apéndice A: Resolución de problemas 23Apéndice B: Especificaciones 24Router de banda ancha Wir<strong>el</strong>ess-Gii
ContenidoApéndice C: Información de garantía 25GARANTÍA LIMITADA . . . . . . . . . . . . . . . . . . . . . . . . . . . . . . . . . . . . . . . . . . .25EXCLUSIONES Y LIMITACIONES . . . . . . . . . . . . . . . . . . . . . . . . . . . . . . . . . . . . .25OBTENCIÓN DEL SERVICIO DE GARANTÍA . . . . . . . . . . . . . . . . . . . . . . . . . . . . . .25ASISTENCIA TÉCNICA . . . . . . . . . . . . . . . . . . . . . . . . . . . . . . . . . . . . . . . . . . .26GENERAL . . . . . . . . . . . . . . . . . . . . . . . . . . . . . . . . . . . . . . . . . . . . . . . . . . 26Apéndice D: Información sobre normativas 27FCC Statement . . . . . . . . . . . . . . . . . . . . . . . . . . . . . . . . . . . . . . . . . . . . . . .27Safety Notices. . . . . . . . . . . . . . . . . . . . . . . . . . . . . . . . . . . . . . . . . . . . . . . 27Industry Canada Statement . . . . . . . . . . . . . . . . . . . . . . . . . . . . . . . . . . . . . . .27Avis d’Industrie Canada. . . . . . . . . . . . . . . . . . . . . . . . . . . . . . . . . . . . . . . . . 27Wir<strong>el</strong>ess Disclaimer . . . . . . . . . . . . . . . . . . . . . . . . . . . . . . . . . . . . . . . . . . . .28Avis de non-responsabilité concernant les appareils sans fil . . . . . . . . . . . . . . . . . .28Declaración de conformidad con la directiva de la UE 1999/5/CE (directiva RTTE) . . . . . 29Marca CE . . . . . . . . . . . . . . . . . . . . . . . . . . . . . . . . . . . . . . . . . . . . . . . . . . .30Restricciones nacionales . . . . . . . . . . . . . . . . . . . . . . . . . . . . . . . . . . . . . . . . .30Restricciones de uso d<strong>el</strong> producto . . . . . . . . . . . . . . . . . . . . . . . . . . . . . . . . . . 31Documentos técnicos en www.linksys.com/international . . . . . . . . . . . . . . . . . . . .31Información de usuario para productos de consumo afectados por la directiva d<strong>el</strong>a UE 2002/96/CE sobre residuos de aparatos <strong>el</strong>éctricos y <strong>el</strong>ectrónicos (RAEE) . . . . . . .32Router de banda ancha Wir<strong>el</strong>ess-Giii
Capítulo 1Descripción d<strong>el</strong> productoCapítulo 1:Descripción d<strong>el</strong> productoGracias por <strong>el</strong>egir <strong>el</strong> router de banda ancha Wir<strong>el</strong>ess-GLinksys. El router le permite acceder a Internet a través deuna conexión inalámbrica, difusión de hasta 54 Mbpso de uno de sus cuatro puertos conmutados. Tambiénpuede utilizar <strong>el</strong> router para compartir recursos comoordenadores, impresoras y archivos. Una s<strong>el</strong>ección defunciones de seguridad le ayuda a proteger los datos ysu privacidad mientras se encuentra en línea. Entre lasfunciones de seguridad se incluyen seguridad WPA2, unfirewall con inspección exhaustiva de paquetes (SPI) ytecnología NAT. Es fácil configurar <strong>el</strong> router, con la utilidadbasada en explorador proporcionada.Pan<strong>el</strong> frontal1, 2, 3, 4 (verde). Estas luces numeradas,que corresponden a los puertos numeradosd<strong>el</strong> pan<strong>el</strong> posterior d<strong>el</strong> router, tienen dosfinalidades. Si la luz está encendida de formacontinua, esto indica que <strong>el</strong> router estáconectado correctamente a un dispositivomediante dicho puerto. Si parpadea, esto indicaque existe actividad de red en dicho puerto.Botón de configuración Wi-Fi protegida. Sitiene dispositivos cliente, como adaptadoresinalámbricos, que admitan la configuración Wi-Fi protegida, puede hacer que la configuraciónWi-Fi protegida configure de forma automáticala seguridad inalámbrica de sus redesinalámbricas.Para utilizar la configuración Wi-Fi protegida,ejecute <strong>el</strong> asistente de configuración o consult<strong>el</strong>a sección “Wir<strong>el</strong>ess > Basic Wir<strong>el</strong>ess Settings”(Inalámbrico > Parámetros inalámbricos básicos)d<strong>el</strong> “Capítulo 3: Configuración avanzada”.Luz de configuración Wi-Fi protegida (verde/ámbar). Esta luz se ilumina en verde cuandola seguridad inalámbrica está activada. La luzparpadea en verde durante dos minutos en laconfiguración Wi-Fi protegida.La luz se ilumina en ámbar si se produce unerror durante <strong>el</strong> proceso de configuración Wi‐Fiprotegida. Asegúrese de que <strong>el</strong> dispositivocliente es compatible con la configuraciónWi‐Fi protegida. Espere a que la luz se apague yvu<strong>el</strong>va a intentarlo.Router de banda ancha Wir<strong>el</strong>ess-GLa luz parpadea en ámbar cuando una sesiónde configuración Wi‐Fi protegida está activa yse inicia una segunda sesión. El router admit<strong>el</strong>as sesiones de una en una. Espere a que la luzse apague antes de iniciar la siguiente sesión deconfiguración Wi-Fi inalámbrica.Wir<strong>el</strong>ess (Inalámbrico, verde). La luz inalámbricase enciende cuando la función inalámbrica estáactivada Si parpadea, esto indica que <strong>el</strong> routerestá enviando o recibiendo datos por la red.Internet. La luz de Internet (verde) se enciendecuando se ha establecido una conexión a travésd<strong>el</strong> puerto Internet. Si parpadea, esto indicaque existe actividad de red en <strong>el</strong> puerto deInternet.Power (Alimentación, verde). La luz dealimentación se ilumina y permanece activadaal encender <strong>el</strong> router. Cuando <strong>el</strong> router esté en <strong>el</strong>modo de autodiagnóstico durante <strong>el</strong> arranque,esta luz parpadeará. Cuando <strong>el</strong> diagnósticotermine, la luz quedará encendida de formacontinua.Pan<strong>el</strong> posteriorInternet. En <strong>el</strong> puerto Internet se conecta laconexión a Internet por cable o DSL.1, 2, 3, 4. Estos puertos Ethernet (1, 2, 3, 4)conectan <strong>el</strong> router al PC en su red con cables yotros dispositivos de red Ethernet.Reset (Reinicio). Hay dos maneras de restablecerlos parámetros predeterminados de fábrica d<strong>el</strong>router. Pulse <strong>el</strong> botón Reset (Reinicio) duranteunos cinco segundos o restaure los parámetrospredeterminados desde Administration(Administración) > Factory Defaults (Parámetrospredeterminados de fábrica) en la utilidadbasada en Web d<strong>el</strong> router.Power (Alimentación). En <strong>el</strong> puerto Power seconecta <strong>el</strong> adaptador de corriente.Posiciones de colocaciónHay dos maneras de instalar físicamente <strong>el</strong> router. Laprimera es colocarlo horizontalmente en una superficie.La segunda es montarlo en una pared.
Capítulo 1Descripción d<strong>el</strong> productoColocación horizontalEl router tiene cuatro pies de goma en <strong>el</strong> pan<strong>el</strong> inferior.Coloque <strong>el</strong> router en una superficie niv<strong>el</strong>ada, cerca de unatoma <strong>el</strong>éctrica.Colocación en la paredEl router tiene dos ranuras en <strong>el</strong> pan<strong>el</strong> inferior para<strong>el</strong> montaje en pared. La distancia entre las ranuras es de152 mm (6 pulgadas).Se necesitan dos tornillos para montar <strong>el</strong> router.Piezas de montaje recomendadasNOTA: Linksys no se hace responsable de losdaños que se produzcan por un montaje pocoseguro d<strong>el</strong> dispositivo en la pared.Siga estas instrucciones:1. Decida dónde desea montar <strong>el</strong> router. Asegúrese deque la pared <strong>el</strong>egida sea lisa, plana, sólida y esté seca.Asegúrese también de que quede ubicado cerca deuna toma <strong>el</strong>éctrica.2. Taladre dos orificios en la pared. Asegúrese de queentre los dos orificios haya 152 mm (6 pulgadas) deseparación.3. Introduzca un tornillo en cada orificio y deje quesobresalga 3 mm (0,12 pulgadas).4. Disponga <strong>el</strong> router de tal manera que las ranuraspara montaje en pared queden alineadas con los dostornillos.5. Coloque las ranuras para <strong>el</strong> montaje en pared sobre lostornillos y deslice <strong>el</strong> router hacia abajo hasta que lostornillos encajen perfectamente en las ranuras.4-5 mm 1-1,5 mm2,5-3,0 mm† Nota: Las ilustraciones de las piezas de montajeno se muestran a escala real.152 mmImprima esta página al 100 % de su tamaño.Corte por la línea de puntos y coloque la plantilla en la pared para perforar en los puntosexactos.Plantilla para montaje en paredRouter de banda ancha Wir<strong>el</strong>ess-G
Capítulo 2Lista de comprobación de seguridad inalámbricaCapítulo 2:Lista de comprobación deseguridad inalámbricaLas redes inalámbricas son prácticas y fáciles de instalar,por lo que <strong>el</strong> número de hogares que están instalandoun acceso a Internet de alta v<strong>el</strong>ocidad está creciendorápidamente. Puesto que las redes inalámbricas funcionanenviando información a través de las ondas de radio,pueden ser más vulnerables frente a los intrusos que unared con cables tradicional. Al igual que las señales queemiten los t<strong>el</strong>éfonos móviles o inalámbricos, las señalesde la red inalámbrica también se pueden interceptar.Dado que no se puede prevenir físicamente que alguiense conecte a su red inalámbrica, deberá tomar algunasmedidas adicionales para mantener la seguridad de lared.1. Cambie <strong>el</strong> nombrepredeterminado de la redinalámbrica (SSID)Los dispositivos inalámbricos tienen un nombre de redinalámbrica predeterminado o identificador d<strong>el</strong> conjuntode servicios (SSID) configurado de fábrica. Éste es <strong>el</strong>nombre de su red inalámbrica, y puede tener una longitudde hasta 32 caracteres. Los productos inalámbricos deLinksys utilizan linksys como nombre predeterminadode la red inalámbrica. Debe cambiar <strong>el</strong> nombre de la redinalámbrica a algo único que distinga su red inalámbricade otras redes inalámbricas que puedan existir cerca, perono utilice información personal (como <strong>el</strong> número de laSeguridad social), porque esta información podría estardisponible para cualquier persona que busque redesinalámbricas.2. Cambie la contraseñapredeterminadaSe le solicitará una contraseña cuando desee modificar losparámetros de productos inalámbricos como puntos deacceso y routers. Estos dispositivos tienen una contraseñapredeterminada configurada de fábrica. La contraseñapredeterminada de Linksys es admin. Los hackers conocenestas contraseñas predeterminadas y podrían intentarutilizarlas para acceder a su dispositivo inalámbrico ycambiar los parámetros de la red. Para frustrar los cambiosno autorizados, personalice la contraseña d<strong>el</strong> dispositivopara que resulte difícil de adivinar.3. Active <strong>el</strong> filtrado dedirecciones MACLos routers de Linksys le permiten activar <strong>el</strong> filtrado dedirecciones MAC (control de acceso a medios). La direcciónMAC es una serie única de números y letras que se asignaRouter de banda ancha Wir<strong>el</strong>ess-Ga cada dispositivo de red. Sólo se proporcionará accesoa la red inalámbrica con <strong>el</strong> filtrado de direcciones MACactivado a los dispositivos inalámbricos con direccionesMAC específicas. Por ejemplo, puede especificar ladirección MAC de cada ordenador de su hogar para quesólo estos puedan acceder a su red inalámbrica.4. Active la encriptaciónLa encriptación protege los datos que se transmiten através de una red inalámbrica. El acceso Wi-Fi protegido(WPA/WPA2) y la privacidad equivalente a conexión concables (WEP) ofrecen varios niv<strong>el</strong>es de seguridad parala comunicación inalámbrica. En estos momentos a losdispositivos que tienen la certificación Wi-Fi se les exigeque admitan WPA2, pero no se les exige que admitanWEP.Una red encriptada con WPA/WPA2 es más segura queuna red encriptada con WEP, porque WPA/WPA2 utilizauna encriptación de clave dinámica. Para proteger lainformación que pasa a través de las ondas, deberá activar<strong>el</strong> niv<strong>el</strong> más alto de encriptación que admita <strong>el</strong> equipo dered.WEP es un estándar de encriptación antiguo y puede ser laúnica opción disponible en algunos dispositivos antiguosque no admitan WPA.Directrices generales de seguridad de la redLa seguridad de la red inalámbrica no sirve de nada si lared subyacente no es segura.• Una contraseña protege todos los ordenadores de lared, y la contraseña individual protege los archivosconfidenciales.• Cambie las contraseñas de forma regular.• Instale un software de antivirus y un software defirewall personal.• Desactive <strong>el</strong> intercambio de archivos (de igual a igual).Algunas aplicaciones pueden activar <strong>el</strong> intercambiode archivos sin su consentimiento y conocimiento.Sugerencias de seguridad adicionales• Mantenga routers inalámbricos, puntos de acceso opuertas de enlace alejados de paredes exteriores yventanas.• Apague routers inalámbricos, puntos de acceso opuertas de enlace cuando no los esté utilizando (por lanoche, durante las vacaciones).• Utilice frases de paso seguras que tengan una longitudmínima de ocho caracteres. Combine letras y númerospara evitar <strong>el</strong> uso de palabras estándar que puedanencontrarse en un diccionario.WEB: Para obtener más informaciónsobre la seguridad inalámbrica, visitewww.linksys.com/security
Capítulo 3Configuración avanzadaCapítulo 3:Configuración avanzadaDespués de configurar <strong>el</strong> router con <strong>el</strong> asistente deconfiguración (situado en <strong>el</strong> CD-ROM), <strong>el</strong> router estarálisto para utilizarse. Sin embargo, si desea modificar losparámetros avanzados, utilice la utilidad basada en Webd<strong>el</strong> router. En este capítulo se describen las páginas Webde la utilidad y las funciones clave de cada una. Puedeacceder a la utilidad mediante un navegador Web en unequipo conectado al router.La utilidad basada en Web cuenta con las siguientes fichasprincipales: Setup (Configuración), Wir<strong>el</strong>ess (Inalámbrico),Security (Seguridad), Access Restrictions (Restricciones deacceso), Applications & Gaming (Aplicaciones y juegos),Administration (Administración) y Status (Estado). Alhacer clic en una de las fichas principales apareceránfichas adicionales.Setup (Configuración) > Basic Setup(Configuración básica)La primera pantalla que aparece es Basic Setup(Configuración básica). Permite cambiar los parámetrosgenerales d<strong>el</strong> router.NOTA: Al instalar por primera vez <strong>el</strong> router,debería utilizar <strong>el</strong> CD-ROM d<strong>el</strong> asistentede configuración. Si desea configurar losparámetros avanzados, utilice este capítulopara obtener información sobre la utilidadbasada en Web.Cómo acceder a la utilidad basada en WebPara acceder a la utilidad basada en Web, abra <strong>el</strong>explorador Web en su equipo e introduzca la direcciónIP predeterminada d<strong>el</strong> router, 192.168.1.1, en <strong>el</strong> campoDirección. A continuación, pulse Intro.Aparece una pantalla en la que se le solicita unacontraseña. (Si no es usuario de Windows XP, verá unapantalla parecida). Deje <strong>el</strong> campo Nombre de usuario enblanco. La primera vez que abra la utilidad basada enWeb, utilice la contraseña predeterminada admin. Puedeestablecer una nueva contraseña en la ficha Administration(Administración) de la pantalla Management (Gestión).Haga clic en <strong>el</strong> botón Aceptar para continuar.Pantalla de contraseñaSetup (Configuración) > Basic Setup (Configuración básica)Configuración de InternetEn la sección Internet Setup (Configuración de Internet) seconfigura <strong>el</strong> router para la conexión a Internet. La mayorparte de esta información se puede obtener d<strong>el</strong> ISP.Tipo de conexión a InternetS<strong>el</strong>eccione <strong>el</strong> tipo de conexión a Internet que proporcione<strong>el</strong> ISP en <strong>el</strong> menú desplegable. Los tipos disponibles son:• Configuración automática - DHCP• IP estática• PPPoE• PPTP• L2TP• T<strong>el</strong>stra CableConfiguración automática - DHCPDe forma predeterminada, <strong>el</strong> tipo de conexión a Internet(Internet Connection Type) d<strong>el</strong> router está establecidoen Automatic Configuration - DHCP (Configuraciónautomática - DHCP), que sólo se debe conservar si <strong>el</strong> ISPadmite DHCP o si se realiza la conexión mediante unadirección IP dinámica. (Esta opción se aplica normalmentea las conexiones por cable.)Internet Connection Type (Tipo de conexión a Internet) > AutomaticConfiguration - DHCP (Configuración automática - DHCP)Router de banda ancha Wir<strong>el</strong>ess-G
Capítulo 3Configuración avanzadaIP estáticaSi necesita utilizar una dirección IP permanente paraconectarse a Internet, s<strong>el</strong>eccione Static IP (IP estática).(Mantener activo). En <strong>el</strong> campo Redial Period (Periodopara nueva marcación), especifique la frecuencia con quedesea que <strong>el</strong> router compruebe la conexión a Internet. Elperiodo para nueva marcación predeterminado es de30 segundos.PPTPEl protocolo de tún<strong>el</strong> de punto a punto (PPTP) es un servicioque se utiliza únicamente en conexiones europeas.Internet Connection Type (Tipo de conexión a Internet) >Static IP (IP estática)Internet IP Address (Dirección IP de Internet). Se tratade la dirección IP d<strong>el</strong> router, vista desde Internet. El ISP leproporcionará la dirección IP que debe especificar aquí.Subnet Mask (Máscara de subred). Se trata de lamáscara de subred d<strong>el</strong> router, tal como la ven los usuariosen Internet (incluido <strong>el</strong> ISP). El ISP le proporcionará lamáscara de subred.Gateway (Puerta de enlace). El ISP le proporcionará ladirección de la puerta de enlace, que es la dirección IP d<strong>el</strong>servidor d<strong>el</strong> ISP.DNS. El ISP le proporcionará al menos una dirección IP deservidor DNS (sistema de nombres de dominio).PPPoEAlgunos ISP basados en DSL utilizan PPPoE (protocolo depunto a punto en Ethernet) para establecer conexiones aInternet. Si se conecta a Internet a través de una línea DSL,consulte con <strong>el</strong> ISP si utiliza PPPoE. En ese caso, tendrá queactivar PPPoE.Internet Connection Type (Tipo de conexión a Internet) > PPPoEUser Name and Password (Nombre de usuario yContraseña). Introduzca <strong>el</strong> nombre de usuario y lacontraseña proporcionados por <strong>el</strong> ISP.Connect on Demand: Max Idle Time (Conectar cuandose solicite: Tiempo máximo de inactividad). Puedeconfigurar <strong>el</strong> router para que interrumpa la conexióna Internet cuando esté inactiva durante un periodo detiempo especificado (Max Idle Time, Tiempo máximode inactividad). Si la conexión a Internet finaliza debidoa la inactividad, Conectar cuando se solicite permite alrouter restablecer automáticamente la conexión si intentaacceder de nuevo a Internet. Para utilizar esta opción,s<strong>el</strong>eccione Connect on Demand (Conectar cuando sesolicite). En <strong>el</strong> campo Max Idle Time (Tiempo máximo deinactividad), introduzca <strong>el</strong> número de minutos que deseaque transcurran para que finalice la conexión a Internet. Eltiempo máximo de inactividad es de 5 minutos.Keep Alive: Redial Period (Mantener activo: Periodo paranueva marcación). Si s<strong>el</strong>ecciona esta opción, <strong>el</strong> routercomprobará periódicamente la conexión a Internet. Si sedesconecta, <strong>el</strong> router restablecerá automáticamente laconexión. Para utilizar esta opción, s<strong>el</strong>eccione Keep AliveRouter de banda ancha Wir<strong>el</strong>ess-GInternet Connection Type (Tipo de conexión a Internet) > PPTPInternet IP Address (Dirección IP de Internet). Se tratade la dirección IP d<strong>el</strong> router, vista desde Internet. El ISP leproporcionará la dirección IP que debe especificar aquí.Subnet Mask (Máscara de subred). Se trata de lamáscara de subred d<strong>el</strong> router, tal como la ven los usuariosen Internet (incluido <strong>el</strong> ISP). El ISP le proporcionará lamáscara de subred.Gateway (Puerta de enlace). El ISP le proporcionará ladirección de la puerta de enlace.User Name and Password (Nombre de usuario yContraseña). Introduzca <strong>el</strong> nombre de usuario y lacontraseña proporcionados por <strong>el</strong> ISP.Connect on Demand: Max Idle Time (Conectar cuandose solicite: Tiempo máximo de inactividad). Puedeconfigurar <strong>el</strong> router para que interrumpa la conexióna Internet cuando esté inactiva durante un periodo detiempo especificado (Max Idle Time, Tiempo máximode inactividad). Si la conexión a Internet finaliza debidoa la inactividad, Conectar cuando se solicite permite alrouter restablecer automáticamente la conexión si intentaacceder de nuevo a Internet. Para utilizar esta opción,s<strong>el</strong>eccione Connect on Demand (Conectar cuando sesolicite). En <strong>el</strong> campo Max Idle Time (Tiempo máximo deinactividad), introduzca <strong>el</strong> número de minutos que deseaque transcurran para que finalice la conexión a Internet. Eltiempo máximo de inactividad es de 5 minutos.Keep Alive: Redial Period (Mantener activo: Periodopara nueva marcación). Si s<strong>el</strong>ecciona esta opción,<strong>el</strong> router comprobará periódicamente la conexióna Internet. Si se desconecta, <strong>el</strong> router restableceráautomáticamente la conexión. Para utilizar esta opción,s<strong>el</strong>eccione Keep Alive (Mantener activo). En <strong>el</strong> campoRedial Period (Periodo para nueva marcación), especifiqu<strong>el</strong>a frecuencia con que desea que <strong>el</strong> router compruebe laconexión a Internet. El valor predeterminado es de 30segundos.L2TPL2TP es un servicio que se utiliza únicamente enconexiones en Isra<strong>el</strong>.
Capítulo 3Configuración avanzadaInternet Connection Type (Tipo de conexión a Internet) > L2TPUser Name and Password (Nombre de usuario yContraseña). Introduzca <strong>el</strong> nombre de usuario y lacontraseña proporcionados por <strong>el</strong> ISP.L2TP Server (Servidor L2TP). Ésta es la dirección IP d<strong>el</strong>servidor L2TP. El ISP le proporcionará la dirección IP quedebe especificar aquí.Connect on Demand: Max Idle Time (Conectar cuandose solicite: Tiempo máximo de inactividad). Puedeconfigurar <strong>el</strong> router para que interrumpa la conexióna Internet cuando esté inactiva durante un periodo detiempo especificado (Max Idle Time, Tiempo máximode inactividad). Si la conexión a Internet finaliza debidoa la inactividad, Conectar cuando se solicite permite alrouter restablecer automáticamente la conexión si intentaacceder de nuevo a Internet. Para utilizar esta opción,s<strong>el</strong>eccione Connect on Demand (Conectar cuando sesolicite). En <strong>el</strong> campo Max Idle Time (Tiempo máximo deinactividad), introduzca <strong>el</strong> número de minutos que deseaque transcurran para que finalice la conexión a Internet. Eltiempo máximo de inactividad es de 5 minutosKeep Alive: Redial Period (Mantener activo: Periodo paranueva marcación). Si s<strong>el</strong>ecciona esta opción, <strong>el</strong> routercomprobará periódicamente la conexión a Internet. Si sedesconecta, <strong>el</strong> router restablecerá automáticamente laconexión. Para utilizar esta opción, s<strong>el</strong>eccione Keep Alive(Mantener activo). En <strong>el</strong> campo Redial Period (Periodopara nueva marcación), especifique la frecuencia con quedesea que <strong>el</strong> router compruebe la conexión a Internet.El periodo para nueva marcación predeterminado es de30 segundos.T<strong>el</strong>stra CableT<strong>el</strong>stra Cable es un servicio que se utiliza únicamenteen las conexiones australianas. Si <strong>el</strong> ISP utiliza HeartBeatSignal (HBS), s<strong>el</strong>eccione T<strong>el</strong>stra.Internet Connection Type (Tipo de conexión a Internet) > T<strong>el</strong>stra CableUser Name and Password (Nombre de usuario yContraseña). Introduzca <strong>el</strong> nombre de usuario y lacontraseña proporcionados por <strong>el</strong> ISP.Heart Beat Server (Servidor de Heart Beat). Éstaes la dirección IP d<strong>el</strong> servidor de Heart Beat. El ISP leproporcionará la dirección IP que debe especificar aquí.Connect on Demand: Max Idle Time (Conectar cuandose solicite: Tiempo máximo de inactividad). Puedeconfigurar <strong>el</strong> router para que interrumpa la conexióna Internet cuando esté inactiva durante un periodo detiempo especificado (Max Idle Time, Tiempo máximoRouter de banda ancha Wir<strong>el</strong>ess-Gde inactividad). Si la conexión a Internet finaliza debidoa la inactividad, Conectar cuando se solicite permite alrouter restablecer automáticamente la conexión si intentaacceder de nuevo a Internet. Para utilizar esta opción,s<strong>el</strong>eccione Connect on Demand (Conectar cuando sesolicite). En <strong>el</strong> campo Max Idle Time (Tiempo máximo deinactividad), introduzca <strong>el</strong> número de minutos que deseaque transcurran para que finalice la conexión a Internet. Eltiempo máximo de inactividad es de 5 minutosKeep Alive: Redial Period (Mantener activo: Periodo paranueva marcación). Si s<strong>el</strong>ecciona esta opción, <strong>el</strong> routercomprobará periódicamente la conexión a Internet. Si sedesconecta, <strong>el</strong> router restablecerá automáticamente laconexión. Para utilizar esta opción, s<strong>el</strong>eccione Keep Alive(Mantener activo). En <strong>el</strong> campo Redial Period (Periodopara nueva marcación), especifique la frecuencia con quedesea que <strong>el</strong> router compruebe la conexión a Internet.El periodo para nueva marcación predeterminado es de30 segundos.Parámetros opcionalesEs posible que <strong>el</strong> ISP exija <strong>el</strong> uso de algunos de estosparámetros. Verifique con <strong>el</strong> ISP si es necesario realizaralgún cambio.Parámetros opcionalesRouter Name (Nombre de router). En este campopuede introducir un nombre de hasta 39 caracteres pararepresentar <strong>el</strong> router.Host Name/Domain Name (Nombre de host/Nombrede dominio). En estos campos puede proporcionar unnombre de host y de dominio para <strong>el</strong> router. AlgunosISP, normalmente los de cable, solicitan estos nombrescomo identificación. Puede que deba consultar al ISP si<strong>el</strong> servicio de Internet de banda ancha se ha configuradocon un nombre de host y de dominio. En la mayoría d<strong>el</strong>os casos, no habrá ningún problema si se dejan estoscampos en blanco.MTU. MTU es la unidad de transmisión máxima.Especifica <strong>el</strong> tamaño máximo de paquete permitido parala transmisión de Internet. S<strong>el</strong>eccione Manual si deseaintroducir manualmente <strong>el</strong> tamaño máximo de paqueteque se transmitirá. Para que <strong>el</strong> router s<strong>el</strong>eccione la MTUóptima para la conexión a Internet, mantenga <strong>el</strong> parámetropredeterminado, Auto (Automático).Size (Tamaño). Cuando se s<strong>el</strong>ecciona Manual en <strong>el</strong>campo MTU, se activará esta opción. Este valor debe estaren <strong>el</strong> intervalo de 1200 a 1500. El tamaño predeterminadodepende d<strong>el</strong> tipo de conexión a Internet:• DHCP, IP estática, o T<strong>el</strong>stra: 1500• PPPoE: 1492• PPTP o L2TP: 1460
Capítulo 3Configuración avanzadaConfiguración de redLa sección Network Setup (Configuración de red) permitecambiar los parámetros de la red conectada a los puertosEthernet d<strong>el</strong> router. La configuración inalámbrica seefectúa mediante la ficha Wir<strong>el</strong>ess (Inalámbrico).IP d<strong>el</strong> routerPresenta la dirección IP (IP Address) y la máscara de subred(Subnet Mask) d<strong>el</strong> router tal como las ve la red.Dirección IP d<strong>el</strong> routerNetwork Address Server Settings (DHCP) (Parámetros deservidor de direcciones de red, DHCP).Los parámetros le permiten configurar la función deservidor de protocolo de configuración dinámica dehost (DHCP) d<strong>el</strong> router. El router se puede utilizar comoservidor DHCP para la red. Un servidor DHCP asignaautomáticamente una dirección IP a cada ordenador de lared. Si desea activar la opción de servidor DHCP d<strong>el</strong> router,asegúrese de que no hay otro servidor DHCP en la red.Network Address Server Settings (DHCP) (Parámetros de servidor dedirecciones de red, DHCP).DHCP Server (Servidor DHCP). DHCP viene activado defábrica, de forma predeterminada. Si ya dispone de unservidor DHCP en la red o si no desea utilizar un servidorDHCP, s<strong>el</strong>eccione Disable (Desactivar) (no estarándisponibles otras funciones de DHCP).Starting IP Address (Dirección IP inicial). Introduzca unvalor para <strong>el</strong> servidor DHCP con <strong>el</strong> que se empezarán emitirdirecciones IP. Debido a que la dirección IP predeterminadad<strong>el</strong> router es 192.168.1.1, la dirección IP inicial debe ser192.168.1.2 o mayor, pero menor que 192.168.1.253. Ladirección IP inicial predeterminada es 192.168.1.100.Maximum Number of DHCP Users (Número máximode usuarios de DHCP). Introduzca <strong>el</strong> número máximo deordenadores a los que desea que <strong>el</strong> servidor DHCP asignedirecciones IP. Este número no puede superar los 253. Elvalor predeterminado es 50.Client Lease Time (Tiempo de concesión d<strong>el</strong> cliente). Eltiempo de concesión d<strong>el</strong> cliente es la cantidad de tiempoque un usuario podrá estar conectado al router con ladirección IP dinámica actual. Introduzca <strong>el</strong> tiempo, enminutos, durante <strong>el</strong> que se “concederá” al usuario estadirección IP dinámica. Una vez transcurrido este tiempo,al usuario se le asignará automáticamente una nuevadirección IP dinámica. De forma predeterminada es 0minutos, lo que significa un día.Static DNS (1-3) (DNS estático 1-3). El sistema denombres de dominio (DNS) es <strong>el</strong> método que se utiliza enInternet para traducir los nombres de dominio o sitio Weba direcciones de Internet o URL. El ISP le proporcionará almenos una dirección IP de servidor DNS. Si desea utilizarotra, introduzca dicha dirección IP en uno de estos campos.Puede introducir aquí hasta tres direcciones IP de servidorDNS. El router las utilizará para acceder más rápidamente alos servidores DNS en funcionamiento.WINS. El servicio de nombres de Internet de Windows(WINS) administra la interacción de cada ordenador conInternet. Si va a utilizar un servidor WINS, introduzca aquíla dirección IP d<strong>el</strong> mismo. De lo contrario, deje los camposen blanco.Parámetro de horaS<strong>el</strong>eccione la zona horaria en la que funciona la red,en <strong>el</strong> menú desplegable. (puede incluso ajustarlaautomáticamente para <strong>el</strong> horario de verano).Parámetro de horaHaga clic en Save Settings (Guardar parámetros) paraaplicar los cambios o en Canc<strong>el</strong> Changes (Canc<strong>el</strong>arcambios) para canc<strong>el</strong>arlos.Setup (Configuración) > DDNSEl router proporciona una función de sistema dinámicode nombres de dominio (DDNS). DDNS permite asignarun nombre de host y de dominio fijo a una dirección IPdinámica de Internet. Así podrá alojar su propio sitio Web,servidor FTP u otro servidor que se encuentre detrás d<strong>el</strong>router.Antes de que pueda utilizar esta función, tendrá quesuscribirse al servicio DDNS con un proveedor deservicios DDNS, www.dyndns.org o www.TZO.com. Sino desea utilizar esta función, mantenga <strong>el</strong> parámetropredeterminado, Disable (Desactivar).DDNSEl router proporciona una función de sistema dinámicode nombres de dominio (DDNS). DDNS permite asignarun nombre de host y de dominio fijo a una dirección IPdinámica de Internet. Así podrá alojar su propio sitio Web,servidor FTP u otro servidor que se encuentre detrás d<strong>el</strong>router.Para poder utilizar esta función debe suscribirse al servicioDDNS con uno de los distribuidores de dicho servicio,DynDNS.org o TZO.com. Si no desea utilizar esta función,mantenga <strong>el</strong> parámetro predeterminado, Disable(Desactivar).Servicio DDNSSi DynDNS.org proporciona <strong>el</strong> servicio DDNS, s<strong>el</strong>eccioneDynDNS.org en <strong>el</strong> menú desplegable. Si TZO proporciona<strong>el</strong> servicio DDNS, s<strong>el</strong>eccione TZO.com. Las funcionesdisponibles en la pantalla DDNS varían según <strong>el</strong> distribuidord<strong>el</strong> servicio DDNS que utilice.Router de banda ancha Wir<strong>el</strong>ess-G
Capítulo 3Configuración avanzadaDynDNS.orgSetup (Configuración) > MAC Address Clone(Clonación de direcciones MAC)Una dirección MAC es un código de 12 dígitos asignadoa un dispositivo de hardware para su identificación.Algunos ISP requieren que se registre una dirección MACpara acceder a Internet. Si no desea volver a registrarla dirección MAC con <strong>el</strong> ISP, puede asignar al router ladirección MAC que tiene registrada actualmente con <strong>el</strong> ISPmediante la función de clonación de direcciones MAC.Setup (Configuración) > DDNS > DynDNSUser Name (Nombre de usuario). Introduzca <strong>el</strong> nombrede usuario de la cuenta DDNS.Password (Contraseña). Introduzca la contraseña de lacuenta DDNS.Host Name (Nombre de host). Se trata de la URL deDDNS asignada por <strong>el</strong> servicio DDNS.Internet IP Address (Dirección IP de Internet). Aquíse muestra la dirección IP de Internet d<strong>el</strong> router. Estadirección cambiará, ya que es dinámica.Status (Estado). Aquí se muestra <strong>el</strong> estado de la conexiónd<strong>el</strong> servicio DDNS.Haga clic en Save Settings (Guardar parámetros) paraaplicar los cambios o en Canc<strong>el</strong> Changes (Canc<strong>el</strong>arcambios) para canc<strong>el</strong>arlos.TZO.comSetup (Configuración) > MAC Address Clone (Clonación de direccionesMAC)Clonación de direcciones MACEnable/Disable (Activar/Desactivar). Para que se clon<strong>el</strong>a dirección MAC, s<strong>el</strong>eccione Enabled (Activado).User Defined Entry (Entrada definida por <strong>el</strong>usuario). Introduzca aquí la dirección MAC registrada con<strong>el</strong> ISP.Clone Your PC’s MAC (Clonar la MAC d<strong>el</strong> PC). Al hacer clicen este botón se clonará la dirección MAC d<strong>el</strong> ordenadorque esté utilizando.Haga clic en Save Settings (Guardar parámetros) paraaplicar los cambios o en Canc<strong>el</strong> Changes (Canc<strong>el</strong>arcambios) para canc<strong>el</strong>arlos.Setup (Configuración) > Advanced Routing(Enrutamiento avanzado)Esta pantalla se utiliza para configurar las funcionesavanzadas de enrutamiento d<strong>el</strong> router. NAT (Traducciónde direcciones de red) dirige a Internet la conexión dered d<strong>el</strong> router host. Con Dynamic Routing (Enrutamientodinámico) se ajusta automáticamente <strong>el</strong> modo en que lospaquetes recorren la red. Con Enrutamiento estático sepuede configurar una ruta fija a otro destino de red.Setup (Configuración) > DDNS > TZOE-mail Address (Correo <strong>el</strong>ectrónico), TZO Key (Clave TZO)y Domain Name (Nombre de dominio). Introduzca losparámetros de la cuenta que haya configurado en TZO.Internet IP Address (Dirección IP de Internet). Aquíse muestra la dirección IP de Internet d<strong>el</strong> router. Estadirección cambiará, ya que es dinámica.Status (Estado). Aquí se muestra <strong>el</strong> estado de la conexiónd<strong>el</strong> servicio DDNS.Haga clic en Save Settings (Guardar parámetros) paraaplicar los cambios o en Canc<strong>el</strong> Changes (Canc<strong>el</strong>arcambios) para canc<strong>el</strong>arlos.Router de banda ancha Wir<strong>el</strong>ess-G
Capítulo 3Configuración avanzadaSetup (Configuración) > Advanced Routing (Gateway) (Enrutamientoavanzado) (Puerta de enlace)Setup (Configuración) > Advanced Routing (Enrutamiento avanzado)(Router)Enrutamiento avanzadoOperating Mode (Modo de funcionamiento). S<strong>el</strong>eccione<strong>el</strong> modo en que funcionará este router. Si <strong>el</strong> router aloja laconexión a Internet de la red, s<strong>el</strong>eccione Gateway (Puertade enlace). Si existe otro router en la red, s<strong>el</strong>eccioneRouter. Al s<strong>el</strong>eccionar <strong>el</strong> router, la opción DynamicRouting (Enrutamiento dinámico) estará disponible.Enrutamiento dinámicoRIP. Esta función permite que <strong>el</strong> router se ajusteautomáticamente a los cambios físicos que se produzcanen <strong>el</strong> diseño de la red e intercambie tablas de enrutamientocon <strong>el</strong> resto de routers. El router determina la ruta d<strong>el</strong>os paquetes de red basándose en <strong>el</strong> menor número desaltos entre <strong>el</strong> origen y <strong>el</strong> destino. El valor predeterminadode esta función es Disabled (Desactivado). En <strong>el</strong> menúdesplegable también puede s<strong>el</strong>eccionar LAN & Wir<strong>el</strong>ess(Red LAN e inalámbrica), que realiza un enrutamientodinámico por las redes Ethernet e inalámbrica. Tambiénpuede s<strong>el</strong>eccionar WAN (Internet), que realiza unenrutamiento dinámico con los datos procedentes deInternet. Finalmente, al s<strong>el</strong>eccionar Both (Ambas) sepermite <strong>el</strong> enrutamiento dinámico para ambas redes, asícomo para los datos procedentes de Internet.Router de banda ancha Wir<strong>el</strong>ess-GS<strong>el</strong>ect set number (S<strong>el</strong>eccionar número configurado).Para configurar una ruta estática entre <strong>el</strong> router y otrared, s<strong>el</strong>eccione un número en la lista desplegable StaticRouting (Enrutamiento estático). (Una ruta estáticaes la ruta predeterminada por la que se desplaza lainformación de red hasta alcanzar un host determinadoo una red concreta.) Introduzca la información descritaa continuación para configurar una nueva ruta estática.(Haga clic en <strong>el</strong> botón D<strong>el</strong>ete This Entry (Eliminar estaentrada) para <strong>el</strong>iminar una ruta estática.)Enter Route Name (Introducir nombre de ruta).Introduzca aquí <strong>el</strong> nombre de la ruta, con un máximo de25 caracteres alfanuméricos.Destination LAN IP (IP de red LAN de destino). La IP d<strong>el</strong>a red LAN de destino es la dirección de la red o <strong>el</strong> hostremoto al que desea asignar una ruta estática.Subnet Mask (Máscara de subred). La máscara desubred determina qué parte de una dirección IP de redLAN de destino corresponde a la parte de la red y cuál a laparte d<strong>el</strong> host.Default Gateway (Puerta de enlace predeterminada).Se trata de la dirección IP d<strong>el</strong> dispositivo de puerta deenlace que permite <strong>el</strong> contacto entre <strong>el</strong> router y la red o<strong>el</strong> host remoto.Interface (Interfaz). Esta interfaz indica si la dirección IPde destino está en LAN & Wir<strong>el</strong>ess (Red LAN e inalámbrica,para redes Ethernet e inalámbricas) o WAN (Internet).D<strong>el</strong>ete This Entry (Eliminar esta entrada). Para <strong>el</strong>iminaruna ruta, s<strong>el</strong>eccione su número en <strong>el</strong> menú desplegable yhaga clic en este botón.Show Routing Table (Mostrar tabla de enrutamiento).Haga clic en Show Routing Table (Mostrar tabla deenrutamiento) para abrir una pantalla en la que se mostrarácómo se enrutan los datos a través de la red local. Para cadaruta se muestran la dirección IP de red LAN de destino, lamáscara de subred, la puerta de enlace y la interfaz. Hagaclic en Refresh (Actualizar) para actualizar la información.Haga clic en Close (Cerrar) para salir de esta pantalla.Tabla de enrutamientoHaga clic en Save Settings (Guardar parámetros) paraaplicar los cambios o en Canc<strong>el</strong> Changes (Canc<strong>el</strong>arcambios) para canc<strong>el</strong>arlos.Wir<strong>el</strong>ess (Inalámbrico) > Basic Wir<strong>el</strong>essSettings (Parámetros inalámbricos básicos)Los parámetros básicos para la red inalámbrica seestablecen en esta pantalla.Hay dos formas de configurar la red o redes inalámbricasd<strong>el</strong> router: manual y configuración Wi-Fi protegida.Wi-Fi Protected Setup (Configuración Wi-Fi protegida)es una función que facilita la configuración de lared inalámbrica. Si tiene dispositivos cliente, comoadaptadores inalámbricos, que sean compatibles con laconfiguración Wi-Fi protegida, podrá utilizar este tipo deconfiguración.
Capítulo 3Configuración avanzadaWir<strong>el</strong>ess Configuration (Configuración inalámbrica)Para configurar la red inalámbrica de forma manual,s<strong>el</strong>eccione Manual. Vaya a la sección “Basic Wir<strong>el</strong>essSettings” (Parámetros inalámbricos básicos). Para utilizar laconfiguración Wi-Fi protegida, s<strong>el</strong>eccione Wi-Fi ProtectedSetup (Configuración Wi-Fi protegida). Vaya a la sección“Wi-Fi Protected Setup” (Configuración Wi-Fi protegida).Parámetros inalámbricos básicosConfiguración Wi-Fi protegidaHay tres métodos disponibles. Utilice <strong>el</strong> método quecorresponda al dispositivo cliente que está configurando.Wir<strong>el</strong>ess (Inalámbrico) > Basic Wir<strong>el</strong>ess Settings (Parámetrosinalámbricos básicos) (Configuración manual)Wir<strong>el</strong>ess Network Mode (Modo de red inalámbrica). Eneste menú desplegable puede s<strong>el</strong>eccionar los estándaresinalámbricos que se utilizan en la red. Si cuenta condispositivos Wir<strong>el</strong>ess-N, Wir<strong>el</strong>ess-G y Wir<strong>el</strong>ess-B en la red,mantenga <strong>el</strong> parámetro predeterminado, Mixed (Mixto).Si sólo dispone de dispositivos Wir<strong>el</strong>ess-G y Wir<strong>el</strong>ess-Ben la red, s<strong>el</strong>eccione BG-Mixed (Mixto BG). Si sólo tienedispositivos Wir<strong>el</strong>ess-N, s<strong>el</strong>eccione Wir<strong>el</strong>ess-N only(Sólo Wir<strong>el</strong>ess-N). Si sólo tiene dispositivos Wir<strong>el</strong>ess-G,s<strong>el</strong>eccione Wir<strong>el</strong>ess-G only (Sólo Wir<strong>el</strong>ess-G). Si sólo tienedispositivos Wir<strong>el</strong>ess-B, s<strong>el</strong>eccione Wir<strong>el</strong>ess-B only (SóloWir<strong>el</strong>ess-B). Si la red no tiene dispositivos inalámbricos,s<strong>el</strong>eccione Disabled (Desactivado).Wir<strong>el</strong>ess Network Name (SSID) (Nombre de la redinalámbrica, SSID). EL SSID es un nombre de red quecomparten todos los puntos de una red inalámbrica.Debe ser <strong>el</strong> mismo para todos los dispositivos de la redinalámbrica. El nombre distingue entre mayúsculas yminúsculas y no debe tener una longitud superior a los32 caracteres (se puede utilizar cualquier carácter d<strong>el</strong>teclado). Asegúrese de que este parámetro es <strong>el</strong> mismopara todos los puntos de la red inalámbrica. Para mayorseguridad, debe cambiar <strong>el</strong> SSID predeterminado (linksys)por otro.Wir<strong>el</strong>ess Chann<strong>el</strong> (Canal inalámbrico). S<strong>el</strong>eccione <strong>el</strong>canal de la lista que coincida con los parámetros de red.Para que <strong>el</strong> funcionamiento sea correcto, debe realizars<strong>el</strong>a difusión para todos los dispositivos de la red inalámbricaen <strong>el</strong> mismo canal.Wir<strong>el</strong>ess SSID Broadcast (Difusión inalámbrica deSSID). Cuando los clientes inalámbricos sondeen <strong>el</strong> árealocal en busca de redes inalámbricas con las que asociarse,detectarán <strong>el</strong> SSID que difunde <strong>el</strong> router. Para difundir <strong>el</strong>SSID d<strong>el</strong> router, mantenga <strong>el</strong> parámetro predeterminado,Enabled (Activado). Si no desea difundir <strong>el</strong> SSID d<strong>el</strong> router,s<strong>el</strong>eccione Disabled (Desactivado).Haga clic en Save Settings (Guardar parámetros) paraaplicar los cambios o en Canc<strong>el</strong> Changes (Canc<strong>el</strong>arcambios) para canc<strong>el</strong>arlos.Router de banda ancha Wir<strong>el</strong>ess-GWir<strong>el</strong>ess (Inalámbrico) > Basic Wir<strong>el</strong>ess Settings (Parámetros inalámbricosbásicos) (Wi-Fi Protected Setup, Configuración Wi-Fi protegida)Wi-Fi Protected Setup (Configuración Wi-Fi protegida) >Congratulations (Enhorabuena)NOTA: La configuración Wi-Fi protegidaconfigura los dispositivos cliente de uno en uno.Repita las instrucciones para cada dispositivocliente que sea compatible con la configuraciónWi-Fi protegida.Método nº 1Utilice este método si <strong>el</strong> dispositivo cliente tiene un botónde configuración Wi-Fi protegida.1. Haga clic o pulse <strong>el</strong> botón de configuración Wi-Fiprotegida d<strong>el</strong> dispositivo cliente.2. Haga clic en <strong>el</strong> botón de configuración Wi-Fiprotegida que aparece en esta pantalla.3. Una vez que <strong>el</strong> dispositivo cliente se haya configurado,haga clic en OK (Aceptar). A continuación, vu<strong>el</strong>va aldispositivo cliente o consulte la documentación paraobtener más instrucciones.10
Capítulo 3Configuración avanzadaMétodo nº 2Utilice este método si <strong>el</strong> dispositivo cliente tiene unnúmero PIN de configuración Wi-Fi protegida.1.2.3.Introduzca <strong>el</strong> número PIN en <strong>el</strong> campo que aparece enesta pantalla.Haga clic en Register (Registro).Una vez que <strong>el</strong> dispositivo cliente se haya configurado,haga clic en OK (Aceptar). A continuación, vu<strong>el</strong>va aldispositivo cliente o consulte la documentación paraobtener más instrucciones.Método nº 3Utilice este método si <strong>el</strong> dispositivo cliente solicita <strong>el</strong>número PIN d<strong>el</strong> router.1. Introduzca <strong>el</strong> número PIN que aparece en esta pantalla(también aparece en la etiqueta que hay en la parteinferior d<strong>el</strong> router.)2. Una vez que <strong>el</strong> dispositivo cliente se haya configurado,haga clic en OK (Aceptar). A continuación, vu<strong>el</strong>va aldispositivo cliente o consulte la documentación paraobtener más instrucciones.En la parte inferior de la pantalla aparecen las opcionesWi-Fi Protected Setup Status (Estado de la configuraciónWi-Fi protegida), Network Name (SSID) (Nombre de la red,SSID), Security (Seguridad), Encryption (Encriptación) yPassphrase (Frase de paso).NOTA: Si <strong>el</strong> cliente tiene dispositivos que noson compatibles con la configuración Wi-Fiprotegida, anote los parámetros inalámbricosy, a continuación, configure los dispositivosclientes de forma manual.Wir<strong>el</strong>ess (Inalámbrico) > Wir<strong>el</strong>ess Security(Seguridad inalámbrica)Los parámetros de la ficha Wir<strong>el</strong>ess Security (Seguridadinalámbrica) configuran la seguridad de la red inalámbrica.El router admite seis opciones de modo de seguridadinalámbrica: WPA Personal, WPA Enterprise, WPA2Personal, WPA2 Enterprise, RADIUS y WEP. (WPA quieredecir acceso Wi-Fi protegido y es un estándar de seguridadmás fiable que la encriptación WEP. WPA2 es una versiónmás avanzada y segura de WPA. WEP significa privacidadequivalente a conexión con cables y RADIUS significaservicio de usuario de acceso t<strong>el</strong>efónico de autenticaciónremota). Estas seis opciones se analizan a continuación.Para obtener información detallada sobre la configuraciónde la seguridad inalámbrica d<strong>el</strong> router, consulte <strong>el</strong>“Capítulo 2: Seguridad inalámbrica.”Seguridad inalámbricaModo de seguridadS<strong>el</strong>eccione <strong>el</strong> método de seguridad para la red inalámbrica.Si no desea utilizar la seguridad inalámbrica, mantenga <strong>el</strong>parámetro predeterminado, Disabled (Desactivado).Router de banda ancha Wir<strong>el</strong>ess-GWPA PersonalNOTA: Si utiliza WPA, recuerde siempre quecada dispositivo de la red inalámbrica DEBEutilizar <strong>el</strong> mismo método WPA y la misma clavecompartida; de lo contrario, la red no funcionarácorrectamente.Security Mode (Modo de seguridad) > WPA PersonalWPA Algorithm (Algoritmo WPA). WPA admite dosmétodos de encriptación, TKIP y AES, con claves deencriptación dinámica. S<strong>el</strong>eccione <strong>el</strong> tipo de algoritmo,TKIP o AES. (AES es un método de encriptación másfiable que TKIP.)WPA Shared Key (Clave compartida WPA). Introduzca laclave compartida por <strong>el</strong> router y los otros dispositivos dered. Debe tener entre 8 y 63 caracteres.Group Key Renewal (Renovación de clave degrupo). Introduzca un periodo de renovación de clave(Key Renewal), que indica al router la frecuencia con quedebe cambiar las claves de encriptación. El periodo derenovación de clave de grupo predeterminado es de 3600segundos.WPA EnterpriseEsta opción permite <strong>el</strong> uso de WPA junto con un servidorRADIUS. (Sólo se debe utilizar si hay un servidor RADIUSconectado al router).Security Mode (Modo de seguridad) > WPA EnterpriseWPA Algorithm (Algoritmo WPA). WPA admite dosmétodos de encriptación, TKIP y AES, con claves deencriptación dinámica. S<strong>el</strong>eccione <strong>el</strong> tipo de algoritmo,TKIP o AES. (AES es un método de encriptación más fiableque TKIP.)RADIUS Server Address (Dirección de servidorRADIUS). Introduzca la dirección IP d<strong>el</strong> servidor RADIUS.11
Capítulo 3Configuración avanzadaRADIUS Port (Puerto RADIUS). Introduzca <strong>el</strong> número depuerto d<strong>el</strong> servidor RADIUS. El valor predeterminado es1812.Shared Key (Clave compartida). Introduzca la clavecompartida por <strong>el</strong> router y <strong>el</strong> servidor.Key Renewal Timeout (Tiempo de espera de renovaciónde claves). Introduzca un periodo de renovación declaves que indique al router la frecuencia con que debecambiar las claves de encriptación. El periodo de tiempode espera de renovación de clave predeterminado es de3600 segundos.WPA2 PersonalRADIUS Server Address (Dirección de servidorRADIUS). Introduzca la dirección IP d<strong>el</strong> servidor RADIUS.RADIUS Port (Puerto RADIUS). Introduzca <strong>el</strong> número depuerto d<strong>el</strong> servidor RADIUS. El valor predeterminado es1812.Shared Key (Clave compartida). Introduzca la clavecompartida por <strong>el</strong> router y <strong>el</strong> servidor.Key Renewal Timeout (Tiempo de espera de renovaciónde claves). Introduzca un periodo de renovación declaves que indique al router la frecuencia con que debecambiar las claves de encriptación. El periodo de tiempode espera de renovación de clave predeterminado es de3600 segundos.RADIUSEsta opción permite <strong>el</strong> uso de WEP junto con un servidorRADIUS (Sólo se debe utilizar si hay un servidor RADIUSconectado al router).Security Mode (Modo de seguridad) > WPA2 PersonalWPA Algorithm (Algoritmo WPA). WPA2 admite dosmétodos de encriptación, TKIP y AES, con claves deencriptación dinámica. S<strong>el</strong>eccione <strong>el</strong> tipo de algoritmo,AES o TKIP + AES. La s<strong>el</strong>ección predeterminada es AES.WPA Shared Key (Clave compartida WPA). Introduzcauna clave compartida WPA (WPA Shared Key) quecontenga de 8 a 63 caracteres.Group Key Renewal (Renovación de clave degrupo). Introduzca un periodo de renovación de clavede grupo (Group Key Renewal), que indica al routerla frecuencia con que debe cambiar las claves deencriptación. El periodo de renovación de clave de grupopredeterminado es de 3600 segundos.WPA2 EnterpriseEsta opción permite <strong>el</strong> uso de WPA2 junto con un servidorRADIUS. (Sólo se debe utilizar si hay un servidor RADIUSconectado al router.)Security Mode (Modo de seguridad) > WPA2 EnterpriseWPA Algorithm (Algoritmo WPA). WPA2 admite dosmétodos de encriptación, TKIP y AES, con claves deencriptación dinámica. S<strong>el</strong>eccione <strong>el</strong> tipo de algoritmo,AES o TKIP + AES. La s<strong>el</strong>ección predeterminada es AES.Router de banda ancha Wir<strong>el</strong>ess-GSecurity Mode (Modo de seguridad) > RADIUSIMPORTANTE: Si utiliza encriptación WEP,recuerde siempre que cada dispositivo de lared inalámbrica DEBE utilizar <strong>el</strong> mismo métodode encriptación WEP y la misma clave deencriptación; de lo contrario, la red inalámbricano funcionará correctamente.RADIUS Server Address (Dirección de servidorRADIUS). Introduzca la dirección IP d<strong>el</strong> servidor RADIUS.RADIUS Port (Puerto RADIUS). Introduzca <strong>el</strong> número depuerto d<strong>el</strong> servidor RADIUS. El valor predeterminado es1812.Shared Key (Clave compartida). Introduzca la clavecompartida por <strong>el</strong> router y <strong>el</strong> servidor.Default Transmit Key (Clave de transmisiónpredeterminada). S<strong>el</strong>eccione una clave de transmisiónpredeterminada (<strong>el</strong>ija la que desea utilizar). El valorpredeterminado es 1.WEP Encryption (Encriptación WEP). S<strong>el</strong>eccione <strong>el</strong> niv<strong>el</strong>de encriptación WEP, 64 bits (10 hex digits) (64 bits, 10dígitos hexadecimales) o 128 bits (26 hex digits) (128bits, 26 dígitos hexadecimales). El valor predeterminado es64 bits 10 hex digits (64 bits, 10 dígitos hexadecimales).Passphrase (Frase de paso). Introduzca una frase depaso (Passphrase) para generar las claves WEP de formaautomática. A continuación, haga clic en Generate(Generar).12
Capítulo 3Configuración avanzadaKey 1-4 (Clave 1-4). Si no ha introducido ninguna frase depaso, introduzca las claves WEP de forma manual.WEPWEP es un método de encriptación básico y no es tanseguro como WPA.Security Mode (Modo de seguridad) > WEPDefault Transmit Key (Clave de transmisiónpredeterminada). S<strong>el</strong>eccione una clave de transmisiónpredeterminada (<strong>el</strong>ija la que desea utilizar). El valorpredeterminado es 1.WEP Encryption (Encriptación WEP). S<strong>el</strong>eccione un niv<strong>el</strong>de cifrado WEP, 64 bits (10 hex digits) (64 bits, 10 dígitoshexadecimales) o 128 bits (26 hex digits) (128 bits, 26dígitos hexadecimales). El valor predeterminado es 64 bits(10 hex digits) (64 bits, 10 dígitos hexadecimales).Passphrase (Frase de paso). Introduzca una frase depaso (Passphrase) para generar las claves WEP de formaautomática. A continuación, haga clic en Generate(Generar).Key 1-4 (Clave 1-4). Si no ha introducido ninguna frase depaso, introduzca las claves WEP de forma manual.Haga clic en Save Settings (Guardar parámetros) paraaplicar los cambios o en Canc<strong>el</strong> Changes (Canc<strong>el</strong>arcambios) para canc<strong>el</strong>arlos.Wir<strong>el</strong>ess (Inalámbrico) > Wir<strong>el</strong>ess MACFilter (Filtro de MAC inalámbrico)Se puede filtrar <strong>el</strong> acceso inalámbrico mediante <strong>el</strong> uso d<strong>el</strong>as direcciones MAC de los dispositivos inalámbricos quetransmiten en <strong>el</strong> radio de la red.Filtro de MAC inalámbricoWir<strong>el</strong>ess MAC Filter (Filtro de MAC inalámbrico). Parafiltrar los usuarios por dirección MAC, ya sea para permitir obloquear <strong>el</strong> acceso, haga clic en Enable (Activar). Si no deseafiltrar los usuarios por dirección MAC, s<strong>el</strong>eccione Disable(Desactivar).Prevent (Evitar). S<strong>el</strong>ección<strong>el</strong>o para bloquear <strong>el</strong> accesoinalámbrico por dirección MAC. Este botón estás<strong>el</strong>eccionado de forma predeterminada.Permit Only (Permitir sólo). S<strong>el</strong>ección<strong>el</strong>o para tener <strong>el</strong>acceso inalámbrico por dirección MAC. Este botón no estás<strong>el</strong>eccionado de forma predeterminada.Edit MAC Filter List (Editar lista de filtros de direccionesMAC). Haga clic en esta opción para abrir la pantalla MACAddress Filter List (Lista de filtros de direcciones MAC). En estapantalla se pueden enumerar por dirección MAC los usuariosa los que desea proporcionar o bloquear <strong>el</strong> acceso. Parafacilitar la referencia, haga clic en Wir<strong>el</strong>ess Client MAC List(Lista de MAC de clientes inalámbricos) para mostrar una listade usuarios de la red por dirección MAC.Lista de filtros de direcciones MACHaga clic en Save Settings (Guardar parámetros) paraaplicar los cambios o en Canc<strong>el</strong> Changes (Canc<strong>el</strong>arcambios) para canc<strong>el</strong>arlos.Wir<strong>el</strong>ess (Inalámbrico) > Advanced Wir<strong>el</strong>essSettings (Parámetros inalámbricos avanzados)La pantalla Wir<strong>el</strong>ess (Inalámbrico) > Advanced Wir<strong>el</strong>essSettings (Parámetros inalámbricos avanzados) se utilizapara configurar las funciones inalámbricas avanzadasd<strong>el</strong> router. Estos parámetros sólo los debe ajustarun administrador experto, ya que unos parámetrosincorrectos pueden reducir <strong>el</strong> rendimiento inalámbrico.Wir<strong>el</strong>ess (Inalámbrico) > Wir<strong>el</strong>ess MAC Filter (Filtro de MAC inalámbrico)Router de banda ancha Wir<strong>el</strong>ess-G13
Capítulo 3Configuración avanzadaWir<strong>el</strong>ess (Inalámbrico) > Advanced Wir<strong>el</strong>ess Settings (Parámetrosinalámbricos avanzados)Parámetros inalámbricos avanzadosAuthentication Type (Tipo de autenticación). El valorpredeterminado está establecido en Auto (Automático),que permite utilizar la autenticación Open System(Sistema abierto) o Shared Key (Clave compartida). Conla autenticación Open System (Sistema abierto), <strong>el</strong>emisor y <strong>el</strong> receptor NO utilizan una clave WEP para laautenticación. Con la autenticación Shared Key (Clavecompartida), <strong>el</strong> emisor y <strong>el</strong> receptor utilizan una clave WEPpara la autenticación.Basic Rate (V<strong>el</strong>ocidad básica). Este parámetro enrealidad no es una única v<strong>el</strong>ocidad de transmisión, sinouna serie de v<strong>el</strong>ocidades a las que puede transmitir <strong>el</strong>router. El router anunciará su v<strong>el</strong>ocidad básica a los demásdispositivos inalámbricos de la red para que conozcan lasv<strong>el</strong>ocidades que se utilizarán. El router también anunciaráque s<strong>el</strong>eccionará automáticamente la mejor v<strong>el</strong>ocidadpara la transmisión. El parámetro predeterminado esDefault (Predeterminada), con <strong>el</strong> que <strong>el</strong> router puedetransmitir a todas las v<strong>el</strong>ocidades inalámbricas estándar(1-2 Mbps, 5,5 Mbps, 11 Mbps, 18 Mbps y 24 Mbps). Otrasopciones son 1-2 Mbps, para su uso con tecnologíainalámbrica antigua, y All (Todas), con la que <strong>el</strong> routerpuede transmitir a todas las v<strong>el</strong>ocidades inalámbricas. Lav<strong>el</strong>ocidad básica no es la v<strong>el</strong>ocidad real de transmisiónde datos. Si desea especificar la v<strong>el</strong>ocidad de transmisiónde datos d<strong>el</strong> router, configure <strong>el</strong> parámetro V<strong>el</strong>ocidad detransmisión.Transmission Rate (V<strong>el</strong>ocidad de transmisión). Lav<strong>el</strong>ocidad de transmisión de datos se debe establecer segúnla v<strong>el</strong>ocidad de la red inalámbrica. Puede s<strong>el</strong>eccionar unvalor entre una serie de v<strong>el</strong>ocidades de transmisión o biens<strong>el</strong>eccionar Auto (Automática) para que <strong>el</strong> router utiliceautomáticamente la máxima v<strong>el</strong>ocidad de transferenciade datos posible y active la función de reserva automática.La reserva automática negociará la mejor v<strong>el</strong>ocidad deconexión posible entre <strong>el</strong> router y un cliente inalámbrico.El valor predeterminado es Auto (Automática).CTS Protection Mode (Modo de protección CTS). Elmodo de protección CTS (listo para emitir) debepermanecer desactivado a menos que tenga problemasgraves con los productos Wir<strong>el</strong>ess-G y éstos no puedantransmitir al router en un entorno con tráfico 802.11bintenso. Esta función incrementa la capacidad d<strong>el</strong> routerpara captar todas las transmisiones Wir<strong>el</strong>ess-G, peroreduce <strong>el</strong> rendimiento en gran medida.Router de banda ancha Wir<strong>el</strong>ess-GFrame Burst (Ráfaga de tramas). Al activar esta opciónse debe conseguir un mayor rendimiento de la red, enfunción d<strong>el</strong> fabricante de los productos inalámbricos.Para activar la opción Frame Burst (Ráfaga de tramas),s<strong>el</strong>eccione Enable (Activar). La opción predeterminada esDisable (Desactivar).Beacon Interval (Intervalo de baliza). El valorpredeterminado es 100. Introduzca un valor entre 1y 65.535 milisegundos. Este valor indica <strong>el</strong> intervalode frecuencia de la baliza. Una baliza consiste en unpaquete difundido por <strong>el</strong> router para sincronizar la redinalámbrica.DTIM Interval (Intervalo DTIM). Este valor, entre 1 y255, indica <strong>el</strong> intervalo de mensajes de indicación detráfico de entrega (DTIM). El campo DTIM es un campode cuenta atrás que informa a los clientes d<strong>el</strong> siguienteintervalo para la recepción de mensajes de difusión ymultidifusión. Una vez que <strong>el</strong> router ha almacenado en<strong>el</strong> búfer los mensajes de difusión o multidifusión para losclientes asociados, envía <strong>el</strong> siguiente DTIM con un valor deintervalo DTIM. Sus clientes reciben las balizas y se activanpara recibir los mensajes de difusión y multidifusión. Elvalor predeterminado es 1.Fragmentation Threshold (Umbral de fragmentación).Este valor especifica <strong>el</strong> tamaño máximo de un paqueteantes de fragmentar los datos en varios paquetes. Siexperimenta una tasa alta de errores de paquete, puedeaumentar ligeramente <strong>el</strong> umbral de fragmentación. Siestablece un umbral de fragmentación demasiado bajo, sepuede reducir <strong>el</strong> rendimiento de la red. Sólo se recomiendaefectuar una reducción mínima d<strong>el</strong> valor predeterminado.En la mayoría de los casos, debe permanecer en su valorpredeterminado de 2346.RTS Threshold (Umbral RTS). Si detecta un flujo de datosirregular, sólo se recomienda efectuar una reducciónmínima d<strong>el</strong> valor predeterminado, 2347. Si un paquetede red es más pequeño que <strong>el</strong> tamaño de umbral RTSpredefinido, <strong>el</strong> mecanismo RTS/CTS no se activará. Elrouter envía tramas de petición de envío (RTS) a unadeterminada estación de recepción y negocia <strong>el</strong> envío deuna trama de datos. Después de recibir una RTS, la estacióninalámbrica responde con una trama de listo para emitir(CTS) para confirmar <strong>el</strong> inicio de la transmisión. El valor deumbral RTS debe permanecer en su valor predeterminadode 2347.AP Isolation (Aislamiento de PA). Este parámetro aíslaentre sí todos los clientes y dispositivos inalámbricos d<strong>el</strong>a red. Los dispositivos inalámbricos se podrán comunicarcon <strong>el</strong> router, pero no entre <strong>el</strong>los. Para utilizar esta función,s<strong>el</strong>eccione On (Activado). El aislamiento de PA está en Off(Desactivado) de forma predeterminada.SecureEasySetup. Permite activar o desactivar la funciónSecureEasySetup. S<strong>el</strong>eccione Disabled (Desactivado) paradesactivar la función y apagar la luz d<strong>el</strong> botón. La funciónestá Enabled (Activada) de forma predeterminada.Haga clic en Save Settings (Guardar parámetros) paraaplicar los cambios o en Canc<strong>el</strong> Changes (Canc<strong>el</strong>arcambios) para canc<strong>el</strong>arlos.Security (Seguridad) > FirewallLa pantalla Security (Seguridad) > Firewall se utiliza paraconfigurar un firewall que pueda filtrar varios tipos detráficos no deseados en la red local d<strong>el</strong> router.14
Capítulo 3Configuración avanzadaSecurity (Seguridad) > FirewallFirewallFirewall Protection (Protección de firewall). Parautilizar la protección de firewall, mantenga la s<strong>el</strong>ecciónpredeterminada, Enable (Activar). Para desactivar laprotección de firewall, s<strong>el</strong>eccione Disable (Desactivar).Bloquear solicitudes WANBlock Anonymous Internet Requests (Bloquearsolicitudes de Internet anónimas). Esta funcióndificulta a los usuarios externos <strong>el</strong> acceso a la red. Estafunción está s<strong>el</strong>eccionada de forma predeterminada.Desactive la función para permitir las solicitudes deInternet anónimas.Filter Multicast (Filtrar multidifusión). Esta funciónpermite varias transmisiones simultáneas a receptoresespecíficos. Si activa la multidifusión, <strong>el</strong> router permitiráque los paquetes de multidifusión IP se reenvíen a losordenadores adecuados. Esta función está activada deforma predeterminada. Des<strong>el</strong>eccione esta función paradesactivarla.Filter Internet NAT Redirection (Filtrar redirección NATde Internet). Esta función utiliza <strong>el</strong> reenvío de puertospara bloquear <strong>el</strong> acceso a los servidores locales desdeordenadores en red locales. S<strong>el</strong>eccione Filter InternetNAT Redirection (Filtrar redirección NAT de Internet) parafiltrar la redirección NAT de Internet. Esta función estáactivada de forma predeterminada.Filter IDENT (Port 113) (Filtrar IDENT [puerto 113]). Estafunción impide que los dispositivos externos a la redlocal analicen <strong>el</strong> puerto 113. Esta función está activada deforma predeterminada. Des<strong>el</strong>eccione esta función paradesactivarla.Haga clic en Save Settings (Guardar parámetros) paraaplicar los cambios o en Canc<strong>el</strong> Changes (Canc<strong>el</strong>arcambios) para canc<strong>el</strong>arlos.Security (Seguridad) > VPN Passthrough(Paso a través de VPN)La pantalla Security (Seguridad) > VPN Passthrough (Pasoa través de VPN) le permite activar los tún<strong>el</strong>es VPN queutilicen los protocolos IPSec, PPTP o L2TP para pasar através d<strong>el</strong> firewall d<strong>el</strong> router.Paso a través de VPNIPSec Passthrough (Paso a través de IPSec). Laseguridad de protocolo de Internet (IPSec) es una suitede protocolos utilizados para implantar <strong>el</strong> intercambioseguro de paquetes en la capa IP. Para permitir que lostún<strong>el</strong>es IPSec pasen a través d<strong>el</strong> router, mantenga <strong>el</strong> valorpredeterminado Enable (Activar).PPTP Passthrough (Paso a través de PPTP). El protocolode tún<strong>el</strong> de punto a punto (PPTP) permite establecertún<strong>el</strong>es para <strong>el</strong> protocolo de punto a punto (PPP) a travésde una red IP. Para permitir que los tún<strong>el</strong>es PPTP pasena través d<strong>el</strong> router, mantenga <strong>el</strong> valor predeterminadoEnable (Activar).L2TP Passthrough (Paso a través de L2TP). El protocolode tún<strong>el</strong> de capa 2 es <strong>el</strong> método que se utiliza para activarlas sesiones de punto a punto a través de Internet en <strong>el</strong>niv<strong>el</strong> de la capa 2. Para permitir que los tún<strong>el</strong>es L2TP pasena través d<strong>el</strong> router, mantenga <strong>el</strong> valor predeterminadoEnable (Activar).Haga clic en Save Settings (Guardar parámetros) paraaplicar los cambios o en Canc<strong>el</strong> Changes (Canc<strong>el</strong>arcambios) para canc<strong>el</strong>arlos.Access Restrictions (Restricciones deacceso) > Acceso a InternetLa pantalla Access Restrictions (Restricciones de acceso)> Internet Access (Acceso a Internet) permite bloquear oaceptar determinados tipos de uso y tráfico de Internet,como <strong>el</strong> acceso a Internet, servicios concretos y sitios Weba determinados días y horas.Security (Seguridad) > VPN Passthrough (Paso a través de VPN)Router de banda ancha Wir<strong>el</strong>ess-GAccess Restrictions (Restricciones de acceso) > Acceso a InternetAcceso a InternetInternet Access Policy (Directiva de acceso a Internet).El acceso se puede administrar mediante una directiva.Utilice los parámetros de esta pantalla para estableceruna directiva de acceso (una vez que haya hecho clic en <strong>el</strong>15
Capítulo 3Configuración avanzadabotón Save Settings [Guardar parámetros]). Al s<strong>el</strong>eccionaruna directiva en <strong>el</strong> menú desplegable se mostrarán losparámetros de la misma. Para <strong>el</strong>iminar una directiva,s<strong>el</strong>eccione su número y haga clic en D<strong>el</strong>ete (Eliminar). Paraver todas las directivas, haga clic en <strong>el</strong> botón Summary(Resumen). (Las directivas se pueden <strong>el</strong>iminar en la pantallaSummary (Resumen) s<strong>el</strong>eccionándolas y haciendo clic enD<strong>el</strong>ete (Eliminar). Para volver a la ficha Internet Access(Acceso a Internet) haga clic en Close (Cerrar).)Resumen de directivas de InternetStatus (Estado). De forma predeterminada, las directivasestán desactivadas. Para activar una directiva, s<strong>el</strong>eccionesu número en <strong>el</strong> menú desplegable y s<strong>el</strong>eccione Enable(Activar).Para crear una directiva de acceso a Internet:1.2.3.4.5.6.S<strong>el</strong>eccione un número en <strong>el</strong> menú desplegable InternetAccess Policy (Directiva de acceso a Internet).Para activar esta directiva, s<strong>el</strong>eccione Enable (Activar).Introduzca un nombre de directiva en <strong>el</strong> campoproporcionado (Introducir nombre de directiva).Haga clic en Edit List of PCs (Editar lista de ordenadores)para s<strong>el</strong>eccionar los ordenadores a los que afectaráesta directiva. Aparecerá la pantalla List of PCs (Lista dePC). Puede s<strong>el</strong>eccionar un PC por dirección MAC o pordirección IP. También puede introducir un intervalo dedirecciones IP si desea que esta directiva afecte a ungrupo de ordenadores. Tras efectuar los cambios, hagaclic en Save Settings (Guardar parámetros) para aplicarlos cambios, o bien en Canc<strong>el</strong> Changes (Canc<strong>el</strong>arcambios) para canc<strong>el</strong>arlos. A continuación, haga clic enClose (Cerrar).Lista de PCS<strong>el</strong>eccione la opción correspondiente, Deny (Denegar)o Allow (Permitir), en función de si desea bloquearo permitir <strong>el</strong> acceso a Internet de los ordenadoresenumerados en la pantalla List of PCs (Lista de PC).Decida los días y las horas en que desea que se apliqueesta directiva. S<strong>el</strong>eccione cada día en que se aplicarála directiva o s<strong>el</strong>eccione Everyday (Todos los días).A continuación, introduzca un intervalo de horas y7.8.minutos durante los que se aplicará la directiva os<strong>el</strong>eccione 24 hours (24 horas).S<strong>el</strong>eccione <strong>el</strong> servicio bloqueado (Blocked Services) obloqueo de sitios Web (Website Blocking) que deseautilizar.Haga clic en Save Settings (Guardar parámetros) paraguardar los parámetros de la directiva o haga clic enCanc<strong>el</strong> Changes (Canc<strong>el</strong>ar cambios) para canc<strong>el</strong>arlos.Servicios bloqueadosPuede filtrar <strong>el</strong> acceso a diferentes servicios a travésde Internet, como FTP o T<strong>el</strong>net, s<strong>el</strong>eccionándolos enlos menús desplegables que aparecen junto a BlockedServices (Servicios bloqueados). (Puede bloquear hasta20 servicios.) A continuación, introduzca <strong>el</strong> intervalo depuertos que desea filtrar.Si <strong>el</strong> servicio que desea bloquear no se encuentra en lalista o desea editar los parámetros de un servicio, hagaclic en Add/Edit Service (Agregar/Editar servicio). Acontinuación, aparecerá la pantalla Port Services (Serviciosde puertos).Servicios de puertosPara agregar un servicio, introduzca <strong>el</strong> nombre d<strong>el</strong>mismo en <strong>el</strong> campo Service Name (Nombre de servicio).S<strong>el</strong>eccione su protocolo en <strong>el</strong> menú desplegable Protocol(Protocolo) e introduzca su intervalo en los campos PortRange (Intervalo de puertos). A continuación, haga clic enAdd (Agregar).Para modificar un servicio, s<strong>el</strong>ección<strong>el</strong>o en la lista d<strong>el</strong>a parte derecha. Cambie su nombre, parámetro deprotocolo o intervalo de puertos. A continuación, hagaclic en Modify (Modificar).Para <strong>el</strong>iminar un servicio, s<strong>el</strong>ección<strong>el</strong>o en la lista de la partederecha. A continuación, haga clic en D<strong>el</strong>ete (Eliminar).Cuando termine de efectuar cambios en la pantalla PortServices (Servicios de puertos), haga clic en Apply (Aplicar)para guardar los cambios. Si desea canc<strong>el</strong>ar los cambios,haga clic en Canc<strong>el</strong> (Canc<strong>el</strong>ar). Para cerrar la pantalla PortServices (Servicios de puertos) y volver a la pantalla AccessRestrictions (Restricciones de acceso), haga clic en Close(Cerrar).Bloqueo de sitios Web por dirección URLSi desea bloquear sitios Web con direcciones URLespecíficas, introduzca cada una en un campoindependiente situado junto a Website Blocking by URLAddress (Bloqueo de sitios Web por dirección URL).Bloqueo de sitios Web por palabra claveSi desea bloquear sitios Web mediante palabrasclave específicas, introduzca cada una en un campoindependiente situado junto a Website Blocking byKeyword (Bloqueo de sitios Web por palabra clave).Router de banda ancha Wir<strong>el</strong>ess-G16
Capítulo 3Configuración avanzadaHaga clic en Save Settings (Guardar parámetros) paraaplicar los cambios o en Canc<strong>el</strong> Changes (Canc<strong>el</strong>arcambios) para canc<strong>el</strong>arlos.Applications and Gaming (Aplicaciones yjuegos) > Port Range Forward (Reenvío deintervalos de puertos)La pantalla Applications & Gaming (Aplicaciones y juegos)> Port Range Forward (Reenvío de intervalos de puertos)permite configurar servicios públicos en la red, comoservidores Web, servidores FTP, servidores de correo<strong>el</strong>ectrónico u otras aplicaciones de Internet especializadas.(Las aplicaciones especializadas de Internet son aqu<strong>el</strong>lasque utilizan <strong>el</strong> acceso a Internet para realizar funciones comovideoconferencias o juegos en línea. Puede que algunasaplicaciones de Internet no requieran ningún reenvío).Applications & Gaming (Aplicaciones yjuegos) > Port Triggering (Desencadenadode puertos)La pantalla Applications & Gaming (Aplicaciones y juegos)> Port Triggering (Desencadenado de puertos) permiteque <strong>el</strong> router controle los datos salientes de números depuerto específicos. El router recuerda la dirección IP d<strong>el</strong>ordenador que envía los datos coincidentes, de formaque, cuando los datos solicitados circulen a través d<strong>el</strong>router, se dirijan al ordenador correspondiente mediant<strong>el</strong>a dirección IP y las reglas de asignación de puertos.Applications and Gaming (Aplicaciones y juegos) > Port Range Forward(Reenvío de intervalos de puertos)Port Range Forward (Reenvío de intervalos depuertos)Para reenviar un puerto, introduzca la informaciónsolicitada en cada línea, según los criterios pertinentes.Application (Aplicación). Introduzca en este campo <strong>el</strong>nombre que desea asignar a la aplicación. Cada nombrepuede tener hasta 12 caracteres.Start/End (Inicio/Final). Se trata d<strong>el</strong> intervalo de puertos.Introduzca <strong>el</strong> número que inicia <strong>el</strong> intervalo de puertosen la columna Start (Inicio) y <strong>el</strong> número que finaliza <strong>el</strong>intervalo en la columna End (Final).Protocol (Protocolo). Introduzca <strong>el</strong> protocolo que seutilizará para esta aplicación, TCP, UDP o Both (Ambos).IP Address (Dirección IP). Introduzca para cadaaplicación la dirección IP d<strong>el</strong> ordenador que ejecuta laaplicación específica.Enable (Activar). S<strong>el</strong>eccione Enable (Activar) para activar<strong>el</strong> reenvío de puertos para la aplicación correspondiente.Haga clic en Save Settings (Guardar parámetros) paraaplicar los cambios o en Canc<strong>el</strong> Changes (Canc<strong>el</strong>arcambios) para canc<strong>el</strong>arlos.Applications and Gaming (Aplicaciones y juegos) > Port Triggering(Desencadenado de puertos)Desencadenado de puertosApplication (Aplicación). Introduzca <strong>el</strong> nombre deaplicación d<strong>el</strong> desencadenador.Intervalo desencadenadoIntroduzca para cada aplicación <strong>el</strong> intervalo de números depuertos desencadenados. Consulte en la documentaciónde la aplicación de Internet los números de puertonecesarios.Start Port (Puerto inicial). Introduzca <strong>el</strong> número depuerto inicial d<strong>el</strong> intervalo desencadenado.End Port (Puerto final). Introduzca <strong>el</strong> número de puertofinal d<strong>el</strong> intervalo desencadenado.Intervalo reenviadoIntroduzca para cada aplicación <strong>el</strong> intervalo de números depuertos reenviados. Consulte en la documentación de laaplicación de Internet los números de puerto necesarios.Start Port (Puerto inicial). Introduzca <strong>el</strong> número depuerto inicial d<strong>el</strong> intervalo reenviado.End Port (Puerto final). Introduzca <strong>el</strong> número de puertofinal d<strong>el</strong> intervalo reenviado.Enable (Activar). S<strong>el</strong>eccione Enable (Activar) paraactivar <strong>el</strong> desencadenado de puertos para la aplicacióncorrespondiente.Haga clic en Save Settings (Guardar parámetros) paraaplicar los cambios o en Canc<strong>el</strong> Changes (Canc<strong>el</strong>arcambios) para canc<strong>el</strong>arlos.Router de banda ancha Wir<strong>el</strong>ess-G17
Capítulo 3Configuración avanzadaApplications and Gaming (Aplicaciones yjuegos) > DMZLa función DMZ permite exponer a un ordenador de red aInternet para <strong>el</strong> uso de un servicio especial, como juegospor Internet y videoconferencias. La asignación de DMZreenvía todos los puertos a un PC al mismo tiempo. Lafunción de reenvío de intervalos de puertos es más seguraporque sólo abre los puertos que usted desee, mientrasque la asignación de DMZ abre todos los puertos de unordenador, exponiéndolo a Internet.Applications and Gaming (Aplicaciones y juegos) > DMZDMZCualquier PC cuyo puerto se reenvíe debe tener la funciónde cliente DHCP desactivada y debe tener asignada unanueva dirección IP estática, ya que su dirección IP puedecambiar al utilizar la función DHCP.Para exponer un ordenador, s<strong>el</strong>eccione Enable (Activar).A continuación, introduzca la dirección IP d<strong>el</strong> ordenadoren <strong>el</strong> campo DMZ Host IP Address (Dirección IP deasignación de DMZ). Esta función está desactivada deforma predeterminada.Haga clic en Save Settings (Guardar parámetros) paraaplicar los cambios o en Canc<strong>el</strong> Changes (Canc<strong>el</strong>arcambios) para canc<strong>el</strong>arlos.Applications and Gaming (Aplicaciones yjuegos) > QoSLa calidad de servicio (QoS) garantiza un servicio óptimopara tipos de tráfico de red de alta prioridad, que puedenconsistir en aplicaciones en tiempo real y muy exigentes,como las videoconferencias.Existen tres tipos de QoS disponibles: Device Priority(Prioridad de dispositivos), Ethernet Port Priority (Prioridadde puertos Ethernet) y Application Priority (Prioridad deaplicaciones).QoSEnable/Disable (Activar/Desactivar). Para activar QoS,s<strong>el</strong>eccione Enable (Activar). De lo contrario, s<strong>el</strong>eccioneDisable (Desactivar). QoS está desactivado de formapredeterminada.Upstream Bandwidth (Ancho de banda de flujoascendente). S<strong>el</strong>eccione Auto (Automático) o Manualen <strong>el</strong> menú desplegable. La opción manual le permiteespecificar <strong>el</strong> máximo ancho de banda saliente que laaplicación puede utilizar.Applications and Gaming (Aplicaciones y juegos) > QoSPrioridad de dispositivosIntroduzca <strong>el</strong> nombre d<strong>el</strong> dispositivo de red en <strong>el</strong> campoDevice name (Nombre de dispositivo), introduzca sudirección MAC y, a continuación, s<strong>el</strong>eccione su prioridaden <strong>el</strong> menú desplegable.Prioridad de puertos EthernetEl tipo de QoS Ethernet Port Priority (Prioridad de puertosEthernet) permite asignar prioridades de rendimiento alos puertos d<strong>el</strong> router, los puertos LAN de 1 a 4. Para cadapuerto, s<strong>el</strong>eccione la prioridad y <strong>el</strong> parámetro de controlde flujo.Priority (Prioridad). S<strong>el</strong>eccione High (Alta) o Low(Baja) en la columna Priority (Prioridad). Se ha asignadoprioridad baja a los cuatro puertos d<strong>el</strong> router de formapredeterminada.Flow Control (Control de flujo). Si desea que <strong>el</strong> routercontrole la transmisión de datos entre los dispositivos dered, s<strong>el</strong>eccione Enabled (Activado). Para desactivar estafunción, s<strong>el</strong>eccione Disabled (Desactivado). El tipo deQoS Ethernet Port Priority (Prioridad de puertos Ethernet)no requiere compatibilidad por parte d<strong>el</strong> ISP, ya que lospuertos LAN de 1 a 4 con prioridad se encuentran en lared. Esta función está activada de forma predeterminada.Prioridad de aplicacionesEl tipo de QoS Application Priority (Prioridad deaplicaciones) administra la información cuando setransmite y se recibe. Según los parámetros de la pantallaQoS, esta función asignará a la información una prioridadalta o baja para las aplicaciones que especifique.Router de banda ancha Wir<strong>el</strong>ess-G18
Capítulo 3Configuración avanzadaOptimize Gaming Applications (Optimizar juegos).S<strong>el</strong>eccione esta función para permitir automáticamenteque los puertos de las aplicaciones de juegos tenganuna prioridad superior. Estos juegos incluyen, entreotros: Counter-Strike, Half-Life, Age of Empires, Everquest,Quake2/Quake3 y Diablo II. El valor predeterminado noestá s<strong>el</strong>eccionado.Application Name (Nombre de aplicación). Introduzca<strong>el</strong> nombre que desea asignar a la aplicación en <strong>el</strong> campoApplication Name (Nombre de aplicación).Priority (Prioridad). S<strong>el</strong>eccione una prioridad High(Alta) o Low (Baja) para la aplicación. La s<strong>el</strong>ecciónpredeterminada es Low (Baja).Specific Port # (Número de puerto específico). Introduzca<strong>el</strong> número de puerto para la aplicación.QoS inalámbricaWMM Support (Compatibilidad con WMM). Wi-FiMultimedia (WMM), antes conocido como Extensionesmultimedia inalámbricas (WME), es una función certificadade Wi-Fi Alliance basada en <strong>el</strong> estándar IEEE 802.11.Esta opción proporciona calidad de servicio a las redesinalámbricas. Esta opción está especialmente indicadapara aplicaciones de vídeo, música y voz; por ejemplo,voz sobre IP (VoIP), transmisión de vídeos y juegosinteractivos. Si dispone de otros dispositivos en la redinalámbrica que sean compatibles con WMM, s<strong>el</strong>eccioneEnabled (Activado). De lo contrario, mantenga <strong>el</strong> valorpredeterminado Disabled (Desactivado).No Acknowledgement (Sin confirmación). Esta funciónevita que <strong>el</strong> router vu<strong>el</strong>va a enviar los datos si seproduce un error. Para utilizar esta función, s<strong>el</strong>eccioneEnabled (Activado). De lo contrario, mantenga <strong>el</strong> valorpredeterminado, Disabled (Desactivado).Haga clic en Save Settings (Guardar parámetros) paraaplicar los cambios o en Canc<strong>el</strong> Changes (Canc<strong>el</strong>arcambios) para canc<strong>el</strong>arlos.Administration (Administración) >Management (Gestión)La pantalla Administration > Management (Administración> Gestión) permite que <strong>el</strong> administrador de la redadministre funciones específicas d<strong>el</strong> router para <strong>el</strong> accesoy la seguridad.Contraseña d<strong>el</strong> routerLocal Router Access (Acceso al router local)Router Password (Contraseña d<strong>el</strong> router). Introduzcauna nueva contraseña para <strong>el</strong> router.Re-enter to confirm (Confirmar contraseña). Vu<strong>el</strong>va aintroducir la contraseña para confirmarla.Acceso WebAccess Server (Servidor de acceso). HTTP (protocolode transferencia de hipertexto) es <strong>el</strong> protocolo decomunicaciones utilizado para conectarse a los servidoresde la Web. HTTPS utiliza SSL (capa de socket seguro) paraencriptar los datos transmitidos para una mayor seguridad.S<strong>el</strong>eccione HTTP o HTTPS. La s<strong>el</strong>ección predeterminadaes HTTP.Wir<strong>el</strong>ess Access Web (Web de acceso inalámbrico). Siutiliza <strong>el</strong> router en un dominio público donde se concedeacceso inalámbrico a los invitados, puede desactivar <strong>el</strong>acceso inalámbrico a la utilidad basada en Web d<strong>el</strong> router.Si desactiva <strong>el</strong> parámetro sólo podrá acceder a la utilidadbasada en Web mediante una conexión con cables.Mantenga <strong>el</strong> valor predeterminado, Enable (Activar)para permitir <strong>el</strong> acceso inalámbrico a la utilidad basadaen Web d<strong>el</strong> router o s<strong>el</strong>eccione Disable (Desactivar) paradesactivar <strong>el</strong> acceso inalámbrico a la utilidad.Acceso remoto al routerRemote Management (Administración remota). Paraacceder al router de forma remota desde fuera de la redlocal, s<strong>el</strong>eccione Enable (Activar).Management Port (Puerto de administración). Introduzca<strong>el</strong> número de puerto que se abrirá al acceso exterior.Como es habitual, tendrá que introducir la contraseña d<strong>el</strong>router cuando acceda al mismo de este modo.Use https (Utilizar https). S<strong>el</strong>eccione esta función parasolicitar <strong>el</strong> uso de HTTPS para acceso remoto.UPnPUPnP. (Mantenga <strong>el</strong> valor predeterminado, Enable(Activar) para activar la función UPnP; de lo contrario,s<strong>el</strong>eccione Disable (Desactivar).Haga clic en Save Settings (Guardar parámetros) paraaplicar los cambios o en Canc<strong>el</strong> Changes (Canc<strong>el</strong>arcambios) para canc<strong>el</strong>arlos.Administration (Administración) > Log(Registro)El router puede mantener registros de todo <strong>el</strong> tráfico de laconexión a Internet.Administration (Administración) > Management (Gestión)Router de banda ancha Wir<strong>el</strong>ess-GAdministration (Administración) > Log (Registro)19
Capítulo 3Configuración avanzadaRegistroLog (Registro). Para desactivar la función Log (Registro),mantenga <strong>el</strong> parámetro predeterminado Disable(Desactivar). Para controlar <strong>el</strong> tráfico entre la red e Internet,s<strong>el</strong>eccione Enable (Activar).Cuando desee ver los registros, haga clic en Incoming Log(Registro de entrada) o Outgoing Log (Registro de salida),según <strong>el</strong> que desee ver.Haga clic en Save Settings (Guardar parámetros) paraaplicar los cambios o en Canc<strong>el</strong> Changes (Canc<strong>el</strong>arcambios) para canc<strong>el</strong>arlos.Administration (Administración) >Diagnostics (Diagnóstico)Las pruebas de diagnóstico (ping y traceroute) permitencomprobar las conexiones de los componentes de red.Prueba de tracerouteTraceroute. Para probar <strong>el</strong> rendimiento de una conexión,haga clic en Traceroute para abrir la pantalla TracerouteTest (Prueba de traceroute). Introduzca la direcciónd<strong>el</strong> ordenador cuya conexión desea probar y haga clicen Traceroute. La pantalla Traceroute Test (Prueba detraceroute) mostrará si la prueba se ha realizado con éxito.Para detener la prueba, haga clic en Stop (Detener). Hagaclic en Clear Log (Borrar registro) para borrar la pantalla.Haga clic en <strong>el</strong> botón Close (Cerrar) para volver a la pantallaDiagnostics (Diagnóstico).Administration (Administración) > Diagnostics (Diagnóstico)Prueba de pingPing. La prueba de ping comprueba <strong>el</strong> estado de unaconexión. Haga clic en Ping para abrir la pantalla Ping Test(Prueba de ping). Introduzca la dirección d<strong>el</strong> ordenadorcuya conexión desea probar y <strong>el</strong> número de veces quedesea probarla. A continuación, haga clic en Ping. Lapantalla Ping Test (Prueba de Ping) mostrará si la pruebase ha realizado con éxito. Para detener la prueba, haga clicen Stop (Detener). Haga clic en Clear Log (Borrar registro)para borrar la pantalla. Haga clic en <strong>el</strong> botón Close (Cerrar)para volver a la pantalla Diagnostics (Diagnóstico).Traceroute Test (Prueba de traceroute)Administration (Administración) > FactoryDefaults (Parámetros predeterminados defábrica)La pantalla Administration > Factory Defaults(Administración > Parámetros predeterminados defábrica) permite restaurar la configuración d<strong>el</strong> router conlos parámetros predeterminados de fábrica.Parámetros predeterminados de fábricaRestore Factory Defaults (Restaurar parámetrospredeterminados de fábrica). Para restablecer losparámetros d<strong>el</strong> router en sus valores predeterminados,s<strong>el</strong>eccione Yes (Sí) y, a continuación, haga clic en SaveSettings (Guardar parámetros). Los parámetros quehaya guardado se perderán al restaurar los parámetrospredeterminados.Ping Test (Prueba de ping)Administration (Administración) > Factory Defaults (Parámetrospredeterminados de fábrica)Administration (Administración) > UpgradeFirmware (Actualizar <strong>el</strong> firmware)La pantalla Administration (Administración) > UpgradeFirmware (Actualizar <strong>el</strong> firmware) permite actualizar <strong>el</strong>firmware d<strong>el</strong> router. No actualice <strong>el</strong> firmware a menos quetenga problemas con <strong>el</strong> router o desee utilizar una funciónd<strong>el</strong> nuevo router.Router de banda ancha Wir<strong>el</strong>ess-G20
Capítulo 3Configuración avanzadaStatus (Estado) > RouterLa pantalla Status (Estado) > Router muestra <strong>el</strong> estadoactual d<strong>el</strong> router.Administration (Administración) > Upgrade Firmware (Actualizar <strong>el</strong>firmware)Antes de actualizar <strong>el</strong> firmware, descargue <strong>el</strong> archivo deactualización d<strong>el</strong> firmware d<strong>el</strong> router desde <strong>el</strong> sitio Webde Linksys, www.linksys.com. A continuación, extraiga <strong>el</strong>archivo.Actualizar <strong>el</strong> firmwarePlease s<strong>el</strong>ect a file to upgrade (S<strong>el</strong>eccione un archivoque actualizar). Haga clic en Browse (Examinar) ys<strong>el</strong>eccione <strong>el</strong> archivo de actualización de firmware que haextraído. A continuación, haga clic en Upgrade (Actualizar)y siga las instrucciones que aparecen en la pantalla.Administration (Administración) > ConfigManagement (Administración de laconfiguración)Esta pantalla se utiliza para realizar una copia de seguridadd<strong>el</strong> archivo de configuración d<strong>el</strong> router o para restaurarlo.Administration (Administración) > Config Management (Administraciónde la configuración)Configuración de copia de seguridadPara realizar una copia de seguridad d<strong>el</strong> archivo deconfiguración d<strong>el</strong> router, haga clic en Backup (Copia deseguridad). A continuación, siga las instrucciones queaparecen en pantalla.Restauración de la configuraciónPlease s<strong>el</strong>ect a file to restore (S<strong>el</strong>eccione un archivo querestaurar). Haga clic en Browse (Examinar) y s<strong>el</strong>eccione<strong>el</strong> archivo de configuración. A continuación, haga clic enRestore (Restauración).Status (Estado) > RouterInformación d<strong>el</strong> routerFirmware Version (Versión d<strong>el</strong> firmware). Se trata d<strong>el</strong>firmware actual d<strong>el</strong> router.Current Time (Hora actual). Muestra la hora que se hayaestablecido en la ficha Setup (Configuración).MAC Address (Dirección MAC). Se trata de la direcciónMAC d<strong>el</strong> router tal como la ve <strong>el</strong> ISP.Router Name (Nombre de router). El nombre específicod<strong>el</strong> router que se haya establecido en la ficha Setup(Configuración).Host Name (Nombre de host). Si lo requiere <strong>el</strong> ISP, seintroduce en la ficha Setup (Configuración).Domain Name (Nombre de dominio). Si lo requiere <strong>el</strong>ISP, se introduce en la ficha Setup (Configuración).InternetTipo de configuraciónEsta sección muestra la información de red actualalmacenada en <strong>el</strong> router. La información varía en funciónd<strong>el</strong> tipo de conexión a Internet s<strong>el</strong>eccionada en la pantallaSetup (Configuración) > Basic Setup (Configuraciónbásica).Haga clic en Refresh (Actualizar) para actualizar lainformación de la pantalla.Status (Estado) > Local Network (Red local)La pantalla Status (Estado) > Local Network (Red local)muestra <strong>el</strong> estado de la red.Router de banda ancha Wir<strong>el</strong>ess-G21
Capítulo 3Configuración avanzadaStatus (Estado) > Wir<strong>el</strong>ess (Inalámbrica)La pantalla Status (Estado) > Wir<strong>el</strong>ess (Inalámbrica) muestra<strong>el</strong> estado de la red inalámbrica.Status (Estado) > Local Network (Red local)Red localMAC Address (Dirección MAC). Se trata de la direcciónMAC d<strong>el</strong> router tal como se ve en la red Ethernet local.IP Address (Dirección IP). Indica la dirección IP d<strong>el</strong> routertal como aparece en la red Ethernet local.Subnet Mask (Máscara de subred). Muestra la máscarade subred actual configurada para la red local.DHCP Server (Servidor DHCP). Si utiliza <strong>el</strong> router comoservidor DHCP, se indicará aquí.Start IP Address (Dirección IP inicial). Aquí se muestra<strong>el</strong> inicio d<strong>el</strong> intervalo de direcciones IP que utilizan losdispositivos de la red Ethernet local.End IP Address (Dirección IP final). Aquí se muestra<strong>el</strong> final d<strong>el</strong> intervalo de direcciones IP que utilizan losdispositivos de la red Ethernet local.DHCP Clients Table (Tabla de clientes DHCP). Al hacerclic en este botón se abrirá una pantalla para mostrar losordenadores que utilizan <strong>el</strong> router como servidor DHCP.Puede <strong>el</strong>iminar los ordenadores de dicha lista e interrumpirsus conexiones activando una casilla D<strong>el</strong>ete (Eliminar) yhaciendo clic en <strong>el</strong> botón D<strong>el</strong>ete (Eliminar).Status (Estado) > Wir<strong>el</strong>ess (Inalámbrica)InalámbricoMAC Address (Dirección MAC). Se trata de la direcciónMAC d<strong>el</strong> router tal como se ve en la red inalámbrica local.Mode (Modo). Tal como se haya s<strong>el</strong>eccionado en lapantalla Wir<strong>el</strong>ess (Inalámbrico) > Basic Wir<strong>el</strong>ess Settings(Parámetros inalámbricos básicos), se muestra <strong>el</strong> modoinalámbrico: Mixed (Mixto), G-Only (Sólo G) o Disabled(Desactivado) que utiliza la red.SSID. Según la configuración de la pantalla Wir<strong>el</strong>ess(Inalámbrico) > Basic Wir<strong>el</strong>ess Settings (Parámetrosinalámbricos básicos), se muestra <strong>el</strong> nombre de redinalámbrica o SSID.DHCP Server (Servidor DHCP). En este campo se muestra<strong>el</strong> estado d<strong>el</strong> funcionamiento d<strong>el</strong> servidor DHCP.Chann<strong>el</strong> (Canal). Según la configuración de la pantallaWir<strong>el</strong>ess (Inalámbrico) > Basic Wir<strong>el</strong>ess Settings (Parámetrosinalámbricos básicos), se muestra <strong>el</strong> canal en <strong>el</strong> que emit<strong>el</strong>a red inalámbrica.Encryption Function (Función de encriptación) Segúnla configuración de la pantalla Wir<strong>el</strong>ess (Inalámbrico) >Wir<strong>el</strong>ess Security (Seguridad inalámbrica), se muestra <strong>el</strong>estado d<strong>el</strong> modo de la seguridad inalámbrica d<strong>el</strong> router.Haga clic en Refresh (Actualizar) para actualizar lainformación de la pantalla.DHCP Client Table (Tabla de clientes DHCP)Haga clic en Refresh (Actualizar) para actualizar lainformación de la pantalla.Router de banda ancha Wir<strong>el</strong>ess-G22
Apéndice AResolución de problemasApéndice A:Resolución de problemasSu ordenador no puede conectarse a Internet.Siga las siguientes instrucciones hasta que <strong>el</strong> ordenadorpueda conectarse a Internet:• Asegúrese de que <strong>el</strong> router está encendido. La luzde alimentación debe estar encendida en verde y nodebe parpadear.• Si la luz de alimentación parpadea, apague todoslos dispositivos de red, incluidos módem, routery ordenadores. A continuación, encienda cadadispositivo en <strong>el</strong> siguiente orden:1.2.3.Módem por cable o DSLRouterOrdenador• Compruebe las conexiones de los cables. El ordenadordebe estar conectado a uno de los puertos numeradosd<strong>el</strong> 1 al 4 d<strong>el</strong> router, y <strong>el</strong> módem al puerto Internet d<strong>el</strong>router.El módem no dispone de puerto Ethernet.El módem es un módem de acceso t<strong>el</strong>efónico para <strong>el</strong>servicio de acceso t<strong>el</strong>efónico tradicional. Para utilizar esterouter, necesita un módem por cable/DSL y una conexióna Internet de alta v<strong>el</strong>ocidad.No puede utilizar <strong>el</strong> servicio DSL para conectarse deforma manual a Internet.Una vez que haya instalado <strong>el</strong> router, se conectaráautomáticamente al distribuidor de servicios de Internet(ISP), para que no tenga que volver a conectarse de formamanual.La línea t<strong>el</strong>efónica DSL no encaja en <strong>el</strong> puerto Internetd<strong>el</strong> router.El router no es un sustituto d<strong>el</strong> módem. Sigue siendonecesario para utilizar <strong>el</strong> router. Conecte la línea t<strong>el</strong>efónicaal módem DSL, inserte <strong>el</strong> CD de configuración en <strong>el</strong>ordenador y, a continuación, siga las instrucciones queaparecen en pantalla.Al hacer doble clic en <strong>el</strong> explorador Web, se le solicitaráun nombre de usuario y una contraseña. Si desea evitaresta solicitud, siga las siguientes instrucciones.Abra <strong>el</strong> explorador Web y complete los siguientes pasos(estos pasos son específicos para Internet Explorer, peroson similares para otros exploradores):1.2.3.4.S<strong>el</strong>eccione Herramientas > Opciones de Internet.Haga clic en la ficha Conexiones.S<strong>el</strong>eccione No marcar nunca una conexión.Haga clic en Aceptar.El router no tiene un puerto coaxial para la conexión porcable.El router no es un sustituto d<strong>el</strong> módem. Sigue siendonecesario para utilizar <strong>el</strong> router. Conecte la conexión porcable al módem por cable, inserte <strong>el</strong> CD de configuraciónen <strong>el</strong> ordenador y, a continuación, siga las instruccionesque aparecen en pantalla.El ordenador no puede conectarse a la red de formainalámbrica.Asegúrese de que <strong>el</strong> nombre de la red inalámbrica o SSIDes <strong>el</strong> mismo en <strong>el</strong> ordenador y en <strong>el</strong> router. Si ha activadola seguridad inalámbrica, asegúrese de que <strong>el</strong> ordenadory <strong>el</strong> router utilizan <strong>el</strong> mismo método de seguridad y lamisma clave.Debe modificar los parámetros d<strong>el</strong> router.Abra <strong>el</strong> explorador Web (por ejemplo, Internet Explorero Firefox) e introduzca la dirección IP d<strong>el</strong> router en <strong>el</strong>campo de dirección (la dirección IP predeterminada es192.168.1.1). Cuando se le solicite, deje en blanco <strong>el</strong>campo User name (Nombre de usuario) e introduzca lacontraseña para <strong>el</strong> router (la contraseña predeterminadaes admin). Haga clic en la ficha correspondiente paracambiar los parámetros.WEB: Si no ha encontrado respuesta asus dudas, consulte <strong>el</strong> sitio Web de Linksys,www.linksys.es.Router de banda ancha Wir<strong>el</strong>ess-G23
Apéndice BEspecificacionesApéndice B:EspecificacionesMod<strong>el</strong>oEstándaresPuertosBotónLucesWRT54G2Tipo de cableado CAT 5IEEE 802.3, IEEE 802.3u,IEEE 802.11g, IEEE 802.11bInternet: un puerto 10/100 RJ-45LAN: Cuatro puertos 10/100 RJ-45conmutadosUn puerto de alimentaciónUn botón Reset (Reinicio)Un botón WPSPower (Alimentación), Wir<strong>el</strong>ess(Inalámbrico), LAN (1-4), Internet,Configuración Wi-Fi protegida (WPS)Número de antenas 2 antenas internasPotencia de salidade radiofrecuencia18 dBmCert./compat. UPnP CompatibleCaracterísticasde seguridadSeguridadinalámbricaCondiciones ambientalesDimensionesPesoAlimentaciónCertificacionesFirewall con inspección exhaustivade paquetes (SPI), directiva deInternetWi-Fi Protected Access2(acceso Wi-Fi protegido, WPA2),WEP, filtrado de direccionesMAC inalámbrico203 mm x 35 mm x 160 mm280 gExterna, 12 V CC, 0,5 ATemperatura defuncionamiento De 0 a 40 °CTemperatura dealmacenamiento De -20 a 60 °CHumedad defuncionamientoHumedad dealmacenamientoFCC, CE, IC-UL, Wi-Fi (802.11b,802.11g), WPA2, WMM10 a 85%, sin condensación5 a 90%, sin condensaciónRouter de banda ancha Wir<strong>el</strong>ess-G24
Apéndice CInformación de garantíaApéndice C:Información de garantíaGARANTÍA LIMITADALinksys garantiza que este producto de hardware deLinksys estará sustancialmente exento de defectos defabricación y en los materiales en condiciones normales deuso durante <strong>el</strong> período de garantía. Tal periodo comienzaen la fecha de adquisición por parte d<strong>el</strong> comprador yusuario final inicial, y se extiende durante <strong>el</strong> periodo quese especifica a continuación:• Dos (2) años para productos nuevos• Noventa (90) días para productos reparadosEsta garantía limitada no es transferible y se aplicaúnicamente al comprador y usuario final inicial. El únicorecurso y la responsabilidad de Linksys en virtud de lapresente garantía limitada será que Linksys, a su <strong>el</strong>ección(a) repare <strong>el</strong> producto con piezas nuevas o modificadas,(b) sustituya <strong>el</strong> producto por otro producto nuevo oreparado de Linksys equivalente que se encuentredisponible de forma razonable, o (c) reembolse <strong>el</strong> preciode la compra d<strong>el</strong> producto excepto cualquier devolución.Todo producto reparado o sustituido estará garantizadodurante <strong>el</strong> tiempo restante d<strong>el</strong> Periodo de garantíaoriginal o durante treinta (30) días, siendo válida la opciónde mayor duración. Todos los productos y piezas que sesustituyan pasarán a ser propiedad de Linksys.Esta garantía limitada se aplicará además de cualquierreglamento u otro derecho que pudiera establecerse enun contrato de venta.EXCLUSIONES Y LIMITACIONESEsta garantía limitada dejará de tener vigor si: (a) se ha<strong>el</strong>iminado o dañado <strong>el</strong> s<strong>el</strong>lo de montaje d<strong>el</strong> producto, (b)<strong>el</strong> producto se ha modificado o alterado, salvo si Linksysha efectuado tal modificación o reparación; (c) <strong>el</strong> productose ha dañado debido a un uso con productos de otrosfabricantes, (d) <strong>el</strong> producto no se ha instalado, utilizado,reparado o mantenido de acuerdo con las instruccionessuministradas por Linksys, (e) se ha sometido al productoa una fuerza física o <strong>el</strong>éctrica no habituales, un usoincorrecto, negligencias o accidentes, (f) <strong>el</strong> número deserie d<strong>el</strong> producto se ha alterado, <strong>el</strong>iminado o borrado, o(g) <strong>el</strong> producto se suministra o u obtiene la licencia parauna versión beta, para su evaluación o para realización dedemostraciones, por tanto, Linksys no cobra una tasa decompra ni de licencia.TODO EL SOFTWARE QUE LINKSYS PROPORCIONA JUNTOCON EL PRODUCTO, YA SEA CARGADO EN FÁBRICA EN ELPRODUCTO O EN UNO DE LOS MEDIOS QUE ACOMPAÑANAL PRODUCTO, SE FACILITA “TAL CUAL”, SIN GARANTÍARouter de banda ancha Wir<strong>el</strong>ess-GDE NINGÚN TIPO. Sin perjuicio de lo anterior, Linksysno garantiza que <strong>el</strong> funcionamiento d<strong>el</strong> producto od<strong>el</strong> software se realice de forma continuada o que notenga errores. D<strong>el</strong> mismo modo, y debido al continuodesarrollo de nuevas técnicas de intrusión y ataques ala red, Linksys no garantiza que <strong>el</strong> producto, <strong>el</strong> servicio,<strong>el</strong> software o cualquier tipo de dispositivo, sistema ored en los que se utilice <strong>el</strong> producto o <strong>el</strong> software esténexentos de vulnerabilidades a intrusiones o ataques. Esposible que este producto incluya o contenga softwareu ofertas de servicio de terceros. Esta garantía limitadano se aplicará a este software u ofertas de servicios deterceros. La presente garantía limitada no garantiza unadisponibilidad continuada de un servicio de terceros quepudiera ser necesario para la utilización o funcionamientode este producto.EN LA MEDIDA EN QUE LA LEGISLACIÓN LO PERMITA,TODAS LAS GARANTÍAS IMPLÍCITAS Y CONDICIONESDE COMERCIABILIDAD, CALIDAD SATISFACTORIAO IDONEIDAD PARA UN FIN EN PARTICULAR ESTÁNLIMITADAS A LA DURACIÓN DEL PERIODO DE GARANTÍA.SE EXCLUYE EL RESTO DE CONDICIONES, DECLARACIONESY GARANTÍAS, EXPLÍCITAS O IMPLÍCITAS, INCLUIDA, PERONO LIMITÁNDOSE A, CUALQUIER GARANTÍA IMPLÍCITADE NO INFRACCIÓN. En algunas jurisdicciones no estápermitido limitar la duración de una garantía implícita,por lo que es posible que la limitación mencionada no seaplique en su caso. Esta garantía limitada confiere al usuarioderechos legales específicos; además, es posible que gocede otros derechos, que varían según la jurisdicción.EN LA MEDIDA EN QUE LA LEGISLACIÓN LO PERMITA,LINKSYS NO SERÁ RESPONSABLE EN NINGÚN CASODE PÉRDIDAS DE DATOS, INGRESOS O BENEFICIOS,NI DE DAÑOS CUANTIFICABLES, INDIRECTOS,ACCESORIOS O PUNITIVOS, A PESAR DE LA TEORÍA DELA RESPONSABILIDAD (INCLUIDA LA NEGLIGENCIA),RESULTANTES DE O RELACIONADOS CON EL USO DELPRODUCTO O LA IMPOSIBILIDAD DE USARLO (INCLUIDOCUALQUIER SOFTWARE), AUNQUE SE HAYA ADVERTIDO ALINKSYS DE LA POSIBILIDAD DE TALES DAÑOS. EN NINGÚNCASO LA RESPONSABILIDAD DE LINKSYS SERÁ SUPERIORAL IMPORTE QUE EL USUARIO HAYA ABONADO POR ELPRODUCTO. Se aplicarán las limitaciones precedentesaunque algún recurso o garantía estipulados en estagarantía limitada no cumpla con su finalidad esencial. Enalgunas jurisdicciones no está permitido excluir o limitarlos daños derivados o indirectos, por lo que la limitación oexclusión mencionada quizá no sea aplicable en su caso.OBTENCIÓN DEL SERVICIO DE GARANTÍASSi tiene alguna pregunta sobre <strong>el</strong> producto, o si tieneproblemas al utilizarlo, visite www.linksys.com/support.Aquí podrá encontrar diversas herramientas de asistenciatécnica en línea, así como información para prestarleasistencia con <strong>el</strong> producto. Si <strong>el</strong> producto presenta defectos25
Apéndice CInformación de garantíadurante <strong>el</strong> Periodo de garantía, póngase en contacto conla Asistencia técnica de Linksys para obtener instruccionessobre cómo obtener <strong>el</strong> servicio de garantía. Podráencontrar <strong>el</strong> número de t<strong>el</strong>éfono de Asistencia técnica deLinksys correspondiente a su zona en la Guía d<strong>el</strong> usuarioy en la dirección www.linksys.es. Tenga preparado <strong>el</strong>número de serie de su producto y la prueba de compracuando llame. PARA PROCESAR RECLAMACIONES DEGARANTÍA, ES NECESARIO CONTAR CON UNA PRUEBA DECOMPRA ORIGINAL FECHADA. Si se le solicita que devu<strong>el</strong>vasu producto, se le asignará un número RMA (Autorizaciónde devolución de material, d<strong>el</strong> inglés Return MaterialsAuthorization). Usted es <strong>el</strong> responsable de embalar yenviar correctamente <strong>el</strong> producto a Linksys, y debe hacerlopor su propia cuenta y riesgo. Al devolver <strong>el</strong> producto,debe incluir <strong>el</strong> número RMA y una copia de la pruebade compra original fechada. Los productos recibidos sinnúmero RMA y sin una prueba de compra original fechadano se aceptarán. No incluya ningún otro <strong>el</strong>emento juntocon <strong>el</strong> producto que vaya a devolver a Linksys. Losproductos defectuosos que cubra esta garantía limitadase repararán o sustituirán y se devolverán sin ningún tipode cargo. Aqu<strong>el</strong>los clientes ubicados fuera de los EstadosUnidos de América y Canadá serán responsables de todoslos gastos de embalaje y envío, gestión, aduanas, IVA yotros impuestos y cargos asociados. Las reparaciones osustituciones que no cubra esta garantía limitada estaránsujetas a las tarifas vigentes de Linksys.ASISTENCIA TÉCNICAEsta garantía limitada no es un contrato de servicio nide asistencia. Podrá encontrar información acerca de lasofertas y políticas de asistencia técnica actuales de Linksys(incluidas las tarifas de los servicios de asistencia técnica)en www.linksys.com/support.GENERALEsta garantía limitada está sujeta a las leyes de lajurisdicción donde adquirió <strong>el</strong> producto.Si se considera que alguna parte de esta garantía limitadaes nula o no se puede aplicar, las demás disposicionesseguirán siendo vigentes y efectivas.Dirija todas sus preguntas a: Linksys, P.O. Box 18558, Irvine,CA 92623 (EE. UU.).Para obtener más información, póngase en contactocon nosotros www.linksys.esEscoja su país y, a continuación, SOPORTE TÉCNICOPara devolución de productos:Escoja su país y, a continuación, SOPORTE TÉCNICO ALCLIENTERouter de banda ancha Wir<strong>el</strong>ess-G26
Apéndice DInformación sobre normativasApéndice D:Información sobrenormativasFCC StatementThis product has been tested and complies with thespecifications for a Class B digital device, pursuant to Part15 of the FCC Rules. These limits are designed to providereasonable protection against harmful interference ina residential installation. This equipment generates,uses, and can radiate radio frequency energy and, if notinstalled and used according to the instructions, maycause harmful interference to radio communications.However, there is no guarantee that interference will notoccur in a particular installation. If this equipment doescause harmful interference to radio or t<strong>el</strong>evision reception,which is found by turning the equipment off and on, theuser is encouraged to try to correct the interference byone or more of the following measures:• Reorient or r<strong>el</strong>ocate the receiving antenna• Increase the separation between the equipment ordevices• Connect the equipment to an outlet other than thereceiver’s• Consult a dealer or an experienced radio/TV technicianfor assistanceFCC Radiation Exposure StatementThis equipment complies with FCC radiation exposur<strong>el</strong>imits set forth for an uncontrolled environment. Thisequipment should be installed and operated withminimum distance 20 cm between the radiator and yourbody.Safety Notices• Caution: To reduce the risk of fire, use only No.26 AWGor larger t<strong>el</strong>ecommunication line cord.• Do not use this product near water, for example, in awet basement or near a swimming pool.• Avoid using this product during an <strong>el</strong>ectrical storm.There may be a remote risk of <strong>el</strong>ectric shock fromlightning.Industry Canada StatementThis Class B digital apparatus complies with CanadianICES-003 and RSS210.Operation is subject to the following two conditions:1. This device may not cause interference and2. This device must accept any interference, includinginterference that may cause undesired operationof the device.To reduce potential radio interference to other users,the antenna type and its gain should be so chosenthat the EIRP is not more than required for successfulcommunication.Industry Canada Radiation Exposure StatementThis equipment complies with IC radiation exposure limitsset forth for an uncontrolled environment. This equipmentshould be installed and operated with minimum distance20 cm between the radiator & your body.This transmitter must not be co-located or operating inconjunction with any other antenna or transmitter.Avis d’Industrie CanadaCet appareil numérique de la classe B est conforme auxnormes NMB-003 et RSS210 du Canada.L’utilisation de ce dispositif est autorisée seulement auxconditions suivantes :1. il ne doit pas produire de brouillage et2. il doit accepter tout brouillage radioélectrique reçu,même si ce brouillage est susceptible de compromettre lefonctionnement du dispositif.Afin de réduire le risque d’interférence aux autresutilisateurs, le type d’antenne et son gain doiventêtre choisis de façon à ce que la puissance isotroperayonnée équivalente (p.i.r.e.) ne soit pas supérieureau niveau requis pour obtenir une communicationsatisfaisante.Avis d’Industrie Canada concernant l’expositionaux radiofréquencesCe matéri<strong>el</strong> est conforme aux limites établies par ICen matière d’exposition aux radiofréquences dans unenvironnement non contrôlé. Ce matéri<strong>el</strong> doit être installéet utilisé à une distance d’au moins 20 cm entre l’antenneet le corps de l’utilisateur.L’émetteur ne doit pas être placé près d’une autre antenneou d’un autre émetteur, ou fonctionner avec une autreantenne ou un autre émetteur.Router de banda ancha Wir<strong>el</strong>ess-G27
Apéndice DInformación sobre normativasWir<strong>el</strong>ess DisclaimerThe maximum performance for wir<strong>el</strong>ess is derived fromIEEE Standard 802.11 specifications. Actual performancecan vary, including lower wir<strong>el</strong>ess network capacity,data throughput rate, range and coverage. Performancedepends on many factors, conditions and variables,including distance from the access point, volume ofnetwork traffic, building materials and construction,operating system used, mix of wir<strong>el</strong>ess products used,interference and other adverse conditions.Avis de non-responsabilité concernant lesappareils sans filLes performances maximales pour les réseaux sans filsont tirées des spécifications de la norme IEEE 802.11.Les performances ré<strong>el</strong>les peuvent varier, notammenten fonction de la capacité du réseau sans fil, du débitde la transmission de données, de la portée et de lacouverture. Les performances dépendent de facteurs,conditions et variables multiples, en particulier de ladistance par rapport au point d’accès, du volume du traficréseau, des matériaux utilisés dans le bâtiment et dutype de construction, du système d’exploitation et de lacombinaison de produits sans fil utilisés, des interférenceset de toute autre condition défavorable.Router de banda ancha Wir<strong>el</strong>ess-G28
Apéndice DInformación sobre normativasDeclaración de conformidad con la directivade la UE 1999/5/CE (directiva RTTE)Información sobre la conformidad de los productosinalámbricos de 2,4 GHz y 5 GHz utilizados en la UE y otrospaíses donde se aplique la directiva de la UE 1999/5/CE(directiva RTTE)Lietuvių[Lithuanian]:Nederlands[Dutch]:Šis įrenginys tenkina 1999/5/EB Direktyvosesminius reikalavimus ir kitas šios direktyvosnuostatas.Dit apparaat voldoet aan de essenti<strong>el</strong>e eisenen andere van toepassing zijnde bepalingenvan de Richtlijn 1999/5/EC.Б ъ л г а р с к и[Bulgarian]Това оборудване отговаря на същественитеизисквания и приложими клаузи наДиректива 1999/5/ЕС.Malti[Maltese]:Dan l-apparat huwa konformi mal-ħtiġietessenzjali u l-provedimenti l-oħra rilevantitad-Direttiva 1999/5/EC.Česky[Czech]:Toto zařízení je v souladu se základnímipožadavky a ostatními odpovídajícímiustanoveními Směrnice 1999/5/EC.Magyar[Hungarian]:Ez a készülék t<strong>el</strong>jesíti az alapvetőkövet<strong>el</strong>ményeket és más 1999/5/EKirány<strong>el</strong>vben meghatározott vonatkozórend<strong>el</strong>kezéseket.Dansk[Danish]:Dette udstyr er i overensstemm<strong>el</strong>se medde væsentlige krav og andre r<strong>el</strong>evantebestemm<strong>el</strong>ser i Direktiv 1999/5/EF.Norsk[Norwegian]:Dette utstyret er i samsvar med degrunnleggende krav og andre r<strong>el</strong>evantebestemm<strong>el</strong>ser i EU-direktiv 1999/5/EF.Deutsch[German]:Dieses Gerät entspricht den grundlegendenAnforderungen und den weiterenentsprechenden Vorgaben der Richtlinie1999/5/EU.Polski[Polish]:Urządzenie jest zgodne z ogólnymiwymaganiami oraz szczególnymi warunkamiokreślonymi Dyrektywą UE: 1999/5/EC.Eesti[Estonian]:See seade vastab direktiivi 1999/5/EÜ olulist<strong>el</strong>enõuet<strong>el</strong>e ja teist<strong>el</strong>e asjakohast<strong>el</strong>e sätet<strong>el</strong>e.Português[Portuguese]:Este equipamento está em conformidade comos requisitos essenciais e outras provisõesr<strong>el</strong>evantes da Directiva 1999/5/EC.English:This equipment is in compliance with theessential requirements and other r<strong>el</strong>evantprovisions of Directive 1999/5/EC.Română[Romanian]Acest echipament este in conformitatecu cerint<strong>el</strong>e esentiale si cu alte prevederir<strong>el</strong>evante ale Directivei 1999/5/EC.Español[Spanish]:Este equipo cumple con los requisitosesenciales asi como con otras disposicionesde la Directiva 1999/5/CE.Slovensko[Slovenian]:Ta naprava je skladna z bistvenimi zahtevamiin ostalimi r<strong>el</strong>evantnimi pogoji Direktive1999/5/EC.Ελληνική[Greek]:Αυτός ο εξοπλισµός είναι σε συµµόρφωση µετις ουσιώδεις απαιτήσεις και άλλες σχετικέςδιατάξεις της Οδηγίας 1999/5/EC.Slovensky[Slovak]:Toto zariadenie je v zhode so základnýmipožiadavkami a inými príslušnými nariadeniamidirektív: 1999/5/EC.Français[French]:Cet appareil est conforme aux exigencesessenti<strong>el</strong>les et aux autres dispositionspertinentes de la Directive 1999/5/EC.Suomi[Finnish]:Tämä laite täyttää direktiivin 1999/5/EYolennaiset vaatimukset ja on siinä asetettujenmuiden laitetta koskevien määräystenmukainen.Íslenska[Ic<strong>el</strong>andic]:Þetta tæki er samkvæmt grunnkröfum ogöðrum viðeigandi ákvæðum Tilskipunar1999/5/EC.Svenska[Swedish]:Denna utrustning är i överensstämm<strong>el</strong>se medde väsentliga kraven och andra r<strong>el</strong>evantabestämm<strong>el</strong>ser i Direktiv 1999/5/EC.Italiano[Italian]:Latviski[Latvian]:Router de banda ancha Wir<strong>el</strong>ess-GQuesto apparato é conforme ai requisitiessenziali ed agli altri principi sanciti dallaDirettiva 1999/5/CE.Šī iekārta atbilst Direktīvas 1999/5/EKbūtiskajām prasībām un citiem ar tosaistītajiem noteikumiem.En todos los productos, la declaración de conformidadestá disponible a través de una o varias de las siguientesopciones:• En <strong>el</strong> CD d<strong>el</strong> producto se incluye un archivo pdf.• Con <strong>el</strong> producto se incluye una copia impresa.• En la página Web d<strong>el</strong> producto hay disponible unarchivo pdf. Visite www.linkys.com/international ys<strong>el</strong>eccione su zona o país. A continuación, s<strong>el</strong>eccione<strong>el</strong> producto.29
Apéndice DInformación sobre normativasSi necesita algún tipo de documentación técnica, consult<strong>el</strong>a sección “Documentos técnicos en www.linksys.com/international”, como se muestra más ad<strong>el</strong>ante en esteapéndice.Se han aplicado los siguientes estándares durante laevaluación d<strong>el</strong> producto según los requisitos de laDirectiva 1999/5/CE:• Radio: EN 300 328 y/o EN 301 893, según proceda• EMC: EN 301 489-1, EN 301 489-17• Seguridad: EN 60950, y EN 50385 o EN 50371La s<strong>el</strong>ección dinámica de frecuencia (DFS) y <strong>el</strong> control depotencia de transmisión (TPC) son obligatorios para <strong>el</strong>funcionamiento en la banda de 5 GHz.DFS: El equipo cumple con los requisitos de DFS comose definen en la norma ETSI EN 301 893. Esta función esobligatoria por ley para evitar la interferencia con losservicios de localización de radio (radares).TPC: Para <strong>el</strong> funcionamiento en la banda de 5 GHz, <strong>el</strong> niv<strong>el</strong>máximo de potencia es 3 dB o más por debajo d<strong>el</strong> límiteaplicable. Como tal, no es obligatorio <strong>el</strong> TPC.Marca CEA los productos Wir<strong>el</strong>ess-N, -G, -B y/o -A de Linksys se lesagrega la marca CE, <strong>el</strong> número de organismo notificado (siprocede) y <strong>el</strong> identificador de clase 2.oooRestricciones nacionalesEste producto se puede utilizar en todos los países de laUE (y en otros países donde se aplique la directiva de laUE 1999/5/CE) sin limitación, excepto en los países que semencionan a continuación:Ce produit peut être utilisé dans tous les pays de l’UE (et danstous les pays ayant transposés la directive 1999/5/CE) sansaucune limitation, excepté pour les pays mentionnés cidessous:Questo prodotto è utilizzabile in tutte i paesi EU (ed in tuttigli altri paesi che seguono le direttive EU 1999/5/EC) senzanessuna limitazione, eccetto per i paesii menzionati diseguito:Das Produkt kann in allen EU Staaten ohne Einschränkungeneingesetzt werden (sowie in anderen Staaten die der EUDirektive 1999/5/CE folgen) mit Außnahme der folgendenaufgeführten Staaten:En la mayoría de los países de la UE y europeos, las bandasde 2,4 y 5 GHz están disponibles para la utilización de lasredes de área local inalámbricas (LAN). La tabla de nombre“Descripción general de los requisitos normativos para lasLAN inalámbricas” proporciona una descripción generalde los requisitos normativos aplicables para las bandas de2,4 y 5 GHz.Más ad<strong>el</strong>ante en este documento encontrará unadescripción general de los países en los que se aplicanrestricciones o requisitos adicionales.Los requisitos de los países pueden cambiar. Linksysrecomienda que compruebe con las autoridades locales<strong>el</strong> estado más reciente de la normativa nacional para lasLAN inalámbricas de 2,4 y 5 GHz.Descripción general de los requisitos normativos para lasLAN inalámbricasBanda defrecuencia (MHz)Niv<strong>el</strong> máximode potencia(EIRP) (mW)SÓLOinterioresInteriores yexteriores2400-2483,5 100 X5150-5350 † 200 X5470-5725 † 1000 XConsulte la etiqueta CE d<strong>el</strong> producto para saber quéorganismo notificado ha participado en la evaluación.Router de banda ancha Wir<strong>el</strong>ess-G† La s<strong>el</strong>ección dinámica de frecuencia y <strong>el</strong> control de potencia detransmisión son obligatorios en los rangos de frecuencia de 5250-5350 MHz y 5470-5725 MHz.Los siguientes países tienen restricciones y/o requisitosadicionales a los que se proporcionan en la tabla denombre “Descripción general de los requisitos normativospara las LAN inalámbricas”:DenmarkIn Denmark, the band 5150 - 5350 MHz is also allowed foroutdoor usage.I Danmark må frekvensbåndet 5150 - 5350 også anvendesudendørs.30
Apéndice DInformación sobre normativasFranceFor 2,4 GHz, the product should not be used outdoorsin the band 2454 - 2483,5 MHz. There are no restrictionswhen used in other parts of the 2,4 GHz band when usedindoors. Check http://www.arcep.fr/ for more details.Pour la bande 2,4 GHz, l’ équipement ne doit pas être utiliséen extérieur dans la bande 2454 - 2483,5 MHz. Il n’y a pas derestrictions pour des utilisations en intérieur dans d’autresparties de la bande 2,4GHz. Consultez http://www.arcep.fr/pour de plus amples détails.LocationIndoor(No restrictions)ItalyOutdoorApplicable Power Lev<strong>el</strong>s in FranceFrequencyRange (MHz)Router de banda ancha Wir<strong>el</strong>ess-GPower (EIRP)2400-2483.5 100 mW (20 dBm)2400-24542454-2483.5100 mW (20 dBm)10 mW (10 dBm)This product meets the National Radio Interface andthe requirements specified in the National FrequencyAllocation Table for Italy. Unless this 2,4-GHz wir<strong>el</strong>ess LANproduct is operating within the boundaries of the owner’sproperty, its use requires a “general authorization”. Pleasecheck http://www.comunicazioni.it/it/ for more details.Questo prodotto è conforme alla specifiche di InterfacciaRadio Nazionali e rispetta il Piano Nazionale di ripartizioned<strong>el</strong>le frequenze in Italia. Se non viene installato all’internod<strong>el</strong> proprio fondo, l’utilizzo di prodotti Wir<strong>el</strong>ess LAN a2,4 GHz richiede una “Autorizzazione Generale”. Consultarehttp://www.comunicazioni.it/it/ per maggiori dettagli.LatviaThe outdoor usage of the 2,4 GHz band requires anauthorization from the Electronic Communications Office.Please check http://www.esd.lv for more details.2,4 GHz frekveču joslas izmantošanai ārpus t<strong>el</strong>pāmnepieciešama atļauja no Elektronisko sakaru direkcijas.Vairāk informācijas: http://www.esd.lv.Notes:1.2.Although Norway, Switzerland and Liechtenstein arenot EU member states, the EU Directive 1999/5/EC hasalso been implemented in those countries.The regulatory limits for maximum output power arespecified in EIRP. The EIRP lev<strong>el</strong> of a device can becalculated by adding the gain of the antenna used(specified in dBi) to the output power available at theconnector (specified in dBm).Restricciones de uso d<strong>el</strong> productoEste producto está diseñado sólo para uso en <strong>el</strong> interior.No se recomienda la utilización en exteriores, a menosque se indique lo contrario.Restricciones para 2,4 GHzEste producto está diseñado para su uso con las antenasestándar, integrales o exclusivas (externas) incluidas con<strong>el</strong> equipo. No obstante, algunas aplicaciones puedenrequerir que las antenas se separen d<strong>el</strong> producto, si sonextraíbles, y se instalen alejadas d<strong>el</strong> dispositivo mediante<strong>el</strong> uso de cables de extensión. Para estas aplicaciones,Linksys ofrece un cable de extensión R‐SMA (AC9SMA)y un cable de extensión R-TNC (AC9TNC). Ambos cablestienen una longitud de 9 metros y una pérdida de cable(atenuación) de 5 dB. Para compensar la atenuación,Linksys también ofrece antenas con mayor ganancia:HGA7S (con conector R-SMA) y HGA7T (con conector R-TNC). Estas antenas tienen una ganancia de 7 dBi y sólo sepueden utilizar con <strong>el</strong> cable de extensión R-SMA o R-TNC.Se consideran ilegales las combinaciones de cables deextensión y antenas que producen un niv<strong>el</strong> de potenciaradiada superior a 100 mW EIRP.Software o firmware de tercerosEl uso de software o firmware no admitido o proporcionadopor Linksys puede provocar que <strong>el</strong> equipo deje de cumplirlos requisitos normativos.Documentos técnicos enwww.linksys.com/internationalSiga estos pasos para acceder a los documentos técnicos:1.2.3.4.5.6.7.Escriba http://www.linksys.com/international en <strong>el</strong>explorador Web.S<strong>el</strong>eccione <strong>el</strong> país o la zona en la que vive.Haga clic en la ficha Productos.S<strong>el</strong>eccione la categoría de producto correspondiente.Si es necesario, s<strong>el</strong>eccione la subcategoría deproducto.S<strong>el</strong>eccione <strong>el</strong> producto.S<strong>el</strong>eccione <strong>el</strong> tipo de documentación que desee en lasección Más información. El documento se abrirá enformato PDF si tiene Adobe Acrobat instalado en <strong>el</strong>ordenador.NOTA: Si tiene dudas sobre la conformidadde este producto o si no puede encontrar lainformación que necesita, póngase en contactocon la oficina local de ventas o visite www.linksys.com/international31
Apéndice DInformación sobre normativasInformación de usuario para productos deconsumo afectados por la directiva de laUE 2002/96/CE sobre residuos de aparatos<strong>el</strong>éctricos y <strong>el</strong>ectrónicos (RAEE)Este documento contiene información importante paralos usuarios en r<strong>el</strong>ación con la <strong>el</strong>iminación y <strong>el</strong> reciclajeadecuados de los productos de Linksys. Los consumidoresdeben cumplir con este aviso para todos los productos<strong>el</strong>ectrónicos en los que figure <strong>el</strong> siguiente símbolo:Ceština (Czech) - Informace o ochraně životníhoprostředí pro zákazníky v zemích Evropské unieEvropská směrnice 2002/96/ES zakazuje, aby zařízení označenétímto symbolem na produktu anebo na obalu bylo likvidovános netříděným komunálním odpadem. Tento symbol udává,že daný produkt musí být likvidován odděleně od běžnéhokomunálního odpadu. Odpovídáte za likvidaci tohoto produktua dalších <strong>el</strong>ektrických a <strong>el</strong>ektronických zařízení prostřednictvímurčených sběrných míst stanovených vládou nebo místnímiúřady. Správná likvidace a recyklace pomáhá předcházetpotenciálním negativním dopadům na životní prostředí a lidskézdraví. Podrobnější informace o likvidaci starého vybavení silaskavě vyžádejte od místních úřadů, podniku zabývajícího s<strong>el</strong>ikvidací komunálních odpadů nebo obchodu, kde jste produktzakoupili.English - Environmental Information for Customers inthe European UnionEuropean Directive 2002/96/EC requires that the equipmentbearing this symbol on the product and/or its packaging mustnot be disposed of with unsorted municipal waste. The symbolindicates that this product should be disposed of separat<strong>el</strong>yfrom regular household waste streams. It is your responsibility todispose of this and other <strong>el</strong>ectric and <strong>el</strong>ectronic equipment viadesignated collection facilities appointed by the government orlocal authorities. Correct disposal and recycling will h<strong>el</strong>p preventpotential negative consequences to the environment andhuman health. For more detailed information about the disposalof your old equipment, please contact your local authorities,waste disposal service, or the shop where you purchased theproduct.Български (Bulgarian) - Информация относноопазването на околната среда за потребители вЕвропейския съюзЕвропейска директива 2002/96/EC изисква уредите, носещитози символ върху изделието и/или опаковката му, да несе изхвърля т с несортирани битови отпадъци. Символътобозначава, че изделието трябва да се изхвърля отделно отсметосъбирането на обикновените битови отпадъци. Вашае отговорността този и другите електрически и електронниуреди да се изхвърлят в предварително определени отдържавните или общински органи специализирани пунктовеза събиране. Правилното изхвърляне и рециклиранеще спомогнат да се предотвратят евентуални вредни заоколната среда и здравето на населението последствия. Запо-подробна информация относно изхвърлянето на вашитестари уреди се обърнете към местните власти, службите засметосъбиране или магазина, от който сте закупили уреда.Dansk (Danish) - Miljøinformation for kunder i EUEU-direktiv 2002/96/EF kræver, at udstyr der bærer dette symbolpå produktet og/<strong>el</strong>ler emballagen ikke må bortskaffes somusorteret kommunalt affald. Symbolet betyder, at dette produktskal bortskaffes adskilt fra det almind<strong>el</strong>ige husholdningsaffald.Det er dit ansvar at bortskaffe dette og andet <strong>el</strong>ektrisk og<strong>el</strong>ektronisk udstyr via bestemte indsamlingssteder udpegetaf staten <strong>el</strong>ler de lokale myndigheder. Korrekt bortskaff<strong>el</strong>seog genvinding vil hjælpe med til at undgå mulige skader formiljøet og menneskers sundhed. Kontakt venligst de lokalemyndigheder, renovationstjenesten <strong>el</strong>ler den butik, hvor duhar købt produktet, angående mere detaljeret information ombortskaff<strong>el</strong>se af dit gamle udstyr.Deutsch (German) - Umw<strong>el</strong>tinformation für Kundeninnerhalb der Europäischen UnionDie Europäische Richtlinie 2002/96/EC verlangt, dass technischeAusrüstung, die direkt am Gerät und/oder an der Verpackung mitdiesem Symbol versehen ist , nicht zusammen mit unsortiertemGemeindeabfall entsorgt werden darf. Das Symbol weist daraufhin, dass das Produkt von regulärem Haushaltmüll getrenntentsorgt werden sollte. Es liegt in Ihrer Verantwortung, diesesGerät und andere <strong>el</strong>ektrische und <strong>el</strong>ektronische Geräte überdie dafür zuständigen und von der Regierung oder örtlichenBehörden dazu bestimmten Samm<strong>el</strong>st<strong>el</strong>len zu entsorgen.Ordnungsgemäßes Entsorgen und Recyc<strong>el</strong>n trägt dazu bei,potenti<strong>el</strong>le negative Folgen für Umw<strong>el</strong>t und die menschlicheGesundheit zu vermeiden. Wenn Sie weitere Informationen zurEntsorgung Ihrer Altgeräte benötigen, wenden Sie sich bitte andie örtlichen Behörden oder städtischen Entsorgungsdiensteoder an den Händler, bei dem Sie das Produkt erworben haben.Router de banda ancha Wir<strong>el</strong>ess-G32
Apéndice DInformación sobre normativasEesti (Estonian) - Keskkonnaalane informatsioonEuroopa Liidus asuvat<strong>el</strong>e klientid<strong>el</strong>eEuroopa Liidu direktiivi 2002/96/EÜ nõuete kohas<strong>el</strong>t onseadmeid, mill<strong>el</strong> on toot<strong>el</strong> või pakendil käesolev sümbol ,ke<strong>el</strong>atud kõrvaldada koos sorteerimata olmejäätmetega. Seesümbol näitab, et toode tuleks kõrvaldada eraldi tavalistestolmejäätmevoogudest. Olete kohustatud kõrvaldama käesolevaja ka muud <strong>el</strong>ektri- ja <strong>el</strong>ektroonikaseadmed riigi või kohalikeametiasutuste poolt ette nähtud kogumispunktide kaudu.Seadmete korrektne kõrvaldamine ja ringlussevõtt aitab vältidavõimalikke negatiivseid tagajärgi keskkonnale ning inimestetervis<strong>el</strong>e. Vanade seadmete kõrvaldamise kohta täpsemainformatsiooni saamiseks võtke palun ühendust kohalikeametiasutustega, jäätmekäitlusfirmaga või kauplusega, kust tetoote ostsite.Español (Spanish) - Información medioambiental paraclientes de la Unión EuropeaLa Directiva 2002/96/CE de la UE exige que los equipos qu<strong>el</strong>leven este símbolo en <strong>el</strong> propio aparato y/o en su embalajeno deben <strong>el</strong>iminarse junto con otros residuos urbanos nos<strong>el</strong>eccionados. El símbolo indica que <strong>el</strong> producto en cuestióndebe separarse de los residuos domésticos convencionales convistas a su <strong>el</strong>iminación. Es responsabilidad suya desechar este ycualesquiera otros aparatos <strong>el</strong>éctricos y <strong>el</strong>ectrónicos a través d<strong>el</strong>os puntos de recogida que ponen a su disposición <strong>el</strong> gobierno ylas autoridades locales. Al desechar y reciclar correctamente estosaparatos estará contribuyendo a evitar posibles consecuenciasnegativas para <strong>el</strong> medio ambiente y la salud de las personas. Sidesea obtener información más detallada sobre la <strong>el</strong>iminaciónsegura de su aparato usado, consulte a las autoridades locales,al servicio de recogida y <strong>el</strong>iminación de residuos de su zona opregunte en la tienda donde adquirió <strong>el</strong> producto.ξλληνικά (Greek) - Στοιχεία περιβαλλοντικήςπροστασίας για πελάτες εντός της ΕυρωπαϊκήςΈνωσηςΗ Κοινοτική Οδηγία 2002/96/EC απαιτεί ότι ο εξοπλισμός ο οποίοςφέρει αυτό το σύμβολο στο προϊόν και/ή στη συσκευασίατου δεν πρέπει να απορρίπτεται μαζί με τα μικτά κοινοτικάαπορρίμματα. Το σύμβολο υποδεικνύει ότι αυτό το προϊόν θαπρέπει να απορρίπτεται ξεχωριστά από τα συνήθη οικιακάαπορρίμματα. Είστε υπεύθυνος για την απόρριψη του παρόντοςκαι άλλου ηλεκτρικού και ηλεκτρονικού εξοπλισμού μέσω τωνκαθορισμένων εγκαταστάσεων συγκέντρωσης απορριμμάτων οιοποίες παρέχονται από το κράτος ή τις αρμόδιες τοπικές αρχές.Η σωστή απόρριψη και ανακύκλωση συμβάλλει στην πρόληψηπιθανών αρνητικών συνεπειών για το περιβάλλον και την υγεία.Για περισσότερες πληροφορίες σχετικά με την απόρριψη τουπαλιού σας εξοπλισμού, παρακαλώ επικοινωνήστε με τις τοπικέςαρχές, τις υπηρεσίες απόρριψης ή το κατάστημα από το οποίοαγοράσατε το προϊόν.Français (French) - Informations environnementalespour les clients de l’Union européenneLa directive européenne 2002/96/CE exige que l’équipementsur lequ<strong>el</strong> est apposé ce symbole sur le produit et/ou sonemballage ne soit pas jeté avec les autres ordures ménagères. Cesymbole indique que le produit doit être éliminé dans un circuitdistinct de c<strong>el</strong>ui pour les déchets des ménages. Il est de votreresponsabilité de jeter ce matéri<strong>el</strong> ainsi que tout autre matéri<strong>el</strong>électrique ou électronique par les moyens de collecte indiquéspar le gouvernement et les pouvoirs publics des collectivitésterritoriales. L’élimination et le recyclage en bonne et due formeont pour but de lutter contre l’impact néfaste potenti<strong>el</strong> de cetype de produits sur l’environnement et la santé publique. Pourplus d’informations sur le mode d’élimination de votre ancienéquipement, veuillez prendre contact avec les pouvoirs publicslocaux, le service de traitement des déchets, ou l’endroit où vousavez acheté le produit.Italiano (Italian) - Informazioni r<strong>el</strong>ative all’ambienteper i clienti residenti n<strong>el</strong>l’Unione EuropeaLa direttiva europea 2002/96/EC richiede che le apparecchiaturecontrassegnate con questo simbolo sul prodotto e/osull’imballaggio non siano smaltite insieme ai rifiuti urbaninon differenziati. Il simbolo indica che questo prodotto nondeve essere smaltito insieme ai normali rifiuti domestici. Èresponsabilità d<strong>el</strong> proprietario smaltire sia questi prodotti siale altre apparecchiature <strong>el</strong>ettriche ed <strong>el</strong>ettroniche mediant<strong>el</strong>e specifiche strutture di raccolta indicate dal governo o daglienti pubblici locali. Il corretto smaltimento ed il riciclaggioaiuteranno a prevenire conseguenze potenzialmente negativeper l’ambiente e per la salute d<strong>el</strong>l’essere umano. Per ricevereinformazioni più dettagliate circa lo smaltimento d<strong>el</strong>le vecchieapparecchiature in Vostro possesso, Vi invitiamo a contattare glienti pubblici di competenza, il servizio di smaltimento rifiuti o ilnegozio n<strong>el</strong> quale avete acquistato il prodotto.Latviešu valoda (Latvian) - Ekoloģiska informācijaklientiem Eiropas Savienības jurisdikcijāDirektīvā 2002/96/EK ir prasība, ka aprīkojumu, kam pievienotazīme uz paša izstrādājuma vai uz tā iesaiņojuma, nedrīkstizmest nešķirotā veidā kopā ar komunālajiem atkritumiem(tiem, ko rada vietēji iedzīvotāji un uzņēmumi). Šī zīme nozīmēto, ka šī ierīce ir jāizmet atkritumos tā, lai tā nenonāktu kopā arparastiem mājsaimniecības atkritumiem. Jūsu pienākums ir šoun citas <strong>el</strong>ektriskas un <strong>el</strong>ektroniskas ierīces izmest atkritumos,izmantojot īpašus atkritumu savākšanas veidus un līdzekļus, konodrošina valsts un pašvaldību iestādes. Ja izmešana atkritumosun pārstrāde tiek veikta pareizi, tad mazinās iespējamaiskaitējums dabai un cilvēku ves<strong>el</strong>ībai. Sīkākas ziņas parnovecojuša aprīkojuma izmešanu atkritumos jūs varat saņemtvietējā pašvaldībā, atkritumu savākšanas dienestā, kā arī veikalā,kur iegādājāties šo izstrādājumu.Router de banda ancha Wir<strong>el</strong>ess-G33
Apéndice DInformación sobre normativasLietuvškai (Lithuanian) - Aplinkosaugos informacija,skirta Europos Sąjungos vartotojamsEuropos direktyva 2002/96/EC numato, kad įrangos, kuri irkurios pakuotė yra pažymėta šiuo simboliu (įveskite simbolį),negalima šalinti kartu su nerūšiuotomis komunalinėmisatliekomis. Šis simbolis rodo, kad gaminį reikia šalinti atskirainuo bendro buitinių atliekų srauto. Jūs privalote užtikrinti, kadši ir kita <strong>el</strong>ektros ar <strong>el</strong>ektroninė įranga būtų šalinama per tamtikras nacionalinės ar vietinės valdžios nustatytas atliekų rinkimosistemas. Tinkamai šalinant ir perdirbant atliekas, bus išvengtagalimos žalos aplinkai ir žmonių sveikatai. Daugiau informacijosapie jūsų senos įrangos šalinimą gali pateikti vietinės valdžiosinstitucijos, atliekų šalinimo tarnybos arba parduotuvės, kurioseįsigijote tą gaminį.Malti (Maltese) - Informazzjoni Ambjentali għal Klijentifl-Unjoni EwropeaId-Direttiva Ewropea 2002/96/KE titlob li t-tagħmir li jkun fih issimbolufuq il-prodott u/jew fuq l-ippakkjar ma jistax jintremama’ skart muniċipali li ma ġiex isseparat. Is-simbolu jindikali dan il-prodott għandu jintrema separatament minn ma’ l-iskart domestiku regolari. Hija responsabbiltà tiegħek li tarmidan it-tagħmir u kull tagħmir ieħor ta’ l-<strong>el</strong>ettriku u <strong>el</strong>ettronikupermezz ta’ faċilitajiet ta’ ġbir appuntati apposta mill-gvern jewmill-awtoritajiet lokali. Ir-rimi b’mod korrett u r-riċiklaġġ jgħinjipprevjeni konsegwenzi negattivi potenzjali għall-ambjent ugħas-saħħa tal-bniedem. Għal aktar informazzjoni dettaljatadwar ir-rimi tat-tagħmir antik tiegħek, jekk jogħġbok ikkuntattjalill-awtoritajiet lokali tiegħek, is-servizzi għar-rimi ta’ l-iskart, jewil-ħanut minn fejn xtrajt il-prodott.Magyar (Hungarian) - Környezetvéd<strong>el</strong>mi információ azeurópai uniós vásárlók számáraA 2002/96/EC számú európai uniós irány<strong>el</strong>v megkívánja, hogyazokat a termékeket, am<strong>el</strong>yeken, és/vagy am<strong>el</strong>yek csomagolásánaz alábbi címke megj<strong>el</strong>enik, tilos a többi sz<strong>el</strong>ektálatlan lakosságihulladékkal együtt kidobni. A címke azt j<strong>el</strong>öli, hogy az adotttermék kidobásakor a szokványos háztartási hulladék<strong>el</strong>szállításirendszerektõl <strong>el</strong>különített <strong>el</strong>járást k<strong>el</strong>l alkalmazni. Az Önf<strong>el</strong><strong>el</strong>õssége, hogy ezt, és más <strong>el</strong>ektromos és <strong>el</strong>ektronikusberendezéseit a kormányzati vagy a h<strong>el</strong>yi hatóságok általkij<strong>el</strong>ölt gyűjtõredszereken keresztül számolja f<strong>el</strong>. A megf<strong>el</strong><strong>el</strong>õhulladékf<strong>el</strong>dolgozás segít a környezetre és az emberi egészségrepotenciálisan ártalmas negatív hatások meg<strong>el</strong>õzésében. Ha<strong>el</strong>avult berendezéseinek f<strong>el</strong>számolásához további részletesinformációra van szüksége, kérjük, lépjen kapcsolatba a h<strong>el</strong>yihatóságokkal, a hulladékf<strong>el</strong>dolgozási szolgálattal, vagy azzalüzlett<strong>el</strong>, ahol a terméket vásárolta.Nederlands (Dutch) - Milieu-informatie voor klantenin de Europese UnieDe Europese Richtlijn 2002/96/EC schrijft voor dat apparatuur dieis voorzien van dit symbool op het product of de verpakking,niet mag worden ingezam<strong>el</strong>d met niet-gescheiden huishoud<strong>el</strong>ijkafval. Dit symbool geeft aan dat het product apart moet wordeningezam<strong>el</strong>d. U bent z<strong>el</strong>f verantwoord<strong>el</strong>ijk voor de vernietigingvan deze en andere <strong>el</strong>ektrische en <strong>el</strong>ektronische apparatuur via dedaarvoor door de land<strong>el</strong>ijke of plaats<strong>el</strong>ijke overheid aangewezeninzam<strong>el</strong>ingskanalen. De juiste vernietiging en recycling vandeze apparatuur voorkomt mog<strong>el</strong>ijke negatieve gevolgen voorhet milieu en de gezondheid. Voor meer informatie over hetvernietigen van uw oude apparatuur neemt u contact op metde plaats<strong>el</strong>ijke autoriteiten of afvalverwerkingsdienst, of met dewink<strong>el</strong> waar u het product hebt aangeschaft.Norsk (Norwegian) - Miljøinformasjon for kunder i EUEU-direktiv 2002/96/EF krever at utstyr med følgende symbolavbildet på produktet og/<strong>el</strong>ler pakningen, ikke må kastessammen med usortert avfall. Symbolet indikerer at detteproduktet skal håndteres atskilt fra ordinær avfallsinnsamlingfor husholdningsavfall. Det er ditt ansvar å kvitte deg meddette produktet og annet <strong>el</strong>ektrisk og <strong>el</strong>ektronisk avfall via egneinnsamlingsordninger slik myndighetene <strong>el</strong>ler kommunenebestemmer. Korrekt avfallshåndtering og gjenvinning vilvære med på å forhindre mulige negative konsekvenser formiljø og h<strong>el</strong>se. For nærmere informasjon om håndtering avdet kasserte utstyret ditt, kan du ta kontakt med kommunen,en innsamlingsstasjon for avfall <strong>el</strong>ler butikken der du kjøpteproduktet.Polski (Polish) - Informacja dla klientów w UniiEuropejskiej o przepisach dotyczących ochronyśrodowiskaDyrektywa Europejska 2002/96/EC wymaga, aby sprzętoznaczony symbolem znajdującym się na produkcie i/lub jegoopakowaniu nie był wyrzucany razem z innymi niesortowanymiodpadami komunalnymi. Symbol ten wskazuje, że produktnie powinien być usuwany razem ze zwykłymi odpadami zgospodarstw domowych. Na Państwu spoczywa obowiązekwyrzucania tego i innych urządzeń <strong>el</strong>ektrycznych oraz<strong>el</strong>ektronicznych w punktach odbioru wyznaczonych przez władzekrajowe lub lokalne. Pozbywanie się sprzętu we właściwy sposóbi jego recykling pomogą zapobiec potencjalnie negatywnymkonsekwencjom dla środowiska i zdrowia ludzkiego. W c<strong>el</strong>uuzyskania szczegółowych informacji o usuwaniu starego sprzętu,prosimy zwrócić się do lokalnych władz, służb oczyszczaniamiasta lub sklepu, w którym produkt został nabyty.Router de banda ancha Wir<strong>el</strong>ess-G34
Apéndice DInformación sobre normativasPortuguês (Portuguese) - Informação ambiental paraclientes da União EuropeiaA Directiva Europeia 2002/96/CE exige que o equipamentoque exibe este símbolo no produto e/ou na sua embalagemnão seja <strong>el</strong>iminado junto com os resíduos municipais nãoseparados. O símbolo indica que este produto deve ser<strong>el</strong>iminado separadamente dos resíduos domésticos regulares.É da sua responsabilidade <strong>el</strong>iminar este e qualquer outroequipamento <strong>el</strong>éctrico e <strong>el</strong>ectrónico através das instalaçõesde recolha designadas p<strong>el</strong>as autoridades governamentais oulocais. A <strong>el</strong>iminação e reciclagem correctas ajudarão a preveniras consequências negativas para o ambiente e para a saúdehumana. Para obter informações mais detalhadas sobre aforma de <strong>el</strong>iminar o seu equipamento antigo, contacte asautoridades locais, os serviços de <strong>el</strong>iminação de resíduos ou oestab<strong>el</strong>ecimento comercial onde adquiriu o produto.Română (Romanian) - Informaţii de mediu pentruclienţii din Uniunea EuropeanăDirectiva europeană 2002/96/CE impune ca echipament<strong>el</strong>e careprezintă acest simbol pe produs şi/sau pe ambalajul acestuia sănu fie casate împreună cu gunoiul menajer municipal. Simbolulindică faptul că acest produs trebuie să fie casat separat degunoiul menajer obişnuit. Este responsabilitatea dvs. să casaţiacest produs şi alte echipamente <strong>el</strong>ectrice şi <strong>el</strong>ectronice prinintermediul unităţilor de colectare special desemnate de guvernsau de autorităţile locale. Casarea şi reciclarea corecte vor ajutala prevenirea potenţial<strong>el</strong>or consecinţe negative asupra sănătăţiimediului şi a oamenilor. Pentru mai multe informaţii detaliatecu privire la casarea acestui echipament vechi, contactaţiautorităţile locale, serviciul de salubrizare sau magazinul de lacare aţi achiziţionat produsul.Slovenčina (Slovak) - Informácie o ochrane životnéhoprostredia pre zákazníkov v Európskej úniiPodľa európskej smernice 2002/96/ES zariadenie s týmtosymbolom na produkte a/alebo jeho balení nesmie byťlikvidované spolu s netriedeným komunálnym odpadom.Symbol znamená, že produkt by sa mal likvidovať odd<strong>el</strong>eneod bežného odpadu z domácností. Je vašou povinnosťoulikvidovať toto i ostatné <strong>el</strong>ektrické a <strong>el</strong>ektronické zariadeniaprostredníctvom špecializovaných zberných zariadení určenýchvládou alebo miestnymi orgánmi. Správna likvidácia a recykláciapomôže zabrániť prípadným negatívnym dopadom na životnéprostredie a zdravie ľudí. Ak máte záujem o podrobnejšieinformácie o likvidácii starého zariadenia, obráťte sa, prosím, namiestne orgány, organizácie zaoberajúce sa likvidáciou odpadovalebo obchod, v ktorom ste si produkt zakúpili.Slovenčina (Slovene) - Okoljske informacije za strankev Evropski unijiEvropska direktiva 2002/96/EC prepoveduje odlaganje opreme,označene s tem simbolom – na izd<strong>el</strong>ku in/ali na embalaži – medobičajne, nerazvrščene odpadke. Ta simbol opozarja, da je trebaizd<strong>el</strong>ek odvreči ločeno od preostalih gospodinjskih odpadkov.Vaša odgovornost je, da to in preostalo <strong>el</strong>ektrično in <strong>el</strong>ektronskoopremo odnesete na posebna zbirališča, ki jih določijodržavne ustanove ali lokalna uprava. S pravilnim odlaganjemin recikliranjem boste preprečili morebitne škodljive vplive naokolje in zdravje ljudi. Če ž<strong>el</strong>ite izvedeti več o odlaganju stareopreme, se obrnite na lokalno upravo, odpad ali trgovino, kjerste izd<strong>el</strong>ek kupili.Suomi (Finnish) - Ympäristöä koskevia tietoja EUalueenasiakkailleEU-direktiivi 2002/96/EY ed<strong>el</strong>lyttää, että jos laitteistossa on tämäsymboli itse tuotteessa ja/tai sen pakkauksessa, laitteistoaei saa hävittää lajitt<strong>el</strong>emattoman yhdyskuntajätteen mukana.Symboli merkitsee sitä, että tämä tuote on hävitettävä erillääntavallisesta kotitalousjätteestä. Sinun vastuullasi on hävittäätämä <strong>el</strong>ektroniikkatuote ja muut vastaavat <strong>el</strong>ektroniikkatuotteetviemällä tuote tai tuotteet viranomaisten määräämäänkeräyspisteeseen. Laitteiston oikea hävittäminen estäämahdolliset ki<strong>el</strong>teiset vaikutukset ympäristöön ja ihmistenterveyteen. Lisätietoja vanhan laitteiston oikeasta hävitystavastasaa paikallisilta viranomaisilta, jätteenhävityspalv<strong>el</strong>usta tai siitämyymälästä, josta ostit tuotteen.Svenska (Swedish) - Miljöinformation för kunder iEuropeiska unionenDet europeiska direktivet 2002/96/EC kräver att utrustning meddenna symbol på produkten och/<strong>el</strong>ler förpackningen inte fårkastas med osorterat kommunalt avfall. Symbolen visar att dennaprodukt bör kastas efter att den avskiljts från vanligt hushållsavfall.Det faller på ditt ansvar att kasta denna och annan <strong>el</strong>ektrisk och<strong>el</strong>ektronisk utrustning på fastställda insamlingsplatser utseddaav regeringen <strong>el</strong>ler lokala myndigheter. Korrekt kassering ochåtervinning skyddar mot eventu<strong>el</strong>la negativa konsekvenserför miljön och personhälsa. För mer detaljerad information omkassering av din gamla utrustning kontaktar du dina lokalamyndigheter, avfallshanteringen <strong>el</strong>ler butiken där du köpteprodukten.WEB: Para obtener información adicional, visitewww.linksys.com/internationalRouter de banda ancha Wir<strong>el</strong>ess-G8013010NC-JL35
GUIDE DEL’UTILISATEURRouteur haut débitsans fil GModèle : WRT54G2 (FR)
A propos de ce guideA propos de ce guideDescriptions des icônesEn parcourant le Guide de l’utilisateur, vous pouvezrencontrer diverses icônes attirant votre attention surdes éléments spécifiques. Ces icônes sont décrites cidessous:REMARQUE : Cette coche indique un élémentqui mérite une attention plus particulière lorsde l’utilisation de votre produit.AVERTISSEMENT : Ce point d’exclamationindique un avertissement et vous informe quevotre installation ou votre produit peut êtreendommagé.WEB : Cette icône en forme de globe indiqueune adresse de site Web ou une adresse e-mail.Ressources en ligneLa plupart des navigateurs Web vous permettent de saisirl’adresse Web sans devoir la faire précéder de http://.Les références aux sites Web incluses dans ce Guide d<strong>el</strong>’utilisateur ne comportent pas le préfixe http://. Il se peutque certains anciens navigateurs Web nécessitent quevous l’ajoutiez.RessourceLinksysLinksys InternationalGlossaire (en anglais)Sécurité réseau(en anglais)Site Webwww.linksys.comwww.linksys.com/internationalwww.linksys.com/glossarywww.linksys.com/securityCopyright et marquesLinksys est une marque déposée ouune marque commerciale de CiscoSystems, Inc. et/ou de ses filialesaux Etats-Unis et dans d’autres pays.Copyright © 2008 Cisco Systems, Inc.Tous droits réservés. Les autres nomsde marques et de produits sont desmarques ou marques déposées d<strong>el</strong>eurs détenteurs respectifs.Routeur haut débit sans fil G
Table des matièresChapitre 1 : Présentation du produit 1Panneau avant . . . . . . . . . . . . . . . . . . . . . . . . . . . . . . . . . . . . . . . . . . . . . . . 1Panneau arrière. . . . . . . . . . . . . . . . . . . . . . . . . . . . . . . . . . . . . . . . . . . . . . . 1Options d’emplacement . . . . . . . . . . . . . . . . . . . . . . . . . . . . . . . . . . . . . . . . . 1Chapitre 2 : Liste de vérification de la sécurité sans fil 3Consignes de sécurité réseau d’ordre général. . . . . . . . . . . . . . . . . . . . . . . . . . . . 3Consignes de sécurité supplémentaires . . . . . . . . . . . . . . . . . . . . . . . . . . . . . . . 3Chapitre 3 : Configuration avancée 4Configuration > Configuration de base. . . . . . . . . . . . . . . . . . . . . . . . . . . . . . . . 4Configuration > DDNS . . . . . . . . . . . . . . . . . . . . . . . . . . . . . . . . . . . . . . . . . . 7Configuration > Adresse MAC dupliquée . . . . . . . . . . . . . . . . . . . . . . . . . . . . . . 8Configuration > Routage avancé. . . . . . . . . . . . . . . . . . . . . . . . . . . . . . . . . . . . 8Sans fil > Paramètres sans fil de base . . . . . . . . . . . . . . . . . . . . . . . . . . . . . . . . . 9Sans fil > Sécurité sans fil. . . . . . . . . . . . . . . . . . . . . . . . . . . . . . . . . . . . . . . . 11Sans fil > Filtre MAC sans fil . . . . . . . . . . . . . . . . . . . . . . . . . . . . . . . . . . . . . . .13Sans fil > Paramètres sans fil avancés . . . . . . . . . . . . . . . . . . . . . . . . . . . . . . . . .14Sécurité > Pare-feu. . . . . . . . . . . . . . . . . . . . . . . . . . . . . . . . . . . . . . . . . . . . 15Pare-feu . . . . . . . . . . . . . . . . . . . . . . . . . . . . . . . . . . . . . . . . . . . . . . . . . . .15Sécurité > Passthrough VPN . . . . . . . . . . . . . . . . . . . . . . . . . . . . . . . . . . . . . . 15Restrictions d’accès > Accès Internet . . . . . . . . . . . . . . . . . . . . . . . . . . . . . . . . .15Applications et jeux > Transfert de connexion . . . . . . . . . . . . . . . . . . . . . . . . . . .17Applications et jeux > Déclenchement de connexion. . . . . . . . . . . . . . . . . . . . . . 17Applications et jeux > DMZ . . . . . . . . . . . . . . . . . . . . . . . . . . . . . . . . . . . . . . .18Applications et jeux > QS . . . . . . . . . . . . . . . . . . . . . . . . . . . . . . . . . . . . . . . .18Administration > Gestion . . . . . . . . . . . . . . . . . . . . . . . . . . . . . . . . . . . . . . . .19Administration > Fichier journal . . . . . . . . . . . . . . . . . . . . . . . . . . . . . . . . . . . .20Administration > Diagnostics . . . . . . . . . . . . . . . . . . . . . . . . . . . . . . . . . . . . . .20Administration > Paramètres d’usine . . . . . . . . . . . . . . . . . . . . . . . . . . . . . . . . .20Administration > Mise à niveau du micrologici<strong>el</strong>. . . . . . . . . . . . . . . . . . . . . . . . . 21Administration > Gestion de la configuration. . . . . . . . . . . . . . . . . . . . . . . . . . . 21Etat > Routeur . . . . . . . . . . . . . . . . . . . . . . . . . . . . . . . . . . . . . . . . . . . . . . .21Etat > Réseau local. . . . . . . . . . . . . . . . . . . . . . . . . . . . . . . . . . . . . . . . . . . . 22Etat > Réseau sans fil . . . . . . . . . . . . . . . . . . . . . . . . . . . . . . . . . . . . . . . . . . .22Annexe A : Dépannage 23Annexe B : Spécifications 24Annexe C : Informations de garantie 25GARANTIE LIMITEE . . . . . . . . . . . . . . . . . . . . . . . . . . . . . . . . . . . . . . . . . . . . 25EXCLUSIONS ET LIMITATIONS . . . . . . . . . . . . . . . . . . . . . . . . . . . . . . . . . . . . .25OBTENTION DU SERVICE DE GARANTIE. . . . . . . . . . . . . . . . . . . . . . . . . . . . . . . 25Routeur haut débit sans fil Gii
Table des matièresSUPPORT TECHNIQUE. . . . . . . . . . . . . . . . . . . . . . . . . . . . . . . . . . . . . . . . . . 26GENERAL . . . . . . . . . . . . . . . . . . . . . . . . . . . . . . . . . . . . . . . . . . . . . . . . . . 26Annexe D : Réglementation 27FCC Statement . . . . . . . . . . . . . . . . . . . . . . . . . . . . . . . . . . . . . . . . . . . . . . .27Safety Notices. . . . . . . . . . . . . . . . . . . . . . . . . . . . . . . . . . . . . . . . . . . . . . . 27Industry Canada Statement . . . . . . . . . . . . . . . . . . . . . . . . . . . . . . . . . . . . . . .27Avis d’Industrie Canada. . . . . . . . . . . . . . . . . . . . . . . . . . . . . . . . . . . . . . . . . 27Wir<strong>el</strong>ess Disclaimer . . . . . . . . . . . . . . . . . . . . . . . . . . . . . . . . . . . . . . . . . . . .28Avis de non-responsabilité concernant les appareils sans fil . . . . . . . . . . . . . . . . . .28Déclaration de conformité concernant la directive européenne 1999/5/CE (R&TTE) . . .29Marquage CE . . . . . . . . . . . . . . . . . . . . . . . . . . . . . . . . . . . . . . . . . . . . . . . .30Restrictions nationales . . . . . . . . . . . . . . . . . . . . . . . . . . . . . . . . . . . . . . . . . .30Restrictions d’utilisation du produit . . . . . . . . . . . . . . . . . . . . . . . . . . . . . . . . . 31Documents techniques disponibles sur le site www.linksys.com/international . . . . . .31Informations pour les utilisateurs sur les biens de consommation dans le cadre d<strong>el</strong>’application de la directive européenne 2002/96/CE r<strong>el</strong>ative aux déchetsd’équipements électriques et électroniques (DEEE) . . . . . . . . . . . . . . . . . . . . . . . .32Routeur haut débit sans fil Giii
Chapitre 1Présentation du produitChapitre 1 :Présentation du produitMerci d’avoir choisi le routeur haut débit sans fil G deLinksys. Le routeur vous permet d’accéder à Internet via uneconnexion sans fil haut débit atteignant jusqu’à 54 Mbit/sou via l’un de ses quatre ports de commutation. Vouspouvez également utiliser le routeur pour partager desressources comme des ordinateurs, des imprimantes et desfichiers. Un certain nombre de fonctions de sécurité vousaident à protéger vos données et votre vie privée lorsquevous êtes en ligne. Elles comprennent le système desécurité WPA2, un pare-feu SPI (Stateful Packet Inspection)et la technologie NAT. La configuration du routeur estinstantanée grâce à l’utilitaire basé sur un navigateur Web.Panneau avantWir<strong>el</strong>ess (Sans fil) (vert) : le voyant sans fils’allume lorsque la fonction sans fil est activée.Si le voyant clignote, c<strong>el</strong>a signifie que le routeurtraite actu<strong>el</strong>lement l’envoi ou la réception dedonnées sur le réseau.Internet (vert) : le voyant Internet s’allume dèsqu’une connexion est établie par l’intermédiairedu port Internet. Un voyant qui clignote indiqueune activité réseau sur le port Internet.Power (Alimentation) (vert) : le voyant Power(Alimentation) s’allume et reste allumé tant qu<strong>el</strong>e routeur est sous tension. Il clignote à chaquedémarrage lorsque le routeur passe en moded’autodiagnostic. Une fois le diagnostic terminé,le voyant reste allumé en permanence.Panneau arrière1, 2, 3, 4 (vert) : ces voyants, dont les numéroscorrespondent aux numéros des ports indiquéssur le panneau arrière du routeur, remplissentdeux fonctions. Si un voyant est allumé enpermanence, c<strong>el</strong>a signifie que le routeur estcorrectement connecté à un périphérique via leport concerné. Un voyant qui clignote indiqueune activité réseau sur ce même port.Bouton Wi-Fi Protected Setup : si vouspossédez des périphériques clients, t<strong>el</strong>s quedes adaptateurs sans fil, prenant en charge leWi-Fi Protected Setup (configuration protégéepar Wi-Fi), vous pouvez utiliser cette fonctionpour configurer automatiquement la sécuritésans fil pour vos réseaux sans fil.Pour utiliser la fonctionnalité Wi-Fi ProtectedSetup, exécutez l’Assistant de configuration oureportez-vous à la section Sans fil > Paramètressans fil de base du « Chapitre 3 : Configurationavancée ».Voyant Wi-Fi Protected Setup (vert/orange) : le voyant vert indique que lasécurité sans fil est activée. Le voyantclignote en vert pendant deux minuteslors du processus Wi-Fi Protected Setup.Le voyant clignote en orange si une erreur seproduit lors du processus Wi-Fi Protected Setup.Assurez-vous que le périphérique client prend encharge la fonctionnalité Wi-Fi Protected Setup.Attendez que le voyant s’éteigne, puis réessayez.Internet : le port Internet doit être raccordé àvotre connexion Internet câblée ou ADSL.1, 2, 3, 4 : ces ports Ethernet (1, 2, 3, 4)permettent de connecter le routeur àvos ordinateurs en réseau et à d’autrespériphériques réseau Ethernet.Reset (Réinitialisation) : il existe deux façonsde réinitialiser les paramètres d’usine devotre routeur. Appuyez sur le bouton Reset(Réinitialisation) pendant environ cinqsecondes ou restaurez les paramètres pardéfaut à partir de l’écran Administration >Paramètres d’usine de l’utilitaire Web durouteur.Power (Alimentation) : le port Power(Alimentation) est l’emplacement auqu<strong>el</strong> vousdevez connecter l’adaptateur électrique.Options d’emplacementIl est possible d’installer le routeur de deux façons. Il peutêtre placé horizontalement sur une surface ou être fixé aumur.Le voyant clignote en orange lorsqu’unesession Wi-Fi Protected Setup est active etqu’une seconde session démarre. Le routeur neprend en charge qu’une seule session à la fois.Attendez que le voyant s’éteigne pour lancerune autre session Wi-Fi Protected Setup.Routeur haut débit sans fil G
Chapitre 1Présentation du produitPosition horizontaleLe panneau inférieur du routeur comporte quatre piedsen caoutchouc. Placez le routeur sur une surface plane àproximité d’une prise électrique.Montage muralLe panneau inférieur du routeur comporte deux orificesde montage mural. La distance entre ces orifices est de152 mm.Deux vis sont nécessaires pour la fixation du routeur aumur.REMARQUE : Linksys n’est pas responsable desdommages causés par une fixation incorrectedu matéri<strong>el</strong> de montage.Procédez comme suit :1. Déterminez l’emplacement du routeur. Assurezvousque le mur est lisse, plat, sec et solide. Vérifiezégalement que l’emplacement du routeur est situé àproximité d’une prise électrique.2. Percez deux trous dans le mur Vérifiez que les troussont à une distance de 152 mm.3. Insérez une vis dans chaque trou en laissant dépasserla tête de 3 mm.4. Positionnez le routeur de sorte que les orifices demontage mural soient alignés sur les deux vis.5. Placez les orifices de fixation murale sur les vis et faitesglisser le routeur vers le bas jusqu’à ce que les viss’ajustent parfaitement dans les orifices.Matéri<strong>el</strong> de montage suggéré4 - 5 mm 1 - 1,5 mm2,5 - 3,0 mm† Remarque : Les illustrations du matéri<strong>el</strong> demontage ne sont pas à l’éch<strong>el</strong>le.152 mmImprimez cette page en taille ré<strong>el</strong>le.Découpez en suivant les pointillés, puis placez la feuille sur le mur pour percer les trous enrespectant l’espacement requis.Modèle de montage muralRouteur haut débit sans fil G
Chapitre 2Liste de vérification de la sécurité sans filChapitre 2 :Liste de vérification de lasécurité sans filTrès pratiques et d’une grande simplicité d’installation, lesréseaux sans fil sont de plus en plus souvent choisis parles foyers disposant d’une connexion Internet haut débit.Toutefois, l’utilisation d’ondes radio rend les réseaux sans filplus vulnérables que les réseaux câblés traditionn<strong>el</strong>s. De lamême façon qu’il est possible d’intercepter les signaux devotre téléphone c<strong>el</strong>lulaire ou sans fil, les signaux de votreréseau sans fil peuvent également être interceptés. Etantdonné qu’il est impossible de bloquer physiquement uneconnexion non autorisée à votre réseau sans fil, certainesmesures sont nécessaires pour garantir la sécurité de votreréseau.1. Modifier le nom ou SSID duréseau sans fil par défautTout périphérique sans fil possède un nom de réseau sansfil ou SSID (Service Set Identifier) configuré en usine. Ils’agit du nom de votre réseau sans fil ; il peut comporterjusqu’à 32 caractères. Les produits sans fil Linksys utilisentlinksys comme nom de réseau sans fil par défaut. Il estrecommandé de changer le nom de votre réseau sansfil pour le différencier des autres réseaux sans fil, maisn’utilisez pas d’informations personn<strong>el</strong>les (t<strong>el</strong>les quevotre numéro de téléphone), car ces informations sontdisponibles à toute personne à la recherche de réseauxsans fil.2. Modifier le mot de passe pardéfautPour les produits sans fil, t<strong>el</strong>s que les points d’accès etles routeurs, un mot de passe vous est demandé si voussouhaitez modifier leurs paramètres. Ces périphériquespossèdent un mot de passe par défaut configuré enusine. Le mot de passe Linksys par défaut est admin. Lespirates informatiques connaissent ces noms et peuventtenter d’accéder à votre réseau sans fil et de modifier vosparamètres réseau. Pour éviter toute modification nonautorisée, personnalisez le mot de passe du périphériquede sorte qu’il soit difficile à deviner.3. Activer le filtrage desadresses MACLes routeurs Linksys permettent d’activer le filtraged’adresses MAC (Media Access Control). Tout périphériqueréseau se voit attribuer une adresse MAC unique,composée d’une série de chiffres et de lettres. Lorsque lafonction de filtrage des adresses MAC est activée, l’accèsRouteur haut débit sans fil Gau réseau sans fil n’est autorisé qu’aux périphériques dontl’adresse MAC est reconnue. Vous pouvez, par exemple,spécifier l’adresse MAC de chaque ordinateur de votredomicile, de manière à ce que seuls ces ordinateurspuissent accéder au réseau sans fil.4. Activer le cryptageLe cryptage protège les données transmises via un réseausans fil. WPA/WPA2 (Wi-Fi Protected Access) et WEP(Wired Equivalency Privacy) offrent différents niveaux deprotection des communications sans fil. Actu<strong>el</strong>lement,les périphériques certifiés Wi-Fi doivent obligatoirementprendre en charge le WPA2, mais pas le WEP.Un réseau utilisant le cryptage WPA/WPA2 est plus sécuriséqu’un réseau utilisant le cryptage WEP, car WPA/WPA2utilise une méthode de cryptage par clé dynamique. Afinde protéger les informations transmises par ondes radio,il est recommandé d’activer le niveau de cryptage le plusélevé pris en charge par votre matéri<strong>el</strong> réseau.Il est possible que les périphériques les plus anciens, quine prennent pas en charge la sécurité WPA, ne proposentque la méthode de cryptage WEP.Consignes de sécurité réseau d’ordre généralLa sécurité du réseau sans fil ne sert à rien si le réseausous-jacent n’est pas sécurisé.• Protégez l’accès à tous les ordinateurs du réseau à l’aidede mots de passe et protégez vos fichiers importants àl’aide de mots de passe individu<strong>el</strong>s.• Modifiez les mots de passe régulièrement.• Installez un logici<strong>el</strong> anti-virus et un pare-feu personn<strong>el</strong>sur chaque poste.• Désactivez le partage de fichiers (point à point).Certaines applications sont susceptibles de partagerdes fichiers sans demande de confirmation ouavertissement.Consignes de sécurité supplémentaires• Maintenez routeurs, points d’accès et modemsrouteurs sans fil à distance des murs extérieurs ou desfenêtres.• Mettez hors tension les routeurs, points d’accès oumodem routeurs lorsqu’ils ne sont pas utilisés (la nuit,pendant vos vacances).• Utilisez des phrases de passe d’au moins huitcaractères et difficiles à deviner. Mélangez chiffres etlettres pour éviter tout mot pouvant se trouver dansun dictionnaire.WEB : Pour plus d’informations sur lasécurité sans fil, rendez-vous sur la pagewww.linksys.com/security.
Chapitre 3Configuration avancéeChapitre 3 :Configuration avancéeVous pourrez utiliser le routeur une fois qu’il aura étéconfiguré à l’aide de l’assistant de configuration (présentsur le CD-ROM). Néanmoins, vous pouvez modifier sesparamètres avancés à l’aide de l’utilitaire Web du routeur.Ce chapitre décrit chaque page Web de l’utilitaire ainsique ses fonctions clés. Vous pouvez accéder à l’utilitaireà l’aide d’un navigateur Web, sur un ordinateur connectéau routeur.Les onglets principaux de l’utilitaire Web sont les suivants :Setup (Configuration), Wir<strong>el</strong>ess (Sans fil), Security (Sécurité),Access Restrictions (Restrictions d’accès), Applications &Gaming (Applications et jeux), Administration et Status(Etat). D’autres onglets apparaissent lorsque vous cliquezsur les onglets principaux.Configuration > Configuration de baseLe premier écran qui s’affiche est l’écran Basic Setup(Configuration de base). Les options de cet onglet vouspermettent de modifier les paramètres généraux du routeur.REMARQUE : Lors de la première installationdu routeur, utilisez l’Assistant de configurationdu CD-ROM d’installation. Si vous souhaitezprocéder à la configuration des paramètresavancés, lisez ce chapitre pour en savoir plussur l’utilitaire Web.Comment accéder à l’utilitaire Web ?Pour accéder à l’utilitaire Web, lancez votre navigateur Websur l’ordinateur, puis saisissez l’adresse IP par défaut durouteur, 192.168.1.1, dans le champ Adresse. Appuyezensuite sur la touche Entrée.Un écran vous invite à entrer un mot de passe. (Lesutilisateurs de systèmes autres que Windows XPobtiennent un écran semblable.) Ne remplissez pas lechamp User name (Nom d’utilisateur). Utilisez le mot depasse par défaut (admin) la première fois que vous ouvrezl’utilitaire Web. Vous pouvez définir un nouveau mot depasse à partir de l’écran Management (Gestion) de l’ongletAdministration. Cliquez ensuite sur OK pour continuer.Ecran de saisie du mot de passeSetup > Basic Setup (Configuration > Configuration de base)Configuration InternetLa section Internet Setup (Configuration Internet) permetde configurer votre routeur conformément à votreconnexion Internet. Vous pouvez vous procurer la plupartde ces informations auprès de votre fournisseur d’accès àInternet (FAI).Type de connexion InternetDans le menu déroulant, sélectionnez le type de connexionInternet communiqué par votre FAI. Les types disponiblessont les suivants :••••••Configuration automatique - DHCPAdresse IP statiquePPPoEPPTPL2TPCâble T<strong>el</strong>straConfiguration automatique - DHCPPar défaut, le type de connexion Internet du routeurest défini sur Automatic Configuration - DHCP(Configuration automatique - DHCP). Vous devezconserver cette option uniquement si votre FAI prenden charge le protocole DHCP ou si vous vous connectezau moyen d’une adresse IP dynamique. (Cette options’applique généralement aux connexions par câble.)Internet Connection Type > Automatic Configuration - DHCP (Type deconnexion Internet > Configuration automatique - DHCP)Routeur haut débit sans fil G
Chapitre 3Configuration avancéeAdresse IP statiqueSi vous devez obligatoirement utiliser une adresse IPpermanente pour vous connecter à Internet, sélectionnezl’option Static IP (Adresse IP statique).Internet Connection Type > Static IP (Type de connexion Internet > Adresse IP statique)Internet IP Address (Adresse IP Internet) : il s’agit d<strong>el</strong>’adresse IP du routeur, t<strong>el</strong>le qu’<strong>el</strong>le apparaît sur Internet.Votre FAI peut vous fournir l’adresse IP que vous devezspécifier dans ce champ.Subnet Mask (Masque de sous-réseau) : il s’agit dumasque de sous-réseau du routeur, t<strong>el</strong> qu’il est fourni auxutilisateurs sur Internet (y compris à votre FAI). Votre FAIpeut vous fournir le masque de sous-réseau.Gateway (Passer<strong>el</strong>le) : votre FAI peut vous fournirl’adresse de la passer<strong>el</strong>le (il s’agit en fait de l’adresse IP duserveur du FAI).DNS : votre FAI peut vous fournir au moins une adresse IPde serveur DNS (Domain Name System).PPPoECertains fournisseurs d’accès à Internet DSL utilisent leprotocole PPPoE (Point-to-Point Protocol over Ethernet)pour établir des connexions Internet. Si vous êtes connectéà Internet par l’intermédiaire d’une ligne ADSL, demandezà votre FAI s’il utilise le protocole PPPoE. Si t<strong>el</strong> est le cas,vous devrez sélectionner l’option PPPoE.Internet Connection Type > PPPoE (Type de connexion Internet > PPPoE)User Name and Password (Nom d’utilisateur et Mot depasse) : saisissez le nom d’utilisateur et le mot de passefournis par votre FAI.Connect on Demand: Max Idle Time (Connexion àla demande : délai d’inactivité maximal) : vous pouvezconfigurer le routeur afin qu’il désactive la connexionInternet après une période donnée d’inactivité maximale.Si votre connexion Internet a été désactivée suite à soninactivité, l’option Connexion à la demande permet aurouteur de rétablir automatiquement votre connexion dèsque vous tentez d’accéder de nouveau à Internet. Pourutiliser cette option, sélectionnez Connect on Demand(Connexion à la demande). Dans le champ Max Idle Time(Délai d’inactivité maximal), saisissez le nombre de minutesque vous souhaitez voir s’écouler avant la désactivation devotre connexion Internet. Le délai d’inactivité maximal estde 5 minutes.Keep Alive: Redial Period (Maintenir la connexion :rapp<strong>el</strong> après) : si vous sélectionnez cette option, leRouteur haut débit sans fil Grouteur procède régulièrement à une vérification de votreconnexion Internet. Si vous êtes déconnecté, le routeurrétablit alors automatiquement votre connexion. Si voussouhaitez sélectionner cette option, choisissez l’optionKeep Alive (Maintenir la connexion). Dans le champRedial Period (Rapp<strong>el</strong> après), spécifiez la fréquence àlaqu<strong>el</strong>le le routeur doit vérifier votre connexion Internet.Par défaut, le temps devant s’écouler avant le rapp<strong>el</strong> est de30 secondes.PPTPle protocole PPTP (Point-to-Point Tunn<strong>el</strong>ing Protocol)est un service appliqué uniquement dans le cadre deconnexions intra-européennes.Internet Connection Type > PPTP (Type de connexion Internet > PPTP)Internet IP Address (Adresse IP Internet) : il s’agit d<strong>el</strong>’adresse IP du routeur, t<strong>el</strong>le qu’<strong>el</strong>le apparaît sur Internet.Votre FAI peut vous fournir l’adresse IP que vous devezspécifier dans ce champ.Subnet Mask (Masque de sous-réseau) : il s’agit dumasque de sous-réseau du routeur, t<strong>el</strong> qu’il est fourni auxutilisateurs sur Internet (y compris à votre FAI). Votre FAIpeut vous fournir le masque de sous-réseau.Gateway (Passer<strong>el</strong>le) : votre FAI peut vous fournirl’adresse de passer<strong>el</strong>le.User Name and Password (Nom d’utilisateur et Mot depasse) : saisissez le nom d’utilisateur et le mot de passefournis par votre FAI.Connect on Demand: Max Idle Time (Connexion àla demande : délai d’inactivité maximal) : vous pouvezconfigurer le routeur afin qu’il désactive la connexionInternet après une période donnée d’inactivité maximale.Si votre connexion Internet a été désactivée suite à soninactivité, l’option Connexion à la demande permet aurouteur de rétablir automatiquement votre connexion dèsque vous tentez d’accéder de nouveau à Internet. Pourutiliser cette option, sélectionnez Connect on Demand(Connexion à la demande). Dans le champ Max Idle Time(Délai d’inactivité maximal), saisissez le nombre de minutesque vous souhaitez voir s’écouler avant la désactivation devotre connexion Internet. Le délai d’inactivité maximal estde 5 minutes.Keep Alive: Redial Period (Maintenir la connexion :rapp<strong>el</strong> après) : si vous sélectionnez cette option, le routeurprocède régulièrement à une vérification de votreconnexion Internet. Si vous êtes déconnecté, le routeurrétablit alors automatiquement votre connexion. Si voussouhaitez sélectionner cette option, choisissez l’optionKeep Alive (Maintenir la connexion). Dans le champ RedialPeriod (Rapp<strong>el</strong> après), spécifiez la fréquence à laqu<strong>el</strong>le lerouteur doit vérifier votre connexion Internet. La valeur pardéfaut est 30 secondes.
Chapitre 3Configuration avancéeL2TPL2TP est un service appliqué uniquement dans le cadre deconnexions établies en Israël.Internet Connection Type > L2TP (Type de connexion Internet > L2TP)User Name and Password (Nom d’utilisateur et Mot depasse) : saisissez le nom d’utilisateur et le mot de passefournis par votre FAI.L2TP Server (Serveur L2TP) : il s’agit de l’adresse IP duserveur L2TP. Votre FAI peut vous fournir l’adresse IP quevous devez spécifier dans ce champ.Connect on Demand: Max Idle Time (Connexion àla demande : délai d’inactivité maximal) : vous pouvezconfigurer le routeur afin qu’il désactive la connexionInternet après une période donnée d’inactivité maximale.Si votre connexion Internet a été désactivée suite à soninactivité, l’option Connexion à la demande permet aurouteur de rétablir automatiquement votre connexion dèsque vous tentez d’accéder de nouveau à Internet. Pourutiliser cette option, sélectionnez Connect on Demand(Connexion à la demande). Dans le champ Max Idle Time(Délai d’inactivité maximal), saisissez le nombre de minutesque vous souhaitez voir s’écouler avant la désactivation devotre connexion Internet. Le délai d’inactivité maximal estde 5 minutes.Keep Alive: Redial Period (Maintenir la connexion :rapp<strong>el</strong> après) : si vous sélectionnez cette option, lerouteur procède régulièrement à une vérification de votreconnexion Internet. Si vous êtes déconnecté, le routeurrétablit alors automatiquement votre connexion. Si voussouhaitez sélectionner cette option, choisissez l’optionKeep Alive (Maintenir la connexion). Dans le champRedial Period (Rapp<strong>el</strong> après), spécifiez la fréquence àlaqu<strong>el</strong>le le routeur doit vérifier votre connexion Internet.Par défaut, le temps devant s’écouler avant le rapp<strong>el</strong> est de30 secondes.Câble T<strong>el</strong>straCâble T<strong>el</strong>stra est un service appliqué uniquement dans lecadre de connexions établies sur le territoire australien.Si votre FAI utilise le signal HBS (HeartBeat Signal),sélectionnez T<strong>el</strong>stra.Internet Connection Type > T<strong>el</strong>stra Cable (Type de connexionInternet > Câble T<strong>el</strong>stra)User Name and Password (Nom d’utilisateur et Mot depasse) : saisissez le nom d’utilisateur et le mot de passefournis par votre FAI.Routeur haut débit sans fil GHeart Beat Server (Serveur Heart Beat) : il s’agit d<strong>el</strong>’adresse IP du serveur Heart Beat. Votre FAI peut vous fournirl’adresse IP que vous devez spécifier dans ce champ.Connect on Demand: Max Idle Time (Connexion àla demande : délai d’inactivité maximal) : vous pouvezconfigurer le routeur afin qu’il désactive la connexionInternet après une période donnée d’inactivité maximale.Si votre connexion Internet a été désactivée suite à soninactivité, l’option Connexion à la demande permet aurouteur de rétablir automatiquement votre connexion dèsque vous tentez d’accéder de nouveau à Internet. Pourutiliser cette option, sélectionnez Connect on Demand(Connexion à la demande). Dans le champ Max Idle Time(Délai d’inactivité maximal), saisissez le nombre de minutesque vous souhaitez voir s’écouler avant la désactivation devotre connexion Internet. Le délai d’inactivité maximal estde 5 minutes.Keep Alive: Redial Period (Maintenir la connexion :rapp<strong>el</strong> après) : si vous sélectionnez cette option, lerouteur procède régulièrement à une vérification de votreconnexion Internet. Si vous êtes déconnecté, le routeurrétablit alors automatiquement votre connexion. Si voussouhaitez sélectionner cette option, choisissez l’optionKeep Alive (Maintenir la connexion). Dans le champRedial Period (Rapp<strong>el</strong> après), spécifiez la fréquence àlaqu<strong>el</strong>le le routeur doit vérifier votre connexion Internet.Par défaut, le temps devant s’écouler avant le rapp<strong>el</strong> est de30 secondes.Paramètres facultatifsCertains paramètres décrits ci-après peuvent être exigéspar votre fournisseur d’accès à Internet. Renseignez-vousauprès de votre fournisseur d’accès à Internet avant toutemodification éventu<strong>el</strong>le.Optional Settings (Paramètres facultatifs)Router Name (Nom du routeur) : saisissez dans cechamp un nom de 39 caractères maximum qui identifi<strong>el</strong>e routeur.Host Name / Domain Name (Nom d’hôte / Nom dedomaine) : ces champs permettent de spécifier unnom d’hôte et un nom de domaine pour le routeur.Certains fournisseurs d’accès à Internet, notamment lesfournisseurs d’accès par câble, exigent la saisie de cesdeux noms à des fins d’identification. Vous devrez peutêtrevérifier auprès de votre fournisseur d’accès à Internetsi votre service Internet à haut débit a été configuré avecun nom d’hôte et un nom de domaine. Dans la plupart descas, vous pourrez laisser ces champs vides.MTU : MTU détermine l’unité de transmission maximale(Maximum Transmission Unit). Elle spécifie la taille depaquet maximale autorisée pour la transmission Internet.Sélectionnez Manu<strong>el</strong> pour saisir manu<strong>el</strong>lement la taillemaximale de paquet à transmettre. Pour laisser le routeurchoisir la valeur MTU la mieux adaptée à votre connexionInternet, conservez le paramètre par défaut, Auto(Automatique).
Chapitre 3Configuration avancéeSize (Taille) : cette option est activée lorsque l’optionManu<strong>el</strong> est sélectionnée dans le champ MTU. Saisissez unevaleur comprise entre 1200 et 1500. La taille par défautvarie en fonction du type de connexion Internet :• DHCP, Static IP (IP statique) ou T<strong>el</strong>stra : 1500• PPPoE : 1492• PPTP ou L2TP : 1460Configuration du réseauLa section Network Setup (Configuration réseau) modifi<strong>el</strong>es paramètres du réseau connecté aux ports Ethernetdu routeur. La configuration sans fil s’effectue à partir d<strong>el</strong>’onglet Wir<strong>el</strong>ess (Sans fil).Adresse IP du routeurCette section présente l’adresse IP et le masque desous-réseau du routeur, t<strong>el</strong>s qu’ils apparaissent sur votreréseau.Router IP Address (Adresse IP du routeur)Paramètres du serveur d’adresses de réseau (DHCP)Les paramètres de cette section vous permettent deconfigurer le serveur DHCP (protocole de configurationdynamique de l’hôte) du routeur. Vous pouvez utiliser lerouteur en tant que serveur DHCP de votre réseau. Unserveur DHCP attribue automatiquement une adresse IPà chaque ordinateur de votre réseau. Si vous choisissezd’activer l’option de serveur DHCP du routeur, assurez-vousqu’aucun autre serveur DHCP n’est présent sur votre réseau.adresses IP. Ce nombre ne peut pas être supérieur à 253.Par défaut, il est défini sur 50.Client Lease Time (Durée de connexion du client) :cette option détermine la période pendant laqu<strong>el</strong>le unutilisateur du réseau est autorisé à se connecter au routeurà l’aide de son adresse IP dynamique actu<strong>el</strong>le. Saisissezla durée (en minutes) pendant laqu<strong>el</strong>le l’adresse IPdynamique est allouée à l’utilisateur. Une fois ce délaiécoulé, l’utilisateur se voit automatiquement attribuerune nouv<strong>el</strong>le adresse IP dynamique. La valeur par défautest 0 minutes, ce qui correspond à une journée.Static DNS (DNS statique), 1 à 3 : le système DNS (DomainName System) est le service adopté par Internet pourconvertir des noms de domaine ou de sites Web en adressesInternet ou URL. Votre FAI peut vous fournir au moins uneadresse IP de serveur DNS. Si vous souhaitez utiliser uneautre adresse, saisissez cette adresse IP dans l’un de ceschamps. Vous pouvez taper jusqu’à trois adresses IP deserveur DNS. Le routeur utilise alors ces trois adresses IP pouraccéder plus rapidement aux serveurs DNS opérationn<strong>el</strong>s.WINS : le système WINS (Windows Internet NamingService) permet de gérer l’interaction entre chaqueordinateur et Internet. Si vous optez pour un serveurWINS, saisissez son adresse IP dans ce champ. Autrement,laissez-le vide.Réglage de l’heureSélectionnez le fuseau horaire de votre réseau à partirde ce menu déroulant. Vous pouvez également réglerautomatiquement votre horloge pour le passage à l’heured’été.Network Address Server Settings (DHCP) (Paramètres du serveurd’adresse de réseau (DHCP))DHCP Server (Serveur DHCP) : DHCP est activé pardéfaut. Si vous disposez déjà d’un serveur DHCP survotre réseau ou si vous ne souhaitez utiliser aucunserveur DHCP, sélectionnez Disable (Désactiver). Aucuneautre fonctionnalité DHCP n’est alors disponible.Starting IP Address (Adresse IP de début) : saisissez lavaleur de début que devra utiliser le serveur DHCP pourla publication des adresses IP. L’adresse IP par défaut durouteur étant 192.168.1.1, l’adresse IP de début doit être192.168.1.2, voire supérieure, mais rester inférieure à192.168.1.253. L’adresse IP de début attribuée par défautest 192.168.1.100.Maximum Number of DHCP Users (Nombre maximald’utilisateurs DHCP) : saisissez le nombre maximald’ordinateurs auxqu<strong>el</strong>s le serveur DHCP peut attribuer desRouteur haut débit sans fil GTime Setting (Réglage de l’heure)Cliquez sur Save Settings (Enregistrer les paramètres)pour appliquer vos modifications ou sur Canc<strong>el</strong> Changes(Annuler les modifications) pour les annuler.Configuration > DDNSLe routeur inclut une fonction DDNS (Dynamic DomainName System) vous permettant d’attribuer un nomde domaine et d’hôte fixe à une adresse IP Internetdynamique. Ceci peut s’avérer utile si vous hébergez votrepropre site Web, un serveur FTP ou tout autre type deserveur avec le routeur.Avant d’utiliser cette fonction, vous devez souscrire à unservice DDNS auprès d’un fournisseur de service DDNS àl’adresse www.dyndns.org ou www.TZO.com. Si vous nesouhaitez pas utiliser cette fonction, conservez l’optionpar défaut, Disable (Désactiver).DDNSLe routeur inclut une fonction DDNS (Dynamic DomainName System) vous permettant d’attribuer un nomde domaine et d’hôte fixe à une adresse IP Internetdynamique. Ceci peut s’avérer utile si vous hébergez votrepropre site Web, un serveur FTP ou tout autre type deserveur avec le routeur.
Chapitre 3Configuration avancéeAvant d’opter pour cette fonctionnalité, vous devezobtenir la connexion à un service DDNS auprès de l’undes deux fournisseurs de service DDNS (DynDNS.org etTZO.com). Si vous ne souhaitez pas utiliser cette fonction,conservez l’option par défaut, Disable (Désactiver).Service DDNSSi votre service DDNS est fourni par DynDNS.org,sélectionnez DynDNS.org dans le menu déroulant. S’ilest fourni par TZO, sélectionnez TZO.com. Les fonctionsproposées dans l’écran DDNS varient en fonction de votrefournisseur de service DDNS.DynDNS.orgE-Mail Address, TZO Key et Domain Name (Adresse e-mail, Clé TZO et Nom de domaine) : saisissez les paramètresdu compte configuré avec TZO.Internet IP Address (Adresse IP Internet) : l’adresse IPInternet du routeur est indiquée dans ce champ. Etantdynamique, cette adresse change.Status (Etat) : l’état de la connexion du service DDNS estspécifié dans ce champ.Cliquez sur Save Settings (Enregistrer les paramètres)pour appliquer vos modifications ou sur Canc<strong>el</strong> Changes(Annuler les modifications) pour les annuler.Configuration > Adresse MAC dupliquéeUne adresse MAC désigne un code à 12 chiffres attribuéà un composant matéri<strong>el</strong> unique en vue de sonidentification. Certains fournisseurs d’accès à Internetexigent l’enregistrement d’une adresse MAC pour accéder àInternet. Si vous ne souhaitez pas enregistrer une nouv<strong>el</strong>leadresse MAC chez votre fournisseur d’accès à Internet, vouspouvez attribuer au routeur l’adresse MAC actu<strong>el</strong>lementenregistrée auprès de votre fournisseur d’accès à Internetvia la fonctionnalité Adresse MAC dupliquée.Setup > DDNS > DynDNS (Configuration > DDNS > DynDNS)User Name (Nom d’utilisateur) : saisissez le nomd’utilisateur de votre compte DDNS.Password (Mot de passe) : saisissez le mot de passe devotre compte DDNS.Host Name (Nom d’hôte) : il s’agit de l’URL DDNSattribuée par le service DDNS.Internet IP Address (Adresse IP Internet) : l’adresse IPInternet du routeur est indiquée dans ce champ. Etantdynamique, cette adresse change.Status (Etat) : l’état de la connexion du service DDNS estspécifié dans ce champ.Cliquez sur Save Settings (Enregistrer les paramètres)pour appliquer vos modifications ou sur Canc<strong>el</strong> Changes(Annuler les modifications) pour les annuler.TZO.comSetup > MAC Address Clone (Configuration > Adresse MAC dupliquée)Adresse MAC dupliquéeEnable/Disable (Activer/Désactiver) : pour dupliquer oucloner l’adresse MAC, sélectionnez Enable (Activer).User Defined Entry (Entrée définie par l’utilisateur) :saisissez dans ce champ l’adresse MAC enregistrée auprèsde votre fournisseur d’accès à Internet.Clone Your PC’s MAC (Dupliquer l’adresse MAC devotre ordinateur) : cliquez sur ce bouton pour dupliquerl’adresse MAC de l’ordinateur que vous utilisez.Cliquez sur Save Settings (Enregistrer les paramètres)pour appliquer vos modifications ou sur Canc<strong>el</strong> Changes(Annuler les modifications) pour les annuler.Configuration > Routage avancéVous pouvez faire app<strong>el</strong> aux options de cet écran pourdéfinir les fonctions de routage avancées du routeur. Lemode NAT achemine la connexion réseau du routeurvers Internet. Les options de la section Dynamic Routing(Routage dynamique) vous permettent de réglerautomatiquement le mode de transmission des paquetssur votre réseau. Les options de la section Routagestatique permettent de définir un itinéraire fixe vers uneautre destination du réseau.Setup > DDNS > TZO (Configuration > DDNS > TZO)Routeur haut débit sans fil G
Chapitre 3Configuration avancéeSetup > Advanced Routing (Gateway) (Configuration > Routage avancé(Modem routeur))Setup > Advanced Routing (Router) (Configuration > Routage avancé(Routeur))Routage avancéOperating Mode (Mode de fonctionnement) :sélectionnez le mode sous lequ<strong>el</strong> le routeur doit opérer.Si le routeur concerné héberge la connexion de votreréseau à Internet, sélectionnez l’option Gateway(Modem routeur). Si un autre routeur existe sur le réseau,sélectionnez Router (Routeur). Si vous choisissez l’optionRouter (Routeur), la section Dynamic Routing (Routagedynamique) est activée.Routage dynamiqueRIP : cette fonction permet au routeur de s’adapterautomatiquement aux modifications physiques apportéesà la configuration du réseau et d’échanger les tableaux deroutage avec les autres routeurs. Le routeur détermin<strong>el</strong>’itinéraire des paquets du réseau en fonction du pluspetit nombre de sauts r<strong>el</strong>evés entre le composant sourceet l’élément de destination. Cette fonctionnalité estdéfinie par défaut sur Disabled (Désactivé). Vous pouvezégalement sélectionner l’option LAN & Wir<strong>el</strong>ess (LAN etsans fil) du menu déroulant pour effectuer un routagedynamique sur vos réseaux Ethernet et sans fil. De même,vous pouvez choisir l’option WAN (Internet) pour créerun routage dynamique avec les données provenantd’Internet. Enfin, l’option Both (Les deux) vous permet decréer un routage dynamique pour les deux réseaux, ainsique pour les données issues d’Internet.S<strong>el</strong>ect set number (Sélectionner un numéro d’itinéraire) :pour définir un itinéraire statique entre le routeur et unautre réseau, choisissez un numéro dans la liste déroulanteRoutage statique. Un itinéraire statique identifie unchemin pré-défini que les informations du réseau doiventemprunter pour atteindre un hôte ou un réseau spécifique.Saisissez les informations décrites ci-dessous pour définirun nouv<strong>el</strong> itinéraire statique. Cliquez sur le bouton D<strong>el</strong>eteThis Entry (Supprimer cette entrée) pour supprimer unitinéraire statique.Enter Route Name (Entrer le nom de l’itinéraire) : saisissezdans ce champ le nom de l’itinéraire. Vous pouvez saisirjusqu’à 25 caractères alphanumériques.Destination LAN IP (Adresse IP du réseau local dedestination) : cette option identifie l’adresse du réseaudistant ou hôte auqu<strong>el</strong> vous souhaitez attribuer unitinéraire statique.Subnet Mask (Masque de sous-réseau) : cette optiondétermine qu<strong>el</strong>le partie de l’adresse IP du réseau localde destination correspond au réseau, et qu<strong>el</strong>le partiecorrespond à l’hôte.Default Gateway (Passer<strong>el</strong>le par défaut) : il s’agit d<strong>el</strong>’adresse IP de la passer<strong>el</strong>le permettant le contact entre lerouteur et le réseau ou l’hôte distant.Interface : cette option vous indique si l’adresse IP dedestination est située sur l’interface LAN et sans fil, c’està-dir<strong>el</strong>es réseaux Ethernet et sans fil, ou sur l’interfaceWAN (Internet).D<strong>el</strong>ete This Entry (Supprimer cette entrée) : poursupprimer un itinéraire, sélectionnez le numérocorrespondant dans le menu déroulant, puis cliquez surce bouton.Show Routing Table (Afficher la table de routage) : cliquezsur Show Routing Table (Afficher la table de routage)pour afficher un écran indiquant l’itinéraire des donnéessur le réseau local. Pour chaque itinéraire, l’adresse IP duréseau local de destination, le masque de sous-réseau, lapasser<strong>el</strong>le et l’interface sont affichés. Cliquez sur Refresh(Actualiser) pour mettre à jour les informations. Cliquezsur Close (Fermer) pour quitter cet écran.Table de routageCliquez sur Save Settings (Enregistrer les paramètres)pour appliquer vos modifications ou sur Canc<strong>el</strong> Changes(Annuler les modifications) pour les annuler.Sans fil > Paramètres sans fil de baseLes paramètres de base des réseaux sans fil sont définisdans cet écran.Routeur haut débit sans fil G
Chapitre 3Configuration avancéeDeux procédures permettent de configurer les réseauxsans fil du routeur : la configuration manu<strong>el</strong>le et laconfiguration protégée par Wi-Fi.Wi-Fi Protected Setup est une fonction qui facilite laconfiguration de votre réseau sans fil. Si vous avez despériphériques clients, t<strong>el</strong>s que des adaptateurs sans fil,prenant en charge le Wi-Fi Protected Setup, vous pouvezutiliser cette fonction.Wir<strong>el</strong>ess Configuration (Configuration sans fil) : pourconfigurer manu<strong>el</strong>lement votre réseau sans fil, sélectionnezManual (Manu<strong>el</strong>le). Passez à la section « Paramètressans fil de base ». Pour utiliser le Wi-Fi Protected Setup,sélectionnez Wi-Fi Protected Setup. Passez à la section« Wi-Fi Protected Setup ».Paramètres sans fil de baseWir<strong>el</strong>ess SSID Broadcast (Diffusion SSID sans fil) : lorsquedes ordinateurs clients sans fil recherchent des réseauxsans fil auxqu<strong>el</strong>s s’associer, ils détectent le SSID diffusépar le routeur. Pour diffuser le SSID du routeur, conservezle paramètre par défaut Enabled (Activé). Si vous nesouhaitez pas diffuser le SSID du routeur, sélectionnezDisabled (Désactivé).Cliquez sur Save Settings (Enregistrer les paramètres)pour appliquer vos modifications ou sur Canc<strong>el</strong> Changes(Annuler les modifications) pour les annuler.Wi-Fi Protected SetupTrois méthodes sont disponibles. Utilisez la méthode quis’applique au périphérique client que vous configurez.Wir<strong>el</strong>ess > Basic Wir<strong>el</strong>ess Settings (Manual Setup) (Sans fil > Paramètressans fil de base [Configuration manu<strong>el</strong>le])Wir<strong>el</strong>ess Network Mode (Mode réseau sans fil) : dansce menu déroulant, vous pouvez sélectionner les normesde connexion sans fil fonctionnant sur vos réseaux. Sivotre réseau compte des périphériques sans fil N, sansfil G et sans fil B, conservez le paramètre par défautMixed (mixte). Si votre réseau ne comporte que despériphériques sans fil G et des périphériques sans fil B,sélectionnez BG-Mixed (Mixte - BG). Si votre réseaucomporte des périphériques sans fil N uniquement,sélectionnez Wir<strong>el</strong>ess-N Only (Sans fil N uniquement).Si votre réseau comporte des périphériques sans fil Guniquement, sélectionnez Wir<strong>el</strong>ess-G Only (Sans fil Guniquement). Si votre réseau comporte des périphériquessans fil B uniquement, sélectionnez Wir<strong>el</strong>ess-B Only(Sans fil B uniquement). Si votre réseau ne compte pas depériphériques sans fil, sélectionnez Disabled (Désactivé).Wir<strong>el</strong>ess Network Name (SSID) (Nom du réseau sans fil[SSID]) : le SSID correspond au nom de réseau partagé partous les points d’un réseau sans fil. Il doit être identiquepour tous les périphériques du réseau sans fil. Ce paramètre,sensible à la casse, ne doit pas comporter plus de32 caractères. Tous les caractères du clavier peuvent êtreutilisés. Assurez-vous que ce paramètre est identique pourtous les points de votre réseau sans fil. Pour optimiser lasécurité de votre système, vous devez remplacer le nomdu réseau sans fil par défaut (linksys) par un nom unique.Wir<strong>el</strong>ess Chann<strong>el</strong> (Canal sans fil) : sélectionnez le canaldans la liste fournie en fonction de vos paramètresréseau. Tous les périphériques de votre réseau sans fildoivent diffuser sur le même canal pour fonctionnercorrectement.Routeur haut débit sans fil GWir<strong>el</strong>ess > Basic Wir<strong>el</strong>ess Settings (Wi-Fi Protected Setup) [Sansfil > Paramètres sans fil de base (Wi-fi Protected Setup)]Wi-Fi Protected Setup > Congratulations (Wi-Fi ProtectedSetup > Félicitations)REMARQUE : Wi-Fi Protected Setup configureun seul périphérique client à la fois. Répétezla procédure pour chaque périphérique clientprenant en charge la fonctionnalité Wi-FiProtected Setup.10
Chapitre 3Configuration avancéeMéthode n° 1Utilisez cette méthode si votre périphérique client disposed’un bouton Wi-Fi Protected Setup.1. Cliquez ou appuyez sur le bouton Wi-Fi ProtectedSetup du périphérique client.2. Cliquez sur le bouton Wi-Fi Protected Setup de cetécran.3. Une fois le périphérique client configuré, cliquez surOK. Reportez-vous ensuite au guide de l’utilisateur devotre périphérique client pour obtenir des instructionssupplémentaires.Méthode n° 2Utilisez cette méthode si votre périphérique client disposed’un code PIN Wi-Fi Protected Setup.1.2.3.Saisissez le code PIN dans le champ correspondant decet écran.Cliquez sur Register (Enregistrement).Une fois le périphérique client configuré, cliquez surOK. Reportez-vous ensuite au guide de l’utilisateur devotre périphérique client pour obtenir des instructionssupplémentaires.Méthode n° 3Utilisez cette méthode si votre périphérique clientdemande le code PIN du routeur.1. Saisissez le code PIN indiqué sur cet écran. (Ce code estégalement noté sous le routeur.)2. Une fois le périphérique client configuré, cliquez surOK. Reportez-vous ensuite au guide de l’utilisateur devotre périphérique client pour obtenir des instructionssupplémentaires.Les éléments suivants s’affichent au bas de l’écran : Wi-Fi Protected Setup Status (état Wi-Fi Protected Setup),Network Name (nom du réseau, SSID), Security (sécurité),Encryption (cryptage) et Passphrase (phrase de passe).REMARQUE : Si vous possédez des périphériquesclients qui ne prennent pas en charge le Wi-FiProtected Setup, notez les paramètres sans filet configurez manu<strong>el</strong>lement les périphériquesclients.Sans fil > Sécurité sans filLes paramètres de cette section permettent deconfigurer la sécurité de votre réseau sans fil. Le routeurprend en charge six options en mode Sécurité sansfil : WPA Personal (WPA personn<strong>el</strong>), WPA Enterprise(WPA entreprise), WPA2 Personal (WPA2 personn<strong>el</strong>),WPA2 Enterprise (WPA2 entreprise), RADIUS et WEP.WPA, acronyme de Wi-Fi Protected Access, désigne unenorme de sécurité plus puissante que le système decryptage WEP. WPA2 est une version plus avancée etplus sécurisée de WPA. WEP est l’acronyme de WiredEquivalent Privacy, et RADIUS l’acronyme de RemoteAuthentication Dial-In User Service. Ces six modèles fontl’objet d’une description sommaire ci-après. Pour obtenirdes instructions plus détaillées sur la configurationde la sécurité sans fil du routeur, reportez-vous au« Chapitre 2 : Sécurité sans fil ».Routeur haut débit sans fil GSécurité sans filMode de sécuritéSélectionnez la méthode de sécurité pour votre réseausans fil. Si vous ne souhaitez pas utiliser cette fonction,conservez l’option par défaut, Disabled (Désactivé).WPA personn<strong>el</strong>REMARQUE : Si vous utilisez la technologieWPA, gardez toujours à l’esprit que chaquepériphérique de votre réseau sans fil DOITutiliser la même méthode WPA et la même clépartagée, sans quoi le réseau ne fonctionnerapas correctement.Security Mode > WPA Personal (Mode de sécurité > WPA personn<strong>el</strong>)WPA Algorithms (Algorithmes WPA) : WPA prend encharge deux méthodes de cryptage, nommées TKIP et AES,associées à des clés de cryptage dynamiques. Sélectionnezle type d’algorithme : TKIP ou AES. AES est une méthodede cryptage plus puissante que la méthode TKIP.WPA Shared Key (Clé WAP partagée) : saisissez la clépartagée par le routeur et par vos autres périphériquesréseau. Elle doit comporter entre 8 et 63 caractères.Group Key Renewal (Renouv<strong>el</strong>lement des clés dugroupe) : précisez ensuite un délai de renouv<strong>el</strong>lement desclés du groupe pour indiquer au routeur à qu<strong>el</strong>le fréquenceil doit changer les clés de cryptage. La valeur par défautdu champ Group Key Renewal (Renouv<strong>el</strong>lement de la clédu groupe) est définie à 3 600 secondes.WPA entrepriseCette option associe le système WPA à l’utilisationconjointe d’un serveur RADIUS. Elle ne doit être utiliséeque lorsqu’un serveur RADIUS est connecté au routeur.Security Mode > WPA Enterprise (Mode de sécurité > WPA entreprise)11
Chapitre 3Configuration avancéeWPA Algorithms (Algorithmes WPA) : WPA prend encharge deux méthodes de cryptage, nommées TKIPet AES, associées à des clés de cryptage dynamiques.Sélectionnez le type d’algorithme : TKIP ou AES. AES estune méthode de cryptage plus puissante que la méthodeTKIP.RADIUS Server Address (Adresse du serveur RADIUS) :saisissez l’adresse IP du serveur RADIUS.RADIUS Port (Port RADIUS) : saisissez le numéro de portdu serveur RADIUS. La valeur par défaut est 1812.Shared Key (Clé partagée) : saisissez la clé partagée parle routeur et le serveur.Key Renewal Timeout (Délai de renouv<strong>el</strong>lement desclés) : saisissez un délai de renouv<strong>el</strong>lement des clés pourindiquer au routeur à qu<strong>el</strong>le fréquence il doit changer lesclés de cryptage. Le délai par défaut du champ Key Renewal(Renouv<strong>el</strong>lement de clé) est défini à 3 600 secondes.WPA2 personn<strong>el</strong>Security Mode > WPA2 Personal (Mode de sécurité > WPA2 personn<strong>el</strong>)WPA2 Algorithms (Algorithmes WPA) : WPA2 prenden charge deux méthodes de cryptage, nommées TKIPet AES, associées à des clés de cryptage dynamiques.Sélectionnez le type d’algorithme, AES ou TKIP + AES. Lasélection par défaut est AES.WPA Shared Key (Clé WPA partagée) : saisissez une clépré-partagée WPA composée de 8 à 63 caractères.Group Key Renewal (Renouv<strong>el</strong>lement des clés dugroupe) : précisez ensuite un délai de renouv<strong>el</strong>lementdes clés du groupe dans la zone Group Key Renewal(Renouv<strong>el</strong>lement des clés du groupe) pour indiquerau routeur à qu<strong>el</strong>le fréquence il doit changer les clésde cryptage. La valeur par défaut du champ Group KeyRenewal (Renouv<strong>el</strong>lement de la clé du groupe) est définieà 3 600 secondes.WPA2 entrepriseCette option associe le système WPA2 à l’utilisationconjointe d’un serveur RADIUS. (Elle ne doit être utiliséeque lorsqu’un serveur RADIUS est connecté au routeur.)Security Mode > WPA2 Enterprise (Mode de sécurité > WPA2 entreprise)WPA2 Algorithm (Algorithme WPA) : WPA2 prend encharge deux méthodes de cryptage, nommées TKIPet AES, associées à des clés de cryptage dynamiques.Sélectionnez le type d’algorithme, AES ou TKIP + AES. Lasélection par défaut est AES.RADIUS Server Address (Adresse du serveur RADIUS) :saisissez l’adresse IP du serveur RADIUS.RADIUS Port (Port RADIUS) : saisissez le numéro de portdu serveur RADIUS. La valeur par défaut est 1812.Shared Key (Clé partagée) : saisissez la clé partagée parle routeur et le serveur.Key Renewal Timeout (Délai de renouv<strong>el</strong>lement desclés) : saisissez un délai de renouv<strong>el</strong>lement des clés pourindiquer au routeur à qu<strong>el</strong>le fréquence il doit changer lesclés de cryptage. Le délai par défaut du champ Key Renewal(Renouv<strong>el</strong>lement de clé) est défini à 3 600 secondes.RADIUSCette option associe le système WEP à l’utilisationconjointe d’un serveur RADIUS Elle ne doit être utiliséeque lorsqu’un serveur RADIUS est connecté au routeur.Security Mode > RADIUS (Mode de sécurité > RADIUS)IMPORTANT : Si vous utilisez le cryptage WEP,gardez toujours à l’esprit que chaquepériphérique de votre réseau sans fil DOIT utiliserla même méthode de cryptage WEP et la mêmeclé de cryptage, sans quoi votre réseau sans fil nefonctionnera pas correctement.Routeur haut débit sans fil G12
Chapitre 3Configuration avancéeRADIUS Server Address (Adresse du serveur RADIUS) :saisissez l’adresse IP du serveur RADIUS.RADIUS Port (Port RADIUS) : saisissez le numéro de portdu serveur RADIUS. La valeur par défaut est 1812.Shared Key (Clé partagée) : saisissez la clé partagée parle routeur et le serveur.Default Transmit Key (Clé de transmission par défaut) :sélectionnez une clé de transmission par défaut(sélectionnez la clé à utiliser). La valeur par défaut est 1.WEP Encryption (Cryptage WEP) : sélectionnez le niveauapproprié de cryptage WEP : 64 bits 10 hex digits (64 bits10 chiffres hexadécimaux) ou 128 bits 26 hex digits(128 bits 26 chiffres hexadécimaux). Le niveau de cryptagepar défaut est 64 bits 10 hex digits (64 bits 10 chiffreshexadécimaux).Passphrase (Phrase de passe) : saisissez une phrase depasse afin de générer automatiquement les clés WEP.Cliquez ensuite sur Generate (Générer).Key 1-4 (Clé 1 à Clé 4) : si vous n’avez saisi aucune phrasede passe, saisissez la ou les clés WEP manu<strong>el</strong>lement.WEPLe système WEP est une méthode de cryptage élémentaire,moins sécurisée que le système WPA.Sans fil > Filtre MAC sans filVous pouvez filtrer l’accès sans fil s<strong>el</strong>on les adresses MACdes périphériques sans fil qui émettent dans le rayond’action de votre réseau.Wir<strong>el</strong>ess > Wir<strong>el</strong>ess MAC Filter (Sans fil > Filtre MAC sans fil)Filtre MAC sans filWir<strong>el</strong>ess MAC Filter (Filtre MAC sans fil) : pour filtrer lesutilisateurs sans fil en fonction de leur adresse MAC, en leurautorisant ou bloquant l’accès, sélectionnez Enable (Activer).Si vous ne souhaitez pas filtrer les utilisateurs en fonction d<strong>el</strong>eur adresse MAC, conservez le paramètre par défaut, Disable(Désactiver).Prevent (Bloquer) : sélectionnez cette option pourbloquer l’accès sans fil par adresse MAC. Ce bouton estsélectionné par défaut.Permit Only (Autoriser uniquement) : sélectionnez cetteoption pour autoriser l’accès sans fil par adresse MAC. Cebouton n’est pas sélectionné par défaut.Edit MAC Filter List (Modifier la liste des filtres MAC) :cliquez sur ce bouton pour ouvrir l’écran MAC Address FilterList (Liste de filtrage des adresses MAC). L’écran qui apparaîtvous permet de répertorier par adresse MAC les utilisateursauxqu<strong>el</strong>s vous souhaitez autoriser ou bloquer l’accès. Pourvous y référer plus facilement, cliquez sur Wir<strong>el</strong>ess ClientMAC List (Liste MAC des clients sans fil) pour afficher la listedes utilisateurs du réseau s<strong>el</strong>on leur adresse MAC.Security Mode > WEP (Mode de sécurité > WEP)Default Transmit Key (Clé de transmission par défaut) :sélectionnez une clé de transmission par défaut(sélectionnez la clé à utiliser). La valeur par défaut est 1.Encryption WEP (Cryptage WEP) : sélectionnez unniveau de cryptage WEP, 64 bits 10 hex digits (64 bits(10 chiffres hexadécimaux)) ou 128 bits 26 hex digits(128 bits (26 chiffres hexadécimaux)). Le niveau decryptage par défaut est 64 bits 10 hex digits (64 bits10 chiffres hexadécimaux)Passphrase (Phrase de passe) : saisissez une phrase depasse afin de générer automatiquement les clés WEP.Cliquez ensuite sur Generate (Générer).Key 1-4 (Clé 1 à Clé 4) : si vous n’avez saisi aucune phrasede passe, saisissez la ou les clés WEP manu<strong>el</strong>lement.Cliquez sur Save Settings (Enregistrer les paramètres)pour appliquer vos modifications ou sur Canc<strong>el</strong> Changes(Annuler les modifications) pour les annuler.MAC Addresse Filter List (Liste de filtrage des adresses MAC)Routeur haut débit sans fil G13
Chapitre 3Configuration avancéeCliquez sur Save Settings (Enregistrer les paramètres)pour appliquer vos modifications ou sur Canc<strong>el</strong> Changes(Annuler les modifications) pour les annuler.Sans fil > Paramètres sans fil avancésL’écran Wir<strong>el</strong>ess > Advanced Wir<strong>el</strong>ess Settings (Sansfil > Paramètres sans fil avancés) permet de définir lesfonctions sans fil avancées du routeur. Il est préférable deréserver cette tâche à un administrateur chevronné, cardes paramètres mal définis risqueraient de diminuer lesperformances de votre infrastructure sans fil.Wir<strong>el</strong>ess > Advanced Wir<strong>el</strong>ess Settings (Sans fil > Paramètres sans fil avancés)Paramètres sans fil avancésAuthentication Type (Type d’authentification) : la valeurAuto (Automatique) définie par défaut vous permet dechoisir entre une authentification Système ouvert ouClé partagée. En mode d’authentification Open System(Système ouvert), l’expéditeur et le destinataire n’utilisentPAS de clé WEP pour l’authentification. En revanche,ils utilisent ce type de clé en mode Shared Key (Clépartagée).Basic Rate (Taux de base) : en réalité, ce paramètren’est pas un taux de transmission unique, mais unesérie de taux auxqu<strong>el</strong>s le routeur peut transmettredes données. Le routeur publie son taux de base auxautres périphériques sans fil de votre réseau afin qu’ilsconnaissent les taux appliqués. Il informe égalementqu’il sélectionnera automatiquement le meilleur tauxde transmission. L’option définie par défaut est Default(Par défaut) lorsque le routeur prend en charge tousles taux de transmission sans fil standard (1-2 Mbit/s,5,5 Mbit/s, 11 Mbit/s, 18 Mbit/s et 24 Mbit/s). D’autresoptions disponibles sont 1-2 Mbps (1-2 Mbit/s), utiliséesdans le cadre de technologies sans fil plus anciennes, etAll (Tous) lorsque le routeur prend en charge tous les tauxdisponibles pour la transmission sans fil de données. Leparamètre Basic Rate (Taux de base) n’indique pas le tauxré<strong>el</strong> de transmission des données. Pour préciser le tauxde transmission des données du routeur, utilisez l’optionTransmission Rate (Taux de transmission).Transmission Rate (Taux de transmission) : vous devezdéfinir le taux de transmission des données en fonctionde la vitesse de vos réseaux sans fil. Vous pouvez fairevotre choix parmi les diverses vitesses de transmissionproposées ou sélectionner l’option Auto (Automatique)Routeur haut débit sans fil Gpour demander au routeur d’adopter automatiquementle taux de transmission le plus rapide possible et activerla fonctionnalité de reconnexion automatique. C<strong>el</strong>le-ciest alors chargée de déterminer la meilleure vitesse deconnexion possible entre le routeur et un client sans fil. Lavaleur par défaut est Auto.CTS Protection Mode (Mode de protection CTS) : cemode doit rester désactivé sauf si vous rencontrez desproblèmes graves avec vos produits sans fil G, notammentl’incapacité de transmettre des données au routeur dansun environnement à trafic 802.11b surchargé. Cettefonction augmente la capacité du routeur à capter toutesles transmissions sans fil G, mais réduit considérablementles performances.Frame Burst (Rafale de trames) : s<strong>el</strong>on le fabricant de vosproduits sans fil, vous pouvez optimiser les performancesde votre réseau en choisissant d’activer cette option.Pour activer l’option Frame Burst (Rafale de frames),sélectionnez Enable (Activer). La valeur par défaut estDisable (Désactiver).Beacon Interval (Intervalle de transmission de balise) :la valeur par défaut est 100. Entrez une valeur compriseentre 1 et 65 535 millisecondes. La valeur Intervalle detransmission de balise indique l’intervalle de fréquencede la balise. Une balise désigne un paquet diffusé par lerouteur pour synchroniser le réseau sans fil.DTIM Interval (Intervalle DTIM) : cette valeur, compriseentre 1 et 255, indique l’intervalle du message d’indicationde transmission de données (DTIM). Un champ DTIM estun champ de compte à rebours chargé d’informer lesclients sur la prochaine fenêtre à utiliser pour écouterdes messages de diffusion ou de multidiffusion. Aprèsavoir mis en mémoire tampon les messages de diffusionou de multidiffusion des clients qui lui sont associés, lerouteur transmet le DTIM suivant en fonction d’une valeurd’intervalle DTIM. Ses clients sont informés par les baliseset se préparent à recevoir les messages de diffusion et demultidiffusion. La valeur par défaut est 1.Fragmentation Threshold (Seuil de fragmentation) :cette valeur permet de spécifier la taille maximale d’unpaquet avant de fragmenter les données en plusieurspaquets. Si le taux d’erreurs de paquet que vous rencontrezest élevé, vous pouvez légèrement augmenter le seuilde fragmentation. Un seuil de fragmentation trop baspeut se traduire par des performances faibles du réseau.Seule une légère diminution de la valeur par défaut estrecommandée. Dans la plupart des cas, il est préférable deconserver la valeur par défaut (2346).RTS Threshold (Seuil RTS) : si vous faites face à un fluxde données incohérent, seule une réduction légère de lavaleur par défaut (2347) est conseillée. Si un paquet duréseau est plus petit que la taille prédéfinie du seuil RTS, lemécanisme RTS/CTS n’est pas activé. Le routeur transmetdes trames RTS (Request To Send, demande d’émission) àune station de réception donnée et négocie l’envoi d’unetrame de données. Après réception d’un signal RTS, lastation sans fil répond par une trame CTS (Clear To Send,prêt pour émission) pour autoriser le lancement de latransmission. Le seuil RTS doit conserver sa valeur pardéfaut 2347.14
Chapitre 3Configuration avancéeAP Isolation (Isolement AP) : isole les uns des autrestous les clients et périphériques sans fil du réseau.Les périphériques sans fil peuvent communiqueravec le routeur, mais pas entre eux. Pour activer cettefonctionnalité, sélectionnez On (Activé). Par défaut, APIsolation (Isolement AP) est réglé sur Off (Désactivé).SecureEasySetup : cette fonctionnalité vous permetd’activer ou de désactiver la fonction SecureEasySetup.Sélectionnez Disabled (Désactivé) pour désactiver lafonctionnalité et éteindre le voyant de la touche. Pardéfaut, cette fonctionnalité est définie sur Enabled(Activé).Cliquez sur Save Settings (Enregistrer les paramètres)pour appliquer vos modifications ou sur Canc<strong>el</strong> Changes(Annuler les modifications) pour les annuler.Sécurité > Pare-feuL’écran Security > Firewall (Sécurité > Pare-feu) est utilisépour configurer un pare-feu capable de filtrer différentstypes de trafic indésirables sur le réseau local du routeur.Filter IDENT (Port 113) (Filtrage IDENT [Port 113]) :cette fonction empêche l’analyse du port 113 par despériphériques extérieurs au réseau local. Cette fonctionest sélectionnée par défaut. Désélectionnez cette fonctionpour la désactiver.Cliquez sur Save Settings (Enregistrer les paramètres)pour appliquer vos modifications ou sur Canc<strong>el</strong> Changes(Annuler les modifications) pour les annuler.Sécurité > Passthrough VPNL’écran Security > VPN Passthrough (Sécurité >Passthrough VPN) permet d’autoriser des tunn<strong>el</strong>s VPNutilisant les protocoles IPSec, PPTP ou L2TP à traverser lepare-feu du routeur.Security > VPN Passthrough (Sécurité > Passthrough VPN)Security > Firewall (Sécurité > Pare-feu)Pare-feuFirewall Protection (Protection par pare-feu) : pour uneprotection pare-feu, conservez la sélection par défaut,Enable (Activer). Pour désactiver la protection pare-feu,sélectionnez Disable (Désactiver).Bloquer les requêtes WANBlock Anonymous Internet Requests (Bloquer lesrequêtes Internet anonymes) : cette fonction rend plusardue toute tentative d’infiltration de votre réseau pourdes utilisateurs externes. Cette fonction est sélectionnéepar défaut. Désélectionnez cette fonction pour autoriserles requêtes Internet anonymes.Filter Multicast (Filtre multidiffusion) : cette fonctionnalitépermet plusieurs transmissions simultanées vers desdestinataires donnés. Si <strong>el</strong>le est autorisée, le routeurpermet le transfert des paquets de multidiffusion IP auxordinateurs appropriés. Cette fonction est sélectionnée pardéfaut. Désélectionnez cette fonction pour la désactiver.Filter Internet NAT Redirection (Filtrage de redirectionNAT Internet) : cette fonction utilise le transfert de portpour bloquer l’accès aux serveurs locaux depuis lesordinateurs du réseau local. Sélectionnez Filter InternetNAT Redirection (Filtrage de redirection NAT Internet)pour filtrer la redirection NAT Internet. Cette fonction n’estpas sélectionnée par défaut.Passthrough VPNIPSec Passthrough (Passthrough IPSec) : latechnologie IPSec (Internet Protocol Security) désigneune série de protocoles utilisés pour la mise en place d’unéchange sécurisé des paquets au niveau de la couche IP.Pour permettre aux tunn<strong>el</strong>s IPSec de traverser le routeur,conservez la valeur par défaut, Enable (Activer).PPTP Passthrough (Passthrough PPTP) : la technologiePPTP (Point-to-Point Protocol over Ethernet) permet detransmettre le protocole PPP (Point-to-Point Protocol)via un réseau IP. Pour permettre aux tunn<strong>el</strong>s PPTP detraverser le routeur, conservez la valeur par défaut, Enable(Activer).L2TP Passthrough (Passthrough L2TP) : le protocoleL2TP (Layer 2 Tunn<strong>el</strong>ing Protocol) désigne la méthodeemployée pour activer des sessions point à point viaInternet au niveau de la couche 2. Pour permettre auxtunn<strong>el</strong>s L2TP de traverser le routeur, conservez la valeurpar défaut, Enable (Activer).Cliquez sur Save Settings (Enregistrer les paramètres)pour appliquer vos modifications ou sur Canc<strong>el</strong> Changes(Annuler les modifications) pour les annuler.Restrictions d’accès > Accès InternetL’écran Access Restrictions > Internet Access (Restrictionsd’accès > Accès Internet) vous permet de bloquer oud’autoriser des modes spécifiques d’exploitation et detrafic Internet, notamment l’accès à Internet, les servicesdédiés et les sites Web à des jours ou des heures précis.Routeur haut débit sans fil G15
Chapitre 3Configuration avancéeapparaît. Vous pouvez sélectionner un ordinateurs<strong>el</strong>on son adresse MAC ou son adresse IP. Vous pouvezégalement saisir une plage d’adresses IP si vous souhaitezappliquer cette stratégie à un groupe d’ordinateurs. Unefois les modifications apportées, cliquez sur Save Settings(Enregistrer les paramètres) pour les appliquer ou surCanc<strong>el</strong> Changes (Annuler les modifications) pour lesannuler. Cliquez ensuite sur Close (Fermer).Access Restrictions > Internet Access (Restrictions d’accès > Accès Internet)Accès InternetInternet Access Policy (Stratégie d’accès à Internet) : vouspouvez contrôler l’accès à l’aide d’une stratégie. Utilisezles paramètres de cet écran pour définir une stratégied’accès (après avoir cliqué sur Save Settings [Enregistrerles paramètres]). La sélection d’une stratégie dans le menudéroulant permet d’afficher les paramètres de la stratégieen question. Pour supprimer une stratégie, sélectionnezson numéro, puis cliquez sur D<strong>el</strong>ete (Supprimer). Pourafficher l’ensemble des stratégies, cliquez sur Summary(Récapitulatif). (Vous pouvez supprimer les stratégies àpartir de l’écran Summary (Récapitulatif) en sélectionnantla ou les stratégies, puis en cliquant sur le bouton D<strong>el</strong>ete(Supprimer)). Pour revenir à l’onglet Internet Access (Accèsà Internet), cliquez sur Close (Fermer).Internet Policy Summary (Récapitulatif de la stratégie Internet)Status (Etat) : les stratégies sont désactivées par défaut.Pour activer une stratégie, sélectionnez son numéro dansle menu déroulant, puis sélectionnez Enable (Activer).Pour créer une stratégie d’accès à Internet :1.2.3.4.Sélectionnez un numéro dans le menu déroulantInternet Access Policy (Stratégie d’accès à Internet).Pour activer cette stratégie, sélectionnez Enabled(Activé).Saisissez le nom de la stratégie dans le champ prévuà cet effet.Cliquez sur Edit List of PCs (Modifier la liste des ordinateurs)pour sélectionner les ordinateurs auxqu<strong>el</strong>s cette stratégiedoit s’appliquer. L’écran List of PCs (Liste des ordinateurs)Routeur haut débit sans fil GList of PCs (Liste des ordinateurs)5. Sélectionnez l’option appropriée, Deny (Refuser) ouAllow (Autoriser), s<strong>el</strong>on que vous voulez bloquer ouautoriser l’accès à Internet aux PC répertoriés dansl’écran List of PCs (Liste des ordinateurs).6. Définissez les jours et les heures pendant lesqu<strong>el</strong>svous souhaitez appliquer cette stratégie. Sélectionnezun à un les jours auxqu<strong>el</strong>s la stratégie doit s’appliquer,ou sélectionnez Everyday (Tous les jours). Saisissezensuite une plage d’heures et de minutes pendantlesqu<strong>el</strong>les la stratégie devra être appliquée, ousélectionnez l’option 24 Hours (24 heures).7. Sélectionnez le service bloqué ou le blocage de siteWeb que vous souhaitez utiliser.8. Cliquez sur Save Settings (Enregistrer les paramètres)pour enregistrer les paramètres de la stratégie ou surCanc<strong>el</strong> Changes (Annuler les modifications) pourannuler les paramètres de la stratégie.Services bloquésVous pouvez filtrer l’accès à divers services accessibles parInternet, notamment FTP ou T<strong>el</strong>net, en choisissant ces servicesdans les menus déroulants en regard de l’option BlockedServices (Services bloqués). (Vous pouvez bloquer jusqu’à20 services.) Saisissez ensuite la plage des ports à filtrer.Si le service que vous envisagez de bloquer n’apparaît pasdans la liste ou si vous souhaitez modifier les paramètresd’un service, cliquez sur Add/Edit Service (Ajouter/Modifier un service). L’écran Port Services (Services desports) apparaît.Services des portsPour ajouter un service, saisissez son nom dans le champService Name (Nom du service). Sélectionnez son protocoledans le menu déroulant Protocol (Protocole), puis saisissezune plage dans les champs Port Range (Plage de ports).Cliquez ensuite sur Add (Ajouter).16
Chapitre 3Configuration avancéePour modifier un service, sélectionnez-le dans la liste dedroite. Modifiez son nom, son paramètre de protocole oula plage de ports. Cliquez ensuite sur Modify (Modifier).Pour supprimer un service, sélectionnez-le dans la liste dedroite. Cliquez ensuite sur D<strong>el</strong>ete (Supprimer).Une fois vos modifications dans l’écran Port Services(Services des ports) terminées, cliquez sur Apply(Appliquer) pour les enregistrer. Pour annuler vosmodifications, cliquez sur Canc<strong>el</strong> (Annuler). Pour fermerl’écran Port Services (Services des ports) et revenir à l’écranAccess Restrictions (Restrictions d’accès), cliquez sur Close(Fermer).Blocage du site Web par adresse URLSi vous souhaitez bloquer des sites Web dotés d’adressesURL spécifiques, saisissez chaque URL dans un champdistinct en regard de la section Website Blocking by URLAddress (Blocage de site Web par adresse URL).Blocage du site Web par mot-cléSi vous souhaitez bloquer des sites Web à l’aide de motsclésspécifiques, saisissez chaque mot-clé dans un champdistinct en regard de la section Website Blocking by Keyword(Blocage de site Web par mot-clé).Cliquez sur Save Settings (Enregistrer les paramètres)pour appliquer vos modifications ou sur Canc<strong>el</strong> Changes(Annuler les modifications) pour les annuler.Applications et jeux > Transfert deconnexionL’écran Applications & Gaming > Port Range Forward(Applications et jeux > Transfert de connexion) vouspermet de configurer des services publics sur votre réseau,notamment des serveurs Web, des serveurs FTP, desserveurs de messagerie ou d’autres applications Internetspécialisées (par applications spécialisées, on entend toutesles applications qui utilisent un accès Internet pour effectuerdes fonctions spécifiques, t<strong>el</strong>les que la vidéoconférence oules jeux en ligne. Certaines applications Internet n’exigentaucun transfert.)Transfert de connexionPour transférer un port, saisissez les informations surchaque ligne pour les critères requis.Application : saisissez dans ce champ le nom à donnerà l’application. Chaque nom peut comporter jusqu’à12 caractères.Start/End (Début/Fin) : il s’agit de la plage de ports.Saisissez le numéro de début de la plage dans la colonneStart (Début) et le numéro par lequ<strong>el</strong> <strong>el</strong>le se termine dansla colonne End (Fin).Protocol (Protocole) : sélectionnez le protocole utilisépour cette application, soit TCP, UDP ou Both (Les deux).IP Address (Adresse IP) : pour chaque application,saisissez l’adresse IP de l’ordinateur chargé de l’exécuter.Enable (Activer) : sélectionnez Enable (Activer) pouractiver le transfert de connexion pour l’applicationconcernée.Cliquez sur Save Settings (Enregistrer les paramètres)pour appliquer vos modifications ou sur Canc<strong>el</strong> Changes(Annuler les modifications) pour les annuler.Applications et jeux > Déclenchement deconnexionL’écran Applications & Gaming > Port Triggering(Applications et jeux > Déclenchement de connexion)permet au routeur de contrôler les données sortantesde certains numéros de ports spécifiques. L’adresse IPde l’ordinateur qui envoie les données correspondantesest enregistrée par le routeur. Ainsi, lorsque les donnéestransitent de nouveau par le routeur, <strong>el</strong>les sont redirigéesvers l’ordinateur approprié au moyen de l’adresse IP et desrègles de mappage de ports.Applications and Gaming > Port Triggering (Applications etjeux > Déclenchement de connexion)Applications and Gaming > Port Range Forward (Applications etjeux > Transfert de connexion)Déclenchement de connexionApplication : saisissez le nom de l’application dudéclencheur.Routeur haut débit sans fil G17
Chapitre 3Configuration avancéeConnexion sortante déclenchéePour chaque application, cette option répertorie l’intervallede numéros de ports déclenchés. Dans la documentationde l’application Internet, vérifiez le ou les numéros deports nécessaires.Start Port (Port de début) : saisissez le numéro de portde début de la connexion sortante déclenchée.End Port (Port de fin) : saisissez le numéro de port de finde la connexion sortante déclenchée.Connexion entrante transféréePour chaque application, cette option répertorie l’intervalledes numéros de ports transférés. Dans la documentationde l’application Internet, vérifiez le ou les numéros deports nécessaires.Start Port (Port de début) : saisissez le numéro de portde début de la connexion entrante transférée.End Port (Port de fin) : saisissez le numéro de port de finde la connexion entrante transférée.Enable (Activer) : sélectionnez Enable (Activer) pouractiver le déclenchement de l’application concernée.Cliquez sur Save Settings (Enregistrer les paramètres)pour appliquer vos modifications ou sur Canc<strong>el</strong> Changes(Annuler les modifications) pour les annuler.Applications et jeux > DMZLa fonctionnalité DMZ permet à un ordinateur du réseaud’accéder à Internet en vue d’utiliser un service à usagespécifique, t<strong>el</strong> que des jeux Internet ou un systèmede vidéoconférence. L’hébergement DMZ permet detransférer tous les ports en même temps vers un seulordinateur. La fonctionnalité de transfert des ports estplus sécurisée puisqu’<strong>el</strong>le ouvre uniquement les portssouhaités tandis que la fonction d’hébergement DMZouvre tous les ports d’un ordinateur et expose ce dernierà Internet.Cliquez sur Save Settings (Enregistrer les paramètres)pour appliquer vos modifications ou sur Canc<strong>el</strong> Changes(Annuler les modifications) pour les annuler.Applications et jeux > QSLa qualité de service (QoS [QS]) assure un meilleur serviceaux types de priorité élevée du trafic réseau, pouvantimpliquer des applications importantes en temps ré<strong>el</strong>,comme les app<strong>el</strong>s téléphoniques ou la vidéoconférencevia Internet.Trois types de qualités de service sont disponibles : DevicePriority (Priorité du périphérique), Application Priority(Priorité de l’application) et Ethernet Port Priority (Prioritédu port Ethernet).QSEnable/Disable (Activer/Désactiver) : pour activerla fonction QS, sélectionnez Enable (Activer). Sinon,sélectionnez Disable (Désactiver). Par défaut, cettefonctionnalité est désactivée.Upstream Bandwidth (Bande passante émission) :sélectionnez Auto ou Manual (Manu<strong>el</strong>le) dans le menudéroulant. L’option Manual (Manu<strong>el</strong>le) vous permetd’indiquer la bande passante sortante maximum pouvantêtre utilisée par les applications.Applications and Gaming > DMZ (Applications et jeux > DMZ)DMZTout ordinateur dont le port est transféré doit avoir safonction de client DHCP désactivée et doit disposer d’unenouv<strong>el</strong>le adresse IP statique puisque son adresse IP risquede changer lors de l’utilisation de la fonction DHCP.Pour exposer un ordinateur, sélectionnez Enable (Activer),puis saisissez l’adresse IP de l’ordinateur dans le champDMZ Host IP Address (Adresse IP de l’hôte DMZ). Cettefonctionnalité est désactivée par défaut.Applications and Gaming > QoS (Applications et jeux > QS)Priorité du périphériqueSaisissez le nom du périphérique réseau dans le champDevice name (Nom du périphérique), entrez son adresseMAC, puis sélectionnez sa priorité dans le menudéroulant.Routeur haut débit sans fil G18
Chapitre 3Configuration avancéePriorité du port EthernetLe paramètre Ethernet Port Priority (Priorité du portEthernet) vous permet de définir la priorité du trafic dequatre des ports du routeur : les ports LAN 1 à 4. Pourchaque port, sélectionnez la priorité et le paramètre decontrôle de flux.Priority (Priorité) : sélectionnez High (Elevée) ou Low(Faible) dans la colonne Priority (Priorité). Par défaut, lapriorité des quatre ports du routeur est définie sur Low(Faible).Flow Control (Contrôle de flux) : si vous voulez que lerouteur contrôle la transmission des données entre lespériphériques du réseau, sélectionnez Enabled (Activé).Pour désactiver cette option, sélectionnez Disabled(Désactivé). Le paramètre Ethernet Port Priority (Prioritédu port Ethernet) ne nécessite aucune assistance devotre FAI, car les ports hiérarchisés sont les ports LAN 1à 4 de votre réseau. Par défaut, cette fonctionnalité estactivée.Priorité de l’applicationLe paramètre Application Priority (Priorité de l’application)gère les informations lors de leur transmission/réception.S<strong>el</strong>on le paramètre de l’écran QoS (QS), cette fonctionaffecte une priorité faible ou élevée aux applications quevous spécifiez.Optimize Gaming Applications (Optimiser lesapplications de jeu) : sélectionnez cette option pourattribuer automatiquement la priorité la plus élevée auxports d’applications de jeu courantes. Ces jeux incluent,sans s’y limiter : Counter-Strike, Half-Life, Age of Empires,Everquest, Quake 2/Quake 3 et Diablo II. Par défaut, cetteoption n’est pas sélectionnée.Application Name (Nom de l’application) : saisissez lenom que vous souhaitez donner à l’application dans lechamp Application Name (Nom de l’application).Priority (Priorité) : sélectionnez High (Elevée) ou Low(Faible) pour attribuer une priorité à l’application. Lasélection par défaut est Low (Faible).Specific Port # (N° de port spécifique) : saisissez lenuméro du port utilisé par l’application.QS sans filWMM Support (Prise en charge WMM) : Wi-Fi Multimedia(WMM), anciennement connue sous le nom Wir<strong>el</strong>essMultimedia Extensions (WME), est une fonctionnalitécertifiée Wi-Fi Alliance basée sur la norme IEEE 802.11e.Cette fonctionnalité fournit une QS aux réseaux sans fil.Elle convient particulièrement aux applications vocales,musicales et vidéo, par exemple la téléphonie sur IP(VoIP), la transmission de flux vidéo et les jeux interactifs.Si d’autres périphériques présents sur votre réseau sans filprennent en charge le mode WMM, sélectionnez Enabled(Activé). Sinon, conservez la valeur par défaut Disabled(Désactivé).No Acknowledgement (Aucune confirmation) : cettefonction empêche le routeur de renvoyer des données siune erreur se produit. Pour activer cette fonctionnalité,sélectionnez Enabled (Activé). Sinon, conservez leparamètre par défaut, Disabled (Désactivé).Routeur haut débit sans fil GCliquez sur Save Settings (Enregistrer les paramètres)pour appliquer vos modifications ou sur Canc<strong>el</strong> Changes(Annuler les modifications) pour les annuler.Administration > GestionL’écran Administration > Management (Administration >Gestion) permet à l’administrateur du réseau de gérer lesfonctions d’accès et de sécurité spécifiques du routeur.Administration > Management (Administration > Gestion)Mot de passe du routeurAccès local au routeurRouter Password (Mot de passe du routeur) : saisissez unnouveau mot de passe pour le routeur.Re-enter to confirm (Confirmation du mot de passe) :saisissez à nouveau le mot de passe pour le confirmer.Accès WebAccess Server (Accès au serveur) : HTTP (HyperTextTransport Protocol) désigne le protocole decommunication utilisé pour la connexion à des serveurssur Internet. Le protocole HTTPS utilise SSL (SecuredSocket Layer) pour crypter les données transmises àdes niveaux élevés de sécurité. Sélectionnez HTTP ouHTTPS. La sélection par défaut est HTTP.Wir<strong>el</strong>ess Access Web (Web par accès sans fil) : si vousutilisez votre routeur dans un domaine public où vousoffrez un accès sans fil à vos hôtes, vous pouvez désactiverl’accès sans fil à l’utilitaire Web du routeur. En désactivantce paramètre, vous ne pourrez accéder à l’utilitaire Webque par une connexion câblée. Conservez la valeur pardéfaut, Enable (Activer), pour activer l’accès sans fil àl’utilitaire Web du routeur. Sinon, sélectionnez Disable(Désactiver) pour désactiver l’accès sans fil à l’utilitaire.Accès distant au routeurRemote Management (Gestion distante) : pour accéderà distance au routeur, c’est-à-dire depuis un emplacementextérieur au réseau local, sélectionnez Enable (Activer).Management Port (Port de gestion) : saisissez le numérodu port chargé d’ouvrir l’accès à tout élément externe.Vous devrez comme d’habitude saisir le mot de passe durouteur dès l’accès au routeur.19
Chapitre 3Configuration avancéeUse https (Utiliser https) : pour imposer l’utilisation duHTTPS pour l’accès distant, sélectionnez cette option.UPnPUPnP : conservez le paramètre par défaut, Enable(Activer), pour activer la fonction UPnP ; sinon, sélectionnezDisable (Désactiver).Cliquez sur Save Settings (Enregistrer les paramètres)pour appliquer vos modifications ou sur Canc<strong>el</strong> Changes(Annuler les modifications) pour les annuler.Administration > Fichier journalLe routeur peut garder trace de l’ensemble du trafic devotre connexion Internet.Test PingPing : le test Ping permet de vérifier l’état d’uneconnexion. Cliquez sur Ping pour ouvrir l’écran Ping Test(Test Ping). Saisissez l’adresse de l’ordinateur dont voussouhaitez tester la connexion et précisez combien defois vous envisagez de la tester. Cliquez ensuite sur Ping.L’écran Ping s’affiche si le test réussit. Pour arrêter le test,cliquez sur Stop (Arrêter). Cliquez sur Clear Log (Effacerle fichier journal) pour effacer le contenu de l’écran.Cliquez sur le bouton Close (Fermer) pour revenir à l’écranDiagnostics.Administration > Log (Administration > Fichier journal)Fichier journalLog (Fichier journal) : pour désactiver la fonction Log(Fichier journal), conservez le paramètre par défautDisable (Désactiver). Pour contrôler le trafic entre leréseau et Internet, sélectionnez Enable (Activer).Pour consulter les fichiers journaux, cliquez sur IncomingLog (Fichier journal des entrées) ou Outgoing Log (Fichierjournal des sorties) s<strong>el</strong>on les données que vous souhaitezconsulter.Cliquez sur Save Settings (Enregistrer les paramètres)pour appliquer vos modifications ou sur Canc<strong>el</strong> Changes(Annuler les modifications) pour les annuler.Administration > DiagnosticsLes tests de diagnostic [Ping and Traceroute (Ping etDétermination d’itinéraire)] vous permettent de vérifierles connexions de vos composants réseau.Ping Test (Test Ping)Test de détermination d’itinéraireTraceroute (Détermination d’itinéraire) : pour évaluer lesperformances d’une connexion, cliquez sur Traceroute(Détermination d’itinéraire) : l’écran Traceroute Test (Testde détermination d’itinéraire) s’affiche. Saisissez l’adressede l’ordinateur dont vous souhaitez tester la connexion,puis cliquez sur Traceroute (Détermination d’itinéraire).L’écran Traceroute Test (Test de détermination d’itinéraire)s’affiche si le test réussit. Pour arrêter le test, cliquez surStop (Arrêter). Cliquez sur Clear Log (Effacer le fichierjournal) pour effacer le contenu de l’écran. Cliquezsur le bouton Close (Fermer) pour revenir à l’écranDiagnostics.Traceroute Test (Test de détermination d’itinéraire)Administration > DiagnosticsAdministration > Paramètres d’usineL’écran Administration > Factory Defaults (Administration> Paramètres d’usine) permet de restaurer les paramètresd’usine du routeur.Routeur haut débit sans fil G20
Chapitre 3Configuration avancéeParamètres d’usineRestore Factory Defaults (Restaurer les paramètresd’usine) : pour rétablir les valeurs par défaut desparamètres du routeur, sélectionnez Yes (Oui), puiscliquez sur Save Settings (Enregistrer les paramètres).Tous les paramètres enregistrés précédemment serontperdus une fois les paramètres par défaut restaurés.Administration > Factory Defaults (Administration > Paramètres d’usine)Administration > Mise à niveau du micrologici<strong>el</strong>L’écran Administration > Upgrade Firmware (Administration> Mise à niveau du micrologici<strong>el</strong>) vous permet d’effectuerla mise à niveau du micrologici<strong>el</strong> du routeur. Ne mettezpas à niveau votre micrologici<strong>el</strong> sauf si vous rencontrez desproblèmes avec le routeur, à moins que la nouv<strong>el</strong>le versiondu micrologici<strong>el</strong> n’offre une nouv<strong>el</strong>le fonctionnalité quevous souhaitez utiliser.Administration > Config Management (Administration > Gestion de laconfiguration)Sauvegarder la configurationPour sauvegarder le fichier de configuration du routeur,cliquez sur Backup (Sauvegarder). Suivez les instructionsaffichées à l’écran.Restaurer la configurationPlease s<strong>el</strong>ect a file to restore (Veuillez sélectionnerun fichier à restaurer) : cliquez sur Browse (Parcourir) etsélectionnez le fichier de configuration. Cliquez ensuitesur Restore (Restaurer).Etat > RouteurL’écran Status > Router (Etat > Routeur) affiche l’état actu<strong>el</strong>du routeur.Administration > Upgrade Firmware (Administration > Mise à niveau dumicrologici<strong>el</strong>)Avant de mettre à niveau le micrologici<strong>el</strong>, téléchargezle fichier de mise à niveau du micrologici<strong>el</strong> du routeurdepuis le site Web de Linksys, www.linksys.com. Extrayezensuite le fichier.Mettre à niveau le micrologici<strong>el</strong>Please s<strong>el</strong>ect a file to upgrade (Sélectionnez un fichierde mise à niveau) : cliquez sur Browse (Parcourir) etsélectionnez le fichier de micrologici<strong>el</strong> que vous avezextrait. Cliquez ensuite sur Upgrade (Mettre à niveau) etsuivez les instructions à l’écran.Administration > Gestion de la configurationCet écran sert à sauvegarder ou à restaurer le fichier deconfiguration du routeur.Routeur haut débit sans fil GStatus > Router (Etat > Routeur)Informations sur le routeurFirmware Version (Version du micrologici<strong>el</strong>) : ce champindique la version actu<strong>el</strong>le du micrologici<strong>el</strong> du routeur.Current Time (Heure actu<strong>el</strong>le) : ce champ affich<strong>el</strong>’heure t<strong>el</strong>le que vous l’avez définie dans l’onglet Setup(Configuration).MAC Address (Adresse MAC) : ce champ indiqu<strong>el</strong>’adresse MAC du routeur t<strong>el</strong>le qu’<strong>el</strong>le apparaît à votrefournisseur d’accès à Internet (FAI).21
Chapitre 3Configuration avancéeRouter Name (Nom du routeur) : il s’agit ici du nomspécifique du routeur que vous avez défini dans l’ongletSetup (Configuration).Host Name (Nom d’hôte) : ce nom doit avoir été définidans l’onglet Setup (Configuration) si votre FAI l’exigeait.Domain Name (Nom de domaine) : ce nom doit avoirété défini dans l’onglet Setup (Configuration) si votre FAIl’exigeait.InternetType de configurationCette section contient les informations du réseau actu<strong>el</strong>stockées dans le routeur. Les informations varient enfonction du type de connexion Internet sélectionné dansl’écran Setup > Basic Setup (Configuration > Configurationde base).Cliquez sur le bouton Refresh (Actualiser) pour mettre àjour les informations à l’écran.Etat > Réseau localL’écran Status > Local Network (Etat > Réseau local) indiqu<strong>el</strong>’état de votre réseau.de cette liste et interrompre leurs connexions en activantla case à cocher D<strong>el</strong>ete (Supprimer) correspondante, puisen cliquant sur le bouton D<strong>el</strong>ete (Supprimer).Tableau des clients DHCPCliquez sur le bouton Refresh (Actualiser) pour mettre àjour les informations à l’écran.Etat > Réseau sans filL’écran Status > Wir<strong>el</strong>ess (Etat > Sans fil) affiche l’état devotre réseau sans fil.Status > Local Network (Etat > Réseau local)Réseau localMAC Address (Adresse MAC) : ce champ indiqu<strong>el</strong>’adresse MAC du routeur t<strong>el</strong>le qu’<strong>el</strong>le apparaît sur votreréseau local Ethernet.IP Address (Adresse IP) : ce champ indique l’adresse IPdu routeur, t<strong>el</strong>le qu’<strong>el</strong>le apparaît sur votre réseau localEthernet.Subnet Mask (Masque de sous-réseau) : ce champaffiche le masque de sous-réseau configuré pour votreréseau local.DHCP Server (Serveur DHCP) : si vous utilisez le routeurcomme serveur DHCP, cette information s’affiche sur cett<strong>el</strong>igne.Start IP Address (Adresse IP de début) : cette ligneindique le début de la plage des adresses IP utilisées parles périphériques de votre réseau local Ethernet.End IP Address (Adresse IP de fin) : cette ligne indique lafin de la plage des adresses IP utilisées par les périphériquesde votre réseau local Ethernet.DHCP Clients Table (Tableau des clients DHCP) : cliquezsur ce bouton pour ouvrir l’écran dans lequ<strong>el</strong> sontprésentés les ordinateurs qui utilisent le routeur en tantque serveur DHCP. Vous pouvez supprimer des ordinateursRouteur haut débit sans fil GStatus > Wir<strong>el</strong>ess (Etat > Réseau sans fil)Sans filMAC Address (Adresse MAC) : ce champ indiqu<strong>el</strong>’adresse MAC du routeur t<strong>el</strong>le qu’<strong>el</strong>le apparaît sur votreréseau local sans fil.Mode : sélectionnée dans l’écran Wir<strong>el</strong>ess > Basic Wir<strong>el</strong>essSettings (Sans fil > Paramètres sans fil de base), cetteoption affiche le mode sans fil (Mixte, G uniquement ouDésactivé) utilisé par le réseau.SSID : sélectionnée dans l’écran Wir<strong>el</strong>ess > Basic Wir<strong>el</strong>essSettings (Sans fil > Paramètres sans fil de base), cetteoption indique le nom du réseau sans fil ou SSID.DHCP Server (Serveur DHCP) : l’état de la fonction deserveur DHCP s’affiche ici.Chann<strong>el</strong> (Canal) : sélectionnée dans l’écran Wir<strong>el</strong>ess >Basic Wir<strong>el</strong>ess Settings (Sans fil > Paramètres sans fil debase), cette option indique le canal de diffusion de votreréseau sans fil.Encryption Function (Fonction de cryptage) :sélectionnée dans l’écran Wir<strong>el</strong>ess > Wir<strong>el</strong>ess Security (Sansfil > Sécurité sans fil), cette option indique l’état de lasécurité sans fil du réseau.Cliquez sur le bouton Refresh (Actualiser) pour mettre àjour les informations à l’écran.22
Annexe ADépannageAnnexe A :DépannageL’ordinateur ne parvient pas à se connecter à Internet.Suivez ces instructions jusqu’à ce que l’ordinateur seconnecte à Internet :• Assurez-vous que le routeur est sous tension. Le voyantd’alimentation doit être vert et ne pas clignoter.• Si le voyant d’alimentation clignote, mettez horstension tous les périphériques réseau, y compris lemodem, le routeur et les ordinateurs. Allumez ensuitechaque périphérique dans l’ordre suivant :1. Câble ou modem DSL2.3.RouteurOrdinateur• Vérifiez que les câbles sont bien branchés. L’ordinateurdoit être connecté à l’un des ports numérotés de 1 à 4sur le routeur et le modem doit être connecté au portInternet sur le routeur.Le modem n’a pas de port Ethernet.Il s’agit d’un modem avec connexion à distance destinéà un service de connexion à distance traditionn<strong>el</strong>. Pourutiliser le routeur, vous devez disposer d’un modem câble/DSL et d’une connexion Internet haut débit.Le service DSL ne permet pas de se connectermanu<strong>el</strong>lement à Internet.Une fois installé, le routeur se connecte automatiquementau réseau de votre fournisseur d’accès à Internet (FAI),aucune connexion manu<strong>el</strong>le n’est nécessaire.Le port Internet du routeur ne permet pas d’y brancherla prise téléphonique de la ligne DSL.Le routeur ne remplace pas votre modem. Votre modemDSL reste nécessaire à l’utilisation du routeur. Connectezla ligne téléphonique au modem DSL, insérez le CD-ROM d’installation dans votre ordinateur, puis suivez lesinstructions à l’écran.Lorsque vous cliquez deux fois sur votre navigateur Web,un nom d’utilisateur et un mot de passe vous sontdemandés. Pour ne plus avoir à saisir ces informations,suivez ces instructions.Lancez le navigateur Web et procédez comme suit (lesinstructions suivantes correspondent à Internet Explorer,mais sont similaires pour les autres navigateurs) :1.2.3.4.Sélectionnez Outils > Options Internet.Cliquez sur l’onglet Connexions.Sélectionnez Ne jamais établir de connexion.Cliquez sur OK.Le routeur ne dispose pas de port coaxial pour laconnexion par câble.Le routeur ne remplace pas votre modem. Votre modemcâble reste nécessaire à l’utilisation du routeur. Branchezvotre connexion par câble au modem câble, insérez le CD-ROM d’installation dans votre ordinateur, puis suivez lesinstructions à l’écran.L’ordinateur ne parvient pas à établir de connexion sansfil au réseau.Assurez-vous que l’ordinateur et le routeur utilisent lemême nom ou SSID de réseau sans fil. Si la sécurité sans filest activée, vérifiez que l’ordinateur et le routeur utilisentla même méthode de sécurité et la même clé de sécurité.Vous devez modifier les paramètres du routeur.Ouvrez le navigateur Web (par exemple, Internet Explorerou Firefox) et saisissez l’adresse IP du routeur dans le champd’adresse (l’adresse IP par défaut étant 192.168.1.1).Lorsque le système vous y invite, ne remplissez pas lechamp Nom d’utilisateur et entrez le mot de passe d’accèsau routeur (par défaut, il s’agit d’admin). Cliquez surl’onglet approprié pour modifier les paramètres.WEB : Si certaines de vos questions ne sontpas abordées dans cette annexe, consultez lesite Web de Linksys : www.linksys.com.Routeur haut débit sans fil G23
Annexe BSpécificationsAnnexe B :SpécificationsModèleNormesWRT54G2IEEE 802.3, IEEE 802.3u,IEEE 802.11g, IEEE 802.11bPorts Internet : un port RJ-45 10/100Réseau local (LAN) : quatre ports decommutation 10/100 RJ-45Ports de commutationUn port d’alimentationBoutonsVoyantsType de câblageUn bouton Reset (Réinitialiser)Un bouton WPSPower (Alimentation), Wir<strong>el</strong>ess(Sans fil), LAN (1 à 4), Internet,Wi-Fi Protected Setup (WPS)CAT5Nombre d’antennes 2 antennes internesSortie RF18 dBmPrise en charge UPnP(possible/certifiée) PossibleOptions de sécuritéSécurité sans filConditions environnementalesDimensionsPoidsAlimentationCertificationsPare-feu SPI (Stateful PacketInspection), Stratégie InternetWi-Fi Protected Access 2 (WPA2),WEP, Filtrage MAC sans fil203 x 35 x 160 mm280 gExterne, 12 V cc / 0,50 ATempérature defonctionnement de 0 à 40 °CTempérature destockage –20 à 60 ºCHumidité enfonctionnementHumidité destockageFCC, CE, IC-UL Wi-Fi (802.11b,802.11g), WPA2, WMM10 à 85 % non condensée5 à 90 % non condenséeRouteur haut débit sans fil G24
Annexe CInformations de garantieAnnexe C :Informations de garantieGARANTIE LIMITEELinksys garantit ce produit matéri<strong>el</strong> Linksys contre toutvice matéri<strong>el</strong> et de fabrication dans des conditionsnormales d’utilisation pendant la période de garantie,qui commence à la date de son acquisition par l’acheteurd’origine et s’applique pendant la durée indiquée cidessous:• deux (2) ans pour un produit neuf• quatre-vingt-dix (90) jours pour un produit réusiné.Cette garantie limitée est non transférable et concerneuniquement l’acheteur d’origine. Votre unique recours etl’entière responsabilité de Linksys sont limités, au choix deLinksys, (a) à la réparation du produit par des pièces neuvesou remises à neuf, (b) au remplacement du produit par unproduit Linksys disponible raisonnablement équivalent,neuf ou remis à neuf, ou (c) au remboursement du prixd’achat du produit, déduction faite des remises. Tous lesproduits réparés ou de remplacement seront garantisjusqu’à l’échéance de la période de garantie initiale ou, sicette période s’achève dans moins de 30 jours, pendantune durée de (30) jours. Tous les produits et/ou piècesremplacés deviennent la propriété de Linksys.Cette restriction de garantie s’applique en supplémentà tout droit statutaire ou autre qui pourrait s’appliquer àvous en vertu d’un contrat de vente.EXCLUSIONS ET LIMITATIONSCette garantie limitée ne s’applique pas si (a) le sceaud’assemblage du produit a été retiré ou endommagé,(b) le produit a été modifié, sauf si cette modification estle fait de Linksys, (c) le produit a été endommagé parcequ’il a été utilisé avec des produits non-Linksys, (d) leproduit n’a pas été installé, utilisé, réparé ou entretenuconformément aux instructions fournies par Linksys, (e)le produit a été altéré suite à une charge physique ouélectrique anormale, un usage inadapté du produit, unenégligence ou un accident, (f) le numéro de série inscrit surle produit a été altéré, dégradé ou retiré, ou (g) le produitest fourni ou concédé sous licence pour un essai pilote,une évaluation, des tests ou une démonstration auxqu<strong>el</strong>saucun prix d’achat ou frais de licence n’est appliqué parLinksys.TOUS LES LOGICIELS FOURNIS PAR LINKSYS AVEC LEPRODUIT, SOIT CHARGES SUR LE PRODUIT A L’USINESOIT CONTENUS SUR LE SUPPORT QUI ACCOMPAGNELE PRODUIT, SONT FOURNIS EN L’ETAT SANS AUCUNEGARANTIE D’AUCUNE SORTE. Sans limitation des clausesprécédentes, Linksys ne garantit pas que le produit ou leRouteur haut débit sans fil Glogici<strong>el</strong> fonctionnera de manière ininterrompue ou qu’ilest exempt d’erreurs. De plus, en raison du dév<strong>el</strong>oppementpermanent de nouv<strong>el</strong>les techniques visant à infiltreret à attaquer les réseaux, Linksys ne garantit pas qu<strong>el</strong>e produit, le service, le logici<strong>el</strong> ou tout équipement,système ou réseau sur lequ<strong>el</strong> le produit ou le logici<strong>el</strong> serautilisé, sera protégé contre les intrusions ou les attaquesdont vous pourriez faire l’objet. Ce produit peut contenirou être associé à un logici<strong>el</strong> ou à des offres de servicesémanant de tiers. Cette garantie limitée ne s’applique pasà ces logici<strong>el</strong>s ou offres de services. Cette garantie limitéene garantit aucune disponibilité permanente d’un servicetiers pour lequ<strong>el</strong> l’utilisation ou le fonctionnement de ceproduit est nécessaire.SOUS RESERVE DE DISPOSITIONS LEGALES CONTRAIRES,TOUTES LES GARANTIES TACITES ET CONDITIONS DEVALEUR MARCHANDE OU D’ADEQUATION A UN USAGEPARTICULIER SONT LIMITEES A LA DUREE DE LA PERIODEDE GARANTIE. TOUTES LES AUTRES CONDITIONS,DECLARATIONS ET GARANTIES EXPRESSES OU TACITES,Y COMPRIS, MAIS SANS LIMITATION, TOUTE GARANTIETACITE DE NON-CONTREFACON, SONT EXCLUES. Certainspays n’autorisent pas les limitations r<strong>el</strong>atives à la duréed’une garantie tacite. Par conséquent, la limitationsusmentionnée peut ne pas s’appliquer à vous. Cettegarantie vous accorde des droits spécifiques. Vous pouvezdisposer d’autres droits qui varient en fonction des pays.CONFORMEMENT A LA LOI ET INDEPENDAMMENT DUFONDEMENT DE LA RESPONSABILITE (Y COMPRIS LANEGLIGENCE), LINKSYS NE PEUT EN AUCUN CAS ETRETENU POUR RESPONSABLE DES PERTES DE DONNEES,DE REVENUS OU DE BENEFICES, OU DES DOMMAGESSPECIAUX, INDIRECTS, ACCESSOIRES OU EXEMPLAIRESLIES OU NON A L’UTILISATION OU A L’INCAPACITE AUTILISER LE PRODUIT (Y COMPRIS TOUS LES LOGICIELS),MEME SI LINKSYS A ETE AVERTI DE L’EVENTUALITE DE TELSDOMMAGES. LA RESPONSABILITE DE LINKSYS N’EXCEDERAEN AUCUN CAS LE MONTANT QUE VOUS AVEZ DEPENSEPOUR LE PRODUIT. Les limitations susmentionnéess’appliquent même si toutes les garanties ou les recoursstipulés dans la présente garantie limitée ne remplissentpas leur fonction principale. Certains pays n’autorisant pasl’exclusion ou la limitation des dommages accessoires ouindirects, les limitations ou exclusions susmentionnéessont susceptibles de ne pas s’appliquer à vous.OBTENTION DU SERVICE DE GARANTIESi vous avez des questions sur votre produitou rencontrez un problème, accédez au sitewww.linksys.com/support. Vous y trouverez différentsoutils d’assistance en ligne et des informations sur leproduit. Si ce produit s’avérait défectueux pendant lapériode de garantie, contactez le support techniquede Linksys pour obtenir des instructions sur l’obtentiondu service de garantie. Vous trouverez le numéro de25
Annexe CInformations de garantietéléphone du support technique de Linksys dans votrerégion dans le Guide de l’utilisateur du produit et sur lesite www.linksys.com. Pour tout contact téléphonique,munissez-vous du numéro de série du produit et d’unepreuve d’achat. UNE PREUVE D’ACHAT ORIGINALE ETDATEE EST REQUISE POUR TOUTE RECLAMATION AUSERVICE DE GARANTIE. Si vous êtes invité à retournervotre produit, vous recevrez un numéro d’autorisation deretour d’article (RMA, Return Materials Authorization). Lesfrais d’emballage et d’expédition du produit à Linksys sontà votre charge. Lorsque vous retournez le produit, vousdevez inclure le numéro d’autorisation de retour d’article(RMA) et une copie datée de votre preuve d’achat datéeoriginale. Les produits reçus sans ces éléments serontrefusés. N’incluez aucun autre article avec le produitrenvoyé à Linksys. Tout produit défectueux couvert parcette garantie limitée sera remplacé ou réparé par Linksyset renvoyé gratuitement. S’agissant des clients résidanten dehors des Etats-Unis et du Canada, les frais d’envoi,de douane, de T.V.A. et autres taxes restent à leur charge.Les réparations ou remplacements non couverts par cettegarantie limitée seront facturés aux tarifs en vigueur deLinksys.SUPPORT TECHNIQUECette garantie limitée ne représente ni un contratde service ni un contrat d’assistance. Pour desinformations sur les offres et stratégies d’assistancetechnique de Linksys (y compris les tarifs applicablesaux services d’assistance), consultez l’adresse suivante :www.linksys.com/support.GENERALCette garantie limitée est régie par les lois de la juridictiondans laqu<strong>el</strong>le vous avez acheté le produit.Si une qu<strong>el</strong>conque disposition de la présente restrictionde garantie est déclarée nulle ou non applicable au regarddes lois en vigueur, les autres dispositions de la garantiedemeurent pleinement effectives.Veuillez envoyer toutes vos demandes derenseignements à l’adresse suivante : Linksys, P.O. Box18558, Irvine, CA 92623, Etats-Unis.Veuillez nous contacter pour obtenir plusd’informations.www.linksys.comSélectionnez votre pays, puis SUPPORT TECHNIQUEPour les retours produits :Sélectionnez votre pays, puis SUPPORT CLIENTRouteur haut débit sans fil G26
Annexe DRéglementationAnnexe D :RéglementationFCC StatementThis product has been tested and complies with thespecifications for a Class B digital device, pursuant to Part15 of the FCC Rules. These limits are designed to providereasonable protection against harmful interference ina residential installation. This equipment generates,uses, and can radiate radio frequency energy and, if notinstalled and used according to the instructions, maycause harmful interference to radio communications.However, there is no guarantee that interference will notoccur in a particular installation. If this equipment doescause harmful interference to radio or t<strong>el</strong>evision reception,which is found by turning the equipment off and on, theuser is encouraged to try to correct the interference byone or more of the following measures:• Reorient or r<strong>el</strong>ocate the receiving antenna• Increase the separation between the equipment ordevices• Connect the equipment to an outlet other than thereceiver’s• Consult a dealer or an experienced radio/TV technicianfor assistanceFCC Radiation Exposure StatementThis equipment complies with FCC radiation exposur<strong>el</strong>imits set forth for an uncontrolled environment. Thisequipment should be installed and operated withminimum distance 20 cm between the radiator and yourbody.Safety Notices• Caution: To reduce the risk of fire, use only No.26 AWGor larger t<strong>el</strong>ecommunication line cord.• Do not use this product near water, for example, in awet basement or near a swimming pool.• Avoid using this product during an <strong>el</strong>ectrical storm.There may be a remote risk of <strong>el</strong>ectric shock fromlightning.Industry Canada StatementThis Class B digital apparatus complies with CanadianICES-003 and RSS210.Operation is subject to the following two conditions:1.2.This device may not cause interference andThis device must accept any interference, includinginterference that may cause undesired operationof the device.To reduce potential radio interference to other users,the antenna type and its gain should be so chosenthat the EIRP is not more than required for successfulcommunication.Industry Canada Radiation Exposure StatementThis equipment complies with IC radiation exposure limitsset forth for an uncontrolled environment. This equipmentshould be installed and operated with minimum distance20 cm between the radiator & your body.This transmitter must not be co-located or operating inconjunction with any other antenna or transmitter.Avis d’Industrie CanadaCet appareil numérique de la classe B est conforme auxnormes NMB-003 et RSS210 du Canada.L’utilisation de ce dispositif est autorisée seulement auxconditions suivantes :1. il ne doit pas produire de brouillage et2. il doit accepter tout brouillage radioélectrique reçu,même si ce brouillage est susceptible de compromettre lefonctionnement du dispositif.Afin de réduire le risque d’interférence aux autresutilisateurs, le type d’antenne et son gain doiventêtre choisis de façon à ce que la puissance isotroperayonnée équivalente (p.i.r.e.) ne soit pas supérieureau niveau requis pour obtenir une communicationsatisfaisante.Avis d’Industrie Canada concernant l’expositionaux radiofréquencesCe matéri<strong>el</strong> est conforme aux limites établies par ICen matière d’exposition aux radiofréquences dans unenvironnement non contrôlé. Ce matéri<strong>el</strong> doit être installéet utilisé à une distance d’au moins 20 cm entre l’antenneet le corps de l’utilisateur.L’émetteur ne doit pas être placé près d’une autre antenneou d’un autre émetteur, ou fonctionner avec une autreantenne ou un autre émetteur.Routeur haut débit sans fil G27
Annexe DRéglementationWir<strong>el</strong>ess DisclaimerThe maximum performance for wir<strong>el</strong>ess is derived fromIEEE Standard 802.11 specifications. Actual performancecan vary, including lower wir<strong>el</strong>ess network capacity,data throughput rate, range and coverage. Performancedepends on many factors, conditions and variables,including distance from the access point, volume ofnetwork traffic, building materials and construction,operating system used, mix of wir<strong>el</strong>ess products used,interference and other adverse conditions.Avis de non-responsabilité concernant lesappareils sans filLes performances maximales pour les réseaux sans filsont tirées des spécifications de la norme IEEE 802.11.Les performances ré<strong>el</strong>les peuvent varier, notammenten fonction de la capacité du réseau sans fil, du débitde la transmission de données, de la portée et de lacouverture. Les performances dépendent de facteurs,conditions et variables multiples, en particulier de ladistance par rapport au point d’accès, du volume du traficréseau, des matériaux utilisés dans le bâtiment et dutype de construction, du système d’exploitation et de lacombinaison de produits sans fil utilisés, des interférenceset de toute autre condition défavorable.Routeur haut débit sans fil G28
Annexe DRéglementationDéclaration de conformité concernant ladirective européenne 1999/5/CE (R&TTE)Informations de conformité pour les produits sans fil2,4 GHz et 5 GHz concernant l’Union européenne et lesautres pays se conformant à la directive européenne1999/5/CE (R&TTE)Nederlands[Dutch]:Malti[Maltese]:Dit apparaat voldoet aan de essenti<strong>el</strong>e eisenen andere van toepassing zijnde bepalingenvan de Richtlijn 1999/5/EC.Dan l-apparat huwa konformi mal-ħtiġietessenzjali u l-provedimenti l-oħra rilevantitad-Direttiva 1999/5/EC.Б ъ л г а р с к и[Bulgarian]Česky[Czech]:Dansk[Danish]:Deutsch[German]:Това оборудване отговаря на същественитеизисквания и приложими клаузи наДиректива 1999/5/ЕС.Toto zařízení je v souladu se základnímipožadavky a ostatními odpovídajícímiustanoveními Směrnice 1999/5/EC.Dette udstyr er i overensstemm<strong>el</strong>se medde væsentlige krav og andre r<strong>el</strong>evantebestemm<strong>el</strong>ser i Direktiv 1999/5/EF.Dieses Gerät entspricht den grundlegendenAnforderungen und den weiterenentsprechenden Vorgaben der Richtlinie1999/5/EU.Magyar[Hungarian]:Norsk[Norwegian]:Polski[Polish]:Português[Portuguese]:Ez a készülék t<strong>el</strong>jesíti az alapvetőkövet<strong>el</strong>ményeket és más 1999/5/EKirány<strong>el</strong>vben meghatározott vonatkozórend<strong>el</strong>kezéseket.Dette utstyret er i samsvar med degrunnleggende krav og andre r<strong>el</strong>evantebestemm<strong>el</strong>ser i EU-direktiv 1999/5/EF.Urządzenie jest zgodne z ogólnymiwymaganiami oraz szczególnymi warunkamiokreślonymi Dyrektywą UE: 1999/5/EC.Este equipamento está em conformidade comos requisitos essenciais e outras provisõesr<strong>el</strong>evantes da Directiva 1999/5/EC.Eesti[Estonian]:See seade vastab direktiivi 1999/5/EÜ olulist<strong>el</strong>enõuet<strong>el</strong>e ja teist<strong>el</strong>e asjakohast<strong>el</strong>e sätet<strong>el</strong>e.Română[Romanian]Acest echipament este in conformitatecu cerint<strong>el</strong>e esentiale si cu alte prevederir<strong>el</strong>evante ale Directivei 1999/5/EC.English:This equipment is in compliance with theessential requirements and other r<strong>el</strong>evantprovisions of Directive 1999/5/EC.Slovensko[Slovenian]:Ta naprava je skladna z bistvenimi zahtevamiin ostalimi r<strong>el</strong>evantnimi pogoji Direktive1999/5/EC.Español[Spanish]:Este equipo cumple con los requisitosesenciales asi como con otras disposicionesde la Directiva 1999/5/CE.Slovensky[Slovak]:Toto zariadenie je v zhode so základnýmipožiadavkami a inými príslušnými nariadeniamidirektív: 1999/5/EC.Ελληνική[Greek]:Français[French]:Íslenska[Ic<strong>el</strong>andic]:Italiano[Italian]:Latviski[Latvian]:Lietuvių[Lithuanian]:Αυτός ο εξοπλισµός είναι σε συµµόρφωση µετις ουσιώδεις απαιτήσεις και άλλες σχετικέςδιατάξεις της Οδηγίας 1999/5/EC.Cet appareil est conforme aux exigencesessenti<strong>el</strong>les et aux autres dispositionspertinentes de la Directive 1999/5/EC.Þetta tæki er samkvæmt grunnkröfum ogöðrum viðeigandi ákvæðum Tilskipunar1999/5/EC.Questo apparato é conforme ai requisitiessenziali ed agli altri principi sanciti dallaDirettiva 1999/5/CE.Šī iekārta atbilst Direktīvas 1999/5/EKbūtiskajām prasībām un citiem ar tosaistītajiem noteikumiem.Šis įrenginys tenkina 1999/5/EB Direktyvosesminius reikalavimus ir kitas šios direktyvosnuostatas.Suomi[Finnish]:Svenska[Swedish]:Tämä laite täyttää direktiivin 1999/5/EYolennaiset vaatimukset ja on siinä asetettujenmuiden laitetta koskevien määräystenmukainen.Denna utrustning är i överensstämm<strong>el</strong>se medde väsentliga kraven och andra r<strong>el</strong>evantabestämm<strong>el</strong>ser i Direktiv 1999/5/EC.Pour tous les produits, la déclaration de conformité estmise à votre disposition sous différentes formes :• Un fichier PDF figure sur le CD du produit.• Une copie imprimée est fournie avec le produit.• Un fichier PDF est disponible sur la page Web duproduit. Visitez le site www.linksys.com/internationalet sélectionnez votre pays ou zone géographique.Sélectionnez ensuite votre produit.Si vous avez besoin de documentation techniquecomplémentaire, reportez-vous à la section « Documentstechniques disponibles sur le site www.linksys.com/international » située plus loin dans l’annexe.Routeur haut débit sans fil G29
Annexe DRéglementationLes normes suivantes ont été appliquées lors d<strong>el</strong>’évaluation du produit conformément aux normes de ladirective 1999/5/CE :• Radio : EN 300 328 et/ou EN 301 893• Compatibilité électromagnétique : EN 301 489-1,EN 301 489-17• Sécurité : EN 60950 et EN 50385 ou EN 50371DFS (sélection dynamique de la fréquence) et TPC (contrôlede la puissance de transmission) sont nécessaires pourfonctionner dans la bande 5 GHz.DFS : ce produit est conforme aux recommandations DFS(sélection dynamique de la fréquence) comme défini dansETSI EN 301 893. Cette fonctionnalité est requise par lesréglementations pour éviter toute interférence avec lesservices de radiolocalisation (radars).TPC : pour le fonctionnement dans la bande 5 GHz, leniveau de puissance maximum est inférieur d’au moins3 dB à la limite applicable. De ce fait, TPC (contrôle de lapuissance de transmission) n’est pas requis.Marquage CEPour les produits Linksys sans fil N, G, B et/ou A, lemarquage CE, le numéro de l’organisme notifié (le caséchéant) et l’identifiant de classe 2 suivants sont ajoutésà l’équipement.ouououRestrictions nationalesThis product may be used in all EU countries (and othercountries following the EU directive 1999/5/EC) withoutany limitation except for the countries mentioned b<strong>el</strong>ow:Ce produit peut être utilisé dans tous les pays de l’UE (et danstous les pays ayant transposés la directive 1999/5/CE) sansaucune limitation, excepté pour les pays mentionnés cidessous:Questo prodotto è utilizzabile in tutte i paesi EU (ed in tuttigli altri paesi che seguono le direttive EU 1999/5/EC) senzanessuna limitazione, eccetto per i paesii menzionati diseguito:Das Produkt kann in allen EU Staaten ohne Einschränkungeneingesetzt werden (sowie in anderen Staaten die der EUDirektive 1999/5/CE folgen) mit Außnahme der folgendenaufgeführten Staaten:Dans la plupart des pays d’Europe, les bandes 2,4 et 5 GHzsont disponibles pour être utilisées par les WLAN (Wir<strong>el</strong>essLocal Area Network, réseau local sans fil). Le tableauintitulé « Présentation de la réglementation en vigueurpour les WLAN (réseaux sans fil locaux) » présente laréglementation en vigueur applicable pour les bandes 2,4et 5 GHz.Vous trouverez ci-dessous une présentation des pays danslesqu<strong>el</strong>s des restrictions supplémentaires ou limitationssont applicables.Les exigences pour chaque pays peuvent évoluer. Linksysvous recommande de consulter les autorités locales afinde connaître leur réglementation actu<strong>el</strong>le concernant lesréseaux sans fil locaux 2,4 et 5 GHz.Présentation de la réglementation en vigueur pour lesWLAN (réseaux sans fil locaux)Bande defréquences (MHz)Niveau depuissancemaximal EIRP(PIRE) (mW)En intérieuruniquementEnintérieuret enextérieur2 400 à 2 483,5 100 X5 150 à 5 350 † 200 X5 470 à 5 725 † 1000 XVérifiez l’étiquette CE sur le produit pour déterminer lenuméro de l’organisme notifié chargé de l’évaluation.Routeur haut débit sans fil G† DFS (sélection dynamique de la fréquence) et TPC (contrôle d<strong>el</strong>a puissance de transmission) sont requis pour les bandes defréquence de 5 250-5 350 MHz et 5 470-5 725 MHz.En plus de c<strong>el</strong>les répertoriées dans le tableau « Présentationde la réglementation en vigueur pour les WLAN (réseauxsans fil locaux) », les restrictions et/ou exigences ci-dessoussont appliquées dans les pays suivants :DenmarkIn Denmark, the band 5150 - 5350 MHz is also allowed foroutdoor usage.I Danmark må frekvensbåndet 5150 - 5350 også anvendesudendørs.30
Annexe DRéglementationFranceFor 2,4 GHz, the product should not be used outdoorsin the band 2454 - 2483,5 MHz. There are no restrictionswhen used in other parts of the 2,4 GHz band when usedindoors. Check http://www.arcep.fr/ for more details.Pour la bande 2,4 GHz, l’ équipement ne doit pas être utiliséen extérieur dans la bande 2454 - 2483,5 MHz. Il n’y a pas derestrictions pour des utilisations en intérieur dans d’autresparties de la bande 2,4GHz. Consultez http://www.arcep.fr/pour de plus amples détails.ItalyNiveaux de puissance en vigueur en FranceEmplacementEn intérieur(pas derestrictions)En extérieurRouteur haut débit sans fil GBande defréquences (MHz)Puissance (PIRE)2 400 à 2 483,5 100 mW (20 dBm)2 400 à 2 4542 454 à 2 483,5100 mW (20 dBm)10 mW (10 dBm)This product meets the National Radio Interface andthe requirements specified in the National FrequencyAllocation Table for Italy. Unless this 2,4-GHz wir<strong>el</strong>ess LANproduct is operating within the boundaries of the owner’sproperty, its use requires a “general authorization”. Pleasecheck http://www.comunicazioni.it/it/ for more details.Questo prodotto è conforme alla specifiche di InterfacciaRadio Nazionali e rispetta il Piano Nazionale di ripartizioned<strong>el</strong>le frequenze in Italia. Se non viene installato all’internod<strong>el</strong> proprio fondo, l’utilizzo di prodotti Wir<strong>el</strong>ess LAN a2,4 GHz richiede una “Autorizzazione Generale”. Consultarehttp://www.comunicazioni.it/it/ per maggiori dettagli.LatviaThe outdoor usage of the 2,4 GHz band requires anauthorization from the Electronic Communications Office.Please check http://www.esd.lv for more details.2,4 GHz frekveču joslas izmantošanai ārpus t<strong>el</strong>pāmnepieciešama atļauja no Elektronisko sakaru direkcijas.Vairāk informācijas: http://www.esd.lv.Notes:1.2.Although Norway, Switzerland and Liechtenstein arenot EU member states, the EU Directive 1999/5/EC hasalso been implemented in those countries.The regulatory limits for maximum output power arespecified in EIRP. The EIRP lev<strong>el</strong> of a device can becalculated by adding the gain of the antenna used(specified in dBi) to the output power available at theconnector (specified in dBm).Restrictions d’utilisation du produitCe produit est conçu pour une utilisation en intérieuruniquement. L’utilisation en extérieur n’est pasrecommandée, sauf indication contraire.Restrictions 2,4 GHzCe produit est conçu pour une utilisation avec uneou plusieurs antennes standard, intégrées ou dédiées(externes) livrées avec l’équipement. Toutefois, certainesapplications peuvent exiger que la ou les antennes soientphysiquement séparées du produit, si <strong>el</strong>les sont amovibleset installées à distance de l’équipement à l’aide de câblesd’extension. Pour ces applications, Linksys propose deuxcâbles d’extension R-SMA (AC9SMA) et R-TNC (AC9TNC).Ces câbles mesurent tous les deux 9 mètres de long etprésentent une atténuation de 5 dB. Pour la compenser,Linksys propose également des antennes à gain plusélevé, la HGA7S (avec le connecteur R-SMA) et la HGA7T(avec le connecteur R-TNC). Ces antennes présentent ungain de 7 dBi et ne peuvent être utilisées qu’avec le câbleR-SMA ou R-TNC.L’utilisation conjointe de câbles d’extension et d’antennesgénérant un niveau de puissance émise supérieur à100 mW de la puissance isotrope rayonnée équivalente(PIRE) est considérée comme non conforme.Logici<strong>el</strong> ou micrologici<strong>el</strong> tiersL’utilisation d’un logici<strong>el</strong> ou d’un micrologici<strong>el</strong> non prisen charge/non fourni par Linksys peut se traduire par unenon conformité de l’équipement aux réglementations envigueur.Documents techniques disponibles sur lesite www.linksys.com/internationalPour accéder aux documents techniques, procédezcomme suit :1.2.3.4.5.6.7.Saisissez http://www.linksys.com/international dans labarre d’adresse de votre navigateur Web.Sélectionnez votre pays ou région de résidence.Cliquez sur l’onglet Produits.Sélectionnez la catégorie de produits appropriée.Le cas échéant, sélectionnez la sous-catégorie deproduits appropriée.Sélectionnez un produit.Sélectionnez le type de documentation que voussouhaitez obtenir dans la section Plus d’informations.Si le logici<strong>el</strong> Acrobat est installé sur l’ordinateur, ledocument s’ouvre au format PDF.REMARQUE : Si vous avez des questionsau sujet de la conformité de ces produitsou si vous ne trouvez pas les informationsque vous recherchez, contactez votrebureau de vente local ou consultez le sitewww.linksys.com/international31
Annexe DRéglementationInformations pour les utilisateurs surles biens de consommation dans lecadre de l’application de la directiveeuropéenne 2002/96/CE r<strong>el</strong>ative auxdéchets d’équipements électriques etélectroniques (DEEE)Ce document contient des informations importantesdestinées aux utilisateurs concernant la mise au rebutet le recyclage appropriés des produits Linksys. Lesconsommateurs sont tenus de se conformer à cet avis pourtous les produits électroniques présentant le symbolesuivant :English - Environmental Information for Customers inthe European UnionEuropean Directive 2002/96/EC requires that the equipmentbearing this symbol on the product and/or its packaging mustnot be disposed of with unsorted municipal waste. The symbolindicates that this product should be disposed of separat<strong>el</strong>yfrom regular household waste streams. It is your responsibility todispose of this and other <strong>el</strong>ectric and <strong>el</strong>ectronic equipment viadesignated collection facilities appointed by the government orlocal authorities. Correct disposal and recycling will h<strong>el</strong>p preventpotential negative consequences to the environment andhuman health. For more detailed information about the disposalof your old equipment, please contact your local authorities,waste disposal service, or the shop where you purchased theproduct.Български (Bulgarian) - Информация относноопазването на околната среда за потребители вЕвропейския съюзЕвропейска директива 2002/96/EC изисква уредите, носещитози символ върху изделието и/или опаковката му, да несе изхвърля т с несортирани битови отпадъци. Символътобозначава, че изделието трябва да се изхвърля отделно отсметосъбирането на обикновените битови отпадъци. Вашае отговорността този и другите електрически и електронниуреди да се изхвърлят в предварително определени отдържавните или общински органи специализирани пунктовеза събиране. Правилното изхвърляне и рециклиранеще спомогнат да се предотвратят евентуални вредни заоколната среда и здравето на населението последствия. Запо-подробна информация относно изхвърлянето на вашитестари уреди се обърнете към местните власти, службите засметосъбиране или магазина, от който сте закупили уреда.Ceština (Czech) - Informace o ochraně životníhoprostředí pro zákazníky v zemích Evropské unieEvropská směrnice 2002/96/ES zakazuje, aby zařízení označenétímto symbolem na produktu anebo na obalu bylo likvidovános netříděným komunálním odpadem. Tento symbol udává,že daný produkt musí být likvidován odděleně od běžnéhokomunálního odpadu. Odpovídáte za likvidaci tohoto produktua dalších <strong>el</strong>ektrických a <strong>el</strong>ektronických zařízení prostřednictvímurčených sběrných míst stanovených vládou nebo místnímiúřady. Správná likvidace a recyklace pomáhá předcházetpotenciálním negativním dopadům na životní prostředí a lidskézdraví. Podrobnější informace o likvidaci starého vybavení silaskavě vyžádejte od místních úřadů, podniku zabývajícího s<strong>el</strong>ikvidací komunálních odpadů nebo obchodu, kde jste produktzakoupili.Dansk (Danish) - Miljøinformation for kunder i EUEU-direktiv 2002/96/EF kræver, at udstyr der bærer dette symbolpå produktet og/<strong>el</strong>ler emballagen ikke må bortskaffes somusorteret kommunalt affald. Symbolet betyder, at dette produktskal bortskaffes adskilt fra det almind<strong>el</strong>ige husholdningsaffald.Det er dit ansvar at bortskaffe dette og andet <strong>el</strong>ektrisk og<strong>el</strong>ektronisk udstyr via bestemte indsamlingssteder udpegetaf staten <strong>el</strong>ler de lokale myndigheder. Korrekt bortskaff<strong>el</strong>seog genvinding vil hjælpe med til at undgå mulige skader formiljøet og menneskers sundhed. Kontakt venligst de lokalemyndigheder, renovationstjenesten <strong>el</strong>ler den butik, hvor duhar købt produktet, angående mere detaljeret information ombortskaff<strong>el</strong>se af dit gamle udstyr.Deutsch (German) - Umw<strong>el</strong>tinformation für Kundeninnerhalb der Europäischen UnionDie Europäische Richtlinie 2002/96/EC verlangt, dass technischeAusrüstung, die direkt am Gerät und/oder an der Verpackung mitdiesem Symbol versehen ist , nicht zusammen mit unsortiertemGemeindeabfall entsorgt werden darf. Das Symbol weist daraufhin, dass das Produkt von regulärem Haushaltmüll getrenntentsorgt werden sollte. Es liegt in Ihrer Verantwortung, diesesGerät und andere <strong>el</strong>ektrische und <strong>el</strong>ektronische Geräte überdie dafür zuständigen und von der Regierung oder örtlichenBehörden dazu bestimmten Samm<strong>el</strong>st<strong>el</strong>len zu entsorgen.Ordnungsgemäßes Entsorgen und Recyc<strong>el</strong>n trägt dazu bei,potenti<strong>el</strong>le negative Folgen für Umw<strong>el</strong>t und die menschlicheGesundheit zu vermeiden. Wenn Sie weitere Informationen zurEntsorgung Ihrer Altgeräte benötigen, wenden Sie sich bitte andie örtlichen Behörden oder städtischen Entsorgungsdiensteoder an den Händler, bei dem Sie das Produkt erworben haben.Routeur haut débit sans fil G32
Annexe DRéglementationEesti (Estonian) - Keskkonnaalane informatsioonEuroopa Liidus asuvat<strong>el</strong>e klientid<strong>el</strong>eEuroopa Liidu direktiivi 2002/96/EÜ nõuete kohas<strong>el</strong>t onseadmeid, mill<strong>el</strong> on toot<strong>el</strong> või pakendil käesolev sümbol ,ke<strong>el</strong>atud kõrvaldada koos sorteerimata olmejäätmetega. Seesümbol näitab, et toode tuleks kõrvaldada eraldi tavalistestolmejäätmevoogudest. Olete kohustatud kõrvaldama käesolevaja ka muud <strong>el</strong>ektri- ja <strong>el</strong>ektroonikaseadmed riigi või kohalikeametiasutuste poolt ette nähtud kogumispunktide kaudu.Seadmete korrektne kõrvaldamine ja ringlussevõtt aitab vältidavõimalikke negatiivseid tagajärgi keskkonnale ning inimestetervis<strong>el</strong>e. Vanade seadmete kõrvaldamise kohta täpsemainformatsiooni saamiseks võtke palun ühendust kohalikeametiasutustega, jäätmekäitlusfirmaga või kauplusega, kust tetoote ostsite.Español (Spanish) - Información medioambiental paraclientes de la Unión EuropeaLa Directiva 2002/96/CE de la UE exige que los equipos qu<strong>el</strong>leven este símbolo en <strong>el</strong> propio aparato y/o en su embalajeno deben <strong>el</strong>iminarse junto con otros residuos urbanos nos<strong>el</strong>eccionados. El símbolo indica que <strong>el</strong> producto en cuestióndebe separarse de los residuos domésticos convencionales convistas a su <strong>el</strong>iminación. Es responsabilidad suya desechar este ycualesquiera otros aparatos <strong>el</strong>éctricos y <strong>el</strong>ectrónicos a través d<strong>el</strong>os puntos de recogida que ponen a su disposición <strong>el</strong> gobierno ylas autoridades locales. Al desechar y reciclar correctamente estosaparatos estará contribuyendo a evitar posibles consecuenciasnegativas para <strong>el</strong> medio ambiente y la salud de las personas. Sidesea obtener información más detallada sobre la <strong>el</strong>iminaciónsegura de su aparato usado, consulte a las autoridades locales,al servicio de recogida y <strong>el</strong>iminación de residuos de su zona opregunte en la tienda donde adquirió <strong>el</strong> producto.ξλληνικά (Greek) - Στοιχεία περιβαλλοντικήςπροστασίας για πελάτες εντός της ΕυρωπαϊκήςΈνωσηςΗ Κοινοτική Οδηγία 2002/96/EC απαιτεί ότι ο εξοπλισμός ο οποίοςφέρει αυτό το σύμβολο στο προϊόν και/ή στη συσκευασίατου δεν πρέπει να απορρίπτεται μαζί με τα μικτά κοινοτικάαπορρίμματα. Το σύμβολο υποδεικνύει ότι αυτό το προϊόν θαπρέπει να απορρίπτεται ξεχωριστά από τα συνήθη οικιακάαπορρίμματα. Είστε υπεύθυνος για την απόρριψη του παρόντοςκαι άλλου ηλεκτρικού και ηλεκτρονικού εξοπλισμού μέσω τωνκαθορισμένων εγκαταστάσεων συγκέντρωσης απορριμμάτων οιοποίες παρέχονται από το κράτος ή τις αρμόδιες τοπικές αρχές.Η σωστή απόρριψη και ανακύκλωση συμβάλλει στην πρόληψηπιθανών αρνητικών συνεπειών για το περιβάλλον και την υγεία.Για περισσότερες πληροφορίες σχετικά με την απόρριψη τουπαλιού σας εξοπλισμού, παρακαλώ επικοινωνήστε με τις τοπικέςαρχές, τις υπηρεσίες απόρριψης ή το κατάστημα από το οποίοαγοράσατε το προϊόν.Français (French) - Informations environnementalespour les clients de l’Union européenneLa directive européenne 2002/96/CE exige que l’équipementsur lequ<strong>el</strong> est apposé ce symbole sur le produit et/ou sonemballage ne soit pas jeté avec les autres ordures ménagères. Cesymbole indique que le produit doit être éliminé dans un circuitdistinct de c<strong>el</strong>ui pour les déchets des ménages. Il est de votreresponsabilité de jeter ce matéri<strong>el</strong> ainsi que tout autre matéri<strong>el</strong>électrique ou électronique par les moyens de collecte indiquéspar le gouvernement et les pouvoirs publics des collectivitésterritoriales. L’élimination et le recyclage en bonne et due formeont pour but de lutter contre l’impact néfaste potenti<strong>el</strong> de cetype de produits sur l’environnement et la santé publique. Pourplus d’informations sur le mode d’élimination de votre ancienéquipement, veuillez prendre contact avec les pouvoirs publicslocaux, le service de traitement des déchets, ou l’endroit où vousavez acheté le produit.Italiano (Italian) - Informazioni r<strong>el</strong>ative all’ambienteper i clienti residenti n<strong>el</strong>l’Unione EuropeaLa direttiva europea 2002/96/EC richiede che le apparecchiaturecontrassegnate con questo simbolo sul prodotto e/osull’imballaggio non siano smaltite insieme ai rifiuti urbaninon differenziati. Il simbolo indica che questo prodotto nondeve essere smaltito insieme ai normali rifiuti domestici. Èresponsabilità d<strong>el</strong> proprietario smaltire sia questi prodotti siale altre apparecchiature <strong>el</strong>ettriche ed <strong>el</strong>ettroniche mediant<strong>el</strong>e specifiche strutture di raccolta indicate dal governo o daglienti pubblici locali. Il corretto smaltimento ed il riciclaggioaiuteranno a prevenire conseguenze potenzialmente negativeper l’ambiente e per la salute d<strong>el</strong>l’essere umano. Per ricevereinformazioni più dettagliate circa lo smaltimento d<strong>el</strong>le vecchieapparecchiature in Vostro possesso, Vi invitiamo a contattare glienti pubblici di competenza, il servizio di smaltimento rifiuti o ilnegozio n<strong>el</strong> quale avete acquistato il prodotto.Latviešu valoda (Latvian) - Ekoloģiska informācijaklientiem Eiropas Savienības jurisdikcijāDirektīvā 2002/96/EK ir prasība, ka aprīkojumu, kam pievienotazīme uz paša izstrādājuma vai uz tā iesaiņojuma, nedrīkstizmest nešķirotā veidā kopā ar komunālajiem atkritumiem(tiem, ko rada vietēji iedzīvotāji un uzņēmumi). Šī zīme nozīmēto, ka šī ierīce ir jāizmet atkritumos tā, lai tā nenonāktu kopā arparastiem mājsaimniecības atkritumiem. Jūsu pienākums ir šoun citas <strong>el</strong>ektriskas un <strong>el</strong>ektroniskas ierīces izmest atkritumos,izmantojot īpašus atkritumu savākšanas veidus un līdzekļus, konodrošina valsts un pašvaldību iestādes. Ja izmešana atkritumosun pārstrāde tiek veikta pareizi, tad mazinās iespējamaiskaitējums dabai un cilvēku ves<strong>el</strong>ībai. Sīkākas ziņas parnovecojuša aprīkojuma izmešanu atkritumos jūs varat saņemtvietējā pašvaldībā, atkritumu savākšanas dienestā, kā arī veikalā,kur iegādājāties šo izstrādājumu.Routeur haut débit sans fil G33
Annexe DRéglementationLietuvškai (Lithuanian) - Aplinkosaugos informacija,skirta Europos Sąjungos vartotojamsEuropos direktyva 2002/96/EC numato, kad įrangos, kuri irkurios pakuotė yra pažymėta šiuo simboliu (įveskite simbolį),negalima šalinti kartu su nerūšiuotomis komunalinėmisatliekomis. Šis simbolis rodo, kad gaminį reikia šalinti atskirainuo bendro buitinių atliekų srauto. Jūs privalote užtikrinti, kadši ir kita <strong>el</strong>ektros ar <strong>el</strong>ektroninė įranga būtų šalinama per tamtikras nacionalinės ar vietinės valdžios nustatytas atliekų rinkimosistemas. Tinkamai šalinant ir perdirbant atliekas, bus išvengtagalimos žalos aplinkai ir žmonių sveikatai. Daugiau informacijosapie jūsų senos įrangos šalinimą gali pateikti vietinės valdžiosinstitucijos, atliekų šalinimo tarnybos arba parduotuvės, kurioseįsigijote tą gaminį.Malti (Maltese) - Informazzjoni Ambjentali għal Klijentifl-Unjoni EwropeaId-Direttiva Ewropea 2002/96/KE titlob li t-tagħmir li jkun fih issimbolufuq il-prodott u/jew fuq l-ippakkjar ma jistax jintremama’ skart muniċipali li ma ġiex isseparat. Is-simbolu jindikali dan il-prodott għandu jintrema separatament minn ma’ l-iskart domestiku regolari. Hija responsabbiltà tiegħek li tarmidan it-tagħmir u kull tagħmir ieħor ta’ l-<strong>el</strong>ettriku u <strong>el</strong>ettronikupermezz ta’ faċilitajiet ta’ ġbir appuntati apposta mill-gvern jewmill-awtoritajiet lokali. Ir-rimi b’mod korrett u r-riċiklaġġ jgħinjipprevjeni konsegwenzi negattivi potenzjali għall-ambjent ugħas-saħħa tal-bniedem. Għal aktar informazzjoni dettaljatadwar ir-rimi tat-tagħmir antik tiegħek, jekk jogħġbok ikkuntattjalill-awtoritajiet lokali tiegħek, is-servizzi għar-rimi ta’ l-iskart, jewil-ħanut minn fejn xtrajt il-prodott.Magyar (Hungarian) - Környezetvéd<strong>el</strong>mi információ azeurópai uniós vásárlók számáraA 2002/96/EC számú európai uniós irány<strong>el</strong>v megkívánja, hogyazokat a termékeket, am<strong>el</strong>yeken, és/vagy am<strong>el</strong>yek csomagolásánaz alábbi címke megj<strong>el</strong>enik, tilos a többi sz<strong>el</strong>ektálatlan lakosságihulladékkal együtt kidobni. A címke azt j<strong>el</strong>öli, hogy az adotttermék kidobásakor a szokványos háztartási hulladék<strong>el</strong>szállításirendszerektõl <strong>el</strong>különített <strong>el</strong>járást k<strong>el</strong>l alkalmazni. Az Önf<strong>el</strong><strong>el</strong>õssége, hogy ezt, és más <strong>el</strong>ektromos és <strong>el</strong>ektronikusberendezéseit a kormányzati vagy a h<strong>el</strong>yi hatóságok általkij<strong>el</strong>ölt gyűjtõredszereken keresztül számolja f<strong>el</strong>. A megf<strong>el</strong><strong>el</strong>õhulladékf<strong>el</strong>dolgozás segít a környezetre és az emberi egészségrepotenciálisan ártalmas negatív hatások meg<strong>el</strong>õzésében. Ha<strong>el</strong>avult berendezéseinek f<strong>el</strong>számolásához további részletesinformációra van szüksége, kérjük, lépjen kapcsolatba a h<strong>el</strong>yihatóságokkal, a hulladékf<strong>el</strong>dolgozási szolgálattal, vagy azzalüzlett<strong>el</strong>, ahol a terméket vásárolta.Nederlands (Dutch) - Milieu-informatie voor klantenin de Europese UnieDe Europese Richtlijn 2002/96/EC schrijft voor dat apparatuur dieis voorzien van dit symbool op het product of de verpakking,niet mag worden ingezam<strong>el</strong>d met niet-gescheiden huishoud<strong>el</strong>ijkafval. Dit symbool geeft aan dat het product apart moet wordeningezam<strong>el</strong>d. U bent z<strong>el</strong>f verantwoord<strong>el</strong>ijk voor de vernietigingvan deze en andere <strong>el</strong>ektrische en <strong>el</strong>ektronische apparatuur via dedaarvoor door de land<strong>el</strong>ijke of plaats<strong>el</strong>ijke overheid aangewezeninzam<strong>el</strong>ingskanalen. De juiste vernietiging en recycling vandeze apparatuur voorkomt mog<strong>el</strong>ijke negatieve gevolgen voorhet milieu en de gezondheid. Voor meer informatie over hetvernietigen van uw oude apparatuur neemt u contact op metde plaats<strong>el</strong>ijke autoriteiten of afvalverwerkingsdienst, of met dewink<strong>el</strong> waar u het product hebt aangeschaft.Norsk (Norwegian) - Miljøinformasjon for kunder i EUEU-direktiv 2002/96/EF krever at utstyr med følgende symbolavbildet på produktet og/<strong>el</strong>ler pakningen, ikke må kastessammen med usortert avfall. Symbolet indikerer at detteproduktet skal håndteres atskilt fra ordinær avfallsinnsamlingfor husholdningsavfall. Det er ditt ansvar å kvitte deg meddette produktet og annet <strong>el</strong>ektrisk og <strong>el</strong>ektronisk avfall via egneinnsamlingsordninger slik myndighetene <strong>el</strong>ler kommunenebestemmer. Korrekt avfallshåndtering og gjenvinning vilvære med på å forhindre mulige negative konsekvenser formiljø og h<strong>el</strong>se. For nærmere informasjon om håndtering avdet kasserte utstyret ditt, kan du ta kontakt med kommunen,en innsamlingsstasjon for avfall <strong>el</strong>ler butikken der du kjøpteproduktet.Polski (Polish) - Informacja dla klientów w UniiEuropejskiej o przepisach dotyczących ochronyśrodowiskaDyrektywa Europejska 2002/96/EC wymaga, aby sprzętoznaczony symbolem znajdującym się na produkcie i/lub jegoopakowaniu nie był wyrzucany razem z innymi niesortowanymiodpadami komunalnymi. Symbol ten wskazuje, że produktnie powinien być usuwany razem ze zwykłymi odpadami zgospodarstw domowych. Na Państwu spoczywa obowiązekwyrzucania tego i innych urządzeń <strong>el</strong>ektrycznych oraz<strong>el</strong>ektronicznych w punktach odbioru wyznaczonych przez władzekrajowe lub lokalne. Pozbywanie się sprzętu we właściwy sposóbi jego recykling pomogą zapobiec potencjalnie negatywnymkonsekwencjom dla środowiska i zdrowia ludzkiego. W c<strong>el</strong>uuzyskania szczegółowych informacji o usuwaniu starego sprzętu,prosimy zwrócić się do lokalnych władz, służb oczyszczaniamiasta lub sklepu, w którym produkt został nabyty.Routeur haut débit sans fil G34
Annexe DRéglementationPortuguês (Portuguese) - Informação ambiental paraclientes da União EuropeiaA Directiva Europeia 2002/96/CE exige que o equipamentoque exibe este símbolo no produto e/ou na sua embalagemnão seja <strong>el</strong>iminado junto com os resíduos municipais nãoseparados. O símbolo indica que este produto deve ser<strong>el</strong>iminado separadamente dos resíduos domésticos regulares.É da sua responsabilidade <strong>el</strong>iminar este e qualquer outroequipamento <strong>el</strong>éctrico e <strong>el</strong>ectrónico através das instalaçõesde recolha designadas p<strong>el</strong>as autoridades governamentais oulocais. A <strong>el</strong>iminação e reciclagem correctas ajudarão a preveniras consequências negativas para o ambiente e para a saúdehumana. Para obter informações mais detalhadas sobre aforma de <strong>el</strong>iminar o seu equipamento antigo, contacte asautoridades locais, os serviços de <strong>el</strong>iminação de resíduos ou oestab<strong>el</strong>ecimento comercial onde adquiriu o produto.Română (Romanian) - Informaţii de mediu pentruclienţii din Uniunea EuropeanăDirectiva europeană 2002/96/CE impune ca echipament<strong>el</strong>e careprezintă acest simbol pe produs şi/sau pe ambalajul acestuia sănu fie casate împreună cu gunoiul menajer municipal. Simbolulindică faptul că acest produs trebuie să fie casat separat degunoiul menajer obişnuit. Este responsabilitatea dvs. să casaţiacest produs şi alte echipamente <strong>el</strong>ectrice şi <strong>el</strong>ectronice prinintermediul unităţilor de colectare special desemnate de guvernsau de autorităţile locale. Casarea şi reciclarea corecte vor ajutala prevenirea potenţial<strong>el</strong>or consecinţe negative asupra sănătăţiimediului şi a oamenilor. Pentru mai multe informaţii detaliatecu privire la casarea acestui echipament vechi, contactaţiautorităţile locale, serviciul de salubrizare sau magazinul de lacare aţi achiziţionat produsul.Slovenčina (Slovak) - Informácie o ochrane životnéhoprostredia pre zákazníkov v Európskej úniiPodľa európskej smernice 2002/96/ES zariadenie s týmtosymbolom na produkte a/alebo jeho balení nesmie byťlikvidované spolu s netriedeným komunálnym odpadom.Symbol znamená, že produkt by sa mal likvidovať odd<strong>el</strong>eneod bežného odpadu z domácností. Je vašou povinnosťoulikvidovať toto i ostatné <strong>el</strong>ektrické a <strong>el</strong>ektronické zariadeniaprostredníctvom špecializovaných zberných zariadení určenýchvládou alebo miestnymi orgánmi. Správna likvidácia a recykláciapomôže zabrániť prípadným negatívnym dopadom na životnéprostredie a zdravie ľudí. Ak máte záujem o podrobnejšieinformácie o likvidácii starého zariadenia, obráťte sa, prosím, namiestne orgány, organizácie zaoberajúce sa likvidáciou odpadovalebo obchod, v ktorom ste si produkt zakúpili.Slovenčina (Slovene) - Okoljske informacije za strankev Evropski unijiEvropska direktiva 2002/96/EC prepoveduje odlaganje opreme,označene s tem simbolom – na izd<strong>el</strong>ku in/ali na embalaži – medobičajne, nerazvrščene odpadke. Ta simbol opozarja, da je trebaizd<strong>el</strong>ek odvreči ločeno od preostalih gospodinjskih odpadkov.Vaša odgovornost je, da to in preostalo <strong>el</strong>ektrično in <strong>el</strong>ektronskoopremo odnesete na posebna zbirališča, ki jih določijodržavne ustanove ali lokalna uprava. S pravilnim odlaganjemin recikliranjem boste preprečili morebitne škodljive vplive naokolje in zdravje ljudi. Če ž<strong>el</strong>ite izvedeti več o odlaganju stareopreme, se obrnite na lokalno upravo, odpad ali trgovino, kjerste izd<strong>el</strong>ek kupili.Suomi (Finnish) - Ympäristöä koskevia tietoja EUalueenasiakkailleEU-direktiivi 2002/96/EY ed<strong>el</strong>lyttää, että jos laitteistossa on tämäsymboli itse tuotteessa ja/tai sen pakkauksessa, laitteistoaei saa hävittää lajitt<strong>el</strong>emattoman yhdyskuntajätteen mukana.Symboli merkitsee sitä, että tämä tuote on hävitettävä erillääntavallisesta kotitalousjätteestä. Sinun vastuullasi on hävittäätämä <strong>el</strong>ektroniikkatuote ja muut vastaavat <strong>el</strong>ektroniikkatuotteetviemällä tuote tai tuotteet viranomaisten määräämäänkeräyspisteeseen. Laitteiston oikea hävittäminen estäämahdolliset ki<strong>el</strong>teiset vaikutukset ympäristöön ja ihmistenterveyteen. Lisätietoja vanhan laitteiston oikeasta hävitystavastasaa paikallisilta viranomaisilta, jätteenhävityspalv<strong>el</strong>usta tai siitämyymälästä, josta ostit tuotteen.Svenska (Swedish) - Miljöinformation för kunder iEuropeiska unionenDet europeiska direktivet 2002/96/EC kräver att utrustning meddenna symbol på produkten och/<strong>el</strong>ler förpackningen inte fårkastas med osorterat kommunalt avfall. Symbolen visar att dennaprodukt bör kastas efter att den avskiljts från vanligt hushållsavfall.Det faller på ditt ansvar att kasta denna och annan <strong>el</strong>ektrisk och<strong>el</strong>ektronisk utrustning på fastställda insamlingsplatser utseddaav regeringen <strong>el</strong>ler lokala myndigheter. Korrekt kassering ochåtervinning skyddar mot eventu<strong>el</strong>la negativa konsekvenserför miljön och personhälsa. För mer detaljerad information omkassering av din gamla utrustning kontaktar du dina lokalamyndigheter, avfallshanteringen <strong>el</strong>ler butiken där du köpteprodukten.WEB : Pour plus d’informations, rendez-vous surle site Web www.linksys.com/internationalRouteur haut débit sans fil G8013010NC-JL35
GUIDA PER L’UTENTEWir<strong>el</strong>ess-GRouter a banda largaN. mod<strong>el</strong>lo: WRT54G2 (IT)
Informazioni sulla Guida per l’utenteInformazioni sulla Guidaper l’utenteDescrizione d<strong>el</strong>le iconeLa Guida per l’utente contiene diverse icone destinate arichiamare l’attenzione su <strong>el</strong>ementi specifici. Segue unadescrizione d<strong>el</strong>le icone:NOTA: questo segno di spunta indica lapresenza di una nota che contiene informazioniimportanti per l’utilizzo d<strong>el</strong> prodotto.AVVERTENZA: questo punto esclamativoindica la presenza di un avvertimento o di unavviso r<strong>el</strong>ativo a potenziali danni alla proprietào al prodotto.WEB: questa sfera indica un sito Web o unindirizzo e-mail importante.Risorse onlineLa maggior parte dei browser Web consentono di inserir<strong>el</strong>’indirizzo senza il prefisso http://. I siti Web citati in questaGuida per l’utente saranno <strong>el</strong>encati senza il prefissohttp://. Alcuni browser Web datati potrebbero tuttaviarichiederlo.RisorseLinksysLinksys InternationalGlossarioSicurezza d<strong>el</strong>la reteSito Webwww.linksys.comwww.linksys.com/internationalwww.linksys.com/glossarywww.linksys.com/securityCopyright e marchiLinksys è un marchio o marchioregistrato di Cisco Systems, Inc. e/od<strong>el</strong>le r<strong>el</strong>ative aziende affiliate negliStati Uniti e in altri Paesi. Copyright© 2008 Cisco Systems, Inc. Tutti idiritti riservati. Altri marchi e nomidi prodotti sono marchi o marchiregistrati dei rispettivi proprietari.Router a banda larga Wir<strong>el</strong>ess-G
SommarioCapitolo 1: Panoramica d<strong>el</strong> prodotto 1Pann<strong>el</strong>lo anteriore . . . . . . . . . . . . . . . . . . . . . . . . . . . . . . . . . . . . . . . . . . . . . 1Pann<strong>el</strong>lo posteriore . . . . . . . . . . . . . . . . . . . . . . . . . . . . . . . . . . . . . . . . . . . . 1Posizionamento d<strong>el</strong> router. . . . . . . . . . . . . . . . . . . . . . . . . . . . . . . . . . . . . . . . 1Capitolo 2: Lista di controllo di protezione wir<strong>el</strong>ess 3Istruzioni generali per la protezione di rete . . . . . . . . . . . . . . . . . . . . . . . . . . . . . 3Ulteriori suggerimenti sulla protezione. . . . . . . . . . . . . . . . . . . . . . . . . . . . . . . . 3Capitolo 3: Configurazione avanzata 4Setup > Basic Setup (Configurazione > Configurazione di base) . . . . . . . . . . . . . . . . 4Setup > DDNS (Configurazione > DDNS) . . . . . . . . . . . . . . . . . . . . . . . . . . . . . . . 7Setup > MAC Address Clone (Configurazione > Clonazione indirizzo MAC) . . . . . . . . . 8Setup > Advanced Routing (Configurazione > Routing avanzato) . . . . . . . . . . . . . . . 8Wir<strong>el</strong>ess > Basic Wir<strong>el</strong>ess Settings (Wir<strong>el</strong>ess > Impostazioni wir<strong>el</strong>ess di base) . . . . . . . . 9Wir<strong>el</strong>ess > Wir<strong>el</strong>ess Security (Wir<strong>el</strong>ess > Protezione Wir<strong>el</strong>ess) . . . . . . . . . . . . . . . . . 11Wir<strong>el</strong>ess > Wir<strong>el</strong>ess MAC Filter (Wir<strong>el</strong>ess > Filtro MAC wir<strong>el</strong>ess) . . . . . . . . . . . . . . . . 13Wir<strong>el</strong>ess > Advanced Wir<strong>el</strong>ess Settings (Wir<strong>el</strong>ess > Impostazioni wir<strong>el</strong>ess avanzate) . . .13Security > Firewall (Protezione > Firewall) . . . . . . . . . . . . . . . . . . . . . . . . . . . . . .15Firewall . . . . . . . . . . . . . . . . . . . . . . . . . . . . . . . . . . . . . . . . . . . . . . . . . . . .15Security > VPN Passthrough (Protezione > Passthrough VPN). . . . . . . . . . . . . . . . . 15Access Restrictions > Internet Access (Restrizioni di accesso > Accesso Internet) . . . . .15Applications and Gaming > Port Range Forward (Applicazioni e giochi >Inoltro intervallo porte). . . . . . . . . . . . . . . . . . . . . . . . . . . . . . . . . . . . . . . . . 17Applications & Gaming > Port Triggering (Applicazioni e giochi > Attivazione porte) . .17Applications and Gaming > DMZ (Applicazioni e giochi > DMZ) . . . . . . . . . . . . . . . 18Applications and Gaming > QoS (Applicazioni e giochi > QoS). . . . . . . . . . . . . . . . 18Administration > Management (Amministrazione > Gestione). . . . . . . . . . . . . . . . 19Administration > Log (Amministrazione > Registro). . . . . . . . . . . . . . . . . . . . . . . 20Administration > Diagnostics (Amministrazione > Diagnostica) . . . . . . . . . . . . . . . .20Administration > Factory Defaults (Amministrazione > Impostazioni predefinite). . . . 20Administration > Factory Defaults (Amministrazione > Aggiornamento firmware) . . . .21Administration > Config Management (Amministrazione > Gestione configurazione) . 21Status > Router (Stato > Router) . . . . . . . . . . . . . . . . . . . . . . . . . . . . . . . . . . . .21Status > Local Network (Stato > Rete locale) . . . . . . . . . . . . . . . . . . . . . . . . . . . .22Status > Wir<strong>el</strong>ess (Stato > Wir<strong>el</strong>ess) . . . . . . . . . . . . . . . . . . . . . . . . . . . . . . . . . .22Appendice A: Risoluzione dei problemi 23Appendice B: Specifiche tecniche 24Appendice C: Informazioni sulla garanzia 25GARANZIA LIMITATA. . . . . . . . . . . . . . . . . . . . . . . . . . . . . . . . . . . . . . . . . . . 25ESCLUSIONI E LIMITAZIONI . . . . . . . . . . . . . . . . . . . . . . . . . . . . . . . . . . . . . . .25COME OTTENERE L’APPLICAZIONE DELLA GARANZIA . . . . . . . . . . . . . . . . . . . . . . 25Router a banda larga Wir<strong>el</strong>ess-Gii
SommarioASSISTENZA TECNICA . . . . . . . . . . . . . . . . . . . . . . . . . . . . . . . . . . . . . . . . . . 26GENERALE . . . . . . . . . . . . . . . . . . . . . . . . . . . . . . . . . . . . . . . . . . . . . . . . . .26Appendice D: Informazioni sulle normative 27FCC Statement . . . . . . . . . . . . . . . . . . . . . . . . . . . . . . . . . . . . . . . . . . . . . . .27Safety Notices. . . . . . . . . . . . . . . . . . . . . . . . . . . . . . . . . . . . . . . . . . . . . . . 27Industry Canada Statement . . . . . . . . . . . . . . . . . . . . . . . . . . . . . . . . . . . . . . .27Avis d’Industrie Canada. . . . . . . . . . . . . . . . . . . . . . . . . . . . . . . . . . . . . . . . . 27Wir<strong>el</strong>ess Disclaimer . . . . . . . . . . . . . . . . . . . . . . . . . . . . . . . . . . . . . . . . . . . .28Avis de non-responsabilité concernant les appareils sans fil . . . . . . . . . . . . . . . . . .28Dichiarazione di conformità alla Direttiva UE 1999/5/EC (Direttiva R&TTE) . . . . . . . . .29Marchio CE. . . . . . . . . . . . . . . . . . . . . . . . . . . . . . . . . . . . . . . . . . . . . . . . . 30Restrizioni valide nei singoli Paesi . . . . . . . . . . . . . . . . . . . . . . . . . . . . . . . . . . .30Restrizioni d’uso d<strong>el</strong> prodotto. . . . . . . . . . . . . . . . . . . . . . . . . . . . . . . . . . . . . 31Documentazione tecnica su www.linksys.com/international . . . . . . . . . . . . . . . . . .31Informazioni per l’utente sui prodotti di consumo coperti dalla Direttiva UE 2002/96/CEper le apparecchiature WEEE (Waste Electric and Electronic Equipment) . . . . . . . . . .32Router a banda larga Wir<strong>el</strong>ess-Giii
Capitolo 1Panoramica d<strong>el</strong> prodottoCapitolo 1:Panoramica d<strong>el</strong> prodottoGrazie per aver sc<strong>el</strong>to il router a banda larga Wir<strong>el</strong>ess-G diLinksys. Il router consente di accedere a Internet medianteuna connessione wir<strong>el</strong>ess, una trasmissione a 54 Mbps oattraverso una d<strong>el</strong>le quattro porte commutate. È anchepossibile utilizzare il router per condividere risorse, qualicomputer, stampanti e file. Una vasta gamma di funzioni disicurezza consentono di proteggere i propri dati riservatiquando si è online. Le funzioni di sicurezza comprendonola protezione WPA2, un firewall SPI (Stateful PacketInspection) e la tecnologia NAT. Configurare il router èfacile grazie all’utilità basata sul Web in dotazione con ilprodotto.Pann<strong>el</strong>lo anterioreWir<strong>el</strong>ess (verde): l’indicatore wir<strong>el</strong>ess siillumina quando la funzione wir<strong>el</strong>ess è attivata.Se questo LED lampeggia, il router sta inviandoo ricevendo dati sulla rete.Internet (verde): l’indicatore Internet siillumina e rimane acceso quando è attiva unaconnessione sulla porta Internet. Quandolampeggia indica attività di rete sulla portacorrispondente.Alimentazione (verde): il LED di alimentazionesi accende e rimane acceso quando il routerè alimentato. Quando il router esegu<strong>el</strong>’autodiagnostica ad ogni avvio, il LEDlampeggia. Al termine d<strong>el</strong>la diagnosi, il LEDsmette di lampeggiare e rimane acceso.Pann<strong>el</strong>lo posteriore1, 2, 3, 4 (verde): gli indicatori numerati,corrispondenti alle porte numerate sul pann<strong>el</strong>loposteriore d<strong>el</strong> router, hanno due funzionalità.Quando sono accesi indicano che il router èconnesso a un dispositivo mediante la portacorrispondente. Quando lampeggiano indicanoattività di rete sulla porta corrispondente.Pulsante Wi-Fi Protected Setup: in caso didispositivi client, come adattatori wir<strong>el</strong>ess chesupportano Wi-Fi Protected Setup, consentedi configurare automaticamente la protezioned<strong>el</strong>le reti wir<strong>el</strong>ess.Per utilizzare Wi-Fi Protected Setup, avviar<strong>el</strong>’installazione guidata o fare riferimento allasezione “Wir<strong>el</strong>ess > Basic Wir<strong>el</strong>ess Settings(Wir<strong>el</strong>ess > Impostazioni wir<strong>el</strong>ess di base)” d<strong>el</strong>“Capitolo 3: Configurazione avanzata”.LED di Wi-Fi Protected Setup (verde/ambra): emette una luce verde quandoè attiva una protezione wir<strong>el</strong>ess. La luceverde d<strong>el</strong> LED lampeggia per due minutidurante la procedura Wi-Fi Protected Setup.Il LED emette una luce ambra se si verificaun errore durante il processo Wi-Fi ProtectedSetup. Assicurarsi che il dispositivo clientsupporti Wi-Fi Protected Setup. Attendereche il LED si spenga, quindi riprovare.Il LED emette una luce ambra lampeggiantequando è attiva una sessione di Wi-Fi ProtectedSetup, quindi viene avviata una secondasessione. Il router supporta una sessione allavolta. Attendere che il LED si spenga prima diiniziare la sessione successiva di Wi-Fi ProtectedSetup.Router a banda larga Wir<strong>el</strong>ess-GInternet: porta Internet per il collegamentod<strong>el</strong> cavo o la connessione Internet DSL.1, 2, 3, 4: queste porte Ethernet (1, 2, 3, 4)consentono di collegare il router ai computere ad altri dispositivi Ethernet che fanno parted<strong>el</strong>la rete cablata.Ripristino: sono disponibili due modi perripristinare le impostazioni di fabbrica d<strong>el</strong>router. È possibile premere il pulsante Ripristinoper circa cinque secondi oppure utilizzare laschermata Administration > Factory Defaults(Amministrazione > Impostazioni predefinite)d<strong>el</strong>l’utilità basata sul Web d<strong>el</strong> router.Alimentazione: porta di alimentazione per ilcollegamento d<strong>el</strong>l’adattatore di corrente.Posizionamento d<strong>el</strong> routerIl router può essere posizionato in due modi. Il primoconsiste n<strong>el</strong> posizionarlo orizzontalmente su unasuperficie. Il secondo modo consiste n<strong>el</strong>l’installare il routera parete.Posizionamento orizzontaleSul pann<strong>el</strong>lo inferiore d<strong>el</strong> router sono presenti 4 piediniin gomma. Posizionare il router su una superficie piana,vicino a una presa <strong>el</strong>ettrica.
Capitolo 1Panoramica d<strong>el</strong> prodottoInstallazione a pareteSul pann<strong>el</strong>lo inferiore d<strong>el</strong> router sono presenti due slot peril montaggio a parete. La distanza tra gli slot è di 152 mm(6 pollici).Per l’installazione sono necessarie due viti.Attenersi alle istruzioni riportate di seguito:1. Individuare il punto in cui installare il router. Accertarsiche la parete sc<strong>el</strong>ta sia uniforme, liscia, solida e privadi umidità. Controllare inoltre che la presa <strong>el</strong>ettrica siavicina.2. Praticare due fori n<strong>el</strong>la parete. a una distanza di152 mm (6 pollici).3. Inserire una vite in ogni foro, lasciando fuoriuscire latesta d<strong>el</strong>la vite di 3 mm (0,12 pollici).4. Allineare gli slot d<strong>el</strong> router per il montaggio a paretecon le due viti.5. Posizionare gli slot sopra le viti e far scorrere il routerverso il basso affinché le viti si inseriscano saldamentenegli slot.Attrezzatura consigliataper l’installazione4-5 mm 1-1,5 mm2,5-3,0 mm† Nota: le illustrazioni d<strong>el</strong>la procedura diinstallazione non sono in scala.NOTA: Linksys non è responsabile di eventualidanni causati da un’errata installazione.152 mmStampare questa pagina impostando le dimensioni al 100%.Ritagliare lungo la linea tratteggiata e appoggiarla sulla parete per individuare l’esatta distanzada lasciare tra i due fori.Schema d<strong>el</strong>l’installazione a pareteRouter a banda larga Wir<strong>el</strong>ess-G
Capitolo 2Lista di controllo di protezione wir<strong>el</strong>essCapitolo 2:Lista di controllo diprotezione wir<strong>el</strong>essLe reti wir<strong>el</strong>ess sono pratiche e facili da installare: è perquesto che sono sempre più utilizzate per l’accessoa Internet ad alta v<strong>el</strong>ocità. Poiché la connettività direte wir<strong>el</strong>ess funziona inviando informazioni tramiteonde radio, può essere maggiormente vulnerabile agliattacchi di intrusi rispetto alla rete cablata tradizionale.I segnali d<strong>el</strong>la rete wir<strong>el</strong>ess possono essere intercettati,proprio come i segnali dei t<strong>el</strong>efoni c<strong>el</strong>lulari o cordless.Dal momento che non è possibile impedire fisicamente aun utente di connettersi alla rete wir<strong>el</strong>ess, è importanteadottare alcune misure precauzionali per rendere sicurala propria rete.1. Modificare il nome di retewir<strong>el</strong>ess predefinito o SSIDI dispositivi wir<strong>el</strong>ess hanno un nome di rete wir<strong>el</strong>esspredefinito o SSID (Service Set Identifier) impostato infabbrica. Si tratta d<strong>el</strong> nome d<strong>el</strong>la rete wir<strong>el</strong>ess che puòavere una lunghezza massima di 32 caratteri. I prodottiwir<strong>el</strong>ess Linksys utilizzano linksys come nome di retewir<strong>el</strong>ess predefinito. È opportuno sostituire il nome direte wir<strong>el</strong>ess con uno univoco per distinguere la propriarete wir<strong>el</strong>ess dalle altre reti esistenti; tuttavia, si consigliadi non utilizzare informazioni personali (ad esempio ilcodice fiscale) poiché queste potrebbero essere visibili achiunque navighi sulla rete wir<strong>el</strong>ess.2. Modificare la passwordpredefinitaPer i prodotti wir<strong>el</strong>ess, quali punti di accesso e router, vienerichiesta una password per la modifica d<strong>el</strong>le impostazioni.Tali dispositivi hanno una password predefinita, impostatain fabbrica. La password predefinita Linksys è admin. Glihacker sono a conoscenza di questi valori predefiniti epotrebbero tentare di usarli per accedere al dispositivowir<strong>el</strong>ess e modificare le impostazioni di rete. Per impedirequalsiasi modifica non autorizzata, personalizzare lapassword d<strong>el</strong> dispositivo in modo che sia difficile dadecifrare.3. Attivare il filtro indirizzi MACI router Linksys consentono di attivare il filtro degli indirizziMAC (Media Access Control). L’indirizzo MAC è una serieunivoca di numeri e lettere assegnati a ciascun dispositivoconnesso in rete. Con il filtro indirizzi MAC attivato,l’accesso di rete wir<strong>el</strong>ess viene fornito esclusivamente aidispositivi wir<strong>el</strong>ess con specifici indirizzi MAC. Ad esempio,Router a banda larga Wir<strong>el</strong>ess-Gè possibile specificare l’indirizzo MAC di ciascun computern<strong>el</strong>la propria abitazione in modo che solo tali computerpossano accedere alla rete wir<strong>el</strong>ess.4. Attivare la cifraturaLa cifratura protegge i dati trasmessi su una rete wir<strong>el</strong>ess.I tipi di cifratura WPA/WPA2 (Wi-Fi Protected Access) eWEP (Wired Equivalency Privacy) offrono diversi liv<strong>el</strong>li diprotezione per la comunicazione wir<strong>el</strong>ess. Al momento,i dispositivi con certificazione Wi-Fi sono necessari persupportare il protocollo WPA2, ma non per il protocolloWEP.Una rete che utilizza la cifratura WPA/WPA2 è più sicurarispetto a una rete con cifratura WEP, poiché WPA/WPA2utilizza la cifratura dinamica d<strong>el</strong>le chiavi. Per protegger<strong>el</strong>e informazioni man mano che passano sulle onde radio,si consiglia di attivare il massimo liv<strong>el</strong>lo di cifraturasupportato dal dispositivo di rete.WEP è uno standard di cifratura meno recente e può esser<strong>el</strong>’unica opzione disponibile per alcuni dispositivi che nonsupportano WPA.Istruzioni generali per la protezione di reteLa protezione di rete wir<strong>el</strong>ess non ha alcuna utilità se larete sottostante non è sicura.• Le password proteggono tutti i computer sulla rete esingolarmente proteggono i file riservati.• Cambiare le password periodicamente.• Installare software antivirus e Personal Firewall.• Disattivare la condivisione file (peer-to-peer). Alcuneapplicazioni possono aprire la condivisione file senzal’autorizzazione e/o la consapevolezza d<strong>el</strong>l’utente.Ulteriori suggerimenti sulla protezione• Mantenere i router, i punti di accesso e i gatewaywir<strong>el</strong>ess lontani da muri esterni e finestre.• Spegnere i router, i punti di accesso e i gatewaywir<strong>el</strong>ess quando non sono utilizzati (di notte, durant<strong>el</strong>e vacanze).• Utilizzare passphrase complesse, di almeno ottocaratteri. Combinare lettere e numeri per evitare diusare parole comuni che possono essere facilmentetrovate in un dizionario.WEB: per ulteriori informazioni sullaprotezione wir<strong>el</strong>ess, visitare il sito Webwww.linksys.com/security
Capitolo 3Configurazione avanzataCapitolo 3:Configurazione avanzataDopo l’impostazione mediante la procedura di installazioneguidata (disponibile sul CD-ROM), il router è pronto perl’uso. Tuttavia, se si desidera modificarne le impostazioniavanzate, utilizzare l’utilità basata sul Web d<strong>el</strong> routerstesso. In questo capitolo vengono descritte le pagineWeb d<strong>el</strong>l’utilità e le funzioni principali di ogni pagina. Èpossibile accedere all’utilità attraverso un browser Web suun computer collegato al router.Le schede principali d<strong>el</strong>l’utilità basata sul Web sono: Setup(Configurazione), Wir<strong>el</strong>ess, Security (Protezione), AccessRestrictions (Restrizioni di accesso), Applications & Gaming(Applicazioni e giochi), Administration (Amministrazione)e Status (Stato). Ulteriori schede sono disponibili all’internod<strong>el</strong>le schede principali.Setup > Basic Setup (Configurazione >Configurazione di base)La prima schermata visualizzata è la schermata Basic Setup(Configurazione di base). Questa schermata consente dimodificare le impostazioni generali d<strong>el</strong> router.NOTA: quando si installa per la prima volta ilrouter, è importante utilizzare la procedura diinstallazione guidata disponibile sul CD-ROMdi installazione. Se si desidera configurare leimpostazioni avanzate, leggere questo capitoloper ulteriori informazioni sull’utilità basata sulWeb.Accesso all’utilità basata sul WebPer accedere all’utilità basata sul Web, avviare il browserWeb sul computer e immettere l’indirizzo IP predefinitod<strong>el</strong> router, 192.168.1.1, n<strong>el</strong> campo Indirizzo, quindipremere Invio.Viene visualizzata una schermata in cui si chiede diimmettere la password. Per gli utenti che non utilizzanoWindows XP verrà visualizzata una schermata simile.Lasciare vuoto il campo User name (Nome utente). Laprima volta che si apre l’utilità basata sul Web, utilizzar<strong>el</strong>a password predefinita admin. È possibile impostare unanuova password n<strong>el</strong>la schermata Management (Gestione)d<strong>el</strong>la scheda Administration (Amministrazione). Fare clicsul pulsante OK per continuare.Password Screen (Schermata password)Setup > Basic Setup (Configurazione > Configurazione di base)Internet Setup (Configurazione Internet)La sezione Internet Setup (Configurazione Internet)consente di configurare il router per la connessioneInternet. La maggior parte d<strong>el</strong>le informazioni possonoessere fornite dal provider di servizi Internet.Internet Connection Type (Tipo di connessione Internet)N<strong>el</strong> menu a discesa, scegliere il tipo di connessione fornitodal provider di servizi Internet. I tipi disponibili sono:• Automatic Configuration - DHCP (Configurazioneautomatica - DHCP)• Static IP (IP statico)• PPPoE• PPTP• L2TP• T<strong>el</strong>stra Cable (Cavo T<strong>el</strong>stra)Automatic Configuration - DHCP (Configurazione automatica - DHCP)L’impostazione predefinita per il tipo di connessioneInternet d<strong>el</strong> router è Automatic Configuration - DHCP(Configurazione automatica - DHCP) e deve esseremantenuta solo se il provider di servizi Internet supportaDHCP o se la connessione viene stabilita tramite indirizzoIP dinamico. Questa opzione si applica generalmente alleconnessioni via cavo.Router a banda larga Wir<strong>el</strong>ess-GInternet Connection Type > Automatic Configuration - DHCP(Tipo di connessione Internet > Configurazione automatica - DHCP)
Capitolo 3Configurazione avanzataStatic IP (IP statico)Se la connessione viene effettuata tramite un indirizzo IPpermanente, s<strong>el</strong>ezionare Static IP (IP statico).Internet Connection Type > Static IP(Tipo di connessione Internet > IP Statico)Internet IP Address (Indirizzo IP Internet): è l’indirizzoIP d<strong>el</strong> router, come visualizzato su Internet. L’indirizzo IPda inserire in questo campo viene fornito dal provider diservizi Internet.Subnet Mask (Maschera di sottorete): è la maschera disottorete d<strong>el</strong> router visualizzata dagli utenti collegati aInternet (incluso il servizio ISP). La maschera di sottoreteviene fornita dal provider di servizi Internet.Gateway: l’indirizzo d<strong>el</strong> gateway, che corrispondeall’indirizzo IP d<strong>el</strong> server d<strong>el</strong>l’ISP, viene fornito dal providerdi servizi Internet.DNS: l’ISP fornisce almeno un indirizzo IP d<strong>el</strong> server DNS(Domain Name System).PPPoEAlcuni ISP basati su DSL utilizzano il protocollo PPPoE(Point-to-Point Protocol over Ethernet) per la connessioneInternet. Se ci si connette a Internet tramite una linea DSL,verificare se il provider di servizi Internet utilizza PPPoE. Incaso affermativo, è necessario abilitare PPPoE.Internet Connection Type > PPPoE(Tipo di connessione Internet > PPPoE)Username and Password (Nome utente e password):immettere il nome utente e la password forniti dal providerdi servizi Internet.Connect on Demand: Max Idle Time (Connessione surichiesta: Tempo max. di inattività): è possibile configurareil router in modo che la connessione Internet si interrompadopo che è stato inattivo per un determinato periodo ditempo (Max Idle Time - Tempo max. di inattività). Se laconnessione a Internet viene interrotta per inattività, lafunzione Connect on Demand (Connessione su richiesta)consente al router di ristabilirla automaticamente nonappena si tenta di accedere nuovamente a Internet.Per utilizzare questa opzione, s<strong>el</strong>ezionare Connect onDemand (Connessione su richiesta). N<strong>el</strong> campo Max IdleTime (Tempo max. di inattività), immettere i minuti diinattività che devono trascorrere prima che la connessioneInternet venga interrotta. Il valore di tempo massimo diinattività predefinito è 5 minuti.Router a banda larga Wir<strong>el</strong>ess-GKeep Alive: Redial Period (Connessione sempre attiva:Intervallo di ris<strong>el</strong>ezione): se si s<strong>el</strong>eziona questa opzione, ilrouter controlla periodicamente la connessione Internet. Serisulta interrotta, il router la ristabilisce automaticamente.Per utilizzare questa opzione, s<strong>el</strong>ezionare Keep Alive(Connessione sempre attiva). N<strong>el</strong> campo Redial Period(Intervallo di ris<strong>el</strong>ezione), specificare la frequenza con cuisi desidera che il router verifichi la connessione Internet.L’intervallo di ris<strong>el</strong>ezione predefinito è 30 secondi.PPTPPPTP (Point-to-Point Tunn<strong>el</strong>ing Protocol) è un servizio chesi applica solo alle connessioni in Europa.Internet Connection Type > PPTP (Tipo di connessione Internet > PPTP)Internet IP Address (Indirizzo IP Internet): è l’indirizzoIP d<strong>el</strong> router, come visualizzato su Internet. L’indirizzo IPda inserire in questo campo viene fornito dal provider diservizi Internet.Subnet Mask (Maschera di sottorete): è la maschera disottorete d<strong>el</strong> router visualizzata dagli utenti collegati aInternet (incluso il servizio ISP). La maschera di sottoreteviene fornita dal provider di servizi Internet.Gateway: l’indirizzo d<strong>el</strong> gateway viene fornito dalprovider di servizi Internet.Username and Password (Nome utente e password):immettere il nome utente e la password forniti dal providerdi servizi Internet.Connect on Demand: Max Idle Time (Connessione surichiesta: Tempo max. di inattività): è possibile configurareil router in modo che interrompa la connessione Internetdopo che è stato inattivo per un periodo di tempoindicato (Max Idle Time - Tempo max. di inattività). Se laconnessione a Internet viene interrotta per inattività, lafunzione Connect on Demand (Connessione su richiesta)consente al router di ristabilirla automaticamente nonappena si tenta di accedere nuovamente a Internet.Per utilizzare questa opzione, s<strong>el</strong>ezionare Connect onDemand (Connessione su richiesta). N<strong>el</strong> campo Max IdleTime (Tempo max. di inattività), immettere i minuti diinattività che devono trascorrere prima che la connessioneInternet venga interrotta. Il valore di tempo massimo diinattività predefinito è 5 minuti.Keep Alive: Redial Period (Connessione sempreattiva: Intervallo di ris<strong>el</strong>ezione): se si s<strong>el</strong>ezionaquesta opzione, il router controlla periodicamente laconnessione Internet. Se risulta interrotta, il router laristabilisce automaticamente. Per utilizzare questa opzione,s<strong>el</strong>ezionare Keep Alive (Connessione sempre attiva). N<strong>el</strong>campo Redial Period (Intervallo di ris<strong>el</strong>ezione), specificar<strong>el</strong>a frequenza con cui si desidera che il router verifichi laconnessione Internet. L’impostazione predefinita è 30secondi.
Capitolo 3Configurazione avanzataL2TPL2TP è un servizio disponibile solo per le connessioni inIsra<strong>el</strong>e.Internet Connection Type > L2TP (Tipo di connessione Internet > L2TP)Username and Password (Nome utente e password):immettere il nome utente e la password forniti dal providerdi servizi Internet.L2TP Server (Server L2TP): indirizzo IP d<strong>el</strong> server L2TP.L’indirizzo IP da inserire in questo campo viene fornito dalprovider di servizi Internet.Connect on Demand: Max Idle Time (Connessione surichiesta: Tempo max. di inattività): è possibile configurareil router in modo che la connessione Internet si interrompadopo che è stato inattivo per un determinato periodo ditempo (Max Idle Time - Tempo max. di inattività). Se laconnessione a Internet viene interrotta per inattività, lafunzione Connect on Demand (Connessione su richiesta)consente al router di ristabilirla automaticamente nonappena si tenta di accedere nuovamente a Internet.Per utilizzare questa opzione, s<strong>el</strong>ezionare Connect onDemand (Connessione su richiesta). N<strong>el</strong> campo Max IdleTime (Tempo max. di inattività), immettere i minuti diinattività che devono trascorrere prima che la connessioneInternet venga interrotta. Il valore di tempo massimo diinattività predefinito è 5 minuti.Keep Alive: Redial Period (Connessione sempre attiva:Intervallo di ris<strong>el</strong>ezione): se si s<strong>el</strong>eziona questa opzione, ilrouter controlla periodicamente la connessione Internet. Serisulta interrotta, il router la ristabilisce automaticamente.Per utilizzare questa opzione, s<strong>el</strong>ezionare Keep Alive(Connessione sempre attiva). N<strong>el</strong> campo Redial Period(Intervallo di ris<strong>el</strong>ezione), specificare la frequenza concui si desidera che il router verifichi la connessioneInternet. L’intervallo di ris<strong>el</strong>ezione predefinito è30 secondi.T<strong>el</strong>stra Cable (Cavo T<strong>el</strong>stra)T<strong>el</strong>stra Cable (Cavo T<strong>el</strong>stra) è un servizio che riguardaunicamente le connessioni in Australia. Se il provider diservizi Internet utilizza il segnale HeartBeat, s<strong>el</strong>ezionareT<strong>el</strong>stra.Internet Connection Type > T<strong>el</strong>stra Cable( Tipo di connessione Internet > Cavo T<strong>el</strong>stra)Username and Password (Nome utente e password):immettere il nome utente e la password forniti dal providerdi servizi Internet.Router a banda larga Wir<strong>el</strong>ess-GHeart Beat Server (Server Heart Beat): indirizzo IP d<strong>el</strong>server Heart Beat. L’indirizzo IP da inserire in questo campoviene fornito dal provider di servizi Internet.Connect on Demand: Max Idle Time (Connessione surichiesta: Tempo max. di inattività): è possibile configurareil router in modo che la connessione Internet si interrompadopo che è stato inattivo per un determinato periodo ditempo (Max Idle Time - Tempo max. di inattività). Se laconnessione a Internet viene interrotta per inattività, lafunzione Connect on Demand (Connessione su richiesta)consente al router di ristabilirla automaticamente nonappena si tenta di accedere nuovamente a Internet.Per utilizzare questa opzione, s<strong>el</strong>ezionare Connect onDemand (Connessione su richiesta). N<strong>el</strong> campo Max IdleTime (Tempo max. di inattività), immettere i minuti diinattività che devono trascorrere prima che la connessioneInternet venga interrotta. Il valore di tempo massimo diinattività predefinito è 5 minuti.Keep Alive: Redial Period (Connessione sempre attiva:Intervallo di ris<strong>el</strong>ezione): se si s<strong>el</strong>eziona questa opzione, ilrouter controlla periodicamente la connessione Internet. Serisulta interrotta, il router la ristabilisce automaticamente.Per utilizzare questa opzione, s<strong>el</strong>ezionare Keep Alive(Connessione sempre attiva). N<strong>el</strong> campo Redial Period(Intervallo di ris<strong>el</strong>ezione), specificare la frequenza con cuisi desidera che il router verifichi la connessione Internet.L’intervallo di ris<strong>el</strong>ezione predefinito è 30 secondi.Optional Settings (Impostazioni opzionali)Alcune d<strong>el</strong>le seguenti impostazioni potrebbero essererichieste dal provider di servizi Internet. Prima di effettuaremodifiche, consultare il proprio provider.Optional Settings (Impostazioni opzionali)Router Name (Nome router): in questo campo, è possibiledigitare fino a 39 caratteri per indicare il nome d<strong>el</strong> router.Host Name/Domain Name (Nome host/Nome dominio):questi campi consentono di indicare un nome di dominioe di host per il router. Alcuni provider di servizi Internet,generalmente via cavo, richiedono questi nomi perl’identificazione. Potrebbe essere necessario verificare conl’ISP se il servizio Internet a banda larga utilizzato è statoconfigurato con un nome host e un nome di dominio.N<strong>el</strong>la maggior parte dei casi è possibile lasciare vuotiquesti campi.MTU: acronimo di Maximum Transmission Unit, ossiaunità di trasmissione massima. Questo valore specifica ladimensione massima dei pacchetti consentita durante latrasmissione via Internet. S<strong>el</strong>ezionare Manual (Manuale)se si desidera immettere manualmente le dimensionimassime dei pacchetti che verranno trasmessi. Per far sìche il router s<strong>el</strong>ezioni la MTU adatta per la connessioneInternet, mantenere l’impostazione predefinita, Auto(Automatico).
Capitolo 3Configurazione avanzataSize (Dimensioni): se il campo MTU è impostato su Manual(Manuale), l’opzione è attivata. Tale valore deve esserecompreso n<strong>el</strong>l’intervallo tra 1200 e 1500. Le dimensionipredefinite dipendono dal tipo di connessione a Internet:• DHCP, IP statico o T<strong>el</strong>stra: 1500• PPPoE: 1492• PPTP o L2TP: 1460Network Setup (Configurazione rete)La sezione Network Setup (Configurazione rete) consentedi modificare le impostazioni d<strong>el</strong>la rete collegata alleporte Ethernet d<strong>el</strong> router. La configurazione wir<strong>el</strong>ess vieneeffettuata tramite la scheda Wir<strong>el</strong>ess.Router IP (IP router)Fornisce l’indirizzo IP d<strong>el</strong> router (Local IP Address) e lamaschera di sottorete (Subnet Mask) rilevati dalla rete.Router IP Address (Indirizzo IP d<strong>el</strong> router)Network Address Server Settings (DHCP) (Impostazioniserver indirizzo di rete - DHCP)Queste opzioni consentono di configurare la funzione d<strong>el</strong>server DHCP (Dynamic Host Configuration Protocol) d<strong>el</strong>router. Il router può essere utilizzato come server DHCPd<strong>el</strong>la rete. Il server DHCP assegna automaticamente unindirizzo IP ad ogni computer d<strong>el</strong>la rete. Se si decide diattivare l’opzione server DHCP d<strong>el</strong> router, verificare chenon siano presenti altri server DHCP n<strong>el</strong>la rete.Network Address Server Settings (DHCP)(Impostazioni server indirizzo di rete - DHCP)DHCP Server (Server DHCP): DHCP è attivo perimpostazione predefinita. Se già si dispone di un serverDHCP n<strong>el</strong>la rete o se non si desidera utilizzarlo, s<strong>el</strong>ezionareDisable (Disattiva). In questo modo, anche le altre opzioniDHCP non saranno disponibili.Starting IP Address (Indirizzo IP iniziale): immettere unvalore di partenza per l’emissione di indirizzi IP da parted<strong>el</strong> server DHCP. Poiché l’indirizzo IP predefinito d<strong>el</strong> routerè 192.168.1.1, l’indirizzo IP iniziale deve essere 192.168.1.2o superiore, ma sempre inferiore a 192.168.1.253. L’indirizzoIP iniziale predefinito è 192.168.1.100.Maximum Number of DHCP Users (Numero massimo diutenti DHCP): immettere il numero massimo di computera cui il server DHCP può assegnare indirizzi IP. Tale numeronon può essere superiore a 253. L’impostazione predefinitaè 50.Router a banda larga Wir<strong>el</strong>ess-GClient Lease Time (Durata lease client): è il tempomassimo di connessione che il router consente a un utentedi rete che usa indirizzo IP dinamico. Immettere l’intervallodi tempo, in minuti, r<strong>el</strong>ativo all’assegnazione in leased<strong>el</strong>l’indirizzo IP dinamico. Scaduto il tempo, all’utenteviene assegnato automaticamente un nuovo indirizzoIP dinamico. L’impostazione predefinita è 0 minuti, checorrisponde a 1 giorno.Static DNS (1-3) (DNS statico 1-3): il DNS (Domain NameSystem) indica il modo in cui Internet traduce i nomi deisiti Web o dei domini in indirizzi Internet o URL. Il providerdi servizi Internet fornirà almeno un indirizzo IP d<strong>el</strong> serverDNS. Se si desidera utilizzarne un altro, immettere taleindirizzo IP in uno di questi campi. È possibile immetterefino a tre indirizzi IP d<strong>el</strong> server DNS. Il router utilizzerà gliindirizzi immessi per accedere più rapidamente ai serverDNS in funzione.WINS (Windows Internet Naming Service): gestisc<strong>el</strong>’interazione di ciascun computer con la rete Internet. Se siutilizza un server WINS, immettere l’indirizzo IP d<strong>el</strong> serverin questo campo. In caso contrario, lasciarlo vuoto.Time Setting (Impostazione orario)N<strong>el</strong> menu a discesa, s<strong>el</strong>ezionare il fuso orario per la zonadi funzionamento d<strong>el</strong>la rete. È anche possibile regolareautomaticamente l’ora legale.Time Setting (Impostazione orario)Fare clic su Save Settings (Salva impostazioni) perapplicare le modifiche o su Canc<strong>el</strong> Changes (Annullamodifiche) per annullarle.Setup > DDNS (Configurazione > DDNS)Il router supporta la funzione DDNS (Dynamic DomainName System), che consente di assegnare un nome hoste di dominio fissi a un indirizzo IP Internet dinamico e siriv<strong>el</strong>a particolarmente utile per l’hosting d<strong>el</strong> proprio sitoWeb, di un server FTP o di altri server dietro al router.Prima di poter utilizzare questa funzione, ènecessario iscriversi al servizio DDNS all’indirizzowww.dyndns.org o www.TZO.com. Se non si desiderautilizzare questa opzione, mantenere l’impostazionepredefinita, Disable (Disattiva).DDNSIl router supporta la funzione DDNS (Dynamic DomainName System), che consente di assegnare un nome hoste di dominio fissi a un indirizzo IP Internet dinamico e siriv<strong>el</strong>a particolarmente utile per l’hosting d<strong>el</strong> proprio sitoWeb, di un server FTP o di altri server dietro al router.Prima di utilizzare questa funzione, è necessario iscriversia uno dei due provider di servizi DDNS disponibiliagli indirizzi www.DynDNS.org o www.TZO.com Senon si desidera utilizzare questa opzione, mantener<strong>el</strong>’impostazione predefinita, Disable (Disattiva).
Capitolo 3Configurazione avanzataDDNS Service (Servizio DDNS)Se il servizio DDNS viene fornito tramite l’iscrizione alsito www.DynDNS.org, s<strong>el</strong>ezionare l’opzione DynDNS.org dal menu a discesa. Se il servizio DDNS viene fornitotramite l’iscrizione al sito TZO, s<strong>el</strong>ezionare TZO.com. Lefunzioni disponibili n<strong>el</strong>la schermata DDNS variano in baseal provider di servizi DDNS in uso.DynDNS.orgSetup > DDNS > DynDNS (Configurazione > DDNS > DynDNS)User Name (Nome utente): immettere il nome utente d<strong>el</strong>proprio account DDNS.Password: immettere la password per l’account DDNS.Host Name (Nome host): l’URL DDNS assegnato dalservizio DDNS.Internet IP Address (Indirizzo IP Internet): mostral’indirizzo IP Internet d<strong>el</strong> router. L’indirizzo IP è dinamicoe verrà modificato.Status (Stato): visualizza lo stato d<strong>el</strong>la connessione alservizio DDNS.Fare clic su Save Settings (Salva impostazioni) perapplicare le modifiche o su Canc<strong>el</strong> Changes (Annullamodifiche) per annullarle.TZO.comSetup > DDNS > TZO (Configurazione > DDNS > TZO)E-mail Address, TZO Key e Domain Name (Indirizzoe-mail, Chiave TZO e Nome dominio): inserire leimpostazioni d<strong>el</strong>l’account TZO.Internet IP Address (Indirizzo IP Internet): mostral’indirizzo IP Internet d<strong>el</strong> router. L’indirizzo IP è dinamicoe verrà modificato.Status (Stato): visualizza lo stato d<strong>el</strong>la connessione alservizio DDNS.Fare clic su Save Settings (Salva impostazioni) perapplicare le modifiche o su Canc<strong>el</strong> Changes (Annullamodifiche) per annullarle.Setup > MAC Address Clone (Configurazione> Clonazione indirizzo MAC)L’indirizzo MAC è un codice composto da 12 cifreassegnato a un singolo componente hardware perconsentirne l’identificazione. Alcuni provider di serviziInternet richiedono la registrazione d<strong>el</strong>l’indirizzo MACper accedere a Internet. Se non si desidera registrarenuovamente l’indirizzo MAC, è possibile utilizzare lafunzione MAC Address Clone (Clonazione indirizzo MAC)per assegnare al router qu<strong>el</strong>lo attualmente registrato conil provider di servizi Internet.Setup > MAC Address Clone(Configurazione > Clonazione indirizzo MAC)MAC Address Clone (Clonazione indirizzo MAC)Enable/Disable (Attiva/Disattiva): per clonare l’indirizzoMAC, s<strong>el</strong>ezionare Enable (Attiva).User Defined Entry (Voce definita dall’utente): immetterequi l’indirizzo MAC registrato presso il provider di serviziInternet.Clone Your PC’s MAC (Clona indirizzo MAC d<strong>el</strong> PC): fareclic su questo pulsante per clonare l’indirizzo MAC d<strong>el</strong>computer in uso.Fare clic su Save Settings (Salva impostazioni) perapplicare le modifiche o su Canc<strong>el</strong> Changes (Annullamodifiche) per annullarle.Setup > Advanced Routing (Configurazione> Routing avanzato)Questa scheda consente di configurare le funzioniavanzate d<strong>el</strong> router. Il NAT indirizza la connessione direte d<strong>el</strong> router host a Internet. Dynamic Routing (Routingdinamico) regola automaticamente il numero di pacchettiche viaggiano n<strong>el</strong>la rete. Static Routing (Routing statico)consente di impostare una route fissa verso un’altradestinazione di rete.Router a banda larga Wir<strong>el</strong>ess-G
Capitolo 3Configurazione avanzataSetup > Advanced Routing (Gateway) (Configurazioni > Routing avanzato - Gateway)Setup > Advanced Routing (Router) (Configurazione > Routing avanzato - Router)Advanced Routing (Routing avanzato)Operating Mode (Modalità operativa): s<strong>el</strong>ezionar<strong>el</strong>a modalità di funzionamento d<strong>el</strong> router. Se il routerfunziona come host per la connessione di rete a Internet,s<strong>el</strong>ezionare Gateway. Se è presente un secondo routern<strong>el</strong>la rete, s<strong>el</strong>ezionare Router. Dopo aver s<strong>el</strong>ezionatoRouter, sarà disponibile l’opzione Dynamic Routing(Routing dinamico).Dynamic Routing (Routing dinamico)RIP: questa funzione consente al router di adattarsiautomaticamente alle modifiche fisiche d<strong>el</strong> layout d<strong>el</strong>larete e di scambiare le tab<strong>el</strong>le di routing con altrirouter. Il router determina la route dei pacchetti direte in base al minor numero di passaggi necessari traorigine e destinazione. Questa opzione è disattivataper impostazione predefinita. Dal menu a discesa èpossibile s<strong>el</strong>ezionare LAN & Wir<strong>el</strong>ess (LAN e wir<strong>el</strong>ess),che consente di effettuare il routing dinamico fra le retiEthernet e wir<strong>el</strong>ess. È anche possibile s<strong>el</strong>ezionare WAN(Internet), che consente di effettuare il routing dinamicocon i dati provenienti da Internet. Infine, s<strong>el</strong>ezionandoBoth (Entrambi) viene s<strong>el</strong>ezionato il routing dinamico perentrambe le reti, oltre che per i dati da Internet.Router a banda larga Wir<strong>el</strong>ess-GS<strong>el</strong>ect set number (S<strong>el</strong>eziona numero impostato):per configurare una route statica tra il router e un’altrarete, s<strong>el</strong>ezionare un numero dall’<strong>el</strong>enco a discesa StaticRouting (Routing statico). Una route statica è un percorsopredeterminato mediante il quale le informazioniraggiungono un host o una rete specifica. Immetter<strong>el</strong>e informazioni descritte di seguito per configurare unanuova route statica. Fare clic sul pulsante D<strong>el</strong>ete This Entry(Elimina questa voce) per <strong>el</strong>iminare una route statica.Enter Route Name (Immetti nome route): immettere quiil nome d<strong>el</strong>la route, utilizzando al massimo 25 caratterialfanumerici.Destination LAN IP (IP LAN di destinazione): è l’indirizzod<strong>el</strong>la rete o d<strong>el</strong>l’host remoto a cui si desidera assegnareuna route statica.Subnet Mask (Maschera di sottorete): determina laporzione d<strong>el</strong>l’indirizzo IP di destinazione assegnata allarete e qu<strong>el</strong>la assegnata all’host.Default Gateway (Gateway predefinito): è l’indirizzo IPd<strong>el</strong> dispositivo gateway che consente la connessione trail router e la rete o l’host remoto.Interface (Interfaccia): indica se l’indirizzo IP didestinazione si trova in reti LAN e wir<strong>el</strong>ess (Ethernet ewir<strong>el</strong>ess) o WAN (Internet).D<strong>el</strong>ete This Entry (Elimina questa voce): per <strong>el</strong>iminareuna route, s<strong>el</strong>ezionare il numero corrispondente dal menua discesa e fare clic su questo pulsante.Show Routing Table (Mostra tab<strong>el</strong>la di routing): consentedi aprire la schermata in cui è indicata la modalità ditrasmissione dei dati attraverso la rete locale. Per ciascunaroute vengono visualizzati l’indirizzo IP LAN di destinazione(Destination LAN IP), la maschera di sottorete (SubnetMask), il gateway e l’interfaccia (Interface). Fare clic suRefresh (Aggiorna) per aggiornare le informazioni. Fareclic su Close (Chiudi) per uscire dalla schermata corrente.Routing Table (Tab<strong>el</strong>la di routing)Fare clic su Save Settings (Salva impostazioni) perapplicare le modifiche o su Canc<strong>el</strong> Changes (Annullamodifiche) per annullarle.Wir<strong>el</strong>ess > Basic Wir<strong>el</strong>ess Settings(Wir<strong>el</strong>ess > Impostazioni wir<strong>el</strong>ess di base)Questa schermata consente di impostare le configurazionidi base per le reti wir<strong>el</strong>ess.Esistono due procedure per la configurazione d<strong>el</strong>le retiwir<strong>el</strong>ess d<strong>el</strong> router: manuale e Wi-Fi Protected Setup.La funzione Wi-Fi Protected Setup consente di configurarein maniera semplice la rete wir<strong>el</strong>ess. In caso di dispositiviclient come adattatori wir<strong>el</strong>ess che supportano laconfigurazione Wi-Fi Protected Setup, è possibile utilizzarequesta funzione.
Capitolo 3Configurazione avanzataWir<strong>el</strong>ess Configuration (Configurazione wir<strong>el</strong>ess): perconfigurare manualmente la rete wir<strong>el</strong>ess, s<strong>el</strong>ezionareManual (Manuale). Passare alla sezione r<strong>el</strong>ativaalle impostazioni wir<strong>el</strong>ess di base. Per utilizzare laconfigurazione Wi-Fi Protected Setup, s<strong>el</strong>ezionare Wi-FiProtected Setup. Passare alla sezione “Wi-Fi ProtectedSetup”.Basic Wir<strong>el</strong>ess Settings (Impostazioni wir<strong>el</strong>ess dibase)Fare clic su Save Settings (Salva impostazioni) perapplicare le modifiche o su Canc<strong>el</strong> Changes (Annullamodifiche) per annullarle.Wi-Fi Protected SetupSono disponibili tre metodi. Utilizzare il metodo idoneoper il dispositivo client che si sta configurando.Wir<strong>el</strong>ess > Basic Wir<strong>el</strong>ess Settings (Manual Setup)(Wir<strong>el</strong>ess > Impostazioni wir<strong>el</strong>ess di base - Configurazione manuale)Wir<strong>el</strong>ess Network Mode (Modalità di rete wir<strong>el</strong>ess): menua discesa che consente di s<strong>el</strong>ezionare gli standard wir<strong>el</strong>essin esecuzione sulla rete. Se sono presenti dispositiviWir<strong>el</strong>ess-N, Wir<strong>el</strong>ess-G e Wir<strong>el</strong>ess-B in rete, mantener<strong>el</strong>’impostazione predefinita, Mixed (Mista). Se sono presentidispositivi Wir<strong>el</strong>ess-G e Wir<strong>el</strong>ess-B in rete, s<strong>el</strong>ezionare,BG-Mixed (BG-Mista). Se sono presenti esclusivamentedispositivi Wir<strong>el</strong>ess-N, s<strong>el</strong>ezionare Wir<strong>el</strong>ess-N Only (SoloWir<strong>el</strong>ess-N). Se sono presenti esclusivamente dispositiviWir<strong>el</strong>ess-G, s<strong>el</strong>ezionare Wir<strong>el</strong>ess-G Only (Solo Wir<strong>el</strong>ess-G). Se sono presenti esclusivamente dispositivi Wir<strong>el</strong>ess-B, s<strong>el</strong>ezionare Wir<strong>el</strong>ess-B Only (Solo Wir<strong>el</strong>ess-B). Se nonsono presenti dispositivi wir<strong>el</strong>ess in rete, s<strong>el</strong>ezionareDisabled (Disattivato).Wir<strong>el</strong>ess Network Name (SSID) (Nome di rete wir<strong>el</strong>ess -SSID): per SSID si intende il nome di rete univoco condivisoda tutti i punti di una rete wir<strong>el</strong>ess, che deve essereidentico per tutti i dispositivi collegati in rete. Distinguetra lettere maiuscole e minuscole e non deve superare i32 caratteri (tra tutti qu<strong>el</strong>li disponibili sulla tastiera).Verificare che questa impostazione sia identica per tuttii punti d<strong>el</strong>la rete wir<strong>el</strong>ess. Per una maggiore sicurezza, siconsiglia di sostituire il valore SSID predefinito (linksys)con un nome univoco.Wir<strong>el</strong>ess Chann<strong>el</strong> (Canale wir<strong>el</strong>ess): n<strong>el</strong>l’<strong>el</strong>enco fornito,s<strong>el</strong>ezionare il canale appropriato corrispondente alleimpostazioni di rete. Tutti i dispositivi collegati alla retewir<strong>el</strong>ess devono comunicare sullo stesso canale per poterfunzionare correttamente.Wir<strong>el</strong>ess SSID Broadcast (Trasmissione SSID wir<strong>el</strong>ess):quando ricercano le reti wir<strong>el</strong>ess a cui associarsi n<strong>el</strong>l’arealocale, i client wir<strong>el</strong>ess rilevano l’identificativo SSIDtrasmesso dal router. Per trasmettere il valore SSID d<strong>el</strong>router, mantenere l’impostazione predefinita Enabled(Attivato). Se non si desidera trasmettere il valore SSID d<strong>el</strong>router, s<strong>el</strong>ezionare Disabled (Disattivato).Router a banda larga Wir<strong>el</strong>ess-GWir<strong>el</strong>ess > Basic Wir<strong>el</strong>ess Settings (Wi-Fi Protected Setup)(Wir<strong>el</strong>ess > Basic Wir<strong>el</strong>ess Settings - Wi-Fi Protected Setup)Wi-Fi Protected Setup > Congratulations(Wi-Fi Protected Setup > Congratulazioni)NOTA: la configurazione Wi-Fi Protected Setupconfigura un dispositivo client alla volta.Ripetere la procedura per ogni dispositivo clientche supporta la configurazione Wi-Fi ProtectedSetup.Metodo 1Utilizzare questo metodo se il dispositivo client è dotatodi un pulsante Wi-Fi Protected Setup.1. Fare clic o premere il pulsante Wi-Fi Protected Setupsul dispositivo client.10
Capitolo 3Configurazione avanzata2. Fare clic sul pulsante Wi-Fi Protected Setup in questaschermata.3. Dopo aver configurato il dispositivo client, fare clicsu OK. Per ulteriori informazioni, fare riferimento aldispositivo client o alla sua documentazione.Metodo 2Utilizzare questo metodo se il dispositivo client è dotatodi un codice PIN WPS.1.2.3.Inserire il codice PIN n<strong>el</strong> campo di questa schermata.Fare clic su Register (Registra).Dopo aver configurato il dispositivo client, fare clicsu OK. Per ulteriori informazioni, fare riferimento aldispositivo client o alla sua documentazione.Metodo 3Utilizzare questo metodo se il dispositivo client richiede ilcodice PIN d<strong>el</strong> router.1. Immettere il codice PIN <strong>el</strong>encato in questa schermata.Il codice è <strong>el</strong>encato anche sull’etichetta n<strong>el</strong>la parteinferiore d<strong>el</strong> router.2. Dopo aver configurato il dispositivo client, fare clicsu OK. Per ulteriori informazioni, fare riferimento aldispositivo client o alla sua documentazione.Lo stato Wi-Fi Protected Setup (Wi-Fi Protected SetupStatus), il nome di rete (Network Name - SSID), la protezione(Security), la crittografia (Encryption) e la passphrasevengono visualizzati n<strong>el</strong>la parte inferiore d<strong>el</strong>la schermata.NOTA: se si dispone di dispositivi client che nonsupportano la configurazione Wi-Fi ProtectedSetup, annotare le impostazioni wir<strong>el</strong>ess econfigurare manualmente i dispositivi client.Wir<strong>el</strong>ess > Wir<strong>el</strong>ess Security (Wir<strong>el</strong>ess >Protezione Wir<strong>el</strong>ess)Le impostazioni di protezione wir<strong>el</strong>ess consentono diconfigurare la protezione d<strong>el</strong>la rete wir<strong>el</strong>ess. Il routersupporta sei opzioni di modalità di protezione wir<strong>el</strong>ess:WPA-Personal, WPA-Enterprise, WPA2-Personal, WPA2-Enterprise, RADIUS e WEP. WPA è l’acronimo di Wi-FiProtected Access ed è uno standard di protezione più efficacerispetto alla cifratura WEP. WPA2 è la versione più sicurae avanzata di WPA. WEP è l’acronimo di Wired EquivalentPrivacy (protezione equivalente a rete cablata) e RADIUSdi Remote Authentication Dial-In User Service (serviziodi autenticazione remota degli utenti). Qui di seguitoviene riportata una breve descrizione d<strong>el</strong>le sei opzioni.Per istruzioni dettagliate sulle modalità di configurazioned<strong>el</strong>la protezione wir<strong>el</strong>ess per il router, consultare il“Capitolo 2: Lista di controllo di protezione wir<strong>el</strong>ess)”.Wir<strong>el</strong>ess Security (Protezione wir<strong>el</strong>ess)Security Mode (Modalità di protezione)S<strong>el</strong>ezionare il metodo di protezione corretto per larete in uso. Se non si desidera utilizzare la protezionewir<strong>el</strong>ess, mantenere l’impostazione predefinita, Disabled(Disattivata).WPA-PersonalNOTA: se si utilizza una cifratura WPA, teneresempre presente che ciascun dispositivo d<strong>el</strong>larete wir<strong>el</strong>ess DEVE utilizzare lo stesso metododi WPA e la stessa chiave condivisa, altrimenti larete wir<strong>el</strong>ess non funziona correttamente.Security Mode > WPA Personal (Modalità di protezione > WPA-Personal)WPA Algorithm (Algoritmo WPA): WPA supporta duemetodi di cifratura, TKIP e AES, che utilizzano chiavidinamiche. S<strong>el</strong>ezionare il tipo di algoritmo, TKIP o AES.AES è un metodo di cifratura più efficace di TKIP.WPA Shared Key (Chiave WPA condivisa): immettere lachiave condivisa dal router e dagli altri dispositivi di rete.La chiave può contenere da 8 a 63 caratteri.Group Key Renewal (Rinnovo chiave di gruppo):immettere un intervallo di tempo per il rinnovo d<strong>el</strong>lachiave, per specificare la frequenza con cui si desidera cheil router cambi le chiavi di cifratura. Il periodo di rinnovod<strong>el</strong>la chiave di gruppo predefinita è di 3600 secondi.WPA EnterpriseQuesta opzione fornisce il metodo WPA utilizzato conun server RADIUS. Deve essere utilizzata solo quando unserver RADIUS è collegato al router.Security Mode > WPA Enterprise(Modalità di protezione > WPA Enterprise)WPA Algorithm (Algoritmo WPA): WPA supporta duemetodi di cifratura, TKIP e AES, che utilizzano chiavidinamiche. S<strong>el</strong>ezionare il tipo di algoritmo, TKIP o AES.AES è un metodo di cifratura più efficace di TKIP.Router a banda larga Wir<strong>el</strong>ess-G11
Capitolo 3Configurazione avanzataRADIUS Server Address (Indirizzo server RADIUS):inserire l’indirizzo IP d<strong>el</strong> server RADIUS.RADIUS Port (Porta RADIUS): immettere il numero d<strong>el</strong>laporta d<strong>el</strong> server RADIUS. Il valore predefinito è 1812.Shared Key (Chiave condivisa): immettere la chiavecondivisa tra il router e il server.Key Renewal Timeout (Timeout rinnovo chiave):immettere un intervallo di tempo per indicare al router lafrequenza di modifica d<strong>el</strong>le chiavi di cifratura. Il timeoutpredefinito per il rinnovo d<strong>el</strong>la chiave è di 3600 secondi.WPA2 PersonalRADIUS Server Address (Indirizzo server RADIUS):inserire l’indirizzo IP d<strong>el</strong> server RADIUS.RADIUS Port (Porta RADIUS): immettere il numero d<strong>el</strong>laporta d<strong>el</strong> server RADIUS. Il valore predefinito è 1812.Shared Key (Chiave condivisa): immettere la chiavecondivisa tra il router e il server.Key Renewal Timeout (Timeout rinnovo chiave):immettere un intervallo di tempo per indicare al router lafrequenza di modifica d<strong>el</strong>le chiavi di cifratura. Il timeoutpredefinito per il rinnovo d<strong>el</strong>la chiave è di 3600 secondi.RADIUSQuesta opzione utilizza il metodo WEP insieme a un serverRADIUS. Deve essere utilizzata solo quando un serverRADIUS è collegato al router.Security Mode > WPA2 Personal (Modalità di protezione > WPA2-Personal)WPA Algorithm (Algoritmo WPA): WPA2 supporta duemetodi di cifratura, TKIP e AES, che utilizzano chiavidinamiche. S<strong>el</strong>ezionare il tipo di algoritmo, AES, oTKIP + AES. La s<strong>el</strong>ezione predefinita è AES.WPA Shared Key (Chiave WPA condivisa): immettere unachiave WPA condivisa di lunghezza compresa tra 8 e 63caratteri.Key Renewal (Rinnovo chiave): immettere un periodo dirinnovo d<strong>el</strong>la chiave di gruppo per specificare la frequenzacon cui si desidera che il router modifichi le chiavi dicifratura. Il periodo di rinnovo d<strong>el</strong>la chiave di gruppopredefinita è di 3600 secondi.WPA2 EnterpriseQuesta opzione fornisce il metodo WPA2 utilizzato conun server RADIUS. Deve essere utilizzata solo quando unserver RADIUS è collegato al router.Security Mode > WPA2 Enterprise(Modalità di protezione > WPA2-Enterprise)WPA Algorithm (Algoritmo WPA): WPA2 supporta duemetodi di cifratura, TKIP e AES, che utilizzano chiavidinamiche. S<strong>el</strong>ezionare il tipo di algoritmo, AES, oTKIP + AES. La s<strong>el</strong>ezione predefinita è AES.Router a banda larga Wir<strong>el</strong>ess-GSecurity Mode > RADIUS (Modalità di protezione > RADIUS)IMPORTANTE: se si utilizza una cifratura WEP,tenere sempre presente che ciascun dispositivod<strong>el</strong>la rete wir<strong>el</strong>ess DEVE utilizzare lo stessometodo di cifratura WEP e la stessa chiave dicifratura, altrimenti la rete wir<strong>el</strong>ess non funzionacorrettamente.RADIUS Server Address (Indirizzo server RADIUS):inserire l’indirizzo IP d<strong>el</strong> server RADIUS.RADIUS Port (Porta RADIUS): immettere il numero d<strong>el</strong>laporta d<strong>el</strong> server RADIUS. Il valore predefinito è 1812.Shared Key (Chiave condivisa): immettere la chiavecondivisa tra il router e il server.Default Transmit Key (Chiave di trasmissionepredefinita): s<strong>el</strong>ezionare una chiave di trasmissionepredefinita (scegliere quale chiave usare). L’impostazionepredefinita è 1.WEP Encryption (Cifratura WEP): s<strong>el</strong>ezionare un liv<strong>el</strong>lodi cifratura WEP, 64 bits 10 hex digits (64 bit 10 cifreesadecimali) o 128 bits 26 hex digits (128 bit 26 cifreesadecimali). L’impostazione predefinita è 64 bits 10 hexdigits (64 bit 10 cifre esadecimali).Passphrase: immettere una passphrase per generareautomaticamente le chiavi WEP. Quindi, fare clic suGenerate (Genera).12
Capitolo 3Configurazione avanzataKey 1-4 (Chiave 1-4): se non è stata specificata unapassphrase, immettere le chiavi WEP manualmente.WEPWEP è un metodo di cifratura di base meno sicuro diWPA.Security Mode > WEP (Modalità di protezione > WEP)Default Transmit Key (Chiave di trasmissionepredefinita): s<strong>el</strong>ezionare una chiave di trasmissionepredefinita (scegliere quale chiave usare). L’impostazionepredefinita è 1.WEP Encryption (Cifratura WEP): s<strong>el</strong>ezionare un liv<strong>el</strong>lodi cifratura WEP, 64 bits 10 hex digits (64 bit 10 cifreesadecimali) o 128 bits 26 hex digits (128 bit 26 cifreesadecimali). L’impostazione predefinita è 64 bits 10 hexdigits (64 bit 10 cifre esadecimali).Passphrase: immettere una passphrase per generareautomaticamente le chiavi WEP. Quindi, fare clic suGenerate (Genera).Key 1-4 (Chiave 1-4): se non è stata specificata unapassphrase, immettere le chiavi WEP manualmente.Fare clic su Save Settings (Salva impostazioni) perapplicare le modifiche o su Canc<strong>el</strong> Changes (Annullamodifiche) per annullarle.Wir<strong>el</strong>ess > Wir<strong>el</strong>ess MAC Filter (Wir<strong>el</strong>ess >Filtro MAC wir<strong>el</strong>ess)È possibile filtrare l’accesso wir<strong>el</strong>ess utilizzando gli indirizziMAC dei dispositivi wir<strong>el</strong>ess che trasmettono entro ilraggio d<strong>el</strong>la rete.Wir<strong>el</strong>ess MAC Filter (Filtro MAC wir<strong>el</strong>ess)Wir<strong>el</strong>ess MAC Filter (Filtro MAC wir<strong>el</strong>ess): per filtraregli utenti wir<strong>el</strong>ess tramite l’indirizzo MAC, consentendo obloccando l’accesso, s<strong>el</strong>ezionare Enable (Attiva). Se non sidesidera filtrare gli utenti in base all’indirizzo MAC, mantener<strong>el</strong>’impostazione predefinita, Disable (Disattiva).Prevent (Impedisci): s<strong>el</strong>ezionare questa impostazione perbloccare l’accesso wir<strong>el</strong>ess tramite l’indirizzo MAC. Questopulsante è s<strong>el</strong>ezionato per impostazione predefinita.Permit Only (Consenti solo): s<strong>el</strong>ezionare questaimpostazione per consentire l’accesso wir<strong>el</strong>ess tramit<strong>el</strong>’indirizzo MAC. Questo pulsante non è s<strong>el</strong>ezionato perimpostazione predefinita.Edit MAC Filter List (Modifica <strong>el</strong>enco filtri MAC): consentedi aprire la schermata MAC Address Filter List (Elenco filtriindirizzi MAC). Sulla schermata visualizzata è possibile<strong>el</strong>encare gli utenti, tramite gli indirizzi MAC, ai quali sidesidera consentire o bloccare l’accesso. Per visualizzar<strong>el</strong>’<strong>el</strong>enco degli utenti di rete in base agli indirizzi MAC, fare clicsu Wir<strong>el</strong>ess Client MAC List (Elenco MAC client wir<strong>el</strong>ess).MAC Address Filter List (Elenco filtri indirizzi MAC)Fare clic su Save Settings (Salva impostazioni) perapplicare le modifiche o su Canc<strong>el</strong> Changes (Annullamodifiche) per annullarle.Wir<strong>el</strong>ess > Advanced Wir<strong>el</strong>ess Settings(Wir<strong>el</strong>ess > Impostazioni wir<strong>el</strong>essavanzate)La schermata Wir<strong>el</strong>ess > Advanced Wir<strong>el</strong>ess Settings(Wir<strong>el</strong>ess > Impostazioni wir<strong>el</strong>ess avanzate) consente diconfigurare le funzioni wir<strong>el</strong>ess avanzate d<strong>el</strong> router. Leimpostazioni devono essere modificate esclusivamenteda un amministratore esperto; eventuali impostazionierrate possono compromettere le prestazioni wir<strong>el</strong>ess.Wir<strong>el</strong>ess > Wir<strong>el</strong>ess MAC Filter (Wir<strong>el</strong>ess > Filtro MAC wir<strong>el</strong>ess)Router a banda larga Wir<strong>el</strong>ess-G13
Capitolo 3Configurazione avanzataWir<strong>el</strong>ess > Advanced Wir<strong>el</strong>ess Settings(Wir<strong>el</strong>ess > Impostazioni wir<strong>el</strong>ess avanzate)Advanced Wir<strong>el</strong>ess Settings (Impostazioniwir<strong>el</strong>ess avanzate)Authentication Type (Tipo di autenticazione):l’impostazione predefinita è Auto (Automatico), checonsente di utilizzare l’autenticazione Sistema apertoo Chiave condivisa. Con l’autenticazione Open System(Sistema aperto), il mittente e il destinatario NON utilizzanouna chiave WEP. Con l’autenticazione Shared Key (Chiavecondivisa), il mittente e il destinatario utilizzano unachiave WEP.Basic Rate (V<strong>el</strong>ocità di base): l’impostazione Basic ratenon rappresenta una sola v<strong>el</strong>ocità di trasmissione, mauna serie di v<strong>el</strong>ocità che il router può utilizzare per latrasmissione. Il router segnala la propria v<strong>el</strong>ocità di baseagli altri dispositivi wir<strong>el</strong>ess d<strong>el</strong>la rete in modo da renderenote le v<strong>el</strong>ocità utilizzate. Il router segnala anche ches<strong>el</strong>ezionerà automaticamente la migliore v<strong>el</strong>ocità perla trasmissione. L’impostazione predefinita è Default(Predefinita), che consente al router di trasmettere a tutt<strong>el</strong>e v<strong>el</strong>ocità wir<strong>el</strong>ess standard (1-2 Mbps, 5,5 Mbps, 11 Mbps,18 Mbps e 24 Mbps). Le altre opzioni sono 1-2 Mbps,da utilizzare con le tecnologie wir<strong>el</strong>ess meno recenti,e All (Tutte), quando il router è in grado di trasmetterea tutte le v<strong>el</strong>ocità wir<strong>el</strong>ess. La v<strong>el</strong>ocità di base non è lav<strong>el</strong>ocità effettiva di trasmissione dei dati. Se si desideraspecificare la v<strong>el</strong>ocità di trasmissione dei dati d<strong>el</strong> router,configurare l’impostazione Transmission Rate (V<strong>el</strong>ocità ditrasmissione).Transmission Rate (V<strong>el</strong>ocità di trasmissione): la v<strong>el</strong>ocitàdi trasmissione dei dati deve essere impostata in basealla v<strong>el</strong>ocità d<strong>el</strong>la rete wir<strong>el</strong>ess. È possibile scegliere travarie v<strong>el</strong>ocità di trasmissione o mantenere l’impostazioneAuto (Automatico), in modo che il router utilizziautomaticamente la v<strong>el</strong>ocità dati più alta disponibilee attivi la funzione di fallback automatico. Il fallbackautomatico negozia la migliore v<strong>el</strong>ocità di connessionepossibile tra il router e il client wir<strong>el</strong>ess. Il valore predefinitoè Auto (Automatico).CTS Protection Mode (Modalità di protezione CTS):mantenere la modalità di protezione CTS (Clear-To-Send)disattivata a meno che i prodotti Wir<strong>el</strong>ess-G presentinogravi problemi n<strong>el</strong>l’effettuare la trasmissione al routerRouter a banda larga Wir<strong>el</strong>ess-Gin un ambiente con un intenso traffico 802.11b. Questafunzione aumenta la capacità d<strong>el</strong> router di catturare tutt<strong>el</strong>e trasmissioni Wir<strong>el</strong>ess-G, ma comporta una drasticadiminuzione d<strong>el</strong>le prestazioni.Frame Burst (Suddivisione frame): attivando questaopzione dovrebbero migliorare notevolmente leprestazioni d<strong>el</strong>la rete, a seconda d<strong>el</strong> produttore deidispositivi wir<strong>el</strong>ess. Per attivare l’opzione Frame Burst(Suddivisione frame), s<strong>el</strong>ezionare Enable (Attiva).L’impostazione predefinita è Disable (Disattiva).Beacon Interval (Intervallo beacon): il valore predefinitoè 100. Inserire un valore compreso tra 1 e 65.535millisecondi. Il valore Beacon Interval (Intervallo beacon)indica l’intervallo di frequenza d<strong>el</strong> beacon. Il beacon è unpacchetto trasmesso dal router per sincronizzare la retewir<strong>el</strong>ess.DTIM Interval (Intervallo DTIM): questo valore,compreso tra 1 e 255, indica l’intervallo d<strong>el</strong> messaggioDTIM (D<strong>el</strong>ivery Traffic Indication Message, messaggiodi indicazione d<strong>el</strong> traffico di consegna). Il campo DTIM èun campo di conto alla rovescia che comunica ai client lafinestra successiva disponibile per l’ascolto dei messaggibroadcast e multicast. Dopo aver archiviato in un bufferdi memoria i messaggi broadcast o multicast per i clientassociati, il router invia il DTIM successivo con un valore diintervallo DTIM. I client rilevano i beacon e si attivano perla ricezione dei messaggi broadcast e multicast. Il valorepredefinito è 1.Fragmentation Threshold (Soglia di frammentazione):specifica la dimensione massima di un pacchetto oltr<strong>el</strong>a quale i dati verranno frammentati in più pacchetti.Se si verifica una percentuale <strong>el</strong>evata di errori r<strong>el</strong>ativi aipacchetti, è possibile aumentare leggermente la soglia diframmentazione. Impostando la soglia di frammentazionesu un valore troppo basso le prestazioni d<strong>el</strong>la retepossono risultare insoddisfacenti. Si consiglia di ridurresolo leggermente il valore predefinito. N<strong>el</strong>la maggiorparte dei casi, questo valore deve rimanere impostatosull’impostazione predefinita 2346.RTS Threshold (Soglia RTS): se si verifica un flussonon uniforme dei dati, si consiglia di diminuire sololeggermente il valore predefinito 2347. Se un pacchettodi rete è inferiore alla dimensione d<strong>el</strong>la soglia RTSpreimpostata, il meccanismo RTS/CTS non viene attivato.Il router invia frame RTS (Request to Send) a una specificastazione ricevente e negozia l’invio di un frame di dati.Dopo aver ricevuto la richiesta RTS, la stazione wir<strong>el</strong>essrisponde con un frame CTS (Clear to Send) che autorizza ainiziare la trasmissione. Il valore d<strong>el</strong>la soglia RTS dovrebberimanere impostato sull’impostazione predefinita 2347.AP Isolation (Isolamento AP): questa funzione isola traloro tutti i client e i dispositivi wir<strong>el</strong>ess all’interno d<strong>el</strong>la rete.I dispositivi wir<strong>el</strong>ess potranno comunicare con il routerma non tra loro. Per utilizzare la funzione, s<strong>el</strong>ezionareOn (Attivata). La funzione AP Isolation (IsolamentoAP) è impostata su Off (Disattivata) per impostazionepredefinita.SecureEasySetup: questa funzione consente di attivareo disattivare la funzione SecureEasySetup. S<strong>el</strong>ezionareDisabled (Disattivata) per disattivare la funzione e14
Capitolo 3Configurazione avanzataspegnere la luce d<strong>el</strong> pulsante. Questa funzione è Enabled(Attivata) per impostazione predefinita.Fare clic su Save Settings (Salva impostazioni) perapplicare le modifiche o su Canc<strong>el</strong> Changes (Annullamodifiche) per annullarle.Security > Firewall (Protezione > Firewall)La schermata Security > Firewall (Protezione > Firewall)consente di configurare un firewall in grado di filtrare varitipi di traffico non desiderato sulla rete locale d<strong>el</strong> router.Security > VPN Passthrough (Protezione >Passthrough VPN)La schermata Security > VPN Passthrough (Protezione >Passthrough VPN) consente ai tunn<strong>el</strong> VPN che utilizzano iprotocolli IPSec, PPTP o L2TP di passare attraverso il firewalld<strong>el</strong> router.Security > VPN Passthrough (Protezione > Passthrough VPN)Security > Firewall (Protezione > Firewall)FirewallFirewall Protection (Protezione firewall): per utilizzar<strong>el</strong>a protezione firewall, mantenere la s<strong>el</strong>ezione predefinita,Enable (Attiva). Per disattivare la protezione firewall,s<strong>el</strong>ezionare Disable (Disattiva).Block WAN Requests (Blocco richieste WAN)Block Anonymous Internet Requests (Bloccorichieste Internet anonime): questa funzioneostacola l’accesso di utenti esterni alla rete. Questaopzione è s<strong>el</strong>ezionata per impostazione predefinita.Des<strong>el</strong>ezionare la funzione per consentire le richiesteInternet anonime.Filter Multicast (Filtro multicast): il multicast consentedi trasmettere dati contemporaneamente a piùdestinatari specifici. Se l’indirizzamento multicast èconsentito, il router inoltra i pacchetti IP multicast aicomputer appropriati. Questa opzione è s<strong>el</strong>ezionata perimpostazione predefinita. Des<strong>el</strong>ezionare questa opzioneper disattivarla.Filter Internet NAT Redirection (Filtro reindirizzamentoNAT Internet): questa funzione utilizza l’inoltro porte perimpedire che i computer locali d<strong>el</strong>la rete accedano aiserver locali. S<strong>el</strong>ezionare Filter Internet NAT Redirection(Filtro reindirizzamento NAT Internet) per filtrare ilreindirizzamento NAT Internet. Questa funzione non ès<strong>el</strong>ezionata per impostazione predefinita.Filter IDENT (Port 113) (Filtro IDENT - Porta 113): questafunzione impedisce ai dispositivi esterni alla rete localedi sottoporre a scansione la porta 113. Questa opzione ès<strong>el</strong>ezionata per impostazione predefinita. Des<strong>el</strong>ezionarequesta opzione per disattivarla.Fare clic su Save Settings (Salva impostazioni) perapplicare le modifiche o su Canc<strong>el</strong> Changes (Annullamodifiche) per annullarle.VPN Passthrough (Passthrough VPN)IPSec Passthrough (Passthrough IPSec): IPSec (InternetProtocol Security) è una suite di protocolli utilizzati perimplementare lo scambio sicuro di pacchetti a liv<strong>el</strong>lo IP. Perconsentire ai tunn<strong>el</strong> IPSec di passare attraverso il router,mantenere l’impostazione predefinita, Enable (Attiva).PPTP Passthrough (Passthrough PPTP): il protocolloPPTP (Point-to-Point Tunn<strong>el</strong>ing Protocol) consente iltunn<strong>el</strong>ing d<strong>el</strong> protocollo PPP (Point-to-Point Protocol)attraverso una rete IP. Per consentire ai tunn<strong>el</strong> PPTP dipassare attraverso il router, mantenere l’impostazionepredefinita, Enable (Attiva).L2TP Passthrough (Passthrough L2TP): il protocolloL2TP (Layer 2 Tunn<strong>el</strong>ing Protocol) è il metodo utilizzatoper attivare le sessioni Point-to-Point tramite Internet aliv<strong>el</strong>lo Layer 2. Per consentire ai tunn<strong>el</strong> L2TP di passareattraverso il router, mantenere l’impostazione predefinita,Enable (Attiva).Fare clic su Save Settings (Salva impostazioni) perapplicare le modifiche o su Canc<strong>el</strong> Changes (Annullamodifiche) per annullarle.Access Restrictions > Internet Access(Restrizioni di accesso > Accesso Internet)La schermata Access Restrictions > Internet Access(Restrizioni di accesso > Accesso Internet) consente dibloccare o permettere utilizzi e traffico Internet specifici,tra cui accesso a Internet, servizi designati e siti Web,durante giorni e orari stabiliti.Router a banda larga Wir<strong>el</strong>ess-G15
Capitolo 3Configurazione avanzataMAC o all’indirizzo IP. Per applicare un criterio aun gruppo di computer è possibile immettere unintervallo di indirizzi IP. Fare clic su Save Settings(Salva impostazioni) per applicare le modifiche o suCanc<strong>el</strong> Changes (Annulla modifiche) per annullarle.Quindi, fare clic su Close (Chiudi).Access Restrictions > Internet Access (Restrizioni di accesso > Accesso Internet)Internet Access (Accesso Internet)Internet Access Policy (Criteri di accesso Internet):l’accesso può essere gestito mediante dei criteri. Utilizzar<strong>el</strong>e impostazioni di questa schermata per stabilire i criteridi accesso, dopo aver fatto clic su Save Settings (Salvaimpostazioni). S<strong>el</strong>ezionare un criterio dal menu a discesaper visualizzare le r<strong>el</strong>ative impostazioni. Per <strong>el</strong>iminareun criterio, s<strong>el</strong>ezionare il numero d<strong>el</strong> criterio e fare clicsu D<strong>el</strong>ete (Elimina). Per visualizzare tutti i criteri, fareclic su Summary (Riepilogo). Per <strong>el</strong>iminare i criteri dallaschermata Summary (Riepilogo) fare clic su uno o piùcriteri, quindi fare clic su D<strong>el</strong>ete (Elimina). Per tornare allascheda Accesso Internet, fare clic su Close (Chiudi).Internet Policy Summary (Riepilogo criteri Internet)Status (Stato): i criteri sono disattivati per impostazionepredefinita. Per attivare un criterio, s<strong>el</strong>ezionare il numerodi criterio dal menu a discesa, quindi s<strong>el</strong>ezionare Enable(Attiva).Per creare un criterio di accesso a Internet:1.2.3.4.S<strong>el</strong>ezionare un numero dal menu a discesa InternetAccess Policy (Criterio di accesso Internet).Per attivare il criterio, s<strong>el</strong>ezionare Enable (Attiva).Immettere il nome d<strong>el</strong> criterio n<strong>el</strong> r<strong>el</strong>ativo campo.Fare clic su Edit List of PCs (Modifica <strong>el</strong>enco PC) pers<strong>el</strong>ezionare i computer a cui applicare il criterio. Vienevisualizzata la schermata List of PCs (Elenco PC). Èpossibile s<strong>el</strong>ezionare un computer in base all’indirizzoRouter a banda larga Wir<strong>el</strong>ess-GElenco PC5. S<strong>el</strong>ezionare l’opzione appropriata, Deny (Nega) oAllow (Consenti), per negare o consentire l’accesso aInternet ai computer <strong>el</strong>encati n<strong>el</strong>la schermata List ofPCs (Elenco PC).6. Stabilire i giorni e gli orari di applicazione d<strong>el</strong> criterio.S<strong>el</strong>ezionare i singoli giorni di attivazione d<strong>el</strong> criteriooppure s<strong>el</strong>ezionare Everyday (Tutti i giorni). Quindi,specificare l’intervallo di attivazione d<strong>el</strong> criterio (in oree minuti) oppure s<strong>el</strong>ezionare 24 Hours (24 ore).7. S<strong>el</strong>ezionare qualsiasi funzione Blocked Services (Servizibloccati) o Website Blocking (Blocco dei siti Web) che sidesidera utilizzare.8. Fare clic su Save Settings (Salva impostazioni), persalvare le impostazioni d<strong>el</strong> criterio, oppure fare clic suCanc<strong>el</strong> Changes (Annulla modifiche) per annullare leimpostazioni d<strong>el</strong> criterio.Blocked Services (Servizi bloccati)È possibile filtrare l’accesso ai vari servizi disponibili suInternet, come FTP o t<strong>el</strong>net, s<strong>el</strong>ezionandoli dai menua discesa accanto a Blocked Services (Servizi bloccati). Èpossibile bloccare fino a 20 servizi. Quindi, immetter<strong>el</strong>’intervallo di porte che si desidera filtrare.Se il servizio che si desidera bloccare non comparen<strong>el</strong>l’<strong>el</strong>enco o si desidera modificare un’impostazione d<strong>el</strong>servizio, fare clic sul pulsante Add/Edit Service (Aggiungi/modifica servizio). Viene visualizzata la schermata PortServices (Servizi porte).Port Services (Servizi porte)Per aggiungere un servizio, immettere il nome n<strong>el</strong> campoService Name (Nome servizio). S<strong>el</strong>ezionare il r<strong>el</strong>ativoprotocollo dal menu a discesa Protocol (Protocollo) edimmettere il corrispondente intervallo nei campi Port Range(Intervallo porte). Quindi fare clic su Add (Aggiungi).16
Capitolo 3Configurazione avanzataPer modificare un servizio, s<strong>el</strong>ezionarlo dall’<strong>el</strong>encon<strong>el</strong>la parte destra. Cambiare il nome, l’impostazione d<strong>el</strong>protocollo e l’intervallo d<strong>el</strong>le porte. Quindi fare clic suModify (Modifica).Per <strong>el</strong>iminare un servizio, s<strong>el</strong>ezionarlo dall’<strong>el</strong>enco n<strong>el</strong>laparte destra. Quindi, fare clic su D<strong>el</strong>ete (Elimina).Dopo aver effettuato le modifiche n<strong>el</strong>la schermata PortServices (Servizi porte), fare clic su Apply (Applica) persalvarle. Se si desidera annullare le modifiche, fare clic suCanc<strong>el</strong> (Annulla). Per chiudere la schermata Port Services(Servizi porte) e tornare alla schermata Access Restrictions(Restrizioni di accesso), fare clic sul pulsante Close(Chiudi).Website Blocking by URL Address (Blocco d<strong>el</strong> sito Webmediante indirizzo URL)Se si desidera bloccare i siti Web con specifici indirizzi URL,immettere ciascun URL in un campo separato accantoa Website Blocking by URL Address (Blocco d<strong>el</strong> sito Webmediante indirizzo URL).Website Blocking by Keyword (Blocco d<strong>el</strong> sito Web medianteparola chiave)Se si desidera bloccare i siti Web tramite specifiche parolechiave, immettere ciascuna parola chiave in un camposeparato accanto a Website Blocking by Keyword (Bloccod<strong>el</strong> sito Web mediante parola chiave).Fare clic su Save Settings (Salva impostazioni) perapplicare le modifiche o su Canc<strong>el</strong> Changes (Annullamodifiche) per annullarle.Applications and Gaming > Port RangeForward (Applicazioni e giochi > Inoltrointervallo porte)La schermata Applications & Gaming > Port Range Forward(Applicazioni e giochi > Inoltro intervallo porte) consente diinstallare in rete servizi pubblici, quali server Web, server ftp,server di posta o altre applicazioni Internet specializzate. Leapplicazioni Internet specializzate sono qu<strong>el</strong>le che utilizzanol’accesso a Internet per eseguire funzioni determinatequali videoconferenze o giochi online. Alcune applicazioniInternet possono non richiedere l’operazione di inoltro.Port Range Forward (Inoltro intervallo porte)Per inoltrare una porta, immettere su ciascuna riga leinformazioni per i criteri richiesti.Application (Applicazione): immettere in questo campoil nome che si desidera attribuire all’applicazione. Il nomepuò essere composto da un massimo di 12 caratteri.Start/End (Inizio/Fine): è l’intervallo d<strong>el</strong>le porte.Immettere il numero d<strong>el</strong>la porta iniziale n<strong>el</strong>la colonnaStart (Inizio) e il numero d<strong>el</strong>la porta finale n<strong>el</strong>la colonnaEnd (Fine).Protocol (Protocollo): s<strong>el</strong>ezionare il protocollo utilizzatoper l’applicazione: TCP, UDP oppure Both (Entrambi).IP Address (Indirizzo IP): per ciascuna applicazione,immettere l’indirizzo IP d<strong>el</strong> computer che esegu<strong>el</strong>’applicazione specifica.Enable (Attiva): s<strong>el</strong>ezionare Enable (Attiva) per attivar<strong>el</strong>’inoltro porte per l’applicazione desiderata.Fare clic su Save Settings (Salva impostazioni) perapplicare le modifiche o su Canc<strong>el</strong> Changes (Annullamodifiche) per annullarle.Applications & Gaming > Port Triggering(Applicazioni e giochi > Attivazione porte)La schermata Applications & Gaming > Port Triggering(Applicazioni e giochi > Attivazione porte) consente alrouter di osservare i dati in uscita per determinati numeridi porte. L’indirizzo IP d<strong>el</strong> computer che invia i daticorrispondenti viene memorizzato dal router in modoche, quando i dati richiesti ripassano attraverso il router,vengono inoltrati al computer appropriato in base agliindirizzi IP e alle regole di mappatura d<strong>el</strong>le porte.Applications and Gaming > Port Range Forward(Applicazioni e giochi > Inoltro intervallo porte)Router a banda larga Wir<strong>el</strong>ess-GApplications and Gaming > Port Triggering(Applicazioni e giochi > Attivazione porte)Port Triggering (Attivazione porte)Application (Applicazione): immettere il nomed<strong>el</strong>l’applicazione di attivazione.Triggered Range (Intervallo di attivazione)Per ciascuna applicazione, <strong>el</strong>encare l’intervallo d<strong>el</strong>numero di porte attivate. Per informazioni sui numeri diporta necessari, consultare la documentazione r<strong>el</strong>ativaall’applicazione Internet.17
Capitolo 3Configurazione avanzataStart Port (Porta iniziale): immettere il numero di portainiziale d<strong>el</strong>l’intervallo di applicazione.End Port (Porta finale): immettere il numero di portafinale d<strong>el</strong>l’intervallo di applicazione.Forwarded Range (Intervallo di inoltro)Per ciascuna applicazione, <strong>el</strong>encare l’intervallo d<strong>el</strong>numero di porte inoltrate. Per informazioni sui numeri diporta necessari, consultare la documentazione r<strong>el</strong>ativaall’applicazione Internet.Start Port (Porta iniziale): immettere il numero di portainiziale d<strong>el</strong>l’intervallo di inoltro.End Port (Porta finale): immettere il numero di portafinale d<strong>el</strong>l’intervallo di inoltro.Enable (Attiva): s<strong>el</strong>ezionare Enable (Attiva) per attivare leporte per l’applicazione desiderata.Fare clic su Save Settings (Salva impostazioni) perapplicare le modifiche o su Canc<strong>el</strong> Changes (Annullamodifiche) per annullarle.Applications and Gaming > DMZ(Applicazioni e giochi > DMZ)La funzione DMZ consente a un computer di rete diaccedere a Internet per utilizzare un determinato servizio,ad esempio giochi online o videoconferenze. L’hostingDMZ inoltra contemporaneamente tutte le porte a ununico computer. La funzione di Port Range Forward (Inoltrointervallo porte) è più sicura in quanto apre solo le porteche si desidera tenere aperte, mentre la funzione hostingDMZ apre tutte le porte di un computer rendendolovisibile su Internet.Applications and Gaming > QoS(Applicazioni e giochi > QoS)QoS (Quality of Service) garantisce un servizio miglioreai tipi di traffico di rete ad alta priorità, che possonorichiedere applicazioni su richiesta e in tempo reale qualile videoconferenze.Sono disponibili tre tipi di funzioni QoS: Device Priority(Priorità dispositivo), Application Priority (Prioritàapplicazione) e Ethernet Port Priority (Priorità portaEthernet).QoSEnable/Disable (Attiva/Disattiva): per attivare il servizioQoS, s<strong>el</strong>ezionare Enable (Attiva). In caso contrario,s<strong>el</strong>ezionare Disable (Disattiva). La funzione QoS èdisattivata per impostazione predefinita.Upstream Bandwidth (Larghezza di banda di upstream):s<strong>el</strong>ezionare Auto (Automatico) o Manual (Manuale)dal menu a discesa. L’impostazione manuale permettedi specificare la massima larghezza di banda in uscitautilizzabile dalle applicazioni.Applications and Gaming > DMZ (Applicazioni e giochi > DMZ)DMZÈ necessario disattivare la funzione di client DHCP su tutti iPC su cui viene eseguito l’inoltro porte. È inoltre necessarioassegnare a tali PC un nuovo indirizzo IP statico, poichél’indirizzo IP potrebbe cambiare durante l’utilizzo d<strong>el</strong>lafunzione DHCP.Per rendere visibile un computer, s<strong>el</strong>ezionare Enable(Attiva). Quindi, immettere l’indirizzo IP d<strong>el</strong> computern<strong>el</strong> campo DMZ Host IP Address (Indirizzo IP d<strong>el</strong>l’hostDMZ). Questa opzione è disattivata per impostazionepredefinita.Fare clic su Save Settings (Salva impostazioni) perapplicare le modifiche o su Canc<strong>el</strong> Changes (Annullamodifiche) per annullarle.Applications and Gaming > QoS (Applicazioni e giochi > QoS)Device Priority (Priorità dispositivo)Immettere il nome d<strong>el</strong> dispositivo n<strong>el</strong> campo Device name(Nome dispositivo), immettere il corrispondente indirizzoMAC, quindi s<strong>el</strong>ezionare la priorità dal menu a discesa.Ethernet Port Priority (Priorità porta Ethernet)La QoS Ethernet Port Priority (Priorità porta Ethernet)consente di stabilire una priorità per le quattro porte d<strong>el</strong>router, le porte LAN 1-4. Per ciascuna porta s<strong>el</strong>ezionare lapriorità e l’impostazione d<strong>el</strong> controllo di flusso.Router a banda larga Wir<strong>el</strong>ess-G18
Capitolo 3Configurazione avanzataPriority (Priorità): s<strong>el</strong>ezionare High (Alta) o Low (Bassa)n<strong>el</strong>la colonna Priority (Priorità). Per impostazionepredefinita alle quattro porte d<strong>el</strong> router viene assegnatauna priorità bassa.Flow Control (Controllo di flusso): se si desidera cheil router controlli la trasmissione dei dati tra i dispositividi rete, s<strong>el</strong>ezionare Enabled (Attivato). Per disattivarequesta funzione, s<strong>el</strong>ezionare Disabled (Disattivato). LaQoS Ethernet Port Priority (Priorità porta Ethernet) nonrichiede il supporto d<strong>el</strong> provider di servizi Internet poichéle porte LAN con priorità 1-4 si trovano n<strong>el</strong>la rete. Questafunzione è disattivata per impostazione predefinita.Application Priority (Priorità applicazione)La QoS Application Priority (Priorità applicazione) gestisc<strong>el</strong>e informazioni non appena vengono trasmesse e ricevute.In base alle impostazioni d<strong>el</strong>la schermata QoS, questafunzione assegna una priorità alta o bassa alle applicazionispecificate.Optimize Gaming Applications (Ottimizza giochi):s<strong>el</strong>ezionare questa opzione per assegnareautomaticamente una priorità più alta alle porte utilizzateda alcune comuni applicazioni per giochi. Alcuni di questigiochi sono: Counter-Strike, Half-Life, Age of Empires,Everquest, Quake2/Quake3 e Diablo II. Questa opzione èdes<strong>el</strong>ezionata per impostazione predefinita.Application Name (Nome applicazione): immettere ilnome che si desidera attribuire all’applicazione n<strong>el</strong> campoApplication Name (Nome applicazione).Priority (Priorità): s<strong>el</strong>ezionare High (Alta) o Low (Bassa)per assegnare la priorità all’applicazione. L’impostazionepredefinita è Low (Bassa).Specific Port # (N. porta specifica): immettere il numerodi porta utilizzato dall’applicazione.QoS wir<strong>el</strong>essWMM Support (Supporto WMM): il Wi-Fi Multimedia(WMM), noto anche come Wir<strong>el</strong>ess Multimedia Extensions(WME), è una funzione certificata dalla Wi-Fi Alliance,basata sullo standard IEEE 802.11e. Questa funzionefornisce QoS alle reti wir<strong>el</strong>ess. È particolarmente adatta alleapplicazioni per video, voce e musica: ad esempio, Voiceover IP (VoIP), streaming video e giochi interattivi. Se sullarete wir<strong>el</strong>ess sono presenti altri dispositivi che supportanole funzioni WMM, s<strong>el</strong>ezionare Enabled (Attivato). In casocontrario, mantenere l’impostazione predefinita, Disabled(Disattivato).No Acknowledgement (Nessun riconoscimento): questafunzione impedisce al router di inviare nuovamente i datiin caso di errore. Per utilizzare questa opzione, s<strong>el</strong>ezionareEnabled (Attivato). In caso contrario, mantener<strong>el</strong>’impostazione predefinita, Disabled (Disattivato).Fare clic su Save Settings (Salva impostazioni) perapplicare le modifiche o su Canc<strong>el</strong> Changes (Annullamodifiche) per annullarle.Administration > Management(Amministrazione > Gestione)La schermata Amministrazione > Gestione (Amministrazione> Gestione) consente all’amministratore di rete di gestirefunzioni router specifiche per l’accesso e la sicurezza.Router a banda larga Wir<strong>el</strong>ess-GAdministration > Management (Amministrazione > Gestione)Router Password (Password router)Local Router Access (Accesso al router locale)Router Password (Password router): immettere unanuova password per il router.Re-enter to confirm (Conferma password): immetterenuovamente la password per confermarla.Web Access (Accesso Web)Access Server (Server di accesso): HTTP (HyperTextTransport Protocol) è il protocollo di comunicazioneutilizzato per connettersi ai server sul World Wide Web.Il protocollo HTTPS utilizza SSL (Secured Socket Layer)per cifrare i dati trasmessi, assicurando una maggioresicurezza. S<strong>el</strong>ezionare HTTP o HTTPS. La s<strong>el</strong>ezionepredefinita è HTTP.Wir<strong>el</strong>ess Access Web (Accesso wir<strong>el</strong>ess Web): se si utilizzaun router in un dominio pubblico che consente l’accessowir<strong>el</strong>ess a utenti guest, è possibile disattivare l’accessowir<strong>el</strong>ess all’utilità basata sul Web d<strong>el</strong> router. In questomodo l’accesso all’utilità basata sul Web è possibile solotramite la connessione cablata. Mantenere l’impostazionepredefinita Enable (Attiva) per attivare l’accesso wir<strong>el</strong>essall’utilità basata sul Web d<strong>el</strong> router o Disable (Disattiva)per disattivarlo.Remote Router Access (Accesso al router remoto)Remote Management (Gestione remota): per accedereal router in modalità remota, dall’esterno d<strong>el</strong>la rete,s<strong>el</strong>ezionare Enable (Attiva).Management Port (Porta di gestione): immettere ilnumero di porta da aprire per l’accesso esterno. In questomodo quando si accede al router è necessario immetter<strong>el</strong>a password.Use https (Utilizza https): per richiedere l’uso d<strong>el</strong>protocollo HTTPS per l’accesso remoto, s<strong>el</strong>ezionare questaopzione.UPnPUPnP: mantenere l’impostazione predefinita, Enable(Attiva) per attivare la funzione UPnP; oppure s<strong>el</strong>ezionareDisable (Disattiva).19
Capitolo 3Configurazione avanzataFare clic su Save Settings (Salva impostazioni) perapplicare le modifiche o su Canc<strong>el</strong> Changes (Annullamodifiche) per annullarle.Administration > Log (Amministrazione >Registro)Il router è in grado di registrare tutto il traffico sullaconnessione Internet.Ping Test (Test ping)Log (Registro)Administration > Log (Amministrazione > Registro)Log (Registro): per disattivare la funzione registro,mantenere l’impostazione predefinita Disable (Disattiva).Per controllare il traffico fra la rete e Internet, s<strong>el</strong>ezionareEnable (Attiva).Per visualizzare i registri, fare clic su Incoming Log(Registro in entrata) o Outgoing Log (Registro in uscita)in base al registro che si desidera visualizzare.Fare clic su Save Settings (Salva impostazioni) perapplicare le modifiche o su Canc<strong>el</strong> Changes (Annullamodifiche) per annullarle.Administration > Diagnostics(Amministrazione > Diagnostica)I test di diagnostica (Ping e Traceroute) consentono dicontrollare le connessioni dei componenti d<strong>el</strong>la rete.Administration > Diagnostics (Amministrazione > Diagnostica)Ping Test (Test ping)Ping: il test ping controlla lo stato d<strong>el</strong>la connessione.Fare clic su Ping per aprire la schermata Ping Test (Testping). Immettere l’indirizzo d<strong>el</strong> computer di cui si desideraverificare la connessione e il numero di esecuzioni d<strong>el</strong> test.Quindi fare clic su Ping. La schermata Ping Test (Test ping)mostra l’esito d<strong>el</strong> test. Per interrompere il test, fare clic suStop (Interrompi). Per canc<strong>el</strong>lare la schermata, fare clic suClear Log (Canc<strong>el</strong>la registro). Per tornare alla schermataDiagnostics (Diagnostica), fare clic su Close (Chiudi).Router a banda larga Wir<strong>el</strong>ess-GTraceroute Test (Test traceroute)Traceroute: per verificare le prestazioni di unaconnessione, fare clic su Traceroute per aprire la schermataTraceroute Test (Test traceroute). Immettere l’indirizzo d<strong>el</strong>computer di cui si desidera verificare la connessione efare clic su Traceroute. La schermata Traceroute test (Testtraceroute) mostra l’esito d<strong>el</strong> test. Per interrompere il test,fare clic su Stop (Interrompi). Per canc<strong>el</strong>lare la schermata,fare clic su Clear Log (Canc<strong>el</strong>la registro). Per tornare allaschermata Diagnostics (Diagnostica), fare clic su Close(Chiudi).Traceroute Test (Test traceroute)Administration > Factory Defaults(Amministrazione > Impostazionipredefinite)La schermata Administration > Factory Defaults(Amministrazione > Impostazioni predefinite) consente diripristinare le impostazioni predefinite d<strong>el</strong>la configurazioned<strong>el</strong> router.Factory Defaults (Impostazioni predefinite)Restore Factory Defaults (Ripristina impostazionipredefinite): per riportare le impostazioni d<strong>el</strong> router aivalori predefiniti, s<strong>el</strong>ezionare Yes (Sì) e fare clic su SaveSettings (Salva impostazioni). Le impostazioni salvatevengono perse quando si ripristinano le impostazionipredefinite.20
Capitolo 3Configurazione avanzataAdministration > Factory Defaults(Amministrazione > Impostazioni predefinite)Administration > Factory Defaults(Amministrazione > Aggiornamentofirmware)La schermata Administration > Upgrade Firmware(Amministrazione > Aggiornamento firmware) consentedi aggiornare il firmware d<strong>el</strong> router. Aggiornare il firmwaresolo se si sono verificati problemi con il router o se ilnuovo firmware dispone di una funzione che si desiderautilizzare.Administration > Config Management(Amministrazione > Gestione configurazione)Backup Configuration (Backup configurazione)Per eseguire il backup d<strong>el</strong> file di configurazione d<strong>el</strong> router,fare clic su Backup. Quindi, seguire le istruzioni visualizzatesullo schermo.Restore Configuration (Ripristino configurazione)Please s<strong>el</strong>ect a file to restore (S<strong>el</strong>ezionare un file daripristinare): fare clic su Browse (Sfoglia) e s<strong>el</strong>ezionare il filedi configurazione. Quindi, fare clic su Restore (Ripristina).Status > Router (Stato > Router)La schermata Status > Router (Stato > Router) visualizza lostato corrente d<strong>el</strong> router.Administration > Factory Defaults(Amministrazione > Aggiornamento firmware)Prima di aggiornare il firmware, scaricare il file diaggiornamento d<strong>el</strong> firmware per il router dal sito Web diLinksys, www.linksys.com., quindi, estrarre il file.Upgrade Firmware (Aggiorna firmware)Please S<strong>el</strong>ect a File to Upgrade (S<strong>el</strong>ezionare un file daaggiornare): fare clic su Browse (Sfoglia) e s<strong>el</strong>ezionare ilfile di aggiornamento d<strong>el</strong> firmware estratto. Quindi fare clicsu Upgrade (Aggiorna) e seguire le istruzioni visualizzatesullo schermo.Administration > Config Management(Amministrazione > Gestioneconfigurazione)Questa schermata viene utilizzata per eseguire il backup oil ripristino d<strong>el</strong> file di configurazione d<strong>el</strong> router.Status > Router (Stato > Router)Router Information (Informazioni router)Firmware Version (Versione firmware): indica la versionecorrente d<strong>el</strong> firmware utilizzato dal router.Current Time (Ora corrente): consente di visualizzar<strong>el</strong>’ora n<strong>el</strong> formato impostato n<strong>el</strong>la scheda Setup(Configurazione).MAC Address (Indirizzo MAC): l’indirizzo MAC d<strong>el</strong> routercome appare al provider di servizi Internet.Router a banda larga Wir<strong>el</strong>ess-G21
Capitolo 3Configurazione avanzataRouter Name (Nome router): il nome specifico d<strong>el</strong> routerimpostato n<strong>el</strong>la scheda Setup (Configurazione).Host Name (Nome host): è il nome che deve essereimmesso n<strong>el</strong>la scheda Setup (Configurazione), se richiestodal provider di servizi Internet.Domain Name (Nome dominio): è il nome che deveessere immesso n<strong>el</strong>la scheda Setup (Configurazione), serichiesto dal provider di servizi Internet.InternetConfiguration Type (Tipo di configurazione)Questa sezione mostra le informazioni di rete correntimemorizzate n<strong>el</strong> router. Le informazioni variano aseconda d<strong>el</strong> tipo di connessione Internet s<strong>el</strong>ezionaton<strong>el</strong>la schermata Setup > Basic Setup (Configurazione >Configurazione di base).Fare clic su Refresh (Aggiorna) per aggiornare leinformazioni visualizzate sullo schermo.Status > Local Network (Stato > Rete locale)La schermata Status > Local Network (Stato > Rete locale)consente di visualizzare lo stato d<strong>el</strong>la rete.DHCP Clients Table (Tab<strong>el</strong>la client DHCP)Fare clic su Refresh (Aggiorna) per aggiornare leinformazioni visualizzate sullo schermo.Status > Wir<strong>el</strong>ess (Stato > Wir<strong>el</strong>ess)La schermata Status > Wir<strong>el</strong>ess (Stato > Wir<strong>el</strong>ess) consentedi visualizzare lo stato d<strong>el</strong>la rete wir<strong>el</strong>ess.Status > Wir<strong>el</strong>ess (Stato > Wir<strong>el</strong>ess)Status > Local Network (Stato > Rete locale)Local Network (Rete locale)MAC Address (Indirizzo MAC): l’indirizzo MAC d<strong>el</strong> routercome appare sulla rete Ethernet locale.IP Address (Indirizzo IP): l’indirizzo IP d<strong>el</strong> router comeappare sulla rete Ethernet locale.Subnet Mask (Maschera di sottorete): mostra la mascheradi sottorete corrente che è stata configurata per la ret<strong>el</strong>ocale.DHCP Server (Server DHCP): indica se il router vieneutilizzato come server DHCP.Start IP Address (Indirizzo IP iniziale): l’indirizzo IP inizialed<strong>el</strong>l’intervallo di indirizzi IP utilizzato per la rete Ethernetlocale viene indicato qui.End IP Address (Indirizzo IP finale): l’indirizzo IP finaled<strong>el</strong>l’intervallo di indirizzi IP utilizzato per la rete Ethernetlocale viene indicato qui.DHCP Clients Table (Tab<strong>el</strong>la client DHCP): fare clic suquesto pulsante per aprire una schermata in cui sonovisualizzati i PC che utilizzano il router come server DHCP. Èpossibile <strong>el</strong>iminare i computer dall’<strong>el</strong>enco e interromper<strong>el</strong>e r<strong>el</strong>ative connessioni s<strong>el</strong>ezionando la cas<strong>el</strong>la D<strong>el</strong>ete(Elimina) e facendo clic sul pulsante D<strong>el</strong>ete (Elimina).Router a banda larga Wir<strong>el</strong>ess-GWir<strong>el</strong>essMAC Address (Indirizzo MAC): l’indirizzo MAC d<strong>el</strong> routercome appare sulla rete wir<strong>el</strong>ess locale.Mode (Modalità): visualizza la modalità wir<strong>el</strong>ess utilizzatadalla rete (Mixed, G-Only o Disabled - Mista, Solo G oDisattivata) e s<strong>el</strong>ezionata n<strong>el</strong>la schermata Wir<strong>el</strong>ess > BasicWir<strong>el</strong>ess Settings (Wir<strong>el</strong>ess > Impostazioni wir<strong>el</strong>ess dibase).SSID: visualizza il nome d<strong>el</strong>la rete wir<strong>el</strong>ess o SSID,immesso n<strong>el</strong>la schermata Wir<strong>el</strong>ess > Basic Wir<strong>el</strong>ess Settings(Wir<strong>el</strong>ess > Impostazioni wir<strong>el</strong>ess di base).DHCP Server (Server DHCP): mostra lo stato d<strong>el</strong>lafunzione server DHCP.Chann<strong>el</strong> (Canale): visualizza il canale su cui la rete wir<strong>el</strong>esssta trasmettendo, immesso n<strong>el</strong>la schermata Wir<strong>el</strong>ess >Basic Wir<strong>el</strong>ess Settings (Wir<strong>el</strong>ess > Impostazioni wir<strong>el</strong>ess dibase).Encryption Function (Funzione di cifratura): visualizzalo stato d<strong>el</strong>la protezione wir<strong>el</strong>ess d<strong>el</strong> router, s<strong>el</strong>ezionatan<strong>el</strong>la schermata Wir<strong>el</strong>ess > Wir<strong>el</strong>ess Security (Wir<strong>el</strong>ess >Protezione wir<strong>el</strong>ess).Fare clic su Refresh (Aggiorna) per aggiornare leinformazioni visualizzate sullo schermo.22
Appendice ARisoluzione dei problemiAppendice A:Risoluzione dei problemiIl computer non riesce a connettersi a Internet.Attenersi alle istruzioni riportate finché il computer non siconnette a Internet:• Verificare che il router sia acceso. L’indicatore diaccensione dovrebbe essere di colore verde e nonlampeggiante.• Se l’indicatore di accensione lampeggia, spegneretutti i dispositivi di rete, compreso il modem, il routere i computer. Quindi, accendere ciascun dispositivon<strong>el</strong>l’ordine riportato di seguito:1.2.3.Modem via cavo o DSLRouterComputer• Verificare i collegamenti dei cavi. Il computer deveessere collegato alle porte da 1 a 4 d<strong>el</strong> router, mentreil modem deve essere collegato alla porta Internet d<strong>el</strong>router.Il modem non dispone di una porta Ethernet.Si tratta di un modem per l’accesso remoto, utilizzato peril tradizionale servizio di accesso remoto. Per utilizzareil router, è necessario un modem via cavo/DSL e unaconnessione a Internet ad alta v<strong>el</strong>ocità.Non è possibile utilizzare il servizio DSL per effettuare laconnessione manuale a Internet.Dopo aver installato il router, viene effettuata laconnessione automatica al servizio ISP (Internet ServiceProvider), pertanto non è più necessario effettuare laconnessione manuale.La linea t<strong>el</strong>efonica DSL non è compatibile con la portaInternet d<strong>el</strong> router.Il router non sostituisce il modem. Per poter utilizzare ilrouter, è necessario comunque disporre di un modemDSL. Collegare la linea t<strong>el</strong>efonica al modem DSL, inserire ilCD per l’installazione n<strong>el</strong> computer e seguire le istruzionivisualizzate sullo schermo.Quando si fa doppio clic sul browser Web, vengonorichiesti il nome utente e la password. Per <strong>el</strong>iminarequesta richiesta, attenersi alle seguenti istruzioni.Avviare il browser Web ed eseguire i passaggi riportati diseguito (questi passaggi sono specifici di Internet Explorerma sono simili per gli altri browser):1.2.3.4.S<strong>el</strong>ezionare Tools (Strumenti) > Internet Options(Opzioni Internet).Fare clic sulla scheda Connections (Connessioni).S<strong>el</strong>ezionare Never dial a connection (Non utilizzaremai connessioni remote).Fare clic su OK.Il router non dispone di una porta coassiale per laconnessione via cavo.Il router non sostituisce il modem. Per poter utilizzare ilrouter, è necessario comunque disporre di un modemvia cavo. Collegare la linea t<strong>el</strong>efonica al modem via cavo,inserire il CD per l’installazione n<strong>el</strong> computer e seguire leistruzioni visualizzate sullo schermo.Il computer non riesce a connettersi alla rete in modalitàwir<strong>el</strong>ess.Verificare che il nome di rete wir<strong>el</strong>ess o SSID sia identicosul computer e sul router. Se è stata attivata la protezionewir<strong>el</strong>ess, assicurarsi di utilizzare lo stesso metodo diprotezione e la stessa chiave sul computer e sul router.È necessario modificare le impostazioni sul router.Aprire il browser Web (ad esempio, Internet Explorer oFirefox) e immettere l’indirizzo IP d<strong>el</strong> router n<strong>el</strong> campod<strong>el</strong>l’indirizzo (l’indirizzo IP predefinito è 192.168.1.1). Serichiesto, lasciare vuoto il campo User name (Nome utente)e immettere la password n<strong>el</strong> router (per impostazionepredefinita la password è admin). Per modificare leimpostazioni, fare clic sulla scheda appropriata.WEB: se la presente appendice non forniscerisposte a tutte le domande, visitare il sito Webdi Linksys all’indirizzo www.linksys.com.Router a banda larga Wir<strong>el</strong>ess-G23
Appendice BSpecifiche tecnicheAppendice B:Specifiche tecnicheMod<strong>el</strong>loStandardWRT54G2IEEE 802.3, IEEE 802.3u,IEEE 802.11g, IEEE 802.11bPorte Internet: una porta RJ-45 10/100LAN: quattro portecommutate 10/100 RJ-45Una porta di alimentazionePulsanteUn pulsante di ripristinoUn pulsante WPSLED Alimentazione, wir<strong>el</strong>ess, LAN 1-4,Internet Configurazione WPS (Wi-FiProtected Setup)Tipo di cablaggioCAT5N. di antenne 2 internePotenza di uscita RF 18 dBmSupporto/certificazioneUPnPAbilitatoFunzioni diprotezioneProtezione wir<strong>el</strong>essSpecifiche ambientaliDimensioniPesoAlimentazioneCertificazioniSPI (Stateful Packet Inspection)Firewall, criteri InternetWi-Fi Protected Access 2 (WPA2),WEP, filtraggio MAC wir<strong>el</strong>ess203 mm x 35 mm x 160 mm280 gEsterna, 12 V CC, 0,5 ATemp. d’esercizio Da 0 a 40ºCTemp. diconservazione Da -20 a 60ºCUmidità d’esercizioUmidità diconservazioneFCC, CE, IC-UL Wi-Fi (802.11b,802.11g), WPA2, WMMDal 10 all’85% senza condensaDal 5 al 90% senza condensaRouter a banda larga Wir<strong>el</strong>ess-G24
Appendice CInformazioni sulla garanziaAppendice C:Informazioni sullagaranziaGARANZIA LIMITATALinksys garantisce che il presente prodotto hardwareLinksys sarà privo di difetti derivanti da materiali e damanodopera in condizioni di uso normale, per il periododi validità d<strong>el</strong>la garanzia che ha inizio dalla data diacquisto d<strong>el</strong> prodotto da parte d<strong>el</strong>l’acquirente originale esi conclude nei termini di seguito specificati:• Due (2) anni per un prodotto nuovo• Novanta (90) giorni per un prodotto ricostituitoLa presente garanzia limitata non è trasferibile e si estendesolo all’acquirente originale. La responsabilità totale diLinksys e il risarcimento esclusivo per l’acquirente previstida questa garanzia saranno, a discrezione di Linksys, (a)la riparazione d<strong>el</strong> prodotto con parti nuove o ricostituite,(b) la sostituzione d<strong>el</strong> prodotto con un altro nuovo oricostituito e ragionevolmente equivalente oppure (c) ilrimborso d<strong>el</strong>la somma pagata meno eventuali sconti. Iprodotti riparati o sostituiti saranno coperti da garanziaper la durata restante d<strong>el</strong> periodo originale di garanzia oper trenta (30) giorni, se la durata restante è inferiore a 30giorni. Tutte le parti e/o i prodotti sostituiti diventerannoproprietà di Linksys.La presente garanzia limitata non esclude l’applicazionedi altri diritti stabiliti per legge o derivanti da un eventualecontratto di vendita.ESCLUSIONI E LIMITAZIONILa presente garanzia non è valida se: a) il sigillo diassemblaggio d<strong>el</strong> prodotto risulta rimosso o danneggiato;(b) il prodotto è stato alterato o modificato da un soggettodiverso da Linksys; (c) il danno al prodotto è stato causatodall’uso con prodotti non Linksys; (d) il prodotto non è statoinstallato, utilizzato, riparato o conservato conformementealle istruzioni fornite da Linksys; (e) il prodotto è statosottoposto a sollecitazione fisica o <strong>el</strong>ettrica anomala, usoimproprio, negligenza o incidente; (f) il numero di seriesul prodotto è stato alterato, canc<strong>el</strong>lato o rimosso oppure(g) il prodotto è stato fornito o concesso in licenza perscopi di verifica d<strong>el</strong>le versioni beta, valutazione, test odimostrazione, per i quali Linksys non applica un prezzo diacquisto o un canone di licenza.TUTTI I SOFTWARE IN DOTAZIONE CON IL PRODOTTOLINKSYS, SIA CARICATI NEL PRODOTTO SIA CONTENUTIIN SUPPORTI MULTIMEDIALI ALLEGATI AL PRODOTTO,VENGONO FORNITI “COSÌ COME SONO” SENZA ALCUNTIPO DI GARANZIA. Senza che ciò costituisca unaRouter a banda larga Wir<strong>el</strong>ess-Glimitazione a quanto sopra esposto, Linksys non garantisceche il software potrà essere utilizzato senza problemio interruzioni. Inoltre, a causa d<strong>el</strong> continuo sviluppo dinuove tecniche di intrusione e attacco alle reti, Linksysnon garantisce che il prodotto, il servizio o il software, néqualsiasi altro dispositivo, sistema o rete su cui il prodotto oil software viene utilizzato, non sia vulnerabile a intrusionio attacchi. Il presente prodotto Linksys può includere oessere venduto in pacchetto con software od offerte diservizi di terze parti. La presente garanzia limitata non siapplicherà a tali software od offerte di servizi di terze parti.La presente garanzia limitata non assicura la continuadisponibilità di servizi di terze parti che l’uso di questoprodotto potrebbe rendere necessari.NELLA MISURA IN CUI NON SIA PROIBITO DALLA LEGGE,TUTTE LE GARANZIE IMPLICITE E LE CONDIZIONI DICOMMERCIABILITÀ, DI QUALITÀ SODDISFACENTE O DIIDONEITÀ A UNO SCOPO SPECIFICO SONO LIMITATEALLA DURATA DEL PERIODO DI GARANZIA. TUTTELE ALTRE CONDIZIONI, DICHIARAZIONI E GARANZIE,ESPRESSE O IMPLICITE, INCLUSE EVENTUALI GARANZIEIMPLICITE DI NON VIOLAZIONE, SONO ESCLUSE. Alcunegiurisdizioni non consentono limitazioni di durata di unagaranzia implicita; in tal caso, le limitazioni sopra indicatepotrebbero non essere applicabili. Questa garanzialimitata conferisce all’acquirente diritti legali specifici edè possibile che l’acquirente disponga di altri diritti chepossono variare da una giurisdizione all’altra.NELLA MISURA CONSENTITA DALLA LEGGE, IN NESSUNCASO LINKSYS POTRÀ ESSERE RITENUTA RESPONSABILEDI EVENTUALI PERDITE DI DATI, INTROITI, PROFITTIO DI DANNI SPECIFICI, INDIRETTI, CONSEQUENZIALI,INCIDENTALI O VOLONTARI, INDIPENDENTEMENTEDALL’AMBITO DI RESPONSABILITÀ PREVISTO (INCLUSALA NEGLIGENZA), DERIVANTI O CONNESSI ALL’USO OALL’IMPOSSIBILITÀ DI UTILIZZARE IL PRODOTTO (INCLUSIEVENTUALI SOFTWARE), ANCHE QUALORA LINKSYS SIASTATA AVVERTITA DELLA POSSIBILITÀ DI TALI DANNI. INNESSUN CASO, LA RESPONSABILITÀ DI LINKSYS SUPERERÀL’IMPORTO PAGATO DALL’UTENTE PER IL PRODOTTO.Tali limitazioni si applicano anche in caso di mancatoraggiungimento d<strong>el</strong>lo scopo di qualsiasi garanzia orimedio previsti n<strong>el</strong>la presente garanzia limitata. Alcunegiurisdizioni non prevedono l’esclusione o la limitazionedi responsabilità per danni incidentali o consequenziali,n<strong>el</strong> qual caso le limitazioni o esclusioni sopra indicate nonsono applicabili.COME OTTENERE L’APPLICAZIONE DELLAGARANZIAIn caso di domande o problemi r<strong>el</strong>ativi a un prodotto, èpossibile visitare il sito Web www.linksys.com/support,dove sono disponibili vari strumenti di assistenza online einformazioni dettagliate. Se il prodotto dovesse presentaredifetti durante il Periodo di garanzia, contattare l’Assistenza25
Appendice CInformazioni sulla garanziatecnica di Linksys per indicazioni su come ottener<strong>el</strong>’applicazione d<strong>el</strong>la garanzia. Il numero di t<strong>el</strong>efonod<strong>el</strong>l’assistenza tecnica più vicina può essere trovato n<strong>el</strong>laGuida per l’utente e sul sito Web www.linksys.com. Primadi chiamare, assicurarsi di avere a disposizione il numerodi serie e la prova di acquisto. PER L’APPLICAZIONEDELLA GARANZIA È NECESSARIA LA PROVA DI ACQUISTOCOMPLETA DI DATA. Se viene richiesto all’acquirentedi restituire il prodotto, gli viene fornito un numero diautorizzazione per la restituzione (RMA). L’imballaggioe la spedizione d<strong>el</strong> prodotto a Linksys, inclusi eventualicosti e rischi, sono a carico d<strong>el</strong>l’acquirente. Insieme alprodotto restituito, è necessario accludere il numero RMAe una copia d<strong>el</strong>la prova di acquisto originale completadi data. I prodotti sprovvisti di numero RMA e prova diacquisto originale completa di data non sono accettati.Non includere altri prodotti n<strong>el</strong>la spedizione d<strong>el</strong> prodottoda restituire a Linksys. Il prodotto difettoso coperto dallapresente garanzia viene riparato o sostituito e restituitoall’acquirente senza alcuna spesa aggiuntiva. I clientiresidenti al di fuori di Stati Uniti e Canada sono responsabilidei costi di gestione e spedizione, dazi doganali, IVA e altrieventuali oneri e tasse. Le riparazioni o le sostituzioni noncoperte dalla presente garanzia limitata sono soggette alletariffe applicate da Linksys al momento d<strong>el</strong>l’intervento.ASSISTENZA TECNICALa presente garanzia limitata non costituisce un servizioné un contratto di supporto. Le informazioni su offertein vigore e politiche di assistenza tecnica Linksys (inclusi icosti dei servizi di assistenza) sono disponibili sul sito Webwww.linksys.com/support.GENERALELa presente garanzia limitata è disciplinata dalle leggid<strong>el</strong>la giurisdizione in cui il prodotto è stato acquistato.Qualora una parte d<strong>el</strong>la presente Garanzia limitatadovesse essere ritenuta nulla o non applicabile, tutte lealtre disposizioni conserveranno comunque piena validitàed efficacia.Inviare tutte le richieste di informazioni a: Linksys, P.O. Box18558, Irvine, CA 92623 (U.S.A.).Per maggiori informazioni, contattare Linksyswww.linksys.comS<strong>el</strong>ezionare il proprio paese di residenza, quindi sceglier<strong>el</strong>a sezione SUPPORTO / SUPPORTO TECNICOPer la restituzione dei prodotti:S<strong>el</strong>ezionare il proprio paese di residenza, quindi sceglier<strong>el</strong>a sezione SERVIZIO CLIENTIRouter a banda larga Wir<strong>el</strong>ess-G26
Appendice DInformazioni sulle normativeAppendice D:Informazioni sullenormativeFCC StatementThis product has been tested and complies with thespecifications for a Class B digital device, pursuant to Part15 of the FCC Rules. These limits are designed to providereasonable protection against harmful interference ina residential installation. This equipment generates,uses, and can radiate radio frequency energy and, if notinstalled and used according to the instructions, maycause harmful interference to radio communications.However, there is no guarantee that interference will notoccur in a particular installation. If this equipment doescause harmful interference to radio or t<strong>el</strong>evision reception,which is found by turning the equipment off and on, theuser is encouraged to try to correct the interference byone or more of the following measures:• Reorient or r<strong>el</strong>ocate the receiving antenna• Increase the separation between the equipment ordevices• Connect the equipment to an outlet other than thereceiver’s• Consult a dealer or an experienced radio/TV technicianfor assistanceFCC Radiation Exposure StatementThis equipment complies with FCC radiation exposur<strong>el</strong>imits set forth for an uncontrolled environment. Thisequipment should be installed and operated withminimum distance 20 cm between the radiator and yourbody.Safety Notices• Caution: To reduce the risk of fire, use only No.26 AWGor larger t<strong>el</strong>ecommunication line cord.• Do not use this product near water, for example, in awet basement or near a swimming pool.• Avoid using this product during an <strong>el</strong>ectrical storm.There may be a remote risk of <strong>el</strong>ectric shock fromlightning.Industry Canada StatementThis Class B digital apparatus complies with CanadianICES-003 and RSS210.Operation is subject to the following two conditions:1. This device may not cause interference and2. This device must accept any interference, includinginterference that may cause undesired operationof the device.To reduce potential radio interference to other users,the antenna type and its gain should be so chosenthat the EIRP is not more than required for successfulcommunication.Industry Canada Radiation Exposure StatementThis equipment complies with IC radiation exposure limitsset forth for an uncontrolled environment. This equipmentshould be installed and operated with minimum distance20 cm between the radiator & your body.This transmitter must not be co-located or operating inconjunction with any other antenna or transmitter.Avis d’Industrie CanadaCet appareil numérique de la classe B est conforme auxnormes NMB-003 et RSS210 du Canada.L’utilisation de ce dispositif est autorisée seulement auxconditions suivantes :1. il ne doit pas produire de brouillage et2. il doit accepter tout brouillage radioélectrique reçu,même si ce brouillage est susceptible de compromettre lefonctionnement du dispositif.Afin de réduire le risque d’interférence aux autresutilisateurs, le type d’antenne et son gain doiventêtre choisis de façon à ce que la puissance isotroperayonnée équivalente (p.i.r.e.) ne soit pas supérieureau niveau requis pour obtenir une communicationsatisfaisante.Avis d’Industrie Canada concernant l’expositionaux radiofréquencesCe matéri<strong>el</strong> est conforme aux limites établies par ICen matière d’exposition aux radiofréquences dans unenvironnement non contrôlé. Ce matéri<strong>el</strong> doit être installéet utilisé à une distance d’au moins 20 cm entre l’antenneet le corps de l’utilisateur.L’émetteur ne doit pas être placé près d’une autre antenneou d’un autre émetteur, ou fonctionner avec une autreantenne ou un autre émetteur.Router a banda larga Wir<strong>el</strong>ess-G27
Appendice DInformazioni sulle normativeWir<strong>el</strong>ess DisclaimerThe maximum performance for wir<strong>el</strong>ess is derived fromIEEE Standard 802.11 specifications. Actual performancecan vary, including lower wir<strong>el</strong>ess network capacity,data throughput rate, range and coverage. Performancedepends on many factors, conditions and variables,including distance from the access point, volume ofnetwork traffic, building materials and construction,operating system used, mix of wir<strong>el</strong>ess products used,interference and other adverse conditions.Avis de non-responsabilité concernant lesappareils sans filLes performances maximales pour les réseaux sans filsont tirées des spécifications de la norme IEEE 802.11.Les performances ré<strong>el</strong>les peuvent varier, notammenten fonction de la capacité du réseau sans fil, du débitde la transmission de données, de la portée et de lacouverture. Les performances dépendent de facteurs,conditions et variables multiples, en particulier de ladistance par rapport au point d’accès, du volume du traficréseau, des matériaux utilisés dans le bâtiment et dutype de construction, du système d’exploitation et de lacombinaison de produits sans fil utilisés, des interférenceset de toute autre condition défavorable.Router a banda larga Wir<strong>el</strong>ess-G28
Appendice DInformazioni sulle normativeDichiarazione di conformità alla DirettivaUE 1999/5/EC (Direttiva R&TTE)Informazioni sulla conformità per i prodotti wir<strong>el</strong>ess da2,4 GHz e 5 GHz r<strong>el</strong>ative ai Paesi d<strong>el</strong>l’Unione Europea eagli altri Paesi che osservano la Direttiva UE 1999/5/CE(direttiva R&TTE)Nederlands[Dutch]:Malti[Maltese]:Dit apparaat voldoet aan de essenti<strong>el</strong>e eisenen andere van toepassing zijnde bepalingenvan de Richtlijn 1999/5/EC.Dan l-apparat huwa konformi mal-ħtiġietessenzjali u l-provedimenti l-oħra rilevantitad-Direttiva 1999/5/EC.Б ъ л г а р с к и[Bulgarian]Česky[Czech]:Dansk[Danish]:Deutsch[German]:Това оборудване отговаря на същественитеизисквания и приложими клаузи наДиректива 1999/5/ЕС.Toto zařízení je v souladu se základnímipožadavky a ostatními odpovídajícímiustanoveními Směrnice 1999/5/EC.Dette udstyr er i overensstemm<strong>el</strong>se medde væsentlige krav og andre r<strong>el</strong>evantebestemm<strong>el</strong>ser i Direktiv 1999/5/EF.Dieses Gerät entspricht den grundlegendenAnforderungen und den weiterenentsprechenden Vorgaben der Richtlinie1999/5/EU.Magyar[Hungarian]:Norsk[Norwegian]:Polski[Polish]:Português[Portuguese]:Ez a készülék t<strong>el</strong>jesíti az alapvetőkövet<strong>el</strong>ményeket és más 1999/5/EKirány<strong>el</strong>vben meghatározott vonatkozórend<strong>el</strong>kezéseket.Dette utstyret er i samsvar med degrunnleggende krav og andre r<strong>el</strong>evantebestemm<strong>el</strong>ser i EU-direktiv 1999/5/EF.Urządzenie jest zgodne z ogólnymiwymaganiami oraz szczególnymi warunkamiokreślonymi Dyrektywą UE: 1999/5/EC.Este equipamento está em conformidade comos requisitos essenciais e outras provisõesr<strong>el</strong>evantes da Directiva 1999/5/EC.Eesti[Estonian]:See seade vastab direktiivi 1999/5/EÜ olulist<strong>el</strong>enõuet<strong>el</strong>e ja teist<strong>el</strong>e asjakohast<strong>el</strong>e sätet<strong>el</strong>e.Română[Romanian]Acest echipament este in conformitatecu cerint<strong>el</strong>e esentiale si cu alte prevederir<strong>el</strong>evante ale Directivei 1999/5/EC.English:This equipment is in compliance with theessential requirements and other r<strong>el</strong>evantprovisions of Directive 1999/5/EC.Slovensko[Slovenian]:Ta naprava je skladna z bistvenimi zahtevamiin ostalimi r<strong>el</strong>evantnimi pogoji Direktive1999/5/EC.Español[Spanish]:Este equipo cumple con los requisitosesenciales asi como con otras disposicionesde la Directiva 1999/5/CE.Slovensky[Slovak]:Toto zariadenie je v zhode so základnýmipožiadavkami a inými príslušnými nariadeniamidirektív: 1999/5/EC.Ελληνική[Greek]:Français[French]:Íslenska[Ic<strong>el</strong>andic]:Italiano[Italian]:Latviski[Latvian]:Lietuvių[Lithuanian]:Αυτός ο εξοπλισµός είναι σε συµµόρφωση µετις ουσιώδεις απαιτήσεις και άλλες σχετικέςδιατάξεις της Οδηγίας 1999/5/EC.Cet appareil est conforme aux exigencesessenti<strong>el</strong>les et aux autres dispositionspertinentes de la Directive 1999/5/EC.Þetta tæki er samkvæmt grunnkröfum ogöðrum viðeigandi ákvæðum Tilskipunar1999/5/EC.Questo apparato é conforme ai requisitiessenziali ed agli altri principi sanciti dallaDirettiva 1999/5/CE.Šī iekārta atbilst Direktīvas 1999/5/EKbūtiskajām prasībām un citiem ar tosaistītajiem noteikumiem.Šis įrenginys tenkina 1999/5/EB Direktyvosesminius reikalavimus ir kitas šios direktyvosnuostatas.Suomi[Finnish]:Svenska[Swedish]:Tämä laite täyttää direktiivin 1999/5/EYolennaiset vaatimukset ja on siinä asetettujenmuiden laitetta koskevien määräystenmukainen.Denna utrustning är i överensstämm<strong>el</strong>se medde väsentliga kraven och andra r<strong>el</strong>evantabestämm<strong>el</strong>ser i Direktiv 1999/5/EC.Per tutti i prodotti, la Dichiarazione di conformità èdisponibile in una o più di queste opzioni:• Un file PDF contenuto n<strong>el</strong> CD d<strong>el</strong> prodotto.• Una copia stampata allegata al prodotto.• Un file PDF disponibile sul sito Web d<strong>el</strong> prodotto.Accedere al sito www.linksys.com/internationale s<strong>el</strong>ezionare il Paese o la regione di appartenenza,quindi s<strong>el</strong>ezionare il prodotto.Per ulteriore documentazione tecnica, vedere lasezione “Documentazione tecnica su www.linksys.com/international”, come indicato più avanti in questaappendice.Router a banda larga Wir<strong>el</strong>ess-G29
Appendice DInformazioni sulle normativeDurante la valutazione d<strong>el</strong> prodotto in r<strong>el</strong>azione ai requisitid<strong>el</strong>la Direttiva 1999/5/EC, sono stati applicati i seguentistandard:• Radio: EN 300 328 e/o EN 301 893, come applicabile• EMC: EN 301 489-1, EN 301 489-17• Sicurezza: EN 60950 e EN 50385 o EN 50371DFS (Dynamic Frequency S<strong>el</strong>ection) e TPC (Transmit PowerControl) sono necessari per il funzionamento all’internod<strong>el</strong>la banda 5 GHz.DFS: l’apparecchio soddisfa i requisiti DFS definiti inETSI EN 301 893. Questa funzione viene richiesta dallenormative vigenti per evitare interferenze con servizi dilocalizzazione radio (radar).TPC: per il funzionamento all’interno d<strong>el</strong>la banda 5 GHz,il massimo liv<strong>el</strong>lo di potenza è 3 dB o più al di sotto d<strong>el</strong>limite applicabile. In questo caso, la funzione TPC non ènecessaria.Marchio CEPer quanto riguarda i prodotti Wir<strong>el</strong>ess-N, -G, -B e/o -A diLinksys, vengono aggiunti a ogni dispositivo il marchioCE, il numero d<strong>el</strong>l’ente certificato (dove applicabile) <strong>el</strong>’identificatore di classe 2.oppureoppureoppureControllare l’etichetta CE sul prodotto per individuar<strong>el</strong>’ente certificato che ha partecipato alla valutazione.Restrizioni valide nei singoli PaesiQuesto prodotto può essere utilizzato in tutti i Paesid<strong>el</strong>l’Unione Europea (e in altri Paesi che osservano laDirettiva UE 1999/5/CE) senza alcuna limitazione eccettoper i Paesi sotto indicati:Ce produit peut être utilisé dans tous les pays de l’UE (et danstous les pays ayant transposés la directive 1999/5/CE) sansaucune limitation, excepté pour les pays mentionnés cidessous:Questo prodotto è utilizzabile in tutte i paesi EU (ed in tuttigli altri paesi che seguono le direttive EU 1999/5/EC) senzanessuna limitazione, eccetto per i paesii menzionati diseguito:Das Produkt kann in allen EU Staaten ohne Einschränkungeneingesetzt werden (sowie in anderen Staaten die der EUDirektive 1999/5/CE folgen) mit Außnahme der folgendenaufgeführten Staaten:N<strong>el</strong>la maggior parte d<strong>el</strong>l’UE e degli altri Paesi europei, lebande 2,4 e 5 GHz sono state rese disponibili per l’utilizzodi reti locali (LAN) wir<strong>el</strong>ess. La tab<strong>el</strong>la denominata“Panoramica dei requisiti normativi per LAN wir<strong>el</strong>ess”fornisce una panoramica dei requisiti normativi applicabiliper le bande di frequenza 2,4 e 5 GHz.Più avanti n<strong>el</strong>la presente documentazione, viene fornitauna panoramica dei Paesi in cui sono applicate ulteriorirestrizioni e/o requisiti.I requisiti per ciascun Paese potrebbero subire modifiche.Linksys consiglia di verificare presso le autorità localilo stato d<strong>el</strong>le più recenti normative nazionali per LANwir<strong>el</strong>ess a 2,4 e 5 GHz.Panoramica dei requisiti normativi per LAN wir<strong>el</strong>essBanda difrequenza (MHz)Liv<strong>el</strong>lo dipotenza massima(EIRP) (mW)SOLO peruso ininterniAmbientiinterni/esterni2400-2483,5 100 X5150-5350 † 200 X5470-5725 † 1000 X† DFS (Dynamic Frequency S<strong>el</strong>ection) e TPC (Transmit Power Control)sono richiesti negli intervalli di frequenza di 5250-5350 MHz e 5470-5725 MHz.I seguenti Paesi prevedono restrizioni e/o requisitiulteriori rispetto a qu<strong>el</strong>li indicati n<strong>el</strong>la tab<strong>el</strong>la denominata“Panoramica dei requisiti normativi per LAN wir<strong>el</strong>ess”:DenmarkIn Denmark, the band 5150 - 5350 MHz is also allowed foroutdoor usage.I Danmark må frekvensbåndet 5150 - 5350 også anvendesudendørs.Router a banda larga Wir<strong>el</strong>ess-G30
Appendice DInformazioni sulle normativeFranceFor 2,4 GHz, the product should not be used outdoorsin the band 2454 - 2483,5 MHz. There are no restrictionswhen used in other parts of the 2,4 GHz band when usedindoors. Check http://www.arcep.fr/ for more details.Pour la bande 2,4 GHz, l’ équipement ne doit pas être utiliséen extérieur dans la bande 2454 - 2483,5 MHz. Il n’y a pas derestrictions pour des utilisations en intérieur dans d’autresparties de la bande 2,4GHz. Consultez http://www.arcep.fr/pour de plus amples détails.LocationIndoor(No restrictions)ItalyOutdoorApplicable Power Lev<strong>el</strong>s in FranceRouter a banda larga Wir<strong>el</strong>ess-GFrequencyRange (MHz)Power (EIRP)2400-2483.5 100 mW (20 dBm)2400-24542454-2483.5100 mW (20 dBm)10 mW (10 dBm)This product meets the National Radio Interface andthe requirements specified in the National FrequencyAllocation Table for Italy. Unless this 2,4-GHz wir<strong>el</strong>ess LANproduct is operating within the boundaries of the owner’sproperty, its use requires a “general authorization”. Pleasecheck http://www.comunicazioni.it/it/ for more details.Questo prodotto è conforme alla specifiche di InterfacciaRadio Nazionali e rispetta il Piano Nazionale di ripartizioned<strong>el</strong>le frequenze in Italia. Se non viene installato all’internod<strong>el</strong> proprio fondo, l’utilizzo di prodotti Wir<strong>el</strong>ess LAN a2,4 GHz richiede una “Autorizzazione Generale”. Consultarehttp://www.comunicazioni.it/it/ per maggiori dettagli.LatviaThe outdoor usage of the 2,4 GHz band requires anauthorization from the Electronic Communications Office.Please check http://www.esd.lv for more details.2,4 GHz frekveču joslas izmantošanai ārpus t<strong>el</strong>pāmnepieciešama atļauja no Elektronisko sakaru direkcijas.Vairāk informācijas: http://www.esd.lv.Notes:1.2.Although Norway, Switzerland and Liechtenstein arenot EU member states, the EU Directive 1999/5/EC hasalso been implemented in those countries.The regulatory limits for maximum output power arespecified in EIRP. The EIRP lev<strong>el</strong> of a device can becalculated by adding the gain of the antenna used(specified in dBi) to the output power available at theconnector (specified in dBm).Restrizioni d’uso d<strong>el</strong> prodottoIl prodotto è stato progettato solo per l’uso in interni.Non è consigliato l’uso in esterni, se non diversamentespecificato.Restrizioni 2,4 GHzIl prodotto è stato progettato per l’uso con le antennestandard, integrate o dedicate (esterne), fornite conl’apparecchiatura. Tuttavia, alcune applicazioni possonorichiedere che le antenne, se rimovibili, vengano separatedal prodotto e installate a una certa distanza utilizzandoopportune prolunghe. Per tali applicazioni, Linksys fornisc<strong>el</strong>e prolunghe R-SMA (AC9SMA) e R-TNC (AC9TNC). Entrambii cavi sono lunghi 9 metri e presentano un’attenuazioned<strong>el</strong> segnale di 5 dB. Per compensare l’attenuazione,Linksys offre anche antenne con un guadagno maggiore,HGA7S (con connettore R-SMA) e HGA7T (con connettoreR-TNC). Queste antenne offrono un guadagno di 7 dBi epossono essere utilizzate esclusivamente con prolungheR-SMA o R-TNC.Le combinazioni di prolunghe e antenne che produconoun liv<strong>el</strong>lo di potenza irradiata superiore a 100 mW EIRPsono considerate illegali.Software o firmware di terziL’uso di software o firmware non supportato/fornito daLinksys potrebbe comportare la mancata conformità d<strong>el</strong>dispositivo con i requisiti normativi.Documentazione tecnica suwww.linksys.com/internationalPer accedere alla documentazione tecnica, procederecome segue:1.2.3.4.5.6.7.Digitare http://www.linksys.com/international n<strong>el</strong>browser Web.S<strong>el</strong>ezionare il Paese o la regione di residenza.Fare clic sulla scheda Prodotti.S<strong>el</strong>ezionare la categoria di prodotti appropriata.Se necessario, s<strong>el</strong>ezionare una sottocategoria diprodotti.S<strong>el</strong>ezionare il prodotto.S<strong>el</strong>ezionare il tipo di documentazione desideraton<strong>el</strong>la sezione Altre informazioni. Se Adobe Acrobatè installato sul computer, il documento si aprirà informato PDF.NOTA: per eventuali domande sulla conformitàdi questo prodotto o se non è possibiletrovare le informazioni desiderate, contattar<strong>el</strong>’ufficio vendite locale o visitare il sitowww.linksys.com/international31
Appendice DInformazioni sulle normativeInformazioni per l’utente sui prodottidi consumo coperti dalla Direttiva UE2002/96/CE per le apparecchiature WEEE(Waste Electric and Electronic Equipment)Questo documento contiene importanti informazioniper gli utenti riguardo lo smaltimento e il riciclaggio deiprodotti Linksys. I consumatori sono tenuti a rispettarequesta avvertenza per tutti i prodotti <strong>el</strong>ettronicicontrassegnati dal seguente simbolo:Ceština (Czech) - Informace o ochraně životníhoprostředí pro zákazníky v zemích Evropské unieEvropská směrnice 2002/96/ES zakazuje, aby zařízení označenétímto symbolem na produktu anebo na obalu bylo likvidovános netříděným komunálním odpadem. Tento symbol udává,že daný produkt musí být likvidován odděleně od běžnéhokomunálního odpadu. Odpovídáte za likvidaci tohoto produktua dalších <strong>el</strong>ektrických a <strong>el</strong>ektronických zařízení prostřednictvímurčených sběrných míst stanovených vládou nebo místnímiúřady. Správná likvidace a recyklace pomáhá předcházetpotenciálním negativním dopadům na životní prostředí a lidskézdraví. Podrobnější informace o likvidaci starého vybavení silaskavě vyžádejte od místních úřadů, podniku zabývajícího s<strong>el</strong>ikvidací komunálních odpadů nebo obchodu, kde jste produktzakoupili.English - Environmental Information for Customers inthe European UnionEuropean Directive 2002/96/EC requires that the equipmentbearing this symbol on the product and/or its packaging mustnot be disposed of with unsorted municipal waste. The symbolindicates that this product should be disposed of separat<strong>el</strong>yfrom regular household waste streams. It is your responsibility todispose of this and other <strong>el</strong>ectric and <strong>el</strong>ectronic equipment viadesignated collection facilities appointed by the government orlocal authorities. Correct disposal and recycling will h<strong>el</strong>p preventpotential negative consequences to the environment andhuman health. For more detailed information about the disposalof your old equipment, please contact your local authorities,waste disposal service, or the shop where you purchased theproduct.Български (Bulgarian) - Информация относноопазването на околната среда за потребители вЕвропейския съюзЕвропейска директива 2002/96/EC изисква уредите, носещитози символ върху изделието и/или опаковката му, да несе изхвърля т с несортирани битови отпадъци. Символътобозначава, че изделието трябва да се изхвърля отделно отсметосъбирането на обикновените битови отпадъци. Вашае отговорността този и другите електрически и електронниуреди да се изхвърлят в предварително определени отдържавните или общински органи специализирани пунктовеза събиране. Правилното изхвърляне и рециклиранеще спомогнат да се предотвратят евентуални вредни заоколната среда и здравето на населението последствия. Запо-подробна информация относно изхвърлянето на вашитестари уреди се обърнете към местните власти, службите засметосъбиране или магазина, от който сте закупили уреда.Dansk (Danish) - Miljøinformation for kunder i EUEU-direktiv 2002/96/EF kræver, at udstyr der bærer dette symbolpå produktet og/<strong>el</strong>ler emballagen ikke må bortskaffes somusorteret kommunalt affald. Symbolet betyder, at dette produktskal bortskaffes adskilt fra det almind<strong>el</strong>ige husholdningsaffald.Det er dit ansvar at bortskaffe dette og andet <strong>el</strong>ektrisk og<strong>el</strong>ektronisk udstyr via bestemte indsamlingssteder udpegetaf staten <strong>el</strong>ler de lokale myndigheder. Korrekt bortskaff<strong>el</strong>seog genvinding vil hjælpe med til at undgå mulige skader formiljøet og menneskers sundhed. Kontakt venligst de lokalemyndigheder, renovationstjenesten <strong>el</strong>ler den butik, hvor duhar købt produktet, angående mere detaljeret information ombortskaff<strong>el</strong>se af dit gamle udstyr.Deutsch (German) - Umw<strong>el</strong>tinformation für Kundeninnerhalb der Europäischen UnionDie Europäische Richtlinie 2002/96/EC verlangt, dass technischeAusrüstung, die direkt am Gerät und/oder an der Verpackung mitdiesem Symbol versehen ist , nicht zusammen mit unsortiertemGemeindeabfall entsorgt werden darf. Das Symbol weist daraufhin, dass das Produkt von regulärem Haushaltmüll getrenntentsorgt werden sollte. Es liegt in Ihrer Verantwortung, diesesGerät und andere <strong>el</strong>ektrische und <strong>el</strong>ektronische Geräte überdie dafür zuständigen und von der Regierung oder örtlichenBehörden dazu bestimmten Samm<strong>el</strong>st<strong>el</strong>len zu entsorgen.Ordnungsgemäßes Entsorgen und Recyc<strong>el</strong>n trägt dazu bei,potenti<strong>el</strong>le negative Folgen für Umw<strong>el</strong>t und die menschlicheGesundheit zu vermeiden. Wenn Sie weitere Informationen zurEntsorgung Ihrer Altgeräte benötigen, wenden Sie sich bitte andie örtlichen Behörden oder städtischen Entsorgungsdiensteoder an den Händler, bei dem Sie das Produkt erworben haben.Router a banda larga Wir<strong>el</strong>ess-G32
Appendice DInformazioni sulle normativeEesti (Estonian) - Keskkonnaalane informatsioonEuroopa Liidus asuvat<strong>el</strong>e klientid<strong>el</strong>eEuroopa Liidu direktiivi 2002/96/EÜ nõuete kohas<strong>el</strong>t onseadmeid, mill<strong>el</strong> on toot<strong>el</strong> või pakendil käesolev sümbol ,ke<strong>el</strong>atud kõrvaldada koos sorteerimata olmejäätmetega. Seesümbol näitab, et toode tuleks kõrvaldada eraldi tavalistestolmejäätmevoogudest. Olete kohustatud kõrvaldama käesolevaja ka muud <strong>el</strong>ektri- ja <strong>el</strong>ektroonikaseadmed riigi või kohalikeametiasutuste poolt ette nähtud kogumispunktide kaudu.Seadmete korrektne kõrvaldamine ja ringlussevõtt aitab vältidavõimalikke negatiivseid tagajärgi keskkonnale ning inimestetervis<strong>el</strong>e. Vanade seadmete kõrvaldamise kohta täpsemainformatsiooni saamiseks võtke palun ühendust kohalikeametiasutustega, jäätmekäitlusfirmaga või kauplusega, kust tetoote ostsite.Español (Spanish) - Información medioambiental paraclientes de la Unión EuropeaLa Directiva 2002/96/CE de la UE exige que los equipos qu<strong>el</strong>leven este símbolo en <strong>el</strong> propio aparato y/o en su embalajeno deben <strong>el</strong>iminarse junto con otros residuos urbanos nos<strong>el</strong>eccionados. El símbolo indica que <strong>el</strong> producto en cuestióndebe separarse de los residuos domésticos convencionales convistas a su <strong>el</strong>iminación. Es responsabilidad suya desechar este ycualesquiera otros aparatos <strong>el</strong>éctricos y <strong>el</strong>ectrónicos a través d<strong>el</strong>os puntos de recogida que ponen a su disposición <strong>el</strong> gobierno ylas autoridades locales. Al desechar y reciclar correctamente estosaparatos estará contribuyendo a evitar posibles consecuenciasnegativas para <strong>el</strong> medio ambiente y la salud de las personas. Sidesea obtener información más detallada sobre la <strong>el</strong>iminaciónsegura de su aparato usado, consulte a las autoridades locales,al servicio de recogida y <strong>el</strong>iminación de residuos de su zona opregunte en la tienda donde adquirió <strong>el</strong> producto.ξλληνικά (Greek) - Στοιχεία περιβαλλοντικήςπροστασίας για πελάτες εντός της ΕυρωπαϊκήςΈνωσηςΗ Κοινοτική Οδηγία 2002/96/EC απαιτεί ότι ο εξοπλισμός ο οποίοςφέρει αυτό το σύμβολο στο προϊόν και/ή στη συσκευασίατου δεν πρέπει να απορρίπτεται μαζί με τα μικτά κοινοτικάαπορρίμματα. Το σύμβολο υποδεικνύει ότι αυτό το προϊόν θαπρέπει να απορρίπτεται ξεχωριστά από τα συνήθη οικιακάαπορρίμματα. Είστε υπεύθυνος για την απόρριψη του παρόντοςκαι άλλου ηλεκτρικού και ηλεκτρονικού εξοπλισμού μέσω τωνκαθορισμένων εγκαταστάσεων συγκέντρωσης απορριμμάτων οιοποίες παρέχονται από το κράτος ή τις αρμόδιες τοπικές αρχές.Η σωστή απόρριψη και ανακύκλωση συμβάλλει στην πρόληψηπιθανών αρνητικών συνεπειών για το περιβάλλον και την υγεία.Για περισσότερες πληροφορίες σχετικά με την απόρριψη τουπαλιού σας εξοπλισμού, παρακαλώ επικοινωνήστε με τις τοπικέςαρχές, τις υπηρεσίες απόρριψης ή το κατάστημα από το οποίοαγοράσατε το προϊόν.Français (French) - Informations environnementalespour les clients de l’Union européenneLa directive européenne 2002/96/CE exige que l’équipementsur lequ<strong>el</strong> est apposé ce symbole sur le produit et/ou sonemballage ne soit pas jeté avec les autres ordures ménagères. Cesymbole indique que le produit doit être éliminé dans un circuitdistinct de c<strong>el</strong>ui pour les déchets des ménages. Il est de votreresponsabilité de jeter ce matéri<strong>el</strong> ainsi que tout autre matéri<strong>el</strong>électrique ou électronique par les moyens de collecte indiquéspar le gouvernement et les pouvoirs publics des collectivitésterritoriales. L’élimination et le recyclage en bonne et due formeont pour but de lutter contre l’impact néfaste potenti<strong>el</strong> de cetype de produits sur l’environnement et la santé publique. Pourplus d’informations sur le mode d’élimination de votre ancienéquipement, veuillez prendre contact avec les pouvoirs publicslocaux, le service de traitement des déchets, ou l’endroit où vousavez acheté le produit.Italiano (Italian) - Informazioni r<strong>el</strong>ative all’ambienteper i clienti residenti n<strong>el</strong>l’Unione EuropeaLa direttiva europea 2002/96/EC richiede che le apparecchiaturecontrassegnate con questo simbolo sul prodotto e/osull’imballaggio non siano smaltite insieme ai rifiuti urbaninon differenziati. Il simbolo indica che questo prodotto nondeve essere smaltito insieme ai normali rifiuti domestici. Èresponsabilità d<strong>el</strong> proprietario smaltire sia questi prodotti siale altre apparecchiature <strong>el</strong>ettriche ed <strong>el</strong>ettroniche mediant<strong>el</strong>e specifiche strutture di raccolta indicate dal governo o daglienti pubblici locali. Il corretto smaltimento ed il riciclaggioaiuteranno a prevenire conseguenze potenzialmente negativeper l’ambiente e per la salute d<strong>el</strong>l’essere umano. Per ricevereinformazioni più dettagliate circa lo smaltimento d<strong>el</strong>le vecchieapparecchiature in Vostro possesso, Vi invitiamo a contattare glienti pubblici di competenza, il servizio di smaltimento rifiuti o ilnegozio n<strong>el</strong> quale avete acquistato il prodotto.Latviešu valoda (Latvian) - Ekoloģiska informācijaklientiem Eiropas Savienības jurisdikcijāDirektīvā 2002/96/EK ir prasība, ka aprīkojumu, kam pievienotazīme uz paša izstrādājuma vai uz tā iesaiņojuma, nedrīkstizmest nešķirotā veidā kopā ar komunālajiem atkritumiem(tiem, ko rada vietēji iedzīvotāji un uzņēmumi). Šī zīme nozīmēto, ka šī ierīce ir jāizmet atkritumos tā, lai tā nenonāktu kopā arparastiem mājsaimniecības atkritumiem. Jūsu pienākums ir šoun citas <strong>el</strong>ektriskas un <strong>el</strong>ektroniskas ierīces izmest atkritumos,izmantojot īpašus atkritumu savākšanas veidus un līdzekļus, konodrošina valsts un pašvaldību iestādes. Ja izmešana atkritumosun pārstrāde tiek veikta pareizi, tad mazinās iespējamaiskaitējums dabai un cilvēku ves<strong>el</strong>ībai. Sīkākas ziņas parnovecojuša aprīkojuma izmešanu atkritumos jūs varat saņemtvietējā pašvaldībā, atkritumu savākšanas dienestā, kā arī veikalā,kur iegādājāties šo izstrādājumu.Router a banda larga Wir<strong>el</strong>ess-G33
Appendice DInformazioni sulle normativeLietuvškai (Lithuanian) - Aplinkosaugos informacija,skirta Europos Sąjungos vartotojamsEuropos direktyva 2002/96/EC numato, kad įrangos, kuri irkurios pakuotė yra pažymėta šiuo simboliu (įveskite simbolį),negalima šalinti kartu su nerūšiuotomis komunalinėmisatliekomis. Šis simbolis rodo, kad gaminį reikia šalinti atskirainuo bendro buitinių atliekų srauto. Jūs privalote užtikrinti, kadši ir kita <strong>el</strong>ektros ar <strong>el</strong>ektroninė įranga būtų šalinama per tamtikras nacionalinės ar vietinės valdžios nustatytas atliekų rinkimosistemas. Tinkamai šalinant ir perdirbant atliekas, bus išvengtagalimos žalos aplinkai ir žmonių sveikatai. Daugiau informacijosapie jūsų senos įrangos šalinimą gali pateikti vietinės valdžiosinstitucijos, atliekų šalinimo tarnybos arba parduotuvės, kurioseįsigijote tą gaminį.Malti (Maltese) - Informazzjoni Ambjentali għal Klijentifl-Unjoni EwropeaId-Direttiva Ewropea 2002/96/KE titlob li t-tagħmir li jkun fih issimbolufuq il-prodott u/jew fuq l-ippakkjar ma jistax jintremama’ skart muniċipali li ma ġiex isseparat. Is-simbolu jindikali dan il-prodott għandu jintrema separatament minn ma’ l-iskart domestiku regolari. Hija responsabbiltà tiegħek li tarmidan it-tagħmir u kull tagħmir ieħor ta’ l-<strong>el</strong>ettriku u <strong>el</strong>ettronikupermezz ta’ faċilitajiet ta’ ġbir appuntati apposta mill-gvern jewmill-awtoritajiet lokali. Ir-rimi b’mod korrett u r-riċiklaġġ jgħinjipprevjeni konsegwenzi negattivi potenzjali għall-ambjent ugħas-saħħa tal-bniedem. Għal aktar informazzjoni dettaljatadwar ir-rimi tat-tagħmir antik tiegħek, jekk jogħġbok ikkuntattjalill-awtoritajiet lokali tiegħek, is-servizzi għar-rimi ta’ l-iskart, jewil-ħanut minn fejn xtrajt il-prodott.Magyar (Hungarian) - Környezetvéd<strong>el</strong>mi információ azeurópai uniós vásárlók számáraA 2002/96/EC számú európai uniós irány<strong>el</strong>v megkívánja, hogyazokat a termékeket, am<strong>el</strong>yeken, és/vagy am<strong>el</strong>yek csomagolásánaz alábbi címke megj<strong>el</strong>enik, tilos a többi sz<strong>el</strong>ektálatlan lakosságihulladékkal együtt kidobni. A címke azt j<strong>el</strong>öli, hogy az adotttermék kidobásakor a szokványos háztartási hulladék<strong>el</strong>szállításirendszerektõl <strong>el</strong>különített <strong>el</strong>járást k<strong>el</strong>l alkalmazni. Az Önf<strong>el</strong><strong>el</strong>õssége, hogy ezt, és más <strong>el</strong>ektromos és <strong>el</strong>ektronikusberendezéseit a kormányzati vagy a h<strong>el</strong>yi hatóságok általkij<strong>el</strong>ölt gyűjtõredszereken keresztül számolja f<strong>el</strong>. A megf<strong>el</strong><strong>el</strong>õhulladékf<strong>el</strong>dolgozás segít a környezetre és az emberi egészségrepotenciálisan ártalmas negatív hatások meg<strong>el</strong>õzésében. Ha<strong>el</strong>avult berendezéseinek f<strong>el</strong>számolásához további részletesinformációra van szüksége, kérjük, lépjen kapcsolatba a h<strong>el</strong>yihatóságokkal, a hulladékf<strong>el</strong>dolgozási szolgálattal, vagy azzalüzlett<strong>el</strong>, ahol a terméket vásárolta.Nederlands (Dutch) - Milieu-informatie voor klantenin de Europese UnieDe Europese Richtlijn 2002/96/EC schrijft voor dat apparatuur dieis voorzien van dit symbool op het product of de verpakking,niet mag worden ingezam<strong>el</strong>d met niet-gescheiden huishoud<strong>el</strong>ijkafval. Dit symbool geeft aan dat het product apart moet wordeningezam<strong>el</strong>d. U bent z<strong>el</strong>f verantwoord<strong>el</strong>ijk voor de vernietigingvan deze en andere <strong>el</strong>ektrische en <strong>el</strong>ektronische apparatuur via dedaarvoor door de land<strong>el</strong>ijke of plaats<strong>el</strong>ijke overheid aangewezeninzam<strong>el</strong>ingskanalen. De juiste vernietiging en recycling vandeze apparatuur voorkomt mog<strong>el</strong>ijke negatieve gevolgen voorhet milieu en de gezondheid. Voor meer informatie over hetvernietigen van uw oude apparatuur neemt u contact op metde plaats<strong>el</strong>ijke autoriteiten of afvalverwerkingsdienst, of met dewink<strong>el</strong> waar u het product hebt aangeschaft.Norsk (Norwegian) - Miljøinformasjon for kunder i EUEU-direktiv 2002/96/EF krever at utstyr med følgende symbolavbildet på produktet og/<strong>el</strong>ler pakningen, ikke må kastessammen med usortert avfall. Symbolet indikerer at detteproduktet skal håndteres atskilt fra ordinær avfallsinnsamlingfor husholdningsavfall. Det er ditt ansvar å kvitte deg meddette produktet og annet <strong>el</strong>ektrisk og <strong>el</strong>ektronisk avfall via egneinnsamlingsordninger slik myndighetene <strong>el</strong>ler kommunenebestemmer. Korrekt avfallshåndtering og gjenvinning vilvære med på å forhindre mulige negative konsekvenser formiljø og h<strong>el</strong>se. For nærmere informasjon om håndtering avdet kasserte utstyret ditt, kan du ta kontakt med kommunen,en innsamlingsstasjon for avfall <strong>el</strong>ler butikken der du kjøpteproduktet.Polski (Polish) - Informacja dla klientów w UniiEuropejskiej o przepisach dotyczących ochronyśrodowiskaDyrektywa Europejska 2002/96/EC wymaga, aby sprzętoznaczony symbolem znajdującym się na produkcie i/lub jegoopakowaniu nie był wyrzucany razem z innymi niesortowanymiodpadami komunalnymi. Symbol ten wskazuje, że produktnie powinien być usuwany razem ze zwykłymi odpadami zgospodarstw domowych. Na Państwu spoczywa obowiązekwyrzucania tego i innych urządzeń <strong>el</strong>ektrycznych oraz<strong>el</strong>ektronicznych w punktach odbioru wyznaczonych przez władzekrajowe lub lokalne. Pozbywanie się sprzętu we właściwy sposóbi jego recykling pomogą zapobiec potencjalnie negatywnymkonsekwencjom dla środowiska i zdrowia ludzkiego. W c<strong>el</strong>uuzyskania szczegółowych informacji o usuwaniu starego sprzętu,prosimy zwrócić się do lokalnych władz, służb oczyszczaniamiasta lub sklepu, w którym produkt został nabyty.Router a banda larga Wir<strong>el</strong>ess-G34
Appendice DInformazioni sulle normativePortuguês (Portuguese) - Informação ambiental paraclientes da União EuropeiaA Directiva Europeia 2002/96/CE exige que o equipamentoque exibe este símbolo no produto e/ou na sua embalagemnão seja <strong>el</strong>iminado junto com os resíduos municipais nãoseparados. O símbolo indica que este produto deve ser<strong>el</strong>iminado separadamente dos resíduos domésticos regulares.É da sua responsabilidade <strong>el</strong>iminar este e qualquer outroequipamento <strong>el</strong>éctrico e <strong>el</strong>ectrónico através das instalaçõesde recolha designadas p<strong>el</strong>as autoridades governamentais oulocais. A <strong>el</strong>iminação e reciclagem correctas ajudarão a preveniras consequências negativas para o ambiente e para a saúdehumana. Para obter informações mais detalhadas sobre aforma de <strong>el</strong>iminar o seu equipamento antigo, contacte asautoridades locais, os serviços de <strong>el</strong>iminação de resíduos ou oestab<strong>el</strong>ecimento comercial onde adquiriu o produto.Română (Romanian) - Informaţii de mediu pentruclienţii din Uniunea EuropeanăDirectiva europeană 2002/96/CE impune ca echipament<strong>el</strong>e careprezintă acest simbol pe produs şi/sau pe ambalajul acestuia sănu fie casate împreună cu gunoiul menajer municipal. Simbolulindică faptul că acest produs trebuie să fie casat separat degunoiul menajer obişnuit. Este responsabilitatea dvs. să casaţiacest produs şi alte echipamente <strong>el</strong>ectrice şi <strong>el</strong>ectronice prinintermediul unităţilor de colectare special desemnate de guvernsau de autorităţile locale. Casarea şi reciclarea corecte vor ajutala prevenirea potenţial<strong>el</strong>or consecinţe negative asupra sănătăţiimediului şi a oamenilor. Pentru mai multe informaţii detaliatecu privire la casarea acestui echipament vechi, contactaţiautorităţile locale, serviciul de salubrizare sau magazinul de lacare aţi achiziţionat produsul.Slovenčina (Slovak) - Informácie o ochrane životnéhoprostredia pre zákazníkov v Európskej úniiPodľa európskej smernice 2002/96/ES zariadenie s týmtosymbolom na produkte a/alebo jeho balení nesmie byťlikvidované spolu s netriedeným komunálnym odpadom.Symbol znamená, že produkt by sa mal likvidovať odd<strong>el</strong>eneod bežného odpadu z domácností. Je vašou povinnosťoulikvidovať toto i ostatné <strong>el</strong>ektrické a <strong>el</strong>ektronické zariadeniaprostredníctvom špecializovaných zberných zariadení určenýchvládou alebo miestnymi orgánmi. Správna likvidácia a recykláciapomôže zabrániť prípadným negatívnym dopadom na životnéprostredie a zdravie ľudí. Ak máte záujem o podrobnejšieinformácie o likvidácii starého zariadenia, obráťte sa, prosím, namiestne orgány, organizácie zaoberajúce sa likvidáciou odpadovalebo obchod, v ktorom ste si produkt zakúpili.Slovenčina (Slovene) - Okoljske informacije za strankev Evropski unijiEvropska direktiva 2002/96/EC prepoveduje odlaganje opreme,označene s tem simbolom – na izd<strong>el</strong>ku in/ali na embalaži – medobičajne, nerazvrščene odpadke. Ta simbol opozarja, da je trebaizd<strong>el</strong>ek odvreči ločeno od preostalih gospodinjskih odpadkov.Vaša odgovornost je, da to in preostalo <strong>el</strong>ektrično in <strong>el</strong>ektronskoopremo odnesete na posebna zbirališča, ki jih določijodržavne ustanove ali lokalna uprava. S pravilnim odlaganjemin recikliranjem boste preprečili morebitne škodljive vplive naokolje in zdravje ljudi. Če ž<strong>el</strong>ite izvedeti več o odlaganju stareopreme, se obrnite na lokalno upravo, odpad ali trgovino, kjerste izd<strong>el</strong>ek kupili.Suomi (Finnish) - Ympäristöä koskevia tietoja EUalueenasiakkailleEU-direktiivi 2002/96/EY ed<strong>el</strong>lyttää, että jos laitteistossa on tämäsymboli itse tuotteessa ja/tai sen pakkauksessa, laitteistoaei saa hävittää lajitt<strong>el</strong>emattoman yhdyskuntajätteen mukana.Symboli merkitsee sitä, että tämä tuote on hävitettävä erillääntavallisesta kotitalousjätteestä. Sinun vastuullasi on hävittäätämä <strong>el</strong>ektroniikkatuote ja muut vastaavat <strong>el</strong>ektroniikkatuotteetviemällä tuote tai tuotteet viranomaisten määräämäänkeräyspisteeseen. Laitteiston oikea hävittäminen estäämahdolliset ki<strong>el</strong>teiset vaikutukset ympäristöön ja ihmistenterveyteen. Lisätietoja vanhan laitteiston oikeasta hävitystavastasaa paikallisilta viranomaisilta, jätteenhävityspalv<strong>el</strong>usta tai siitämyymälästä, josta ostit tuotteen.Svenska (Swedish) - Miljöinformation för kunder iEuropeiska unionenDet europeiska direktivet 2002/96/EC kräver att utrustning meddenna symbol på produkten och/<strong>el</strong>ler förpackningen inte fårkastas med osorterat kommunalt avfall. Symbolen visar att dennaprodukt bör kastas efter att den avskiljts från vanligt hushållsavfall.Det faller på ditt ansvar att kasta denna och annan <strong>el</strong>ektrisk och<strong>el</strong>ektronisk utrustning på fastställda insamlingsplatser utseddaav regeringen <strong>el</strong>ler lokala myndigheter. Korrekt kassering ochåtervinning skyddar mot eventu<strong>el</strong>la negativa konsekvenserför miljön och personhälsa. För mer detaljerad information omkassering av din gamla utrustning kontaktar du dina lokalamyndigheter, avfallshanteringen <strong>el</strong>ler butiken där du köpteprodukten.WEB: per ulteriori informazioni, visitare il sitoweb www.linksys.com/internationalRouter a banda larga Wir<strong>el</strong>ess-G8013010NC-JL35
GEBRUIKERSHANDLEIDINGWir<strong>el</strong>ess-GBreedbandrouterMod<strong>el</strong>nr.: WRT54G2 (NL)
Over deze handleidingOver deze handleidingPictogrambeschrijvingenAls. u. de. gebruikershandleiding. leest,. kunt. u. diverse.pictogrammen.tegenkomen.die.de.aandacht.vestigen.op.een.bepaald.item .Hieronder.vindt.u.een.beschrijving.van.deze.pictogrammen:OPMERKING:. dit. vinkje. geeft. een.aandachtspunt.aan.voor.iets.waarop.u.speciaal.moet.letten.bij.het.gebruik.van.het.productCopyright en hand<strong>el</strong>smerkenLinksys. is. een. gedeponeerd.hand<strong>el</strong>smerk.van.Cisco.Systems,.Inc .en/of.zijn.dochterondernemingen.in.de. VS. en. bepaalde. andere. landen .Copyright.©.2008.Cisco.Systems,.Inc .Alle. rechten. voorbehouden . Andere.merken. en. productnamen. zijn.hand<strong>el</strong>smerken. of. gedeponeerde.hand<strong>el</strong>smerken. van. de. respectieve.houders.WAARSCHUWING:. dit. uitroepteken. geeft. een.voorzorgsmaatreg<strong>el</strong>. of. waarschuwing. aan. en.is. bedo<strong>el</strong>d. om. u. erop. attent. te. maken. dat. bij.onvoorzichtig. hand<strong>el</strong>en. uw. eigendom. of. het.product.beschadigd.kan.rakenWEB:. dit. pictogram. van. een. wer<strong>el</strong>dbol. geeft.een. b<strong>el</strong>angrijk. websiteadres. of. e-mailadres.aanOnline-bronnenBij.de.meeste.webbrowsers.kunt.u.het.webadres.invoeren.zonder. dat. u. http://. aan. het. begin. van. het. adres. hoeft.toe. te. voegen . In. deze. gebruikershandleiding. wordt. bij.het. verwijzen. naar. websites. http://. aan. het. begin. van.het.adres.wegg<strong>el</strong>aten .Bij.bepaalde.oudere.webbrowsers.dient.u.mog<strong>el</strong>ijk.http://.aan.het.begin.van.het.adres.toe.te.voegenBronLinksysLinksys.International.Verklarende.woordenlijstNetwerkbeveiligingWebsitewww linksys comwww linksys com/internationalwww linksys com/glossarywww linksys com/securityWir<strong>el</strong>ess-G breedbandrouteri
InhoudsopgaveHoofdstuk 1: Productoverzicht 1Voorpane<strong>el</strong> . . . . . . . . . . . . . . . . . . . . . . . . . . . . . . . . . . . . . . . . . . . . . . . . . . 1Achterpane<strong>el</strong>. . . . . . . . . . . . . . . . . . . . . . . . . . . . . . . . . . . . . . . . . . . . . . . . . 1Plaatsen van de router. . . . . . . . . . . . . . . . . . . . . . . . . . . . . . . . . . . . . . . . . . . 1Hoofdstuk 2: Control<strong>el</strong>ijst voor WLAN-beveiliging 3Algemene richtlijnen voor netwerkbeveiliging . . . . . . . . . . . . . . . . . . . . . . . . . . . 3Aanvullende beveiligingstips. . . . . . . . . . . . . . . . . . . . . . . . . . . . . . . . . . . . . . . 3Hoofdstuk 3: Geavanceerde configuratie 4Setup (Inst<strong>el</strong>lingen) > Basic Setup (Basisinst<strong>el</strong>lingen) . . . . . . . . . . . . . . . . . . . . . . . 4Setup (Inst<strong>el</strong>lingen) > DDNS . . . . . . . . . . . . . . . . . . . . . . . . . . . . . . . . . . . . . . . 7Setup (Inst<strong>el</strong>lingen) > MAC Address Clone (MAC-adres klonen). . . . . . . . . . . . . . . . . 8Setup (Inst<strong>el</strong>lingen) > Advanced Routing (Geavanceerde routing). . . . . . . . . . . . . . . 8Wir<strong>el</strong>ess (WLAN) - Basic Wir<strong>el</strong>ess Settings (Standaardinst<strong>el</strong>lingen WLAN). . . . . . . . . . . 9Wir<strong>el</strong>ess (WLAN) > Wir<strong>el</strong>ess Security (WLAN-beveiliging). . . . . . . . . . . . . . . . . . . . 11Wir<strong>el</strong>ess (WLAN) > Wir<strong>el</strong>ess MAC Filter (MAC-filter WLAN). . . . . . . . . . . . . . . . . . . . 13Wir<strong>el</strong>ess (WLAN) > Advanced Wir<strong>el</strong>ess Settings (Geavanceerde inst<strong>el</strong>lingen WLAN) . . . 13Security (Beveiliging) > Firewall . . . . . . . . . . . . . . . . . . . . . . . . . . . . . . . . . . . . 15Firewall. . . . . . . . . . . . . . . . . . . . . . . . . . . . . . . . . . . . . . . . . . . . . . . . . . . . 15Security (Beveiliging) > VPN Passthrough (VPN-doorvoer) . . . . . . . . . . . . . . . . . . . 15Access Restrictions (Toegangsbeperkingen) > Internet Access (Internettoegang) . . . . 15Applications and Gaming (Toepassingen en games) > Port Range Forward .(Doorsturen poortbereik) . . . . . . . . . . . . . . . . . . . . . . . . . . . . . . . . . . . . . . . . 17Applications & Gaming (Toepassingen en games) > Port Triggering (Poorttriggers). . . 17Applications and Gaming (Toepassingen en games) > DMZ. . . . . . . . . . . . . . . . . . 18Applications and Gaming (Toepassingen en games) > QoS . . . . . . . . . . . . . . . . . . 18Administration (Administratie) > Management (Beheer) . . . . . . . . . . . . . . . . . . . . 19Administration (Administratie) > Log (Logboek). . . . . . . . . . . . . . . . . . . . . . . . . . 20Administration (Administratie) > Diagnostics (Diagnostische gegevens) . . . . . . . . . . 20Administration (Administratie) > Factory Defaults (Fabrieksinst<strong>el</strong>lingen). . . . . . . . . . 20Administration (Administratie) > Upgrade Firmware (Firmware upgraden). . . . . . . . . 21Administration (Administratie) - Config Management (Configuratiebeheer). . . . . . . . 21Status > Router. . . . . . . . . . . . . . . . . . . . . . . . . . . . . . . . . . . . . . . . . . . . . . . 21Status > Local Network (Lokaal netwerk) . . . . . . . . . . . . . . . . . . . . . . . . . . . . . . 22Status > Wir<strong>el</strong>ess (WLAN) . . . . . . . . . . . . . . . . . . . . . . . . . . . . . . . . . . . . . . . . 22Bijlage A: Probleemoplossing 23Bijlage B: Specificaties 24Wir<strong>el</strong>ess-G breedbandrouterii
InhoudsopgaveBijlage C: Informatie over garantie 25BEPERKTE GARANTIE. . . . . . . . . . . . . . . . . . . . . . . . . . . . . . . . . . . . . . . . . . . 25UITSLUITINGEN EN BEPERKINGEN. . . . . . . . . . . . . . . . . . . . . . . . . . . . . . . . . . . 25VERKRIJGEN VAN GARANTIESERVICE. . . . . . . . . . . . . . . . . . . . . . . . . . . . . . . . . 25TECHNISCHE ONDERSTEUNING . . . . . . . . . . . . . . . . . . . . . . . . . . . . . . . . . . . . 26ALGEMEEN . . . . . . . . . . . . . . . . . . . . . . . . . . . . . . . . . . . . . . . . . . . . . . . . . 26Bijlage D: Informatie over reg<strong>el</strong>geving 27FCC Statement. . . . . . . . . . . . . . . . . . . . . . . . . . . . . . . . . . . . . . . . . . . . . . . 27Safety Notices . . . . . . . . . . . . . . . . . . . . . . . . . . . . . . . . . . . . . . . . . . . . . . . 27Industry Canada Statement. . . . . . . . . . . . . . . . . . . . . . . . . . . . . . . . . . . . . . . 27Avis d’Industrie Canada . . . . . . . . . . . . . . . . . . . . . . . . . . . . . . . . . . . . . . . . . 27Wir<strong>el</strong>ess Disclaimer. . . . . . . . . . . . . . . . . . . . . . . . . . . . . . . . . . . . . . . . . . . . 28Avis de non-responsabilité concernant les appareils sans fil . . . . . . . . . . . . . . . . . . 28Verklaring van conformiteit met betrekking tot EU-richtlijn 1999/5/EC .(R&TTE-richtlijn) . . . . . . . . . . . . . . . . . . . . . . . . . . . . . . . . . . . . . . . . . . . . . . 29CE-markering. . . . . . . . . . . . . . . . . . . . . . . . . . . . . . . . . . . . . . . . . . . . . . . . 30Beperkingen op nationaal niveau. . . . . . . . . . . . . . . . . . . . . . . . . . . . . . . . . . . 30Beperkingen aan het productgebruik . . . . . . . . . . . . . . . . . . . . . . . . . . . . . . . . 31Technische documenten op www.linksys.com/international. . . . . . . . . . . . . . . . . . 31Gebruikersinformatie voor consumentenproducten onder EU-richtlijn .2002/96/EC inzake afgedankte <strong>el</strong>ektrische en <strong>el</strong>ektronische apparatuur (WEEE) . . . . . 32Wir<strong>el</strong>ess-G breedbandrouteriii
Hoofdstuk1ProductoverzichtHoofdstuk 1:ProductoverzichtBedankt. dat. u. hebt. gekozen. voor. de. Wir<strong>el</strong>ess-Gbreedbandrouter.van.Linksys.Met.de.router.hebt.u.toegang.tot. internet. via. een. draadloze. verbinding,. broadcast. tot.maximaal. 54.Mbps,. of. via. een. van. de. vier. geschak<strong>el</strong>de.poorten .U.kunt.de.router.ook.gebruiken.voor.het.d<strong>el</strong>en.van. bronnen,. zoals. computers,. printers. en. bestanden .Verder. biedt. de. gateway. de. nodige. beveiligingsfuncties.waarmee.u.uw.gegevens.en.uw.privacy.kunt.beschermen.als. u. online. werkt . Deze. beveiligingsfuncties. zijn.bijvoorbe<strong>el</strong>d.WPA2-beveiliging,. een. SPI-firewall. (Stateful.Packet.Inspection).en.NAT-technologie .U.kunt.de.router.eenvoudig. configureren. met. het. browser-gebaseerde.hulpprogrammaVoorpane<strong>el</strong>Wir<strong>el</strong>ess (WLAN). (groen):. de. LED. Wir<strong>el</strong>ess.(WLAN).licht.op.als.de.draadloze.functie.wordt.ingeschak<strong>el</strong>d . Als. de. LED. knippert,. worden. er.actief. gegevens. via. het. netwerk. verzonden. of.ontvangenInternet (groen):. de. LED. Internet. licht. op.en. blijft. branden. als. er. een. verbinding. tot.stand. is. gebracht. via. de. internetpoort . Een.knipperende.LED.duidt.op.netwerkactiviteit.via.de.internetpoortPower (Groen). De. LED. Power. (voeding).licht. op. en. blijft. branden. terwijl. de. router.wordt. ingeschak<strong>el</strong>d . Wanneer. de. router.tijdens. het. opstarten. de. z<strong>el</strong>fdiagnostische.routine. doorloopt,. knippert. deze. LED .Wanneer.de.diagnose.is.voltooid,.blijft.de.LED.ononderbroken.brandenAchterpane<strong>el</strong>1, 2, 3, 4 (groen):. dit. zijn. genummerde. LED’s.die. overeenkomen. met. de. genummerde.poorten.op.het.achterpane<strong>el</strong>.van.de.router .Ze.worden.gebruikt.voor.twee.do<strong>el</strong>einden .Als.de.LED.ononderbroken.brandt,.is.de.router.via.de.betreffende.poort.met.een.apparaat.verbonden .Een.knipperende.LED.duidt.op.netwerkactiviteit.via.de.betreffende.poortDe knop Wi-Fi Protected Setup: als. u.clientapparaten,.zoals.een.WLAN-adapter,.hebt.die.Wi-Fi.Protected.Setup.ondersteunen,.kunt.u.Wi-Fi.Protected.Setup.gebruiken.om.de.WLANbeveiliging.voor. uw. draadloze. netwerk(en). te.configurerenAls. u. Wi-Fi. Protected. Setup. wilt. gebruiken,.voert.u.de.installatiewizard.uit.of.raadpleegt.u.het.gede<strong>el</strong>te.“Wir<strong>el</strong>ess.(WLAN).>.Basic.Wir<strong>el</strong>ess.Settings. (Standaardinst<strong>el</strong>lingen. WLAN)”. in.“Hoofdstuk.3:.Geavanceerde.configuratie”Wi-Fi Protected Setup LED (Wi-Fi. Protected.Setup-LED).(blauw/oranje):.deze.licht.groen.op.als. de. draadloze. beveiliging. is. ingeschak<strong>el</strong>d .De. LED. knippert. twee. minuten. groen.tijdens. het. Wi-Fi. Protected. Setup-proces .De. LED. licht. oranje. op. als. er. een. fout.optreedt. tijdens. het. Wi-Fi. Protected. Setupproces. Controleer. of. het. clientapparaat. Wi-Fi.Protected. Setup. ondersteunt . Wacht. totdat.de. LED. uit. gaat. en. probeer. het. dan. opnieuw .De. LED. knippert. oranje. als. er. al. een. Wi-Fi.Protected.Setup-sessie.actief.is.en.er.een.tweede.sessie.wordt.gestart .De.router.ondersteunt.één.sessie .Wacht.totdat.de.LED.uit.is.voordat.u.de.volgende.Wi-Fi.Protected.Setup-sessie.startWir<strong>el</strong>ess-G breedbandrouterInternet: de.internetpoort.is.de.poort.waar.u.uw.kab<strong>el</strong>-.of.DSL-internetverbinding.aansluit .1, 2, 3, 4 Met. deze. Ethernet-poorten. (1,. 2,. 3,.4). sluit. u. de. router. aan. op. de. computers. van.uw. bekab<strong>el</strong>de. netwerk. en. andere. Ethernetnetwerkapparatuur.Reset: de. fabrieksinst<strong>el</strong>lingen. van. de. router.kunnen.op.twee.manieren.worden.herst<strong>el</strong>d .U.kunt. ongeveer. vijf. seconden. lang. op. de. knop.Reset.drukken.of.de.standaardwaarden.herst<strong>el</strong>len.vanuit. het. scherm. Administration.>.Factory.Defaults. (Administratie. >. Fabrieksinst<strong>el</strong>lingen).in.het.webgebaseerde.hulpprogramma.van.de.router .Power: de.poort.Power.(Voeding).is.de.poort.waarop.u.de.netstroomadapter.aansluitPlaatsen van de routerEr.zijn.twee.manieren.om.de.router.fysiek.te.installeren .De.eerste.manier.is.om.de.router.horizontaal.te.plaatsen.op.een.oppervlak .De.tweede.manier.is.om.de.router.aan.een.wand.te.bevestigenHorizontale plaatsingDe.router.heeft.vier.rubberen.voetjes.op.het.onderpane<strong>el</strong> .Plaats. de. router. op. een. vlak. oppervlak. nabij. een.wandcontactdoos1
Hoofdstuk1ProductoverzichtWandmontageHet.onderpane<strong>el</strong>.van.de.router.beschikt.over.twee.sleuven.voor. wandmontage . De. afstand. tussen. de. sleuven. is.152.mm.(6.inches) .Er.zijn.twee.schroeven.nodig.om.de.router.te.bevestigenVolg.de.onderstaande.instructies:1 Bepaal.waar.u.de.router.wilt.bevestigen .Controleer.of.de.wand.vlak,.glad,.droog.en.stevig.is .Controleer.ook.dat.of.de.gekozen.locatie.binnen.het.bereik.van.een.wandcontactdoos.is2 Boor. twee. gaten. in. de. wand . Zorg. ervoor. dat. de.afstand.tussen.de.gaten.152.mm.(6.inches).is3 Draai.een.schroef.in.<strong>el</strong>k.gat.en.laat.3.mm.(0,12.inches).van.de.kop.uitsteken4 Houd.de.router.zo.dat.de.sleuven.voor.wandbevestiging.zich.op.een.lijn.bevinden.met.de.twee.schroeven5 Plaats. de. sleuven. voor. wandbevestiging. over. de.schroeven. en. schuif. de. router. omlaag. totdat. de.schroeven.stevig.in.de.sleuven.vastgrijpenAanbevolen bevestigingsmaterialen4-5.mm1-1,5.mm2,5-3,0.mm† Opmerking:.Afbe<strong>el</strong>dingen.van.aanbevolen.bevestigingsmaterialen.zijn.niet.op.ware.grootteOPMERKING:. Linksys. is. niet. verantwoord<strong>el</strong>ijk.voor.schade.die.het.gevolg.is.van.ondeugd<strong>el</strong>ijke.bevestigingsmaterialen .152.mmDruk.deze.pagina.af.op.ware.grootte.(100%) .Knip.de.sjabloon.uit.langs.de.stipp<strong>el</strong>lijn.en.houd.deze.tegen.de.wand.voor.een.juiste.afstand.tussen.de.boorgatenSjabloon.voor.wandmontageWir<strong>el</strong>ess-G breedbandrouter2
Hoofdstuk2Control<strong>el</strong>ijst voor WLAN-beveiligingHoofdstuk 2:Control<strong>el</strong>ijst voor WLANbeveiligingVanwege. het. gebruiksgemak. en. de. gemakk<strong>el</strong>ijke.installatieprocedure. worden. er. steeds. meer. draadloze.netwerken. opgezet. in. huizen. die. over. een. sn<strong>el</strong>le.internetverbinding. beschikken . Deze. netwerken. maken.gebruik. van. radiogolven. voor. de. verzending. van.informatie.en.zijn.daarom.een.gemakk<strong>el</strong>ijk.do<strong>el</strong>wit.voor.indringers .De.signalen.van.uw.draadloze.netwerk.kunnen.worden.onderschept,.op.dez<strong>el</strong>fde.manier.als.bij.mobi<strong>el</strong>e.of.draadloze.t<strong>el</strong>efoons .Het.is.niet.mog<strong>el</strong>ijk.om.met.fysieke.maatreg<strong>el</strong>en.te.verhinderen.dat.anderen.verbinding.met.uw. draadloze. netwerk. maken,. maar. u. kunt. uw. netwerk.w<strong>el</strong>.op.andere.manieren.beveiligen .1. Standaardnaam of SSIDvan het draadloze netwerkwijzigenVoor.draadloze.apparatuur.wordt.in.de.fabriek.een.naam.van.het.draadloze.netwerk.of.SSID.(Service.Set.Identifier).ingest<strong>el</strong>d . Dit. is. de. naam. van. uw. draadloze. netwerk. en.deze. mag. maximaal. 32. tekens. lang. zijn .Voor. draadloze.apparatuur.van.Linksys.wordt.standaard.linksys.als.naam.van.het.draadloze.netwerk.gebruikt .U.kunt.uw.draadloze.netwerk.onderscheiden.van.eventu<strong>el</strong>e.andere.draadloze.netwerken. in. de. omgeving. door. een. unieke. naam. voor.uw. draadloze. netwerk. op. te. geven . Gebruik. hiervoor.geen.persoonlijke.informatie.(zoals.een.fiscaal.nummer),.want. deze. informatie. kan. door. iedereen. worden. gezien.die.naar.draadloze.netwerken.zoekt .2. StandaardwachtwoordwijzigenAls. u. de. inst<strong>el</strong>lingen. van. draadloze. apparatuur. zoals.access. points. en. routers. wilt. wijzigen,. wordt. u. om.een. wachtwoord. gevraagd . In. de. fabriek. wordt. een.standaardwachtwoord. ingest<strong>el</strong>d. voor. deze. apparatuur .Het. standaardwachtwoord. voor. Linksys. is. admin .Hackers. kennen. deze. standaardwaarden. en. kunnen.deze.gebruiken.om.toegang.te.krijgen.tot.uw.draadloze.apparatuur. en. uw. netwerkinst<strong>el</strong>lingen. te. wijzigen . U.kunt. deze. onrechtmatige. wijzigingen. verhinderen. door.het. wachtwoord. van. uw. apparaat. aan. te. passen,. zodat.onbevoegden.dit.moeilijk.kunnen.raden3. MAC-adresfilteringinschak<strong>el</strong>enU. kunt. MAC-adresfiltering. (Media. Access. Control-adres).inschak<strong>el</strong>en.voor.de.routers.van.Linksys .Het.MAC-adres.is.een.unieke.reeks.cijfers.en.letters.voor.<strong>el</strong>k.netwerkapparaat .Wir<strong>el</strong>ess-G breedbandrouterAls. MAC-adresfiltering. is. ingeschak<strong>el</strong>d,. is. het. draadloze.netwerk. alleen. toegank<strong>el</strong>ijk. voor. draadloze. apparatuur.met. specifieke. MAC-adressen . U. kunt. bijvoorbe<strong>el</strong>d. een.specifiek.MAC-adres.opgeven.voor.<strong>el</strong>ke.computer.in.uw.huis,.zodat.alleen.die.computers.toegang.hebben.tot.uw.draadloze.netwerk .4. Versleut<strong>el</strong>ing inschak<strong>el</strong>enDe. gegevens. die. via. een. draadloos. netwerk. worden.verzonden,. kunnen. worden. midd<strong>el</strong>s. versleut<strong>el</strong>ing.worden. beveiligd . Met. Wi-Fi. Protected. Access. (WPA/WPA2). en. Wired. Equivalency. Privacy. (WEP). beschikt. u.over. verschillende. beveiligingsniveaus. voor. draadloze.communicatie .Momente<strong>el</strong>.is.het.voor.apparaten.met.Wi-Fi-certificering.vereist.dat.deze.WPA2.ondersteunen,.maar.de.ondersteuning.van.WEP.is.niet.vereistVersleut<strong>el</strong>ing.met.WPA/WPA2.biedt.een.betere.beveiliging.van.uw.netwerk.dan.WEP,.omdat.WPA/WPA2-versleut<strong>el</strong>ing.gebruikmaakt. van. dynamische. sleut<strong>el</strong>s . U. moet. het.hoogst. mog<strong>el</strong>ijke. beveiligingsniveau. gebruiken. voor. de.versleut<strong>el</strong>ing. van. uw. netwerkapparatuur. om. de. door. u.verzonden.en.ontvangen.informatie.te.beveiligen .WEP.is.een.oudere.versleut<strong>el</strong>ingsmethode.die.soms.moet.worden. gebruikt. voor. oudere. apparatuur. waarop. WPA.niet.wordt.ondersteundAlgemene richtlijnen voornetwerkbeveiligingBeveiliging.van.draadloze.netwerken.is.alleen.effectief.als.ook.het.onderliggende.netwerk.is.beveiligd .• U.kunt.alle.computers.van.het.netwerk.beveiligen.met.een. wachtwoord . Bovendien. kunt. u. bestanden. met.gevo<strong>el</strong>ige.informatie.ook.nog.afzonderlijk.beveiligen.met.een.wachtwoord• Wijzig.de.wachtwoorden.reg<strong>el</strong>matig• Installeer. antivirussoftware. en. persoonlijke.firewallsoftware• Schak<strong>el</strong>. het. d<strong>el</strong>en. van. bestanden. uit. (peer-to-peer) .In. bepaalde. toepassingen. wordt. het. d<strong>el</strong>en. van.bestanden.geactiveerd.zonder.uw.instemming.en/of.zonder.dat.u.het.weetAanvullende beveiligingstips• Houd.draadloze.routers,.access.points.en.gateways.uit.de.buurt.van.buitenmuren.en.ramen• Schak<strong>el</strong>.draadloze.routers,.access.points.en.gateways.uit. wanneer. u. ze. niet. gebruikt. (‘s. nachts,. tijdens. uw.vakantie)• Gebruik. sterke. wachtzinnen. van. ten. minste. acht.tekens .Gebruik.geen.woorden.uit.het.woordenboek,.maar.een.combinatie.van.cijfers.en.letters .WEB:. zie. www.linksys.com/security voor.meer.informatie.over.WLAN-beveiliging3
Hoofdstuk3Geavanceerde configuratieHoofdstuk 3:GeavanceerdeconfiguratieNadat. u. de. router. hebt. geïnstalleerd. met. de. Setup.Wizard. (Installatiewizard). op. de. cd-rom,. is. de. router.klaar. voor. gebruik . U. kunt. het. webprogramma. van. de.router. gebruiken. om. de. geavanceerde. inst<strong>el</strong>lingen. te.wijzigen . In. dit. hoofdstuk. komen. alle. webpagina’s. van.het.hulpprogramma.en.de.b<strong>el</strong>angrijkste.functies.op.deze.pagina’s.aan.de.orde .U.kunt.het.hulpprogramma.openen.via.een.webbrowser.op.een.computer.die.is.aangesloten.op.de.routerHet. webprogramma. bestaat. uit. de. volgende.hoofdtabbladen:. Setup. (Inst<strong>el</strong>lingen),. Wir<strong>el</strong>ess.(WLAN),. Security. (Beveiliging),. Access. Restrictions.(Toegangsbeperkingen),. Applications. &. Gaming.(Toepassingen.en.games),.Administration.(Administratie).en. Status . Nadat. u. op. één. van. de. hoofdtabbladen. hebt.geklikt,.worden.meer.tabbladen.weergegevenOPMERKING:. gebruik. de. Setup. Wizard.(Installatiewizard). op. de. installatie-cd. als.u. de. router. voor. het. eerst. installeert . Als. u.geavanceerde. inst<strong>el</strong>lingen. wilt. configureren,.vindt. u. in. dit. hoofdstuk. meer. informatie. over.het.webprogrammaHet webprogramma openenU.kunt.het.webprogramma.openen.door.de.webbrowser.op.uw.computer.te.starten.en.het.standaard-IP-adres.van.de.router.(192.168.1.1).op.te.geven.in.het.v<strong>el</strong>d. Address.(Adres) .Druk.vervolgens.op.EnterEr.verschijnt.nu.een.venster.waarin.u.uw.wachtwoord.kunt.invoeren .(Gebruikers.met.een.ander.besturingsprogramma.dan. Windows. XP. zien. een. soortg<strong>el</strong>ijk. scherm ). Laat.het. v<strong>el</strong>d. User name. (Gebruikersnaam). leeg . Voer. het.standaardwachtwoord.admin.in.als.u.het.webprogramma.voor.het.eerst.gebruikt .(U.kunt.een.nieuw.wachtwoord.inst<strong>el</strong>len. in. het. scherm. Management. (Beheer). op. het.tabblad. Administration. (Administratie)) . Klik. op. OK. om.door.te.gaanSetup (Inst<strong>el</strong>lingen) > Basic Setup(Basisinst<strong>el</strong>lingen)Het.eerste.scherm.dat.wordt.weergegeven,.is.het.scherm.Basic Setup. (Basisinst<strong>el</strong>lingen) . Hier. kunt. u. de. algemene.inst<strong>el</strong>lingen.van.de.router.wijzigen .Setup.(Inst<strong>el</strong>lingen).>.Basic.Setup.(Basisinst<strong>el</strong>lingen)Internetinst<strong>el</strong>lingenIn.het.gede<strong>el</strong>te.Internet.Setup.(Internetinst<strong>el</strong>lingen).kunt.u. de. router. configureren. voor. uw. internetverbinding . U.kunt.het.merende<strong>el</strong>.van.de.benodigde.gegevens.bij.uw.internetprovider.opvragenType internetverbindingKies.het.type.internetverbinding.van.uw.internetprovider.in.de.vervolgkeuz<strong>el</strong>ijst .De.beschikbare.typen.zijn:••••••Automatische.configuratie.DHCPVast.IPPPPoEPPTPL2TP-T<strong>el</strong>stra-kab<strong>el</strong>Automatische configuratie DHCPHet. type. internetverbinding. van. de. router. is. standaard.ingest<strong>el</strong>d. op. Automatic Configuration - DHCP(Automatische.configuratie.-.DHCP) .Houd.deze.inst<strong>el</strong>ling.alleen.aan,.als.uw.internetprovider.DHCP.ondersteunt.of.als.u.verbinding.maakt.via.een.dynamisch.IP-adres .(Deze.optie.is.meestal.van.toepassing.op.kab<strong>el</strong>verbindingen )Scherm.Password.(Wachtwoord)Internet.Connection.Type.(Type.Internetverbinding).>.Automatic.Configuration.-.DHCP.(Automatische.configuratie.-.DHCP)Wir<strong>el</strong>ess-G breedbandrouter4
Hoofdstuk3Geavanceerde configuratieVast IPAls. u. een. permanent. IP-adres. moet. gebruiken. om.verbinding.te.maken.met.internet,.s<strong>el</strong>ecteert.u.Static IP.(Vast.IP-adres)Internet.Connection.Type.(Type.internetverbinding).>.Static.IP.(Vast.IP-adres)Internet IP Address (IP-adres.internet):.dit.is.het.IP-adres.van.de.router.dat.gebruikers.op.internet.te.zien.krijgen .U.ontvangt.het.IP-adres.dat.u.hier.dient.op.te.geven.via.uw.internetproviderSubnet Mask (Subnetmasker):. dit. is. het. subnetmasker.van. de. router. dat. gebruikers. op. internet. (inclusief.uw. internetprovider). te. zien. krijgen . U. ontvangt. het.subnetmasker.via.uw.internetproviderGateway: u. ontvangt. het. gateway-adres. via.uw. internetprovider;. dit. is. het. IP-adres. van. de.internetproviderserverDNS: u. ontvangt. het. IP-adres. van. ten. minste. één. DNS.(Domain.Name.System).via.uw.internetproviderPPPoESommige. internetproviders. op. basis. van. DSL. brengen.internetverbinding. tot. stand. met. gebruik. van. PPPoE.(Point-to-Point. Protocol. over. Ethernet) . Als. u. een.internetverbinding. via. een. DSL-lijn. gebruikt,. dient. u.contact. op. te. nemen. met. uw. internetprovider. om. te.controleren.of.PPPoE.wordt.gebruikt .Als.dit.het.geval.is,.schak<strong>el</strong>t.u.PPPoE.inInternet.Connection.Type.(Type.internetverbinding).>.PPPoEUsername and Password (Gebruikersnaam. en.wachtwoord):.geef.de.gebruikersnaam.en.het.wachtwoord.op.die.u.hebt.ontvangen.van.uw.internetprovider .Connect on Demand: Max Idle Time (Verbinden. op.verzoek:. Max . duur. inactiviteit):. in. de. configuratie. van.de. router. kunt. u. aangeven. wat. de. maximale. duur. van.inactiviteit. is. waarna. de. verbinding. met. internet. wordt.verbroken .Als.de.internetverbinding.vanwege.inactiviteit.is.verbroken,.wordt.de.router.door.Verbinden.op.verzoek.zo. ingest<strong>el</strong>d,. dat. er. automatisch. weer. verbinding. tot.stand.wordt.gebracht.wanneer.u.verbinding.met.internet.wilt. maken . S<strong>el</strong>ecteer. de. optie. Connect on Demand.(Verbinden. op. verzoek). als. u. deze. optie. wilt. gebruiken .Voer. in. het. v<strong>el</strong>d. Max Idle Time. (Max . duur. inactiviteit):.het. aantal. minuten. in. waarna. de. internetverbinding.moet. worden. verbroken . De. Max. Idle. Time. (Max . duur.inactiviteit).is.standaard.ingest<strong>el</strong>d.op.5.minutenWir<strong>el</strong>ess-G breedbandrouterKeep Alive: Redial Period (Continu.verbinding.houden:.Interval.voor.opnieuw.kiezen):.als.u.deze.optie.s<strong>el</strong>ecteert,.wordt. de. internetverbinding. reg<strong>el</strong>matig. door. de. router.gecontroleerd . Als. de. verbinding. wordt. verbroken,.brengt. de. router. automatisch. weer. een. verbinding. tot.stand .S<strong>el</strong>ecteer.Keep Alive.(Continu.verbinding.houden).als. u. deze. optie. wilt. gebruiken . . Geef. in. het. v<strong>el</strong>d. RedialPeriod. (Interval. voor. opnieuw. kiezen). op. hoe. vaak. u. de.internetverbinding.door.de.router.wilt.laten.controleren .De. Redial. Period. (Interval. voor. opnieuw. kiezen). is.standaard.ingest<strong>el</strong>d.op.30.secondenPPTPPoint-to-Point.Tunn<strong>el</strong>ing.Protocol.(PPTP).is.een.service.die.alleen.van.toepassing.is.op.verbindingen.in.EuropaInternet.Connection.Type.(Type.internetverbinding).>.PPTPInternet IP Address (IP-adres.internet):.dit.is.het.IP-adres.van.de.router.dat.gebruikers.op.internet.te.zien.krijgen .U.ontvangt.het.IP-adres.dat.u.hier.dient.op.te.geven.via.uw.internetproviderSubnet Mask (Subnetmasker):.dit.is.het.subnetmasker.van. de. router. dat. gebruikers. op. internet. (inclusief.uw. internetprovider). te. zien. krijgen . U. ontvangt. het.subnetmasker.via.uw.internetproviderGateway: u.ontvangt.het.IP-adres.van.de.gateway.via.uw.internetproviderUsername and Password (Gebruikersnaam. en.wachtwoord):.geef.de.gebruikersnaam.en.het.wachtwoord.op.die.u.hebt.ontvangen.van.uw.internetproviderConnect on Demand: Max Idle Time (Verbinden. op.verzoek:. Max . duur. inactiviteit):. in. de. configuratie. van.de. router. kunt. u. aangeven. wat. de. maximale. duur. van.inactiviteit. is. waarna. de. verbinding. met. internet. wordt.verbroken .Als.de.internetverbinding.vanwege.inactiviteit.is.verbroken,.wordt.de.router.door.Verbinden.op.verzoek.zo. ingest<strong>el</strong>d,. dat. er. automatisch. weer. verbinding. tot.stand.wordt.gebracht.wanneer.u.verbinding.met.internet.wilt. maken . S<strong>el</strong>ecteer. de. optie. Connect on Demand(Verbinden. op. verzoek). als. u. deze. optie. wilt. gebruiken .Voer. in. het. v<strong>el</strong>d. Max Idle Time. (Max . duur. inactiviteit):.het. aantal. minuten. in. waarna. de. internetverbinding.moet. worden. verbroken . De. Max. Idle. Time. (Max . duur.inactiviteit).is.standaard.ingest<strong>el</strong>d.op.5.minutenKeep Alive: Redial Period (Continu. verbinding. houden:.Interval.voor.opnieuw.kiezen):.als.u.deze.optie.s<strong>el</strong>ecteert,.wordt. de. internetverbinding. reg<strong>el</strong>matig. door. de. router.gecontroleerd .Als.de.verbinding.wordt.verbroken,.brengt.de.router.automatisch.weer.een.verbinding.tot.stand .S<strong>el</strong>ecteer.Keep Alive.(Continu.verbinding.houden).als.u.deze.optie.wilt.gebruiken ..Geef.in.het.v<strong>el</strong>d.Redial Period.(Interval.voor.opnieuw.kiezen).op.hoe.vaak.u.de.internetverbinding.door.de.router.wilt.laten.controleren .De.standaardlevensduur.is.30.seconden5
Hoofdstuk3Geavanceerde configuratieL2TP-L2TP.is.een.dienst.die.alleen.is.bedo<strong>el</strong>d.voor.verbindingen.in.IsraëlInternet.Connection.Type.(Type.internetverbinding).>.L2TPUsername and Password (Gebruikersnaam. en.wachtwoord):.geef.de.gebruikersnaam.en.het.wachtwoord.op.die.u.hebt.ontvangen.van.uw.internetproviderL2TP Server (L2TP-server):. dit. is. het. IP-adres. van. de.L2TP-server .U.ontvangt.het.IP-adres.dat.u.hier.dient.op.te.geven.via.uw.internetproviderConnect on Demand: Max Idle Time (Verbinden. op.verzoek:. Max . duur. inactiviteit):. in. de. configuratie. van.de. router. kunt. u. aangeven. wat. de. maximale. duur. van.inactiviteit. is. waarna. de. verbinding. met. internet. wordt.verbroken .Als.de.internetverbinding.vanwege.inactiviteit.is.verbroken,.wordt.de.router.door.Verbinden.op.verzoek.zo. ingest<strong>el</strong>d,. dat. er. automatisch. weer. verbinding. tot.stand.wordt.gebracht.wanneer.u.verbinding.met.internet.wilt. maken . S<strong>el</strong>ecteer. de. optie. Connect on Demand.(Verbinden. op. verzoek). als. u. deze. optie. wilt. gebruiken .Voer. in. het. v<strong>el</strong>d. Max Idle Time. (Max . duur. inactiviteit):.het. aantal. minuten. in. waarna. de. internetverbinding.moet. worden. verbroken . De. Max. Idle. Time. (Max . duur.inactiviteit).is.standaard.ingest<strong>el</strong>d.op.5.minutenKeep Alive: Redial Period (Continu.verbinding.houden:.Interval.voor.opnieuw.kiezen):.als.u.deze.optie.s<strong>el</strong>ecteert,.wordt. de. internetverbinding. reg<strong>el</strong>matig. door. de. router.gecontroleerd .Als.de.verbinding.wordt.verbroken,.brengt.de. router. automatisch. weer. een. verbinding. tot. stand .S<strong>el</strong>ecteer. Keep Alive. (Continu. verbinding. houden).als. u. deze. optie. wilt. gebruiken . . Geef. in. het. v<strong>el</strong>d. RedialPeriod. (Interval. voor. opnieuw. kiezen). op. hoe. vaak. u. de.internetverbinding.door.de.router.wilt.laten.controleren .De. Redial. Period. (Interval. voor. opnieuw. kiezen). is.standaard.ingest<strong>el</strong>d.op.30.secondenT<strong>el</strong>stra-kab<strong>el</strong>T<strong>el</strong>stra-kab<strong>el</strong>. is. een. dienst. die. alleen. is. bedo<strong>el</strong>d. voor.verbindingen. in. Australië . S<strong>el</strong>ecteer. T<strong>el</strong>stra. als. uw. ISP.gebruikmaakt.van.een.HeartBeat-signaal.(HBS).Internet.Connection.Type.(Type.internetverbinding).>.T<strong>el</strong>stra.Cable.(T<strong>el</strong>stra-kab<strong>el</strong>)Username and Password (Gebruikersnaam. en.wachtwoord):.geef.de.gebruikersnaam.en.het.wachtwoord.op.die.u.hebt.ontvangen.van.uw.internetproviderHeart Beat Server (HeartBeat-server):.dit.is.het.IP-adres.van. de. HeartBeat-server . U. ontvangt. het. IP-adres. dat. u.hier.dient.op.te.geven.via.uw.internetproviderWir<strong>el</strong>ess-G breedbandrouterConnect on Demand: Max Idle Time (Verbinden. op.verzoek:. Max . duur. inactiviteit):. in. de. configuratie. van.de. router. kunt. u. aangeven. wat. de. maximale. duur. van.inactiviteit. is. waarna. de. verbinding. met. internet. wordt.verbroken .Als.de.internetverbinding.vanwege.inactiviteit.is.verbroken,.wordt.de.router.door.Verbinden.op.verzoek.zo. ingest<strong>el</strong>d,. dat. er. automatisch. weer. verbinding. tot.stand.wordt.gebracht.wanneer.u.verbinding.met.internet.wilt. maken . S<strong>el</strong>ecteer. de. optie. Connect on Demand(Verbinden. op. verzoek). als. u. deze. optie. wilt. gebruiken .Voer. in. het. v<strong>el</strong>d. Max Idle Time. (Max . duur. inactiviteit):.het. aantal. minuten. in. waarna. de. internetverbinding.moet. worden. verbroken . De. Max. Idle. Time. (Max . duur.inactiviteit).is.standaard.ingest<strong>el</strong>d.op.5.minutenKeep Alive: Redial Period (Continu.verbinding.houden:.Interval.voor.opnieuw.kiezen):.als.u.deze.optie.s<strong>el</strong>ecteert,.wordt. de. internetverbinding. reg<strong>el</strong>matig. door. de. router.gecontroleerd . Als. de. verbinding. wordt. verbroken,.brengt. de. router. automatisch. weer. een. verbinding. tot.stand .S<strong>el</strong>ecteer.Keep Alive.(Continu.verbinding.houden).als. u. deze. optie. wilt. gebruiken . . Geef. in. het. v<strong>el</strong>d. RedialPeriod. (Interval. voor. opnieuw. kiezen). op. hoe. vaak. u. de.internetverbinding.door.de.router.wilt.laten.controleren .De. Redial. Period. (Interval. voor. opnieuw. kiezen). is.standaard.ingest<strong>el</strong>d.op.30.secondenOption<strong>el</strong>e inst<strong>el</strong>lingenEen. aantal. van. deze. inst<strong>el</strong>lingen. is. mog<strong>el</strong>ijk. vereist.door. uw. internetprovider . Neem. contact. op. met. uw.internetprovider.voordat.u.wijzigingen.aanbrengtOption<strong>el</strong>e.inst<strong>el</strong>lingenRouter Name (Naam.router):.in.dit.v<strong>el</strong>d.kunt.u.een.naam.van.maximaal.39.tekens.invoeren.voor.de.router .Host Name/Domain Name (Hostnaam/domeinnaam):.in. deze. v<strong>el</strong>den. kunt. u. een. hostnaam. en. domeinnaam.opgeven.voor.de.router .Voor.sommige.internetproviders,.meestal.kab<strong>el</strong>internetproviders,.zijn.deze.namen.vereist.ter.identificatie .U.dient.w<strong>el</strong>licht.bij.uw.internetprovider.na.te.vragen.of.uw.breedbandinternetdienst.is.geconfigureerd.met. een. host-. en. domeinnaam . In. de. meeste. gevallen.kunt.u.deze.v<strong>el</strong>den.leeg.laten .MTU: MTU.is.de.Maximum.Transmission.Unit .Deze.geeft.de. maximale. pakketgrootte. aan. die. via. internet. kan.worden.verstuurd .S<strong>el</strong>ecteer.Manual.(Handmatig).als.u.de.grootst.mog<strong>el</strong>ijke.pakketgrootte.handmatig.wilt.invoeren .Gebruik. de. standaardwaarde, Auto. (Automatisch). als. u.wilt. dat. de. beste. MTU. voor. uw. internetverbinding. door.de.router.wordt.ges<strong>el</strong>ecteerdSize (Formaat):. deze. optie. is. ingeschak<strong>el</strong>d. als. Manual.(Handmatig). is. ges<strong>el</strong>ecteerd. in. het. MTU-v<strong>el</strong>d . U. dient.hier. een. waarde. tussen. 1200. en. 1500. op. te. geven .Het. standaardformaat. is. afhank<strong>el</strong>ijk. van. het. type.internetverbinding:• DHCP,.Static.IP.(Vast.IP-adres).of.T<strong>el</strong>stra:.15006
Hoofdstuk3Geavanceerde configuratie• PPPoE:.1492• PPTP.of.L2TP:.1460Netwerkinst<strong>el</strong>lingenIn. het. gede<strong>el</strong>te. Network. Setup. (Netwerkinst<strong>el</strong>lingen).kunt. u. de. inst<strong>el</strong>lingen. wijzigen. voor. het. netwerk. dat. is.verbonden.met.de.Ethernet-poorten.op.uw.router .U.kunt.een.draadloos.netwerk.inst<strong>el</strong>len.op.het.tabblad.Wir<strong>el</strong>ess.(WLAN)IP-adres routerDit.is.zow<strong>el</strong>.het.IP-adres.als.het.submasker.van.de.router.zoals.die.worden.weergegeven.in.het.netwerkIP-adres.routerServerinst<strong>el</strong>lingen netwerkadres (DHCP)Met.de.inst<strong>el</strong>lingen.kunt.u.de.serverfunctie.Dynamic.Host.Configuration.Protocol.(DHCP).van.de.router.configureren .De. router. kan. worden. gebruikt. als. DHCP-server. voor.uw. netwerk . DHCP-servers. wijzen. automatisch. een. IPadres.toe. aan. <strong>el</strong>ke. computer. in. uw. netwerk . Als. u. de.DHCP-serveroptie.van.de.router.wilt.inschak<strong>el</strong>en,.moet.u.controleren.of.er.geen.andere.DHCP-server.op.uw.netwerk.is .om. dit. dynamische. IP-adres. te. kunnen. gebruiken . Als.deze. tijd. is. verstreken,. wordt. automatisch. een. nieuw.dynamisch. IP-adres. aan. de. gebruiker. toegewezen . De.standaardinst<strong>el</strong>ling.is.0.minuten,.waarmee.één.dag.wordt.aangegevenStatic DNS (1-3) (Statische. DNS. [1-3]):. DNS. (Domain.Name.System).geeft.aan.hoe.de.namen.van.domeinen.of.websites.worden.omgezet.in.internetadressen.of.URL’s.op.internet .Van.uw.internetprovider.ontvangt.u.het.IP-adres.van.ten.minste.één.domeinnaamserver .Als.u.een.andere.server.wilt.gebruiken,.dient.u.het.desbetreffende.IP-adres.in.een.van.deze.v<strong>el</strong>den.op.te.geven .U.kunt.hier.maximaal.drie.IP-adressen.van.DNS-servers.invoeren .Deze.adressen.worden. door. de. router. gebruikt. om. sn<strong>el</strong>ler. toegang. te.krijgen.tot.werkende.DNS-serversWINS: de. interactie. van. <strong>el</strong>ke. computer. met. internet.wordt. door. WINS. (Windows. Internet. Naming. Service).beheerd .Als.u.een.WINS-server.gebruikt,.voert.u.hier.het.IP-adres.van.die.server.in .In.alle.andere.gevallen.laat.u.dit.v<strong>el</strong>d.leegTijdsinst<strong>el</strong>lingenIn. deze. vervolgkeuz<strong>el</strong>ijst. kunt. u. de. tijdzone. s<strong>el</strong>ecteren.waarin. uw. netwerk. opereert . (U. kunt. z<strong>el</strong>fs. de. klok.automatisch.aanpassen.aan.zomer-.en.wintertijd )Wir<strong>el</strong>ess-G breedbandrouterServerinst<strong>el</strong>lingen.netwerkadres.(DHCP)DHCP Server (DHCP-server):. DHCP. is. standaard.ingeschak<strong>el</strong>d .Als.er.zich.al.een.DHCP-server.in.uw.netwerk.bevindt.of.u.geen.DHCP-server.wilt.gebruiken,.s<strong>el</strong>ecteer.dan. Disable. (Uitschak<strong>el</strong>en). (er. zijn. dan. geen. andere.DHCP-functies.beschikbaar)Starting IP Address (Eerste. IP-adres):. voer. een. waarde.in. voor. de. DHCP-server. waarmee. u. wilt. starten. als. u. IPadressen.uitgeeft . . Aangezien. het. standaard. IP-adres. van.de. router. 192 168 1 1. is,. moet. het. standaardbegin. van.het. IP-bereik. 192 168 1 2. zijn. of. hoger,. maar. lager. dan.192 168 1 253 . Het. standaard. begin-IP-adres. van. het. IPbereik.is.192.168.1.100Maximum Number of DHCP Users (Maximumaantal.DHCP-gebruikers):. voer. het. maximumaantal. computers.in.waaraan.u.door.de.DHCP-server.IP-adressen.wilt.laten.toewijzen . Dit. aantal. mag. niet. groter. zijn. dan. 253 . De.standaard.is.50Client Lease Time (Leasetijd.client):.de.leasetijd.van.de.client. geeft. aan. ho<strong>el</strong>ang. een. computer. verbinding. kan.hebben. met. de. router. via. het. huidige. dynamische. IPadres.Voer. de. tijd. in. minuten. in. die. de. gebruiker. krijgt.Tijdsinst<strong>el</strong>lingenKlik. op. Save Settings. (Inst<strong>el</strong>lingen. opslaan). om. de.wijzigingen. door. te. voeren. of. klik. op. Canc<strong>el</strong> changes(Wijzigingen.annuleren).om.de.wijzigingen.te.annulerenSetup (Inst<strong>el</strong>lingen) > DDNSDe. router. beschikt. over. een. DDNS-functie. (Dynamic.Domain.Name.System) .Met.DDNS.kunt.u.een.vaste.host-.en.domeinnaam.aan.een.dynamisch.IP-adres.toekennen .Dit.is.een.handige.optie.wanneer.u.de.host.van.uw.eigen.website,.FTP-server.of.een.andere.server.achter.de.router.bent .Voordat.u.deze.functie.kunt.gebruiken,.dient.u.zich.voor.een.DDNS-service.aan.te.m<strong>el</strong>den.via.een.DDNS-provider,.www dyndns org.of.www TZO com .Als.u.deze.functie.niet.wilt.gebruiken,.gebruikt.u.de.standaardinst<strong>el</strong>ling.Disable(Uitschak<strong>el</strong>en)DDNSDe. router. beschikt. over. een. DDNS-functie. (Dynamic.Domain.Name.System) .Met.DDNS.kunt.u.een.vaste.host-.en.domeinnaam.aan.een.dynamisch.IP-adres.toekennen .Dit.is.een.handige.optie.wanneer.u.de.host.van.uw.eigen.website,.FTP-server.of.een.andere.server.achter.de.router.bentVoordat. u. deze. functie. kunt. gebruiken,. moet. u. zich.aanm<strong>el</strong>den. voor. DDNS-service. bij. een. van. de. twee.serviceproviders. voor. DDNS,. DynDNS org. of. TZO com .Als. u. deze. functie. niet. wilt. gebruiken,. gebruikt. u. de.standaardinst<strong>el</strong>ling.Disable.(Uitschak<strong>el</strong>en)7
Hoofdstuk3Geavanceerde configuratieDDNS-serviceAls. uw. DDNS-service. wordt. g<strong>el</strong>everd. door. DynDNS org,.s<strong>el</strong>ecteert. u. DynDNS.org. in. het. vervolgkeuzemenu . Als.uw. DDNS-service. wordt. g<strong>el</strong>everd. door.TZO,. s<strong>el</strong>ecteert. u.TZO.com .De.functies.op.het.DDNS-scherm.zijn.afhank<strong>el</strong>ijk.van.de.leverancier.van.de.DDNS-service .DynDNS.orgStatus: de.status.van.de.verbinding.met.de.DDNS-service.wordt.hier.weergegevenKlik. op. Save Settings. (Inst<strong>el</strong>lingen. opslaan). om. de.wijzigingen. door. te. voeren. of. klik. op. Canc<strong>el</strong> changes(Wijzigingen.annuleren).om.de.wijzigingen.te.annulerenSetup (Inst<strong>el</strong>lingen) > MAC Address Clone(MAC-adres klonen)Een. MAC-adres. is. een. 12-cijferige. code. die. voor.identificatiedo<strong>el</strong>einden.wordt.toegewezen.aan.een.uniek.stuk. hardware . Bij. sommige. internetproviders. moet. u.een. MAC-adres. registreren. om. verbinding. met. internet.te. kunnen. maken . Als. u. het. MAC-adres. niet. opnieuw.wilt. registreren. met. uw. ISP,. kunt. u. het. MAC-adres. dat.momente<strong>el</strong>.bij.uw.ISP-adres.is.geregistreerd,.aan.de.router.toewijzen.bij.de.functie.MAC-adres.klonenSetup.(Inst<strong>el</strong>lingen).>.DDNS.>.DynDNSUser Name (Gebruikersnaam):. geef. de. gebruikersnaam.voor.uw.DDNS-account.opPassword (Wachtwoord):.voer.het.wachtwoord.voor.uw.DDNS-account.inHost Name (Hostnaam):.dit.is.de.DDNS-URL.die.door.de.DDNS-service.is.toegekendInternet IP Address (IP-adres. internet):. hier. wordt. het.huidige.internet-IP-adres.van.de.router.weergegeven .Dit.is.een.dynamisch.adres.en.het.verandert.dan.ookStatus: de.status.van.de.verbinding.met.de.DDNS-service.wordt.hier.weergegevenKlik. op. Save Settings. (Inst<strong>el</strong>lingen. opslaan). om. de.wijzigingen. door. te. voeren. of. klik. op. Canc<strong>el</strong> changes.(Wijzigingen.annuleren).om.de.wijzigingen.te.annulerenTZO.comSetup.(Inst<strong>el</strong>lingen).>.DDNS.>.TZOE-Mail Address, TZO Key en Domain Name (E-mailadres,.TZO-wachtwoord.en.Domeinnaam):.geef.de.inst<strong>el</strong>lingen.op.van.uw.account.bij.TZOInternet IP Address (IP-adres. internet):. hier. wordt. het.huidige.internet-IP-adres.van.de.router.weergegeven .Dit.is.een.dynamisch.adres.en.het.verandert.dan.ookWir<strong>el</strong>ess-G breedbandrouter.Setup.(Inst<strong>el</strong>lingen).>.MAC.Address.Clone.(MAC-adres.klonen)MAC-adres klonenEnable/Disable (Inschak<strong>el</strong>en/uitschak<strong>el</strong>en):. als. u. het.MAC-adres.wilt.klonen,.s<strong>el</strong>ecteert.u.Enable.(Inschak<strong>el</strong>en)User Defined Entry (Eigen. invoer):. geef. hier. het. MACadres.op.dat.bij.uw.internetprovider.is.geregistreerdClone Your PC’s MAC (MAC-adres.van.mijn.pc.klonen):.als.u.het.MAC-adres.wilt.klonen.van.de.pc.die.u.momente<strong>el</strong>.gebruikt. om. de. router. te. configureren,. klikt. u. op. deze.knopKlik. op. Save Settings. (Inst<strong>el</strong>lingen. opslaan). om. de.wijzigingen. door. te. voeren. of. klik. op. Canc<strong>el</strong> changes(Wijzigingen.annuleren).om.de.wijzigingen.te.annulerenSetup (Inst<strong>el</strong>lingen) > Advanced Routing(Geavanceerde routing)Op.dit.scherm.kunt.u.de.geavanceerde.routing-functies.van.de.router.inst<strong>el</strong>len .Met.NAT.wordt.de.netwerkverbinding.van. de. hostrouter. met. internet. gestuurd . Met. Dynamic.Routing. (Dynamische. routing). wordt. de. wijze. waarop.pakketten.worden.verplaatst.in.uw.netwerk.automatisch.aangepast . Met. Statische. routing. wordt. een. vaste. route.naar.een.andere.bestemming.in.het.netwerk.ingest<strong>el</strong>d8
Hoofdstuk3Geavanceerde configuratieSetup.(Inst<strong>el</strong>lingen).-.Advanced.Routing.(Geavanceerde.routing).(gateway)Setup.(Inst<strong>el</strong>lingen).-.Advanced.Routing.(Geavanceerde.routing).(router)Geavanceerde routingOperating Mode (Bedrijfsmodus):. s<strong>el</strong>ecteer. de. modus.waarin.deze.router.werkt .S<strong>el</strong>ecteer.Gateway.als.de.router.de.host.is.van.uw.internetverbinding .S<strong>el</strong>ecteer.Router.als.zich.nog.een.andere.router.in.uw.netwerk.bevindt .Als.u.Router.s<strong>el</strong>ecteert,.wordt.Dynamic Routing.(Dynamische.routing).als.optie.beschikbaarDynamische routingRIP: met. deze. functie. kan. de. router. zich. automatisch.aanpassen. aan. fysieke. veranderingen. in. de.netwerkstructuur. en. routingtab<strong>el</strong>len. met. andere.routers. uitwiss<strong>el</strong>en . De. router. bepaalt. de. route. van. de.netwerkpakketten. op. basis. van. het. geringste. aantal.knooppunten. tussen. de. bron. en. de. bestemming . Deze.functie.is.standaard.uitgeschak<strong>el</strong>d .In.de.vervolgkeuz<strong>el</strong>ijst.kunt.u.ook.LAN & Wir<strong>el</strong>ess.(LAN.&.draadloos).s<strong>el</strong>ecteren .Met. deze. functie. vindt. dynamische. routing. plaats. via.uw.Ethernet-.en.draadloze.netwerken .U.kunt.ook. WAN(Internet).s<strong>el</strong>ecteren .Hiermee.vindt.dynamische.routing.plaats.met.gegevens.die.worden.ontvangen.van.internet .S<strong>el</strong>ecteer. Both. (Beide). voor. dynamische. routing. voor.beide.netwerken,.en.met.gegevens.van.internetS<strong>el</strong>ect set number (Getal.s<strong>el</strong>ecteren):.u.st<strong>el</strong>t.een.statische.route.tussen.de.router.en.een.ander.netwerk.in.door.een.Wir<strong>el</strong>ess-G breedbandroutergetal. in. de. vervolgkeuz<strong>el</strong>ijst. Static. Routing. (Statische.routing). te. s<strong>el</strong>ecteren . (Een. statische. route. is. een. vooraf.gedefinieerd. pad. dat. netwerkgegevens. moeten. volgen.om.een.bepaalde.host.of.een.bepaald.netwerk.te.bereiken ).Voer.de.onderstaande.gegevens.in.als.u.een.nieuwe.route.wilt. inst<strong>el</strong>len . (Klik. op. de. knop. D<strong>el</strong>ete. This. Entry. (Item.verwijderen).als.u.een.statische.route.wilt.verwijderen )Enter Route Name (Voer. routenaam. in):. voer. hier. de.naam.van.de.route.in .De.naam.mag.niet.langer.zijn.dan.25.alfanumerieke.tekensDestination LAN IP (IP.do<strong>el</strong>-LAN):.dit.is.het.adres.van.het.externe.netwerk.of.de.externe.host.waaraan.u.de.statische.route.wilt.toewijzenSubnet Mask (Subnetmasker):. hiermee. wordt. bepaald.w<strong>el</strong>k. de<strong>el</strong>. van. een. do<strong>el</strong>-IP-adres. voor. het. netwerk. is. en.w<strong>el</strong>k.de<strong>el</strong>.voor.de.host .Default Gateway (Standaardgateway):. dit. is. het. IPadres.van. het. apparaat. dat. als. gateway. dient. en. dat. de.verbinding.tussen.de.router.en.het.externe.netwerk.of.de.externe.host.mog<strong>el</strong>ijk.maaktInterface: deze. interface. geeft. aan. of. IP-adres. van. het.do<strong>el</strong>-LAN. zich. op. het. LAN & Wir<strong>el</strong>ess. (LAN. en. WLAN).-. Ethernet. en. draadloze. netwerken. -. of. op. het. WAN(internet) bevindtD<strong>el</strong>ete This Entry (Item.verwijderen):.als.u.een.route.wilt.verwijderen,.s<strong>el</strong>ecteert.u.het.nummer.van.de.route.in.het.vervolgkeuzemenu.en.klikt.u.op.deze.knopShow Routing Table (Routingtab<strong>el</strong>. weergeven):. klik. op.Show Routing Table. (Routingtab<strong>el</strong>. weergeven). om. een.scherm. te. openen. waarin. u. kunt. zien. hoe. de. gegevens.door.het.lokale.netwerk.worden.gestuurd .U.ziet.van.<strong>el</strong>ke.route. het. do<strong>el</strong>-IP-adres. van. het. LAN,. het. subnetmasker,.de.gateway.en.de.interface .Klik.op.Refresh.(Vernieuwen).om.de.gegevens.te.vernieuwen .Klik.op.Close.(Sluiten).om.dit.scherm.af.te.sluitenRoutingtab<strong>el</strong>Klik. op. Save Settings. (Inst<strong>el</strong>lingen. opslaan). om. de.wijzigingen. door. te. voeren. of. klik. op. Canc<strong>el</strong> changes(Wijzigingen.annuleren).om.de.wijzigingen.te.annulerenWir<strong>el</strong>ess (WLAN) - Basic Wir<strong>el</strong>ess Settings(Standaardinst<strong>el</strong>lingen WLAN)In. dit. scherm. kunt. u. de. standaardinst<strong>el</strong>lingen. voor.draadloze.netwerken.opgevenEr.zijn.twee.manieren.om.de.draadloze.netwerken.van.de.router.te.configureren:.handmatig.en.met.Wi-Fi.Protected.SetupWi-Fi.Protected.Setup.(WPS).is.een.functie.waarmee.u.uw.draadloze.netwerk.op.eenvoudige.wijze.kunt.inst<strong>el</strong>len .Als.u.clientapparaten,.zoals.een.WLAN-adapter,.hebt.die.Wi-Fi.Protected.Setup.ondersteunen,.kunt.u.Wi-Fi.Protected.Setup.gebruiken9
Hoofdstuk3Geavanceerde configuratieWir<strong>el</strong>ess Configuration (WLAN-configuratie):. als. u.uw. draadloze. netwerk. handmatig. wilt. configureren,.s<strong>el</strong>ecteert. u. Manual (Handmatig) . Ga. verder. naar. het.gede<strong>el</strong>te.“Basic.Wir<strong>el</strong>ess. Settings”. (Standaardinst<strong>el</strong>lingen.WLAN) . S<strong>el</strong>ecteer. Wi-Fi Protected Setup (WPS). als. u.Wi-Fi.Protected.Setup.wilt.gebruiken .Ga.verder.naar.het.gede<strong>el</strong>te.“Wi-Fi.Protected.Setup”Standaardinst<strong>el</strong>lingen WLANKlik. op. Save Settings. (Inst<strong>el</strong>lingen. opslaan). om. de.wijzigingen. door. te. voeren. of. klik. op. Canc<strong>el</strong> changes(Wijzigingen.annuleren).om.de.wijzigingen.te.annulerenWi-Fi Protected SetupEr. zijn. drie. beschikbare. methoden . Gebruik. de. juiste.methode. voor. het. clientapparaat. dat. u. aan. het.configureren.bentWir<strong>el</strong>ess.(WLAN).>.Basic.Wir<strong>el</strong>ess.Settings.(Standaardinst<strong>el</strong>lingen.WLAN),.handmatig.installerenWir<strong>el</strong>ess Network Mode (Draadloze.netwerkmodus):.in.deze. vervolgkeuz<strong>el</strong>ijst. kunt. u. de. draadloze. standaarden.voor. uw. netwerk(en). s<strong>el</strong>ecteren . Als. u. binnen. het.netwerk.beschikt.over.Wir<strong>el</strong>ess-N,.Wir<strong>el</strong>ess-G.en.Wir<strong>el</strong>ess-B. apparatuur,. houdt. u. de. standaardinst<strong>el</strong>ling. Mixed.(Gemengd).aan .Als.u.binnen.het.netwerk.alleen.beschikt.over. Wir<strong>el</strong>ess-G. en. Wir<strong>el</strong>ess-B. apparatuur,. houdt. u. de.standaardinst<strong>el</strong>ling. BG-Mixed. (BG-Gemengd). aan .S<strong>el</strong>ecteer. Alleen Wir<strong>el</strong>ess-N. als. u. alleen. Wir<strong>el</strong>ess-N.apparaten.hebt .S<strong>el</strong>ecteer.Alleen Wir<strong>el</strong>ess-G.als.u.alleen.Wir<strong>el</strong>ess-G. apparaten. hebt . S<strong>el</strong>ecteer. Alleen Wir<strong>el</strong>ess-B.als.u.alleen.Wir<strong>el</strong>ess-B.apparaten.hebt .S<strong>el</strong>ecteer.Disabled.(Uitgeschak<strong>el</strong>d).als.u.geen.draadloze.apparatuur.binnen.het.netwerk.gebruiktWir<strong>el</strong>ess Network Name (SSID) (Naam. WLAN.(SSID)):. de. SSID. is. de. netwerknaam. die. door.alle. apparaten. in. een. draadloos. netwerk. wordt.gede<strong>el</strong>d . Deze. SSID. moet. voor. alle. apparaten. in. het.draadloze. netwerk. hetz<strong>el</strong>fde. zijn . De. netwerknaam.is. hoofdlettergevo<strong>el</strong>ig. en. mag. niet. langer. zijn. dan.32. tekens. (u. kunt. alle. tekens. op. het. toetsenbord.gebruiken) . Zorg. ervoor. dat. deze. inst<strong>el</strong>ling. voor. alle.punten. in. uw. draadloze. netwerk. g<strong>el</strong>ijk. is . Voor. extra.veiligheid.is.het.raadzaam.de.standaard-SSID.(linksys).te.wijzigen.in.een.unieke.naamWir<strong>el</strong>ess Chann<strong>el</strong> (WLAN-kanaal):. s<strong>el</strong>ecteer. in. de.meeg<strong>el</strong>everde. lijst. het. kanaal. dat. overeenkomt. met. uw.netwerkinst<strong>el</strong>lingen . Voor. een. juiste. werking. dient. voor.alle.apparaten.in.uw.draadloze.netwerk.hetz<strong>el</strong>fde.kanaal.te.worden.gebruikt.voor.verzendingWir<strong>el</strong>ess SSID Broadcast (WLAN. SSID-broadcast):.als. draadloze. clients. in. het. lokale. gebied. zoeken. naar.draadloze.netwerken.waaraan.ze.zich.kunnen.kopp<strong>el</strong>en,.detecteren.deze.clients.de.SSID-broadcast.van.de.router .Gebruik. de. standaardinst<strong>el</strong>ling. Enabled. (Ingeschak<strong>el</strong>d).als.u.de.SSID.van.de.router.wilt.broadcasten .Als.u.de.SSID.van. de. router. niet. wilt. broadcasten,. dient. u. Disabled.(Uitgeschak<strong>el</strong>d).te.s<strong>el</strong>ecterenWir<strong>el</strong>ess-G breedbandrouterWir<strong>el</strong>ess.(WLAN).>.Basic.Wir<strong>el</strong>ess.Settings.(Standaardinst<strong>el</strong>lingen.WLAN),.Wi-Fi.Protected.SetupWi-Fi.Protected.Setup.>.Congratulations.(Gef<strong>el</strong>iciteerd)OPMERKING:. Wi-Fi. Protected. Setup.configureert. één. clientapparaat. teg<strong>el</strong>ijk .Herhaal. deze. stappen. voor. <strong>el</strong>k. clientapparaat.dat.Wi-Fi.Protected.Setup.ondersteuntMethode nr. 1Gebruik. deze. methode. als. uw. clientapparaat. over. een.knop.Wi-Fi.Protected.Setup.beschikt1 Klik.of.druk.op.de.knop Wi-Fi Protected Setup.op.het.clientapparaat2 Klik. op. de. knop. Wi-Fi Protected Setup. op. dit.scherm10
Hoofdstuk3Geavanceerde configuratie3 Nadat.het.clientapparaat.is.geconfigureerd,.klikt.u.op.OK .Ga.vervolgens.terug.naar.het.clientapparaat.of.de.documentatie.voor.verdere.instructiesMethode nr. 2Gebruik. deze. methode. als. uw. clientapparaat. over. een.PIN-code.voor.Wi-Fi.Protected.Setup.beschikt123Geef.de.PIN-code.op.in.het v<strong>el</strong>d.op.dit.schermKlik.op.Register (Aanm<strong>el</strong>den)Nadat.het.clientapparaat.is.geconfigureerd,.klikt.u.op.OK .Ga.vervolgens.terug.naar.het.clientapparaat.of.de.documentatie.voor.verdere.instructiesMethode nr. 3Gebruik.deze.methode.als.uw.clientapparaat.om.het.PINnummer.van.de.router.vraagt.1 Geef. het. PIN-nummer. op. dat. in. dit. scherm. wordt.weergegeven .(Het.nummer.is.ook.op.het.lab<strong>el</strong>.op.de.onderkant.van.uw.router.weergegeven )2 Nadat.het.clientapparaat.is.geconfigureerd,.klikt.u.op.OK .Ga.vervolgens.terug.naar.het.clientapparaat.of.de.documentatie.voor.verdere.instructiesDe. status. van. Wi-Fi. Protected. Setup,. de. netwerknaam.(SSID),. beveiliging,. versleut<strong>el</strong>ing,. en. wachtzin. worden.onderaan.het.scherm.weergegevenOPMERKING:.als.u.clientapparaten.hebt.die.Wi-Fi. Protected. Setup. niet. ondersteunen,. noteert.u.de.inst<strong>el</strong>lingen.van.het.draadloze.netwerk.en.configureert.u.de.clientapparaten.handmatigWir<strong>el</strong>ess (WLAN) > Wir<strong>el</strong>ess Security(WLAN-beveiliging)Op. dit. tabblad. kunt. u. de. beveiliging. van. uw. draadloze.netwerk. configureren . De. router. ondersteunt. zes. modi.voor.beveiliging.van.draadloze.netwerken:.WPA.Personal,.WPA.Enterprise,.WPA2.Personal,.WPA2.Enterprise,.RADIUS.en. WEP . (WPA. staat. voor. Wi-Fi. Protected. Access,. een.beveiligingsstandaard.die.sterker.is.dan.WEP-versleut<strong>el</strong>ing .WPA2. is. een. geavanceerdere,. veiligere. versie. van. WPA .WEP.staat.voor.Wired.Equivalent.Privacy.en.RADIUS.voor.Remote. Authentication. Dial-In. User. Service ). Hieronder.vindt. u. een. beknopte. beschrijving. van. de. zes. modi .Voor. uitgebreide. instructies. voor. het. configureren.van. draadloze. beveiliging. voor. de. router,. raadpleegt. u.“Hoofdstuk.2:.WLAN-beveiliging”WLAN-beveiligingBeveiligingsmodusS<strong>el</strong>ecteer. de. juiste. beveiligingsmethode. voor. uw.draadloze. netwerk . Als. u. geen. WLAN-beveiliging. wilt.gebruiken,. houdt. u. de. standaardinst<strong>el</strong>ling. Disabled.(Uitgeschak<strong>el</strong>d).aanWir<strong>el</strong>ess-G breedbandrouterWPA-Personal.OPMERKING:.als.u.WPA.gebruikt,.houd.er.dan.rekening.mee.dat.<strong>el</strong>k.apparaat.in.uw.draadloze.netwerk. dez<strong>el</strong>fde. WPA-methode. en. gede<strong>el</strong>de.sleut<strong>el</strong>. moet. gebruiken,. anders. functioneert.het.netwerk.niet.naar.behorenSecurity.Mode.(Beveiligingsmodus).>.WPA.PersonalWPA Algorithm (WPA-algoritme):. WPA2. biedt. twee.versleut<strong>el</strong>ingsmethoden:. TKIP. en. AES,. met. dynamische.versleut<strong>el</strong>ingssleut<strong>el</strong>s . S<strong>el</strong>ecteer. het. algoritme:. TKIP. of.AES . . (AES. is. een. sterkere. versleut<strong>el</strong>ingsmethode. dan.TKIP )WPA Shared Key (WPA.gede<strong>el</strong>de.sleut<strong>el</strong>):.geef.de.sleut<strong>el</strong>.op. die. door. de. router. en. de. andere. netwerkapparatuur.wordt.gede<strong>el</strong>d .De.sleut<strong>el</strong>.moet.8-63.tekens.hebbenGroup Key Renewal (Groepssleut<strong>el</strong>. vernieuwen):. geef.een.interval.voor.de.vernieuwing.van.de.groepssleut<strong>el</strong>.op .Hiermee. bepaalt. u. hoe. vaak. de. router. de. sleut<strong>el</strong>s. moet.wijzigen . Het. standaardinterval. voor. vernieuwen. van. de.groepssleut<strong>el</strong>.is.3600.secondenWPA-EnterpriseMet. deze. optie. wordt. WPA. gebruikt. in. combinatie. met.een. RADIUS-server . (U. kunt. deze. optie. dan. ook. alleen.gebruiken. als. een. RADIUS-server. met. de. router. is.verbonden )Security.Mode.(Beveiligingsmodus).>.WPA.EnterpriseWPA Algorithm (WPA-algoritme):. WPA2. biedt. twee.versleut<strong>el</strong>ingsmethoden:. TKIP. en. AES,. met. dynamische.versleut<strong>el</strong>ingssleut<strong>el</strong>s . S<strong>el</strong>ecteer. het. algoritme:. TKIP. of.AES . (AES. is. een. sterkere. versleut<strong>el</strong>ingsmethode. dan.TKIP )11
Hoofdstuk3Geavanceerde configuratieRADIUS Server Address (Adres.RADIUS-server):.voer.het.IP-adres.van.de.RADIUS-server.inRADIUS Port (RADIUS-poort):. voer. het. poortnummer.van.de.RADIUS-server.in .De.standaardwaarde.is.1812Shared Key (Gede<strong>el</strong>de. sleut<strong>el</strong>):. voer. de. sleut<strong>el</strong>. in. die.gede<strong>el</strong>d.wordt.tussen.de.router.en.de-serverKey Renewal (Vernieuwing.van.sleut<strong>el</strong>):.geef.een.interval.voor.de.vernieuwing.van.de.sleut<strong>el</strong>.op .Hiermee.bepaalt.u. hoe. vaak. de. router. de. versleut<strong>el</strong>ingssleut<strong>el</strong>s. moet.wijzigen . Het. standaardinterval. voor. vernieuwen. van. de.sleut<strong>el</strong>.is.3600.secondenWPA2-Personalversleut<strong>el</strong>ingssleut<strong>el</strong>s . S<strong>el</strong>ecteer. het. type. algoritme:. AESof.TKIP + AES .De.standaardinst<strong>el</strong>ling.is.AESRADIUS Server Address (Adres.RADIUS-server):.voer.het.IP-adres.van.de.RADIUS-server.inRADIUS Port (RADIUS-poort):. voer. het. poortnummer.van.de.RADIUS-server.in .De.standaardwaarde.is.1812Shared Key (Gede<strong>el</strong>de. sleut<strong>el</strong>):. voer. de. sleut<strong>el</strong>. in. die.gede<strong>el</strong>d.wordt.tussen.de.router.en.de-serverKey Renewal (Vernieuwing.van.sleut<strong>el</strong>):.geef.een.interval.voor.de.vernieuwing.van.de.sleut<strong>el</strong>.op .Hiermee.bepaalt.u. hoe. vaak. de. router. de. versleut<strong>el</strong>ingssleut<strong>el</strong>s. moet.wijzigen . Het. standaardinterval. voor. vernieuwen. van. de.sleut<strong>el</strong>.is.3600.secondenRADIUSMet. deze. optie. wordt. WEP. gebruikt. in. combinatie. met.een. RADIUS-server . (U. kunt. deze. optie. dan. ook. alleen.gebruiken. als. een. RADIUS-server. met. de. router. is.verbonden )Security.Mode.(Beveiligingsmodus).>.WPA2.PersonalWPA Algorithm (WPA-algoritme):. WPA2. biedt. twee.versleut<strong>el</strong>ingsmethoden:. TKIP. en. AES,. met. dynamische.versleut<strong>el</strong>ingssleut<strong>el</strong>s . S<strong>el</strong>ecteer. het. type. algoritme:. AES.of.TKIP + AES .De.standaardinst<strong>el</strong>ling.is.AESWPA Shared Key (WPA.gede<strong>el</strong>de.sleut<strong>el</strong>):.voer.een.WPA.gede<strong>el</strong>de.sleut<strong>el</strong>.van.8-63.tekens.in .Key Renewal (Sleut<strong>el</strong>. vernieuwen):. geef. een. interval.voor.de.vernieuwing.van.de.sleut<strong>el</strong>.op .Hiermee.bepaalt.u. hoe. vaak. de. router. de. sleut<strong>el</strong>s. moet. wijzigen . Het.standaardinterval.voor.vernieuwen.van.de.groepssleut<strong>el</strong>.is.3600.secondenWPA2 EnterpriseMet. deze. optie. wordt. WPA2. gebruikt. in. combinatie.met. een. RADIUS-server . (U. kunt. deze. optie. dan. ook.alleen.gebruiken.als.een.RADIUS-server.met.de.router.is.verbonden ).Security.Mode.(Beveiligingsmodus).-.WPA2.EnterpriseWPA Algorithm (WPA-algoritme):. WPA2. biedt. twee.versleut<strong>el</strong>ingsmethoden:. TKIP. en. AES,. met. dynamische.Wir<strong>el</strong>ess-G breedbandrouterSecurity.Mode.(Beveiligingsmodus).>.RADIUSBELANGRIJK:. Als. u.WEP-versleut<strong>el</strong>ing. gebruikt,.houd. er. dan. rekening. mee. dat. <strong>el</strong>k. apparaat.in. uw. draadloze. netwerk. dez<strong>el</strong>fde. WEPversleut<strong>el</strong>ingsmethode.en. versleut<strong>el</strong>ingssleut<strong>el</strong>.moet. gebruiken,. anders. functioneert. het.draadloze.netwerk.niet.naar.behorenRADIUS Server Address (Adres.RADIUS-server):.voer.het.IP-adres.van.de.RADIUS-server.inRADIUS Port (RADIUS-poort):. voer. het. poortnummer.van.de.RADIUS-server.in .De.standaardwaarde.is.1812Shared Key (Gede<strong>el</strong>de. sleut<strong>el</strong>):. voer. de. sleut<strong>el</strong>. in. die.gede<strong>el</strong>d.wordt.tussen.de.router.en.de-serverDefault Transmit Key (Standaardzendsleut<strong>el</strong>):. s<strong>el</strong>ecteer.een. standaardzendsleut<strong>el</strong>. (hiermee. bepaalt. u. w<strong>el</strong>ke.sleut<strong>el</strong>.wordt.gebruikt) .Het.standaardnummer.is.1WEPEncryption (WEP-versleut<strong>el</strong>ing):.s<strong>el</strong>ecteer. een. niveau. voor. WEP-versleut<strong>el</strong>ing,.64 bits 10 hex digits.(64-bits.10.hexadecimale.tekens).of.128 bits 26 hex digits.(128-bits.26.hexadecimale.tekens).De.standaardwaarde.is.64 bits 10 hex digits.(64-bits.10.hexadecimale.tekens)12
Hoofdstuk3Geavanceerde configuratiePassphrase (Wachtzin):. voer. een. wachtzin. in. om.automatisch. WEP-sleut<strong>el</strong>s. te. genereren . Klik. vervolgens.op.Generate.(Genereren)Key 1-4 (Sleut<strong>el</strong>.1-4):.als.u.geen.wachtzin.hebt.ingevoerd,.kunt.u.de.WEP-sleut<strong>el</strong>(s).handmatig.opgevenWEP-WEP.is.een.basale.versleut<strong>el</strong>ingsmethode.en.minder.veilig.dan.WPA .MAC-filter WLANWir<strong>el</strong>ess MAC Filter (MAC-filter. WLAN):. klik. op. Enable(Inschak<strong>el</strong>en).als.u.draadloze.gebruikers.wilt.filteren.op.MACadres.en.daarmee.toegang.wilt.toestaan.of.blokkeren.Als.u.de.gebruikers.niet.wilt.filteren.op.basis.van.het.MAC-adres,.houdt.u.de.standaardwaarde.Disable.(Uitschak<strong>el</strong>en).aanPrevent (Voorkomen): s<strong>el</strong>ecteer. deze. optie. als. u. de.toegang.tot.het.draadloze.netwerk.wilt.blokkeren.op.basis.van.het.MAC-adres .Deze.knop.is.standaard.ges<strong>el</strong>ecteerdPermit Only (Alleen. toestaan):. s<strong>el</strong>ecteer. deze. optie. als.u. de. toegang. tot. het. draadloze. netwerk. wilt. toestaan.op.basis.van.het.MAC-adres .Deze.knop.is.standaard.niet.ges<strong>el</strong>ecteerdEdit MAC Filter List (Lijst. MAC-filter. bewerken):. klik. op.deze. optie. om. het. scherm. MAC Address Filter List. (Filterlijst.MAC-adressen).te.openen .Op.dit.scherm.kunt.u.gebruikers.weergeven.(op.MAC-adres).aan.wie.u.toegang.wilt.toekennen.of. voor. wie. u. toegang. u. wilt. blokkeren . Klik. op. Wir<strong>el</strong>essClient MAC List.(Overzicht.MAC-adressen.WLAN-clients).om.sn<strong>el</strong>.een.lijst.weer.te.geven.van.netwerkgebruikers.op.basis.van.hun.MAC-adresSecurity.Mode.(Beveiligingsmodus).>.WEPDefault Transmit Key (Standaardzendsleut<strong>el</strong>):. s<strong>el</strong>ecteer.een. standaardzendsleut<strong>el</strong>. (hiermee. bepaalt. u. w<strong>el</strong>ke.sleut<strong>el</strong>.wordt.gebruikt) .Het.standaardnummer.is.1WEP Encryption (WEP-versleut<strong>el</strong>ing):.s<strong>el</strong>ecteer.het.WEPversleut<strong>el</strong>ingsniveau.dat. u. wilt. gebruiken,. 64 bits 10hex digits. (40/64-bits. 10. hexadecimale. tekens). of. 128bits 26 hex digits. (128-bits. 26. hexadecimale. tekens) .De.standaardwaarde.is.64 bits 10 hex digits.(64-bits.10.hexadecimale.tekens)Passphrase (Wachtzin):. voer. een. wachtzin. in. om.automatisch. WEP-sleut<strong>el</strong>s. te. genereren . Klik. vervolgens.op.Generate.(Genereren)Key 1-4 (Sleut<strong>el</strong>.1-4):.als.u.geen.wachtzin.hebt.ingevoerd,.kunt.u.de.WEP-sleut<strong>el</strong>(s).handmatig.opgevenKlik. op. Save Settings. (Inst<strong>el</strong>lingen. opslaan). om. de.wijzigingen. door. te. voeren. of. klik. op. Canc<strong>el</strong> changes.(Wijzigingen.annuleren).om.de.wijzigingen.te.annulerenWir<strong>el</strong>ess (WLAN) > Wir<strong>el</strong>ess MAC Filter(MAC-filter WLAN)Draadloze. toegang. kan. worden. beperkt. tot. de. MACadressen.van. de. draadloze. apparaten. die. binnen. het.bereik.van.uw.netwerk.gegevens.verzenden ..Filterlijst.MAC-adressenKlik. op. Save Settings. (Inst<strong>el</strong>lingen. opslaan). om. de.wijzigingen. door. te. voeren. of. klik. op. Canc<strong>el</strong> changes(Wijzigingen.annuleren).om.de.wijzigingen.te.annulerenWir<strong>el</strong>ess (WLAN) > Advanced Wir<strong>el</strong>essSettings (Geavanceerde inst<strong>el</strong>lingenWLAN)Het.scherm.Wir<strong>el</strong>ess > Advanced Wir<strong>el</strong>ess Settings.(Draadloos.>. Geavanceerde. inst<strong>el</strong>lingen. WLAN). wordt. gebruikt. om.de. geavanceerde. functies. in. te. st<strong>el</strong>len. voor. de. router .Deze.inst<strong>el</strong>lingen.dienen.alleen.door.ervaren.beheerders.te.worden.aangepast,.omdat.bij.onjuiste.inst<strong>el</strong>lingen.de.prestaties.van.het.draadloze.netwerk.kunnen.afnemenWir<strong>el</strong>ess.(WLAN).>.Wir<strong>el</strong>ess.MAC.Filter.(MAC-filter.WLAN)Wir<strong>el</strong>ess-G breedbandrouter13
Hoofdstuk3Geavanceerde configuratieWir<strong>el</strong>ess.(WLAN).>.Advanced.Wir<strong>el</strong>ess.Settings.(Geavanceerde.inst<strong>el</strong>lingen.WLAN)Geavanceerde inst<strong>el</strong>lingen WLANWir<strong>el</strong>ess-G breedbandrouterAuthentication Type (Verificatietype):. de.standaardwaarde. is. Auto. (Automatisch). waardoor.Open. System-verificatie. of. verificatie. met. een. gede<strong>el</strong>de.sleut<strong>el</strong>.kan.worden.gebruikt .Bij.Open System-verificatie.gebruiken. de. verzender. en. de. ontvanger. GEEN. WEPsleut<strong>el</strong>.voor.de.verificatie.Bij.verificatie.met.een.gede<strong>el</strong>desleut<strong>el</strong>.gebruiken.de.verzender.en.de.ontvanger.wél.een.WEP-sleut<strong>el</strong>.voor.de.verificatieBasic Rate (Basissn<strong>el</strong>heid):. de. inst<strong>el</strong>ling. Basic. Rate.(Basissn<strong>el</strong>heid). is. niet. één. vaste. overdrachtssn<strong>el</strong>heid,.maar. een. reeks. sn<strong>el</strong>heden. waarmee. de. router. kan.zenden . De. router. geeft. de. basissn<strong>el</strong>heid. door. aan. de.andere. draadloze. apparaten. in. het. netwerk,. zodat. deze.weten. w<strong>el</strong>ke. sn<strong>el</strong>heden. worden. gebruikt . De. router.zal. ook. bekendmaken. dat. deze. automatisch. de. beste.overdrachtssn<strong>el</strong>heid.zal.s<strong>el</strong>ecteren .De.standaardinst<strong>el</strong>ling.is. Standaard,. waarbij. de. router. kan. zenden. met. alle.draadloze. standaardsn<strong>el</strong>heden. (1-2. Mbps,. 5,5. Mbps,. 11.Mbps,.18.Mbps.en.24.Mbps) .Andere.opties.zijn.1-2 Mbps,.voor.gebruik.met.oudere.draadloze.technologie,.en.Alles.als. overdracht. met. alle. draadloze. gegevenssn<strong>el</strong>heden.mog<strong>el</strong>ijk. is . De. basissn<strong>el</strong>heid. is. niet. g<strong>el</strong>ijk. aan. de.daadwerk<strong>el</strong>ijke. gegevensoverdrachtssn<strong>el</strong>heid . Als. u.de. gegevensoverdrachtssn<strong>el</strong>heid. van. de. router. wilt.opgeven,. configureert. u. de. inst<strong>el</strong>ling.Transmission. Rate.(Overdrachtssn<strong>el</strong>heid)Transmission Rate (Overdrachtsn<strong>el</strong>heid):. de. sn<strong>el</strong>heid.van. gegevensoverdracht. dient. ingest<strong>el</strong>d. te. worden.afhank<strong>el</strong>ijk.van.de.sn<strong>el</strong>heid.van.uw.draadloze.netwerk .U.kunt.het.bereik.van.de.overdrachtssn<strong>el</strong>heden.s<strong>el</strong>ecteren.of. Auto. (Automatisch). s<strong>el</strong>ecteren. als. u. de. router. de.hoogst.mog<strong>el</strong>ijke.gegevenssn<strong>el</strong>heid.wilt.laten.gebruiken.en.de.functie.voor.automatisch.terugvallen.wilt.inst<strong>el</strong>len .Met. deze. optie. wordt. onderhand<strong>el</strong>d. over. de. beste.verbindingssn<strong>el</strong>heid. tussen. de. router. en. een. draadloze.client .De.standaardwaarde.is.Auto.(Automatisch)CTS Protection Mode (CTS-beveiligingsmodus):.schak<strong>el</strong>.de. CTS-beveiligingsmodus. (CTS,. Clear-To-Send). alleen.in. wanneer. u. ernstige. problemen. ondervindt. met. uw.Wir<strong>el</strong>ess-G-producten. en. geen. overdracht. mog<strong>el</strong>ijk. is.naar. de. router. in. een. omgeving. met. intensief. 802 11bverkeer. Met. deze. functie. kan. de. router. alle. Wir<strong>el</strong>ess-G.overdrachten.beter.opvangen,.maar.nemen.de.prestaties.van.de.router.zeer.sterk.afFrame Burst (Frame-burst):. met. deze. optie. nemen.de. prestaties. van. uw. netwerk. toe,. afhank<strong>el</strong>ijk. van. de.leverancier. van. uw. draadloze. producten . S<strong>el</strong>ecteer.Enable. (Inschak<strong>el</strong>en). als. u. de. optie. voor. frame-burst.wilt. inschak<strong>el</strong>en . De. standaardinst<strong>el</strong>ling. is. Disable(Uitschak<strong>el</strong>en)Beacon Interval (Bakeninterval):. de. standaardwaarde.is. 100 . Geef. een. waarde. op. tussen. 1. en. 65 535.milliseconden .De.waarde.van.het.bakeninterval.geeft.het.frequentie-interval.van.het.baken.aan .Een.baken.is.een.pakketbroadcast.van.de.router.voor.de.synchronisatie.van.het.draadloze.netwerkDTIM Interval (DTIM-interval):. deze. waarde,. die. tussen.1. en. 255. ligt,. geeft. het. DTIM-interval. (D<strong>el</strong>ivery. Traffic.Indication. Message). aan . Een. DTIM-v<strong>el</strong>d. is. een. aft<strong>el</strong>v<strong>el</strong>d.dat. de. clients. informatie. verstrekt. over. het. volgende.venster. voor. het. luisteren. naar. broadcast-. en. multicastberichten. Als. er. zich. broadcast-. of. multicast-berichten.voor. gekopp<strong>el</strong>de. clients. in. de. buffer. van. de. router.bevinden,.verzendt.de.router.de.volgende.DTIM.met.een.DTIM-intervalwaarde . De. clients. krijgen. de. bakens. door.en.worden.geactiveerd .Vervolgens.kunnen.de.clients.de.broadcast-berichten. en. multicast-berichten. ontvangen .De.standaardwaarde.is.1Fragmentation Threshold (Fragmentatiedremp<strong>el</strong>):.deze.waarde. geeft. de. maximale. grootte. van. een. pakket. aan.voordat. de. gegevens. over. meerdere. pakketten. worden.verde<strong>el</strong>d . Als. er. zich. ve<strong>el</strong>. pakketfouten. voordoen,. kunt.u. de. fragmentatiedremp<strong>el</strong>. iets. verhogen . Als. u. de.fragmentatiedremp<strong>el</strong>. te. laag. inst<strong>el</strong>t,. kan. dat. slechte.netwerkprestaties. veroorzaken . Het. is. raadzaam. de.verlaging. van. de. standaardwaarde. tot. een. minimum. te.beperken .In.de.meeste.gevallen.kan.de.standaardwaarde.2346.worden.gebruiktRTS Threshold (RTS-dremp<strong>el</strong>):. bij. een. inconsistente.gegevensstroom. is. het. raadzaam. de. standaardwaarde,.2347,. slechts. licht. te. wijzigen . Als. een. netwerkpakket.de. vooraf. ingest<strong>el</strong>de. RTS-dremp<strong>el</strong>. niet. overschrijdt,.wordt.de.RTS/CTS-techniek.niet.ingeschak<strong>el</strong>d .De.router.verzendt.Request.to.Send-frames.(RTS).naar.een.bepaald.ontvangststation. en. onderhand<strong>el</strong>t. over. het. verzenden.van. een. gegevensframe . Het. draadloze. station. reageert.op.de.ontvangst.van.de.RTS.met.een.Clear.to.Send-frame.(CTS). ter. bevestiging. van. het. recht. de. overdracht. te.beginnen .De.RTS-dremp<strong>el</strong>.moet.op.de.standaardwaarde.2347.blijven.ingest<strong>el</strong>dAP Isolation (AP-isolatie):.hiermee.worden.alle.draadloze.clients.en.draadloze.apparaten.in.uw.netwerk.van.<strong>el</strong>kaar.gescheiden .Draadloze.apparaten.kunnen.communiceren.met. de. router,. maar. niet. met. <strong>el</strong>kaar . S<strong>el</strong>ecteer. On. (Aan).als.u.deze.functie.wilt.gebruiken .AP-isolatie.is.standaard.uitgeschak<strong>el</strong>d.(Off) .SecureEasySetup: met. deze. optie. kunt. u. de. functie.SecureEasySetup.in-.of.uitschak<strong>el</strong>en .S<strong>el</strong>ecteer.Disabled(Uitgeschak<strong>el</strong>d). als. u. de. functie. wilt. uitschak<strong>el</strong>en . De.knop. is. dan. niet. langer. verlicht . De. functie. is. standaard.ingest<strong>el</strong>d.op.Enabled.(Ingeschak<strong>el</strong>d)14
Hoofdstuk3Geavanceerde configuratieKlik. op. Save Settings. (Inst<strong>el</strong>lingen. opslaan). om. de.wijzigingen. door. te. voeren. of. klik. op. Canc<strong>el</strong> changes.(Wijzigingen.annuleren).om.de.wijzigingen.te.annulerenSecurity (Beveiliging) > FirewallHet.scherm.Security > Firewall.(Beveiliging.>.Firewall).wordt.gebruikt. voor. de. configuratie. van. een. firewall. waarmee.op.het.lokale.netwerk.van.de.router.verschillende.typen.ongewenst.verkeer.kunnen.worden.uitgefilterdSecurity (Beveiliging) > VPN Passthrough(VPN-doorvoer)U.kunt.het.scherm.Security > VPN Passthrough.(Beveiliging.>.VPN-doorvoer).gebruiken.om.de.doorvoer.van.VPN-tunn<strong>el</strong>s.met.IPSec-,.PPTP-.of.L2TP-protocollen.door.de.firewall.van.de.router.toe.te.staanSecurity.(Beveiliging).>.FirewallFirewallFirewall Protection (Firewallbescherming):. houd. de.standaardwaarde. Enable. (Inschak<strong>el</strong>en). aan. als. u. een.firewallbeveiliging. wilt. gebruiken . S<strong>el</strong>ecteer. Disable.(Uitschak<strong>el</strong>en).om.de.firewallbeveiliging.uit.te.schak<strong>el</strong>enWAN-verzoeken blokkerenBlock Anonymous Internet Requests (Anonieme.internetverzoeken. blokkeren):. met. deze. functie. maakt.u. het. gebruikers. van. buitenaf. moeilijker. uw. netwerk.binnen.te.dringen .Deze.functie.is.standaard ges<strong>el</strong>ecteerd .U. kunt. de. functie. uitschak<strong>el</strong>en. als. u. anonieme.internetverzoeken.w<strong>el</strong>.wilt.toestaanFilter Multicast (Filter. Multicast):. met. multicasting.kunnen. meerdere. overdrachten. teg<strong>el</strong>ijk. naar. bepaalde.ontvangers. worden. verzonden . Als. multicasting. is.toegestaan,.kan.de.router.IP-multicastpakketten.naar.de.daarvoor.bestemde.computers.doorsturen .Deze.functie.is. standaard. ges<strong>el</strong>ecteerd . Des<strong>el</strong>ecteer. deze. functie. om.hem.uit.te.schak<strong>el</strong>enFilter Internet NAT Redirection (Filter.Doorsturen.NAT):.met. deze. functie. worden. poorten. doorgestuurd. om. te.voorkomen. dat. met. lokale. netwerkcomputers. toegang.wordt. verkregen. tot. lokale. servers . S<strong>el</strong>ecteer. FilterInternet NAT Redirection. (Filter. Doorsturen. NAT). als. u.het.doorsturen.van.internet-NAT.wilt.filteren .Deze.functie.is.standaard.niet.ges<strong>el</strong>ecteerdFilter IDENT (Port 113) (Filter. IDENT. (Poort. 113)):. met.deze. functie. wordt. voorkomen. dat. poort. 113. wordt.gescand. door. apparaten. buiten. uw. lokale. netwerk .Deze.functie.is.standaard.ges<strong>el</strong>ecteerd .Des<strong>el</strong>ecteer.deze.functie.om.hem.uit.te.schak<strong>el</strong>enKlik. op. Save Settings. (Inst<strong>el</strong>lingen. opslaan). om. de.wijzigingen. door. te. voeren. of. klik. op. Canc<strong>el</strong> changes.(Wijzigingen.annuleren).om.de.wijzigingen.te.annuleren.Security.(Beveiliging).>.VPN.Passthrough.(VPN-doorvoer)VPN-doorvoerIPSec Passthrough (IPSec-doorvoer):. IPSec. (Internet.Protocol. Security). is. een. pakket. protocollen. waarmee.een.veilige.uitwiss<strong>el</strong>ing.van.pakketten.op.de.IP-laag.kan.worden.gegarandeerd .Houd.de.standaardwaarde.Enable(Inschak<strong>el</strong>en).aan.als.u.de.doorvoer.van.IPSec-tunn<strong>el</strong>s.op.de.gateway.wilt.toestaan .PPTP Passthrough (PPTP-doorvoer):.met.Point-to-Point.Tunn<strong>el</strong>ing.Protocol.(PPTP).kan.het.Point-to-Point.Protocol.(PPP). via. een. IP-netwerk. worden. doorgevoerd . Houd.de. standaardwaarde. Enable. (Inschak<strong>el</strong>en). aan. als. u. de.doorvoer.van.PPTP-tunn<strong>el</strong>s.op.de.gateway.wilt.toestaan .L2TP Passthrough (L2TP-doorvoer):. Layer. 2. Tunn<strong>el</strong>ing.Protocol. is. de. methode. waarmee. Point-to-Point-sessies.via.internet.op.Layer.2-niveau.worden.ingeschak<strong>el</strong>d .Houd.de. standaardwaarde. Enable. (Inschak<strong>el</strong>en). aan. als. u. de.doorvoer.van.L2TP-tunn<strong>el</strong>s.op.de.gateway.wilt.toestaanKlik. op. Save Settings. (Inst<strong>el</strong>lingen. opslaan). om. de.wijzigingen. door. te. voeren. of. klik. op. Canc<strong>el</strong> changes(Wijzigingen.annuleren).om.de.wijzigingen.te.annulerenAccess Restrictions (Toegangsbeperkingen)> Internet Access (Internettoegang)In. het. scherm. Access Restrictions > Internet Access(Toegangsbeperkingen. >. Internettoegang). kunt. u.bepaalde.typen.internetgebruik.en.-verkeer.blokkeren.of.toestaan,.zoals.internettoegang,.toegewezen.services.en.websites.op.bepaalde.dagen.en.tijdstippenWir<strong>el</strong>ess-G breedbandrouter15
Hoofdstuk3Geavanceerde configuratiezijn . Het. venster. List of PCs. (Overzicht. van. pc’s). wordt.weergegeven . U. kunt. een. computer. s<strong>el</strong>ecteren. op.basis. van. het. MAC-. of. IP-adres . U. kunt. ook. een. reeks.IP-adressen.invoeren.als.u.dit.b<strong>el</strong>eid.wilt.toepassen.op.een.groep.computers .Klik.nadat.u.de.wijzigingen.hebt.ingevoerd.op.Save Settings.(Inst<strong>el</strong>lingen.opslaan).als.u.de.wijzigingen.wilt.toepassen.of.op.Canc<strong>el</strong> Changes(Wijzigingen. annuleren). als. u. de. wijzigingen. wilt.annuleren .Klik.vervolgens.op.Close.(Sluiten) .Access.Restrictions.(Toegangsbeperkingen).>.Internet.Access.(Internettoegang)InternettoegangInternet Access Policy (Internettoegangsb<strong>el</strong>eid):.hiermee.kunt.u.de.internettoegang.beheren .Met.de.inst<strong>el</strong>lingen.in.dit.scherm.kunt.u.een.toegangsb<strong>el</strong>eid.inst<strong>el</strong>len.(nadat.u. op. Save Settings. (Inst<strong>el</strong>lingen. opslaan). hebt. geklikt) .S<strong>el</strong>ecteer. in. het. vervolgkeuzemenu. een. b<strong>el</strong>eid. om. de.inst<strong>el</strong>lingen. voor. die. b<strong>el</strong>eidsreg<strong>el</strong>. weer. te. geven . Als. u.een. b<strong>el</strong>eid. wilt. verwijderen,. s<strong>el</strong>ecteert. u. het. nummer.van. dat. b<strong>el</strong>eid. en. klikt. u. op. D<strong>el</strong>ete. (Verwijderen) . Klik.op. Summary. (Samenvatting). voor. een. overzicht. van.alle. b<strong>el</strong>eidsreg<strong>el</strong>s . (U. kunt. een. b<strong>el</strong>eidsreg<strong>el</strong>. verwijderen.in. het. scherm. Summary. (Overzicht). door. de. gewenste.b<strong>el</strong>eidsreg<strong>el</strong>(s). te. s<strong>el</strong>ecteren. en. op. D<strong>el</strong>ete. (Verwijderen).te.klikken .Klik.op.Close.(Sluiten).als.u.wilt.terugkeren.naar.het.tabblad.Internet.Access.[Internettoegang] )Overzicht.internettoegangsb<strong>el</strong>eidStatus: b<strong>el</strong>eidsreg<strong>el</strong>s. zijn. standaard. uitgeschak<strong>el</strong>d .Als. u. een. b<strong>el</strong>eidsreg<strong>el</strong>. wilt. inschak<strong>el</strong>en,. s<strong>el</strong>ecteert. u. het.nummer.van.de.b<strong>el</strong>eidsreg<strong>el</strong>.in.het.vervolgkeuzemenu.en.s<strong>el</strong>ecteert.u.Enable.(Inschak<strong>el</strong>en)Een b<strong>el</strong>eid voor internettoegang inst<strong>el</strong>len:1234S<strong>el</strong>ecteer. een. nummer. in. het. vervolgkeuzemenu.Internet Access Policy.(Internettoegangsb<strong>el</strong>eid)Als.u.dit.b<strong>el</strong>eid.wilt.inschak<strong>el</strong>en,.s<strong>el</strong>ecteert.u.Enable.(Inschak<strong>el</strong>en)Geef. een. naam. voor. het. b<strong>el</strong>eid. op. in. het. daarvoor.bestemde.v<strong>el</strong>d .Klik.op Edit List of PCs.(Overzicht.van.pc’s.bewerken).en. s<strong>el</strong>ecteer. op. w<strong>el</strong>ke. pc’s. het. b<strong>el</strong>eid. van. kracht. zal.Wir<strong>el</strong>ess-G breedbandrouterOverzicht.van.pc’s5 S<strong>el</strong>ecteer. Deny. (Weigeren). of. Allow. (Toestaan). en.bepaal. zo. of. u. internettoegang. wilt. toestaan. of.blokkeren.voor.de.pc’s.die.u.hebt.ges<strong>el</strong>ecteerd.in.het.scherm.List of PCs.(Overzicht.van.pc’s)6 Bepaal. op. w<strong>el</strong>ke. dagen. en. tijdstippen. dit. b<strong>el</strong>eid. van.toepassing. is . S<strong>el</strong>ecteer. de. gewenste. dagen. waarop.het.b<strong>el</strong>eid.van.kracht.moet.zijn.of.s<strong>el</strong>ecteer.Everyday(Dag<strong>el</strong>ijks) . Geef. vervolgens. een. tijdsduur.in.uren.en.minuten. op. waarin. het. b<strong>el</strong>eid. van. kracht. zal. zijn. of.s<strong>el</strong>ecteer.24 Hours.(24.uur)7 S<strong>el</strong>ecteer.de.Blocked.Services.(geblokkeerde.diensten).of. Website. Blocking. (websiteblokkering). die. u. wilt.gebruiken8 Klik. op. Save Settings. (Inst<strong>el</strong>lingen. opslaan). als. u. de.inst<strong>el</strong>lingen. voor. de. b<strong>el</strong>eidsreg<strong>el</strong>. wilt. opslaan. of. klik.op.Canc<strong>el</strong> Changes.(Wijzigingen.annuleren).als.u.de.inst<strong>el</strong>lingen.voor.het.b<strong>el</strong>eid.wilt.annulerenGeblokkeerde servicesU. kunt. de. toegang. tot. verschillende. services. die. via.internet.toegank<strong>el</strong>ijk.zijn,.zoals.FTP.of.T<strong>el</strong>net,.filteren.door.deze.services.te.s<strong>el</strong>ecteren.in.de.vervolgkeuz<strong>el</strong>ijsten.naast.Blocked Services.(Geblokkeerde.services) .(U.kunt.maximaal.20. services. blokkeren ). Geef. vervolgens. het. poortbereik.op.dat.u.wilt.filterenAls.de.service.die.u.wilt.blokkeren.niet.in.de.lijst.staat.of.als.u.de.inst<strong>el</strong>lingen.van.een.service.wilt.bewerken,.klikt.u.op.Add/Edit Service.(Service.toevoegen/bewerken) .Het.scherm.Port Services.(Poortservices).wordt.weergegevenPort.Services.(Poortservices)Als. u. een. service. wilt. toevoegen,. geeft. u. de. naam. van.de. service. op. in. het. v<strong>el</strong>d. Service Name. (Servicenaam) .S<strong>el</strong>ecteer. het. protocol. voor. de. service. in. het.vervolgkeuzemenu.Protocol.en.geef.het.gewenste.bereik.16
Hoofdstuk3Geavanceerde configuratieop.in.de.v<strong>el</strong>den.Port Range.(Poortbereik) .Klik.vervolgens.op.Add.(Toevoegen)Als. u. een. service. wilt. wijzigen,. s<strong>el</strong>ecteert. u. de. service.in. de. lijst. rechts. in. het. scherm . Wijzig. de. naam,. de.protocolinst<strong>el</strong>ling.of.het.poortbereik .Klik.vervolgens.op.Modify.(Wijzigen)Als.u.een.service.wilt.verwijderen,.s<strong>el</strong>ecteert.u.de.service.in.de.lijst.rechts.in.het.scherm .Klik.vervolgens.op.D<strong>el</strong>ete.(Verwijderen)Nadat. u. de. gewenste. wijzigingen. hebt. aangebracht. in.het.scherm.Port Services.(Poortservices),.klikt.u.op.Apply.(Toepassen).om.de.wijzigingen.op.te.slaan .Klik.op.Canc<strong>el</strong>.(Annuleren). als. u. de. wijzigingen. wilt. annuleren . Klik. op.Close.(Sluiten).om.het.scherm.Port Services.(Poortservices).te. sluiten. en. terug. te. keren. naar. het. scherm. AccessRestrictions.(Toegangsbeperkingen)Website Blocking by URL Address (Websiteblokkering op URL)Als. u. websites. op. basis. van. een. bepaalde. URL. wilt.blokkeren,.typt.u.<strong>el</strong>ke.URL.in.een.apart.v<strong>el</strong>d.naast.WebsiteBlocking by URL Address.(Websiteblokkering.op.URL)Website Blocking by Keyword (Websiteblokkering op trefwoord)Als. u. websites. op. basis. van. een. bepaald. trefwoord. wilt.blokkeren,. typt. u. <strong>el</strong>k. trefwoord. in. een. apart. v<strong>el</strong>d. naast.Website Blocking by Keyword. (Websiteblokkering. op.trefwoord)Klik. op. Save Settings. (Inst<strong>el</strong>lingen. opslaan). om. de.wijzigingen. door. te. voeren. of. klik. op. Canc<strong>el</strong> changes.(Wijzigingen.annuleren).om.de.wijzigingen.te.annulerenApplications and Gaming (Toepassingen engames) > Port Range Forward (Doorsturenpoortbereik)In. het. scherm Applications & Gaming >Port Range Forward.(Toepassingen. en. games. >. Doorsturen. poortbereik).kunt. u. openbare. services. op. uw. netwerk. inst<strong>el</strong>len,.zoals. webservers,. FTP-servers,. e-mailservers. of. andere,.gespecialiseerde. internettoepassingen . (Gespecialiseerde.internettoepassingen. zijn. toepassingen. die. gebruikmaken.van.internet.om.functies.uit.te.voeren,.zoals.videoconferenties.en. onlinegames . Voor. sommige. internettoepassingen. is.doorsturen.niet.nodig )Port Range Forward (Doorsturen poortbereik)Als.u.een.poort.wilt.doorsturen,.voert.u.op.<strong>el</strong>ke.reg<strong>el</strong>.de.gegevens.voor.de.vereiste.criteria.inApplication (Toepassing):. typ. in. dit. v<strong>el</strong>d. de. naam. voor.de.toepassing .Elke.naam.mag.niet.langer.dan.12.tekens.zijnStart/End (Begin/einde):. dit. is. het. poortbereik . Geef. de.waarde.waarmee.het.poortbereik.begint.op.in.de.kolom.Start.(Begin).en.de.waarde.waarmee.het.bereik.eindigt.in.de.kolom.End.(Einde)Protocol: s<strong>el</strong>ecteer. het. voor. deze. toepassing. gebruikte.protocol.(TCP,.UDP.of.Both.(Beide))IP Address (IP-adres):. geef. voor. <strong>el</strong>ke. toepassing. het.IP-adres. op. van. de. computer. waarop. de. specifieke.toepassing.wordt.uitgevoerdEnable (Inschak<strong>el</strong>en):.s<strong>el</strong>ecteer.Enable.(Inschak<strong>el</strong>en).als.u. het. doorsturen. van. poorten. voor. de. desbetreffende.toepassing.wilt.inschak<strong>el</strong>enKlik. op. Save Settings. (Inst<strong>el</strong>lingen. opslaan). om. de.wijzigingen. door. te. voeren. of. klik. op. Canc<strong>el</strong> changes(Wijzigingen.annuleren).om.de.wijzigingen.te.annulerenApplications & Gaming (Toepassingen engames) > Port Triggering (Poorttriggers)In. het. scherm. Applications & Gaming > Port Triggering(Toepassingen.en.games.>.Poorttriggers).kunt.u.inst<strong>el</strong>len.dat.de.router.uitgaande.gegevens.controleert.op.bepaalde.poortnummers . De. router. onthoudt. het. IP-adres. van. de.computer. die. de. overeenkomende. gegevens. verzendt .Wanneer.de.aangevraagde.gegevens.vervolgens.worden.teruggestuurd.via.de.router,.worden.de.gegevens.naar.de.juiste.computer.terugg<strong>el</strong>eid.aan.de.hand.van.het.IP-adres.en.de.reg<strong>el</strong>s.voor.poorttoewijzingApplications.and.Gaming.(Toepassingen.en.games).>.Port.Triggering.(Poorttriggers)PoorttriggersApplication (Toepassing):.voer.de.toepassingsnaam.van.de.trigger.inApplications.and.Gaming.(Toepassingen.en.games).>.Port.Range.Forward.(Doorsturen.poortbereik)Wir<strong>el</strong>ess-G breedbandrouter17
Hoofdstuk3Geavanceerde configuratieGetriggerd bereikVoer.voor.<strong>el</strong>ke.toepassing.het.getriggerde.poortbereik.in .Zie. de. documentatie. bij. de. internettoepassing. voor. de.gewenste.poortnummersStart Port (Begin.poortbereik):.voer.het.nummer.in.van.de.eerste.poort.in.het.getriggerde.bereikEnd Port (Einde.poortbereik):.voer.het.nummer.in.van.de.laatste.poort.in.het.getriggerde.bereikDoorgestuurd bereikVoer.voor.<strong>el</strong>ke.toepassing.het.doorgestuurde.poortbereik.in .Zie.de.documentatie.bij.de.internettoepassing.voor.de.gewenste.poortnummersStart Port (Begin.poortbereik):.voer.het.nummer.in.van.de.eerste.poort.in.het.doorgestuurde.bereikEnd Port (Einde.poortbereik):.voer.het.nummer.in.van.de.laatste.poort.in.het.doorgestuurde.bereikEnable (Inschak<strong>el</strong>en):.s<strong>el</strong>ecteer.Enable.(Inschak<strong>el</strong>en).als.u.de.poorttriggers.voor.de.desbetreffende.toepassing.wilt.inschak<strong>el</strong>enKlik. op. Save Settings. (Inst<strong>el</strong>lingen. opslaan). om. de.wijzigingen. door. te. voeren. of. klik. op. Canc<strong>el</strong> changes.(Wijzigingen.annuleren).om.de.wijzigingen.te.annulerenApplications and Gaming (Toepassingen engames) > DMZMet.de.DMZ-functie.kan.één.netwerkcomputer.verbinding.met.internet.maken.en.een.bepaalde.service.gebruiken,.zoals. onlinegames. of. videoconferenties . DMZ-hosting.wijst.alle.poorten.op.hetz<strong>el</strong>fde.moment.aan.één.computer.toe .De.functie.voor.het.doorsturen.van.poortbereiken.is.veiliger,.omdat.hierbij.alleen.de.poorten.worden.geopend.die. u. wilt. openen,. terwijl. bij. DMZ-hosting. alle. poorten.op. één. computer. worden. geopend,. zodat. via. internet.verbinding.met.de.computer.kan.worden.gemaakt .Applications and Gaming (Toepassingen engames) > QoSDankzij.Quality.of.Service.(QoS).is.betere.service.mog<strong>el</strong>ijk.voor. netwerkverkeer. met. een. hoge. prioriteit. waarvoor.ve<strong>el</strong>eisende,. real-time. toepassingen. nodig. zijn,. zoals.videoconferenties .U. kunt. kiezen. uit. drie. soorten. QoS:. Device. Priority.(Prioriteit.apparaat),.Ethernet.Port.Priority.(Prioriteit.LANpoort).en.Application.Priority.(Prioriteit.toepassing)QoSEnable/Disable (Inschak<strong>el</strong>en/uitschak<strong>el</strong>en):. s<strong>el</strong>ecteer.Enable.(Inschak<strong>el</strong>en).als.u.QoS.wilt.inschak<strong>el</strong>en .In.andere.gevallen. s<strong>el</strong>ecteert. u. Disable. (Uitschak<strong>el</strong>en) . QoS. is.standaard.uitgeschak<strong>el</strong>dUpstream Bandwidth (Upload-bandbreedte):. s<strong>el</strong>ecteer.Auto. (Automatisch). of. Manual. (Handmatig). in. het.vervolgkeuzemenu .Met.Handmatig.kunt.u.de.maximale.uitgaande.bandbreedte.opgeven.waarvan.toepassingen.gebruik.kunnen.makenApplications.and.Gaming.(Toepassingen.en.games).>.DMZDMZOp.<strong>el</strong>ke.computer.waarvan.de.poort.wordt.toegewezen,.moet. de. DHCP-clientfunctie. worden. uitgeschak<strong>el</strong>d. en.moet.er.een.nieuw,.vast.IP-adres.aan.worden.toegewezen,.omdat. het. IP-adres. kan. veranderen. wanneer. de. DHCPfunctie.wordt.gebruiktAls.u.één.computer.wilt.weergeven,.s<strong>el</strong>ecteert.u.Enable.(Inschak<strong>el</strong>en) . Geef. vervolgens. in. het. v<strong>el</strong>d. DMZ Host IPAddress.(IP-adres.DMZ-host).het.IP-adres.van.de.computer.op .Deze.functie.is.standaard.uitgeschak<strong>el</strong>dKlik. op. Save Settings. (Inst<strong>el</strong>lingen. opslaan). om. de.wijzigingen. door. te. voeren. of. klik. op. Canc<strong>el</strong> changes.(Wijzigingen.annuleren).om.de.wijzigingen.te.annulerenWir<strong>el</strong>ess-G breedbandrouterApplications.and.Gaming.(Toepassingen.en.games).>.QoSPrioriteit apparaatTyp.de.naam.van.uw.netwerkapparaat.in.het.v<strong>el</strong>d.Devicename. (Apparaatnaam),. geef. het. MAC-adres. van. het.apparaat. op. en. s<strong>el</strong>ecteer. de. gewenste. prioriteit. in. de.vervolgkeuz<strong>el</strong>ijstPrioriteit LAN-poortMet.Ethernet.Port.Priority.QoS.(QoS-prioriteit.LAN-poort).kunt.u.een.prioriteit.inst<strong>el</strong>len.voor.de.prestaties.voor.vier.routerpoorten.(LAN-poort.1-4) ..S<strong>el</strong>ecteer.voor.<strong>el</strong>ke.poort.de.inst<strong>el</strong>lingen.voor.prioriteit.en.gegevensstroombeheer18
Hoofdstuk3Geavanceerde configuratiePriority (Prioriteit):.s<strong>el</strong>ecteer.in.de.kolom.Priority.(Prioriteit).High.(Hoog).of.Low.(Laag) .Aan.de.vier.routerpoorten.is.standaard.een.lage.prioriteit.toegewezen .Flow Control (Gegevensstroombeheer):. s<strong>el</strong>ecteer.Enabled. (Ingeschak<strong>el</strong>d). als. u. de. gegevens. tussen.netwerkapparaten.door.de.router.wilt.laten.beheren .Wilt.u. deze. functie. uitschak<strong>el</strong>en,. dan. s<strong>el</strong>ecteert. u. Disabled.(Uitgeschak<strong>el</strong>d) .Ethernet.Port.Priority.QoS.(QoS-prioriteit.LAN-poort). hoeft. niet. te. worden. ondersteund. door.uw. internetprovider. omdat. de. poorten. waarvoor. een.prioriteit.wordt.ingest<strong>el</strong>d,.LAN-poorten.1-4.in.uw.netwerk.zijn .Deze.functie.is.standaard.ingeschak<strong>el</strong>dPrioriteit toepassingMet. Application. Priority. QoS. (QoS-prioriteit. toepassing).worden.gegevens.beheerd.terwijl.deze.worden.verzonden.en.ontvangen .Naar.g<strong>el</strong>ang.de.inst<strong>el</strong>lingen.in.het.scherm.QoS,.kunt.u.met.deze.functie.een.hoge.of.lage.prioriteit.toekennen.aan.gegevens.voor.de.toepassingen.die.u.hebt.ingest<strong>el</strong>dOptimize Gaming Applications (Games.optimaliseren):.s<strong>el</strong>ecteer.dit.als.u.wilt.toestaan.dat.algemene.gamepoorten.automatisch. een. hogere. prioriteit. krijgen . Deze. games.omvatten,.maar.zijn.niet.beperkt.tot:.Counter-Strike,.Half-Life,.Age of Empires,.Everquest,.Quake2/Quake3.en.Diablo II .De.standaardinst<strong>el</strong>ling.is.uitgeschak<strong>el</strong>dApplication Name (Naam. toepassing):. voer. in. het. v<strong>el</strong>d.Application Name.(Naam.toepassing).de.gewenste.naam.voor.de.toepassing.inPriority (Prioriteit):.s<strong>el</strong>ecteer.High.(Hoog).of.Low.(Laag).als. u. een. prioriteit. wilt. toewijzen. aan. de. toepassing . De.standaardinst<strong>el</strong>ling.is.Low.(Laag)Specific Port # (Specifiek. poortnummer):. voer. het.poortnummer.voor.de.toepassing.inQoS voor WLANWMM Support (WMM-ondersteuning):.Wi-Fi.Multimedia.(WMM),. voorheen. bekend. als. Wir<strong>el</strong>ess. Multimedia.Extensions. (WME),. is. een. Wi-Fi. Alliance-gecertificeerde.functie.die.is.gebaseerd.op.de.standaard.van.IEEE.802 11e .Deze. functie. biedt. QoS. voor. draadloze. netwerken . De.functie. is. speciaal. geschikt. voor. spraak-,. muziek-. en.videotoepassingen;. bijvoorbe<strong>el</strong>d. Voice. over. IP. (VoIP),.videostreaming.en.interactieve.games .S<strong>el</strong>ecteer.Enabled.(Ingeschak<strong>el</strong>d).als.andere.apparaten.binnen.het.draadloze.netwerk.WMM.ondersteunen .Kies.in.alle.andere.gevallen.voor.de.standaardinst<strong>el</strong>ling:.Disabled.(Uitgeschak<strong>el</strong>d)No Acknowledgement (Geen. bevestiging):. met. deze.functie. voorkomt. u. dat. de. router. opnieuw. gegevens.verzendt.als.er.een.fout.optreedt .S<strong>el</strong>ecteer.Ingeschak<strong>el</strong>d.als. u. deze. functie. wilt. gebruiken . Houd. anders. de.standaardinst<strong>el</strong>ling.Uitgeschak<strong>el</strong>d.aanKlik. op. Save Settings. (Inst<strong>el</strong>lingen. opslaan). om. de.wijzigingen. door. te. voeren. of. klik. op. Canc<strong>el</strong> changes.(Wijzigingen.annuleren).om.de.wijzigingen.te.annulerenAdministration (Administratie) >Management (Beheer)De. netwerkbeheerder. kan. het. scherm. Administration >Management.(Administratie.>.Beheer).gebruiken.voor.het.Wir<strong>el</strong>ess-G breedbandrouterbeheer.van.specifieke.toegangs-.en.beveiligingsfuncties.van.de.router.Administration.(Administratie).>.Management.(Beheer)Wachtwoord routerLocal Router Access (Lokale routertoegang).Router Password (Wachtwoord.router):.voer.een.nieuw.wachtwoord.in.voor.de.routerRe-enter to Confirm (Voer. opnieuw. in. ter. bevestiging):.voer.het.wachtwoord.nogmaals.in.om.het.te.bevestigenInternettoegangAccess Server (Toegangsserver):.HTTP.(HyperText.Transport.Protocol).is.het.communicatieprotocol.dat.wordt.gebruikt.om.verbinding.te.maken.met.servers.op.internet .HTTPS.maakt. gebruik. van. SSL. (Secure. Socket. Layer). voor. het.versleut<strong>el</strong>en. van. gegevens. die. worden. verzonden. en.biedt.daarmee.een.betere.beveiliging .S<strong>el</strong>ecteer.HTTP.of.HTTPS ..De.standaardinst<strong>el</strong>ling.is.HTTPWir<strong>el</strong>ess Access Web (Draadloze. internettoegang):. als.u. de. router. gebruikt. in. een. openbaar. domein.waarin. u. draadloze. toegang. verleent. aan. uw. gasten,.kunt. u. draadloze. toegang. tot. het. webgebaseerde.hulpprogramma.van.de.router.uitschak<strong>el</strong>en .U.hebt.dan.alleen. toegang. tot. het. webgebaseerde. hulpprogramma.via.een.bekab<strong>el</strong>de.aansluiting .Houd.de.standaardwaarde.Enable. (Inschak<strong>el</strong>en). aan. als. u. draadloze. toegang. tot.het. webgebaseerde. hulpprogramma. van. de. router.wilt. inschak<strong>el</strong>en. of. s<strong>el</strong>ecteer. Disable. (Uitschak<strong>el</strong>en).als. u. draadloze. toegang. tot. het. hulpprogramma. wilt.uitschak<strong>el</strong>enRemote Router Access (Externe routertoegang)Remote Management (Extern. beheer):. om. extern.toegang. tot. de. router. (vanaf. buiten. het. netwerk). te.krijgen,.s<strong>el</strong>ecteert.u.Enable.(Inschak<strong>el</strong>en) .Management Port (Beheerpoort):.geef.het.poortnummer.op. voor. de. externe. toegang . Wanneer. u. de. router. op.deze. manier. benadert,. dient. u. net. als. gebruik<strong>el</strong>ijk. het.wachtwoord.van.de.router.in.te.voerenUse https (HTTPS.gebruiken):.s<strong>el</strong>ecteer.deze.functie.als.u.het.gebruik.van.HTTPS.voor.externe.toegang.vereist.wilt.maken19
Hoofdstuk3Geavanceerde configuratieUPnPUPnP: houd.de.standaardinst<strong>el</strong>ling.Enable.(Inschak<strong>el</strong>en).aan. als. u. de. UPnP-functie. wilt. inschak<strong>el</strong>en . In. andere.gevallen.s<strong>el</strong>ecteert.u.Disable.(Uitschak<strong>el</strong>en)Klik. op. Save Settings. (Inst<strong>el</strong>lingen. opslaan). om. de.wijzigingen. door. te. voeren. of. klik. op. Canc<strong>el</strong> changes.(Wijzigingen.annuleren).om.de.wijzigingen.te.annulerenAdministration (Administratie) > Log(Logboek)De. router. kan. logboeken. van. al. het. verkeer. van. uw.internetverbinding.bijhoudenwaarvan.u.de.verbinding.wilt.testen.en.geef.op.hoe.vaak.u. de. verbinding. wilt. testen . Klik. vervolgens. op. Ping . In.het.scherm.Ping Test.(Pingtest).wordt.weergegeven.of.de.test. is. geslaagd . Klik. op. Stop. (Stoppen). als. u. het. testen.wilt. stoppen . Klik. op. Clear Log. (Logboek. wissen). als. u.het.scherm.wilt.wissen .Klik.op. Close.(Sluiten).als.u.wilt.terugkeren. naar. het. scherm. Diagnostics. (Diagnostische.gegevens)De.Ping-testLogboekAdministration.(Administratie).>.Log.(Logboek)Log (Logboek):. houd. de. standaardwaarde. Disable.(Uitschak<strong>el</strong>en).aan.als.u.deze.functie.niet.wilt.inschak<strong>el</strong>en .S<strong>el</strong>ecteer.Enable.(Inschak<strong>el</strong>en).als.u.toezicht.wilt.houden.op.het.verkeer.tussen.het.netwerk.en.internetKlik. (naar. g<strong>el</strong>ang. het. gewenste. type. logboek). op.Incoming Log.(Logboek.inkomend.verkeer).of.OutgoingLog.(Logboek.uitgaand.verkeer).als.u.de.logboeken.wilt.weergevenKlik. op. Save Settings. (Inst<strong>el</strong>lingen. opslaan). om. de.wijzigingen. door. te. voeren. of. klik. op. Canc<strong>el</strong> changes.(Wijzigingen.annuleren).om.de.wijzigingen.te.annulerenAdministration (Administratie) >Diagnostics (Diagnostische gegevens)Met.de.diagnostische.tests.(Ping.en.Traceroute).kunt.u.de.verbindingen.van.uw.netwerkcomponenten.controlerenAdministration.(Administratie).>.Diagnostics.(Diagnostische.gegevens)Ping-testPing: met.de.pingtest.wordt.de.status.van.een.verbinding.gecontroleerd . Klik. op. Ping. om. het. scherm. Ping Test.(Ping-test).te.openen .Voer.het.adres.in.van.de.computer.Wir<strong>el</strong>ess-G breedbandrouterTraceroute-testTraceroute: als. u. de. prestaties. van. een. verbinding. wilt.testen,. klikt. u. op. Traceroute. om. het. scherm. TracerouteTest.(Traceroute-test).te.openen .Voer.het.adres.in.van.de.computer.waarvan.u.de.verbinding.wilt.testen.en.klik.op.Traceroute . In. het. scherm. Traceroute Test. (Traceroutetest). wordt. weergegeven. of. de. test. is. geslaagd . Klik. op.Stop.(Stoppen).als.u.het.testen.wilt.stoppen .Klik.op.ClearLog. (Logboek. wissen). als. u. het. scherm. wilt. wissen . Klik.op.Close.(Sluiten).als.u.wilt.terugkeren.naar.het.scherm.Diagnostics.(Diagnostische.gegevens)De.Traceroute-testAdministration (Administratie) > FactoryDefaults (Fabrieksinst<strong>el</strong>lingen)In. het. scherm. Administration > Factory Defaults.(Administratie.>.Fabrieksinst<strong>el</strong>lingen).kunt.u.de.configuratie.van.de.router.terugzetten.naar.de.fabrieksinst<strong>el</strong>lingen .Fabrieksinst<strong>el</strong>lingenRestore Factory Defaults (Fabrieksinst<strong>el</strong>lingen.herst<strong>el</strong>len):.als. u. de. routerinst<strong>el</strong>lingen. wilt. terugzetten. naar. de.standaardwaarden,. s<strong>el</strong>ecteert. u. Yes. (Ja). en. klikt. u.op. Save Settings. (Inst<strong>el</strong>lingen. opslaan) . Als. u. de.standaardinst<strong>el</strong>lingen. herst<strong>el</strong>t,. gaan. alle. door. u.opgeslagen.inst<strong>el</strong>lingen.verloren20
Hoofdstuk3Geavanceerde configuratieAdministration.(Administratie).>.Factory.Defaults.(Fabrieksinst<strong>el</strong>lingen)Administration (Administratie) > UpgradeFirmware (Firmware upgraden)In. het. scherm. Administration. (Administratie). >. UpgradeFirmware (Firmware.upgraden).kunt.u.de.firmware.van.de.router.upgraden .Voer.alleen.een.upgrade.van.de.firmware.uit.wanneer.u.problemen.ondervindt.met.de.router.of.als.de.nieuwe.firmware.een.functie.heeft.die.u.wilt.gebruiken ..Administration.(Administratie).>.Upgrade.Firmware.(Firmware.upgraden)..Download. het. firmware-upgradebestand. voor. de. router.van. de. Linksys-website,. www linksys com,. voordat. u.een. upgrade. op. de. firmware. uitvoert . Pak. het. bestand.vervolgens.uitFirmware upgradenPlease S<strong>el</strong>ect a File to Upgrade (S<strong>el</strong>ecteer.het.bestand.dat. de. upgrade. bevat):. klik. op. Browse. (Bladeren). en.s<strong>el</strong>ecteer. het. uitgepakte. upgradebestand. voor. de.firmware . Klik. op. Upgrade. en. volg. de. instructies. op. het.schermAdministration (Administratie) - ConfigManagement (Configuratiebeheer)Op. dit. scherm. kunt. u. een. reservekopie. maken.van. het. configuratiebestand. van. de. router. of. dit.configuratiebestand.herst<strong>el</strong>lenAdministration.(Administratie).-.Config.Management.(Configuratiebeheer)Backup Configuration (Reservekopie configuratiemaken)Klik.op.Backup.(Reservekopie).als.u.een.reservekopie.wilt.maken.van.het.configuratiebestand.van.de.router .Volg.de.instructies.op.het.schermConfiguratie herst<strong>el</strong>lenPlease s<strong>el</strong>ect a file to restore (S<strong>el</strong>ecteer. het. bestand.dat. de. reservekopie. bevat):. klik. op. Browse. (Bladeren).en.s<strong>el</strong>ecteer.het.configuratiebestand .Klik.vervolgens.op.Restore.(Herst<strong>el</strong>len)Status > RouterIn.het.scherm.Status > Router.wordt.de.huidige.status.van.de.router.weergegevenRouterinformatieStatus.>.RouterFirmware Version (Firmwareversie):. dit. is. de. huidige.firmware.van.de.routerCurrent Time (Huidige.tijd):.de.huidige.tijd,.zoals.u.deze.hebt.ingest<strong>el</strong>d.op.het.tabblad.Inst<strong>el</strong>lingenMAC Address (MAC-adres):.dit.is.het.MAC-adres.van.de.router.zoals.dat.wordt.gezien.door.uw.internetproviderWir<strong>el</strong>ess-G breedbandrouter21
Hoofdstuk3Geavanceerde configuratieRouter Name (Naam.router):.dit.is.de.routernaam.die.u.hebt.ingest<strong>el</strong>d.op.het.tabblad.Setup.(Inst<strong>el</strong>lingen)Host Name (Hostnaam):. dit. is. de. hostnaam. die. u. hebt.ingest<strong>el</strong>d. op. het. tabblad. Setup. (Inst<strong>el</strong>lingen). als. uw.internetprovider.een.hostnaam.vereistDomain Name (Domeinnaam):.dit.is.de.domeinnaam.die.u. hebt. ingest<strong>el</strong>d. op. het. tabblad. Setup. (Inst<strong>el</strong>lingen). als.uw.internetprovider.een.domeinnaam.vereistInternetConfiguratietypeIn. dit. gede<strong>el</strong>te. worden. de. huidige. netwerkgegevens.weergegeven. die. zijn. opgeslagen. in. de. router . De.gegevens.zijn.afhank<strong>el</strong>ijk.van.het.type.internetverbinding.dat. in. het. scherm. Setup > Basic Setup. (Inst<strong>el</strong>lingen. >.Basisinst<strong>el</strong>lingen).is.ges<strong>el</strong>ecteerdKlik. op. Refresh. (Vernieuwen). als. u. de. gegevens. in. het.scherm.wilt.vernieuwenStatus > Local Network (Lokaal netwerk)In. het. scherm. Status > Local Network. (Lokaal. Netwerk).wordt.de.status.van.uw.netwerk.weergegevenDHCP.Clients.Table.(Clienttab<strong>el</strong>.DHCP)Klik. op. Refresh. (Vernieuwen). als. u. de. gegevens. in. het.scherm.wilt.vernieuwenStatus > Wir<strong>el</strong>ess (WLAN)In. het. scherm. Status > Wir<strong>el</strong>ess. (WLAN). vindt. u. de.statusgegevens.van.het.draadloze.netwerk..Status.>.Local.Network.(Lokaal.netwerk)Lokaal netwerkMAC Address (MAC-adres):.dit.is.het.MAC-adres.van.de.router.zoals.dit.wordt.weergegeven.in.uw.LAN-netwerkIP Address (IP-adres):. dit. is. het. IP-adres. van. de. router,.zoals.dit.wordt.weergegeven.in.het.LAN-netwerkSubnet Mask (Subnetmasker):. hier. wordt. het. huidige.subnetmasker. weergegeven. dat. wordt. geconfigureerd.voor.uw.netwerkDHCP Server (DHCP-server):.als.de.router.wordt.gebruikt.als.DHCP-server,.wordt.dat.hier.weergegevenStart IP Address (Begin.IP-bereik):.het.begin.van.de.reeks.IP-adressen.die.door.de.apparaten.in.uw.lokale.Ethernetnetwerk.worden.gebruiktEnd IP Address (Einde.IP-bereik):.het.einde.van.de.reeks.IP-adressen.die.door.de.apparaten.in.uw.lokale.Ethernetnetwerk.worden.gebruiktDHCP Clients Table (Clienttab<strong>el</strong>.DHCP):.met.deze.knop.geeft. u. een. scherm. weer. met. een. overzicht. van. de.computers. die. de. router. als. DHCP-server. gebruiken . U.kunt.computers.uit.deze.lijst.verwijderen.en.de.verbinding.ervan. verbreken. door. het. vakje. D<strong>el</strong>ete. (Verwijderen).te. s<strong>el</strong>ecteren. en. op. de. knop. D<strong>el</strong>ete. (Verwijderen). te.klikkenWir<strong>el</strong>ess-G breedbandrouterDraadloosStatus.>.Wir<strong>el</strong>ess.(WLAN)MAC Address (MAC-adres):.dit.is.het.MAC-adres.van.de.router.zoals.dit.wordt.weergegeven.in.uw.lokale.WLANnetwerkMode (Modus):. de. draadloze. modus. (Gemengd,.Alleen. G. of. Uitgeschak<strong>el</strong>d). die. u. hebt. ingest<strong>el</strong>d. in.het. scherm. Wir<strong>el</strong>ess > Basic Wir<strong>el</strong>ess Settings. (WLAN. >.Standaardinst<strong>el</strong>lingen.WLAN)SSID: de.naam.van.het.WLAN.of.SSID.die.u.hebt.ingevoerd.in. het. scherm. Wir<strong>el</strong>ess > Basic Wir<strong>el</strong>ess Settings. (WLAN. >.Standaardinst<strong>el</strong>lingen.WLAN)DHCP Server (DCHP-server):.hier.wordt.de.status.van.de.DHCP-serverfunctie.weergegevenChann<strong>el</strong> (Kanaal):. het. kanaal. dat. u. hebt. opgegeven.in. het. scherm. Wir<strong>el</strong>ess > Basic Wir<strong>el</strong>ess Settings. (WLAN. >.Standaardinst<strong>el</strong>lingen.WLAN) .Hierop.zendt.uw.draadloze.netwerk.uitEncryption Function (Versleut<strong>el</strong>ing):. de. status. van. de.draadloze.beveiliging.van.de.router.die.u.hebt.ges<strong>el</strong>ecteerd.in.het.scherm.Wir<strong>el</strong>ess > Wir<strong>el</strong>ess Security.(WLAN.>.WLANbeveiliging)Klik. op. Refresh. (Vernieuwen). als. u. de. gegevens. in. het.scherm.wilt.vernieuwen22
BijlageAProbleemoplossingBijlage A:ProbleemoplossingUw computer kan geen verbinding met internet totstand brengen.Volg.deze.instructies.totdat.uw.computer.een.verbinding.met.internet.tot.stand.kan.brengen:• Controleer.of.de.router.is.ingeschak<strong>el</strong>d .De.LED.Power.(Voeding).moet.groen.zijn.en.mag.niet.knipperen• Als. de. LED.Power. (Voeding). knippert,. moet. u. alle.netwerkapparatuur. uitschak<strong>el</strong>en,. inclusief. de.modem,.router.en.computers .Vervolgens.moet.u.de.apparatuur.inschak<strong>el</strong>en.in.deze.volgorde:123Kab<strong>el</strong>-/DSL-modemRouterComputer• Controleer.de.kab<strong>el</strong>verbindingen .De.computer.moet.zijn.aangesloten.op.een.van.de.genummerde.poorten.1-4.op.de.router,.en.de.modem.moet.zijn.aangesloten.de.poort.Internet.op.de.routerDe modem heeft geen Ethernet-poort.De. modem. is. een. inb<strong>el</strong>modem. voor. een. tradition<strong>el</strong>e.inb<strong>el</strong>service .Om.de.router.te.kunnen.gebruiken,.hebt.u.een.kab<strong>el</strong>-/DSL-modem.en.een.sn<strong>el</strong>le.internetverbinding.nodigU kunt de DSL-service niet gebruiken om handmatigverbinding te maken met het internet.Nadat. u. de. router. hebt. geïnstalleerd,. maakt. deze.automatisch.verbinding.met.uw.internetprovider.(ISP) .U.hoeft.dus.niet.meer.handmatig.verbinding.te.makenDe DSL-t<strong>el</strong>efoonlijn past niet in de internetpoort van derouter.De. router. vervangt. uw. modem. niet . U. hebt. nog. steeds.uw.DSL-modem.nodig.om.de.router.te.kunnen.gebruiken .Sluit. de. t<strong>el</strong>efoonlijn. aan. op. uw. DSL-modem,. plaats. de.installatie-cd. in. uw. computer. en. volg. de. instructies. op.het.schermAls u dubb<strong>el</strong>klikt op de webbrowser, wordt u om eengebruikersnaam en wachtwoord gevraagd. Als u verderwilt gaan zonder gebruikersnaam en wachtwoord op tegeven, voert u de volgende instructies uit.Start. de. webbrowser. en. voer. de. volgende. stappen. uit.(deze. stappen. zijn. specifiek. voor. Internet. Explorer;. voor.andere. browsers. kunt. u. een. soortg<strong>el</strong>ijke. procedure.volgen):1234S<strong>el</strong>ecteer.Extra.>.Internet-opties .Klik.op.het.tabblad.VerbindingenS<strong>el</strong>ecteer.Nooit een verbinding kiezen .Klik.op.OKDe router heeft geen coaxpoort voor dekab<strong>el</strong>verbinding.De.router.vervangt.uw.modem.niet .U.hebt.nog.steeds.uw.kab<strong>el</strong>modem. nodig. om. de. router. te. kunnen. gebruiken .Sluit.de.kab<strong>el</strong>verbinding.aan.op.uw.kab<strong>el</strong>modem,.plaats.de.installatie-cd.in.uw.computer.en.volg.de.instructies.op.het.schermEr kan geen draadloze verbinding tot stand wordengebracht tussen de computer en het netwerk.Controleer.of.de.naam.van.het.draadloze.netwerk.of.SSID.hetz<strong>el</strong>fde. is. op. de. computer. en. de. router . Als. Wir<strong>el</strong>ess.Security.(WLAN-beveiliging).is.ingeschak<strong>el</strong>d,.controleert.u.of.de.computer.en.de.router.gebruikmaken.van.dez<strong>el</strong>fde.beveiligingsmethode.en.-sleut<strong>el</strong>U moet de inst<strong>el</strong>lingen op de router wijzigen.Open. de. webbrowser. (bijvoorbe<strong>el</strong>d. Internet. Explorer.of. Firefox). en. geef. het. IP-adres. van. de. router. op. in.het. adresv<strong>el</strong>d. (het. standaard-IP-adres. is. 192.168.1.1) .Wanneer. daarom. wordt. gevraagd,. laat. u. het. v<strong>el</strong>d. Username.(Gebruikersnaam).leeg.en.voert.u.het.wachtwoord.van.de.router.in.(het.standaardwachtwoord.is.admin) .Klik.op.het.gewenste.tabblad.om.de.inst<strong>el</strong>lingen.te.wijzigenWEB:. raadpleeg. de. website. van. Linksys. op.www.linksys.com. als. uw. vragen. niet. zijn.behand<strong>el</strong>d.in.deze.bijlageWir<strong>el</strong>ess-G breedbandrouter23
BijlageBSpecificatiesBijlage B:SpecificatiesMod<strong>el</strong>.WRT54G2Standaarden. IEEE.802 3,.IEEE.802 3u. IEEE.802 11g,.IEEE.802 11bPoorten.Internet:.één.10/100.RJ-45-poort. LAN:.vier.10/100.RJ-45.. geschak<strong>el</strong>de.poorten. Eén.aansluiting.voor.voedingKnop.Eén.reset-knop. Eén.WPS-knopLED’s.aan/uit,.draadloos,.LAN.(1-4),.. internet,.Wi-Fi.Protected.Setup.. (WPS)Type.bekab<strong>el</strong>ing.Aantal.antennes.Afgegeven.RF-vermogen.UPnP.mog<strong>el</strong>ijk/gecertifi.ceerd.CAT52.interne.antennes18.dBm.Mog<strong>el</strong>ijkBeveiligingsfuncties. Stateful.Packet.Inspection.(SPI). fi.rewall,.internetb<strong>el</strong>eidWLAN-beveiliging. Wi-Fi.Protected.Access2.(WPA2),. WEP,.draadloze.MAC-fi.lteringOmgevingAfmetingen.Gewicht. 280.gVoeding.203.x.35.x.160.mmExtern,.12.V.DC,.0,5.ACertifi.ceringen. FCC,.IC-UL,.CE,.Wi-Fi.(802 11b,... 802 11g),.WPA,.WPA2,.WMMBedrijfstemperatuur. 0.tot.40.ºCOpslagtemperatuur. -20.tot.60.ºCBedrijfsvochtigheid.Opslagvochtigheid.10.tot.85%,.niet-condenserend5.tot.90%,.niet-condenserendWir<strong>el</strong>ess-G breedbandrouter24
BijlageCInformatie over garantieBijlage C:Informatie over garantieBEPERKTE GARANTIELinksys.garandeert.dat.dit.Linksys-hardwareproduct.tijdens.de.garantieperiode.bij.normaal.gebruik.grotende<strong>el</strong>s.vrij.is.van.materiaal-.en.constructiefouten .De.garantieperiode.begint.op.de.datum.van.aankoop.door.de.oorspronk<strong>el</strong>ijke.koper/eindgebruiker. en. loopt. gedurende. de. hieronder.opgegeven.periode:• Twee.(2).jaar.voor.een.nieuw.product• Negentig.(90).dagen.voor.een.gereviseerd.productDeze.beperkte.garantie.is.niet-overdraagbaar.en.is.alleen.van.toepassing.op.de.oorspronk<strong>el</strong>ijke.koper/eindgebruiker .Uw. exclusieve. verhaalmog<strong>el</strong>ijkheid. en. de. volledige.aansprak<strong>el</strong>ijkheid. van. Linksys. krachtens. deze. beperkte.garantie.bestaan.ter.keuze.van.Linksys.uit.(a).het.repareren.van.het.product.met.nieuwe.of.gerepareerde.onderd<strong>el</strong>en,.(b).het.vervangen.van.het.product.door.een.red<strong>el</strong>ijkerwijs.beschikbaar. g<strong>el</strong>ijkwaardig. nieuw. of. gereviseerd. Linksysproduct,.of. (c). restitutie. van. de. aankoopsom. van. het.product.minus.eventu<strong>el</strong>e.kortingen .Op.gerepareerde.of.vervangen. producten. wordt. een. garantie. gegeven. voor.de. duur. van. de. oorspronk<strong>el</strong>ijk. garantieperiode. of. een.periode.van.dertig.(30).dagen,.naarg<strong>el</strong>ang.w<strong>el</strong>ke.periode.langer. is . Alle. producten. en/of. onderd<strong>el</strong>en. die. worden.vervangen,.worden.eigendom.van.LinksysDeze. beperkte. garantie. is. van. toepassing. naast. de.wettige. of. andere. rechten. die. u. hebt. onder. een.verkoopovereenkomstUITSLUITINGEN EN BEPERKINGENDeze.garantie.vervalt.als.(a).het.zeg<strong>el</strong>.van.het.product.is.verwijderd.of.beschadigd,.(b).het.product.is.gewijzigd,.tenzij.dit.door.Linksys.is.gebeurd,.(c).het.product.is.beschadigd.door. gebruik. in. combinatie. met. niet-Linksys. producten,.(d). het. product. is. geïnstalleerd,. bediend,. gerepareerd.of. onderhouden. op. een. manier. die. in. strijd. is. met. de.instructies. van. Linksys,. (e). het. product. is. blootgest<strong>el</strong>d.aan.abnormale.fysieke.of.<strong>el</strong>ektrische.b<strong>el</strong>asting,.verkeerd.gebruik,.nalatigheid.of.een.ongeval,.(f).het.serienummer.op. het. product. is. gewijzigd,. beschadigd. of. verwijderd,.of.(g).het.product.is.g<strong>el</strong>everd.of.g<strong>el</strong>icentieerd.voor.bèta-,. evaluatie-,. test-. of. demonstratiedo<strong>el</strong>einden. waarvoor.Linksys.geen.aankoopbedrag.of.licentiekosten.in.rekening.brengtALLE. SOFTWARE. DIE. DOOR. LINKSYS. BIJ. HET.PRODUCT. WORDT. GELEVERD,. ONGEACHT. OF. DEZE. IS.VOORGEÏNSTALLEERD. OP. HET. PRODUCT. OF. OP. MEDIA.BIJ. HET. PRODUCT. IS. GELEVERD,. WORDT. GELEVERD. IN.DE. HUIDIGE. STAAT. (“AS. IS”). ZONDER. ENIGE. VORM. VAN.GARANTIE . Zonder. beperking. van. het. voorgaande,.garandeert. Linksys. niet. dat. het. product. of. de. software.foutloos.of.zonder.onderbrekingen.kan.worden.gebruikt .Vanwege. de. voortdurende. ontwikk<strong>el</strong>ing. van. nieuwe.Wir<strong>el</strong>ess-G breedbandroutertechnieken. voor. het. binnendringen. en. aanvallen. van.netwerken,.garandeert.Linksys.ook.niet.dat.het.product,.de.service,.de.software.of.enige.apparatuur,.dan.w<strong>el</strong>.het.systeem. of. netwerk. waarop. het. product. of. de. software.wordt.gebruikt,.niet.kwetsbaar.zal.zijn.voor.aanvallen.of.binnendringen . Dit. product. bevat. mog<strong>el</strong>ijk. software. of.serviceaanbiedingen.van.derden.of.is.daarmee.mog<strong>el</strong>ijk.gebund<strong>el</strong>d .Deze.beperkte.garantie.is.niet.van.toepassing.op. derg<strong>el</strong>ijke. software. of. serviceaanbiedingen. van.derden .Deze.beperkte.garantie.garandeert.geen.enk<strong>el</strong>e.voortdurende. beschikbaarheid. van. een. service. door.derden. die. mog<strong>el</strong>ijk. vereist. is. voor. het. gebruik. of. de.bediening.van.het.product .VOOR. ZOVER. DIT. NIET. IS. VERBODEN. BIJ. WET,. GELDEN.ALLE. STILZWIJGENDE. GARANTIES. EN. VOORWAARDEN.VAN. VERHANDELBAARHEID. OF. GESCHIKTHEID. VOOR.EEN. BEPAALD. DOEL. UITSLUITEND. GEDURENDE. DE.GARANTIEPERIODE . ALLE. ANDERE. UITDRUKKELIJKE. OF.STILZWIJGENDE. VOORWAARDEN,. VERKLARINGEN. EN.GARANTIES,. MET. INBEGRIP. VAN. MAAR. NIET. BEPERKT.TOT. STILZWIJGENDE. GARANTIES. INZAKE. AFWEZIGHEID.VAN. INBREUKEN. OP. RECHTEN. VAN. DERDEN,. WORDEN.AFGEWEZEN . Aangezien. in. sommige. rechtsgebieden.geen. beperkingen. zijn. toegestaan. inzake. de. duur. van.een. impliciete. garantie,. g<strong>el</strong>dt. deze. beperking. mog<strong>el</strong>ijk.niet. voor. u . Deze. beperkte. garantie. geeft. u. specifieke.wett<strong>el</strong>ijke.rechten,.en.u.kunt.ook.andere.rechten.hebben.die.per.rechtsgebied.variërenVOOR. ZOVER. WETTELIJK. TOEGESTAAN. IS. LINKSYS.GEENSZINS. AANSPRAKELIJK. VOOR. GEGEVENSVERLIES,.DERVING.VAN.INKOMSTEN.OF.WINST,.OF.VOOR.SPECIALE,.INDIRECTE. OF. INCIDENTELE. SCHADE,. GEVOLGSCHADE.OF. SCHADEVERGOEDINGEN. HOGER. DAN. DE. FEITELIJK.GELEDEN. SCHADE,. ONGEACHT. DE. THEORIE. VAN.AANSPRAKELIJKHEID.(MET.INBEGRIP.VAN.NALATIGHEID),.DIE. HET. GEVOLG. IS.VAN. OF. BETREKKING. HEEFT. OP. HET.GEBRUIK. OF. HET. NIET. KUNNEN. GEBRUIKEN. VAN. HET.PRODUCT.(MET.INBEGRIP.VAN.SOFTWARE),.ZELFS.INDIEN.LINKSYS. OP. DE. HOOGTE. WAS. VAN. DE. MOGELIJKHEID.VAN. DERGELIJKE. SCHADE . . DE. AANSPRAKELIJKHEID.VAN. LINKSYS. IS. IN. GEEN. GEVAL. HOGER. DAN. HET.AANKOOPBEDRAG. DAT. U. VOOR. HET. PRODUCT. HEBT.BETAALD . De. bovengenoemde. beperkingen. zijn. ook.van. toepassing. als. het. wezenlijke. do<strong>el</strong>. van. garanties. of.verhaalmog<strong>el</strong>ijkheden.krachtens.deze.beperkte.garantie.niet.is.behaald .In.sommige.rechtsgebieden.is.de.uitsluiting.of.beperking.van.incident<strong>el</strong>e.schade.of.gevolgschade.niet.toegestaan . Mog<strong>el</strong>ijk. is. de. bovenstaande. beperking. of.uitsluiting.niet.op.u.van.toepassingVERKRIJGEN VAN GARANTIESERVICEAls. u. een. vraag. over. uw. product. hebt. of. er. een.probleem. mee. ondervindt,. gaat. u. dan. naar.www.linksys.com/support. waar. u. een. aantal. online.support-tools. en. informatie. kunt. vinden. die. u. kunnen.h<strong>el</strong>pen. bij. het. gebruik. van. uw. product . Als. het. product.gebreken.vertoont.tijdens.de.garantieperiode,.neemt.u.dan.contact.op.met.de.Technical.Support-afd<strong>el</strong>ing.van.Linksys.voor. informatie. over. het. verkrijgen. van. garantieservice .Het. t<strong>el</strong>efoonnummer. voor. Linksys. Technical. Support. in.25
BijlageCInformatie over garantieuw.regio.kunt.u.vinden.in.de.gebruikershandleiding.en.op.www.linksys.com .Zorg.ervoor.dat.u.uw.aankoopbewijs.bij. de. hand. hebt. wanneer. u. contact. opneemt . VOOR.HET. VERWERKEN. VAN. GARANTIEAANVRAGEN. IS. EEN.ORIGINEEL. AANKOOPBEWIJS. MET. DATUM. VEREIST . Als.u. wordt. gevraagd. uw. product. te. retourneren,. ontvangt.u. een. Return. Materials. Authorization. (RMA)-nummer . U.bent.er.verantwoord<strong>el</strong>ijk.voor.dat.het.product.op.de.juiste.manier. wordt. verpakt. en. verzonden. naar. Linksys. en. u.draagt.de.kosten.en.het.risico.van.deze.verzending .U.dient.het. RMA-nummer. en. een. kopie. van. het. oorspronk<strong>el</strong>ijke.aankoopbewijs. met. datum. mee. te. sturen. als. u. uw.product.terugstuurt .Producten.die.zonder.RMA-nummer.en. oorspronk<strong>el</strong>ijk. aankoopbewijs. met. datum. worden.ontvangen,.zullen.worden.geweigerd .Stuur.geen.andere.items.mee.met.het.product.dat.u.retourneert.aan.Linksys .Defecte. producten. die. onder. deze. beperkte. garantie.vallen,.zullen.worden.gerepareerd.of.vervangen.en.zonder.kosten. aan. u. worden. teruggestuurd . Klanten. buiten. de.Verenigde. Staten. en. Canada. zijn. verantwoord<strong>el</strong>ijk. voor.alle. verzend-. en. afhand<strong>el</strong>ingskosten,. douanekosten,.BTW.en.andere.ger<strong>el</strong>ateerde.b<strong>el</strong>astingen.en.kosten .Aan.reparaties.of.vervangingen.die.niet.onder.deze.beperkte.garantie. vallen,. zijn. kosten. verbonden. op. basis. van. de.dan.g<strong>el</strong>dende.Linksys-tarievenTECHNISCHE ONDERSTEUNINGDeze. beperkte. garantie. is. noch. een. servicecontract.noch.een.ondersteuningscontract ....Informatie.over.het.huidige. Linksys-aanbod. en. -b<strong>el</strong>eid. inzake. technische.ondersteuning. (inclusief. prijzen. voor. supportservices).kunt.u.vinden.op.www.linksys.com/supportALGEMEENOp.deze.beperkte.garantie.zijn.de.wetten.van.toepassing.van. de. jurisdictie. waaronder. het. product. door. u. is.aangeschaftIndien.enig.de<strong>el</strong>.van.deze.beperkte.garantie.ong<strong>el</strong>dig.of.niet.afdwingbaar.mocht.blijken.te.zijn,.blijven.de.overige.bepalingen.onverkort.van.krachtU.kunt.al.uw.vragen.richten.aan:.Linksys,.P O .Box.18558,.Irvine,.CA.92623,.Verenigde.StatenNeem voor meer informatie contact met ons opwww.linksys.comS<strong>el</strong>ecteer.uw.land.en.s<strong>el</strong>ecteer.vervolgens.Ondersteuning/Technische.ondersteuning.Voor geretourneerde producten:S<strong>el</strong>ecteer.uw.land.en.s<strong>el</strong>ecteer.vervolgens.Ondersteuning/Klanten.ServiceWir<strong>el</strong>ess-G breedbandrouter26
BijlageDInformatie over reg<strong>el</strong>gevingBijlage D:Informatie overreg<strong>el</strong>gevingFCC StatementThis. product. has. been. tested. and. complies. with. the.specifications.for.a.Class.B.digital.device,.pursuant.to.Part.15.of.the.FCC.Rules .These.limits.are.designed.to.provide.reasonable. protection. against. harmful. interference. in.a. residential. installation . This. equipment. generates,.uses,.and.can.radiate.radio.frequency.energy.and,.if.not.installed. and. used. according. to. the. instructions,. may.cause. harmful. interference. to. radio. communications .However,.there.is.no.guarantee.that.interference.will.not.occur. in. a. particular. installation . If. this. equipment. does.cause.harmful.interference.to.radio.or.t<strong>el</strong>evision.reception,.which.is.found.by.turning.the.equipment.off.and.on,.the.user. is. encouraged. to. try. to. correct. the. interference. by.one.or.more.of.the.following.measures:• Reorient.or.r<strong>el</strong>ocate.the.receiving.antenna• Increase. the. separation. between. the. equipment. or.devices• Connect. the. equipment. to. an. outlet. other. than. the.receiver’s• Consult.a.dealer.or.an.experienced.radio/TV.technician.for.assistanceFCC Radiation Exposure StatementThis. equipment. complies. with. FCC. radiation. exposure.limits. set. forth. for. an. uncontrolled. environment . This.equipment. should. be. installed. and. operated. with.minimum.distance.20.cm.between.the.radiator.and.your.bodySafety Notices• Caution:.To.reduce.the.risk.of.fire,.use.only.No 26.AWG.or.larger.t<strong>el</strong>ecommunication.line.cord• Do.not.use.this.product.near.water,.for.example,.in.a.wet.basement.or.near.a.swimming.pool• Avoid. using. this. product. during. an. <strong>el</strong>ectrical. storm .There. may. be. a. remote. risk. of. <strong>el</strong>ectric. shock. from.lightningIndustry Canada StatementThis. Class. B. digital. apparatus. complies. with. Canadian.ICES-003.and.RSS210Operation.is.subject.to.the.following.two.conditions:12This.device.may.not.cause.interference.andThis. device. must. accept. any. interference,. including.interference. that. may. cause. undesired. operation.of.the.device ... . . .To.reduce.potential.radio.interference.to.other.users,.the. antenna. type. and. its. gain. should. be. so. chosen.that.the.EIRP.is.not.more.than.required.for.successful.communicationIndustry Canada Radiation Exposure StatementThis.equipment.complies.with.IC.radiation.exposure.limits.set.forth.for.an.uncontrolled.environment .This.equipment.should.be.installed.and.operated.with.minimum.distance.20.cm.between.the.radiator.&.your.bodyThis. transmitter. must. not. be. co-located. or. operating. in.conjunction.with.any.other.antenna.or.transmitterAvis d’Industrie CanadaCet. appareil. numérique. de. la. classe. B. est. conforme. aux.normes.NMB-003.et.RSS210.du.CanadaL’utilisation. de. ce. dispositif. est. autorisée. seulement. aux.conditions.suivantes.:12il.ne.doit.pas.produire.de.brouillage.et.il. doit. accepter. tout. brouillage. radioélectrique. reçu,.même.si.ce.brouillage.est.susceptible.de.compromettre.le.fonctionnement.du.dispositif .... .Afin. de. réduire. le. risque. d’interférence. aux. autres.utilisateurs,. le. type. d’antenne. et. son. gain. doivent.être. choisis. de. façon. à. ce. que. la. puissance. isotrope.rayonnée. équivalente. (p i r e ). ne. soit. pas. supérieure.au. niveau. requis. pour. obtenir. une. communication.satisfaisanteAvis d’Industrie Canada concernant l’expositionaux radiofréquencesCe. matéri<strong>el</strong>. est. conforme. aux. limites. établies. par. IC.en. matière. d’exposition. aux. radiofréquences. dans. un.environnement.non.contrôlé .Ce.matéri<strong>el</strong>.doit.être.installé.et.utilisé.à.une.distance.d’au.moins.20.cm.entre.l’antenne.et.le.corps.de.l’utilisateurL’émetteur.ne.doit.pas.être.placé.près.d’une.autre.antenne.ou. d’un. autre. émetteur,. ou. fonctionner. avec. une. autre.antenne.ou.un.autre.émetteurWir<strong>el</strong>ess-G breedbandrouter27
BijlageDInformatie over reg<strong>el</strong>gevingWir<strong>el</strong>ess DisclaimerThe. maximum. performance. for. wir<strong>el</strong>ess. is. derived. from.IEEE. Standard. 802 11. specifications . Actual. performance.can. vary,. including. lower. wir<strong>el</strong>ess. network. capacity,.data. throughput. rate,. range. and. coverage . Performance.depends. on. many. factors,. conditions. and. variables,.including. distance. from. the. access. point,. volume. of.network. traffic,. building. materials. and. construction,.operating. system. used,. mix. of. wir<strong>el</strong>ess. products. used,.interference.and.other.adverse.conditionsAvis de non-responsabilité concernant lesappareils sans filLes. performances. maximales. pour. les. réseaux. sans. fil.sont. tirées. des. spécifications. de. la. norme. IEEE. 802 11 .Les. performances. ré<strong>el</strong>les. peuvent. varier,. notamment.en. fonction. de. la. capacité. du. réseau. sans. fil,. du. débit.de. la. transmission. de. données,. de. la. portée. et. de. la.couverture . Les. performances. dépendent. de. facteurs,.conditions. et. variables. multiples,. en. particulier. de. la.distance.par.rapport.au.point.d’accès,.du.volume.du.trafic.réseau,. des. matériaux. utilisés. dans. le. bâtiment. et. du.type.de.construction,.du.système.d’exploitation.et.de.la.combinaison.de.produits.sans.fil.utilisés,.des.interférences.et.de.toute.autre.condition.défavorableWir<strong>el</strong>ess-G breedbandrouter28
BijlageDInformatie over reg<strong>el</strong>gevingVerklaring van conformiteit met betrekkingtot EU-richtlijn 1999/5/EC (R&TTE-richtlijn)Informatie.over.de.naleving.van.richtlijnen.voor.draadloze.producten.van.2,4.GHz.en.5.GHz.die.van.b<strong>el</strong>ang.zijn.voor.de. EU. en. andere. landen. die. de. EU-richtlijn. 1999/5/EC.(R&TTE-richtlijn).hanterenБ ъ л г а р с к и.[Bulgarian]Česky.[Czech]:Dansk.[Danish]:Deutsch.[German]:Това.оборудване.отговаря.на.съществените.изисквания. и. приложими. клаузи. на.Директива.1999/5/ЕСToto. zařízení. je. v. souladu. se. základními.požadavky. a. ostatními. odpovídajícími.ustanoveními.Směrnice.1999/5/ECDette. udstyr. er. i. overensstemm<strong>el</strong>se. med.de. væsentlige. krav. og. andre. r<strong>el</strong>evante.bestemm<strong>el</strong>ser.i.Direktiv.1999/5/EFDieses. Gerät. entspricht. den. grundlegenden.Anforderungen. und. den. weiteren.entsprechenden. Vorgaben. der. Richtlinie.1999/5/EUNederlands[Dutch]:Malti.[Maltese]:Magyar[Hungarian]:Norsk[Norwegian]:Polski.[Polish]:Português.[Portuguese]:Dit. apparaat. voldoet. aan. de. essenti<strong>el</strong>e. eisen.en. andere. van. toepassing. zijnde. bepalingen.van.de.Richtlijn.1999/5/ECDan. l-apparat. huwa. konformi. mal-ħtiġiet.essenzjali. u. l-provedimenti. l-oħra. rilevanti.tad-Direttiva.1999/5/ECEz. a. készülék. t<strong>el</strong>jesíti. az. alapvető.követ<strong>el</strong>ményeket. és. más. 1999/5/EK.irány<strong>el</strong>vben. meghatározott. vonatkozó.rend<strong>el</strong>kezéseketDette. utstyret. er. i. samsvar. med. de.grunnleggende. krav. og. andre. r<strong>el</strong>evante.bestemm<strong>el</strong>ser.i.EU-direktiv.1999/5/EFUrządzenie. jest. zgodne. z. ogólnymi.wymaganiami. oraz. szczególnymi. warunkami.określonymi.Dyrektywą.UE:.1999/5/ECEste.equipamento.está.em.conformidade.com.os. requisitos. essenciais. e. outras. provisões.r<strong>el</strong>evantes.da.Directiva.1999/5/EC.Eesti.[Estonian]:See.seade.vastab.direktiivi.1999/5/EÜ.olulist<strong>el</strong>e.nõuet<strong>el</strong>e.ja.teist<strong>el</strong>e.asjakohast<strong>el</strong>e.sätet<strong>el</strong>eRomână.[Romanian]Acest. echipament. este. in. conformitate.cu. cerint<strong>el</strong>e. esentiale. si. cu. alte. prevederi.r<strong>el</strong>evante.ale.Directivei.1999/5/ECEnglish:This. equipment. is. in. compliance. with. the.essential. requirements. and. other. r<strong>el</strong>evant.provisions.of.Directive.1999/5/ECSlovensko.[Slovenian]:Ta.naprava.je.skladna.z.bistvenimi.zahtevami.in. ostalimi. r<strong>el</strong>evantnimi. pogoji. Direktive.1999/5/ECEspañol.[Spanish]:Este. equipo. cumple. con. los. requisitos.esenciales. asi. como. con. otras. disposiciones.de.la.Directiva.1999/5/CESlovensky.[Slovak]:Toto. zariadenie. je. v. zhode. so. základnými.požiadavkami.a.inými.príslušnými.nariadeniami.direktív:.1999/5/EC .Ελληνική.[Greek]:Français.[French]:Íslenska.[Ic<strong>el</strong>andic]:Italiano.[Italian]:Latviski.[Latvian]:Lietuvių.[Lithuanian]:Wir<strong>el</strong>ess-G breedbandrouterΑυτός.ο.εξοπλισµός.είναι.σε.συµµόρφωση.µε.τις. ουσιώδεις. απαιτήσεις. και. άλλες. σχετικές.διατάξεις.της.Οδηγίας.1999/5/ECCet. appareil. est. conforme. aux. exigences.essenti<strong>el</strong>les. et. aux. autres. dispositions.pertinentes.de.la.Directive.1999/5/ECÞetta. tæki. er. samkvæmt. grunnkröfum. og.öðrum. viðeigandi. ákvæðum. Tilskipunar.1999/5/ECQuesto. apparato. é. conforme. ai. requisiti.essenziali. ed. agli. altri. principi. sanciti. dalla.Direttiva.1999/5/CEŠī. iekārta. atbilst. Direktīvas. 1999/5/EK.būtiskajām. prasībām. un. citiem. ar. to.saistītajiem.noteikumiemŠis. įrenginys. tenkina. 1999/5/EB. Direktyvos.esminius. reikalavimus. ir. kitas. šios. direktyvos.nuostatasSuomi.[Finnish]:Svenska.[Swedish]:Tämä. laite. täyttää. direktiivin. 1999/5/EY.olennaiset.vaatimukset.ja.on.siinä.asetettujen.muiden. laitetta. koskevien. määräysten.mukainenDenna.utrustning.är.i.överensstämm<strong>el</strong>se.med.de. väsentliga. kraven. och. andra. r<strong>el</strong>evanta.bestämm<strong>el</strong>ser.i.Direktiv.1999/5/ECDe. verklaring. van. conformiteit. is. voor. alle. producten.beschikbaar.via.een.of.meer.van.de.volgende.opties:.• De.cd.van.het.product.bevat.een.PDF-bestand• Het. product. gaat. vergez<strong>el</strong>d. van. een. gedrukt.exemplaar• Op. de. website. van. het. product. is. een. PDF-bestand.beschikbaar .Ga.naar.www.linksys.com/internationalen.s<strong>el</strong>ecteer.uw.land.of.regio .S<strong>el</strong>ecteer.vervolgens.uw.productAls. u. andere. technische. documentatie. nodig. hebt,.raadpleegt.u.de.sectie.‘Technische.documenten.op.wwwlinksys com/international’. zoals. verderop. in. deze. bijlage.wordt.aangegeven29
BijlageDInformatie over reg<strong>el</strong>gevingBij.het.beoord<strong>el</strong>en.van.het.product.aan.de.hand.van.de.vereisten. in. richtlijn. 1999/5/EC. werden. de. volgende.standaarden.toegepast:• Straling:. EN. 300. 328. en/of. EN. 301. 893. zoals. van.toepassing• EMC:.EN.301.489-1,.EN.301.489-17• Veiligheid:.EN.60950.alsmede.EN.50385.of.EN.50371Voor. het. gebruik. met. de. 5. GHz-band. zijn. Dynamic.Frequency. S<strong>el</strong>ection. (DFS). en. Transmit. Power. Control.(TPC).vereistDFS:. de. apparatuur. voldoet. aan. de. vereisten. voor. DFS.zoals. vastg<strong>el</strong>egd. in. ETSI. EN. 301. 893 . Deze. functie. is.wett<strong>el</strong>ijk. verplicht. om. interferentie. met. Radio. Location.Services.(radars).te.voorkomenTPC:. het. maximale. vermogensniveau. voor. gebruik. met.de.5.GHz-band.is.3.dB.of.meer.volgens.de.toepass<strong>el</strong>ijke.beperking .TPC.is.dus.niet.vereist .CE-markeringVoor.de.Wir<strong>el</strong>ess-N,.-G,.-B,.en/of.-A.producten.van.Linksys.zijn. als. volgt. de. CE-markering,. het. nummer. van. de.aangem<strong>el</strong>de.instantie.(waar.dat.van.toepassing.is).en.de.klasse.2-identificator.op.de.apparatuur.aangebrachtofofofControleer.het.CE-lab<strong>el</strong>.op.het.product.om.te.zien.w<strong>el</strong>ke.aangem<strong>el</strong>de.instantie.bij.de.beoord<strong>el</strong>ing.was.betrokkenWir<strong>el</strong>ess-G breedbandrouterBeperkingen op nationaal niveauDit.product.kan.zonder.enige.beperking.worden.gebruikt.in. alle. EU-landen. (en. andere. landen. die. de. EU-richtlijn.1999/5/EC. hanteren),. met. uitzondering. van. de. hierna.genoemde.landen:Ce produit peut être utilisé dans tous les pays de l’UE (et danstous les pays ayant transposés la directive 1999/5/CE) sansaucune limitation, excepté pour les pays mentionnés cidessous:Questo prodotto è utilizzabile in tutte i paesi EU (ed in tuttigli altri paesi che seguono le direttive EU 1999/5/EC) senzanessuna limitazione, eccetto per i paesii menzionati diseguito:Das Produkt kann in allen EU Staaten ohne Einschränkungeneingesetzt werden (sowie in anderen Staaten die der EUDirektive 1999/5/CE folgen) mit Außnahme der folgendenaufgeführten Staaten:In.het.grootste.de<strong>el</strong>.van.de.EU.en.andere.Europese.landen.zijn.2,4-.en.5-GHz-banden.beschikbaar.voor.gebruik.van.draadloze. lokale. netwerken. (wir<strong>el</strong>ess. local. networks,.LAN’s) . De. tab<strong>el</strong>.“Overzicht. van. wett<strong>el</strong>ijke. vereisten. voor.Wir<strong>el</strong>ess. LAN’s”. biedt. een. overzicht. van. de. wett<strong>el</strong>ijke.vereisten.voor.2,4-.en.5-GHz-bandenVerderop. in. dit. document. staat. een. overzicht. van. de.landen. waar. extra. beperkingen. en/of. vereisten. van.toepassing.zijnDe. vereisten. voor. een. land. kunnen. verschillen . Linksys.raadt.u.aan.bij.de.plaats<strong>el</strong>ijke.autoriteiten.te.informeren.naar.de.huidige.status.van.de.nationale.reg<strong>el</strong>s.voor.2,4-.en.5-GHz.Wir<strong>el</strong>ess.LAN’sOverzicht van wett<strong>el</strong>ijke vereisten voor Wir<strong>el</strong>ess LAN’sFrequentieband(MHz)Maximaalvermogensniveau(EIRP) (mW)ALLEENbinnenshuisBinnenshuisenbuitenshuis2400-2483 5 100 X5150-5350 † 200 X5470-5725 † 1000 X† Voor.de.frequentiebereiken.van.5250-5350.MHz.en.5470-5725.MHz.zijn.Dynamic.Frequency.S<strong>el</strong>ection.en.Transmit.Power.Control.vereistIn. de. volgende. landen. zijn. extra. beperkingen. en/of.vereisten.van.toepassing,.in.aanvulling.op.die.w<strong>el</strong>ke.zijn.verm<strong>el</strong>d. in. de. tab<strong>el</strong>.“Overzicht. van. wett<strong>el</strong>ijke. vereisten.voor.Wir<strong>el</strong>ess.LAN’s”:DenmarkIn.Denmark,.the.band.5150.-.5350.MHz.is.also.allowed.for.outdoor.usageI Danmark må frekvensbåndet 5150 - 5350 også anvendesudendørs.30
BijlageDInformatie over reg<strong>el</strong>gevingFranceFor. 2,4. GHz,. the. product. should. not. be. used. outdoors.in.the.band.2454.-.2483,5.MHz .There.are.no.restrictions.when.used.in.other.parts.of.the.2,4.GHz.band.when.used.indoors .Check.http://www arcep fr/.for.more.detailsPour la bande 2,4 GHz, l’ équipement ne doit pas être utiliséen extérieur dans la bande 2454 - 2483,5 MHz. Il n’y a pas derestrictions pour des utilisations en intérieur dans d’autresparties de la bande 2,4GHz. Consultez http://www.arcep.fr/pour de plus amples détails.LocationIndoor(No.restrictions)ItalyOutdoorWir<strong>el</strong>ess-G breedbandrouterApplicable Power Lev<strong>el</strong>s in FranceFrequencyRange (MHz)Power (EIRP)2400-2483 5 100.mW.(20.dBm)2400-24542454-2483 5100.mW.(20.dBm)10.mW.(10.dBm)This. product. meets. the. National. Radio. Interface. and.the. requirements. specified. in. the. National. Frequency.Allocation.Table.for.Italy .Unless.this.2,4-GHz.wir<strong>el</strong>ess.LAN.product.is.operating.within.the.boundaries.of.the.owner’s.property,.its.use.requires.a.“general.authorization” .Please.check.http://www comunicazioni it/it/.for.more.detailsQuesto prodotto è conforme alla specifiche di InterfacciaRadio Nazionali e rispetta il Piano Nazionale di ripartizioned<strong>el</strong>le frequenze in Italia. Se non viene installato all’internod<strong>el</strong> proprio fondo, l’utilizzo di prodotti Wir<strong>el</strong>ess LAN a2,4 GHz richiede una “Autorizzazione Generale”. Consultarehttp://www.comunicazioni.it/it/ per maggiori dettagli.LatviaThe. outdoor. usage. of. the. 2,4. GHz. band. requires. an.authorization.from.the.Electronic.Communications.Office .Please.check.http://www esd lv.for.more.details2,4 GHz frekveču joslas izmantošanai ārpus t<strong>el</strong>pāmnepieciešama atļauja no Elektronisko sakaru direkcijas.Vairāk informācijas: http://www.esd.lv.Notes:.12Although. Norway,. Switzerland. and. Liechtenstein. are.not.EU.member.states,.the.EU.Directive.1999/5/EC.has.also.been.implemented.in.those.countriesThe.regulatory.limits.for.maximum.output.power.are.specified. in. EIRP . The. EIRP. lev<strong>el</strong>. of. a. device. can. be.calculated. by. adding. the. gain. of. the. antenna. used.(specified.in.dBi).to.the.output.power.available.at.the.connector.(specified.in.dBm)Beperkingen aan het productgebruikDit. product. is. alleen. bedo<strong>el</strong>d. voor. gebruik. binnenshuis .Tenzij.anders.aangegeven.wordt.gebruik.buitenshuis.niet.aanbevolenBeperkingen voor 2,4 GHzDit.product.is.bedo<strong>el</strong>d.voor.gebruik.met.de.integrale.of.speciale.(externe).antenne(s).die.standaard.bij.het.product.worden.g<strong>el</strong>everd .Bij.sommige.toepassingen.moet(en).de.antenne(s),.indien.verwijderbaar,.van.het.product.worden.losgenomen. en. op. afstand. van. het. product. worden.geïnstalleerd. met. behulp. van. verlengkab<strong>el</strong>s . Voor. deze.toepassingen. biedt. Linksys. een. R-SMA-verlengkab<strong>el</strong>.(AC9SMA). en. een. R-TNC-verlengkab<strong>el</strong>. (AC9TNC) . Beide.kab<strong>el</strong>s.zijn.9.meter.lang.en.hebben.een.verlies.(demping).van.5.dB .Ter.compensatie.voor.de.demping.biedt.Linksys.ook. antennes. met. een. hogere. versterkingsfactor,. de.HGA7S. (met. R-SMA-aansluiting). en. HGA7T. (met. R-TNCaansluiting).Deze.antennes.hebben.een.versterkingsfactor.van. 7. dBi. en. mogen. alleen. worden. gebruikt. met. de. R-SMA-.of.de.R-TNC-verlengkab<strong>el</strong>Combinaties. van. verlengkab<strong>el</strong>s. en. antennes,. die. een.uitgestraald. vermogensniveau. van. meer. dan. 100. mW.EIRP.tot.gevolg.hebben,.zijn.verbodenSoftware of firmware van derdenHet.gebruik.van.software.of.firmware.die.niet.door.Linksys.wordt. ondersteund/g<strong>el</strong>everd. kan. ertoe. leiden. dat. het.product.niet.langer.voldoet.aan.de.wett<strong>el</strong>ijke.vereistenTechnische documenten opwww.linksys.com/internationalVoer.de.volgende.stappen.uit.voor.toegang.tot.technische.documenten:1234567Voer. http://www linksys com/international. in. uw.webbrowser.inS<strong>el</strong>ecteer.het.land.of.de.regio.waarin.u.woontKlik.op.het.tabblad.Products.(Producten)S<strong>el</strong>ecteer.de.juiste.productcategorieS<strong>el</strong>ecteer.zo.nodig.de.productsubcategorieS<strong>el</strong>ecteer.het.productS<strong>el</strong>ecteer. het. type. documentatie. dat. u. wenst. in.de. sectie. More. Information. (Meer. informatie) . Het.document.wordt.geopend.in.PDF-ind<strong>el</strong>ing.als.u.Adobe.Acrobat.op.uw.computer.hebt.geïnstalleerdOPMERKING:. als. u. vragen. hebt. over. de.compatibiliteit. van. dit. product. of. als. u. de.gewenste. informatie. niet. kunt. vinden,. neemt.u.contact.op.met.uw.lokale.verkoopkantoor.of.gaat.u.naar.www.linksys.com/international31
BijlageDInformatie over reg<strong>el</strong>gevingGebruikersinformatie voorconsumentenproducten onder EU-richtlijn2002/96/EC inzake afgedankte <strong>el</strong>ektrischeen <strong>el</strong>ektronische apparatuur (WEEE)Dit.document.bevat.b<strong>el</strong>angrijke.informatie.voor.gebruikers.met.betrekking.tot.de.juiste.afvoerwijze.en.recycling.van.Linksys-producten . Consumenten. moeten. zich. aan. deze.kennisgeving. houden. voor. alle. <strong>el</strong>ektronische. producten.die.het.volgende.symbool.dragen:Ceština (Czech). -. Informace o ochraně životníhoprostředí pro zákazníky v zemích Evropské unieEvropská.směrnice.2002/96/ES.zakazuje,.aby.zařízení.označené.tímto.symbolem. .na.produktu.anebo.na.obalu.bylo.likvidováno.s. netříděným. komunálním. odpadem . Tento. symbol. udává,.že. daný. produkt. musí. být. likvidován. odděleně. od. běžného.komunálního.odpadu .Odpovídáte.za.likvidaci.tohoto.produktu.a.dalších.<strong>el</strong>ektrických.a.<strong>el</strong>ektronických.zařízení.prostřednictvím.určených. sběrných. míst. stanovených. vládou. nebo. místními.úřady . Správná. likvidace. a. recyklace. pomáhá. předcházet.potenciálním.negativním.dopadům.na.životní.prostředí.a.lidské.zdraví . Podrobnější. informace. o. likvidaci. starého. vybavení. si.laskavě. vyžádejte. od. místních. úřadů,. podniku. zabývajícího. se.likvidací.komunálních.odpadů.nebo.obchodu,.kde.jste.produkt.zakoupiliEnglish - Environmental Information for Customers inthe European UnionEuropean. Directive. 2002/96/EC. requires. that. the. equipment.bearing.this.symbol. .on.the.product.and/or.its.packaging.must.not.be.disposed.of.with.unsorted.municipal.waste .The.symbol.indicates. that. this. product. should. be. disposed. of. separat<strong>el</strong>y.from.regular.household.waste.streams .It.is.your.responsibility.to.dispose.of.this.and.other.<strong>el</strong>ectric.and.<strong>el</strong>ectronic.equipment.via.designated.collection.facilities.appointed.by.the.government.or.local.authorities .Correct.disposal.and.recycling.will.h<strong>el</strong>p.prevent.potential. negative. consequences. to. the. environment. and.human.health .For.more.detailed.information.about.the.disposal.of. your. old. equipment,. please. contact. your. local. authorities,.waste. disposal. service,. or. the. shop. where. you. purchased. the.productБългарски (Bulgarian) - Информация относноопазването на околната среда за потребители вЕвропейския съюзЕвропейска.директива.2002/96/EC.изисква.уредите,.носещи.този. символ. . върху. изделието. и/или. опаковката. му,. да. не.се. изхвърля. т. с. несортирани. битови. отпадъци . Символът.обозначава,.че.изделието.трябва.да.се.изхвърля.отделно.от.сметосъбирането. на. обикновените. битови. отпадъци . Ваша.е.отговорността.този.и.другите.електрически.и.електронни.уреди. да. се. изхвърлят. в. предварително. определени. от.държавните.или.общински.органи.специализирани.пунктове.за. събиране . Правилното. изхвърляне. и. рециклиране.ще. спомогнат. да. се. предотвратят. евентуални. вредни. за.околната. среда. и. здравето. на. населението. последствия . За.по-подробна.информация.относно.изхвърлянето.на.вашите.стари.уреди.се.обърнете.към.местните.власти,.службите.за.сметосъбиране.или.магазина,.от.който.сте.закупили.уредаDansk (Danish) - Miljøinformation for kunder i EUEU-direktiv.2002/96/EF.kræver,.at.udstyr.der.bærer.dette.symbol.. på. produktet. og/<strong>el</strong>ler. emballagen. ikke. må. bortskaffes. som.usorteret.kommunalt.affald .Symbolet.betyder,.at.dette.produkt.skal.bortskaffes.adskilt.fra.det.almind<strong>el</strong>ige.husholdningsaffald .Det. er. dit. ansvar. at. bortskaffe. dette. og. andet. <strong>el</strong>ektrisk. og.<strong>el</strong>ektronisk. udstyr. via. bestemte. indsamlingssteder. udpeget.af. staten. <strong>el</strong>ler. de. lokale. myndigheder . Korrekt. bortskaff<strong>el</strong>se.og. genvinding. vil. hjælpe. med. til. at. undgå. mulige. skader. for.miljøet. og. menneskers. sundhed . Kontakt. venligst. de. lokale.myndigheder,. renovationstjenesten. <strong>el</strong>ler. den. butik,. hvor. du.har.købt.produktet,.angående.mere.detaljeret.information.om.bortskaff<strong>el</strong>se.af.dit.gamle.udstyrDeutsch (German) - Umw<strong>el</strong>tinformation für Kundeninnerhalb der Europäischen UnionDie.Europäische.Richtlinie.2002/96/EC.verlangt,.dass.technische.Ausrüstung,.die.direkt.am.Gerät.und/oder.an.der.Verpackung.mit.diesem.Symbol.versehen.ist. ,.nicht.zusammen.mit.unsortiertem.Gemeindeabfall.entsorgt.werden.darf .Das.Symbol.weist.darauf.hin,. dass. das. Produkt. von. regulärem. Haushaltmüll. getrennt.entsorgt. werden. sollte . Es. liegt. in. Ihrer.Verantwortung,. dieses.Gerät. und. andere. <strong>el</strong>ektrische. und. <strong>el</strong>ektronische. Geräte. über.die. dafür. zuständigen. und. von. der. Regierung. oder. örtlichen.Behörden. dazu. bestimmten. Samm<strong>el</strong>st<strong>el</strong>len. zu. entsorgen .Ordnungsgemäßes. Entsorgen. und. Recyc<strong>el</strong>n. trägt. dazu. bei,.potenti<strong>el</strong>le. negative. Folgen. für. Umw<strong>el</strong>t. und. die. menschliche.Gesundheit.zu.vermeiden .Wenn.Sie.weitere.Informationen.zur.Entsorgung.Ihrer.Altgeräte.benötigen,.wenden.Sie.sich.bitte.an.die. örtlichen. Behörden. oder. städtischen. Entsorgungsdienste.oder.an.den.Händler,.bei.dem.Sie.das.Produkt.erworben.habenWir<strong>el</strong>ess-G breedbandrouter32
BijlageDInformatie over reg<strong>el</strong>gevingEesti (Estonian) - Keskkonnaalane informatsioonEuroopa Liidus asuvat<strong>el</strong>e klientid<strong>el</strong>eEuroopa. Liidu. direktiivi. 2002/96/EÜ. nõuete. kohas<strong>el</strong>t. on.seadmeid,. mill<strong>el</strong>. on. toot<strong>el</strong>. või. pakendil. käesolev. sümbol. ,.ke<strong>el</strong>atud. kõrvaldada. koos. sorteerimata. olmejäätmetega . See.sümbol. näitab,. et. toode. tuleks. kõrvaldada. eraldi. tavalistest.olmejäätmevoogudest .Olete.kohustatud.kõrvaldama.käesoleva.ja. ka. muud. <strong>el</strong>ektri-. ja. <strong>el</strong>ektroonikaseadmed. riigi. või. kohalike.ametiasutuste. poolt. ette. nähtud. kogumispunktide. kaudu .Seadmete.korrektne.kõrvaldamine.ja.ringlussevõtt.aitab.vältida.võimalikke. negatiivseid. tagajärgi. keskkonnale. ning. inimeste.tervis<strong>el</strong>e . Vanade. seadmete. kõrvaldamise. kohta. täpsema.informatsiooni. saamiseks. võtke. palun. ühendust. kohalike.ametiasutustega,. jäätmekäitlusfirmaga. või. kauplusega,. kust. te.toote.ostsiteEspañol (Spanish) - Información medioambiental paraclientes de la Unión EuropeaLa. Directiva. 2002/96/CE. de. la. UE. exige. que. los. equipos. que.lleven.este.símbolo. .en.<strong>el</strong>.propio.aparato.y/o.en.su.embalaje.no. deben. <strong>el</strong>iminarse. junto. con. otros. residuos. urbanos. no.s<strong>el</strong>eccionados . El. símbolo. indica. que. <strong>el</strong>. producto. en. cuestión.debe.separarse.de.los.residuos.domésticos.convencionales.con.vistas.a.su.<strong>el</strong>iminación .Es.responsabilidad.suya.desechar.este.y.cualesquiera.otros.aparatos.<strong>el</strong>éctricos.y.<strong>el</strong>ectrónicos.a.través.de.los.puntos.de.recogida.que.ponen.a.su.disposición.<strong>el</strong>.gobierno.y.las.autoridades.locales .Al.desechar.y.reciclar.correctamente.estos.aparatos.estará.contribuyendo.a.evitar.posibles.consecuencias.negativas.para.<strong>el</strong>.medio.ambiente.y.la.salud.de.las.personas .Si.desea.obtener.información.más.detallada.sobre.la.<strong>el</strong>iminación.segura.de.su.aparato.usado,.consulte.a.las.autoridades.locales,.al.servicio.de.recogida.y.<strong>el</strong>iminación.de.residuos.de.su.zona.o.pregunte.en.la.tienda.donde.adquirió.<strong>el</strong>.productoξλληνικά (Greek) - Στοιχεία περιβαλλοντικήςπροστασίας για πελάτες εντός της ΕυρωπαϊκήςΈνωσηςΗ.Κοινοτική.Οδηγία.2002/96/EC.απαιτεί.ότι.ο.εξοπλισμός.ο.οποίος.φέρει. αυτό. το. σύμβολο. . στο. προϊόν. και/ή. στη. συσκευασία.του. δεν. πρέπει. να. απορρίπτεται. μαζί. με. τα. μικτά. κοινοτικά.απορρίμματα .Το. σύμβολο. υποδεικνύει. ότι. αυτό. το. προϊόν. θα.πρέπει. να. απορρίπτεται. ξεχωριστά. από. τα. συνήθη. οικιακά.απορρίμματα .Είστε.υπεύθυνος.για.την.απόρριψη.του.παρόντος.και. άλλου. ηλεκτρικού. και. ηλεκτρονικού. εξοπλισμού. μέσω. των.καθορισμένων.εγκαταστάσεων.συγκέντρωσης.απορριμμάτων.οι.οποίες.παρέχονται.από.το.κράτος.ή.τις.αρμόδιες.τοπικές.αρχές .Η.σωστή.απόρριψη.και.ανακύκλωση.συμβάλλει.στην.πρόληψη.πιθανών.αρνητικών.συνεπειών.για.το.περιβάλλον.και.την.υγεία .Για. περισσότερες. πληροφορίες. σχετικά. με. την. απόρριψη. του.παλιού.σας.εξοπλισμού,.παρακαλώ.επικοινωνήστε.με.τις.τοπικές.αρχές,.τις.υπηρεσίες.απόρριψης.ή.το.κατάστημα.από.το.οποίο.αγοράσατε.το.προϊόνFrançais (French) - Informations environnementalespour les clients de l’Union européenneLa. directive. européenne. 2002/96/CE. exige. que. l’équipement.sur. lequ<strong>el</strong>. est. apposé. ce. symbole. . sur. le. produit. et/ou. son.emballage.ne.soit.pas.jeté.avec.les.autres.ordures.ménagères .Ce.symbole.indique.que.le.produit.doit.être.éliminé.dans.un.circuit.distinct. de. c<strong>el</strong>ui. pour. les. déchets. des. ménages . Il. est. de. votre.responsabilité.de.jeter.ce.matéri<strong>el</strong>.ainsi.que.tout.autre.matéri<strong>el</strong>.électrique.ou.électronique.par.les.moyens.de.collecte.indiqués.par. le. gouvernement. et. les. pouvoirs. publics. des. collectivités.territoriales .L’élimination.et.le.recyclage.en.bonne.et.due.forme.ont. pour. but. de. lutter. contre. l’impact. néfaste. potenti<strong>el</strong>. de. ce.type.de.produits.sur.l’environnement.et.la.santé.publique .Pour.plus. d’informations. sur. le. mode. d’élimination. de. votre. ancien.équipement,.veuillez.prendre.contact.avec.les.pouvoirs.publics.locaux,.le.service.de.traitement.des.déchets,.ou.l’endroit.où.vous.avez.acheté.le.produitItaliano (Italian) - Informazioni r<strong>el</strong>ative all’ambienteper i clienti residenti n<strong>el</strong>l’Unione EuropeaLa.direttiva.europea.2002/96/EC.richiede.che.le.apparecchiature.contrassegnate. con. questo. simbolo. . sul. prodotto. e/o.sull’imballaggio. non. siano. smaltite. insieme. ai. rifiuti. urbani.non. differenziati . Il. simbolo. indica. che. questo. prodotto. non.deve. essere. smaltito. insieme. ai. normali. rifiuti. domestici . È.responsabilità. d<strong>el</strong>. proprietario. smaltire. sia. questi. prodotti. sia.le. altre. apparecchiature. <strong>el</strong>ettriche. ed. <strong>el</strong>ettroniche. mediante.le. specifiche. strutture. di. raccolta. indicate. dal. governo. o. dagli.enti. pubblici. locali . Il. corretto. smaltimento. ed. il. riciclaggio.aiuteranno. a. prevenire. conseguenze. potenzialmente. negative.per. l’ambiente. e. per. la. salute. d<strong>el</strong>l’essere. umano . Per. ricevere.informazioni.più.dettagliate.circa.lo.smaltimento.d<strong>el</strong>le.vecchie.apparecchiature.in.Vostro.possesso,.Vi.invitiamo.a.contattare.gli.enti.pubblici.di.competenza,.il.servizio.di.smaltimento.rifiuti.o.il.negozio.n<strong>el</strong>.quale.avete.acquistato.il.prodottoLatviešu valoda (Latvian) - Ekoloģiska informācijaklientiem Eiropas Savienības jurisdikcijāDirektīvā.2002/96/EK.ir.prasība,.ka.aprīkojumu,.kam.pievienota.zīme. . uz. paša. izstrādājuma. vai. uz. tā. iesaiņojuma,. nedrīkst.izmest. nešķirotā. veidā. kopā. ar. komunālajiem. atkritumiem.(tiem,.ko.rada.vietēji.iedzīvotāji.un.uzņēmumi) .Šī.zīme.nozīmē.to,.ka.šī.ierīce.ir.jāizmet.atkritumos.tā,.lai.tā.nenonāktu.kopā.ar.parastiem. mājsaimniecības. atkritumiem . Jūsu. pienākums. ir. šo.un. citas. <strong>el</strong>ektriskas. un. <strong>el</strong>ektroniskas. ierīces. izmest. atkritumos,.izmantojot.īpašus.atkritumu.savākšanas.veidus.un.līdzekļus,.ko.nodrošina.valsts.un.pašvaldību.iestādes .Ja.izmešana.atkritumos.un. pārstrāde. tiek. veikta. pareizi,. tad. mazinās. iespējamais.kaitējums. dabai. un. cilvēku. ves<strong>el</strong>ībai . Sīkākas. ziņas. par.novecojuša. aprīkojuma. izmešanu. atkritumos. jūs. varat. saņemt.vietējā.pašvaldībā,.atkritumu.savākšanas.dienestā,.kā.arī.veikalā,.kur.iegādājāties.šo.izstrādājumuWir<strong>el</strong>ess-G breedbandrouter33
BijlageDInformatie over reg<strong>el</strong>gevingLietuvškai (Lithuanian) - Aplinkosaugos informacija,skirta Europos Sąjungos vartotojamsEuropos. direktyva. 2002/96/EC. numato,. kad. įrangos,. kuri. ir. .kurios. pakuotė. yra. pažymėta. šiuo. simboliu. (įveskite. simbolį),.negalima. šalinti. kartu. su. nerūšiuotomis. komunalinėmis.atliekomis . Šis. simbolis. rodo,. kad. gaminį. reikia. šalinti. atskirai.nuo.bendro.buitinių.atliekų.srauto .Jūs.privalote.užtikrinti,.kad.ši. ir. kita. <strong>el</strong>ektros. ar. <strong>el</strong>ektroninė. įranga. būtų. šalinama. per. tam.tikras.nacionalinės.ar.vietinės.valdžios.nustatytas.atliekų.rinkimo.sistemas .Tinkamai. šalinant. ir. perdirbant. atliekas,. bus. išvengta.galimos.žalos.aplinkai.ir.žmonių.sveikatai .Daugiau.informacijos.apie. jūsų. senos. įrangos. šalinimą. gali. pateikti. vietinės. valdžios.institucijos,.atliekų.šalinimo.tarnybos.arba.parduotuvės,.kuriose.įsigijote.tą.gaminįMalti (Maltese) - Informazzjoni Ambjentali għal Klijentifl-Unjoni EwropeaId-Direttiva.Ewropea.2002/96/KE.titlob.li.t-tagħmir.li.jkun.fih.issimbolu..fuq.il-prodott.u/jew.fuq.l-ippakkjar.ma.jistax.jintrema.ma’. skart. muniċipali. li. ma. ġiex. isseparat . Is-simbolu. jindika.li. dan. il-prodott. għandu. jintrema. separatament. minn. ma’. l-iskart. domestiku. regolari . Hija. responsabbiltà. tiegħek. li. tarmi.dan. it-tagħmir. u. kull. tagħmir. ieħor. ta’. l-<strong>el</strong>ettriku. u. <strong>el</strong>ettroniku.permezz.ta’.faċilitajiet.ta’.ġbir.appuntati.apposta.mill-gvern.jew.mill-awtoritajiet. lokali . Ir-rimi. b’mod. korrett. u. r-riċiklaġġ. jgħin.jipprevjeni. konsegwenzi. negattivi. potenzjali. għall-ambjent. u.għas-saħħa. tal-bniedem . Għal. aktar. informazzjoni. dettaljata.dwar.ir-rimi.tat-tagħmir.antik.tiegħek,.jekk.jogħġbok.ikkuntattja.lill-awtoritajiet.lokali.tiegħek,.is-servizzi.għar-rimi.ta’.l-iskart,.jew.il-ħanut.minn.fejn.xtrajt.il-prodottNederlands (Dutch) - Milieu-informatie voor klantenin de Europese UnieDe.Europese.Richtlijn.2002/96/EC.schrijft.voor.dat.apparatuur.die.is.voorzien.van.dit.symbool. .op.het.product.of.de.verpakking,.niet.mag.worden.ingezam<strong>el</strong>d.met.niet-gescheiden.huishoud<strong>el</strong>ijk.afval .Dit.symbool.geeft.aan.dat.het.product.apart.moet.worden.ingezam<strong>el</strong>d . U. bent. z<strong>el</strong>f. verantwoord<strong>el</strong>ijk. voor. de. vernietiging.van.deze.en.andere.<strong>el</strong>ektrische.en.<strong>el</strong>ektronische.apparatuur.via.de.daarvoor.door.de.land<strong>el</strong>ijke.of.plaats<strong>el</strong>ijke.overheid.aangewezen.inzam<strong>el</strong>ingskanalen . De. juiste. vernietiging. en. recycling. van.deze.apparatuur.voorkomt.mog<strong>el</strong>ijke.negatieve.gevolgen.voor.het. milieu. en. de. gezondheid . Voor. meer. informatie. over. het.vernietigen. van. uw. oude. apparatuur. neemt. u. contact. op. met.de.plaats<strong>el</strong>ijke.autoriteiten.of.afvalverwerkingsdienst,.of.met.de.wink<strong>el</strong>.waar.u.het.product.hebt.aangeschaftNorsk (Norwegian) - Miljøinformasjon for kunder i EUEU-direktiv. 2002/96/EF. krever. at. utstyr. med. følgende. symbol.. avbildet. på. produktet. og/<strong>el</strong>ler. pakningen,. ikke. må. kastes.sammen. med. usortert. avfall . Symbolet. indikerer. at. dette.produktet. skal. håndteres. atskilt. fra. ordinær. avfallsinnsamling.for. husholdningsavfall . Det. er. ditt. ansvar. å. kvitte. deg. med.dette.produktet.og.annet.<strong>el</strong>ektrisk.og.<strong>el</strong>ektronisk.avfall.via.egne.innsamlingsordninger. slik. myndighetene. <strong>el</strong>ler. kommunene.bestemmer . Korrekt. avfallshåndtering. og. gjenvinning. vil.være. med. på. å. forhindre. mulige. negative. konsekvenser. for.miljø. og. h<strong>el</strong>se . For. nærmere. informasjon. om. håndtering. av.det. kasserte. utstyret. ditt,. kan. du. ta. kontakt. med. kommunen,.en. innsamlingsstasjon. for. avfall. <strong>el</strong>ler. butikken. der. du. kjøpte.produktetMagyar (Hungarian) - Környezetvéd<strong>el</strong>mi információ azeurópai uniós vásárlók számáraA. 2002/96/EC. számú. európai. uniós. irány<strong>el</strong>v. megkívánja,. hogy.azokat.a.termékeket,.am<strong>el</strong>yeken,.és/vagy.am<strong>el</strong>yek.csomagolásán.az.alábbi.címke. .megj<strong>el</strong>enik,.tilos.a.többi.sz<strong>el</strong>ektálatlan.lakossági.hulladékkal. együtt. kidobni . A. címke. azt. j<strong>el</strong>öli,. hogy. az. adott.termék.kidobásakor.a.szokványos.háztartási.hulladék<strong>el</strong>szállítási.rendszerektõl. <strong>el</strong>különített. <strong>el</strong>járást. k<strong>el</strong>l. alkalmazni . Az. Ön.f<strong>el</strong><strong>el</strong>õssége,. hogy. ezt,. és. más. <strong>el</strong>ektromos. és. <strong>el</strong>ektronikus.berendezéseit. a. kormányzati. vagy. a. h<strong>el</strong>yi. hatóságok. által.kij<strong>el</strong>ölt. gyűjtõredszereken. keresztül. számolja. f<strong>el</strong> . A. megf<strong>el</strong><strong>el</strong>õ.hulladékf<strong>el</strong>dolgozás.segít.a.környezetre.és.az.emberi.egészségre.potenciálisan. ártalmas. negatív. hatások. meg<strong>el</strong>õzésében . Ha.<strong>el</strong>avult. berendezéseinek. f<strong>el</strong>számolásához. további. részletes.információra. van. szüksége,. kérjük,. lépjen. kapcsolatba. a. h<strong>el</strong>yi.hatóságokkal,. a. hulladékf<strong>el</strong>dolgozási. szolgálattal,. vagy. azzal.üzlett<strong>el</strong>,.ahol.a.terméket.vásároltaPolski (Polish) - Informacja dla klientów w UniiEuropejskiej o przepisach dotyczących ochronyśrodowiskaDyrektywa. Europejska. 2002/96/EC. wymaga,. aby. sprzęt.oznaczony.symbolem. .znajdującym.się.na.produkcie.i/lub.jego.opakowaniu.nie.był.wyrzucany.razem.z.innymi.niesortowanymi.odpadami. komunalnymi . Symbol. ten. wskazuje,. że. produkt.nie. powinien. być. usuwany. razem. ze. zwykłymi. odpadami. z.gospodarstw. domowych . Na. Państwu. spoczywa. obowiązek.wyrzucania. tego. i. innych. urządzeń. <strong>el</strong>ektrycznych. oraz.<strong>el</strong>ektronicznych.w.punktach.odbioru.wyznaczonych.przez.władze.krajowe.lub.lokalne .Pozbywanie.się.sprzętu.we.właściwy.sposób.i. jego. recykling. pomogą. zapobiec. potencjalnie. negatywnym.konsekwencjom. dla. środowiska. i. zdrowia. ludzkiego . W. c<strong>el</strong>u.uzyskania.szczegółowych.informacji.o.usuwaniu.starego.sprzętu,.prosimy. zwrócić. się. do. lokalnych. władz,. służb. oczyszczania.miasta.lub.sklepu,.w.którym.produkt.został.nabytyWir<strong>el</strong>ess-G breedbandrouter34
BijlageDInformatie over reg<strong>el</strong>gevingPortuguês (Portuguese) - Informação ambiental paraclientes da União EuropeiaA. Directiva. Europeia. 2002/96/CE. exige. que. o. equipamento.que.exibe.este.símbolo. .no.produto.e/ou.na.sua.embalagem.não. seja. <strong>el</strong>iminado. junto. com. os. resíduos. municipais. não.separados . O. símbolo. indica. que. este. produto. deve. ser.<strong>el</strong>iminado. separadamente. dos. resíduos. domésticos. regulares .É. da. sua. responsabilidade. <strong>el</strong>iminar. este. e. qualquer. outro.equipamento. <strong>el</strong>éctrico. e. <strong>el</strong>ectrónico. através. das. instalações.de. recolha. designadas. p<strong>el</strong>as. autoridades. governamentais. ou.locais .A.<strong>el</strong>iminação.e.reciclagem.correctas.ajudarão.a.prevenir.as. consequências. negativas. para. o. ambiente. e. para. a. saúde.humana . Para. obter. informações. mais. detalhadas. sobre. a.forma. de. <strong>el</strong>iminar. o. seu. equipamento. antigo,. contacte. as.autoridades.locais,.os.serviços.de.<strong>el</strong>iminação.de.resíduos.ou.o.estab<strong>el</strong>ecimento.comercial.onde.adquiriu.o.produtoRomână (Romanian) - Informaţii de mediu pentruclienţii din Uniunea EuropeanăDirectiva.europeană.2002/96/CE.impune.ca.echipament<strong>el</strong>e.care.prezintă.acest.simbol. .pe.produs.şi/sau.pe.ambalajul.acestuia.să.nu.fie.casate.împreună.cu.gunoiul.menajer.municipal .Simbolul.indică. faptul. că. acest. produs. trebuie. să. fie. casat. separat. de.gunoiul. menajer. obişnuit . Este. responsabilitatea. dvs . să. casaţi.acest. produs. şi. alte. echipamente. <strong>el</strong>ectrice. şi. <strong>el</strong>ectronice. prin.intermediul.unităţilor.de.colectare.special.desemnate.de.guvern.sau.de.autorităţile.locale .Casarea.şi.reciclarea.corecte.vor.ajuta.la.prevenirea.potenţial<strong>el</strong>or.consecinţe.negative.asupra.sănătăţii.mediului. şi. a. oamenilor . Pentru. mai. multe. informaţii. detaliate.cu. privire. la. casarea. acestui. echipament. vechi,. contactaţi.autorităţile. locale,. serviciul. de. salubrizare. sau. magazinul. de. la.care.aţi.achiziţionat.produsulSlovenčina (Slovak) - Informácie o ochrane životnéhoprostredia pre zákazníkov v Európskej úniiPodľa. európskej. smernice. 2002/96/ES. zariadenie. s. týmto.symbolom. . na. produkte. a/alebo. jeho. balení. nesmie. byť.likvidované. spolu. s. netriedeným. komunálnym. odpadom .Symbol. znamená,. že. produkt. by. sa. mal. likvidovať. odd<strong>el</strong>ene.od. bežného. odpadu. z. domácností . Je. vašou. povinnosťou.likvidovať. toto. i. ostatné. <strong>el</strong>ektrické. a. <strong>el</strong>ektronické. zariadenia.prostredníctvom.špecializovaných.zberných.zariadení.určených.vládou.alebo.miestnymi.orgánmi .Správna.likvidácia.a.recyklácia.pomôže.zabrániť.prípadným.negatívnym.dopadom.na.životné.prostredie. a. zdravie. ľudí . Ak. máte. záujem. o. podrobnejšie.informácie.o.likvidácii.starého.zariadenia,.obráťte.sa,.prosím,.na.miestne.orgány,.organizácie.zaoberajúce.sa.likvidáciou.odpadov.alebo.obchod,.v.ktorom.ste.si.produkt.zakúpiliSlovenčina (Slovene) - Okoljske informacije za strankev Evropski unijiEvropska.direktiva.2002/96/EC.prepoveduje.odlaganje.opreme,.označene.s.tem.simbolom. .–.na.izd<strong>el</strong>ku.in/ali.na.embalaži.–.med.običajne,.nerazvrščene.odpadke .Ta.simbol.opozarja,.da.je.treba.izd<strong>el</strong>ek. odvreči. ločeno. od. preostalih. gospodinjskih. odpadkov .Vaša.odgovornost.je,.da.to.in.preostalo.<strong>el</strong>ektrično.in.<strong>el</strong>ektronsko.opremo. odnesete. na. posebna. zbirališča,. ki. jih. določijo.državne. ustanove. ali. lokalna. uprava . S. pravilnim. odlaganjem.in. recikliranjem. boste. preprečili. morebitne. škodljive. vplive. na.okolje. in. zdravje. ljudi . Če. ž<strong>el</strong>ite. izvedeti. več. o. odlaganju. stare.opreme,.se.obrnite.na.lokalno.upravo,.odpad.ali.trgovino,.kjer.ste.izd<strong>el</strong>ek.kupiliSuomi (Finnish) - Ympäristöä koskevia tietoja EUalueenasiakkailleEU-direktiivi.2002/96/EY.ed<strong>el</strong>lyttää,.että.jos.laitteistossa.on.tämä.symboli. . itse. tuotteessa. ja/tai. sen. pakkauksessa,. laitteistoa.ei. saa. hävittää. lajitt<strong>el</strong>emattoman. yhdyskuntajätteen. mukana .Symboli.merkitsee.sitä,.että.tämä.tuote.on.hävitettävä.erillään.tavallisesta. kotitalousjätteestä . Sinun. vastuullasi. on. hävittää.tämä.<strong>el</strong>ektroniikkatuote.ja.muut.vastaavat.<strong>el</strong>ektroniikkatuotteet.viemällä. tuote. tai. tuotteet. viranomaisten. määräämään.keräyspisteeseen . Laitteiston. oikea. hävittäminen. estää.mahdolliset. ki<strong>el</strong>teiset. vaikutukset. ympäristöön. ja. ihmisten.terveyteen .Lisätietoja.vanhan.laitteiston.oikeasta.hävitystavasta.saa.paikallisilta.viranomaisilta,.jätteenhävityspalv<strong>el</strong>usta.tai.siitä.myymälästä,.josta.ostit.tuotteenSvenska (Swedish) - Miljöinformation för kunder iEuropeiska unionenDet.europeiska.direktivet.2002/96/EC.kräver.att.utrustning.med.denna.symbol. .på.produkten.och/<strong>el</strong>ler.förpackningen.inte.får.kastas.med.osorterat.kommunalt.avfall .Symbolen.visar.att.denna.produkt.bör.kastas.efter.att.den.avskiljts.från.vanligt.hushållsavfall .Det.faller.på.ditt.ansvar.att.kasta.denna.och.annan.<strong>el</strong>ektrisk.och.<strong>el</strong>ektronisk.utrustning.på.fastställda.insamlingsplatser.utsedda.av. regeringen. <strong>el</strong>ler. lokala. myndigheter . Korrekt. kassering. och.återvinning. skyddar. mot. eventu<strong>el</strong>la. negativa. konsekvenser.för.miljön.och.personhälsa .För.mer.detaljerad.information.om.kassering. av. din. gamla. utrustning. kontaktar. du. dina. lokala.myndigheter,. avfallshanteringen. <strong>el</strong>ler. butiken. där. du. köpte.produktenWEB:.aanvullende.informatie.kunt.u.vinden.op.www.linksys.com/internationalWir<strong>el</strong>ess-G breedbandrouter8013010NC-JL35
MANUAL DOUTILIZADORRouter sem fios Gde banda largaMod<strong>el</strong>o n.º: WRT54G2 (PT)
Acerca deste manualAcerca deste manualDescrições dos íconesDurante a leitura do Manual do Utilizador, poderáencontrar vários ícones que chamam a atenção para itensespecíficos. Segue-se uma descrição destes ícones:NOTA: Esta marca de verificação indica umanota de interesse sobre algo a que deverádar especial atenção durante a utilização doproduto.AVISO: Este ponto de exclamação indica umachamada de atenção ou aviso sobre algo quepoderá danificar os seus bens ou o produto.WEB: Este ícone do globo indica um endereçode correio <strong>el</strong>ectrónico ou endereço de Web sitedigno de atenção.Recursos onlineA maioria dos Web browsers permite introduzir o endereçoWeb sem adicionar http:// antes do endereço. Este Manualdo Utilizador irá fazer referência aos Web sites sem incluirhttp:// antes do endereço. Alguns Web browsers maisantigos podem requerer que seja adicionado.RecursoLinksysLinksys internacionalGlossárioSegurança de redeWeb sitewww.linksys.comwww.linksys.com/internationalwww.linksys.com/glossarywww.linksys.com/securityDireitos de autor e marcas comerciaisLinksys é uma marca registada oumarca comercial da Cisco Systems,Inc. e/ou das respectivas afiliadas nosE.U.A. e noutros países. Copyright ©2008 Cisco Systems, Inc. Todos osdireitos reservados. Outras marcase nomes de produtos são marcascomerciais ou marcas registadas dosrespectivos proprietários.Router sem fios G de banda larga
ÍndiceCapítulo 1: Descrição geral do produto 1Pain<strong>el</strong> frontal . . . . . . . . . . . . . . . . . . . . . . . . . . . . . . . . . . . . . . . . . . . . . . . . 1Pain<strong>el</strong> posterior . . . . . . . . . . . . . . . . . . . . . . . . . . . . . . . . . . . . . . . . . . . . . . . 1Posições de colocação . . . . . . . . . . . . . . . . . . . . . . . . . . . . . . . . . . . . . . . . . . 1Capítulo 2: Lista de verificação da segurança sem fios 3Directrizes gerais de segurança da rede . . . . . . . . . . . . . . . . . . . . . . . . . . . . . . . 3Sugestões adicionais de segurança . . . . . . . . . . . . . . . . . . . . . . . . . . . . . . . . . . 3Capítulo 3: Configuração avançada 4Setup (Configuração) > Basic Setup (Configuração básica) . . . . . . . . . . . . . . . . . . . 4Setup (Configuração) > DDNS . . . . . . . . . . . . . . . . . . . . . . . . . . . . . . . . . . . . . 7Setup (Configuração) > MAC Address Clone (Clonar endereço MAC) . . . . . . . . . . . . . 8Setup (Configuração) > Advanced Routing (Encaminhamento avançado). . . . . . . . . . 8Wir<strong>el</strong>ess (Sem fios) > Basic Wir<strong>el</strong>ess Settings (Definições sem fios básicas) . . . . . . . . . 9Wir<strong>el</strong>ess (Sem fios) > Wir<strong>el</strong>ess Security (Segurança sem fios) . . . . . . . . . . . . . . . . . .11Wir<strong>el</strong>ess (Sem fios) > Wir<strong>el</strong>ess MAC Filter (Filtro MAC sem fios) . . . . . . . . . . . . . . . . .13Wir<strong>el</strong>ess (Sem fios) > Advanced Wir<strong>el</strong>ess Settings (Definições sem fios avançadas) . . . .13Security (Segurança) > Firewall . . . . . . . . . . . . . . . . . . . . . . . . . . . . . . . . . . . . 15Firewall . . . . . . . . . . . . . . . . . . . . . . . . . . . . . . . . . . . . . . . . . . . . . . . . . . . .15Security (Segurança) > VPN Passthrough (Passagem VPN). . . . . . . . . . . . . . . . . . . 15Access Restrictions (Restrições de acesso) > Internet Access (Acesso à Internet) . . . . . 15Applications and Gaming (Aplicações e jogos) > Port Range Forward (Intervalo dereencaminhamento de portas) . . . . . . . . . . . . . . . . . . . . . . . . . . . . . . . . . . . . .17Applications & Gaming (Aplicações e jogos) > Port Triggering(Accionamento de portas) . . . . . . . . . . . . . . . . . . . . . . . . . . . . . . . . . . . . . . . .17Applications and Gaming (Aplicações e jogos) > DMZ . . . . . . . . . . . . . . . . . . . . . .18Applications and Gaming (Aplicações e jogos) > QoS. . . . . . . . . . . . . . . . . . . . . . 18Administration (Administração) > Management (Gestão) . . . . . . . . . . . . . . . . . . . .19Administration (Administração) > Log (Registo) . . . . . . . . . . . . . . . . . . . . . . . . . .20Administration (Administração) > Diagnostics (Diagnósticos) . . . . . . . . . . . . . . . . .20Administration (Administração) > Factory Defaults (Predefinições de fábrica) . . . . . . .20Administration (Administração) > Upgrade Firmware (Actualizar firmware). . . . . . . . 21Administration (Administração) > Config Management (Gestão de configurações). . . 21Status (Estado) > Router . . . . . . . . . . . . . . . . . . . . . . . . . . . . . . . . . . . . . . . . .21Status (Estado) > Local Network (Rede local) . . . . . . . . . . . . . . . . . . . . . . . . . . . .22Status (Estado) > Wir<strong>el</strong>ess (Sem fios) . . . . . . . . . . . . . . . . . . . . . . . . . . . . . . . . .22Apêndice A: Resolução de problemas 23Apêndice B: Especificações 24Apêndice C: Informações sobre a garantia 25GARANTIA LIMITADA . . . . . . . . . . . . . . . . . . . . . . . . . . . . . . . . . . . . . . . . . . .25EXCLUSÕES E LIMITAÇÕES . . . . . . . . . . . . . . . . . . . . . . . . . . . . . . . . . . . . . . . .25OBTER O SERVIÇO DE GARANTIA. . . . . . . . . . . . . . . . . . . . . . . . . . . . . . . . . . . 25Router sem fios G de banda largaii
ÍndiceSUPORTE TÉCNICO. . . . . . . . . . . . . . . . . . . . . . . . . . . . . . . . . . . . . . . . . . . . 26GERAL. . . . . . . . . . . . . . . . . . . . . . . . . . . . . . . . . . . . . . . . . . . . . . . . . . . . 26Apêndice D: Informações de regulamentação 27FCC Statement . . . . . . . . . . . . . . . . . . . . . . . . . . . . . . . . . . . . . . . . . . . . . . .27Safety Notices. . . . . . . . . . . . . . . . . . . . . . . . . . . . . . . . . . . . . . . . . . . . . . . 27Industry Canada Statement . . . . . . . . . . . . . . . . . . . . . . . . . . . . . . . . . . . . . . .27Avis d’Industrie Canada. . . . . . . . . . . . . . . . . . . . . . . . . . . . . . . . . . . . . . . . . 27Wir<strong>el</strong>ess Disclaimer . . . . . . . . . . . . . . . . . . . . . . . . . . . . . . . . . . . . . . . . . . . .28Avis de non-responsabilité concernant les appareils sans fil . . . . . . . . . . . . . . . . . .28Declaração de conformidade com a Directiva da UE 1999/5/CE (Directiva RTTE) . . . . .29Marca CE . . . . . . . . . . . . . . . . . . . . . . . . . . . . . . . . . . . . . . . . . . . . . . . . . . .30National Restrictions . . . . . . . . . . . . . . . . . . . . . . . . . . . . . . . . . . . . . . . . . . .30Restrições à utilização do produto . . . . . . . . . . . . . . . . . . . . . . . . . . . . . . . . . . 31Documentos técnicos em www.linksys.com/international . . . . . . . . . . . . . . . . . . .31Informações do utilizador para produtos de consumidor abrangidos p<strong>el</strong>a Directiva2002/96/CE da UE sobre Resíduos de Equipamentos Eléctricos e Electrónicos (REEE) . .32Router sem fios G de banda largaiii
Capítulo 1Descrição geral do produtoCapítulo 1:Descrição geral do produtoObrigado por escolher o Router sem fios G de banda largada Linksys. O Router permite-lhe aceder à Internet atravésde uma ligação sem fios, com uma difusão a v<strong>el</strong>ocidadesaté 54 Mbps, ou de uma das respectivas quatro portascomutadas. Também pode utilizar o Router para partilharrecursos, como, por exemplo, computadores, impressorase ficheiros. Várias funcionalidades de segurança ajudam-noa proteger os seus dados e privacidade quando seencontra online. As funcionalidades de segurança incluema segurança WPA2, uma firewall de SPI (Stateful PacketInspection) e a tecnologia NAT. É fácil configurar o Routerutilizando o utilitário baseado no browser fornecido.Pain<strong>el</strong> frontalSem fios (Verde) Este LED acende-se quandoa funcionalidade sem fios estiver activada. Se oLED estiver intermitente, o Router está a enviarou a receber activamente dados através darede.Internet (Verde) O LED Internet acende-sequando for estab<strong>el</strong>ecida uma ligação atravésda porta Internet. Um LED intermitente indicaactividade de rede através da porta Internet.Alimentação (Verde) O LED de alimentaçãoacende-se e permanecerá aceso enquanto oRouter estiver ligado. Quando o Router executao modo de diagnóstico automático durantecada arranque, este LED ficará intermitente.Quando o diagnóstico for concluído, o LEDpermanecerá aceso, sem piscar.Pain<strong>el</strong> posterior1, 2, 3, 4 (Verde) Estes LEDs numerados,correspondentes às portas numeradas no pain<strong>el</strong>posterior do Router, têm duas finalidades. Se oLED estiver permanentemente aceso, o Routerestá ligado com êxito a um dispositivo atravésdessa porta. Um LED intermitente indicaactividade de rede através dessa porta.Botão Wi-Fi Protected Setup Se tiverdispositivos clientes, como, por exemplo, placassem fios, que suportem Wi-Fi Protected Setup,pode utilizar a funcionalidade Wi-Fi ProtectedSetup para configurar automaticamente asegurança sem fios para a(s) rede(s) sem fios.Para utilizar Wi-Fi Protected Setup, execute oSetup Wizard (Assistente de configuração) ouconsulte a secção “Wir<strong>el</strong>ess (Sem fios) > BasicWir<strong>el</strong>ess Settings (Definições sem fios básicas)”do “Capítulo 3: Configuração avançada”.LED Wi-Fi Protected Setup (Verde/âmbar)Acende-se a verde quando a segurança semfios estiver activada. O LED fica intermitentee verde durante dois minutos duranteo processo de Wi-Fi Protected Setup.O LED acende-se a âmbar se ocorrer um errodurante o processo de Wi‐Fi Protected Setup.Certifique-se de que o dispositivo cliente suportaWi‐Fi Protected Setup. Aguarde até que o LEDse desligue e, em seguida, tente novamente.Internet A porta Internet é onde será ligada aligação à Internet por cabo ou DSL.1, 2, 3, 4 Estas portas Ethernet (1, 2, 3, 4) ligamo Router aos computadores da rede com fios ea outros dispositivos de rede Ethernet.Reset (Repor) Existem duas formas derepor as predefinições de fábrica do Router.Prima e mantenha premido o botão Reset(Repor) durante aproximadamente cincosegundos ou restaure as predefinições apartir de Administration > Factory Defaults(Administração > Predefinições de fábrica) noutilitário baseado na Web do Router.Power (Alimentação) O transformador seráligado à porta Power (Alimentação).Posições de colocaçãoExistem duas formas de instalar fisicamente o Router. Aprimeira consiste em colocar o Router horizontalmentenuma superfície. A segunda consiste em montar o Routernuma parede.O LED fica intermitente e âmbar quando existeuma sessão de Wi‐Fi Protected Setup activae é iniciada uma segunda sessão. O Router sósuporta uma sessão de cada vez. Aguarde atéque o LED se desligue antes de iniciar a sessãode Wi-Fi Protected Setup seguinte.Router sem fios G de banda larga
Capítulo 1Descrição geral do produtoColocação na horizontalO Router tem quatro pés de borracha no pain<strong>el</strong> inferior.Coloque o Router numa superfície plana junto a umatomada <strong>el</strong>éctrica.Colocação na paredeO Router tem duas ranhuras para montagem em paredeno pain<strong>el</strong> inferior. A distância entre as ranhuras é152 mm.São necessários dois parafusos para montar o Router.Material de montagem sugeridoNOTA: A Linksys não é responsáv<strong>el</strong> por danosresultantes de material de montagem emparede inseguro.Siga estas instruções:1. Determine onde pretende montar o Router. Certifique-sede que a parede utilizada é lisa, robusta e não temhumidade. Certifique-se também de que a localizaçãofica perto de uma tomada <strong>el</strong>éctrica.2. Faça dois furos na parede. Certifique-se de que os furosestão a 152 mm de distância.3. Insira um parafuso em cada furo deixando de fora 3 mmda respectiva cabeça.4. Manobre o Router de modo a alinhar as ranhuras paramontagem em parede com os dois parafusos.5. Coloque as ranhuras para montagem em paredesobre os parafusos e faça deslizar o Router nosentido descendente até os parafusos encaixaremcorrectamente nas ranhuras para montagem emparede.4-5 mm 1-1,5 mm2,5-3,0 mm† Nota: As ilustrações do material de montagemnão estão à escala real.152 mmImprima esta página com o tamanho 100%.Recorte p<strong>el</strong>a linha tracejada e coloque na parede para fazer os furos com a distância correcta.Mod<strong>el</strong>o para montagem em paredeRouter sem fios G de banda larga
Capítulo 2Lista de verificação da segurança sem fiosCapítulo 2:Lista de verificação dasegurança sem fiosAs redes sem fios são práticas e de fácil instalação e, porisso, estão a ser adoptadas a um ritmo ac<strong>el</strong>erado p<strong>el</strong>osutilizadores que dispõem de Internet de alta v<strong>el</strong>ocidadeem casa. Como a rede sem fios funciona através doenvio de informações por ondas de rádio, poderá sermais vulneráv<strong>el</strong> a intrusões do que uma rede com fiostradicional. À sem<strong>el</strong>hança dos sinais emitidos p<strong>el</strong>ost<strong>el</strong>emóveis ou t<strong>el</strong>efones sem fios, os sinais emitidos p<strong>el</strong>arede sem fios também podem ser interceptados. Uma vezque não é possív<strong>el</strong> impedir fisicamente alguém de ligarà sua rede sem fios, é necessário efectuar alguns passosadicionais para manter a rede segura.1. Alterar o nome ou SSIDpredefinido da rede sem fiosOs dispositivos sem fios têm um nome ou Identificador doconjunto de serviços (SSID) da rede sem fios predefinidode fábrica. Trata-se do nome da rede sem fios e pode teraté 32 caracteres. Os produtos sem fios da Linksys utilizamlinksys como nome predefinido da rede sem fios. Deveráalterar o nome da rede sem fios para algo exclusivo, paradistinguir a sua rede sem fios de outras redes sem fios quepossam existir em seu redor, mas não utilize informaçõespessoais (como, por exemplo, o número da segurançasocial) porque estas informações poderão ser vistas porqualquer pessoa que esteja à procura de redes sem fios.2. Alterar a palavra-passepredefinidaPara produtos sem fios, como, por exemplo, pontosde acesso e routers, será solicitada uma palavra-passequando pretender alterar as respectivas definições. Estesdispositivos têm uma palavra-passe predefinida de fábrica.A palavra-passe predefinida da Linksys é admin. Os piratasinformáticos conhecem estas predefinições e poderãotentar utilizá-las para aceder ao seu dispositivo sem fiose alterar as definições da rede. Para impedir qualqueralteração não autorizada, personalize a palavra-passe dodispositivo de modo a que seja difícil de adivinhar.3. Activar o filtro de endereçosMACOs routers da Linksys permitem activar o filtro de endereçosMAC (Controlo de acesso a suportes de dados). O endereçoMAC é uma série única de números e letras atribuída acada dispositivo da rede. Com o filtro de endereços MACactivado, o acesso à rede sem fios é fornecido apenas paraRouter sem fios G de banda largadispositivos sem fios com endereços MAC específicos.Por exemplo, pode especificar o endereço MAC de cadacomputador existente na sua casa para que apenas essescomputadores possam aceder à rede sem fios.4. Activar a encriptaçãoA encriptação protege os dados transmitidos numa redesem fios. Wi-Fi Protected Access (WPA/WPA2) e WiredEquivalency Privacy (WEP) oferecem diferentes níveis desegurança para a comunicação sem fios. Actualmente, osdispositivos com certificação Wi-Fi têm de suportar WPA2,mas não são obrigados a suportar WEP.Uma rede com encriptação WPA/WPA2 é mais segura queuma rede com encriptação WEP, porque a WPA/WPA2utiliza a encriptação de chaves dinâmicas. Para protegeras informações durante a transmissão através das ondasde rádio, deverá activar o nív<strong>el</strong> mais alto de encriptaçãosuportado p<strong>el</strong>o equipamento de rede.WEP é uma norma de encriptação mais antiga e poderáser a única opção disponív<strong>el</strong> em alguns dispositivos maisantigos que não suportam WPA.Directrizes gerais de segurança da redeA segurança da rede sem fios é inútil se a rede subjacentenão for segura.• Proteja todos os computadores na rede com umapalavra-passe e proteja individualmente os ficheirosimportantes com uma palavra-passe.• Altere regularmente as palavras-passe.• Instale software antivírus e software de firewallpessoal.• Desactive a partilha de ficheiros (unidade a unidade).Algumas aplicações podem abrir a partilha de ficheirossem o seu consentimento e/ou conhecimento.Sugestões adicionais de segurança• Mantenha os routers, pontos de acesso ou gatewayssem fios afastados das paredes exteriores e dasjan<strong>el</strong>as.• Desligue os routers, pontos de acesso ou gatewayssem fios quando não estiverem a ser utilizados (à noiteou durante as férias).• Utilize frases-passe seguras com, p<strong>el</strong>o menos, oitocaracteres. Combine letras e números para evitarutilizar palavras normais existentes no dicionário.WEB: Para obter mais informaçõessobre a segurança sem fios, visitewww.linksys.com/security
Capítulo 3Configuração avançadaCapítulo 3:Configuração avançadaApós configurar o Router com o Setup Wizard (Assistentede configuração), localizado no CD-ROM, o router estarápronto para ser utilizado. No entanto, se pretender alteraras respectivas definições avançadas, utilize o utilitáriobaseado na Web do Router. Este capítulo descreve cadauma das páginas Web do utilitário, bem como as funçõeschave de cada página. O utilitário pode ser acedido atravésdo Web browser de um computador ligado ao Router.O utilitário baseado na Web tem os seguintes separadoresprincipais: Setup (Configuração), Wir<strong>el</strong>ess (Sem fios),Security (Segurança), Access Restrictions (Restriçõesde acesso), Applications & Gaming (Aplicações e jogos),Administration (Administração) e Status (Estado). Estarãodisponíveis separadores adicionais depois de clicar numdos separadores principais.Setup (Configuração) > Basic Setup(Configuração básica)O primeiro ecrã apresentado é o ecrã Basic Setup(Configuração básica). Este ecrã permite alterar asdefinições gerais do Router.NOTA: Na primeira instalação do Router,deverá utilizar o Setup Wizard (Assistente deconfiguração) no CD-ROM de configuração.Se pretender configurar definições avançadas,utilize este capítulo para obter informaçõessobre o utilitário baseado na Web.Como aceder ao utilitário baseado na WebPara aceder ao utilitário baseado na Web, inicie o Webbrowser no computador e introduza o endereço IPpredefinido do Router, 192.168.15.1, no campo Endereço.Em seguida, prima Enter.Será apresentado um ecrã a solicitar a palavra-passe.(Será apresentado um ecrã sem<strong>el</strong>hante aos utilizadoressem ser do sistema operativo Windows XP.) Deixe ocampo Nome de utilizador em branco. Quando abrir p<strong>el</strong>aprimeira vez o utilitário baseado na Web, utilize a palavrapassepredefinida admin. (Poderá definir uma novapalavra-passe a partir do ecrã Management (Gestão) doseparador Administration (Administração).) Clique em OKpara continuar.Ecrã da palavra-passeSetup (Configuração) > Basic Setup (Configuração básica)Internet Setup (Configuração da Internet)A secção Internet Setup (Configuração da Internet)configura o Router para a ligação à Internet. A maioriadestas informações pode ser obtida através do ISP.Internet Connection Type (Tipo de ligação à Internet)S<strong>el</strong>eccione o tipo de ligação à Internet fornecida p<strong>el</strong>o ISP apartir do menu pendente. Os tipos disponíveis são:• Automatic Configuration - DHCP (Configuraçãoautomática - DHCP)• Static IP (IP estático)• PPPoE• PPTP• L2TP• T<strong>el</strong>stra CableAutomatic Configuration - DHCP (Configuração automática - DHCP)Por predefinição, a opção Internet Connection Type(Tipo de ligação à Internet) do Router está definidacomo Automatic Configuration - DHCP (Configuraçãoautomática - DHCP), que só deve ser mantida se oISP suportar DHCP ou se estiver a ligar através de umendereço IP dinâmico. (Normalmente, esta opçãoaplica-se a ligações por cabo.)Router sem fios G de banda largaInternet Connection Type (Tipo de ligação à Internet) > AutomaticConfiguration - DHCP (Configuração automática - DHCP)
Capítulo 3Configuração avançadaStatic IP (IP estático)Se for necessário utilizar um endereço IP permanente paraligar à Internet, s<strong>el</strong>eccione Static IP (IP estático).Para utilizar esta opção, s<strong>el</strong>eccione Keep Alive (Manterligado). No campo Redial Period (Período de remarcação),especifique a frequência com que pretende que o Routerverifique a ligação à Internet. O período de remarcaçãopredefinido é 30 segundos.PPTPO Protocolo de tún<strong>el</strong> ponto a ponto (PPTP) é um serviçoaplicáv<strong>el</strong> apenas a ligações na Europa.Internet Connection Type (Tipo de ligação à Internet) > Static IP (IP estático)Internet IP Address (Endereço IP de Internet) Trata-sedo endereço IP do Router, visto a partir da Internet. O ISPfornecerá o endereço IP que é necessário especificar aqui.Subnet Mask (Máscara de sub-rede) Trata-se da máscarade sub-rede do Router apresentada aos utilizadores naInternet (incluindo o ISP). O ISP fornecerá a máscara desub-rede.Gateway O ISP fornecerá o endereço do gateway, que é oendereço IP do servidor do ISP.DNS O ISP fornecerá, p<strong>el</strong>o menos, um endereço IP doservidor de DNS (Sistema de nomes de domínio).PPPoEAlguns ISPs baseados em DSL utilizam PPPoE (Protocoloponto a ponto sobre Ethernet) para estab<strong>el</strong>ecer ligações àInternet. Se estiver ligado à Internet através de uma linhaDSL, consulte o ISP para averiguar se é utilizado o PPPoE.Em caso afirmativo, terá de activar o PPPoE.Internet Connection Type (Tipo de ligação à Internet) > PPPoEUser Name e Password (Nome de utilizador ePalavra-passe) Introduza o nome de utilizador e a palavrapassefornecidos p<strong>el</strong>o ISP.Connect on Demand: Max Idle Time (Ligar mediantepedido: Tempo máximo de inactividade) Poderá configuraro Router para terminar a ligação à Internet quando estafica inactiva por um período de tempo especificado (MaxIdle Time (Tempo máximo de inactividade)). Se a ligaçãoà Internet tiver sido terminada devido a inactividade,a opção Connect on Demand (Ligar mediante pedido)permite ao Router restab<strong>el</strong>ecer automaticamente aligação quando tentar novamente aceder à Internet.Para utilizar esta opção, s<strong>el</strong>eccione Connect on Demand(Ligar mediante pedido). No campo Max Idle Time (Tempomáximo de inactividade), introduza o número de minutosque pretende que decorra antes de terminar a ligação àInternet. O tempo máximo de inactividade predefinido é5 minutos.Keep Alive: Redial Period (Manter ligado: Período deremarcação) Se s<strong>el</strong>eccionar esta opção, o Router verificaráperiodicamente a ligação à Internet. Se estiver desligada,o Router restab<strong>el</strong>ecerá automaticamente a ligação.Router sem fios G de banda largaInternet Connection Type (Tipo de ligação à Internet) > PPTPInternet IP Address (Endereço IP de Internet) Trata-sedo endereço IP do Router, visto a partir da Internet. O ISPfornecerá o endereço IP que é necessário especificar aqui.Subnet Mask (Máscara de sub-rede) Trata-se da máscarade sub-rede do Router apresentada aos utilizadores naInternet (incluindo o ISP). O ISP fornecerá a máscara desub-rede.Gateway O ISP fornecerá o endereço do gateway.User Name e Password (Nome de utilizador ePalavra-passe) Introduza o nome de utilizador e a palavrapassefornecidos p<strong>el</strong>o ISP.Connect on Demand: Max Idle Time (Ligar mediantepedido: Tempo máximo de inactividade) Poderá configuraro Router para terminar a ligação à Internet quando estafica inactiva por um período de tempo especificado (MaxIdle Time (Tempo máximo de inactividade)). Se a ligaçãoà Internet tiver sido terminada devido a inactividade,a opção Connect on Demand (Ligar mediante pedido)permite ao Router restab<strong>el</strong>ecer automaticamente aligação quando tentar novamente aceder à Internet.Para utilizar esta opção, s<strong>el</strong>eccione Connect on Demand(Ligar mediante pedido). No campo Max Idle Time (Tempomáximo de inactividade), introduza o número de minutosque pretende que decorra antes de terminar a ligação àInternet. O tempo máximo de inactividade predefinido é5 minutos.Keep Alive: Redial Period (Manter ligado: Período deremarcação) Se s<strong>el</strong>eccionar esta opção, o Router verificaráperiodicamente a ligação à Internet. Se estiver desligada,o Router restab<strong>el</strong>ecerá automaticamente a ligação. Parautilizar esta opção, s<strong>el</strong>eccione Keep Alive (Manter ligado).No campo Redial Period (Período de remarcação), especifiquea frequência com que pretende que o Router verifique aligação à Internet. O valor predefinido é 30 segundos.
Capítulo 3Configuração avançadaL2TPL2TP é um serviço aplicáv<strong>el</strong> apenas a ligações em Isra<strong>el</strong>.Internet Connection Type (Tipo de ligação à Internet) > L2TPUser Name e Password (Nome de utilizador ePalavra-passe) Introduza o nome de utilizador e a palavrapassefornecidos p<strong>el</strong>o ISP.L2TP Server (Servidor de L2TP) Trata-se do endereço IPdo Servidor de L2TP. O ISP fornecerá o endereço IP que énecessário especificar aqui.Connect on Demand: Max Idle Time (Ligar mediantepedido: Tempo máximo de inactividade) Poderá configuraro Router para terminar a ligação à Internet quando estafica inactiva por um período de tempo especificado (MaxIdle Time (Tempo máximo de inactividade)). Se a ligaçãoà Internet tiver sido terminada devido a inactividade,a opção Connect on Demand (Ligar mediante pedido)permite ao Router restab<strong>el</strong>ecer automaticamente aligação quando tentar novamente aceder à Internet.Para utilizar esta opção, s<strong>el</strong>eccione Connect on Demand(Ligar mediante pedido). No campo Max Idle Time (Tempomáximo de inactividade), introduza o número de minutosque pretende que decorra antes de terminar a ligação àInternet. O tempo máximo de inactividade predefinido é5 minutos.Keep Alive: Redial Period (Manter ligado: Período deremarcação) Se s<strong>el</strong>eccionar esta opção, o Router verificaráperiodicamente a ligação à Internet. Se estiver desligada,o Router restab<strong>el</strong>ecerá automaticamente a ligação.Para utilizar esta opção, s<strong>el</strong>eccione Keep Alive (Manterligado). No campo Redial Period (Período de remarcação),especifique a frequência com que pretende que o Routerverifique a ligação à Internet. O período de remarcaçãopredefinido é 30 segundos.T<strong>el</strong>stra CableT<strong>el</strong>stra Cable é um serviço aplicáv<strong>el</strong> apenas a ligações naAustrália. Se o ISP utiliza HeartBeat Signal (HBS), s<strong>el</strong>eccioneT<strong>el</strong>stra.Internet Connection Type (Tipo de ligação à Internet) > T<strong>el</strong>stra CableUser Name e Password (Nome de utilizador ePalavra-passe) Introduza o nome de utilizador e a palavrapassefornecidos p<strong>el</strong>o ISP.Heart Beat Server (Servidor heart beat) Trata-se doendereço IP do Servidor Heartbeat. O ISP fornecerá oendereço IP que é necessário especificar aqui.Router sem fios G de banda largaConnect on Demand: Max Idle Time (Ligar mediantepedido: Tempo máximo de inactividade) Poderá configuraro Router para terminar a ligação à Internet quando estafica inactiva por um período de tempo especificado (MaxIdle Time (Tempo máximo de inactividade)). Se a ligaçãoà Internet tiver sido terminada devido a inactividade,a opção Connect on Demand (Ligar mediante pedido)permite ao Router restab<strong>el</strong>ecer automaticamente aligação quando tentar novamente aceder à Internet.Para utilizar esta opção, s<strong>el</strong>eccione Connect on Demand(Ligar mediante pedido). No campo Max Idle Time (Tempomáximo de inactividade), introduza o número de minutosque pretende que decorra antes de terminar a ligação àInternet. O tempo máximo de inactividade predefinido é5 minutos.Keep Alive: Redial Period (Manter ligado: Período deremarcação) Se s<strong>el</strong>eccionar esta opção, o Router verificaráperiodicamente a ligação à Internet. Se estiver desligada,o Router restab<strong>el</strong>ecerá automaticamente a ligação.Para utilizar esta opção, s<strong>el</strong>eccione Keep Alive (Manterligado). No campo Redial Period (Período de remarcação),especifique a frequência com que pretende que o Routerverifique a ligação à Internet. O período de remarcaçãopredefinido é 30 segundos.Optional Settings (Definições opcionais)Algumas destas definições poderão ser requeridas p<strong>el</strong>oISP. Consulte o ISP antes de efectuar quaisquer alterações.Optional Settings (Definições opcionais)Router Name (Nome do router) Neste campo, poderáintroduzir um nome com um máximo de 39 caracterespara representar o Router.Host Name/Domain Name (Nome do sistema anfitrião/Nome do domínio) Estes campos permitem fornecer onome de um sistema anfitrião e de um domínio para oRouter. Alguns ISPs, normalmente ISPs do serviço de cabo,requerem estes nomes como identificação. Poderá ter deconsultar o ISP para averiguar se o serviço de Internet debanda larga foi configurado com um nome de sistemaanfitrião e de domínio. Na maioria dos casos, poderádeixar estes campos em branco.MTU MTU significa Unidade máxima de transmissão.Especifica o tamanho máximo de pacote permitido para atransmissão na Internet. S<strong>el</strong>eccione Manual se pretenderintroduzir manualmente o tamanho máximo de pacotepara transmissão. Para que o Router s<strong>el</strong>eccione a m<strong>el</strong>horMTU para a ligação à Internet, mantenha a predefinição,Auto (Automático).Size (Tamanho) Quando for s<strong>el</strong>eccionado Manual nocampo MTU, esta opção é activada. Introduza um valorentre 1200 e 1500. O tamanho predefinido depende dotipo de ligação à Internet:• DHCP, Static IP (IP estático) ou T<strong>el</strong>stra: 1500
Capítulo 3Configuração avançada• PPPoE: 1492• PPTP ou L2TP: 1460Network Setup (Configuração da rede)A secção Network Setup (Configuração da rede) altera asdefinições na rede ligada às portas Ethernet do Router.A configuração da rede sem fios é efectuada através doseparador Wir<strong>el</strong>ess (Sem fios).Router IP (IP do router)Mostra o endereço IP e a máscara de sub-rede do Routerapresentados à rede.Router IP Address (Endereço IP do router)Network Address Server Settings (DHCP) (Definições doservidor de endereços de rede (DHCP))As definições permitem configurar a função do servidor deDHCP (Protocolo de configuração dinâmica de anfitrião)do Router. O Router pode ser utilizado como servidorde DHCP para a rede. Um servidor de DHCP atribuiautomaticamente um endereço IP a cada computador narede. Se optar por activar a opção de servidor de DHCP doRouter, certifique-se de que não existe outro servidor deDHCP na rede.Network Address Server Settings (DHCP) (Definições do servidor deendereços de rede (DHCP))DHCP Server (Servidor de DHCP) O DHCP está activadopor predefinição de fábrica. Se já existir um servidor deDHCP na rede ou não pretender utilizar um servidorde DHCP, s<strong>el</strong>eccione Disable (Desactivar) (não estarãodisponíveis outras funcionalidades de DHCP).Starting IP Address (Endereço IP inicial) Introduza umvalor inicial para o servidor de DHCP começar a emitirendereços IP. Uma vez que o endereço IP predefinidodo Router é 192.168.1.1, o endereço IP inicial tem de ser192.168.1.2 ou superior, mas inferior a 192.168.1.253. Oendereço IP inicial predefinido é 192.168.1.100.Maximum Number of DHCP Users (Número máximode utilizadores de DHCP) Introduza o número máximo decomputadores aos quais pretende que o servidor de DHCPatribua endereços IP. Este número não pode ser superior a253. A predefinição é 50.Client Lease Time (Tempo de concessão do cliente) Otempo de concessão do cliente é o período de tempo queum utilizador de rede pode permanecer ligado ao Routercom o endereço IP dinâmico actual. Introduza o períodoRouter sem fios G de banda largade tempo, em minutos, durante o qual o utilizador teráa “concessão” deste endereço IP dinâmico. Quando esseperíodo de tempo terminar, será automaticamenteatribuído ao utilizador um novo endereço IP dinâmico. Apredefinição é 0 minutos, o que significa um dia.Static DNS (1-3) (DNS estático (1-3)) O Sistema de nomesde domínio (DNS) é a forma como a Internet convertenomes de domínios ou Web sites em endereços ou URLsda Internet. O ISP fornece, p<strong>el</strong>o menos, um endereço IPde servidor de DNS. Se pretender utilizar outro, introduzao endereço IP num destes campos. Pode introduzir ummáximo de três endereços IP de servidor de DNS. O Routerutiliza estes endereços para proporcionar um acesso maisrápido aos servidores de DNS disponíveis.WINS O Windows Internet Naming Service (WINS) gere ainteracção de cada computador com a Internet. Se utilizarum servidor de WINS, introduza aqui o endereço IP desseservidor. Caso contrário, deixe o campo em branco.Time Setting (Definição da hora)S<strong>el</strong>eccione o fuso horário em que funciona a rede a partirdeste menu pendente. (Poderá inclusivamente efectuarautomaticamente a transição para a hora de Verão.)Time Setting (Definição da hora)Clique em Save Settings (Guardar definições) para aplicaras alterações ou em Canc<strong>el</strong> Changes (Canc<strong>el</strong>ar alterações)para canc<strong>el</strong>ar as alterações.Setup (Configuração) > DDNSO Router oferece uma funcionalidade de Sistema denomes de domínio dinâmicos (DDNS). O DDNS permiteatribuir um nome de domínio e sistema anfitrião fixo a umendereço IP de Internet dinâmico. É útil se estiver a alojaro seu próprio Web site, servidor de FTP ou outro servidoratrás do Router.Antes de poder utilizar esta funcionalidade, tem deinscrever-se no serviço DDNS junto de um fornecedor deserviços DDNS, www.dyndns.org ou www.TZO.com. Senão pretender utilizar esta funcionalidade, mantenha apredefinição, Disable (Desactivar).DDNSO Router oferece uma funcionalidade de Sistema denomes de domínio dinâmicos (DDNS). O DDNS permiteatribuir um nome de domínio e sistema anfitrião fixo a umendereço IP de Internet dinâmico. É útil se estiver a alojaro seu próprio Web site, servidor de FTP ou outro servidoratrás do Router.Antes de poder utilizar esta funcionalidade, tem deinscrever-se no serviço DDNS junto de um dos doisfornecedores de serviços DDNS, DynDNS.org ou TZO.com.Se não pretender utilizar esta funcionalidade, mantenha apredefinição, Disable (Desactivar).
Capítulo 3Configuração avançadaDDNS Service (Serviço DDNS)Se o serviço DDNS for fornecido p<strong>el</strong>a DynDNS.org,s<strong>el</strong>eccione DynDNS.org no menu pendente. Se o serviçoDDNS for fornecido p<strong>el</strong>a TZO, s<strong>el</strong>eccione TZO.com.As funcionalidades disponíveis no ecrã DDNS variarãoconsoante o fornecedor de serviços DDNS utilizado.DynDNS.orgSetup (Configuração) > DDNS > DynDNSUser Name (Nome de utilizador) Introduza o nome deutilizador da conta de DDNS.Password (Palavra-passe) Introduza a palavra-passe daconta de DDNS.Host Name (Nome do sistema anfitrião) Este é o URL doDDNS atribuído p<strong>el</strong>o serviço DDNS.Internet IP Address (Endereço IP de Internet) O endereçoIP de Internet do Router é apresentado aqui. Uma vez queé dinâmico, será alterado.Status (Estado) O estado da ligação ao serviço DDNS éapresentado aqui.Clique em Save Settings (Guardar definições) para aplicaras alterações ou em Canc<strong>el</strong> Changes (Canc<strong>el</strong>ar alterações)para canc<strong>el</strong>ar as alterações.TZO.comSetup (Configuração) > DDNS > TZOInternet IP Address (Endereço IP de Internet) O endereçoIP de Internet do Router é apresentado aqui. Uma vez queé dinâmico, será alterado.Status (Estado) O estado da ligação ao serviço DDNS éapresentado aqui.Clique em Save Settings (Guardar definições) para aplicaras alterações ou em Canc<strong>el</strong> Changes (Canc<strong>el</strong>ar alterações)para canc<strong>el</strong>ar as alterações.Setup (Configuração) > MAC Address Clone(Clonar endereço MAC)Um endereço MAC é um código de 12 dígitos atribuído aum componente de hardware exclusivo para identificação.Alguns ISPs requerem o registo do endereço MAC paraaceder à Internet. Se não pretender registar novamenteo endereço MAC no ISP, pode atribuir o endereço MACactualmente registado no ISP ao Router através dafuncionalidade MAC Address Clone (Clonar endereçoMAC).Setup (Configuração) > MAC Address Clone (Clonar endereço MAC)MAC Address Clone (Clonar endereço MAC)Enable/Disable (Activar/Desactivar) Para clonar oendereço MAC, s<strong>el</strong>eccione Enable (Activar).User Defined Entry (Entrada definida p<strong>el</strong>o utilizador)Introduza aqui o endereço MAC registado no ISP.Clone Your PC’s MAC (Clonar o MAC do computador)Se clicar neste botão, será clonado o endereço MAC docomputador que está a utilizar.Clique em Save Settings (Guardar definições) para aplicaras alterações ou em Canc<strong>el</strong> Changes (Canc<strong>el</strong>ar alterações)para canc<strong>el</strong>ar as alterações.Setup (Configuração) > Advanced Routing(Encaminhamento avançado)Este ecrã é utilizado para configurar as funções deencaminhamento avançado do Router. O NAT encaminhaa ligação da rede alojada p<strong>el</strong>o Router para a Internet. ODynamic Routing (Encaminhamento dinâmico) ajustaautomaticamente o percurso dos pacotes na rede. OStatic Routing (Encaminhamento estático) configura umarota fixa para outro destino na rede.E-mail Address, TZO Key e Domain Name (Endereço decorreio <strong>el</strong>ectrónico, Chave da TZO e Nome do domínio)Introduza as definições da conta configurada com a TZO.Router sem fios G de banda larga
Capítulo 3Configuração avançadaSetup (Configuração) > Advanced Routing (Encaminhamentoavançado) (Gateway)Setup (Configuração) > Advanced Routing (Encaminhamentoavançado) (Router)Advanced Routing (Encaminhamento avançado)Operating Mode (Modo de funcionamento) S<strong>el</strong>eccioneo modo em que este Router irá funcionar. Se este Routeralojar a ligação da rede à Internet, s<strong>el</strong>eccione Gateway. Seexistir outro Router na rede, s<strong>el</strong>eccione Router. Quandofor s<strong>el</strong>eccionado Router, a opção Dynamic Routing(Encaminhamento dinâmico) ficará disponív<strong>el</strong>.Dynamic Routing (Encaminhamento dinâmico)RIP Esta funcionalidade permite que o Router se adapteautomaticamente às alterações físicas na disposição darede e troque tab<strong>el</strong>as de encaminhamento com os outrosrouters. O Router determina a rota dos pacotes de redecom base no menor número de saltos entre a origem e odestino. Esta funcionalidade está Disabled (Desactivada)por predefinição. A partir do menu pendente, poderás<strong>el</strong>eccionar LAN & Wir<strong>el</strong>ess (LAN & sem fios), para efectuaro encaminhamento dinâmico através das redes Ethernete sem fios. Também poderá s<strong>el</strong>eccionar WAN (Internet),para efectuar o encaminhamento dinâmico com dadosprovenientes da Internet. Finalmente, a s<strong>el</strong>ecção de Both(Ambas) permite o encaminhamento dinâmico para ambasas redes, bem como de dados provenientes da Internet.Router sem fios G de banda largaS<strong>el</strong>ect set number (S<strong>el</strong>eccione o número do conjunto)Para configurar uma rota estática entre o Router e outrarede, s<strong>el</strong>eccione um número na lista pendente StaticRouting (Encaminhamento estático). (Uma rota estática éum caminho predeterminado que as informações têm depercorrer na rede para alcançarem um sistema anfitriãoou uma rede específica.) Introduza as informações abaixodescritas para configurar uma nova rota estática. (Cliqueno botão D<strong>el</strong>ete This Entry (Eliminar esta entrada) para<strong>el</strong>iminar uma rota estática.)Enter Route Name (Introduza o nome da rota) Introduzaaqui o nome da Rota, com um máximo de 25 caracteresalfanuméricos.Destination LAN IP (IP da LAN de destino) O IP da LAN dedestino é o endereço da rede ou sistema anfitrião remotoao qual pretende atribuir uma rota estática.Subnet Mask (Máscara de sub-rede) A máscara desub-rede determina que parte de um endereço IP da LANde destino corresponde à rede e que parte correspondeao sistema anfitrião.Default Gateway (Gateway predefinido) Trata-se doendereço IP do dispositivo de gateway que permite ocontacto entre o Router e a rede ou sistema anfitriãoremoto.Interface Esta interface indica se o endereço IP dedestino se encontra em LAN & Wir<strong>el</strong>ess (LAN & sem fios)(Ethernet e redes sem fios) ou WAN (Internet).D<strong>el</strong>ete This Entry (Eliminar esta entrada) Para <strong>el</strong>iminaruma rota, s<strong>el</strong>eccione o respectivo número no menupendente e clique neste botão.Show Routing Table (Mostrar tab<strong>el</strong>a de encaminhamento)Clique em Show Routing Table (Mostrar tab<strong>el</strong>a deencaminhamento) para abrir um ecrã que mostra como osdados são encaminhados através da rede local. Para cadarota, são apresentados os seguintes campos: DestinationLAN IP (IP da LAN de destino), Subnet Mask (Máscarade sub-rede), Gateway e Interface. Clique em Refresh(Actualizar) para actualizar as informações. Clique emClose (Fechar) para sair deste ecrã.Routing Table (Tab<strong>el</strong>a de encaminhamento)Clique em Save Settings (Guardar definições) para aplicaras alterações ou em Canc<strong>el</strong> Changes (Canc<strong>el</strong>ar alterações)para canc<strong>el</strong>ar as alterações.Wir<strong>el</strong>ess (Sem fios) > Basic Wir<strong>el</strong>essSettings (Definições sem fios básicas)As definições básicas para as redes sem fios são definidasneste ecrã.Existem duas formas de configurar as redes sem fios doRouter: manual e Wi-Fi Protected Setup.
Capítulo 3Configuração avançadaWi-Fi Protected Setup é uma funcionalidade que facilita aconfiguração da rede sem fios. Se tiver dispositivos clientes,como, por exemplo, placas sem fios, que suportem Wi-FiProtected Setup, pode utilizar Wi-Fi Protected Setup.Wir<strong>el</strong>ess Configuration (Configuração sem fios) Paraconfigurar manualmente a rede sem fios, s<strong>el</strong>eccioneManual. Avance para a secção “Basic Wir<strong>el</strong>ess Settings(Definições sem fios básicas)”. Para utilizar Wi-Fi ProtectedSetup, s<strong>el</strong>eccione Wi-Fi Protected Setup. Avance para asecção “Wi-Fi Protected Setup”.Basic Wir<strong>el</strong>ess Settings (Definições sem fios básicas)Clique em Save Settings (Guardar definições) para aplicaras alterações ou em Canc<strong>el</strong> Changes (Canc<strong>el</strong>ar alterações)para canc<strong>el</strong>ar as alterações.Wi-Fi Protected SetupEstão disponíveis três métodos. Utilize o método que seaplica ao dispositivo cliente que está a configurar.Wir<strong>el</strong>ess (Sem fios) > Basic Wir<strong>el</strong>ess Settings (Definições sem fiosbásicas) (Configuração manual)Wir<strong>el</strong>ess Network Mode (Modo de rede sem fios) A partirdeste menu pendente, pode s<strong>el</strong>eccionar as normas derede sem fios em utilização na rede. Se tiver dispositivosSem fios N, Sem fios G e Sem fios B na rede, mantenhaa predefinição, Mixed (Misto). Se existirem apenasdispositivos Sem fios G e Sem fios B na rede, s<strong>el</strong>eccioneBG-Mixed (BG misto). Se existirem apenas dispositivosSem fios N, s<strong>el</strong>eccione Wir<strong>el</strong>ess-N Only (Só sem fios N).Se existirem apenas dispositivos Sem fios G, s<strong>el</strong>eccioneWir<strong>el</strong>ess-G Only (Só sem fios G). Se existirem apenasdispositivos Sem fios B, s<strong>el</strong>eccione Wir<strong>el</strong>ess-B Only (Sósem fios B). Se não existirem dispositivos sem fios na rede,s<strong>el</strong>eccione Disabled (Desactivado).Wir<strong>el</strong>ess Network Name (SSID) (Nome da rede semfios (SSID)) O SSID é o nome da rede partilhado entretodos os pontos de uma rede sem fios. O SSID tem deser idêntico para todos os dispositivos na rede sem fios.É sensív<strong>el</strong> a maiúsculas e minúsculas e não pode exceder32 caracteres (utilize qualquer carácter do teclado).Certifique-se de que esta definição é idêntica para todosos pontos da rede sem fios. Para obter segurança adicional,deverá alterar o SSID predefinido (linksys) para um nomeexclusivo.Wir<strong>el</strong>ess Chann<strong>el</strong> (Canal sem fios) S<strong>el</strong>eccione o canal apartir da lista fornecida, para corresponder às definições darede. Todos os dispositivos da rede sem fios têm de difundirno mesmo canal para funcionarem correctamente.Wir<strong>el</strong>ess SSID Broadcast (Difusão de SSID sem fios)Quando os clientes sem fios pesquisarem a área localpara se associarem a redes sem fios, detectarão a difusãodo SSID efectuada p<strong>el</strong>o Router. Para difundir o SSID doRouter, mantenha a predefinição, Enabled (Activada).Se não pretender difundir o SSID do Router, s<strong>el</strong>eccioneDisabled (Desactivada).Router sem fios G de banda largaWir<strong>el</strong>ess (Sem fios) > Basic Wir<strong>el</strong>ess Settings (Definições sem fiosbásicas) (Wi-Fi Protected Setup)Wi-Fi Protected Setup > Congratulations (Parabéns)NOTA: A funcionalidade Wi-Fi Protected Setupconfigura um dispositivo cliente de cada vez.Repita as instruções para cada dispositivocliente que suporte Wi-Fi Protected Setup.Método n.º 1Utilize este método se o dispositivo cliente tiver um botãoWi-Fi Protected Setup.1.2.3.Clique em ou prima o botão Wi-Fi Protected Setupno dispositivo cliente.Clique no botão Wi‐Fi Protected Setup neste ecrã.Depois de o dispositivo cliente ter sido configurado,clique em OK. Em seguida, consulte o dispositivocliente ou a respectiva documentação para obter maisinstruções.10
Capítulo 3Configuração avançadaMétodo n.º 2Utilize este método se o dispositivo cliente tiver umnúmero PIN de Wi-Fi Protected Setup.1.2.3.Introduza o número PIN no campo deste ecrã.Clique em Register (Registar).Depois de o dispositivo cliente ter sido configurado,clique em OK. Em seguida, consulte o dispositivocliente ou a respectiva documentação para obter maisinstruções.Método n.º 3Utilize este método se o dispositivo cliente pedir o númeroPIN do router.1. Introduza o número PIN indicado neste ecrã. (Tambémestá indicado na etiqueta existente na parte inferior dorouter.)2. Depois de o dispositivo cliente ter sido configurado,clique em OK. Em seguida, consulte o dispositivocliente ou a respectiva documentação para obter maisinstruções.Na parte inferior do ecrã, são apresentadas as seguintesinformações: Wi-Fi Protected Setup Status (Estado daWi-Fi Protected Setup), Network Name (SSID) (Nome darede (SSID)), Security (Segurança), Encryption (Encriptação)e Passphrase (Frase-passe).NOTA: Se tiver dispositivos clientes que nãosuportem Wi-Fi Protected Setup, tome nota dasdefinições sem fios e, em seguida, configuremanualmente esses dispositivos clientes.Wir<strong>el</strong>ess (Sem fios) > Wir<strong>el</strong>ess Security(Segurança sem fios)As definições de Wir<strong>el</strong>ess Security (Segurança semfios) configuram a segurança da rede sem fios. ORouter suporta seis opções de modo de segurança semfios: WPA Personal, WPA Enterprise, WPA2 Personal,WPA2 Enterprise, RADIUS e WEP. (WPA significa Wi-FiProtected Access (Acesso protegido sem fios) e é umanorma de segurança mais forte do que a encriptaçãoWEP. WPA2 é uma versão mais avançada e mais segurado WPA. WEP significa Wired Equivalent Privacy(Privacidade equivalente com fios) e RADIUS significaRemote Authentication Dial-In User Service (Serviço deautenticação remota de utilizadores de acesso t<strong>el</strong>efónico).)Estes seis modos de segurança são abordados de formabreve aqui. Para obter instruções detalhadas sobre aconfiguração da segurança sem fios do Router, consulte o“Capítulo 2: Segurança sem fios”.Wir<strong>el</strong>ess Security (Segurança sem fios)Security Mode (Modo de segurança)S<strong>el</strong>eccione o método de segurança para a rede sem fios.Se não pretender utilizar a segurança sem fios, mantenhaa predefinição, Disabled (Desactivado).Router sem fios G de banda largaWPA PersonalNOTA: Se estiver a utilizar encriptaçãoWPA, tenha sempre em conta que todos osdispositivos na rede sem fios TÊM de utilizar omesmo método de encriptação WPA e chavepartilhada, pois, caso contrário, a rede nãofuncionará correctamente.Security Mode (Modo de segurança) > WPA PersonalWPA Algorithm (Algoritmo WPA) O WPA suporta doismétodos de encriptação, TKIP e AES, com chaves deencriptação dinâmicas. S<strong>el</strong>eccione o tipo de algoritmo,TKIP ou AES. (AES é um método de encriptação maisforte do que TKIP.)WPA Shared Key (Chave partilhada WPA) Introduza achave partilhada p<strong>el</strong>o Router e os outros dispositivos darede. Tem de ter entre 8 e 63 caracteres.Group Key Renewal (Renovação do grupo de chaves)Introduza o período de Key Renewal (Renovação daschaves), que indica ao Router a frequência com que devealterar as chaves de encriptação. O período de Group KeyRenewal (Renovação do grupo de chaves) predefinido é3600 segundos.WPA EnterpriseEsta opção inclui WPA utilizado em coordenação comum servidor de RADIUS. (Só deverá ser utilizado quandoestiver ligado um servidor de RADIUS ao Router.)Security Mode (Modo de segurança) > WPA EnterpriseWPA Algorithm (Algoritmo WPA) O WPA suporta doismétodos de encriptação, TKIP e AES, com chaves deencriptação dinâmicas. S<strong>el</strong>eccione o tipo de algoritmo,TKIP ou AES. (AES é um método de encriptação mais fortedo que TKIP.)11
Capítulo 3Configuração avançadaRADIUS Server Address (Endereço do servidor deRADIUS) Introduza o endereço IP do servidor de RADIUS.RADIUS Port (Porta RADIUS) Introduza o número daporta do servidor de RADIUS. O valor predefinido é 1812.Shared Key (Chave partilhada) Introduza a chavepartilhada entre o Router e o servidor.Key Renewal Timeout (Tempo limite de renovaçãodas chaves) Introduza um período de tempo limite derenovação das chaves, que indica ao Router a frequênciacom que deve alterar as chaves de encriptação. O períodode Key Renewal Timeout (Tempo limite de renovação daschaves) predefinido é 3600 segundos.WPA2 PersonalWPA Algorithm (Algoritmo WPA) O WPA2 suporta doismétodos de encriptação, TKIP e AES, com chaves deencriptação dinâmicas. S<strong>el</strong>eccione o tipo de algoritmo,AES ou TKIP + AES. A s<strong>el</strong>ecção predefinida é AES.RADIUS Server Address (Endereço do servidor deRADIUS) Introduza o endereço IP do servidor de RADIUS.RADIUS Port (Porta RADIUS) Introduza o número daporta do servidor de RADIUS. O valor predefinido é 1812.Shared Key (Chave partilhada) Introduza a chavepartilhada entre o Router e o servidor.Key Renewal Timeout (Tempo limite de renovaçãodas chaves) Introduza um período de tempo limite derenovação das chaves, que indica ao Router a frequênciacom que deve alterar as chaves de encriptação. O períodode Key Renewal Timeout (Tempo limite de renovação daschaves) predefinido é 3600 segundos.RADIUSEsta opção inclui WEP utilizado em coordenação comum servidor de RADIUS. (Só deverá ser utilizado quandoestiver ligado um servidor de RADIUS ao Router.)Security Mode (Modo de segurança) > WPA2 PersonalWPA Algorithm (Algoritmo WPA) O WPA2 suporta doismétodos de encriptação, TKIP e AES, com chaves deencriptação dinâmicas. S<strong>el</strong>eccione o tipo de algoritmo,AES ou TKIP + AES. A s<strong>el</strong>ecção predefinida é AES.WPA Shared Key (Chave partilhada WPA) Introduza umachave partilhada WPA com 8 a 63 caracteres.Group Key Renewal (Renovação do grupo de chaves)Introduza o período de Group Key Renewal (Renovaçãodo grupo de chaves), que indica ao Router a frequênciacom que deve alterar as chaves de encriptação. O períodode Group Key Renewal (Renovação do grupo de chaves)predefinido é 3600 segundos.WPA2 EnterpriseEsta opção inclui WPA2 utilizado em coordenação comum servidor de RADIUS. (Só deverá ser utilizado quandoestiver ligado um servidor de RADIUS ao Router.)Security Mode (Modo de segurança) > WPA2 EnterpriseRouter sem fios G de banda largaSecurity Mode (Modo de segurança) > RADIUSIMPORTANTE: Se estiver a utilizar encriptaçãoWEP, tenha sempre em conta que todos osdispositivos na rede sem fios TÊM de utilizar omesmo método de encriptação WEP e chave deencriptação, pois, caso contrário, a rede sem fiosnão funcionará correctamente.RADIUS Server Address (Endereço do servidor deRADIUS) Introduza o endereço IP do servidor de RADIUS.RADIUS Port (Porta RADIUS) Introduza o número daporta do servidor de RADIUS. O valor predefinido é 1812.Shared Key (Chave partilhada) Introduza a chavepartilhada entre o Router e o servidor.Default Transmit Key (Chave de transmissão predefinida)S<strong>el</strong>eccione a Default Transmit Key (Chave de transmissãopredefinida) que pretende utilizar. A predefinição é 1.WEP Encryption (Encriptação WEP) S<strong>el</strong>eccione um nív<strong>el</strong>de encriptação WEP, 64 bits 10 hex digits (64 bits, 10dígitos hexadecimais) ou 128 bits 26 hex digits (128 bits,26 dígitos hexadecimais). A predefinição é 64 bits 10 hexdigits (64 bits, 10 dígitos hexadecimais).12
Capítulo 3Configuração avançadaPassphrase (Frase-passe) Introduza uma frase-passepara gerar automaticamente chaves WEP. Em seguida,clique em Generate (Gerar).Key 1-4 (Chave 1-4) Se não introduziu uma frase-passe,introduza a(s) chave(s) WEP manualmente.WEPWEP é um método de encriptação básico, que não é tãoseguro como o WPA.Wir<strong>el</strong>ess MAC Filter (Filtro MAC sem fios)Wir<strong>el</strong>ess MAC Filter (Filtro MAC sem fios) Para filtrar osutilizadores da rede sem fios p<strong>el</strong>o endereço MAC, permitindoou bloqueando o acesso, s<strong>el</strong>eccione Enable (Activar). Se nãopretender filtrar os utilizadores por endereço MAC, mantenhaa predefinição, Disable (Desactivar).Prevent (Impedir) S<strong>el</strong>eccione para bloquear o acessosem fios por endereço MAC. Este botão está s<strong>el</strong>eccionadopor predefinição.Permit Only (Permitir apenas) S<strong>el</strong>eccione para permitir oacesso sem fios por endereço MAC. Este botão não estás<strong>el</strong>eccionado por predefinição.Edit MAC Filter List (Editar lista de filtros MAC) Cliquepara abrir o ecrã MAC Address Filter List (Lista de filtros deendereços MAC). Neste ecrã, poderá listar os utilizadores porendereço MAC para os quais pretende permitir ou bloquearo acesso. Para uma fácil consulta, clique em Wir<strong>el</strong>ess ClientMAC List (Lista de MACs de clientes sem fios) para apresentaruma lista de utilizadores da rede por endereço MAC.Security Mode (Modo de segurança) > WEPDefault Transmit Key (Chave de transmissão predefinida)S<strong>el</strong>eccione a Default Transmit Key (Chave de transmissãopredefinida) que pretende utilizar. A predefinição é 1.WEP Encryption (Encriptação WEP) S<strong>el</strong>eccione um nív<strong>el</strong>de encriptação WEP, 64 bits 10 hex digits (64 bits, 10dígitos hexadecimais) ou 128 bits 26 hex digits (128 bits,26 dígitos hexadecimais). A predefinição é 64 bits 10 hexdigits (64 bits, 10 dígitos hexadecimais).Passphrase (Frase-passe) Introduza uma frase-passepara gerar automaticamente chaves WEP. Em seguida,clique em Generate (Gerar).Key 1-4 (Chave 1-4) Se não introduziu uma frase-passe,introduza a(s) chave(s) WEP manualmente.Clique em Save Settings (Guardar definições) para aplicaras alterações ou em Canc<strong>el</strong> Changes (Canc<strong>el</strong>ar alterações)para canc<strong>el</strong>ar as alterações.Wir<strong>el</strong>ess (Sem fios) > Wir<strong>el</strong>ess MAC Filter(Filtro MAC sem fios)É possív<strong>el</strong> filtrar o acesso sem fios utilizando os endereçosMAC dos dispositivos sem fios a transmitir dentro do raioda rede.MAC Address Filter List (Lista de filtros de endereços MAC)Clique em Save Settings (Guardar definições) para aplicaras alterações ou em Canc<strong>el</strong> Changes (Canc<strong>el</strong>ar alterações)para canc<strong>el</strong>ar as alterações.Wir<strong>el</strong>ess (Sem fios) > Advanced Wir<strong>el</strong>essSettings (Definições sem fios avançadas)O ecrã Wir<strong>el</strong>ess > Advanced Wir<strong>el</strong>ess Settings (Sem fios >Definições sem fios avançadas) é utilizado para configuraras funções sem fios avançadas do Router. Estas definiçõessó devem ser ajustadas por um administrador experiente,uma vez que definições incorrectas poderão reduzir odesempenho da rede sem fios.Wir<strong>el</strong>ess (Sem fios) > Wir<strong>el</strong>ess MAC Filter (Filtro MAC sem fios)Router sem fios G de banda larga13
Capítulo 3Configuração avançadaWir<strong>el</strong>ess (Sem fios) > Advanced Wir<strong>el</strong>ess Settings (Definições sem fiosavançadas)Advanced Wir<strong>el</strong>ess (Sem fios avançadas)Authentication Type (Tipo de autenticação) Apredefinição é Auto (Automático), que permite a utilizaçãoda autenticação Open System (Sistema aberto) ou SharedKey (Chave partilhada). Com a autenticação OpenSystem (Sistema aberto), o remetente e o destinatárioNÃO utilizam uma chave WEP para a autenticação.Com a autenticação Shared Key (Chave partilhada), oremetente e o destinatário utilizam uma chave WEP paraa autenticação.Basic Rate (V<strong>el</strong>ocidade básica) A definição Basic Rate(V<strong>el</strong>ocidade básica) não é efectivamente uma v<strong>el</strong>ocidadede transmissão, mas antes uma série de v<strong>el</strong>ocidades detransmissão que o Router pode utilizar. O Router anunciaráa sua v<strong>el</strong>ocidade básica aos outros dispositivos sem fiosna rede, para que estes saibam que v<strong>el</strong>ocidades serãoutilizadas. O Router anunciará também que irá s<strong>el</strong>eccionarautomaticamente a m<strong>el</strong>hor v<strong>el</strong>ocidade de transmissão.A predefinição é Default (Predefinição), com a qual oRouter pode transmitir utilizando todas as v<strong>el</strong>ocidadessem fios padrão (1-2 Mbps, 5,5 Mbps, 11 Mbps, 18 Mbps e24 Mbps). As outras opções são 1-2Mbps, para utilizaçãocom tecnologias de redes sem fios mais antigas, e All(Todas) com a qual o Router pode transmitir utilizandotodas as v<strong>el</strong>ocidades de transmissão sem fios. A Basic Rate(V<strong>el</strong>ocidade básica) não é a v<strong>el</strong>ocidade real de transmissãode dados. Se pretender especificar a v<strong>el</strong>ocidade detransmissão de dados do Router, configure a definiçãoTransmission Rate (V<strong>el</strong>ocidade de transmissão).Transmission Rate (V<strong>el</strong>ocidade de transmissão) Av<strong>el</strong>ocidade de transmissão de dados deve ser definidacom base na v<strong>el</strong>ocidade da rede sem fios. Pode s<strong>el</strong>eccionara partir de um intervalo de v<strong>el</strong>ocidades de transmissãoou pode s<strong>el</strong>eccionar Auto (Automática) para que oRouter utilize automaticamente a maior v<strong>el</strong>ocidade detransmissão de dados possív<strong>el</strong> e active a funcionalidadeAuto-Fallback (Reversão automática). A funcionalidadeAuto-Fallback (Reversão automática) irá negociar a m<strong>el</strong>horv<strong>el</strong>ocidade de ligação possív<strong>el</strong> entre o Router e um clientesem fios. O valor predefinido é Auto (Automática).CTS Protection Mode (Modo de protecção de CTS) OCTS (Clear-To-Send) Protection Mode (Modo de protecçãoRouter sem fios G de banda largade CTS) deve permanecer desactivado, a menos queocorram problemas graves nos produtos Sem fios G pornão conseguirem transmitir para o Router num ambientecom tráfego 802.11b intenso. Esta função aumenta acapacidade de o Router captar todas as transmissões Semfios G, mas diminuirá drasticamente o desempenho.Frame Burst (Rajada de pacotes) A activação desta opçãodeve fornecer à rede um m<strong>el</strong>hor desempenho, consoanteo fabricante dos produtos sem fios. Para activar a opçãoFrame Burst (Rajada de pacotes), s<strong>el</strong>eccione Enable(Activar). A predefinição é Disable (Desactivar).Beacon Interval (Intervalo do sinalizador) O valorpredefinido é 100. Introduza um valor entre 1 e 65.535milissegundos. O valor de Beacon Interval (Intervalo dosinalizador) indica o intervalo de frequência do sinalizador.Um sinalizador é um pacote difundido p<strong>el</strong>o Router parasincronizar a rede sem fios.DTIM Interval (Intervalo de DTIM) Este valor, entre 1 e255, indica o intervalo de DTIM (Mensagem de indicaçãode tráfego de entrega). Um campo de DTIM é um campode contagem decrescente que informa os clientes dapróxima jan<strong>el</strong>a de escuta de mensagens de difusão emulticast. Após o Router ter transmitido mensagens dedifusão ou multicast para os clientes associados, envia apróxima DTIM com um valor de DTIM Interval (Intervalode DTIM). Os respectivos clientes escutam os sinalizadorese activam-se para receber as mensagens de difusão emulticast. O valor predefinido é 1.Fragmentation Threshold (Limiar de fragmentação)Este valor especifica o tamanho máximo de um pacoteantes que os dados sejam fragmentados em múltiplospacotes. Se tiver uma taxa de erros de pacotes <strong>el</strong>evada,poderá aumentar ligeiramente o Fragmentation Threshold(Limiar de fragmentação). A definição de um limiar defragmentação demasiado baixo poderá originar umfraco desempenho da rede. Recomendamos que efectueapenas uma pequena redução do valor predefinido. Namaioria dos casos, deverá ser mantido o valor predefinido2346.RTS Threshold (Limiar de RTS) Se encontrar um fluxo dedados inconsistente, recomendamos que efectue apenasuma pequena redução do valor predefinido, 2347. Se umpacote da rede for menor do que o tamanho do limiar deRTS predefinido, o mecanismo RTS/CTS não será activado.O Router envia pacotes RTS para uma estação receptoraespecífica e negoceia o envio de um pacote de dados.Depois de receber um RTS, a estação sem fios respondecom um pacote CTS para reconhecer o direito de início detransmissão. Deverá ser mantido o valor predefinido deRTS Threshold (Limiar de RTS) de 2347.AP Isolation (Isolamento do ponto de acesso) Destaforma, todos os clientes e dispositivos sem fios sãoisolados uns dos outros na rede. Os dispositivos sem fiosconseguirão comunicar com o Router, mas não uns com osoutros. Para utilizar esta função, s<strong>el</strong>eccione On (Activado).Por predefinição, AP Isolation (Isolamento do ponto deacesso) está Off (Desactivado).SecureEasySetup Esta funcionalidade permite activar oudesactivar a funcionalidade SecureEasySetup. S<strong>el</strong>eccioneDisabled (Desactivada) para desactivar a funcionalidade e14
Capítulo 3Configuração avançadadesligar o indicador luminoso do botão. A funcionalidadeestá Enabled (Activada) por predefinição.Clique em Save Settings (Guardar definições) para aplicaras alterações ou em Canc<strong>el</strong> Changes (Canc<strong>el</strong>ar alterações)para canc<strong>el</strong>ar as alterações.Security (Segurança) > FirewallO ecrã Security > Firewall (Segurança > Firewall) é utilizadopara configurar uma firewall que possa filtrar vários tiposde tráfego não pretendido na rede local do Router.Security (Segurança) > VPN Passthrough(Passagem VPN)O ecrã Security > VPN Passthrough (Segurança > PassagemVPN) é utilizado para permitir que os túneis de VPN queutilizam protocolos IPSec, PPTP ou L2TP passem através dafirewall do Router.Security (Segurança) > VPN Passthrough (Passagem VPN)Security (Segurança) > FirewallFirewallFirewall Protection (Protecção da firewall) Para utilizara protecção da firewall, mantenha a s<strong>el</strong>ecção predefinida,Enable (Activar). Para desactivar a protecção da firewall,s<strong>el</strong>eccione Disable (Desactivar).Block WAN Requests (Bloquear pedidos da WAN)Block Anonymous Internet Requests (Bloquearpedidos de Internet anónimos) Esta funcionalidadedificulta a entrada de utilizadores externos na sua rede.Esta funcionalidade está s<strong>el</strong>eccionada por predefinição.Desmarque a funcionalidade para permitir pedidos deInternet anónimos.Filter Multicast (Filtrar multicast) Esta funcionalidadepermite várias transmissões para destinatáriosespecíficos em simultâneo. Se a funcionalidade multicastfor permitida, o Router permitirá o reencaminhamento depacotes multicast IP para os computadores adequados.Esta funcionalidade está s<strong>el</strong>eccionada por predefinição.Desmarque a funcionalidade para a desactivar.Filter Internet NAT Redirection (Filtrarredireccionamento de NAT de Internet) Esta funcionalidadeutiliza o reencaminhamento de portas para bloquear oacesso aos servidores locais a partir dos computadoresna rede local. S<strong>el</strong>eccione Filter Internet NAT Redirection(Filtrar redireccionamento de NAT de Internet) para filtrar oredireccionamento de NAT de Internet. Esta funcionalidadenão está s<strong>el</strong>eccionada por predefinição.Filter IDENT (Port 113) (Filtrar IDENT (Porta 113)) Estafuncionalidade impede que a porta 113 seja procuradapor dispositivos fora da rede local. Esta funcionalidadeestá s<strong>el</strong>eccionada por predefinição. Desmarque afuncionalidade para a desactivar.Clique em Save Settings (Guardar definições) para aplicaras alterações ou em Canc<strong>el</strong> Changes (Canc<strong>el</strong>ar alterações)para canc<strong>el</strong>ar as alterações.VPN Passthrough (Passagem VPN)IPSec Passthrough (Passagem IPSec) A Segurança doprotocolo Internet (IPSec) é um conjunto de protocolosutilizado para implementar a troca segura de pacotes nacamada IP. Para permitir a passagem de túneis de IPSecatravés do Router, mantenha a predefinição, Enable(Activar).PPTP Passthrough (Passagem PPTP) O Protocolo detún<strong>el</strong> ponto a ponto (PPTP) permite que o Protocoloponto a ponto (PPP) seja transmitido em tún<strong>el</strong> atravésde uma rede IP. Para permitir a passagem de túneis dePPTP através do Router, mantenha a predefinição, Enable(Activar).L2TP Passthrough (Passagem L2TP) O Protocolo de tún<strong>el</strong>de camada 2 é o método utilizado para permitir sessõesPonto a ponto através da Internet na Camada de nív<strong>el</strong> 2.Para permitir a passagem de túneis de L2TP através doRouter, mantenha a predefinição, Enable (Activar).Clique em Save Settings (Guardar definições) para aplicaras alterações ou em Canc<strong>el</strong> Changes (Canc<strong>el</strong>ar alterações)para canc<strong>el</strong>ar as alterações.Access Restrictions (Restrições de acesso) >Internet Access (Acesso à Internet)O ecrã Access Restrictions > Internet Access (Restrições deacesso > Acesso à Internet) permite bloquear ou permitirtipos específicos de utilização e tráfego da Internet, como,por exemplo, acesso à Internet, serviços específicos e Websites em dias e horas específicos.Router sem fios G de banda larga15
Capítulo 3Configuração avançadaintroduzir um intervalo de endereços IP se pretender queesta política afecte um grupo de computadores. Depoisde efectuar as alterações, clique em Save Settings(Guardar definições) para aplicar as alterações ou emCanc<strong>el</strong> Changes (Canc<strong>el</strong>ar alterações) para canc<strong>el</strong>ar asalterações. Em seguida, clique em Close (Fechar).Access Restrictions (Restrições de acesso) > Internet Access (Acesso à Internet)Internet Access (Acesso à Internet)Internet Access Policy (Política de acesso à Internet)O acesso pode ser gerido por uma política. Utilize asdefinições deste ecrã para estab<strong>el</strong>ecer uma política deacesso (depois de clicar em Save Settings (Guardardefinições)). A s<strong>el</strong>ecção de uma política no menu pendenteapresentará as definições dessa política. Para <strong>el</strong>iminaruma política, s<strong>el</strong>eccione o respectivo número e clique emD<strong>el</strong>ete (Eliminar). Para ver todas as políticas, clique emSummary (Resumo). (As políticas podem ser <strong>el</strong>iminadas apartir do ecrã Summary (Resumo) s<strong>el</strong>eccionando a políticaou políticas e clicando em D<strong>el</strong>ete (Eliminar). Para regressarao separador Internet Access (Acesso à Internet), cliqueem Close (Fechar).)Internet Policy Summary (Resumo de políticas da Internet)Status (Estado) As políticas estão desactivadas porpredefinição. Para activar uma política, s<strong>el</strong>eccione onúmero da política a partir do menu pendente e s<strong>el</strong>eccioneEnable (Activar).Para criar uma política de acesso à Internet:1.2.3.4.S<strong>el</strong>eccione um número no menu pendente InternetAccess Policy (Política de acesso à Internet).Para activar esta política, s<strong>el</strong>eccione Enable (Activar).Introduza o nome da política no campo fornecido.Clique em Edit List of PCs (Editar lista de computadores)para s<strong>el</strong>eccionar os computadores que serão afectadosp<strong>el</strong>a política. É apresentado o ecrã List of PCs (Lista decomputadores). É possív<strong>el</strong> s<strong>el</strong>eccionar um computadorpor endereço MAC ou endereço IP. Também podeRouter sem fios G de banda largaList of PCs (Lista de computadores)5. S<strong>el</strong>eccione a opção adequada, Deny (Negar) ou Allow(Permitir), para bloquear ou permitir o acesso à Internetaos computadores listados no ecrã List of PCs (Lista decomputadores).6. Decida em que dias e horas pretende que esta políticaseja imposta. S<strong>el</strong>eccione em que dias individuaisa política estará em vigor ou s<strong>el</strong>eccione Everyday(Todos os dias). Em seguida, introduza o intervalo dehoras e minutos durante o qual a política estará emvigor ou s<strong>el</strong>eccione 24 Hours (24 horas).7. S<strong>el</strong>eccione os serviços bloqueados ou o bloqueio deWeb site que pretende utilizar.8. Clique em Save Settings (Guardar definições) paraguardar as definições da política ou em Canc<strong>el</strong>Changes (Canc<strong>el</strong>ar alterações) para canc<strong>el</strong>ar asdefinições da política.Blocked Services (Serviços bloqueados)Poderá filtrar o acesso a vários serviços acedidos atravésda Internet, como, por exemplo, FTP ou t<strong>el</strong>net, atravésda s<strong>el</strong>ecção dos serviços a partir dos menus pendentesjunto a Blocked Services (Serviços bloqueados). (É possív<strong>el</strong>bloquear até 20 serviços.) Em seguida, introduza ointervalo de portas que pretende filtrar.Se o serviço que pretende bloquear não estiver na lista ouse pretender editar as definições de um serviço, clique emAdd/Edit Service (Adicionar/editar serviço). Em seguida,será apresentado o ecrã Port Services (Serviços de portas).Port Services (Serviços de portas)Para adicionar um serviço, introduza o nome do serviçono campo Service Name (Nome do serviço). S<strong>el</strong>eccione orespectivo protocolo a partir do menu pendente Protocol(Protocolo) e introduza o respectivo intervalo nos camposPort Range (Intervalo de portas). Em seguida, clique emAdd (Adicionar).16
Capítulo 3Configuração avançadaPara modificar um serviço, s<strong>el</strong>eccione-o na lista à direita.Altere o nome, definição de protocolo ou intervalo deportas. Em seguida, clique em Modify (Modificar).Para <strong>el</strong>iminar um serviço, s<strong>el</strong>eccione-o na lista à direita.Em seguida, clique em D<strong>el</strong>ete (Eliminar).Quando concluir a introdução de alterações no ecrã PortServices (Serviços de portas), clique em Apply (Aplicar) paraguardar as alterações. Se pretender canc<strong>el</strong>ar as alterações,clique em Canc<strong>el</strong> (Canc<strong>el</strong>ar). Para fechar o ecrã Port Services(Serviços de portas) e regressar ao ecrã Access Restrictions(Restrições de acesso), clique em Close (Fechar).Website Blocking by URL Address (Bloquear Web site porendereço de URL)Se pretender bloquear Web sites com endereços de URLespecíficos, introduza cada URL num campo separadojunto a Website Blocking by URL Address (Bloquear Web sitepor endereço de URL).Website Blocking by Keyword (Bloquear Web site porpalavra-chave)Se pretender bloquear Web sites utilizando palavras-chaveespecíficas, introduza cada palavra-chave num camposeparado junto a Website Blocking by Keyword (BloquearWeb site por palavra-chave).Clique em Save Settings (Guardar definições) para aplicaras alterações ou em Canc<strong>el</strong> Changes (Canc<strong>el</strong>ar alterações)para canc<strong>el</strong>ar as alterações.Applications and Gaming (Aplicações ejogos) > Port Range Forward (Intervalo dereencaminhamento de portas)O ecrã Applications & Gaming > Port Range Forward(Aplicações e jogos > Intervalo de reencaminhamento deportas) permite configurar serviços públicos na rede, taiscomo servidores da Web, servidores de FTP, servidores decorreio <strong>el</strong>ectrónico ou outras aplicações especializadasda Internet. (Aplicações especializadas da Internet sãoquaisquer aplicações que utilizem o acesso à Internet paraexecutar funções, tais como videoconferências ou jogosonline. Algumas aplicações da Internet podem não requererqualquer reencaminhamento.)Port Range Forward (Intervalo dereencaminhamento de portas)Para reencaminhar uma porta, introduza as informaçõesem cada linha para os critérios necessários.Application (Aplicação) Neste campo, introduza o nomeque pretende atribuir à aplicação. Cada nome pode conteraté 12 caracteres.Start/End (Inicial/Final) Trata-se do intervalo de portas.Introduza o número inicial do intervalo de portas nacoluna Start (Inicial) e o número final do intervalo nacoluna End (Final).Protocol (Protocolo) S<strong>el</strong>eccione o protocolo utilizadopara esta aplicação, TCP ou UDP ou Both (Ambos).IP Address (Endereço IP) Para cada aplicação, introduzao endereço IP do computador que está a executar aaplicação específica.Enable (Activar) S<strong>el</strong>eccione Enable (Activar) para activar oreencaminhamento de portas para a aplicação r<strong>el</strong>evante.Clique em Save Settings (Guardar definições) para aplicaras alterações ou em Canc<strong>el</strong> Changes (Canc<strong>el</strong>ar alterações)para canc<strong>el</strong>ar as alterações.Applications & Gaming (Aplicações ejogos) > Port Triggering (Accionamento deportas)O ecrã Applications & Gaming > Port Triggering (Aplicaçõese jogos > Accionamento de portas) permite ao Routervigiar os dados enviados para números de portasespecíficos. O endereço IP do computador que envia osdados correspondentes é memorizado p<strong>el</strong>o Router, demodo a que, quando os dados pedidos forem devolvidosatravés do Router, sejam enviados para o computadoradequado mediante regras de mapeamento de endereçosIP e portas.Applications and Gaming (Aplicações e jogos) > Port Triggering(Accionamento de portas)Applications and Gaming (Aplicações e jogos) > Port Range Forward(Intervalo de reencaminhamento de portas)Router sem fios G de banda largaPort Triggering (Accionamento de portas)Application (Aplicação) Introduza o nome da aplicaçãodo accionador.17
Capítulo 3Configuração avançadaTriggered Range (Intervalo accionado)Para cada aplicação, lista o intervalo de números de portasaccionado. Consulte a documentação da aplicação daInternet para obter os números das portas necessários.Start Port (Porta inicial) Introduza o número da portainicial do Triggered Range (Intervalo accionado).End Port (Porta final) Introduza o número da porta finaldo Triggered Range (Intervalo accionado).Forwarded Range (Intervalo reencaminhado)Para cada aplicação, lista o intervalo de números deportas reencaminhado. Consulte a documentação daaplicação da Internet para obter os números das portasnecessários.Start Port (Porta inicial) Introduza o número da portainicial do Forwarded Range (Intervalo reencaminhado).End Port (Porta final) Introduza o número da porta finaldo Forwarded Range (Intervalo reencaminhado).Enable (Activar) S<strong>el</strong>eccione Enable (Activar) para activaro accionamento de portas para a aplicação aplicáv<strong>el</strong>.Clique em Save Settings (Guardar definições) para aplicaras alterações ou em Canc<strong>el</strong> Changes (Canc<strong>el</strong>ar alterações)para canc<strong>el</strong>ar as alterações.Applications and Gaming (Aplicações ejogos) > DMZA funcionalidade de DMZ permite que um computadorda rede seja exposto à Internet para utilizar umserviço especial, tal como um jogo da Internet ou umavideoconferência. O alojamento de DMZ reencaminhasimultaneamente todas as portas para um computador.A funcionalidade Port Range Forward (Intervalo dereencaminhamento de portas) é mais segura porque sóabre as portas pretendidas, enquanto que o alojamento deDMZ abre todas as portas de um computador, expondo-oà Internet.Clique em Save Settings (Guardar definições) para aplicaras alterações ou em Canc<strong>el</strong> Changes (Canc<strong>el</strong>ar alterações)para canc<strong>el</strong>ar as alterações.Applications and Gaming (Aplicações ejogos) > QoSA Qualidade do serviço (QoS) assegura um m<strong>el</strong>horserviço para tipos de tráfego de rede de alta prioridade,que poderão incluir aplicações em tempo real exigentes,como, por exemplo, uma videoconferência.Estão disponíveis três tipos de QoS: Device Priority(Prioridade do dispositivo), Ethernet Port Priority(Prioridade da porta Ethernet) e Application Priority(Prioridade da aplicação).QoSEnable/Disable (Activar/Desactivar) Para activar a QoS,s<strong>el</strong>eccione Enable (Activar). Caso contrário, s<strong>el</strong>eccioneDisable (Desactivar). A QoS está desactivada porpredefinição.Upstream Bandwidth (Largura de banda a montante)S<strong>el</strong>eccione Auto (Automático) ou Manual no menupendente. A opção Manual permite especificar a largurade banda de saída máxima que as aplicações podemutilizar.Applications and Gaming (Aplicações e jogos) > DMZDMZQualquer computador cuja porta esteja a serreencaminhada requer a desactivação da função decliente de DHCP e necessita que lhe seja atribuído umnovo endereço IP estático, porque o respectivo endereçoIP pode mudar durante a utilização da função de DHCP.Para expor um computador, s<strong>el</strong>eccione Enable (Activar).Em seguida, introduza o endereço IP do computadorno campo DMZ Host IP Address (Endereço IP do sistemaanfitrião de DMZ). Esta funcionalidade está desactivadapor predefinição.Router sem fios G de banda largaApplications and Gaming (Aplicações e jogos) > QoSDevice Priority (Prioridade do dispositivo)Introduza o nome do dispositivo de rede no campo Devicename (Nome do dispositivo), introduza o respectivoendereço MAC e, em seguida, s<strong>el</strong>eccione a respectivaprioridade no menu pendente.18
Capítulo 3Configuração avançadaEthernet Port Priority (Prioridade da porta Ethernet)A QoS Ethernet Port Priority (Prioridade da porta Ethernet)permite atribuir prioridades de desempenho às quatroportas do Router, as portas LAN 1 a 4. Para cada porta,s<strong>el</strong>eccione a definição de prioridade e de controlo defluxo.Priority (Prioridade) S<strong>el</strong>eccione High (Alta) ou Low(Baixa) na coluna Priority (Prioridade). Por predefinição, éatribuída a prioridade baixa às quatro portas do Router.Flow Control (Controlo de fluxo) Se pretender que oRouter controle a transmissão de dados entre dispositivosde rede, s<strong>el</strong>eccione Enabled (Activado). Para desactivaresta funcionalidade, s<strong>el</strong>eccione Disabled (Desactivado). AQoS Ethernet Port Priority (Prioridade da porta Ethernet)não necessita de suporte por parte do ISP, porque asportas LAN 1 a 4 com prioridade encontram-se na rede.Esta funcionalidade está activada por predefinição.Application Priority (Prioridade da aplicação)A QoS Application Priority (Prioridade da aplicação) gereas informações à medida que são transmitidas e recebidas.Consoante as definições do ecrã QoS, esta funcionalidadeatribuirá às informações a prioridade alta ou baixa para asaplicações especificadas.Optimize Gaming Applications (Optimizar jogos)S<strong>el</strong>eccione esta opção para permitir automaticamenteque as portas frequentemente utilizadas p<strong>el</strong>os jogostenham uma prioridade mais alta. Este jogos incluem,além de outros, os seguintes: Counter-Strike, Half-Life,Age of Empires, Everquest, Quake2/Quake3 e Diablo II. Apredefinição é não s<strong>el</strong>eccionado.Application Name (Nome da aplicação) Introduzao nome que pretende atribuir à aplicação no campoApplication Name (Nome da aplicação).Priority (Prioridade) S<strong>el</strong>eccione High (Alta) ou Low(Baixa) para atribuir a prioridade à aplicação. A s<strong>el</strong>ecçãopredefinida é Low (Baixa).Specific Port # (N.º da porta específica) Introduza onúmero da porta para a aplicação.Wir<strong>el</strong>ess QoS (QoS sem fios)WMM Support (Suporte de WMM) O Wi-Fi Multimedia(WMM), anteriormente conhecido como Wir<strong>el</strong>essMultimedia Extensions (WME), é uma funcionalidadecertificada p<strong>el</strong>a Wi-Fi Alliance, baseada na norma IEEE802.11e. Esta funcionalidade fornece QoS às redes sem fios.É adequada especialmente para aplicações de voz, músicae vídeo; por exemplo, Voz sobre IP (VoIP), sequências devídeo e jogos interactivos. Se existirem outros dispositivosna rede que suportem WMM, s<strong>el</strong>eccione Enabled(Activado). Caso contrário, mantenha a predefinição,Disabled (Desactivado).No Acknowledgement (Sem confirmação) Estafuncionalidade impede que o Router reenvie os dadosse ocorrer um erro. Para utilizar esta funcionalidade,s<strong>el</strong>eccione Enabled (Activado). Caso contrário, mantenhaa predefinição, Disabled (Desactivado).Clique em Save Settings (Guardar definições) para aplicaras alterações ou em Canc<strong>el</strong> Changes (Canc<strong>el</strong>ar alterações)para canc<strong>el</strong>ar as alterações.Router sem fios G de banda largaAdministration (Administração) >Management (Gestão)O ecrã Administration > Management (Administração >Gestão) permite ao administrador da rede gerir funçõesespecíficas do Router r<strong>el</strong>acionadas com acesso esegurança.Administration (Administração) > Management (Gestão)Router Password (Palavra-passe do router)Local Router Access (Acesso local ao router)Router Password (Palavra-passe do router) Introduzauma nova palavra-passe para o Router.Re-enter to confirm (Introduza novamente paraconfirmar) Introduza novamente a palavra-passe para aconfirmar.Web Access (Acesso à Web)Access Server (Acesso através do servidor) O HTTP(Protocolo de transporte de hipertexto) é o protocolo decomunicações utilizado para ligar a servidores na WorldWide Web. O HTTPS utiliza SSL (Secured Socket Layer) paraencriptar dados transmitidos, para aumentar a segurança.S<strong>el</strong>eccione HTTP ou HTTPS. A s<strong>el</strong>ecção predefinida éHTTP.Wir<strong>el</strong>ess Access Web (Acesso sem fios à Web) Se estivera utilizar o Router num domínio público onde esteja a daracesso sem fios aos seus convidados, poderá desactivar oacesso sem fios ao Utilitário baseado na Web do Router. Sóconseguirá aceder ao utilitário baseado na Web através deuma ligação com fios se desactivar a definição. Mantenhaa predefinição, Enable (Activar), para activar o acesso semfios ao utilitário baseado na Web do Router ou s<strong>el</strong>eccioneDisable (Desactivar) para desactivar o acesso sem fios aoutilitário.Remote Router Access (Acesso remoto ao router)Remote Management (Gestão remota) Para acederremotamente ao Router, fora da rede, s<strong>el</strong>eccione Enable(Activar).Management Port (Porta de gestão) Introduza o númeroda porta que estará aberta para acesso externo. Terá de19
Capítulo 3Configuração avançadaintroduzir a palavra-passe do Router quando aceder aoRouter desta forma, como habitualmente.Use https (Utilizar https) Para requerer a utilizaçãode HTTPS para o acesso remoto, s<strong>el</strong>eccione estafuncionalidade.UPnPUPnP Mantenha a predefinição, Enable (Activar), paraactivar a funcionalidade UPnP; caso contrário, s<strong>el</strong>eccioneDisable (Desactivar).Clique em Save Settings (Guardar definições) para aplicaras alterações ou em Canc<strong>el</strong> Changes (Canc<strong>el</strong>ar alterações)para canc<strong>el</strong>ar as alterações.Administration (Administração) > Log(Registo)O Router pode manter registos de todo o tráfego daligação à Internet.Ping Test (Teste de ping)Ping O teste de Ping verifica o estado de uma ligação.Clique em Ping para abrir o ecrã Ping Test (Teste deping). Introduza o endereço do computador cuja ligaçãopretende testar e o número de vezes que a pretendetestar. Em seguida, clique em Ping. O ecrã Ping Test (Testede ping) mostrará se o teste teve êxito. Para parar o teste,clique em Stop (Parar). Clique em Clear Log (Limparregisto) para limpar o ecrã. Clique em Close (Fechar) pararegressar ao ecrã Diagnostics (Diagnósticos).Teste de pingAdministration (Administração) > Log (Registo)Log (Registo)Log (Registo) Para desactivar a função Log (Registo),mantenha a predefinição, Disable (Desactivar). Paramonitorizar o tráfego entre a rede e a Internet, s<strong>el</strong>eccioneEnable (Activar).Quando pretender ver os registos, clique em IncomingLog (Registo de recepção) ou Outgoing Log (Registo deenvio), consoante o que pretender ver.Clique em Save Settings (Guardar definições) para aplicaras alterações ou em Canc<strong>el</strong> Changes (Canc<strong>el</strong>ar alterações)para canc<strong>el</strong>ar as alterações.Administration (Administração) >Diagnostics (Diagnósticos)Os testes de diagnóstico (Ping e rastreio de rota) permitemverificar as ligações dos componentes de rede.Traceroute Test (Teste de rastreio de rota)Traceroute (Rastrear rota) Para testar o desempenhode uma ligação, clique em Traceroute (Rastrear rota)para abrir o ecrã Traceroute Test (Teste de rastreio derota). Introduza o endereço do computador cuja ligaçãopretende testar e clique em Traceroute (Rastrear rota).O ecrã Traceroute Test (Teste de rastreio de rota) mostraráse o teste teve êxito. Para parar o teste, clique em Stop(Parar). Clique em Clear Log (Limpar registo) para limparo ecrã. Clique em Close (Fechar) para regressar ao ecrãDiagnostics (Diagnósticos).Teste de rastreio de rotaAdministration (Administração) > FactoryDefaults (Predefinições de fábrica)O ecrã Administration > Factory Defaults (Administração >Predefinições de fábrica) permite restaurar as predefiniçõesde fábrica da configuração do Router.Administration (Administração) > Diagnostics (Diagnósticos)Router sem fios G de banda larga20
Capítulo 3Configuração avançadaFactory Defaults (Predefinições de fábrica)Restore Factory Defaults (Restaurar predefinições defábrica) Para repor as predefinições do Router, s<strong>el</strong>eccioneYes (Sim) e, em seguida, clique em Save Settings(Guardar definições). Quaisquer definições que tenhaguardado serão perdidas quando as predefinições foremrestauradas.Administration (Administração) > Config Management (Gestão deconfigurações)Administration (Administração) > Factory Defaults (Predefinições defábrica)Administration (Administração) > UpgradeFirmware (Actualizar firmware)O ecrã Administration > Upgrade Firmware (Administração> Actualizar firmware) permite actualizar o firmware doRouter. Não actualize o firmware, a menos que ocorramproblemas com o Router ou que o novo firmware tenhauma funcionalidade que pretenda utilizar.Backup Configuration (Cópia de segurança daconfiguração)Para efectuar uma cópia de segurança do ficheiro deconfiguração do Router, clique em Backup (Cópia desegurança). Depois, siga as instruções apresentadas noecrã.Restore Configuration (Restaurar configuração)Please s<strong>el</strong>ect a file to restore (S<strong>el</strong>eccione um ficheiropara restaurar) Clique em Browse (Procurar) e s<strong>el</strong>eccioneo ficheiro de configuração. Em seguida, clique em Restore(Restaurar).Status (Estado) > RouterO ecrã Status > Router (Estado > Router) apresenta oestado actual do Router.Administration (Administração) > Upgrade Firmware (Actualizarfirmware)Antes de actualizar o firmware, transfira o ficheiro deactualização do firmware do Router a partir do Web site daLinksys, www.linksys.com. Em seguida, extraia o ficheiro.Upgrade Firmware (Actualizar firmware)Please s<strong>el</strong>ect a file to upgrade (S<strong>el</strong>eccione um ficheiropara actualizar) Clique em Browse (Procurar) e s<strong>el</strong>eccioneo ficheiro de actualização do firmware extraído. Emseguida, clique em Upgrade (Actualizar) e siga as instruçõesapresentadas no ecrã.Administration (Administração) > ConfigManagement (Gestão de configurações)Este ecrã é utilizado para efectuar cópias de segurança ourestaurar o ficheiro de configuração do Router.Status (Estado) > RouterRouter Information (Informações sobre o router)Firmware Version (Versão do firmware) Trata-se dofirmware actual do Router.Current Time (Hora actual) Apresenta a hora definida noseparador Setup (Configuração).Router sem fios G de banda larga21
Capítulo 3Configuração avançadaMAC Address (Endereço MAC) Trata-se do endereço MACdo Router apresentado ao ISP.Router Name (Nome do router) Trata-se do nomeespecífico do Router, definido no separador Setup(Configuração).Host Name (Nome do sistema anfitrião) Se requeridop<strong>el</strong>o seu ISP, estas informações foram introduzidas noseparador Setup (Configuração).Domain Name (Nome do domínio) Se requerido p<strong>el</strong>o seuISP, estas informações foram introduzidas no separadorSetup (Configuração).InternetConfiguration Type (Tipo de configuração)Esta secção mostra as informações actuais da redearmazenadas no Router. As informações variam consoanteo tipo de ligação à Internet s<strong>el</strong>eccionado no ecrã Setup >Basic Setup (Configuração > Configuração básica).Clique em Refresh (Actualizar) para actualizar asinformações apresentadas no ecrã.Status (Estado) > Local Network (Rede local)O ecrã Status > Local Network (Estado > Rede local)apresenta o estado da rede.as respectivas ligações s<strong>el</strong>eccionando a caixa D<strong>el</strong>ete(Eliminar) e clicando no botão D<strong>el</strong>ete (Eliminar).DHCP Clients Table (Tab<strong>el</strong>a de clientes DHCP)Clique em Refresh (Actualizar) para actualizar asinformações apresentadas no ecrã.Status (Estado) > Wir<strong>el</strong>ess (Sem fios)O ecrã Status > Wir<strong>el</strong>ess (Estado > Sem fios) apresenta oestado da rede sem fios.Status (Estado) > Local Network (Rede local)Local Network (Rede local)MAC Address (Endereço MAC) Trata-se do endereço MACdo Router apresentado na rede Ethernet local.IP Address (Endereço IP) Mostra o endereço IP do Routerapresentado na rede Ethernet local.Subnet Mask (Máscara de sub-rede) Mostra a máscarade sub-rede actual a ser configurada para a rede local.DHCP Server (Servidor de DHCP) Se estiver a utilizaro Router como servidor DHCP, essa informação seráapresentada aqui.Start IP Address (Endereço IP inicial) O início do intervalode endereços IP utilizado p<strong>el</strong>os dispositivos na redeEthernet local é apresentado aqui.End IP Address (Endereço IP final) O fim do intervalo deendereços IP utilizado p<strong>el</strong>os dispositivos na rede Ethernetlocal é apresentado aqui.DHCP Clients Table (Tab<strong>el</strong>a de clientes DHCP) Clicar nestebotão apresenta um ecrã que mostra os computadoresque estão a utilizar o Router como servidor de DHCP.Pode <strong>el</strong>iminar computadores dessa lista e terminarRouter sem fios G de banda largaWir<strong>el</strong>ess (Sem fios)Status (Estado) > Wir<strong>el</strong>ess (Sem fios)MAC Address (Endereço MAC) Trata-se do endereço MACdo Router apresentado na rede sem fios local.Mode (Modo) Conforme s<strong>el</strong>eccionado no ecrã Wir<strong>el</strong>ess> Basic Wir<strong>el</strong>ess Settings (Sem fios > Definições sem fiosbásicas), este campo apresenta o modo sem fios (Mixed(Misto), G‐Only (Só G) ou Disabled (Desactivado)) utilizadop<strong>el</strong>a rede.SSID Conforme introduzido no ecrã Wir<strong>el</strong>ess > BasicWir<strong>el</strong>ess Settings (Sem fios > Definições sem fios básicas),este campo apresenta o nome ou SSID da rede sem fios.DHCP Server (Servidor de DHCP) É apresentado aqui oestado da função do servidor de DHCP.Chann<strong>el</strong> (Canal) Conforme introduzido no ecrã Wir<strong>el</strong>ess> Basic Wir<strong>el</strong>ess Settings (Sem fios > Definições sem fiosbásicas), este campo apresenta o canal em que a rede semfios está a difundir.Encryption Function (Função de encriptação) Conformes<strong>el</strong>eccionado no ecrã Wir<strong>el</strong>ess > Wir<strong>el</strong>ess Security (Sem fios> Segurança sem fios), este campo apresenta o estado dasegurança sem fios do Router.Clique em Refresh (Actualizar) para actualizar asinformações apresentadas no ecrã.22
Apêndice AResolução de problemasApêndice A:Resolução de problemasO computador não consegue estab<strong>el</strong>ecer ligação àInternet.Siga estas instruções até o computador conseguirestab<strong>el</strong>ecer ligação à Internet:• Certifique-se de que o Router está ligado. O LED dealimentação deve ficar verde e não intermitente.• Se o LED de alimentação estiver intermitente, desliguetodos os dispositivos de rede, incluindo o modem,o Router e os computadores. Em seguida, ligue osdispositivos p<strong>el</strong>a seguinte ordem:1.2.3.Modem de cabo ou DSLRouterComputador• Verifique as ligações dos cabos. O computador deveestar ligado a uma das portas numeradas de 1 a 4no Router e o modem tem de estar ligado à portaInternet no Router.O modem não tem porta Ethernet.O modem é um modem de acesso t<strong>el</strong>efónico para oserviço de acesso t<strong>el</strong>efónico tradicional. Para utilizar oRouter, necessita de um modem de cabo/DSL e de umaligação à Internet de alta v<strong>el</strong>ocidade.Não consegue utilizar o serviço DSL para ligarmanualmente à Internet.Depois de ter instalado o Router, este irá ligarautomaticamente ao Fornecedor de serviços Internet(ISP) e, por isso, já não é necessário estab<strong>el</strong>ecer ligaçãomanualmente.A linha t<strong>el</strong>efónica DSL não encaixa na porta Internet doRouter.O Router não substitui o modem. Continua a ser necessárioo modem DSL para poder utilizar o Router. Ligue a linhat<strong>el</strong>efónica ao modem DSL, introduza o CD de configuraçãono computador e, depois, siga as instruções apresentadasno ecrã.Quando faz duplo clique no Web browser, é solicitadoum nome de utilizador e uma palavra-passe. Para queestas informações não sejam solicitadas, siga estasinstruções.Inicie o Web browser e execute os passos seguintes(estes passos são específicos do Internet Explorer, massem<strong>el</strong>hantes aos de outros browsers):1.2.3.4.S<strong>el</strong>eccione Ferramentas > Opções da Internet.Clique no separador Ligações.S<strong>el</strong>eccione Nunca estab<strong>el</strong>ecer uma ligação.Clique em OK.O Router não tem uma porta para cabo coaxial para aligação por cabo.O Router não substitui o modem. Continua a ser necessárioo modem de cabo para poder utilizar o Router. Ligue aligação por cabo ao modem de cabo, introduza o CD deconfiguração no computador e, depois, siga as instruçõesapresentadas no ecrã.O computador não consegue estab<strong>el</strong>ecer uma ligaçãosem fios à rede.Certifique-se de que o nome da rede sem fios ou SSID éo mesmo no computador e no Router. Se tiver activadoa segurança sem fios, certifique-se de que o método desegurança e chave utilizados são idênticos no computadore no Router.Necessita de modificar as definições do Router.Abra o Web browser (por exemplo, Internet Explorer ouFirefox) e introduza o endereço IP do Router no campode endereço (o endereço IP predefinido é 192.168.1.1).Quando solicitado, deixe o campo User name (Nome deutilizador) em branco e introduza a palavra-passe doRouter (a predefinição é admin). Clique no separadoradequado para alterar as definições.WEB: Se as suas questões não forem aquiabordadas, consulte o Web site da Linksys,www.linksys.com.Router sem fios G de banda larga23
Apêndice BEspecificaçõesApêndice B:EspecificaçõesMod<strong>el</strong>oNormasPortasBotãoWRT54G2IEEE 802.3, IEEE 802.3u,IEEE 802.11g, IEEE 802.11bInternet: uma porta 10/100 RJ-45LAN: quatro portas 10/100 RJ-45comutadasUma porta Power (Alimentação)Um botão Reset (Repor)Um botão WPSLEDs Alimentação, Sem fios, LAN (1-4),Internet, Wi-Fi Protected Setup(WPS)Tipo de caboN.º de antenasPotência desaída RFUPnP able/certFuncionalidadesde segurançaSegurança sem fiosAmbienteDimensõesPesoCAT52 antenas internas18 dBmAbleFirewall de SPI (Stateful PacketInspection), Política de InternetWi-Fi Protected Access2 (WPA2),WEP, Filtro MAC sem fios203 x 35 x 160 mm280 gAlimentação Externa, 12V CC, 0,5ACertificaçõesTemp. defuncionamento 0 a 40ºCTemp. dearmazenamento -20 a 60ºCHumidade defuncionamentoHumidade dearmazenamentoFCC, CE, IC-UL Wi-Fi (802.11b,802.11g), WPA2, WMM10 a 85%, sem condensação5 a 90%, sem condensaçãoRouter sem fios G de banda larga24
Apêndice CInformações sobre a garantiaApêndice C:Informações sobre agarantiaGARANTIA LIMITADAA Linksys garante que este produto de hardware daLinksys está isento de defeitos de materiais e mão-de-obraem condições normais de utilização durante o Períodode vigência da garantia, que tem início na data em queo adquirente original do produto efectuou a compra e aduração especificada abaixo:• Dois (2) anos para um produto novo• Noventa (90) dias para um produto renovadoEsta garantia limitada não pode ser transferida e abrangeapenas o adquirente original do produto. O único recursodo Adquirente e a única responsabilidade da Linksys aoabrigo desta garantia limitada será de a Linksys, à suadiscrição, optar por (a) reparar o produto com peças novasou renovadas, (b) substituir o produto por um produto daLinksys novo ou renovado razoav<strong>el</strong>mente equivalentee disponív<strong>el</strong> ou (c) reembolsar o valor de compra doproduto, descontando eventuais abatimentos. Qualquerproduto reparado ou de substituição será abrangido p<strong>el</strong>operíodo restante da garantia original ou trinta (30) dias, oque for maior. Todos os produtos e/ou peças substituídospassarão a pertencer à Linksys.Esta garantia limitada aplica-se em aditamento a quaisquerdireitos legais ou outros direitos que o Adquirente possater ao abrigo de um contrato de venda.EXCLUSÕES E LIMITAÇÕESEsta garantia limitada não se aplica se: (a) o s<strong>el</strong>o demontagem do produto tiver sido removido ou danificado,(b) o produto tiver sido alterado ou modificado, exceptop<strong>el</strong>a Linksys, (c) os danos no produto tiverem sido causadosp<strong>el</strong>a utilização com produtos que não sejam da Linksys,(d) o produto não tiver sido instalado, utilizado, reparadoou mantido de acordo com as instruções fornecidas p<strong>el</strong>aLinksys, (e) o produto tiver sido sujeito a tensões físicasou <strong>el</strong>éctricas anormais, utilização indevida, negligênciaou acidente, (f) o número de série do produto tiver sidoalterado, danificado ou removido ou (g) o produto tiversido fornecido ou licenciado para efeitos de avaliaçãobeta, teste ou demonstração, situação na qual a Linksysnão cobra o valor da compra ou uma taxa de licença.TODO O SOFTWARE FORNECIDO PELA LINKSYS COM OPRODUTO, QUER TENHA SIDO CARREGADO NA FÁBRICAOU ESTEJA CONTIDO NO SUPORTE QUE ACOMPANHAO PRODUTO, É FORNECIDO “TAL COMO ESTÁ”, SEMGARANTIAS DE QUALQUER TIPO. Sem limitação para oacima disposto, a Linksys não garante que a utilizaçãodo produto ou software ocorra sem interrupções ouRouter sem fios G de banda largaesteja isenta de erros. Além disso, devido ao constantedesenvolvimento de novas técnicas de intrusão e ataquea redes, a Linksys não garante que o produto, serviço,software ou qualquer equipamento, sistema ou rede noqual o produto ou software é utilizado esteja isento devulnerabilidades a intrusões ou ataques. O produto podeincluir ou ser apresentado num conjunto de software ouserviços de terceiros. A presente garantia limitada não seráaplicáv<strong>el</strong> ao software ou serviços de terceiros. A presentegarantia limitada não garante qualquer disponibilidadecontínua de um serviço de terceiros para o qual possa sernecessária a utilização ou funcionamento deste produto.NA EXTENSÃO NÃO PROIBIDA PELA LEI, TODASAS GARANTIAS IMPLÍCITAS E CONDIÇÕES DECOMERCIALIZAÇÃO, QUALIDADE SATISFATÓRIA OUADEQUAÇÃO A UMA FINALIDADE ESPECÍFICA ESTÃOLIMITADAS AO PERÍODO DE VIGÊNCIA DA GARANTIA.TODAS AS OUTRAS CONDIÇÕES, REPRESENTAÇÕES EGARANTIAS, EXPRESSAS OU IMPLÍCITAS, INCLUINDO, SEMLIMITAÇÃO, QUALQUER GARANTIA IMPLÍCITA DE NÃOINFRACÇÃO, SÃO EXCLUÍDAS. Determinadas jurisdiçõesnão permitem limitações à duração de uma garantiaimplícita. Por este motivo, é possív<strong>el</strong> que as limitaçõesanteriormente referidas não se apliquem ao Adquirente.Esta garantia limitada fornece ao Adquirente determinadosdireitos legais específicos. O Adquirente poderá ter outrosdireitos que podem variar entre diferentes jurisdições.NA EXTENSÃO NÃO PROIBIDA PELA LEI, EM NENHUMACIRCUNSTÂNCIA PODERÁ A LINKSYS SER RESPONSÁVELPELA PERDA DE DADOS, RENDIMENTOS OU LUCROS, NEMPOR DANOS ESPECIAIS, INDIRECTOS, CONSEQUENCIAIS,ACIDENTAIS OU PUNITIVOS, INDEPENDENTEMENTEDA TEORIA DE RESPONSABILIDADE (INCLUINDONEGLIGÊNCIA), RESULTANTES OU RELACIONADOS COMA UTILIZAÇÃO OU INCAPACIDADE DE UTILIZAÇÃODO PRODUTO (INCLUINDO QUALQUER SOFTWARE),MESMO QUE A LINKSYS TENHA SIDO INFORMADA DAPOSSIBILIDADE DE OCORRÊNCIA DOS REFERIDOS DANOS.EM NENHUM CASO PODERÁ A RESPONSABILIDADE DALINKSYS EXCEDER A QUANTIA PAGA PELO ADQUIRENTENA AQUISIÇÃO DO PRODUTO. As limitações anterioresaplicam-se mesmo que a garantia ou qualquer outrasolução fornecida ao abrigo desta garantia limitadanão cumpra o seu objectivo essencial. Determinadasjurisdições não permitem a exclusão ou limitação dosdanos acidentais ou indirectos. Por este motivo, é possív<strong>el</strong>que a exclusão ou limitação anteriormente referida não seaplique ao Adquirente.OBTER O SERVIÇO DE GARANTIASe tiver questões ou problemas r<strong>el</strong>acionados com oproduto, aceda ao Web site www.linksys.com/supportonde encontrará uma variedade de ferramentas desuporte online e informações que o ajudarão na utilizaçãodo produto. Se o produto apresentar algum defeitodurante o Período de vigência da garantia, contacte oSuporte técnico da Linksys para obter instruções sobre25
Apêndice CInformações sobre a garantiacomo obter o serviço de garantia. Pode encontrar onúmero de t<strong>el</strong>efone do Suporte técnico da Linksys nasua área no Manual do Utilizador do produto e emwww.linksys.com. Quando ligar para o suporte técnico,tenha consigo o número de série e a prova de comprado produto. É NECESSÁRIA UMA PROVA DE COMPRAORIGINAL DATADA PARA PROCESSAR RECLAMAÇÕESDE GARANTIA. Se for solicitada a devolução do produto,ser-lhe-á fornecido um número de RMA (Autorização dedevolução de material). O Adquirente é responsáv<strong>el</strong> p<strong>el</strong>aembalagem e expedição adequadas do produto paraa Linksys por sua conta e risco. Terá de incluir o númerode RMA e uma cópia da prova de compra original datadaquando devolver o produto. Os produtos recebidos semum número de RMA e uma prova de compra originaldatada serão rejeitados. Não inclua nenhum outro itemcom o produto que está a devolver à Linksys. O produtocom defeito abrangido por esta garantia limitada seráreparado ou substituído e devolvido ao Adquirentesem qualquer encargo. Os clientes localizados fora dosEstados Unidos da América e Canadá serão responsáveispor todas as despesas de envio e manuseamento, direitosaduaneiros, IVA e outros impostos e encargos associados.As reparações ou substituições não abrangidas p<strong>el</strong>apresente garantia limitada estão sujeitas às taxas em vigorda Linksys.SUPORTE TÉCNICOEsta garantia limitada não é um contrato de serviço nemde assistência. Pode encontrar informações sobre aspolíticas e ofertas de suporte técnico actuais da Linksys(incluindo as taxas dos serviços de assistência) no Web sitewww.linksys.com/support.GERALEsta garantia limitada é regulada p<strong>el</strong>as leis da jurisdiçãona qual o Produto foi adquirido.Se qualquer parte desta garantia limitada for consideradanula ou não vinculativa, as restantes disposiçõespermanecerão em pleno efeito e vigor.Envie todas as perguntas para: Linksys, P.O. Box 18558,Irvine, CA 92623 E.U.A.Para obter mais informações, contacte-noswww.linksys.comS<strong>el</strong>eccione o seu país e, em seguida, s<strong>el</strong>eccione SUPORTE/SUPORTE TÉCNICOPara devoluções de produtos:S<strong>el</strong>eccione o seu país e, em seguida, s<strong>el</strong>eccione SUPORTEAO CLIENTERouter sem fios G de banda larga26
Apêndice DInformações de regulamentaçãoApêndice D:Informações deregulamentaçãoFCC StatementThis product has been tested and complies with thespecifications for a Class B digital device, pursuant to Part15 of the FCC Rules. These limits are designed to providereasonable protection against harmful interference ina residential installation. This equipment generates,uses, and can radiate radio frequency energy and, if notinstalled and used according to the instructions, maycause harmful interference to radio communications.However, there is no guarantee that interference will notoccur in a particular installation. If this equipment doescause harmful interference to radio or t<strong>el</strong>evision reception,which is found by turning the equipment off and on, theuser is encouraged to try to correct the interference byone or more of the following measures:• Reorient or r<strong>el</strong>ocate the receiving antenna• Increase the separation between the equipment ordevices• Connect the equipment to an outlet other than thereceiver’s• Consult a dealer or an experienced radio/TV technicianfor assistanceFCC Radiation Exposure StatementThis equipment complies with FCC radiation exposur<strong>el</strong>imits set forth for an uncontrolled environment. Thisequipment should be installed and operated withminimum distance 20 cm between the radiator and yourbody.Safety Notices• Caution: To reduce the risk of fire, use only No.26 AWGor larger t<strong>el</strong>ecommunication line cord.• Do not use this product near water, for example, in awet basement or near a swimming pool.• Avoid using this product during an <strong>el</strong>ectrical storm.There may be a remote risk of <strong>el</strong>ectric shock fromlightning.Industry Canada StatementThis Class B digital apparatus complies with CanadianICES-003 and RSS210.Operation is subject to the following two conditions:1.2.This device may not cause interference andThis device must accept any interference, includinginterference that may cause undesired operationof the device.To reduce potential radio interference to other users,the antenna type and its gain should be so chosenthat the EIRP is not more than required for successfulcommunication.Industry Canada Radiation Exposure StatementThis equipment complies with IC radiation exposure limitsset forth for an uncontrolled environment. This equipmentshould be installed and operated with minimum distance20 cm between the radiator & your body.This transmitter must not be co-located or operating inconjunction with any other antenna or transmitter.Avis d’Industrie CanadaCet appareil numérique de la classe B est conforme auxnormes NMB-003 et RSS210 du Canada.L’utilisation de ce dispositif est autorisée seulement auxconditions suivantes :1. il ne doit pas produire de brouillage et2. il doit accepter tout brouillage radioélectrique reçu,même si ce brouillage est susceptible de compromettre lefonctionnement du dispositif.Afin de réduire le risque d’interférence aux autresutilisateurs, le type d’antenne et son gain doiventêtre choisis de façon à ce que la puissance isotroperayonnée équivalente (p.i.r.e.) ne soit pas supérieureau niveau requis pour obtenir une communicationsatisfaisante.Avis d’Industrie Canada concernant l’expositionaux radiofréquencesCe matéri<strong>el</strong> est conforme aux limites établies par ICen matière d’exposition aux radiofréquences dans unenvironnement non contrôlé. Ce matéri<strong>el</strong> doit être installéet utilisé à une distance d’au moins 20 cm entre l’antenneet le corps de l’utilisateur.L’émetteur ne doit pas être placé près d’une autre antenneou d’un autre émetteur, ou fonctionner avec une autreantenne ou un autre émetteur.Router sem fios G de banda larga27
Apêndice DInformações de regulamentaçãoWir<strong>el</strong>ess DisclaimerThe maximum performance for wir<strong>el</strong>ess is derived fromIEEE Standard 802.11 specifications. Actual performancecan vary, including lower wir<strong>el</strong>ess network capacity,data throughput rate, range and coverage. Performancedepends on many factors, conditions and variables,including distance from the access point, volume ofnetwork traffic, building materials and construction,operating system used, mix of wir<strong>el</strong>ess products used,interference and other adverse conditions.Avis de non-responsabilité concernant lesappareils sans filLes performances maximales pour les réseaux sans filsont tirées des spécifications de la norme IEEE 802.11.Les performances ré<strong>el</strong>les peuvent varier, notammenten fonction de la capacité du réseau sans fil, du débitde la transmission de données, de la portée et de lacouverture. Les performances dépendent de facteurs,conditions et variables multiples, en particulier de ladistance par rapport au point d’accès, du volume du traficréseau, des matériaux utilisés dans le bâtiment et dutype de construction, du système d’exploitation et de lacombinaison de produits sans fil utilisés, des interférenceset de toute autre condition défavorable.Router sem fios G de banda larga28
Apêndice DInformações de regulamentaçãoDeclaração de conformidade com aDirectiva da UE 1999/5/CE (Directiva RTTE)Informações de conformidade para produtos sem fios de2,4 GHz e 5 GHz r<strong>el</strong>evantes para a UE e outros países queseguem a Directiva da UE 1999/5/CE (Directiva RTTE)Б ъ л г а р с к и[Bulgarian]Česky[Czech]:Dansk[Danish]:Deutsch[German]:Това оборудване отговаря на същественитеизисквания и приложими клаузи наДиректива 1999/5/ЕС.Toto zařízení je v souladu se základnímipožadavky a ostatními odpovídajícímiustanoveními Směrnice 1999/5/EC.Dette udstyr er i overensstemm<strong>el</strong>se medde væsentlige krav og andre r<strong>el</strong>evantebestemm<strong>el</strong>ser i Direktiv 1999/5/EF.Dieses Gerät entspricht den grundlegendenAnforderungen und den weiterenentsprechenden Vorgaben der Richtlinie1999/5/EU.Nederlands[Dutch]:Malti[Maltese]:Magyar[Hungarian]:Norsk[Norwegian]:Polski[Polish]:Português[Portuguese]:Dit apparaat voldoet aan de essenti<strong>el</strong>e eisenen andere van toepassing zijnde bepalingenvan de Richtlijn 1999/5/EC.Dan l-apparat huwa konformi mal-ħtiġietessenzjali u l-provedimenti l-oħra rilevantitad-Direttiva 1999/5/EC.Ez a készülék t<strong>el</strong>jesíti az alapvetőkövet<strong>el</strong>ményeket és más 1999/5/EKirány<strong>el</strong>vben meghatározott vonatkozórend<strong>el</strong>kezéseket.Dette utstyret er i samsvar med degrunnleggende krav og andre r<strong>el</strong>evantebestemm<strong>el</strong>ser i EU-direktiv 1999/5/EF.Urządzenie jest zgodne z ogólnymiwymaganiami oraz szczególnymi warunkamiokreślonymi Dyrektywą UE: 1999/5/EC.Este equipamento está em conformidade comos requisitos essenciais e outras provisõesr<strong>el</strong>evantes da Directiva 1999/5/EC.Eesti[Estonian]:English:Español[Spanish]:Ελληνική[Greek]:Français[French]:Íslenska[Ic<strong>el</strong>andic]:Italiano[Italian]:Latviski[Latvian]:Lietuvių[Lithuanian]:See seade vastab direktiivi 1999/5/EÜ olulist<strong>el</strong>enõuet<strong>el</strong>e ja teist<strong>el</strong>e asjakohast<strong>el</strong>e sätet<strong>el</strong>e.This equipment is in compliance with theessential requirements and other r<strong>el</strong>evantprovisions of Directive 1999/5/EC.Este equipo cumple con los requisitosesenciales asi como con otras disposicionesde la Directiva 1999/5/CE.Αυτός ο εξοπλισµός είναι σε συµµόρφωση µετις ουσιώδεις απαιτήσεις και άλλες σχετικέςδιατάξεις της Οδηγίας 1999/5/EC.Cet appareil est conforme aux exigencesessenti<strong>el</strong>les et aux autres dispositionspertinentes de la Directive 1999/5/EC.Þetta tæki er samkvæmt grunnkröfum ogöðrum viðeigandi ákvæðum Tilskipunar1999/5/EC.Questo apparato é conforme ai requisitiessenziali ed agli altri principi sanciti dallaDirettiva 1999/5/CE.Šī iekārta atbilst Direktīvas 1999/5/EKbūtiskajām prasībām un citiem ar tosaistītajiem noteikumiem.Šis įrenginys tenkina 1999/5/EB Direktyvosesminius reikalavimus ir kitas šios direktyvosnuostatas.Română[Romanian]Slovensko[Slovenian]:Slovensky[Slovak]:Suomi[Finnish]:Svenska[Swedish]:Acest echipament este in conformitatecu cerint<strong>el</strong>e esentiale si cu alte prevederir<strong>el</strong>evante ale Directivei 1999/5/EC.Ta naprava je skladna z bistvenimi zahtevamiin ostalimi r<strong>el</strong>evantnimi pogoji Direktive1999/5/EC.Toto zariadenie je v zhode so základnýmipožiadavkami a inými príslušnými nariadeniamidirektív: 1999/5/EC.Tämä laite täyttää direktiivin 1999/5/EYolennaiset vaatimukset ja on siinä asetettujenmuiden laitetta koskevien määräystenmukainen.Denna utrustning är i överensstämm<strong>el</strong>se medde väsentliga kraven och andra r<strong>el</strong>evantabestämm<strong>el</strong>ser i Direktiv 1999/5/EC.Para todos os produtos, a Declaração de conformidadeestá disponív<strong>el</strong> através de uma ou mais destas opções:• É incluído um ficheiro PDF no CD do produto.• É incluída uma cópia impressa com o produto.• Está disponív<strong>el</strong> um ficheiro PDF na página Web doproduto. Visite www.linksys.com/international es<strong>el</strong>eccione o seu país ou região. Em seguida, s<strong>el</strong>eccioneo produto.Se necessitar de outros documentos técnicos, consultea secção “Documentos técnicos em www.linksys.com/international”, conforme indicado posteriormente nesteapêndice.Router sem fios G de banda larga29
Apêndice DInformações de regulamentaçãoDurante a avaliação do produto em r<strong>el</strong>ação aos requisitosda Directiva 1999/5/CE, foram aplicadas as seguintesnormas:• Rádio: EN 300 328 e/ou EN 301 893 conformeaplicáv<strong>el</strong>• EMC: EN 301 489-1, EN 301 489-17• Segurança: EN 60950 e EN 50385 ou EN 50371A S<strong>el</strong>ecção dinâmica de frequências (DFS) e o Controlode potência de transmissão (TPC) são necessários para ofuncionamento na banda de 5 GHz.DFS: O equipamento cumpre os requisitos DFS conformedefinido na norma ETSI EN 301 893. Esta funcionalidadeé requerida p<strong>el</strong>os regulamentos para evitar interferênciascom Serviços de radiolocalização (radares).TPC: Para funcionamento na banda de 5 GHz, o nív<strong>el</strong>máximo de potência é 3 dB ou mais, abaixo do limiteaplicáv<strong>el</strong>. Como tal, o TPC não é necessário.Marca CEPara os produtos Sem fios N, G, B e/ou A da Linksys, aseguinte marca CE, número do organismo notificado(onde aplicáv<strong>el</strong>) e identificador de classe 2 são adicionadosao equipamento.ouououNational RestrictionsThis product may be used in all EU countries (and othercountries following the EU directive 1999/5/EC) withoutany limitation except for the countries mentioned b<strong>el</strong>ow:Ce produit peut être utilisé dans tous les pays de l’UE (et danstous les pays ayant transposés la directive 1999/5/CE) sansaucune limitation, excepté pour les pays mentionnés cidessous:Questo prodotto è utilizzabile in tutte i paesi EU (ed in tuttigli altri paesi che seguono le direttive EU 1999/5/EC) senzanessuna limitazione, eccetto per i paesii menzionati diseguito:Das Produkt kann in allen EU Staaten ohne Einschränkungeneingesetzt werden (sowie in anderen Staaten die der EUDirektive 1999/5/CE folgen) mit Außnahme der folgendenaufgeführten Staaten:In the majority of the EU and other European countries,the 2,4- and 5-GHz bands have been made availablefor the use of wir<strong>el</strong>ess local area networks (LANs). Thetable lab<strong>el</strong>ed “Overview of Regulatory Requirements forWir<strong>el</strong>ess LANs” provides an overview of the regulatoryrequirements applicable for the 2,4‐ and 5-GHz bands.Later in this document you will find an overview ofcountries in which additional restrictions or requirementsor both are applicable.The requirements for any country may evolve. Linksysrecommends that you check with the local authorities forthe latest status of their national regulations for both the2,4- and 5-GHz wir<strong>el</strong>ess LANs.Overview of Regulatory Requirements for Wir<strong>el</strong>ess LANsFrequencyBand (MHz)Max Power Lev<strong>el</strong>(EIRP) (mW)IndoorONLYIndoor &Outdoor2400-2483.5 100 X5150-5350 † 200 XConsulte a etiqueta CE no produto para verificar qual oorganismo notificado envolvido na avaliação.5470-5725 † 1000 X† Dynamic Frequency S<strong>el</strong>ection and Transmit Power Control arerequired in the frequency ranges of 5250-5350 MHz and 5470-5725MHz.The following countries have restrictions and/orrequirements in addition to those given in the tabl<strong>el</strong>ab<strong>el</strong>ed “Overview of Regulatory Requirements forWir<strong>el</strong>ess LANs”:DenmarkIn Denmark, the band 5150 - 5350 MHz is also allowed foroutdoor usage.I Danmark må frekvensbåndet 5150 - 5350 også anvendesudendørs.Router sem fios G de banda larga30
Apêndice DInformações de regulamentaçãoFranceFor 2,4 GHz, the product should not be used outdoorsin the band 2454 - 2483,5 MHz. There are no restrictionswhen used in other parts of the 2,4 GHz band when usedindoors. Check http://www.arcep.fr/ for more details.Pour la bande 2,4 GHz, l’ équipement ne doit pas être utiliséen extérieur dans la bande 2454 - 2483,5 MHz. Il n’y a pas derestrictions pour des utilisations en intérieur dans d’autresparties de la bande 2,4GHz. Consultez http://www.arcep.fr/pour de plus amples détails.LocationIndoor(No restrictions)ItalyOutdoorApplicable Power Lev<strong>el</strong>s in FranceRouter sem fios G de banda largaFrequencyRange (MHz)Power (EIRP)2400-2483.5 100 mW (20 dBm)2400-24542454-2483.5100 mW (20 dBm)10 mW (10 dBm)This product meets the National Radio Interface andthe requirements specified in the National FrequencyAllocation Table for Italy. Unless this 2,4-GHz wir<strong>el</strong>ess LANproduct is operating within the boundaries of the owner’sproperty, its use requires a “general authorization”. Pleasecheck http://www.comunicazioni.it/it/ for more details.Questo prodotto è conforme alla specifiche di InterfacciaRadio Nazionali e rispetta il Piano Nazionale di ripartizioned<strong>el</strong>le frequenze in Italia. Se non viene installato all’internod<strong>el</strong> proprio fondo, l’utilizzo di prodotti Wir<strong>el</strong>ess LAN a2,4 GHz richiede una “Autorizzazione Generale”. Consultarehttp://www.comunicazioni.it/it/ per maggiori dettagli.LatviaThe outdoor usage of the 2,4 GHz band requires anauthorization from the Electronic Communications Office.Please check http://www.esd.lv for more details.2,4 GHz frekveču joslas izmantošanai ārpus t<strong>el</strong>pāmnepieciešama atļauja no Elektronisko sakaru direkcijas.Vairāk informācijas: http://www.esd.lv.Notes:1.2.Although Norway, Switzerland and Liechtenstein arenot EU member states, the EU Directive 1999/5/EC hasalso been implemented in those countries.The regulatory limits for maximum output power arespecified in EIRP. The EIRP lev<strong>el</strong> of a device can becalculated by adding the gain of the antenna used(specified in dBi) to the output power available at theconnector (specified in dBm).Restrições à utilização do produtoEste produto foi concebido apenas para utilização nointerior. A utilização no exterior não é recomendada, salvoindicação em contrário.Restrições da banda de 2,4 GHzEste produto foi concebido para ser utilizado comas antenas integrais ou dedicadas padrão (externas)fornecidas juntamente com o equipamento. No entanto,algumas aplicações poderão requerer que as antenas,caso sejam amovíveis, sejam separadas do produto einstaladas desacopladas do dispositivo utilizando cabosde extensão. Para estas aplicações, a Linksys forneceum cabo de extensão R‐SMA (AC9SMA) e um cabo deextensão R-TNC (AC9TNC). Estes dois cabos têm 9 metrosde comprimento e têm uma perda de cabo (atenuação)de 5 dB. Para compensar a atenuação, a Linksys tambémfornece antenas de maior ganho, a HGA7S (com fichaR-SMA) e a HGA7T (com ficha R-TNC). Estas antenas têmum ganho de 7 dBi e só poderão ser utilizadas com o cabode extensão R-SMA ou R-TNC.As combinações de cabos de extensão e antenas queresultem na emissão de um nív<strong>el</strong> de potência superior a100 mW EIRP são ilegais.Software ou firmware de terceirosA utilização de software ou firmware nãosuportado/fornecido p<strong>el</strong>a Linksys poderá fazer com queo equipamento deixe de estar em conformidade com osrequisitos regulamentares.Documentos técnicos emwww.linksys.com/internationalSiga estes passos para aceder aos documentos técnicos:1. Introduza http://www.linksys.com/international noWeb browser.2.3.4.5.S<strong>el</strong>eccione o país ou região em que reside.Clique no separador Produtos.S<strong>el</strong>eccione a categoria de produtos adequada.S<strong>el</strong>eccione a subcategoria de produtos, caso sejanecessário.6.7.S<strong>el</strong>eccione o produto.S<strong>el</strong>eccione o tipo de documentação pretendida apartir da secção More Information (Mais informações).O documento será aberto no formato PDF, caso tenhao Adobe Acrobat instalado no computador.NOTA: Se tiver questões a colocarr<strong>el</strong>ativamente à conformidade desteproduto ou se não conseguir encontrar asinformações de que necessita, contacteo representante de vendas local ou visitewww.linksys.com/international31
Apêndice DInformações de regulamentaçãoInformações do utilizador para produtosde consumidor abrangidos p<strong>el</strong>a Directiva2002/96/CE da UE sobre Resíduos deEquipamentos Eléctricos e Electrónicos(REEE)Este documento contém informações importantes para osutilizadores r<strong>el</strong>acionadas com a <strong>el</strong>iminação e reciclagemdos produtos da Linksys. Os consumidores devem agirem conformidade com este aviso para todos os produtos<strong>el</strong>ectrónicos que tenham o seguinte símbolo:Ceština (Czech) - Informace o ochraně životníhoprostředí pro zákazníky v zemích Evropské unieEvropská směrnice 2002/96/ES zakazuje, aby zařízení označenétímto symbolem na produktu anebo na obalu bylo likvidovános netříděným komunálním odpadem. Tento symbol udává,že daný produkt musí být likvidován odděleně od běžnéhokomunálního odpadu. Odpovídáte za likvidaci tohoto produktua dalších <strong>el</strong>ektrických a <strong>el</strong>ektronických zařízení prostřednictvímurčených sběrných míst stanovených vládou nebo místnímiúřady. Správná likvidace a recyklace pomáhá předcházetpotenciálním negativním dopadům na životní prostředí a lidskézdraví. Podrobnější informace o likvidaci starého vybavení silaskavě vyžádejte od místních úřadů, podniku zabývajícího s<strong>el</strong>ikvidací komunálních odpadů nebo obchodu, kde jste produktzakoupili.English - Environmental Information for Customers inthe European UnionEuropean Directive 2002/96/EC requires that the equipmentbearing this symbol on the product and/or its packaging mustnot be disposed of with unsorted municipal waste. The symbolindicates that this product should be disposed of separat<strong>el</strong>yfrom regular household waste streams. It is your responsibility todispose of this and other <strong>el</strong>ectric and <strong>el</strong>ectronic equipment viadesignated collection facilities appointed by the government orlocal authorities. Correct disposal and recycling will h<strong>el</strong>p preventpotential negative consequences to the environment andhuman health. For more detailed information about the disposalof your old equipment, please contact your local authorities,waste disposal service, or the shop where you purchased theproduct.Български (Bulgarian) - Информация относноопазването на околната среда за потребители вЕвропейския съюзЕвропейска директива 2002/96/EC изисква уредите, носещитози символ върху изделието и/или опаковката му, да несе изхвърля т с несортирани битови отпадъци. Символътобозначава, че изделието трябва да се изхвърля отделно отсметосъбирането на обикновените битови отпадъци. Вашае отговорността този и другите електрически и електронниуреди да се изхвърлят в предварително определени отдържавните или общински органи специализирани пунктовеза събиране. Правилното изхвърляне и рециклиранеще спомогнат да се предотвратят евентуални вредни заоколната среда и здравето на населението последствия. Запо-подробна информация относно изхвърлянето на вашитестари уреди се обърнете към местните власти, службите засметосъбиране или магазина, от който сте закупили уреда.Dansk (Danish) - Miljøinformation for kunder i EUEU-direktiv 2002/96/EF kræver, at udstyr der bærer dette symbolpå produktet og/<strong>el</strong>ler emballagen ikke må bortskaffes somusorteret kommunalt affald. Symbolet betyder, at dette produktskal bortskaffes adskilt fra det almind<strong>el</strong>ige husholdningsaffald.Det er dit ansvar at bortskaffe dette og andet <strong>el</strong>ektrisk og<strong>el</strong>ektronisk udstyr via bestemte indsamlingssteder udpegetaf staten <strong>el</strong>ler de lokale myndigheder. Korrekt bortskaff<strong>el</strong>seog genvinding vil hjælpe med til at undgå mulige skader formiljøet og menneskers sundhed. Kontakt venligst de lokalemyndigheder, renovationstjenesten <strong>el</strong>ler den butik, hvor duhar købt produktet, angående mere detaljeret information ombortskaff<strong>el</strong>se af dit gamle udstyr.Deutsch (German) - Umw<strong>el</strong>tinformation für Kundeninnerhalb der Europäischen UnionDie Europäische Richtlinie 2002/96/EC verlangt, dass technischeAusrüstung, die direkt am Gerät und/oder an der Verpackung mitdiesem Symbol versehen ist , nicht zusammen mit unsortiertemGemeindeabfall entsorgt werden darf. Das Symbol weist daraufhin, dass das Produkt von regulärem Haushaltmüll getrenntentsorgt werden sollte. Es liegt in Ihrer Verantwortung, diesesGerät und andere <strong>el</strong>ektrische und <strong>el</strong>ektronische Geräte überdie dafür zuständigen und von der Regierung oder örtlichenBehörden dazu bestimmten Samm<strong>el</strong>st<strong>el</strong>len zu entsorgen.Ordnungsgemäßes Entsorgen und Recyc<strong>el</strong>n trägt dazu bei,potenti<strong>el</strong>le negative Folgen für Umw<strong>el</strong>t und die menschlicheGesundheit zu vermeiden. Wenn Sie weitere Informationen zurEntsorgung Ihrer Altgeräte benötigen, wenden Sie sich bitte andie örtlichen Behörden oder städtischen Entsorgungsdiensteoder an den Händler, bei dem Sie das Produkt erworben haben.Router sem fios G de banda larga32
Apêndice DInformações de regulamentaçãoEesti (Estonian) - Keskkonnaalane informatsioonEuroopa Liidus asuvat<strong>el</strong>e klientid<strong>el</strong>eEuroopa Liidu direktiivi 2002/96/EÜ nõuete kohas<strong>el</strong>t onseadmeid, mill<strong>el</strong> on toot<strong>el</strong> või pakendil käesolev sümbol ,ke<strong>el</strong>atud kõrvaldada koos sorteerimata olmejäätmetega. Seesümbol näitab, et toode tuleks kõrvaldada eraldi tavalistestolmejäätmevoogudest. Olete kohustatud kõrvaldama käesolevaja ka muud <strong>el</strong>ektri- ja <strong>el</strong>ektroonikaseadmed riigi või kohalikeametiasutuste poolt ette nähtud kogumispunktide kaudu.Seadmete korrektne kõrvaldamine ja ringlussevõtt aitab vältidavõimalikke negatiivseid tagajärgi keskkonnale ning inimestetervis<strong>el</strong>e. Vanade seadmete kõrvaldamise kohta täpsemainformatsiooni saamiseks võtke palun ühendust kohalikeametiasutustega, jäätmekäitlusfirmaga või kauplusega, kust tetoote ostsite.Español (Spanish) - Información medioambiental paraclientes de la Unión EuropeaLa Directiva 2002/96/CE de la UE exige que los equipos qu<strong>el</strong>leven este símbolo en <strong>el</strong> propio aparato y/o en su embalajeno deben <strong>el</strong>iminarse junto con otros residuos urbanos nos<strong>el</strong>eccionados. El símbolo indica que <strong>el</strong> producto en cuestióndebe separarse de los residuos domésticos convencionales convistas a su <strong>el</strong>iminación. Es responsabilidad suya desechar este ycualesquiera otros aparatos <strong>el</strong>éctricos y <strong>el</strong>ectrónicos a través d<strong>el</strong>os puntos de recogida que ponen a su disposición <strong>el</strong> gobierno ylas autoridades locales. Al desechar y reciclar correctamente estosaparatos estará contribuyendo a evitar posibles consecuenciasnegativas para <strong>el</strong> medio ambiente y la salud de las personas. Sidesea obtener información más detallada sobre la <strong>el</strong>iminaciónsegura de su aparato usado, consulte a las autoridades locales,al servicio de recogida y <strong>el</strong>iminación de residuos de su zona opregunte en la tienda donde adquirió <strong>el</strong> producto.ξλληνικά (Greek) - Στοιχεία περιβαλλοντικήςπροστασίας για πελάτες εντός της ΕυρωπαϊκήςΈνωσηςΗ Κοινοτική Οδηγία 2002/96/EC απαιτεί ότι ο εξοπλισμός ο οποίοςφέρει αυτό το σύμβολο στο προϊόν και/ή στη συσκευασίατου δεν πρέπει να απορρίπτεται μαζί με τα μικτά κοινοτικάαπορρίμματα. Το σύμβολο υποδεικνύει ότι αυτό το προϊόν θαπρέπει να απορρίπτεται ξεχωριστά από τα συνήθη οικιακάαπορρίμματα. Είστε υπεύθυνος για την απόρριψη του παρόντοςκαι άλλου ηλεκτρικού και ηλεκτρονικού εξοπλισμού μέσω τωνκαθορισμένων εγκαταστάσεων συγκέντρωσης απορριμμάτων οιοποίες παρέχονται από το κράτος ή τις αρμόδιες τοπικές αρχές.Η σωστή απόρριψη και ανακύκλωση συμβάλλει στην πρόληψηπιθανών αρνητικών συνεπειών για το περιβάλλον και την υγεία.Για περισσότερες πληροφορίες σχετικά με την απόρριψη τουπαλιού σας εξοπλισμού, παρακαλώ επικοινωνήστε με τις τοπικέςαρχές, τις υπηρεσίες απόρριψης ή το κατάστημα από το οποίοαγοράσατε το προϊόν.Français (French) - Informations environnementalespour les clients de l’Union européenneLa directive européenne 2002/96/CE exige que l’équipementsur lequ<strong>el</strong> est apposé ce symbole sur le produit et/ou sonemballage ne soit pas jeté avec les autres ordures ménagères. Cesymbole indique que le produit doit être éliminé dans un circuitdistinct de c<strong>el</strong>ui pour les déchets des ménages. Il est de votreresponsabilité de jeter ce matéri<strong>el</strong> ainsi que tout autre matéri<strong>el</strong>électrique ou électronique par les moyens de collecte indiquéspar le gouvernement et les pouvoirs publics des collectivitésterritoriales. L’élimination et le recyclage en bonne et due formeont pour but de lutter contre l’impact néfaste potenti<strong>el</strong> de cetype de produits sur l’environnement et la santé publique. Pourplus d’informations sur le mode d’élimination de votre ancienéquipement, veuillez prendre contact avec les pouvoirs publicslocaux, le service de traitement des déchets, ou l’endroit où vousavez acheté le produit.Italiano (Italian) - Informazioni r<strong>el</strong>ative all’ambienteper i clienti residenti n<strong>el</strong>l’Unione EuropeaLa direttiva europea 2002/96/EC richiede che le apparecchiaturecontrassegnate con questo simbolo sul prodotto e/osull’imballaggio non siano smaltite insieme ai rifiuti urbaninon differenziati. Il simbolo indica che questo prodotto nondeve essere smaltito insieme ai normali rifiuti domestici. Èresponsabilità d<strong>el</strong> proprietario smaltire sia questi prodotti siale altre apparecchiature <strong>el</strong>ettriche ed <strong>el</strong>ettroniche mediant<strong>el</strong>e specifiche strutture di raccolta indicate dal governo o daglienti pubblici locali. Il corretto smaltimento ed il riciclaggioaiuteranno a prevenire conseguenze potenzialmente negativeper l’ambiente e per la salute d<strong>el</strong>l’essere umano. Per ricevereinformazioni più dettagliate circa lo smaltimento d<strong>el</strong>le vecchieapparecchiature in Vostro possesso, Vi invitiamo a contattare glienti pubblici di competenza, il servizio di smaltimento rifiuti o ilnegozio n<strong>el</strong> quale avete acquistato il prodotto.Latviešu valoda (Latvian) - Ekoloģiska informācijaklientiem Eiropas Savienības jurisdikcijāDirektīvā 2002/96/EK ir prasība, ka aprīkojumu, kam pievienotazīme uz paša izstrādājuma vai uz tā iesaiņojuma, nedrīkstizmest nešķirotā veidā kopā ar komunālajiem atkritumiem(tiem, ko rada vietēji iedzīvotāji un uzņēmumi). Šī zīme nozīmēto, ka šī ierīce ir jāizmet atkritumos tā, lai tā nenonāktu kopā arparastiem mājsaimniecības atkritumiem. Jūsu pienākums ir šoun citas <strong>el</strong>ektriskas un <strong>el</strong>ektroniskas ierīces izmest atkritumos,izmantojot īpašus atkritumu savākšanas veidus un līdzekļus, konodrošina valsts un pašvaldību iestādes. Ja izmešana atkritumosun pārstrāde tiek veikta pareizi, tad mazinās iespējamaiskaitējums dabai un cilvēku ves<strong>el</strong>ībai. Sīkākas ziņas parnovecojuša aprīkojuma izmešanu atkritumos jūs varat saņemtvietējā pašvaldībā, atkritumu savākšanas dienestā, kā arī veikalā,kur iegādājāties šo izstrādājumu.Router sem fios G de banda larga33
Apêndice DInformações de regulamentaçãoLietuvškai (Lithuanian) - Aplinkosaugos informacija,skirta Europos Sąjungos vartotojamsEuropos direktyva 2002/96/EC numato, kad įrangos, kuri irkurios pakuotė yra pažymėta šiuo simboliu (įveskite simbolį),negalima šalinti kartu su nerūšiuotomis komunalinėmisatliekomis. Šis simbolis rodo, kad gaminį reikia šalinti atskirainuo bendro buitinių atliekų srauto. Jūs privalote užtikrinti, kadši ir kita <strong>el</strong>ektros ar <strong>el</strong>ektroninė įranga būtų šalinama per tamtikras nacionalinės ar vietinės valdžios nustatytas atliekų rinkimosistemas. Tinkamai šalinant ir perdirbant atliekas, bus išvengtagalimos žalos aplinkai ir žmonių sveikatai. Daugiau informacijosapie jūsų senos įrangos šalinimą gali pateikti vietinės valdžiosinstitucijos, atliekų šalinimo tarnybos arba parduotuvės, kurioseįsigijote tą gaminį.Malti (Maltese) - Informazzjoni Ambjentali għal Klijentifl-Unjoni EwropeaId-Direttiva Ewropea 2002/96/KE titlob li t-tagħmir li jkun fih issimbolufuq il-prodott u/jew fuq l-ippakkjar ma jistax jintremama’ skart muniċipali li ma ġiex isseparat. Is-simbolu jindikali dan il-prodott għandu jintrema separatament minn ma’ l-iskart domestiku regolari. Hija responsabbiltà tiegħek li tarmidan it-tagħmir u kull tagħmir ieħor ta’ l-<strong>el</strong>ettriku u <strong>el</strong>ettronikupermezz ta’ faċilitajiet ta’ ġbir appuntati apposta mill-gvern jewmill-awtoritajiet lokali. Ir-rimi b’mod korrett u r-riċiklaġġ jgħinjipprevjeni konsegwenzi negattivi potenzjali għall-ambjent ugħas-saħħa tal-bniedem. Għal aktar informazzjoni dettaljatadwar ir-rimi tat-tagħmir antik tiegħek, jekk jogħġbok ikkuntattjalill-awtoritajiet lokali tiegħek, is-servizzi għar-rimi ta’ l-iskart, jewil-ħanut minn fejn xtrajt il-prodott.Magyar (Hungarian) - Környezetvéd<strong>el</strong>mi információ azeurópai uniós vásárlók számáraA 2002/96/EC számú európai uniós irány<strong>el</strong>v megkívánja, hogyazokat a termékeket, am<strong>el</strong>yeken, és/vagy am<strong>el</strong>yek csomagolásánaz alábbi címke megj<strong>el</strong>enik, tilos a többi sz<strong>el</strong>ektálatlan lakosságihulladékkal együtt kidobni. A címke azt j<strong>el</strong>öli, hogy az adotttermék kidobásakor a szokványos háztartási hulladék<strong>el</strong>szállításirendszerektõl <strong>el</strong>különített <strong>el</strong>járást k<strong>el</strong>l alkalmazni. Az Önf<strong>el</strong><strong>el</strong>õssége, hogy ezt, és más <strong>el</strong>ektromos és <strong>el</strong>ektronikusberendezéseit a kormányzati vagy a h<strong>el</strong>yi hatóságok általkij<strong>el</strong>ölt gyűjtõredszereken keresztül számolja f<strong>el</strong>. A megf<strong>el</strong><strong>el</strong>õhulladékf<strong>el</strong>dolgozás segít a környezetre és az emberi egészségrepotenciálisan ártalmas negatív hatások meg<strong>el</strong>õzésében. Ha<strong>el</strong>avult berendezéseinek f<strong>el</strong>számolásához további részletesinformációra van szüksége, kérjük, lépjen kapcsolatba a h<strong>el</strong>yihatóságokkal, a hulladékf<strong>el</strong>dolgozási szolgálattal, vagy azzalüzlett<strong>el</strong>, ahol a terméket vásárolta.Nederlands (Dutch) - Milieu-informatie voor klantenin de Europese UnieDe Europese Richtlijn 2002/96/EC schrijft voor dat apparatuur dieis voorzien van dit symbool op het product of de verpakking,niet mag worden ingezam<strong>el</strong>d met niet-gescheiden huishoud<strong>el</strong>ijkafval. Dit symbool geeft aan dat het product apart moet wordeningezam<strong>el</strong>d. U bent z<strong>el</strong>f verantwoord<strong>el</strong>ijk voor de vernietigingvan deze en andere <strong>el</strong>ektrische en <strong>el</strong>ektronische apparatuur via dedaarvoor door de land<strong>el</strong>ijke of plaats<strong>el</strong>ijke overheid aangewezeninzam<strong>el</strong>ingskanalen. De juiste vernietiging en recycling vandeze apparatuur voorkomt mog<strong>el</strong>ijke negatieve gevolgen voorhet milieu en de gezondheid. Voor meer informatie over hetvernietigen van uw oude apparatuur neemt u contact op metde plaats<strong>el</strong>ijke autoriteiten of afvalverwerkingsdienst, of met dewink<strong>el</strong> waar u het product hebt aangeschaft.Norsk (Norwegian) - Miljøinformasjon for kunder i EUEU-direktiv 2002/96/EF krever at utstyr med følgende symbolavbildet på produktet og/<strong>el</strong>ler pakningen, ikke må kastessammen med usortert avfall. Symbolet indikerer at detteproduktet skal håndteres atskilt fra ordinær avfallsinnsamlingfor husholdningsavfall. Det er ditt ansvar å kvitte deg meddette produktet og annet <strong>el</strong>ektrisk og <strong>el</strong>ektronisk avfall via egneinnsamlingsordninger slik myndighetene <strong>el</strong>ler kommunenebestemmer. Korrekt avfallshåndtering og gjenvinning vilvære med på å forhindre mulige negative konsekvenser formiljø og h<strong>el</strong>se. For nærmere informasjon om håndtering avdet kasserte utstyret ditt, kan du ta kontakt med kommunen,en innsamlingsstasjon for avfall <strong>el</strong>ler butikken der du kjøpteproduktet.Polski (Polish) - Informacja dla klientów w UniiEuropejskiej o przepisach dotyczących ochronyśrodowiskaDyrektywa Europejska 2002/96/EC wymaga, aby sprzętoznaczony symbolem znajdującym się na produkcie i/lub jegoopakowaniu nie był wyrzucany razem z innymi niesortowanymiodpadami komunalnymi. Symbol ten wskazuje, że produktnie powinien być usuwany razem ze zwykłymi odpadami zgospodarstw domowych. Na Państwu spoczywa obowiązekwyrzucania tego i innych urządzeń <strong>el</strong>ektrycznych oraz<strong>el</strong>ektronicznych w punktach odbioru wyznaczonych przez władzekrajowe lub lokalne. Pozbywanie się sprzętu we właściwy sposóbi jego recykling pomogą zapobiec potencjalnie negatywnymkonsekwencjom dla środowiska i zdrowia ludzkiego. W c<strong>el</strong>uuzyskania szczegółowych informacji o usuwaniu starego sprzętu,prosimy zwrócić się do lokalnych władz, służb oczyszczaniamiasta lub sklepu, w którym produkt został nabyty.Router sem fios G de banda larga34
Apêndice DInformações de regulamentaçãoPortuguês (Portuguese) - Informação ambiental paraclientes da União EuropeiaA Directiva Europeia 2002/96/CE exige que o equipamentoque exibe este símbolo no produto e/ou na sua embalagemnão seja <strong>el</strong>iminado junto com os resíduos municipais nãoseparados. O símbolo indica que este produto deve ser<strong>el</strong>iminado separadamente dos resíduos domésticos regulares.É da sua responsabilidade <strong>el</strong>iminar este e qualquer outroequipamento <strong>el</strong>éctrico e <strong>el</strong>ectrónico através das instalaçõesde recolha designadas p<strong>el</strong>as autoridades governamentais oulocais. A <strong>el</strong>iminação e reciclagem correctas ajudarão a preveniras consequências negativas para o ambiente e para a saúdehumana. Para obter informações mais detalhadas sobre aforma de <strong>el</strong>iminar o seu equipamento antigo, contacte asautoridades locais, os serviços de <strong>el</strong>iminação de resíduos ou oestab<strong>el</strong>ecimento comercial onde adquiriu o produto.Română (Romanian) - Informaţii de mediu pentruclienţii din Uniunea EuropeanăDirectiva europeană 2002/96/CE impune ca echipament<strong>el</strong>e careprezintă acest simbol pe produs şi/sau pe ambalajul acestuia sănu fie casate împreună cu gunoiul menajer municipal. Simbolulindică faptul că acest produs trebuie să fie casat separat degunoiul menajer obişnuit. Este responsabilitatea dvs. să casaţiacest produs şi alte echipamente <strong>el</strong>ectrice şi <strong>el</strong>ectronice prinintermediul unităţilor de colectare special desemnate de guvernsau de autorităţile locale. Casarea şi reciclarea corecte vor ajutala prevenirea potenţial<strong>el</strong>or consecinţe negative asupra sănătăţiimediului şi a oamenilor. Pentru mai multe informaţii detaliatecu privire la casarea acestui echipament vechi, contactaţiautorităţile locale, serviciul de salubrizare sau magazinul de lacare aţi achiziţionat produsul.Slovenčina (Slovak) - Informácie o ochrane životnéhoprostredia pre zákazníkov v Európskej úniiPodľa európskej smernice 2002/96/ES zariadenie s týmtosymbolom na produkte a/alebo jeho balení nesmie byťlikvidované spolu s netriedeným komunálnym odpadom.Symbol znamená, že produkt by sa mal likvidovať odd<strong>el</strong>eneod bežného odpadu z domácností. Je vašou povinnosťoulikvidovať toto i ostatné <strong>el</strong>ektrické a <strong>el</strong>ektronické zariadeniaprostredníctvom špecializovaných zberných zariadení určenýchvládou alebo miestnymi orgánmi. Správna likvidácia a recykláciapomôže zabrániť prípadným negatívnym dopadom na životnéprostredie a zdravie ľudí. Ak máte záujem o podrobnejšieinformácie o likvidácii starého zariadenia, obráťte sa, prosím, namiestne orgány, organizácie zaoberajúce sa likvidáciou odpadovalebo obchod, v ktorom ste si produkt zakúpili.Slovenčina (Slovene) - Okoljske informacije za strankev Evropski unijiEvropska direktiva 2002/96/EC prepoveduje odlaganje opreme,označene s tem simbolom – na izd<strong>el</strong>ku in/ali na embalaži – medobičajne, nerazvrščene odpadke. Ta simbol opozarja, da je trebaizd<strong>el</strong>ek odvreči ločeno od preostalih gospodinjskih odpadkov.Vaša odgovornost je, da to in preostalo <strong>el</strong>ektrično in <strong>el</strong>ektronskoopremo odnesete na posebna zbirališča, ki jih določijodržavne ustanove ali lokalna uprava. S pravilnim odlaganjemin recikliranjem boste preprečili morebitne škodljive vplive naokolje in zdravje ljudi. Če ž<strong>el</strong>ite izvedeti več o odlaganju stareopreme, se obrnite na lokalno upravo, odpad ali trgovino, kjerste izd<strong>el</strong>ek kupili.Suomi (Finnish) - Ympäristöä koskevia tietoja EUalueenasiakkailleEU-direktiivi 2002/96/EY ed<strong>el</strong>lyttää, että jos laitteistossa on tämäsymboli itse tuotteessa ja/tai sen pakkauksessa, laitteistoaei saa hävittää lajitt<strong>el</strong>emattoman yhdyskuntajätteen mukana.Symboli merkitsee sitä, että tämä tuote on hävitettävä erillääntavallisesta kotitalousjätteestä. Sinun vastuullasi on hävittäätämä <strong>el</strong>ektroniikkatuote ja muut vastaavat <strong>el</strong>ektroniikkatuotteetviemällä tuote tai tuotteet viranomaisten määräämäänkeräyspisteeseen. Laitteiston oikea hävittäminen estäämahdolliset ki<strong>el</strong>teiset vaikutukset ympäristöön ja ihmistenterveyteen. Lisätietoja vanhan laitteiston oikeasta hävitystavastasaa paikallisilta viranomaisilta, jätteenhävityspalv<strong>el</strong>usta tai siitämyymälästä, josta ostit tuotteen.Svenska (Swedish) - Miljöinformation för kunder iEuropeiska unionenDet europeiska direktivet 2002/96/EC kräver att utrustning meddenna symbol på produkten och/<strong>el</strong>ler förpackningen inte fårkastas med osorterat kommunalt avfall. Symbolen visar att dennaprodukt bör kastas efter att den avskiljts från vanligt hushållsavfall.Det faller på ditt ansvar att kasta denna och annan <strong>el</strong>ektrisk och<strong>el</strong>ektronisk utrustning på fastställda insamlingsplatser utseddaav regeringen <strong>el</strong>ler lokala myndigheter. Korrekt kassering ochåtervinning skyddar mot eventu<strong>el</strong>la negativa konsekvenserför miljön och personhälsa. För mer detaljerad information omkassering av din gamla utrustning kontaktar du dina lokalamyndigheter, avfallshanteringen <strong>el</strong>ler butiken där du köpteprodukten.WEB: Para obter informações adicionais, visitewww.linksys.com/internationalRouter sem fios G de banda larga8013010NC-JL35
MANUAL DO USUÁRIORoteador de BandaLarga Wir<strong>el</strong>ess-GMod<strong>el</strong>o Nº: WRT54G2 (BP)
Sobre este ManualSobre este ManualDescrições dos íconesNa medida em que for lendo este Manual do Usuário, vocêverá diversos ícones que chamam a atenção para itensespecíficos. Segue abaixo uma descrição desses ícones:NOTA: Esta marca de verificação indica queexiste uma nota de interesse e que você deve,portanto, prestar uma atenção especial durantea utilização do produto.ATENÇÃO: Este ponto de exclamação indicaum alerta ou um ponto de atenção, significandoque algo pode danificar sua propriedade ouproduto.WEB: Este ícone com o globo indica umendereço válido de um site da web ou umendereço de e-mail.Recursos OnlineA maior parte dos navegadores da web permitem quevocê informe o endereço da web sem precisar inserir ohttp:// no início. Este Manual do Usuário irá abordar oswebsites sem a inclusão do http:// no início do endereço.Alguns navegadores mais antigos podem pedir que vocêo insira.RecursoLinksysLinksys InternationalGlossárioSegurança de RedeSitewww.linksys.comwww.linksys.com/internationalwww.linksys.com/glossarywww.linksys.com/securityDireitos Autorais e Marcas RegistradasA Linksys é uma marca registradada Cisco Systems, Inc. e/ou de suasafiliadas nos EUA e em outros países.Copyright © 2008 Cisco Systems,Inc. Todos os direitos reservados.Outras marcas e nomes de produtossão marcas registradas de seusrespectivos proprietários.Roteador de Banda Larga Wir<strong>el</strong>ess-G
SumárioCapítulo 1: Visão Geral do Produto 1Pain<strong>el</strong> Frontal . . . . . . . . . . . . . . . . . . . . . . . . . . . . . . . . . . . . . . . . . . . . . . . . 1Pain<strong>el</strong> Traseiro. . . . . . . . . . . . . . . . . . . . . . . . . . . . . . . . . . . . . . . . . . . . . . . . 1Posicionamento . . . . . . . . . . . . . . . . . . . . . . . . . . . . . . . . . . . . . . . . . . . . . . 1Capítulo 2: Lista de Verificação da Segurança Sem Fio 3Diretrizes Gerais de Segurança na Rede . . . . . . . . . . . . . . . . . . . . . . . . . . . . . . . 3Dicas Adicionais de Segurança . . . . . . . . . . . . . . . . . . . . . . . . . . . . . . . . . . . . . 3Capítulo 3: Configuração Avançada 4Configuração > Configuração Básica . . . . . . . . . . . . . . . . . . . . . . . . . . . . . . . . . 4Configuração > DDNS. . . . . . . . . . . . . . . . . . . . . . . . . . . . . . . . . . . . . . . . . . . 7Configuração - MAC Address Clone . . . . . . . . . . . . . . . . . . . . . . . . . . . . . . . . . . 8Configuração > Roteamento avançado. . . . . . . . . . . . . . . . . . . . . . . . . . . . . . . . 8Sem fio > Configurações sem fio básicas . . . . . . . . . . . . . . . . . . . . . . . . . . . . . . . 9Sem fio > Segurança sem fio . . . . . . . . . . . . . . . . . . . . . . . . . . . . . . . . . . . . . .11Sem Fio > Filtro MAC Sem Fio . . . . . . . . . . . . . . . . . . . . . . . . . . . . . . . . . . . . . 13Sem fio > Configurações sem fio avançadas. . . . . . . . . . . . . . . . . . . . . . . . . . . . 13Segurança > Firewall . . . . . . . . . . . . . . . . . . . . . . . . . . . . . . . . . . . . . . . . . . .15Firewall . . . . . . . . . . . . . . . . . . . . . . . . . . . . . . . . . . . . . . . . . . . . . . . . . . . .15Segurança > Passagem de VPN . . . . . . . . . . . . . . . . . . . . . . . . . . . . . . . . . . . . 15Restrições de Acesso > Acesso à Internet . . . . . . . . . . . . . . . . . . . . . . . . . . . . . .15Aplicativos e Jogos - Port Range Forward (Encaminhamento de Intervalo de Portas) . .17Aplicativos e Jogos > Disparo de portas . . . . . . . . . . . . . . . . . . . . . . . . . . . . . . .17Aplicativos e Jogos > DMZ. . . . . . . . . . . . . . . . . . . . . . . . . . . . . . . . . . . . . . . 18Aplicativos e Jogos > QoS . . . . . . . . . . . . . . . . . . . . . . . . . . . . . . . . . . . . . . . .18Administração > Gerenciamento. . . . . . . . . . . . . . . . . . . . . . . . . . . . . . . . . . . 19Administração > Log . . . . . . . . . . . . . . . . . . . . . . . . . . . . . . . . . . . . . . . . . . .20Administração > Diagnóstico . . . . . . . . . . . . . . . . . . . . . . . . . . . . . . . . . . . . . .20Administração > Padrões de fábrica . . . . . . . . . . . . . . . . . . . . . . . . . . . . . . . . . 20Administração > Atualização do firmware . . . . . . . . . . . . . . . . . . . . . . . . . . . . . .21Administração > Gerenciamento de config . . . . . . . . . . . . . . . . . . . . . . . . . . . . .21Status > Roteador . . . . . . . . . . . . . . . . . . . . . . . . . . . . . . . . . . . . . . . . . . . . .21Status > Rede local. . . . . . . . . . . . . . . . . . . . . . . . . . . . . . . . . . . . . . . . . . . . 22Status > Sem fio . . . . . . . . . . . . . . . . . . . . . . . . . . . . . . . . . . . . . . . . . . . . . .22Apêndice A: Resolução de Problemas 23Apêndice B: Especificações 24Apêndice C: Informações de garantia 25GARANTIA LIMITADA . . . . . . . . . . . . . . . . . . . . . . . . . . . . . . . . . . . . . . . . . . .25EXCLUSÕES E LIMITAÇÕES . . . . . . . . . . . . . . . . . . . . . . . . . . . . . . . . . . . . . . . .25COMO OBTER O SERVIÇO DE GARANTIA . . . . . . . . . . . . . . . . . . . . . . . . . . . . . . .25Roteador Banda Larga Wir<strong>el</strong>ess-Gii
SumárioSUPORTE TÉCNICO. . . . . . . . . . . . . . . . . . . . . . . . . . . . . . . . . . . . . . . . . . . . 26GERAL. . . . . . . . . . . . . . . . . . . . . . . . . . . . . . . . . . . . . . . . . . . . . . . . . . . . 26Apêndice D: Informações normativas 27FCC Statement . . . . . . . . . . . . . . . . . . . . . . . . . . . . . . . . . . . . . . . . . . . . . . .27Safety Notices. . . . . . . . . . . . . . . . . . . . . . . . . . . . . . . . . . . . . . . . . . . . . . . 27Industry Canada Statement . . . . . . . . . . . . . . . . . . . . . . . . . . . . . . . . . . . . . . .27Avis d’Industrie Canada. . . . . . . . . . . . . . . . . . . . . . . . . . . . . . . . . . . . . . . . . 27Wir<strong>el</strong>ess Disclaimer . . . . . . . . . . . . . . . . . . . . . . . . . . . . . . . . . . . . . . . . . . . .28Avis de non-responsabilité concernant les appareils sans fil . . . . . . . . . . . . . . . . . .28Declaração de conformidade referente à Diretiva da UE 1999/5/EC(Diretiva R&TTE) . . . . . . . . . . . . . . . . . . . . . . . . . . . . . . . . . . . . . . . . . . . . . .29Marca CE . . . . . . . . . . . . . . . . . . . . . . . . . . . . . . . . . . . . . . . . . . . . . . . . . . .30Restrições nacionais . . . . . . . . . . . . . . . . . . . . . . . . . . . . . . . . . . . . . . . . . . . 30Restrições de uso do produto . . . . . . . . . . . . . . . . . . . . . . . . . . . . . . . . . . . . . 31Documentos técnicos em www.linksys.com/international . . . . . . . . . . . . . . . . . . .31Informações para o usuário sobre produtos para o consumidor cobertos p<strong>el</strong>aDiretiva da UE 2002/96/EC r<strong>el</strong>ativas ao WEEE (Waste Electric and ElectronicEquipment) . . . . . . . . . . . . . . . . . . . . . . . . . . . . . . . . . . . . . . . . . . . . . . . . .32Roteador Banda Larga Wir<strong>el</strong>ess-Giii
Capítulo 1Visão Geral do ProdutoCapítulo 1:Visão Geral do ProdutoAgradecemos a sua preferência p<strong>el</strong>o Roteador de BandaLarga Linksys Wir<strong>el</strong>ess-G. O Roteador permite que vocêacesse a Internet por meio de uma conexão sem fio, umatransmissão de até 54 Mbps ou por uma de suas quatroportas alternadas. Você também pode usar o Roteadorpara compartilhar recursos, como computadores,impressoras e arquivos. Diversos recursos de segurançaajudam a proteger os seus dados e a sua privacidadeenquanto está online. Os recursos de segurança incluemo WPA2, um firewall de Stateful Packet Inspection (SPI) euma tecnologia NAT. Configurar o Roteador é fácil, usandoo utilitário baseado no navegadorPain<strong>el</strong> FrontalWir<strong>el</strong>ess (Verde) O LED do Wir<strong>el</strong>ess acendequando seu recurso está habilitado. Se o LEDestiver piscando, o Roteador estará ativamenteenviando ou recebendo dados p<strong>el</strong>a rede.Internet (Verde) O LED da Internet acendequando há uma conexão feita p<strong>el</strong>a porta daInternet. Um LED com a luz piscando indica aatividade de rede p<strong>el</strong>a porta da Internet.Energia (Verde) O LED de Energia acendee permanece assim quando o Roteador estáligado. Quando o Roteador inicia um modo deauto-diagnóstico durante uma inicialização,o LED começa a piscar. Quando o diagnósticoestiver completo, o LED irá acender.Pain<strong>el</strong> Traseiro1, 2, 3, 4 (Verde) Esses LEDs numerados, quecorrespondem às portas numeradas do pain<strong>el</strong>traseiro do Roteador, têm duas finalidades. Casoo LED esteja continuamente aceso, o Roteadorestá conectado com um dispositivo p<strong>el</strong>a porta.Um LED com a luz piscando indica a atividadede rede daqu<strong>el</strong>a porta.Botão Wi-Fi Protected Setup Caso você tenhadispositivos clientes, como adaptadores semfio, que suporte o Wi-Fi Protected Setup, entãovocê pode usar o Wi-Fi Protected Setup paraconfigurar automaticamente a segurança semfio para a sua rede sem fio.Para usar o Wi-Fi Protected Setup, execute oAssistente de Configuração ou recorra à seção“Sem Fio > Configurações Sem Fio Básicas” do“Capítulo 3: Configuração Avançada”.LED do Wi-Fi Protected Setup (Verde/Amar<strong>el</strong>o) Ele acende em verde quandoa segurança sem fio está habilitada. OLED acende em verde por dois minutosdurante a Configuração do Wi-Fi Protected.O LED acende em amar<strong>el</strong>o caso ocorra um errodurante o processo de Configuração do Wi‐FiProtected. Verifique se o dispositivo clientesuporta o Wi‐Fi Protected Setup. Aguardeaté que o LED se apague e tente novamente.Internet A porta da Internet é onde vocêconecta o seu cabo ou a Internet do DSL.1, 2, 3, 4 Essas portas Ethernet (1, 2, 3, 4)conectam o Roteador aos PCs em sua rede comfio e outros dispositivos de rede Ethernet.Redefinir Existem duas maneiras de redefiniros padrões de fábrica do Roteador. Pressione esegure o Botão Redefinir por, aproximadamente,cinco segundos, ou restaure os padrões a partirde Administração > Padrões de Fábrica, noutilitário baseado na web do Roteador.Energia A porta de Energia é onde vocêconecta o adaptador de energia.PosicionamentoExistem duas maneiras de instalar fisicamente o Roteador.A primeira é colocando o Roteador horizontalmente emuma superfície. A segunda maneira é montar o Roteadorem uma parede.Posição HorizontalO Roteador possui quatro pés de borracha em seu pain<strong>el</strong>inferior. Coloque o Roteador em uma superfície próxima auma saída <strong>el</strong>étrica.O LED acende em amar<strong>el</strong>o quando a sessão doWi‐Fi Protected Setup está ativa e uma segundasessão é iniciada. O Roteador suporta umasessão de cada vez. Aguarde até que o LED seapague antes de iniciar a próxima sessão do Wi-Fi Protected Setup.Roteador de Banda Larga Wir<strong>el</strong>ess-G
Capítulo 1Visão geral do produtoPosição de Montagem na ParedeO Roteador possui dois slots de montagem em seupain<strong>el</strong> inferior. A distância entre os slots é de 152 mm(15 cm).São necessários dois parafusos para montar o Roteador.Siga as instruções:1. Determine onde você deseja montar o Roteador.Verifique se a parede em que você deseja montá-loestá limpa, plana, seca e firme. Verifique também se olocal está próximo a uma saída <strong>el</strong>étrica.2. Faça dois furos na parede. Veja se os furos têm152 mm (15 cm) de distância um do outro.3. Insira um parafuso em cada furo e deixe 3 mmde sua cabeça expostos.4. Maneje o Roteador até que os slots da parede estejamalinhados com os dois parafusos.5. Coloque os slots nos parafusos e deslize o Roteadorpara baixo até que os parafusos encaixem firmementenos slots da parede.Hardware de Montagem Sugerido4 a 5 mm 1 a 1,5 mm2,5 a 3,0mm† Nota: As ilustrações de montagem do hardwarenão estão em escala.NOTA: A Linksys não se responsabiliza pordanos que possam ocorrer p<strong>el</strong>a montagem nãosegura do hardware.152 mmImprima essa página em tamanho 100%.Corte a linha pontilhada e fixe-a na parede para furar o espaço com precisão.Mod<strong>el</strong>o de Montagem na ParedeRoteador de Banda Larga Wir<strong>el</strong>ess-G
Capítulo 2Lista de Verificação da Segurança Sem FioCapítulo 2:Lista de Verificação daSegurança Sem FioAs redes sem fio são convenientes e fáceis de instalar, e,por esse motivo, as redes domésticas que possuem acessoà Internet de alta v<strong>el</strong>ocidade já estão adotando essa opção.Como as redes sem fio operam enviando informaçõessobre as ondas de rádio, <strong>el</strong>as podem estar mais vulneráveisa invasões do que as redes convencionais, com fio. Assimcomo os sinais do seu c<strong>el</strong>ular ou t<strong>el</strong>efones sem fio, os sinaisda sua rede sem fio também podem ser interceptados. Jáque você não pode prevenir, fisicamente, que alguém seconecte à sua rede sem fio, deve tomar alguns cuidadosadicionais para manter sua rede segura.1. Altere o nome padrão ouSSID da rede sem fioOs dispositivos sem fio possuem um nome de rede semfio padrão ou SSID (Service Set Identifier) definido p<strong>el</strong>afábrica. Esse é o nome da sua rede sem fio, que pode ter até32 caracteres. Os produtos sem fio da Linksys usam linksyscomo nome padrão da rede sem fio. Você deve substituiresse nome por algo exclusivo, a fim de diferenciar a suarede sem fio de outras redes que possam existir próximasa você, mas não utilize informações pessoais (como o seunúmero de Segurança Social), pois <strong>el</strong>as estarão disponíveispara que qualquer pessoa veja enquanto navega p<strong>el</strong>asredes sem fio.2. Altere a senha padrãoQuando desejar alterar as configurações dos produtos semfio, será solicitada uma senha. Esses dispositivos possuemuma senha padrão definida p<strong>el</strong>a fábrica. A senha padrãoda Linksys é admin. Os hackers conhecem esses padrõese podem tentar usá-los para acessar o seu dispositivosem fio e mudar as suas configurações de rede. Paraevitar alterações não-autorizadas, personalize a senha dodispositivo para que <strong>el</strong>a seja difícil de adivinhar.3. Habilite o filtro de endereçoMACOs roteadores da Linksys possibilitam que você habilite ofiltro de endereço MAC (Media Access Control). O endereçoMAC é uma série única de números e letras atribuídosa cada dispositivo de rede. Com esse filtro habilitado,o acesso à rede sem fio é fornecido unicamente aosdispositivos sem fio com endereços específicos MAC. Porexemplo, você pode especificar o endereço MAC de cadacomputador na sua casa, para que apenas <strong>el</strong>es possamacessar a sua rede sem fio.4. Habilite a criptografiaA criptografia protege os dados transmitidos por uma redesem fio. O WPA/WPA2 (Wi-Fi Protected Access) e o WEP(Wired Equivalency Privacy) oferecem níveis diferentesde segurança para a comunicação sem fio. Atualmente,os dispositivos certificados de Wi-Fi precisam suportar oWPA2, mas não o WEP.Uma rede criptografada com o WPA/WPA2 é maissegura do que uma rede com WEP, pois o WPA/WPA2usa a criptografia de chave dinâmica. Para proteger asinformações na medida em que <strong>el</strong>as passam p<strong>el</strong>as ondasde transmissão, você deve habilitar o nív<strong>el</strong> mais alto decriptografia suportado p<strong>el</strong>o seu equipamento de rede.O WEP é um padrão mais antigo de criptografia e podeser a única opção disponív<strong>el</strong> em alguns dispositivos maisantigos que não suportam o WPA.Diretrizes Gerais de Segurança na RedeA segurança da rede sem fio não é útil se a rede não estásegura.• Definir senhas é proteger todos os computadores narede, mas definir individualmente as senhas é protegeros seus arquivos mais importantes.• Altere as senhas regularmente.• Instale um software antivírus em um software pessoalde firewall.• Desabilite o compartilhamento de rede (ponto a ponto).Algumas aplicações podem abrir o compartilhamentode arquivos sem que você autorize ou saiba.Dicas Adicionais de Segurança• Mantenha os roteadores sem fio, os pontos de rede ouos gateways longe de paredes e jan<strong>el</strong>as externas.• Desabilite os roteadores sem fio, pontos de acessoou gateways quando não estiverem em uso (à noite,durante as férias).• Use sentenças fortes com, p<strong>el</strong>o menos, oito caracteres.Combine letras e números para evitar o uso depalavras conhecidas que possam ser encontradas nodicionário.WEB: Para mais informações sobrea segurança sem fio, visite o sitewww.linksys.com/securityRoteador de Banda Larga Wir<strong>el</strong>ess-G
Capítulo 3Configuração AvançadaCapítulo 3:Configuração AvançadaDepois de configurar o Roteador usando o Assistente deConfiguração (localizado no CD-ROM), <strong>el</strong>e estará prontopara ser usado. No entanto, caso você deseje alterar suasconfigurações avançadas, use o utilitário baseado na webdesse Roteador. Este capítulo descreve cada página daweb do utilitário e as principais funções da página. Vocêpode acessar o utilitário por meio de um navegador daweb, em um computador conectado ao Roteador.O utilitário baseado na web apresenta as seguintes guias:Configuração, Sem Fio, Segurança, Restrições de Acesso,Aplicações & Jogos, Administração e Status. As guiasadicionais são disponibilizadas assim que você clica emuma das guias principais.Configuração > Configuração BásicaA primeira t<strong>el</strong>a que aparece é Configuração Básica. Elapermite que você altere as configurações gerais doRoteador.OBSERVAÇÃO: ao instalar o roteador p<strong>el</strong>aprimeira vez, você deve usar o Assistentepara configuração disponív<strong>el</strong> no CD-ROMde configuração. Se você quiser definir asconfigurações avançadas, use este capítulo paraaprender sobre o Utilitário baseado na Web.Como Acessar o Utilitário Baseado na WebPara acessar o utilitário baseado na web, inicie o navegadorem seu computador e informe o endereço IP padrão doRoteador, 192.168.1.1, no campo Endereço. Em seguida,pressione Enter.Aparecerá uma t<strong>el</strong>a solicitando uma senha. (Usuários quenão sejam de Windows XP verão uma t<strong>el</strong>a sem<strong>el</strong>hante).Deixe o campo Nome de Usuário em branco. Na primeiravez em que você abrir o utilitário baseado na Web, utilize asenha padrão admin. (Você pode definir uma nova senhaa partir da t<strong>el</strong>a Gerenciamento da guia Administração).Clique em OK para continuar.T<strong>el</strong>a de SenhaConfiguração > Configuração BásicaConfiguração da InternetA seção de Configuração da Internet configura o Roteadorpara a sua conexão da Internet. Muitas das informaçõespodem ser obtidas por meio do seu ISP.Tipo de conexão com a InternetS<strong>el</strong>ecione o tipo de conexão da Internet que o seu ISPfornece a partir do menu suspenso. Os tipos disponíveissão:• Configuração Automática - DHCP• IP estático• PPPoE• PPTP• L2TP• Cabo T<strong>el</strong>straConfiguração Automática - DHCPPor padrão, o Tipo de Conexão da Internet do Roteadorestá definido como Configuração Automática - DHCP,que deve ser mantido apenas se o seu ISP suportar oDHCP ou se você estiver se conectando por meio de umendereço IP dinâmico. (Essa opção geralmente se aplica àsconexões a cabo).Tipo de Conexão da Internet > Configuração Automática - DHCPRoteador de banda larga Wir<strong>el</strong>ess-G
Capítulo 3Configuração AvançadaIP estáticoCaso você precise usar um endereço IP permanente parase conectar à Internet, s<strong>el</strong>ecione IP Estático.de Internet. O período de rediscagem padrão é de30 segundos.PPTPO PPTP (Point-to-Point Tunn<strong>el</strong>ing Protocol) é um serviçoque se aplica somente a conexões na Europa.Tipo de Conexão da Internet > IP EstáticoEndereço IP da Internet Esse é o endereço IP doRoteador, quando visto da Internet. O seu ISP irá fornecero Endereço IP que você deve especificar aqui.Máscara de Sub-rede Essa é a Máscara de Sub-rede doRoteador, vista p<strong>el</strong>os usuários na Internet (incluindo o seuISP). O seu ISP irá fornecer sua Máscara de Sub-rede.Gateway O seu ISP irá fornecer o Endereço de Gateway,que é o endereço IP do servidor ISP.DNS O seu ISP irá fornecer p<strong>el</strong>o menos um Endereço IPdo Servidor DNS (Domain Name System).PPPoEAlguns ISPs baseados em DSL utilizam o PPPoE (Point-to-Point Protocol over Ethernet) para estab<strong>el</strong>ecer conexõesda Internet. Se você estiver conectado à Internet por umalinha DSL, verifique com o ISP se <strong>el</strong>e usa o protocolo PPPoE.Em caso afirmativo, você terá de habilitar o PPPoE.Tipo de Conexão da Internet > PPPoENome de Usuário e Senha Insira o Nome de Usuário e aSenha fornecidos por seu ISP.Conexão sob demanda: Tempo ocioso máximo Vocêpode configurar o Gateway para interromper a conexão deInternet depois que <strong>el</strong>a ficar inativa por um determinadoperíodo (Tempo ocioso máximo). Se a conexão deInternet for encerrada por inatividade, a opção Conexãosob demanda permitirá que o Roteador restab<strong>el</strong>eça aconexão automaticamente assim que você tentar acessarnovamente a Internet. Para usar essa opção, s<strong>el</strong>ecioneConexão sob demanda. No campo Tempo ocioso máximo,insira o número de minutos que devem transcorrer antesque a conexão de Internet seja encerrada. O Tempo ociosomáximo padrão é de 5 minutos.Keep Alive: Período de rediscagem Se você s<strong>el</strong>ecionaressa opção, o Roteador verificará sua conexão deInternet periodicamente. Se você estiver desconectado,<strong>el</strong>e restab<strong>el</strong>ecerá sua conexão automaticamente. Parausar essa opção, s<strong>el</strong>ecione Keep Alive. No campoRedial Period (Período de rediscagem), especifique comque freqüência o Roteador deve verificar a conexãoTipo de Conexão da Internet > PPTPEndereço IP da Internet Esse é o endereço IP doRoteador, conforme visto na Internet. O seu ISP irá fornecero Endereço IP que você deve especificar aqui.Máscara de Sub-rede Essa é a Máscara de Sub-rede doRoteador, vista p<strong>el</strong>os usuários na Internet (incluindo o seuISP). O seu ISP irá fornecer sua Máscara de Sub-rede.Gateway O ISP fornecerá o endereço do gateway.Nome de Usuário e Senha Insira o Nome de Usuário e aSenha fornecidos por seu ISP.Conexão sob demanda: Tempo ocioso máximo Vocêpode configurar o Gateway para interromper a conexão deInternet depois que <strong>el</strong>a ficar inativa por um determinadoperíodo (Tempo ocioso máximo). Se a conexão deInternet for encerrada por inatividade, a opção Conexãosob demanda permitirá que o Roteador restab<strong>el</strong>eça aconexão automaticamente assim que você tentar acessarnovamente a Internet. Para usar essa opção, s<strong>el</strong>ecioneConexão sob demanda. No campo Tempo ocioso máximo,insira o número de minutos que devem transcorrer antesque a conexão de Internet seja encerrada. O Tempo ociosomáximo padrão é de 5 minutos.Keep Alive: Período de rediscagem Se vocês<strong>el</strong>ecionar essa opção, o Roteador verificará suaconexão de Internet periodicamente. Se estiverdesconectado, o Roteador irá automaticamenterestab<strong>el</strong>ecer sua conexão. Para usar essa opção, s<strong>el</strong>ecioneKeep Alive. No campo Redial Period (Período de rediscagem),especifique com que freqüência o Roteador deve verificar aconexão de Internet. O valor padrão é 30 segundos.Roteador de banda larga Wir<strong>el</strong>ess-G
Capítulo 3Configuração AvançadaL2TPO L2TP é um serviço que se aplica somente a conexõesem Isra<strong>el</strong>.Tipo de Conexão da Internet > L2TPNome de Usuário e Senha Insira o Nome de Usuário e aSenha fornecidos por seu ISP.Servidor L2TP Este é o endereço IP do servidor L2TP. Oseu ISP irá fornecer o Endereço IP que você deve especificaraqui.Conexão sob demanda: Tempo ocioso máximo Vocêpode configurar o Gateway para interromper a conexão deInternet depois que <strong>el</strong>a ficar inativa por um determinadoperíodo (Tempo ocioso máximo). Se a conexão deInternet for encerrada por inatividade, a opção Conexãosob demanda permitirá que o Roteador restab<strong>el</strong>eça aconexão automaticamente assim que você tentar acessarnovamente a Internet. Para usar essa opção, s<strong>el</strong>ecioneConexão sob demanda. No campo Tempo ocioso máximo,insira o número de minutos que devem transcorrer antesque a conexão de Internet seja encerrada. O Tempo ociosomáximo padrão é de 5 minutosKeep Alive: Período de rediscagem Se você s<strong>el</strong>ecionaressa opção, o Roteador verificará sua conexão deInternet periodicamente. Se você estiver desconectado,<strong>el</strong>e restab<strong>el</strong>ecerá sua conexão automaticamente. Parausar essa opção, s<strong>el</strong>ecione Keep Alive. No campoRedial Period (Período de rediscagem), especifique comque freqüência o Roteador deve verificar a conexãode Internet. O período de rediscagem padrão é de30 segundos.Cabo T<strong>el</strong>straO T<strong>el</strong>stra Cable é um serviço que se aplica somente aconexões na Austrália. Se o seu ISP usar HBS (HeartBeatSignal), s<strong>el</strong>ecione T<strong>el</strong>stra.Tipo de Conexão de Internet > T<strong>el</strong>stra CableNome de Usuário e Senha Insira o Nome de Usuário e aSenha fornecidos por seu ISP.Heart Beat Server Este é o endereço IP do HeartbeatServer. O seu ISP irá fornecer o Endereço IP que você deveespecificar aqui.Conexão sob demanda: Tempo ocioso máximo Vocêpode configurar o Gateway para interromper a conexão deInternet depois que <strong>el</strong>a ficar inativa por um determinadoperíodo (Tempo ocioso máximo). Se a conexão deInternet for encerrada por inatividade, a opção Conexãosob demanda permitirá que o Roteador restab<strong>el</strong>eça aconexão automaticamente assim que você tentar acessarnovamente a Internet. Para usar essa opção, s<strong>el</strong>ecioneConexão sob demanda. No campo Tempo ocioso máximo,insira o número de minutos que devem transcorrer antesque a conexão de Internet seja encerrada. O Tempo ociosomáximo padrão é de 5 minutosKeep Alive: Período de rediscagem Se você s<strong>el</strong>ecionaressa opção, o Roteador verificará sua conexão deInternet periodicamente. Se você estiver desconectado,<strong>el</strong>e restab<strong>el</strong>ecerá sua conexão automaticamente. Parausar essa opção, s<strong>el</strong>ecione Keep Alive. No campoRedial Period (Período de rediscagem), especifique comque freqüência o Roteador deve verificar a conexãode Internet. O período de rediscagem padrão é de30 segundos.Configurações opcionaisAlgumas destas configurações podem ser exigidas por seuISP. Consulte o ISP antes de fazer quaisquer alterações.Configurações opcionaisNome do Roteador Neste campo, você pode inserir umnome com até 39 caracteres para representar o Roteador.Nome do host e Nome do domínio Esses campospermitem que você defina um nome de host e um nomede domínio para o Roteador. Alguns ISPs, normalmenteos de conexão via cabo, exigem esses nomes comoidentificação. Consulte seu ISP para saber se o serviço deInternet de banda larga foi configurado com nomes dehost e de domínio. Na maioria dos casos, deixar os camposem branco funciona.MTU MTU é a Unidade máxima de transmissão. Essevalor especifica o maior tamanho de pacote permitidopara transmissão via Internet. S<strong>el</strong>ecione Manual se quiserinserir manualmente o maior tamanho de pacote que serátransmitido. Para que o Roteador s<strong>el</strong>ecione a m<strong>el</strong>hor MTUpara sua conexão de Internet, mantenha a configuraçãopadrão, Automático.Tamanho Quando a opção Manual é s<strong>el</strong>ecionada nocampo MTU, essa opção é habilitada. Deixe esse valor nafaixa de 1200 a 1500. O tamanho padrão depende do Tipode Conexão de Internet:• DHCP, IP Estático ou T<strong>el</strong>stra: 1500• PPPoE: 1492• PPTP ou L2TP: 1460Roteador de banda larga Wir<strong>el</strong>ess-G
Capítulo 3Configuração AvançadaConfiguração de redeA seção Network Setup (Configuração de rede) altera asconfigurações da rede conectada às portas Ethernet doRoteador. A configuração sem fio é feita através da guiaWir<strong>el</strong>ess (Sem fio).IP do roteadorA seção Router IP (IP do Roteador) mostra o endereço IP ea máscara de sub-rede do Roteador conforme vistos p<strong>el</strong>asua rede.Router IP Address (Endereço IP do Roteador).Configurações do servidor de endereços de rede (DHCP)As configurações permitem definir a função do servidorDHCP (Dynamic Host Configuration Protocol) do Roteador.O Roteador pode ser utilizado como Servidor DHCP desua rede. Um servidor DHCP atribui automaticamenteum endereço IP a cada computador da rede. Se decidirhabilitar a opção de Servidor DHCP do Roteador, vocêdeverá se assegurar de que não exista outro servidorDHCP em sua rede.Configurações do servidor de endereços de rede (DHCP)Servidor DHCP Por padrão, o DHCP já vem habilitadoda fábrica. Se já houver um servidor DHCP na sua redeou se você não quiser um, clique no botão de opçãoDisable (Desabilitar). (Nenhum outro recurso DHCP ficarádisponív<strong>el</strong>.)Endereço IP inicial Insira um valor a partir do qual oservidor DHCP iniciará a emissão de endereços IP. Como oendereço IP padrão do Roteador é 192.168.1.1, o valor doEndereço IP Inicial deve ser 192.168.1.2 ou maior, porémmenor que 192.168.1.253. O valor padrão do Endereço IPInicial é 192.168.1.100.Número Máximo de Usuários DHCP Insira o númeromáximo de PCs aos quais você deseja que o servidor DHCPatribua endereços IP. Esse número não pode ser superior a253. O padrão é 50.Tempo de concessão para o cliente Esse é o tempodurante o qual um usuário da rede poderá se conectar aoRoteador usando seu endereço IP dinâmico atual. Insirao tempo, em minutos, durante o qual esse endereço IPdinâmico será “concedido” ao usuário. Quando o limite detempo for atingido, o usuário receberá um novo endereçoIP dinâmico automaticamente. O padrão é 0 minutos, oque significa um dia.Roteador de banda larga Wir<strong>el</strong>ess-GDNS Estático (1-3) DNS (Domain Name System) é a formaem que a Internet converte nomes de domínio e de sites emendereços da Internet ou URLs. Seu ISP fornecerá ao menosum Endereço IP de Servidor DNS. Se você quiser usar outro,digite o Endereço IP desejado em um desses campos. Vocêpode inserir até três Endereços IP de Servidor DNS aqui.O Roteador utilizará esses endereços para ter acesso maisrápido a servidores DNS em operação.WINS O WINS (Windows Internet Naming Service)gerencia a interação de cada PC com a Internet. Se vocêusar um servidor WINS, insira o Endereço IP do servidoraqui. Caso contrário, deixe o campo em branco.Time Setting (Configuração de horário)S<strong>el</strong>ecione o fuso horário no qual a sua rede funcionausando esse menu suspenso. (Também é possív<strong>el</strong> fazer oajuste automático para o horário de verão).Time Setting (Configuração de horário)Clique em Salvar configurações para aplicar suasalterações ou em Canc<strong>el</strong>ar alterações para canc<strong>el</strong>á-las.Configuração > DDNSO Roteador oferece um recurso chamado DDNS (DynamicDomain Name System). O DDNS permite atribuir um nomefixo de host e de domínio a um endereço IP de Internetdinâmico. Ele é útil quando você hospeda seu próprio site,servidor FTP ou outro servidor atrás do Roteador.Para poder usar esse recurso, você deve se inscrever noserviço DDNS através de um provedor de serviços DDNS,como o www.dyndns.org ou o www.TZO.com. Se vocênão quiser usar este recurso, mantenha a configuraçãopadrão, Disable (Desabilitar).DDNSO Roteador oferece um recurso chamado DDNS (DynamicDomain Name System). O DDNS permite atribuir um nomefixo de host e de domínio a um endereço IP de Internetdinâmico. Ele é útil quando você hospeda seu próprio site,servidor FTP ou outro servidor no Roteador.Para poder usar esse recurso, você deve se inscrever noserviço DDNS de um dos dois provedores de serviçosDDNS, DynDNS.org ou TZO.com. Se você não quiser usareste recurso, mantenha a configuração padrão, Disable(Desabilitar).Serviço DDNSSe o seu serviço DDNS for fornecido por DynDNS.org,escolha DynDNS.org no menu suspenso. Se seu serviçoDNSS for fornecido p<strong>el</strong>o TZO, s<strong>el</strong>ecione TZO.com. Osrecursos disponíveis na t<strong>el</strong>a DDNS variam de acordo comseu provedor de serviços DDNS.
Capítulo 3Configuração AvançadaDynDNS.orgConfiguração - MAC Address CloneUm endereço MAC é um código de 12 dígitos atribuído aum único hardware para fins de identificação. Alguns ISPsexigem que você registre um endereço MAC para poderacessar a Internet. Se você não quiser registrar o endereçoMAC novamente no ISP, poderá atribuir ao Roteador oendereço MAC que está atualmente registrado no seu ISPusando o recurso MAC Address Clone (Clone de endereçoMAC).Configuração > DDNS > DynDNSNome de Usuário Insira o Nome de Usuário de sua contaDDNS.Senha Insira a Senha da sua conta DDNS.Nome do Host Esta é a URL DDNS atribuída p<strong>el</strong>o serviçoDDNS.Endereço IP Internet O endereço IP de Internet doRoteador é exibido aqui. Por ser dinâmico, <strong>el</strong>e mudará.Status O status da conexão do serviço DDNS é exibidoaqui.Clique em Salvar configurações para aplicar suasalterações ou em Canc<strong>el</strong>ar alterações para canc<strong>el</strong>á-las.TZO.comConfiguração > MAC Address CloneMAC Address Clone (Clone de endereço MAC)Habilitar/Desabilitar Para clonar o Endereço MAC,s<strong>el</strong>ecione Habilitar.Entrada Definida p<strong>el</strong>o Usuário Insira aqui o EndereçoMAC registrado em seu ISP.Clonar o MAC do Seu PC Ao clicar neste botão, oendereço MAC do computador que você está usando seráclonado.Clique em Salvar configurações para aplicar suasalterações ou em Canc<strong>el</strong>ar alterações para canc<strong>el</strong>á-las.Configuração > Roteamento avançadoEsta t<strong>el</strong>a é usada para configurar as funções de roteamentoavançadas do Roteador. O NAT roteia a conexão de rededo Roteador host para a Internet. O Dynamic Routing(Roteamento dinâmico) ajusta automaticamente a formaem que os pacotes percorrem sua rede. O Roteamentoestático define uma rota fixa para outro destino na rede.Configuração > DDNS > TZOEndereço de E-mail, Chave TZO e Nome deDomínio Insira as configurações da conta que vocêdefiniu com TZO.Endereço IP Internet O endereço IP de Internet doRoteador é exibido aqui. Por ser dinâmico, <strong>el</strong>e mudará.Status O status da conexão do serviço DDNS é exibidoaqui.Clique em Salvar configurações para aplicar suasalterações ou em Canc<strong>el</strong>ar alterações para canc<strong>el</strong>á-las.Configuração > Advanced Routing (Gateway)Roteador de banda larga Wir<strong>el</strong>ess-G
Capítulo 3Configuração AvançadaGateway padrão Este é o endereço IP do dispositivo degateway que possibilita o contato entre o Roteador e arede ou o host remoto.Interface Esta interface lhe diz se o Endereço IP deDestino está em LAN & Wir<strong>el</strong>ess (redes Ethernet e semfio) ou em WAN (Internet).Excluir esta Entrada Para excluir uma rota, s<strong>el</strong>ecione onúmero da rota no menu suspenso e clique neste botão.Mostrar tab<strong>el</strong>a de roteamento Clique no botãoMostrar Tab<strong>el</strong>a de Roteamento para abrir uma t<strong>el</strong>a queexibe como os dados são roteados p<strong>el</strong>a sua rede local. Paracada rota, são exibidos o endereço IP da LAN de destino, aMáscara de sub-rede, o Gateway e a Interface. Clique emAtualizar para atualizar as informações. Clique em Fecharpara sair da t<strong>el</strong>a.Configuração > Roteamento Avançado (Roteador)Roteamento avançadoModo de Operação S<strong>el</strong>ecione o modo em que esteRoteador funcionará. Se o Roteador estiver hospedando aconexão da sua rede com a Internet, s<strong>el</strong>ecione Gateway.Se houver outro Roteador na sua rede, s<strong>el</strong>ecione Router(Roteador). Quando a opção Router é escolhida, DynamicRouting (Roteamento dinâmico) fica disponív<strong>el</strong> comoopção.Roteamento dinâmicoRIP Este recurso permite que o Roteador se ajusteautomaticamente às alterações físicas feitas no layout darede e troque tab<strong>el</strong>as de roteamento com o(s) outro(s)roteador(es). O Roteador determina a rota dos pacotesda rede com base no menor número de saltos entre aorigem e o destino. Este recurso é definido como Disabled(Desabilitado) por padrão. No menu suspenso, também épossív<strong>el</strong> s<strong>el</strong>ecionar LAN & Wir<strong>el</strong>ess (LAN e sem fio), quefaz o roteamento dinâmico p<strong>el</strong>as suas redes Ethernet esem fio. Você também pode s<strong>el</strong>ecionar WAN (Internet),que faz o roteamento dinâmico com dados recebidos daInternet. Por fim, s<strong>el</strong>ecione Both (Ambas) para habilitar oroteamento dinâmico de ambas as redes, bem como paraos dados da Internet.S<strong>el</strong>ecionar número da rota Para configurar uma rotaestática entre o Roteador e outra rede, s<strong>el</strong>ecione umnúmero na lista suspensa Static Routing (Roteamentoestático). (Uma rota estática é um caminho predeterminadoque as informações de rede devem percorrer para atingirum host ou uma rede específica). Insira as informaçõesdescritas abaixo para configurar uma nova rota estática.(Clique no botão D<strong>el</strong>ete This Entry (Excluir esta entrada)para excluir uma rota estática).Inserir nome da rota Insira aqui um nome para a rotausando, no máximo, 25 caracteres alfanuméricos.IP da LAN de destino Este é o endereço da rede oudo host remoto ao qual você deseja atribuir uma rotaestática.Máscara de sub-rede Determina qual parte de umendereço IP de destino é a parte da rede e qual é a partedo host.Roteador de banda larga Wir<strong>el</strong>ess-GTab<strong>el</strong>a de RoteamentoClique em Salvar configurações para aplicar suasalterações ou em Canc<strong>el</strong>ar alterações para canc<strong>el</strong>á-las.Sem fio > Configurações sem fio básicasAs configurações básicas da rede sem fio são definidasnesta t<strong>el</strong>a.Existem duas maneiras de configurar a(s) rede(s) sem fiodo Roteador, manual e Configuração protegida por Wi-Fi.A Configuração Protegida por Wi-Fi é um recurso quefacilita a configuração da sua rede sem fio. Se você tiverdispositivos de cliente, tais como adaptadores sem fio,que suportam Configuração Protegida por Wi-Fi, é possív<strong>el</strong>usar Configuração Protegida por Wi-Fi.Configuração Sem Fio Para configurar manualmentesua rede sem fio, s<strong>el</strong>ecione Manual. Prossiga para a seção“Configurações Sem Fio Básicas”. Para usar ConfiguraçãoProtegida por Wi-Fi, s<strong>el</strong>ecione Configuração Protegidapor Wi-Fi. Prossiga para a seção “Configuração Protegidapor Wi-Fi”.Configurações sem fio básicasSem Fio > Configurações Sem Fio Básicas (Configuração Manual)
Capítulo 3Configuração AvançadaModo de Rede Sem Fio Nesse menu suspenso, você podes<strong>el</strong>ecionar os padrões sem fio que estão em execução nasua rede. Se houver dispositivos Wir<strong>el</strong>ess-N, Wir<strong>el</strong>ess-G eWir<strong>el</strong>ess-B na sua rede, mantenha a configuração padrão,Mixed (Misto). Se houver apenas dispositivos Wir<strong>el</strong>ess-G eWir<strong>el</strong>ess-B em sua rede, s<strong>el</strong>ecione BG-Mixed. Se só houverdispositivos Wir<strong>el</strong>ess-N, s<strong>el</strong>ecione Wir<strong>el</strong>ess-N Only(Apenas Wir<strong>el</strong>ess-N). Se só houver dispositivos Wir<strong>el</strong>ess-G, s<strong>el</strong>ecione Wir<strong>el</strong>ess-G Only (Apenas Wir<strong>el</strong>ess-G). Se sóhouver dispositivos Wir<strong>el</strong>ess-B, s<strong>el</strong>ecione Wir<strong>el</strong>ess-B Only(Apenas Wir<strong>el</strong>ess-B). Se não houver nenhum dispositivosem fio na sua rede, s<strong>el</strong>ecione Disable (Desabilitar).Nome da Rede Sem Fio (SSID) SSID é o nome de redecompartilhado entre todos os pontos de uma rede semfio. Ele deve ser idêntico para todos os dispositivos darede sem fio. Ele diferencia maiúsculas e minúsculas enão deve exceder 32 caracteres (use qualquer caracteredo teclado). Certifique-se de que essa configuração sejaa mesma em todos os pontos da sua rede sem fio. Paraobter mais segurança, altere o SSID padrão (linksys) paraum nome exclusivo.Canal Sem Fio S<strong>el</strong>ecione na lista o canal apropriadoque corresponde às suas configurações de rede. Emtodos os dispositivos da rede sem fio, a transmissãodeve ser realizada p<strong>el</strong>o mesmo canal para que funcionecorretamente.Transmissão de SSID Sem Fio Quando clientes sem fiopesquisam a área local em busca de redes sem fio às quaispossam se associar, <strong>el</strong>es detectam o SSID transmitido p<strong>el</strong>oRoteador. Para transmitir o SSID do Roteador, mantenha aconfiguração padrão, Enabled (Habilitado). Se você nãoquiser transmitir o SSID do Roteador, s<strong>el</strong>ecione Disabled(Desabilitado).Clique em Salvar configurações para aplicar suasalterações ou em Canc<strong>el</strong>ar alterações para canc<strong>el</strong>á-las.Configuração Wi-Fi ProtectedExistem três métodos disponíveis. Use o métodoque se aplicar ao dispositivo de cliente que você estáconfigurando.Sem Fio > Configurações Sem Fio Básicas(Configuração Wi-Fi Protected)Configuração protegida por Wi-Fi > ParabénsOBSERVAÇÃO: a configuração Wi-Fi Protecteddefine um dispositivo de cliente de cada vez.Repita as instruções para cada dispositivo decliente que suporta essa configuração.Método n. 1Use este método se seu dispositivo de cliente tiver o botãoWi-Fi Protected Setup.1. Clique ou pressione o botão Wi-Fi Protected Setupno dispositivo de cliente.2. Clique no botão Wi-Fi Protected Setup nesta t<strong>el</strong>a.Roteador de banda larga Wir<strong>el</strong>ess-G10
Capítulo 3Configuração Avançada3. Depois que o dispositivo cliente tiver sido configurado,clique em OK. Em seguida, consulte novamente o seudispositivo cliente ou sua documentação para obtermaiores instruções.Método n. 2Use este método se seu dispositivo cliente tiver umnúmero PIN de Wi-Fi Protected Setup.1.2.3.Insira o número PIN no campo nesta t<strong>el</strong>a.Clique em Registrar.Depois que o dispositivo cliente tiver sido configurado,clique em OK. Em seguida, consulte novamente o seudispositivo cliente ou sua documentação para obtermaiores instruções.Método n. 3Use este método se seu dispositivo de cliente pedir onúmero PIN do Roteador.1. Insira o número PIN listado nesta t<strong>el</strong>a. (Ele também élistado no rótulo na parte inferior do Roteador).2. Depois que o dispositivo de cliente tiver sidoconfigurado, clique em OK. Em seguida, consultenovamente o seu dispositivo cliente ou suadocumentação para obter maiores instruções.O Status de Wi-Fi Protected Setup, Nome da Rede (SSID),Segurança, Criptografia e Senha são exibidos na parteinferior da t<strong>el</strong>a.OBSERVAÇÃO: se você tiver dispositivos decliente que não suportam a configuraçãoWi-Fi Protected, observe as configurações semfio e, em seguida, configure manualmente essesdispositivos de cliente.Sem fio > Segurança sem fioAs configurações de Wir<strong>el</strong>ess Security (Segurança sem fio)definem a segurança da sua rede sem fio. Há suporte paraseis opções de modo de segurança sem fio no Roteador:WPA Personal, WPA Enterprise, WPA2 Personal, WPA2Enterprise, RADIUS e WEP. (WPA significa Wi-Fi ProtectedAccess, que é um padrão de segurança mais forte que acriptografia WEP. A WPA2 é uma versão mais avançadae mais segura da WPA. WEP significa Wired EquivalentPrivacy e RADIUS significa Remote Authentication Dial-InUser Service). Essas seis opções são rapidamente discutidasaqui. Para obter instruções detalhadas sobre comoconfigurar a segurança sem fio para o Roteador, consulte o“Capítulo 2: Segurança Sem Fio”Segurança sem fioModo de segurançaS<strong>el</strong>ecione o método de segurança para sua rede sem fio.Se você não quiser usar a segurança sem fio, mantenha opadrão, Desabilitado.Roteador de banda larga Wir<strong>el</strong>ess-GWPA PersonalOBSERVAÇÃO: se você estiver usando a WPA,lembre-se sempre de que cada dispositivo darede sem fio DEVE utilizar o mesmo métodoWPA e a mesma chave compartilhada; casocontrário, a rede não funcionará corretamente.Modo de segurança > WPA PersonalAlgoritmo WPA A WPA oferece dois métodos decriptografia, o TKIP e o AES, com chaves de criptografiadinâmicas. S<strong>el</strong>ecione o tipo de algoritmo, TKIP ou AES. (OAES é um método de criptografia mais forte que o TKIP).Chave Compartilhada WPA Insira a chavecompartilhada p<strong>el</strong>o Roteador e seus outros dispositivosde rede. Ela deve ter entre 8 e 63 caracteres.Renovação de Chave de Grupo Insira um períodode Renovação de Chave, que instrui o Roteador sobrea freqüência com que <strong>el</strong>e deve alterar as chaves decriptografia. O período padrão para Renovação de Chavede Grupo é de 3600 segundos.WPA EnterpriseEsta opção oferece a WPA usada conjuntamente comum servidor RADIUS. (Ela só deve ser usada quando umservidor RADIUS estiver conectado ao Roteador).Modo de segurança > WPA EnterpriseAlgoritmo WPA A WPA oferece dois métodos decriptografia, o TKIP e o AES, com chaves de criptografiadinâmicas. S<strong>el</strong>ecione o tipo de algoritmo, TKIP ou AES. (OAES é um método de criptografia mais forte que o TKIP).Endereço do Servidor RADIUS Insira o endereço IP doservidor RADIUS.11
Capítulo 3Configuração AvançadaPorta RADIUS Insira o número da porta do servidorRADIUS. O valor padrão é 1812 segundos.Chave Compartilhada Insira a chave compartilhadaentre o Roteador e o servidor.Tempo Limite para Renovação da Chave Insira umperíodo de Tempo Limite para Renovação da Chave, queinstrui o Roteador com que freqüência <strong>el</strong>e deve alterar aschaves de criptografia. O período padrão para o TempoLimite de Renovação de Chave é de 3600 segundos.WPA2 PersonalEndereço do Servidor RADIUS Insira o endereço IP doservidor RADIUS.Porta RADIUS Insira o número da porta do servidorRADIUS. O valor padrão é 1812 segundos.Chave Compartilhada Insira a chave compartilhadaentre o Roteador e o servidor.Tempo Limite para Renovação da Chave Insira umperíodo de Tempo Limite para Renovação da Chave, queinstrui o Roteador com que freqüência <strong>el</strong>e deve alterar aschaves de criptografia. O período padrão para o TempoLimite de Renovação de Chave é de 3600 segundos.RADIUSEsta opção oferece a WEP usada conjuntamente comum servidor RADIUS. (Ela só deve ser usada quando umservidor RADIUS estiver conectado ao Roteador).Modo de segurança > WPA2 PersonalAlgoritmo WPA2 A WPA oferece dois métodos decriptografia, o TKIP e o AES, com chaves de criptografiadinâmicas. S<strong>el</strong>ecione o tipo de algoritmo, AES ou TKIP +AES. A s<strong>el</strong>eção padrão é AES.Chave Compartilhada WPA Insira uma ChaveCompartilhada WPA entre 8 e 63 caracteres.Renovação de Chave de Grupo Insira um período deRenovação de Chave de Grupo, que instrui o Roteadorsobre a freqüência com que <strong>el</strong>e deve alterar as chaves decriptografia. O período padrão para Renovação de Chavede Grupo é de 3600 segundos.WPA2 EnterpriseEsta opção oferece a WPA2 usada conjuntamente comum servidor RADIUS. (Ela só deve ser usada quando umservidor RADIUS estiver conectado ao Roteador).Modo de segurança > WPA2 EnterpriseAlgoritmo WPA2 A WPA2 oferece dois métodos decriptografia, o TKIP e o AES, com chaves de criptografiadinâmicas. S<strong>el</strong>ecione o tipo de algoritmo, AES ou TKIP +AES. A s<strong>el</strong>eção padrão é AES.Roteador de banda larga Wir<strong>el</strong>ess-GModo de segurança > RADIUSIMPORTANTE: se você estiver usando acriptografia WEP, lembre-se sempre de que cadadispositivo da rede sem fio DEVE utilizar o mesmométodo de criptografia WEP e a mesma chave decriptografia; caso contrário, a rede sem fio nãofuncionará corretamente.RADIUS Server Address Insira o endereço IP do servidorRADIUS.Porta RADIUS Insira o número da porta do servidorRADIUS. O valor padrão é 1812 segundos.Chave Compartilhada Insira a chave compartilhadaentre o Roteador e o servidor.Chave de Transmissão Padrão S<strong>el</strong>ecione uma Chavede Transmissão Padrão (escolha qual Chave usar). O valorpadrão é 1.Criptografia WEP S<strong>el</strong>ecione um nív<strong>el</strong> de criptografiaWEP, 64 bits 10 dígitos hexadecimais ou 128 bits 26dígitos hexadecimais. O valor padrão é de 64 bits 10dígitos hexadecimais.Senha Insira uma senha para gerar automaticamentechaves WEP. Em seguida, clique em Gerar.Chave 1 a 4 Se você não tiver inserido uma senha, insiraa(s) chave(s) WEP manualmente.12
Capítulo 3Configuração AvançadaWEPA WEP é um método de criptografia básico não tão seguroquanto a WPA.Impedir S<strong>el</strong>ecione essa opção para bloquear acessosem fio por Endereço MAC. Esse botão é s<strong>el</strong>ecionado porpadrão.Apenas Permitir S<strong>el</strong>ecione essa opção para permitiracesso sem fio por Endereço MAC. Esse botão não és<strong>el</strong>ecionado por padrão.Editar Lista de Filtros MAC Clique nesta opção para abrira t<strong>el</strong>a MAC Address Filter List. Nessa t<strong>el</strong>a, você pode listar osusuários, por endereço MAC, aos quais deseja conceder oubloquear o acesso. Para referência rápida, clique em Lista deMACs de clientes sem fio para exibir uma lista de usuáriosda rede por Endereço MAC.Modo de segurança > WEPChave de Transmissão Padrão S<strong>el</strong>ecione uma Chavede Transmissão Padrão (escolha qual Chave usar). O valorpadrão é 1.Criptografia WEP S<strong>el</strong>ecione um nív<strong>el</strong> de criptografiaWEP, 64 bits 10 dígitos hexadecimais ou 128 bits 26dígitos hexadecimais. O valor padrão é de 64 bits 10dígitos hexadecimais.Senha Insira uma senha para gerar automaticamentechaves WEP. Em seguida, clique em Gerar.Chave 1 a 4 Se você não tiver inserido uma senha, insiraa(s) chave(s) WEP manualmente.Clique em Salvar configurações para aplicar suasalterações ou em Canc<strong>el</strong>ar alterações para canc<strong>el</strong>á-las.Sem Fio > Filtro MAC Sem FioO acesso sem fio pode ser filtrado utilizando-se osendereços MAC dos dispositivos sem fio que fazemtransmissões na área da rede.Lista de filtros de endereços MACClique em Salvar configurações para aplicar suasalterações ou em Canc<strong>el</strong>ar alterações para canc<strong>el</strong>á-las.Sem fio > Configurações sem fio avançadasEssa t<strong>el</strong>a Sem Fio > Configurações Sem Fio Avançadas éusada para configurar as funções sem fio avançadas doRoteador. Essas configurações só devem ser ajustadas porum administrador especialista, uma vez que, se estiveremincorretas, poderão reduzir o desempenho da conexãosem fio.Sem Fio - Filtro MAC Sem FioWir<strong>el</strong>ess MAC Filter (Filtro de MAC sem fio)Filtro MAC Sem FioPara filtrar usuários sem fio de acordocom o Endereço MAC, permitindo ou bloqueando acesso,clique em Habilitar. Se não quiser filtrar os usuários deacordo com o Endereço MAC, mantenha a configuraçãopadrão, Desabilitar.Roteador de banda larga Wir<strong>el</strong>ess-G13
Capítulo 3Configuração AvançadaSem fio > Configurações sem fio avançadasRecursos sem fio avançadosTipo de autenticação O padrão é definido comoAutomático, que permite usar a autenticação SistemaAberto ou Chave Compartilhada. Na autenticação OpenSystem (Sistema aberto), o remetente e o destinatárioNÃO usam uma chave WEP para a autenticação. Naautenticação Shared Key (Chave compartilhada), oremetente e o destinatário usam uma chave WEP para aautenticação.Taxa Básica A configuração Basic Rate (Taxa básica) naverdade não representa uma taxa de transmissão, masuma série de taxas nas quais o Roteador pode transmitir. ORoteador anunciará sua taxa básica aos outros dispositivossem fio da rede para que <strong>el</strong>es saibam quais taxas serãousadas. Ele também anunciará que será feita a s<strong>el</strong>eçãoautomática da m<strong>el</strong>hor taxa de transmissão. A configuraçãopadrão é Default (Padrão), na qual o Roteador poderátransmitir usando todas as taxas sem fio padrão (1-2 Mbps,5.5 Mbps, 11 Mbps, 18 Mbps e 24 Mbps). Outras opções são1-2 Mbps, para uso com tecnologias sem fio mais antigas,e All (Tudo), na qual o Roteador pode transmitir usandotodas as taxas sem fio. A taxa básica não é a taxa real detransmissão de dados. Se quiser especificar a taxa detransmissão de dados do Roteador, defina a configuraçãoTransmission Rate (Taxa de transmissão).Taxa de Transmissão A taxa de transmissão de dadosdeve ser definida dependendo da v<strong>el</strong>ocidade de sua redesem fio. Você pode escolher entre diversas v<strong>el</strong>ocidades detransmissão ou s<strong>el</strong>ecionar Auto (Automático) para queo Roteador use automaticamente a taxa de dados maisrápida possív<strong>el</strong> e habilite o recurso Auto-Fallback (Fallbackautomático). O recurso de Fallback automático negociaráa m<strong>el</strong>hor v<strong>el</strong>ocidade de conexão possív<strong>el</strong> entre o Roteadore um cliente sem fio. O valor padrão é Automático.Modo de Proteção CTS O modo de proteção CTS(Clear-To-Send) deve permanecer desabilitado, a menosque você esteja enfrentando sérios problemas com osprodutos Wir<strong>el</strong>ess-G por não conseguir transmitir para oRoteador em um ambiente com tráfego 802.11b pesado.Essa função aumenta a capacidade do Roteador decapturar todas as transmissões Wir<strong>el</strong>ess-G, mas reduz odesempenho considerav<strong>el</strong>mente.Intermitência de Quadros Habilite esta opção para quea rede tenha um desempenho m<strong>el</strong>hor, dependendo dofabricante dos produtos sem fio que você usa. Para ativar aopção Frame Burst (Intermitência de Quadros) , s<strong>el</strong>ecioneEnable (Habilitar). O padrão é Disable (Desabilitar).Intervalo de Beacon O valor padrão é 100. Insira umvalor entre 1 e 65.535 milissegundos. O valor do Intervalode beacon indica o intervalo de freqüência do beacon.Um beacon é um pacote transmitido p<strong>el</strong>o Roteador parasincronizar a rede sem fio.Intervalo de DTIM Esse valor, entre 1 e 255, indica ointervalo de DTIM (D<strong>el</strong>ivery Traffic Indication Message).Um campo DTIM é um campo de contagem regressivaque informa aos clientes qual é a próxima jan<strong>el</strong>a a escutarmensagens de transmissão e de multicast. Quando oRoteador armazena no buffer mensagens de transmissãoou de multicast para os clientes associados, <strong>el</strong>e envia apróxima DTIM com um valor de intervalo de DTIM. Seusclientes ouvem os beacons e despertam para receber asmensagens de transmissão e de multicast. O valor padrãoé 1.Limite de fragmentação Esse valor especifica otamanho máximo de um pacote antes de os dados seremfragmentados em vários pacotes. Se você observar umataxa <strong>el</strong>evada de erros de pacote, poderá aumentar umpouco o valor de Limite de fragmentação. Se você definirum valor muito baixo para o Limite de fragmentação,o desempenho da rede poderá ser prejudicado. Érecomendáv<strong>el</strong> apenas uma pequena redução do valorpadrão. Na maioria dos casos, deve ser mantido o valorpadrão de 2346.Limite de RTS Se você detectar um fluxo de dadosinconsistente, é recomendáv<strong>el</strong> apenas uma pequenaredução do valor padrão, 2347. Se um pacote de rede formenor do que o limite de RTS predefinido, o mecanismoRTS/CTS não será habilitado. O Roteador envia quadrosRTS (Request to Send) para uma determinada estaçãoreceptora e negocia o envio de um quadro de dados.Após receber um RTS, a estação sem fio responde comum quadro CTS (Clear to Send) para confirmar o direitode iniciar a transmissão. O valor do Limite de RTS deve sermantido no padrão de 2347.Isolamento de AP Isola todos os clientes e dispositivossem fio da rede uns dos outros. Os dispositivos sem fiopoderão se comunicar com o Roteador, mas não entre si.Para usar essa função, s<strong>el</strong>ecione On (Ativado). O padrãodo Isolamento de AP é Off (Desativado).SecureEasySetup Este recurso permite habilitar oudesabilitar o SecureEasySetup. S<strong>el</strong>ecione Disable(Desabilitar) para desabilitar o recurso e apagar a luz dobotão. Por padrão, o recurso fica Enabled (Desabilitado).Clique em Salvar configurações para aplicar suasalterações ou em Canc<strong>el</strong>ar alterações para canc<strong>el</strong>á-las.Roteador de banda larga Wir<strong>el</strong>ess-G14
Capítulo 3Configuração AvançadaSegurança > FirewallA t<strong>el</strong>a Segurança > Firewall é usada para configurarum firewall que pode filtrar vários tipos de tráfegosindesejados na rede local do Roteador.Segurança > Passagem de VPNA t<strong>el</strong>a Segurança > Passagem de VPN permite que vocêautorize que encapsulamentos de VPN com protocolosIPSec, PPTP ou L2TP passem p<strong>el</strong>o firewall do Roteador.Segurança > FirewallFirewallProteção de firewall Para usar a proteção de firewall,mantenha a s<strong>el</strong>eção padrão, Habilitar. Para desabilitar aproteção de firewall, s<strong>el</strong>ecione Desabilitar.Bloquear solicitações de WANBloquear solicitações de Internet anônimas Essaopção dificulta o acesso de usuários externos àrede. Essa configuração é s<strong>el</strong>ecionada por padrão.Desmarque essa opção para permitir solicitações deInternet anônimas.Filtrar Multicast O multicast possibilita váriastransmissões para destinatários específicos ao mesmotempo. Se o multicast for permitido, o Roteadorautorizará o encaminhamento de pacotes de multicastIP aos computadores apropriados. Essa configuração és<strong>el</strong>ecionada por padrão. Desmarque essa opção paradesabilitá-la.Filtrar redirecionamento NAT da Internet Este recursousa o encaminhamento de portas para bloquear o acessoa servidores locais a partir de computadores da rede local.S<strong>el</strong>ecione Filtrar redirecionamento NAT da Internetpara filtrar o redirecionamento NAT da Internet. Esserecurso não é s<strong>el</strong>ecionado por padrão.Filtrar IDENT (Port 113) Este recurso impede que aporta 113 seja verificada por dispositivos de fora da suarede local. Essa configuração é s<strong>el</strong>ecionada por padrão.Desmarque essa opção para desabilitá-la.Clique em Salvar configurações para aplicar suasalterações ou em Canc<strong>el</strong>ar alterações para canc<strong>el</strong>á-las.Passagem de VPNSegurança > Passagem de VPNPassagem IPSec O IPSec (Internet Protocol Security)é um conjunto de protocolos usado para implementaro intercâmbio seguro de pacotes na camada IP. Paraautorizar a passagem de encapsulamentos IPSec p<strong>el</strong>oRoteador, mantenha o padrão, Enable (Habilitar).Passagem PPTP O PPTP (Point-to-Point Tunn<strong>el</strong>ingProtocol) permite que o protocolo PPP (Point-to-PointProtocol) seja encapsulado através de uma rede IP. Paraautorizar a passagem de encapsulamentos PPTP p<strong>el</strong>oRoteador, mantenha o padrão, Enable (Habilitar).Passagem L2TP O protocolo L2TP é o método usadopara habilitar sessões PPP via Internet no nív<strong>el</strong> da Camada2. Para autorizar a passagem de encapsulamentos L2TPp<strong>el</strong>o Roteador, mantenha o padrão, Enable (Habilitar).Clique em Salvar configurações para aplicar suasalterações ou em Canc<strong>el</strong>ar alterações para canc<strong>el</strong>á-las.Restrições de Acesso > Acesso à InternetA t<strong>el</strong>a Restrições de Acesso permite bloquear ou autorizartipos específicos de tráfego e uso da Internet, como acessoà Internet, serviços designados e sites da Web em dias ehorários específicos.Roteador de banda larga Wir<strong>el</strong>ess-G15
Capítulo 3Configuração AvançadaMAC ou IP. Também pode inserir um intervalo deendereços IP se quiser que a diretiva em questão afeteum grupo de PCs. Após fazer suas alterações, cliqueem Salvar Configurações para aplicar suas alteraçõesou Canc<strong>el</strong>ar Alterações para canc<strong>el</strong>á-las. Em seguida,clique em Fechar.Acesso à InternetRestrições de Acesso > Acesso à InternetDiretiva de acesso à Internet O acesso pode sergerenciado por uma diretiva. Use as configurações dessat<strong>el</strong>a para estab<strong>el</strong>ecer uma diretiva de acesso (depois declicar no botão Salvar configurações. Quando vocês<strong>el</strong>eciona uma diretiva no menu suspenso, as configuraçõesdessa diretiva são exibidas. Para excluir uma diretiva,s<strong>el</strong>ecione o número correspondente e clique no botãoExcluir. Para exibir todas as diretivas, clique em Resumo.(É possív<strong>el</strong> excluir diretivas na t<strong>el</strong>a Summary s<strong>el</strong>ecionandoa(s) diretiva(s) e clicando no botão D<strong>el</strong>ete. Para voltar àguia Internet Access (Acesso à Internet), clique no botãoClose - Fechar).Lista de PCs5. S<strong>el</strong>ecione a opção adequada, Negar ou Permitir, sequiser bloquear ou permitir acesso à Internet para osPCs listados na t<strong>el</strong>a Lista de PCs.6. Decida em quais dias da semana e horários a diretivadeve ser aplicada. S<strong>el</strong>ecione dias específicos nos quaisa diretiva estará em vigor ou s<strong>el</strong>ecione Everyday(Todos os Dias). Em seguida, insira um intervalo dehoras e minutos durante os quais a diretiva estará emvigor ou s<strong>el</strong>ecione 24 Hours (24 Horas).7. S<strong>el</strong>ecione os serviços bloqueados (Blocked Services)ou o bloqueio de site (Website Blocking) que desejausar.8. Clique em Salvar Configurações para salvar asconfigrações da diretiva ou clique em Canc<strong>el</strong>arAlterações para canc<strong>el</strong>á-las.Serviços bloqueadosÉ possív<strong>el</strong> filtrar o acesso a vários serviços acessados viaInternet, como FTP ou t<strong>el</strong>net, s<strong>el</strong>ecionando serviços nosmenus suspensos ao lado de Blocked Services (ServiçosBloqueados). (Você pode bloquear até 20 serviços). Emseguida, insira o intervalo de portas que deseja filtrar.Se o serviço que você deseja bloquear não estiver listadoou se desejar editar as configurações de um serviço, cliqueem Add/Edit Service (Adicionar/Editar Serviço). Emseguida, a t<strong>el</strong>a Port Services aparecerá.Resumo de diretivas de InternetStatus Por padrão, as diretivas ficam desabilitadas. Parahabilitar uma diretiva, s<strong>el</strong>ecione o número da diretiva nomenu suspenso e s<strong>el</strong>ecione Enable (Habilitar).Para criar uma diretiva de acesso à Internet:1.2.3.4.S<strong>el</strong>ecione um número no menu suspenso Diretiva deacesso à Internet.Para habilitar a diretiva, s<strong>el</strong>ecione Habilitar.Insira um nome para a diretiva no campo fornecido.Clique em Editar Lista de PCs para s<strong>el</strong>ecionar quaisPCs serão afetados p<strong>el</strong>a diretiva. A t<strong>el</strong>a Lista de PCsaparecerá. Você pode s<strong>el</strong>ecionar um PC por endereçoRoteador de banda larga Wir<strong>el</strong>ess-GPort ServicesPara adicionar um serviço, insira o nome do serviço nocampo Service Name (Nome do Serviço). S<strong>el</strong>ecione seuprotocolo no menu suspenso Protocol (Protocolo) e insiraseu intervalo nos campos Port Range (Intervalo de Porta).Em seguida, clique em Add (Adicionar).16
Capítulo 3Configuração AvançadaPara modificar um serviço, s<strong>el</strong>ecione-o na lista à direita.Altere seu nome, as configurações de protocolo ouo intervalo de portas. Em seguida, clique em Modify(Modificar).Para excluir um serviço, s<strong>el</strong>ecione-o na lista à direita. Emseguida, clique em D<strong>el</strong>ete.Ao terminar de fazer suas alterações na t<strong>el</strong>a Port Services,clique em Apply (Aplicar) para salvar as alterações.Se desejar canc<strong>el</strong>ar suas alterações, clique em Canc<strong>el</strong>(Canc<strong>el</strong>ar). Para fechar a t<strong>el</strong>a Port Services e retornar à t<strong>el</strong>aAccess Restrictions (Restrições de Acesso), clique em Close(Fechar).Bloqueio de sites por endereço de URLPara bloquear sites com endereços de URL específicos,insira cada URL em um campo separado ao lado de WebsiteBlocking by URL Address (Bloqueio de Sites por Endereçode URL).Bloqueio de sites por palavra-chavePara bloquear sites que usam palavras-chave específicas,insira cada palavra-chave em um campo separado ao ladode Website Blocking by Keyword (Bloqueio de Sites porPalavra-chave).Clique em Salvar configurações para aplicar suasalterações ou em Canc<strong>el</strong>ar alterações para canc<strong>el</strong>á-las.Aplicativos e Jogos - Port Range Forward(Encaminhamento de Intervalo de Portas)A t<strong>el</strong>a Applications & Gaming => Port Range Forward(Aplicativos e jogos => Encaminhamento de intervalo deportas) permite configurar serviços públicos em sua rede,como servidores Web, servidores ftp, servidores de e-mailou outros aplicativos de Internet especializados. (Aplicativosde Internet especializados são quaisquer aplicativos queusam o acesso à Internet para executar funções, comovideoconferência ou jogos on-line. Alguns aplicativos deInternet podem não exigir encaminhamento.)Port Range Forward (Encaminhamento de Intervalode Portas)Para encaminhar uma porta, insira as informações emcada linha dos critérios exigidos.Aplicativo Nesse campo, insira o nome que você desejadar ao aplicativo. Cada nome pode ter até 12 caracteres.Start/End (Início/Final) Este é o intervalo de portas. Insirao número que inicia o intervalo de portas na coluna Inícioe o número que termina o intervalo na coluna Final.Protocolo S<strong>el</strong>ecione o protocolo usado para o aplicativo:TCP, UDP ou Ambos.Endereço IP Para cada aplicativo, insira o endereço IP docomputador com o aplicativo específico em execução.Enable (Habilitar) S<strong>el</strong>ecione Enable (Habiliar) parahabilitar o encaminhamento de portas para o aplicativoadequado.Clique em Salvar configurações para aplicar suasalterações ou em Canc<strong>el</strong>ar alterações para canc<strong>el</strong>á-las.Aplicativos e Jogos > Disparo de portasA t<strong>el</strong>a Applications & Gaming > Port Triggering (Aplicativose Jogos > Disparo de Portas) permite que o Roteadorobserve determinados números de porta nos dados desaída. O endereço IP do computador que envia os dadoscorrespondentes é memorizado p<strong>el</strong>o Roteador para que,quando os dados solicitados retornarem p<strong>el</strong>o Roteador,<strong>el</strong>es sejam reencaminhados ao computador adequado pormeio de regras de mapeamento de endereço IP e porta.Aplicativos e Jogos > Disparo de intervalo de portasAplicativos e Jogos - Port Range Forward (Encaminhamento deIntervalo de Portas)Port TriggeringApplication (Aplicativo) Insira o nome de aplicativo dedisparo.Intervalo de disparoPara cada aplicativo, liste o intervalo de números de portasdisparadas. Verifique na documentação do aplicativo deInternet os números de portas necessários.Porta Inicial Insira o número da porta inicial do intervalode disparo.Roteador de banda larga Wir<strong>el</strong>ess-G17
Capítulo 3Configuração AvançadaPorta Final Insira o número da porta final do intervalo dedisparo.Intervalo de encaminhamentoPara cada aplicativo, liste o intervalo de números de portasencaminhadas. Verifique na documentação do aplicativode Internet os números de portas necessários.Porta Inicial Insira o número da porta inicial do intervalode encaminhamento.Porta Final Insira o número da porta final do intervalo deencaminhamento.Enable (Habilitar) S<strong>el</strong>ecione Enable (Habilitar) parahabilitar o disparo de portas para o aplicativo apropriado.Clique em Salvar configurações para aplicar suasalterações ou em Canc<strong>el</strong>ar alterações para canc<strong>el</strong>á-las.Aplicativos e Jogos > DMZO recurso DMZ permite que um computador da rede sejaexposto à Internet para uso de um serviço de finalidadeespecial, como jogos p<strong>el</strong>a Internet ou videoconferência. Ahospedagem DMZ encaminha todas as portas ao mesmotempo para um único PC. O recurso Port Range Forward(Encaminhamento de intervalo de portas) é mais seguropois só abre as portas que você deseja abrir, ao passoque a hospedagem DMZ abre todas as portas de umcomputador, o que o expõe à Internet.QoSEnable/Disable (Habilitar/Desabilitar) Para habilitaro QoS, s<strong>el</strong>ecione Enable (Habilitar). Caso contrário,s<strong>el</strong>ecione Disable (Desabilitar). Por padrão, o QoS estádesabilitado.Upstream Bandwidth (Largura de Banda upstream)S<strong>el</strong>ecione Auto ou Manual no menu suspenso. A opçãoManual permite especificar o máximo de largura de bandade saída que os aplicativos podem utilizar.DMZAplicativos e Jogos > DMZQualquer PC cuja porta esteja sendo encaminhada deveter sua função de cliente DHCP desabilitada e receber umnovo endereço IP estático, pois seu endereço IP poderámudar quando for usada a função DHCP.Para expor um PC, s<strong>el</strong>ecione Enable (Habilitar). Emseguida, insira o endereço IP do computador no campoDMZ Host IP Address (Endereço IP do host DMZ). Esterecurso é definido como Disabled (Desabilitado) porpadrão.Clique em Salvar configurações para aplicar suasalterações ou em Canc<strong>el</strong>ar alterações para canc<strong>el</strong>á-las.Aplicativos e Jogos > QoSA QoS (Qualidade do serviço) assegura um m<strong>el</strong>hor serviçopara tipos de tráfego de rede com alta prioridade, quepodem envolver aplicativos em tempo real exigentes,como os de videoconferência.Existem três tipos de QoS disponív<strong>el</strong>: Device Priority,Ethernet Port Priority e Application Priority.Aplicativos e Jogos > QoSDevice PriorityInsira o nome do dispositivo de rede no campo Devicename (Nome do Dispositivo), insira seu endereço MAC es<strong>el</strong>ecione sua prioridade no menu suspenso.Ethernet Port PriorityA QoS Ethernet Port Priority (Prioridade de porta Ethernet)permite priorizar o desempenho das quatro portas doRoteador, as portas LAN de 1 a 4. Para cada porta, s<strong>el</strong>ecionea prioridade e configuração de controle de fluxo.Priority (Prioridade) S<strong>el</strong>ecione High (Alto) ou Low (Baixo)na coluna Prioridade. Por padrão, as quatro portas doRoteador têm prioridade baixa.Flow Control (Controle de Fluxo) para que o Roteadorcontrole a transmissão de dados entre os dispositivosda rede, s<strong>el</strong>ecione Enabled (Habilitado). Para desabilitaresse recurso, s<strong>el</strong>ecione Disabled (Desabilitado). A QoSEthernet Port Priority não requer suporte do ISP porqueas portas priorizadas (as portas LAN de 1 a 4) estão na suarede. Por padrão, o recurso fica habilitado.Roteador de banda larga Wir<strong>el</strong>ess-G18
Capítulo 3Configuração AvançadaPrioridade de aplicativoA QoS Application Port Priority (Prioridade de porta deaplicativo) gerencia as informações à medida que sãotransmitidas e recebidas. Dependendo das configuraçõesda t<strong>el</strong>a QoS, este recurso atribuirá às informaçõesuma prioridade alta ou baixa referente aos aplicativosespecificados.Optimize Gaming Applications S<strong>el</strong>ecione esta opçãopara que as portas de aplicativos de jogos comuns tenhamautomaticamente uma prioridade mais alta. Esses jogosincluem os seguintes, sem limitação: Counter-Strike, Half-Life, Age of Empires, Everquest, Quake2/Quake3, e Diablo II.A configuração não é s<strong>el</strong>ecionada por padrão.Application Name Insira o nome que você deseja dar aoaplicativo no campo Application Name.S<strong>el</strong>ecione High (Alta) ou Low (Baixa) para atribuir umaprioridade ao aplicativo. A s<strong>el</strong>eção padrão é Low.Specific Port # Insira o número da porta para oaplicativo.Wir<strong>el</strong>ess QoS (QoS sem fio)WMM Support O WMM (Wi-Fi Multimedia),anteriormente conhecido como WME (Wir<strong>el</strong>essMultimedia Extensions), é um recurso certificado p<strong>el</strong>a Wi-Fi Alliance que se baseia no padrão IEEE 802.11e, em fasede homologação. Esse recurso fornece a QoS para redessem fio. Ele é especialmente adequado para aplicativos devoz, música e vídeo, como VoIP (Voice over IP), fluxo devídeo e jogos interativos. Se você tiver outros dispositivosem sua rede que dão suporte a WMM, s<strong>el</strong>ecione Enabled(Habilitado). Caso contrário, mantenha o padrão,Desabilitado.No Acknowledgement Este recurso impede o Roteadorde reenviar os dados se ocorrer um erro. Para utilizaresse recurso, s<strong>el</strong>ecione Enabled (Habilitado). Casocontrário, mantenha a configuração padrão, Disabled(Desabilitado).Clique em Salvar configurações para aplicar suasalterações ou em Canc<strong>el</strong>ar alterações para canc<strong>el</strong>á-las.Administração > GerenciamentoA t<strong>el</strong>a Administração > Gerenciamento permite que oadministrador da rede gerencie funções específicas doRoteador de acesso e segurança.Administração > GerenciamentoSenha do roteadorAcesso local ao roteadorSenha do roteador Insira uma nova senha para oRoteador.Insira novamente para confirmar insira a senhanovamente para confirmá-la.Web Access (Acesso à Web)Servidor de acesso HTTP (HyperText Transport Protocol)é o protocolo de comunicação usado para a conexão comservidores da World Wide Web. O HTTPS usa SSL (SecuredSocket Layer) para criptografar os dados transmitidos e,desse modo, oferecer um nív<strong>el</strong> de segurança mais alto.S<strong>el</strong>ecione HTTP ou HTTPS. A s<strong>el</strong>eção padrão é HTTP.Web via acesso sem fio Se você estiver usando o Roteadorem um domínio público no qual está concedendo acessosem fio para seus convidados, poderá desabilitar o acessosem fio ao utilitário baseado na Web do Roteador. Você sóconseguirá acessar o utilitário baseado na Web por meiode uma conexão com fio se desabilitar a configuração.Mantenha o padrão, Habilitar, para habilitar o acessosem fio ao utilitário baseado na Web do Roteador ouDesabilitar para desabilitar o acesso sem fio ao utilitário.Acesso Remoto ao RoteadorGerenciamento remoto Para acessar o Roteadorremotamente, quando estiver fora da rede, s<strong>el</strong>ecioneHabilitar.Porta de gerenciamento Insira o número da porta queserá aberta para acesso externo. Como de costume, vocêterá de inserir a senha do Roteador quando acessá-lodessa maneira.Usar https Para exigir o uso de HTTPS para o acessoremoto, s<strong>el</strong>ecione esse recurso.UPnPUPnP Mantenha o padrão, Habilitar para habilitar orecursoUPnP; caso contrário, s<strong>el</strong>ecione Desabilitar.Clique em Salvar configurações para aplicar suasalterações ou em Canc<strong>el</strong>ar alterações para canc<strong>el</strong>á-las.Roteador de banda larga Wir<strong>el</strong>ess-G19
Capítulo 3Configuração AvançadaAdministração > LogO Roteador pode manter logs de todo o tráfego da suaconexão de Internet.O teste de PingLogAdministração > LogLog Para desabilitar a função de Log, mantenha aconfiguração padrão, Desabilitar. Para monitorar otráfego entre a rede e a Internet, s<strong>el</strong>ecione Habilitar.Quando quiser exibir os logs, clique em Log de entradaou Log de saída, dependendo do que deseja ver.Clique em Salvar configurações para aplicar suasalterações ou em Canc<strong>el</strong>ar alterações para canc<strong>el</strong>á-las.Administração > DiagnósticoOs testes de diagnóstico (Ping e Traceroute) permitemverificar as conexões dos componentes da rede.Traceroute TestTraceroute Para testar o desempenho de uma conexão,clique em Traceroute para abrir a t<strong>el</strong>a Teste de Traceroute.Insira o endereço do PC cuja conexão você desejatestar e clique em Traceroute. A t<strong>el</strong>a Teste de Tracerouteserá exibida se o teste for concluído com êxito. Parainterromper o teste, clique em Stop. Clique em Clear Logpara limpar a t<strong>el</strong>a. Clique em Fechar para voltar à t<strong>el</strong>aDiagnóstico.O teste de TracerouteTeste de pingAdministração > DiagnósticoPing O teste de ping verifica o status de uma conexão.Clique em Ping para abrir a t<strong>el</strong>a Teste de Ping. Insira oendereço do PC cuja conexão você deseja testar e quantasvezes deseja testá-la. Em seguida, clique em Ping. A t<strong>el</strong>aTeste de ping será exibida se o teste for concluído comêxito. Para interromper o teste, clique em Stop. Clique emClear Log para limpar a t<strong>el</strong>a. Clique em Fechar para voltarà t<strong>el</strong>a Diagnóstico.Administração > Padrões de fábricaA t<strong>el</strong>a Administração > Padrões de fábrica permite restauraras configurações padrão de fábrica do Roteador.Padrões de fábricaRestaurar padrões de fábrica Para redefinir asconfigurações do roteador para os valores padrão, s<strong>el</strong>ecioneSim e, em seguida, clique em Salvar configurações.Todas as configurações salvas serão perdidas quando asconfigurações padrão forem restauradas.Administração > Padrões de fábricaRoteador de banda larga Wir<strong>el</strong>ess-G20
Capítulo 3Configuração AvançadaAdministração > Atualização do firmwareA t<strong>el</strong>a Administração > Atualização do Firmware permiteatualizar o firmware do Roteador. Não atualize o firmwarea menos que esteja com problemas no Roteador ou queirausar um recurso disponív<strong>el</strong> no novo firmware.Status > RoteadorA t<strong>el</strong>a Status > Roteador exibe o status atual do Roteador.Administração > Atualização do firmwarePara atualizar o firmware, baixe o arquivo deatualização do firmware do Roteador no site da Linksys,www.linksys.com. Em seguida, extraia o arquivo.Upgrade Firmware (Atualizar firmware)S<strong>el</strong>ecione um arquivo para atualizar Clique emProcurar e s<strong>el</strong>ecione o arquivo de atualização dofirmware extraído. Em seguida, clique em Atualizar e sigaas instruções exibidas na t<strong>el</strong>a.Administração > Gerenciamento de configEsta t<strong>el</strong>a é usada para fazer backup ou restaurar o arquivode configuração do Roteador.Administração > Gerenciamento de configFazer backup da configuraçãoPara fazer backup do arquivo de configuração do Roteador,clique em Backup. Em seguida, siga as instruções exibidasna t<strong>el</strong>a.Restaurar configuraçãoS<strong>el</strong>ecione um arquivo para restaurar Clique emProcurar e s<strong>el</strong>ecione o arquivo de configuração. Emseguida, clique em Restaurar.Status > RoteadorRouter Information (Informações sobre oRoteador)Versão do firmware A versão atual do firmware doRoteador.Hora atual Mostra a hora, conforme definida na guiaConfiguração.Endereço MAC Esse é o endereço MAC do Roteador,conforme visto p<strong>el</strong>o ISP.Nome do roteador Esse é o nome específico do Roteador,definido na guia Configuração.Nome do host Se exigido p<strong>el</strong>o ISP, esse nome deve tersido inserido na guia Configuração.Nome do domínio Se exigido p<strong>el</strong>o ISP, esse nome deveter sido inserido na guia Configuração.InternetTipo de configuraçãoEsta seção mostra as informações atuais sobre a redearmazenadas no Roteador. As informações variamconforme o tipo de conexão com a Internet s<strong>el</strong>ecionadona t<strong>el</strong>a Configuração > Configuração Básica.Clique em Atualizar para atualizar as informações dat<strong>el</strong>a.Roteador de banda larga Wir<strong>el</strong>ess-G21
Capítulo 3Configuração AvançadaStatus > Rede localA t<strong>el</strong>a Status > Rede local exibe o status da rede.Status > Sem fioA t<strong>el</strong>a Status > Sem fio exibe o status da rede sem fio.Status > Rede localRede localEndereço MAC Esse é o endereço MAC do Roteador,conforme visto na rede Ethernet local.Endereço IP Esse é o endereço IP do Roteador, cconformeexibido na rede Ethernet local.Máscara de sub-rede Mostra a máscara de sub-redeatual configurada para a sua rede local.Servidor DHCP Se você estiver usando o Roteador comoum servidor DHCP, <strong>el</strong>e será exibido aqui.Endereço IP inicial Em r<strong>el</strong>ação ao intervalo de endereçosIP usados p<strong>el</strong>os dispositivos da rede Ethernet local, o iníciodesse intervalo é mostrado aqui.Endereço IP final Em r<strong>el</strong>ação ao intervalo de endereçosIP usados p<strong>el</strong>os dispositivos da rede Ethernet local, o finaldesse intervalo é mostrado aqui.Tab<strong>el</strong>a de clientes DHCP Clique neste botão para abriruma t<strong>el</strong>a que mostra quais PCs estão utilizando o Roteadorcomo um servidor DHCP. Você pode excluir PCs dessa listae interromper suas conexões marcando a caixa de s<strong>el</strong>eçãoD<strong>el</strong>ete (Excluir) e clicando no botão D<strong>el</strong>ete.Sem fioStatus > Sem fioEndereço MAC Esse é o endereço MAC do Roteador,conforme visto na rede sem fio local.Modo Dependendo da s<strong>el</strong>eção na t<strong>el</strong>aSem Fio >Configurações sem fio básicas, este campo exibirá o modosem fio (Misto, Apenas‐G ou Desabilitado) usado p<strong>el</strong>arede.SSID Dependendo do que foi inserido na t<strong>el</strong>a Sem Fio >Configurações sem fio básicas, este campo exibirá o nomeda rede sem fio ou SSID.Servidor DHCP O status da função servidor DHCP éexibido aqui.Canal Dependendo do que foi inserido na t<strong>el</strong>a Sem Fio >Configurações sem fio básicas, este campo exibirá o canalde transmissão da rede sem fio.Função de criptografia Dependendo da s<strong>el</strong>eção na t<strong>el</strong>aSem Fio > Segurança sem fio, este campo exibirá o statusda segurança sem fio do roteador.Clique em Atualizar para atualizar as informações dat<strong>el</strong>a.Tab<strong>el</strong>a de clientes DHCPClique em Atualizar para atualizar as informações dat<strong>el</strong>a.Roteador de banda larga Wir<strong>el</strong>ess-G22
Apêndice AResolução de ProblemasApêndice A:Resolução de ProblemasSeu computador não consegue se conectar à Internet.Siga estas instruções até que o seu computador possa seconectar à Internet:• Assegure-se de que o Roteador esteja ligado. O LEDde Energia deve estar verde, mas sem estar piscando.• Caso esteja, desligue todos os dispositivos da rede,incluindo o modem, o Roteador e os computadores.Em seguida, ligue todos os dispositivos na ordem quesegue:1.2.3.Cabo ou modem DSLRoteadorComputador• Verifique as conexões do cabo. O computador deveestar conectado a uma das portas numeradas de 1 a4, no Roteador, e o modem deve estar conectado àporta da Internet no Roteador.O modem não possui uma porta Ethernet.O modem é de conexão discada para os serviçostradicionais. Para usar o Roteador, você precisa de ummodem a cabo/DSL e uma conexão à Internet de altav<strong>el</strong>ocidade.Você não pode usar o serviço DSL para se conectarmanualmente à Internet.Depois de instalar o Roteador, <strong>el</strong>e automaticamente seconecta com o seu ISP (Internet Service Provider), portanto,você não precisa mais se conectar manualmente.A linha t<strong>el</strong>efônica DSL não se adapta à porta da Internetdo Roteador.O Roteador não substitui o seu modem. Você ainda precisado modem DSL para usar o Roteador. Conecte a sua linhat<strong>el</strong>efônica ao modem DSL, insira o CD de instalação emseu computador e siga as instruções que aparecem nat<strong>el</strong>a.Quando você clica duas vezes no navegador da web,aparece um aviso pedindo seu nome de usuário e suasenha. Caso não queira que o aviso apareça, siga estasinstruções.Inicie o navegador da web e execute os passos queseguem (<strong>el</strong>es são específicos para o Internet Explorer, massem<strong>el</strong>hantes para outros navegadores):1.2.3.4.S<strong>el</strong>ecione Ferramentas > Opções da Internet.Clique na guia Conexões.S<strong>el</strong>ecione Nunca Discar uma Conexão.Clique em OK.O Roteador não possui uma porta coaxial para aconexão a cabo.O Roteador não substitui o seu modem. Você ainda precisado modem a cabo para usar o Roteador. Conecte o seucabo no modem a cabo, insira o CD de instalação em seucomputador e siga as instruções que aparecem na t<strong>el</strong>a.O computador não consegue se conectar sem fio à rede.Verifique se o nome da rede sem fio ou o SSID é o mesmo nocomputador e no Roteador. Caso você tenha a segurançasem fio habilitada, verifique se o mesmo método desegurança e a chave são usados p<strong>el</strong>o computador e p<strong>el</strong>oRoteador.Você deve modificar as configurações do Roteador.Abra o navegador da web (por exemplo, o InternetExplorer ou o Firefox) e informe o endereço IP doRoteador no campo de endereço (o endereço IP padrãoé 192.168.1.1). Quando solicitado, deixe o campo Nomede usuário em branco e digite uma senha para o Roteador(a senha padrão é admin). Clique na guia apropriada paramudar as configurações.WEB: Caso a sua dúvida não estejadescrita aqui, recorra ao site da Linksys emwww.linksys.com.Roteador de Banda Larga Wir<strong>el</strong>ess-G23
Apêndice BEspecificaçõesApêndice B:EspecificaçõesMod<strong>el</strong>oPadrõesPortasBotãoWRT54G2IEEE 802.3, IEEE 802.3u,IEEE 802.11g, IEEE 802.11bInternet: Uma Porta 10/100 RJ-45LAN: Four 10/100 RJ-45Portas AlternadasUma Porta de EnergiaUm Botão de ReinicializaçãoUm Botão WPSLEDs Energia, Wir<strong>el</strong>ess, LAN (1-4),Internet, Configuração Protegidapara Wi-Fi (WPS)Tipo deCabeamentoCAT5# de Antenas 2 Antenas InternasSaída de Energia RFCompat./certif.UPnPRecursos deSegurançaSegurançaWir<strong>el</strong>essAmbienteDimensõesPeso18 dBmCompatív<strong>el</strong>Stateful Packet Inspection (SPI)Firewall, Diretiva da InternetWi-Fi Protected Access2 (WPA2),WEP, filtragem de endereços MACsem fio203 x 35 x 160 mm280 gPotência Externa, 12V DC, 0,5ACertificaçõesTemp. Operacional 0 a 40ºCTemp. deArmazenamento -20 a 60ºCUmidadeOperacionalUmidade deArmazenamentoFCC, CE, IC-UL Wi-Fi (802.11b,802.11g), WPA2, WMM10% a 85%, sem condensação5% a 90%, sem condensaçãoRoteador de Banda Larga Wir<strong>el</strong>ess-G24
Apêndice CInformações de garantiaApêndice C:Informações de garantiaGARANTIA LIMITADAA Linksys garante que esse produto de hardware nãoapresentará defeitos de material ou fabricação sobcondições normais de uso durante o Período de Garantia,que começa na data da compra p<strong>el</strong>o usuário final originale dura o período especificado a seguir:• Dois (2) anos para novo produto• Noventa (90) dias para produto recondicionadoEssa garantia limitada não é transferív<strong>el</strong> e destina-seapenas ao usuário final original. Sob esta garantia limitada,seu único recurso, e a única responsabilidade da Linksysserá, a seu critério, (a) consertar o produto com peçasnovas ou recondicionadas, (b) trocar o produto por umproduto da Linksys novo ou recondicionado equivalenteou (c) reembolsar o preço de compra, deduzidosquaisquer descontos. Todos os produtos consertados outrocados serão cobertos p<strong>el</strong>o tempo restante da Garantiaoriginal ou por trinta (30) dias, prevalecendo o tempo maislongo. Todos os produtos e/ou peças que forem trocadospertencerão à Linksys.Essa garantia limitada se aplica, além de quaisquer direitosestatutários ou outros direitos que você possa ter segundoum contrato de venda.EXCLUSÕES E LIMITAÇÕESEsta garantia limitada não se aplicará se: (a) o s<strong>el</strong>o doproduto tiver sido removido ou danificado, (b) o produtotiver sido modificado, exceto se p<strong>el</strong>a Linksys, (c) o danoao produto tiver sido causado p<strong>el</strong>o uso com produtosnão fabricados p<strong>el</strong>a Linksys, (d) o produto não tiver sidoinstalado, operado, consertado ou mantido de acordocom as instruções fornecidas p<strong>el</strong>a Linksys, (e) o produtoesteve sujeito a estresse físico ou <strong>el</strong>étrico anormal, usoindevido, negligência ou acidentes, (f) o número de sériedo produto tiver sido alterado, apagado ou removido ou(g) se o produto for fornecido ou licenciado para fins deavaliação, testes ou demonstração da versão beta p<strong>el</strong>osquais a Linksys não cobra um preço de compra nem taxade licença.TODO SOFTWARE FORNECIDO PELA LINKSYS COM OPRODUTO, SEJA ORIGINAL DE FÁBRICA OU CONTIDO EMMÍDIA QUE ACOMPANHA O PRODUTO, É FORNECIDO“NO ESTADO EM QUE SE ENCONTRA” SEM NENHUMTIPO DE GARANTIA. Sem limitar o que foi mencionadoanteriormente, a Linksys não garante que este produto ousoftware funcionará sem problemas nem erros. Além disso,devido ao desenvolvimento contínuo de novas técnicasde invasão e ataque a redes, a Linksys não garante queRoteador de banda larga Wir<strong>el</strong>ess-Go produto, serviço, software ou qualquer equipamento,sistema ou rede em que o produto ou software é utilizadoestará isento de vulnerabilidade a invasões ou ataques. Oproduto pode incluir ou vir acompanhado de ofertas deserviços ou softwares de terceiros. Esta garantia limitadanão se aplicará a essas ofertas de serviços ou softwaresde terceiros. Esta garantia limitada não assegura adisponibilidade contínua de um serviço de terceironecessário para a utilização ou operação desse produto.DENTRO DO MÁXIMO RIGOR PERMITIDO PELA LEI,TODAS AS CONDIÇÕES E GARANTIAS IMPLÍCITASDE COMERCIABILIDADE, QUALIDADE SATISFATÓRIAOU ADEQUAÇÃO A UM DETERMINADO PROPÓSITOLIMITAM-SE À DURAÇÃO DO PERÍODO DE GARANTIA. ALINKSYS ISENTA-SE DE TODAS AS OUTRAS CONDIÇÕES,REPRESENTAÇÕES E GARANTIAS EXPRESSAS OUIMPLÍCITAS, INCLUINDO, MAS NÃO LIMITADO A, QUALQUERGARANTIA IMPLÍCITA DE NÃO-VIOLAÇÃO. Algumasjurisdições não permitem limitações da duração de umagarantia implícita; portanto, talvez a limitação acimanão se aplique a você. Esta garantia limitada concede avocê direitos legais específicos, e talvez você tambémtenha outros direitos, que podem variar de acordo coma jurisdição.DENTRO DO MÁXIMO RIGOR PERMITIDO PELA LEI,A LINKSYS NÃO SE RESPONSABILIZARÁ, DE FORMAALGUMA, PELA PERDA DE DADOS, RECEITA OU LUCROS,OU POR DANOS ESPECIAIS, INDIRETOS, CONSEQÜENCIAIS,INCIDENTAIS OU PUNITIVOS, INDEPENDENTEMENTEDA TEORIA DE RESPONSABILIDADE (INCLUINDONEGLIGÊNCIA) DECORRENTES OU RELACIONADOSAO USO OU À INCAPACIDADE DE USO DO PRODUTO(INCLUINDO SOFTWARES), MESMO QUE A LINKSYS TENHASIDO AVISADA SOBRE A POSSIBILIDADE DE TAIS DANOS.EM HIPÓTESE ALGUMA A RESPONSABILIDADE DA LINKSYSEXCEDERÁ O VALOR PAGO POR VOCÊ PELO PRODUTO.As limitações acima se aplicarão mesmo que qualquergarantia ou recurso oferecido sob esta garantia limitadafalhe em sua finalidade essencial. Algumas jurisdições nãopermitem a exclusão ou limitação de danos incidentais ouconseqüenciais; portanto, a limitação ou exclusão acimapode não se aplicar a você.COMO OBTER O SERVIÇO DE GARANTIASe você tiver alguma dúvida sobre o produtoou algum problema com <strong>el</strong>e, acesse o sitewww.linksys.com/support, no qual você encontrarávárias ferramentas e informações de suporte online. Se oproduto apresentar defeitos durante o Período de Garantia,entre em contato com o Suporte técnico da Linksys parareceber instruções sobre como obter o serviço de garantia.O número de t<strong>el</strong>efone do Suporte técnico da Linksys emsua área pode ser encontrado no Guia do usuário doproduto no site www.linksys.com. Tenha o número desérie e a nota fiscal de compra do produto à mão ao entrar25
Apêndice CInformações de garantiaem contato conosco. PARA SOLICITAR A GARANTIA, ÉNECESSÁRIO TER A NOTA FISCAL DE COMPRA ORIGINALDATADA. Se for solicitado que você devolva o produto,você receberá um número de RMA (Return MaterialsAuthorization, Autorização de retorno de mercadoria).Você é inteiramente responsáv<strong>el</strong> por embalar e enviar oproduto à Linksys. Ao devolver o produto, é necessárioincluir o número de RMA e uma cópia da nota fiscal decompra original datada. Os produtos recebidos sem umnúmero de RMA e sem uma cópia da nota fiscal de compraoriginal datada serão rejeitados. Não inclua nenhumoutro item no produto que você está devolvendo para aLinksys. O produto com defeito coberto por esta garantialimitada será consertado ou trocado e devolvido paravocê sem nenhum custo. Os clientes localizados fora dosEstados Unidos e do Canadá são responsáveis por todosos encargos de envio e manuseio, taxas alfandegárias,IVA (imposto sobre o valor agregado) e outros encargose tarifas associados. Consertos ou trocas não cobertospor esta garantia limitada estarão sujeitos à cobrança dastaxas praticadas p<strong>el</strong>a Linksys.SUPORTE TÉCNICOEsta garantia limitada não é um contrato de serviços nemum contrato de suporte. Você encontra informaçõessobre ofertas e políticas de suporte técnico atuais daLinksys (incluindo taxas de serviços de suporte) no sitewww.linksys.com/support.GERALEsta garantia limitada é regida p<strong>el</strong>as leis da jurisdição emque você adquiriu o Produto.Se qualquer parte desta garantia limitada for julgada nulaou não-executáv<strong>el</strong>, suas cláusulas restantes continuarãoem pleno vigor e efeito.As consultas devem ser encaminhadas para: Linksys, P.O.Box 18558, Irvine, CA 92623.Para obter mais informações, entre em contatoconoscowww.linksys.comS<strong>el</strong>ecione o seu país e, em seguida, SUPORTE TÉCNICOPara devoluções de produtos:S<strong>el</strong>ecione o seu país e, em seguida, SUPORTE AO CLIENTERoteador de banda larga Wir<strong>el</strong>ess-G26
Apêndice DInformações normativasApêndice D:Informações normativasFCC StatementThis product has been tested and complies with thespecifications for a Class B digital device, pursuant to Part15 of the FCC Rules. These limits are designed to providereasonable protection against harmful interference ina residential installation. This equipment generates,uses, and can radiate radio frequency energy and, if notinstalled and used according to the instructions, maycause harmful interference to radio communications.However, there is no guarantee that interference will notoccur in a particular installation. If this equipment doescause harmful interference to radio or t<strong>el</strong>evision reception,which is found by turning the equipment off and on, theuser is encouraged to try to correct the interference byone or more of the following measures:• Reorient or r<strong>el</strong>ocate the receiving antenna• Increase the separation between the equipment ordevices• Connect the equipment to an outlet other than thereceiver’s• Consult a dealer or an experienced radio/TV technicianfor assistanceFCC Radiation Exposure StatementThis equipment complies with FCC radiation exposur<strong>el</strong>imits set forth for an uncontrolled environment. Thisequipment should be installed and operated withminimum distance 20 cm between the radiator and yourbody.Safety Notices• Caution: To reduce the risk of fire, use only No.26 AWGor larger t<strong>el</strong>ecommunication line cord.• Do not use this product near water, for example, in awet basement or near a swimming pool.• Avoid using this product during an <strong>el</strong>ectrical storm.There may be a remote risk of <strong>el</strong>ectric shock fromlightning.Industry Canada StatementThis Class B digital apparatus complies with CanadianICES-003 and RSS210.Operation is subject to the following two conditions:1.2.This device may not cause interference andThis device must accept any interference, includinginterference that may cause undesired operationof the device.To reduce potential radio interference to other users,the antenna type and its gain should be so chosenthat the EIRP is not more than required for successfulcommunication.Industry Canada Radiation Exposure StatementThis equipment complies with IC radiation exposure limitsset forth for an uncontrolled environment. This equipmentshould be installed and operated with minimum distance20 cm between the radiator & your body.This transmitter must not be co-located or operating inconjunction with any other antenna or transmitter.Avis d’Industrie CanadaCet appareil numérique de la classe B est conforme auxnormes NMB-003 et RSS210 du Canada.L’utilisation de ce dispositif est autorisée seulement auxconditions suivantes :1. il ne doit pas produire de brouillage et2. il doit accepter tout brouillage radioélectrique reçu,même si ce brouillage est susceptible de compromettre lefonctionnement du dispositif.Afin de réduire le risque d’interférence aux autresutilisateurs, le type d’antenne et son gain doiventêtre choisis de façon à ce que la puissance isotroperayonnée équivalente (p.i.r.e.) ne soit pas supérieureau niveau requis pour obtenir une communicationsatisfaisante.Avis d’Industrie Canada concernant l’expositionaux radiofréquencesCe matéri<strong>el</strong> est conforme aux limites établies par ICen matière d’exposition aux radiofréquences dans unenvironnement non contrôlé. Ce matéri<strong>el</strong> doit être installéet utilisé à une distance d’au moins 20 cm entre l’antenneet le corps de l’utilisateur.L’émetteur ne doit pas être placé près d’une autre antenneou d’un autre émetteur, ou fonctionner avec une autreantenne ou un autre émetteur.Roteador de banda larga Wir<strong>el</strong>ess-G27
Apêndice DInformações normativasWir<strong>el</strong>ess DisclaimerThe maximum performance for wir<strong>el</strong>ess is derived fromIEEE Standard 802.11 specifications. Actual performancecan vary, including lower wir<strong>el</strong>ess network capacity,data throughput rate, range and coverage. Performancedepends on many factors, conditions and variables,including distance from the access point, volume ofnetwork traffic, building materials and construction,operating system used, mix of wir<strong>el</strong>ess products used,interference and other adverse conditions.Avis de non-responsabilité concernant lesappareils sans filLes performances maximales pour les réseaux sans filsont tirées des spécifications de la norme IEEE 802.11.Les performances ré<strong>el</strong>les peuvent varier, notammenten fonction de la capacité du réseau sans fil, du débitde la transmission de données, de la portée et de lacouverture. Les performances dépendent de facteurs,conditions et variables multiples, en particulier de ladistance par rapport au point d’accès, du volume du traficréseau, des matériaux utilisés dans le bâtiment et dutype de construction, du système d’exploitation et de lacombinaison de produits sans fil utilisés, des interférenceset de toute autre condition défavorable.Roteador de banda larga Wir<strong>el</strong>ess-G28
Apêndice DInformações normativasDeclaração de conformidade referente àDiretiva da UE 1999/5/EC (Diretiva R&TTE)Informações de conformidade para produtos sem fiode 2.4 GHz e 5 GHz r<strong>el</strong>evantes à UE e outros países queseguem a Diretiva da UE 1999/5/EC (Diretiva R&TTE)Б ъ л г а р с к и[Bulgarian]Česky[Czech]:Dansk[Danish]:Deutsch[German]:Това оборудване отговаря на същественитеизисквания и приложими клаузи наДиректива 1999/5/ЕС.Toto zařízení je v souladu se základnímipožadavky a ostatními odpovídajícímiustanoveními Směrnice 1999/5/EC.Dette udstyr er i overensstemm<strong>el</strong>se medde væsentlige krav og andre r<strong>el</strong>evantebestemm<strong>el</strong>ser i Direktiv 1999/5/EF.Dieses Gerät entspricht den grundlegendenAnforderungen und den weiterenentsprechenden Vorgaben der Richtlinie1999/5/EU.Nederlands[Dutch]:Malti[Maltese]:Magyar[Hungarian]:Norsk[Norwegian]:Polski[Polish]:Português[Portuguese]:Dit apparaat voldoet aan de essenti<strong>el</strong>e eisenen andere van toepassing zijnde bepalingenvan de Richtlijn 1999/5/EC.Dan l-apparat huwa konformi mal-ħtiġietessenzjali u l-provedimenti l-oħra rilevantitad-Direttiva 1999/5/EC.Ez a készülék t<strong>el</strong>jesíti az alapvetőkövet<strong>el</strong>ményeket és más 1999/5/EKirány<strong>el</strong>vben meghatározott vonatkozórend<strong>el</strong>kezéseket.Dette utstyret er i samsvar med degrunnleggende krav og andre r<strong>el</strong>evantebestemm<strong>el</strong>ser i EU-direktiv 1999/5/EF.Urządzenie jest zgodne z ogólnymiwymaganiami oraz szczególnymi warunkamiokreślonymi Dyrektywą UE: 1999/5/EC.Este equipamento está em conformidade comos requisitos essenciais e outras provisõesr<strong>el</strong>evantes da Directiva 1999/5/EC.Eesti[Estonian]:English:Español[Spanish]:Ελληνική[Greek]:Français[French]:Íslenska[Ic<strong>el</strong>andic]:Italiano[Italian]:Latviski[Latvian]:Lietuvių[Lithuanian]:See seade vastab direktiivi 1999/5/EÜ olulist<strong>el</strong>enõuet<strong>el</strong>e ja teist<strong>el</strong>e asjakohast<strong>el</strong>e sätet<strong>el</strong>e.This equipment is in compliance with theessential requirements and other r<strong>el</strong>evantprovisions of Directive 1999/5/EC.Este equipo cumple con los requisitosesenciales asi como con otras disposicionesde la Directiva 1999/5/CE.Αυτός ο εξοπλισµός είναι σε συµµόρφωση µετις ουσιώδεις απαιτήσεις και άλλες σχετικέςδιατάξεις της Οδηγίας 1999/5/EC.Cet appareil est conforme aux exigencesessenti<strong>el</strong>les et aux autres dispositionspertinentes de la Directive 1999/5/EC.Þetta tæki er samkvæmt grunnkröfum ogöðrum viðeigandi ákvæðum Tilskipunar1999/5/EC.Questo apparato é conforme ai requisitiessenziali ed agli altri principi sanciti dallaDirettiva 1999/5/CE.Šī iekārta atbilst Direktīvas 1999/5/EKbūtiskajām prasībām un citiem ar tosaistītajiem noteikumiem.Šis įrenginys tenkina 1999/5/EB Direktyvosesminius reikalavimus ir kitas šios direktyvosnuostatas.Română[Romanian]Slovensko[Slovenian]:Slovensky[Slovak]:Suomi[Finnish]:Svenska[Swedish]:Acest echipament este in conformitatecu cerint<strong>el</strong>e esentiale si cu alte prevederir<strong>el</strong>evante ale Directivei 1999/5/EC.Ta naprava je skladna z bistvenimi zahtevamiin ostalimi r<strong>el</strong>evantnimi pogoji Direktive1999/5/EC.Toto zariadenie je v zhode so základnýmipožiadavkami a inými príslušnými nariadeniamidirektív: 1999/5/EC.Tämä laite täyttää direktiivin 1999/5/EYolennaiset vaatimukset ja on siinä asetettujenmuiden laitetta koskevien määräystenmukainen.Denna utrustning är i överensstämm<strong>el</strong>se medde väsentliga kraven och andra r<strong>el</strong>evantabestämm<strong>el</strong>ser i Direktiv 1999/5/EC.A Declaração de conformidade (DofC) para todos osprodutos está disponív<strong>el</strong> por meio de uma ou mais destasopções:• Um arquivo PDF é fornecido no CD do produto.• Uma cópia impressa é fornecida com o produto.• Um arquivo PDF está disponív<strong>el</strong> na página do produtona Web. Visite www.linksys.com/international es<strong>el</strong>ecione seu país ou sua região. Em seguida, s<strong>el</strong>ecioneo seu produto.Se precisar de alguma outra documentação técnica,consulte a seção “Documentos técnicos em www.linksys.com/international”, mais adiante neste apêndice.Roteador de banda larga Wir<strong>el</strong>ess-G29
Apêndice DInformações normativasOs padrões a seguir foram utilizados durante a avaliaçãodo produto com r<strong>el</strong>ação aos requisitos da Diretiva 1999/5/EC:• Rádio: EN 300 328 e/ou EN 301 893, conformeaplicáv<strong>el</strong>• EMC: EN 301 489-1, EN 301 489-17• Segurança: EN 60950 e EN 50385 ou EN 50371O DFS (Dynamic Frequency S<strong>el</strong>ection) e o TPC (TransmitPower Control) são necessários para a operação na faixade 5 GHz.DFS: o equipamento atende aos requisitos do DFS,conforme definidos no ETSI EN 301 893. Esse recursoé exigido p<strong>el</strong>as normas para evitar interferências emserviços de localização por rádio (radares).TPC: para a operação na faixa de 5 GHz, o nív<strong>el</strong> de potênciamáximo é de 3 dB ou mais, abaixo do limite aplicáv<strong>el</strong>.Dessa forma, o TPC não é necessário.Marca CEPara os produtos Wir<strong>el</strong>ess-N, -G, -B e/ou -A da Linksys,a seguinte marca CE, o número da entidade notificada(quando aplicáv<strong>el</strong>) e o identificador de classe 2 sãoadicionados ao equipamento.ouououVerifique o rótulo CE no produto para saber qual é aentidade notificada envolvida na avaliação.Restrições nacionaisEste produto pode ser usado em todos os países da UE (eem outros países que sigam a diretiva da UE 1999/5/EC)sem limitações, com exceção dos países mencionados aseguir:Ce produit peut être utilisé dans tous les pays de l’UE (et danstous les pays ayant transposés la directive 1999/5/CE) sansaucune limitation, excepté pour les pays mentionnés cidessous:Questo prodotto è utilizzabile in tutte i paesi EU (ed in tuttigli altri paesi che seguono le direttive EU 1999/5/EC) senzanessuna limitazione, eccetto per i paesii menzionati diseguito:Das Produkt kann in allen EU Staaten ohne Einschränkungeneingesetzt werden (sowie in anderen Staaten die der EUDirektive 1999/5/CE folgen) mit Außnahme der folgendenaufgeführten Staaten:Na maioria dos países da UE e dos outros países europeus,as faixas de 2.4 e 5-GHz foram disponibilizadas para usopor LANs (redes locais) sem fio. A tab<strong>el</strong>a “Visão geral dosrequisitos normativos para LANs sem fio” fornece umavisão geral dos requisitos normativos aplicáveis para asfaixas de 2,4‐ e 5-GHz.Mais adiante neste documento você encontrará umavisão geral dos países aos quais se aplicam restrições ourequisitos adicionais, ou ambos.Os requisitos de qualquer país podem ser modificados. ALinksys recomenda que você verifique junto às autoridadeslocais o status mais recente das normas nacionais para asLANs sem fio de 2.4 e 5 GHz.Visão geral dos requisitos normativos para LANs sem fioFaixa defreqüência (MHz)Nív<strong>el</strong> de potênciamáx. (EIRP) (mW)SOMENTEusointernoUso internoe externoDe 2400 a 2483,5 100 X5150-5350 † 200 X5470-5725 † 1000 X† O DFS e o TPC são exigidos nas faixas de freqüência de 5250 a 5350MHz e de 5470 a 5725 MHz.Os seguintes países têm restrições e/ou requisitosadicionais aos apresentados na tab<strong>el</strong>a “Visão geral dosrequisitos normativos para LANs sem fio”:DenmarkIn Denmark, the band 5150 - 5350 MHz is also allowed foroutdoor usage.I Danmark må frekvensbåndet 5150 - 5350 også anvendesudendørs.Roteador de banda larga Wir<strong>el</strong>ess-G30
Apêndice DInformações normativasFranceFor 2,4 GHz, the product should not be used outdoorsin the band 2454 - 2483,5 MHz. There are no restrictionswhen used in other parts of the 2,4 GHz band when usedindoors. Check http://www.arcep.fr/ for more details.Pour la bande 2,4 GHz, l’ équipement ne doit pas être utiliséen extérieur dans la bande 2454 - 2483,5 MHz. Il n’y a pas derestrictions pour des utilisations en intérieur dans d’autresparties de la bande 2,4GHz. Consultez http://www.arcep.fr/pour de plus amples détails.LocationIndoor(No restrictions)ItalyOutdoorApplicable Power Lev<strong>el</strong>s in FranceFrequencyRange (MHz)Roteador de banda larga Wir<strong>el</strong>ess-GPower (EIRP)2400-2483.5 100 mW (20 dBm)2400-24542454-2483.5100 mW (20 dBm)10 mW (10 dBm)This product meets the National Radio Interface andthe requirements specified in the National FrequencyAllocation Table for Italy. Unless this 2,4-GHz wir<strong>el</strong>ess LANproduct is operating within the boundaries of the owner’sproperty, its use requires a “general authorization”. Pleasecheck http://www.comunicazioni.it/it/ for more details.Questo prodotto è conforme alla specifiche di InterfacciaRadio Nazionali e rispetta il Piano Nazionale di ripartizioned<strong>el</strong>le frequenze in Italia. Se non viene installato all’internod<strong>el</strong> proprio fondo, l’utilizzo di prodotti Wir<strong>el</strong>ess LAN a2,4 GHz richiede una “Autorizzazione Generale”. Consultarehttp://www.comunicazioni.it/it/ per maggiori dettagli.LatviaThe outdoor usage of the 2,4 GHz band requires anauthorization from the Electronic Communications Office.Please check http://www.esd.lv for more details.2,4 GHz frekveču joslas izmantošanai ārpus t<strong>el</strong>pāmnepieciešama atļauja no Elektronisko sakaru direkcijas.Vairāk informācijas: http://www.esd.lv.Notes:1.2.Although Norway, Switzerland and Liechtenstein arenot EU member states, the EU Directive 1999/5/EC hasalso been implemented in those countries.The regulatory limits for maximum output power arespecified in EIRP. The EIRP lev<strong>el</strong> of a device can becalculated by adding the gain of the antenna used(specified in dBi) to the output power available at theconnector (specified in dBm).Restrições de uso do produtoEste produto foi projetado apenas para uso interno. O usoexterno não é recomendáv<strong>el</strong>, a menos que observado emcontrário.Restrições de 2.4 GHzEste produto foi projetado para uso com as antenasintegrais ou dedicadas (externas) padrão fornecidas como equipamento. Entretanto, talvez alguns aplicativosexijam que as antenas, se removíveis, sejam separadas doproduto e instaladas longe do dispositivo usando cabosde extensão. Para esses aplicativos, a Linksys ofereceum cabo de extensão R‐SMA (AC9SMA) e um cabo deextensão R-TNC (AC9TNC). Os dois cabos têm nove metrosde comprimento e uma perda (atenuação) de 5 dB. Paracompensar a atenuação, a Linksys também ofereceantenas com ganhos mais altos, a HGA7S (com conectorR-SMA) e a HGA7T (com conector R-TNC). Essas antenastêm um ganho de 7 dBi e podem ser usadas apenas comos cabos de extensão R-SMA ou R-TNC.As combinações de cabos de extensão e antenas queresultem em um nív<strong>el</strong> de potência irradiada acima de 100mW EIRP são ilegais.Software ou firmware de terceirosO uso de software ou firmware que não tenha suporteda Linksys ou não seja fornecido por <strong>el</strong>a pode tornar oequipamento incompatív<strong>el</strong> com os requisitos normativos.Documentos técnicos emwww.linksys.com/internationalSiga estas etapas para acessar os documentos técnicos:1.2.3.4.5.6.7.Digite http://www.linksys.com/international em seunavegador da Web.S<strong>el</strong>ecione seu país ou sua região.Clique na guia Produtos.S<strong>el</strong>ecione a categoria de produto apropriada.S<strong>el</strong>ecione a subcategoria de produto, se necessário.S<strong>el</strong>ecione o produto.S<strong>el</strong>ecione o tipo de documentação que deseja naseção Mais informação. O documento será aberto emformato PDF, se o Adobe Acrobat estiver instalado nocomputador.OBSERVAÇÃO: se tiver dúvidas r<strong>el</strong>acionadasà conformidade deste produto ou se nãoconseguir encontrar as informações deque necessita, entre em contato como escritório de vendas local ou visitewww.linksys.com/international31
Apêndice DInformações normativasInformações para o usuário sobre produtospara o consumidor cobertos p<strong>el</strong>a Diretivada UE 2002/96/EC r<strong>el</strong>ativas ao WEEE (WasteElectric and Electronic Equipment)Este documento contém informações importantes para osusuários com r<strong>el</strong>ação ao descarte e à reciclagem corretosdos produtos da Linksys. É necessário que os consumidoresestejam de acordo com este aviso com r<strong>el</strong>ação a todos osprodutos <strong>el</strong>etrônicos que contenham o seguinte símbolo:Ceština (Czech) - Informace o ochraně životníhoprostředí pro zákazníky v zemích Evropské unieEvropská směrnice 2002/96/ES zakazuje, aby zařízení označenétímto symbolem na produktu anebo na obalu bylo likvidovános netříděným komunálním odpadem. Tento symbol udává,že daný produkt musí být likvidován odděleně od běžnéhokomunálního odpadu. Odpovídáte za likvidaci tohoto produktua dalších <strong>el</strong>ektrických a <strong>el</strong>ektronických zařízení prostřednictvímurčených sběrných míst stanovených vládou nebo místnímiúřady. Správná likvidace a recyklace pomáhá předcházetpotenciálním negativním dopadům na životní prostředí a lidskézdraví. Podrobnější informace o likvidaci starého vybavení silaskavě vyžádejte od místních úřadů, podniku zabývajícího s<strong>el</strong>ikvidací komunálních odpadů nebo obchodu, kde jste produktzakoupili.English - Environmental Information for Customers inthe European UnionEuropean Directive 2002/96/EC requires that the equipmentbearing this symbol on the product and/or its packaging mustnot be disposed of with unsorted municipal waste. The symbolindicates that this product should be disposed of separat<strong>el</strong>yfrom regular household waste streams. It is your responsibility todispose of this and other <strong>el</strong>ectric and <strong>el</strong>ectronic equipment viadesignated collection facilities appointed by the government orlocal authorities. Correct disposal and recycling will h<strong>el</strong>p preventpotential negative consequences to the environment andhuman health. For more detailed information about the disposalof your old equipment, please contact your local authorities,waste disposal service, or the shop where you purchased theproduct.Български (Bulgarian) - Информация относноопазването на околната среда за потребители вЕвропейския съюзЕвропейска директива 2002/96/EC изисква уредите, носещитози символ върху изделието и/или опаковката му, да несе изхвърля т с несортирани битови отпадъци. Символътобозначава, че изделието трябва да се изхвърля отделно отсметосъбирането на обикновените битови отпадъци. Вашае отговорността този и другите електрически и електронниуреди да се изхвърлят в предварително определени отдържавните или общински органи специализирани пунктовеза събиране. Правилното изхвърляне и рециклиранеще спомогнат да се предотвратят евентуални вредни заоколната среда и здравето на населението последствия. Запо-подробна информация относно изхвърлянето на вашитестари уреди се обърнете към местните власти, службите засметосъбиране или магазина, от който сте закупили уреда.Dansk (Danish) - Miljøinformation for kunder i EUEU-direktiv 2002/96/EF kræver, at udstyr der bærer dette symbolpå produktet og/<strong>el</strong>ler emballagen ikke må bortskaffes somusorteret kommunalt affald. Symbolet betyder, at dette produktskal bortskaffes adskilt fra det almind<strong>el</strong>ige husholdningsaffald.Det er dit ansvar at bortskaffe dette og andet <strong>el</strong>ektrisk og<strong>el</strong>ektronisk udstyr via bestemte indsamlingssteder udpegetaf staten <strong>el</strong>ler de lokale myndigheder. Korrekt bortskaff<strong>el</strong>seog genvinding vil hjælpe med til at undgå mulige skader formiljøet og menneskers sundhed. Kontakt venligst de lokalemyndigheder, renovationstjenesten <strong>el</strong>ler den butik, hvor duhar købt produktet, angående mere detaljeret information ombortskaff<strong>el</strong>se af dit gamle udstyr.Deutsch (German) - Umw<strong>el</strong>tinformation für Kundeninnerhalb der Europäischen UnionDie Europäische Richtlinie 2002/96/EC verlangt, dass technischeAusrüstung, die direkt am Gerät und/oder an der Verpackung mitdiesem Symbol versehen ist , nicht zusammen mit unsortiertemGemeindeabfall entsorgt werden darf. Das Symbol weist daraufhin, dass das Produkt von regulärem Haushaltmüll getrenntentsorgt werden sollte. Es liegt in Ihrer Verantwortung, diesesGerät und andere <strong>el</strong>ektrische und <strong>el</strong>ektronische Geräte überdie dafür zuständigen und von der Regierung oder örtlichenBehörden dazu bestimmten Samm<strong>el</strong>st<strong>el</strong>len zu entsorgen.Ordnungsgemäßes Entsorgen und Recyc<strong>el</strong>n trägt dazu bei,potenti<strong>el</strong>le negative Folgen für Umw<strong>el</strong>t und die menschlicheGesundheit zu vermeiden. Wenn Sie weitere Informationen zurEntsorgung Ihrer Altgeräte benötigen, wenden Sie sich bitte andie örtlichen Behörden oder städtischen Entsorgungsdiensteoder an den Händler, bei dem Sie das Produkt erworben haben.Roteador de banda larga Wir<strong>el</strong>ess-G32
Apêndice DInformações normativasEesti (Estonian) - Keskkonnaalane informatsioonEuroopa Liidus asuvat<strong>el</strong>e klientid<strong>el</strong>eEuroopa Liidu direktiivi 2002/96/EÜ nõuete kohas<strong>el</strong>t onseadmeid, mill<strong>el</strong> on toot<strong>el</strong> või pakendil käesolev sümbol ,ke<strong>el</strong>atud kõrvaldada koos sorteerimata olmejäätmetega. Seesümbol näitab, et toode tuleks kõrvaldada eraldi tavalistestolmejäätmevoogudest. Olete kohustatud kõrvaldama käesolevaja ka muud <strong>el</strong>ektri- ja <strong>el</strong>ektroonikaseadmed riigi või kohalikeametiasutuste poolt ette nähtud kogumispunktide kaudu.Seadmete korrektne kõrvaldamine ja ringlussevõtt aitab vältidavõimalikke negatiivseid tagajärgi keskkonnale ning inimestetervis<strong>el</strong>e. Vanade seadmete kõrvaldamise kohta täpsemainformatsiooni saamiseks võtke palun ühendust kohalikeametiasutustega, jäätmekäitlusfirmaga või kauplusega, kust tetoote ostsite.Español (Spanish) - Información medioambiental paraclientes de la Unión EuropeaLa Directiva 2002/96/CE de la UE exige que los equipos qu<strong>el</strong>leven este símbolo en <strong>el</strong> propio aparato y/o en su embalajeno deben <strong>el</strong>iminarse junto con otros residuos urbanos nos<strong>el</strong>eccionados. El símbolo indica que <strong>el</strong> producto en cuestióndebe separarse de los residuos domésticos convencionales convistas a su <strong>el</strong>iminación. Es responsabilidad suya desechar este ycualesquiera otros aparatos <strong>el</strong>éctricos y <strong>el</strong>ectrónicos a través d<strong>el</strong>os puntos de recogida que ponen a su disposición <strong>el</strong> gobierno ylas autoridades locales. Al desechar y reciclar correctamente estosaparatos estará contribuyendo a evitar posibles consecuenciasnegativas para <strong>el</strong> medio ambiente y la salud de las personas. Sidesea obtener información más detallada sobre la <strong>el</strong>iminaciónsegura de su aparato usado, consulte a las autoridades locales,al servicio de recogida y <strong>el</strong>iminación de residuos de su zona opregunte en la tienda donde adquirió <strong>el</strong> producto.ξλληνικά (Greek) - Στοιχεία περιβαλλοντικήςπροστασίας για πελάτες εντός της ΕυρωπαϊκήςΈνωσηςΗ Κοινοτική Οδηγία 2002/96/EC απαιτεί ότι ο εξοπλισμός ο οποίοςφέρει αυτό το σύμβολο στο προϊόν και/ή στη συσκευασίατου δεν πρέπει να απορρίπτεται μαζί με τα μικτά κοινοτικάαπορρίμματα. Το σύμβολο υποδεικνύει ότι αυτό το προϊόν θαπρέπει να απορρίπτεται ξεχωριστά από τα συνήθη οικιακάαπορρίμματα. Είστε υπεύθυνος για την απόρριψη του παρόντοςκαι άλλου ηλεκτρικού και ηλεκτρονικού εξοπλισμού μέσω τωνκαθορισμένων εγκαταστάσεων συγκέντρωσης απορριμμάτων οιοποίες παρέχονται από το κράτος ή τις αρμόδιες τοπικές αρχές.Η σωστή απόρριψη και ανακύκλωση συμβάλλει στην πρόληψηπιθανών αρνητικών συνεπειών για το περιβάλλον και την υγεία.Για περισσότερες πληροφορίες σχετικά με την απόρριψη τουπαλιού σας εξοπλισμού, παρακαλώ επικοινωνήστε με τις τοπικέςαρχές, τις υπηρεσίες απόρριψης ή το κατάστημα από το οποίοαγοράσατε το προϊόν.Français (French) - Informations environnementalespour les clients de l’Union européenneLa directive européenne 2002/96/CE exige que l’équipementsur lequ<strong>el</strong> est apposé ce symbole sur le produit et/ou sonemballage ne soit pas jeté avec les autres ordures ménagères. Cesymbole indique que le produit doit être éliminé dans un circuitdistinct de c<strong>el</strong>ui pour les déchets des ménages. Il est de votreresponsabilité de jeter ce matéri<strong>el</strong> ainsi que tout autre matéri<strong>el</strong>électrique ou électronique par les moyens de collecte indiquéspar le gouvernement et les pouvoirs publics des collectivitésterritoriales. L’élimination et le recyclage en bonne et due formeont pour but de lutter contre l’impact néfaste potenti<strong>el</strong> de cetype de produits sur l’environnement et la santé publique. Pourplus d’informations sur le mode d’élimination de votre ancienéquipement, veuillez prendre contact avec les pouvoirs publicslocaux, le service de traitement des déchets, ou l’endroit où vousavez acheté le produit.Italiano (Italian) - Informazioni r<strong>el</strong>ative all’ambienteper i clienti residenti n<strong>el</strong>l’Unione EuropeaLa direttiva europea 2002/96/EC richiede che le apparecchiaturecontrassegnate con questo simbolo sul prodotto e/osull’imballaggio non siano smaltite insieme ai rifiuti urbaninon differenziati. Il simbolo indica che questo prodotto nondeve essere smaltito insieme ai normali rifiuti domestici. Èresponsabilità d<strong>el</strong> proprietario smaltire sia questi prodotti siale altre apparecchiature <strong>el</strong>ettriche ed <strong>el</strong>ettroniche mediant<strong>el</strong>e specifiche strutture di raccolta indicate dal governo o daglienti pubblici locali. Il corretto smaltimento ed il riciclaggioaiuteranno a prevenire conseguenze potenzialmente negativeper l’ambiente e per la salute d<strong>el</strong>l’essere umano. Per ricevereinformazioni più dettagliate circa lo smaltimento d<strong>el</strong>le vecchieapparecchiature in Vostro possesso, Vi invitiamo a contattare glienti pubblici di competenza, il servizio di smaltimento rifiuti o ilnegozio n<strong>el</strong> quale avete acquistato il prodotto.Latviešu valoda (Latvian) - Ekoloģiska informācijaklientiem Eiropas Savienības jurisdikcijāDirektīvā 2002/96/EK ir prasība, ka aprīkojumu, kam pievienotazīme uz paša izstrādājuma vai uz tā iesaiņojuma, nedrīkstizmest nešķirotā veidā kopā ar komunālajiem atkritumiem(tiem, ko rada vietēji iedzīvotāji un uzņēmumi). Šī zīme nozīmēto, ka šī ierīce ir jāizmet atkritumos tā, lai tā nenonāktu kopā arparastiem mājsaimniecības atkritumiem. Jūsu pienākums ir šoun citas <strong>el</strong>ektriskas un <strong>el</strong>ektroniskas ierīces izmest atkritumos,izmantojot īpašus atkritumu savākšanas veidus un līdzekļus, konodrošina valsts un pašvaldību iestādes. Ja izmešana atkritumosun pārstrāde tiek veikta pareizi, tad mazinās iespējamaiskaitējums dabai un cilvēku ves<strong>el</strong>ībai. Sīkākas ziņas parnovecojuša aprīkojuma izmešanu atkritumos jūs varat saņemtvietējā pašvaldībā, atkritumu savākšanas dienestā, kā arī veikalā,kur iegādājāties šo izstrādājumu.Roteador de banda larga Wir<strong>el</strong>ess-G33
Apêndice DInformações normativasLietuvškai (Lithuanian) - Aplinkosaugos informacija,skirta Europos Sąjungos vartotojamsEuropos direktyva 2002/96/EC numato, kad įrangos, kuri irkurios pakuotė yra pažymėta šiuo simboliu (įveskite simbolį),negalima šalinti kartu su nerūšiuotomis komunalinėmisatliekomis. Šis simbolis rodo, kad gaminį reikia šalinti atskirainuo bendro buitinių atliekų srauto. Jūs privalote užtikrinti, kadši ir kita <strong>el</strong>ektros ar <strong>el</strong>ektroninė įranga būtų šalinama per tamtikras nacionalinės ar vietinės valdžios nustatytas atliekų rinkimosistemas. Tinkamai šalinant ir perdirbant atliekas, bus išvengtagalimos žalos aplinkai ir žmonių sveikatai. Daugiau informacijosapie jūsų senos įrangos šalinimą gali pateikti vietinės valdžiosinstitucijos, atliekų šalinimo tarnybos arba parduotuvės, kurioseįsigijote tą gaminį.Malti (Maltese) - Informazzjoni Ambjentali għal Klijentifl-Unjoni EwropeaId-Direttiva Ewropea 2002/96/KE titlob li t-tagħmir li jkun fih issimbolufuq il-prodott u/jew fuq l-ippakkjar ma jistax jintremama’ skart muniċipali li ma ġiex isseparat. Is-simbolu jindikali dan il-prodott għandu jintrema separatament minn ma’ l-iskart domestiku regolari. Hija responsabbiltà tiegħek li tarmidan it-tagħmir u kull tagħmir ieħor ta’ l-<strong>el</strong>ettriku u <strong>el</strong>ettronikupermezz ta’ faċilitajiet ta’ ġbir appuntati apposta mill-gvern jewmill-awtoritajiet lokali. Ir-rimi b’mod korrett u r-riċiklaġġ jgħinjipprevjeni konsegwenzi negattivi potenzjali għall-ambjent ugħas-saħħa tal-bniedem. Għal aktar informazzjoni dettaljatadwar ir-rimi tat-tagħmir antik tiegħek, jekk jogħġbok ikkuntattjalill-awtoritajiet lokali tiegħek, is-servizzi għar-rimi ta’ l-iskart, jewil-ħanut minn fejn xtrajt il-prodott.Magyar (Hungarian) - Környezetvéd<strong>el</strong>mi információ azeurópai uniós vásárlók számáraA 2002/96/EC számú európai uniós irány<strong>el</strong>v megkívánja, hogyazokat a termékeket, am<strong>el</strong>yeken, és/vagy am<strong>el</strong>yek csomagolásánaz alábbi címke megj<strong>el</strong>enik, tilos a többi sz<strong>el</strong>ektálatlan lakosságihulladékkal együtt kidobni. A címke azt j<strong>el</strong>öli, hogy az adotttermék kidobásakor a szokványos háztartási hulladék<strong>el</strong>szállításirendszerektõl <strong>el</strong>különített <strong>el</strong>járást k<strong>el</strong>l alkalmazni. Az Önf<strong>el</strong><strong>el</strong>õssége, hogy ezt, és más <strong>el</strong>ektromos és <strong>el</strong>ektronikusberendezéseit a kormányzati vagy a h<strong>el</strong>yi hatóságok általkij<strong>el</strong>ölt gyűjtõredszereken keresztül számolja f<strong>el</strong>. A megf<strong>el</strong><strong>el</strong>õhulladékf<strong>el</strong>dolgozás segít a környezetre és az emberi egészségrepotenciálisan ártalmas negatív hatások meg<strong>el</strong>õzésében. Ha<strong>el</strong>avult berendezéseinek f<strong>el</strong>számolásához további részletesinformációra van szüksége, kérjük, lépjen kapcsolatba a h<strong>el</strong>yihatóságokkal, a hulladékf<strong>el</strong>dolgozási szolgálattal, vagy azzalüzlett<strong>el</strong>, ahol a terméket vásárolta.Nederlands (Dutch) - Milieu-informatie voor klantenin de Europese UnieDe Europese Richtlijn 2002/96/EC schrijft voor dat apparatuur dieis voorzien van dit symbool op het product of de verpakking,niet mag worden ingezam<strong>el</strong>d met niet-gescheiden huishoud<strong>el</strong>ijkafval. Dit symbool geeft aan dat het product apart moet wordeningezam<strong>el</strong>d. U bent z<strong>el</strong>f verantwoord<strong>el</strong>ijk voor de vernietigingvan deze en andere <strong>el</strong>ektrische en <strong>el</strong>ektronische apparatuur via dedaarvoor door de land<strong>el</strong>ijke of plaats<strong>el</strong>ijke overheid aangewezeninzam<strong>el</strong>ingskanalen. De juiste vernietiging en recycling vandeze apparatuur voorkomt mog<strong>el</strong>ijke negatieve gevolgen voorhet milieu en de gezondheid. Voor meer informatie over hetvernietigen van uw oude apparatuur neemt u contact op metde plaats<strong>el</strong>ijke autoriteiten of afvalverwerkingsdienst, of met dewink<strong>el</strong> waar u het product hebt aangeschaft.Norsk (Norwegian) - Miljøinformasjon for kunder i EUEU-direktiv 2002/96/EF krever at utstyr med følgende symbolavbildet på produktet og/<strong>el</strong>ler pakningen, ikke må kastessammen med usortert avfall. Symbolet indikerer at detteproduktet skal håndteres atskilt fra ordinær avfallsinnsamlingfor husholdningsavfall. Det er ditt ansvar å kvitte deg meddette produktet og annet <strong>el</strong>ektrisk og <strong>el</strong>ektronisk avfall via egneinnsamlingsordninger slik myndighetene <strong>el</strong>ler kommunenebestemmer. Korrekt avfallshåndtering og gjenvinning vilvære med på å forhindre mulige negative konsekvenser formiljø og h<strong>el</strong>se. For nærmere informasjon om håndtering avdet kasserte utstyret ditt, kan du ta kontakt med kommunen,en innsamlingsstasjon for avfall <strong>el</strong>ler butikken der du kjøpteproduktet.Polski (Polish) - Informacja dla klientów w UniiEuropejskiej o przepisach dotyczących ochronyśrodowiskaDyrektywa Europejska 2002/96/EC wymaga, aby sprzętoznaczony symbolem znajdującym się na produkcie i/lub jegoopakowaniu nie był wyrzucany razem z innymi niesortowanymiodpadami komunalnymi. Symbol ten wskazuje, że produktnie powinien być usuwany razem ze zwykłymi odpadami zgospodarstw domowych. Na Państwu spoczywa obowiązekwyrzucania tego i innych urządzeń <strong>el</strong>ektrycznych oraz<strong>el</strong>ektronicznych w punktach odbioru wyznaczonych przez władzekrajowe lub lokalne. Pozbywanie się sprzętu we właściwy sposóbi jego recykling pomogą zapobiec potencjalnie negatywnymkonsekwencjom dla środowiska i zdrowia ludzkiego. W c<strong>el</strong>uuzyskania szczegółowych informacji o usuwaniu starego sprzętu,prosimy zwrócić się do lokalnych władz, służb oczyszczaniamiasta lub sklepu, w którym produkt został nabyty.Roteador de banda larga Wir<strong>el</strong>ess-G34
Apêndice DInformações normativasPortuguês (Portuguese) - Informação ambiental paraclientes da União EuropeiaA Directiva Europeia 2002/96/CE exige que o equipamentoque exibe este símbolo no produto e/ou na sua embalagemnão seja <strong>el</strong>iminado junto com os resíduos municipais nãoseparados. O símbolo indica que este produto deve ser<strong>el</strong>iminado separadamente dos resíduos domésticos regulares.É da sua responsabilidade <strong>el</strong>iminar este e qualquer outroequipamento <strong>el</strong>éctrico e <strong>el</strong>ectrónico através das instalaçõesde recolha designadas p<strong>el</strong>as autoridades governamentais oulocais. A <strong>el</strong>iminação e reciclagem correctas ajudarão a preveniras consequências negativas para o ambiente e para a saúdehumana. Para obter informações mais detalhadas sobre aforma de <strong>el</strong>iminar o seu equipamento antigo, contacte asautoridades locais, os serviços de <strong>el</strong>iminação de resíduos ou oestab<strong>el</strong>ecimento comercial onde adquiriu o produto.Română (Romanian) - Informaţii de mediu pentruclienţii din Uniunea EuropeanăDirectiva europeană 2002/96/CE impune ca echipament<strong>el</strong>e careprezintă acest simbol pe produs şi/sau pe ambalajul acestuia sănu fie casate împreună cu gunoiul menajer municipal. Simbolulindică faptul că acest produs trebuie să fie casat separat degunoiul menajer obişnuit. Este responsabilitatea dvs. să casaţiacest produs şi alte echipamente <strong>el</strong>ectrice şi <strong>el</strong>ectronice prinintermediul unităţilor de colectare special desemnate de guvernsau de autorităţile locale. Casarea şi reciclarea corecte vor ajutala prevenirea potenţial<strong>el</strong>or consecinţe negative asupra sănătăţiimediului şi a oamenilor. Pentru mai multe informaţii detaliatecu privire la casarea acestui echipament vechi, contactaţiautorităţile locale, serviciul de salubrizare sau magazinul de lacare aţi achiziţionat produsul.Slovenčina (Slovak) - Informácie o ochrane životnéhoprostredia pre zákazníkov v Európskej úniiPodľa európskej smernice 2002/96/ES zariadenie s týmtosymbolom na produkte a/alebo jeho balení nesmie byťlikvidované spolu s netriedeným komunálnym odpadom.Symbol znamená, že produkt by sa mal likvidovať odd<strong>el</strong>eneod bežného odpadu z domácností. Je vašou povinnosťoulikvidovať toto i ostatné <strong>el</strong>ektrické a <strong>el</strong>ektronické zariadeniaprostredníctvom špecializovaných zberných zariadení určenýchvládou alebo miestnymi orgánmi. Správna likvidácia a recykláciapomôže zabrániť prípadným negatívnym dopadom na životnéprostredie a zdravie ľudí. Ak máte záujem o podrobnejšieinformácie o likvidácii starého zariadenia, obráťte sa, prosím, namiestne orgány, organizácie zaoberajúce sa likvidáciou odpadovalebo obchod, v ktorom ste si produkt zakúpili.Slovenčina (Slovene) - Okoljske informacije za strankev Evropski unijiEvropska direktiva 2002/96/EC prepoveduje odlaganje opreme,označene s tem simbolom – na izd<strong>el</strong>ku in/ali na embalaži – medobičajne, nerazvrščene odpadke. Ta simbol opozarja, da je trebaizd<strong>el</strong>ek odvreči ločeno od preostalih gospodinjskih odpadkov.Vaša odgovornost je, da to in preostalo <strong>el</strong>ektrično in <strong>el</strong>ektronskoopremo odnesete na posebna zbirališča, ki jih določijodržavne ustanove ali lokalna uprava. S pravilnim odlaganjemin recikliranjem boste preprečili morebitne škodljive vplive naokolje in zdravje ljudi. Če ž<strong>el</strong>ite izvedeti več o odlaganju stareopreme, se obrnite na lokalno upravo, odpad ali trgovino, kjerste izd<strong>el</strong>ek kupili.Suomi (Finnish) - Ympäristöä koskevia tietoja EUalueenasiakkailleEU-direktiivi 2002/96/EY ed<strong>el</strong>lyttää, että jos laitteistossa on tämäsymboli itse tuotteessa ja/tai sen pakkauksessa, laitteistoaei saa hävittää lajitt<strong>el</strong>emattoman yhdyskuntajätteen mukana.Symboli merkitsee sitä, että tämä tuote on hävitettävä erillääntavallisesta kotitalousjätteestä. Sinun vastuullasi on hävittäätämä <strong>el</strong>ektroniikkatuote ja muut vastaavat <strong>el</strong>ektroniikkatuotteetviemällä tuote tai tuotteet viranomaisten määräämäänkeräyspisteeseen. Laitteiston oikea hävittäminen estäämahdolliset ki<strong>el</strong>teiset vaikutukset ympäristöön ja ihmistenterveyteen. Lisätietoja vanhan laitteiston oikeasta hävitystavastasaa paikallisilta viranomaisilta, jätteenhävityspalv<strong>el</strong>usta tai siitämyymälästä, josta ostit tuotteen.Svenska (Swedish) - Miljöinformation för kunder iEuropeiska unionenDet europeiska direktivet 2002/96/EC kräver att utrustning meddenna symbol på produkten och/<strong>el</strong>ler förpackningen inte fårkastas med osorterat kommunalt avfall. Symbolen visar att dennaprodukt bör kastas efter att den avskiljts från vanligt hushållsavfall.Det faller på ditt ansvar att kasta denna och annan <strong>el</strong>ektrisk och<strong>el</strong>ektronisk utrustning på fastställda insamlingsplatser utseddaav regeringen <strong>el</strong>ler lokala myndigheter. Korrekt kassering ochåtervinning skyddar mot eventu<strong>el</strong>la negativa konsekvenserför miljön och personhälsa. För mer detaljerad information omkassering av din gamla utrustning kontaktar du dina lokalamyndigheter, avfallshanteringen <strong>el</strong>ler butiken där du köpteprodukten.WEB: para obter informações adicionais, acessewww.linksys.com/internationalRoteador de banda larga Wir<strong>el</strong>ess-G8013010NC-JL35