Sony CDX-GT560UI - CDX-GT560UI Consignes d’utilisation Italien
Sony CDX-GT560UI - CDX-GT560UI Consignes d’utilisation Italien
Sony CDX-GT560UI - CDX-GT560UI Consignes d’utilisation Italien
You also want an ePaper? Increase the reach of your titles
YUMPU automatically turns print PDFs into web optimized ePapers that Google loves.
Getting Started<br />
Canceling the DEMO<br />
mode<br />
You can cancel the demonstration display<br />
which appears during turning off.<br />
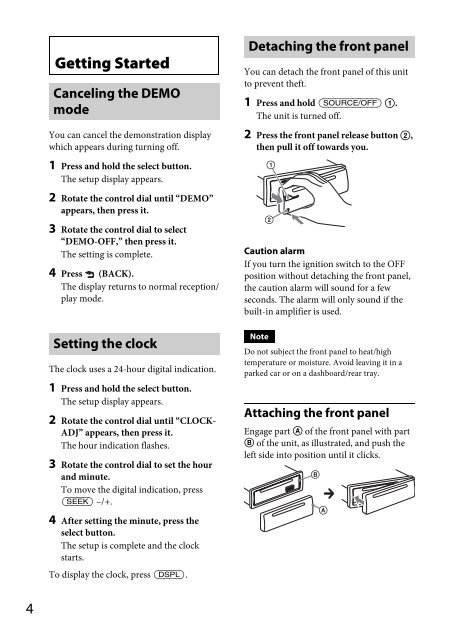
Detaching the front panel<br />
You can detach the front panel of this unit<br />
to prevent theft.<br />
1 Press and hold .<br />
The unit is turned off.<br />
2 Press the front panel release button ,<br />
then pull it off towards you.<br />
1 Press and hold the select button.<br />
The setup display appears.<br />
2 Rotate the control dial until “DEMO”<br />
appears, then press it.<br />
3 Rotate the control dial to select<br />
“DEMO-OFF,” then press it.<br />
The setting is complete.<br />
4 Press (BACK).<br />
The display returns to normal reception/<br />
play mode.<br />
Setting the clock<br />
The clock uses a 24-hour digital indication.<br />
1 Press and hold the select button.<br />
The setup display appears.<br />
2 Rotate the control dial until “CLOCK-<br />
ADJ” appears, then press it.<br />
The hour indication flashes.<br />
3 Rotate the control dial to set the hour<br />
and minute.<br />
To move the digital indication, press<br />
–/+.<br />
Caution alarm<br />
If you turn the ignition switch to the OFF<br />
position without detaching the front panel,<br />
the caution alarm will sound for a few<br />
seconds. The alarm will only sound if the<br />
built-in amplifier is used.<br />
Note<br />
Do not subject the front panel to heat/high<br />
temperature or moisture. Avoid leaving it in a<br />
parked car or on a dashboard/rear tray.<br />
Attaching the front panel<br />
Engage part A of the front panel with part<br />
B of the unit, as illustrated, and push the<br />
left side into position until it clicks.<br />
4 After setting the minute, press the<br />
select button.<br />
The setup is complete and the clock<br />
starts.<br />
To display the clock, press .<br />
4


