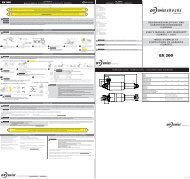
instruction manual and warranty rules instructions d ... - DT Swiss
instruction manual and warranty rules instructions d ... - DT Swiss
instruction manual and warranty rules instructions d ... - DT Swiss

You also want an ePaper? Increase the reach of your titles
YUMPU automatically turns print PDFs into web optimized ePapers that Google loves.
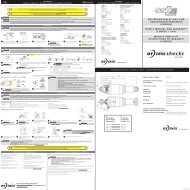
INSTRUCTION MANUAL AND WARRANTY RULES<br />
INSTRUCTIONS D'UTILISATION ET CONDITIONS DE GARANTIE<br />
BEDIENUNGSANLEITUNG UND GARANTIEBESTIMMUNGEN<br />
<strong>DT</strong> <strong>Swiss</strong> XR Models / Modèles / Modelle<br />
<strong>DT</strong> <strong>Swiss</strong> XM Models / Modèles / Modelle<br />
<strong>DT</strong> <strong>Swiss</strong> EX Models / Modèles / Modelle<br />
FORKS
Forks www.dtswiss.com<br />
ENGLISH<br />
INSTRUCTION MANUAL AND WARRANTY RULES 4 – 22<br />
Thank you for choosing a <strong>DT</strong> <strong>Swiss</strong> fork. You’ve purchased a product of best <strong>Swiss</strong> quality<br />
<strong>and</strong> innovative technology.<br />
This <strong>instruction</strong> <strong>manual</strong> explains the installation, operation <strong>and</strong> h<strong>and</strong>ling of <strong>DT</strong> <strong>Swiss</strong><br />
forks. For further questions, which are not covered in this <strong>instruction</strong> <strong>manual</strong>, please<br />
contact your local dealer or the responsible <strong>DT</strong> <strong>Swiss</strong> Service Center (contact information<br />
at the end of this <strong>manual</strong>).<br />
FRANCAIS<br />
INSTRUCTIONS D'UTILISATION ET CONDITIONS DE GARANTIE 23 – 41<br />
Nous vous remercions pour l'achat d'une fourche <strong>DT</strong> <strong>Swiss</strong>! Vous avez choisi un produit<br />
innovant de qualité suisse.<br />
Ce mode d'emploi explique le montage dans le cadre, les fonctions et les manipulations<br />
des fourches <strong>DT</strong> <strong>Swiss</strong>. Si vous avez des questions, dont la réponse ne se trouve pas dans<br />
ce manuel, veuillez s'il vous plait prendre contact avec votre revendeur ou directement<br />
avec le <strong>DT</strong> <strong>Swiss</strong> Service Center le plus proche (coordonnées à la fin de ce manuel).<br />
DEUTSCH<br />
BEDIENUNGSANLEITUNG UND GARANTIEBESTIMMUNGEN 42 – 60<br />
Wir gratulieren Ihnen zum Kauf Ihrer neuen <strong>DT</strong> <strong>Swiss</strong> Federgabel! Sie haben sich für ein<br />
Schweizer Qualitätsprodukt führender Technologie entschieden.<br />
Diese Bedienungsanleitung erklärt den Einbau ins Fahrrad, die Bedienung und die<br />
H<strong>and</strong>habung der <strong>DT</strong> <strong>Swiss</strong> Federgabeln. Sollten Sie weitere Fragen haben, die nicht<br />
durch diese Bedienungsanleitung abgedeckt werden, wenden Sie sich an Ihren Händler<br />
oder direkt an das zuständige <strong>DT</strong> <strong>Swiss</strong> Service Center (Kontaktinformationen am Ende<br />
der Bedienungsanleitung).<br />
More technical information see www.dtswiss.com<br />
Plus d'informations techniques sur www.dtswiss.com.<br />
Mehr technische Informationen unter www.dtswiss.com.
1 GENERAL INFORMATION<br />
1.1 GENERAL INFORMATION<br />
• The installation of the fork should only be carried out by qualified bicycle mechanics.<br />
• During bike riding always wear a helmet, sufficient protection gear <strong>and</strong> eye protection.<br />
• Don’t mount the bike on a roof rack using the fork’s dropouts. The fork might get damaged.<br />
• Please read the <strong>instruction</strong> <strong>manual</strong> <strong>and</strong> <strong>warranty</strong> <strong>rules</strong> attentively before installing or using the fork!<br />
• The information contained in the <strong>instruction</strong> <strong>manual</strong> <strong>and</strong> <strong>warranty</strong> <strong>rules</strong> respectively, must be accessible to the end user of<br />
the product!<br />
• Please take note that it is in the riders responsibility to have the product regularly checked to determine if it needs to be<br />
serviced. <strong>DT</strong> <strong>Swiss</strong> recommends regular maintenance <strong>and</strong> inspection by a <strong>DT</strong> <strong>Swiss</strong> Service Center. Please read the <strong>instruction</strong><br />
<strong>manual</strong> <strong>and</strong> <strong>warranty</strong> <strong>rules</strong> of your <strong>DT</strong> <strong>Swiss</strong> fork.<br />
• If the fork shows any scratches or grooves, contact your local dealer or the responsible <strong>DT</strong> <strong>Swiss</strong> Service Center to evaluate<br />
the damage. Do not continue to ride the fork until an assessment has been made by the Service Center.<br />
1.2 TERMS<br />
The terms suspension fork <strong>and</strong> fork as well as carbon steerer <strong>and</strong> steerer are to be understood equally in this document.<br />
1.3 USE OF WARNING SYMBOLS<br />
CAUTION<br />
Shows a danger, which can cause damage to the material or to a third person, as well as serious injuries or even death.<br />
INFORMATION<br />
Shows practice-oriented information <strong>and</strong> tips which allow an optimal use.<br />
1.4 MAXIMUM RIDER WEIGHT<br />
<strong>DT</strong> <strong>Swiss</strong> forks are designed to be used by a single rider, on mountain trails <strong>and</strong> similar off-road conditions. A non adapted use<br />
can cause damage to the material or a third person, as well as serious injuries or even death.<br />
4<br />
Model Max. rider weight<br />
<strong>DT</strong> <strong>Swiss</strong> XRC-Models 210 lbs / 95 kg<br />
<strong>DT</strong> <strong>Swiss</strong> XRM-Models 245 lbs / 110 kg<br />
<strong>DT</strong> <strong>Swiss</strong> XM-Models 245 lbs / 110 kg<br />
<strong>DT</strong> <strong>Swiss</strong> EX-Models 245 lbs / 110 kg<br />
1.5 OPERATING PURPOSE<br />
• <strong>DT</strong> <strong>Swiss</strong> Forks are recommended only for the use in bicycles.<br />
• <strong>DT</strong> <strong>Swiss</strong> Forks must only be used in electrically power assisted bicycles according to DIN EN 15194 st<strong>and</strong>ards <strong>and</strong> only if the<br />
power transmission does not go over the front wheel (Front hub).<br />
• <strong>DT</strong> <strong>Swiss</strong> Forks cannot be used for other applications than shown in the chart below or as a tool or toy or for anything else<br />
than described in the user's <strong>manual</strong>.<br />
XRC<br />
XRM<br />
XMC<br />
XMM<br />
EXC<br />
EXM<br />
XR Cross Race XM Cross Mountain EX Enduro Cross FR Freeride
2 TECHNOLOGIES<br />
2.1 OVERVIEW FORK MODELS<br />
Model Damping technology Spring technology<br />
<strong>DT</strong> <strong>Swiss</strong> XR-Models • Single Shot with optional Remote<br />
Control<br />
<strong>DT</strong> <strong>Swiss</strong> XM-Models<br />
• Twin Shot with optional Remote<br />
Control<br />
<strong>DT</strong> <strong>Swiss</strong> EX-Models Launch Control<br />
2.2 ABS AUTO BALANCING SPRING SYSTEM<br />
<strong>DT</strong> <strong>Swiss</strong> forks with ABS spring technology use positive <strong>and</strong> negative air spring. While adjusting the air pressure in the positive<br />
air chamber, the air pressure in the negative air chamber adjusts automatically. The air pressure in the positive <strong>and</strong> negative air<br />
chambers is always in an optimal way to the weight of the rider.<br />
2.3 SINGLE SHOT<br />
<strong>DT</strong> <strong>Swiss</strong> forks with Single Shot damping technology have an extern adjustable low speed rebound damping. The high speed<br />
compression <strong>and</strong> rebound damping, as well as the low speed compression damping are factory setting <strong>and</strong> not adjustable.<br />
The compression lock out can be activated on the top of the fork or by Remote Control on the h<strong>and</strong>lebar.<br />
2.4 TWIN SHOT<br />
<strong>DT</strong> <strong>Swiss</strong> forks with Twin Shot damping technology do have an externally adjustable low speed rebound <strong>and</strong> compression<br />
damping. The high speed rebound <strong>and</strong> compression damping are factory setting <strong>and</strong> not adjustable. The sequential rebound<br />
<strong>and</strong> compression Lockout is externally adjustable with an adjuster lever or by Remote Control on the h<strong>and</strong>lebar.<br />
The rebound lock out is an assistance for climbing, the rebound circuit is closed after a defined height. The fork cannot extend<br />
completely anymore <strong>and</strong> stays down, at about a third of its normal full travel.<br />
The compression lock out will be mostly used in sprints or on the road. The compression damping is closed, so that the fork<br />
cannot move anymore.<br />
2.5 LAUNCH CONTROL<br />
<strong>DT</strong> <strong>Swiss</strong> forks with Launch Control damping technology do have an externally adjustable low speed rebound <strong>and</strong> compression<br />
damping. The high speed compression damping is factory setting <strong>and</strong> not adjustable.<br />
The Launch Control function is an assistance for climbing where the rebound damping circuit will be closed to a pre-defined<br />
level. The fork cannot rebound completely <strong>and</strong> stays in lowered position until the Launch Control function gets deactivated.<br />
ABS<br />
5<br />
ENGLISH<br />
FRANCAIS<br />
DEUTSCH
3 INSTALLATION<br />
3.1 GENERAL INFORMATION<br />
CAUTION<br />
Please take note of the following safety advice for the assembly.<br />
• To fasten bolted connections, always use a torque wrench in the appropriate torque range specified by <strong>DT</strong> <strong>Swiss</strong>, by the<br />
headset-manufacturer or the stem-manufacturer.<br />
• Please note the maximum <strong>and</strong> minimum torque while fastening the parts. The lowest value is authoritative, but the torque<br />
should not go below the lowest value given by <strong>DT</strong> <strong>Swiss</strong>.<br />
• Your <strong>DT</strong> <strong>Swiss</strong> fork can have a straight steerer with a diameter of 28.6mm (1 1/8“) or a tapered steerer with a diameter of<br />
39.82mm (1.5") at the bottom <strong>and</strong> 28.6mm (1 1/8“) at the top. Please only use a headset which is compatible with your<br />
steerer diameter.<br />
• Do not use any steerer adapters or reducer bushings.<br />
• Your <strong>DT</strong> <strong>Swiss</strong> fork is built for a stem clamp without thread. Do not add any holes or threading, or make any kind of technical<br />
alternations to the fork.<br />
• Be careful not to damage the steerer or the crown when assembling or using your <strong>DT</strong> <strong>Swiss</strong> fork. Pay special attention when<br />
fitting the headset crown race to the base of the steerer tube. The parts mounted on your fork should have no sharp edges.<br />
• Do not use cotter style stems<br />
• The flange of the discontinuous clamp area of the stem must be at least 7mm high.<br />
CAUTION<br />
The spacers used between the headset <strong>and</strong> the stem when assembling, must not under-run the minimal height of 5mm or<br />
exceed the maximal height of 30mm.<br />
The steerer clamp of the stem must not be larger than 45mm.<br />
A 5mm spacer must be applied above the stem, to guarantee that the whole clamping length of the stem rests on the steerer.<br />
Make sure, that there is a big enough gap between the top edge of the spacer <strong>and</strong> the steerer, so you can adjust the play of<br />
your steerer correctly (<strong>DT</strong> <strong>Swiss</strong> recommends 2-3mm)<br />
6
3.2 SHORTENING AND PREPARING THE STEERER FOR THE ASSEMBLY<br />
Because shortening the steerer essentially depends on the headset <strong>and</strong> the stem as well as the stem model, it is m<strong>and</strong>atory to<br />
consult the <strong>instruction</strong> <strong>manual</strong> of the headset <strong>and</strong> that of the stem.<br />
Please take note, that when exchanging the headset <strong>and</strong>/or the stem, the new installation height can have an effect on the<br />
length of the steerer.<br />
• Disassemble your old fork from the frame.<br />
• Remove the headset crown race from the old fork.<br />
• Measure the steerer length of the old fork <strong>and</strong> transfer the result onto the steerer of your new <strong>DT</strong> <strong>Swiss</strong> fork. Make sure<br />
that the length is measured from the supporting area of the headset crown race on the crown to the top edge of the<br />
steerer.<br />
• Make sure, that the residual clamping area complies with the overall installation height of the stem including a 5mm spacer<br />
above the stem.<br />
Auflagefläche Steuersatzkonus<br />
unten<br />
Supporting area headset base plate<br />
Base du jeu de direction<br />
Schaftrohrlänge<br />
Steerer length<br />
Longeur du pivot<br />
Anschlag Schaftrohr<br />
Exp<strong>and</strong>er (Nur Carbonschaftrohr)<br />
Arrester steerer<br />
Exp<strong>and</strong>er (only carbon shaft)<br />
Arret exp<strong>and</strong>eur de pivot<br />
(seulement pivot en carbone)<br />
Auflagefläche Steuersatzkonus<br />
unten<br />
Supporting area headset base plate<br />
Base du jeu de direction<br />
ca. 2mm<br />
Schaftrohrlänge<br />
Steerer length<br />
Longeur du pivot<br />
3.2.1 SPECIAL PROCEDURE FOR CARBON STEERER<br />
CAUTION<br />
Take special precautions for the safety of your health, especially the skin, eyes <strong>and</strong> respiratory passages before shortening a<br />
carbon steerer.<br />
For assembling your headset <strong>and</strong> stem do not use a conventional A-Head-Set Star-Nut. Only use the steerer exp<strong>and</strong>er provided<br />
by <strong>DT</strong> <strong>Swiss</strong>. For safety reasons the steerer exp<strong>and</strong>er must be permanently mounted.<br />
INFORMATION<br />
Take note, that the steerer exp<strong>and</strong>er provided by <strong>DT</strong> <strong>Swiss</strong> elongates the installation height of the steerer of about 2mm.<br />
3.2.1.1 REQUIRED MATERIAL<br />
• safety goggles<br />
• breathing protection<br />
• protective gloves<br />
• masking tape<br />
• h<strong>and</strong>saw (new saw blade for metal with at least 24 teeth per Inch)<br />
• s<strong>and</strong>paper (min. grit 400)<br />
7<br />
ENGLISH<br />
FRANCAIS<br />
DEUTSCH
3.2.1.2 PROCEDURE<br />
• Only use a h<strong>and</strong>saw to shorten your carbon steerer.<br />
• Wrap masking tape tightly around the steerer at height of the measured length in order to prevent the carbon fiber from<br />
fraying when it is cut. Saw to achieve the desired length. Carefully file a smooth radius or chamfer on the inside <strong>and</strong> outside<br />
at the top edge of the steerer with s<strong>and</strong>paper. The carbon fiber of the steerer must not be allowed to fray.<br />
• Carefully remove all of the masking tape from the steerer. Do no use any aggressive dissolvers to remove any left over<br />
masking tape (<strong>DT</strong> <strong>Swiss</strong> recommends the use of Motorex <strong>Swiss</strong>clean 2300).<br />
• Check inside the steerer for any grit or dirt, clean if necessary.<br />
• Insert the steerer exp<strong>and</strong>er into the steerer until the arrester securely rests on the ring surface of the steerer. Make sure the<br />
slotted bushing is orientated backwards.<br />
• Hold the exp<strong>and</strong>er whilst tightening the screw with an Allen wrench size 6mm until the exp<strong>and</strong>er stops turning, without<br />
exceeding the maximal torque of 7Nm.<br />
• The exp<strong>and</strong>er should always stay mounted in your fork.<br />
3.2.2 SPECIAL PROCEDURE FOR ALUMINIUM STEERER<br />
3.2.2.1 REQUIRED MATERIAL<br />
• pipe cutter<br />
• file<br />
•<br />
3.2.2.2 PROCEDURE<br />
• Cut the steerer to the desired length. <strong>DT</strong> <strong>Swiss</strong> recommends to use a pipe cutter.<br />
• Deburr the steerer with the file, inside <strong>and</strong> outside<br />
• Put a star-nut inside the steerer using an appropriate tool<br />
3.3 ASSEMBLING THE FORK IN THE FRAME<br />
INFORMATION<br />
Assemble the headset as described in the <strong>instruction</strong> <strong>manual</strong> by the headset-manufacturer. Pay attention to the following<br />
restrictions by <strong>DT</strong> <strong>Swiss</strong>.<br />
The adjusting screw is used to set up the bearing play of the headset. This screw should not be used for tightening!<br />
CAUTION<br />
The headset crown race <strong>and</strong> headset top cone must not have any sharp edges as they can scratch or groove the steerer <strong>and</strong><br />
shorten the life-span or even lead to failure of your <strong>DT</strong> <strong>Swiss</strong> fork.<br />
By mounting the crown race <strong>and</strong> the stem take care not to damage the fork <strong>and</strong> especially the shaft. Damages on the fork<br />
could shorten the life-span or even lead to failure of your <strong>DT</strong> <strong>Swiss</strong> fork.<br />
• By aluminum steerer, please put some grease on the steerer <strong>and</strong> on the crown race of the headset. By carbon steerer, please<br />
use carbon mounting paste (Art. No. FXXXXX0XXX040717S).<br />
• Press the crown race on the steerer following the <strong>instruction</strong> of the headset manufacturer<br />
• Assemble the fork with the pressed on headset crown race onto your frame. Make sure, that the headset crown race <strong>and</strong><br />
the compliant headset are fitted together properly.<br />
• Assemble the headset top bearing according to the <strong>instruction</strong> of the headset-manufacturer. Use the spacer at the bottom<br />
of the stem to adjust the stem to the desired height.<br />
• Without tightening the fastening screw, mount the stem including the spacer above the stem on the steerer. Take note<br />
of the restrictions concerning minimal <strong>and</strong> maximal height of the spacer between the headset <strong>and</strong> the stem. In case of a<br />
carbon steerer, apply a fine film of carbon adhesive paste onto the clamping area of the stem.<br />
• Adjust the bearing play of the headset using the cap <strong>and</strong> the adjusting screw provided by the headset-manufacturer.<br />
• Tighten the screw, with open stem clamping screws, to the point when there is no more bearing play noticeable when pulling<br />
the front brake <strong>and</strong> moving the bicycle forwards <strong>and</strong> backwards. The fork must turn freely in the steerer tube.<br />
• Check the bearing play of the upper <strong>and</strong> lower bearing shell with your thumb <strong>and</strong> index finger whilst the front brake is<br />
pulled <strong>and</strong> the bicycle is moved forwards <strong>and</strong> backwards.<br />
INFORMATION<br />
If the steerer is installed properly, there is no bearing play noticeable <strong>and</strong> the h<strong>and</strong>le bar resp. the front wheel tilts over on its<br />
own when the bicycle is placed at an angle.<br />
• Adjust the stem <strong>and</strong> tighten the fastening screw of the stem as described in the <strong>instruction</strong> <strong>manual</strong> of the stem-manufacturer.<br />
Take note of the maximal fastening torque of the fastening screws for carbon steerers.<br />
INFORMATION<br />
If the stem-manufacturer does not supply any torque information for carbon steerers, continue as follows:<br />
• Tighten the fastening screw to 4Nm using a torque wrench.<br />
• Check if the stem is fitting securely on the steerer by jamming the front wheel between your legs <strong>and</strong> trying to twist the h<strong>and</strong>lebar.<br />
• If this is not the case, enhance the torque in steps of 0.5Nm <strong>and</strong> alternately tighten the fastening screw until the stem cannot<br />
be twisted anymore.<br />
8
CAUTION<br />
In this procedure, do not exceed the maximal torque mentioned by the stem-manufacturer. The steerer exp<strong>and</strong>er delivered<br />
with the fork has to be mounted during these operations.<br />
3.4 REMOTE LOCKOUT<br />
3.4.1 GENERAL INFORMATION<br />
• The remote lever is only available with forks with Single Shot <strong>and</strong> Twin Shot damping technologies<br />
• The remote lever can be mounted on the right side as well as on the left side of the h<strong>and</strong>lebar.<br />
• There has to be enough space between the grip <strong>and</strong> all the h<strong>and</strong>ling elements (brakes, switchers, etc.) on the bar. Please<br />
mount the remote lever so that its function won't be hindered from any other component. The function <strong>and</strong> h<strong>and</strong>ling of all<br />
the other components (especially the brakes) should not be hindered either.<br />
• Please use a special mounting paste to mount the remote lever on the h<strong>and</strong>lebar. <strong>DT</strong> <strong>Swiss</strong> recommend the delivered Carbon<br />
mounting paste (Art. Nr. FXXXXX0XXX040717S)<br />
• The pipe has to be mounted on the crown side, it is not allowed to mount it on the remote lever side.<br />
INFORMATION<br />
The remote lever is made for h<strong>and</strong>lebars with a diameter of Ø22,2mm. If the h<strong>and</strong>lebar has a too small diameter, the remote<br />
lever cannot be tightened enough <strong>and</strong> can turn on the h<strong>and</strong>lebar.<br />
CAUTION<br />
The screw M3x8 should be tightened with a maximum torque of 1.5Nm. A higher torque could lead to damage the h<strong>and</strong>lebar.<br />
Choose the length of the outer casing of the remote lockout long enough to prevent the arrester on the crown to break in<br />
case of exaggerated twisting of the h<strong>and</strong>lebar (for ex. crash)<br />
3.4.2 INSTALLATION OF THE REMOTE LOCKOUT<br />
3.4.2.1 REQUIRED MATERIAL<br />
• Cable<br />
• 4mm outer casing<br />
• 2,5mm Allen key<br />
• 2mm Allen key<br />
3.4.2.2 FIRST STEPS<br />
• In case of a carbon h<strong>and</strong>lebar, apply some carbon mounting paste on the h<strong>and</strong>lebar (Art. Nr. FXXXXX0XXX040717S).<br />
• Mount the remote lever on the h<strong>and</strong>lebar <strong>and</strong> tighten with the M3x8 bolt.<br />
• Cut the outer casing to the correct length. The h<strong>and</strong>lebar has to turn freely once the cable with outer casing <strong>and</strong> pipe has<br />
been assembled.<br />
• Use non-coated inner cables only!<br />
• Make sure the set screw on the pipe is fully screwed in<br />
• Set the lever to pos. 1<br />
• Feed the cable through the hole in the lever, the outer casing, the pipe <strong>and</strong> the crown. Make sure the outer casing <strong>and</strong> the<br />
pipe are correctly placed.<br />
9<br />
ENGLISH<br />
FRANCAIS<br />
DEUTSCH
3.4.2.3 FURTHER STEPS SINGLE SHOT<br />
• Put the cable around the silver wheel <strong>and</strong> through the hole.<br />
• Pull on the cable with the h<strong>and</strong> so that everything gets into its place.<br />
• Tighten the cable with the h<strong>and</strong> <strong>and</strong> tighten the M4x4 screw with 1Nm to clamp the cable<br />
• Switch the lever several times through the different positions<br />
• Set the tension of the cable with the setting screw on the pipe so that the lockout is activated when the lever is in position 3.<br />
• Cut the cable to the wished length <strong>and</strong> apply a cable ferrule at its end.<br />
• Put the cable behind the M2 screw.<br />
3.4.2.4 FURTHER STEPS TWIN SHOT<br />
• Loose the M3x4 screw on the hex wheel<br />
• Put the cable around the hex wheel <strong>and</strong> under the M3x4 screw<br />
• Pull on the cable with the h<strong>and</strong> so that everything gets into its place.<br />
• Tighten the cable with the h<strong>and</strong> <strong>and</strong> tighten the M3x4 screw with 1Nm to clamp the cable<br />
• Switch the lever several times through the different positions<br />
• Set the tension of the cable with the setting screw on the pipe so that the lockout is activated when the lever is in position 3.<br />
• Cut the cable to the wished length <strong>and</strong> apply a cable ferrule at its end.<br />
Pos 1 Pos 2 Pos 3<br />
10<br />
Lockout open Rebound Lockout activated<br />
(only Twin Shot)<br />
Compression Lockout<br />
activated
3.5 BRAKES<br />
3.5.1 GENERAL INFORMATION<br />
Maximum allowed disc brake diameters:<br />
Model Max. diameter<br />
<strong>DT</strong> <strong>Swiss</strong> XRC-Models 185 mm<br />
<strong>DT</strong> <strong>Swiss</strong> XRM-Models 210 mm<br />
<strong>DT</strong> <strong>Swiss</strong> XM-Models<br />
<strong>DT</strong> <strong>Swiss</strong> EX-Models<br />
INFORMATION<br />
All <strong>DT</strong> <strong>Swiss</strong> forks, models 2009 onwards, are made for the post mount brake st<strong>and</strong>ard for a disc brake diameter of 160mm. For<br />
disc brake diameters larger than 160mm, a special adapter from the brake manufacturer must be used<br />
3.5.2 INSTALLATION OF THE BRAKE<br />
CAUTION<br />
Do not use screws that are too long for the mounting of the brake caliper. Screws that are too long may damage the post<br />
mount socket. Make sure that the screw does not touch the end of the thread without clamping the brake caliper. The thread<br />
depth of the screw in the fork should be between 8 <strong>and</strong> 10mm.<br />
Tighten the bolts alternately with min 6Nm <strong>and</strong> max. 10Nm. The highest value required by the brake manufacturer should not<br />
be exceeded.<br />
When using disc brakes without Center Lock adapter or disc brakes with a spider arm construction, a collision test must be<br />
made between the front wheel with mounted disc brake <strong>and</strong> the fork.<br />
Do not affix the brake pipe to the crown. Scratch areas must be protected by a suitable sticker.<br />
Thread depth<br />
min. 8/max. 10<br />
When using a <strong>DT</strong> <strong>Swiss</strong> fork the following installation of the brake pipe is recommended.<br />
11<br />
ENGLISH<br />
FRANCAIS<br />
DEUTSCH
3.6 FRONT WHEEL<br />
3.6.1 TYRE SIZES<br />
CAUTION<br />
After tyre installation, a collision test must be made!<br />
• Inflate tyre up to maximum allowed pressure. The maximum pressure will be defined either by the tyre or by the rim. Authoritative<br />
is the lower pressure of the two parts.<br />
• Deflate fork <strong>and</strong> compress completely .<br />
• Check if the tyre touches either the fork crown or the fork stanchions. If this is the case, the tyre must not be used.<br />
•<br />
12<br />
Model Max. diameter of the wheel Max. tire width<br />
<strong>DT</strong> <strong>Swiss</strong> XRC-Models 686 mm 59 mm<br />
<strong>DT</strong> <strong>Swiss</strong> XRM-Models 26"<br />
<strong>DT</strong> <strong>Swiss</strong> XM-Models 26"<br />
<strong>DT</strong> <strong>Swiss</strong> EX-Models 26"<br />
690 mm 65 mm<br />
<strong>DT</strong> <strong>Swiss</strong> XMM-Models 29" 756 mm 62 mm<br />
3.6.2 INSTALLING THE FRONT WHEEL WITH QUICK RELEASE (QR)<br />
CAUTION<br />
Grinding the security tabs of the fork dropouts away could lead to lose the front wheel during the ride <strong>and</strong> is strongly prohibited.<br />
Any modification leads to the loss of any <strong>warranty</strong> claim.<br />
Install the wheel according to the <strong>instruction</strong>s of the manufacturer.<br />
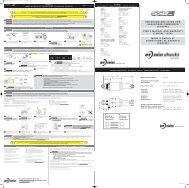
3.6.3 INSTALLING THE FRONT WHEEL WITH FORKS WITH THRU AXLE RWS<br />
(Option XRM, XMM <strong>and</strong> EXM Models)<br />
• Remove thru axle from the fork.<br />
• Lightly grease the thru axle, especially the thread of the thru axle.<br />
• Position the front wheel between the dropouts, so that the hole of the hub <strong>and</strong> the dropouts are aligned.<br />
• Push the thru axle into the right dropout, through the hub until the thru axle touches the thread of the left dropout.<br />
• Screw the thru axle into the thread <strong>and</strong> tighten the RWS lever h<strong>and</strong>-tight (min. 15 Nm).<br />
• For the end position of the RWS lever, follow the steps in the picture.<br />
1<br />
2<br />
1. Lift lever<br />
2. Rotate the lever in the desired position<br />
3. Release lever<br />
INFORMATION<br />
Do not use the red bolt for opening or closing the RWS.
4 HANDLING<br />
4.1 AIR SPRING<br />
4.1.1 ADJUSTMENT OF THE SAG<br />
The SAG is the amount of travel of which the fork will be compressed by the weight of the rider with full equipment. If the<br />
SAG is correctly adjusted, the front wheel can better follow the ground during the ride.<br />
To set up the SAG, you will have to adjust the air pressure in your fork. You may eventually need the help of another person.<br />
• To measure the SAG you have to deactivate the function of your fork:<br />
• EX-Models: deactivate the Launch control<br />
• XM-Models: put the Single Shot or Twin Shot on position 1<br />
• Push the o-ring on the right stanchion to the bottom, until it touches the wiper seal<br />
• Sit with full equipment (backpack, helmet, shoes...) on the bike as you would sit during the ride. The fork goes down<br />
because of your own weight.<br />
• Step down of your bike <strong>and</strong> measure the distance between o-ring <strong>and</strong> wiper seal. This measurement is called SAG. The SAG<br />
should be between 15% <strong>and</strong> 25% of the full travel <strong>and</strong> can be adjusted depending on the riding style <strong>and</strong> use.<br />
SAG Guide value Use<br />
15% of full travel Cross Country/Race<br />
20% of full travel Marathon/Tour<br />
25% of full travel Enduro<br />
4.1.2 ADJUSTMENT OF THE AIR PRESSURE<br />
CAUTION<br />
Do not use the fork while the shock pump is mounted. This may cause the shock pump to touch the frame <strong>and</strong> the valvethread<br />
will break off.<br />
INFORMATION<br />
Only use a suitable shock pump to adjust the air pressure. We suggest to use the <strong>DT</strong> <strong>Swiss</strong> shock pump<br />
(Art. Nr. FXTXXX0S000040223S)<br />
In all <strong>DT</strong> <strong>Swiss</strong> fork models, the air spring is located in the left stanchion. By adjusting the air pressure, the spring rate will be<br />
affected. The higher the air pressure, the harder the spring.<br />
The air chamber is filled with a small amount of lubricating oil. Make sure that the valve is upwards during inflation or deflation.<br />
Adjustment is possible by changing the air pressure. Adjusting the air pressure to the weight of the rider can slightly change<br />
the total length of the fork.<br />
• Position the fork resp. the bicycle that the valve on the left upper stanchion is upward.<br />
• Remove the valve cap from the valve-housing.<br />
• Mount a suitable shock pump on to the valve-housing.<br />
• Adjust the air pressure by in- or deflating.<br />
• Screw the valve cap on to the valve-housing.<br />
13<br />
ENGLISH<br />
FRANCAIS<br />
DEUTSCH
4.1.3 MAXIMUM AIR PRESSURE<br />
Model Max. diameter<br />
ABS<br />
<strong>DT</strong> <strong>Swiss</strong> XRC-Models 203 psi/14 bar<br />
<strong>DT</strong> <strong>Swiss</strong> XRM-Models 26" 174 psi/12 bar<br />
<strong>DT</strong> <strong>Swiss</strong> XM-Models 26"<br />
<strong>DT</strong> <strong>Swiss</strong> EX-Models 26"<br />
<strong>DT</strong> <strong>Swiss</strong> XMM-Models 29"<br />
4.1.4 RECOMMENDED AIR PRESSURE<br />
14<br />
XRC100 XRM100<br />
XMM100 29"<br />
XM120<br />
XMM120 29"<br />
Rider weight (lbs/kg) Recommended air pressure (psi/bar)<br />
XM140 XM150<br />
EX150<br />
88 / 40 80/5.5 52/3.6 52/3.6 52/3.6 54/3.7<br />
99 / 45 90/6.2 58/4.0 58/4.0 58/4.0 58/4.0<br />
110 / 50 99/6.8 64/4.4 62/4.3 62/4.3 62/4.3<br />
121 / 55 110/7.5 70/4.8 68/4.7 68/4.7 68/4.7<br />
132 / 60 119/8.2 75/5.2 74/5.1 73/5.0 73/5.0<br />
143 / 65 128/8.8 81/5.6 78/5.4 78/5.4 77/5.3<br />
154 / 70 138/9.5 87/6.0 84/5.8 83/5.7 81/5.6<br />
165 / 75 148/10.2 93/6.4 90/6.2 88/6.1 86/5.9<br />
176 / 80 157/10.8 99/6.8 94/6.5 93/6.4 90/6.2<br />
187 / 85 167/11.5 104/7.2 100/6.9 99/6.8 96/6.6<br />
198 / 90 177/12.2 110/7.6 106/7.3 103/7.1 100/6.9<br />
210 / 95 186/12.8 116/8.0 110/7.6 109/7.5 104/7.2<br />
220 / 100 122/8.4 116/8.0 113/7.8 109/7.5<br />
232 / 105 128/8.4 122/8.4 119/8.2 113/7.8<br />
245 / 110 133/9.2 126/8.7 123/8.5 117/8.1<br />
4.2 DAMPING<br />
<strong>DT</strong> <strong>Swiss</strong> forks use oil damping. We differentiate between:<br />
• Rebound damping: Damping when the fork extends<br />
• Compression damping: Damping when the fork compresses<br />
Model Adjustable Rebound damping Adjustable Compression damping<br />
<strong>DT</strong> <strong>Swiss</strong> XR-Models x x (Twin Shot)<br />
<strong>DT</strong> <strong>Swiss</strong> XM-Models x x (Twin Shot)<br />
<strong>DT</strong> <strong>Swiss</strong> EX-Models x x
4.2.1 SINGLE SHOT<br />
4.2.1.1 ADJUSTMENT OF THE REBOUND DAMPING<br />
You can turn the red wheel on top of the right stanchion to adjust the rebound damping. Clockwise to get it slower, counterclockwise<br />
to get it faster.<br />
4.2.1.2 LOCKOUT<br />
The lockout closes the compression damping circuit. The fork cannot be compressed anymore. A pressure control valve, called<br />
«Blow off», protects the system against damages caused by impacts on the fork while the lockout is activated. A whistling<br />
sound can be heard when the blow off opens, this sound is normal <strong>and</strong> cannot be seen as a failure.<br />
To activate the lockout turn the lever from position 1 to position 2<br />
Pos 1 Pos 2<br />
Single Shot<br />
Lockout open<br />
Single Shot<br />
Lockout closed<br />
4.2.1.3 REMOTE LOCKOUT<br />
MANIPULATION<br />
To activate the remote lockout push the remote lever to position 2. To deactivate it pull it back to position 1.<br />
ADJUSTMENT<br />
• Deactivate the lockout function by pulling the remote lever to position 1. The cable of the remote lockout is loose.<br />
• Screw the adjustment screw of the pipe until block<br />
• Unscrew the adjustment screw step by step to adjust the tension of the cable<br />
• Control the lockout function by pushing the remote lever from position 1 into position 2. The adjustment is correct once the<br />
fork cannot be compressed anymore.<br />
Pos 1 Pos 2<br />
Single Shot<br />
Lockout open<br />
Single Shot<br />
Lockout closed<br />
15<br />
ENGLISH<br />
FRANCAIS<br />
DEUTSCH
4.2.2 TWIN SHOT<br />
4.2.2.1 ADJUSTMENT OF THE REBOUND DAMPING<br />
You can turn the red wheel on top of the right stanchion to adjust the rebound damping. Clockwise to get it slower, counterclockwise<br />
to get it faster.<br />
4.2.2.2 ADJUSTMENT OF THE COMPRESSION DAMPING<br />
You can turn the blue wheel on top of the right stanchion to adjust the compression damping. Clockwise to get it harder,<br />
counterclockwise to get it softer.<br />
4.2.2.3 LOCKOUT<br />
You can activate the rebound lockout by turning the lever from position 1 to position 2. The fork cannot extend to full travel<br />
anymore.<br />
If a big force applies on the front wheel, the fork will be lowered by about a third of its full travel, during the ride it always<br />
comes back to this position<br />
INFORMATION<br />
Once the fork is lowered, it can be that it slowly extends of about 6 to 8mm during a few seconds, before getting stable.<br />
You can activate the compression damping by turning the lever to position 3. The fork cannot move anymore<br />
INFORMATION<br />
As you cannot activate the compression lockout without having the rebound lockout activated, the fork will stay lowered if<br />
the blow off opens on an impact.<br />
To get the fork back to its normal position, both lockouts have to be opened, this means you have to move the lever to position<br />
1 <strong>and</strong> close the lockouts again by moving the lever to position 3.<br />
Pos 1<br />
Lockout open<br />
16<br />
Pos 2<br />
Rebound lockout<br />
activated<br />
Pos 3<br />
Compression lockout<br />
activated
4.2.2.4 REMOTE LOCKOUT<br />
MANIPULATION<br />
Push the remote lever to position 2 to activate the rebound lockout. Pull the remote lever back to position 1 to deactivate it.<br />
Push the lever to position 3 to activate the compression lockout. Pull the remote lever back to position 1 to deactivate it. When<br />
you deactivate the compression lockout, the remote lever springs automatically back to position 1.<br />
ADJUSTMENT<br />
• Deactivate the lockout function by pulling the remote lever to position 1. The cable of the remote lockout is loose.<br />
• Screw the adjustment screw of the pipe until block<br />
• Unscrew the adjustment screw step by step to adjust the tension of the cable<br />
• Control the lockout function by pushing the remote lever from position 1 into position 2. The adjustment is correct once the<br />
fork cannot be compressed anymore.<br />
Pos 1 Pos 2 Pos 3<br />
Lockout open Rebound Lockout activated<br />
(only Twin Shot)<br />
Compression Lockout<br />
activated<br />
4.2.3 LAUNCH CONTROL<br />
INFORMATION<br />
Through horizontal or upside-down storage of the fork, air gets into the damping oil chamber. The damping as well as the<br />
Launch Control function does not work correctly. By compressing the fork repeatedly in upright position, the oil chamber gets<br />
bled <strong>and</strong> the damping as well as the Launch Control function will work correctly.<br />
4.2.3.1 ADJUSTMENT OF THE REBOUND DAMPING<br />
You can turn the red wheel on top of the right stanchion to adjust the rebound damping. Clockwise to get it slower, counterclockwise<br />
to get it faster.<br />
4.2.3.2 ADJUSTMENT OF THE COMPRESSION DAMPING<br />
To adjust the low speed compression, turn the blue adjuster knob at the bottom end of the right stanchion. The turning-direction<br />
is shown on the dropout by +/– symbols.<br />
+ Increase of the low speed compression, the fork gets harder<br />
– Decrease of the low speed compression, the fork gets softer<br />
17<br />
ENGLISH<br />
FRANCAIS<br />
DEUTSCH
4.2.3.3 ADJUSTEMENT OF LAUNCH CONTROL AND THRESHOLD<br />
INFORMATION<br />
If low speed compression is turned to maximum then it may have an influence on the Launch Control function if the Threshold<br />
Adjuster is in position 1. In such a case decrease the low speed compression by turning the blue adjuster knob at the bottom<br />
end of the right stanchion or increase the release force of the Launch Control function by turning the nickel-plated adjuster<br />
lever clockwise.<br />
• ACTIVATING:<br />
Press the red adjuster knob on the right stanchion down completely <strong>and</strong> compress the fork. After strongly compressing the<br />
fork, the fork will rebound to a pre-defined level.<br />
• DEACTIVATING:<br />
CAUTION<br />
The fork can rebound very fast, when deactivating the Launch Control function <strong>manual</strong>ly. Therefore the head of the rider<br />
must not be over the stem or the h<strong>and</strong>lebar.<br />
Adjustment of the release force may not be made when the bicycle is in motion!<br />
The Launch Control function can be deactivated <strong>manual</strong>ly or automatically.<br />
The force needed to deactivate the Launch Control can be adjusted by turning the grey lever on the top of the right stanchion.<br />
Clockwise to get the force higher, counterclockwise to get it lower.<br />
• Manually: Pull the red adjuster knob on the top of the right stanchion out. The fork exp<strong>and</strong>s completely.<br />
• Automatically: Through a shock from the ground (e.g. riding over obstacles) the Launch Control function will be automatically<br />
deactivated. The release force to deactivate the Launch Control function can be adjusted using the nickel-plated<br />
adjuster lever (Threshold Adjuster).<br />
5 TROUBLE SHOOTING<br />
5.1 BEDDING-IN TIME<br />
Some parts of the new fork may need some bedding-in or sagging-in time. Especially the bushings of the new fork may have a<br />
higher breakaway force. Therefore the fork may be uncomfortable. After about 20 hours of riding, the fork should be run in,<br />
<strong>and</strong> the effect will disappear.<br />
5.2 BEFORE EACH RIDE<br />
Check the fork for externally visible damage such as cracks or deep scratches. Listen for unusual noises during slow riding or<br />
braking in a secure area. Do not use a defective fork!<br />
If one of the mentioned incidences above apply, contact your local dealer or the responsible <strong>DT</strong> <strong>Swiss</strong> Service Center.<br />
5.3 AFTER A CRASH<br />
After a crash the danger of damage is very high. Check your fork thoroughly after each crash.<br />
Visual check: Look for damage such as cracks, breaks, oil leakages <strong>and</strong> scratches etc.<br />
Functional check: Try out whether all functions such as damping, suspension <strong>and</strong> Lockout or Launch Control work correctly.<br />
Acoustic check: Listen for unusual noises during slow riding or braking in a secure area.<br />
CAUTION<br />
Do not use a defective fork! Contact your local dealer or the responsible <strong>DT</strong> <strong>Swiss</strong> Service Center to repair the damage.<br />
5.4 BUSHING CLEARANCE <strong>DT</strong> SWISS FORKS<br />
<strong>DT</strong> <strong>Swiss</strong> forks use bushings in combination with oil lubrication. The function of the bushings is laid out for driving operation<br />
regarding an optimum of lubrication, thermal expansion of parts based on warming, manufacturing tolerances <strong>and</strong> the occurring<br />
loads. The bushing clearance is therefore necessary for the correct function of the fork <strong>and</strong> may be noticeable. A possible<br />
noticeable bushing clearance does not automatically mean an excessive wear out.<br />
18
5.5 SET UP ADVICE<br />
Please follow the following advice to set up your fork<br />
Problem Cause Solution<br />
The fork is not responding properly. The bedding-in time is not over Continue riding<br />
The fork bottoms out on moderate<br />
bumps.<br />
The fork does not rebound completely<br />
<strong>and</strong> hardens on fast repetitive bumps.<br />
The fork rebounds too fast, the front<br />
wheel loses contact to the ground<br />
after bumps or it slides in curves.<br />
AIR SPRING<br />
The fork becomes compressed while<br />
decreasing the air pressure.<br />
SINGLE SHOT<br />
The fork loses its damping characteristics<br />
<strong>and</strong> does loud noises<br />
The air pressure is too high. Decrease the air pressure controlled<br />
using a suitable shock pump.<br />
To much low speed compression. Decrease low speed compression.<br />
The fork needs a service for lubrication Contact your local dealer or the<br />
responsible <strong>DT</strong> <strong>Swiss</strong> Service Center to<br />
change the lubricating oil<br />
The air pressure is too low. Increase the air pressure controlled<br />
using a suitable shock pump.<br />
Not enough low speed compression. Increase low speed compression.<br />
Too much rebound damping. Decrease rebound damping.<br />
Not enough rebound damping. Increase rebound damping.<br />
Too fast decreasing of the air pressure. Increase the air pressure controlled<br />
using a suitable shock pump until<br />
achieving the initial air pressure or pull<br />
the fork <strong>manual</strong>ly apart <strong>and</strong> hold it a<br />
short time pressed against the top out.<br />
Then decrease the air pressure controlled<br />
using a suitable shock pump.<br />
The air chamber on the damping unit<br />
side loss its pressure<br />
Contact your local dealer or the<br />
responsible <strong>DT</strong> <strong>Swiss</strong> Service Center to<br />
solve this problem<br />
The lockout does not work well Leaks inside the cartridge Contact your local dealer or the<br />
responsible <strong>DT</strong> <strong>Swiss</strong> Service Center to<br />
solve this problem<br />
TWIN SHOT<br />
The fork slowly extends while the lever<br />
is in position 2 (rebound lockout)<br />
The fork quickly extends while the<br />
lever is in position 2 (rebound lockout)<br />
Lockouts do not work well<br />
LAUNCH CONTROL<br />
The damping as well as the Launch<br />
Control function do not work properly<br />
6-8mm rebound until the bypass channel<br />
is completely closed.<br />
Backflow of oil thru micro gaps in the<br />
upper damping unit.<br />
Normal effect due to the construction.<br />
The performance of the fork is not<br />
affected<br />
This is acceptable if the fork gets to its<br />
full travel in more than one hour.<br />
Leaks inside the cartridge Contact your local dealer or the<br />
responsible <strong>DT</strong> <strong>Swiss</strong> Service Center to<br />
solve this problem<br />
There is air in the oil chamber. By compressing the fork repeatedly<br />
in upright position, the oil chamber<br />
gets bled <strong>and</strong> the damping as well<br />
the Launch Control function will work<br />
correctly<br />
19<br />
ENGLISH<br />
FRANCAIS<br />
DEUTSCH
20<br />
LAUNCH CONTROL<br />
Even with activated Launch Control<br />
function the fork exp<strong>and</strong>s slowly.<br />
The Launch Control adjusting knob<br />
releases immediately after activating.<br />
Through small shocks from the ground,<br />
the fork leaps back to ground position.<br />
Even with a big impact on the front<br />
wheel, the Launch Control does not<br />
release.<br />
REMOTE LOCKOUT<br />
The Remote Lockout lever does not<br />
work properly<br />
The Remote Lockout function works<br />
correctly, but the lever does not stay in<br />
the desired position.<br />
The Remote Lockout cable<br />
is defective.<br />
There is air in the oil chamber. By compressing the fork repeatedly<br />
in upright position, the oil chamber<br />
gets bled <strong>and</strong> the damping as well<br />
the Launch Control function will work<br />
correctly<br />
The seal is defective. The defective seal must be replaced<br />
by the responsible <strong>DT</strong> <strong>Swiss</strong> Service<br />
Center.<br />
Normal flow through micro holes in<br />
the seal.<br />
This is acceptable if the fork gets to its<br />
full travel in more than one hour.<br />
The release force is to low. The release force must be increased by<br />
turning the nickel-plated adjuster lever<br />
clockwise.<br />
The compression damping is completely<br />
closed<br />
Slightly open the compression damping<br />
The release force is too high The release force must be decreased by<br />
turning the nickel-plated adjuster lever<br />
counterclockwise<br />
The sliding surface of the lever is dirty<br />
or not properly lubricated<br />
The tension of the Remote Lockout<br />
cable is too high.<br />
Wash the Remote Lockout lever on the<br />
h<strong>and</strong>lebar with water <strong>and</strong> properly<br />
lubricate it with oil<br />
Turn the knurled cable adjusting screw<br />
clockwise, so that the cable tension<br />
is reduced. At the same time, check<br />
whether<br />
the lever now stays in the desired<br />
position.<br />
The lever-index is worn out. Contact your local dealer or the<br />
responsible <strong>DT</strong> <strong>Swiss</strong> Service Center,<br />
to have the Remote Lockout lever<br />
replaced.<br />
This can have several causes for example:<br />
crashes, dirt,<br />
wear, etc.<br />
Contact your local dealer or the<br />
<strong>DT</strong> <strong>Swiss</strong> Service Center, to have the<br />
Remote Lockout cable replaced.
6 MAINTENANCE<br />
To ensure a long product life, follow the <strong>instruction</strong>s below:<br />
• Clean the fork with a damp cloth. Remove dirt between stanchion/lower unit.<br />
• Never use aggressive cleaners that attack rubber materials (main seals)!<br />
• Never use high pressure cleaners (e.g. steam jet). Water <strong>and</strong> dirt can get into the system <strong>and</strong> damage it!<br />
• Remove all visible, dried dirt form the area of the main seal. This will prevent dirt from getting into the fork.<br />
• It is not necessary to additionally grease the main seal. To get a good lubrication of the main seal you can regularly turn<br />
your bike/fork upside down<br />
• After the cleaning, lubricate regularly the sliding surface of the remote lever on the h<strong>and</strong>lebar.<br />
INFORMATION<br />
If service intervals are not respected any <strong>warranty</strong> claims can be denied.<br />
To get the most fun <strong>and</strong> security out of your <strong>DT</strong> <strong>Swiss</strong> fork, you have to get it to service regularly. If you use your bike in extreme<br />
conditions, you will have to service your components sooner.<br />
Wash the whole fork, only<br />
with smooth soap <strong>and</strong> water<br />
Check the whole fork for damages,<br />
scratches or grooves<br />
Check the air pressure x<br />
Check <strong>and</strong> lubricate the remote<br />
lever on the h<strong>and</strong>lebar<br />
Check the torque of all the<br />
parts screwed on the fork<br />
Remove the lower unit,<br />
check the bushings <strong>and</strong><br />
change the lubricating oil<br />
Check <strong>and</strong> lubricate the ABS<br />
spring system<br />
Big service in a <strong>DT</strong> <strong>Swiss</strong><br />
Service Center<br />
7 <strong>DT</strong> SWISS SERVICE CENTERS<br />
Please find the list of our Service Centers on www.dtswiss.com.<br />
8 WARRANTY<br />
After each ride After 50 hours Once a year<br />
x<br />
x<br />
x<br />
x<br />
8.1 WARRANTY TERMS EUROPE<br />
The first owner has the right to claims under the guarantee as covered by -general law against the sales contract partner<br />
(retailer). In addition to the general -guarantee required by law, <strong>DT</strong> <strong>Swiss</strong> LTD with head office in Biel/Switzerl<strong>and</strong>, guarantees<br />
the <strong>DT</strong> <strong>Swiss</strong> fork for two years (24 months) from the date of purchase. A valid purchasing receipt has to be delivered with any<br />
<strong>warranty</strong> claim.<br />
There shall be no claim under the guarantee for:<br />
normal wear of parts, subject to wear (bushings, seals, sliding surfaces, -shifters etc.)<br />
incorrect assembly or in combination with products that do not fit<br />
incorrect maintenance, incorrect repair or alteration<br />
incorrect use, bad treatment, misuse, negligence, carelessness -during -installation, maintenance or use, commercial use or use<br />
in cycling -competitions<br />
delivery <strong>and</strong> transport damage<br />
<strong>DT</strong> <strong>Swiss</strong> LTD shall reject any liability for both indirect damage caused by -accidents <strong>and</strong> consequential damage. In case of <strong>warranty</strong><br />
repair/replacement please -contact the dealer where you bought the product. <strong>DT</strong> <strong>Swiss</strong> forks which have to be -checked,<br />
can be sent postage paid to a <strong>DT</strong> <strong>Swiss</strong> Service Center.<br />
Legal venue <strong>and</strong> place of performance is Biel (Switzerl<strong>and</strong>). <strong>Swiss</strong> law shall apply. Subject to technical changes. Please keep the<br />
user‘s <strong>manual</strong> <strong>and</strong> <strong>warranty</strong> for future use.<br />
x<br />
x<br />
x<br />
21<br />
DEUTSCH FRANCAIS ENGLISH
8.2 LIMITED EQUIPMENT WARRANTY USA<br />
<strong>DT</strong> <strong>Swiss</strong> LTD makes every effort to assure that its product meets high quality <strong>and</strong> durability st<strong>and</strong>ards <strong>and</strong> warrants to the<br />
original retail consumer/purchaser of our product that each product is free from defects in materials <strong>and</strong> workmanship as<br />
follows:<br />
2 YEAR LIMITED WARRANTY ON THIS <strong>DT</strong> SWISS PRODUCT. This <strong>warranty</strong> does not apply to defects due directly or indirectly to<br />
misuse, abuse, negligence or -accidents, repairs or alterations outside our facilities or to a lack of maintenance.<br />
<strong>DT</strong> SWISS LTD LIMITS ALL IMPLIED WARRANTIES TO THE PERIOD OF TWO YEARS FROM THE DATE OF INITIAL PURCHASE AT<br />
RETAIL. EXCEPT AS STATED HEREIN, ANY IMPLIED WARRANTIES OF MERCHANTABILITY AND FITNESS ARE EXCLUDED. SOME<br />
STATES MAY NOT ALLOW LIMITATIONS ON HOW LONG THE IMPLIED WARRANTY LASTS, SO THE ABOVE LIMITATION MAY<br />
NOT APPLY TO YOU. <strong>DT</strong> SWISS LTD SHALL IN NO EVENT BE LIABLE FOR DEATH, INJURIES TO PEOPLE OR PROPERTY OR FOR<br />
INCIDENTAL, CONTINGENT, SPECIAL OR CONSEQUENTIAL DAMAGES ARISING FROM THE USE OF OUR PRODUCTS. SOME<br />
STATES MAY NOT ALLOW THE EXCLUSION OR LIMITATION OF INCIDENTAL OR CONSEQUENTIAL DAMAGES, SO THE ABOVE<br />
LIMITATION OR EXCLUSION MAY NOT APPLY TO YOU.<br />
To take advantage of this <strong>warranty</strong>, the product or part must be returned for examination, postage prepaid, to the dealer<br />
where you bought the product or to a <strong>DT</strong> <strong>Swiss</strong> Service Centre. Proof of purchase date <strong>and</strong> an explanation of the complaint<br />
must accompany the product. If our inspection discloses a defect, <strong>DT</strong> <strong>Swiss</strong> will either repair or replace the product or refund<br />
the purchase price, if we cannot readily <strong>and</strong> quickly provide a repair or replacement. <strong>DT</strong> <strong>Swiss</strong> will return repaired product or<br />
replacement at <strong>DT</strong> <strong>Swiss</strong> expense, but if it is determined there is no defect, or that the defect resulted from causes not within<br />
the scope of this <strong>warranty</strong>, then the user must bear the cost of shipping. This <strong>warranty</strong> gives you specific legal rights, <strong>and</strong> you<br />
may also have other rights which vary from state to state. Legal venue <strong>and</strong> place of performance is Biel (Switzerl<strong>and</strong>). <strong>Swiss</strong><br />
law shall apply. Subject to technical changes. Please keep the user <strong>manual</strong> <strong>and</strong> <strong>warranty</strong> for future use.<br />
22
1 INFORMATIONS GENERALES<br />
1.1 INFORMATIONS DE SECURITE<br />
• Le montage d'une fourche <strong>DT</strong> <strong>Swiss</strong> doit être réalisé par un mécanicien spécialisé !<br />
• Veuillez toujours porter un casque, des lunettes et des protections appropriées durant la pratique du vélo.<br />
• Ne pas fixer votre vélo aux pattes de la fourche lors du transport sur un porte-vélo. La fourche pourrait être endommagée.<br />
• Veuillez lire attentivement le mode d'emploi et les conditions de garantie avant l'utilisation de votre fourche!<br />
• Le mode d'emploi et les conditions de garantie doivent être transmis à l'utilisateur final du produit.<br />
• Veuillez noter qu'il est de la responsabilité du client de faire contrôler régulièrement son produit afin de décider si un<br />
service est nécessaire ou non. <strong>DT</strong> <strong>Swiss</strong> recomm<strong>and</strong>e d'effectuer régulièrement un service dans un <strong>DT</strong> <strong>Swiss</strong> Service Center.<br />
Pour plus d'informations veuillez lire les conditions de garantie dans le manuel d'utilisation de votre fourche <strong>DT</strong> <strong>Swiss</strong>.<br />
• Si votre fourche présente des rayures ou des impacts visibles à l'œil, veuillez vous adresser à votre magasin spécialisé ou à un<br />
<strong>DT</strong> <strong>Swiss</strong> Service Center pour évaluer les dégâts.<br />
1.2 NOTIONS<br />
Les notions de fourche à suspensions et de fourche tout comme pivot en carbone et pivot ont dans ce document la même<br />
signification.<br />
1.3 UTILISATION DE SIGNAUX D'AVERTISSEMENT<br />
ATTENTION<br />
Indique un danger pouvant entrainer des blessures légères, moyennes ou graves voir la mort de l'utilisateur et/ou des dommages<br />
au produit ou à un tiers pouvant avoir des conséquences graves.<br />
INFORMATION<br />
Indique des informations pratiques et des astuces qui garantissent une bonne utilisation et un fonctionnement optimal du<br />
produit.<br />
1.4 LIMITES DE POIDS DE L'UTILISATEUR<br />
Les fourches <strong>DT</strong> <strong>Swiss</strong> sont conçues pour être utilisées par un unique utilisateur sur des sentiers ou des conditions tout-terrain<br />
similaires. Une utilisation non conforme peut entrainer des blessures légères, moyennes ou graves voir la mort de l'utilisateur<br />
et/ou des dommages au produit ou à un tiers pouvant avoir des conséquences graves.<br />
Modèles Limite de poids<br />
Modèles <strong>DT</strong> <strong>Swiss</strong> XRC 210 lbs / 95 kg<br />
Modèles <strong>DT</strong> <strong>Swiss</strong> XRM 245 lbs / 110 kg<br />
Modèles <strong>DT</strong> <strong>Swiss</strong> XM 245 lbs / 110 kg<br />
Modèles <strong>DT</strong> <strong>Swiss</strong> EX 245 lbs / 110 kg<br />
1.5 UTILISATION<br />
• Les fourches <strong>DT</strong> <strong>Swiss</strong> sont uniquement conçues pour être utilisées dans une bicyclette<br />
• Les fourches <strong>DT</strong> <strong>Swiss</strong> ne peuvent être utilisées dans un cycle à assistance électrique uniquement lorsque celui-ci est conforme<br />
à la norme DIN EN 15194 et que la puissance n'est pas transmise par la roue avant (moyeu avant).<br />
• Toute utilisation autre que celles présentées dans le tableau ci-dessous n'est pas autorisée. L'utilisation comme outil ou<br />
jouet, ainsi que toute manipulation ne correspondant pas au manuel d'utilisation ne sont pas autorisées.<br />
XRC<br />
XRM<br />
XMC<br />
XMM<br />
EXC<br />
EXM<br />
XR Cross Race XM Cross Mountain EX Enduro Cross FR Freeride<br />
23<br />
ENGLISH<br />
FRANCAIS<br />
DEUTSCH
2 TECHNOLOGIES<br />
2.1 APERÇU DES MODELES DE FOURCHES<br />
24<br />
Modèle Technologie d'amortissement Technologie de ressort<br />
Modèles <strong>DT</strong> <strong>Swiss</strong> XR • Single Shot avec option<br />
Remote Control<br />
Modèles <strong>DT</strong> <strong>Swiss</strong> XM<br />
• Twin Shot avec option<br />
Remote Control<br />
Modèles <strong>DT</strong> <strong>Swiss</strong> EX Launch Control<br />
2.2 ABS: AUTO BALANCING SPRING SYSTEM<br />
Les fourches <strong>DT</strong> <strong>Swiss</strong> avec la technologie de ressort ABS fonctionnent avec un ressort à air positif et négatif. Lors du remplissage<br />
de la chambre à air positive, la pression d'air dans la chambre négative est ajustée automatiquement. La pression d'air<br />
dans les chambres positive et négative est ainsi toujours réglée de façon optimale en fonction du poids de l'utilisateur.<br />
2.3 SINGLE SHOT<br />
Les fourches <strong>DT</strong> <strong>Swiss</strong> avec technologie d'amortissement Single Shot ont un réglage externe de l'amortissement en détente en<br />
basses vitesses. Les amortissements en compression en basses en hautes vitesses ainsi qu'en détente en hautes vitesses sont des<br />
réglages d'usine non modifiables.<br />
Le blocage de la compression peut être activé par un levier sur la fourche ou au guidon.<br />
2.4 TWIN SHOT<br />
Les fourches <strong>DT</strong> <strong>Swiss</strong> avec technologie d'amortissement Twin Shot ont un réglage externe de l'amortissement en basses<br />
vitesses en détente et en compression. Les amortissements en hautes vitesses en détente et en compression sont des réglages<br />
d'usine non modifiables.<br />
Le blocage séquentiel de la détente puis de la compression peut être activé par un levier sur la fourche ou au guidon.<br />
Le blocage de la détente est une aide à la montée, lors de son activation, l'amortissement en détente est bloqué jusqu'à un<br />
niveau défini. La fourche ne peut alors plus se détendre totalement et reste dans une position abaissée.<br />
Le blocage de la compression est surtout pensé pour une utilisation en sprint. L'amortissement en compression est bloqué et la<br />
fourche ne peut plus s'enfoncer.<br />
2.5 LAUNCH CONTROL<br />
Les fourches <strong>DT</strong> <strong>Swiss</strong> avec technologie d'amortissement Launch Control ont un réglage externe de l'amortissement en<br />
détente et de l'amortissement en basses vitesses en compression. L'amortissement en hautes vitesses en compression est un<br />
réglage d'usine non modifiable.<br />
Le Launch Control est une aide à la montée, lors de son activation on bloque l'amortissement en détente jusqu'à un niveau<br />
défini. La fourche ne peut alors plus se détendre totalement et reste dans une position abaissée jusqu'à ce que le Launch<br />
Control soit désactivé.<br />
ABS
3 MONTAGE<br />
3.1 INFORMATIONS GENERALES<br />
ATTENTION<br />
Veuillez prendre note des conseils de sécurité suivants pour le montage.<br />
• Pour serrer les vis, utilisez toujours une clé dynamométrique ayant la bonne plage de réglages de couple définie par <strong>DT</strong><br />
<strong>Swiss</strong> ou par le fabricant des pièces.<br />
• Veuillez respecter les couples de serrages maximaux pour la fixation des pièces. La valeur la plus basse est déterminante,<br />
cependant la valeur minimale définie par <strong>DT</strong> <strong>Swiss</strong> ne doit pas être dépassée.<br />
• Votre fourche <strong>DT</strong> <strong>Swiss</strong> a un pivot droit de diamètre 28,6mm (1 1/8") ou un pivot conique (tapered) ayant un diamètre de<br />
39,82mm (1,5") à la base et un diamètre de 28,6mm (1 1/8") en haut. Utilisez toujours un jeu de direction adapté à votre pivot.<br />
• N'utilisez pas d'adaptateur pour pivot ou de tube de réduction<br />
• Votre fourche <strong>DT</strong> <strong>Swiss</strong> est conçu pour l'utilisation d'une potence sans filetage. N'ajoutez aucun filetage ou perçage à votre<br />
fourche ou toute autre modification technique quelle qu'elle soit.<br />
• Lors du montage et de l'utilisation de votre fourche <strong>DT</strong> <strong>Swiss</strong>, il est important qu'aucun dommage n'apparaisse. Le montage<br />
du cône inférieur du jeu de direction nécessite particulièrement d'attention. Les pièces fixées à votre fourche ne doivent<br />
présenter aucune arête vive.<br />
• N'utilisez en aucun cas une potence à fixation par cône ou par clavette<br />
• Dans le cas d'une potence à surface de serrage discontinue, la surface de serrage doit mesurer au moins 7mm de haut.<br />
ATTENTION<br />
• Lors du montage du jeu de direction, montez toujours des entretoises entre le jeu de direction et la potence. Leur hauteur<br />
doit être comprise entre 5 et 30mm.<br />
• La hauteur de serrage de la potence ne doit pas dépasser 45mm<br />
• Veuillez monter une entretoise de 5mm au dessus de la potence, ainsi la potence peut serrer le pivot sur toute sa longueur.<br />
Veuillez vous assurer qu'il y a un espace suffisant (2-3mm) entre le haut de l'entretoise et le haut du pivot, vous pourrez<br />
ainsi ajuster correctement le jeu de votre jeu de direction.<br />
25<br />
ENGLISH<br />
FRANCAIS<br />
DEUTSCH
3.2 RACCOURCIR ET PREPARER LE PIVOT AU MONTAGE<br />
Comme la longueur du pivot dépend gr<strong>and</strong>ement de la forme du jeu de direction et de la potence, il est important de consulter<br />
leur mode d'emploi avant de commencer.<br />
Veuillez noter que le changement de jeu de direction ou de potence peut avoir une influence sur la longueur du pivot.<br />
• Démontez votre ancienne fourche de votre cadre<br />
• Enlevez le cône inférieur du jeu de direction de votre ancienne fourche<br />
• Mesurez la longueur du pivot de votre ancienne fourche et reportez la sur votre nouvelle fourche <strong>DT</strong> <strong>Swiss</strong>.<br />
• Assurez vous que la longueur restante suffise au serrage sur toute la hauteur de la potence et à l'ajout de l'entretoise de 5mm.<br />
Auflagefläche Steuersatzkonus<br />
unten<br />
Supporting area headset base plate<br />
Base du jeu de direction<br />
26<br />
Schaftrohrlänge<br />
Steerer length<br />
Longeur du pivot<br />
Anschlag Schaftrohr<br />
Exp<strong>and</strong>er (Nur Carbonschaftrohr)<br />
Arrester steerer<br />
Exp<strong>and</strong>er (only carbon shaft)<br />
Arret exp<strong>and</strong>eur de pivot<br />
(seulement pivot en carbone)<br />
Auflagefläche Steuersatzkonus<br />
unten<br />
Supporting area headset base plate<br />
Base du jeu de direction<br />
ca. 2mm<br />
Schaftrohrlänge<br />
Steerer length<br />
Longeur du pivot<br />
3.2.1 SPECIAL POUR PIVOT EN CARBONE<br />
ATTENTION<br />
Avant le montage, il est important de prendre les précautions nécessaires pour la protection de votre santé, en particulier la<br />
peau, les yeux et les voies respiratoires.<br />
Il est interdit d'utiliser un écrou en étoile (Star-Nut) st<strong>and</strong>ard pour le serrage et le réglage du jeu de direction. Veuillez n'utiliser<br />
que l'exp<strong>and</strong>eur pour pivot <strong>DT</strong> <strong>Swiss</strong> livré avec votre fourche. Pour des raisons de sécurité, l'exp<strong>and</strong>eur pour pivot doit<br />
toujours être monté.<br />
INFORMATION<br />
Veuillez noter que l'exp<strong>and</strong>eur pour pivot <strong>DT</strong> <strong>Swiss</strong> livré avec votre fourche rallonge le pivot d'environ 2mm<br />
3.2.1.1 MATERIEL REQUIS<br />
• Lunettes de protection<br />
• Masque de protection<br />
• Gants<br />
• B<strong>and</strong>e autocollante<br />
• Scie à métaux (nouvelle lame avec 24 dents par pouce)<br />
• papier émeri (grain min 400)
3.2.1.2 PROCEDURE<br />
• Utilisez toujours une scie manuelle pour raccourcir votre pivot.<br />
• Enroulez de la b<strong>and</strong>e autocollante autour du pivot à l'endroit de la coupe pour éviter que les fibres de carbones ne se désolidarisent<br />
lors de la découpe. Sciez le pivot à la longueur souhaitée. Poncez les arêtes intérieures et extérieures.<br />
• Enlevez la b<strong>and</strong>e autocollante avec précaution. N'utilisez pas de produits agressifs pour enlever les restes de colle.<br />
• Nettoyez l'intérieur du pivot<br />
• Insérez l'exp<strong>and</strong>eur dans le pivot, fente vers l'arrière, jusqu'à ce qu'il soit en butée.<br />
• Tenez fermement l'exp<strong>and</strong>eur et visser la vis avec une clé à six pans de 6mm jusqu'à ce que l'exp<strong>and</strong>eur ne tourne plus, le<br />
couple maximum de 7Nm ne devant pas être dépassé.<br />
• L'exp<strong>and</strong>eur doit toujours être monté dans le pivot de votre fourche.<br />
3.2.2 SPECIAL POUR PIVOT EN ALUMINUM<br />
3.2.2.1 MATERIEL REQUIS<br />
• Coupe tube<br />
• Lime<br />
3.2.2.2 PROCEDURE<br />
• Coupez le tube à la longueur souhaitée. <strong>DT</strong> <strong>Swiss</strong> recomm<strong>and</strong>e d'utiliser un coupe tube pour cela.<br />
• Ebavurez le tube à l'intérieur comme à l'extérieur avec la lime<br />
• Enfoncez un écrou en étoile (Star Nut) dans le pivot à l'aide d'un outil approprié.<br />
3.3 MONTAGE DE LA FOURCHE DANS LE CADRE<br />
INFORMATION<br />
Montez le jeu de direction en suivant les <strong>instruction</strong> de son fabricant et en respectant les restrictions suivantes de <strong>DT</strong> <strong>Swiss</strong><br />
La vis de réglage sert à régler le jeu de votre jeu de direction, elle ne doit pas servir au serrage!<br />
ATTENTION<br />
Les cônes inférieurs et supérieurs du jeu de directions ne doivent pas avoir d'arêtes coupantes qui pourraient causer des rayures<br />
ou autres dommages au pivot et ainsi réduire la durée de vie de votre fourche <strong>DT</strong> <strong>Swiss</strong>.<br />
Lors du montage du jeu de direction et de la potence, soyez très prudent à ne pas endommager votre fourche. Tout dommage<br />
pourrait réduire la durée de vie de votre fourche <strong>DT</strong> <strong>Swiss</strong>.<br />
• Pour le montage du cône inférieur du jeu de direction, veuillez graisser légèrement le pivot de votre fourche. Dans le cas<br />
d'un pivot en carbone, veuillez appliquer un léger film de la pâte de montage pour carbone fournie avec votre fourche (Art.<br />
No. FXXXXX0XXX040717S).<br />
• Pressez le cône inférieur du jeu de direction en suivant les indications du fabricant.<br />
• Montez la fourche munie du cône inférieur du jeu de direction dans votre cadre. Assurez vous que le cône soit bien placé<br />
dans le jeu de direction.<br />
• Montez le cône supérieur du jeu de direction en suivant les <strong>instruction</strong>s du fabricant. Placez les entretoises voulues sous la<br />
potence.<br />
• Appliquez un film de pâte de montage pour carbone. Montez la potence et l'entretoise supérieure sur le pivot sans serrer.<br />
• Montez le bouchon du jeu de direction. Ajustez le jeu du jeu de direction à l'aide de la vis de réglage. Il ne doit pas y avoir<br />
de jeu lorsque, frein avant serré et vis de potences ouvertes, vous prenez le cône inférieur du jeu de direction entre vos<br />
doigts et bougez le vélo d'avant en arrière. La fourche doit tourner facilement dans le jeu de direction.<br />
• Alignez la potence et serrez les vis de serrage de la potence en suivant les <strong>instruction</strong>s du fabricant. Respectez le couple<br />
maximal de serrage pour pivot en carbone.<br />
INFORMATION<br />
Si le fabricant de la potence ne donne pas de couple maximal de serrage pour pivot en carbone, procédez comme suit:<br />
• Serrer les vis de la potence à l'aide d'une clé dynamométrique jusqu'à 4Nm<br />
• Contrôlez que la potence est suffisamment serrée sur la fourche en serrant la roue avant entre vos jambes et en vous assurant<br />
que vous ne pouvez pas tourner le guidon.<br />
• Si ce n'est pas le cas répétez cette opération en augmentant le couple de serrage par étapes de 0,5Nm<br />
ATTENTION<br />
Ne dépassez jamais le couple maximal de serrage donné par le fabricant de la potence. L'exp<strong>and</strong>eur de pivot livré avec votre<br />
fourche <strong>DT</strong> <strong>Swiss</strong> doit être impérativement monté.<br />
27<br />
ENGLISH<br />
FRANCAIS<br />
DEUTSCH
3.4 LEVIER DE BLOCAGE AU GUIDON (REMOTE LOCKOUT)<br />
3.4.1 INFORMATIONS GENERALES<br />
• Le levier de blocage au guidon est uniquement compatible avec les fourches équipées des technologies Single Shot ou Twin Shot<br />
• Le levier de blocage au guidon est prévu pour être monté au choix sur le côté droit ou gauche.<br />
• Il doit y avoir suffisamment de place entre la poignée et les autres éléments de comm<strong>and</strong>e pour garantir le montage.<br />
Veuillez monter le levier de blocage au guidon de telle sorte que le fonctionnement soit optimal. L'utilisation des autres<br />
éléments de comm<strong>and</strong>e, en particulier les freins, ne doit pas être gênée.<br />
• Pour le montage sur un guidon en carbone, veuillez utiliser une pâte de montage pour carbone<br />
(Art. No. FXXXXX0XXX040717S).<br />
• Le coude de guidage du câble doit être monté du côté du té de la fourche, il ne doit en aucun cas être monté du côté du levier<br />
INFORMATION<br />
La fixation du levier de blocage est prévue pour un cintre de Ø22.2mm. Un diamètre de cintre trop petit peut conduire à ce<br />
que le levier ne puisse pas être suffisamment serré et tourne sur le cintre<br />
ATTENTION<br />
Le couple de serrage maximal de la vis M3x8 pour la fixation du levier de blocage au guidon est de 1.5Nm! Un serrage trop<br />
important de cette vis peut entrainer une dégradation du guidon.<br />
Veuillez choisir une longueur de câble adéquate de sorte que l'arrêt dans le té en carbone ne soit pas arraché en cas de pivotement<br />
exagéré du cintre (ex. chute)<br />
3.4.2 MONTAGE DU LEVIER<br />
3.4.2.1 MATERIEL REQUIS<br />
• Câble de dérailleur<br />
• Gaine de câble de 4mm<br />
• Clé à six pans de 2,5mm<br />
• Clé à six pans de 2mm<br />
3.4.2.2 PREMIERES ETAPES<br />
• Appliquez une fine couche de pâte de montage pour carbone sur votre cintre en carbone (Art. Nr. FXXXXX0XXX040717S).<br />
• Montez votre levier de blocage au guidon sur le cintre à l'aide de la vis M3x8.<br />
• Coupez la gaine à la bonne longueur de sorte que le cintre puisse tourner librement lorsque la gaine et le coude de guidage<br />
sont montés.<br />
• Utilisez un cable sans revêtement !<br />
• Assurez vous que la vis de réglage du coude de guidage soit complètement vissée<br />
• Placez le levier en pos. 1<br />
• Insérez le câble à travers l'ouverture du levier, la gaine, le coude de guidage et le support sur le té de la fourche.<br />
Vérifiez que la gaine et le coude soient positionnées correctement dans leurs ouvertures respectives.<br />
28
3.4.2.3 ETAPES SUIVANTES SINGLE SHOT<br />
• Enroulez le câble autour de la roue argentée puis à travers le trou de cette même roue<br />
• Tirer légèrement sur le câble afin que toutes les pièces se mettent en place<br />
• Tirer fermement sur le câble et serrer la vis M4x4 avec 1Nm pour fixer le câble<br />
• Actionnez plusieurs fois le levier<br />
• Réglez la tension du câble à l'aide de la vis de réglage placée sur le coude de guidage de sorte que le blocage (lockout) soit<br />
activé lorsque le levier se trouve en position 3<br />
• Coupez le câble à la longueur voulue et protégez le avec un embout de câble<br />
• Placez le câble derrière la vis M2<br />
3.4.2.4 ETAPES SUIVANTES TWIN SHOT<br />
• Dévissez la vis M3x4 de la roue hexagonale<br />
• Enroulez le câble autour de la roue hexagonale puis sous la vis M3x4<br />
• Tirer légèrement sur le câble afin que toutes les pièces se mettent en place<br />
• Tirer fermement sur le câble et serrer la vis M3x4 avec 1Nm pour fixer le câble<br />
• Actionnez plusieurs fois le levier<br />
• Réglez la tension du câble à l'aide de la vis de réglage placée sur le coude de guidage de sorte que le blocage (lockout) soit<br />
activé lorsque le levier se trouve en position 3<br />
• Coupez le câble à la longueur voulue et protégez le avec un embout de câble<br />
Pos 1 Pos 2 Pos 3<br />
Lockout ouvert Blocage de la détente activé<br />
(Twin Shot uniquement)<br />
Blocage de la<br />
compression activé<br />
29<br />
ENGLISH<br />
FRANCAIS<br />
DEUTSCH
3.5 FREINS<br />
3.5.1 INFORMATIONS GENERALES<br />
Diamètres maximaux de freins autorisés<br />
30<br />
Modèle Diamètre maximal<br />
Modèles <strong>DT</strong> <strong>Swiss</strong> XRC 185 mm<br />
Modèles <strong>DT</strong> <strong>Swiss</strong> XRM 210 mm<br />
Modèles <strong>DT</strong> <strong>Swiss</strong> XM<br />
Modèles <strong>DT</strong> <strong>Swiss</strong> EX<br />
INFORMATION<br />
A partir de 2009, toutes les fourches <strong>DT</strong> <strong>Swiss</strong> sont construites avec le st<strong>and</strong>ard Postmount pour disques de 160mm. Pour<br />
l'utilisation de disques de diamètre supérieur à 160mm, un adaptateur adéquat fournit par le fabricant du frein doit être<br />
utilisé.<br />
3.5.2 MONTAGE DU FREIN<br />
ATTENTION<br />
N'utilisez pas de vis trop longues pour le montage de l'étrier de frein. Le support de frein pourrait être endommagé. Assurez<br />
vous avant le montage que les vis de fixation n'arrivent pas en butée au fond du filetage sans serrer l'étrier de frein. La<br />
longueur de serrage doit être comprise entre 8 et 10mm<br />
Serrez les vis de fixation du frein alternativement avec un couple de minimum 6Nm et maximum 10Nm. Le couple maximal<br />
recomm<strong>and</strong>é par le fabricant de frein ne doit pas être dépassé.<br />
Lors de l'utilisation de disque sans adaptateur Center Lock ou de disque avec cage en alu, il est nécessaire d'effectuer un test<br />
de collision entre le disque et la fourche.<br />
Profondeur de vissage<br />
min. 8/max. 10<br />
Nous vous conseillons le passage de gaines suivant pour les fourches <strong>DT</strong> <strong>Swiss</strong>.
3.6 ROUE AVANT<br />
3.6.1 DIMENSIONS DU PNEU<br />
ATTENTION<br />
Il est important de procéder à un test de collision après le montage du pneu.<br />
• Pompez le pneu jusqu'à la pression maximale autorisée. Cette pression est définie soit par le pneu soit par la jante. La pression<br />
la plus basse est la pression maximale autorisée<br />
• Videz complètement l'air de votre fourche et comprimez la au maximum.<br />
• Contrôlez que le pneu n'entre pas en contact avec le Té ou les plongeurs. Dans le cas contraire, le pneu ne doit pas être utilisé.<br />
Modèle Diamètre maximal<br />
de la roue (26")<br />
Largeur maximale du pneu<br />
Modèles <strong>DT</strong> <strong>Swiss</strong> XRC 686 mm 59 mm<br />
Modèles <strong>DT</strong> <strong>Swiss</strong> XRM 26"<br />
Modèles <strong>DT</strong> <strong>Swiss</strong> XM 26"<br />
Modèles <strong>DT</strong> <strong>Swiss</strong> EX 26"<br />
690 mm 65 mm<br />
Modèles <strong>DT</strong> <strong>Swiss</strong> XMM 29" 756 mm 62 mm<br />
3.6.2 MONTAGE DE LA ROUE AVANT AVEC SERRAGE RAPIDE (QR)<br />
ATTENTION<br />
Il est interdit de poncer les supports de sécurité de la fourche évitant que la roue ne tombe en cas de desserrage de l'axe. Toute<br />
modification conduit à la perte de toute garantie.<br />
Monter la roue en suivant les recomm<strong>and</strong>ations du constructeur<br />
3.6.3 MONTAGE DE LA ROUE AVANT AVEC AXE TRAVERSANT RWS<br />
(Option sur les modèles XRM, XMM et EXM)<br />
• Démontez l'axe de 15mm de la fourche<br />
• Graissez légèrement l'axe, en particulier au niveau du filetage<br />
• Positionnez la roue entre les pattes de façon à ce que les passages dans les pattes et le moyeux soient alignés.<br />
• Insérez l'axe par la patte droite jusqu'à atteindre le filetage.<br />
• Vissez l'axe jusqu'en butée et serrez le levier RWS à la main (min 15Nm)<br />
• Veuillez suivre les indications sur l'illustration suivante pour positionner le levier RWS une fois l'axe serré<br />
1<br />
2<br />
1. Soulever le levier<br />
2. Tourner le levier jusqu'à la position souhaitée<br />
3. Enclencher le levier dans la denture.<br />
INFORMATION<br />
Ne pas utiliser la vis rouge pour serrer ou desserrer l'axe RWS<br />
31<br />
ENGLISH<br />
FRANCAIS<br />
DEUTSCH
4 MANIPULATION<br />
4.1 RESSORT<br />
4.1.1 REGLAGE DU SAG<br />
Le SAG est la distance dont s'enfonce la fourche sous le poids du pilote et de son équipement. Un SAG correctement réglé<br />
permet à la fourche d'égaliser toutes les irrégularités du terrain durant l'utilisation.<br />
Pour régler le SAG vous aurez besoin d'ajuster la pression d'air dans votre fourche. Si vous le pouvez, faites vous aider d'une<br />
deuxième personne.<br />
• Pour mesurer le SAG il faut désactiver les fonctions de votre fourche:<br />
• Modèles EX: désactiver le Launch Control<br />
• Modèles XM: Positionner le Single Shot ou le Twin Shot en position 1<br />
• Poussez le joint torique sur le plongeur droit jusqu'en butée contre le joint racleur<br />
• Asseyez vous sur le velo avec tout votre équipement (sac, casque, chaussures...) Prenez votre position naturelle lorsque<br />
vous roulez.<br />
• Descendez du velo et mesurez la distance entre le joint torique et le joint racleur. Cette mesure est appelée SAG. Le SAG doit<br />
représenter entre 15% et 25% du débattement total de votre fourche en fonction de l'utilisation et du style de pilotage.<br />
32<br />
Valeurs recomm<strong>and</strong>ées pour le SAG Utilisation<br />
15% du débattement total Cross Country/Race<br />
20% du débattement total Marathon/Tour<br />
25% du débattement total Enduro<br />
4.1.2 REGLAGE DE LA PRESSION D'AIR<br />
ATTENTION<br />
Ne pas tourner la fourche avec la pompe vissée dessus, celle-ci peut cogner contre le cadre et arracher la valve.<br />
INFORMATION<br />
Toujours utiliser une pompe à haute pression adéquate pour régler la pression d'air. Nous recomm<strong>and</strong>ons l'utilisation d'une<br />
pompe à haute pression <strong>DT</strong> <strong>Swiss</strong> (Art. No . FXTXXX0S000040223S)<br />
Le ressort à air se situe dans toutes les fourches <strong>DT</strong> <strong>Swiss</strong> dans le plongeur gauche. La modification de la pression d'air dans la<br />
fourche engendre une modification de la force du ressort. Une pression plus élevée engendre un ressort plus dur, une pression<br />
plus basse un ressort plus souple.<br />
Une petite quantité d'huile se trouve dans la chambre d'air. C'est pour cette raison que la valve doit pointer vers le haut<br />
lorsque l'on pompe ou que l'on laisse s'échapper de l'air<br />
Le réglage est possible en modifiant la pression d'air. Lors du réglage de la pression d'air en fonction du poids de l'utilisateur,<br />
la longueur totale de la fourche peut légèrement varier.<br />
• Positionner la fourche, ou le vélo, de telle sorte que la valve en haut du plongeur gauche pointe vers le haut.<br />
• Dévisser le capot de la valve<br />
• Visser une pompe adaptée complètement sur la valve<br />
• Régler la pression en pompant ou en laissant s'échapper de l'air<br />
• Revisser le capot sur la valve
4.1.3 PRESSIONS MAXIMALES<br />
Modèle Pression maximale<br />
ABS<br />
Modèles <strong>DT</strong> <strong>Swiss</strong> XRC 203 psi/14 bar<br />
Modèles <strong>DT</strong> <strong>Swiss</strong> XRM 26" 174 psi/12 bar<br />
Modèles <strong>DT</strong> <strong>Swiss</strong> XM 26"<br />
Modèles <strong>DT</strong> <strong>Swiss</strong> EX 26"<br />
Modèles <strong>DT</strong> <strong>Swiss</strong> XMM 29"<br />
4.1.4 PRESSIONS RECOMMANDEES<br />
XRC100 XRM100<br />
XMM100 29"<br />
Poids de l'utilisateur (lbs/kg) Pression recomm<strong>and</strong>ée (psi/bar)<br />
XM120<br />
XMM120 29"<br />
XM140 XM150<br />
EX150<br />
88 / 40 80/5.5 52/3.6 52/3.6 52/3.6 54/3.7<br />
99 / 45 90/6.2 58/4.0 58/4.0 58/4.0 58/4.0<br />
110 / 50 99/6.8 64/4.4 62/4.3 62/4.3 62/4.3<br />
121 / 55 110/7.5 70/4.8 68/4.7 68/4.7 68/4.7<br />
132 / 60 119/8.2 75/5.2 74/5.1 73/5.0 73/5.0<br />
143 / 65 128/8.8 81/5.6 78/5.4 78/5.4 77/5.3<br />
154 / 70 138/9.5 87/6.0 84/5.8 83/5.7 81/5.6<br />
165 / 75 148/10.2 93/6.4 90/6.2 88/6.1 86/5.9<br />
176 / 80 157/10.8 99/6.8 94/6.5 93/6.4 90/6.2<br />
187 / 85 167/11.5 104/7.2 100/6.9 99/6.8 96/6.6<br />
198 / 90 177/12.2 110/7.6 106/7.3 103/7.1 100/6.9<br />
210 / 95 186/12.8 116/8.0 110/7.6 109/7.5 104/7.2<br />
220 / 100 122/8.4 116/8.0 113/7.8 109/7.5<br />
232 / 105 128/8.4 122/8.4 119/8.2 113/7.8<br />
245 / 110 133/9.2 126/8.7 123/8.5 117/8.1<br />
4.2 AMORTISSEMENT<br />
Les fourches <strong>DT</strong> <strong>Swiss</strong> ont un amortissement à huile. Il faut différencier:<br />
• amortissement en détente: Amortissement lorsque la fourche se détend<br />
• amortissement en compression: Amortissement lorsque la fourche se comprime<br />
Modèle Réglage de l'amortissement<br />
en détente<br />
Réglage de l'amortissement<br />
en compression<br />
Modèles <strong>DT</strong> <strong>Swiss</strong> XR x x (seulement Twin Shot)<br />
Modèles <strong>DT</strong> <strong>Swiss</strong> XM x x (seulement Twin Shot)<br />
Modèles <strong>DT</strong> <strong>Swiss</strong> EX x x<br />
33<br />
ENGLISH<br />
FRANCAIS<br />
DEUTSCH
4.2.1 SINGLE SHOT<br />
4.2.1.1 REGLAGE DE L'AMORTISSEMENT EN DETENTE<br />
Tournez la molette rouge en haut du plongeur droit pour régler l'amortissement en détente. Dans le sens horaire pour augmenter<br />
l'amortissement, contre le sens horaire pour le diminuer.<br />
4.2.1.2 LOCKOUT<br />
Le blocage au guidon est un verrouillage de la compression par lequel on empêche la fourche de se comprimer. Une soupape<br />
de sécurité protège le système de dégâts éventuels en cas de gros chocs, lorsque le blocage est activé. On peut entendre un<br />
sifflement lorsque la soupape de sécurité s'ouvre. Ce bruit n'est pas un problème de fonctionnement.<br />
On active le blocage en tournant le levier de la position 1 vers la position 2<br />
Pos 1 Pos 2<br />
34<br />
Single Shot<br />
Lockout ouvert<br />
Single Shot<br />
Lockout fermé<br />
4.2.1.3 REMOTE LOCKOUT<br />
MANIPULATION<br />
Pousser le levier de blocage au guidon en position 2 pour activer le blocage. Repositionner le levier en position 1 pour désactiver<br />
le blocage.<br />
REGLAGE<br />
• Désactivez le levier de blocage au guidon en le mettant en position 1. Le câble est détendu.<br />
• Vissez la vis de support du câble jusqu'en butée.<br />
• Dévissez petit à petit la vis de support du câble. Le câble se tend.<br />
• Contrôlez la fonction du blocage au guidon en manipulant le levier. Lorsque la fourche se bloque, la position correcte de la<br />
vis de blocage est déterminée.<br />
Pos 1 Pos 2<br />
Single Shot<br />
Lockout ouvert<br />
Single Shot<br />
Lockout fermé
4.2.2 TWIN SHOT<br />
4.2.2.1 REGLAGE DE L'AMORTISSEMENT EN DETENTE<br />
Tournez la molette rouge en haut du plongeur droit pour régler l'amortissement en détente. Dans le sens horaire pour augmenter<br />
l'amortissement, contre le sens horaire pour le diminuer.<br />
4.2.2.2 REGLAGE DE L'AMORTISSEMENT EN COMPRESSION<br />
Tournez la molette bleue en haut du plongeur droit pour régler l'amortissement en compression. Dans le sens horaire pour<br />
augmenter l'amortissement, contre le sens horaire pour le diminuer.<br />
4.2.2.3 LOCKOUT<br />
Le blocage de la détente est activé en tournant le levier de la position 1 vers la position 2. La fourche ne peut plus se détendre<br />
complètement<br />
Lors d'une forte charge sur la roue avant la fourche s'enfonce de façon permanente d'environ un tiers de son débattement.<br />
Lors de l'utilisation elle revient toujours à cette position.<br />
INFORMATION<br />
Apres avoir été enfoncée, la fourche peut lentement se détendre sur environ 6-8mm pendant quelques secondes, jusqu'à<br />
atteindre sa position normale.<br />
Le blocage de la compression est activé en tournant le levier jusqu'à la position 3<br />
La fourche est alors complètement bloquée dans une position souhaitée entre sa position haute et une position enfoncée d'un<br />
tiers.<br />
INFORMATION<br />
Une soupape de sécurité est installée pour protéger le système lorsque le blocage en compression est activé.<br />
Comme le blocage en détente est toujours activé lorsque l'on active le blocage en compression, la fourche restera enfoncée si<br />
la soupape s'ouvre sous un gros choc. Pour revenir à la position originale de la fourche il faut donc désactiver les deux blocages<br />
en mettant le levier en position 1 puis les réactiver en mettant le levier en position 3.<br />
Pos 1<br />
Lockout ouvert<br />
Pos 2<br />
Blocage de la<br />
détente activé<br />
Pos 3<br />
Blocage de la<br />
compression activé<br />
35<br />
ENGLISH<br />
FRANCAIS<br />
DEUTSCH
4.2.2.4 REMOTE LOCKOUT<br />
MANIPULATION<br />
Pousser le levier de blocage au guidon en position 2 pour activer le blocage en détente. Repositionner le levier en position 1<br />
pour désactiver le blocage.<br />
Pousser le levier de blocage au guidon en position 3 pour activer le blocage en compression. Repositionner le levier en position<br />
1 pour désactiver le blocage. Lors de la désactivation, le levier saute directement en position 1.<br />
REGLAGE<br />
• Désactivez le levier de blocage au guidon. Le câble est détendu.<br />
• Vissez la vis de support du câble jusqu'en butée.<br />
• Dévissez petit à petit la vis de support du câble. Le câble se tend.<br />
• Contrôlez la fonction du blocage au guidon en manipulant le levier. Lorsque la fourche se bloque, la position correcte de la<br />
vis de blocage est déterminée.<br />
Pos 1 Pos 2 Pos 3<br />
4.2.3 LAUNCH CONTROL<br />
INFORMATION<br />
Lorsque l'on entrepose la fourche à l'horizontale ou sur la tête, de l'air peut s'introduire dans la cartouche d'huile.<br />
L'amortissement ainsi que le Launch Control ne fonctionnent alors plus correctement. En comprimant énergiquement plusieurs<br />
fois la fourche dans sa position verticale normale, l'air contenu dans la cartouche d'huile est évacué. L'amortissement ainsi<br />
que le Launch Control fonctionnent à nouveau sans problème.<br />
4.2.3.1 REGLAGE DE L'AMORTISSEMENT EN DETENTE<br />
Tournez la molette rouge en haut du plongeur droit pour régler l'amortissement en détente. Dans le sens horaire pour augmenter<br />
l'amortissement, contre le sens horaire pour le diminuer.<br />
4.2.3.2 REGLAGE DE L'AMORTISSEMENT EN COMPRESSION<br />
Tournez la molette bleue en bas du fourreau droit pour régler l'amortissement en compression.<br />
La direction de rotation est indiquée au bas du fourreau par des signes +/-<br />
+ L'amortissement en compression est augmenté<br />
- L'amortissement en compression est diminué<br />
36<br />
Lockout ouvert Blocage de la détente activé<br />
(Twin Shot uniquement)<br />
Blocage de la<br />
compression activé
4.2.3.3 LAUNCH CONTROL ET REGLAGE DU THRESHOLD<br />
INFORMATION<br />
Ils se peut que le Launch Control se désactive automatiquement lorsque l'amortissement en compression est complètement<br />
fermé et que la force de désactivation est réglée au plus faible. Dans ce cas veuillez réduire l'amortissement en compression et/<br />
ou augmenter la force de désactivation du Launch Control<br />
• Activer le Launch Control<br />
Enfoncer entièrement le bouton rouge sur le haut du plongeur droit et comprimer la fourche. Si l'on comprime fortement la<br />
fourche elle se détend automatiquement jusqu'à un niveau prédéfini.<br />
• Désactiver le Launch Control<br />
ATTENTION<br />
Lors de la désactivation manuelle du Launch Control, il se peut que la fourche se détende rapidement. Ne pas garder la tête au<br />
dessus du cintre ou de la potence!<br />
Toujours ajuster la force de désactivation à l'arrêt.<br />
Le Launch Control peut être désactivé manuellement ou automatiquement:<br />
La force de désactivation peut être réglée à l'aide du levier nickelé (Threshold Adjuster). La force de désactivation est augmentée<br />
en tournant dans le sens horaire et réduite en tournant contre le sens horaire.<br />
• Manuellement: Tirer sur le bouton rouge sur le haut du plongeur droit. La fourche se détend complètement<br />
• Automatiquement: Le Launch Control se désactive automatiquement lorsque la fourche est comprimée rapidement (<br />
par ex. lors du passage sur un obstacle). La force de désactivation peut être réglée à l'aide du levier de réglage nickelé<br />
(Threshold Adjuster)<br />
5 TROUBLE SHOOTING<br />
5.1 RODAGE<br />
Certaine pièces d'une fourche neuve doivent être rodées pour offrir un fonctionnement optimal. C'est en particulier le cas des<br />
bagues de guidage qui, neuves, peuvent engendrer un frottement important et un sentiment de mauvais fonctionnement<br />
de la fourche. Apres environ 20 heures d'utilisation, ces bagues de guidage devraient être rodées et cette friction devrait<br />
disparaitre.<br />
5.2 AVANT CHAQUE UTILISATION<br />
Vérifiez que la fourche ne présente aucuns dommages extérieurs comme des fissures ou des traces de chocs. Lors d'un essai<br />
à vitesse réduite et sur un terrain sûr, veuillez faire attention à tout bruit inhabituel par ex. en comprimant la fourche ou en<br />
freinant.<br />
Si l'un des cas ci dessus apparait, veuillez vous adresser à votre revendeur ou à un <strong>DT</strong> <strong>Swiss</strong> Service Center, afin de résoudre le<br />
problème<br />
5.3 APRES CHAQUE CHUTE<br />
Apres une chute, le risque d'un endommagement de la fourche est gr<strong>and</strong>. Contrôlez votre fourche après chaque chute avec<br />
attention.<br />
Contrôle optique: Contrôlez que la fourche n'ait pas de dégâts comme des fissures, cassures, pertes d'huile, traces de chocs,<br />
etc.<br />
Contrôle de fonction: Contrôlez toutes les fonctions comme l'amortissement, le ressort, le blocage ou le Launch Control<br />
Contrôle acoustique: Lors d'un essai à vitesse réduite et sur un terrain sûr, veuillez faire attention à tout bruit inhabituel par<br />
ex. en comprimant la fourche ou en freinant.<br />
ATTENTION<br />
Ne continuez pas à rouler avec une fourche abimée! Adressez vous à votre revendeur ou à un <strong>DT</strong> <strong>Swiss</strong> Service Center afin de<br />
réparer les dégâts.<br />
5.4 JEU FONCTIONNEL DES BAGUES DE GUIDAGE DES FOURCHES <strong>DT</strong> SWISS<br />
Les fourches <strong>DT</strong> <strong>Swiss</strong> utilisent des bagues de guidage avec lubrification à l'huile. Ces bagues de guidages sont réglées de façon<br />
à avoir un fonctionnement parfait en prenant en compte une lubrification optimale, la dilatation des pièces suite à un échauffement,<br />
les tolérances de fabrication et les efforts devant être absorbés. Un jeu fonctionnel au niveau des bagues de guidage<br />
est indispensable au bon fonctionnement de la fourche et peut être remarqué. La présence de jeu dans les bagues de guidage<br />
n'est pas synonyme d'usure prématurée.<br />
37<br />
ENGLISH<br />
FRANCAIS<br />
DEUTSCH
5.5 CONSEILS DE REGLAGE<br />
Les conseils suivants sont valables pour tous les modèles de fourche <strong>DT</strong> <strong>Swiss</strong><br />
38<br />
Problème Cause Conseil<br />
La fourche est peu sensible La fourche n'est pas encore rodée Continuer à rouler pour<br />
roder la fourche<br />
La fourche arrive en butée déjà sur des<br />
petits chocs<br />
La fourche ne se détend pas entre des<br />
chocs répétitifs et se raffermit<br />
La fourche se détend trop vite, la roue<br />
avant perd le contact avec le sol.<br />
RESSORT A AIR<br />
La fourche se comprime lorsque l'on<br />
réduit la pression d'air<br />
SINGLE SHOT<br />
La fourche perd ses caractéristiques<br />
d'amortissement et fait des bruits<br />
de succion<br />
Le blocage en compression ne<br />
fonctionne plus<br />
TWIN SHOT<br />
Lorsque le blocage de la détente est<br />
activé (levier en position 2) la fourche<br />
se détend lentement<br />
Lorsque le blocage de la détente est<br />
activé (levier en position 2) la fourche<br />
se détend rapidement<br />
Le blocage en compression ou en<br />
détente ne fonctionnent plus<br />
LAUNCH CONTROL<br />
L'amortissement ainsi que la fonction<br />
Launch Control ne fonctionnent pas<br />
correctement<br />
Pression d'air trop importante Réduire la pression d'air à l'aide d'une<br />
pompe adéquate<br />
L'amortissement en compression<br />
est trop fermé<br />
La fourche a besoin d'un service pour<br />
changer l'huile de lubrification<br />
Réduire l'amortissement<br />
en compression<br />
Adressez vous à votre revendeur ou à<br />
un <strong>DT</strong> <strong>Swiss</strong> Service Center pour faire<br />
changer l'huile de lubrification<br />
La pression d'air est trop faible Augmenter la pression à l'aide d'une<br />
pompe adaptée<br />
L'amortissement en compression<br />
est trop ouvert<br />
L'amortissement en détente est<br />
trop fermé<br />
L'amortissement en détente est<br />
trop ouvert<br />
Augmenter l'amortissement<br />
en compression<br />
Réduire l'amortissement en détente<br />
Augmenter l'amortissement<br />
en détente<br />
Réduction trop rapide de la pression Augmenter de façon contrôlée la pression<br />
avec une pompe adaptée jusqu'à<br />
la pression d'origine ou détendre<br />
manuellement la fourche et la maintenir<br />
un court instant en butée. Ensuite<br />
réduire de façon contrôlée la pression<br />
à l'aide d'une pompe adaptée.<br />
La chambre d'air de la cartouche<br />
d'amortissement n'est plus<br />
sous pression<br />
Adressez vous à votre revendeur ou<br />
à un <strong>DT</strong> <strong>Swiss</strong> Service Center pour<br />
résoudre ce problème<br />
Un joint du système n'est plus étanche Adressez vous à votre revendeur ou<br />
à un <strong>DT</strong> <strong>Swiss</strong> Service Center pour<br />
résoudre ce problème<br />
La fourche se détend de 6-8mm puis<br />
atteint une position stable<br />
Cet effet est du à la conception du<br />
système et n'affecte pas les performances<br />
de la fourche<br />
Légère fuite dans le système Une détente complète de la fourche en<br />
plus d'une heure peut être considérée<br />
comme acceptable<br />
Un joint du système n'est plus étanche Adressez vous à votre revendeur ou<br />
à un <strong>DT</strong> <strong>Swiss</strong> Service Center pour<br />
résoudre ce problème<br />
Il y a de l'air dans la cartouche d'huile Comprimer plusieurs fois la fourche<br />
pour évacuer l'air de la cartouche<br />
d'huile
LAUNCH CONTROL<br />
Malgré l'activation du Launch Control<br />
la fourche se détend lentement<br />
Le bouton rouge d'activation du<br />
Launch Control revient dans sa position<br />
initiale lorsque l'on comprime<br />
la fourche<br />
Le Launch Control se désactive au<br />
moindre petit choc<br />
Le Launch Control ne se désactive pas<br />
malgré un gros choc sur la roue avant<br />
BLOCAGE AU GUIDON<br />
(REMOTE LOCKOUT)<br />
Le blocage au guidon ne fonctionne<br />
pas correctement<br />
Le blocage au guidon fonctionne<br />
correctement, mais le levier ne reste<br />
pas dans la position souhaitée<br />
Il y a de l'air dans la cartouche d'huile Comprimer plusieurs fois la fourche<br />
pour évacuer l'air de la cartouche<br />
d'huile<br />
Le joint est défectueux Adressez vous à votre revendeur ou à<br />
un <strong>DT</strong> <strong>Swiss</strong> Service Center pour faire<br />
changer le joint défectueux<br />
Légère fuite dans le système Une détente complète de la fourche en<br />
plus d'une heure peut être considérée<br />
comme acceptable<br />
La force de désactivation est trop faible Augmenter la force de désactivation<br />
en tournant le levier de réglage dans le<br />
sens horaire<br />
L'amortissement en compression est<br />
complètement fermé<br />
Ouvrir légèrement l'amortissement<br />
en compression<br />
La force de désactivation est trop forte Réduire la force de désactivation en<br />
tournant le levier de réglage dans le<br />
sens antihoraire<br />
La surface de contact du levier est sale<br />
ou mal lubrifiée<br />
Le câble du blocage est défectueux Ceci peut avoir plusieurs causes comme<br />
une chute, beaucoup de saleté,<br />
usure, etc.<br />
Nettoyer le levier de blocage à l'eau et<br />
le lubrifier avec de l'huile<br />
Le câble du blocage est trop tendu Visser la vis de support du câble afin de<br />
réduire la tension du câble. Essayer en<br />
même temps si le blocage fonctionne<br />
toujours et si le levier reste dans la<br />
position voulue<br />
La butée du levier est usée Adressez vous à votre revendeur ou à<br />
un <strong>DT</strong> <strong>Swiss</strong> Service Center pour faire<br />
changer le levier<br />
Adressez vous à votre revendeur ou à<br />
un <strong>DT</strong> <strong>Swiss</strong> Service Center pour faire<br />
changer le câble<br />
39<br />
ENGLISH<br />
FRANCAIS<br />
DEUTSCH
6 ENTRETIENT<br />
Pour obtenir une durée de vie allongée de votre produit, veuillez suivre ces quelques règles d'entretient:<br />
• Nettoyez votre fourche à l'aide d'un chiffon humide. Enlever toute accumulation de saleté dans la zone où les plongeurs<br />
entrent dans les fourreaux.<br />
• N'utilisez pas de produits agressifs qui pourraient endommager les joints racleurs<br />
• N'utilisez pas de nettoyeur haute pression pour nettoyer votre fourche, de l'eau pouvant s'infiltrer dans la fourche et en<br />
altérer les performances<br />
• Eliminez tout reste de saleté visible des joints racleurs, cela empêchera une intrusion de saleté dans la fourche.<br />
• Une lubrification supplémentaire de la fourche au niveau des racleurs n'est pas nécessaire. Pour lubrifier votre fourche vous<br />
pouvez la posez sur la tête régulièrement<br />
• Lubrifiez la surface de contact du levier de blocage au guidon après chaque lavage.<br />
INFORMATION<br />
Le non respect des intervalles d'entretient peut annuler les conditions de garantie<br />
Afin de vous assurer une gr<strong>and</strong>e satisfaction et une sécurité renforcée lors de l'utilisation de votre fourche <strong>DT</strong> <strong>Swiss</strong>, vous<br />
devez effectuer un service régulier. Si vous utilisez votre vélo dans des conditions extrêmes, les intervalles de services<br />
seront réduits.<br />
Nettoyer toute la fourche,<br />
avec un savon doux et<br />
de l'eau<br />
Contrôler que la fourche<br />
n'ait pas de rayures, d'éclats<br />
ou de cassure<br />
40<br />
Contrôler la pression d'air x<br />
Contrôler et lubrifier le<br />
levier de blocage au guidon<br />
Contrôler le couple de serrage<br />
de toutes les pièces<br />
Démonter les fourreaux,<br />
contrôler les bagues de<br />
guidage et changer l'huile<br />
de lubrification<br />
Contrôler et lubrifier le<br />
ressort à air ABS<br />
Gr<strong>and</strong> service dans un <strong>DT</strong><br />
<strong>Swiss</strong> Service Center<br />
Apres chaque sortie Apres 50 heures Chaque année<br />
x<br />
x<br />
x<br />
x<br />
x<br />
x<br />
x
7 <strong>DT</strong> SWISS SERVICE CENTER<br />
Vous trouvez les adresses de tous les <strong>DT</strong> <strong>Swiss</strong> Services Centers sous www.dtswiss.com<br />
8 GARANTIE<br />
8.1 DISPOSITION DE GARANTIE (EUROPE)<br />
Vous pouvez faire valoir vos droits à garantie légale pour vice de produit vis-à-vis de votre concessionnaire (commerçant). Audelà<br />
de ces droits à garantie, la société <strong>DT</strong> <strong>Swiss</strong> AG dont le siège est à Bienne/Suisse, accorde une garantie de 2 ans (24 mois) à<br />
partir de la date d‘achat sur votre fourche <strong>DT</strong> <strong>Swiss</strong>. Seul le premier propriétaire du produit muni d'une preuve d'achat valable<br />
peut bénéficier d'une garantie.<br />
ATTENTION: Aucune garantie ne sera reconnue dans les cas suivants:<br />
• Usure ordinaire des pièces. Les guidages, joints à rotule, leurs surfaces de frottement, articulations ainsi que les éléments de<br />
fonction de l‘amortissement sont exclus de la garantie par une usure de fonctionnement ou par un fort vieillissement.<br />
• Montage non conforme ou assemblage avec des produits inadéquats.<br />
• Entretien, réparation ou modification non conforme<br />
• Emploi non conforme, mauvais traitement, abus, négligence, imprudence, usage à but commercial ou emploi lors de compétition.<br />
• Dommage de livraison et de transport.<br />
• Modification, rendre méconnaissable ou enlèvement du numéro de série.<br />
<strong>DT</strong> <strong>Swiss</strong> SA décline toute responsabilité en cas de dommages indirects ou résultant d‘un accident. En tout cas, la responsabilité<br />
de la réglementation légale de cette garantie reste inchangée.<br />
Si des travaux devaient être nécessaires sous cette garantie, nous vous prions de bien vouloir contacter le march<strong>and</strong> chez<br />
lequel vous avez acheté le produit. Les produits qui doivent être envoyés pour être révisés peuvent être livrés franco de port au<br />
<strong>DT</strong> <strong>Swiss</strong> Services Center.<br />
Tribunal compétent et for juridique: Bienne (Suisse). Le droit suisse est applicable. Sous réserve des changements techniques.<br />
Veuillez conserver le mode d‘emploi et les dispositions de garantie pour des utilisations futures.<br />
41<br />
ENGLISH<br />
FRANCAIS<br />
DEUTSCH
1 ALLGEMEINE INFORMATIONEN<br />
1.1 SICHERHEITSINFORMATIONEN<br />
• Der Einbau einer <strong>DT</strong> <strong>Swiss</strong> Federgabel darf ausschließlich von qualifizierten Fahrradmechanikern durchgeführt werden!<br />
• Beim Fahrrad fahren stets einen Helm, Augenschutz und ausreichende Schutzbekleidung tragen.<br />
• Beim Transport auf einem Fahrradträger das Fahrrad nicht an den Ausfallenden der Gabel befestigen. Die Gabel kann<br />
beschädigt werden.<br />
• Bedienungsanleitung und Garantiebestimmungen vor der Inbetriebnahme der Federgabel aufmerksam durchlesen!<br />
• Die Bedienungsanleitung und Garantiebestimmungen respektive die darin enthaltenen Informationen müssen dem Endkunden<br />
des Produktes zugänglich gemacht werden.<br />
• Bitte beachten Sie, dass es in der Verantwortung des Kunden liegt, das Produkt regelmäßig überprüfen zu lassen um zu<br />
festzustellen, ob ein Service notwendig ist. <strong>DT</strong> <strong>Swiss</strong> empfiehlt Ihnen, Ihre Gabel einem regelmäßigen Service in einem <strong>DT</strong><br />
<strong>Swiss</strong> Service Center zu unterziehen. Lesen Sie dazu die Garantiebestimmungen in der Gebrauchsanweisung Ihrer <strong>DT</strong> <strong>Swiss</strong><br />
Gabel.<br />
• Falls die Gabel von Auge erkennbare Kratzer oder Riefen aufweist, wenden Sie sich an Ihren Händler oder das <strong>DT</strong> <strong>Swiss</strong><br />
Service Center um den Schaden beurteilen zu lassen.<br />
1.2 BEGRIFFE<br />
Der Begriff Federgabel und Gabel als auch Carbon/Alu Schaftrohr und Schaftrohr sind in diesem Dokument gleich zu setzen.<br />
1.3 VERWENDUNG VON WARNSYMBOLEN<br />
VORSICHT<br />
Kennzeichnet eine Gefährdung, die entweder leichte, mittlere oder schwere Verletzungen des Fahrers bis hin zu dessen Tod,<br />
oder aber auch Sachschäden am Produkt und gegenüber Dritten zur Folge haben könnte.<br />
INFORMATION<br />
Kennzeichnet praxisbezogene Informationen und Tipps, die einen optimalen Einsatz und eine bestmögliche Funktion des<br />
Produktes sicherstellen.<br />
1.4 MAXIMALE FAHRERGEWICHTE<br />
<strong>DT</strong> <strong>Swiss</strong> Federgabeln sind für die Benutzung durch einen einzelnen Fahrer auf Trails und in Trail ähnlichem Gelände konstruiert.<br />
Ein nicht angepasster Einsatz, kann entweder leichte, mittlere oder schwere Verletzungen des Fahrers bis hin zu dessen<br />
Tod, oder aber auch Sachschäden am Produkt und gegenüber Dritten zur Folge haben.<br />
42<br />
Modell Max. Fahrergewicht<br />
<strong>DT</strong> <strong>Swiss</strong> XRC-Modelle 210 lbs / 95 kg<br />
<strong>DT</strong> <strong>Swiss</strong> XRM-Modelle 245 lbs / 110 kg<br />
<strong>DT</strong> <strong>Swiss</strong> XM-Modelle 245 lbs / 110 kg<br />
<strong>DT</strong> <strong>Swiss</strong> EX-Modelle 245 lbs / 110 kg<br />
1.5 EINSATZBEREICHE<br />
• <strong>DT</strong> <strong>Swiss</strong> Gabeln sind ausschliesslich für den Einsatz in Fahrrädern konzipiert.<br />
• <strong>DT</strong> <strong>Swiss</strong> Gabeln dürfen nur in elektromotorisch unterstützten Fahrräder verwendet werden, wenn diese der Norm<br />
DIN EN 15194 entsprechen und der Antrieb nicht über das Vorderrad (Vorderradnabe) erfolgt.<br />
• Andere Einsatzbereiche als in der Tabelle unten spezifiziert sind nicht zulässig. Der Einsatz als Werkzeug oder Spielzeug,<br />
sowie eine von der Bedienungsanleitung abweichende H<strong>and</strong>habung sind nicht zulässig.<br />
XRC<br />
XRM<br />
XMC<br />
XMM<br />
EXC<br />
EXM<br />
XR Cross Race XM Cross Mountain EX Enduro Cross FR Freeride
2 TECHNOLOGIEN<br />
2.1 ÜBERSICHT GABELMODELLE<br />
Modell Dämpfungstechnologie Federungstechnologie<br />
<strong>DT</strong> <strong>Swiss</strong> XR-Modelle • Single Shot mit optionalem<br />
Remote Control<br />
<strong>DT</strong> <strong>Swiss</strong> XM-Modelle<br />
• Twin Shot mit optionalem<br />
Remote Control<br />
<strong>DT</strong> <strong>Swiss</strong> EX-Modelle Launch Control<br />
2.2 ABS AUTO BALANCING SPRING SYSTEM<br />
<strong>DT</strong> <strong>Swiss</strong> Federgabeln mit ABS Federungstechnologie, arbeiten mit einer Luftfederung bestehend aus einer Positiv- und Negativluftfeder.<br />
Beim Befüllen der Positiv-Luftkammer wird der Luftdruck der Negativluftfeder automatisch eingestellt. Der Luftdruck<br />
der Gabel in der Positiv- und Negativluftkammer ist somit immer optimal auf das jeweilige Fahrergewicht eingestellt.<br />
2.3 SINGLE SHOT<br />
<strong>DT</strong> <strong>Swiss</strong> Federgabeln mit Single Shot Dämpfungstechnologie haben eine von aussen einstellbare Low Speed Zugstufendämpfung.<br />
Die High Speed Zugstufen- und Druckstufendämpfung sowie die Low Speed Druckstufendämpfung sind vom Werk aus<br />
abgestimmt und nicht einstellbar.<br />
Das Druckstufen-Lockout ist von aussen bedienbar mit Einstellhebel oder Fernbedienung über einen Remotehebel am Lenker.<br />
2.4 TWIN SHOT<br />
<strong>DT</strong> <strong>Swiss</strong> Federgabeln mit Twin Shot Dämpfungstechnologie haben eine von aussen einstellbare Low Speed Zugstufen- und<br />
Druckstufendämpfung. Die High Speed Zugstufen- und Druckstufendämpfung ist vom Werk aus abgestimmt und nicht einstellbar.<br />
Das sequentielle Zugstufen- und Druckstufen-Lockout ist von außen bedienbar mit Einstellhebel oder Fernbedienung<br />
über einen Remotehebel am Lenker.<br />
Die Zugstufen Lockout Funktion ist eine Kletterhilfe für das Bergauffahren bei der die Zugstufendämpfung bis zu einem fest<br />
definierten Niveau geschlossen wird. Die Gabel kann nicht mehr vollständig ausfedern und verbleibt in abgesenkter Position.<br />
Die Druckstufen Lockout Funktion ist vor allem für die Anwendung im Wiegetritt vorgesehen. Dabei wird die Druckstufendämpfung<br />
geschlossen, die Gabel ist blockiert und federt nicht mehr ein.<br />
2.5 LAUNCH CONTROL<br />
<strong>DT</strong> <strong>Swiss</strong> Federgabeln mit Launch Control Dämpfungstechnologie haben eine von aussen einstellbare Low Speed Zugstufen-<br />
und Druckstufendämpfung. Die High Speed Druckstufendämpfung ist vom Werk aus abgestimmt und nicht einstellbar.<br />
Die Launch Control Funktion ist eine Kletterhilfe für das Bergauffahren bei der die Zugstufendämpfung bis zu einem fest<br />
definierten Niveau geschlossen wird bis die Launch Control Funktion deaktiviert wird (siehe 4.2.3.3).<br />
ABS<br />
43<br />
ENGLISH<br />
FRANCAIS<br />
DEUTSCH
3 MONTAGE<br />
3.1 ALLGEMEINE INFORMATIONEN<br />
ACHTUNG<br />
Beachten Sie die nachfolgend aufgeführten Sicherheitshinweise für die Montage.<br />
• Verwenden sie zum Anziehen von Schraubenverbindungen immer einen Drehmomentschlüssel mit entsprechendem<br />
Drehmoment-Bereich der von <strong>DT</strong> <strong>Swiss</strong> und dem Hersteller der Anbauteile spezifizierten Drehmomente.<br />
• Beachten Sie das angegebene maximale und minimale Drehmoment für die Befestigung der Anbauteile. Maßgebend sind<br />
die tiefsten Werte, wobei die Minimalwerte von <strong>DT</strong> <strong>Swiss</strong> nicht unterschritten werden dürfen.<br />
• Ihre <strong>DT</strong> <strong>Swiss</strong> Gabel hat entweder ein gerades Schaftrohr mit einem Durchmesser von 28.6mm/1 1/8“ oder ein konisches (tapered)<br />
Schaftrohr mit einem Durchmesser von 39.82mm/1.5" unten und 28.6mm/1 1/8" oben. Verwenden Sie ausschließlich<br />
einen Steuersatz, der für Ihr Schaftrohr geeignet ist.<br />
• Verwenden Sie generell keine Schaftadapter, Reduzierhülsen oder Reduktionsbauteile.<br />
• Ihre <strong>DT</strong> <strong>Swiss</strong> Gabel ist für eine Vorbauklemmung ohne jegliches Gewinde ausgelegt. Bringen Sie kein zusätzliches Gewinde,<br />
Bohrungen oder sonstige technische Veränderungen an ihrer Gabel an.<br />
• Bei der Montage und der Verwendung ihrer <strong>DT</strong> <strong>Swiss</strong> Gabel ist darauf zu achten, dass keine Beschädigungen am Schaftrohr<br />
und an der Krone entstehen. Insbesondere die Montage des Steuersatzkonus unten erfordert diesbezüglich besondere<br />
Aufmerksamkeit. Alle Anbauteile dürfen keine scharfen Kanten aufweisen.<br />
• Verwenden Sie keine Vorbauten mit Konus- oder Keil-Befestigungssystem.<br />
• Die Bundhöhe bei unterbrochener Klemmfläche im Vorbau muss mindestens 7mm betragen.<br />
VORSICHT<br />
• Die bei der Montage eines A-Head-Set Steuersatzes verwendeten Distanzstücke (Spacer) zwischen Steuersatz und Vorbau,<br />
dürfen eine Minimalhöhe von 5mm nicht unterschreiten und eine Maximalhöhe von 30mm nicht überschreiten.<br />
• Die Schaftklemme des Vorbaus darf maximal 45mm betragen.<br />
• Oberhalb des Vorbaus muss ein 5mm hohes Distanzstück (Spacer) angebracht werden, damit sichergestellt wird, dass der<br />
Vorbau über seine gesamte Klemmlänge auf dem Schaftrohr aufliegt. Stellen Sie sicher, dass ein genügend großer Abst<strong>and</strong><br />
zwischen Oberkante Distanzstück und dem Schaftrohr vorh<strong>and</strong>en ist, damit Sie das Spiel ihres Steuersatzes korrekt einstellen<br />
können (<strong>DT</strong> <strong>Swiss</strong> empfiehlt 2-3mm).<br />
44
3.2 KÜRZEN UND VORBEREITEN DES SCHAFTROHRES FÜR DIE MONTAGE<br />
Da das Kürzen des Schaftrohres im Wesentlichen vom Steuersatz und dem Vorbau und deren Bauform abhängt, ist zwingend<br />
die Gebrauchsanweisung des Steuersatzes und des Vorbaus zu konsultieren.<br />
Bitte beachten Sie, dass beim Austausch des Steuersatzes und/oder des Vorbaus deren neue Einbauhöhe einen Einfluss auf die<br />
Länge ihres Schaftrohres haben kann.<br />
• Demontieren Sie die vorh<strong>and</strong>ene Gabel aus Ihrem Rahmen.<br />
• Demontieren Sie den Steuersatzkonus unten von der alten Gabel.<br />
• Messen Sie die die Schaftrohrlänge der vorh<strong>and</strong>enen Gabel und übertragen Sie diesen Messwert auf das Schaftrohr Ihrer<br />
neuen <strong>DT</strong> <strong>Swiss</strong> Gabel. Stellen Sie sicher, dass die Länge von der Auflage des Steuersatzkonus unten auf der Krone zum<br />
Ende des Schaftrohres gemessen wird.<br />
• Stellen Sie sicher, dass die verbleibende Klemmfläche auf dem Schaftrohr der gesamten Bauhöhe Vorbaus inklusive einem<br />
5mm Distanzstück (Spacer) oberhalb des Vorbaus entspricht.<br />
Auflagefläche Steuersatzkonus<br />
unten<br />
Supporting area headset base plate<br />
Base du jeu de direction<br />
Schaftrohrlänge<br />
Steerer length<br />
Longeur du pivot<br />
Anschlag Schaftrohr<br />
Exp<strong>and</strong>er (Nur Carbonschaftrohr)<br />
Arrester steerer<br />
Exp<strong>and</strong>er (only carbon shaft)<br />
Arret exp<strong>and</strong>eur de pivot<br />
(seulement pivot en carbone)<br />
Auflagefläche Steuersatzkonus<br />
unten<br />
Supporting area headset base plate<br />
Base du jeu de direction<br />
ca. 2mm<br />
Schaftrohrlänge<br />
Steerer length<br />
Longeur du pivot<br />
3.2.1 SPEZIELLES BEIM SCHAFTROHR AUS CARBON<br />
VORSICHT<br />
Vor dem Kürzen des Schaftrohres aus Carbon sind Maßnahmen zum Schutz Ihrer Gesundheit, im speziellen der Haut, Augen<br />
und Atemwege zu treffen.<br />
Für die Montage und Einstellung des Steuersatzes darf keine herkömmliche A-Head-Set Kralle (sogenannte Star-Nut) verwendet<br />
werden. Verwenden Sie ausschließlich den von <strong>DT</strong> <strong>Swiss</strong> mitgelieferten Schaftrohr Exp<strong>and</strong>er. Der Schaftrohr Exp<strong>and</strong>er<br />
muss aus Sicherheitsgründen immer montiert sein.<br />
INFORMATION<br />
Beachten Sie, dass der von <strong>DT</strong> <strong>Swiss</strong> mitgelieferte Schaftrohr Exp<strong>and</strong>er die Einbauhöhe des Schaftrohres um ca. 2mm verlängert.<br />
3.2.1.1 BENÖTIGTES MATERIAL<br />
• Schutzbrille<br />
• Atemschutzmaske<br />
• Schutzh<strong>and</strong>schuhe<br />
• Abdeckb<strong>and</strong><br />
• H<strong>and</strong>säge (neues Sägeblatt für Metall mit mind. 24 Zähne pro Inch)<br />
• Schleifpapier (Körnung mind. 400)<br />
45<br />
ENGLISH<br />
FRANCAIS<br />
DEUTSCH
3.2.1.2 VORGEHEN<br />
• Verwenden Sie für das Kürzen ihres Carbon Schaftrohres ausschließlich eine H<strong>and</strong>säge.<br />
• Umwickeln Sie das Schaftrohr in der Höhe der gemessenen Länge so satt als möglich mit Abdeckb<strong>and</strong>, um das ausfransen<br />
der Carbonfasern beim Sägen zu verhindern. Sägen Sie das Schaftrohr auf die gewünschte Länge ab. Verschleifen Sie die<br />
Schnittkanten am Schaftrohr innen und außen vorsichtig mit Schleifpapier. Die Carbonfasern des Schaftrohres dürfen nicht<br />
ausfransen.<br />
• Entfernen Sie das Abdeckb<strong>and</strong> vorsichtig und restlos vom Schaftrohr. Verwenden Sie keine aggressiven Lösungsmittel für<br />
das Entfernen von Abdeckb<strong>and</strong>resten (<strong>DT</strong> <strong>Swiss</strong> empfiehlt Motorex <strong>Swiss</strong>clean 2300).<br />
• Kontrollieren Sie die Innenfläche des Schaftrohres auf Verunreinigungen und reinigen Sie dieses allenfalls.<br />
• Führen Sie den Schaftrohr Exp<strong>and</strong>er in das Schafrohr ein, bis der Anschlag auf der Ringfläche des Schafrohrers aufliegt.<br />
Richten Sie dabei die geschlitzte Hülse nach hinten aus.<br />
• Halten Sie den Exp<strong>and</strong>er fest und ziehen Sie die Schraube mit einem Innensechskantschlüssel Größe 6mm so fest, dass sich<br />
der Exp<strong>and</strong>er nicht mehr dreht, ohne den maximalen Drehmoment von 7Nm zu überschreiten.<br />
• Der von <strong>DT</strong> <strong>Swiss</strong> mitgelieferte Schaftrohr Exp<strong>and</strong>er muss zwingend montiert sein.<br />
3.2.2 SPEZIELLES BEIM SCHAFTROHR AUS ALUMINIUM<br />
3.2.2.1 BENÖTIGTES MATERIAL<br />
• Rohrschneider<br />
• Feile<br />
3.2.2.2 VORGEHEN<br />
• Schneiden das Schaftrohr auf der eingezeichneten Länge ab. <strong>DT</strong> <strong>Swiss</strong> empfiehlt für diesen Vorgange einen Rohrschneider<br />
zu verwenden.<br />
• Entgraten Sie das Schaftrohr mit einer geeigneten Feile aussen und innen<br />
• Schlagen Sie eine herkömmliche A-Head-Set Kralle (sogenannte Star-Nut) mit einem geeigneten Werkzeug in das Schaftrohr.<br />
3.3 EINBAU DER GABEL IM RAHMEN<br />
INFORMATION<br />
Montieren Sie den Steuersatz und den Vorbau Grundsätzlich gemäß der Montageanleitung des jeweiligen Herstellers. Beachten<br />
Sie folgende Einschränkungen durch <strong>DT</strong> <strong>Swiss</strong>.<br />
Die Einstellschraube Ihres Steuersatzes ist für das Einstellen des Lagerspiels des Steuersatzes vorgesehen. Diese Schraube dient<br />
nicht zur Befestigung!<br />
VORSICHT<br />
Der Steuersatzkonus unten und oben darf keine scharfen Kanten haben, da diese Kratzer und Riefen am Schaftrohr verursachen<br />
und die Lebensdauer ihrer <strong>DT</strong> <strong>Swiss</strong> Gabel verkürzen oder zu einem Bruch führen.<br />
Gehen Sie bei der Montage des Steuersatz und des Vorbau mit äusserster Vorsicht vor und beschädigen Sie die Gabel nicht.<br />
Beschädigungen können die Lebensdauer ihrer <strong>DT</strong> <strong>Swiss</strong> Gabel verkürzen oder zu einem Bruch führen.<br />
• Tragen Sie bei der Montage des Steuersatzkonus unten und Schaftrohren aus Aluminium einen dünnen Film Fett auf das<br />
St<strong>and</strong>rohr auf. <strong>DT</strong> <strong>Swiss</strong> empfiehlt Motorex Langzeitfett 2000. Bei einem Schaftrohr aus Carbon verwenden Sie die von <strong>DT</strong><br />
<strong>Swiss</strong> mitgelieferte Carbon Montagepaste (Art. Nr. FXXXXX0XXX040717S).<br />
• Pressen Sie den Steuersatzkonus unten gemäss der Montageanleitung des Herstellers auf das Schaftrohr.<br />
• Montieren Sie die Gabel mit aufgepresstem Steuersatzkonus in Ihren Rahmen. Stellen Sie dabei sicher, dass der Steuersatzkonus<br />
unten korrekt in das Gegenstück des Steuersatzes eingepasst ist.<br />
• Montieren Sie das obere Steuersatzlager gemäß der Montageanleitung des Herstellers. Verwenden Sie Distanzstücke unter<br />
dem Vorbau um die gewünschte Höhe des Vorbaus einzustellen.<br />
• Montieren Sie den Vorbau inkl. dem Distanzstück oberhalb des Vorbaus auf dem Schaftrohr ohne die Befestigungsschrauben<br />
anzuziehen. Beachten Sie dabei die Einschränkungen betreffend minimaler und maximaler Höhe der Distanzstücke<br />
zwischen Steuersatz und Vorbau. Tragen sie auf die Klemmfläche des Vorbaus bei einem Schaftrohr aus Carbon einen<br />
dünnen Film der Carbon Montagepaste auf.<br />
• Stellen Sie das Lagerspiel des Steuersatzes mittels der Abdeckkappe und der Einstellschraube des Steuersatzherstellers ein.<br />
• Schraube bei geöffneten Vorbauklemmschrauben nur so fest anziehen, dass bei gezogener Vorderradbremse und vor und<br />
zurück Bewegungen des Fahrrades kein Lagerspiel mehr feststellbar ist. Die Gabel muss sich noch leichtgängig im Steuerrohr<br />
drehen lassen.<br />
• Bei gezogener Vorderradbremse jeweils bei der unteren und oberen Lagerschale während des vor- und zurück Bewegens<br />
mit Daumen und Zeigefinger das Lagerspiel überprüfen.<br />
INFORMATION<br />
Bei einem korrekt eingestelltem Steuersatz ist kein Lagerspiel spürbar und der Lenker resp. Vorderrad kippen bei einer seitlichen<br />
Neigung der Fahrrades von alleine weg.<br />
• Richten Sie den Vorbau aus und ziehen Sie die Befestigungsschrauben des Vorbaus gemäß Montageanleitung des Herstellers<br />
an. Beachten Sie das maximale Anzugsmomente der Befestigungsschrauben für Carbon Schaftrohre. Verwenden Sie<br />
für eine Gabel mit Carbon Schaftrohr ausschließlich einen Vorbau der vom Vorbauhersteller für die Montage an Carbon<br />
Schaftrohren freigegeben ist.<br />
46
INFORMATION<br />
Falls der Hersteller des Vorbaus keine Drehmomente für die Montage bei Carbon Schaftrohren angibt, verfahren Sie wie folgt:<br />
• Ziehen Sie die Befestigungsschrauben mit einem Drehmomentschlüssel mit 4Nm an.<br />
• Kontrollieren Sie den sicheren Sitz des Vorbaus indem Sie das Vorderrad zwischen den Beinen einklemmen und über den<br />
Lenker prüfen, ob der Vorbau verdrehsicher auf dem Schaftrohr befestigt ist.<br />
• Falls das nicht der Fall ist, erhöhen Sie das Drehmoment in 0.5Nm Schritten und ziehen Sie die Befestigungsschrauben<br />
jeweils wechselweise fest, bis sich der Vorbau nicht mehr verdreht.<br />
VORSICHT<br />
Überschreiten Sie bei diesem Verfahren das maximale Anzugsmoment das vom Vorbauhersteller angegeben wird nie. Der von<br />
<strong>DT</strong> <strong>Swiss</strong> mitgelieferte Schaftrohr Exp<strong>and</strong>er muss zwingend montiert sein.<br />
3.4 REMOTE LOCKOUT<br />
3.4.1 ALLGEMEINE INFORMATIONEN<br />
• Die Lenkerfernbedienung ist nur für Gabeln mit Single Shot und Twin Shot Dämpfungstechnologie verfügbar.<br />
• Die Lenkerfernbedienung zur Steuerung des Lockouts kann wahlweise links oder rechts am Lenker montiert werden.<br />
• Zur Montage muss ausreichend Platz zwischen Lenkergriff und Bedienelementen (Schaltung, Bremsen usw.) zur Verfügung<br />
stehen. Montieren Sie die Schelle der Lenkerfernbedienung so auf dem Lenker, dass eine reibungslose Bedienung gewährleistet<br />
ist. Die Funktion und Bedienung der <strong>and</strong>eren Bedienelemente (insbesondere der Bremse) darf nicht beeinträchtigt werden.<br />
• Verwenden Sie bei der Montage der Lenkerfernbedienung auf Carbon Lenker eine spezielle Carbon Montagepaste. <strong>DT</strong><br />
<strong>Swiss</strong> empfiehlt die Carbon Montagepaste (Art. Nr. FXXXXX0XXX040717S).<br />
• Die Zugumlenkung muss beim Zuggegenhalter der Krone montiert werden. Sie darf nicht an der Lenkerfernbedienung<br />
montiert werden.<br />
INFORMATION<br />
Die Lenkerfernbedienung ist auf einen Lenkerdurchmesser von Ø22.2mm ausgelegt. Bei einem zu kleinen Lenkerdurchmesser<br />
kann die Schelle der Lenkerfernbedienung nicht fest genug fest angezogen werden. Dies kann zu einem Verdrehen der<br />
Lenkerfernbedienung auf dem Lenker führen.<br />
VORSICHT<br />
Das maximale Drehmoment der Schraube M3x8 zur Befestigung der Lenkerfernbedienung Sockels am Lenker beträgt 1.5Nm!<br />
Ein übermässiges Anziehen der Schraube kann zu Beschädigungen des Lenkers führen.<br />
Wählen Sie die Zughülle der Lenkerfernbedienung genügend lang um das Abreissen des Zuggegenhalters bei einem übermässigen<br />
drehen des Lenkers (Sturz) zu verhindern.<br />
3.4.2 MONTAGE REMOTE LOCKOUT<br />
3.4.2.1 BENÖTIGTES MATERIAL<br />
• Schaltzug<br />
• 4mm Zughülle<br />
• 2.5mm Innensechskant Schlüssel<br />
• 2mm Innensechskant Schlüssel<br />
47<br />
ENGLISH<br />
FRANCAIS<br />
DEUTSCH
3.4.2.2 ERSTE SCHRITTE<br />
• Bei Carbon Lenker, tragen Sie einen dünnen Film Carbon Montagepaste auf den Lenker auf<br />
(Art. Nr. FXXXXX0XXX040717S).<br />
• Montieren Sie die Lenkerfernbedienung mittels der M3x8 Schraube am Lenker.<br />
• Schneiden Sie die Zughülle auf die richtige Länge ab, so dass sich der Lenker mit montierter Zugumlenkung an der Krone<br />
und Zughülle ohne Behinderung drehen lässt.<br />
• Verwenden Sie ausschliesslich unbeschichtete Schaltzüge!<br />
• Stellen Sie sicher, dass die Einstellschraube an der Zugumlenkung vollständig eingeschraubt ist.<br />
• Bringen Sie den Hebel auf Pos. 1<br />
• Führen Sie den Schaltzug nachein<strong>and</strong>er durch die Öffnung am Hebel der Lenkerfernbedienung, die Zughülle, die Zugumlenkung<br />
und durch den Zuggegenhalter der Krone. Beachten Sie dabei, dass die Zughülle und der Zuggegenhalter korrekt<br />
in die dafür vorgesehenen Öffnungen eingeführt sind.<br />
3.4.2.3 WEITERE SCHRITTE SINGLE SHOT<br />
• Führen Sie den Schaltzug um das silbrige Rad und durch das Loch im silbrigen Rad.<br />
• Ziehen Sie von H<strong>and</strong> am Schaltzug damit sich der Schaltzug und die Zughülle setzen können.<br />
• Ziehen Sie fest von H<strong>and</strong> am Schaltzug und ziehen Sie gleichzeitig den M4x4 Gewindestift mit 1Nm an um den Schaltzug zu<br />
klemmen.<br />
• Betätigen Sie der Hebel ein paar Mal<br />
• Mittels der Rändelschraube am Zuggegenhalter, die Kabelspannung so einstellen, dass der Hebel in Position 3 vollständig<br />
einrastet und das Lockout aktiviert.<br />
• Schneiden Sie den Schaltzug auf in die gewünschte Länge ab und bringen Sie eine Kabelendhülse an.<br />
• Klemmen Sie den Schaltzug hinter die M2 Schraube.<br />
3.4.2.4 WEITERE SCHRITTE TWIN SHOT<br />
• Lösen Sie die M3x4 Klemmschraube am Sechskant Rad.<br />
• Führen Sie den Schaltzug um das Sechskant Rad und unter der M3x4 Klemmschraube durch.<br />
• Ziehen Sie von H<strong>and</strong> am Schaltzug damit sich der Schaltzug und die Zughülle setzen können.<br />
• Ziehen Sie fest von H<strong>and</strong> am Schaltzug und ziehen Sie gleichzeitig die M3x4 Schraube mit 1Nm an um den Schaltzug zu<br />
klemmen.<br />
• Betätigen Sie der Hebel ein paar Mal<br />
• Mittels der Rändelschraube am Zuggegenhalter, die Kabelspannung so einstellen, dass der Hebel in Position 3 vollständig<br />
einrastet und das Lockout aktiviert.<br />
• Schneiden Sie den Schaltzug auf in die gewünschte Länge ab und bringen Sie eine Kabelendhülse an.<br />
Pos 1 Pos 2 Pos 3<br />
48<br />
Lockout offen Zugstufenlockout aktiviert<br />
(nur Twin Shot)<br />
Zugstufenlockout<br />
aktiviert
3.5 BREMSEN<br />
3.5.1 ALLGEMEINE INFORMATIONEN<br />
Maximal zugelassene Bremsscheibendurchmesser:<br />
Modell Max. Durchmesser<br />
<strong>DT</strong> <strong>Swiss</strong> XRC-Modelle 185 mm<br />
<strong>DT</strong> <strong>Swiss</strong> XRM-Modelle 210 mm<br />
<strong>DT</strong> <strong>Swiss</strong> XM-Modelle<br />
<strong>DT</strong> <strong>Swiss</strong> EX-Modelle<br />
INFORMATION<br />
Alle <strong>DT</strong> <strong>Swiss</strong> Federgabeln ab Modelljahr 2009 sind mit dem Post Mount Bremsaufnahme St<strong>and</strong>ard für Bremsscheibendurchmesser<br />
von 160mm ausgerüstet. Für Bremsscheibendurchmesser über 160mm muss ein entsprechender Adapter vom Bremsenhersteller<br />
montiert werden.<br />
3.5.2 MONTAGE DER BREMSE<br />
VORSICHT<br />
Verwenden sie keine zu langen Befestigungsschrauben für die Montage der Bremszange. Es besteht die Gefahr, dass die<br />
Bremsaufnahme beschädigt wird. Vergewissern Sie sich vor der Montage, dass die Befestigungsschraube nicht im Gewinde der<br />
Bremsaufnahme ansteht ohne die Bremszange zu klemmen. Die Einschraublänge der Schrauben in der Bremsaufnahme soll<br />
min. 8 und max. 10mm betragen.<br />
Ziehen Sie die Befestigungsschrauben wechselweise mit einem Drehmoment von min. 6Nm und max. 10Nm an. Das maximale<br />
Anzugsdrehmoment darf die Angaben des Bremsenhersteller nicht überschreiten.<br />
Bei der Verwendung von Bremsscheiben ohne Center Lock Adapter sowie bei Bremsscheiben mit einem separaten Spider, ist<br />
ein Kollisionstest mit eingebautem Laufrad und montierter Bremsscheibe an der Gabel durchzuführen.<br />
Die Bremsleitung darf nicht an der Krone befestigt werden. Scheuerstellen sind mit entsprechenden Schutzklebern zu schützen.<br />
Einschraublänge<br />
min. 8/max. 10<br />
Bei <strong>DT</strong> <strong>Swiss</strong> Federgabeln wir folgende Verlegung der Bremsleitung empfohlen.<br />
49<br />
ENGLISH<br />
FRANCAIS<br />
DEUTSCH
3.6 VORDERRAD<br />
3.6.1 REIFENDIMENSIONEN<br />
VORSICHT<br />
Ein Kollisionstest ist nach der Reifenmontage durchzuführen!<br />
• Den eingebauten Reifen auf den maximal zulässigen Druck aufpumpen. Der maximale Druck wird entweder durch den<br />
Reifen oder die Felge bestimmt. Maßgebend ist der niedrigere Druck der beiden Komponenten.<br />
• Entlassen Sie die Luft vollständig aus der Gabel und komprimieren Sie diese vollständig.<br />
• Kontrollieren Sie, ob der Reifen unter voller Kompression die Gabelkrone oder die Gabelholme berührt. Ist dies der Fall,<br />
darf der Reifen nicht verwendet werden.<br />
50<br />
Modell Max. Durchmesser des Rades Max. Reifenbreite<br />
<strong>DT</strong> <strong>Swiss</strong> XRC-Modelle 686 mm 59 mm<br />
<strong>DT</strong> <strong>Swiss</strong> XRM-Modelle 26" 690 mm 65 mm<br />
<strong>DT</strong> <strong>Swiss</strong> XM-Modelle 26"<br />
<strong>DT</strong> <strong>Swiss</strong> EX-Modelle 26"<br />
<strong>DT</strong> <strong>Swiss</strong> XMM-Modelle 29" 756 mm 62 mm<br />
3.6.2 EINBAU DER VORDERRADES MIT SCHNELLSPANNACHSE (QR)<br />
VORSICHT<br />
Das Abschleifen der Sicherheitsanschläge an den Ausfallenden die das Herausspringen der Vorderrades verhindern, ist streng<br />
untersagt. Eine Modifikation führt zu einem Verlust jeglicher Garantieansprüche.<br />
Das Rad gemäß der Anleitung des Herstellers montieren.<br />
3.6.3 EINBAU DES VORDERRADES BEI FEDERGABELN MIT STECKACHSE RWS<br />
(Option XRM-, XMM- und EXM-Modelle)<br />
• Bauen Sie die Steckachse aus der Gabel aus.<br />
• Fetten Sie die Steckachse leicht. Insbesondere das Gewinde der Steckachse.<br />
• Positionieren Sie das Vorderrad so zwischen den beiden Ausfallenden der Gabel, dass die Steckachsaufnahme der Nabe und<br />
jene der Ausfallenden mitein<strong>and</strong>er fluchten.<br />
• Schieben Sie die Steckachse durch das rechte Ausfallende der Gabel und die Nabe, bis die Steckachse am Gewinde des<br />
linken Ausfallendes anstösst.<br />
• Schrauben Sie die Steckachse ins Gewinde und ziehen Sie den RWS Hebel h<strong>and</strong>fest an (min. 15 Nm).<br />
• Zum endgültigen Positionieren des RWS Hebels folgen Sie den Anweisungen in der Abbildung.<br />
1<br />
2<br />
1. Axiales Anheben des Hebels.<br />
2. Hebel in die gewünschte Position drehen.<br />
3. Hebel in die Verzahnung einrasten.<br />
INFORMATION<br />
Benützen Sie die rote Schraube nicht zum Öffnen oder Schließen des RWS
4 BEDIENUNG<br />
4.1 FEDERUNG<br />
4.1.1 EINSTELLUNG DES SAG<br />
Der «SAG» (oder Negativfederweg) ist die Strecke, um welche die Gabel durch das Gewicht des Fahrers mit kompletter Fahrradausrüstung<br />
einfedert.<br />
Bei richtig eingestelltem SAG kann das Vorderrad während der Fahrt den Unebenheiten des Geländes besser folgen.<br />
Um den SAG einzustellen, müssen Sie den Luftdruck Ihrer Gabel anpassen. Nehmen Sie nach Möglichkeit die Hilfe einer zweiten<br />
Person in Anspruch.<br />
• Um den SAG zu messen, müssen Sie die Funktionen ihrer Gabel deaktivieren:<br />
• EX-Modelle: Launch Control deaktivieren<br />
• XR- und XM-Modelle: Twin Shot und Single Shot Funktion auf Position 1<br />
• Schieben Sie den O-Ring für die Federwegsanzeige am rechten Gabelholm ganz nach unten, bis er die Hauptdichtung<br />
berührt.<br />
• Setzen Sie sich mit Ihrer Fahrradausrüstung (Helm, Rucksack, Schuhe etc.) auf das Fahrrad. Nehmen Sie eine normale Fahrposition<br />
ein bei der die Gabel nur durch Ihr Eigengewicht belastet wird.<br />
• Steigen Sie vom Fahrrad und messen Sie den Abst<strong>and</strong> zwischen dem O-Ring und der Hauptdichtung. Dieses Mass wird<br />
als SAG bezeichnet. Der SAG sollte zwischen 15% und 25% des maximalen Federweges betragen und richtet sich je nach<br />
Einsatz und Fahrstil.<br />
Anhaltswerte für den SAG Einsatz<br />
15% des max. Federweges Cross Country/Race<br />
20% des max. Federweges Marathon/Tour<br />
25% des max. Federweges Enduro<br />
4.1.2 ANPASSEN DES LUFTDRUCKS<br />
VORSICHT<br />
Die Gabel nicht mit aufgeschraubter Pumpe einlenken, da diese gegen den Rahmen stossen und dabei das Ventilgewinde<br />
abreissen kann.<br />
INFORMATION<br />
Verwenden Sie zur Anpassung des Luftdrucks ausschließlich geeignete Dämpferpumpen! Wir empfehlen die <strong>DT</strong> <strong>Swiss</strong> Dämpferpumpe<br />
(Art. Nr. . FXTXXX0S000040223S)<br />
Die Luftfeder befindet sich bei allen <strong>DT</strong> <strong>Swiss</strong> Federgabelmodellen im linken Gabelholm. Durch Verändern des Luftdrucks in<br />
der Gabel wird die Federhärte beeinflusst. Ein höherer Luftdruck verhärtet die Feder, ein niedriger macht sie weicher.<br />
Die Luftkammer ist mit einer geringen Menge Schmieröl befüllt. Achten Sie deshalb darauf, dass beim Aufpumpen oder Ablassen<br />
der Luft das Ventil nach oben zeigt.<br />
Die Einstellung ist möglich durch das Anpassen des Luftdrucks. Bei Anpassung des Luftdrucks auf das jeweilige Fahrergewicht<br />
kann sich die Gesamtlänge der Gabel im ausgefederten Zust<strong>and</strong> geringfügig ändern.<br />
• Die Gabel bzw. das Fahrrad so positionieren, dass das Ventil am linken, oberen Gabelholm nach oben zeigt.<br />
• Ventildeckel vom Ventilgehäuse schrauben.<br />
• Geeignete Dämpferpumpe vollständig auf das Ventilgehäuse schrauben.<br />
• Luftdruck durch Aufpumpen oder Ablassen anpassen.<br />
• Ventildeckel wieder auf das Ventilgehäuse schrauben.<br />
51<br />
ENGLISH<br />
FRANCAIS<br />
DEUTSCH
4.1.3 MAXIMALE LUFTDRÜCKE<br />
Modell Max. Luftdruck<br />
ABS<br />
<strong>DT</strong> <strong>Swiss</strong> XRC-Modelle 203 psi/14 bar<br />
<strong>DT</strong> <strong>Swiss</strong> XRM-Modelle 26" 174 psi/12 bar<br />
<strong>DT</strong> <strong>Swiss</strong> XM-Modelle 26"<br />
<strong>DT</strong> <strong>Swiss</strong> EX-Modelle 26"<br />
<strong>DT</strong> <strong>Swiss</strong> XMM-Modelle 29"<br />
4.1.4 EMPFOHLENE LUFTDRÜCKE<br />
52<br />
XRC100 XRM100<br />
XMM100 29"<br />
Fahrergewicht (lbs/kg) Empfohlener Luftdruck (psi/bar)<br />
XM120<br />
XMM120 29"<br />
XM140 XM150<br />
EX150<br />
88 / 40 80/5.5 52/3.6 52/3.6 52/3.6 54/3.7<br />
99 / 45 90/6.2 58/4.0 58/4.0 58/4.0 58/4.0<br />
110 / 50 99/6.8 64/4.4 62/4.3 62/4.3 62/4.3<br />
121 / 55 110/7.5 70/4.8 68/4.7 68/4.7 68/4.7<br />
132 / 60 119/8.2 75/5.2 74/5.1 73/5.0 73/5.0<br />
143 / 65 128/8.8 81/5.6 78/5.4 78/5.4 77/5.3<br />
154 / 70 138/9.5 87/6.0 84/5.8 83/5.7 81/5.6<br />
165 / 75 148/10.2 93/6.4 90/6.2 88/6.1 86/5.9<br />
176 / 80 157/10.8 99/6.8 94/6.5 93/6.4 90/6.2<br />
187 / 85 167/11.5 104/7.2 100/6.9 99/6.8 96/6.6<br />
198 / 90 177/12.2 110/7.6 106/7.3 103/7.1 100/6.9<br />
210 / 95 186/12.8 116/8.0 110/7.6 109/7.5 104/7.2<br />
220 / 100 122/8.4 116/8.0 113/7.8 109/7.5<br />
232 / 105 128/8.4 122/8.4 119/8.2 113/7.8<br />
245 / 110 133/9.2 126/8.7 123/8.5 117/8.1<br />
4.2 Dämpfung<br />
<strong>DT</strong> <strong>Swiss</strong> Federgabeln werden mit Öl gedämpft. Unterschieden wird zwischen:<br />
• Zugstufendämpfung: Dämpfung beim Ausfedern der Gabel<br />
• Druckstufendämpfung: Dämpfung beim Einfedern der Gabel<br />
Modell Einstellbare Zugstufendämpfung Einstellbare Druckstufendämpfung<br />
<strong>DT</strong> <strong>Swiss</strong> XR-Modelle x x (Nur Twin Shot)<br />
<strong>DT</strong> <strong>Swiss</strong> XM-Modelle x x (Nur Twin Shot)<br />
<strong>DT</strong> <strong>Swiss</strong> EX-Modelle x x
4.2.1 SINGLE SHOT<br />
4.2.1.1 EINSTELLUNG DER ZUGSTUFENDÄMPFUNG<br />
Zum Einstellen der Zugstufendämpfung das rote Verstellrad auf dem rechten Gabelholm drehen. Im Uhrzeigersinn wird die<br />
Zugstufendämpfung erhöht, gegen den Uhrzeigersinn verringert.<br />
4.2.1.2 LOCK OUT<br />
Das Lockout ist eine Verriegelung der Druckstufe. Das Einfedern der Gabel wird verhindert. Ein Überdruckventil schützt das<br />
System vor Beschädigung bei starken Schlägen, wenn die Lockout Funktion aktiviert ist. Beim Öffnen des Überdruckventils<br />
kann ein Pfeifen wahrgenommen werden. Dieses Geräusch bedeutet keine Fehlfunktion.<br />
Durch Umlegen des Hebels von Position 1 auf Position 2 wird das Lockout aktiviert.<br />
Pos 1 Pos 2<br />
Single Shot<br />
Lockout offen<br />
Single Shot<br />
Lockout geschlossen<br />
4.2.1.3 REMOTE LOCK OUT<br />
BEDIENUNG<br />
Zum Aktivieren der Lockout Funktion den Hebel an der Lenkerfernbedienung in Position 2 drücken, zum Deaktivieren den<br />
Hebel wieder in Position 1 drücken.<br />
EINSTELLUNG<br />
• Schalten Sie die Lockout Funktion mit dem Hebel an der Lenkerfernbedienung aus. Das Kabel des Remote Lockouts ist<br />
entspannt.<br />
• Setzen Sie das Rändelrad zur Kabelhüllenverlängerung in seine Ausgangsposition zurück, indem Sie dieses bis zum Anschlag<br />
einschrauben.<br />
• Verlängern Sie die Kabelhülle schrittweise, indem Sie das Rändelrad im Gegenuhrzeigesinn ausschrauben.<br />
• Kontrollieren Sie die Funktion des Lockouts durch Umlegen des Hebels an der Lenkerfernbedienung in Position 2. Sobald<br />
die Gabel das erwünschte Blockieren zeigt, ist die korrekte Position des Rändelrads erreicht.<br />
Pos 1 Pos 2<br />
Single Shot<br />
Lockout offen<br />
Single Shot<br />
Lockout geschlossen<br />
53<br />
ENGLISH<br />
FRANCAIS<br />
DEUTSCH
4.2.2 TWIN SHOT<br />
4.2.2.1 EINSTELLUNG DER ZUGSTUFENDÄMPFUNG<br />
Zum Einstellen der Zugstufendämpfung das rote Verstellrad auf dem rechten Gabelholm drehen. Im Uhrzeigersinn wird die<br />
Zugstufendämpfung erhöht, gegen den Uhrzeigersinn verringert.<br />
4.2.2.2 EINSTELLUNG DER DRUCKSTUFENDÄMPFUNG<br />
Zum Einstellen der Druckstufendämpfung das blaue Verstellrad am oberen Ende des rechten Gabelholms drehen. Im Uhrzeigersinn<br />
wird die Druckstufendämpfung erhöht, gegen den Uhrzeigersinn verringert.<br />
4.2.2.3 LOCK OUT<br />
Durch Umlegen des Hebels von Position 1 in Position 2 wird zunächst das Zugstufenlockout aktiviert.<br />
Hierdurch wird ein Ausfedern der Gabel verhindert.<br />
Die Gabel senkt sich bei Belastung des Vorderrads dauerhaft bis zu einem Drittel ihres Federwegs ab und fährt bei weiterer<br />
Belastung immer wieder auf diesen Wert zurück.<br />
INFORMATION<br />
Nach dem Einfedern kann das Gabelunterteil noch einige Sekunden lang langsam ausfedern, bis die Gabel ihre Ruheposition<br />
gefunden hat. Dieser «Ausfederweg» kann 6-8mm betragen.<br />
Durch Umlegen des Hebels in Position 3 wird zusätzlich das Druckstufenlockout aktiviert.<br />
Dadurch wird die Gabel in jeder gewünschten Position zwischen 0 und 1/3 des Federweges komplett blockiert.<br />
INFORMATION<br />
Als Schutz vor Überlasten besitzt das Druckstufenklockout ein Blow-Off !<br />
Da bei aktiviertem Druckstufenlockout auch das Zugstufenlockout geschlossen ist, sinkt die Gabel beim Öffnen des Blow-off-<br />
Ventils dauerhaft etwas ein.<br />
Zum Erreichen der ursprünglichen Gabelhöhe müssen beide Lockoutventile geöffnet (Lockouthebel in Position 1) und anschliessend<br />
wieder geschlossen werden (Lockouthebel in Stufen oder in einem Schritt in Position 3).<br />
Pos 1<br />
Lockout offen<br />
54<br />
Pos 2<br />
Zugstufenlockout<br />
aktiviert<br />
Pos 3<br />
Druckstufenlockout<br />
aktiviert
4.2.2.4 REMOTE LOCK OUT<br />
BEDIENUNG<br />
Zum Aktivieren der Zugstufenlockout Funktion den Hebel an der Lenkerfernbedienung in Position 2 drücken, zum Deaktivieren<br />
den Hebel wieder in Position 1 drücken.<br />
Zum zusätzlichen Aktivieren des Druckstufenlockouts den Hebel an der Lenkerfernbedienung in Position 3 drücken, zum Deaktivieren<br />
den Hebel wieder in Position 1 drücken. Beim Auslösen überspringt der Hebel Position 2 und schaltet direkt nach Position 1.<br />
EINSTELLUNG<br />
• Schalten Sie die Lockout Funktion mit dem Hebel an der Lenkerfernbedienung auf Position 1. Das Kabel des Remote Lockouts<br />
ist entspannt.<br />
• Setzen Sie das Rändelrad zur Kabelhüllenverlängerung in seine Ausgangsposition zurück, indem Sie dieses bis zum Anschlag<br />
einschrauben.<br />
• Verlängern Sie die Kabelhülle schrittweise, indem Sie das Rändelrad ausschrauben.<br />
• Kontrollieren Sie die Funktion des Lockouts durch Umlegen des Hebels an der Lenkerfernbedienung in Position 3. Sobald<br />
die Gabel das erwünschte Blockieren zeigt, ist die korrekte Position des Rändelrads erreicht.<br />
Pos 1 Pos 2 Pos 3<br />
Lockout offen Zugstufenlockout aktiviert<br />
(nur Twin Shot)<br />
Zugstufenlockout<br />
aktiviert<br />
4.2.3 LAUNCH CONTROL<br />
INFORMATION<br />
Bei waagrechter oder umgekehrter Lagerung der Gabeln gerät Luft in die Ölkammer der Dämpfung. Die Dämpfung bzw. die<br />
Launch Control Funktion arbeiten nicht richtig. Durch mehrmaliges kräftiges Komprimieren der Gabel in aufrechter Position<br />
wird die Ölkammer entlüftet. Die Dämpfung bzw. Launch Control Funktion arbeiten wieder einw<strong>and</strong>frei.<br />
4.2.3.1 EINSTELLUNG DER ZUGSTUFENDÄMPFUNG<br />
Zum Einstellen der Zugstufendämpfung das rote Verstellrad auf dem rechten Gabelholm drehen. Im Uhrzeigersinn wird die<br />
Zugstufendämpfung erhöht, gegen den Uhrzeigersinn verringert.<br />
4.2.3.2 EINSTELLUNG DER DRUCKSTUFENDÄMPFUNG<br />
Zum Einstellen der Druckstufendämpfung das blaue Verstellrad am unteren Ende des rechten Gabelholms drehen. Die Drehrichtung<br />
wird auf dem Ausfallende durch +/– Zeichen angegeben<br />
+ Erhöhen der Druckstufendämpfung<br />
– Verringern der Druckstufendämpfung<br />
55<br />
ENGLISH<br />
FRANCAIS<br />
DEUTSCH
4.2.3.3 LAUNCH CONTROL UND THRESHOLD VERSTELLUNG<br />
INFORMATION<br />
Bei vollständig geschlossener Druckstufendämpfung, kann eventuell die Launch Control Funktion auf der niedrigsten Auslösehärte<br />
nicht funktionieren. Verringern sie in diesem Fall die Druckstufendämpfung über das blaue Verstellrad am unteren Ende<br />
des rechten Gabelholms oder erhöhen sie die Auslösehärte der Launch Control Funktion über den nickelfarbigen Einstellhebel<br />
(Threshold Adjuster).<br />
• AKTIVIEREN:<br />
Den roten Drehknopf auf den rechten Gabelholm vollständig nach unten drücken und die Gabel komprimieren. Nach starkem<br />
Komprimieren wird die Gabel bis zu einem fest definierten Niveau ausfedern.<br />
• DEAKTIVIEREN:<br />
VORSICHT<br />
Beim manuellen Deaktivieren der Launch Control Funktion kann die Gabel schnell ausfedern. Der Kopf des Fahrers darf sich<br />
nicht unmittelbar über dem Lenker oder dem Vorbau befinden<br />
Die Auslösehärte der Launch Control Funktion ausschliesslich im Stillst<strong>and</strong> einstellen!<br />
Die Launch Control Funktion kann manuell oder automatisch deaktiviert werden.<br />
Die Auslösehärte kann über den nickelfarbigen Einstellhebel (Threshold Adjuster) eingestellt werden. Beim Drehen im Uhrzeigersinn<br />
wir die Auslösehärte erhöht, im Gegenuhrzeigersinn verringert.<br />
• Manuell: Den roten Drehknopf auf dem rechten Gabelholm herausziehen. Die Gabel federt vollständig aus.<br />
• Automatisch: Durch schnelles Komprimieren der Gabel (z.B. beim Überfahren eines Hindernisses) wird die Launch Control<br />
Funktion deaktiviert.<br />
5 TROUBLE SHOOTING<br />
5.1 EINLAUFZEIT<br />
Im Neuzust<strong>and</strong> der Gabel müssen sich gewisse Bauteile einlaufen und setzen. Insbesondere die Führungsbuchsen der Gabel<br />
können im Neuzust<strong>and</strong> noch ein erhöhtes Losbrechmoment erzeugen. Die Gabel kann sich dadurch unkomfortabel anfühlen.<br />
Nach ungefähr 20 Stunden Fahrzeit sind die Führungsbuchsen eingelaufen und dieser Effekt verschwindet.<br />
5.2 VOR JEDER FAHRT<br />
Untersuchen Sie die Gabel auf äußerlich sichtbare Beschädigungen wie Risse und tiefe Kratzer. Achten Sie bei langsamer Fahrt<br />
in sicherem Gelände auf ungewöhnliche Geräusche z.B. beim Einfedern der Gabel oder beim Bremsen.<br />
Trifft eines der beschriebenen Ereignisse ein, wenden Sie sich an Ihren Händler oder das <strong>DT</strong> <strong>Swiss</strong> Service Center, um das<br />
Problem zu beheben.<br />
5.3 NACH JEDEM STURZ<br />
Nach einem Sturz ist die Gefahr einer Beschädigung der Gabel gross. Kontrollieren Sie die Gabel nach jedem Sturz genau.<br />
• Optische Kontrolle: Kontrollieren Sie die Gabel auf Beschädigungen wie Risse, Brüche, Ölaustritte, Kratzer usw.<br />
• Funktionskontrolle: Kontrollieren Sie alle Funktionen wie Dämpfung, Federung und Lockout bzw. Launch Control auf<br />
korrekte Funktion.<br />
• Akustische Kontrolle: Achten Sie bei langsamer Fahrt in sicherem Gelände auf ungewöhnliche Geräusche z.B. beim Einfedern<br />
der Gabel oder beim Bremsen.<br />
VORSICHT<br />
Nicht mit einer beschädigten Gabel weiter fahren! Wenden Sie sich an Ihren Händler oder das <strong>DT</strong> <strong>Swiss</strong> Service Center um den<br />
Schaden beheben zu lassen.<br />
5.4 BUCHSENSPIEL <strong>DT</strong> SWISS GABELN<br />
<strong>DT</strong> <strong>Swiss</strong> Gabeln verwenden eine Gleitlagerung mit Ölschmierung. Die Funktion den Buchsen ist auf den Fahrbetrieb ausgelegt<br />
unter Berücksichtigung von optimaler Schmierung, Ausdehnung der Bauteile infolge Erwärmung, Fertigungstoleranzen<br />
und den auftretenden Belastungen. Ein solches Buchsenspiel ist für die korrekte Funktion der Gabel notwendig und kann<br />
spürbar sein. Ein allfällig vorh<strong>and</strong>enes Buchsenspiel bedeutet nicht zwangsläufig übermässigen Verschleiss.<br />
56
5.5 EINSTELLUNGSTIPPS<br />
Für alle Modelle gelten folgende Einstellungstipps:<br />
Problem Ursache Tipp<br />
Gabel spricht schlecht an. Die Gabel ist noch nicht eingefahren Weiter fahren bis die Einlaufzeit<br />
vorbei ist<br />
Gabel schlägt schon bei mäßig harten<br />
Schlägen durch.<br />
Gabel federt bei schnell aufein<strong>and</strong>erfolgenden<br />
Schlägen nicht mehr aus,<br />
verhärtet sich.<br />
Gabel federt zu schnell aus, Vorderrad<br />
verliert Bodenkontakt/schiebt in<br />
Kurven.<br />
FEDERUNG<br />
Gabel federt beim Verringern des<br />
Luftdrucks ein<br />
SINGLE SHOT<br />
Die Gabel verliert ihre Dämpfungseigenschaften<br />
und macht laute<br />
Sauggeräusch<br />
Druckstufendämpfung ist<br />
zu stark geschlossen.<br />
Die Druckstufendämpfung verringern.<br />
Zu hoher Luftdruck. Luftdruck mittels Dämpferpumpe<br />
kontrolliert verringern.<br />
Die Gabel braucht einen<br />
Schmieröl-Service<br />
Druckstufendämpfung ist<br />
zu stark geöffnet.<br />
Wenden Sie sich an Ihren Händler oder<br />
das <strong>DT</strong> <strong>Swiss</strong> Service Center, um das<br />
Schmieröl zu wechseln.<br />
Die Druckstufendämpfung erhöhen.<br />
Zu niedriger Luftdruck. Luftdruck mittels Dämpferpumpe<br />
kontrolliert erhöhen.<br />
Zugstufendämpfung ist<br />
zu stark geschlossen.<br />
Zugstufendämpfung ist<br />
zu stark geöffnet.<br />
Die Zugstufendämpfung verringern.<br />
Die Zugstufendämpfung erhöhen.<br />
Zu rasches Verringern des Luftdrucks. Luftdruck mittels Dämpferpumpe<br />
kontrolliert erhöhen bis zum ursprünglichen<br />
Luftdruck oder die Gabel manuell<br />
ausein<strong>and</strong>er ziehen und kurze Zeit<br />
im Anschlag halten. Danach Luftdruck<br />
mittels Dämpferpumpe kontrolliert<br />
verringern.<br />
Die Luftkammer der Dämpfungseinheit<br />
ist nicht mehr unter Druck<br />
Wenden Sie sich an Ihren Händler oder<br />
das <strong>DT</strong> <strong>Swiss</strong> Service Center, um das<br />
Problem zu beheben.<br />
Das Lock Out funktioniert nicht mehr Ölkanäle im Inneren Systems undicht. Wenden Sie sich an Ihren Händler oder<br />
das <strong>DT</strong> <strong>Swiss</strong> Service Center, um das<br />
Problem zu beheben.<br />
TWIN SHOT<br />
Bei aktivierter Absenkung (Hebel in<br />
Mittelposition) federt die Gabel langsam<br />
wieder aus.<br />
Bei aktivierter Absenkung (Hebel in<br />
Mittelposition) federt die Gabel schnell<br />
wieder aus.<br />
Zug- oder Druckstufenventile «fließen»<br />
(Blockierung funktioniert nicht<br />
richtig).<br />
6-8mm «Ausfederung» bis zum vollständigen<br />
Schließen des Bypass-Kanals<br />
Normaler Rückfluss durch Mikrospalte<br />
im Dämpferkopf<br />
Konstruktionsbedingter Effekt, der die<br />
Gesamtperformance nicht beeinträchtigt<br />
Ein vollständiges Ausfedern in mehr<br />
als einer Stunde wird als akzeptabel<br />
angesehen.<br />
Ölkanäle im Inneren Systems undicht. Wenden Sie sich an Ihren Händler oder<br />
das <strong>DT</strong> <strong>Swiss</strong> Service Center, um das<br />
Problem zu beheben.<br />
57<br />
ENGLISH<br />
FRANCAIS<br />
DEUTSCH
58<br />
LAUNCH CONTROL<br />
Die Dämpfung sowie die Launch Control<br />
Funktion arbeiten nicht richtig<br />
Trotz aktivierten Launch Control Funktion<br />
federt die Gabel langsam aus.<br />
Der Drehknopf zur Aktivierung der<br />
Launch Control Funktion springt beim<br />
Komprimieren der Gabel in seine<br />
Ursprungsposition zurück.<br />
Die Gabel schnellt bei kleinsten Schlägen<br />
in ihren ausgefederten Zust<strong>and</strong><br />
zurück.<br />
Trotz großem Schlag, bleibt das Launch<br />
Control aktiviert und die Gabel in<br />
eingefedertem Zust<strong>and</strong><br />
REMOTE LOCKOUT<br />
Der Lock Out Hebel arbeitet nicht<br />
korrekt<br />
Die Lock Out Funktion arbeitet korrekt,<br />
jedoch bleibt der Hebel nicht in<br />
der gewünschten Position<br />
Das Lockout Kabel ist<br />
defekt.<br />
Luft befindet sich in der Ölkammer. Die Gabel mehrmals kräftig komprimieren,<br />
damit die Luft aus der Ölkammer<br />
entweichen kann<br />
Luft befindet sich in der Ölkammer. Die Gabel mehrmals kräftig komprimieren,<br />
damit die Luft aus der Ölkammer<br />
entweichen kann<br />
Dichtring ist defekt. Der defekte Dichtungsring muss vom<br />
<strong>DT</strong> <strong>Swiss</strong> Service Center ausgewechselt<br />
werden.<br />
Normaler Rückfluss durch Mikrospalte<br />
im Dichtring<br />
Die Auslösehärte ist zu schwach<br />
eingestellt.<br />
Ein vollständiges Ausfedern in mehr<br />
als einer Stunde wird als akzeptabel<br />
angesehen.<br />
Die Auslösehärte durch Drehen des<br />
nickelfarbigen Einstellhebel im Uhrzeigersinn<br />
erhöhen.<br />
Die Druckstufe ist ganz zu geschraubt Öffnen Sie die Druckstufe ein paar<br />
Klicks<br />
Die Auslösehärte ist zu hart eingestellt Die Auslösehärte durch Drehen des<br />
nickelfarbigen Einstellhebel im Gegenuhrzeigersinn<br />
verringern.<br />
Die Gleitfläche des Hebels ist schmutzig<br />
oder nicht gut geschmiert<br />
Das Lock Out Kabel ist<br />
zu stark vorgespannt.<br />
Die Rasterung im Hebel ist<br />
abgenützt.<br />
Dies kann diverse Ursachen wie<br />
Sturzfolgen, starke Verschmutzung,<br />
Verschleiß usw. haben.<br />
Den Hebel am Lenker mit Wasser gut<br />
waschen und mit Öl schmieren.<br />
Das Rändelrad zur Kabellängenveränderung<br />
einschrauben, so dass sich die<br />
Kabelspannung verringert. Gleichzeitig<br />
probieren, ob der Hebel in der<br />
gewünschten Position bleibt.<br />
Wenden Sie sich an Ihren Händler oder<br />
das <strong>DT</strong> <strong>Swiss</strong> Service Center, um den<br />
Hebel auswechseln zu lassen.<br />
Wenden Sie sich an Ihren Händler oder<br />
das <strong>DT</strong> <strong>Swiss</strong> Service Center, um das<br />
Lock Out Kabel auswechseln zu lassen.
6 PFLEGE UND WARTUNG<br />
Um eine lange Haltbarkeit Ihres Produktes zu gewähren, beachten Sie folgende Regeln zur Pflege:<br />
• Reinigen Sie die Gabel mit einem feuchten Lappen. Entfernen Sie im Bereich des Überganges St<strong>and</strong>rohr/Tauchrohr jegliche<br />
Schmutzansammlungen.<br />
• Verwenden Sie keine aggressiven Reinigungsmittel, welche den Gummi der Abstreifringe angreifen können!<br />
• Benutzen Sie zur Reinigung keinen Hochdruckreiniger, da dabei Wasser in die Gabel eindringen und deren Funktion beeinträchtigen<br />
kann!<br />
• Entfernen Sie äußerlich sichtbare, eingetrocknete Schmutzreste im Bereich der Abstreifringe. Somit wird ein vorzeitig mögliches<br />
Eindringen von Schmutz ins Innere der Gabel vermieden.<br />
• Ein zusätzliches Schmieren der Gabel im Bereich der Abstreifringe von außen ist nicht nötig. Um die Schmierung der Gabel<br />
zu gewährleisten, kann man regelmässig das Fahrrad / die Gabel auf dem Kopf stellen.<br />
• Nach dem Reinigen, schmieren Sie regelmäßig die Gleitfläche des Remote-Hebels.<br />
INFORMATION<br />
Bei Nichteinhaltung der Serviceintervalle können Garantieansprüche erlöschen.<br />
Um Ihnen einen möglichst langen Fahrspaß und größtmögliche Sicherheit zu ermöglichen, muss Ihre <strong>DT</strong> <strong>Swiss</strong> Federgabel einem<br />
regelmäßigen Service unterzogen werden. Wenn Sie das Fahrrad extrem belasten, müssen Sie die Komponente häufiger warten.<br />
Die ganze Gabel waschen,<br />
nur mit sanfter Seife<br />
und Wasser<br />
Die ganze Gabel auf Beschädigung,<br />
Kratzer oder Risse<br />
überprüfen<br />
Luftdruck prüfen x<br />
Der Remote Hebel am Lenker<br />
prüfen und schmieren<br />
Anzugsmomente von<br />
sämtlichen schrauben der<br />
Anbauteile prüfen<br />
Tauchrohre ausbauen, Buchsen<br />
prüfen und Schmieröl<br />
wechseln<br />
ABS Federung prüfen und<br />
schmieren<br />
Grösser Service im <strong>DT</strong> <strong>Swiss</strong><br />
Service Center<br />
Nach jeder Fahrt Nach 50 Stunden Jährlich<br />
x<br />
x<br />
x<br />
x<br />
x<br />
x<br />
x<br />
59<br />
ENGLISH<br />
FRANCAIS<br />
DEUTSCH
7 <strong>DT</strong> SWISS SERVICE CENTER<br />
Sie finden alle <strong>DT</strong> <strong>Swiss</strong> Service Center unter www.dtswiss.com.<br />
8 GARANTIE<br />
8.1 GARANTIEBESTIMMUNGEN EUROPA<br />
Ihnen stehen die gesetzlichen Gewährleistungsansprüche wegen eines Produktmangels gegenüber Ihrem Vertragspartner<br />
(Händler) zu. Über diese Gewährleistungsansprüche hinaus gewährt <strong>DT</strong> <strong>Swiss</strong> AG mit Sitz in Biel (Schweiz) für die <strong>DT</strong> <strong>Swiss</strong><br />
Starrgabel ab Kaufdatum 2 Jahre (24 Monate) Garantie. Gewährleistungs- und Garantie-Ansprüche können nur mit gültiger<br />
Kaufquittung und nur durch den Erstkäufer geltend gemacht werden.<br />
INFORMATION<br />
Kein Anspruch auf Garantieleistung besteht bei:<br />
• Normaler Abnutzung oder starker Alterung von Verschleißteilen (Führungen, Dichtungen, deren Laufflächen, Funktions-<br />
Elemente der Federung und Dämpfung, Bedienelemente, Aufkleber usw.)<br />
• Unsachgemäßer Montage oder in Verbindung mit nicht passenden Produkten<br />
• Unsachgemäße Inst<strong>and</strong>haltung, unsachgemäßer Reparatur oder Veränderungen<br />
• Unsachgemäßem Gebrauch, unsorgfältiger Beh<strong>and</strong>lung, Missbrauch, Nachlässigkeit, leichter und grober Fahrlässigkeit bei<br />
Montage, Wartung und Benutzung, kommerzieller Gebrauch oder Einsatz in Wettkämpfen<br />
• Lieferungs- und Transportschäden<br />
• Änderung, Unkenntlichmachung oder Entfernung der Seriennummer<br />
<strong>DT</strong> <strong>Swiss</strong> AG haftet aus dieser Garantie nicht auf Schadensersatz, insbesondere nicht für indirekte Schäden, mittelbare -Schäden<br />
und Folgeschäden. Zwingende gesetzliche Haftungsregelungen bleiben von dieser Garantie unberührt. Sollten -Arbeiten<br />
unter dieser Garantie nötig werden, wenden Sie sich an das Geschäft, in dem die <strong>DT</strong> <strong>Swiss</strong> Federgabel erworben -wurde. <strong>DT</strong><br />
<strong>Swiss</strong> Federgabeln, die zur Überprüfung eingeschickt werden, sind frachtfrei an ein <strong>DT</strong> <strong>Swiss</strong> Service Center zu schicken.<br />
Gerichtsst<strong>and</strong> und Erfüllungsort ist Biel (Schweiz). Es gilt schweizerisches Recht. Technische Änderungen vorbehalten. Bitte<br />
bewahren Sie diese Bedienungsanleitung und Garantiebestimmungen für künftige Verwendungen auf.<br />
60
61<br />
ENGLISH<br />
FRANCAIS<br />
DEUTSCH
63<br />
ENGLISH<br />
FRANCAIS<br />
DEUTSCH
<strong>DT</strong> <strong>Swiss</strong> AG<br />
Längfeldweg 101<br />
CH - 2504 Biel/Bienne<br />
Phone +41 (0)32 344 79 30<br />
Fax +41 (0)32 344 62 62<br />
Mail: info.ch@dtswiss.com<br />
<strong>DT</strong> <strong>Swiss</strong>, Inc.<br />
2493 Industrial Blvd.<br />
USA - Gr<strong>and</strong> Junction, CO 81505<br />
Phone +1 (970) 242 92 32<br />
Fax +1 (970) 244 89 18<br />
Mail: info.us@dtswiss.com<br />
<strong>DT</strong> <strong>Swiss</strong> (France) S.A.S.<br />
Parc d‘Activites de la SARREE<br />
Route de Gourdon<br />
F - 06620 Le Bar sur Loup<br />
Phone +33 (4) 926 09 058<br />
Fax +33 (4) 934 00 875<br />
Mail: info.fr@dtswiss.com<br />
<strong>DT</strong> <strong>Swiss</strong> (Asia) Ltd.<br />
No. 26, 21st Road Industrial Park<br />
Taichung City<br />
Taiwan R.O.C<br />
Phone +886 (423) 585256<br />
Fax +886 (423) 598290<br />
Mail: info.tw@dtswiss.com<br />
www.dtswiss.com<br />
printed on 100% recycling paper FXWXXX0X2012GBXXXS / 201103