Cordless Reel Mower Tondeuse à main électrique sur ... - Mantis
Cordless Reel Mower Tondeuse à main électrique sur ... - Mantis
Cordless Reel Mower Tondeuse à main électrique sur ... - Mantis

You also want an ePaper? Increase the reach of your titles
YUMPU automatically turns print PDFs into web optimized ePapers that Google loves.
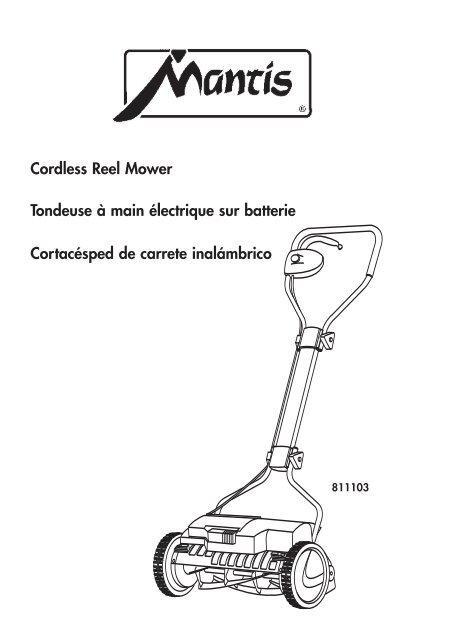
<strong>Cordless</strong> <strong>Reel</strong> <strong>Mower</strong><br />
<strong>Tondeuse</strong> <strong>à</strong> <strong>main</strong> <strong>électrique</strong> <strong>sur</strong> batterie<br />
Cortacésped de carrete inalámbrico<br />
811103
Contents – Contenu – Indice de materias<br />
2<br />
GB<br />
Please read these operating<br />
instructions carefully before<br />
assembling and using your<br />
machine.<br />
1. Operating parts 3<br />
2. Technical data 7<br />
3. Notes on Safety<br />
4. Notes on these operating<br />
8<br />
instructions 11<br />
5. Proper Use 11<br />
6. Assembly 12<br />
7. Putting into operation<br />
8. Information concerning<br />
13<br />
correct mowing 14<br />
9. Maintenance / care / storage15<br />
10. Troubleshooting<br />
11. Instructions for correct<br />
17<br />
use / safety instructions 18<br />
12. Disposal / recycling 19<br />
Warranty 19<br />
FR<br />
Nous vous remercions de bien<br />
vouloir lire attentivement ce<br />
mode d’emploi avant le montage<br />
et l’utilisation de votre machine.<br />
1. Pièces de fonctionne-ment 3<br />
2. Caractéristiques techniques 7<br />
3. Consignes de sécurité 8<br />
4. Informations <strong>sur</strong> le mode<br />
d’emploi 21<br />
5. Utilisation conforme 21<br />
6. Montage 22<br />
7. Mise en service 23<br />
8. Conseils pour tondre<br />
correctement 24<br />
9. Entretien et rangement 25<br />
10. Dépannage 27<br />
11. Conseils de sécurité et<br />
précautions d’emploi 28<br />
12. Mise au rebut / Recyclage 29<br />
Garantie 29<br />
ES<br />
Antes de montar la herramienta<br />
y de ponerla en marcha lea<br />
atentamente estas instrucciones<br />
de uso.<br />
1. Componentes 3<br />
2. Datos técnicos 7<br />
3. Indicaciones de seguridad<br />
4. Indicaciones al manual de<br />
8<br />
instrucciones 31<br />
5. Uso previsto 31<br />
6. Montaje 32<br />
7. Puesta en servicio 33<br />
8. Cortar correctamente<br />
9. Mantenimiento, limpieza,<br />
34<br />
almacenamiento 35<br />
10. Solución de averías<br />
11. Indicaciones para el uso<br />
37<br />
adecuado / Indicaciones de<br />
seguridad 38<br />
12. Eliminación / Reciclaje 39<br />
Garantía 39
1. Operating parts – Pièces de fonctionnement – Componentes<br />
A<br />
5<br />
10<br />
11<br />
8<br />
25<br />
17<br />
12<br />
B C<br />
7<br />
B1<br />
7<br />
1<br />
9<br />
2<br />
14<br />
4<br />
13<br />
3<br />
6<br />
3
4<br />
D E F<br />
G H I<br />
13<br />
J K L<br />
13<br />
9<br />
M N<br />
12<br />
8<br />
E1<br />
8<br />
15<br />
16<br />
14<br />
24<br />
20<br />
21<br />
22<br />
20<br />
21<br />
23<br />
20<br />
O
GB<br />
1 Lower section of the guide<br />
handle<br />
2 Middle section of the guide<br />
handle<br />
3 Upper section of the guide<br />
handle<br />
4 Clamping grip<br />
5 Frame clamping screw to<br />
fix guide transom<br />
6 Opening for snug from or<br />
on handle bolts<br />
7 Handle bolts<br />
8 Cable clamp<br />
9 Fixing nuts<br />
10 Battery<br />
11 Contact bar<br />
12 Adjusting handles<br />
13 Washer<br />
14 Cable<br />
15 Release knob<br />
16 Starting handle<br />
17 On / off switch<br />
18 Cover for harness<br />
compartment<br />
19 Cutting height marking<br />
20 Hexagon thread bolt (to<br />
adjust cutting tool)<br />
21 Thickness gauge<br />
22 Charger<br />
23 Plug for charger<br />
24 Charging socket in Battery<br />
25 Cable Clamp<br />
FR<br />
1 Partie inférieure du guidon<br />
2 Partie centrale du guidon<br />
3 Partie supérieure du guidon<br />
4 Poignée de serrage <strong>à</strong> tige<br />
5 Vis de tension du montant<br />
pour bloquer le longeron de<br />
guidage<br />
6 Evidement pour ergot d'arrêt<br />
du / <strong>sur</strong> boulon de guidon<br />
7 Boulon de guidon<br />
8 Serre-câble<br />
9 Ecrous de blocage<br />
10 Batterie<br />
11 Rail contact<br />
12 Manettes de réglage<br />
13 Rondelle<br />
14 Câble<br />
15 Bouton de déverrouillage<br />
16 Démarreur<br />
17 Interrupteur Marche / Arrêt<br />
18 Couvercle du compartiment<br />
du faisceau<br />
19 Repère de la hauteur de<br />
coupe<br />
20 Vis hexagonale<br />
(réajustement de l'outil de<br />
coupe)<br />
21 Jauge d'épaisseur<br />
22 Chargeur de batteries<br />
23 Fiche du chargeur<br />
24 Prise de charge de la<br />
batterie<br />
25 Serre-câble<br />
ES<br />
1 Sección inferior de las<br />
varillas guía<br />
2 Sección media de las<br />
varillas guía<br />
3 Sección superior de las<br />
varillas guía<br />
4 Asa de apriete de la barra<br />
5 Tornillo tensor para<br />
inmovilizar el manillar<br />
6 Orifico para enganche del<br />
saliente de y a los tornillos<br />
de las varillas.<br />
7 Tornillos de las varillas<br />
8 Sujetacables<br />
9 Tuercas de ajuste<br />
10 Batería<br />
11 Riel de contacto<br />
12 Manijas de ajuste<br />
13 Arandela<br />
14 Cable<br />
15 Botón de desenganche<br />
16 Manija de arranque<br />
17 Interruptor<br />
18 Compartimento para la<br />
correa en la tapa<br />
19 Marcas de altura de corte<br />
20 Tornillo hexagonal (ajuste<br />
de la cuchilla)<br />
21 Galga de rendijas<br />
22 Aparato de carga<br />
23 Enchufe del cargador<br />
24 Casquillo de carga en la<br />
batería<br />
25 Sujetacables<br />
5
2. Technical data – Caractéristiques techniques – Datos técnicos<br />
GB<br />
Power Unit<br />
Battery 20 x 1.2 V NiCd<br />
Voltage / Capacity 24 V / 2.0 Ah<br />
Weight approx. 3 lb.<br />
Number of possible charges approx. 1,000<br />
times<br />
Charger<br />
Voltage 120 V / 100 mA<br />
Charging time 12 – 24 hours<br />
Weight .44 lb.<br />
FR<br />
Bloc d’alimentation<br />
Batterie 20 x 1,2 V NiCd<br />
Tension/Capacité 24 V / 2,0 Ah<br />
Poids 1,4 kg environ<br />
Nombre de recharges possibles 1 000 environ<br />
Chargeur<br />
Tension 120 V / 100 mA<br />
Temps de charge 12 <strong>à</strong> 24 heures<br />
Poids 0,2 kg (0.44 lb)<br />
ES<br />
Unidad de alimentación<br />
Batería 20 x 1,2 V NiCd<br />
Voltaje/capacidad 24 V / 2,0 Ah<br />
Peso aprox. 1,4 kg<br />
Número de cargas posibles aprox. 1.000<br />
veces<br />
Terminal de recarga<br />
Voltaje 120 V / 100 mA<br />
Duración de carga 12 <strong>à</strong> 24 horas<br />
Peso 0,2 kg<br />
<strong>Cordless</strong> <strong>Reel</strong> <strong>Mower</strong><br />
Width of the cutting cylinder 15”<br />
Weight without Battery approx. 21 lb.<br />
Working area related emission characteristic value<br />
L pA 1) 69 dB (A)<br />
Guaranteed noise level L WA 2) 86 dB (A)<br />
Mea<strong>sur</strong>ed noise level L WA 2) 82.2 dB (A)<br />
Hand-Arm vibrations a vhw 1) < 2.5 m/s 2<br />
Mea<strong>sur</strong>ing method according to 1) EN 836 2) 2000/14/EC<br />
<strong>Tondeuse</strong> <strong>à</strong> <strong>main</strong> <strong>électrique</strong> <strong>sur</strong> batterie<br />
Largeur du cylindre de coupe 38 cm<br />
Poids sans batterie 9,5 kg environ<br />
Paramètre d’émission L pA 1) <strong>sur</strong> le lieu de travail<br />
69 dB (A)<br />
Puissance acoustique garantie L WA 2)<br />
86 dB (A)<br />
Puissance acoustique me<strong>sur</strong>ée L WA 2)<br />
82,2 dB (A)<br />
Niveau de vibrations transmises aux <strong>main</strong>s a vhw 1)<br />
< 2,5 m/s 2<br />
Procédé de me<strong>sur</strong>e selon 1) la norme NE 836 2)<br />
la directive 2000/14/CE<br />
Cortacésped de cuchillas helicoidales<br />
Anchura del rodillo de cuchillas 38 cm<br />
Peso sin batería aprox. 9,5 kg<br />
Valor índice de emisión referido al puesto de<br />
trabajo L pA 1) 69 dB (A)<br />
Nivel sonoro garantizado L WA 2) 86 dB (A)<br />
Nivel sonoro medido L WA 2) 82,2 dB (A)<br />
Oscilación mano-brazo a vhw 1) < 2,5 m/s 2<br />
Procedimiento de medición según 1) NE 836 2) 2000/14/CE<br />
7
3. Notes on Safety – Consignes de sécurité – Indicaciones de seguridad<br />
Please adhere to the following safety instructions on the appliance:<br />
Veuillez faire attention aux consignes de sécurité figurant <strong>sur</strong> l’appareil :<br />
Preste atención a las indicaciones de seguridad del aparato:<br />
8<br />
Be extremely cautious and attentive!<br />
Faites particulièrement attention !<br />
¡Preste atención y sea especialmente cuidadoso!<br />
Read instruction handbook before starting!<br />
Merci de lire attentivement le mode d’emploi avant d’utiliser cet appareil !<br />
¡Lea las instrucciones de uso antes de la puesta en marcha!<br />
Keep bystanders away from the danger zone!<br />
Maintenez tout tiers hors de la zone de travail !<br />
¡No debe haber terceras personas dentro de la zona de peligro!<br />
Warning! Contacts should never be bridged with metal! Short-circuit – fire risk!<br />
Attention ! Les éléments de contact ne doivent jamais être reliés par du métal. Risque de court-circuit –<br />
danger d’incendie !<br />
¡Atención! ¡No deben puentear los contactos con piezas metálicas! ¡Peligro de corto circuito –<br />
incendio!<br />
Danger of damage to equipment: never clean electrical equipment under running water, in particular,<br />
do not use water under high pres<strong>sur</strong>e on it.<br />
En raison des risques d’endommagement : ne nettoyez pas les appareils <strong>électrique</strong>s sous de l'eau du<br />
robinet et évitez <strong>sur</strong>tout de le faire sous haute pression.<br />
Debido al peligro de daños en el aparato: No limpie los aparatos eléctricos bajo un chorro de agua<br />
corriente, sobre todo no lo haga a alta presión.
Ni-Cd<br />
Warning! Risk of injury. Keep fingers and feet away from sharp cutting tool!<br />
Attention ! Risque de bles<strong>sur</strong>es par l’outil de coupe – ne mettez ni <strong>main</strong>s ni<br />
pieds <strong>à</strong> proximité !<br />
¡Atención! Peligro de heridas. No acerque las manos ni los pies a las hojas<br />
afiladas.<br />
Danger! Keep hands and feet out of openings while machine is running.<br />
Attention – danger ! Tenez <strong>main</strong>s et pieds éloignés des ouvertures pendant le<br />
fonctionnement de l’appareil.<br />
¡Atención, peligro! Mantenga las manos y los pies retirados de los orificios<br />
mientras la máquina esté en movimiento.<br />
Warning! The cutting tool continues to rotata for a short time after switching<br />
off the motor!<br />
Attention ! L'outil de coupe ne s´arrête pas immédiatement !<br />
¡Atención! ¡El mecanismo de corte marcha en inercia !<br />
Warning! Remove the Power Unit from the socket before carrying out all<br />
<strong>main</strong>tenance work!<br />
Attention ! Enlevez le bloc d’alimentation avant tous travaux de<br />
<strong>main</strong>tenance !<br />
¡Atención! ¡Desconectar la unidad de alimentación antes de realizar<br />
trabajos de mantenimiento !<br />
Disposal of Ni-Cd cells only as per instructions in this booklet.<br />
Pour la mise au rebut de la batterie Ni-Cd, reportez-vous aux informations<br />
portées dans le mode d’emploi.<br />
Depositarlo en los contenedores de reciclaje según las instrucciones.<br />
9
4. Notes on these Operating Instructions<br />
Please carefully read the<br />
operating instructions and<br />
adhere to the general and safety<br />
instructions enclosed therein. Use<br />
this operating manual and the<br />
safety<br />
5. Proper Use<br />
The <strong>Mantis</strong> lawnmower is<br />
intended for cutting lawns and<br />
areas of grass in domestic<br />
gardens and allotments and not<br />
for commercial use in public<br />
areas, parks, sports stadia, on<br />
streets and in agriculture and<br />
forestry.<br />
Adherence to the instructions for<br />
use enclosed by <strong>Mantis</strong> is a precondition<br />
for the proper use of<br />
the equipment. The instructions<br />
for use also include the<br />
operating, care and<br />
<strong>main</strong>tenance instructions.<br />
instructions in order to familiarize<br />
yourself with the<br />
implement, the adjusting parts<br />
and the correct use.<br />
A<br />
Warning! The mower must<br />
not be used for trimming<br />
bushes, hedges and herbaceous<br />
plants, for cutting and chopping<br />
weeds or for mowing lawns on<br />
rooftops or in balcony boxes<br />
because of the risk of physical<br />
injury. Moreover, the machine<br />
may not be used as a shredder<br />
for cutting up tree and hedge<br />
trimmings or for rolling out<br />
uneven areas of ground.<br />
A<br />
Warning! Never allow<br />
children or other people<br />
who<br />
Keep these operating instructions<br />
in a safe place.<br />
are not familiar with these<br />
operating instructions to use this<br />
unit.<br />
Never mow your lawn if other<br />
people, especially children and<br />
pets are nearby.<br />
Local regulations may specify a<br />
minimum age for users of this<br />
type of gardening equipment.<br />
Remember that the user or<br />
operator is responsible for all<br />
accidents that occur involving<br />
other people or their property.<br />
11<br />
GB
GB<br />
6. Assembly<br />
Checking all the Parts are<br />
Included<br />
The box contains the following<br />
parts:<br />
.<strong>Cordless</strong> <strong>Reel</strong> <strong>Mower</strong><br />
.1 Battery<br />
.1 upper section of the guide<br />
handle<br />
.1 middle section of the guide<br />
handle<br />
.2 lower section of the guide<br />
handle<br />
.Assembly parts for the guide<br />
handle in a plastic bag<br />
.1 Charger (24 Volt)<br />
.1 thickness gauge<br />
.Operating instructions<br />
Fitting the Guide Handle<br />
Insert the lower section of the<br />
guiding handle (Fig. A, Pos. 1)<br />
through the opening (Fig. B, Pos.<br />
B1). The arches of the lower<br />
section of the guiding handle<br />
must point to the center of the<br />
piece of equipment. The lower<br />
section of the guiding handle is<br />
to be positioned over the handle<br />
The packaging<br />
material is made of<br />
recyclable materials.<br />
Dispose of packaging<br />
materials in<br />
accordance with regulations.<br />
12<br />
bolts (Fig. B / C, Pos. 7) with the<br />
boreholes (Fig. C, Pos. 6).<br />
Repeat this on the opposite side<br />
with the second lower section of<br />
the guiding handle.<br />
A Warning!<br />
Do not apply<br />
force during assembly.<br />
Insert the beam screw (Fig. A,<br />
Pos. 5) through the borehole of<br />
the cable clip (Fig. A, Pos. 8).<br />
Fit the middle section of the<br />
guiding handle (Fig. A, Pos. 2)<br />
together with both lower sections<br />
of the guiding handle as<br />
demonstrated in Fig. A. Where<br />
the boreholes align, insert the<br />
beam screw with the cable clip<br />
through the boreholes, position<br />
the washer on to the beam<br />
screw (Fig. A, Pos. 13) and then<br />
screw the parts together hand<br />
tight with the beam screw<br />
handle (Fig. A, Pos. 4).<br />
Take the upper section of the<br />
guiding handle and place this<br />
part as demonstrated in Fig. A<br />
Electrical appliances are not to<br />
be disposed of in the normal<br />
household waste, they must be<br />
professionally disposed of.<br />
together with the middle section<br />
of the guiding handle. Where<br />
the boreholes align, insert the<br />
beam screw with the cable clip<br />
through the boreholes, position<br />
the washer on to the beam<br />
screw (Fig. A, Pos. 13) and then<br />
screw the parts together hand<br />
tight with the beam screw<br />
handle (Fig. A, Pos. 4).<br />
Fasten the cable by pushing the<br />
clamp on to the lower part of the<br />
bar from outside (Fig. A,<br />
Pos. 25).<br />
A Warning!<br />
En<strong>sur</strong>e that the<br />
cable is not squeezed
7. Putting into operation<br />
7.1. Setting the cutting height<br />
A<br />
Warning! To prevent injury,<br />
never set the cutting height<br />
when the motor is running.<br />
Set the cutting height on the<br />
<strong>Cordless</strong> <strong>Reel</strong> <strong>Mower</strong> as follows:<br />
1. Stand the mower on a flat,<br />
solid <strong>sur</strong>face.<br />
2. Position yourself in front of the<br />
cutting height scale of the<br />
mower (fig. D).<br />
3. Loosen both fixing nuts (fig. D<br />
pos. 9).<br />
4. With both hands on the<br />
adjusting cutting height you<br />
require (fig. E / E1):<br />
Highest cutting height: 1.75”<br />
Lowest cutting height: .75”<br />
Note: Make <strong>sur</strong>e that the arrows<br />
marking the cutting height (8)<br />
show the same cutting height on<br />
both sides of the scale (fig. E / E1<br />
pos. 8).<br />
5. Re-tighten both fixing nuts<br />
(fig. D pos. 9).<br />
Note: When setting the <strong>Cordless</strong><br />
<strong>Reel</strong> <strong>Mower</strong> to a low cutting<br />
height, en<strong>sur</strong>e that the lower blade<br />
and cutting cylinder do not touch<br />
the ground if the ground is uneven.<br />
7.2.Charging the Battery<br />
For technical reasons the Battery<br />
(fig. F pos. 20) is not charged.<br />
Consequently, the unit needs to<br />
be charged before initial<br />
operation.<br />
For this exclusively use the<br />
Charger (fig. F pos. 21).<br />
Plug the charger (fig. F pos. 21)<br />
into the <strong>main</strong>s socket and then<br />
push the plug for the charger<br />
(fig. F pos. 22) into the charging<br />
socket (fig. F pos. 23) of the<br />
Battery. The charging procedure<br />
begins.<br />
En<strong>sur</strong>e you use the correct <strong>main</strong>s<br />
voltage!<br />
Charging time: approx. 24 hours<br />
for the initial charge. Afterwards,<br />
12 – 24 hours depending on the<br />
state of charge.<br />
The Battery reaches its full<br />
capacity only after numerous<br />
(approx. 5)<br />
charging/discharging processes.<br />
A<br />
Do not charge the Battery<br />
with charging equipment<br />
other than the Charger since<br />
only this charger has been<br />
specifically adapted for use with<br />
the Battery.<br />
The use of other charging units<br />
can lead to damage and injuries.<br />
The use of other charging units<br />
makes all claims for compensation<br />
null and void and releases<br />
the manufacturer from all<br />
guarantee services.<br />
A<br />
Charge the Battery for 24<br />
hours before using your<br />
<strong>Cordless</strong> <strong>Reel</strong> <strong>Mower</strong> for the first<br />
time.<br />
A<br />
The <strong>main</strong>s plug heats up<br />
slightly during the charging<br />
procedure.<br />
A<br />
Charge the Battery in a dry<br />
place and away from direct<br />
sunlight.<br />
A<br />
Never charge the Battery<br />
anywhere near easily<br />
inflammable materials.<br />
7.3. Connecting the Battery<br />
1. Open the harness<br />
compartment (fig. G pos. 13).<br />
Hold the Battery in your right<br />
hand and use your left hand<br />
to pull the harness to the left<br />
so that the ends of the<br />
harness lie flat against the<br />
Battery (fig. H).<br />
2. Push the Battery into the<br />
contact bar (fig. I pos. 24)<br />
until you hear it click into<br />
place.<br />
3. Fold the harness into loops,<br />
stow it away in the harness<br />
compartment (fig. J) and close<br />
the cover (fig. J pos. 13). This<br />
also secures the Battery in the<br />
contact bar.<br />
7.4. Starting your mower<br />
A<br />
Warning! Before starting<br />
your <strong>Cordless</strong> <strong>Reel</strong> <strong>Mower</strong><br />
check for foreign bodies in the<br />
cutting cylinder and remove if<br />
necessary.<br />
Start your <strong>Cordless</strong> <strong>Reel</strong> <strong>Mower</strong><br />
as follows:<br />
1. Stand your mower on a level<br />
part of the lawn.<br />
2. To start the motor, press and<br />
hold down the release knob<br />
(fig. K pos. 15) and with the<br />
other hand, simultaneously<br />
pull the starting handle (fig. K<br />
pos. 16) towards the cross<br />
bar.<br />
3. If you release the starting<br />
handle (fig. K pos. 16) the<br />
motor switches off again.<br />
A<br />
The switches installed by the<br />
manufacturer must not be<br />
removed or be bridged e.g.: by<br />
taping down the starting handle<br />
to the guide handle. This will<br />
prevent the mower switching off<br />
automatically, and could cause<br />
fatal injury.<br />
A<br />
Attention! Cutting cylinder<br />
continue to run for a few<br />
seconds after the motor is<br />
switched off.<br />
When working with the <strong>Cordless</strong><br />
<strong>Reel</strong> <strong>Mower</strong> the Battery heats<br />
up; this is normal and does not<br />
affect its performance.<br />
13<br />
GB
GB<br />
8. Information concerning correct mowing<br />
8.1. General remarks on the<br />
care of lawns<br />
At the beginning of the<br />
grasscutting season and with<br />
newly laid lawns, we<br />
recommend you select a<br />
relatively high cutting height<br />
(e. g. 1.75 inches) then<br />
gradually decrease the cutting<br />
height over time. To <strong>main</strong>tain a<br />
well kept lawn you should set the<br />
cutting height to approximately<br />
1 to 1.5 inches.<br />
If possible, mow your lawn once<br />
a week. When you mow your<br />
lawn frequently the short roots of<br />
the grass grow making your<br />
lawn more resistant.<br />
Always mow your lawn when it<br />
is relatively dry. To obtain a<br />
clean cut guide the <strong>Cordless</strong><br />
<strong>Reel</strong> <strong>Mower</strong> in lanes as straight<br />
as possible at a walking pace.<br />
En<strong>sur</strong>e that the lanes overlap by<br />
a few centimetres so that no<br />
uncut strips are left behind.<br />
Cut the lawn for the first time in<br />
spring when the grass begins to<br />
grow and the lawn can be<br />
walked on. If the grass has<br />
grown too long first cut it<br />
lengthwise with a high cutting<br />
height setting (approx. 1.75”)<br />
and then cut at right angles with<br />
the desired lower cutting height<br />
setting (e. g. 1 inch).<br />
The area of lawn you can mow<br />
with one charged battery<br />
depends on the height and<br />
thickness of the lawn, i.e. the<br />
taller and thicker the lawn, the<br />
smaller the area of lawn you can<br />
mow with one fully charged<br />
battery.<br />
14<br />
8.2. Mowing<br />
Tip: Only cut with a sharp<br />
cutting cylinder so that the grass<br />
is not bruised and turn yellow.<br />
For a clean cut guide the<br />
<strong>Cordless</strong> <strong>Reel</strong> <strong>Mower</strong> at an<br />
appropriate speed in lanes as<br />
straight as possible.<br />
Note: The <strong>Cordless</strong> <strong>Reel</strong> <strong>Mower</strong><br />
can be operated with the battery<br />
or without as a hand mower.<br />
A<br />
Warning: The revolving<br />
cutting cylinder can cause<br />
injuries.<br />
Always <strong>main</strong>tain the distance<br />
between the cutting cylinder and<br />
user suggested by the guide<br />
handle. When working on<br />
inclines always stand diagonally<br />
to the incline in a sturdy, safe<br />
stance.<br />
To prevent tripping, take particular<br />
care when moving<br />
backwards and when pulling the<br />
<strong>Cordless</strong> <strong>Reel</strong> <strong>Mower</strong>. You may<br />
stumble!<br />
For information on how to set<br />
the cutting height see section<br />
“Setting the cutting height“.<br />
8.3. Mowing with the grass<br />
collection box<br />
A<br />
Only attach the grass<br />
catcher when the motor is<br />
switched off and the cutting tool<br />
has stopped moving.<br />
When using a grass collection<br />
box you can save yourself<br />
having to rake up the grass<br />
afterwards. It can be obtained at<br />
specialized shops. In order to<br />
collect a good amount of grass,<br />
the lawn should be dry and you<br />
should push the mower along at<br />
a brisk pace.<br />
Note: The height of the grass<br />
catcher can be adjusted using<br />
the strap. For the best grasscatching<br />
results, push your<br />
mower at a walking pace.<br />
Blockage protection / Circuit<br />
breaker<br />
If the mower is blocked by a<br />
foreign body or if the motor is<br />
overloaded, the motor is<br />
automatically switched off by the<br />
circuit-breaker. Pull the battery<br />
out of the contact bar. Remove<br />
the foreign body or the cause for<br />
the overload and after a few<br />
seconds restart the mower. If the<br />
motor switches off although there<br />
are no foreign bodies in the<br />
cutting tool it is possible that the<br />
cutting height you have selected<br />
is too low. Select a higher<br />
cutting height, e. g. 1.75” and<br />
then select a lower cutting height<br />
for the second cut.<br />
If the <strong>Cordless</strong> <strong>Reel</strong> <strong>Mower</strong> is<br />
overloaded over a longer period<br />
of time the motor may become<br />
hot. To protect the motor from<br />
overheating the thermal circuitbreaker<br />
switches off the motor.<br />
You can switch on the mower<br />
again after approximately 2 – 5<br />
minutes.
9. Maintenance, care and storage<br />
9.1. Maintenance<br />
Maintenance includes all jobs<br />
which keep your <strong>Cordless</strong> <strong>Reel</strong><br />
<strong>Mower</strong> in perfect working order.<br />
By regularly checking the unit<br />
(firm seating of screw<br />
connections, cracks, damage)<br />
and replacing defective or worn<br />
parts you can prevent accidents<br />
and failure.<br />
Repairs may only be carried out<br />
by <strong>Mantis</strong> service centers or<br />
dealers authorized by <strong>Mantis</strong>.<br />
A<br />
Before cleaning and setting<br />
the Hand Lawnmower,<br />
switch off the motor and remove<br />
the battery to prevent starting<br />
the motor unintentionally.<br />
9.2. The Battery<br />
Charging the Battery<br />
A<br />
Note: Only charge the<br />
battery with the charger<br />
supplied! Using other charging<br />
units could lead to damage and<br />
injury. Using a charger other<br />
than the <strong>Mantis</strong> charger supplied<br />
releases <strong>Mantis</strong> from all liability<br />
and warranty claims.<br />
We recommend charging the<br />
battery immediately after using<br />
your mower using the supplied<br />
charger.<br />
A<br />
Important ! Never charge<br />
the battery after having<br />
been heated up by operation or<br />
sun. Let cool down first.<br />
Never expose the battery to<br />
direct sunlight while charging.<br />
Never charge the battery<br />
anywhere near acids and easily<br />
inflammable materials. Danger<br />
of fire!<br />
Note: Do not wait until the<br />
battery is completely flat before<br />
recharging.<br />
Charge the battery in a dry<br />
place as follows:<br />
1. Open the cover of the harness<br />
compartment (fig. J pos. 13).<br />
2. Pull the battery out of the<br />
contact bar (fig. I pos. 24).<br />
3. Plug the plug (fig. F pos. 22)<br />
of the charger into the<br />
charging socket (fig. F pos.<br />
23).<br />
4. Then plug the charger (fig. F<br />
pos. 21) into the <strong>main</strong>s socket.<br />
5. To resume mowing after<br />
charging the battery, proceed<br />
as described in section 7.2.<br />
Important:<br />
.Protect the charging socket<br />
(fig.F pos.23) against dirt and<br />
moisture.<br />
.If the battery capacity is so<br />
low that the <strong>Cordless</strong> <strong>Reel</strong><br />
<strong>Mower</strong> switches off<br />
automatically then the<br />
charging time is 24 hours.<br />
The battery should be stored at<br />
a dry, elevated, frost-free, locked<br />
up place, where children have<br />
no access. Avoid direct sunlight.<br />
Always disconnect the battery<br />
from tools before storing to<br />
avoid improper use and<br />
accidents.<br />
Make <strong>sur</strong>e the <strong>sur</strong>face and the<br />
contacts of the battery always are<br />
clean and dry before connecting<br />
the charging unit. When dirty<br />
clean them with a soft, dry rag;<br />
never use running water.<br />
If you do not use the battery for<br />
long periods of time, please<br />
charge it again before using.<br />
Since a gradual self-discharge<br />
occurs, charge the battery<br />
completely before initial use<br />
after longer periods of storage.<br />
15<br />
GB
GB<br />
9.3. The <strong>Cordless</strong> <strong>Reel</strong> <strong>Mower</strong><br />
Cleaning<br />
A<br />
To avoid injury to persons<br />
and material damage:<br />
Never clean your <strong>Cordless</strong> <strong>Reel</strong><br />
<strong>Mower</strong> with running water, in<br />
particular with water under high<br />
pres<strong>sur</strong>e.<br />
After using the mower clean with<br />
a moist cloth. Spray the cutting<br />
cylinder and lower blade with<br />
an oil of low viscosity (e. g.<br />
spray oil).<br />
Maintenance<br />
The blades, which if cared for<br />
properly must only be sharpened<br />
after years, can only be<br />
sharpened by <strong>Mantis</strong> due to the<br />
special sharpening technique.<br />
The mower may only be<br />
repaired and the cutting blades<br />
may only be installed by<br />
approved specialist workshops.<br />
Note: En<strong>sur</strong>e that all nuts, bolts<br />
and screws are tight and that the<br />
mower is in good working order.<br />
For safety reasons, allow all<br />
worn out and damaged parts to<br />
be exchanged by <strong>Mantis</strong> Service<br />
or authorized specialist dealers.<br />
16<br />
To avoid injury and damage to<br />
the mower we recommend you<br />
have your mower checked in<br />
autumn so that it is ready and<br />
safe to use next season.<br />
Storage<br />
Store your <strong>Cordless</strong> <strong>Reel</strong> <strong>Mower</strong><br />
in a dry, cool place where it is<br />
protected from frost. The mower<br />
should be stored out of the reach<br />
of children.<br />
9.4. Readjusting the cutting tool<br />
The cutting tool of your <strong>Cordless</strong><br />
<strong>Reel</strong> <strong>Mower</strong> was set at an<br />
optimum setting before leaving<br />
our factory. However, if the cut<br />
is not clean after using your<br />
mower for a longer period of<br />
time, please correct the setting of<br />
the lower blade as follows:<br />
1. Switch off the <strong>Cordless</strong> <strong>Reel</strong><br />
<strong>Mower</strong> and pull the battery<br />
out of the contact bar to<br />
prevent starting the <strong>Cordless</strong><br />
<strong>Reel</strong> <strong>Mower</strong> unintentionally.<br />
2. Push the supplied thickness<br />
gauge (fig. L pos.21) on the<br />
left hand side between one<br />
blade of the cutting cylinder<br />
and the lower blade (fig. L).<br />
3. Turn the hexagon thread bolt<br />
(fig. L pos. 20) with a 10 mm<br />
fork wrench to the left or to<br />
the right until the thickness<br />
gauge closes slightly. Repeat<br />
this on the right hand side of<br />
the mower.<br />
4. Turn the cutting cylinder to<br />
test the setting. None of the 5<br />
blades of the cylinder must<br />
touch the lower blade.<br />
A<br />
Warning! Handle the<br />
cutting tool carefully to<br />
avoid cutting yourself. Wear<br />
appropriate gloves to protect<br />
your hands.<br />
5. When you have adjusted the<br />
cutting tool test it using a<br />
piece of newspaper (fig. M).
10. Troubleshooting<br />
General<br />
Faults usually occur if the unit<br />
has not been handled, cared for<br />
or <strong>main</strong>tained properly. The<br />
following table contains the most<br />
common faults and remedies to<br />
eliminate these faults. If you have<br />
any other problems, please<br />
contact your nearest service<br />
center authorized by the<br />
manufacturer, or your nearest<br />
authorized specialist dealer.<br />
A<br />
Caution! Repairs that<br />
require specialist<br />
knowledge must only be carried<br />
out by an authorized specialist.<br />
A<br />
Caution! For safety reasons,<br />
only use original spare<br />
parts supplied by the<br />
manufacturer or parts that have<br />
been authorized by the<br />
manufacturer.<br />
Fault Possible Cause Remedy<br />
Abnormal noise.<br />
Clattering in the unit.<br />
Metal-like hammering noises.<br />
Motor will not start.<br />
Motor turns off.<br />
Motor turns off.<br />
Yellow lawn.<br />
Cut not clean.<br />
Motor fixing screws or<br />
mower casing loose.<br />
Foreign body blocking<br />
the cutting cylinder.<br />
Battery not pushed<br />
all the way in.<br />
Circuit breaker has been<br />
triggered.<br />
Blocked by foreign body.<br />
Blocking protection activated.<br />
The cutting height you have<br />
selected is too low;<br />
you are pushing the mower too<br />
quickly. Circuit breaker has been<br />
activated.<br />
Battery power too low for<br />
cutting height.<br />
Cutting height too low.<br />
Cutting gap between cutting<br />
cylinder and bottom blade is<br />
too wide.<br />
Blades are blunt or damaged.<br />
We expressly point out that in<br />
accordance with product liability<br />
laws, we are not liable for any<br />
damage caused by our units if<br />
this damage is due to improper<br />
repair or if parts exchanged are<br />
not our original parts or parts<br />
approved by us, and if the<br />
repairs were not carried out at<br />
service center authorized by the<br />
manufacturer or by an<br />
authorized specialist. The same<br />
applies to spare parts and<br />
accessories.<br />
Tighten screws<br />
Turn off the mower. Pull the<br />
Battery out of the contact bar.<br />
Remove the foreign body.<br />
Harness is not flat against<br />
Battery.<br />
Wait approx. 2 – 5 minutes,<br />
then turn on the motor again.<br />
Switch off the motor. Pull the<br />
Battery out of the contact bar.<br />
Remove the foreign body.<br />
Let the motor cool for 2 – 5<br />
minutes, then use the mower with<br />
a higher cutting height and reduce<br />
the cutting height in stages until<br />
you reach the lower cutting height<br />
you require. Push the mower more<br />
slowly across the lawn.<br />
Increase the cutting height and<br />
cut the lawn in stages or charge<br />
the battery (see chapter 9.2.<br />
“The Battery”).<br />
Increase the cutting<br />
height.<br />
Readjust cutting tool<br />
(refer to section 9.4.).<br />
Have the blade replaced at<br />
a <strong>Mantis</strong> Service Center or by<br />
an authorized specialist.<br />
17<br />
GB
GB<br />
11. Instructions for correct use, safety instructions<br />
A<br />
Checks before each<br />
operation<br />
Wear sturdy shoes and long<br />
trousers to protect your legs.<br />
Inspect the unit before each use. Keep fingers and feet away from<br />
Do not use the <strong>Cordless</strong> <strong>Reel</strong> the cutting tool.<br />
<strong>Mower</strong> if safety devices (safety<br />
handle; safety cover) and / or the Make <strong>sur</strong>e that there are no<br />
cutting cylinder are damaged or other people (especially children)<br />
worn. Never operate the unit or animals anywhere near the<br />
with the safety devices by-passed working area.<br />
or missing.<br />
En<strong>sur</strong>e that you have a secure<br />
foothold when working.<br />
Attention! Take extra care when<br />
walking backwards. You may<br />
stumble!<br />
Inspect the area of grass you are<br />
going to mow before beginning<br />
work. Remove any foreign<br />
objects (e. g. stones, branches or<br />
bones). Check the working area<br />
for foreign objects during work.<br />
The cutting cylinder and the<br />
lower blade must be checked<br />
regularly for damage and<br />
properly repaired if necessary.<br />
Cutting tools must only be<br />
exchanged by <strong>Mantis</strong> Service or<br />
an authorized specialist dealer.<br />
A<br />
Proper use / Responsibility<br />
This <strong>Cordless</strong> <strong>Reel</strong> <strong>Mower</strong> can<br />
cause serious injuries ! You are<br />
responsible for the safety of the<br />
working area.<br />
To prevent injuries, never start<br />
the motor when the mower is<br />
tipped. Risk of injury.<br />
Only use the <strong>Cordless</strong> <strong>Reel</strong><br />
<strong>Mower</strong> for the purposes<br />
specified in these instructions.<br />
Only work when visibility is good.<br />
Guide the mower at a walking<br />
pace only.<br />
Familiarize yourself with the<br />
<strong>sur</strong>roundings of your working<br />
area. Check for possible risks<br />
which might be not audible due<br />
to the noise of the machine.<br />
18<br />
If you do come into contact with<br />
an obstacle, turn off the <strong>Cordless</strong><br />
<strong>Reel</strong> <strong>Mower</strong> by pulling the<br />
battery out of the contact bar.<br />
Remove the object, then check<br />
the mower for damage and have<br />
it repaired if necessary.<br />
A<br />
Interruptions of work<br />
Never leave the <strong>Cordless</strong> <strong>Reel</strong><br />
<strong>Mower</strong> unattended at the<br />
working area. If you interrupt<br />
your work store the mower in a<br />
safe place.<br />
If you interrupt your work to<br />
move to another working area,<br />
always switch off your <strong>Cordless</strong><br />
<strong>Reel</strong> <strong>Mower</strong> and pull the battery<br />
out of the contact bar.<br />
A<br />
Check the environment<br />
Never use the unit when it is<br />
raining or in damp or wet areas.<br />
Do not operate your <strong>Cordless</strong><br />
<strong>Reel</strong> <strong>Mower</strong> near swimming<br />
pools or garden ponds.<br />
Please observe the prescribed<br />
local quiet times.<br />
Keep the charger in a dry place.<br />
A<br />
Notes on safety regarding<br />
the Battery/ Danger<br />
of fire<br />
Never charge the battery after<br />
having been heated up by<br />
operation or sun. Let cool down<br />
first.<br />
Never expose the battery to<br />
direct sunlight while charging.<br />
Never charge the battery when<br />
connected to a 24-Volt tool.<br />
Never charge the battery<br />
anywhere near acids and easily<br />
inflammable materials. Danger<br />
of fire!<br />
Only use the battery with the<br />
specified tools.<br />
Under extreme conditions, some<br />
battery acid could escape. This,<br />
however, does not represent a<br />
defect. Proceed as follows should<br />
the casing leak:<br />
1. Immediately wash the affected<br />
area of the skin with soap<br />
and water.<br />
2. Neutralize the battery acid<br />
with vinegar or lemon juice.<br />
3. If battery acid should get into<br />
your eyes, rinse your eyes for<br />
at least 10 minutes with fresh<br />
water. Then contact your<br />
doctor immediately!<br />
Do not throw the used battery<br />
into fire under any<br />
circumstances. Danger of fire!<br />
Contacts should never be<br />
bridged with metal or other<br />
electric conducting parts. Shortcircuit<br />
– fire risk!
12. Disposal / recycling<br />
Warranty<br />
Ni-Cd<br />
nickel/cadmium cells.<br />
These batteries<br />
contain<br />
The manufacturer warrants its<br />
products for exclusively noncommercial<br />
use for a period of<br />
24 months from the date of<br />
original purchase. This warranty<br />
does not affect statutory<br />
warranty claims. The warranty<br />
covers all substantial faults of the<br />
product, which are caused by<br />
defects in material and<br />
workmanship. If a product<br />
exhibits such a defect we will, at<br />
our option, repair or replace it<br />
without cost for parts and labour<br />
provided the following<br />
requirements are fulfilled:<br />
.The product must have been<br />
sold to the customer in a<br />
legally correct way.<br />
.The original receipt with the<br />
customer’s address, date of<br />
purchase, model and product<br />
designation is presented as<br />
proof of purchase.<br />
.The product was handled<br />
properly and according to the<br />
recommendations in the<br />
operating instructions. It is<br />
essential that the product has<br />
been <strong>main</strong>tained and cleaned<br />
according to the information in<br />
After their lifetime have expired,<br />
they may not be disposed of as<br />
normal house rubbish, but must<br />
be disposed of properly.<br />
the operating instructions. No<br />
attempt to disassemble or<br />
repair the product has been<br />
made by either the buyer or<br />
an unauthorized third party.<br />
.It must be en<strong>sur</strong>ed that only<br />
original replacement parts and<br />
original accessories approved<br />
by the manufacturer are used.<br />
There may be an increased<br />
risk of consequential damage<br />
and accidents if non-original<br />
parts or non-original<br />
accessories are used.<br />
This warranty does not cover<br />
consequential damages.<br />
.The product must be either<br />
taken directly or sent with<br />
postage paid to an authorized<br />
service center. The original<br />
receipt must be sent with the<br />
product.<br />
.The warranty does not cover<br />
damage from misuse, abuse,<br />
use of unsuitable, non-original<br />
or unauthorized<br />
interchangeable parts,<br />
replacement parts or<br />
accessories, as well as<br />
improper <strong>main</strong>tenance and<br />
cleaning.<br />
Please return battery to a <strong>Mantis</strong><br />
dealer that sells the Power Unit<br />
24-Volt System or take them to a<br />
recycling center that accepts and<br />
recycles rechargeable batteries.<br />
The products contain various<br />
components that are subject to<br />
normal or use-related wear. The<br />
warranty does not extend to<br />
these wearing parts.<br />
In particular the following<br />
components relating to this<br />
product are excluded:<br />
Blades / blade bar / drive<br />
belt / care roller / blade<br />
roller / lower blade / cutting<br />
plate / cutting line / cutting head<br />
cover / saw blade / nickelcadmium-cell<br />
(battery)/brush/aerator cylinder.<br />
The manufacturer warranty does<br />
not affect existing warranty<br />
claims between the customer<br />
and the dealer / seller.<br />
19<br />
GB
GB<br />
20
4. Informations <strong>sur</strong> le mode d’emploi<br />
Veuillez lire attentivement le<br />
mode d'emploi en respectant<br />
tous les conseils ainsi que les<br />
prescriptions de sécurité fournies<br />
dans le présent manuel. Utilisez<br />
ce mode d'em-<br />
5. Utilisation conforme<br />
La tondeuse <strong>Mantis</strong> se destine <strong>à</strong><br />
la tonte de gazons et de<br />
<strong>sur</strong>faces d'herbe dans un jardin<br />
privé. Elle n'est pas conçue pour<br />
un usage professionnel, dans les<br />
installations publiques, parcs,<br />
centres sportifs, le long de routes<br />
ou dans le secteur agricole et<br />
forestier.<br />
Le respect du mode d'emploi<br />
fourni par <strong>Mantis</strong> est<br />
indispensable pour une mise en<br />
œuvre correcte de l'appareil. Le<br />
manuel contient aussi des<br />
informations <strong>sur</strong> les conditions<br />
d'exploitation, de <strong>main</strong>tenance<br />
et d'entretien.<br />
ploi pour vous familiariser avec<br />
l'appareil, les éléments de<br />
réglage et son exploitation<br />
conforme ainsi qu'avec les<br />
prescriptions de sécurité.<br />
A<br />
Attention ! En raison des<br />
risques de bles<strong>sur</strong>es,<br />
l'appareil ne doit pas être utilisé<br />
pour débroussailler, tailler des<br />
haies et des arbustes, couper et<br />
broyer des plantes grimpantes<br />
ou la <strong>sur</strong>face gazonnée de toits<br />
ou la végétation de balcon. Par<br />
ailleurs, il ne peut s'employer<br />
pour broyer des parties d'arbre<br />
et de haie coupées ni pour<br />
aplanir le sol.<br />
A<br />
Attention ! N'autorisez<br />
jamais des enfants ou des<br />
personnes n'ayant pas lu ce<br />
Conservez précieusement ce<br />
mode d'emploi.<br />
mode d'emploi <strong>à</strong> utiliser cet<br />
appareil.<br />
Ne tondez jamais pendant que<br />
des personnes, notamment des<br />
enfants, ou des animaux se<br />
trouvent <strong>à</strong> proximité.<br />
Certaines dispositions légales<br />
peuvent prévoir un âge<br />
d'utilisation minimum.<br />
N'oubliez pas que le conducteur<br />
de la machine ou l'utilisateur est<br />
responsable des accidents<br />
impliquant des tiers ou leurs<br />
biens.<br />
21<br />
FR
FR<br />
6. Montage<br />
Contrôle d'exhaustivité<br />
Le carton d'emballage contient<br />
les pièces suivantes :<br />
.la tondeuse <strong>à</strong> <strong>main</strong> <strong>électrique</strong><br />
<strong>sur</strong> batterie<br />
.1 batterie<br />
.1 partie supérieure de guidon<br />
.1 partie centrale de guidon<br />
.2 parties inférieures de guidon<br />
.les pièces nécessaires au<br />
montage du guidon (sachet<br />
plastique)<br />
.1 chargeur (24 volts)<br />
.1 jauge d’épaisseur<br />
. Mode d’emploi<br />
Montage du système de guidage<br />
Enfoncez l’une des deux parties<br />
inférieures des barres du guidon<br />
(Fig. A pos. 1) dans l’ouverture<br />
(Fig. B pos. B1). Les arcs de la<br />
partie inférieure des barres du<br />
guidon doivent être orientés vers<br />
le centre de l’appareil.<br />
Positionnez les trous (Fig. C pos.<br />
6) de la partie inférieure des<br />
barres du guidon <strong>sur</strong> le boulon<br />
des barres (Fig. B / C pos. 7).<br />
Procédez de la même manière<br />
Protection de l’environnement,<br />
mise au rebut<br />
L´emballage a été<br />
fabriqué avec<br />
matériaux recyclables.<br />
Débarrassez-vous de<br />
l´emballage en<br />
respectant la<br />
réglementation.<br />
22<br />
avec la deuxième partie<br />
inférieure des barres du guidon<br />
du côté opposé.<br />
A Attention<br />
! Ne pas forcer<br />
lors du montage.<br />
Enfoncez la vis de serrage du<br />
guidon (Fig. A pos. 5) dans<br />
l’ouverture du serre-câble (Fig. A<br />
pos. 8).<br />
Montez la partie centrale des<br />
barres du guidon (Fig. A pos. 2)<br />
et les deux parties inférieures<br />
des barres du guidon comme la<br />
figure A l’indique. Pour les trous<br />
se trouvant les uns en face des<br />
autres, enfoncez la vis de<br />
serrage du guidon avec le serrecâble<br />
dans les trous. Placez la<br />
rondelle (Fig. A pos. 13) <strong>sur</strong> la<br />
vis de serrage du guidon et<br />
vissez bien les pièces avec la<br />
poignée de serrage du guidon<br />
(Fig. A pos. 4).<br />
Prenez le haut des barres du<br />
guidon (Fig. A pos. 3) et<br />
montez-le avec la partie centrale<br />
des barres du guidon comme la<br />
Les appareils <strong>électrique</strong>s ne<br />
doivent en aucun cas être mis au<br />
rebut dans les ordures<br />
ménagères, mais doivent être<br />
éliminés correctement.<br />
figure A l’indique. Pour les trous<br />
se trouvant les uns en face des<br />
autres, enfoncez la vis de<br />
serrage du guidon avec le serrecâble<br />
dans les trous. Placez la<br />
rondelle (Fig. A pos. 13) <strong>sur</strong> la<br />
vis de serrage du guidon et<br />
vissez bien les pièces avec la<br />
poignée de serrage du guidon<br />
(Fig. A pos. 4).<br />
Attachez le câble en posant le<br />
serre-câble <strong>sur</strong> la partie<br />
inférieure de la barre depuis<br />
l’extérieur (Fig. A pos. 25).<br />
A Attention<br />
! Veillez <strong>à</strong> ne pas<br />
pincer le câble
7. Mise en service<br />
7.1. Réglage de la hauteur de<br />
coupe<br />
A<br />
Attention – danger de<br />
bles<strong>sur</strong>es : coupez le<br />
moteur avant tout réglage de la<br />
hauteur de coupe !<br />
Réglez la hauteur de coupe de<br />
la tondeuse comme suit :<br />
1. Posez la tondeuse <strong>sur</strong> un sol<br />
plat et ferme.<br />
2. Placez-vous devant les<br />
graduations de la tondeuse<br />
(fig. D).<br />
3. Desserrez les 2 écrous de<br />
blocage (fig. D pos. 9).<br />
4. Avec les deux <strong>main</strong>s, réglez<br />
la hauteur de coupe souhaitée<br />
<strong>à</strong> l’aide des manettes<br />
de réglage (fig. E pos. 12)<br />
(fig. E / E1) :<br />
Hauteur de coupe maxi :<br />
45 mm<br />
Hauteur de coupe mini :<br />
25 - 30 mm<br />
Conseil : Veillez <strong>à</strong> positionner les<br />
flèches de repérage de la<br />
hauteur de coupe (fig. E / E1<br />
pos. 8) face <strong>à</strong> la même hauteur<br />
de coupe <strong>sur</strong> les deux<br />
graduations.<br />
5. Resserrez bien les 2 écrous<br />
de blocage (fig. D pos. 9).<br />
Veillez <strong>à</strong> éviter un réglage trop<br />
bas : le couteau inférieur et le<br />
cylindre de coupe risqueraient<br />
de toucher le sol.<br />
7.2. Charge de la batterie<br />
Pour des raisons techniques, la<br />
batterie (fig. F pos. 20) est livré<br />
non chargée. Chargez-la donc<br />
impérativement avant la<br />
première utilisation.<br />
N’utilisez, pour la charger, que<br />
le chargeur (fig. F pos. 21).<br />
Branchez le chargeur (fig. F pos.<br />
21) <strong>sur</strong> la prise et la fiche (fig. F<br />
pos. 22) <strong>sur</strong> la prise de charge<br />
(fig. F pos. 23) de la batterie. La<br />
charge démarre.<br />
Veillez <strong>à</strong> utiliser la bonne tension !<br />
Temps de charge : environ 24<br />
heures pour la première charge.<br />
Puis 12 <strong>à</strong> 24 heures selon le<br />
niveau de décharge de la<br />
batterie.<br />
La batterie n’atteint ses pleines<br />
performances qu’après plusieurs<br />
charges et décharges (5 cycles<br />
environ).<br />
A<br />
La batterie doit être<br />
exclusivement chargée<br />
avec le chargeur , qui est le seul<br />
<strong>à</strong> garantir un ajustement<br />
technique optimal entre la<br />
batterie et l’appareil de charge.<br />
oute tentative de recharge<br />
Tavec un autre type de<br />
chargeur peut entraîner des<br />
dommages matériels ou<br />
corporels et dégage toute<br />
responsabilité du fabricant.<br />
A<br />
Chargez la batterie<br />
pendant 24 heures avant<br />
la première mise en service.<br />
A<br />
La fiche secteur s’échauffe<br />
légèrement durant la<br />
charge.<br />
A<br />
Chargez la batterie<br />
seulement dans des pièces<br />
sèches, jamais en plein soleil.<br />
A<br />
Veillez, pendant la charge,<br />
<strong>à</strong> ce qu’aucune matière<br />
inflammable ne se trouve dans<br />
l’environnement immédiat.<br />
7.3. Raccordement de la batterie<br />
1. Ouvrez le compartiment du<br />
harnais (fig. G pos. 13).<br />
Tenez la batterie de la <strong>main</strong><br />
droite et tirez en même temps<br />
de la <strong>main</strong> gauche le harnais<br />
vers la gauche, pour que les<br />
extrémités du harnais<br />
reposent <strong>à</strong> plat <strong>sur</strong> la batterie<br />
(fig. H).<br />
2. Glissez la batterie dans le rail<br />
contact (fig. I pos. 24)<br />
jusqu’<strong>à</strong> ce qu’elle s’enclenche<br />
de façon perceptible.<br />
3. Rangez le harnais en boucle<br />
dans le compartiment (fig. J)<br />
et fermez ensuite le couvercle<br />
(fig. J pos. 13). Ceci a pour<br />
effet de caler en même temps<br />
la batterie <strong>sur</strong> le rail contact.<br />
7.4. Démarrage<br />
A<br />
Attention : avant tout<br />
démarrage, vérifiez si un<br />
corps étranger se trouve dans le<br />
cylindre de coupe et enlevez-le le<br />
cas échéant !<br />
Pour démarrer la tondeuse,<br />
procédez comme suit :<br />
1. Placez la tondeuse <strong>sur</strong> un<br />
endroit plat de la pelouse.<br />
2. Démarrez en tenant enfoncé<br />
le bouton de déverrouillage<br />
(fig. K pos. 15) tout en tirant<br />
le contacteur (fig. K pos. 16)<br />
vers le guidon.<br />
3. Pour arrêter le moteur,<br />
relâchez le contacteur (fig. K<br />
pos.16).<br />
A<br />
Les dispositifs de sécurité<br />
prévus par le fabricant ne<br />
doivent en aucun cas être<br />
modifiés ou supprimés : par<br />
exemple ne bloquez jamais le<br />
contacteur <strong>sur</strong> le guidon de sorte<br />
que la tondeuse fonctionne en<br />
continu. Vous risqueriez de vous<br />
blesser, d’autant plus que<br />
l’appareil ne s’arrêterait plus<br />
automatiquement.<br />
A<br />
Attention ! Le système de<br />
coupe continue de tourner<br />
quelques instants après qu’on a<br />
lâché le contacteur.<br />
Au cours de l’utilisation de la<br />
tondeuse, il est normal de<br />
constater un léger échauffement<br />
de la batterie : cela est normal et<br />
ne diminue pas ses<br />
performances.<br />
23<br />
FR
FR<br />
8. Conseils pour tondre correctement<br />
8.1. Généralités concernant<br />
l’entretien du gazon<br />
En début de période de tonte et<br />
pour les pelouses nouvellement<br />
semées, nous conseillons une<br />
hauteur de coupe relativement<br />
importante (par exemple<br />
45 mm), <strong>à</strong> diminuer<br />
progressivement lors des tontes<br />
suivantes. Pour une pelouse bien<br />
entretenue, réglez la hauteur de<br />
coupe <strong>à</strong> environ 25 <strong>à</strong> 30 mm.<br />
Tondez si possible une fois par<br />
se<strong>main</strong>e. Lorsque vous tondez<br />
fréquemment, le brin d’herbe<br />
raccourci profite davantage et<br />
devient plus résistant.<br />
Tondez la pelouse toujours<br />
lorsque l’herbe est relativement<br />
sèche. Pour une coupe nette et<br />
régulière, conduisez la tondeuse<br />
au pas, en bandes bien droites.<br />
Les bandes tondues doivent se<br />
chevaucher de quelques<br />
centimètres pour éviter des<br />
bandes de pelouse non tondues.<br />
Tondez la pelouse pour la<br />
première fois au printemps, dès<br />
que l’herbe commence <strong>à</strong> pousser<br />
et que vous pouvez marcher<br />
dessus. Si l’herbe a trop poussé,<br />
tondez d’abord dans un sens <strong>à</strong><br />
hauteur de coupe importante<br />
(par exemple 45 mm) puis une<br />
seconde fois mais<br />
perpendiculairement, <strong>à</strong> la<br />
hauteur de coupe souhaitée (par<br />
exemple 25 mm).<br />
L’autonomie de la tondeuse<br />
dépend de la hauteur et de<br />
l’épaisseur d’herbe <strong>à</strong> tondre :<br />
plus l’herbe est haute et épaisse,<br />
moins la <strong>sur</strong>face tondue par<br />
charge de batterie est grande.<br />
8.2. Tonte<br />
Les lames doivent toujours être<br />
bien affûtées et en parfait état<br />
afin que l’herbe ne soit pas<br />
arrachée et ne jaunisse pas.<br />
24<br />
Pour une tonte nette et régulière,<br />
conduisez la tondeuse <strong>à</strong> la<br />
bonne vitesse, en bandes bien<br />
droites.<br />
Remarque : Vous pouvez utiliser<br />
la tondeuse en fonctionnement<br />
<strong>sur</strong> batterie ou en tant que<br />
tondeuse <strong>à</strong> <strong>main</strong>, sans batterie.<br />
A<br />
Attention : la rotation du<br />
cylindre de coupe peut<br />
provoquer des bles<strong>sur</strong>es !<br />
Gardez toujours la distance de<br />
sécurité, donnée par le guidon,<br />
entre le cylindre de coupe et<br />
l’utilisateur. Pour les <strong>sur</strong>faces en<br />
pente, tondez transversalement<br />
et veillez <strong>à</strong> conserver une<br />
position sûre et stable.<br />
Soyez particulièrement prudent<br />
en reculant et en tirant la<br />
tondeuse : risque de chute !<br />
Réglage de la hauteur de coupe<br />
: voir section Réglage de la<br />
hauteur de coupe.<br />
8.3. Tonte avec bac de<br />
récupération de l’herbe<br />
A<br />
Pour l’accrochage du bac<br />
de récupération, le moteur<br />
doit être arrêté, l’outil de coupe<br />
immobile.<br />
Le bac de récupération vous<br />
évite de devoir ramasser vousmême<br />
l’herbe coupée. Il est<br />
disponible dans le commerce<br />
spécialisé. Pour obtenir un bon<br />
résultat de ramassage, l’herbe<br />
doit être bien sèche et vous<br />
devez faire avancer la tondeuse<br />
assez vite au pas.<br />
Conseil : vous pouvez régler la<br />
hauteur du sac de récupération<br />
<strong>à</strong> l’aide de la courroie. Pour un<br />
bon résultat de ramassage,<br />
conduisez la tondeuse au pas, <strong>à</strong><br />
une vitesse adaptée.<br />
Protection en cas de blocage /<br />
Disjoncteur thermique<br />
Lorsqu’un corps étranger bloque<br />
la tondeuse ou en cas de<br />
<strong>sur</strong>charge du moteur, la<br />
protection de <strong>sur</strong>charge arrête le<br />
moteur automatiquement. Retirez<br />
la batterie du rail contact.<br />
Eliminez le corps étranger ou la<br />
cause de <strong>sur</strong>charge. Redémarrez<br />
l’appareil après quelques<br />
secondes. Si le moteur s’arrête<br />
malgré l’absence de corps<br />
étrangers dans l’outil de coupe,<br />
peut-être avez-vous choisi une<br />
hauteur de coupe trop basse.<br />
Sélectionnez une hauteur de<br />
coupe plus importante, par<br />
exemple 45 mm, et tondez une<br />
seconde fois <strong>à</strong> la hauteur de<br />
coupe souhaitée.<br />
En cas de sollicitation importante<br />
de la tondeuse pendant une<br />
période relativement longue, le<br />
moteur peut chauffer. Pour le<br />
protéger d’une <strong>sur</strong>chauffe, le<br />
disjoncteur thermique arrête le<br />
moteur.<br />
Vous pouvez redémarrer<br />
l’appareil après 2 <strong>à</strong> 5 minutes<br />
environ.
9. Entretien et rangement<br />
9.1. Entretien<br />
L’entretien de la tondeuse <strong>à</strong> <strong>main</strong><br />
<strong>électrique</strong> <strong>sur</strong> batterie consiste<br />
simplement <strong>à</strong> la <strong>main</strong>tenir en<br />
bon état de marche. Pour éviter<br />
des accidents ou des pannes,<br />
vérifiez régulièrement l’état de la<br />
tondeuse (fixation des vis,<br />
fis<strong>sur</strong>es, endommagements) et<br />
remplacez les pièces<br />
défectueuses ou usées.<br />
Pour des raisons de sécurité, les<br />
réparations ne doivent être<br />
effectuées que par un service<br />
après-vente <strong>Mantis</strong> ou un<br />
revendeur agréé <strong>Mantis</strong>.<br />
A<br />
Avant tout réglage ou<br />
nettoyage, arrêtez le<br />
moteur de la tondeuse et<br />
protégez-le contre tout<br />
démarrage involontaire. Pour<br />
cela, enlevez la batterie.<br />
9.2. Batterie<br />
Charge de la batterie<br />
A<br />
Chargez la batterie<br />
exclusivement <strong>à</strong> l’aide du<br />
chargeur fourni. L’utilisation d’un<br />
autre chargeur peut provoquer<br />
des dégâts matériels et corporels.<br />
En cas d’utilisation d’un autre<br />
chargeur, <strong>Mantis</strong> décline toute<br />
responsabilité et toute garantie.<br />
Nous conseillons de recharger la<br />
batterie aussitôt après utilisation<br />
de la tondeuse <strong>à</strong> l’aide du<br />
chargeur fourni.<br />
A<br />
Important ! Ne chargez<br />
jamais la batterie si sa<br />
température est trop élevée par<br />
suite du fonctionnement de<br />
l’appareil ou d’une exposition<br />
au soleil. Laissez-la d’abord<br />
refroidir.<br />
N’exposez pas la batterie<br />
directement au soleil pendant sa<br />
charge.<br />
Ne chargez pas la batterie <strong>à</strong><br />
proximité de produits ou de<br />
matières acides ou inflammables<br />
: danger d’incendie !<br />
Remarque : n’attendez pas la<br />
décharge complète de la<br />
batterie pour la recharger.<br />
Rechargez-la dans un endroit<br />
sec comme suit :<br />
1. Ouvrez le couvercle du<br />
compartiment du harnais (fig.<br />
J pos. 13).<br />
2. Retirez la batterie du rail<br />
contact (fig. I pos. 24).<br />
3. Raccordez la fiche (fig. F pos.<br />
22) du chargeur <strong>à</strong> la prise de<br />
charge (fig. F pos. 23).<br />
4. Branchez ensuite le chargeur<br />
(fig. F pos. 21) <strong>sur</strong> la prise de<br />
courant.<br />
5. Pour continuer <strong>à</strong> tondre,<br />
procédez conformément au<br />
point 7.2.<br />
Conseils importants :<br />
.Protégez la prise (fig. F pos.<br />
23) pour chargeur contre les<br />
salis<strong>sur</strong>es et l’humidité.<br />
.Si la batterie est déchargée au<br />
point de provoquer l’arrêt de<br />
la tondeuse, le temps de<br />
recharge est de 24 heures.<br />
Rangez toujours la batterie en<br />
hauteur, hors de portée des<br />
enfants, <strong>à</strong> l’abri du gel et de<br />
l’humidité. Evitez de l’exposer<br />
directement au soleil.<br />
Ne stockez jamais la batterie en<br />
la laissant raccordée <strong>à</strong> un<br />
appareil, pour éviter une<br />
utilisation non conforme et des<br />
accidents.<br />
Avant de ranger la batterie,<br />
veillez toujours <strong>à</strong> ce qu’elle soit,<br />
et en particulier ses éléments de<br />
contact, bien secs et propres. En<br />
cas d’encrassement, nettoyez les<br />
<strong>à</strong> l’aide d’un chiffon sec et<br />
doux, <strong>sur</strong>tout pas <strong>à</strong> l’eau<br />
courante.<br />
Si la batterie doit rester<br />
longtemps sans être utilisée,<br />
rechargez-la <strong>à</strong> fond avant de le<br />
ranger. Après une longue<br />
période de non-utilisation,<br />
rechargez-la <strong>à</strong> nouveau avant de<br />
la réutiliser.<br />
25<br />
FR
FR<br />
9.3. <strong>Tondeuse</strong> <strong>à</strong> <strong>main</strong> <strong>électrique</strong><br />
<strong>sur</strong> batterie<br />
Nettoyage<br />
A<br />
Pour éviter tout dommage<br />
corporel ou matériel, ne<br />
projetez pas d’eau <strong>sur</strong><br />
l’appareil, <strong>sur</strong>tout pas avec un<br />
jet puissant.<br />
Après utilisation, nettoyez la<br />
tondeuse <strong>à</strong> l’aide d’un chiffon<br />
humide. Pulvérisez une huile<br />
fluide <strong>sur</strong> le cylindre de coupe et<br />
le couteau inférieur.<br />
Entretien<br />
Une tondeuse bien entretenue ne<br />
nécessite un réaffûtage des<br />
lames qu’après plusieurs années.<br />
En raison de la technique<br />
spéciale d’affûtage, ce travail ne<br />
peut être effectué que par<br />
<strong>Mantis</strong>.<br />
La réparation de la tondeuse<br />
ainsi que le montage des lames<br />
sont réservés <strong>à</strong> un réparateur<br />
qualifié.<br />
Conseil : Pour vous as<strong>sur</strong>er que<br />
la tondeuse est parfaitement<br />
prête <strong>à</strong> l’emploi, vérifiez une fois<br />
encore que tous les écrous,<br />
boulons et vis sont bien serrés <strong>à</strong><br />
fond. Par me<strong>sur</strong>e de sécurité,<br />
faites changer les pièces usées<br />
ou endommagées par le service<br />
après-vente <strong>Mantis</strong> ou par un<br />
revendeur spécialisé agréé.<br />
Pour éviter les bles<strong>sur</strong>es et<br />
l’endommagement de l’appareil,<br />
nous vous conseillons de faire<br />
vérifier la tondeuse <strong>à</strong> l’automne<br />
pour qu’elle soit prête <strong>à</strong><br />
fonctionner dès le début de la<br />
saison.<br />
Rangement<br />
Entreposez la tondeuse dans un<br />
endroit sec, protégé du gel et<br />
inaccessible aux enfants.<br />
26<br />
9.4. Réajustement du mécanisme<br />
de coupe<br />
Le mécanisme de coupe de votre<br />
tondeuse a été réglé en usine<br />
pour un résultat parfait. Si la<br />
tonte devient moins nette après<br />
une utilisation prolongée,<br />
corrigez le réglage du couteau<br />
inférieur comme suit :<br />
1. Éteignez la tondeuse et<br />
empêchez toute remise sous<br />
tension accidentelle en<br />
retirant la batterie du rail<br />
contact.<br />
2. Glissez la jauge d’épaisseur<br />
(fig. L pos. 21) fournie en<br />
accessoire du côté gauche<br />
entre l’une des lames du<br />
cylindre et le couteau<br />
inférieur (fig. L).<br />
3. A l’aide d’une clé de 10 mm,<br />
tournez l’écrou hexagonal<br />
(fig. L pos. 20) vers la droite<br />
ou la gauche, jusqu’<strong>à</strong> ce que<br />
la jauge d’épaisseur touche<br />
légèrement. Répétez<br />
l’intervention du côté droit.<br />
4. Faites tourner le cylindre pour<br />
vérifier le réglage : aucune<br />
des 5 lames ne doit toucher<br />
le couteau inférieur.<br />
A<br />
Attention : la manipulation<br />
du mécanisme de coupe<br />
exige la plus grande prudence<br />
(risque de bles<strong>sur</strong>es) ! Portez des<br />
gants de travail appropriés pour<br />
vous protéger.<br />
5. Après avoir corrigé le<br />
mécanisme de coupe, faites<br />
un essai de coupe avec une<br />
feuille de papier journal (fig.<br />
M).
10. Dépannage<br />
Généralités<br />
Les incidents se produisent en<br />
général seulement quand<br />
l'appareil n'est pas traité,<br />
entretenu et <strong>main</strong>tenu<br />
correctement. Le tableau ci-après<br />
renferme les incidents les plus<br />
courants et propose des<br />
solutions. Si les incidents ne<br />
peuvent être résolus, il est<br />
nécessaire de contacter le point<br />
de service après-vente le plus<br />
proche agréé par le fabricant ou<br />
le revendeur agréé.<br />
A<br />
Attention ! Les réparations<br />
qui exigent des<br />
connaissances particulières sont<br />
réservées <strong>à</strong> un spécialiste agréé.<br />
A<br />
Attention ! Par me<strong>sur</strong>e de<br />
sécurité, utilisez seulement<br />
les pièces originales du fabricant<br />
ou les pièces agréées par le<br />
fabricant.<br />
Nous signalons expressément<br />
que la loi <strong>sur</strong> la responsabilité<br />
produit ne nous oblige pas <strong>à</strong><br />
Incidents Causes possibles Solutions<br />
Bruits anormaux.<br />
Cliquetage <strong>sur</strong> l’appareil.<br />
Bruit métallique par <strong>à</strong> coups.<br />
Le moteur ne démarre pas.<br />
Le moteur s’arrête.<br />
La pelouse jaunit.<br />
La coupe n’est pas nette.<br />
Vis de fixation du moteur ou du<br />
carter desserrée.<br />
Un corps étranger bloque le<br />
cylindre de coupe.<br />
La batterie n’est pas insérée<br />
entièrement.<br />
Le disjoncteur thermique a<br />
disjoncté.<br />
Blocage par un corps étranger.<br />
Protection en cas de blocage<br />
activée.<br />
Choix d’une hauteur de coupe<br />
trop basse ; vous avancez trop<br />
vite. Le disjoncteur thermique a<br />
disjoncté.<br />
La charge de la batterie est trop<br />
faible pour une sollicitation de<br />
coupe importante.<br />
La hauteur de coupe choisie est<br />
trop basse.<br />
Trop grand espace entre le<br />
cylindre de coupe et le couteau<br />
inférieur.<br />
Les lames ne sont pas affûtées<br />
ou sont endommagées.<br />
couvrir les dommages causés<br />
par nos appareils dans la<br />
me<strong>sur</strong>e où ces dommages<br />
résultent d'une réparation<br />
incorrecte, en cas d'utilisation de<br />
pièces non originales ou non<br />
agréées par le fabricant et de<br />
réparation non effectuée par le<br />
service après-vente autorisé du<br />
fabricant ou un spécialiste<br />
autorisé. Il en va de même pour<br />
les pièces complémentaires et<br />
accessoires.<br />
Resserrez la vis.<br />
Arrêtez le moteur. Retirez la<br />
batterie du rail contact. Enlevez<br />
le corps étranger.<br />
Posez le harnais <strong>à</strong> plat <strong>sur</strong> la<br />
batterie.<br />
Attendez environ 2 <strong>à</strong> 5 minutes<br />
puis redémarrez.<br />
Arrêtez le moteur. Retirez la<br />
batterie du rail contact. Enlevez<br />
le corps étranger.<br />
Sélectionnez une hauteur de coupe<br />
plus importante. Redémarrez le<br />
moteur après une pause de<br />
refroidissement de 2 <strong>à</strong> 5 minutes et<br />
baissez progressivement jusqu’<strong>à</strong> la<br />
hauteur de coupe souhaitée.<br />
Avancez moins vite en poussant la<br />
tondeuse.<br />
Réduisez la sollicitation ou<br />
rechargez la batterie (voir point<br />
9.2. Batterie).<br />
Corrigez la hauteur de coupe.<br />
Réajustez l’outil de coupe (voir<br />
point 9.4.).<br />
Faites changer les lames par un service<br />
après-vente <strong>Mantis</strong> ou un spécialiste agréé.<br />
27<br />
FR
FR<br />
11. Conseils de sécurité et précautions d'emploi<br />
A<br />
Vérifications avant toute<br />
utilisation<br />
Avant chaque utilisation, vérifiez<br />
l’état de l’appareil. Ne l’utilisez<br />
que si tous les dispositifs de<br />
sécurité (manette de commande,<br />
capot de sécurité) et les lames<br />
sont en parfait état de<br />
fonctionnement. Ne déconnectez<br />
jamais les dispositifs de sécurité.<br />
Vérifiez l’état de la <strong>sur</strong>face <strong>à</strong><br />
tondre avant le début du travail.<br />
As<strong>sur</strong>ez-vous que la tondeuse ne<br />
risque pas de heurter un<br />
obstacle (pierre, branche, os,<br />
etc.). Écartez tout obstacle avant<br />
de la mettre en marche.<br />
Vérifiez régulièrement si le<br />
cylindre de coupe et le couteau<br />
inférieur n’ont pas été<br />
endommagés. Faites réparer, le<br />
cas échéant.<br />
Faites remplacer les outils de<br />
coupe en vous adressant<br />
exclusivement <strong>à</strong> un service<br />
après-vente <strong>Mantis</strong> ou <strong>à</strong> un<br />
revendeur spécialisé agréé.<br />
A<br />
Utilisation / Responsabilité<br />
Attention ! Cet appareil peut<br />
occasionner de graves bles<strong>sur</strong>es.<br />
En cas d’accident, vous seriez<br />
responsable.<br />
Ne démarrez jamais la tondeuse<br />
en position inclinée – risque de<br />
bles<strong>sur</strong>es !<br />
Utilisez l’appareil conformément<br />
<strong>à</strong> son do<strong>main</strong>e d’utilisation et <strong>à</strong><br />
son mode d’emploi.<br />
Travaillez uniquement dans des<br />
conditions de visibilité suffisante.<br />
Ne conduisez la tondeuse qu’<strong>à</strong><br />
une allure normale de marche <strong>à</strong><br />
pied.<br />
Observez attentivement la zone<br />
de travail. Soyez attentif aux<br />
dangers éventuels qui pourraient<br />
être masqués par le bruit de<br />
l’appareil.<br />
28<br />
Munissez-vous de chaus<strong>sur</strong>es<br />
résistantes et d’un pantalon long<br />
pour protéger vos jambes.<br />
N’approchez ni vos <strong>main</strong>s ni vos<br />
pieds du système de coupe.<br />
Veillez <strong>à</strong> ce qu’aucune autre<br />
personne (en particulier un<br />
enfant) ou aucun animal ne se<br />
trouve <strong>à</strong> proximité de l’endroit<br />
où vous travaillez.<br />
Veillez <strong>à</strong> travailler dans une<br />
position stable et sûre. Evitez de<br />
reculer pendant que l’outil<br />
fonctionne : vous risqueriez de<br />
trébucher.<br />
Si vous rencontrez malgré tout<br />
un obstacle pendant votre<br />
travail, arrêtez la tondeuse et<br />
enlevez la batterie. Enlevez<br />
l’obstacle ; vérifiez si la tondeuse<br />
n’est pas endommagée et faitesla<br />
réparer le cas échéant.<br />
A<br />
Interruption de travail<br />
Ne laissez pas la tondeuse sans<br />
<strong>sur</strong>veillance <strong>sur</strong> la zone de<br />
travail. Si vous interrompez votre<br />
travail, débranchez-la et rangezla<br />
dans un endroit sûr.<br />
Si vous interrompez votre travail<br />
pour vous rendre <strong>à</strong> un autre lieu,<br />
éteignez impérativement la<br />
tondeuse et retirez la batterie du<br />
rail contact.<br />
A<br />
Tenez compte de<br />
l’environnement<br />
Ne travaillez pas sous la pluie,<br />
dans une zone humide, dans ou<br />
<strong>à</strong> proximité d’une piscine ou<br />
d’un bassin.<br />
Respectez les réglementations en<br />
matière de nuisances sonores de<br />
votre commune.<br />
N’exposez pas le chargeur <strong>à</strong><br />
l’humidité.<br />
A<br />
Sécurité de la batterie et<br />
risque d’incendie<br />
Ne chargez pas la batterie si sa<br />
température est trop élevée en<br />
raison de son utilisation ou de<br />
son exposition au soleil. Laissezla<br />
d’abord refroidir.<br />
N’exposez pas la batterie<br />
directement au soleil pendant sa<br />
charge.<br />
Détachez toujours la batterie de<br />
l’appareil 24 volts avant de la<br />
charger.<br />
Ne chargez pas la batterie <strong>à</strong><br />
proximité de produits ou de<br />
matières acides ou inflammables<br />
: il y a danger d’incendie !<br />
Utilisez la batterie exclusivement<br />
avec les appareils prévus.<br />
Dans certaines conditions<br />
extrêmes, la batterie peut fuir.<br />
Un léger écoulement ne signifie<br />
cependant pas que la batterie<br />
soit endommagée. Si du liquide<br />
s’était répandu <strong>sur</strong> la <strong>sur</strong>face du<br />
boîtier, procédez comme suit :<br />
1. Lavez immédiatement avec du<br />
savon et de l’eau claire la<br />
partie de votre peau qui a été<br />
touchée par le liquide.<br />
2. Neutralisez l’acide de batterie<br />
avec du jus de citron ou du<br />
vinaigre.<br />
3. Si vos yeux ont été en contact<br />
avec le liquide, rincez-les <strong>à</strong><br />
l’eau claire pendant au moins<br />
10 minutes. Consultez ensuite<br />
immédiatement un médecin !<br />
Une batterie, même lorsqu’elle<br />
est usagée, ne doit pas être jetée<br />
dans un feu ou laissée <strong>à</strong><br />
proximité de flammes : danger<br />
d’explosion !<br />
Les éléments de contact ne<br />
doivent jamais être reliés par du<br />
métal ou toute autre pièce<br />
conductrice : risque de courtcircuit<br />
et danger d’incendie !
12. Mise au rebut et recyclage<br />
Ni-Cd Ces batteries<br />
contiennent des<br />
éléments<br />
d’accumulation<br />
de type Nickel-Cadmium.<br />
Garantie<br />
Le fabricant accorde <strong>sur</strong> ses<br />
produits exclusivement destinés <strong>à</strong><br />
un usage privé une garantie de<br />
24 mois (<strong>à</strong> compter de la date<br />
d’achat) qui n’affecte pas les<br />
dispositions légales. La garantie<br />
s’applique <strong>à</strong> tous les défauts<br />
majeurs tenant d’une manière<br />
démontrable <strong>à</strong> des vices de<br />
matériau ou de fabrication. Elle<br />
entraîne, <strong>à</strong> la discrétion du<br />
fabricant, le remplacement ou la<br />
réparation du produit défectueux<br />
sans frais de pièces ou <strong>main</strong>d’?uvre<br />
dans les conditions<br />
suivantes :<br />
.Lors du transfert des risques, le<br />
produit a été remis sans vices<br />
juridiques.<br />
.Un bon d’achat original avec<br />
l’adresse de l’acheteur, la date<br />
d’achat, la désignation et le<br />
modèle du produit est joint.<br />
.Le produit a été traité de façon<br />
conforme, suivant les<br />
instructions d’emploi. Le<br />
respect des consignes<br />
d’entretien et de nettoyage<br />
contenues dans le mode<br />
d’emploi est obligatoire. Ni<br />
l’acquéreur ni un tiers non<br />
agréé n’ont tenté de<br />
Après épuisement, elles ne<br />
doivent pas être jetées dans une<br />
poubelle ordinaire mais doivent<br />
être mises au rebut de manière<br />
appropriée ou recyclées.<br />
désassembler ou de réparer le<br />
produit.<br />
.Il est essentiel que seuls des<br />
pièces de rechange et<br />
accessoires originaux ou des<br />
pièces homologuées par le<br />
fabricant aient été utilisés. En<br />
cas d’utilisation de pièces ou<br />
d’accessoires non originaux, il<br />
est impossible d’exclure des<br />
dommages consécutifs et des<br />
risques d’accidents accrus.<br />
Ces dommages ne sont pas<br />
couverts par la garantie.<br />
.Le produit doit être remis<br />
directement ou envoyé<br />
suffisamment affranchi <strong>à</strong> un<br />
point de service après-vente<br />
agréé. Le bon d’achat original<br />
doit être joint au produit.<br />
.Les dommages résultant<br />
d’erreurs de manipulation,<br />
d’un usage non conforme, de<br />
pièces de rechange, de<br />
remplacement et d’accessoires<br />
non originaux ou non<br />
homologués et d’une<br />
<strong>main</strong>tenance ou d’un entretien<br />
inadéquat ne sont pas couverts<br />
par la garantie.<br />
Les produits renferment des<br />
éléments qui s’usent au fil de<br />
l’utilisation et du temps. Ces<br />
pièces ne sont pas couvertes par<br />
la garantie.<br />
Selon le produit, les pièces<br />
d’u<strong>sur</strong>e suivantes en sont exclues<br />
:<br />
Lames / barre de coupe /<br />
courroie d'entraînement /<br />
rouleau aérateur / cylindre de<br />
coupe / contre-lame / plaque<br />
de coupe / fil de coupe /<br />
couvercle de tête de coupe /<br />
lame de scie / batterie nickelcadmium<br />
/ brosse / rouleau<br />
d’aération.<br />
Cette garantie de fabricant<br />
n’affecte pas les droits de<br />
garantie <strong>à</strong> l’égard du<br />
distributeur ou revendeur.<br />
29<br />
FR
FR<br />
30
ES<br />
4. Indicaciones al manual de instrucciones<br />
Le rogamos leer cuidadosamente<br />
las instrucciones para el empleo<br />
y observar sus indicaciones y las<br />
indicaciones de seguridad<br />
adjuntas. Familiarícese mediante<br />
5. Uso previsto<br />
El cortacésped de <strong>Mantis</strong> está<br />
previsto para cortar césped o<br />
hierba en el ámbito doméstico<br />
del jardín de casa o de un<br />
aficionado a la jardinería y no<br />
para el uso industrial en<br />
instalaciones públicas, parques,<br />
centros deportivos, carreteras ni<br />
en explotaciones agrícolas o<br />
forestales.<br />
Para utilizar correctamente el<br />
aparato es imprescindible seguir<br />
el manual de instrucciones de<br />
<strong>Mantis</strong> que se adjunta. El<br />
manual de instrucciones también<br />
contiene información sobre las<br />
condiciones de funcionamiento,<br />
mantenimiento y conservación.<br />
A<br />
¡Atención! El aparato no se<br />
debe utilizar para podar<br />
arbustos, setos ni matorrales, ni<br />
tampoco para cortar trepadoras<br />
o césped plantado sobre tejados<br />
o en tiestos, ya que existe<br />
estas instrucciones para el<br />
empleo con el aparato, las<br />
piezas de regulación y el uso<br />
adecuado así como con las<br />
indicaciones de seguridad.<br />
peligro de lesiones físicas.<br />
Además, el aparato no debe<br />
utilizarse como picadora para<br />
trocear desechos de la poda de<br />
árboles o setos ni para nivelar<br />
las irregularidades del suelo.<br />
A<br />
¡Atención! No permita<br />
nunca que los niños u<br />
otras personas que no conozcan<br />
este manual de instrucciones,<br />
utilicen este aparato.<br />
Guarde estas instrucciones de<br />
uso en un lugar seguro.<br />
No corte el césped cuando haya<br />
cerca personas (sobre todo<br />
niños) o animales.<br />
Puede que haya normativas<br />
locales que impongan una edad<br />
mínima del usuario.<br />
Recuerde que el usuario es<br />
responsable de los accidentes<br />
que afecten a la integridad física<br />
o a la propiedad de otras<br />
personas.<br />
31<br />
ES
ES<br />
6. Montaje<br />
Comprobación del contenido<br />
suministrado<br />
La caja de embalaje debe<br />
contener los siguientes<br />
componentes:<br />
.Cortacésped<br />
.1 batería<br />
.1 pieza superior del varillaje<br />
.1 pieza central del varillaje<br />
.2 pieza inferior del varillaje<br />
.piezas de sujeción para el<br />
varillaje en bolsa de plástico<br />
.1 cargador (24 voltios)<br />
.1 calibre de espesor<br />
.Manual de instrucciones<br />
Montaje del varillaje<br />
Introduzca una parte inferior de<br />
las varillas de guía (fig. A, pos. 1)<br />
por la abertura (fig. B, pos. B1).<br />
Los arcos de la parte inferior de<br />
las varillas de guía tienen que<br />
indicar hacia el centro del<br />
aparato. La parte inferior de las<br />
varillas de guía se introduce en<br />
los taladros (fig. C, pos. 6)<br />
sobre los pernos del varillaje<br />
(fig. B/C, pos 7). En el lado<br />
opuesto repita este proceso con<br />
la segunda parte inferior del<br />
varillaje de guía.<br />
A ¡Atención!<br />
El embalaje del<br />
aparato está<br />
compuesto de material<br />
reciclable o<br />
recuperable. Entregue,<br />
por lo tanto, el<br />
embalaje del aparato y sus<br />
elementos en los Puntos o<br />
32<br />
No use fuerza<br />
durante el montaje.<br />
Introduzca el tornillo de sujeción<br />
de la barra (fig. A, pos. 5) por<br />
el taladro del sujetacables (fig.<br />
A, pos. 8).<br />
Ensamble la pieza central del<br />
varillaje de guía (fig. A, pos. 2)<br />
y .ambas partes centrales del<br />
varillaje de guía como se<br />
expone en la Fig. A, en los<br />
taladros a la misma altura<br />
introduzca el tornillo de sujeción<br />
de la barra con el sujetacables<br />
por los taladros, empuje la<br />
arandela (fig. A, pos. 13) sobre<br />
el tornillo de sujeción de la<br />
barra y con el asa de sujeción<br />
de la barra (fig. A, pos. 4)<br />
atornille las piezas con presión<br />
manual.<br />
Tome la pieza superior del<br />
varillaje de guía (fig. A, pos. 3)<br />
y ensámblela como se expone<br />
en la fig. A con la pieza central<br />
del varillaje de guía, en los<br />
taladros a la misma altura<br />
introduzca el tornillo de sujeción<br />
de la barra con el sujetacables<br />
por los taladros, empuje la<br />
arandela (fig. A, pos. 13) sobre<br />
el tornillo de sujeción de la<br />
barra y con el asa de sujeción<br />
de la barra (fig. A, pos. 4)<br />
atornille las piezas con presión<br />
manual.<br />
Centros Oficiales de recogida<br />
para su reciclaje o<br />
recuperación. Los aparatos<br />
eléctricos no deben ser<br />
desechados con la ba<strong>sur</strong>a<br />
doméstica, sino de la forma<br />
adecuada.<br />
Sujete el cable insertando el<br />
sujetacables desde fuera en la<br />
parte inferior del manillar<br />
(fig. A, pos. 25).<br />
A ¡Atención!<br />
Ponga atención<br />
de no apretar el cable.
ES<br />
7. Puesta en servicio<br />
7.1. Ajuste de la altura de corte<br />
A<br />
Atención: Ajuste la altura<br />
de corte siempre con el<br />
motor desconectado. En caso<br />
contrario existe peligro de<br />
lesiones.<br />
Para ajustar la altura de corte<br />
en el cortacésped proceda de la<br />
forma siguiente:<br />
1. Ponga el cortacésped sobre<br />
una base firme y plana.<br />
2. Colóquese delante de la<br />
escala de alturas de corte del<br />
cortacésped (fig.D).<br />
3. Afloje las dos tuercas de<br />
sujeción (fig. D, pos. 9).<br />
4. Ajuste con ambas manos la<br />
altura de corte deseada con<br />
las palancas (fig. E, pos. 12)<br />
(fig. E / E1):<br />
Altura de corte máxima:<br />
45 mm.<br />
Altura de corte mínima:<br />
20 mm.<br />
Nota: Las flechas indicadoras de<br />
la altura de corte (fig. E / E1,<br />
pos. 8) deben estar en la misma<br />
posición de la escala en ambos<br />
lados.<br />
5. Apriete de nuevo las dos<br />
tuercas de sujeción (fig. D,<br />
pos. 9).<br />
Nota: La altura de corte debe<br />
graduarse de forma que en caso<br />
de irregularidades del terreno la<br />
cuchilla inferior y las cuchillas<br />
helicoidales no rocen el suelo.<br />
7.2. Carga de la batería<br />
Por razones técnicas, la batería<br />
(fig. F, pos. 20) no está<br />
cargada. Por ello, debe<br />
cargarse antes de la primera<br />
puesta en servicio.<br />
Para el efecto, se debe utilizar<br />
únicamente el cargador (fig. F,<br />
pos. 21).<br />
Introduzca el cargador (fig. F,<br />
pos. 21) en la toma y el enchufe<br />
del cargador (fig. F, pos. 22) en<br />
el casquillo de carga (fig. F, pos.<br />
23) de la batería. Se inicia la<br />
carga.<br />
Compruebe que la tensión de<br />
red sea la correcta.<br />
Tiempo de carga inicial aprox.<br />
24 horas. Posteriormente y<br />
según el estado de descarga 12<br />
a 24 horas.<br />
La batería alcanza su pleno<br />
rendimiento después de varios<br />
(aprox. 5) procesos de<br />
carga / descarga.<br />
A<br />
La batería debe cargarse<br />
únicamente con el<br />
cargador , ya que sólo éste<br />
garantiza una óptima<br />
compatibilidad técnica entre la<br />
batería y el cargador.<br />
Cuando se utilizan otros<br />
cargadores pueden producirse<br />
daños materiales y de personas.<br />
La utilización de cargadores<br />
ajenos ocasiona la pérdida de la<br />
garantía y de todos los derechos<br />
a hacer efectiva una<br />
responsabilidad.<br />
A<br />
Cargue la batería durante<br />
24 horas antes de la<br />
primera puesta en servicio.<br />
A<br />
Durante la carga, el<br />
enchufe del cargador se<br />
calienta un poco.<br />
A<br />
Realice la carga siempre<br />
en lugares secos y a la<br />
sombra.<br />
A<br />
Compruebe que no haya<br />
materiales inflamables<br />
cerca durante la carga.<br />
7.3. Conexión de la batería<br />
1. Abra el compartimento para<br />
la correa (fig. G pos. 13).<br />
Sostenga la batería en la<br />
mano derecha mientras tira<br />
con la izquierda de la correa<br />
hacia la izquierda, de modo<br />
que los extremos de la correa<br />
queden planos sobre la<br />
batería (fig. H).<br />
2. Desplace la batería por el riel<br />
de contacto (fig. I, pos. 24)<br />
hasta que oiga cómo encaja.<br />
3. Guarde la correa enrollada<br />
en el compartimento para la<br />
correa (fig. J) y cierre la tapa<br />
(fig. J, pos. 13). De este<br />
modo, bloquea a la vez la<br />
batería en el riel de contacto.<br />
7.4. Arrancar<br />
A<br />
Atención: Antes de la<br />
puesta en marcha del<br />
cortacésped compruebe si se<br />
encuentran cuerpos extraños<br />
entre las cuchillas helicoidales y<br />
quítelos.<br />
Para arrancar el cortacésped<br />
proceda de la forma siguiente:<br />
1. Ponga el aparato sobre un<br />
lugar llano del césped.<br />
2. Para arrancar, apriete el<br />
botón de desbloqueo (fig. K,<br />
pos. 15) y manténgalo<br />
apretado; al mismo tiempo<br />
tire, con la otra mano, de la<br />
palanca de arranque (fig. K,<br />
pos. 16) hacia la<br />
empuñadura.<br />
3. Al soltar de nuevo la palanca<br />
de arranque (fig. K, pos. 16)<br />
se desconecta el motor.<br />
A<br />
Los dispositivos de<br />
seguridad de origen no<br />
deben quitarse ni taparse (p. ej.<br />
atando la palanca de arranque<br />
al larguero). Esto podría causar<br />
lesiones, ya que el aparato no<br />
puede desconectarse<br />
automáticamente.<br />
A ¡Atención!<br />
Funcionamiento<br />
de las cuchillas por inercia.<br />
La batería se calienta cuando se<br />
trabaja con el aparato. Este es<br />
un proceso normal que no afecta<br />
el rendimiento del mismo.<br />
33<br />
ES
ES<br />
8. Cortar correctamente<br />
8.1. Observaciones generales<br />
acerca del césped<br />
Al comienzo del período de<br />
corte y en superficies de césped<br />
nuevas recomendamos elegir<br />
una altura de corte relativamente<br />
alta (p. ej., 45 mm) y reducirla<br />
después progresivamente en los<br />
sucesivos cortes. Para conservar<br />
un césped bien cuidado la altura<br />
de corte debe ajustarse a entre<br />
25 y 30 mm, aproximadamente.<br />
Corte el césped cada semana, si<br />
es posible. Mediante el corte<br />
frecuente el crecimiento se<br />
concentra en los tallos de hierba<br />
cortos y los hace más resistentes.<br />
Corte el césped siempre en<br />
seco. Para obtener un corte<br />
limpio mueva el cortacésped en<br />
franjas lo más rectas posibles y<br />
andando a paso normal. Las<br />
franjas de corte deben solaparse<br />
siempre unos centímetros para<br />
que no queden marcas sobre el<br />
césped.<br />
Corte el césped la primera vez<br />
en primavera, en cuanto la<br />
hierba empiece a crecer y se<br />
pueda pisar. Si la hierba está<br />
demasiado alta alguna vez,<br />
córtela primero en una dirección<br />
con una altura de corte alta<br />
(p. ej., 45 mm) y después en<br />
sentido transversal con una<br />
altura más baja ( p. ej., 25 mm).<br />
La superficie de corte por una<br />
carga de la batería depende de<br />
la altura y del espesor del<br />
césped, es decir, cuanto más<br />
alto y espeso sea el césped más<br />
pequeña será la superficie de<br />
corte por carga de la batería.<br />
8.2. El corte<br />
Nota: Sólo deben emplearse<br />
cuchillas helicoidales afiladas y<br />
en buen estado para que la<br />
hierba del césped no se vuelva<br />
amarilla y su corte sea preciso.<br />
34<br />
Para obtener un aspecto de<br />
corte limpio conduzca el<br />
cortacésped a una velocidad<br />
adecuada en franjas lo más<br />
rectas posible.<br />
Nota: El cortacésped se puede<br />
utilizar con la batería o sin la<br />
batería como cortacésped<br />
manual.<br />
A<br />
Precaución: Las cuchillas<br />
helicoidales en marcha<br />
pueden producir heridas.<br />
Debe mantenerse siempre la<br />
distancia de seguridad entre las<br />
cuchillas helicoidales y el<br />
usuario, establecida por el<br />
varillaje de conducción. En las<br />
pendientes mueva el cortacésped<br />
siempre en sentido transversal y<br />
observe una posición firme y<br />
segura en todo momento.<br />
Tenga un especial cuidado al<br />
desplazarse hacia atrás. Peligro<br />
de tropezar.<br />
Para cambiar la altura de corte<br />
proceda como se describe en el<br />
párrafo “Ajuste de la altura de<br />
corte”.<br />
8.3. Cortar el césped con la<br />
cesta colectora del pasto<br />
A<br />
Coloque el saco recogedor<br />
de césped sólo con el<br />
motor desconectado y las<br />
cuchillas paradas.<br />
Con la cesta colectora del pasto<br />
se ahorra rastrillar el césped<br />
cortado. Se puede adquirir en el<br />
comercio especializado. La<br />
condición previa para un buen<br />
resultado de colección es que el<br />
césped esté seco y que el<br />
cortacésped sea empujado a<br />
paso ligero.<br />
Nota: La altura del saco<br />
recogedor de césped se puede<br />
regular mediante la cadena de<br />
suspensión. Para obtener una<br />
buena recogida de la hierba<br />
cortada, debe conducirse el<br />
cortacésped a paso normal.<br />
Protección contra<br />
bloqueo / Termoprotector<br />
En caso de bloqueo del<br />
cortacésped por un cuerpo<br />
extraño, o sobrecarga del motor,<br />
la protección de bloqueo<br />
desconecta automáticamente el<br />
motor. Saque la batería del riel<br />
de contacto. Extraiga el cuerpo<br />
extraño, o compruebe la causa<br />
de la sobrecarga, conecte el<br />
aparato otra vez después de<br />
algunos segundos. Si se<br />
desconecta el motor a pesar de<br />
no encontrarse ningún cuerpo<br />
extraño entre las cuchillas de<br />
corte, podría ser que la altura<br />
de corte elegida es demasiado<br />
baja. Ajuste una altura de corte<br />
más alta, p. ej., 45 mm, y<br />
realice el segundo corte con la<br />
altura de corte deseada.<br />
En caso de sobrecarga del<br />
cortacésped durante largo<br />
tiempo se puede recalentar el<br />
motor.<br />
Para protegerlo contra<br />
calentamiento, el termoprotector<br />
desconecta el aparato, que se<br />
puede volver a conectar después<br />
de aproximadamente 2 – 5<br />
minutos.
ES<br />
9. Mantenimiento, limpieza, almacenamiento<br />
9.1. Mantenimiento<br />
El mantenimiento consiste en<br />
trabajos que procuran unas<br />
condiciones de servicio<br />
perfectas del cortacésped. Con<br />
un control periódico del<br />
atornillado, posibles fi<strong>sur</strong>as y<br />
daños de cualquier tipo y la<br />
sustitución de las piezas<br />
dañadas o inservibles por el<br />
desgaste, se evitan en gran<br />
parte los accidentes y paros<br />
involuntarios del aparato.<br />
Las reparaciones sólo deben<br />
realizarlas los Servicios Técnicos<br />
de <strong>Mantis</strong> o los puntos de<br />
reparaciones autorizados.<br />
A<br />
Antes de realizar trabajos<br />
de ajuste o limpieza se<br />
debe desconectar el cortacésped<br />
con cilindro de corte y protegerlo<br />
contra la conexión<br />
involuntaria. Para ello, desmonte<br />
la batería.<br />
9.2. La batería<br />
Carga de la batería<br />
A<br />
Nota: La batería debe<br />
cargarse solamente con el<br />
cargador adjunto. En caso de<br />
utilizar otros cargadores se<br />
pueden producir daños<br />
personales y materiales. El uso<br />
de otros cargadores supone la<br />
pérdida de todos los derechos<br />
de reclamación y de la garantía<br />
del fabricante.<br />
Recomendamos que cargue la<br />
batería enseguida después del<br />
uso del cortacésped con el<br />
cargador adjunto.<br />
A<br />
¡Atención! No cargar la<br />
batería a temperatura de<br />
servicio elevada o cuando esté<br />
caliente. Déjela enfriar<br />
previamente.<br />
Durante el proceso de carga no<br />
debe exponer la batería a<br />
radiación directa de sol.<br />
No cargue nunca la batería<br />
cerca de ácidos ni de materiales<br />
inflamables. ¡Peligro de<br />
incendio!<br />
Nota: No espere a cargar la<br />
batería hasta que esté<br />
completamente descargada.<br />
Cargue la batería en un lugar<br />
seco del modo siguiente:<br />
1. Abra la tapa del<br />
compartimento para la correa<br />
(fig. J, pos. 13).<br />
2. Saque la batería del riel de<br />
contacto (fig. I, pos. 24).<br />
3. Conecte el enchufe (fig. F,<br />
pos. 22) del cargador en el<br />
casquillo de carga (fig. F,<br />
pos. 23).<br />
4. A continuación, enchufe el<br />
cargador (fig. F, pos. 21) en<br />
la toma de la red.<br />
5. Para poder seguir cortando,<br />
proceda como se describe en<br />
el apartado 7.2.<br />
Notas:<br />
.El enchufe de carga (fig. F,<br />
pos. 23) se debe proteger<br />
contra suciedad y humedad.<br />
.Si la batería está tan<br />
descargada que el cortacésped<br />
con cilindro de corte se para,<br />
tardará 24 horas en volver a<br />
cargarse.<br />
La batería debe guardarse en un<br />
lugar seco, elevado, no húmedo,<br />
lugar que se pueda cerrar,<br />
donde los niños no tengan<br />
acceso. Evite radiación solar<br />
directa.<br />
Nunca la guarde conectada a un<br />
aparato para evitar un uso<br />
indebido o accidentes.<br />
Asegúrese de que la superficie y<br />
los contactos de la batería<br />
siempre estén limpios y secos<br />
antes de conectarla a la unidad<br />
de carga. En caso de<br />
suciedades, límpielos con un<br />
paño suave, nunca bajo chorro<br />
de agua.<br />
En caso de que deje de usar la<br />
batería durante un tiempo<br />
prolongado, cárguela por<br />
completo antes de su<br />
almacenamiento. Como una<br />
batería de NiCd está sometida<br />
a procesos de autodescarga, se<br />
recomienda efectuar una carga<br />
completa antes de volver a<br />
utilizarla después de un tiempo<br />
prolongado de almacenamiento.<br />
35<br />
ES
ES<br />
9.3. El cortacésped<br />
Limpieza<br />
A<br />
Debido al peligro de daños<br />
personales y materiales,<br />
no debe limpiar el cortacésped<br />
bajo agua corriente, y en<br />
especial no bajo presión.<br />
Después del uso limpie el<br />
aparato con un trapo húmedo.<br />
Recubra las cuchillas<br />
helicoidales y la cuchilla inferior<br />
con una capa de aceite de baja<br />
viscosidad (p.ej., aceite<br />
pulverizado).<br />
Mantenimiento<br />
El reafilado de las cuchillas, que<br />
con un buen cuidado sólo es<br />
necesario después de algunos<br />
años, sólo puede ser realizado<br />
por el Servicio postventa de<br />
<strong>Mantis</strong>, debido a la técnica de<br />
afilado especial.<br />
Las reparaciones del<br />
cortacésped y el montaje de las<br />
cuchillas de corte sólo pueden<br />
ser realizados en talleres<br />
especializados adecuados.<br />
Nota: Compruebe que todos los<br />
tornillos, pernos y tuercas están<br />
bien apretados y que el aparato<br />
se encuentra en un seguro estado<br />
de servicio. Por motivos de<br />
seguridad encargue el cambio<br />
de piezas gastadas y<br />
deterioradas al Servicio<br />
postventa de <strong>Mantis</strong> o a un taller<br />
36<br />
especializado autorizado.<br />
Para evitar daños personales y<br />
materiales recomendamos hacer<br />
revisar el aparato en el otoño,<br />
para que esté inmediatamente<br />
disponible al inicio de la nueva<br />
temporada.<br />
Almacenamiento<br />
Guarde el cortacésped en un<br />
lugar seco, fresco y protegido<br />
contra las heladas, al que no<br />
tengan acceso los niños.<br />
9.4. Reajuste de las cuchillas<br />
Las cuchillas de su cortacésped<br />
han sido óptimamente ajustadas<br />
antes de salir de nuestra fábrica.<br />
Si el corte no es limpio después<br />
de largo uso, corrija el ajuste de<br />
la cuchilla inferior de<br />
contracorte de la forma<br />
siguiente:<br />
1. Desconecte el cortacésped y<br />
protéjalo contra la conexión<br />
involuntaria sacando la<br />
batería del riel de contacto.<br />
2. Introduzca el calibre de<br />
espesor (fig. L, pos. 21), que<br />
se adjunta, en el lado<br />
izquierdo entre una cuchilla<br />
helicoidal y la cuchilla<br />
inferior de contracorte (fig. L).<br />
3. Gire el tornillo hexagonal<br />
(fig. L, pos. 20) con una llave<br />
de 10 mm hacia la izquierda<br />
respectivamente hacia la<br />
derecha, hasta que el calibre<br />
de espesor roce ligeramente.<br />
Repita la operación en el<br />
lado derecho del cortacésped.<br />
4. Haga girar las cuchillas<br />
helicoidales a modo de<br />
prueba; ninguna de las cinco<br />
cuchillas debe tocar la<br />
cuchilla inferior de<br />
contracorte.<br />
A<br />
Atención: Las manipulaciones<br />
en el grupo de<br />
cuchillas deben realizarse con<br />
especial cuidado (peligro de<br />
corte). Use guantes adecuados.<br />
5. Después de ajustar las<br />
cuchillas haga una prueba de<br />
corte con una hoja de papel<br />
de periódico (fig. M).
ES<br />
10. Solución de averías<br />
Aspectos generales<br />
Las averías sólo aparecen en la<br />
mayoría de los casos cuando el<br />
aparato no se trata, no se cuida<br />
y no se mantiene correctamente.<br />
En la tabla siguiente se recogen<br />
las averías más frecuentes y su<br />
solución. Si se dan más averías<br />
acuda al puesto de servicio<br />
autorizado por el fabricante más<br />
cercano o acuda a un<br />
distribuidor oficial autorizado.<br />
A<br />
¡Atención! Las reparaciones<br />
que requieran<br />
conocimientos especializados<br />
sólo deben ser efectuadas por<br />
un técnico autorizado.<br />
A<br />
¡Atención! Por motivos de<br />
seguridad, utilice sólo<br />
repuestos originales del<br />
fabricante o piezas autorizadas<br />
por éste.<br />
Hacemos constar que, según la<br />
ley alemana sobre<br />
responsabilidad por productos,<br />
no nos responsabilizamos de los<br />
Avería Posibles causa Solución<br />
Ruidos anormales.<br />
Ruidos de golpes metálicos.<br />
El motor no arranca.<br />
El motor se para.<br />
El césped se vuelve amarillo.<br />
Corte impreciso.<br />
El césped se vuelve amarillo.<br />
Corte impreciso.<br />
Tornillos sueltos del motor o de<br />
las fijaciones o de la carcasa.<br />
Un cuerpo extraño bloquea las<br />
cuchillas helicoidales.<br />
La batería no está bien<br />
encajada.<br />
El termoprotector se ha<br />
disparado.<br />
Bloqueo por cuerpos extraños.<br />
La protección contra bloqueo<br />
se ha disparado.<br />
La altura de corte ajustada<br />
es demasiado baja; marcha<br />
demasiado rápida.<br />
El termoprotector se ha<br />
disparado.<br />
La capacidad de la batería es<br />
demasiado baja para grandes<br />
esfuerzos de corte.<br />
Altura de corte demasiado<br />
baja.<br />
La distancia de corte entre las<br />
cuchillas helicoidales y la cuchilla<br />
inferior es demasiado amplia.<br />
La cuchilla está gastada<br />
o deteriorada.<br />
daños ocasionados por nuestros<br />
aparatos si tales daños son<br />
causados por reparaciones<br />
indebidas, causados por<br />
recambios parciales en los<br />
cuales no se han usado las<br />
piezas originales del fabricante<br />
o piezas autorizadas por éste, ni<br />
tampoco si son causados por<br />
reparaciones hechas por un<br />
servicio técnico distinto al del<br />
fabricante o por técnicos no<br />
autorizados por el fabricante.<br />
Todo ello también se aplica a los<br />
accesorios.<br />
Ajustar firmemente los tornillos.<br />
Desconectar el aparato. Sacar<br />
la batería del riel de contacto.<br />
Extraer el cuerpo extraño.<br />
La correa no está plana sobre<br />
la batería.<br />
Esperar aproximadamente<br />
2 – 5 minutos. Después conectar<br />
de nuevo el aparato.<br />
Desconectar el aparato. Sacar<br />
la batería del riel de contacto.<br />
Extraer el cuerpo extraño.<br />
Después de una pausa de<br />
enfriamiento de 2 – 5 minutos<br />
cortar con una altura de corte<br />
más alta y reducirla después<br />
progresivamente hasta la altura<br />
más baja deseada. Empujar el<br />
cortacésped más despacio sobre<br />
la superficie de hierba.<br />
Reduzca el esfuerzo o cargue<br />
la batería (vease capítulo 9.2.<br />
“La batería”).<br />
Aumentar la altura de corte.<br />
Reajustar las cuchillas<br />
(véase capítulo 9.4.).<br />
Hacer cambiar las cuchillas<br />
por el servicio técnico de <strong>Mantis</strong><br />
o por un técnico autorizado.<br />
37<br />
ES
ES<br />
11. Indicaciones para el uso adecuado / Indicaciones de seguridad<br />
A<br />
38<br />
Controles a efectuar antes<br />
de cada uso<br />
Antes de cada uso haga un<br />
control visual del aparato. No<br />
debe utilizar el cortacésped si el<br />
mango de arranque, la tapa de<br />
protección y la barra<br />
portacuchillas estuvieran<br />
dañados o las cuchillas<br />
desafiladas. No deben anularse<br />
nunca los dispositivos de<br />
seguridad originales.<br />
Antes de empezar a cortar, revise<br />
la superficie que vaya a cortar.<br />
Compruebe todos los elementos<br />
de corte antes de cada uso y<br />
extraiga posibles cuerpos<br />
extraños (p. ej, piedras, ramas o<br />
huesos). Durante el trabajo<br />
tenga cuidado con cuerpos<br />
extraños.<br />
El rodillo de cuchillas y la<br />
cuchilla inferior se han de<br />
revisar periódicamente y en caso<br />
necesario reparar o sustituir.<br />
Las herramientas de corte deben<br />
ser cambiadas por el Servicio<br />
postventa de <strong>Mantis</strong> o por<br />
talleres autorizados.<br />
A<br />
Utilización /<br />
responsabilidad<br />
Los cortacéspedes pueden<br />
causar serios daños. Vd. es<br />
responsable de la seguridad en<br />
el área de trabajo.<br />
No arranque nunca el<br />
cortacésped tumbado. Peligro de<br />
lesiones.<br />
Sólo debe utilizar el cortacésped<br />
para trabajos especificados en el<br />
presente manual.<br />
Trabaje sólo mientras exista la<br />
suficiente visibilidad.<br />
Haga funcionar el aparato sólo<br />
a paso normal.<br />
Familiarícese con su alrededor y<br />
fíjese en posibles peligros que<br />
posiblemente no podrá oír a<br />
causa del ruido del motor.<br />
Póngase calzado robusto y<br />
antideslizante y pantalones<br />
largos para proteger sus<br />
piernas.<br />
Mantenga los dedos y pies fuera<br />
de los elementos de corte.<br />
Mantenga a terceros<br />
(especialmente a los niños) y<br />
animales fuera del área de<br />
trabajo.<br />
Para trabajar búsquese un sitio<br />
firme. Tenga cuidado al retroceder.<br />
¡Peligro de caídas!<br />
Si se choca contra un obstáculo<br />
durante el trabajo, desconecte el<br />
cortacésped . Saque la batería<br />
del riel de contacto. Elimine el<br />
obstáculo y compruebe si el<br />
aparato ha sufrido<br />
eventualmente daños. En caso<br />
necesario, hágalo reparar.<br />
Interrupción del trabajo<br />
A<br />
No se debe dejar el cortacésped<br />
nunca en el lugar de trabajo sin<br />
vigilar. Si desea interrumpir el<br />
trabajo, guárdelo en lugar<br />
seguro.<br />
Si interrumpe el trabajo porque<br />
quiere cambiar el lugar de<br />
trabajo, desconecte el<br />
cortacésped previamente y<br />
saque la batería del riel de<br />
contacto.<br />
Condiciones atmosféricas<br />
A<br />
No se debe utilizar el aparato en<br />
condiciones húmedas o cuando<br />
está lloviendo.<br />
No debe trabajarse con el<br />
cortacésped junto a piscinas o<br />
estanques.<br />
¡Respete las horas de descanso<br />
de sus vecinos!<br />
Proteja el cargador ante los<br />
ambientes húmedos.<br />
A<br />
Indicaciones de seguridad<br />
para la batería /<br />
Peligro de incendio<br />
No cargue la batería a<br />
temperatura de servicio elevada<br />
o cuando esté caliente. Déjela<br />
enfriar previamente.<br />
No debe exponer la batería a<br />
radiación directa de sol durante<br />
el proceso de carga.<br />
Cargue la batería sólo cuando<br />
esté desconectada del aparato<br />
de 24 voltios.<br />
No cargue nunca la batería<br />
cerca de ácidos ni de materiales<br />
inflamables. ¡Peligro de incendio!<br />
Utilice la batería sólo para los<br />
aparatos de conexión previstos<br />
para ello.<br />
Bajo condiciones extremas, es<br />
posible que la batería pierda un<br />
poco de líquido. Ello no significa<br />
que hay un defecto. Proceda del<br />
modo siguiente, en caso de que<br />
la caja pierda su<br />
impermeabilidad en una situación<br />
tal:<br />
1. Lave con agua y jabón las<br />
zonas de piel afectadas.<br />
2. Neutralice el ácido de la<br />
batería con vinagre o zumo<br />
de limón.<br />
3. En caso de que el líquido de<br />
la batería caiga al ojo,<br />
enjuague el ojo con agua<br />
clara durante 10 minutos<br />
como mínimo. ¡Vaya de<br />
inmediato al médico!<br />
No tirar nuca al fuego baterías<br />
que ya no se utilicen. ¡Peligro de<br />
explosión!<br />
Tenga cuidado de que los<br />
contactos nunca se sobrepasen<br />
con piezas metálicas o<br />
conductoras de electricidad.<br />
¡Peligro de corto circuito – y de<br />
incendios!
ES<br />
12. Eliminación / Reciclaje<br />
Ni-Cd Estas baterías<br />
contienen pilas<br />
de níquelcadmio.<br />
Cuando se acaben, no se deben<br />
eliminar<br />
Garantía<br />
El fabricante garantiza sus<br />
productos para el uso doméstico<br />
durante 24 meses (a partir de la<br />
fecha de compra). Esta garantía<br />
no va en detrimento de los<br />
derechos de garantía legales.<br />
Esta garantía hace referencia a<br />
todos los defectos importantes<br />
de los productos que se<br />
demuestre se deben a defectos<br />
de fabricación o del material. La<br />
garantía consiste en la<br />
sustitución por otro producto en<br />
buen estado o en la reparación<br />
gratuita del producto, lo que se<br />
considere más oportuno. Éstas<br />
son las condiciones previas que<br />
deben darse:<br />
.El producto se ha enviado<br />
según la ley en caso de<br />
transporte de mercancías<br />
peligrosas.<br />
.Se debe adjuntar el<br />
comprobante de compra<br />
original con la dirección del<br />
comprador, la fecha de<br />
compra, el modelo y el<br />
nombre del producto.<br />
.El producto se ha tratado<br />
correctamente siguiendo las<br />
recomendaciones de las<br />
instrucciones de uso. Es<br />
indispensable haber<br />
mantenido y limpiado el<br />
producto según las<br />
instrucciones de uso. Ni el<br />
con la ba<strong>sur</strong>a doméstica sino de<br />
la forma reglamentaria.<br />
Devuelva las baterías a un<br />
distribuidor de unidades de<br />
alimentación de 24 voltios de<br />
<strong>Mantis</strong> o póngase en contacto<br />
con un centro de eliminación de<br />
desechos que recoja baterías<br />
recargables.<br />
comprador ni terceras<br />
personas sin autorización han<br />
intentado desmontar ni<br />
reparar el producto.<br />
.Se debe garantizar que sólo<br />
se han utilizado recambios y<br />
accesorios originales o<br />
componentes autorizados por<br />
el fabricante. Si se han<br />
utilizado piezas o accesorios<br />
no originales, no pueden<br />
excluirse daños ni un<br />
incremento del riesgo de<br />
accidentes. Estos daños no<br />
están incluidos en la garantía.<br />
.El producto se debe llevar o<br />
enviar directamente o por<br />
correo a uno de los centros de<br />
servicio técnico autorizados.<br />
Se debe adjuntar el<br />
comprobante de compra<br />
original.<br />
.Los daños debidos a errores<br />
del usuario, a un uso indebido,<br />
a la utilización de recambios<br />
o accesorios no originales o<br />
no autorizados, así como a<br />
trabajos de reparación y<br />
limpieza incorrectos, no se<br />
incluyen en la garantía.<br />
Los productos incluyen distintos<br />
componentes sujetos a desgaste<br />
por el uso o por el paso del<br />
tiempo. Estos componentes<br />
sujetos a desgaste no están<br />
incluidos en la garantía.<br />
Según el producto, se consideran<br />
componentes sujetos a desgaste<br />
los componentes siguientes:<br />
cuchillas / barra<br />
portacuchillas / correa de<br />
transmisión / rodillo de<br />
tratamiento / cilindro portacuchillas<br />
/ cuchilla<br />
inferior / placa de corte / hilo de<br />
corte / tapa del cabezal de<br />
corte / hoja de sierra / elemento<br />
de níquel cadmio<br />
(batería) / Cepillo / Rodillo<br />
ventilador.<br />
Esta garantía del fabricante no<br />
va en detrimento de los derechos<br />
de garantía del<br />
distribuidor / vendedor.<br />
39<br />
ES
ES<br />
40
1028 STREET ROAD, P.O. BOX 38<br />
SOUTHAMPTON, PA 18966<br />
www.mantis.com<br />
PN RM00002 1/08