C - Ocean Sailing Enterprises
C - Ocean Sailing Enterprises
C - Ocean Sailing Enterprises

You also want an ePaper? Increase the reach of your titles
YUMPU automatically turns print PDFs into web optimized ePapers that Google loves.
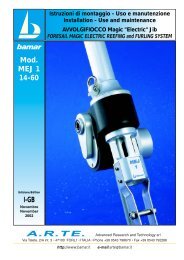
■ C-5 Montaggio dell'avvolgifiocco<br />
in testa d'albero<br />
• Ricollegare il terminale dello<br />
strallo in testa d'albero utilizzando<br />
allo scopo una drizza.<br />
PERICOLO<br />
Non eseguire installazioni in<br />
testa d'albero in caso di forte<br />
vento.<br />
ATTENZIONE<br />
Non piegare troppo i profili al<br />
momento della installazione<br />
sulla barca.<br />
■ C-6 Regolazione del<br />
tenditore dello strallo<br />
• Per regolare il tenditore smontare<br />
le 6 viti TCCE del riduttore<br />
inferiore poste sulla boccola di<br />
adattamento.<br />
• Sollevare il riduttore e farlo<br />
scorrere verso l'alto sugli<br />
estrusi fino a scoprire il<br />
tenditore alloggiato all'interno<br />
del riduttore stesso.<br />
• Ancorare lo strallo sulla landa<br />
di prua.<br />
• Regolare e bloccare il tenditore<br />
avendo cura di non accorciarlo<br />
oltre la lunghezza originaria.<br />
• Abbassare il riduttore fino a<br />
fissare le 6 viti TCCE nella posizione<br />
originale.<br />
22<br />
Uso e Manutenzione Avvolgifiocco<br />
Furler’s use and maintenance<br />
ISTRUZIONI DI MONTAGGIO<br />
INSTALLATION<br />
36<br />
37<br />
■ C-5 How to install the<br />
furler on board<br />
Edit. 11.2002<br />
C<br />
• Connect the top of the stay to<br />
the mast head using a halyard.<br />
DANGER<br />
Do not attempt to install the<br />
assembled system in strong<br />
winds<br />
CAUTION<br />
Make sure not to over bend the<br />
foils when installing on board.<br />
■ C-6 How to adjust the<br />
turnbuckle<br />
• In order to tension the<br />
turnbuckle, unscrew the 6<br />
screws on the tack adapter.<br />
• Lift the motorization and let it<br />
slide upwards over the extrusions<br />
until the turnbuckle<br />
housed inside the motorization<br />
is shown.<br />
• Connect the stay to the chain<br />
plate<br />
• Adjust and tighten the<br />
turnbuckle, making sure not to<br />
shorten it more than the original<br />
length.<br />
• Slip the motorization down and<br />
tighten the 6 screws in the original<br />
position.