gb-owner's manual..................................... 3 f -manuel d'
gb-owner's manual..................................... 3 f -manuel d'
gb-owner's manual..................................... 3 f -manuel d'

Create successful ePaper yourself
Turn your PDF publications into a flip-book with our unique Google optimized e-Paper software.
GB - OWNER’S MANUAL..................................... 3<br />
F - MANUEL D’ INSTRUCTIONS.................. 16<br />
D - BEDIENUNGSANLEITUNG...................... 29<br />
E - LIBRO DE INSTRUCCIONES.................... 42<br />
I - MANUALE DI ISTRUZIONI...................... 55<br />
GUARANTEE-GARANTIE-GARANTIE<br />
GARANTIA-GARANZIA..................................... 72
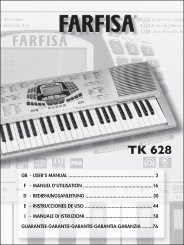
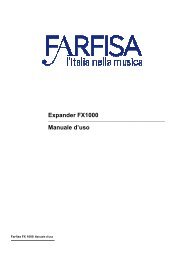
GB Insert the music-stand in the special holes.<br />
2<br />
PORTE-PARTITIONS<br />
<br />
F Insérer le porte-partitions dans les trous correspondants.<br />
D Den Notenständer in die entsprechenden Bohrungen einsetzen.<br />
E Insertar el atril en los agujeros apropriados.<br />
I Inserire il leggìo negli appositi fori.
TECHNICAL CARACTERISTICS ......................3<br />
POWER SUPPLY..................................4<br />
MAINS SUPPLY.............................4<br />
BATTERY SUPPLY ...........................4<br />
BONTEMPI OPTIONAL ACCESSORIES ...............4<br />
CONTROL PANEL . . . . . . . . . . . . . . . . . . . . . . . . . . . . . . . . . 5<br />
SOCKETS .......................................5<br />
DIRECTIONS ON THE KEYBOARD ..................5<br />
HOW TO USE THE KEYBOARD .....................6<br />
SWITCH ON AND SWITCH OFF...................6<br />
DEMO – Chosen excerpt ........................6<br />
VOLUMES ....................................6<br />
THE SONGS...................................6<br />
THE SOUNDS .................................6<br />
THE TRANSPOSER .............................7<br />
ACCOMPANIMENT SOUNDS ....................7<br />
THE STYLES...................................7<br />
TEMPO.......................................7<br />
THE METRONOME .............................7<br />
THE FUNCTIONS...............................8<br />
DJ EFFECTS PADS. .............................8<br />
DRUM PADS..................................8<br />
CHORD PADS .................................8<br />
MEDLEY SONG ON / OFF . ......................8<br />
MEMORY ON / OFF............................8<br />
SUSTAIN ON / OFF.............................8<br />
REVERB ON / OFF ............................8<br />
CHORD RECORD ON / OFF . ....................8<br />
SAVE POWER ALARM OFF / ON. .................8<br />
EASY PLAY ...................................8<br />
KEYBOARD: 32 mini-size keys (F-C).<br />
POLYPHONY: maximum 16 notes<br />
BASIC SOUNDS: 100 polyphonic tones<br />
TRANSPOSER: range +/– 6 semitones<br />
ACCOMPANIMENT SOUNDS: 6 polyphonic tones<br />
EFFECTS: REVERBS and SUSTAIN<br />
STYLES: 32 rhythms<br />
CHORD PROGRAM: 6 buttons for percussive rhythmical<br />
instruments, chords or special DJ effects<br />
CHORD RECORD: To memorise chords<br />
Controls: START/STOP, DOWN BEAT, TEMPO +/–,<br />
METRONOME: classical type<br />
SEQUENCER: REC and PLAY to record and listen<br />
INDEX<br />
TECHNICAL CARACTERISTICS<br />
CHORD CODE ...................................8<br />
CHORD PROGRAM. ..............................8<br />
SIMPLIFIED METHOD ..........................8<br />
CHORD RECORD ................................9<br />
SEQUENCER ..................................9<br />
MAESTRO ....................................9<br />
MAINTENANCE AND REMARKS....................9<br />
MUSIC METHOD ................................10<br />
INTRODUCTION TO THE METHOD ..............10<br />
THE VARIOUS ASPECTS OF MUSIC . .............10<br />
STRUCTURE OF THE METHOD ..................10<br />
LEVEL 1: TEMPO .............................10<br />
LEVEL 2: THE NOTES ..........................11<br />
PREMISE CONCERNING MUSICAL NOTATION .....12<br />
LOOKING AT THE KEYBOARD . .................12<br />
MUSICAL NOTATION ..........................12<br />
MODIFICATIONS . ............................12<br />
SYMBOLS AND LENGTHS OF THE NOTES .........13<br />
LEVEL 3: THE TUNE ..........................14<br />
LEVEL 4: THE CHORDS ........................14<br />
LEVEL 5: THE ACCOMPANIMENT ...............14<br />
THE SONG . .................................15<br />
TROUBLE SHOOTING GUIDE. .....................15<br />
TABLE OF SONGS. ...............................68<br />
SOUNDS LIST...................................69<br />
STYLES LIST . ...................................70<br />
ACCOMPANIMENT SOUNDS LIST ..................70<br />
CHORD CODE...................................71<br />
GUARANTEE ....................................72<br />
AUTOMATIC ACCOMPANIMENT: 6 keys of the Chord<br />
Program<br />
Controls: MEMORY ON/OFF<br />
General controls: ON/OFF, Volume, Numeric keyboard,<br />
Style, Song, Sound<br />
DEMO: Demo song<br />
SONGS: 32 pre-recorded songs with Medley ON/OFF<br />
MAESTRO: 5 learning levels<br />
AMPLIFICATION: 1 watt (RMS)<br />
A high efficiency Ø 77 mm speaker<br />
POWER SUPPLY: 6 x 1,5 Volt IEC R6 / AA batteries<br />
AC/DC Adapter – Input Vdc= 9 V / I = 200 mA<br />
DIMENSIONS: (480 x 175 x 50) mm<br />
WEIGHT: 0,8 Kg<br />
SIGMA S.p.A. reserves all rights to modify specifications of this product without notice.<br />
Keep this <strong>manual</strong> for future reference.<br />
INTRODUCTION<br />
3
INTRODUCTION<br />
MAINS SUPPLY<br />
The instrument can be supplied by the AC/DC “AD 170”<br />
(Vdc =9V / I = 200 mA) positive central adapter<br />
(not supplied) conforms to national and international<br />
safety regulations covering electrical appliances.<br />
The toy is not intended for children under 3 years old.<br />
<br />
<br />
<br />
RECOMMENDATIONS: The socket (1) for the adapter plug<br />
must be easily accessible. Inserting the plug into the socket<br />
at the back of the instrument automatically cuts off supply<br />
from the batteries. Ensure that the adapter is sufficiently<br />
ventilated and that the ventilation slits are not covered with<br />
objects such as newpapers, tablecloths, curtains, etc. Do not<br />
expose the adapter to drops or splashes of water.<br />
WARNING: All batteries or transformers with safety insulation<br />
must be checked regularly for faults in cable, wire, or<br />
plug insulation or other parts.<br />
BATTERY SUPPLY<br />
This instrument works with six 1.5V IEC R6 /AA batteries<br />
(not supplied) which are inserted in the housing at the<br />
bottom.<br />
To open press on the part of the lid marked OPEN.<br />
Fit the batteries as shown at the bottom of the housing.<br />
ADVICE ON USING THE BATTERIES<br />
<br />
Rechargeable batteries must be removed from the product<br />
<br />
<br />
4<br />
<br />
POWER SUPPLY<br />
1<br />
<br />
<br />
<br />
-<br />
<br />
periods of non-use.<br />
WASTE DISPOSAL STANDARDS<br />
For information regarding the disposal of the items mentioned<br />
here below, please refer to Council Administration<br />
office regarding specialised waste collection centres.<br />
1 - DISPOSAL OF BATTERIES<br />
Protect the environment by disposing<br />
of batteries in the special containers<br />
provided for this use.<br />
2 - PACKAGING DISPOSAL<br />
Take the paper, cardboard and corrugated board to the<br />
appropriate waste collection centres. Plastic material must<br />
be placed in the relevant collection containers.<br />
The symbols indicating the various types of plastic are:<br />
01<br />
PET<br />
02<br />
PE<br />
03<br />
PVC<br />
Key for the different types of plastic materials:<br />
PET= Polyethylene terephtalate<br />
PE= Polyethylene, code 02 for PE-HD, 04 for PE-LD<br />
PVC =Polyvinyl chloride<br />
PP= Polypropylene<br />
PS= Polystyrene, Polystyrene foam<br />
O= Other polymers (ABS, Laminates, etc.)<br />
3 - WASTE DISPOSAL OF USED ELECTRICAL<br />
AND ELECTRONIC APPLIANCES<br />
All articles displaying this symbol on the body,<br />
packaging or instruction <strong>manual</strong> of same, must<br />
not be thrown away into normal disposal bins<br />
but brought to specialised waste disposal centres.<br />
Here, the various materials will be divided by characteristics<br />
and recycled, thus making an important contribution to<br />
environmental protection.<br />
05<br />
PP<br />
OPTIONAL ACCESSORIES<br />
AD 170<br />
Mains supply adaptor.<br />
Vdc = 9V; Imax = 200 mA<br />
06<br />
PS<br />
07<br />
O
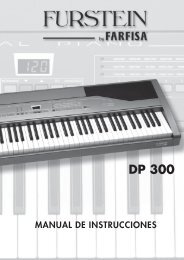
[1] ON/OFF - Turns the instrument on and off.<br />
[2] SEQUENCER REC - Records what is being played.<br />
[2] SEQUENCER PLAY - Plays what has been recorded.<br />
[3 VOLUME +/– - Selects the master volume.<br />
[4] TRANSPOSER +/– - Allows pitch of notes to be<br />
changed.<br />
[5] TEMPO +/– - Sets the tempo for style performance,<br />
songs or metronome.<br />
[6] START/STOP - Starts/Stops a rhythm style or a<br />
song.<br />
[7] STYLES - Selects the rhythm styles.<br />
CONTROL PANEL<br />
DIRECTIONS ON THE KEYBOARD<br />
Numbers: Indicate the keys to press to perform the melody with the simplified musical scores.<br />
INTRODUCTION<br />
<br />
SOCKETS<br />
INPUT DC 9 V -Switches the instrument on with an AC/DC<br />
adapter.<br />
[8] SONGS - Selects the pre-recorded songs.<br />
[9] SOUNDS - To select the sound on the keyboard.<br />
[10] Numeric keyboard 0-9 - To select functions,<br />
rhythm style, songs and sounds.<br />
[11] MAESTRO - Enters the 5 levels learning mode.<br />
[12] DEMO - Plays the<br />
demo song.<br />
[13] C H O R D<br />
PROGRAM - To<br />
play 6 percussive<br />
rhythmical instruments,<br />
chords or<br />
special DJ effects.<br />
<br />
5
HOW TO USE THE KEYBOARD<br />
SWITCH ON AND SWITCH OFF<br />
Move the switch to the ON/OFF position to turn the instrument on or off.<br />
When turned on, the keyboard is set to operate with the Stage Piano sound,<br />
the Pop rhythm and the song La Cucaracha.<br />
Note: to avoid unnecessary battery use, an alarm will sound (Save Power<br />
Alarm) to indicate that the keyboard has not been used for more than two minutes.<br />
The device can be switched off with function 91 Save Power Alarm.<br />
DEMO – Chosen excerpt<br />
Switching on the demo button, a melody that will emphasise the characteristics<br />
of the keyboard will play. To turn off the melody press the demo button.<br />
VOLUMES<br />
To regulate the volume of the instrument you must use buttons volume +<br />
(to turn up) or volume – (to turn down). To restore the standard volume<br />
press both volume + and volume – buttons together.<br />
THE SONGS<br />
The instrument contains 32 classic pieces.<br />
To select the piece, press the SONGS button (light on) and type in a two digit number from the SONGS list (e.g. 03 Jingle<br />
Bells, type in the 0 on the numeric keyboard then the 3) and press the start/stop button to activate the musical piece or to<br />
stop execution.<br />
When the first number is typed, the light blinks until the selection is complete. When the piece is playing, other songs can<br />
be listened to immediately by typing in the number which corresponds to the piece.<br />
THE SOUNDS<br />
The keyboard features 100 sounds divided into 6 families (e.g. 031-050 ORGAN).<br />
They are selected when the SOUNDS button is on by<br />
entering a three digit number between 001 and 100<br />
of the SOUNDS list you will find at the end of the<br />
Instructions Manual.<br />
Example: for the Full Organ sound type the number<br />
034 (first 0, then 3 and then 4 with the numeric<br />
keyboard).<br />
6<br />
HOW TO USE THE KEYBOARD<br />
FAMILY SOUNDS<br />
031<br />
032<br />
033<br />
ORGAN 034<br />
031 - 050 035<br />
036<br />
037<br />
Hammond<br />
Perc Organ<br />
Blues Organ<br />
Full Organ<br />
Theatre<br />
Organ<br />
Jazz Organ
HOW TO USE THE KEYBOARD<br />
IMPORTANT: With some sounds you might notice a slight difference of volume or sound quality when playing<br />
them in different areas of the keyboard. This is an inevitable consequence of multiple sampling and not a technical<br />
problem.<br />
THE TRANSPOSER<br />
The transposer +/– controls shift the whole keyboard tonality by +/– 6<br />
semitones.<br />
By simultaneously pressing the “+/–“ buttons of transposer, you will return<br />
to the standard 00 value.<br />
ACCOMPANIMENT SOUNDS WITH THE 6 BUTTONS OF<br />
THE CHORD PROGRAM<br />
Key in number 72 Chord Pads to activate the chord in the 6 pads of<br />
the CHORD PROGRAM.<br />
Key in a code between 80 and 85 to select the sounds.<br />
THE STYLES<br />
The keyboard has 32 rhythmic styles enriched by automatic<br />
accompaniments and completed by drums.<br />
They are sub-divided into 6 families (e.g. 22-28 LATIN) ,<br />
see the list at the end of this instruction <strong>manual</strong>. To select<br />
them press the STYLES button and then a 2 digit figure<br />
from the STYLES list.<br />
FAMILY STYLES<br />
LATIN<br />
22 - 28<br />
Example: to select Samba rhythm, digit number 23 (2, and 3).<br />
To start or to stop a rhythm press the start/stop button.<br />
To increase or decrease the speed of the song press the two buttons tempo + and tempo – .<br />
To go back to standard rhythm press buttons tempo + and tempo – together.<br />
The STYLES button lights the start of each beat or measure.<br />
When a rhythm is on function and you select a new style this latter starts at the end of the previous rhythm pattern.<br />
TEMPO<br />
The tempo +/– buttons can be used to set the tempo of the rhythm or of a song.<br />
THE METRONOME<br />
The metronome helps you to learn the music, giving the beat during musical exercises and simulating the traditional timemarking<br />
instrument.<br />
Select this by pressing the STYLES button and then number 33. To start or stop the metronome, press the start/stop<br />
button. To change the tempo, use the tempo +/– buttons.<br />
22<br />
23<br />
24<br />
25<br />
26<br />
27<br />
28<br />
Cha Cha Cha<br />
Samba<br />
Bossa<br />
Mambo<br />
Salsa<br />
Bachata<br />
Merengue<br />
ACCOMP. SOUNDS<br />
80<br />
81<br />
82<br />
83<br />
84<br />
85<br />
Piano<br />
El. Piano<br />
Hammond<br />
Theatre Organ<br />
Strings<br />
Slow Strings<br />
7
HOW TO USE THE KEYBOARD<br />
THE FUNCTIONS<br />
DJ Effect Pads<br />
These are used to assign special DJ effects to the 6 buttons. Activate with number 70 DJ Effects.<br />
Drum Pads<br />
To assign the percussion rhythm instruments to the 6 keys. It is activated with number 71 Drum Pads.<br />
Chord Pads<br />
To assign the chords to the 6 keys. It is activated with number 72 Chord Pads.<br />
Medley Song On / Off<br />
This function allows you to listen to all the songs one after the other, starting with the one you selected. It can be enabled<br />
by entering 73 Medley Song On and disabled with 74 Medley Song Off.<br />
Memory On / Off<br />
With a rhythm running, the played chord remains memorized even if the key is released.<br />
It is activated by typing number 75 Memory On and is deactivated with 76 Memory Off. It is normally active.<br />
Sustain On / Off<br />
This prolongs the sound of a note after the key is released.<br />
To switch on, digit number 86 Sustain On, and to switch off number 87 Sustain Off.<br />
Reverb On / Off<br />
This creates an effect as if you were playing music in an large empty room.<br />
To switch on digit number 88 Reverb On, and to switch off digit number 89 Reverb Off.<br />
Chord Record On / Off<br />
To record the chords in the 6 CHORD PROGRAM keys.<br />
It is both activated and deactivated with the number 90 Chord Record On/Off.<br />
During the recording phase, the three LEDs turn on in sequence.<br />
Save Power Alarm Off / On<br />
To switch the power alarm signal on or off. It is activated by typing number 91 Save Power Alarm.<br />
Easy play<br />
Depending on the style, selects right-hand tone and the best tempo for the performance. It is activated by typing number<br />
99 Easy Play.<br />
CHORD CODE<br />
Chord groups are pre-recorded in the instrument to play many pieces.<br />
The table with the relevant chord codes is located at the end of the Use Manual. To select a CHORD CODE, type a 3 digit<br />
number on the numeric keyboard; the selected chords will be automatically set in the 6 CHORD PROGRAM pads.<br />
CHORD PROGRAM<br />
The accompanying chords can be played easily by using the 6 CHORD PROGRAM keys.<br />
Other chords can be recorded in the CHORD PROGRAM keys using the Chord Record function.<br />
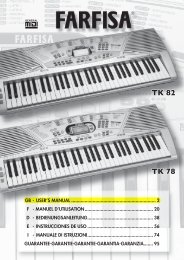
SIMPLIFIED METHOD<br />
One key will provide a major chord, two keys a minor chord and three keys a dominant 7th chord.<br />
The fundamental note of the chord (the most important one<br />
and the one that gives the name to the chord) is represented by<br />
the key pressed on the far left. For example, by pressing simultaneously<br />
C, D and E, you will get a C7 dominant chord.<br />
8<br />
A<br />
B<br />
D E F G A B<br />
MAJOR<br />
CHORD<br />
A<br />
B<br />
D E F G A B<br />
MINOR<br />
CHORD<br />
A<br />
B<br />
D E F G A B<br />
SEVENTH<br />
CHORD
HOW TO USE THE KEYBOARD<br />
CHORD RECORD<br />
How to record the chords:<br />
Type in the function 90 Chord Record On. The three lights will cyclically blink.<br />
Play a chord in the keys marked CHORD RECORD following the simplified method and, with the chord pressed, select one<br />
of the six CHORD PROGRAM keys where it shall be recorded, repeated the operation for the other chords and then type<br />
the function 90 Chord Record Off to complete chord recording.<br />
The data remains stored to memory while the keyboard is on.<br />
SEQUENCER<br />
The sequencer section allows you to record and listen to everything you play.<br />
It can be enabled by pressing the rec. button. The three lights will cyclically blink.<br />
Press rec. again to stop recording and then press play to listen to what has been recorded. Press play again to stop listening.<br />
When memory is full, the lights stop flashing.<br />
After a recording session, while PLAY is active, variations made on the control panel can alter recorded events.<br />
Recorded data is memorised as long as the keyboard is switched on.<br />
MAESTRO<br />
The MAESTRO section helps you in the music learning process<br />
just as if a real musical teacher were there with you, teaching<br />
you five fundamental aspects:<br />
1. Tempo 2. Note 3. Melody 4. Chord<br />
5. Accompaniment<br />
1st level: Tempo of the song<br />
At the 1st level, you can become familiar with the melody notes and learn the tempo of the song.<br />
=== How to do it:<br />
After having chosen a tune, select level 1 first by pressing the MAESTRO button (the light of the SONGS button blink)<br />
and then number 1 with the numeric keyboard.<br />
Use the start/stop control to start and stop the performance.<br />
When the introduction touches are complete try playing the melody by pressing one or more keys and keeping time with<br />
the orchestra.<br />
During your performance, the accompaniment will automatically follow you.<br />
You can quicken or slow down the tempo by using the tempo +/– buttons.<br />
You will be able to change tune by pressing the corresponding button on the SONGS list.<br />
If you wish to listen to the whole song, press start/stop, then press SONG and then start/stop again.<br />
To perform the other levels, i.e.:<br />
2. melody notes, 3. song melody, 4. song chords and 5. accompaniment with orchestra, press the<br />
MAESTRO button and then select the level number and then start/stop. For additional information, see the Method<br />
section.<br />
MAINTENANCE AND REMARKS<br />
To ensure that the instrument works perfectly and has a long life, please follow the recommendations below:<br />
<br />
tion.<br />
<br />
<br />
damage in transit.<br />
<br />
of water and neutral detergent. Dip the cloth in the solution and then wring it until it is nearly dry.<br />
9
MUSIC METHOD<br />
10<br />
MUSIC METHOD<br />
INTRODUCTION TO THE METHOD<br />
This method has been designed for those who are learning music for the first time and want to do it in an easy way, within<br />
a short time and have fun.<br />
There are five learning levels.<br />
1. Tempo 2. Note 3. Melody<br />
4. Chord 5. Accompaniment<br />
You may choose the first step to begin with or choose the way<br />
that you consider to be the most suitable for your level of<br />
skill.<br />
It is important for you to repeat the exercises, without expecting<br />
to learn everything at once.<br />
The keyboard will help as if a teacher were seated next to you and will guide you through the wonderful world of music.<br />
THE VARIOUS ASPECTS OF MUSIC<br />
Any musical piece can be reduced into a series of simple elements. Let’s look at the principal ones: the melody and the<br />
accompaniment.<br />
THE MELODY<br />
The melody is a succession of sounds (notes) of varying pitches and lengths, played<br />
one after the other. The flute, for example, is an instrument which plays the melody.<br />
Even when you whistle a tune, you are whistling the melody.<br />
THE ACCOMPANIMENT<br />
The accompaniment is formed of chords (groups of 3 notes or more notes played simultaneously) which<br />
support the melody. Instruments suitable for playing accompaniment are: the guitar, the piano, etc.<br />
STRUCTURE OF THE MUSIC METHOD<br />
The Music Method consists of a continuous blue band (grey in these<br />
instructions) with all the indications for using the right hand to play the<br />
melody.<br />
Above and below this band, you will find the indications for the use of your<br />
left hand which plays the accompaniment chords.<br />
Below the blue band (grey in these instructions) there is the musical notation of the piece. Later on, we’ll take a look<br />
together at the correct use of this kind of musical notation and its meaning.<br />
For now, it is sufficient to remember that each note has a name: A, B,<br />
C, D, E, F, G, in anglo-saxon notation which correspond to LA, SI, DO,<br />
RE, MI, FA, SOL, in Latin notation and A, H, C, D, E, F, G, in German<br />
notation. This correspondence is illustrated on the next diagram.<br />
Anglo-saxon notation<br />
Latin notation<br />
German notation<br />
LEVEL 1: Tempo<br />
As said before, a melody is made up of a series of notes with a very clearly defined pitch and duration. If we whistle a tune<br />
we notice that some notes last longer than others and if we do not respect their length the music no longer sounds the<br />
same. So first of all we will deal with the length of the notes.<br />
Each number on the blue strip (grey in these instructions) of the method corresponds to a note and so to a key on the<br />
keyboard.
MUSIC METHOD<br />
TEMPO<br />
Each key should be pressed for a certain length of time according to the distance<br />
between the number and the one following it. To make this easier the upper part of the<br />
blue band (grey in these instructions) shows a sequence of alternating black and white<br />
dashes. The distance between one black dash and the next represents a musical unit<br />
known as beat and corresponds to the movement of the metronome from one side to<br />
the other. Therefore each grey or black dash represents half a beat.<br />
The letter P (pause) which sometimes appears in the blue band (grey in these instructions)<br />
shows that playing should not continue until the next number appears.<br />
Most music is written in a series of groups of notes the length of which, when added up, corresponds to 3 or 4 beats and<br />
are respectively called 4/4 or 3/4.<br />
These numbers indicate the rhythm of the song and are shown at the beginning.<br />
Each group is between two vertical strokes. The space between the two strokes is called a measure or a beat.<br />
The length of each sound or pause must be respected for proper use of the rhythmic section.<br />
The beginning of each measure or beat is shown by the flashing light which sets the rhythm.<br />
Level 1 - The tempo. Off we go!<br />
Choose a song and listen to it a few times: you will notice it has a melody, and an orchestra accompanying it. While you<br />
are listening to it try to follow the tempo or tap your foot at the right time. Try to follow the notes of the tune on the music<br />
score of the Music Book.<br />
Now select MAESTRO - Level 1.<br />
The keyboard will only play the accompaniment to the song selected.<br />
An orchestra will accompany you as you play the tune.<br />
At this level it is not necessary to know which key to press: they will all play<br />
the right note.<br />
Just choose a key and concentrate on keeping time.<br />
Press the start/stop key and, when the introduction touches are complete, begin playing.<br />
Remember that at this level any key will play the right note.<br />
Even if you make a mistake and stop the accompaniment will wait for you.<br />
LEVEL 2: Note<br />
Each note corresponds to a number on the blue strip (grey in these instructions) of the method. However, as you can see,<br />
there is a number on each note as well. This will help you to find the right key easily.<br />
To play the melody, read the sequence of numbers contained in the blue<br />
band (grey in these instructions) of the method and press, one after the<br />
other, the white keys which correspond to the same numbers on the strip<br />
above the keyboard. The black keys correspond to the numbers for example<br />
on the music method blue band (grey in these instructions) followed by the<br />
“+”. The black key after white key 1 corresponds to the symbol 1+.<br />
Now that you know which key corresponds to which note, try and play the<br />
tune following the numbers on the blue strip (grey in these instructions).<br />
Remember the tempo!<br />
11
MUSIC METHOD<br />
Level 2 –The notes. Off we go!<br />
Choose a song and select MAESTRO - Level 2.<br />
As for level 1 the keyboard will play the accompaniment alone.<br />
This time you will need to keep time and play the right key.<br />
Press the start/stop key and, when the introduction touches are complete, begin playing.<br />
If you hit the wrong note, the key will not play and the accompaniment will stop until you hit the right one.<br />
Check the Music Book score for the right note to use<br />
PREMISE CONCERNING MUSICAL NOTATION<br />
Underneath the blue band (grey in these instructions) method, the<br />
classical musical notation is shown with the treble clef, the time of<br />
the piece (3/4, 4/4 and so on), the notes with their anglo-saxon<br />
names (letters).<br />
After having played the pieces in the music books several times, try<br />
playing them again, this time following the classical notation in<br />
order to gradually familiarize yourself with this “traditional” world<br />
of music. You will then be able to see the close relationship that<br />
exists between the simplified Music Method and classical musical notation.<br />
LOOKING AT THE KEYBOARD<br />
The keyboard is made up of white and black keys. The black keys are arranged in groups of 2 or 3 which may be of help<br />
to you as you learn to recognize the positioning of the notes.<br />
1) The white key immediately to the left of the two black keys is C (DO).<br />
2) The white key immediately to the left of the three black keys is F (FA).<br />
3) By point 1 and 2 you can locate the other notes on keyboard.<br />
MUSICAL NOTATION<br />
Notes and pauses are written on five parallel horizontal lines and<br />
the four spaces between these lines. This group of five lines is called<br />
the stave.<br />
The correspondence between the notes and their position on the<br />
keyboard is given on the next diagram.<br />
MODIFICATIONS<br />
Sometimes, next to the treble clef at the beginning of the stave or next to a single note, these signs will appear: (flat)<br />
or (sharp).<br />
These signs mean that all the notes on that line, in that space or the single note itself are flat or sharp notes, that is, they<br />
are to be played on the relevant black keys. It’s easy to recognize them because they are indicated in the blue band (grey<br />
in these instructions) of the method with a number followed by the plus (+) sign.<br />
The (bequadro) sign (natural) which you may find on the line of the stave means that the previous (flat) or (sharp)<br />
indications are to be cancelled. All variations are indicated in the blue band (grey in these instructions), so always refer to<br />
this should you have any doubts.<br />
12
SYMBOLS AND LENGTHS OF THE NOTES<br />
WHOLE NOTE AND CORRESPONDING PAUSE (SEMIBREVE)<br />
= play for the duration of 4 beats:<br />
one - and two - and three - and four - and<br />
= suspend the music for the duration of 4 beats:<br />
one - and two - and three - and four - and<br />
HALF NOTE AND CORRESPONDING PAUSE (MINIM)<br />
= play for the duration of 2 beats:<br />
one - and two - and<br />
= suspend the music for the duration of 2 beats:<br />
one - and two - and<br />
QUARTER NOTE AND CORRESPONDING PAUSE (CROTCHET)<br />
= play for the duration of 1 beat:<br />
one - and<br />
= suspend the music for the duration of 1 beat:<br />
one - and<br />
EIGHTH NOTE AND CORRESPONDING PAUSE (QUAVER)<br />
= play for the duration of half a beat :<br />
one -<br />
= suspend the music for the duration of half a beat:<br />
one -<br />
DOTTED NOTE<br />
A dot after a note increases its value by half.<br />
For example: 3 beats = 2 beats + 1 beats<br />
TIE When a curved line joins two or more notes together, the first note is<br />
prolonged by the value of the note(s) it is joined to, keeping the key<br />
pressed down.<br />
= press the key for a total of three beats.<br />
REPEAT SIGNS (CHORUS)<br />
The sign is used especially<br />
when a song has a series of<br />
lyrics or a tune which has parts<br />
that have to be repeated. It is<br />
therefore necessary to repeat<br />
the music included between<br />
these repeat<br />
signs whenever<br />
they appear.<br />
DOUBLE BARS REPEAT SIGNS WITH “AD LIBITUM” CHORD WITH BRACKET<br />
The double bars indicate<br />
the end of a piece of<br />
music.<br />
DA CAPO AL FINE<br />
MUSIC METHOD<br />
REPEAT SIGN (REFRAIN) WITH TWO FINAL MEASURES (DOUBLE ENDINGS)<br />
Some songs are characterized by the fact that<br />
they have a refrain with more than one final<br />
measure. In these cases, they are marked by<br />
the “double ending” sign. 1 and 2. The whole<br />
piece is played, therefore, as far as the measure<br />
which ends the song, indicated by the number<br />
1. The song is then repeated entirely,<br />
skipping over the first concluding measure and<br />
going directly on to the second to finish.<br />
The piece of music<br />
contained between<br />
these signs can<br />
repeated as many times as you like.<br />
When you see this indication, play the whole piece, then repeat it<br />
again from the beginning until you get to the word “Fine” (the phrase<br />
“Da Capo al Fine” is in fact italian for “From beginning to end”).<br />
Whenever this sign appears,<br />
the chord is be interrupted.<br />
DAL AL FINE<br />
C<br />
When you encounter this sign, repeat the piece<br />
from the indication up to the word “Fine”.<br />
13
MUSIC METHOD<br />
LEVEL 3: Melody<br />
Now you are ready to play the tune of a song. If you go wrong the orchestra will play the accompaniment with your mistakes.<br />
All the keys will play and the orchestra will not wait for you.<br />
Level 3 – The tune. Off we go!<br />
Choose a song and select MAESTRO - Level 3. Press start/stop and begin playing.<br />
If you hit the wrong note the song will be out of tune. If you do not follow the right tempo the orchestra will not wait and<br />
you will be out of tempo. Try to follow the notes of the tune on the music score of the Music Book.<br />
LEVEL 4: Chord<br />
Until now we have talked about the tune, now we will try with the<br />
accompaniment. Information about the score can be found above and<br />
below the blue strip (grey in these instructions).<br />
To play the accompaniment, hold each key of Chord Program for the<br />
time indicated by the line next to the letter representing the chord until<br />
you come to the next one.<br />
How to play the chords:<br />
Use the 6 buttons of the CHORD PROGRAM and follow the numbers indicating the chords.<br />
Level 4 - Chords. Off we go!<br />
Choose a song and select MAESTRO - Level 4.<br />
At this level the rhythm and tune of the song are played.<br />
Press start/stop and start playing following the chords in the Music book score.<br />
The metronome sound will give you the tempo to play the first chord.<br />
If you make a mistake, the melody will wait until you get it right. Be careful when changing chords, otherwise you will be<br />
offbeat.<br />
LEVEL 5: Accompaniment<br />
This level is like the previous one but here you will play the part of the orchestra and you will have to play the accompaniment<br />
without making a mistake.<br />
Now all that remains for you to do is select MAESTRO - Level 5.<br />
Press the start/stop button and start playing, following the chord numbers on the score of the Music Book.<br />
If you play the wrong chord, it will be heard and the song will be out of tune.<br />
14<br />
Chord Program keys<br />
Accompaniment<br />
with left hand<br />
Chords<br />
10 10 11 12<br />
C<br />
Line showing<br />
how long the<br />
chord lasts
THE SONG<br />
As you can see, with the help of the keyboard and a bit of practice you managed without difficulty to play the tune or<br />
accompaniment to the songs. Now you will be able to play the music from the son<strong>gb</strong>ook provided.<br />
If we look at the first line of a piece we realize that we know all the signs shown.<br />
1. The numbers on the continuous blue band (grey in these instructions) indicate the keys for playing the melody.<br />
2. The letters beneath the continuous blue band (grey in these instructions) indicate the accompaniment chords that<br />
can be played using the simplified Music Method (the line to the right indicates how long the chord should be<br />
held).<br />
10 10 11 12 12 11 10 9 8 8 9 10 10 9 9<br />
C G C G<br />
G G<br />
F F<br />
E E E E E<br />
D D<br />
C C<br />
Chord Program keys<br />
Accompaniment<br />
with left hand<br />
Chords<br />
10 10 11 12<br />
C<br />
Line showing<br />
how long the<br />
chord lasts<br />
GB - TROUBLE SHOOTING GUIDE<br />
Problem Solution<br />
The instrument does not play or<br />
the sound is distorted.<br />
The instrument switches on or<br />
off when keys are pressed.<br />
D D<br />
10 10 11 12<br />
F<br />
Scripted using the<br />
simplified method<br />
Traditional scripting<br />
Key numbers<br />
for tune with<br />
right hand<br />
Batteries discharged – insert new batteries.<br />
Batteries inserted incorrectly – check. Mains adapter not suitable.<br />
Batteries discharged – insert new batteries.<br />
ATTENTION: In the event of malfunction, remove the batteries and then reinsert them.<br />
MUSIC METHOD<br />
15
CARATTERISTICHE TECNICHE .....................55<br />
ALIMENTAZIONE ................................56<br />
ALIMENTAZIONE A RETE. ...................56<br />
ALIMENTAZIONE A BATTERIE. ...............56<br />
ACCESSORI ORIGINALI A RICHIESTA. ..............56<br />
PANNELLO COMANDI . . . . . . . . . . . . . . . . . . . . . . . . . . . .57<br />
PRESE ......................................57<br />
LE INDICAZIONI SULLA TASTIERA.................57<br />
ISTRUZIONI D’USO ..............................58<br />
ACCENSIONE E SPEGNIMENTO . ................58<br />
DEMO ......................................58<br />
I VOLUMI ...................................58<br />
LE CANZONI .................................58<br />
I SUONI . . . . . . . . . . . . . . . . . . . . . . . . . . . . . . . . . . . . .58<br />
IL TRANSPOSER .............................59<br />
I SUONI PER L’ACCOMPAGNAMENTO . ...........59<br />
GLI STILI ....................................59<br />
TEMPO......................................59<br />
IL METRONOMO. .............................59<br />
LE FUNZIONI.................................60<br />
DJ EFFECTS PADS.............................60<br />
DRUM PADS.................................60<br />
CHORD PADS ................................60<br />
MEDLEY SONG ON / OFF . .....................60<br />
MEMORY ON / OFF...........................60<br />
SUSTAIN ON / OFF............................60<br />
REVERB ON / OFF ...........................60<br />
CHORD RECORD ON / OFF . ...................60<br />
SAVE POWER ALARM OFF / ON . ...............60<br />
EASY PLAY ..................................60<br />
TASTIERA: 32 tasti Mini (FA-DO)<br />
POLIFONIA: 16 note massimo<br />
SUONI BASE: 100 timbri polifonici<br />
TRANSPOSER: spostamento +/– 6 semitoni<br />
SUONI PER L’ACCOMPAGNAMENTO: 6 timbri polifonici<br />
EFFETTI: REVERB e SUSTAIN<br />
STYLES: 32 ritmi<br />
CHORD PROGRAM: 6 tasti con strumenti ritmici percussivi,<br />
accordi o effetti particolari DJ<br />
CHORD RECORD: memorizzazione degli accordi<br />
Controlli: START/STOP, DOWN BEAT, TEMPO +/–<br />
METRONOMO: tipo classico<br />
SEQUENCER: REC e PLAY per registrare e riascoltare<br />
ACCOMPAGNAMENTO AUTOMATICO: 6 tasti del Chord<br />
Program<br />
INDICE<br />
CARATTERISTICHE TECNICHE<br />
CHORD CODE ..................................60<br />
CHORD PROGRAM..............................60<br />
METODO SEMPLIFICATO . ......................60<br />
CHORD RECORD ...............................61<br />
SEQUENCER .................................61<br />
MAESTRO ...................................61<br />
MANUTENZIONE ED AVVERTENZE ................61<br />
METODO MUSICALE . ............................62<br />
INTRODUZIONE AL METODO . ..................62<br />
LE PARTI DELLA MUSICA . .....................62<br />
COMPOSIZIONE DEL METODO .................62<br />
LIVELLO 1: IL TEMPO .........................62<br />
LIVELLO 2: LE NOTE ..........................63<br />
PREMESSA ALLA SCRITTURA MUSICALE .........64<br />
GUARDANDO LA TASTIERA ....................64<br />
SCRITTURA MUSICALE . .......................64<br />
ALTERAZIONI ................................64<br />
SIMBOLOGIA E DURATA DELLE NOTE E PAUSE . . . . 65<br />
LIVELLO 3: LA MELODIA .......................66<br />
LIVELLO 4: GLI ACCORDI . .....................66<br />
LIVELLO 5: L’ACCOMPAGNAMENTO ..............66<br />
LA CANZONE ................................67<br />
GUIDA ALLA SOLUZIONE DEI PROBLEMI. ..........67<br />
TABELLA DELLE CANZONI . .......................68<br />
LISTA DEI SUONI ................................69<br />
LISTA DEGLI STILI ...............................70<br />
LISTA DEI SUONI PER L’ACCOMPAGNAMENTO.......70<br />
CHORD CODE...................................71<br />
GARANZIA .....................................72<br />
Controlli: MEMORY ON/OFF<br />
Controlli generali: ON/OFF, Volume, Tastierina numerica<br />
0-9, Style, Song, Sound<br />
DEMO: Brano dimostrativo<br />
SONGS: 32 brani musicali preregistrati con Medley On/<br />
Off<br />
MAESTRO: 5 livelli di apprendimento<br />
AMPLIFICAZIONE: 1 watt (RMS)<br />
Un altoparlante ad alta efficienza Ø 77 mm<br />
ALIMENTAZIONE: 6 batterie da 1,5 Volt IEC R6/AA<br />
Adattatore AC/DC – 9 V / 200 mA<br />
DIMENSIONI: 480 x 175 x 50 mm<br />
PESO: 0,8 Kg.<br />
SIGMA S.p.A. si riserva il diritto di modificare, senza preavviso, le caratteristiche del prodotto<br />
Conservare il presente <strong>manual</strong>e per future consultazioni.<br />
INTRODUZIONE<br />
55
INTRODUZIONE<br />
ALIMENTAZIONE A RETE<br />
Lo strumento può essere alimentato con adattatore da rete<br />
(non fornito) che abbia in uscita le seguenti caratteristiche:<br />
Vdc = 9V; Imax = 200 mA<br />
(terminale positivo centrale).<br />
Tale apparecchio è conforme alle norme nazionali ed internazionali<br />
sulla sicurezza elettrica. Inserire lo spinotto nella<br />
presa 9V DC della tastiera.<br />
Il giocattolo non è destinato a bambini di età inferiore ai 3 anni.<br />
<br />
<br />
<br />
L’ adattatore da rete NON è un giocattolo.<br />
<br />
spina dell’adattatore deve essere ben accessibile.<br />
L’inserimento dello spinotto esclude automaticamente le<br />
re:<br />
le fessure di aerazione non devono essere coperte con<br />
<br />
l’adattatore a gocce o schizzi d’acqua.<br />
ATTENZIONE: - Qualsiasi adattatore, anche se dotato di<br />
isolamento di sicurezza, va regolarmente esaminato per<br />
evitare possibili rischi dovuti a danni al cavo, alla spina,<br />
all’involucro o ad altre parti. In caso di guasti rivolgersi<br />
esclusivamente a personale qualificato.<br />
ALIMENTAZIONE A BATTERIE<br />
Lo strumento funziona con 6 batterie da 1,5V tipo IEC R6/<br />
AA (non fornite) che vanno collocate nell’apposito vano<br />
situato nella parte inferiore. Per aprire il vano premere<br />
sulla leva in corrispondenza di OPEN; per alloggiare le<br />
batterie seguire le indicazioni grafiche che compaiono in<br />
rilievo sul fondo. Richiudere quindi il coperchio.<br />
56<br />
ALIMENTAZIONE<br />
1<br />
ACCORGIMENTI NELL’USO DELLE BATTERIE<br />
<br />
<br />
<br />
<br />
<br />
<br />
-<br />
<br />
lunghi periodi.<br />
NORME PER LO SMALTIMENTO<br />
Per lo smaltimento dei particolari sotto indicati, informarsi<br />
presso le Amministrazioni Comunali circa i centri di smaltimento<br />
specializzati.<br />
1 - SMALTIMENTO DELLE BATTERIE<br />
Per aiutare la protezione ambientale non<br />
gettare le batterie scariche tra i normali<br />
rifiuti ma portarle negli appositi contenitori<br />
situati nei centri di raccolta.<br />
2 - SMALTIMENTO DEGLI IMBALLAGGI<br />
Consegnare gli imballi di carta, cartone e cartone ondulato nei<br />
centri di raccolta specifici. Le parti in plastica dell’imballo devono<br />
essere messe negli appositi contenitori per la raccolta.<br />
I simboli che individuano i vari tipi di plastica sono:<br />
01<br />
PET<br />
02<br />
PE<br />
03<br />
PVC<br />
Legenda relativa al tipo di materiale plastico:<br />
PET = Polietilen tereftalato<br />
PE = Polietilene, il codice 02 per PE-HD, 04 per PE-LD<br />
PVC = Polivinilcloruro<br />
PP = Polipropilene<br />
PS = Polistirolo, Polistirolo espanso<br />
O = Altri polimeri (ABS, Accoppiati, ecc.)<br />
3 - SMALTIMENTO DI VECCHI PRODOTTI ELETTRICI ED<br />
ELETTRONICI<br />
Tutti gli articoli che recano questo simbolo sul<br />
corpo del prodotto, sull’imballo o nelle istruzioni<br />
non devono essere gettati nella normale spazzatura<br />
ma devono essere consegnati nei centri di raccolta<br />
specializzati.<br />
Qui i materiali saranno divisi in base alle loro caratteristiche ed<br />
in seguito riutilizzati al fine di apportare un importante contributo<br />
per la protezione dell’ambiente.<br />
05<br />
PP<br />
06<br />
PS<br />
ACCESSORI ORIGINALI A RICHIESTA<br />
AD 170<br />
Adattatore da rete.<br />
Vdc = 9V; Imax = 200 mA<br />
07<br />
O
INTRODUZIONE<br />
<br />
[1] ON/OFF -Per accendere o spegnere lo strumento.<br />
[2] SEQUENCER -REC per registrare ciò che si suona e<br />
PLAY per riascoltare la registrazione.<br />
[3] VOLUME +/– -Per la selezione del volume generale.<br />
[4] TRANSPOSER +/– -Permette di cambiare la tonalità<br />
delle note.<br />
[5] TEMPO +/– -Per la regolazione della velocità<br />
d’esecuzione dello stile, delle canzoni o del metronomo.<br />
[6] START/STOP -Per avviare o fermare uno stile ritmico<br />
o una canzone.<br />
[7] STYLES -Per selezionare gli stili ritmici.<br />
PRESE<br />
INPUT DC 9 V -Permette di alimentare lo strumento per<br />
mezzo di un adattatore AC/DC.<br />
PANNELLO COMANDI<br />
[8] SONGS -Per selezionare le canzoni preregistrate.<br />
[9] SOUNDS -Per selezionare il suono sulla tastiera.<br />
[10] Tastierina numerica 0-9 - Per la selezione di funzioni,<br />
stili ritmici, canzoni e suoni.<br />
[11] MAESTRO -Per entrare nella modalità di apprendimento<br />
su 5 livelli.<br />
[12] DEMO -Per ascoltare il brano dimostrativo.<br />
[13] C H O R D<br />
PROGRAM -Per<br />
suonare 6 strumenti<br />
ritmici percussivi,<br />
accordi o effetti<br />
particolari DJ.<br />
LE INDICAZIONI SULLA TASTIERA<br />
<br />
I numeri : Indicano i tasti da suonare per eseguire la melodia con le partiture musicali semplificate.<br />
57
ISTRUZIONI D’USO<br />
ACCENSIONE E SPEGNIMENTO<br />
Lo strumento si accende spostando l’interruttore su on e si spegne su off.<br />
All’accensione la tastiera è predisposta per funzionare con il suono Stage<br />
Piano, il ritmo Pop e la canzone La Cucaracha.<br />
Nota - Per evitare un inutile consumo delle batterie, il suono di un campanello<br />
(dispositivo “Save Power Alarm”), segnala che la tastiera non è stata utilizzata da oltre due minuti. Il dispositivo si<br />
può disattivare con la funzione 91 save power alarm.<br />
DEMO - Brano dimostrativo<br />
Premendo il pulsante demo, va in esecuzione un brano che evidenzia le<br />
caratteristiche musicali della tastiera.<br />
Per interrompere l’esecuzione, premere di nuovo il pulsante demo.<br />
I VOLUMI<br />
Per regolare il volume generale dello strumento, agire sui pulsanti volume<br />
+ (per aumentare) o volume – (per diminuire). Per ripristinare il volume<br />
standard, premere insieme i pulsanti volume + e volume –.<br />
LE CANZONI<br />
Lo strumento contiene 32 brani musicali del repertorio classico.<br />
Per selezionare i brani, premere il pulsante SONGS (luce accesa) e digitare un numero a due cifre secondo la lista SONGS<br />
(es. 03 Jingle Bells, digitare sulla tastierina numerica lo 0, e poi il 3) e premere il pulsante start/stop per avviare il brano<br />
musicale o per fermare l’esecuzione.<br />
Quando si digita il primo numero, la luce lampeggia fino a quando non si completa la selezione.<br />
Quando un brano è in esecuzione, si possono ascoltare altre canzoni in modo immediato digitando il numero abbinato al<br />
brano scelto.<br />
I SUONI<br />
Nella tastiera ci sono 100 suoni suddivisi in 6 famiglie<br />
(es. 031-050 ORGAN).<br />
Si selezionano quando il pulsante SOUNDS è acceso<br />
e digitando un numero a tre cifre da 001 a 100 della<br />
lista SOUNDS che si trova nella parte finale del<br />
Manuale d’Uso.<br />
Esempio: per il suono Full Organ comporre il numero<br />
034 (prima lo 0, poi il 3 e poi il 4 con la tastierina<br />
numerica).<br />
58<br />
ISTRUZIONI D’USO<br />
FAMILY SOUNDS<br />
031<br />
032<br />
033<br />
ORGAN 034<br />
031 - 050 035<br />
036<br />
037<br />
Hammond<br />
Perc Organ<br />
Blues Organ<br />
Full Organ<br />
Theatre<br />
Organ<br />
Jazz Organ
ISTRUZIONI D’USO<br />
Con alcuni suoni, può accadere di notare una leggerissima differenza di volume o di qualità sonora quando si suonano in<br />
punti diversi della tastiera. Questa è una conseguenza inevitabile del campionamento multiplo e non è indice di problemi<br />
di funzionamento.<br />
IL TRANSPOSER<br />
I comandi +/– di transposer permettono di spostare la tonalità di tutta la<br />
tastiera di +/– 6 semitoni.<br />
Premendo contemporaneamente i pulsanti +/– di transposer, si ritorna al<br />
valore normale di 00.<br />
I SUONI PER L’ACCOMPAGNAMENTO CON I 6 TASTI DEL<br />
CHORD PROGRAM<br />
Per attivare gli accordi nei 6 pads del CHORD PROGRAM, comporre il<br />
numero 72 Chord Pads . Per scegliere i suoni, digitare un codice tra<br />
80 ed 85.<br />
GLI STILI<br />
Nella tastiera sono memorizzati 32 stili ritmici arricchiti<br />
da accompagnamenti automatici completi di basso, arrangiamenti<br />
e batteria. Sono suddivisi in 6 famiglie (es.<br />
22-28 LATIN), vedi la lista STYLES in fondo al Manuale<br />
d’Uso. Si selezionano premendo il pulsante STYLES e poi<br />
un numero a due cifre della lista STYLES.<br />
FAMILY STYLES<br />
LATIN<br />
22 - 28<br />
Esempio: per selezionare il ritmo Samba, comporre il numero 23 (prima il 2 e poi il 3).<br />
Per avviare il ritmo o per fermarlo, premere il pulsante start/stop.<br />
Per aumentare o diminuire la velocità di esecuzione, utilizzare i pulsanti + / – di tempo.<br />
Per ripristinare la velocità standard del ritmo, premere insieme i pulsanti + / – di tempo.<br />
La luce del pulsante STYLES visualizza l’inizio di ogni battuta o misura.<br />
Quando un ritmo è in funzione, e si seleziona un nuovo stile, quest’ultimo va in esecuzione al termine del disegno ritmico<br />
precedente.<br />
TEMPO<br />
I pulsanti + / – di tempo, servono per regolare la velocità del ritmo, di una canzone o del metronomo.<br />
Il METRONOMO<br />
Il metronomo aiuta nell’apprendimento della musica, battendo il tempo durante lo svolgimento degli esercizi musicali e<br />
simula il classico strumento che scandisce il tempo. Si seleziona premendo il pulsante STYLES e poi il numero 33. Per<br />
avviare il metronomo o per fermarlo, premere il pulsante start/stop.<br />
Per variare la velocità, utilizzare i pulsanti + / – di tempo.<br />
22<br />
23<br />
24<br />
25<br />
26<br />
27<br />
28<br />
Cha Cha Cha<br />
Samba<br />
Bossa<br />
Mambo<br />
Salsa<br />
Bachata<br />
Merengue<br />
ACCOMP. SOUNDS<br />
80<br />
81<br />
82<br />
83<br />
84<br />
85<br />
Piano<br />
El. Piano<br />
Hammond<br />
Theatre Organ<br />
Strings<br />
Slow Strings<br />
59
ISTRUZIONI D’USO<br />
LE FUNZIONI (FUNCTIONS)<br />
DJ Effect Pads<br />
Per assegnare ai 6 tasti gli effetti particolari DJ. Si attiva con il numero 70 DJ Effects.<br />
Drum Pads<br />
Per assegnare ai 6 tasti gli strumenti ritmici percussivi. Si attiva con il numero 71 Drum Pads.<br />
Chord Pads<br />
Per assegnare ai 6 tasti gli accordi. Si attiva con il numero 72 Chord Pads.<br />
Medley Song On / Off<br />
Con questa funzione è possibile ascoltare tutte le canzoni in successione a partire da quella selezionata.<br />
Si attiva digitando il numero 73 Medley Song On e si disattiva con 74 Medley Song Off.<br />
Memory On / Off<br />
Con un ritmo in funzione, l’accordo suonato, rimane memorizzato anche quando si rilasciano i tasti.<br />
Si attiva digitando il numero 75 Memory On e si disattiva con 76 Memory Off. Normalmente è attiva.<br />
Sustain On / Off<br />
Prolunga il suono di una nota quando il tasto viene rilasciato.<br />
Si attiva digitando il numero 86 Sustain On e si disattiva con 87 Sustain Off.<br />
Reverb On / Off<br />
L’effetto di reverbero consente di ascoltare i suoni come se fossero riprodotti in una grande sala.<br />
Si attiva digitando il numero 88 Reverb On e si disattiva con 89 Reverb Off.<br />
Chord Record On / Off<br />
Per memorizzare gli accordi nei 6 tasti del CHORD PROGRAM.<br />
Si attiva con il numero 90 Chord Record On e si disattiva ancora con 90 Chord Record Off.<br />
Durante la fase di memorizzazione, le tre luci si accendono in successione.<br />
Save Power Alarm Off / On<br />
Per disattivare o riavviare il segnale di allarme. Si attiva digitando il numero 91 Save Power Alarm.<br />
Easy Play<br />
In base allo stile corrente seleziona il timbro della mano destra e la velocità ottimale d’esecuzione dello stile. Si attiva<br />
digitando il numero 99 Easy Play.<br />
CHORD CODE<br />
Nello strumento sono preregistrati gruppi di accordi per suonare molti brani.<br />
La tabella con i codici e relativi accordi si trova alla fine del Manuale d’Uso. Per selezionare un codice CHORD CODE,<br />
digitare un numero a 3 cifre sulla tastierina numerica; nei 6 tasti del CHORD PROGRAM, verranno impostati automaticamente<br />
gli accordi prescelti.<br />
CHORD PROGRAM<br />
Gli accordi per l’accompagnamento si possono suonare in maniera facilitata utilizzando i 6 tasti del CHORD PROGRAM.<br />
Nei tasti del CHORD PROGRAM si possono memorizzare altri accordi utilizzando la funzione CHORD RECORD.<br />
METODO SEMPLIFICATO<br />
Con un tasto un accordo maggiore, con due tasti un accordo minore, con tre tasti un accordo di settima.<br />
La nota fondamentale dell’accordo (la più importante, quella<br />
che gli dà il nome) è rappresentata dal tasto premuto più a<br />
sinistra.<br />
Ad esempio C (DO), D (RE) e E (MI) premuti contemporaneamente,<br />
danno un accordo di C7 (DO settima).<br />
60<br />
A<br />
B<br />
D E F G A B<br />
ACCORDO<br />
MAGGIORE<br />
A<br />
B<br />
D E F G A B<br />
ACCORDO<br />
MINORE<br />
A<br />
B<br />
D E F G A B<br />
ACCORDO<br />
DI SETTIMA
ISTRUZIONI D’USO<br />
CHORD RECORD<br />
Come memorizzare gli accordi:<br />
digitare la funzione 90 Chord Record On. Le tre luci lampeggiano ciclicamente.<br />
Suonare un accordo nei tasti contrassegnati da CHORD RECORD secondo il metodo semplificato e, con l’accordo premuto,<br />
scegliere uno dei sei tasti del CHORD PROGRAM dove memorizzarlo, ripetere l’operazione per gli altri accordi e poi<br />
digitare la funzione 90 Chord Record Off per terminare la registrazione degli accordi. Le tre luci smettono di lampeggiare.<br />
I dati registrati rimangono in memoria fino a quando la tastiera è accesa.<br />
SEQUENCER<br />
Con la sezione Sequencer è possibile registrare e poi riascoltare ciò che si suona.<br />
Si attiva premendo il pulsante rec. Le luci lampeggiano in maniera ciclica.<br />
Per fermare la registrazione, premere di nuovo rec. e poi premere il pulsante play per ascoltare ciò che è stato registrato.<br />
Premere di nuovo play per fermare l’ascolto.<br />
Quando la memoria è piena, le luci smettono di lampeggiare. Dopo una registrazione, quando è in funzione PLAY, eventuali<br />
variazioni fatte con il pannello comandi, possono influire sugli eventi registrati. I dati registrati rimangono in memoria<br />
fino a quando la tastiera è accesa.<br />
MAESTRO<br />
La sezione MAESTRO ti aiuta nell’apprendimento della musica<br />
come se accanto a te ci fosse un vero maestro di musica che<br />
ti insegna 5 aspetti fondamentali:<br />
1. Il Tempo 2. Le Note 3. La Melodia 4. Gli Accordi 5. L’Accompagnamento<br />
1° livello: Il Tempo della canzone<br />
Con il 1° livello, puoi familiarizzare con le note della melodia e soprattutto acquisire il tempo della canzone.<br />
Come si esegue:<br />
Dopo aver scelto una canzone, seleziona il livello 1 premendo prima il pulsante MAESTRO (la luce del pulsante SONGS<br />
lampeggia) e poi il numero 1 sulla tastierina numerica.<br />
Utilizza il comando start/stop per avviare e fermare l’esecuzione.<br />
Dopo i tocchi introduttivi, prova a suonare la melodia della canzone premendo casualmente e ripetutamente uno o più<br />
tasti della tastiera cercando di andare a tempo con l’orchestra. Durante la tua esecuzione l’accompagnamento ti seguirà<br />
automaticamente.<br />
Puoi rallentare o aumentare la velocità di esecuzione della canzone agendo con i pulsanti “+/–“ di tempo. Puoi cambiare<br />
canzone digitando il numero corrispondente secondo la lista SONGS. Se vuoi ascoltare la canzone completa, ferma l’esecuzione<br />
con start/stop, premi il pulsante SONGS e di nuovo start/stop.<br />
Per eseguire gli altri livelli, e cioè:<br />
2. Le note della melodia, 3. La melodia della canzone, 4. Gli accordi della canzone e 5.<br />
L’accompagnamento con l’orchestra, premi il pulsante MAESTRO e poi scegli il numero del livello, quindi start/<br />
stop. Per ulteriori spiegazioni, vedi la parte Metodo.<br />
MANUTENZIONE ED AVVERTENZE<br />
Per assicurare allo strumento un perfetto funzionamento ed una lunga durata, si prega di seguire i seguenti consigli:<br />
<br />
<br />
trasporti.<br />
<br />
<br />
to<br />
con una blanda soluzione di acqua e detergente neutro. Immergere il panno nella soluzione e strizzarlo fino a quando<br />
è quasi asciutto.<br />
61
METODO MUSICALE<br />
62<br />
METODO MUSICALE<br />
INTRODUZIONE AL METODO<br />
Questo metodo è stato studiato per chi si avvicina alla musica per la prima volta e desidera imparare a suonare con facilità,<br />
in breve tempo e, soprattutto, divertendosi.<br />
I livelli di apprendimento sono cinque:<br />
1. IL TEMPO 2. LE NOTE 3. LA MELODIA<br />
4. GLI ACCORDI 5. L’ACCOMPAGNAMENTO<br />
Puoi percorrerli tutti, affrontando gradualmente le difficoltà<br />
che incontrerai, oppure scegliere il livello da cui iniziare.<br />
L'importante è che tu ripeta di tanto in tanto gli esercizi, senza<br />
pretendere di imparare tutto di un fiato.<br />
La tastiera ti sarà di aiuto come un Maestro seduto accanto a te e ti guiderà nel meraviglioso mondo della Musica.<br />
LE PARTI DELLA MUSICA<br />
Ogni discorso musicale è scomponibile in elementi semplici. Vediamo ora di analizzarne i principali: melodia e accompagnamento<br />
LA MELODIA<br />
La melodia è una successione di suoni (note) di varia altezza e durata, eseguite una<br />
dopo l'altra.<br />
Uno strumento fondamentale per eseguire la melodia è, ad esempio, il flauto. Ma<br />
anche tu quando fischietti un motivo, esegui una melodia.<br />
L’ACCOMPAGNAMENTO<br />
L'accompagnamento è formato da accordi (gruppi di 3 o più note eseguite contemporaneamente) che sostengono<br />
la melodia. Strumenti adatti all'accompagnamento sono: la chitarra, il pianoforte, etc.<br />
COMPOSIZIONE DEL METODO MUSICALE<br />
Il Metodo Musicale è caratterizzato da una fascia continua di colore<br />
azzurro (grigia in questa spiegazione) nella quale sono contenute le indicazioni<br />
per l'uso della mano destra che esegue la melodia. Al di sotto di<br />
questa fascia, sono riportate le indicazioni per l'uso della mano sinistra che<br />
esegue gli accordi dell'accompagnamento.<br />
Al di sotto della fascia azzurra (grigia in questa spiegazione) sono riportate<br />
tutte le notazioni musicali del brano utilizzando la scrittura classica. In<br />
seguito vedremo insieme il significato e l'impiego di questa scrittura.<br />
Per ora è sufficiente ricordare che le note hanno un nome: A, B, C, D,<br />
E, F, G nella notazione anglosassone, cui corrispondono LA, SI, DO,<br />
RE, MI, FA, SOL nella notazione latina ed A, H, C, D, E, F, G, nella<br />
notazione tedesca.<br />
Questa corrispondenza è riportata nello schema a lato.<br />
notazione anglosassone<br />
notazione latina<br />
notazione tedesca<br />
LIVELLO 1: IL TEMPO (Tempo)<br />
Come si è detto una melodia è composta da un insieme di note che avranno un’altezza e una durata ben precisa. Se proviamo<br />
a fischiettare un motivetto ci accorgiamo che alcune note durano di più di altre e se non si rispettano le durate la<br />
canzoncina non ci appare più la stessa. Per prima cosa quindi ci occuperemo della durata delle note.<br />
Nella fascia azzurra (grigia in questa spiegazione) del metodo ad ogni numero corrisponde una nota e quindi un tasto sulla<br />
tastiera.
METODO MUSICALE<br />
UNITÀ DI TEMPO<br />
Ogni tasto va tenuto premuto per un tempo più o meno lungo, a seconda della distanza<br />
che separa un numero dal successivo. Per facilitare l’esecuzione, nella parte alta della<br />
fascia azzurra (grigia in questa spiegazione) compare una sequenza di tratti neri e grigi<br />
alternati. La distanza tra un tratto nero e l’altro rappresenta l’unità di tempo musicale<br />
detta battito e corrisponde allo spostamento della asticella del metronomo da una<br />
estremità all’altra. Quindi ciascun tratto nero o grigio corrisponde a mezzo battito.<br />
La lettera P (pausa) che talvolta si trova nella fascia azzurra (grigia in questa spiegazione)<br />
indica che occorre sospendere l’esecuzione della melodia fino a quando compare il numero successivo.<br />
Le musiche più comuni sono scritte con una successione di gruppi di note le cui durate, sommate, corrispondono a 4 o 3<br />
battiti e sono rispettivamente chiamate 4/4, 3/4. Tali numeri indicano il tempo (ritmo) del brano e sono riportati all’inizio<br />
del brano stesso.<br />
Ogni gruppo è raccolto tra due segmenti verticali detti stanghette.<br />
Lo spazio tra questi due segmenti si chiama misura o battuta. È indispensabile rispettare la durata di ciascun suono o<br />
pausa per poter usare correttamente la sezione ritmica. Il segnale d’inizio di ogni misura o battuta è dato dall’indicatore<br />
luminoso che scandisce il tempo.<br />
Livello 1 - Il tempo. Si comincia!<br />
Seleziona una canzone, ascoltala una o più volte: noterai che è composta da una melodia e da un’orchestra che accompagna.<br />
Mentre la ascolti prova a contare lo scorrere del tempo o a battere il piede alla giusta cadenza. Prova anche a seguire<br />
le note della melodia sullo spartito musicale del libro Music Book.<br />
A questo punto seleziona MAESTRO - Livello 1<br />
La tastiera si predispone a suonare solo l’accompagnamento della canzone<br />
scelta.<br />
Avrai una orchestra che ti accompagna mentre tu suonerai la melodia. In<br />
questo livello non è necessario sapere quale tasto premere: tutti i tasti della<br />
tastiera suoneranno la nota giusta. Ti basterà scegliere un tasto e preoccuparti<br />
solo di andare a tempo.<br />
Premi il tasto start/stop e, al termine dei tocchi introduttivi, comincia a suonare.<br />
Ricorda, in questo livello qualsiasi tasto suona la nota giusta.<br />
Anche se sbagli e ti fermi, l’accompagnamento ti aspetta.<br />
LIVELLO 2: LE NOTE (Note)<br />
Sulla fascia azzurra (grigia in questa spiegazione) del metodo ad ogni nota corrisponde un numero; osservando la tastiera<br />
si potrà notare che sopra ogni tasto c’è ugualmente un numero. In questo modo troverai facilmente il tasto giusto.<br />
Per eseguire la melodia, leggi la sequenza numerica contenuta nella fascia<br />
azzurra (grigia in questa spiegazione) del metodo e premi, uno dopo l’altro,<br />
i tasti bianchi corrispondenti agli stessi numeri riportati nella placca al di<br />
sopra della tastiera. I tasti neri corrispondono a numeri della fascia azzurra<br />
(grigia in questa spiegazione) seguiti dal segno “+”. Ad esempio, al simbolo<br />
1+ corrisponde il tasto nero successivo al tasto bianco 1.<br />
Ora che sai quale tasto è associato a ciascuna nota, prova a suonare la<br />
melodia seguendo i numeri sulla fascia azzurra (grigia in questa spiegazione). Ricordati anche di rispettare il tempo!<br />
63
METODO MUSICALE<br />
Livello 2 - Le note. Si comincia!<br />
Scegli una canzone e seleziona MAESTRO - Livello 2.<br />
Come nel livello 1 la tastiera si predispone a suonare solo l’accompagnamento della canzone. In questo caso, sarà necessario<br />
sia andare a tempo che suonare il tasto giusto.<br />
Premi il tasto start/stop e, al termine dei tocchi introduttivi, comincia a suonare.<br />
Se sbagli nota, il tasto non suonerà e l’accompagnamento avanzerà solo quando premerai quella giusta.<br />
Per sapere qual’è la nota giusta, vedi sullo spartito musicale nel libro Music Book.<br />
PREMESSA ALLA SCRITTURA MUSICALE<br />
Al di sotto della fascia azzurra (grigia in questa spiegazione) che<br />
caratterizza il Metodo, è riportata la notazione musicale classica<br />
con la chiave di violino, il tempo del brano (3/4, 4/4 etc.), la scrittura<br />
delle note e il nome anglosassone delle stesse.<br />
Dopo aver eseguito più volte i brani presentati nei libri musicali,<br />
potrai ripetere gli stessi ponendo attenzione alla scrittura classica,<br />
familiarizzando così con il mondo della musica tradizionale.<br />
Scoprirai allora la stretta coerenza tra il Metodo semplificato e la scrittura musicale classica.<br />
GUARDANDO LA TASTIERA<br />
La tastiera è formata da tasti bianchi e neri.<br />
I tasti neri sono disposti a gruppi di 2 o di 3 e ti possono essere di aiuto nella localizzazione delle note.<br />
1) Il tasto bianco immediatamente a sinistra dei due tasti neri è il C (DO).<br />
2) Il tasto bianco immediatamente a sinistra dei tre tasti neri è F (FA).<br />
3) Tenendo presente questi due punti di riferimento, puoi individuare<br />
le altre note sulla tastiera.<br />
SCRITTURA MUSICALE<br />
Note e pause si scrivono su cinque linee parallele orizzontali (e nei<br />
quattro spazi conseguenti), cioè il pentagramma. La corrispondenza<br />
tra le note e la loro posizione sulla tastiera è data dallo schema a<br />
lato.<br />
ALTERAZIONI<br />
A volte, accanto alla chiave di violino, all'inizio del pentagramma o accanto ad una nota singola, compaiono i segni<br />
di (bemolle) o (diesis).<br />
Ciò significa che tutte le note che si riferiscono a quel rigo, o a quello spazio o a quella nota singola, sono note bemolle o<br />
diesis, cioè vanno eseguite sui tasti neri. È facile riconoscerle perché nella fascia azzurra (grigia in questa spiegazione) sono<br />
indicate da numeri seguiti dal segno +.<br />
Il segno (bequadro) che troverai sul rigo lungo il brano ha la funzione di annullare le precedenti indicazioni di (bemolle)<br />
o (diesis).<br />
La variazione è già contemplata nella fascia azzurra (grigia in questa spiegazione). Basterà pertanto fare sempre riferimento<br />
ad essa per chiarire ogni dubbio.<br />
64
SIMBOLOGIA E DURATA DELLE NOTE E DELLE PAUSE<br />
SEMIBREVE E PAUSA CORRISPONDENTE<br />
= Eseguire per la durata di 4 battiti:<br />
u - no, du - e, tre - e, quat - tro<br />
= Sospendere l'esecuzione per la durata di 4 battiti:<br />
u - no, du - e, tre - e, quat - tro<br />
MINIMA E PAUSA CORRISPONDENTE<br />
= Eseguire per la durata di 2 battiti:<br />
u - no, du – e<br />
= Sospendere l'esecuzione per la durata di 2 battiti:<br />
u - no, du – e<br />
SEMIMINIMA E PAUSA CORRISPONDENTE<br />
= Eseguire per la durata di 1 battito:<br />
u - no<br />
= Sospendere l'esecuzione per la durata di 1 battito:<br />
u - no<br />
CROMA E PAUSA CORRISPONDENTE<br />
= Eseguire per la durata di mezzo battito:<br />
u -<br />
= Sospendere l'esecuzione per la durata di mezzo battito:<br />
u -<br />
PUNTO DI VALORE<br />
Un punto dopo la nota ne aumenta il valore della metà come da esempio.<br />
Es: 3 battiti = 2 battiti + 1 battito<br />
LEGATURA DI VALORE<br />
Quando una linea curva unisce due o più note, esegui la prima nota<br />
prolungata del valore delle altre ad essa legate tenendo premuto il<br />
tasto, come da esempio.<br />
= tenere il tasto premuto per tre battiti.<br />
RITORNELLO<br />
Questo segno è usato specialmente<br />
quando una canzone comprende<br />
più strofe oppure quando<br />
una parte di un brano deve essere<br />
ripetuta. È perciò necessario ripetere<br />
la musica compresa tra i<br />
segni di ritornello<br />
quando questi sono<br />
previsti.<br />
SEGNO DI RITORNELLO CON 2 BATTUTE CONCLUSIVE<br />
METODO MUSICALE<br />
DOPPIA STANGHETTA AD LIBITUM<br />
ACCORDO CON SEGNO DI PARENTESI<br />
La doppia stanghetta indica il<br />
termine di un brano musicale.<br />
DA CAPO AL FINE<br />
Quando vedi questa indicazione suona<br />
nuovamente tutto il brano dall'inizio alla<br />
parola “Fine”.<br />
Alcuni brani sono caratterizzati da un<br />
ritornello con più di una battuta conclusiva.<br />
In questi casi si noteranno i segni 1<br />
e 2. Suonerai perciò tutta la canzone<br />
eseguendo la battuta conclusiva contrassegnata<br />
dal n.1. Suonerai poi nuovamente<br />
il brano saltando la battuta che è<br />
caratterizzata dal n.1 e terminerai con la<br />
battuta che reca il n.2.<br />
Il brano musicale<br />
contenuto tra<br />
questi segni va<br />
ripetuto più volte a piacere.<br />
DAL AL FINE<br />
Quando vedi questa indicazione, ripeti il<br />
brano dal segno alla parola “Fine”.<br />
Quando compare questo segno<br />
l'accordo va interrotto.<br />
C<br />
65
METODO MUSICALE<br />
LIVELLO 3: LA MELODIA (Melody)<br />
A questo punto sei pronto a suonare la melodia di una canzone. Ora non puoi sbagliare perché l’orchestra suonerà l’accompagnamento<br />
senza considerare i tuoi errori; i tasti suoneranno tutti la nota e l’orchestra non ti aspetterà.<br />
Livello 3 - La melodia. Si comincia!<br />
Scegli una canzone e seleziona MAESTRO - Livello 3. Premi il tasto start/stop e comincia a suonare.<br />
Se sbagli nota la canzone sarà stonata. Se non segui il tempo giusto l’orchestra non ti aspetta e andrai fuori tempo.<br />
Prova a seguire le note della melodia con lo spartito musicale del libro Music Book.<br />
LIVELLO 4: GLI ACCORDI (Chord)<br />
Fino ad ora abbiamo parlato di melodia, ora proviamo con l’accompagnamento.<br />
L’indicazione sulla partitura la troverai sotto e sopra la<br />
fascia azzurra (grigia in questa spiegazione).<br />
Per eseguire l’accompagnamento premi il tasto del CHORD PROGRAM<br />
per il tempo indicato dalla linea a fianco della lettera che rappresenta<br />
l’accordo, finché non incontrerai quello successivo.<br />
Come suonare gli accordi<br />
Utilizza i 6 tasti del CHORD PROGRAM e segui i numeri che indicano gli accordi.<br />
Livello 4 - Gli accordi. Si comincia!<br />
Scegli una canzone e seleziona MAESTRO - Livello 4.<br />
In questo livello la canzone è riprodotta con la sezione ritmica e la melodia.<br />
Premi il tasto start/stop e comincia a suonare seguendo gli accordi sullo spartito musicale del libro Music Book.<br />
Il suono di un metronomo ti darà il tempo per suonare il primo accordo.<br />
Se sbagli gli accordi la melodia ti aspetterà fino a quando non suonerai quello giusto. Fai attenzione al cambio degli accordi<br />
perchè altrimenti si provoca un fuoritempo rispetto alla melodia.<br />
LIVELLO 5: L’ACCOMPAGNAMENTO (Accomp.)<br />
Questo livello è simile al precedente ma in questo caso farai parte dell’orchestra e dovrai suonare l’accompagnamento senza<br />
sbagliare.<br />
A questo punto non ti resta che selezionare MAESTRO - Livello 5.<br />
Tasti del Chord Program<br />
Accompagnamento<br />
con la mano sinistra<br />
10 10 11 12<br />
C<br />
Premi il comando start/stop e comincia a suonare seguendo i numeri per gli accordi sullo spartito musicale del libro Music<br />
Book.<br />
Se sbagli accordo, questo comunque suonerà e la canzone risulterà stonata.<br />
66<br />
Accordi<br />
linea che indica<br />
la durata<br />
dell'accordo
LA CANZONE<br />
Come puoi vedere, con l’aiuto della tastiera, e con un po’ di esercizio, sei riuscito a suonare con facilità la melodia o l’accompagnamento<br />
delle canzoni contenute in essa. Ora sei in grado di suonare le canzoni contenute nel libro a corredo.<br />
Analizza ora il primo rigo di un brano e ti accorgerai di saper leggere tutti i segni in esso contenuti.<br />
1. I numeri all’interno della fascia continua azzurra (grigia in questa spiegazione) indicano i tasti per suonare la melodia.<br />
2. Le lettere al di sotto della fascia continua azzurra (grigia in questa spiegazione) indicano gli accordi di accompagnamento<br />
che possono essere suonati con il modo semplificato (la linea a destra indica la durata dell’accordo).<br />
10 10 11 12 12 11 10 9 8 8 9 10 10 9 9<br />
C G C G<br />
G G<br />
F F<br />
E E E E E<br />
D D<br />
C C<br />
Tasti del Chord Program<br />
Accompagnamento<br />
con la mano sinistra<br />
Accordi<br />
10 10 11 12<br />
C<br />
linea che indica<br />
la durata<br />
dell'accordo<br />
10 10 11 12<br />
F<br />
I - GUIDA ALLA SOLUZIONE DI EVENTUALI PROBLEMI<br />
Problema Soluzione<br />
Lo strumento non suona o il suono è distorto.<br />
Lo strumento si accende o si spegne premendo dei tasti.<br />
ATTENZIONE: In caso di mal funzionamento togliere e reinserire le batterie<br />
D D<br />
METODO MUSICALE<br />
scrittura secondo<br />
il Metodo<br />
semplificato<br />
scrittura classica<br />
Numeri dei tasti<br />
per la melodia<br />
con la mano<br />
destra<br />
Batterie scariche – introdurre nuove batterie.<br />
Batterie inserite in modo errato – controllare.<br />
Adattatore di rete non idoneo<br />
Batterie scariche – introdurre nuove batterie.<br />
67
68<br />
<br />
<br />
N<br />
01<br />
02<br />
03<br />
04<br />
05<br />
06<br />
07<br />
08<br />
09<br />
10<br />
11<br />
12<br />
13<br />
14<br />
15<br />
16<br />
17<br />
18<br />
19<br />
20<br />
21<br />
22<br />
23<br />
24<br />
25<br />
26<br />
27<br />
28<br />
29<br />
30<br />
31<br />
32<br />
SONG TITLES<br />
LA CUCARACHA<br />
AURA LEE<br />
JINGLE BELLS<br />
HAPPY BIRTHDAY<br />
MOZART op. 40<br />
CAN CAN<br />
PERFIDIA<br />
CARIOCA<br />
ALOUETTE<br />
ROMANZE IN F<br />
LA PRIMAVERA<br />
MINUETTO (BACH)<br />
LONDON BRIDGE<br />
OH! SUSANNA<br />
MARY HAD A LITTLE LAMB<br />
TWINKLE TWINKLE LITTLE STAR<br />
WHEN THE SAINTS GO MARCHING IN<br />
MY DARLING CLEMENTINE<br />
WALTZ FROM SWAN LAKE<br />
RADETZKY MARCH<br />
JOHN BROWN'S BODY<br />
ODE TO JOY<br />
FRERE JACQUES<br />
CIELITO LINDO<br />
DANZA DELLE ORE<br />
SILENT NIGHT<br />
ROSE DEL SUD<br />
IL BRINDISI<br />
FASCINATION<br />
KATJUSCHA<br />
SANTA LUCIA<br />
RONDÒ<br />
CHORD<br />
CODE<br />
655<br />
656<br />
657<br />
658<br />
659<br />
660<br />
661<br />
662<br />
663<br />
664<br />
665<br />
666<br />
667<br />
668<br />
669<br />
670<br />
671<br />
672<br />
673<br />
674<br />
675<br />
676<br />
677<br />
678<br />
679<br />
680<br />
681<br />
682<br />
683<br />
684<br />
685<br />
686<br />
Chord Program<br />
F C7 F C7 F C7<br />
F G7 C7 Bb D7 F<br />
F Bb C7 G7 F Bb<br />
C G7 F C7 Bb C<br />
Dm Gm A7 Bb C7 F<br />
G7 C F D7 C7 G7<br />
C Am Dm G E C<br />
Gm D G D7 Gm D<br />
G D G D G D<br />
F Gm C C7 Bb F<br />
C G C G C G<br />
G C D7 G C D7<br />
C G7 C G7 C G7<br />
G D7 C G D7 C<br />
F C F C F C<br />
C F G7 Bb C7 C<br />
C G7 C7 F C G7<br />
F C7 Gm A7 Dm Bb<br />
G D7 A7 Am E7 Dm<br />
G Em A7 D7 G Em<br />
C F G7 E7 Am C<br />
C G E7 Am C G<br />
C G7 F C7 C G7<br />
C G7 F C G7 F<br />
C G7 B7 D7 E7 F<br />
C G7 F C G7 F<br />
Bb F7 A7 D7 G7 Cm<br />
F C7 Bb E7 Am F<br />
F D7 Gm Bbm C7 F<br />
Gm D7 G7 Cm G Gm<br />
C G7 F C G7 F<br />
G D7 Am Em G D7
FAMILY SOUNDS<br />
PIANO &<br />
PERCUSSION<br />
001 - 030<br />
ORGAN<br />
031 - 050<br />
001<br />
002<br />
003<br />
004<br />
005<br />
006<br />
007<br />
008<br />
009<br />
010<br />
011<br />
012<br />
013<br />
014<br />
015<br />
016<br />
017<br />
018<br />
019<br />
020<br />
021<br />
022<br />
023<br />
024<br />
025<br />
026<br />
027<br />
028<br />
029<br />
030<br />
031<br />
032<br />
033<br />
034<br />
035<br />
036<br />
037<br />
038<br />
039<br />
040<br />
041<br />
042<br />
043<br />
044<br />
045<br />
046<br />
047<br />
048<br />
049<br />
050<br />
Piano<br />
Honky Tonky<br />
Grand Electric<br />
Octave Piano<br />
Stage Piano<br />
El Piano<br />
Cool Piano<br />
Synth Piano<br />
Warm Electric<br />
Digital Piano<br />
Stage El Piano<br />
Chorused Elettric<br />
Electric Ensamble<br />
Wha El Piano<br />
New Age<br />
Wood Piano<br />
Spatial<br />
Harpsy<br />
Barocco<br />
Vibes<br />
Marimba<br />
Xilophone<br />
Carillon<br />
Steel Drum<br />
Toy Piano<br />
Warm Vibes<br />
Space<br />
Stage Vibes<br />
Maribumba<br />
Tubolar<br />
Hammond<br />
Perc Organ<br />
Blues Organ<br />
Full Organ<br />
Theatre Organ<br />
Jazz Organ<br />
Ring Organ<br />
Warm Organ<br />
Big Perc<br />
Sixty Organ<br />
Gospel<br />
Church Organ<br />
Liturgic<br />
Cathedral<br />
Notre Dame<br />
Accordion<br />
Musette<br />
Tango Accordion<br />
Armonium<br />
Harmonica<br />
<br />
FAMILY SOUNDS<br />
GUITAR<br />
051 - 066<br />
STRINGS<br />
067 - 077<br />
WIND<br />
078 - 090<br />
SYNTH<br />
091 - 100<br />
051<br />
052<br />
053<br />
054<br />
055<br />
056<br />
057<br />
058<br />
059<br />
060<br />
061<br />
062<br />
063<br />
064<br />
065<br />
066<br />
067<br />
068<br />
069<br />
070<br />
071<br />
072<br />
073<br />
074<br />
075<br />
076<br />
077<br />
078<br />
079<br />
080<br />
081<br />
082<br />
083<br />
084<br />
085<br />
086<br />
087<br />
088<br />
089<br />
090<br />
091<br />
092<br />
093<br />
094<br />
095<br />
096<br />
097<br />
098<br />
099<br />
100<br />
Jazz Guitar<br />
Steel Guitar<br />
Guitar 12<br />
Mute Guitar<br />
Clean Guitar<br />
Phasing<br />
Banjo<br />
Mandolino<br />
Stage Guitar<br />
Repeat Guitar<br />
Space Steel<br />
Wha Guitar<br />
Bass<br />
Synth Bass<br />
Harp<br />
Duo Harp<br />
Violin<br />
Violoncello<br />
Strings<br />
Slow Strings<br />
Full Strings<br />
Sweet Strings<br />
Chamber<br />
Viole<br />
Viole Orch.<br />
Space Violin<br />
Tremolo Strings<br />
Trumpet<br />
Saxophone<br />
Clarinet<br />
Flute<br />
Oboe<br />
Paradise<br />
Oboe Ensamble<br />
Brass<br />
Fanfare<br />
Trombone<br />
Duo Saxophone<br />
Saxophone Orch.<br />
Space Flute<br />
Square<br />
Saw<br />
Warm Synth<br />
Poly Synth<br />
Perc Synth<br />
Echo<br />
Sound Track<br />
Trailer<br />
Ecstasy<br />
Power Synth<br />
69
70<br />
FAMILY STYLES<br />
ROCK &<br />
BALLAD<br />
01 - 10<br />
SWING<br />
11 - 15<br />
TRADITIONAL<br />
16 - 21<br />
ACCOMP. SOUNDS<br />
80<br />
81<br />
82<br />
83<br />
84<br />
85<br />
Piano<br />
El. Piano<br />
Hammond<br />
Theatre Organ<br />
Strings<br />
Slow Strings<br />
01<br />
02<br />
03<br />
04<br />
05<br />
06<br />
07<br />
08<br />
09<br />
10<br />
11<br />
12<br />
13<br />
14<br />
15<br />
16<br />
17<br />
18<br />
19<br />
20<br />
21<br />
Pop<br />
Cool Beat<br />
Ballad<br />
Hip Hop<br />
House<br />
Disco<br />
Dance<br />
Rock<br />
Slow Rock<br />
Rap<br />
Funky Blues<br />
Blues<br />
Acid<br />
Swing<br />
Big Band<br />
Rock & Roll<br />
Twist<br />
Waltz<br />
Tango<br />
March<br />
Rhumba<br />
STYLES<br />
FAMILY STYLES<br />
LATIN<br />
22 - 28<br />
INTERNATIONAL<br />
29 - 32<br />
METRONOME<br />
33<br />
<br />
22<br />
23<br />
24<br />
25<br />
26<br />
27<br />
28<br />
29<br />
30<br />
31<br />
32<br />
33<br />
Cha Cha Cha<br />
Samba<br />
Bossa<br />
Mambo<br />
Salsa<br />
Bachata<br />
Merengue<br />
Sirtaki<br />
Country<br />
Hawaian<br />
Arabian<br />
Metronome
Chord Program Chord Program Chord Program Chord Program<br />
71