2 - Con Farfisa il MADE IN ITALY vince
2 - Con Farfisa il MADE IN ITALY vince
2 - Con Farfisa il MADE IN ITALY vince

You also want an ePaper? Increase the reach of your titles
YUMPU automatically turns print PDFs into web optimized ePapers that Google loves.
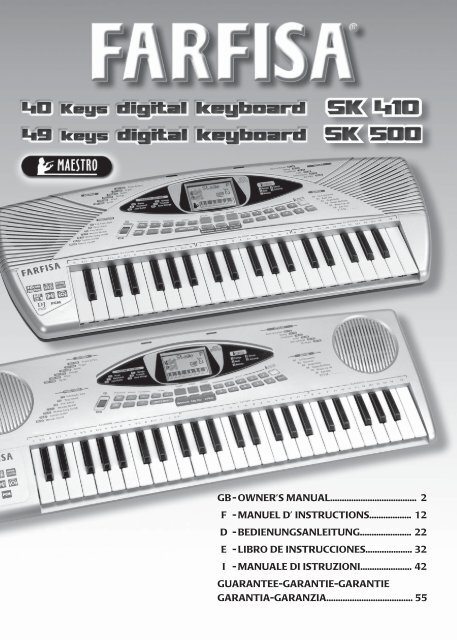
GB - OWNER’S MANUAL..................................... 2<br />
F - MANUEL D’ <strong>IN</strong>STRUCTIONS.................. 12<br />
D - BEDIENUNGSANLEITUNG...................... 22<br />
E - LIBRO DE <strong>IN</strong>STRUCCIONES.................... 32<br />
I - MANUALE DI ISTRUZIONI...................... 42<br />
GUARANTEE-GARANTIE-GARANTIE<br />
GARANTIA-GARANZIA..................................... 55
I N T R OD U C T I ON<br />
TECHNICAL CARACTERISTICS . . . . . . . . . . . . . . . . . . . . . .2<br />
POWER SUPPLY . . . . . . . . . . . . . . . . . . . . . . . . . . . . . . . . . .3<br />
MA<strong>IN</strong>S SUPPLY . . . . . . . . . . . . . . . . . . . . . . . . . . . . . . . .3<br />
BATTERY SUPPLY . . . . . . . . . . . . . . . . . . . . . . . . . . . . . .3<br />
OPTIONAL ACCESSORIES . . . . . . . . . . . . . . . . . . . . . . . . .3<br />
CONTROL PANEL . . . . . . . . . . . . . . . . . . . . . . . . . . . . . . . . .4<br />
SOCKETS . . . . . . . . . . . . . . . . . . . . . . . . . . . . . . . . . . . . . . .4<br />
DIRECTIONS ON THE KEYBOARD . . . . . . . . . . . . . . . . . .5<br />
THE DISPLAY . . . . . . . . . . . . . . . . . . . . . . . . . . . . . . . . . . . .5<br />
MUSIC-STAND . . . . . . . . . . . . . . . . . . . . . . . . . . . . . . . . . . .5<br />
HOW TO USE THE KEYBOARD . . . . . . . . . . . . . . . . . . . . .6<br />
SWITCH ON AND SWITCH OFF . . . . . . . . . . . . . . . . . . .6<br />
DEMO – Chosen excerpt . . . . . . . . . . . . . . . . . . . . . . . .6<br />
VOLUMES . . . . . . . . . . . . . . . . . . . . . . . . . . . . . . . . . . . .6<br />
THE SONGS . . . . . . . . . . . . . . . . . . . . . . . . . . . . . . . . . . .6<br />
THE SOUNDS . . . . . . . . . . . . . . . . . . . . . . . . . . . . . . . . .6<br />
THE TRANSPOSER . . . . . . . . . . . . . . . . . . . . . . . . . . . .7<br />
THE KEYBOARD . . . . . . . . . . . . . . . . . . . . . . . . . . . . . . .7<br />
ACCOMPANIMENT SOUNDS . . . . . . . . . . . . . . . . . . . .7<br />
THE STYLES . . . . . . . . . . . . . . . . . . . . . . . . . . . . . . . . . . .7<br />
TEMPO . . . . . . . . . . . . . . . . . . . . . . . . . . . . . . . . . . . . . . .7<br />
THE METRONOME . . . . . . . . . . . . . . . . . . . . . . . . . . . . .8<br />
EASY PLAY . . . . . . . . . . . . . . . . . . . . . . . . . . . . . . . . . . . .8<br />
DJ STYLE . . . . . . . . . . . . . . . . . . . . . . . . . . . . . . . . . . . . .8<br />
KEYBOARD SK410: 40 midi-size keys (A-C).<br />
KEYBOARD SK500: 49 midi-size keys (C-C)<br />
POLYPHONY: maximum 16 notes<br />
DISPLAY: LCD 62 x 40 mm<br />
BASIC SOUNDS: 100 polyphonic tones<br />
TRANSPOSER: range +/– 6 semitones<br />
ACCOMPANIMENT SOUNDS: 6 polyphonic tones<br />
EFFECTS: REVERBS and SUSTA<strong>IN</strong><br />
STYLES: 32 rhythms<br />
DJ STYLES: 6 styles with 13 effects and 12 loop<br />
<strong>Con</strong>trols: START/STOP, DOWN BEAT, TEMPO +/–,<br />
METRONOME: with immediate control<br />
SEQUENCER: REC and PLAY to record and listen<br />
AUTOMATIC ACCOMPANIMENT: Free Chord and Easy<br />
Chord<br />
<strong>Con</strong>trols: MEMORY ON/OFF, Full Keyb./Split<br />
2<br />
<strong>IN</strong>DEX<br />
T E CH N ICAL C AR A CT E R IST IC S<br />
THE FUNCTIONS . . . . . . . . . . . . . . . . . . . . . . . . . . . . . . .8<br />
FULL KEYB / SPLIT . . . . . . . . . . . . . . . . . . . . . . . . . . . . .8<br />
EASY CHORD . . . . . . . . . . . . . . . . . . . . . . . . . . . . . . . . .8<br />
FREE CHORD . . . . . . . . . . . . . . . . . . . . . . . . . . . . . . . . .8<br />
MEMORY ON / OFF . . . . . . . . . . . . . . . . . . . . . . . . . . . .9<br />
MEDLEY SONG ON / OFF . . . . . . . . . . . . . . . . . . . . . . .9<br />
SUSTA<strong>IN</strong> ON / OFF . . . . . . . . . . . . . . . . . . . . . . . . . . . . .9<br />
REVERB ON / OFF . . . . . . . . . . . . . . . . . . . . . . . . . . . . .9<br />
SEQUENCER . . . . . . . . . . . . . . . . . . . . . . . . . . . . . . . . . .9<br />
MAESTRO . . . . . . . . . . . . . . . . . . . . . . . . . . . . . . . . . . . .9<br />
DISPLAY DIRECTIONS . . . . . . . . . . . . . . . . . . . . . .9<br />
1 ST LEVEL: TEMPO OF THE SONG . . . . . . . . . . . .10<br />
2 ND LEVEL: THE NOTES OF THE MELODY . . . . . . .10<br />
3 RD LEVEL: THE SONG MELODY . . . . . . . . . . . . . .10<br />
4 TH LEVEL: THE SONG CHORDS . . . . . . . . . . . . . .10<br />
5 TH LEVEL: ACCOMPANIMENT WITH ORCHESTRA. .10<br />
NUMBERS AND LETTERS ON THE KEYBOARD . . . .11<br />
MA<strong>IN</strong>TENANCE AND REMARKS . . . . . . . . . . . . . . . . . . .11<br />
TROUBLE SHOOT<strong>IN</strong>G GUIDE . . . . . . . . . . . . . . . . . . . . .11<br />
TABLE OF SONGS . . . . . . . . . . . . . . . . . . . . . . . . . . . . . . .52<br />
SOUNDS LIST . . . . . . . . . . . . . . . . . . . . . . . . . . . . . . . . . . .53<br />
STYLES LIST . . . . . . . . . . . . . . . . . . . . . . . . . . . . . . . . . . . .54<br />
ACCOMPANIMENT SOUNDS LIST . . . . . . . . . . . . . . . . . .54<br />
GUARANTEE . . . . . . . . . . . . . . . . . . . . . . . . . . . . . . . . . . . .55<br />
General controls : ON/OFF, Master Volume, Select, Easy<br />
Play, Style, Song, Sound<br />
DEMO: Demo song<br />
SONGS: 32 pre-recorded songs with Medley ON/OFF<br />
MAESTRO: 5 learning levels<br />
AMPLIFICATION: 1,5 watt (RMS)<br />
Two high efficiency Ø 77 mm speakers<br />
POWER SUPPLY: 6 x 1,5 Volt IEC R6 / AA batteries<br />
AC/DC Adapter – Input Vdc= 9 V / I = 200 mA<br />
PHONES/AUX-OUT: Output for headphones and external<br />
amplification.<br />
DIMENSIONS (SK410): (600 x 232 x 65) mm<br />
DIMENSIONS (SK500): (680 x 240 x 63) mm<br />
WEIGHT (SK410): 1,5 Kg<br />
WEIGHT (SK500): 2 Kg<br />
SIGMA S.p.A.reserves all rights to modify specifications of this product without notice.<br />
Keep this manual for future reference.
MA<strong>IN</strong>S SUPPLY<br />
The instrument can be supplied by the AC/DC “AD 170”<br />
(Vdc =9V / I = 200 mA) positive central adapter<br />
(not supplied) conforms to national and international<br />
safety regulations covering electrical appliances.<br />
• The toy is not intended for ch<strong>il</strong>dren under 3 years old.<br />
• The toy must only be used with the recommended adaptor<br />
• The toy is to be disconnected from the adaptor before cleaning<br />
• The mains adaptor is NOT a toy.<br />
RECOMMENDATIONS: The socket (1) for the adapter plug<br />
must be eas<strong>il</strong>y accessible. Inserting the plug into the socket<br />
at the back of the instrument automatically cuts off supply<br />
from the batteries. Ensure that the adapter is sufficiently<br />
vent<strong>il</strong>ated and that the vent<strong>il</strong>ation slits are not covered with<br />
objects such as newpapers, tablecloths, curtains, etc. Do not<br />
expose the adapter to drops or splashes of water.<br />
WARN<strong>IN</strong>G: All batteries or transformers with safety insulation<br />
must be checked regularly for faults in cable, wire, or<br />
plug insulation or other parts.<br />
PO WER SUPPLY<br />
BATTERY SUPPLY<br />
This instrument works with six 1.5V IEC R6 /AA batteries<br />
(not supplied) which are inserted in the housing at the bottom.<br />
To open press on the part of the lid marked OPEN.<br />
Fit the batteries as shown at the bottom of the housing.<br />
1<br />
<strong>IN</strong> T RODUCT ION<br />
ADVICE ON US<strong>IN</strong>G THE BATTERIES<br />
• Non-rechargeable batteries are NOT to be recharged. •<br />
Rechargeable batteries must be removed from the product<br />
before being charged. • Rechargeable batteries are only to be<br />
charged under adult supervision. • Different types of batteries<br />
or new and old batteries are not to be mixed. • Use only<br />
batteries of the same or equivalent type. • Batteries are to be<br />
inserted with correct polarity. • Remove exhausted batteries<br />
to prevent leakage. • Do not short circuit supply terminals. •<br />
Remove batteries during long periods of non-use.<br />
WASTE DISPOSAL STANDARDS<br />
For information regarding the disposal of the items mentioned<br />
here below, please refer to Counc<strong>il</strong> Administration office<br />
regarding specialised waste collection centres.<br />
1 - DISPOSAL OF BATTERIES<br />
Protect the environment by disposing<br />
of batteries in the special containers<br />
provided for this use.<br />
2 - PACKAG<strong>IN</strong>G DISPOSAL<br />
Take the paper, cardboard and corrugated board to the<br />
appropriate waste collection centres. Plastic material must<br />
be placed in the relevant collection containers.<br />
The symbols indicating the various types of plastic are:<br />
Key for the different types of plastic materials:<br />
PET= Polyethylene terephtalate<br />
PE= Polyethylene, code 02 for PE-HD, 04 for PE-LD<br />
PVC =Polyvinyl chloride<br />
PP= Polypropylene<br />
PS= Polystyrene, Polystyrene foam<br />
O= Other polymers (ABS, Laminates, etc.)<br />
3 - WASTE DISPOSAL OF USED ELECTRICAL AND ELEC-<br />
TRONIC APPLIANCES<br />
All articles displaying this symbol on the body,<br />
packaging or instruction manual of same, must<br />
not be thrown away into normal disposal bins<br />
but brought to specialised waste disposal centres.<br />
Here, the various materials w<strong>il</strong>l be divided<br />
by characteristics and recycled, thus making an important<br />
contribution to environmental protection.<br />
OP T ION AL ACCESSORIES<br />
AD 170<br />
Mains supply adaptor.<br />
Vdc = 9V; Imax = 200 mA<br />
3
I N T R OD U C T I ON<br />
4<br />
[1] ON/OFF - Turns the instrument on and off.<br />
[2] SEQUENCER REC- Records what is being played.<br />
[2] SEQUENCER PLAY- Plays what has been recorded.<br />
[3 VOLUME +/– - Selects the master volume.<br />
[4] TRANSPOSER +/– - Allows pitch of notes to be<br />
changed.<br />
[5] TEMPO +/– - Sets the tempo for style performance,<br />
songs or metronome.<br />
[6] START/STOP - Starts/Stops a rhythm style or a<br />
song.<br />
[7] STYLES- Selects the rhythm styles.<br />
[8] METRONOME- Switches on and off the metronome<br />
beat.<br />
[9] SONGS - Selects the pre-recorded songs.<br />
<strong>IN</strong>PUT DC 9 V -Switches the instrument on with an AC/DC<br />
adapter.<br />
PHONES / AUX-OUT-Socket for headphones and Hi-Fi; output<br />
impedance 150 Ohm – To play without disturbing<br />
and/or being disturbed, you can use a stereo headphone.<br />
When the cable is inserted the speaker is automatically<br />
excluded and all sections of the keyboard can be heard in<br />
the headphone. The socket also allows an additional stereo<br />
amplifier, a recorder, etc. to be connected.<br />
Warning: only connect stereo cables to the “PHONES/ AUX-<br />
OUT” socket.<br />
C ON T ROL PAN E L<br />
SOCKE T S<br />
[10] EASY PLAY- Depending on the style, selects righthand<br />
tone, the best tempo for the performance and<br />
sets the FREE CHORD setting on the keyboard. In<br />
the 32 songs, it selects the sound and the tempo<br />
connected to the songs.<br />
[11] SOUNDS - To select the sound on the keyboard.<br />
[12] DJ STYLE - Enables the DJ STYLE rhythm with the<br />
“complex harmonies” and effects on the right side<br />
of the keyboard.<br />
[13] SELECT - To select functions, rhythm style, songs<br />
and sounds.<br />
[14] MAESTRO- Enters the 5 levels learning mode.<br />
[15] DEMO - Plays the demo song.
DIRECT IONS ON THE KE Y BOARD<br />
Letters on the left<br />
Indicate the basic note for the name of the chord (see pag. 11).<br />
T HE DISPLAY<br />
1) Pentagram with notes displayed.<br />
2) Indication of the identified chord and Easy Chordfunction.<br />
3) Indicates the name of sounds, rhythm styles, volumes and<br />
other functions.<br />
4) Indication of enabled SEQUENCER: “Record” or “Play”.<br />
5) Metronome icon, shows beat tempo.<br />
6) Indicates “TRANSPOSER” is active (transposition high or<br />
low).<br />
7) Indicates the tempo of the rhythm style, of the song or of<br />
the metronome.<br />
8) Indicates “DJ STYLE” function is active.<br />
9) Indication of Split point.<br />
10) 40 key keyboard (SK410) showing notes that are pressed or<br />
that have to be pressed if in MAESTRO mode.<br />
11) 49 key keyboard (SK500) showing notes that are pressed or<br />
that have to be pressed if in MAESTRO mode.<br />
<strong>IN</strong> T RODUCT ION<br />
Numbers on the right<br />
Indicate the keys to press to perform the melody with the simplified musical scores in the “Music Book” (see pag. 11).<br />
DJ STYLE sections<br />
The DJ CHORDis on the left side of the keyboard and is used to play the tonality. The DJ LOOPis in the centre and is used<br />
to play the complex harmonies. The DJ EFFECTSis on the right and is used to play the DJ STYLE characteristic effects.<br />
SK410<br />
SK500<br />
M U SIC - STAN D<br />
Insert the music-stand in the special holes.<br />
5
H OW TO U S E TH E K E Y B OA R D<br />
SWITCH ON AND SWITCH OFF<br />
Move the switch to the ON/OFF position to turn the instrument or .<br />
When turned on, the keyboard is set to operate with the Stage Pianosound,<br />
the Pop rhythm and the song La Cucaracha.<br />
Note: to avoid unnecessary battery use, an alarm w<strong>il</strong>l sound (Save Power<br />
Alarm) to indicate that the keyboard has not been used for more than two minutes.<br />
DEMO – Chosen excerpt<br />
Switching on the button, a melody that w<strong>il</strong>l emphasise the characteristics<br />
of the keyboard w<strong>il</strong>l play.<br />
To turn off the melody press the button.<br />
VOLUMES<br />
To regulate the volume of the instrument you must use buttons<br />
(to turn up) or (to turn down). By holding the button pressed<br />
down, the variation becomes continuous.<br />
To restore the standard volume press both and buttons<br />
together.<br />
THE SONGS<br />
The instrument contains 32 classic pieces.<br />
To select the piece, press the SONGS button (light on) and type in a two digit<br />
number from the SONGS list (e.g. 03 Jingle Bells, type in the 0 on the numeric<br />
keyboard then the 3) and press the button to activate the<br />
musical piece or to stop execution.<br />
When the first number is typed, the light blinks unt<strong>il</strong> the selection is complete. When the piece is playing, other songs can<br />
be listened to immediately by typing in the number which corresponds to the piece.<br />
The control sets the melody of the song and the standard TEMPO on the keyboard.<br />
THE SOUNDS<br />
The keyboard features 100 sounds divided into 6<br />
fam<strong>il</strong>ies(e.g. 031-050 ORGAN).<br />
They are selected when the button is on by<br />
entering a three digit number between 001 and 100<br />
of the SOUNDS list you w<strong>il</strong>l find at the end of the<br />
Instructions Manual.<br />
Example: for the Full Organsound type the number<br />
034 (first 0, then 3 and then 4 with the numeric keyboard).<br />
6<br />
HOW TO USE THE KE Y BOARD
HOW TO USE THE KE Y BOA RD<br />
IMPORTANT: With some sounds you might notice a slight difference of volume or sound quality when playing them in dif -<br />
ferent areas of the keyboard. This is an inevitable consequence of multiple sampling and not a technical problem.<br />
THE TRANSPOSER<br />
The controls shift the whole keyboard tonality by +/– 6<br />
semitones.<br />
By pressing one of the two buttons, the display temporar<strong>il</strong>y shows the current<br />
value.<br />
The TRANSPOSER variation is always indicated on the display by the<br />
“< Tr “ or “ Tr > “ signs.<br />
By simultaneously pressing the “ “ buttons of , you w<strong>il</strong>l return to the standard 00 value.<br />
THE KEYBOARD<br />
It has 40 midi size keys for mod. SK410 (49 keys for mod. SK500)and can be used in the following ways:<br />
1. When simply turned on, one single sound is enabled over the whole keyboard.<br />
2. By entering 73 Full Keyb / Split , the keyboard w<strong>il</strong>l be divided into two sections:<br />
one dedicated to accompaniment to form chords (keys on the left) and the other one<br />
to play the melody (keys on the right).<br />
The keyboard on the display shows the division point with an arrow.<br />
Chords can be played in the FREE CHORDmode, which means in the traditional way,<br />
or in the EASY CHORDmode, which means in the simplified mode (see the EASY<br />
CHORD paragraph).<br />
ACCOMPANIMENT SOUNDS<br />
The selection of ACCOMPANIMENT sounds is achieved by typing a code between 80 and 85, when the<br />
rhythm is off and the keyboard is split.<br />
THE STYLES<br />
The keyboard has 32 rhythmic stylesenriched by automatic<br />
accompaniments and completed by drums.<br />
They are sub-divided into 6 fam<strong>il</strong>ies(e.g. 22-28 LAT<strong>IN</strong>) ,<br />
see the list on page 54. To select them press the<br />
button and then a 2 digit figure from the STYLES list.<br />
Example: to select Sambarhythm, digit number 23 (2, and 3).<br />
To start or to stop a rhythm press the button.<br />
To increase or decrease the speed of the song press the two buttons and .<br />
By holding the button pressed down, the variation becomes continuous.<br />
To go back to standard rhythm press buttons and together.<br />
The metronome icon of the display shows the musical quarters and the beginning of every beat or measure.<br />
When a rhythm is on function and you select a new style this latter starts at the end of the previous rhythm pattern.<br />
TEMPO<br />
The buttons can be used to set the tempo of the rhythm or of a song.<br />
7
H OW TO U S E TH E K E Y B OA R D<br />
THE METRONOME<br />
The metronome helps you to learn the music, giving the beat during musical exercises and simulating the traditional timemarking<br />
instrument.<br />
It can be turned on and off with the button. To change the tempo, use the buttons.<br />
EASY PLAY<br />
Depending on the rhythm, Easy Play sets the tone for the right hand, the best tempo for the performance and splits the<br />
keyboard to play chords in the FREE CHORD mode.<br />
DJ STYLE<br />
The control activates the DJ effects in the<br />
last 13 keys on the keyboard, a DJ rhythm style and<br />
particular complex harmonies. The keyboard splits<br />
automatically into three sectors: playing a key on<br />
the left side, select the tonalityand the rhythm automatically<br />
starts, in the centre of the keyboard “com -<br />
plex harmonies” can be played and on the right side DJ Style characteristic effectscan be played. They are selected by pressing<br />
the button and then a number from 33 to 38.<br />
THE FUNCTIONS<br />
Full Keyb/Split<br />
To split the keyboard with two sounds or set a single<br />
sound.<br />
Number 73 activates Full Keyb, i.e. a single sound<br />
on the entire keyboard, or Split with the keyboard<br />
split to use two different sounds.<br />
EASY CHORD<br />
This function allows you to compose chords on the<br />
left side of the keyboard with the simplified mode:<br />
one key w<strong>il</strong>l provide a major chord,<br />
t wo keys a minor chord<br />
t h ree keys a dominant 7th chord.<br />
It is activated by typing number 74 Easy Chord.<br />
The fundamental note of the chord (the most important one and the one that gives the name to the chord) is represented<br />
by the key pressed on the far left. For example, by pressing simultaneously C, D and E, you w<strong>il</strong>l get a C7 dominant chord.<br />
The table with all the chords is at the end of the Music Book.<br />
Free Chord<br />
Chords are played in the traditional way and all the main chords are identified.<br />
It is activated by typing number 75 Free Chordor when Easy Playis selected.<br />
The display shows the name of the chord in the Anglo-Saxon notation.<br />
The table with all the chords is at the end of the Music Book.<br />
8
Memory On / Off<br />
With a rhythm running, the played chord remains memorized even if the key is released.<br />
It is activated by typing number 76 Memory Onand is deactivated with 77 Memory Off.<br />
It is normally active.<br />
Medley Song On / Off<br />
HOW TO USE THE KE Y BOA RD<br />
This function allows you to listen to all the songs one after the other, starting with the one you selected. It can be enabled<br />
by entering 78 Medley Song Onand disabled with 79 Medley Song Off .<br />
Sustain On / Off<br />
This prolongs the sound of a note after the key is released.<br />
To switch on, digit number 86 Sustain On, and to switch off number 87 Sustain Off.<br />
Reverb On / Off<br />
This creates an effect as if you were playing music in an large empty room.<br />
To switch on digit number 88 Reverb On, and to switch off digit number 89 Reverb Off.<br />
SEQUENCER<br />
The sequencer section allows you to record and listen to everything you play.<br />
It can be enabled by pressing the button. The display shows Rec seq and<br />
Record to show that the Sequencer is active.<br />
The three lights w<strong>il</strong>l cyclically blink. Wh<strong>il</strong>e you are playing, the display shows the<br />
amount of memory used with squares.<br />
Press again to stop recording and then press to listen to what has been<br />
recorded. Press again to stop listening. You can memorize up to 330 events.<br />
When the memory is full, the display temporar<strong>il</strong>y shows F u l l.<br />
After a recording session, wh<strong>il</strong>e PLAY is active, variations made on the control panel<br />
can alter recorded events.<br />
Recorded data is memorised as long as the keyboard is switched on. If nothing has<br />
been recorded in the Sequencer, by pressing the display w<strong>il</strong>l temporar<strong>il</strong>y show E m p t y .<br />
MAESTRO<br />
The MAESTROsection helps you in the music learning process just as if a<br />
real musical teacher were there with you, teaching you five fundamental<br />
aspects:<br />
1. Tempo 2. Note 3. Melody 4. Chord 5. Accompaniment<br />
DISPLAY DIRECTIONS<br />
Press a key on the keyboard, e.g. number 1. The display shows which key you are pressing and the relative note w<strong>il</strong>l be<br />
shown on the pentagram.<br />
9
H OW TO U S E TH E K E Y B OA R D<br />
1st level: Tempo of the song<br />
At the 1st level, you can become fam<strong>il</strong>iar with the melody notes and learn<br />
the tempo of the song.<br />
=== How to do it: After having chosen a tune, select level 1 first by pre ssing<br />
the button and then, when the display shows Level ?,<br />
number 1.<br />
Use the control to start and stop the performance.<br />
When the introduction touches are complete try playing the melody by pressing<br />
one or more keys and keeping time with the orchestra.<br />
During your performance, the display w<strong>il</strong>l show the correct notes of the<br />
melody. The accompaniment w<strong>il</strong>l automatically follow you.<br />
You can quicken or slow down the tempo by using the buttons.<br />
You w<strong>il</strong>l be able to change tune by pressing the corresponding button on the<br />
SONGS list. If you wish to listen to the whole song, press , then<br />
press and then again.<br />
2nd level: The Notes of the melody<br />
When you are able to keep time you can try the 2nd level, which means playing the correct keys to perform the correct<br />
melody.<br />
=== How to do it: After having chosen a tune, select the 2nd level by pressing the button and then number<br />
2. Use the control to start and stop the performance.<br />
When the introduction touches are complete try playing the melody; this time you w<strong>il</strong>l have to press the correct buttons for<br />
the other ones not to play. The display w<strong>il</strong>l help by showing you the correct melody keys in advance.<br />
The accompaniment w<strong>il</strong>l automatically follow your performance.<br />
3rd level: The song Melody<br />
This time the accompaniment w<strong>il</strong>l play normally, without waiting for you. This means you w<strong>il</strong>l have to perform the melody<br />
with the right keys wh<strong>il</strong>e keeping time, or else the song w<strong>il</strong>l sound out of tune.<br />
=== How to do it: After having chosen a song, select the 3rd level by pressing the button and then the<br />
number 3. Use the control to start and stop the performance.<br />
When the introduction touches are complete try playing the melody of the song.<br />
The display w<strong>il</strong>l help by showing notes and keys for the melody.<br />
4th level: The song Chords<br />
At this level the song w<strong>il</strong>l be played with the rhythm section and the melody; you w<strong>il</strong>l be able to play the accompaniment<br />
chords using the left side of the keyboard.<br />
If you do not play the right chord, the rhythm part w<strong>il</strong>l keep on going with the last chord and the melody w<strong>il</strong>l stop.<br />
=== How to do it: After having chosen a song, select the 4th level by pressing the button and then number<br />
4. Use the control to start and stop the performance.<br />
When the introduction touches are complete play the first chord and then the others, following the directions shown on the<br />
display.<br />
If you play a wrong chord, the melody w<strong>il</strong>l not play, and if you play it at the wrong time, accompaniment and melody w<strong>il</strong>l<br />
be out of tempo.<br />
To make the first lessons easier, try slowing the tempo of the song, using the button.<br />
The display w<strong>il</strong>l help by showing the name of the chord, the keys and the notes on the pentagram in advance.<br />
There are two ways of playing chords:<br />
• Free Chordfor playing chords in the traditional way. • Easy Chordfor playing simplified chords.<br />
To choose the desired mode, see the “FUNCTIONS” paragraph.<br />
5th level: Accompaniment with orchestra<br />
At this level the song w<strong>il</strong>l be played with the drums rhythm section together with the melody and you w<strong>il</strong>l be able to play<br />
the accompaniment. Rhythm and melody w<strong>il</strong>l keep going so you w<strong>il</strong>l have to play the right chord in time, or else it w<strong>il</strong>l be<br />
out of tune.<br />
10
HOW TO USE THE KE Y BOA RD<br />
=== How to do it: After having chosen a song, select the 5th level by pressing the button and then the<br />
number 5. Use the control to start and stop the performance.<br />
To start the complete accompaniment, play the first chord following the directions shown on the display.<br />
The display w<strong>il</strong>l help by showing the name of the chord, the keys and the notes on the pentagram.<br />
There are two ways of playing chords:<br />
• Free Chordfor playing chords in the traditional way. • Easy Chordfor playing simplified chords.<br />
To choose the desired mode, see the “FUNCTIONS” paragraph.<br />
US<strong>IN</strong>G THE NUMBERS AND LETTERS ON THE KEYBOARD<br />
To play the tune, read the numerical sequence contained in the blue songs strip and press the black and white keys that<br />
correspond to the same numbers on the keyboard.<br />
The letters beneath the continuous blue line indicate the accompaniment chordsthat can be played using the simplified<br />
mode (the line to the right indicates how long the chord should be held).<br />
M AI N T E N ANC E AN D R E M AR K S<br />
To ensure that the instrument works perfectly and has a long life, please follow the recommendations below:<br />
• Avoid exposing the instrument to heat sources or keeping it in humid places.<br />
• Keep packaging and all its components to replace and store instrument in case of periods of inactivity or transportation.<br />
• Should you notice any malfunction, please contact your nearest authorized dealer.<br />
• If returning the instrument for repair, you should send it in its original packing or pack it in such a way that avoids damage<br />
in transit.<br />
• Do not use alcohol, solvents or sim<strong>il</strong>ar chemical substances for cleaning. Use a soft cloth dampened in a bland solution<br />
of water and neutral detergent. Dip the cloth in the solution and then wring it unt<strong>il</strong> it is nearly dry.<br />
11
I N T R OD U Z I O N E<br />
CARATTERISTICHE TECNICHE . . . . . . . . . . . . . . . . . . . . .42<br />
ALIMENTAZIONE . . . . . . . . . . . . . . . . . . . . . . . . . . . . . . . .43<br />
ALIMENTAZIONE A RETE . . . . . . . . . . . . . . . . . . . . . . .43<br />
ALIMENTAZIONE A BATTERIE . . . . . . . . . . . . . . . . . . .43<br />
ACCESSORI ORIG<strong>IN</strong>ALI A RICHIESTA . . . . . . . . . . . . . .43<br />
PANNELLO COMANDI . . . . . . . . . . . . . . . . . . . . . . . . . . . .44<br />
PRESE . . . . . . . . . . . . . . . . . . . . . . . . . . . . . . . . . . . . . .44<br />
LE <strong>IN</strong>DICAZIONI SULLA TASTIERA . . . . . . . . . . . . . . . . .45<br />
IL DISPLAY . . . . . . . . . . . . . . . . . . . . . . . . . . . . . . . . . . . . .45<br />
LEGGÌO . . . . . . . . . . . . . . . . . . . . . . . . . . . . . . . . . . . . . .45<br />
ISTRUZIONI D’USO . . . . . . . . . . . . . . . . . . . . . . . . . . . . . .46<br />
ACCENSIONE E SPEGNIMENTO . . . . . . . . . . . . . . . . .46<br />
DEMO . . . . . . . . . . . . . . . . . . . . . . . . . . . . . . . . . . . . .46<br />
I VOLUMI . . . . . . . . . . . . . . . . . . . . . . . . . . . . . . . . . . .46<br />
LE CANZONI . . . . . . . . . . . . . . . . . . . . . . . . . . . . . . . . .46<br />
I SUONI . . . . . . . . . . . . . . . . . . . . . . . . . . . . . . . . . . . . .46<br />
IL TRANSPOSER . . . . . . . . . . . . . . . . . . . . . . . . . . . . .47<br />
LA TASTIERA . . . . . . . . . . . . . . . . . . . . . . . . . . . . . . . .47<br />
I SUONI PER L’ACCOMPAGNAMENTO . . . . . . . . . . . .47<br />
GLI STILI . . . . . . . . . . . . . . . . . . . . . . . . . . . . . . . . . . . .47<br />
TEMPO . . . . . . . . . . . . . . . . . . . . . . . . . . . . . . . . . . . . .47<br />
IL METRONOMO . . . . . . . . . . . . . . . . . . . . . . . . . . . . .48<br />
EASY PLAY . . . . . . . . . . . . . . . . . . . . . . . . . . . . . . . . . . .48<br />
DJ STYLE . . . . . . . . . . . . . . . . . . . . . . . . . . . . . . . . . . . .48<br />
TASTIERA: 40 tasti MIDI (LA-DO)<br />
TASTIERA: 49 tasti MIDI (DO-DO)<br />
POLIFONIA: 16 note massimo<br />
DISPLAY: LCD 62 x 40 mm<br />
SUONI BASE: 100 timbri polifonici<br />
TRANSPOSER: spostamento +/- 6 semitoni<br />
SUONI PER L’ACCOMPAGNAMENTO: 6 timbri polifonici<br />
EFFETTI: REVERB e SUSTA<strong>IN</strong><br />
STYLES: 32 ritmi<br />
DJ STYLES: 6 st<strong>il</strong>i con 13 effetti e 12 loop<br />
<strong>Con</strong>trolli: START/STOP, DOWN BEAT, TEMPO +/-<br />
METRONOMO: con commando immediato<br />
SEQUENCER: REC e PLAY per registrare e riascoltare<br />
ACCOMPAGNAMENTO AUTOMATICO: Free Chord ed<br />
Easy Chord<br />
<strong>Con</strong>trolli: MEMORY ON/OFF, Full Keyb./Split<br />
<strong>Con</strong>trolli generali : ON/OFF, Master Volume, Select, Easy<br />
Play, Style, Song, Sound<br />
42<br />
<strong>IN</strong>DICE<br />
C AR ATT E R IST IC H E TEC N ICH E<br />
LE FUNZIONI . . . . . . . . . . . . . . . . . . . . . . . . . . . . . . . .48<br />
FULL KEYB / SPLIT . . . . . . . . . . . . . . . . . . . . . . . . . . .48<br />
EASY CHORD . . . . . . . . . . . . . . . . . . . . . . . . . . . . . . . .48<br />
FREE CHORD . . . . . . . . . . . . . . . . . . . . . . . . . . . . . . . .48<br />
MEMORY ON / OFF . . . . . . . . . . . . . . . . . . . . . . . . . . .49<br />
MEDLEY SONG ON / OFF . . . . . . . . . . . . . . . . . . . . . .49<br />
SUSTA<strong>IN</strong> ON / OFF . . . . . . . . . . . . . . . . . . . . . . . . . . . .49<br />
REVERB ON / OFF . . . . . . . . . . . . . . . . . . . . . . . . . . .49<br />
SEQUENCER . . . . . . . . . . . . . . . . . . . . . . . . . . . . . . . .49<br />
MAESTRO . . . . . . . . . . . . . . . . . . . . . . . . . . . . . . . . . . .49<br />
LE <strong>IN</strong>DICAZIONI DEL DISPLAY . . . . . . . . . . . . . . . . . .49<br />
1° LIVELLO: IL TEMPO DELLA CANZONE . . . . . . . . .50<br />
2° LIVELLO: LE NOTE DELLA MELODIA . . . . . . . . . . .50<br />
3° LIVELLO: LA MELODIA DELLA CANZONE . . . . . . .50<br />
4° LIVELLO: GLI ACCORDI DELLA CANZONE . . . . . .50<br />
5° LIVELLO: L’ACCOMPAGNAMENTO CON L’ORCHESTRA .50<br />
NUMERI E LETTERE SULLA TASTIERA . . . . . . . . . . .51<br />
MANUTENZIONE ED AVVERTENZE . . . . . . . . . . . . . . . .51<br />
GUIDA ALLA SOLUZIONE DEI PROBLEMI . . . . . . . . . . .51<br />
TABELLA DELLE CANZONI . . . . . . . . . . . . . . . . . . . . . . . .52<br />
LISTA DEI SUONI . . . . . . . . . . . . . . . . . . . . . . . . . . . . . . . .53<br />
LISTA DEGLI STILI . . . . . . . . . . . . . . . . . . . . . . . . . . . . . . .54<br />
LISTA DEI SUONI PER L’ACCOMPAGNAMENTO . . . . . . .54<br />
GARANZIA . . . . . . . . . . . . . . . . . . . . . . . . . . . . . . . . . . . . .55<br />
DEMO: Brano dimostrativo<br />
SONGS: 32 brani musicali preregistrati con Medley On/Off<br />
MAESTRO: 5 livelli di apprendimento<br />
AMPLIFICAZIONE: 1,5 watt (RMS)<br />
Due altoparlanti ad alta efficienza Ø 77 mm<br />
ALIMENTAZIONE: 6 batterie da 1,5 Volt IEC R6/AA<br />
Adattatore AC/DC – 9 V / 200 mA<br />
PHONES/AUX-OUT: Presa per cuffia ed amplificazione<br />
esterna<br />
DIMENSIONI SK410: 600 x 232 x 65 mm<br />
DIMENSIONI SK500: 680 x 240 x 63 mm<br />
PESO SK410: 1,5 Kg.<br />
PESO SK500:2 Kg.<br />
SIGMA S.p.A. si riserva <strong>il</strong> diritto di modificare, senza preavviso, le caratteristiche del prodotto<br />
<strong>Con</strong>servare <strong>il</strong> presente manuale per future consultazioni.
ALIMENTAZIONE A RETE<br />
Lo strumento può essere alimentato con adattatore da rete<br />
(non fornito) che abbia in uscita le seguenti caratteristiche:<br />
Vdc = 9V; Imax = 200 mA<br />
(terminale positivo centrale).<br />
Tale apparecchio è conforme alle norme nazionali ed internazionali<br />
sulla sicurezza elettrica. Inserire lo spinotto nella<br />
presa 9V DC della tastiera.<br />
Il giocattolo non è destinato a bambini di età inferiore ai 3 anni.<br />
• Il giocattolo può essere ut<strong>il</strong>izzato solo con <strong>il</strong> trasformatore raccomandato.<br />
• I giocattoli soggetti a pulizia con liquido, devono<br />
e s s e re preliminarmente scollegati dal tra s fo r m a t o re. •<br />
L’adattatore da rete NON è un giocattolo.<br />
RACCOMANDAZIONE: • La presa di rete (1) per collegare la<br />
spina dell’a d a t ta t o re deve essere ben accessib<strong>il</strong>e.<br />
L’inserimento dello spinotto esclude automaticamente le<br />
batterie. • Assicurare la sufficiente aerazione dell’adattatore:<br />
le fessure di aerazione non devono essere coperte con<br />
oggetti come giornali, tovaglie, tende, ecc.. • Non esporre<br />
l’adattatore a gocce o schizzi d’acqua.<br />
ATTENZIONE: - Qualsiasi adattatore, anche se dotato di<br />
isolamento di sicurezza, va regolarmente esaminato per<br />
evitare possib<strong>il</strong>i rischi dovuti a danni al cavo, alla spina,<br />
all’involucro o ad altre parti. In caso di guasti rivolgersi<br />
esclusivamente a personale qualificato.<br />
ALIMENTAZIONE A BATTERIE<br />
Lo strumento funziona con 6 batterie da 1,5Vtipo IEC<br />
R6/AA (non fornite) che vanno collocate nell’apposito vano<br />
situato nella parte inferiore. Per aprire <strong>il</strong> vano premere sulla<br />
leva in corrispondenza di OPEN; per alloggiare le batterie<br />
seguire le indicazioni grafiche che compaiono in r<strong>il</strong>ievo sul<br />
fondo. Richiudere quindi <strong>il</strong> coperchio.<br />
AL IMEN TAZIONE<br />
1<br />
<strong>IN</strong> T RODUZIONE<br />
ACCORGIMENTI NELL’USO DELLE BATTERIE<br />
• Togliere le batterie scariche dal vano p<strong>il</strong>e. • Non ricaricare le<br />
batterie che sono del tipo non ricaricab<strong>il</strong>i. • Per ricaricare le batterie<br />
toglierle dal vano p<strong>il</strong>e. • Ricaricare le batterie sotto la<br />
supervisione di un adulto. • Inserire le batterie con la corretta<br />
polarità. • Non usare differenti tipi di batterie o batterie nuove<br />
ed usate insieme. • Usare solo batterie del tipo raccomandato<br />
od equivalenti. • Non cortocircuitare i terminali di alimentazione.<br />
• Togliere le batterie se lo strumento non viene usato per<br />
lunghi periodi.<br />
NORME PER LO SMALTIMENTO<br />
Per lo smaltimento dei particolari sotto indicati, informarsi<br />
presso le Amministrazioni Comunali circa i centri di smaltimento<br />
specializzati.<br />
1 - SMALTIMENTO DELLE BATTERIE<br />
Per aiutare la protezione ambientale non<br />
gettare le batterie scariche tra i normali<br />
rifiuti ma portarle negli appositi contenitori<br />
situati nei centri di raccolta.<br />
2 - SMALTIMENTO DEGLI IMBALLAGGI<br />
<strong>Con</strong>segnare gli imballi di carta, cartone e cartone ondulato nei<br />
centri di raccolta specifici. Le parti in plastica dell’imballo devono<br />
essere messe negli appositi contenitori per la raccolta.<br />
I simboli che individuano i vari tipi di plastica sono:<br />
Legenda relativa al tipo di materiale plastico:<br />
• PET = Poliet<strong>il</strong>en tereftalato<br />
• PE = Poliet<strong>il</strong>ene, <strong>il</strong> codice 02 per PE-HD, 04 per PE-LD<br />
• PVC = Polivin<strong>il</strong>cloruro<br />
• PP = Poliprop<strong>il</strong>ene<br />
• PS = Polistirolo, Polistirolo espanso<br />
• O = Altri polimeri (ABS, Accoppiati, ecc.)<br />
3 - SMALTIMENTO DI VECCHI PRODOTTI ELETTRICI ED ELET-<br />
TRONICI<br />
Tutti gli articoli che recano questo simbolo sul<br />
corpo del prodotto, sull’imballo o nelle istruzioni<br />
non devono essere gettati nella normale spazzatura<br />
ma devono essere consegnati nei centri di raccolta<br />
specializzati.<br />
Qui i materiali saranno divisi in base alle loro caratteristiche ed<br />
in seguito riut<strong>il</strong>izzati al fine di apportare un importante contributo<br />
per la protezione dell’ambiente.<br />
A CCESSORI ORIG<strong>IN</strong> ALI A RICHIESTA<br />
AD 170<br />
Adattatore da rete.<br />
Vdc = 9V; Imax = 200 mA<br />
43
I N T R OD U Z I O N E<br />
44<br />
[1] -Per accendere o spegnere lo strumento.<br />
[2] - per registrare ciò che si suona e<br />
[3]<br />
play per riascoltare la registrazione.<br />
-Per la selezione del volume generale.<br />
[4] -Permette di cambiare la tonalità<br />
delle note.<br />
[5] -Per la regolazione della velocità d’esecuzione<br />
dello st<strong>il</strong>e, delle canzoni o del metronomo.<br />
[6] -Per avviare o fermare uno st<strong>il</strong>e ritmico<br />
o una canzone.<br />
[7] -Per selezionare gli st<strong>il</strong>i ritmici.<br />
[8] -Per attivare o disattivare <strong>il</strong> tempo<br />
battuto dal metronomo.<br />
-Permette di alimentare lo strumento per<br />
mezzo di un adattatore AC/DC.<br />
-Presa per cuffia e impianto Hi-Fi;<br />
impedenza di uscita 150 Ohm - Per suonare senza disturbare<br />
e/o essere disturbati, si può usare una cuffia stereo.<br />
Quando si inserisce lo spinotto viene escluso automaticamente<br />
l’altoparlante e tutte le sezioni della tastiera si ascoltano<br />
in cuffia. La presa consente anche <strong>il</strong> collegamento ad<br />
un amplificatore stereo supplementare, un registratore, etc..<br />
Attenzione: collegare alla presa “PHONES/ AUX-OUT” solamente<br />
spinotti stereo.<br />
PANNEL LO COM ANDI<br />
PRESE<br />
[9] -Per selezionare le canzoni preregistrate.<br />
[10] -In base allo st<strong>il</strong>e corrente seleziona <strong>il</strong><br />
timbro della mano destra, la velocità ottimale d’esecuzione<br />
dello st<strong>il</strong>e e porta la tastiera in condizione<br />
di FREE CHORD. Nelle 32 canzoni, seleziona <strong>il</strong><br />
suono ed <strong>il</strong> tempo abbinati ai brani musicali.<br />
[11] -Per selezionare <strong>il</strong> suono sulla tastiera.<br />
[12] -Ab<strong>il</strong>ita <strong>il</strong> ritmo DJ STYLE con i “giri<br />
armonici” e gli effetti nella parte destra della tastiera.<br />
[13] - Per la selezione di funzioni, st<strong>il</strong>i ritmici,<br />
canzoni e suoni.<br />
[14] -Per entrare nella modalità di apprendimento<br />
su 5 livelli.<br />
[15] -Per ascoltare <strong>il</strong> brano dimostrativo.
LE <strong>IN</strong>DICAZIONI SUL LA TA ST IERA<br />
Le lettere a sinistra<br />
Indicano la nota fondamentale per <strong>il</strong> nome dell’accordo.<br />
IL DISPLAY<br />
1) Pentagramma con visualizzazione delle note.<br />
2) Indica <strong>il</strong> nome dell’accordo riconosciuto e della funzione<br />
Easy Chord.<br />
3) Indica <strong>il</strong> nome dei suoni, dello st<strong>il</strong>e ritmico, dei volumi ed<br />
altre funzioni.<br />
4) Indicatore di SEQUENCER attivo: Record (registrazione) o<br />
Play (riascolto).<br />
5) Icona Metronomo, visualizza <strong>il</strong> battito del tempo.<br />
6) Indicazione di TRANSPOSER attivo (trasposizione alta o<br />
bassa).<br />
7) Indica la velocità dello st<strong>il</strong>e ritmico, della canzone o del<br />
Metronomo.<br />
8) Indica la funzione DJ STYLE attiva.<br />
9) Indicatore del punto di Split.<br />
10) Tastiera 40 tasti (SK410) con visualizzazione dei tasti premuti<br />
o da premere in modalità MAESTRO.<br />
11) Tastiera 49 tasti (SK500) con visualizzazione dei tasti premuti<br />
o da premere in modalità MAESTRO.<br />
<strong>IN</strong> T RODUZIONE<br />
I numeri a destra<br />
Indicano i tasti da suonare per eseguire la melodia con le partiture musicali semplificate contenute nel libro “Music Book”.<br />
Le sezioni del DJ STYLE<br />
Nella parte sinistra della tastiera, c’è <strong>il</strong> per suonare la tonalità, nella parte centrale c’è <strong>il</strong> per suonare<br />
i giri armonici e nella parte destra, c’è per suonare gli effetti caratteristici del DJ STYLE.<br />
SK410<br />
SK500<br />
L EGG Ì O<br />
Inserire <strong>il</strong> leggìo negli appositi fori.<br />
45
IST RUZIONI D’USO<br />
ACCENSIONE E SPEGNIMENTO<br />
Lo strumento si accende spostando l’interruttore su e si spegne su .<br />
All’accensione la tastiera è predisposta per funzionare con <strong>il</strong> suono Stage<br />
Piano, <strong>il</strong> ritmo Pop e la canzone La Cucaracha.<br />
Nota - Per evitare un inut<strong>il</strong>e consumo delle batterie, <strong>il</strong> suono di un campanello<br />
(dispositivo “Save Power Alarm”), segnala che la tastiera non è stata<br />
ut<strong>il</strong>izzata da oltre due minuti.<br />
DEMO - Brano dimostrativo<br />
Premendo <strong>il</strong> pulsante , va in esecuzione un brano che evidenzia le<br />
caratteristiche musicali della tastiera.<br />
Per interrompere l’esecuzione, premere di nuovo <strong>il</strong> pulsante .<br />
I VOLUMI<br />
Per regolare <strong>il</strong> volume generale dello strumento, agire sui pulsanti<br />
(per aumentare) o (per diminuire). Tenendo premuto <strong>il</strong> pulsante,<br />
la variazione diventa continua.<br />
Per ripristinare <strong>il</strong> volume standard, premere insieme i pulsanti e<br />
.<br />
LE CANZONI<br />
Lo strumento contiene 32 brani musicalidel repertorio classico.<br />
Per selezionare i brani, premere <strong>il</strong> pulsante (luce accesa) e digitare<br />
un numero a due cifre secondo la lista SONGS (es. 03 Jingle Bells, digitare<br />
sulla tastierina numerica lo 0, e poi <strong>il</strong> 3) e premere <strong>il</strong> pulsante<br />
per avviare <strong>il</strong> brano musicale o per fermare l’esecuzione.<br />
Quando si digita <strong>il</strong> primo numero, la luce lampeggia fino a quando non si completa la selezione.<br />
Quando un brano è in esecuzione, si possono ascoltare altre canzoni in modo immediato digitando <strong>il</strong> numero abbinato al<br />
brano scelto.<br />
Il comando imposta sulla tastiera <strong>il</strong> suono della melodia abbinata alla canzone ed <strong>il</strong> TEMPO standard.<br />
I SUONI<br />
Nella tastiera ci sono 100 suonisuddivisi in 6 famiglie<br />
(es. 031-050 ORGAN).<br />
Si selezionano quando <strong>il</strong> pulsante è acceso<br />
e digitando un numero a tre cifre da 001 a 100 della<br />
lista SOUNDS che si trova nella parte finale del<br />
Manuale d’Uso.<br />
Esempio: per <strong>il</strong> suono Full Organcomporre <strong>il</strong> numero<br />
034 (prima lo 0, poi <strong>il</strong> 3 e poi <strong>il</strong> 4 con la tastierina<br />
numerica ).<br />
46<br />
IST RUZIONI D’USO
IST RUZIONI D’USO<br />
<strong>Con</strong> alcuni suoni, può accadere di notare una leggerissima differenza di volume o di qualità sonora quando si suonano in<br />
punti diversi della tastiera. Questa è una conseguenza inevitab<strong>il</strong>e del campionamento multiplo e non è indice di problemi<br />
di funzionamento.<br />
IL TRANSPOSER<br />
I comandi di permettono di spostare la tonalità di tutta la<br />
tastiera di +/– 6 semitoni.<br />
Premendo uno dei due pulsanti, <strong>il</strong> display visualizza in modo temporaneo <strong>il</strong><br />
valore corrente.<br />
La variazione di TRANSPOSER è indicata in maniera permanente dal display con <strong>il</strong> segno “ < Tr “ o “ Tr > “.<br />
Premendo contemporaneamente i pulsanti di , si ritorna al valore normale di 00.<br />
LA TASTIERA<br />
Si compone di 40 tasti per <strong>il</strong> mod. SK410 (49 tasti per <strong>il</strong> mod. SK500) a passo MIDI e può essere ut<strong>il</strong>izzata nei seguenti modi:<br />
1. All’accensione, su tutta la tastiera è attivo un’unico suono.<br />
2. <strong>Con</strong> la funzione 73 Full Keyb/Split , la tastiera si divide in due sezioni: una riservata<br />
all’accompagnamento per comporre gli accordi (tasti a sinistra) e l’altra per<br />
suonare la melodia (tasti a destra).<br />
La tastiera schematizzata sul display visualizza <strong>il</strong> punto di divisione con una freccia.<br />
Gli accordi si possono suonare nel modo FREE CHORDe cioè secondo <strong>il</strong> metodo classico<br />
oppure in EASY CHORDe cioè nel modo semplificato (vedi <strong>il</strong> paragrafo “Easy<br />
Chord”).<br />
I SUONI PER L’ACCOMPAGNAMENTO<br />
La selezione dei suoni per l’accompagnamento, quando <strong>il</strong> ritmo è fermo e la tastiera è divisa , si ottiene<br />
digitando un codice tra 80 ed 85.<br />
GLI STILI<br />
Nella tastiera sono memorizzati 32 st<strong>il</strong>i ritmici arricchiti<br />
da accompagnamenti automatici completi di basso, arrangiamenti<br />
e batteria. Sono suddivisi in 6 famiglie(es. 22-<br />
28 LAT<strong>IN</strong>), vedi la lista STYLES in fondo al Manuale d’Uso.<br />
Si selezionano premendo <strong>il</strong> pulsante e poi un<br />
numero a due cifre della lista STYLES.<br />
Esempio: per selezionare <strong>il</strong> ritmo Samba, comporre <strong>il</strong> numero 23 (prima <strong>il</strong> 2 e poi <strong>il</strong> 3).<br />
Per avviare <strong>il</strong> ritmo o per fermarlo, premere <strong>il</strong> pulsante .<br />
Per aumentare o diminuire la velocità di esecuzione, ut<strong>il</strong>izzare i pulsanti di . Tenendo premuto <strong>il</strong> pulsante, la<br />
variazione diventa continua.<br />
Per ripristinare la velocità standard del ritmo, premere insieme i pulsanti di .<br />
L’icona metronomo del display visualizza i quarti musicali e l’inizio di ogni battuta o misura.<br />
Quando un ritmo è in funzione, e si seleziona un nuovo st<strong>il</strong>e, quest’ultimo va in esecuzione al termine del disegno ritmico<br />
precedente.<br />
TEMPO<br />
I pulsanti di , servono per regolare la velocità del ritmo, di una canzone o del metronomo.<br />
47
IST RUZIONI D’USO<br />
Il METRONOMO<br />
Il metronomo aiuta nell’apprendimento della musica, battendo <strong>il</strong> tempo durante lo svolgimento degli esercizi musicali e<br />
simula <strong>il</strong> classico strumento che scandisce <strong>il</strong> tempo. Si attiva e disattiva premendo <strong>il</strong> comando .<br />
Per variare la velocità, ut<strong>il</strong>izzare i pulsanti di .<br />
EASY PLAY<br />
In base al ritmo corrente, imposta <strong>il</strong> timbro per la mano destra, la velocità ottimale d’esecuzione del ritmo e divide<br />
la tastiera per suonare gli accordi nel modo FREE CHORD.<br />
DJ STYLE<br />
Il comando attiva gli effetti DJ negli ultimi<br />
13 tasti della tastiera, uno st<strong>il</strong>e ritmico DJ e par-<br />
ticolari giri armonici. La tastiera si divide automaticamente<br />
in tre settori : suonando un tasto nella parte<br />
sinistra, si sceglie la tonalitàe si avvia automaticamente<br />
<strong>il</strong> ritmo, al centro della tastiera si possono<br />
suonare i ‘giri armonici’e nella parte destra si possono suonare gli effetticaratteristici del DJ Style. Si selezionano premendo<br />
<strong>il</strong> pulsante e poi un numero da 33 a 38 (vedi la lista STYLES a pag. 54).<br />
LE FUNZIONI (FUNCTIONS)<br />
Full Keyb/Split<br />
Per dividere la tastieracon due suoni o impostare<br />
un unico suono.<br />
<strong>Con</strong> <strong>il</strong> numero 73 si attiva Full Keybe cioè un unico<br />
suono su tutta la tastiera oppure Splitcon la tastiera<br />
divisa per l’ut<strong>il</strong>izzo di due suoni diversi.<br />
Easy Chord<br />
Questa funzione consente di comporre gli accordi<br />
nella parte sinistra della tastiera secondo <strong>il</strong> metodo<br />
semplificato:<br />
con un tasto un accordo maggiore,<br />
con due tasti un accordo minore,<br />
con tre tasti un accordo di settima.<br />
Si attiva digitando 74 Easy Chord.<br />
La nota fondamentale dell’accordo (la più importante, quella che gli dà <strong>il</strong> nome) è rappresentata dal tasto premuto più a<br />
sinistra.<br />
Ad esempio C (DO), D (RE) e E (MI) premuti contemporaneamente, danno un accordo di C7 (DO settima).<br />
Il prontuario con tutti gli accordi principali si trova alla fine del libro canzoni (Music Book).<br />
Free Chord<br />
Gli accordi si suonano secondo <strong>il</strong> metodo classico e vengono riconosciuti tutti gli accordi principali.<br />
Si attiva digitando <strong>il</strong> numero 75 Free Chordoppure quando si seleziona .<br />
Il display visualizza <strong>il</strong> nome dell’accordo nella notazione anglosassone.<br />
Il prontuario con tutti gli accordi principali si trova alla fine del libro canzoni (Music Book).<br />
48
Memory On / Off<br />
<strong>Con</strong> un ritmo in funzione, l’accordo suonato, rimane memorizzato anche quando si r<strong>il</strong>asciano i tasti.<br />
Si attiva digitando <strong>il</strong> numero 76 Memory One si disattiva con 77 Memory Off. Normalmente è attiva.<br />
Medley Song On / Off<br />
<strong>Con</strong> questa funzione è possib<strong>il</strong>e ascoltare tutte le canzoni in successione a partire da quella selezionata.<br />
Si attiva digitando <strong>il</strong> numero 78 Medley Song One si disattiva con 79 Medley Song Off .<br />
Sustain On / Off<br />
Prolunga <strong>il</strong> suono di una nota quando <strong>il</strong> tasto viene r<strong>il</strong>asciato.<br />
Si attiva digitando <strong>il</strong> numero 86 Sustain One si disattiva con 87 Sustain Off.<br />
Reverb On / Off<br />
L’effetto di reverbero consente di ascoltare i suoni come se fossero riprodotti in una grande sala.<br />
Si attiva digitando <strong>il</strong> numero 88 Reverb One si disattiva con 89 Reverb Off.<br />
IST RUZIONI D’USO<br />
SEQUENCER<br />
<strong>Con</strong> la sezione Sequencer è possib<strong>il</strong>e registrare e poi riascoltare ciò che si suona.<br />
Si attiva premendo <strong>il</strong> pulsante Il display indica Rec seq e Record per<br />
segnalare che <strong>il</strong> Sequencer è in funzione.<br />
Le luci lampeggiano in maniera ciclica. La prima riga del display visualizza con dei<br />
quadratini la porzione di memoria occupata. Per fermare la registrazione, premere<br />
di nuovo e poi premere <strong>il</strong> pulsante per ascoltare ciò che è stato registrato.<br />
Premere di nuovo per fermare l’ascolto.<br />
Si possono memorizzare circa 3 3 0 e venti. Quando la memoria è piena, <strong>il</strong> display indica<br />
in modo temporaneo F u l l. Dopo una re g i s t razione, quando è in funzione PLAY,<br />
e ventuali variazioni fatte con <strong>il</strong> pannello comandi, possono influire sugli eventi re g is<br />
t rati. I dati re g i s t rati rimangono in memoria fino a quando la ta s t i e ra è accesa .<br />
Se nel Sequencer non è stato registrato nulla, premendo , <strong>il</strong> display indica in modo temporaneo E m p t y .<br />
MAESTRO<br />
La sezione MAESTRO ti aiuta nell’apprendimento della musica come se<br />
accanto a te ci fosse un vero maestro di musica che ti insegna 5 aspetti fondamentali:<br />
1. Il Tempo 2. Le Note 3. La Melodia 4. Gli Accordi 5. L’Accompagnamento<br />
Le indicazioni del display<br />
Premi un tasto sulla tastiera, ad es. quello contraddistinto dal numero 1; <strong>il</strong> display indica <strong>il</strong> tasto che stai premendo e sul<br />
pentagramma compare la nota corrispondente.<br />
49
IST RUZIONI D’USO<br />
1° livello: Il Tempo della canzone<br />
<strong>Con</strong> <strong>il</strong> 1° livello, puoi fam<strong>il</strong>iarizzare con le note della melodia e soprattutto acquisire <strong>il</strong> tempo della canzone.<br />
=== Come si esegue: Dopo aver scelto una canzone, seleziona <strong>il</strong> livello 1<br />
premendo prima <strong>il</strong> pulsante MAESTRO e poi, quando <strong>il</strong> display visualizza<br />
Level ?, <strong>il</strong> numero 1 sulla tastierina numerica .<br />
Ut<strong>il</strong>izza <strong>il</strong> comando per avviare e fermare l’esecuzione.<br />
Dopo i tocchi introduttivi, prova a suonare la melodia della canzone premendo<br />
casualmente e ripetutamente uno o più tasti della tastiera cercando<br />
di andare a tempo con l’orchestra.<br />
Durante la tua esecuzione, <strong>il</strong> display visualizza le note giuste della melodia.<br />
L’accompagnamento ti seguirà automaticamente.<br />
Puoi rallentare o aumentare la velocità di esecuzione della canzone agendo con i<br />
pulsanti “ “ di . Puoi cambiare canzone digitando <strong>il</strong> numero corrispondente<br />
secondo la lista SONGS. Se vuoi ascoltare la canzone completa, ferma l’esecuzione<br />
con , premi <strong>il</strong> pulsante e di nuovo .<br />
2° livello: Le Note della melodia<br />
Quando riuscirai ad andare bene a tempo, potrai provare <strong>il</strong> 2° livello e cioè suonare le note esatte della melodia premendo<br />
i tasti giusti.<br />
=== Come si esegue: Dopo aver scelto una canzone, seleziona <strong>il</strong> livello 2 premendo prima <strong>il</strong> pulsante MAESTRO e poi <strong>il</strong><br />
numero 2 sulla tastierina numerica . Ut<strong>il</strong>izza <strong>il</strong> comando per avviare e fermare l’esecuzione.<br />
Dopo i tocchi introduttivi, prova a suonare la melodia della canzone; questa volta devi premere i tasti giusti perché gli altri<br />
non suonano. Il display ti aiuta visualizzando in anticipo i tasti giusti della melodia.<br />
L’accompagnamento seguirà automaticamente la tua esecuzione.<br />
3° livello: La Melodia della canzone<br />
L’accompagnamento suonerà normalmente senza attendere, quindi devi eseguire la melodia con i tasti giusti e cercare di<br />
andare a tempo altrimenti la canzone risulterà stonata.<br />
=== Come si esegue: Dopo aver scelto una canzone, seleziona <strong>il</strong> livello 3 premendo prima <strong>il</strong> pulsante MAESTRO e poi <strong>il</strong><br />
numero 3 sulla tastierina numerica . Ut<strong>il</strong>izza <strong>il</strong> comando per avviare e fermare l’esecuzione.<br />
Dopo i tocchi introduttivi, prova a suonare la melodia della canzone.<br />
Il display ti aiuta visualizzando le note ed i tasti per la melodia<br />
4° livello: Gli Accordi della canzone<br />
In questo livello la canzone viene riprodotta con la sezione ritmica e la melodia, tu potrai suonare gli accordi per l’accompagnamento<br />
ut<strong>il</strong>izzando la parte sinistra della tastiera.<br />
Se non esegui l’accordo giusto, la parte ritmica suona con l’ultimo accordo e la melodia non va avanti.<br />
=== Come si esegue: Dopo aver scelto una canzone, seleziona <strong>il</strong> livello 4 premendo prima <strong>il</strong> pulsante MAESTRO e poi <strong>il</strong><br />
numero 4 sulla tastierina numerica . Ut<strong>il</strong>izza <strong>il</strong> comando per avviare e fermare l’esecuzione.<br />
Dopo i tocchi introduttivi, suona l’accordo iniziale e poi gli altri seguendo l’indicazione del display.<br />
Se sbagli l’accordo, la melodia non suonerà e se non lo suoni nel momento giusto, l’accompagnamento risulterà fuori tempo<br />
rispetto alla melodia.<br />
Per fac<strong>il</strong>itare le prime lezioni, prova a diminuire la velocità della canzone ut<strong>il</strong>izzando i pulsanti “ “ di .<br />
Il display ti aiuta visualizzando <strong>il</strong> nome dell’accordo, i tasti e le note sul pentagramma in leggero anticipo.<br />
Per suonare gli accordi, ci sono due modi:<br />
• Free Chordper gli accordi suonati nella maniera classica.<br />
• Easy Chordper gli accordi semplificati.<br />
Per scegliere <strong>il</strong> modo desiderato, vedi nel paragrafo “Le FUNZIONI”.<br />
5° livello: L’Accompagnamento con l’orchestra<br />
In questo livello la canzone viene riprodotta con la sezione ritmica della batteria insieme alla melodia e tu potrai suonare<br />
l’accompagnamento. La parte ritmica e la melodia andranno comunque avanti quindi dovrai suonare l’accordo giusto ed a<br />
tempo perchè altrimenti risulterà stonato.<br />
50
IST RUZIONI D’USO<br />
=== Come si esegue: Dopo aver scelto una canzone, seleziona <strong>il</strong> livello 5 premendo prima <strong>il</strong> pulsante MAESTRO e poi <strong>il</strong><br />
numero 5 sulla tastierina numerica . Ut<strong>il</strong>izza <strong>il</strong> comando per avviare e fermare l’esecuzione.<br />
Per avviare l’accompagnamento completo, suona l’accordo iniziale seguendo le indicazioni del display.<br />
Il display ti aiuta visualizzando <strong>il</strong> nome dell’accordo, i tasti e le note sul pentagramma.<br />
Per suonare gli accordi, ci sono due modi:<br />
• Free Chordper gli accordi suonati nella maniera classica. • Easy Chordper gli accordi semplificati.<br />
Per scegliere <strong>il</strong> modo desiderato, vedi nel paragrafo “Le FUNZIONI.<br />
UTILIZZO DEI NUMERI E DELLE LETTERE SULLA TASTIERA<br />
Per eseguire la melodia, leggi la sequenza numerica contenuta nella fascia azzurra delle canzoni e premi, uno dopo l’altro,<br />
i tasti bianchi e neri corrispondenti agli stessi numeri riportati sulla tastiera.<br />
Le lettere al di sotto della fascia continua azzurra indicano gli accordi di accompagnamentoche possono essere suonati con<br />
<strong>il</strong> modo semplificato (la linea a destra indica la durata dell’accordo).<br />
M AN U T E N Z ION E E D AVVE R T E N Z E<br />
Per assicurare allo strumento un perfetto funzionamento ed una lunga durata, si prega di seguire i seguenti consigli:<br />
• Evitare di esporlo a fonti di calore o di tenerlo in luoghi eccessivamente umidi.<br />
• C o n s e r va re l’imballo e le sue parti componenti per poter riporlo in caso di pro l u n g a ta inattività o di eve n t u a l i<br />
t rasporti.<br />
• In caso di mal funzionamento, contattare <strong>il</strong> più vicino rivenditore autorizzato.<br />
• Se rispedito per eventuale riparazione deve essere imballato per assicurare la massima protezione durante <strong>il</strong> trasporto.<br />
• Non usare alcool, solventi o sostanze chimiche sim<strong>il</strong>i per la pulizia. Pulire lo strumento con un panno morbido inumidito<br />
con una blanda soluzione di acqua e detergente neutro. Immergere <strong>il</strong> panno nella soluzione e strizzarlo fino a quando<br />
è quasi asciutto.<br />
51
52<br />
TABLE OF SONGS • LISTE DES CH ANSONS • SONG -TAFEL<br />
TABLA DE LAS SONGS • TABEL LA DELLE CANZONI
SOUNDS<br />
53
54<br />
STY L ES<br />
A CCOMPANIMENT SOUNDS