Manuale d'uso User manual - Koeltechnieken.org
Manuale d'uso User manual - Koeltechnieken.org
Manuale d'uso User manual - Koeltechnieken.org

You also want an ePaper? Increase the reach of your titles
YUMPU automatically turns print PDFs into web optimized ePapers that Google loves.
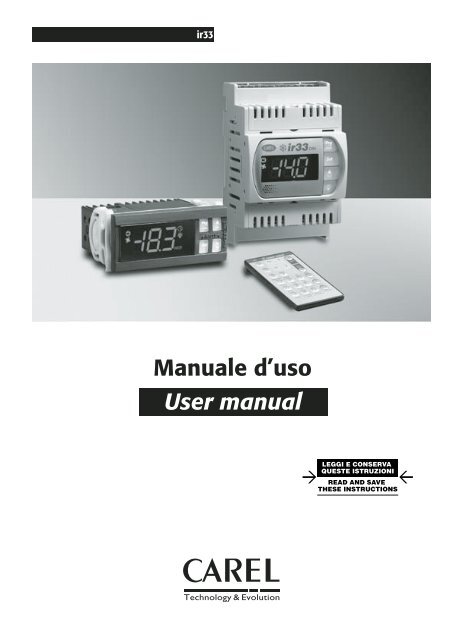
ir33<br />
<strong>Manuale</strong> d’uso<br />
<strong>User</strong> <strong>manual</strong>
2<br />
+030220140 - rel. 1.2 - del 06-06-2005
Vogliamo farvi risparmiare tempo e denaro!<br />
Vi assicuriamo che la completa lettura di questo<br />
<strong>manual</strong>e vi garantirà una corretta installazione ed<br />
un sicuro utilizzo del prodotto descritto.<br />
We want to save you time and money!<br />
We can assure you that the thorough reading of<br />
this <strong>manual</strong> will guarantee correct installation<br />
and safe use of the product described.<br />
AVVERTENZE IMPORTANTI<br />
IMPORTANT WARNINGS<br />
PRIMA DI INSTALLARE O INTERVENIRE SULL’APPARECCHIO, LEGGERE ATTEN-<br />
TAMENTE E SEGUIRE LE ISTRUZIONI CONTENUTE IN QUESTO MANUALE.<br />
Questa apparecchiatura è stata costruita per funzionare senza rischi per gli scopi<br />
prefissati purché:<br />
l’installazione, la conduzione e la manutenzione siano eseguite secondo le istruzioni<br />
contenute in questo <strong>manual</strong>e;<br />
le condizioni dell’ambiente e della tensione di alimentazione rientrino tra quelle<br />
specifi cate.<br />
Ogni utilizzo diverso da questo e l’apporto di modifi che, non espressamente<br />
autorizzate dal costruttore, sono da intendersi impropri.<br />
La responsabilità di lesioni o danni causati da uso improprio ricadrà esclusivamente<br />
sull’utilizzatore.<br />
Si osservi che questa macchina contiene componenti elettrici sotto tensione e<br />
quindi tutte le operazioni di servizio o manutenzione devono essere condotte da<br />
personale esperto e qualificato, cosciente delle necessarie precauzioni.<br />
Prima di accedere alle parti interne sezionare la macchina dalla rete elettrica.<br />
BEFORE INSTALLING OR HANDLING THE APPLIANCE PLEASE CAREFULLY READ<br />
AND FOLLOW THE INSTRUCTIONS DESCRIBED IN THIS MANUAL.<br />
This instrument has been designed to operate without risks for the specific<br />
purpose, only if:<br />
installation, operation and maintenance are performed according to the instructions<br />
in this <strong>manual</strong>;<br />
the environmental conditions and supply voltage fall within the values indicated<br />
here below.<br />
Any different use or changes that have not been previously authorised by the<br />
manufacturer, are considered improper.<br />
Responsibility for injures or damage caused by improper use will lie exclusively<br />
with the user.<br />
Warning: voltage is present in some electrical components of this unit, thus all<br />
the service or maintenance operations must be performed by expert and skilled<br />
personnel only, aware of the necessary precautions to be taken.<br />
Before accessing the internal parts, disconnect the power supply.<br />
Smaltimento delle parti del controllore:<br />
Il controllore è composto da parti in metallo, da parti in plastica e da una<br />
batteria al Litio. Tutte queste parti vanno smaltite secondo le Normative locali in<br />
materia di smaltimento.<br />
Disposal of controller parts:<br />
The controller is made up of metal and plastic parts and a lithium battery.<br />
All these components must be disposed of according to the local legislation in<br />
force.<br />
3<br />
+030220140 - rel. 1.2 - del 06-06-2005
4<br />
+030220140 - rel. 1.2 - del 06-06-2005
Indice<br />
1. INTRODUZIONE 7<br />
1.1 Modelli disponibili 7<br />
1.2 Principali caratteristiche della gamma ir33 7<br />
2. INTERFACCIA UTENTE 9<br />
2.1 Display ed icone 9<br />
2.2 Tastiera 9<br />
2.3 Procedura di visualizzazione e cancellazione degli allarmi HACCP 10<br />
2.4 Tasto aux 11<br />
3. INSTALLAZIONE 11<br />
4. LA PROGRAMMAZIONE DEGLI STRUMENTI 12<br />
4.1 Come accedere ai parametri di tipo F 12<br />
4.2 Come accedere ai parametri di tipo C 12<br />
4.3 Modifi ca dei parametri 12<br />
4.4 Memorizzazione dei nuovi valori assegnati ai parametri 12<br />
4.5 Classifi cazione dei parametri 13<br />
4.6 Come attivare il download di rete dei parametri 13<br />
4.7 Impostazione del set point 13<br />
4.8 Ripristino <strong>manual</strong>e allarmi 13<br />
4.9 Procedura di impostazione dei parametri di default 13<br />
4.10 Assegnazione automatica indirizzo seriale 14<br />
5. ACCESSORI 15<br />
5.1 Chiave copia parametri 15<br />
5.2 Telecomando compatto 16<br />
5.3 Interfaccia scheda seriale RS485 18<br />
5.4 Opzione interfaccia display ripetitore 18<br />
5.5 Opzione del cavo di collegamento interfaccia-display ripetitore 19<br />
6. DESCRIZIONE DELLE FUNZIONALITÀ 19<br />
6.1 Modelli 19<br />
6.2 Test display e tastiera allo start up 20<br />
6.3 ON/OFF del controllo 21<br />
6.4 Gestione aux 22<br />
6.5 Gestione luce 22<br />
6.6 Sbrinamento 23<br />
6.7 Nuove modalità di esecuzione sbrinamento 26<br />
6.8 Pump down e bassa pressione 29<br />
6.9 Ciclo continuo 30<br />
6.10 Allarme di alta temperatura condensazione 32<br />
6.11 Regolazione con banda morta. 33<br />
6.12 Regolazione con secondo gradino 34<br />
6.13 Funzione anti-sweat heater 37<br />
6.14 Allarme anti freeze. 38<br />
6.15 Funzioni particolari per la gestione di banchi canalizzati (MPX) 38<br />
6.16 HACCP (Hazard Analysis and Critical Control Point) 39<br />
7. DESCRIZIONE DEI PARAMETRI DI FUNZIONAMENTO 40<br />
7.1 Parametri relativi alla gestione delle sonde di temperatura 40<br />
7.2 Parametri relativi alla regolazione della temperatura 43<br />
7.3 Parametri relativi alla gestione del compressore 46<br />
7.4 Parametri relativi alla gestione dello sbrinamento 50<br />
7.5 Parametri relativi alla gestione degli allarmi 54<br />
7.6 Parametri relativi alla gestione dei ventilatori dell’evaporatore 62<br />
7.7 Parametri generali di confi gurazione 64<br />
7.8 Parametri relativi alla gestione dell’allarme HACCP 69<br />
7.9 Parametri relativi alla gestione dell’Rtc e degli sbrinamenti temporizzati 69<br />
7.10 Tabella riassuntiva dei parametri di funzionamento 72<br />
8. TABELLE ALLARMI E SEGNALAZIONI 74<br />
8.1 Tabella allarmi e segnalazioni: display, buzzer e relè. 74<br />
8.2 Tabella allarmi e segnalazioni: funzionalità abilitate/disabilitate. 76<br />
9 SUPERVISIONE 77<br />
9.1 Procedura assegnazione semiautomatica indirizzi in rete CAREL 77<br />
10. SPECIFICHE E CONNESSIONI 78<br />
10.1 Caratteristiche elettriche 78<br />
10.2 Caratteristiche elettriche ir33 PowerLine 81<br />
10.3 Corrente consigliata in funzione della sezione dei conduttori 83<br />
10.4 Connessioni 84<br />
Contents<br />
1. INTRODUCTION 7<br />
1.1 Models available 7<br />
1.2 Features of the ir33 range 7<br />
2. USER INTERFACE 9<br />
2.1 Display and icons 9<br />
2.2 Keypad 9<br />
2.3 Procedure for displaying and deleting the HACCP alarms 10<br />
2.4 AUX button 11<br />
3. ISTALLATION 11<br />
4. PROGRAMMING THE INSTRUMENTS 12<br />
4.1 How to access type “F” parameters 12<br />
4.2 How to access type “C” parameters 12<br />
4.3 Modifying the parameters 12<br />
4.4 Storing the new values assigned to the parameters 12<br />
4.5 Classifi cation of the parameters 13<br />
4.6 Downloading the parameters via the network 13<br />
4.7 Setting the set point 13<br />
4.8 Alarms with <strong>manual</strong> reset 13<br />
4.9 Procedure for setting the default parameter values 13<br />
4.10 Automatic serial address assignment procedure 14<br />
5. ACCESSORIES 15<br />
5.1 Parameter copying key 15<br />
5.2 Compact remote control 16<br />
5.3 RS485 serial interface board 18<br />
5.4 Repeater display interface option 18<br />
5.5 Optional interface-repeater display connection cable 19<br />
6. DESCRIPTION OF THE FUNCTIONS 19<br />
6.1 Models 19<br />
6.2 Testing the display and keypad on start-up 20<br />
6.3 Switching the controller ON and OFF 21<br />
6.4 Aux management 22<br />
6.5 Light management 22<br />
6.6 Defrost 23<br />
6.7 New defrost activation modes 26<br />
6.8 Pump down and low pressure 29<br />
6.9 Continuous cycle 30<br />
6.10 High condensing temperature alarm 32<br />
6.11 Control with dead band 33<br />
6.12 Control with second step 34<br />
6.13 Anti-sweat heater function 37<br />
6.14 Anti freeze alarm 38<br />
6.15 Special functions for the management of multiplexed cabinets (MPX) 38<br />
6.16 HACCP (Hazard Analysis and Critical Control Point) 39<br />
7. DESCRIPTION OF THR OPERATING PARAMETERS 40<br />
7.1 Temperature probe management parameters 40<br />
7.2 Temperature control parameters 43<br />
7.3 Compressor management parameters 46<br />
7.4 Defrost management parameters 50<br />
7.5 Alarm management parameters 54<br />
7.6 Evaporator fan management parameters 62<br />
7.7 General confi guration parameters 64<br />
7.8 HACCP alarm management parameters 69<br />
7.9 RTC and timed defrost management parameters 69<br />
7.10 Summary table of operating parameters 72<br />
8. TABLES OF ALARMS AND SIGNALS 74<br />
8.1 Table of alarms and signals: display, buzzer and relay. 74<br />
8.2 Table of alarms and signals: functions enabled/disabled. 76<br />
9. SUPERVISION 77<br />
9.1 Semi-automatic procedure for assigning addresses in the CAREL<br />
network 77<br />
10. SPECIFICATIONS AND CONNECTIONS 80<br />
10.1 Electrical specifi cations 80<br />
10.2 Electrical specifi cations for ir33 PowerLine 82<br />
10.3 Recommended current according to the cross-section of the wires 83<br />
10.4 Connections 84<br />
5<br />
+030220140 - rel. 1.2 - del 06-06-2005
6<br />
+030220140 - rel. 1.2 - del 06-06-2005
1. INTRODUZIONE<br />
La serie ir33 per refrigerazione è una gamma completa di prodotti costituita da<br />
regolatori elettronici integrati a microprocessore con visualizzazione a LED studiati<br />
appositamente per il controllo di unità frigorifere stand-alone. E’ particolarmente<br />
adatta per applicazioni in cui siano richiesti elevata potenza di commutazione dei<br />
carichi, considerevole numero di uscite, funzioni e comando ad accesso diretto da<br />
tastiera, elevato grado di IP frontale ed allo stesso tempo una forma compatta che<br />
riduce notevolmente le dimensioni d’ingombro. La gamma ir33 assicura un facile<br />
utilizzo da parte dell’installatore e l’ottimizzazione dei tempi di produzione per il<br />
costruttore, tipicamente alle prese con produzioni di serie.<br />
Sono disponibili numerosi modelli che vi permettono di trovare la migliore soluzione<br />
per la vostra applicazione al prezzo più competitivo<br />
1. INTRODUCTION<br />
The ir33 series for refrigeration is a complete range of products made up of<br />
integrated electronic microprocessor controllers with LED display, designed<br />
especially for the control of stand-alone refrigeration units: These controllers are<br />
especially suitable in applications that require high load switching power, a<br />
considerable number of outputs, functions and control with direct access from the<br />
keypad, high front panel IP and, at the same time, a compact shape that<br />
signifi cantly reduces the overall dimensions.<br />
The irr33 range is easy to install and ensures optimisation of production times for<br />
the manufacturer in mass production.<br />
Numerous models are available, providing the best solution for each application at<br />
the most competitive price.<br />
1.1 Modelli disponibili<br />
Ir33 è disponibile nella confi gurazione a 1, 2, 3 e 4 uscite, molti dei quali con relè<br />
da 16 A per il compressore frigorifero e con alimentatore switching a range esteso<br />
(12…24 o 115…230 Vac). Le numerose versioni assicurano un’ampia fl essibilità di<br />
utilizzo e quindi, la possibilità di essere impiegato in molteplici e differenti<br />
applicazioni senza la necessità di cambiare radicalmente impianti e progetti.<br />
1.1 Models available<br />
The controllers are available in the confi guration with 1, 2, 3 and 4 outputs, many of<br />
which have a 16 A relay for the refrigerator compressor and a power feeder with<br />
extended switching range (12 to 24 or 115 to 230 Vac). The numerous versions ensure<br />
considerable fl exibility and consequently the possibility to use the controllers in many<br />
different applications, without the need to radically change the systems and designs.<br />
1.2 Principali caratteristiche della gamma ir33<br />
Alimentazione<br />
I modelli della serie ir33 sono disponibili con alimentazione nella versione di 12 Vac,<br />
12…24 Vac/dc (switching), 230 Vac o 115…230 Vac (switching).<br />
Tutti i modelli dispongono, inoltre, della gestione a basso consumo per aumentare<br />
l’immunità ai buchi della tensione di alimentazione.<br />
Quando, internamente allo strumento, la tensione scende al di sotto di una certa<br />
soglia, la macchina spegne il display per ridurre il consumo, continuando comunque<br />
a funzionare normalmente: i relè restano eccitati e, non appena la tensione torna a<br />
livello normale, si riaccende il display.<br />
Estetica ed ergonomia<br />
L’estetica è curata in modo da adattarsi armoniosamente alle nuove linee delle unità<br />
frigorifere.<br />
La caratteristica che lo distingue maggiormente è la compattezza: le sue dimensioni<br />
sono infatti 34,4 x 76,2 x 65 mm e 34,4 x 76,2 x 79 mm della versione a 230 Vac. Le<br />
dime di foratura sono per entrambe le dimensioni 29 x 71 mm.<br />
Display LED<br />
E’ dotato di un display molto luminoso oltre che esteticamente gradevole, in grado<br />
di visualizzare 3 cifre con punto decimale, segno e icone che facilitano la lettura dei<br />
valori e degli stati di funzionamento.<br />
Cicalino di segnalazione allarme<br />
Tutti i modelli montano un cicalino (buzzer) per la segnalazione di allarmi.<br />
Telecomando<br />
Per facilitare l’impostazione e la visualizzazione dei parametri, a seconda del<br />
modello, lo strumento può essere dotato di un ricevitore infrarosso per consentire<br />
l’utilizzo del nuovo telecomando compatto: questo può esser utilizzato su più<br />
controlli ir33 posti nello stesso locale senza problemi di interferenza. Esiste infatti la<br />
possibilità di identifi care ogni controllo con un diverso codice di accesso.<br />
Duty setting<br />
Questa funzione permette il funzionamento del compressore anche quando la<br />
sonda di regolazione (sonda ambiente) è guasta.<br />
Se la sonda è interrotta o in cortocircuito, il compressore viene attivato ad intervalli,<br />
con tempo di funzionamento (in minuti) pari al valore assegnato al parametro duty<br />
setting (parametro C4) e tempo di spegnimento della durata fi ssa di 15 minuti.<br />
Sbrinamento intelligente<br />
Tutti i controlli sono dotati di serie della possibilità di gestire lo sbrinamento secondo<br />
nuove modalità (vedere paragrafo relativo allo sbrinamento intelligente).<br />
Ingresso Multifunzione<br />
Tutti gli strumenti montano due ingressi digitali che possono essere utilizzati<br />
in diversi modi, in relazione al valore dato ai parametri di “confi gurazione di<br />
ingresso digitale” (parametri A4 e A5). Questi ingressi possono essere utilizzati per<br />
abilitare/disabilitare lo sbrinamento, per gestire allarmi gravi che<br />
necessitino del blocco dell’unità con azione immediata (ad esempio alta pressione)<br />
o ritardata (es. bassa pressione), oppure possono essere confi gurati per la lettura di<br />
sonde NTC, con i parametri /3 e /4.<br />
Uscita multifunzione<br />
In base al modello, la famiglia ir33 può disporre dell’uscita ausiliaria multifunzione<br />
per la remotazione del segnale di allarme per comandare <strong>org</strong>ani esterni con<br />
azionamento ON/OFF (acceso/spento).<br />
7<br />
1.2 Features of the ir33 range<br />
Power supply<br />
The ir33 series models are available with power supply in the following versions:<br />
12Vac, 12 to 24 Vac/dc (switching), 230Vac or 115 to 230 Vac (switching).<br />
All the models, furthermore, feature a low power mode to increase immunity to<br />
voltage drops.<br />
When the voltage inside the instrument falls below a certain threshold, the unit<br />
switches off the display so as to reduce power consumption, while still continuing<br />
to operate normally: the main relays remain energised and, as soon as the voltage<br />
returns to the normal level, the display comes on again.<br />
Aesthetics and ergonomics<br />
The appearance of the ir33 series has been designed to harmoniously match the<br />
new lines of the refrigeration units.<br />
It most striking aesthetic feature is its compactness: its dimensions are:<br />
34.4x76.2x70.5 mm and 34.4x76.2x79 mm in the 230 Vac version. The drilling<br />
templates for both versions are 71x29 mm.<br />
LED display<br />
The controller is fi tted with a very powerful and aesthetically pleasant display, with 3<br />
digits and decimal point, minus sign and icons to simplify the reading of the values<br />
and the operating status.<br />
Alarm buzzer<br />
All models in the ir33 series are fi tted with a buzzer to signal the alarms.<br />
Remote control<br />
To simplify the setting and display of the parameters, depending on the model, the<br />
instrument can be fi tted with an infrared receiver to allow the use of the new<br />
compact remote control: this device can be used on a series of ir33 controllers in<br />
the same room, without problems of interference. In fact, each controller is<br />
identifi ed by a different access code.<br />
Duty setting<br />
This function ensures the operation of the compressor even when the control probe<br />
(room probe) is faulty.<br />
If the probe is disconnected or short-circuited, the compressor is activated at set<br />
intervals, with a running time (in minutes) equal to the value assigned to the duty<br />
setting parameter (parameter C4), and a fi xed OFF time of 15 minutes.<br />
Smart defrost<br />
All ir33 series controllers can, as standard, manage the defrost functions in new<br />
modes (see the paragraph on smart defrosts).<br />
Multifunction input<br />
All the ir33 series instruments have two digital inputs that can be used in different<br />
modes, depending on the value set for the “digital input confi guration” parameters<br />
(parameters A4 and A5). These inputs can be used to enable/disable the defrost, to<br />
manage serious alarms that require the immediate shut-down of the unit (e.g. high<br />
pressure) or delayed shut-down of the unit (e.g. low pressure), or alternatively can<br />
be confi gured to read NTC probes, with parameters /3 and /4.<br />
Multifunction output<br />
According to the model, the ir33 family can be provided with an additional<br />
multi-function output for remote control of the alarm signal for controlling<br />
additional units with ON/OFF activation.<br />
+030220140 - rel. 1.2 - del 06-06-2005
Real time clock<br />
L’ampia gamma offre anche delle unità dotate di orologio interno a tempo reale<br />
Pump down<br />
Questa funzionalità permette di fermare il compressore solo ad avvenuto<br />
svuotamento dell’evaporatore (vedere il paragrafo “Pump down e bassa pressione”).<br />
Condensatore<br />
Una delle nuove caratteristiche offerte da questi controlli è la possibilità di gestire,<br />
tramite un ingresso sonda NTC, la temperatura di condensazione sia come<br />
allarmistica che come regolazione, utilizzando l’uscita ausiliaria confi gurata secondo<br />
il parametro H1.<br />
Doppio evaporatore<br />
E’ possibile gestire due unità di evaporazione indipendenti ma collegate allo stesso<br />
circuito, con temperature di fi ne sbrinamento indipendenti e impostabili tramite i<br />
parametri dt1/dt2.<br />
HACCP<br />
Tale funzione, sempre più richiesta dal mercato della refrigerazione, è di serie su tutti<br />
i modelli dotati di orologio interno.<br />
Permette il monitoraggio dei punti critici tramite la rilevazione e la registrazione delle<br />
temperature in caso di allarme di alta temperatura o in mancanza di tensione di<br />
alimentazione.<br />
Gestione luce<br />
Nella gamma ir33 è stata introdotta una novità nella gestione della luce all’apertura<br />
della porta.<br />
Protezione tastiera<br />
La tastiera e il telecomando possono essere disabilitati per evitare manomissioni da<br />
parte di persone non autorizzate, soprattutto nel caso in cui il controllo sia esposto in<br />
una zona aperta al pubblico.<br />
Ciclo continuo<br />
La funzione “ciclo continuo” consente il funzionamento del compressore per il<br />
tempo impostato nel relativo parametro, utile qualora sia richiesta una riduzione<br />
rapida della temperatura.<br />
Connessione seriale<br />
Tutta la gamma prevede un’uscita seriale RS485 a due fi li più schermo per il<br />
collegamento in rete con sistemi di supervisione o teleassistenza.<br />
Grado di protezione<br />
La guarnizione all’interno del frontale e il materiale con cui è realizzata la tastiera<br />
garantiscono al controllo un grado di protezione IP65 sul frontale.<br />
Fissaggio<br />
Il fi ssaggio è ottenuto per mezzo delle viti frontali oppure da due staffe laterali di<br />
fi ssaggio rapido, di ingombro minimo, realizzate in materiale plastico.<br />
Test in circuit<br />
La serie ir33 è realizzata con la più avanzata tecnologia SMD e tutti i controlli sono<br />
sottoposti ad un “TEST IN CIRCUIT”, ovvero alla verifi ca elettrica di tutti i componenti<br />
montati.<br />
Sonda NTC<br />
E’ possibile gestire di serie due tipi di sonde NTC (vedi parametro “/P”): versione<br />
standard –50T90 °C (NTC0*HP*) oppure il modello per alte temperature fi no a 150<br />
°C (NTC Enhanced –40T150 °C).<br />
Watch dog<br />
Si tratta di un dispositivo che impedisce al microprocessore di perdere il controllo<br />
dell’unità anche in presenza di grossi disturbi elettromagnetici. In caso di funzionamento<br />
anomalo, il watch dog (letteralmente “cane da guardia”) provvede a ristabilire<br />
lo stato di funzionamento iniziale. Non tutti i concorrenti provvedono i propri<br />
prodotti di tale dispositivo di sicurezza.<br />
Compatibilità elettromagnetica<br />
La serie ir33 è conforme alle normative UE di compatibilità elettromagnetica mentre<br />
la qualità e la sicurezza della serie ir33 sono assicurate dal sistema di progettazione e<br />
produzione CAREL certifi cato ISO 9001 e dal marchio CE sul prodotto.<br />
Funzionalità di rete<br />
La serie ir33 offre la gestione del defrost canalizzato, la segnalazione di allarmi<br />
remoti e il download in rete locale dei parametri.<br />
Real time clock<br />
The wide range also includes models fi tted with built-in real time clock.<br />
Pump down<br />
This function ensures the compressor is stopped only when the evaporator is<br />
discharged (see the paragraph “Pump down and low pressure”).<br />
Condenser<br />
One of the new characteristics offered by these controllers is the possibility to<br />
manage, via an NTC probe input, the condensing temperature for both the alarms<br />
and control functions, using the auxiliary output confi gured by parameter H1.<br />
Double evaporator<br />
Two independent evaporators can be managed, connected to the same circuit. The<br />
end of defrost temperatures are independent and can be set by parameters dt1/dt2.<br />
HACCP<br />
This function, increasingly required in the refrigeration market, is included as<br />
standard on all models with clock.<br />
This allows the monitoring of critical points by measuring and recording the<br />
temperatures in the event of high temperature alarms or power failures.<br />
Management of the light<br />
The ir33 range has been enhanced by the introduction of the function for managing<br />
the light when the door opens.<br />
Keypad protection<br />
The keypad and the remote control can be disabled to avoid tampering by<br />
unauthorised persons, above all in the event when the controller is installed in an<br />
area open to the public.<br />
Continuous cycle<br />
The “continuous cycle” function ensures the operation of the compressor for the<br />
time set by the corresponding parameter. This function is useful when a rapid<br />
reduction in the temperature is required.<br />
Serial connection<br />
The entire range of ir33 models has an RS485 serial port for connection to<br />
supervisor or telemaintenance systems using a two wire plus shielded cable via a<br />
serial network.<br />
Index of protection<br />
In the ir33 series, the gasket inside the front panel and the material used to build the<br />
keypad guarantee IP65 protection class for the controller on the front panel.<br />
Installation<br />
The ir33 series controllers are mounted using the screws at the front, or alternatively<br />
using two quick-fi t side brackets, with compact dimensions, made from plastic.<br />
In-circuit testing<br />
The ir33 series controllers are made using the most advanced SMD technology. All<br />
the controllers undergo “IN-CIRCUIT TESTING” to check electrical operation of all<br />
components. The tests are performed on 100% of the products.<br />
NTC probe<br />
The ir33 series can manage two types of NTC probes (see parameter “/P”): standard<br />
version –50T90°C (NTC0*HP*) or alternatively the model for high temperatures,<br />
up to 150°C (enhanced NTC –40T150°C).<br />
Watch dog<br />
This feature prevents the microprocessor from losing control over the unit even in<br />
the presence of considerable electromagnetic disturbance. In the event of abnormal<br />
operation, the watchdog function re-establishes the initial operating status. Not all<br />
the competitors fi t their products with this safety feature.<br />
Electromagnetic compatibility<br />
The ir33 series is compliant with EU standards on electromagnetic compatibility. The<br />
quality and the safety of the ir33 series are ensured by the CAREL ISO 9001 certifi ed<br />
design and production system and by the CE mark on the product.<br />
Network functions<br />
The ir33 series allows the management of the multiplexed defrosts, remote alarm<br />
signals and the downloading of the parameters via the local network.<br />
8<br />
+030220140 - rel. 1.2 - del 06-06-2005
2. INTERFACCIA UTENTE<br />
E’ costituita da un display molto luminoso oltre che esteticamente gradevole e da<br />
una tastiera. Il display dotato di 3 cifre con punto decimale ed icone, visualizza le<br />
temperature, i codici, il valore di tutti i parametri ed i principali stati dell’unità.<br />
La tastiera in silicone assicura facilità di utilizzo e affi dabilità nella<br />
digitazione e permette l’accesso diretto alle funzionalità HACCP, luce,<br />
sbrinamento e ciclo continuo.<br />
Grazie alla placchetta removibile è possibile<br />
personalizzare il display in modo semplice<br />
ed economico.<br />
5<br />
2. USER INTERFACE<br />
The ir33 user interface consists of a very powerful and attractive display and a<br />
keypad. The display has 3 digits, decimal point and icons. It shows temperatures,<br />
codes, all parameter values, and the main unit statuses.<br />
The silicon keypad ensures ease of use and reliability, and allows direct access to<br />
the HACCP, light, defrost and continuous cycle functions.<br />
The display can be customised simply and economically by changing the<br />
6 7<br />
12 13<br />
removable frame.<br />
2.1 Display ed icone<br />
1 COMPRESSORE: Si accende<br />
all’attivazione del compressore.<br />
Lampeggia quando l’inserimento del<br />
compressore è ritardato da<br />
tempistiche di protezione.<br />
2 VENTILATORE: Si accende<br />
all’inserimento del ventilatore.<br />
Lampeggia quando l’inserimento del<br />
ventilatore è impedito da inibizioni<br />
esterne o da procedure in atto.<br />
1<br />
2<br />
3<br />
4<br />
8 9<br />
5<br />
14<br />
10 11<br />
6 7<br />
15<br />
12<br />
2.1 Display and icons<br />
1 COMPRESSOR: ON when the<br />
compressor starts. Flashes when<br />
the activation of the compressor is<br />
delayed by safety times.<br />
2 FAN: ON when the fan starts. Flashes<br />
when the activation of the fan is<br />
prevented due to external disabling or<br />
procedures in progress.<br />
3 DEFROST: Si accende all’attivazione<br />
dello sbrinamento. Lampeggia quando<br />
l’inserimento dello sbrinamento è<br />
impedito da inibizioni esterne o da<br />
procedure in atto.<br />
4 AUX: Lampeggia se attiva la funzione<br />
anti-sweat heater, si accende<br />
all’attivazione dell’uscita ausiliaria<br />
selezionata come aux<br />
5 ALLARME: Si accende in caso di pre-attivazione dell’allarme digitale esterno<br />
ritardato. Lampeggia in caso di allarmi durante il normale funzionamento (es.<br />
Alta/Bassa temperatura) o in caso d’allarme da un ingresso digitale, immediato<br />
o ritardato.<br />
8 9 10 11<br />
Fig. 2.1<br />
14<br />
13<br />
15<br />
3 DEFROST: ON when the defrost is<br />
activated. Flashes when the activation<br />
of the defrost is prevented due to<br />
external disabling or procedures in<br />
progress.<br />
4 AUX: Flashes if the anti-sweat heater<br />
function is active, ON when the<br />
output auxiliary selected as AUX is<br />
activated.<br />
5 ALARM: ON following pre-activation of the delayed external digital input<br />
alarm. Flashes in the event of alarms during normal operation (e.g. high/low<br />
temperature) or in the event of alarms from an immediate or delayed external<br />
digital input.<br />
6 OROLOGIO: Si accende se è stato impostato almeno uno sbrinamento<br />
temporizzato. Allo StartUp si accende per qualche secondo ad indicare la<br />
presenza del dispositivo Real time clock.<br />
7 LUCE: Lampeggia se attiva la funzione anti-sweat heater, si accende<br />
all’attivazione dell’uscita ausiliaria 1 selezionata come LUCE.<br />
8 ASSISTENZA: lampeggia in caso di malfunzionamenti, ad esempio in caso di<br />
rilevazione di errori E2PROM o in caso di sonde guaste.<br />
9 DISPLAY: visualizza la temperatura nel range –50 e +150 °C con risoluzione del<br />
decimo di grado tra –19,9 e 19,9 °C.<br />
È possibile disabilitare la visualizzazione dei decimi attraverso la<br />
programmazione di un parametro.<br />
10 HACCP: si accende se la funzione HACCP è abilitata. Lampeggia in caso di<br />
nuovo allarme HACCP memorizzato (Visualizzazione allarme HA e/o HF sul<br />
display).<br />
11 CICLO CONTINUO: si accende alla partenza della funzione CICLO<br />
CONTINUO. Lampeggia se l’attivazione della funzione è impedita da inibizioni<br />
esterne o da procedure in atto (Es: tempo minimo di off del compressore).<br />
6 CLOCK: ON if at least one timed defrost has been set. At start-up, comes<br />
ON for a few seconds to indicate that the Real Time Clock is present.<br />
7 LIGHT: Flashes if the anti-sweat heater function is active, ON when auxiliary<br />
output 1 selected as LIGHT is activated.<br />
8 SERVICE: Flashes in the event of malfunctions, for example E2PROM errors or<br />
probe faults.<br />
9 DISPLAY: shows temperature in range -50 and +150 °C with tenths resolution<br />
in range -19.9 and 19.9 °C.<br />
Display of tenths can be disabled by programming a parameter.<br />
10 HACCP: ON if the HACCP function is enabled. Flashes when there are new<br />
HACCP alarms stored (HA and/or HF alarm shown on the display).<br />
11 CONTINUOUS CYCLE: ON when the CONTINUOUS CYCLE function is<br />
activated. Flashes if the activation of the function is prevented due to external<br />
disabling or procedures in progress (e.g.: minimum compressor OFF time).<br />
2.2 Tastiera<br />
12 PRG/MUTE:<br />
- Tacita l’allarme acustico (buzzer) e disattiva il relè d’allarme;<br />
- Se premuto per più di 1 secondo durante la ricezione del pacchetto di richiesta di<br />
assegnazione automatica dell’indirizzo di rete, entra nella procedura (Vedi paragrafo<br />
Procedura di assegnazione automatica dell’indirizzo seriale);<br />
- Se premuto per più di 5 secondi, dà accesso al menù di impostazione dei parametri<br />
di tipo “F” (Frequenti).<br />
- Se premuto per più di 5 secondi insieme con il tasto Set , dà accesso al menù di<br />
impostazione dei parametri di tipo “C” (Confi gurazione) o al download dei parametri.<br />
- Se premuto per più di 5 secondi all’accensione dello strumento, attiva la procedura<br />
di impostazione dei parametri di Default.<br />
- Se premuto per più di 5 secondi insieme con il tasto aux resetta gli eventuali<br />
9<br />
2.2 Keypad<br />
12 PRG/MUTE:<br />
- Mutes the audible alarm (buzzer) and deactivates the alarm relay;<br />
- If pressed for more than 1 second during the reception of the automatic network<br />
address assignment request package, starts the address assignment procedure (see<br />
paragraph Automatic serial address assignment procedure).<br />
- If pressed for more than 5 seconds, accesses the menu for setting the type “F”<br />
parameters (frequent).<br />
- If pressed for more than 5 seconds together with Set , accesses the menu for<br />
setting the type “C” parameters (confi guration) or downloading the parameters.<br />
- If pressed for more than 5 seconds when switching the instrument ON, activates<br />
the procedure for setting the default parameter values.<br />
- If pressed for more than 5 seconds together with aux , resets any active alarms<br />
+030220140 - rel. 1.2 - del 06-06-2005
allarmi a ripristino <strong>manual</strong>e (il messaggio rES indica l’avvenuto reset); gli eventuali<br />
ritardi legati agli allarmi vengono riattivati.<br />
14 SET:<br />
- Se premuto per più di 1 secondo visualizza e/o permette di impostare il set point.<br />
- Se premuto per più di 5 secondi insieme al tasto , dà accesso al menù di<br />
impostazione dei parametri di tipo “C” (Confi gurazione) o al download dei parametri.<br />
- Se premuto per più di 1 secondo insieme al tasto def , visualizza sul display, un<br />
sottomenù attraverso il quale è possibile raggiungere i parametri relativi agli allarmi<br />
HACCP (HA, Han, HF, HFn)<br />
- Se premuto per più di 5 secondi insieme al tasto aux , attiva la procedura di<br />
stampa del report (funzione disponibile ma gestione da implementare).<br />
13 UP/AUX:<br />
- Se premuto per più di 1 secondo attiva/disattiva l’uscita ausiliaria 1.<br />
- Se premuto insieme a def per più di 5 secondi, attiva/disattiva il<br />
funzionamento a ciclo continuo (i messaggi ccb e ccE indicano rispettivamente la<br />
richiesta di inizio e di fi ne del ciclo continuo).<br />
- Se premuto per più di 5 secondi insieme al tasto Set , attiva la procedura di<br />
stampa del report (funzione disponibile ma gestione da implementare).<br />
- Se premuto per più di 5 secondi insieme con il tasto resetta gli eventuali<br />
allarmi a ripristino <strong>manual</strong>e (il messaggio rES indica l’avvenuto reset); gli eventuali<br />
ritardi legati agli allarmi vengono riattivati.<br />
15 DOWN/DEF:<br />
- Se premuto per più di 5 secondi, attiva/disattiva un defrost <strong>manual</strong>e (i messaggi<br />
dFb e dFE indicano, rispettivamente, la richiesta di inizio e di fi ne del defrost);<br />
- Se premuto insieme a aux per più di 5 secondi, attiva/disattiva il funzionamento a<br />
ciclo continuo (i messaggi ccb e ccE indicano, rispettivamente, la richiesta di inizio e<br />
di fi ne del ciclo continuo).<br />
- Se premuto per più di 1 secondo insieme al tasto Set , visualizza sul display, un<br />
sottomenù attraverso il quale è possibile raggiungere i parametri relativi agli allarmi<br />
HACCP (HA, HAn, HF, HFn).<br />
Attenzione: la pressione di ogni tasto è segnalata da un breve segnale acustico non<br />
disattivabile.<br />
with <strong>manual</strong> reset (the message rES indicates that the alarm has been reset); any<br />
delays relating to the alarms are re-activated.<br />
14 SET:<br />
- If pressed for more than 1 second displays and/or enables setting the set point;<br />
- If pressed for more than 5 seconds together with , accesses the menu for<br />
setting the type “C” parameters (confi guration).<br />
- Pressing this button for more than 1 second together with def displays a<br />
sub-menu used to reach the parameters relating to the HACCP alarms (HA, HAn,<br />
HF, HFn).<br />
- If pressed for more than 5 seconds together with aux , starts the report<br />
printing procedure (function available, management yet to be implemented).<br />
13 UP/AUX:<br />
- If pressed for more than 1 second, it activates/deactivates auxiliary output 1.<br />
- If pressed together with def for more than 5 seconds, activates/deactivates<br />
continuous cycle operation (the messages ccb and ccE indicate, respectively, the<br />
start and end of the continuous cycle).<br />
- If pressed for more than 5 seconds together with Set , starts the report printing<br />
procedure (function available, management yet to be implemented).<br />
- If pressed for more than 5 seconds together with , resets any active alarms<br />
with <strong>manual</strong> reset (the message rES indicates that the alarm has been reset); any<br />
delays relating to the alarms are re-activated.<br />
15 DOWN/DEF:<br />
- If pressed for more than 5 seconds, it activates/deactivates a <strong>manual</strong> defrost (the<br />
messages dFb and dFE indicate, respectively, the defrost start and end request);<br />
- If pressed together with aux for more than 5 seconds, activates/deactivates<br />
continuous cycle operation (the messages ccb and ccE indicate, respectively, the<br />
start and end of the continuous cycle).<br />
- Pressing this button for more than 1 second together with button Set<br />
displays a sub-menu used to reach the parameters relating to the HACCP alarms<br />
(HA, HAn, HF, HFn).<br />
Important: when the buttons are pressed a brief audible signal is emitted; this<br />
signal cannot be disabled.<br />
2.3 Procedura di visualizzazione e cancellazione<br />
degli allarmi HACCP<br />
1) Premendo insieme i tasti def e Set per più di un secondo, sul display<br />
comparirà il nome del primo dei parametri relativi agli allarmi HA e HF;<br />
2) Con i tasti aux e def si scorrono i codici relativi agli allarmi HA e HF.<br />
3) Una volta raggiunto il parametro desiderato premere Set per visualizzarne<br />
il valore sul display.<br />
4) Se il parametro selezionato è HA o HF, attraverso la pressione dei tasti aux e<br />
def<br />
, è possibile vedere anno, mese, giorno, ora, minuto e durata dell’ultimo<br />
allarme intervenuto.<br />
Es:<br />
def<br />
def<br />
def<br />
y03 M07 d22 h23 def<br />
def def<br />
m57 t99 , e ricomincia.<br />
La sequenza indica che l’ultimo allarme HA o HF è intervenuto il 22 Luglio 2003 alle<br />
ore 23:57 ed è durato 99 ore.<br />
5) Premendo nuovamente Set si ritorna all’elenco dei parametri relativi agli<br />
allarmi HA e HF;<br />
Dall’interno del menù è possibile:<br />
a) cancellare l’allarme HACCP premendo per più di 5 secondi il tasto def e Set<br />
(il messaggio rES indica l’avvenuta cancellazione, viene resettato il lampeggio del led<br />
HACCP, la segnalazione HA e/o HF nonchè reinizializzato il monitoraggio di HA);<br />
b) cancellare gli allarmi HACCP e quelli precedentemente memorizzati (HAn, HA,<br />
HA1, HA2, HFn, HF, HF1, HF2) premendo per più di 5 secondi i tasti def ,<br />
Set e aux (il messaggio rES indica l’avvenuta cancellazione, viene resettato il<br />
lampeggio del led HACCP, la segnalazione HA e/o HF, gli allarmi memorizzati relativi,<br />
nonchè reinizializzato il monitoraggio di HA).<br />
6) E’ possibile in qualsiasi momento ritornare in funzionamento normale premendo<br />
il pulsante per 3 secondi o attendendo lo scadere della sessione per TIMEOUT<br />
(60 secondi) senza premere alcun tasto.<br />
2.3 Procedure for displaying and deleting the<br />
HACCP alarms<br />
1) Press def and Set for more than one second, the display will show the<br />
name of the fi rst of the parameters of the HA and HF alarms.<br />
2) Use the aux and def buttons to display the codes relating to the HA and<br />
HF alarms;<br />
3) When having reached the desired parameter press Set to display the value;<br />
4) If the selected parameter is HA or HF, use aux and def to scroll the year,<br />
month, day, hour, minutes and duration of the last alarm activated.<br />
e.g.:<br />
y03 def M07 def d22 def h23 def m57 def t99 def , and start again…<br />
The sequence indicates that the last HA or HF alarm was activated on 22 July 2003<br />
at 23:57 and lasted 99 hours.<br />
5) Press Set again to return to the list of the parameters relating to the HA<br />
and HF alarms;<br />
The following operations are possible from inside the menu:<br />
a) delete the HACCP alarm by pressing def and Set for more than 5 seconds<br />
(the message rES indicates that the alarm has been deleted, the HACCP LED<br />
stops fl ashing, the HA and/or HF signal is also reset, and the monitoring of HA is<br />
reinitialised);<br />
b) delete the HACCP alarms and the alarms saved (HAn, HA, HA1, HA2, HFn, HF,<br />
def<br />
HF1, HF2) by pressing , Set and aux for more than 5 seconds (the<br />
message rES indicates that the alarms have been deleted, the HACCP LED stops<br />
fl ashing, the HA and/or HF signal is reset, the alarms saved are reset and the<br />
monitoring of HA is reinitialised)<br />
6) Normal operation can be resumed at any time by pressing for 3 seconds<br />
or waiting for the expiry of the session due to TIMEOUT (60 seconds) without<br />
pressing any button.<br />
10<br />
+030220140 - rel. 1.2 - del 06-06-2005
2.4 Tasto aux<br />
Il tasto aux è sempre assegnato all’uscita ausiliaria 1. Ma è possibile assegnare ad<br />
H1 funzioni diverse.<br />
Per default è associata la funzione aux. In relazione alla funzione assegnata viene<br />
attivata l’icona sul display.<br />
Uscita fi sica Tasto Funzione Icona<br />
ausiliaria 1 aux aux (default) aux<br />
Si può quindi venire a creare anche una situazione in cui, assegnando funzioni<br />
diverse, con la pressione di aux si attiva l’icona lampadina.<br />
Uscita logica Tasto Funzione Icona<br />
ausiliaria 1 aux LUCE LAMPADINA<br />
2.4 AUX button<br />
The aux button is always assigned to auxiliary logic output 1. However,<br />
different functions can be assigned to H1.<br />
By default it is associated with the AUX function. According to the assigned function,<br />
the corresponding icon is activated on the display.<br />
Physical output Key Function Icon<br />
auxiliary 1 AUX AUX (default) AUX<br />
Consequently, a situation could arise, whereby assigning different functions, pressing<br />
the button switches on the lamp icon.<br />
Logical output Key Function Icon<br />
auxiliary 1 AUX LIGHT LAMP<br />
3. INSTALLAZIONE<br />
Per l’installazione del controllo procedere come indicato di seguito, tenendo<br />
presente gli schemi di collegamento riportati alla fi ne del <strong>manual</strong>e.<br />
1) collegare sonde ed alimentazione: le sonde possono essere remotate fi no ad<br />
una distanza massima di 10 metri dal controllo purchè si usino cavi con sezione<br />
minima di 1 mm 2 schermati. Per migliorare l’immunità ai disturbi si consiglia di<br />
usare sonde con cavo schermato (collegare un solo estremo dello schermo alla<br />
terra del quadro elettrico).<br />
2) Programmare lo strumento: per una descrizione più approfondita vedere il<br />
capitolo “La Programmazione degli strumenti”.<br />
3) Collegare gli attuatori: è preferibile collegare gli attuatori solo dopo aver<br />
programmato il controllo. Al riguardo si raccomanda di valutare attentamente<br />
le portate massime dei relè indicate nelle “caratteristiche tecniche”.<br />
4) Collegamento in rete seriale: tutti i modelli ir33 sono dotati di connettore seriale<br />
per l’allacciamento alla rete di supervisione tramite l’apposita interfaccia seriale<br />
IROPZ48500. E’ necessario curare la messa a terra del sistema, in particolare non<br />
dovrà essere collegato a terra il secondario dei trasformatori che alimentano gli<br />
strumenti. Nel caso sia necessario collegarsi ad un trasformatore con secondario<br />
a terra, dovrà essere interposto un trasformatore di isolamento. E’ possibile<br />
collegare più strumenti allo stesso trasformatore di isolamento, tuttavia è<br />
consigliabile utilizzare un trasformatore di isolamento diverso per ogni strumento.<br />
AVVERTENZE:<br />
Evitare il montaggio dei controlli negli ambienti che presentino le seguenti<br />
caratteristiche:<br />
• umidità relativa maggiore del 90% non condensante;<br />
• forti vibrazioni o urti;<br />
• esposizione a continui getti d’acqua;<br />
• esposizione ad atmosfere aggressive ed inquinanti (ad es. gas solforici e<br />
ammoniacali, nebbie saline, fumi) per evitare corrosione e/o ossidazione;<br />
• elevate interferenze magnetiche e/o radiofrequenze (ad esempio vicino ad<br />
antenne trasmittenti);<br />
• esposizione dei controlli all’irraggiamento solare diretto e agli agenti atmosferici in<br />
genere.<br />
Nel collegamento dei regolatori è necessario rispettare le seguenti avvertenze:<br />
• Il non corretto allacciamento della tensione di alimentazione può danneggiare<br />
seriamente il sistema;<br />
• Utilizzare capicorda adatti per i morsetti in uso. Allentare ciascuna vite ed inserirvi i<br />
capicorda, quindi serrare le viti e tirare leggermente i cavi per verifi carne il corretto<br />
serraggio. Per serrare le viti, non utilizzare avvitatori automatici, oppure regolarli<br />
per una coppia minore di 50 Ncm.<br />
• Separare quanto più possibile, almeno 3 cm, i cavi dei segnali delle sonde e degli<br />
ingressi digitali dai cavi dei carichi induttivi e di potenza per evitare possibili<br />
disturbi elettromagnetici.<br />
Non inserire mai nelle stesse canaline (comprese quelle dei quadri elettrici) cavi di<br />
potenza e cavi delle sonde.<br />
Evitare inoltre che i cavi delle sonde siano installati nelle immediate vicinanze<br />
di dispositivi di potenza (contattori automatici magnetotermici o altro).<br />
Ridurre il più possibile il percorso dei cavi dei sensori ed evitare che compiano<br />
percorsi che racchiudano dispositivi di potenza.<br />
• Utilizzare come sonda di fi ne sbrinamento solo sonde garantite IP67 posizionandole<br />
con il bulbo verticale in modo da favorire il drenaggio dell’eventuale condensa.<br />
Si ricorda che le sonde di temperatura a termistore (NTC) non hanno polarità,<br />
per cui è indifferente l’ordine di collegamento degli estremi.<br />
11<br />
3. ISTALLATION<br />
To install the controller, proceed as follows, with reference to the connection<br />
diagrams shown at the end of the <strong>manual</strong>.<br />
1) connect the probes and power supply: the probes can be installed up to a<br />
maximum distance of 10 m from the controller, using shielded cables with a<br />
minimum cross-section of 1mm 2 . To improve the immunity to disturbance,<br />
use probes with shielded cables (connect only one end of the shield to the<br />
earth on the electrical panel).<br />
2) Program the instrument: for a more detailed description see the chapter<br />
“Programming the instruments”.<br />
3) Connect the actuators: the actuators should only be connected after having<br />
programmed the controller. In this connection, carefully check the maximum<br />
capacities of the relays, indicated in the “technical specifi cations”.<br />
4) Serial network connection: all ir33 models are fi tted with a serial connector for<br />
connection to the supervisory network via the serial interface code IROPZ48500.<br />
Take care when earthing the system, in particular the secondary winding of the<br />
transformers that supply the instruments must not be earthed. If connection to a<br />
transformer with earthed secondary winding is required, an insulating<br />
transformer must be installed in between. A series of instruments can be<br />
connected to the same insulating transformer, nevertheless you are<br />
recommended to use a separate insulating transformer for each instrument.<br />
WARNINGS:<br />
Avoid installing the instrument in environments with the following characteristics:<br />
• relative humidity over 90% non-condensing;<br />
• heavy vibrations or knocks;<br />
• exposure to continuous jets of water;<br />
• exposure to aggressive and polluting atmospheric agents (e.g.: sulphur and<br />
ammonia gases, saline mist, smoke) which may cause corrosion and/or oxidation;<br />
• high magnetic and/or radio frequency interference (e.g. near transmitting<br />
antennas);<br />
• exposure to direct sunlight and atmospheric agents in general; large and<br />
rapid fl uctuations in ambient temperature;<br />
The following warnings must be observed when connecting the controllers:<br />
• Incorrect connection of the power supply may seriously damage the system.<br />
• Use cable ends that are suitable for the terminals. Loosen every screw and fi t the<br />
cable end, next tighten the screws and gently pull the cables to check their<br />
tightness. When tightening the screws, do not use automatic screwdrivers, or<br />
adjust the screws to a tightening torque less than 50 Ncm.<br />
• Separate as much as possible (by at least 3 cm) the probe signal and digital<br />
input cables from inductive loads and power cables, to avoid any electromagnetic<br />
disturbance.<br />
Never lay power cables and probe cables in the same cable conduits (including<br />
those for the electrical panels).<br />
Do not install the probe cables in the immediate vicinity of power devices<br />
(contactors, circuit breakers or the like).<br />
Reduce the length of the sensor cables as much as possible, and avoid spirals<br />
around power devices.<br />
• Only use IP67 guaranteed probes as end defrost probes; place the probes with<br />
the vertical bulb upwards, so as to facilitate drainage of any condensate.<br />
Remember that the thermistor temperature probes (NTC) have no polarity, so the<br />
order of connection of the ends is not important.<br />
+030220140 - rel. 1.2 - del 06-06-2005
PULIZIA DELLO STRUMENTO.<br />
Per la pulizia dello strumento non utilizzare alcol etilico, idrocarburi (benzina),<br />
ammoniaca e derivati. E’ consigliabile usare detergenti neutri ed acqua.<br />
CLEANING THE INSTRUMENT.<br />
When cleaning the instrument do not use ethanol, hydrocarbons (petrol), ammonia<br />
and by-products. Use neutral detergents and water.<br />
4. LA PROGRAMMAZIONE DEGLI<br />
STRUMENTI<br />
I parametri di funzionamento, completamente modifi cabili attraverso la tastiera<br />
frontale, sono suddivisi in due famiglie: uso frequente (tipo F) e di<br />
confi gurazione (tipo C).<br />
L’accesso a questi ultimi è protetto da una password che impedisce modifi che casuali<br />
o da parte di persone non autorizzate.<br />
4.1 Come accedere ai parametri di tipo F<br />
Premendo il tasto per più di 5 secondi (in caso di allarme tacitare prima il<br />
buzzer), sul display compare il codice del primo parametro F modifi cabile.<br />
4.2 Come accedere ai parametri di tipo C<br />
1) Premere contemporaneamente i tasti e Set per piu’ di 5 secondi e sul<br />
display comparirà “00”, la richiesta della password:<br />
def<br />
2) Con i tasti aux o scorrere i numeri fi no a visualizzare “22” (la password<br />
che permette l’accesso ai parametri);<br />
3) Confermando con il tasto Set sul display compare il primo parametro “C”<br />
modifi cabile.<br />
4.3 Modifica dei parametri<br />
Dopo aver visualizzato il parametro, sia esso di tipo “C” o di tipo “F”, si procede nel<br />
seguente modo:<br />
def<br />
1) Con i tasti aux o scorrere i parametri fi no a raggiungere quello da<br />
modifi care. Lo scorrimento è accompagnato dall’accensione di un’icona sul<br />
display che rappresenta la categoria di appartenenza del parametro.<br />
2) In alternativa, premere il tasto per visualizzare un menù che permetta di<br />
raggiungere velocemente la famiglia di parametri da modifi care.<br />
def<br />
3) Scorrendo il menù con i tasti aux e compaiono sul display i codici delle<br />
varie categorie di parametri (vedi”Riepilogo parametri di funzionamento”)<br />
accompagnati dall’accensione della relativa icona sul display (se presente).<br />
4) Una volta raggiunta la categoria desiderata premere Set per ritrovarsi<br />
direttamente sul primo parametro della categoria scelta (nel caso non vi sia<br />
alcun parametro visibile, la pressione del tasto Set non avrà alcun effetto).<br />
5) A questo punto è possibile continuare a consultare i parametri o tornare al menu<br />
categorie con il tasto .<br />
6) Premere Set per visualizzare il valore associato al parametro.<br />
def<br />
7) Incrementare o decrementare il valore rispettivamente con i tasti aux o .<br />
8) Premere Set per memorizzare temporaneamente il nuovo valore e tornare alla<br />
visualizzazione del parametro;<br />
9) Ripetere le operazioni dal punto 1 o dal punto 2.<br />
10) Se il parametro è dotato di sottoparametri premere Set per visualizzare il<br />
primo sottoparametro.<br />
def<br />
11) Premere i tasti aux o per vedere tutti i sottoparametri.<br />
12) Premere Set per visualizzare il valore associato.<br />
def<br />
13) Incrementare o decrementare il valore rispettivam. con i tasti aux o .<br />
14) Premere Set per memorizzare temporaneamente il nuovo valore e tornare alla<br />
visualizzazione del codice del sottoparametro.<br />
15) Premere per ritornare alla visualizzazione del parametro padre.<br />
4. PROGRAMMING THE INSTRUMENTS<br />
The operating parameters can be modifi ed using the front keypad, and are divided<br />
into two families: frequent use parameters (type “F”) and confi guration parameters<br />
(type “C”).<br />
Access to the confi guration parameters is protected by a password that prevents<br />
unwanted modifi cations or access by unauthorised persons.<br />
4.1 How to access type “F” parameters<br />
Press for more than 5 seconds (if an alarm is active, the buzzer is muted fi rst<br />
of all), the display shows the code of the fi rst modifi able type “F” parameter.<br />
4.2 How to access type “C” parameters<br />
1) Press and Set together for more than 5 seconds; the display will<br />
show the number “00”, representing the password prompt;<br />
def<br />
2) Press aux or until displaying the number “22” (the code of the<br />
password allows access to the parameters);<br />
3) Confi rm by pressing Set ; the display will show the code of the fi rst modifi able<br />
type “C” parameter.<br />
4.3 Modifying the parameters<br />
After having displayed the parameter, either type “C” or type “F”, proceed as<br />
follows:<br />
def<br />
1) Press aux or until reaching the parameter to be modifi ed. When<br />
scrolling, an icon appears on the display representing the category the<br />
parameter belongs to.<br />
2) Alternatively, press to display a menu that is used to quickly access the<br />
“group” of parameters to be modifi ed.<br />
def<br />
3) Scroll the menu with the aux and buttons; the display shows the codes<br />
of the various categories of parameters (see the “Summary of operating<br />
parameters”), accompanied by the display of the corresponding icon (if<br />
present).<br />
4) When having reached the desired category, press Set to move directly to the<br />
fi rst parameter in the category (if there are no visible parameters in the<br />
selected category, pressing Set will have no effect).<br />
5) At this stage, continue to scroll the parameters, or return to the Categories<br />
menu by pressing .<br />
6) Press Set to display the value associated with the parameter.<br />
def<br />
7) Increase or decrease the value using the aux or buttons respectively.<br />
8) Press Set to temporarily save the new value and return to the display of the<br />
parameter code.<br />
9) Repeat the operations from point 1 or point 2.<br />
10) If the parameter has sub-parameters, press Set to display the fi rst<br />
sub-parameter.<br />
def<br />
11) Press aux or to display all the sub-parameters.<br />
12) Press to display the associated value.<br />
def<br />
13) Increase or decrease the value using the aux or buttons respectively.<br />
14) Press Set to temporarily save the new value and return to the display of the<br />
sub-parameter code.<br />
15) Press to return to the display of the parent parameter.<br />
4.4 Memorizzazione dei nuovi valori assegnati ai<br />
parametri<br />
Per memorizzare defi nitivamente i valori dei parametri modifi cati premere il tasto<br />
per più di 5 secondi, uscendo così dalla procedura di modifi ca dei parametri.<br />
E’ possibile annullare tutte le modifi che ai parametri, memorizzate temporaneamente<br />
12<br />
4.4 Storing the new values assigned to the<br />
parameters<br />
To defi nitively store the new values of the modifi ed parameters, press for more<br />
than 5 seconds, thus exiting the parameter setting procedure.<br />
All the modifi cations made to the parameters, temporarily stored in the RAM, can<br />
+030220140 - rel. 1.2 - del 06-06-2005
in RAM, e tornare in “funzionamento normale” non premendo nessun tasto per 60<br />
secondi, lasciando quindi scadere la sessione di modifi ca dei parametri per TIMEOUT.<br />
Attenzione: nel caso la sessione di modifi ca scada per timeout i parametri relativi<br />
all’orologio non verranno ripristinati, in quanto questi parametri vengono<br />
memorizzati al momento del loro inserimento.<br />
be cancelled and “normal operation” resumed by not pressing any button for 60<br />
seconds, thus allowing the parameter setting session to expire due to timeout.<br />
Important: if the programming session ends by timeout, the clock parameters will<br />
not be reset, as these parameters are saved immediately when entered.<br />
Nel caso venga tolta tensione allo strumento prima della pressione del tasto<br />
tutte le modifi che apportate ai parametri e temporaneamente memorizzate saranno<br />
perdute.<br />
If the instrument is switched off before pressing<br />
the parameters and temporarily saved will be lost.<br />
, all the modifi cations made to<br />
4.5 Classificazione dei parametri<br />
I parametri, oltre che divisi in relazione al TIPO, sono raggruppati in CATEGORIE<br />
logiche individuate dalle lettere o simboli iniziali. Di seguito vengono riportate le<br />
categorie esistenti con le relative lettere.<br />
4.5 Classification of the parameters<br />
The parameters, as well as being divided by TYPE, are also grouped into logical<br />
CATEGORIES identifi ed by the initial letters or symbols. The following table lists the<br />
categories and the corresponding letters.<br />
Parametri / Parameters Categoria / Category Scritta / Text Icona / Icon<br />
/ Parametri relativi alla gestione delle sonde di temperatura<br />
Pro<br />
Temperature probe management parameters<br />
r<br />
Parametri relativi alla regolazione di temperatura<br />
CtL<br />
Temperature control parameters<br />
c<br />
Parametri relativi alla gestione dei tempi di sicurezza e di attivazione del compressore<br />
CMP<br />
Compressor safety time and activation parameters<br />
d<br />
Parametri relativi alla gestione dello sbrinamento<br />
dEF<br />
Defrost management parameters<br />
A<br />
Parametri relativi alla gestione degli allarmi<br />
ALM<br />
Alarm management parameters<br />
F<br />
Parametri relativi alla gestione dei ventilatori<br />
Fan management parameters<br />
Ventilatore<br />
Fan<br />
H confi gurazione Parametri generali di confi gurazione (indirizzi abilitazioni ecc…)<br />
CnF<br />
H confi guration<br />
General confi guration parameters (addresses, enabling, etc.…)<br />
H haccp<br />
Parametri HACCP<br />
HcP<br />
HACCP parameters<br />
rtc<br />
Parametri Rtc<br />
RTC parameters<br />
rtc<br />
Tab. 4.5.1<br />
4.6 Come attivare il download di rete dei<br />
parametri<br />
1) Premere contemporaneamente i tasti e Set per piu’ di 5 secondi e sul<br />
display comparirà il numero “00”;<br />
def<br />
2) Premere i tasti aux o scorrere i numeri fi no a visualizzare “66” (password<br />
attivazione download).<br />
3) Confermare con il tasto Set .<br />
4) Sul display compare l’indicazione “dnL” ad indicare che il download è attivo.<br />
5) Al termine scompare l’indicazione “dnL” e, in caso di errore, compare una delle<br />
indicazioni d1-d6 ad indicare l’unità su cui si è avuto l’errore.<br />
4.7 Impostazione del set point<br />
Per visualizzare o impostare il set point procedere come segue:<br />
1) Premendo il tasto Set per più di 1 secondo viene visualizzato il valore del set<br />
point;<br />
def<br />
2) Incrementare o decrementare il valore, rispettivamente, con i tasti aux e ,<br />
fi no a raggiungere il valore desiderato;<br />
3) Premere di nuovo il tasto Set per confermare il nuovo valore.<br />
4.6 Downloading the parameters via the network<br />
1) Press the and Set buttons together for more than 5 seconds; the display<br />
will show the number “00”;<br />
def<br />
2) Press the aux or button to scroll the numbers until displaying “66”<br />
(download activation password).<br />
3) Confi rm by pressing .<br />
4) The display will show the message “dnL”, indicating that the download is in<br />
progress.<br />
5) At the end of the procedure, the message “dnL” is cancelled and, in the event of<br />
errors, one of the messages d1 to d6 is displayed to indicate which unit the error<br />
occurred on.<br />
4.7 Setting the set point<br />
To display or set the set point, proceed as follows:<br />
1) Press Set for more than 1 second to display the set point;<br />
def<br />
2) Increase or decrease the set point using the aux and buttons respectively,<br />
until reaching the desired value;<br />
3) Press Set again to confi rm the new value.<br />
4.8 Ripristino <strong>manual</strong>e allarmi<br />
E’ possibile resettare tutti gli allarmi a ripristino <strong>manual</strong>e premendo insieme i tasti<br />
e aux per più di 5 secondi, se la causa è cessata.<br />
4.8 Alarms with <strong>manual</strong> reset<br />
The alarms with <strong>manual</strong> reset can be reset by pressing<br />
more than 5 seconds, if the causes are no longer present.<br />
and aux together for<br />
4.9 Procedura di impostazione dei parametri di<br />
default<br />
Per impostare i parametri di default, nel caso ‘Hdn’= 0, si procede in questo modo:<br />
1. Togliere tensione allo strumento.<br />
2. Ridare tensione tenendo premuto il tasto fi no alla comparsa del messaggio<br />
“_std_” sul display.<br />
Nota: i valori di default vengono impostati solo per i parametri visibili (come C o F),<br />
a seconda del modello vedi tabella “Parametri di funzionamento”.<br />
4.9 Procedure for setting the default parameter<br />
values<br />
To set the default parameter values for the controller, if ‘Hdn’= 0, proceed as<br />
follows:<br />
1) Switch the instrument off;<br />
2) Switch the instrument on again, holding the button until the message “_std_” is<br />
shown on the display;<br />
Note: the default values are set only for the visible parameters (e.g. C or F), according<br />
to the model; see the table of “Operating parameters”.<br />
13<br />
+030220140 - rel. 1.2 - del 06-06-2005
Viceversa nel caso ‘Hdn’ 0 sono disponibili alcuni set di parametri<br />
personalizzati di default, e la procedura è la seguen te:<br />
1. Togliere tensione allo strumento.<br />
2. Ridare tensione tenendo premuto il tasto fi nchè non compare il valore ‘0’.<br />
def<br />
3. Con i tasti aux e selezionare il set di parametri di default che si vuole<br />
impostare. Sarà possibile scegliere il set tra 0 e ‘Hdn’.<br />
4. Premendo il tasto comparirà il messaggio “Std” sul display.<br />
Set Personalizzabile Note<br />
0 NO Non modifi ca i livelli di visibilità.<br />
Permette di impostare i valori solo dei parametri visibili.<br />
1<br />
2<br />
3<br />
4<br />
5<br />
6<br />
SI<br />
Imposta i livelli di visibilità e i valori di tutti i parametri di<br />
funzionamento.<br />
Non vengono impostati i parametri macchina.<br />
Tab. 4.9.1<br />
Note:<br />
• Sul controllo è possibile utilizzare i set dei parametri di default personalizzabili<br />
dal cliente solo se si dispone dell’hardware adeguato (memoria Eeprom espansa)<br />
• Nel caso di caricamento di un set di parametri di default personalizzato vi sia un<br />
errore Eeprom EF (in quanto risulta corrotta la memoria del controllo) è possibile<br />
ripristinare i parametri precedenti spegnendo è riaccendendo lo strumento.<br />
• Qualora vi fosse un errore di Eeprom EF, se si desidera conservare i parametri<br />
caricati, è possibile entrare in modifi ca dei parametri di confi gurazione, verifi carne<br />
il valore e memorizzare gli stessi in Eeprom con la opportuna procedura. Al temine<br />
dell’operazione scomparirà la segnalazione di errore Eeprom.<br />
• Se vi è un ricorrente errore Eeprom EF nel caricamento di un set di parametri<br />
di default personalizzato sarà opportuno correggere l’Eeprom interna dello<br />
strumento con la chiave hardware di programmazione.<br />
• Dopo il caricamento di un set di default personalizzato il controllo aggiorna<br />
automaticamente la memoria di lavoro memorizzando sia i livelli di visibilità che i<br />
valori dei parametri.<br />
• Il parametro ‘Hdn’ deve avere lo stesso valore in tutti i set di parametri di default<br />
personalizzati.<br />
per maggiore protezione il parametro ‘Hdn’ dovrà essere impostato non visibile.<br />
Vice-versa, if ‘Hdn’ 0, a number of sets of customised default parameters are<br />
available. Proceed as follows:<br />
1. Switch the instrument off.<br />
2. Switch the instrument on again, holding the button until the value ‘0’ is<br />
displayed.<br />
def<br />
3. Use the aux and buttons to select the desired set of default parameters.<br />
The sets between 0 and ‘Hdn’ can be chosen.<br />
4. Pressing shows the message “Std” on the display.<br />
Set Customisable Notes<br />
0 NO The levels of visibility are not modifi ed.<br />
1<br />
2<br />
3<br />
4<br />
5<br />
6<br />
YES<br />
Used to set the values of the visible parameters only.<br />
Sets the levels of visibility and the values of all the<br />
operating parameters.<br />
The unit parameters are not set.<br />
Tab. 4.9.1<br />
Notes:<br />
• The set of customisable default parameters can only be used on the controller if<br />
there is suitable hardware (expanded EEPROM memory)<br />
• If when loading a set of customised default parameters there is an EF EEPROM<br />
error (memory error on the controller), the previous parameters can be restored<br />
by switching the instrument off and on again.<br />
• If there is an EF EEPROM error, to maintain the loaded parameters, enter<br />
parameter confi guration mode, check the values then save them to the EEPROM<br />
using the special procedure. At then end of the operation, the EEPROM error<br />
signal will be cancelled.<br />
• If there is a recurring EF EEPROM error when loading a set of customised<br />
default parameters, the EEPROM on the instrument should be corrected using the<br />
programming hardware key.<br />
• After loading a set of customised default parameter, the controller automatically<br />
updates the memory, saving both the levels of visibility and the values of the<br />
parameters.<br />
• The parameter ‘Hdn’ must have the same value in all the sets of customised<br />
default parameters.<br />
For greater protection, parameter ‘Hdn’ must be set to not visible.<br />
4.10 Assegnazione automatica indirizzo seriale<br />
L’operazione di impostazione automatica dell’indirizzo seriale è una particolare<br />
procedura che permette, attraverso un applicativo installato su un PC connesso alla<br />
rete CAREL, di assegnare e gestire in maniera molto semplice gli indirizzi di tutti gli<br />
strumenti che implementano questa funzione.<br />
La procedura da seguire è molto semplice:<br />
1) Attraverso il software si attiva la procedura di “Defi nizione rete”, l’applicativo<br />
inizia ad inviare nella rete CAREL un particolare messaggio (‘’) contenente<br />
l’indirizzo di rete.<br />
2) Premendo il pulsante su uno strumento connesso alla rete, si attiva il<br />
riconoscimento di questo messaggio, il quale autoimposta il proprio indirizzo al<br />
valore richiesto e invia un messaggio di conferma all’applicativo, contenente codice<br />
macchina e revisione fi rmware (messaggio ‘V’).<br />
Al riconoscimento del messaggio inviato dall’applicativo remoto, lo strumento visualizza<br />
per un secondo il messaggio Add sul display, seguito dal valore dell’indirizzo<br />
seriale assegnato.<br />
3) L’applicativo, una volta ricevuto il messaggio di conferma da una delle macchine,<br />
salva le informazioni ricevute nel proprio database, incrementa l’indirizzo seriale e<br />
ricomincia a inviare il messaggio ‘’.<br />
A questo punto è possibile ripetere la procedura dal punto 2 su un’altra macchina<br />
connessa alla rete, fi no a defi nire gli indirizzi di tutta la rete.<br />
Nota: una volta assegnato l’indirizzo su uno strumento, l’operazione, per ragioni di<br />
sicurezza, viene inibita sullo stesso per 1 minuto. Per tale tempo, quindi, non sarà<br />
possibile riassegnare un diverso indirizzo allo strumento.<br />
4.10 Automatic serial address assignment<br />
procedure<br />
The automatic setting of the serial address is a special procedure that, by using<br />
an application installed on a PC connected to the CAREL network, is used to set<br />
and manage in a simple way the addresses of all the instruments that include this<br />
feature.<br />
The procedure is very simple:<br />
1) Using the remote application, start the “Network defi nition” procedure; the<br />
application begins to send a special message (‘’) across the network,<br />
containing the network address;<br />
2) Pressing the button on the keypad of the instrument connected to the<br />
network, the instrument recognises the message sent by the remote application,<br />
automatically setting the address to the required value and sending a confi rmation<br />
message to the application, containing the unit code and fi rmware revision<br />
(message ‘V’). When the message sent by the remote application is recognised, the<br />
instrument displays the message ‘Add’ for 1 second, followed by the value of the<br />
assigned serial address.<br />
3) The application, on receiving the confi rmation message from the units<br />
connected to the network, saves the information received in its database, increases<br />
the serial address and resumes sending the message ‘‘.<br />
At this point, the procedure starting from point 2 can be repeated on another unit<br />
connected to the network, until all network addresses are defi ned.<br />
La nota numero 4 non fa parte dell’elenco numerato , il computer non mi fa fare<br />
l’operazione<br />
Note: When the operation for assigning an address to an instrument has fi nished,<br />
for reasons of safety, the operation is inhibited for 1 minute on that instrument.<br />
Consequently, a different address cannot be re-assigned to the instrument during<br />
that time.<br />
14<br />
+030220140 - rel. 1.2 - del 06-06-2005
5. ACCESSORI<br />
5.1 Chiave copia parametri<br />
Chiavi di programmazione PSOPZKEY00/A0<br />
Le chiavi di programmazione PSOPZKEY00 (fi gura 5.1.1) e PSOPZKEYA0 (fi gura<br />
5.1.2), permettono la copia del set completo dei parametri dei controlli CAREL ir33.<br />
Tali chiavi devono essere inserite nel connettore (AMP 4 pin) previsto nei controlli<br />
compatibili e funziona anche senza alimentare il controllo (vedere schema riassuntivo<br />
fi gura 5.1.3).<br />
5. ACCESSORIES<br />
5.1 Parameter copying key<br />
Programming keys PSOPZKEY00/A0<br />
The programming keys PSOPZKEY00 (Figure 5.1.1) and PSOPZKEYA0 (Figure 5.1.2)<br />
for CAREL controllers are used to copy the complete set of parameters of the CAREL<br />
ir33 controller parameters. The keys must be connected to the connector (4 pin<br />
AMP) fi tted on the compatible controllers, and work even without switching the<br />
controller on, as indicated in the operating instructions for the controller (see the<br />
summary diagram in 5.1.3).<br />
Fig. 5.1.1 Fig. 5.1.2<br />
Chiavi di programmazione IROPZKEY00/A0<br />
Le chiavi di programmazione IROPZKEY00/A0 a<br />
differenza della PSOPZKEY00/A0,<br />
tramite l’utilizzo del kit di confi gurazione<br />
PSOPZPRG00, possono impostare fi no a sette<br />
confi gurazioni differenti di parametri all’interno<br />
dello strumento. Le chiavi devono essere<br />
collegate al connettore (AMP 4 pin) previsto<br />
nei controlli.<br />
Le chiavi IROPZKEY00/A0 possono essere<br />
utilizzate esclusivamente con i controlli<br />
1<br />
derivanti dalla piattaforma ir33 (esempio: ir33,<br />
2<br />
ir33 DIN, powercompact,<br />
powercompact small, Mastercella nuova<br />
versione).<br />
Tutte le operazioni si devono eseguire con lo<br />
strumento scollegato (spento), salvo diversa<br />
indicazione riportata sul foglio istruzione dello specifi co strumento.<br />
ATTENZIONE: PJOPZKEY00 è da utilizzare SOLO per controlli PJ; PSOPZKEY** è da<br />
utilizzare SOLO per i controlli Powercompact/ir33, Mastercella, Power-split, MGE e<br />
I/O module.<br />
Fig. 5.1.3<br />
Programming keys IROPZKEY00/A0<br />
The programming keys IROPZKEY00/A0,<br />
unlike the PSOPZKEY00/A0, with the use of<br />
the confi guration kit PSOPZPRG00, can set up<br />
to seven different confi gurations of parameters<br />
inside the instrument. The keys must be<br />
connected to the connector (4 pin AMP) fi tted<br />
on the controllers.<br />
The keys IROPZKEY00/A0 can only be used<br />
with the controllers based on the ir33 platform<br />
(for example: ir33, ir33 DIN, powercompact,<br />
powercompact small, Mastercella new<br />
PSOPZKEY**:<br />
Chiave di programmazione<br />
Programming key<br />
version).<br />
All the operations must be performed with<br />
the instrument off, unless otherwise indicated<br />
on the instruction sheet for the specifi c<br />
instrument.<br />
IMPORTANT: PJOPZKEY00 to be used ONLY for PJ controllers; PSOPZKEY** to be<br />
used ONLY for powercompact/ir33, MasterCella, Power-split, MGE and I/O module.<br />
Le funzioni previste sono tre e si selezionano mediante la confi gurazione<br />
dei due dip-switch presenti, accessibili togliendo il coperchio batteria:<br />
• Caricamento nella chiave dei parametri di un controllo (UPLOAD<br />
- Fig. 5.1.1.1);<br />
• Copia dalla chiave verso un controllo (DOWNLOAD - Fig. 5.1.1.2);<br />
• Copia estesa dalla chiave verso un controllo (DOWNLOAD<br />
ESTESO - Fig. 5.1.1.3).<br />
Avvertenza: La copia parametri si può effettuare solo tra strumenti<br />
con lo stesso codice mentre l’operazione di caricamento nella chiave<br />
(UPLOAD) è invece sempre permessa.<br />
5.1.1 Copia e scarico parametri<br />
Le operazioni da seguire per le funzioni di UPLOAD e/o DOWNLOAD o<br />
DOWNLOAD ESTESO sono le seguenti, cambiando solo le impostazioni<br />
dei dip-switch sulla chiave:<br />
1) Aprire lo sportellino posteriore della chiave e posizionare i 2<br />
dip-switch secondo l’operazione richiesta;<br />
2) Chiudere lo sportellino ed inserire la chiave nel connettore del<br />
controllo;<br />
3) Premere il tasto e controllare la segnalazione del LED: rosso per<br />
qualche secondo, quindi verde indica la corretta conclusione della<br />
operazione. Segnalazioni diverse o lampeggianti indicano che si<br />
Fig. 5.1.1.1<br />
Fig. 5.1.1.2<br />
15<br />
Three functions are available, and are selected by using the two supplied<br />
dipswitches; these can be accessed by removing the battery cover:<br />
• Load the parameters into the parameter button of a controller<br />
(UPLOAD);<br />
• Copy from the button to a controller (DOWNLOAD);<br />
• Extended copy from the button to a controller (EXTENDED<br />
DOWNLOAD).<br />
Warning: The parameters can only be copied between instruments<br />
with the same code. The UPLOAD operation can, however, always be<br />
performed.<br />
5.1.1 Copying and downloading the parameters<br />
The following operations are used for the UPLOAD and/or DOWNLOAD or<br />
EXTENDED DOWNLOAD functions, simply by changing the settings of the<br />
dipswitches to change the function:<br />
1) open the rear cover on the button and position the 2 dipswitches<br />
according to the desired operation;<br />
2) close the rear cover on the button and insert the button in the<br />
connector of the controller;<br />
3) press the button and check the LED: red for a few seconds,<br />
then green, indicates that the operation was completed correctly.<br />
Other signals or the fl ashing of the LED indicates that problems<br />
+030220140 - rel. 1.2 - del 06-06-2005
sono verifi cati dei problemi: vedi tabella relativa;<br />
4) A conclusione dell’operazione rilasciare il tasto, dopo qualche<br />
secondo il LED si spegne;<br />
5) Sfi lare la chiave dal controllo.<br />
have occurred: refer to the relevant table below;<br />
4) at the end of the operation, release the button, after a few<br />
seconds the LED goes OFF;<br />
5) remove the button from the controller.<br />
Segnalazione LED Causa Signifi cato e soluzione<br />
LED rosso lampeggiante Batterie scariche a inizio copia Le batterie sono scariche, la copia non può essere eseguita. Sostituire le batterie.<br />
LED verde lampeggiante Batterie scariche durante la copia o a fi ne copia Durante la copia o alla fi ne della copia il livello delle batterie è basso. Si consiglia di<br />
sostituire le batterie e ripetere l’operazione.<br />
Lampeggio LED rosso/verde<br />
(segnalazione arancio)<br />
Strumento non compatibile<br />
Il setup dei parametri non può essere copiato poiché il modello del controllo<br />
collegato non è compatibile. Tale errore si ha solo per la funzione DOWNLOAD, verifi care<br />
il codice del controllo ed eseguire la copia solo su codici compatibili.<br />
LED rosso e verde accesi Errore dati da copiare Errore nei dati da copiare. Risulta corrotta l’e_prom dello strumento, per cui non è<br />
possibile effettuare la copia della chiave.<br />
LED rosso acceso fi sso Errore di trasferimento dati L’operazione di copia non si è conclusa per errori gravi di trasferimento o copia dei dati.<br />
Ripetere l’operazione, se il problema persiste verifi care le connessioni della chiave.<br />
LED spenti Batterie scollegate Verifi care batterie.<br />
Tab. 5.1.1.1<br />
LED signal Error Meaning and solution<br />
Red LED fl ashing Batteries discharged at start copy The batteries are discharged, the copy operation cannot be performed. Replace the<br />
batteries.<br />
Green LED fl ashing Batteries discharged during copy or at end of copy During the copy operation or at the end of the operation the battery level is low. Replace<br />
the batteries and repeat the operation.<br />
Red/green LED fl ashing<br />
(orange signal)<br />
Instrument not compatible<br />
Fig. 5.1.1.3<br />
The parameter set-up cannot be copied as the connected controller model is not<br />
compatible. This error only occurs for the DOWNLOAD function; check the code of the<br />
controller and run the copy only for compatible codes.<br />
Red and green LEDs ON Error in Data being copied Error in the data being copied. The instrument’s EEPROM is corrupted, and, therefore<br />
,the button cannot be copied.<br />
Red LED on steady Data transfer error The copy operation was not completed due to a serious error when transferring or<br />
copying the data. Repeat the operation, if the problem persists check the button<br />
connections.<br />
LED OFF Batteries disconnected Check batteries.<br />
Tab. 5.1.1.1<br />
Note:<br />
1 All’inizio e alla fi ne delle operazioni di UPLOAD e DOWNLOAD (normale o<br />
esteso) è prevista una segnalazione acustica del buzzer dello strumento.<br />
2 Il DOWNLOAD (normale o esteso) è possibile anche se i parametri di<br />
funzionamento e macchina sono errati, in tal caso essi verranno recuperati dalla<br />
chiave. Fare molta attenzione nel caso si voglia recuperare i parametri macchina<br />
da una chiave in quanto questi determinano il funzionamento del controllo a<br />
basso livello (modello di macchina, tipo di interfaccia, assegnazione relè logici a<br />
relè fi sici, luminosità del display, livello di modulazione del comando relè …).<br />
È quindi necessario ripristinare i parametri macchina del modello originale<br />
per assicurare il corretto funzionamento del controllo.<br />
Notes:<br />
1 At the start and the end of the UPLOAD and DOWNLOAD operations (normal or<br />
extended), the buzzer on the instrument will emit an audible signal.<br />
2 The DOWNLOAD operation (normal or extended) is possible even if the<br />
operating parameters and controller are incorrect. If there is an error in the unit<br />
parameters, these will be recovered by the button. Be careful when recovering the<br />
unit parameters from a button, as these determine the low-level operation of the<br />
controller (unit model, type of interface, assignment of logical relay to physical<br />
relay, brightness of the display, level of modulation of the relay control signal<br />
…). The unit parameters from the original model must therefore be restored<br />
to ensure the correct operation of the controller.<br />
5.2 Telecomando compatto<br />
Il telecomando compatto tramite i suoi 22 tasti, permette l’accesso diretto ai<br />
parametri:<br />
• Temperatura<br />
• Sbrinamento<br />
• Ventilatori<br />
• Allarmi<br />
• HACCP<br />
Inoltre è possibile comandare le funzioni:<br />
• Start sbrinamento<br />
• aux<br />
• Luce<br />
• ON/OFF<br />
• Mute<br />
Nel telecomando sono riportati i 4 tasti PRG/mute, set , UP e<br />
DOWN che rendono disponibili quasi tutte le funzioni fornite<br />
dalla tastiera dello strumento.<br />
I tasti, in base alla loro funzionalità, si possono suddividere in<br />
tre gruppi:<br />
• Attivazione/disattivazione dell’uso del telecomando (Figura<br />
5.2.2)<br />
16<br />
5.2 Compact remote control<br />
The COMPACT remote control features 20 buttons and allows direct access to the<br />
following parameters:<br />
• Temperature<br />
• Defrost<br />
• Fans<br />
• Alarms<br />
• HACCP.<br />
The following functions can also be controlled:<br />
• Start defrost<br />
• Aux<br />
• Light<br />
• ON/OFF<br />
• Mute.<br />
The standard remote control features the four buttons,<br />
PRG/mute, SET, UP and DOWN, which access almost all the<br />
functions provided by the instrument keypad.<br />
The buttons can be divided into three groups, based on their<br />
functions:<br />
• Buttons for enabling and disabling the use of the remote<br />
Fig. 5.2.1<br />
control (Figure 5.2.2);<br />
+030220140 - rel. 1.2 - del 06-06-2005
• Remotazione della tastiera dello strumento (Figura 5.2.3)<br />
• Visualizzazione/modifi ca diretta dei parametri più utilizzati (Figura 5.2.4)<br />
Attivazione/disattivazione dell’uso del telecomando<br />
Tasto Funzione immediata Funzione ritardata<br />
INIZIO<br />
permette di abilitare l’uso del<br />
telecomando; ogni strumento visualizza<br />
il proprio codice di abilitazione<br />
USCITA<br />
termina l’uso del telecomando,<br />
annullando ogni modifi ca<br />
effettuata ai parametri<br />
PRG<br />
permette di visualizzare i parametri di<br />
confi gurazione<br />
NUMERI<br />
consentono di selezionare lo<br />
strumento, digitando il codice di<br />
abilitazione visualizzato<br />
con la pressione prolungata per 5s<br />
termina l’uso del telecomando,<br />
memorizzando i parametri modifi cati<br />
Tab. 5.2.1<br />
• Buttons for remote simulation of the instrument keypad (Figure 5.2.3);<br />
• Buttons for direct display/modifi cation of the most commonly used parameters<br />
(Figure 5.2.4).<br />
Activating and deactivating the use of the remote control.<br />
Button Immediate function Delayed function<br />
START<br />
used to enable the remote control; each<br />
instrument displays its own enabling<br />
code<br />
EXIT<br />
ends operation using the remote control,<br />
cancelling all changes made to the<br />
parameters<br />
PRG<br />
used to display the confi guration<br />
parameters<br />
NUMBERS<br />
used to select the instrument, by<br />
entering the enabling code displayed<br />
pressing and holding for<br />
5s ends use of the remote<br />
control, saving the<br />
modifi ed parameters<br />
Tab. 5.2.1<br />
Con la pressione del tasto inizio ogni strumento visualizza il<br />
proprio codice di abilitazione telecomando (H3). Con la tastiera<br />
numerica si dovrà selezionare il codice di abilitazione dello<br />
strumento su cui si intende operare. Al termine di questa<br />
operazione solo lo strumento selezionato rimarrà in<br />
programmazione da telecomando, tutti gli altri ritorneranno al<br />
funzionamento normale.<br />
Assegnando agli strumenti diversi codici di abilitazione sarà<br />
possibile, in questa fase, entrare in programmazione da<br />
telecomando solo con lo strumento desiderato, senza il pericolo<br />
di interferenze.<br />
Lo strumento abilitato alla programmazione da telecomando<br />
visualizzerà la misura e il messaggio rCt. Questo stato è detto<br />
Livello 0.<br />
Entrati nella programmazione la pressione di prg per 5 secondi<br />
permette di uscire dalla programmazione da telecomando,<br />
memorizzando le modifi che effettuate: viceversa, la pressione di<br />
uscita consente di uscire dalla procedura, senza memorizzare le<br />
modifi che effettuate<br />
Fig. 5.2.2<br />
By pressing the start button, each instrument displays its own<br />
remote control enabling code (H3). The numeric keypad is used<br />
to enter the enabling code of the instrument in question. At<br />
the end of this operation, only the instrument with the selected<br />
enabling code will be programmed from the remote control, all<br />
the others will resume normal operation.<br />
Assigning different enabling codes to the instruments, allows, in<br />
this phase, only the desired instrument to be programmed using<br />
the remote control, without the risk of interference.<br />
The instrument enabled for programming from the remote<br />
control will display the reading and the rCt message. This status<br />
is called Level 0.<br />
When having entered the programming mode, pressing PRG for<br />
5 seconds exits the programming of the remote control, saving<br />
the modifi cations; vice-versa, press EXIT to exit the programming<br />
of the remote control, without saving the modifi cations.<br />
Remotazione della tastiera dello strumento<br />
La parte evidenziata permette di remotare la tastiera dello<br />
strumento.<br />
Nel Livello 0 (visualizzazione misura e messaggio rCt) sono attivi<br />
i seguenti comandi:<br />
Tasto<br />
Funzione<br />
def<br />
Start e stop dello sbrinamento<br />
aux Attivazione/disattivazione relè ausiliario 1<br />
luce Attivazione/disattivazione relè ausiliario 2<br />
ON/OFF Accensione/spegnimento dello strumento<br />
PRG/mute Spegnimento del buzzer, se attivo, e<br />
disattivazione del relè d’allarme<br />
Tab. 5.2.2<br />
Sempre in questo livello sono attivi i pulsanti set e PRG/mute i<br />
quali permettono di attivare l’impostazione del set point (Livello<br />
1) e dei parametri di confi gurazione (Livello 2).<br />
Remote simulation of the instrument keypad<br />
The highlighted part is used to simulate the instrument keypad<br />
from the remote control.<br />
In Level 0 (display the reading and rCt message), the following<br />
functions are active:<br />
Key<br />
Function<br />
def<br />
Start and stop defrosting<br />
aux Activation and deactivation of auxiliary relay 1<br />
light Activation and deactivation of auxiliary relay 2<br />
ON/OFF Instrument ON/OFF<br />
PRG/mute Mute the buzzer, if ON, and deactivate the alarm<br />
relay<br />
Tab. 5.2.2<br />
In this level, the set and PRG/mute button are also active,<br />
used to activate the set point (Level 1) and the confi guration<br />
parameters (Level 2).<br />
Fig. 5.2.3<br />
Tasto Funzione immediata Funzione ritardata<br />
PRG/mute Modifi ca dei parametri di<br />
confi gurazione<br />
con la pressione prolungata per 5s<br />
memorizza i parametri modifi cati.<br />
set Variazione set point<br />
Tab. 5.2.3<br />
Key Immediate function Delayed function<br />
PRG/mute Modify the confi guration<br />
parameters<br />
pressing and holding for 5s ends use of<br />
the remote control, saving the modifi ed<br />
parameters.<br />
SET Modify the set point<br />
Tab. 5.2.3<br />
Nei Livelli 1 e 2 i tasti PRG/mute, set , UP e DOWN replicano le corrispondenti<br />
funzioni previste per la tastiera dello strumento, consentendo di visualizzare e<br />
modifi care tutti i parametri dello strumento, anche quelli non dotati di un tasti di<br />
accesso rapido.<br />
In Levels 1 and Level 2, the PRG/mute, SET, UP and DOWN buttons repeat the<br />
corresponding functions on the instrument keypad. In this way, all the instrument<br />
parameters can be displayed and modifi ed, even those without shortcut buttons.<br />
17<br />
+030220140 - rel. 1.2 - del 06-06-2005
Visualizzazione/modifica diretta dei parametri più utilizzati<br />
Alcuni parametri relativi a:<br />
• Temperatura<br />
• Sbrinamento<br />
• Allarmi<br />
• Ventilatori<br />
• HACCP<br />
sono direttamente accessibili per mezzo di tasti specifi ci.<br />
Directly display/modify the most commonly used parameters<br />
Some parameters, relating to:<br />
• Temperature<br />
• Defrost<br />
• Alarms<br />
• Fans<br />
• HACCP<br />
are directly accessible using specifi c buttons<br />
Fig. 5.2.4<br />
5.3 Interfaccia scheda seriale RS485<br />
L’opzione interfaccia seriale RS485 (IROPZ48500) riportata in fi gura 5.3.1, permette il<br />
collegamento dello strumento ir33 alla rete seriale RS 485 per la supervisione.<br />
In fi gura 5.3.2 viene rappresentato lo schema di collegamento tra interfaccia e strumento<br />
ma per maggiori dettagli fare riferimento al foglio istruzioni relativo.<br />
5.3 RS485 serial interface board<br />
The RS485 serial card option (IROPZ48500), shown in Figure 5.3.1, allows the ir33<br />
instrument to be connected to the RS485 serial network for supervision.<br />
The connection diagram between the interface and the instrument is shown below<br />
in Figure 5.3.2. For further details, refer to the corresponding instruction sheet.<br />
1<br />
2<br />
IROPZ48500:<br />
Interfaccia scheda seriale RS485<br />
Serial board interface RS485<br />
Fig. 5.3.1 Fig. 5.3.2<br />
5.4 Opzione interfaccia display ripetitore<br />
L’opzione interfaccia display ripetitore (IROPZDSP00), riportata in fi gura 5.4.1, è<br />
necessaria quando si deve interfacciare all’ ir33 un display ripetitore (IR00RG0000)<br />
per la visualizzazione della temperatura rilevata dalla terza sonda.<br />
In fi gura 5.4.2 , viene rappresentato lo schema di collegamento tra interfaccia e<br />
strumento ma per maggiori dettagli fare riferimento al foglio istruzioni relativo.<br />
5.4 Repeater display interface option<br />
The repeater display interface option (IROPZDSP00), shown in Figure 5.4.1, is<br />
required to connect the ir33 to a repeater display (IR00RG0000) for reading the<br />
temperature measured by the third probe.<br />
Figure 5.4.2 shows the connection diagram between the interface and instrument;<br />
for further details, refer to the specifi c instruction sheet.<br />
1<br />
2<br />
IROPZDSP00:<br />
Opzione interfaccia display<br />
Display interface option<br />
Fig. 5.4.1 Fig. 5.4.2<br />
18<br />
+030220140 - rel. 1.2 - del 06-06-2005
5.5 Opzione del cavo di collegamento<br />
interfaccia-display ripetitore<br />
I cavi di collegamento fra l’interfaccia e il display<br />
ripetitore hanno i seguenti codici:<br />
• PSTCON01B0 = 1,5 m<br />
• PSTCON03B0 = 3 m<br />
• PSTCON05B0 = 5 m<br />
5.5 Optional interface-repeater display<br />
connection cable<br />
The connection cables between the interface and<br />
the repeater display have the following codes:<br />
1<br />
• PSTCON01B0 = 1.5 m<br />
• PSTCON03B0 = 3 m<br />
2<br />
• PSTCON05B0 = 5 m<br />
IROPZDSP00:<br />
Opzione interfaccia display<br />
Display interface option<br />
IR00RG0000:<br />
Terminale remoto/Remote terminal<br />
Fig. 5.5.1<br />
6. DESCRIZIONE DELLE FUNZIONALITÀ<br />
6.1 Modelli<br />
Di seguito il sommario delle funzionalità relative ai vari controlli.<br />
Modello S: unità statiche con sbrinamento per fermata del compressore<br />
• regolazione compressore direct e reverse;<br />
• sbrinamento per fermata compressore, a tempo o in temperatura;<br />
• ciclo continuo;<br />
• monitoraggio allarmi di temperatura.<br />
Modello Y: unità statiche con sbrinamento a resistenza o a gas caldo<br />
• regolazione compressoredirect e reverse;<br />
• sbrinamento a resistenza (anche termostatato) o a gas caldo, a tempo o in<br />
temperatura;<br />
• ciclo continuo;<br />
• monitoraggio allarmi di temperatura.<br />
Modello F: unità ventilate con sbrinamento a resistenza o gas caldo (versioni<br />
115…230Vac)<br />
• regolazione compressore direct e reverse;<br />
• sbrinamento a resistenza (anche termostatato) o a gas caldo, a tempo o in<br />
temperatura;<br />
• regolazione ventilatori di evaporazione;<br />
• ciclo continuo;<br />
• monitoraggio allarmi di temperatura.<br />
Modello C: modello con 4 relè<br />
• regolazione compressore direct e reverse ;<br />
• sbrinamento a resistenza (anche termostatato) o a gas caldo, a tempo o in<br />
temperatura;<br />
• regolazione ventilatori di evaporazione;<br />
• ciclo continuo;<br />
• monitoraggio allarmi di temperatura;<br />
• gestione uscita ausiliaria.<br />
Funzioni abilitate in funzione del modello:<br />
Funzione S Y F C<br />
regolazione compressore X X X X<br />
sbrinamento per fermata compressore X X X X<br />
sbrinamento a resistenza o gas caldo X X X X<br />
ciclo continuo X X X X<br />
duty setting X X X X<br />
ventole evaporatore X X X X<br />
uscita ausiliaria<br />
X<br />
Tab. 6.1.1<br />
I modelli C possono essere dotati con un relè ausiliario programmabile, come<br />
riportato in seguito<br />
• uscita di allarme normalmente aperta o chiusa;<br />
• uscita ausiliaria;<br />
19<br />
6. DESCRIPTION OF THE FUNCTIONS<br />
6.1 Models<br />
The following is a summary of the functions relating to the various controllers.<br />
Model S: static units with defrost by stopping the compressor<br />
• direct and reverse-cycle compressor control;<br />
• defrost by stopping the compressor either by time or temperature;<br />
• continuous cycle;<br />
• Temperature alarm monitoring.<br />
Model Y: static units with electric heater or hot gas defrost<br />
• direct and reverse-cycle compressor control;<br />
• electric heater or hot gas defrost, by time or by temperature;<br />
• continuous cycle;<br />
• temperature alarm monitoring.<br />
Model F: ventilated units with electric heater or hot gas defrost (versions 115 to<br />
230Vac)<br />
• direct and reverse-cycle compressor control;<br />
• electric heater or hot gas defrost, by time or by temperature;<br />
• evaporator fan control;<br />
• continuous cycle;<br />
• temperature alarm monitoring.<br />
Model C: model with 4 relays<br />
• Direct and Reverse-cycle compressor control;<br />
• electric heater or hot gas defrost, by time or by temperature;<br />
• evaporator fan control;<br />
• continuous cycle;<br />
• temperature alarm monitoring;<br />
• auxiliary output management.<br />
Functions enabled according to model:<br />
Function S Y F C<br />
compressor control X X X X<br />
defrost by stopping the compressor X X X X<br />
electric heater or hot gas defrost X X X X<br />
continuous cycle X X X X<br />
duty setting X X X X<br />
evaporator fans X X X X<br />
auxiliary output<br />
X<br />
Tab. 6.1.1<br />
The Model C controllers can be fi tted with a programmable auxiliary relay, as<br />
described below:<br />
• alarm output, normally open or closed;<br />
• auxiliary output;<br />
+030220140 - rel. 1.2 - del 06-06-2005
• uscita luce;<br />
• uscita secondo evaporatore;<br />
• uscita di comando per valvola di pump down;<br />
• uscita di regolazione per ventilatori di condensazione;<br />
• uscita secondo compressore ritardato;<br />
• uscita ausiliaria, con spegnimento in off;<br />
• uscita luce, con spegnimento in off;<br />
• nessuna funzione associata all’uscita;<br />
• uscita reverse in regolazione con zona neutra;<br />
• uscita gradino secondo compressore;<br />
• uscita gradino secondo compressore con rotazione.<br />
A seconda del modello, sono presenti due ingressi digitali (in alternativa a tre<br />
ingressi sonda), con le seguenti funzionalità:<br />
• allarme immediato;<br />
• allarme ritardato;<br />
• abilitazione sbrinamento;<br />
• start sbrinamento;<br />
• switch porta con blocco compressore e ventilatori e gestione della luce;<br />
• ON/OFF remoto;<br />
• switch tenda con variazione del set point e gestione della luce;<br />
• allarme di bassa pressione;<br />
• switch porta con blocco ventilatori e gestione della luce;<br />
• selezione Direct/Reverse;<br />
• sensore di luce e gestione luce;<br />
• switch porta con blocco compressore e ventole, senza gestione della luce;<br />
• switch porta con blocco ventole, senza gestione della luce.<br />
I controlli possono essere equipaggiati con un massimo di quattro sonde (di cui tre<br />
in alternativa agli ingressi digitali). Di seguito le funzionalità associate alle sonde:<br />
• sonda ambiente (utilizzata nel calcolo della sonda virtuale di regolazione);<br />
• sonda prodotto (eventualmente utilizzata nel calcolo della sonda virtuale di<br />
regolazione);<br />
• sonda di sbrinamento (evaporatore principale o secondario);<br />
• sonda di condensazione (eventualmente utilizzata nella regolazione dei<br />
ventilatori di condensazione).<br />
Altre funzionalità che arricchiscono la gamma dei controlli per refrigerazione sono:<br />
• Real time clock, per la gestione degli sbrinamenti in tempo reale;<br />
• Real time clock, per la gestione degli allarmi HACCP;<br />
• Real time clock , per l’attivazione/disattivazione dell’uscita ausiliaria aux;<br />
• Real time clock per la variazione automatica del set point.<br />
• interfaccia seriale (opzionale) per il collegamento al sistema di supervisione<br />
CAREL;<br />
• interfaccia (opzionale) per il collegamento di un display ripetitore;<br />
• possibilità di stampa report allarmi (funzione disponibile ma gestione da<br />
implementare).<br />
6.2 Test display e tastiera allo start up<br />
All’accensione è previsto il test del display e della tastiera.<br />
Fase Visualizzazione Tastiera Note<br />
Prima Display tutto spento<br />
per 2 secondi<br />
Con la pressione di PRG per 2<br />
secondi è possibile impostare<br />
i default<br />
Seconda Display tutto acceso Nessun effetto<br />
Terza<br />
Quarta<br />
per 2 secondi<br />
Tre segmenti accesi<br />
(‘---’) per 2 secondi<br />
Normale<br />
funzionamento<br />
Alla pressione di ogni tasto<br />
si accende un segmento<br />
dedicato<br />
Normale funzionamento<br />
In questa fase<br />
l’accensione di<br />
indica presenza<br />
del Rtc<br />
Tab. 6.2.1<br />
• light output;<br />
• second evaporator output;<br />
• control output for pump down valve;<br />
• control output for condenser fans;<br />
• second delayed compressor output,<br />
• auxiliary output, with deactivation set to OFF;<br />
• light output, with deactivation set to OFF;<br />
• no function associated with the output.<br />
• reverse output being controlled, with neutral zone.<br />
Depending on the model, the controllers are fi tted with two digital inputs (or with<br />
three probe inputs). The associated functions are the following:<br />
• immediate alarm;<br />
• delayed alarm;<br />
• enable defrost;<br />
• start defrost;<br />
• door switch with compressor and fan shutdown and light management;<br />
• remote ON/OFF;<br />
• curtain switch with set point variation and light management;<br />
• low pressure alarm;<br />
• door switch with fan shutdown and light management;<br />
• Direct/Reverse selection;<br />
• light sensor and light management;<br />
• door switch with compressor and fans off, without light management;<br />
• door switch with fans off, without light management.<br />
The controllers can be fi tted with a maximum of four probes (three of which as<br />
alternatives to the digital inputs). The following functions are associated with the<br />
probes:<br />
• ambient probe (used to calculate the virtual control probe);<br />
• product probe (if necessary, used for calculating the virtual control probe);<br />
• defrost probe (main or secondary evaporator);<br />
• condenser probe (used, if necessary, for condenser fans control).<br />
Other functions that enhance the range of the refrigeration controllers include:<br />
• Real Time Clock, for management of real time defrosts;<br />
• Real Time Clock for HACCP alarms management;<br />
• Real time clock for the activation/deactivation of the auxiliary output;<br />
• Real time clock for the automatic variation of the set point;<br />
• serial interface (optional) for connection to the CAREL supervisory system;<br />
• interface (optional) for connection of a repeater display;<br />
• facility for printing alarm reports (function available, management yet to be<br />
implemented).<br />
6.2 Testing the display and keypad on start-up<br />
When the controller is switched on, a special procedure tests the display and the<br />
keypad.<br />
Phase Display Keypad Note<br />
First<br />
Display completely<br />
OFF per 2 seconds<br />
Press PRG for 2<br />
seconds to set the<br />
default values<br />
Second Display completely No effect<br />
Third<br />
ON for 2 seconds<br />
Three segments<br />
(‘---’) on for 2<br />
seconds<br />
Pressing each button<br />
lights up a specifi c<br />
segment<br />
Fourth Normal operation Normal operation<br />
In this phase, the clock<br />
appears and indicates the<br />
presence of the RTC.<br />
Tab. 6.2.1<br />
20<br />
+030220140 - rel. 1.2 - del 06-06-2005
6.3 ON/OFF del controllo<br />
Lo stato di ON/OFF può essere comandato da più s<strong>org</strong>enti; supervisore e ingresso<br />
digitale.<br />
In questo modo di funzionamento, sul display verrà visualizzata la temperatura<br />
selezionata con il parametro /tI, alternata al messaggio off.<br />
L’ingresso digitale può essere utilizzato per variare lo stato di ON/OFF del controllo<br />
impostando il parametro A4/A5 al valore “6”.<br />
L’attivazione dello stato di ON/OFF dall’ingresso digitale è prioritaria rispetto a quella<br />
dal supervisore.<br />
Origine Priorità Note Azione<br />
Ingresso digitale Priorità 1 (superiore) Disabilita ON/OFF da Sul livello<br />
supervisore dell’ingresso digitale<br />
Supervisore Priorità 3 (inferiore) Sulla variazione del<br />
valore da supervisore<br />
Tab. 6.3.1<br />
ATTENZIONE: nel caso vi siano più ingressi digitali selezionati come ON/OFF (A4 e<br />
A5 = 6) lo stato di on sarà attivato quando gli ingressi digitali sono chiusi. Quando<br />
anche solo un contatto viene aperto la macchina passa in off.<br />
6.3 Switching the controller ON and OFF<br />
The unit can be switched ON/OFF from a number of sources; supervisor and digital<br />
input.<br />
In this operating mode, the display will be show the temperature selected for<br />
parameter /tI, alternating with the OFF message.<br />
The digital input can be used to switch the controller ON/OFF, setting parameter<br />
A4/A5 to “6”.<br />
Switching ON/OFF from digital input has priority over the same function from the<br />
supervisor.<br />
Origin Priority Note Action<br />
Digital input Priority 1 (higher) ON/OFF disabled<br />
from supervisor<br />
According to digital<br />
input level<br />
Supervisor Priority 3 (lower) Variation in value<br />
from the supervisor<br />
Tab. 6.3.1<br />
IMPORTANT: if there is more than one digital input selected as the ON/OFF function<br />
(A4 and A5 = 6), the ON status will be activated when all the digital inputs are<br />
closed. If event one contact is open, the unit is switched OFF.<br />
Nello stato di off risultano disabilitati:<br />
• regolazione compressore (spento e chiusa la valvola di pump down);<br />
• regolazione aux (H1= 11) con banda morta;<br />
• regolazione secondo gradino compressore con e senza rotazione (H1= 12, 13);<br />
• sbrinamento (ciclico e <strong>manual</strong>e);<br />
• regolazione ventilatori;<br />
• regolazione ventilatori in bassa umidità relativa (se abilitata);<br />
• ciclo continuo;<br />
• regolazione ventole di condensazione (se abilitate);<br />
• gli allarmi di seguito elencati:<br />
- bassa temperatura (LO, allarme resettato e monitoraggio inizializzato);<br />
- alta temperatura (HI, allarme resettato e monitoraggio inizializzato);<br />
- allarme immediato da contatto esterno (IA, allarme resettato e monitoraggio<br />
inizializzato);<br />
- allarme ritardato da contatto esterno (dA, allarme resettato e monitoraggio<br />
inizializzato);<br />
- sbrinamento terminato per timeout (Ed1 ed Ed2, allarme resettato);<br />
- allarme pump down terminato per tempo massimo (Pd, allarme resettato);<br />
- bassa pressione da contatto esterno (LP, allarme resettato e monitoraggio<br />
inizializzato);<br />
- autostart in pump down (AtS, allarme resettato e non visualizzato);<br />
- pre allarme alta temperatura condensatore (cht, allarme resettato e monitoraggio<br />
inizializzato);<br />
- allarme alta temperatura condensatore (CHt, allarme resettato e<br />
monitoraggio inizializzato);<br />
- allarme porta aperta da troppo tempo (dor, allarme resettato);<br />
- allarme antifreeze (AFr, allarme resettato);<br />
- allarme HACCP di tipo HA (allarme resettato e monitoraggio inizializzato);<br />
- allarme HACCP di tipo HF (allarme resettato e monitoraggio inizializzato<br />
• buzzer (spento) e relè di allarme (stato di non allarme);<br />
• controllo HACCP;<br />
• generazione delle richieste di sbrinamento:<br />
- in base alle fasce orarie programmate;<br />
- in base al running time del compressore (se abilitato);<br />
- da ingresso digitale (se abilitato);<br />
- da tastiera e da supervisore; da tastiera e da supervisore;<br />
• abilitazione sbrinamento da ingresso digitale (se abilitato);<br />
• Direct/reverse da ingresso digitale (se abilitato).<br />
Risultano invece abilitati:<br />
• modifi ca e visualizzazione dei parametri frequenti, di confi gurazione e del set point;<br />
• accensione/spegnimento relè ausiliario 1 (impostato come luce o aux);<br />
• selezione sonda da visualizzare (solo nel modello M);<br />
• autostart del compressore in pump down (se abilitato);<br />
• switch porta (con spegnimento compressore e ventilatori) limitatamente alla<br />
gestione della luce;<br />
• ON/OFF remoto;<br />
• switch tenda, limitatamente alla gestione della luce;<br />
• switch porta (con spegnimento dei soli ventilatori) limitatamente alla gestione<br />
della luce;<br />
• gestione del sensore di luce;<br />
• aggiornamento del timer “dI” intervallo di sbrinamento;<br />
• gli allarmi di seguito elencati:<br />
- errore sonda regolazione rE;<br />
- errore sonda 1 (E0);<br />
- errore sonda 2 (E1);<br />
21<br />
In OFF status, the following are disabled:<br />
• compressor control (pump down valve OFF and shut).<br />
• defrost (cyclical and <strong>manual</strong>);<br />
• fan control;<br />
• fan control at low relative humidity (if enabled);<br />
• continuous cycle;<br />
• condenser fan control (if enabled);<br />
• the alarms listed below:<br />
- low temperature (LO, alarm reset, and monitoring initialised);<br />
- high temperature (HI, alarm reset, and monitoring initialised);<br />
- mmediate alarm from external contact (IA, alarm reset and monitoring<br />
initialised);<br />
- delayed alarm from external contact (dA, alarm reset and monitoring<br />
initialised);<br />
- defrost fi nished due to timeout (Ed1 and Ed2, alarm reset);<br />
- Pump-Down alarm fi nished due to maximum time (Pd, alarm reset);<br />
- low pressure from external contact (LP, alarm reset and monitoring initialised);<br />
- autostart in Pump-Down (AtS, alarm reset and not displayed);<br />
- pre-alarm: condenser high temperature (cht, alarm reset, and monitoring<br />
initialised);<br />
- condenser high temperature alarm (Cht, alarm reset, and monitoring<br />
initialised);<br />
- alarm: door open for too long (door, alarm reset);<br />
- HA type HACCP alarm (alarm reset, and monitoring initialised);<br />
- HF type HACCP alarm (alarm reset, and monitoring initialised);<br />
• buzzer (OFF) and alarm relay (non-alarm status);<br />
• HACCP control;<br />
• generation of defrost requests:<br />
- according to programmed time bands;<br />
- according to compressor running time (if enabled);<br />
- from digital input (if enabled);<br />
- from keypad and supervisor;<br />
• defrost enabled from digital input (if enabled);<br />
• direct/Reverse from digital input (if enabled).<br />
While the following are enabled:<br />
• modifi cation and display of frequent and confi guration parameters and the<br />
set point;<br />
• ON/OFF of auxiliary relay 1 (set as LIGHT or AUX);<br />
• selection of the probe displayed (model M only);<br />
• compressor autostart in Pump-Down (if enabled);<br />
• door switch (with fan and compressor shutdown) limited to light<br />
management;<br />
• remote ON/OFF;<br />
• curtain switch, limited to light management;<br />
• door switch (with fan shutdown only) limited to light management;<br />
• management of the light sensor;<br />
• updating of the defrost interval timer “dI”;<br />
• the alarms listed below:<br />
- control probe rE error;<br />
- probe 1 error (E0);<br />
- probe 2 error (E1);<br />
+030220140 - rel. 1.2 - del 06-06-2005
- errore sonda 3 (E2);<br />
- errore sonda 4 (E3);<br />
- errore sonda 5 (E4);<br />
- allarme orologio (Etc);<br />
- allarme e_prom parametri macchina (EE);<br />
- allarme e_prom parametri di funzionamento (EF);<br />
• accensione spegnimento luce o aux in base alle fasce orarie programmate;<br />
• modifi ca del setpoint in base alle fasce orarie programmate;<br />
Nota: Nello stato di off viene sempre aggiornato l’intervallo di sbrinamento dI, in<br />
modo da mantenere la ciclicità di detto intervallo. Se un intervallo di sbrinamento<br />
scade durante lo stato di off questo evento viene memorizzato e, all’attivazione dello<br />
stato di on, viene generata una richiesta.<br />
Il passaggio da on ad off avviene con le seguenti modalità:<br />
• vengono mantenuti i tempi di protezione del compressore;<br />
• viene eseguito il pump down (se abilitato);<br />
• lo sbrinamento viene forzatamente terminato e non sarà ripreso nel passaggio ad<br />
on;<br />
• il ciclo continuo viene forzatamente terminato e non sarà ripreso nel passaggio ad<br />
on.<br />
Il passaggio da off a on avviene con le seguenti modalità:<br />
• vengono mantenuti i tempi di protezione del compressore;<br />
• non viene eseguito lo sbrinamento all’accensione (se abilitato), esso infatti si<br />
riferisce al power-up;<br />
• non viene impostato il ritardo compressore e ventilatori all’accensione.<br />
- probe 3 error (E2);<br />
- probe 4 error (E3);<br />
- probe 5 error (E4);<br />
- clock alarm (Etc);<br />
- e_prom alarm, unit parameters (EE);<br />
- e_prom alarm, operating parameters (EF);<br />
• light or aux ON/OFF based on the set time bands;<br />
• modifi cation of the set point based on the set time bands;<br />
Note: In the OFF status, the defrost interval ‘dI’ is always updated, to maintain<br />
the regularity of the interval. If a defrost interval expires during the OFF status,<br />
this event is saved and, when controller is switched back ON, a defrost request is<br />
generated.<br />
The controller switches from ON to OFF with the following sequence:<br />
• compressor protection times are observed;<br />
• the pump-down procedure is performed (if enabled);<br />
• the defrost is forced OFF and will not resume when switched back ON;<br />
• the continuous cycle is forced OFF and will not resume when switched back ON.<br />
The controller switches from OFF to ON with the following sequence:<br />
• compressor protection times are observed;<br />
• the defrost on start-up (if enabled) is not performed, as this in fact refers to<br />
power-up;<br />
• the compressor and fan delays on start-up are not set.<br />
6.4 Gestione aux<br />
L’ uscita aux può essere comandata da più s<strong>org</strong>enti: tasto, supervisore, ingresso<br />
digitale e fascia oraria.<br />
L’attivazione e disattivazione dell’aux avviene ad evento:<br />
6.4 Aux management<br />
The auxiliary output can be controlled by a number of sources: button, supervisor,<br />
digital input, and time band.<br />
Aux is switched on and off according to the following events:<br />
Aux<br />
Tasto<br />
Supervisore<br />
Ingresso digitale<br />
Fascia oraria<br />
Azione<br />
Sulla pressione del tasto<br />
Sulla variazione del valore da supervisore<br />
Sul fronte del contatto (apertura/chiusura)<br />
In base al giorno, ora, minuti di accensione/spegnimento<br />
Tab. 6.4.1<br />
Aux;<br />
Button<br />
Supervisor<br />
Digital input<br />
Time band<br />
Action<br />
Pressing the button<br />
Variation in value from the supervisor<br />
Change in the status of the contact (opening/closing)<br />
According to day, hour, minutes for switching ON/OFF.<br />
Tab. 6.4.1<br />
Quindi con ingressi digitali stabili sarà sempre possibile da tastiera o da supervisore<br />
attivare/disattivare l’uscita aux.<br />
ATTENZIONE: gli eventi temporizzati di accensione e/o spegnimento (parametri tON<br />
e tOFF) di luce o aux (in funzione del parametro H8) sono attivi anche nello stato di<br />
off.<br />
Nota: la funzione anti-sweat heater, all’accensione del controllo o al passaggio da off<br />
a on, tiene l’uscita ausiliaria spenta fi nchè la temperatura di regolazione non risulta<br />
inferiore al valore impostato. All’evento l’uscita ausiliaria si accende.<br />
Therefore, if the digital inputs are stable, the aux output can always be activated<br />
and de-activated from the keypad or the supervisor.<br />
IMPORTANT: the timed switch ON and/or OFF events (parameters tON and tOFF)<br />
of light or aux (according to parameter H8) are always active in OFF status too.<br />
Nota: la funzione anti-sweat heater, all accensione del controllo o al passaggio da<br />
off a on, tiene l uscita ausiliaria spenta fi nchè la temperatura di regolazione non<br />
risulta inferiore al valore impostato. All evento l uscita ausiliaria si accende.<br />
6.5 Gestione luce<br />
La luce può essere comandata da più s<strong>org</strong>enti: tasto, supervisore, Switch porta e<br />
Switch tenda.<br />
L’attivazione e disattivazione della luce avviene ad evento:<br />
Luce<br />
Tasto<br />
Supervisore<br />
Switch Porta<br />
Switch Tenda<br />
Sensore di luce<br />
Azione<br />
Sulla pressione del tasto<br />
Sulla variazione del valore da supervisore<br />
Sul fronte del contatto (apertura/chiusura)<br />
Sul fronte del contatto (apertura/chiusura)<br />
Sulla rilevazione della luce o del buio<br />
Quindi con ingressi digitali stabili (selezionati come porta o switch tenda) sarà<br />
sempre possibile da tastiera o da supervisore accendere e spegnere la luce.<br />
Tab. 6.5.1<br />
6.5 Light management<br />
Light can be controlled by a number of sources: Key, Supervisor, Door switch and<br />
Curtain switch.<br />
The light is switched on and off in the following events:<br />
Light<br />
Key<br />
Supervisor<br />
Door switch<br />
Curtain switch<br />
Light sensor<br />
Action<br />
Pressing the button<br />
Variation in value from the supervisor<br />
Change in the status of the contact (opening/closing)<br />
Change in the status of the contact (opening/closing)<br />
On detecting light or darkness<br />
Tab. 6.5.1<br />
When the digital inputs (selected as door or curtain switches) are stable, the light<br />
can always be switched on or off from the keypad or the supervisor.<br />
ATTENZIONE: per lo switch porta sono previsti due diversi algoritmi di<br />
accensione e spegnimento della luce:<br />
• non modifi ca lo stato della luce ma agisce solo su compressore e ventole;<br />
• eventi temporizzati di accensione e/o spegnimento di luce o aux (in funzione del<br />
parametro H8) sono attivi anche nello stato di off.<br />
Nota: la funzione anti-sweat heater, all’accensione del controllo o al passaggio da<br />
off a on, tiene l’uscita luce spenta fi nchè la temperatura di regolazione non risulta<br />
inferiore al valore impostato. All’evento l’uscita luce si accende.<br />
IMPORTANT: the door switch features two different algorithms for switching<br />
the light ON/OFF.<br />
• the status of the light is not affected, and acts only on the compressor and fans;<br />
• timed light or aux ON/OFF events (depending on parameter H8) also active<br />
when the unit is off.<br />
Note: the anti-sweat heater function, when the control is powered up or switched<br />
on, keeps the light output off until the control temperature is below the set value.<br />
the light output is activated when the event occurs.<br />
22<br />
+030220140 - rel. 1.2 - del 06-06-2005
6.6 Sbrinamento<br />
Il parametro dC stabilisce l’unità di misura delle tempistiche fi ssate dai parametri dI<br />
(intervallo di sbrinamento) e dP1, dP2 (durata massima dello sbrinamento).<br />
Se il relè ausiliario è selezionato come uscita sbrinamento evaporatore ausiliario<br />
(H1), lo sbrinamento viene eseguito contemporaneamente sui due evaporatori<br />
presenti.<br />
Il parametro d/1 visualizza la sonda di sbrinamento prevista per l’evaporatore<br />
principale (la prima sonda assegnata come sonda di sbrinamento), mentre d/2<br />
visualizza la sonda di sbrinamento prevista per l’evaporatore secondario (la seconda<br />
sonda assegnata come sonda di sbrinamento).<br />
Nel caso non vi siano sonde assegnate allo sbrinamento questo verrà terminato per<br />
timeout dt1 e dt2.<br />
6.6 Defrost<br />
The parameter ‘dC’ establishes the measurement unit for the times set by the<br />
parameters dI (defrost interval) and dP1, dP2 (maximum defrost duration).<br />
If the auxiliary relay is selected as the auxiliary evaporator defrost output (H1), the<br />
defrost is performed at the same time on both evaporators.<br />
The parameter d/1 displays the defrost probe set for the main evaporator (the fi rst<br />
probe assigned as a defrost probe); while parameter d/2 displays the defrost probe<br />
set for the secondary evaporator (the second probe assigned as a defrost probe).<br />
If no probes have been assigned to the defrost function, the defrost will end by<br />
timeout, after the periods dt1 and dt2.<br />
6.6.1 Eventi di sbrinamento<br />
Gli eventi che attivano lo sbrinamento sono:<br />
6.6.1 Defrost events<br />
The following events activate the defrost function:<br />
Evento Esecuzione Condizione<br />
Intervallo tra gli sbrinamenti dI esaurito Condizionata dall’abilitazione Alla scadenza dell’intervallo<br />
Scadenza trigger Rtc Condizionata dall’abilitazione -------<br />
Running time compressore Condizionata dall’abilitazione All’inizio dello sbrinamento<br />
Intervallo tra gli sbrinamenti dI esaurito con algoritmo di skip Condizionata dall’abilitazione<br />
Alla scadenza dell’intervallo<br />
sbrinamento<br />
All’accensione Condizionata dall’abilitazione All’accensione + d5<br />
Ingresso digitale Condizionata dall’abilitazione All’inizio dello sbrinamento<br />
Supervisore Sempre --------<br />
Tastiera Sempre --------<br />
Tab. 6.6.1.1<br />
Event Implementation Condition<br />
Interval between defrosts dI expired Depending on enabling status At the expiry of the interval<br />
Expiry of RTC trigger Depending on enabling status -------<br />
Compressor running time Depending on enabling status When the defrost starts<br />
Interval between defrosts dI expired with skip defrost algorithm Depending on enabling status At the expiry of the interval<br />
At start-up Depending on enabling status At start-up + d5<br />
Digital input Depending on enabling status When the defrost starts<br />
Supervisor Always --------<br />
Keypad Always --------<br />
Tab. 6.6.1.1<br />
Esecuzione dello sbrinamento condizionata dall’abilitazione:<br />
Se un ingresso digitale è confi gurato come abilitazione dello sbrinamento, esso viene<br />
eseguito se l’ingresso stesso è nello stato di abilitazione, in caso contrario rimane<br />
pendente.<br />
ATTENZIONE: lo sbrinamento viene sempre eseguito anche in presenza di una<br />
richiesta da ingresso digitale esterno ritardata o in presenza di un ingresso di<br />
abilitazione sbrinamento (nello stato di non abilitato o nello stato di ritardo<br />
dall’abilitazione).<br />
AVVERTENZA: se il parametro r3 vale 1 (Direct) o 2 (Reverse) lo sbrinamento non<br />
viene mai eseguito.<br />
Implementation of defrost depending on enabling status:<br />
If a digital input is confi gured to enable the defrost, the defrost is performed when<br />
such input is in the enabling status, otherwise it stays pending.<br />
IMPORTANT: the defrost started from the keypad or by the supervisor is always<br />
performed, even when there is a delayed defrost request from external digital input<br />
or if there is a defrost enabling input (in non-enabled or delayed status).<br />
WARNING: if parameter r3 is set to 1 (Direct) or 2 (Reverse), defrost is never<br />
performed.<br />
6.6.2 Stato di sbrinamento richiesto<br />
Si resta in questo stato quando si è verifi cato uno degli eventi attivatori dello<br />
sbrinamento ma non è possibile attivarlo, per cui esso rimarrà pendente per i<br />
seguenti motivi:<br />
• Ritardo dell’ accensione del compressore e dei ventilatori nel punto c0 in quanto<br />
ritardano l’attivazione del compressore.<br />
• Tempi di protezione del compressore (c1,c2,c3), in quanto ne ritardano l’attivazione<br />
del compressore.<br />
• Allarme di bassa pressione (solo con sbrinamento a gas caldo), in quanto ritardano<br />
l’attivazione del compressore.<br />
• Esecuzione del ciclo continuo.<br />
• Procedura di pump down in esecuzione, in quanto ritardano l’attivazione del<br />
compressore.<br />
• Ritardo dello sbrinamento all’accensione (d5).<br />
• Ritardo dello sbrinamento da ingresso digitale confi gurato come start sbrinamento<br />
o abilitazione sbrinamento (d5).<br />
• Abilitazione sbrinamento (A4, A5).<br />
• Allarme immediato da ingresso digitale esterno (A4, A5), ), in quanto ritardano<br />
l’attivazione del compressore.<br />
• Allarme ritardato del tempo A7 da ingresso digitale esterno (A4, A5), in quanto<br />
ritardano l attivazione del compressore.<br />
• Allarme alta temperatura condensatore (solo con sbrinamento a gas caldo), in<br />
quanto ritardano l’attivazione del compressore.<br />
• Apertura porta (solo con sbrinamento a gas caldo se il compressore è bloccato<br />
dall’algoritmo di gestione della porta).<br />
23<br />
6.6.2 Defrost request status<br />
This status exists when one of the events that activates the defrost is present, but<br />
defrost cannot be started and, therefore, is put on hold for the following reasons:<br />
• Compressor and fans start-up delay (c0), as these delay the activation of the<br />
compressor;<br />
• Compressor protection times (c1, c2, c3), as these delay the activation of the<br />
compressor;<br />
• Low pressure alarm (only with hot gas defrost), as this delays the activation of the<br />
compressor;<br />
• Continuous cycle running;<br />
• Pump down procedure running, because this delays the activation of the<br />
compressor;<br />
• Defrost delay at start-up (d5);<br />
• Defrost delay from digital input confi gured as defrost start or enable (d5);<br />
• Enable defrost (A4, A5, A9);<br />
• Immediate alarm from external digital input (A4, A5, A9) because it delays the<br />
activation of the compressor;<br />
• Immediate alarm of time 7A from external digital input (A4, A5, A9) because it<br />
delays the activation of the compressor;<br />
• High condenser temperature alarm (only with hot gas defrost), as this delays the<br />
activation of the compressor;<br />
• Opening the door (only with hot gas defrost if the compressor is subject to the<br />
door management algorithm).<br />
+030220140 - rel. 1.2 - del 06-06-2005
6.6.3 Ingresso nello sbrinamento<br />
Lo sbrinamento viene eseguito a resistenza o a gas caldo in funzione del parametro<br />
d0.<br />
Se selezionato in temperatura esso viene eseguito solo se la temperatura della sonda<br />
di evaporazione risulta inferiore al valore di fi ne sbrinamento (dP1 e dP2) o è in<br />
errore. Ciò è valido anche nel caso di due evaporatori.<br />
Nello sbrinamento a resistenza:<br />
• si spegne il compressore (eseguendo il pump down se abilitato);<br />
• si attende il tempo d3;<br />
• si attivano i relè di sbrinamento evaporatore principale e secondario per attivare le<br />
resistenze;<br />
Nello sbrinamento a gas caldo:<br />
• si accende il compressore;<br />
• si attende il tempo d3;<br />
• si attivano i relè dello sbrinamento evaporatore principale e secondario per<br />
attivare la valvola di gas caldo;<br />
6.6.4 Esecuzione dello sbrinamento<br />
Durante lo sbrinamento la visualizzazione è controllata dal parametro d6. Se durante<br />
tale procedura viene rilevata, ad esempio, un’apertura della porta da contatto digitale<br />
esterno, il compressore viene spento (eseguendo il pump down se abilitato).<br />
Alla chiusura della porta il compressore riprende lo stato previsto per lo sbrinamento<br />
selezionato mentre i ventilatori sono gestiti dal parametro F3.<br />
Se selezionato lo sbrinamento termostatato, le soglie di temperatura permettono di<br />
spegnere il relativo relè di defrost quando la temperatura supera le soglie (‘dt1’,’dt2’)<br />
e di accendere il relativo relè di sbrinamento quando la temperatura è inferiore alle<br />
soglie (‘dt1’,’dt2’) meno l’isteresi fi ssa di 1°C.<br />
Nota 1: se è prevista la sonda di sbrinamento del secondo evaporatore, ma non<br />
è prevista l’uscita di sbrinamento del secondo evaporatore, il defrost relativo viene<br />
eseguito utilizzando l’uscita per il primo evaporatore.<br />
In questo caso, se selezionato lo sbinamento termostatato, l’unico relè di<br />
sbrinamento è spento se ambedue le sonde sugli evaporatori hanno superato le<br />
rispettive soglie (‘dt1’,’dt2’).<br />
Nota 2: se non è prevista la sonda di sbrinamento del secondo evaporatore, ma<br />
è prevista l’uscita di sbrinamento del secondo evaporatore, il defrost relativo viene<br />
eseguito a tempo o considerando la temperatura del primo evaporatore.<br />
6.6.5 Fine dello sbrinamento<br />
Lo sbrinamento termina in temperatura (dt1,dt2) o a tempo (dP1,dP2) in<br />
funzione del parametro d0.<br />
Quello termostatato termina sempre a tempo (‘dP1’,’dP2’).<br />
Se è selezionato lo sbrinamento in temperatura esso può terminare per timeout<br />
(dP1,dP2) ed, in tal caso, in funzione del parametro A8, viene visualizzata la<br />
segnalazione Ed1 o Ed2.<br />
Nel caso di errore sonda selezionata per lo sbrinamento (evaporatore principale o<br />
ausiliario), esso viene sempre eseguito a tempo, con segnalazione del timeout se<br />
abilitata (Ed1 o Ed2).<br />
Nel caso di doppio evaporatore, lo sbrinamento termina quando ambedue gli evaporatori<br />
hanno raggiunto la condizione di fi ne sbrinamento. Nel caso un evaporatore<br />
fi nisca lo sbrinamento (a tempo o in temperatura) prima dell’altro, il corrispondente<br />
relè di sbrinamento viene diseccitato, mentre il compressore rimane nello stato<br />
richiesto dallo sbrinamento.<br />
Lo sbrinamento viene terminato prematuramente da:<br />
• passaggio dalla modalità di funzionamento Direct con sbrinamento a Reverse<br />
(caldo), da parametro (r3) o da ingresso digitale (A4,A5);<br />
• fi ne abilitazione da contatto digitale esterno (mantiene sbrinamento richiesto);<br />
• spegnimento dello strumento (off) da tastiera, supervisore ed ingresso digitale;<br />
• fi ne dello sbrinamento da supervisore e da tastiera.<br />
Se lo sbrinamento viene terminato prematuramente, non vengono eseguiti il gocciolamento<br />
e il fermo ventilatori in post gocciolamento, come se questi tempi fossero<br />
uguali a zero (0).<br />
Caso particolare: Se il controllo sta eseguendo uno sbrinamento a gas caldo ed<br />
interviene un allarme di bassa pressione, il compressore verrà spento per effetto<br />
dell’allarme mentre lo sbrinamento terminerà probabilmente per timeout.<br />
Alla fi ne dello sbrinamento:<br />
• viene spento il compressore (gas caldo) ed eseguito il pump down (se<br />
abilitato) se previsto un periodo di gocciolamento (dd);<br />
• vengono spenti i ventilatori, se previsto un tempo di gocciolamento (dd) o di<br />
fermo ventole in post gocciolamento (Fd);<br />
24<br />
6.6.3 Starting the defrost<br />
The defrost is performed by electric heater or hot gas, according to the value of<br />
parameter d0.<br />
If defrost by temperature has been selected, the defrost is performed only if the<br />
evaporator probe reading is less than the end defrost temperatures (dP1 and dP2),<br />
or if there is a probe error. This is also true in the case of two evaporators.<br />
In the electric heater defrost:<br />
• the compressor stops (Pump-Down is run, if enabled);<br />
• the time d3 elapses;<br />
• the defrost relays for the main and secondary evaporators are activated, to turn<br />
the heaters on.<br />
In hot gas defrost:<br />
• the compressor starts;<br />
• the time d3 elapses;<br />
• the defrost relays for the main and secondary evaporators are activated, to open<br />
the hot gas valve.<br />
6.6.4 Defrost in progress<br />
During the defrost procedure, the display is controlled according to the setting<br />
of parameter d6. If during this procedure, the opening of the door is detected by<br />
the external digital contact, the compressor is stopped (running the Pump-Down<br />
procedure, if enabled).<br />
When the door closes, the compressor resumes the status envisaged for the defrost<br />
procedure, while the status of the fans is determined by setting of parameter F3. If<br />
defrost by temperature is selected, the temperature thresholds are used to<br />
deactivate the corresponding defrost relay when the temperature exceeds the<br />
thresholds (dt1, dt2 ) and activate the corresponding defrost relay when the<br />
temperature is below the thresholds (dt1, dt2 ) minus the fi xed hysteresis of 1°C.<br />
Note 1: if the defrost probe is specifi ed for the second evaporator, but the second<br />
evaporator defrost output is not used, the defrost on the second evaporator is<br />
performed using the output for the fi rst evaporator.<br />
In this case, if defrost by temperature is selected, the defrost relay is off if both<br />
evaporators probes have exceeded the corresponding thresholds (‘dt1’,’dt2’).<br />
Note 2: if the defrost probe is not specifi ed for the second evaporator, but the<br />
second evaporator defrost output is used, the defrost on the second evaporator is<br />
performed by time or considering the temperature of the fi rst evaporator.<br />
6.6.5 End defrost<br />
The defrost ends by temperature (dt1, dt2) or by time (dP1, dP2) according to the<br />
setting of parameter d0.<br />
The defrost by temperature always ends after the set time (‘dP1’, ‘dP2’).<br />
If defrost by temperature is selected, it may also end by timeout (dP1’, dP2’) and, in<br />
this case, according to the setting of parameter A8, signal Ed1 or Ed2 is displayed.<br />
In the case of an error in the probe selected for the defrost (main or auxiliary<br />
evaporator), it is always performed by time, with the timeout signal if enabled (Ed1<br />
or Ed2).<br />
In the case of two evaporators, the defrost ends when both the evaporators have<br />
reached the end defrost condition. If one evaporator fi nishes the defrost (by time or<br />
by temperature) before the other, the corresponding defrost relay is de-energised,<br />
while the compressor remains in the status required by the defrost.<br />
The defrost is ended early in the following situations:<br />
• changeover from Direct operating mode with defrost to Reverse-cycle mode<br />
(heating), by parameter (r3) or the digital input (A4, A5);<br />
• end of enabling signal from external digital contact (the defrost request remains<br />
pending);<br />
• instrument switched OFF from the keypad, supervisor and digital input;<br />
• end defrost from supervisor and keypad.<br />
If the defrost is completed early, the dripping and post-dripping (with the fans OFF)<br />
phases are not performed, as if the times were 0.<br />
Special case: if the controller is running a hot gas defrost and a low pressure alarm<br />
occurs, the compressor will stop due to the low pressure alarm, and the defrost will<br />
probably end by timeout.<br />
At the end of the defrost:<br />
• the compressor is stopped (hot gas) and Pump-Down is run (if enabled), if a<br />
dripping time is set (dd);<br />
• the fans are stopped, if a dripping time (dd) or fans off for post-dripping (Fd) is<br />
set;<br />
+030220140 - rel. 1.2 - del 06-06-2005
• viene disattivato il relè di sbrinamento;<br />
• si attiva il tempo di esclusione allarmi dopo sbrinamento (d8);<br />
• vengono resettate eventuali richieste di sbrinamento pendenti fi no a questo<br />
momento.<br />
Se il tempo di gocciolamento è a zero il compressore rimane nello stato precedente<br />
e viene attivata direttamente la regolazione.<br />
Se il tempo di gocciolamento e di fermo ventilatori in post gocciolamento sono a<br />
zero il compressore e i ventilatori rimangono nello stato precedente e viene attivata<br />
la normale regolazione.<br />
6.6.6 Fine dello sbrinamento canalizzato:<br />
Lo sbrinamento canalizzato si ha:<br />
- nel master ‘In’=1 a seguito di ogni evento in grado di attivare lo sbrinamento,<br />
- negli slave ‘In’=2-6 a seguito di uno sbrinamento da supervisore.<br />
Nel caso di sbrinamento canalizzato, ferme restando le condizioni di fi ne defrost di<br />
cui al punto precedente, prima di passare in gocciolamento master e slave attendono<br />
il consenso dal sincronizzatore di rete.<br />
In ogni caso lo sbrinamento sarà teminato per timeout.<br />
6.6.7 Gocciolamento<br />
Il tempo di gocciolamento è fi ssato dal parametro dd e in tale stato il compressore e<br />
il ventilatore sono spenti.<br />
Al termine del gocciolamento si passa in fermo ventilatori in post gocciolamento<br />
(Fd):<br />
- il compressore riprende il normale funzionamento;<br />
- i ventilatori rimangono spenti.<br />
Se il tempo di fermo ventilatori in post gocciolamento è zero si passa direttamente<br />
alla normale regolazione.<br />
6.6.8 Fermo ventilatori in post gocciolamento<br />
Il tempo di fermo ventilatori in post gocciolamento è fi ssato dal parametro Fd ed al<br />
termine riprende la normale regolazione.<br />
6.6.9 Note sullo sbrinamento<br />
• Se selezionato lo sbrinamento con Rtc il parametro dI non è operativo.<br />
Viene comunque aggiornato il timer dI ed il parametro torna ad essere<br />
operativo solo in caso di allarme Rtc.<br />
Si consiglia, quindi, di impostare dI per motivi di sicurezza.<br />
• Il timer utilizzato per determinare l’intervallo di sbrinamento, caricato al suo<br />
esaurimento con il parametro dI, viene aggiornato ciclicamente alla sua scadenza<br />
permettendo di avere sbrinamenti ciclici. L’aggiornamento del timer avviene anche<br />
con macchina nello stato di off. Se il timer dI scade durante il periodo di off,<br />
all’accensione viene eseguito uno sbrinamento. Nel caso venga eseguito uno<br />
sbrinamento da “Rtc”<strong>manual</strong>e, da tastiera o da supervisore, il timer legato a dI non<br />
viene reimpostato all’inizio dello sbrinamento. Può capitare che, alla fi ne dello<br />
sbrinamento, scada il timer relativo a dI e vi sia un altro sbrinamento. Nel caso<br />
venga eseguito uno sbrinamento da ingresso digitale, con algoritmo running time<br />
del compressore o da supervisore in controlli Slave, il timer legato a “dI” viene<br />
reimpostato nel momento della generazione della richiesta di sbrinamento. In<br />
questo modo l’intervallo di sbrinamento rappresenta un timeout nella generazione<br />
delle richieste di sbrinamento (che entra in funzione ad esempio quando il timer<br />
esterno non funziona correttamente). Se selezionato lo sbrinamento all’accensione<br />
(d4) e impostato un ritardo di sbrinamento all’accensione (d5) il timer relativo a<br />
dI deve essere impostato alla fi ne del ritardo di sbrinamento all’accensione. Così,<br />
tra macchine programmate nello stesso modo, con stesso valore di dI e diversi<br />
valori di d5, per distribuire nel tempo lo sbrinamento all’accensione, sarà possibile<br />
mantenere lo sfasamento temporale degli sbrinamenti anche nei successivi eventi.<br />
Nota: nel caso sia selezionata la regolazione con 2 gradini per il compressore (con o<br />
senza rotazione, H1 = 12 o 13) lo sbrinamento a gas caldo prevede l’accensione dei<br />
2 gradini, quello a resistenza lo spegnimento.<br />
• the defrost relay is disabled;<br />
• the alarm bypass time after defrost is activated (d8);<br />
• any pending defrost requests are reset.<br />
If the dripping time is set to zero, the compressor remains in the previous status,<br />
and normal control resumes directly.<br />
If the dripping and post-dripping times are set to zero, the compressor and the fans<br />
remain in the previous status, and normal control resumes.<br />
6.6.6 End multiplexed defrost<br />
The multiplexed defrost occurs:<br />
- on the master ‘In’=1 following each event able to activate the defrost,<br />
- on the slaves ‘In’=2 to 6 following a defrost signal from the supervisor.<br />
In the case of multiplexed defrosts, the end defrost conditions described in the<br />
previous point are still valid, however before going to dripping the master and slave<br />
wait for the signal from the network synchronizer.<br />
In any case, the defrost will end by timeout.<br />
6.6.7 Dripping<br />
Dripping time is set by parameter dd, when the compressor is OFF and the fans are<br />
OFF.<br />
At the end of dripping time, the post-dripping phase starts with the fans OFF (Fd):<br />
- the compressor restarts normal operation;<br />
- the fans remain off.<br />
If the post-dripping time with fans OFF is set to zero, normal control is resumed<br />
directly.<br />
6.6.8 Post-dripping (fans OFF)<br />
The post-dripping time with fans OFF is set by parameter Fd. At the end of the<br />
post-dripping time with the fans OFF, normal control resumes.<br />
6.6.9 Notes on the defrost function<br />
• If defrost with RTC is selected, the parameter dI has no effect on the days<br />
when defrost events are set.<br />
In any case, the dI timer is updated and the parameter becomes valid on all days<br />
only in the event of RTC alarms. The parameter dI should therefore be set for<br />
safety reasons.<br />
• The timer used to determine the defrost interval dI is updated cyclically when<br />
reaching the end of the interval. thus enabling cyclic defrosts. The timer is also<br />
updated when the unit is OFF. If the timer dI expires when the unit is OFF, a<br />
defrost is performed when the unit is started. If an “RTC” or <strong>manual</strong> defrost is run<br />
from the keypad or the supervisor, the timer linked to dI is not reset at the start of<br />
the defrost. Consequently, at the end of defrost, the dI timer may expire, and<br />
another defrost may be performed. If a defrost is run from the digital input, with<br />
the compressor running time algorithm, or from the supervisor in Slave<br />
controllers, the timer dI is reset when the defrost request is generated. In this way,<br />
the defrost interval is a timeout for the generation of the defrost requests (used,<br />
for example, when the external timer is not working correctly). If defrost on<br />
start-up (d4) has been selected, and a defrost on start-up delay (d5) has been<br />
set, the timer dI must be set to the end of the defrost delay on start-up. For units<br />
programmed in the same way, and with the same value of ‘dI’ and different<br />
values of ‘d5’, this enables the defrosts at start-up to be distributed through time,<br />
and the time staggering of the defrosts to be maintained for the subsequent<br />
events too.<br />
Note: if control with 2 compressor steps is selected (with or without rotation, H1 =<br />
12 or 13) the hot gas defrost requires the activation of the 2 steps, while the heater<br />
defrost deactivates the steps.<br />
Funzionalità attiva<br />
Normale regolazione direct o reverse<br />
off remoto, da supervisore o da tastiera<br />
Defrost<br />
Ciclo continuo<br />
Monitoraggio allarmi di temperatura<br />
Regolazione ventilatori di evaporazione<br />
Power on<br />
Uscita allarme normalmente aperta o chiusa<br />
Uscita ausiliaria<br />
Uscita luce<br />
Uscita secondo evaporatore<br />
Funzionalità con defrost<br />
Sospesa<br />
In off defrost viene terminato<br />
Normale funzionamento<br />
Eventualmente rimane richiesto<br />
durante il defrost<br />
Normale funzionamento<br />
Normale funzionamento<br />
Normale funzionamento<br />
Normale funzionamento<br />
Normale funzionamento<br />
Normale funzionamento<br />
Normale funzionamento<br />
25<br />
Active function<br />
Function with defrost<br />
Normal direct or reverse-cycle control<br />
On hold<br />
Remote off, from supervisor or keypad<br />
When off the defrost is terminated<br />
Defrost<br />
Normal operation<br />
Continuous cycle<br />
If required, the request remains<br />
during the defrost<br />
Temperature alarm monitoring<br />
Normal operation<br />
Evaporator fan control<br />
Normal operation<br />
Power on<br />
Normal operation<br />
Normally-open or normally-closed alarm output Normal operation<br />
Auxiliary output<br />
Normal operation<br />
Light output<br />
Normal operation<br />
Second evaporator output<br />
Normal operation<br />
Control output for pump down valve<br />
Normal operation<br />
+030220140 - rel. 1.2 - del 06-06-2005
Uscita di comando per valvola di pump down Normale funzionamento<br />
Uscita regolazione ventilatore di condensazione Normale funzionamento<br />
Uscita secondo compressore ritardato<br />
Normale funzionamento<br />
Uscita ausiliaria con spegnimento in off<br />
Normale funzionamento<br />
Uscita luce con spegnimento in off<br />
Normale funzionamento<br />
Nessuna funzione associata all’uscita aux Normale funzionamento<br />
Uscita reverse in regolazione con zona neutra Normale funzionamento<br />
Uscita gradino secondo compressore<br />
Sospesa<br />
Uscita gradino secondo compressore con rotazione Sospesa<br />
Switch porta con blocco compressore, ventole e Normale funzionamento<br />
gestione luce<br />
Switch porta con blocco ventole e gestione luce Normale funzionamento<br />
Switch tenda con variazione del set point e gestione Normale funzionamento<br />
della luce<br />
Sensore di luce e gestione luce<br />
Normale funzionamento<br />
Switch di attivazione uscita ausiliaria<br />
Normale funzionamento<br />
Switch porta con blocco compressore, ventole senza Normale funzionamento<br />
gestione luce<br />
Switch porta con blocco ventole senza gestione luce Normale funzionamento<br />
Attivazione luce da tastiera o supervisore Normale funzionamento<br />
Attivazione ausiliario da tastiera o supervisore Normale funzionamento<br />
Allarmi<br />
Si veda tabella allarmi e segnalazioni<br />
Allarme sonda virtuale di regolazione<br />
Normale funzionamento<br />
Allarme sonda prodotto<br />
Normale funzionamento<br />
Allarme sonda defrost<br />
Defrost terminato per timeout.<br />
Allarme sonda condensazione<br />
Normale funzionamento<br />
Allarme sonda antifreeze<br />
Normale funzionamento<br />
Tab. 6.6.9.1<br />
Condenser fan control output<br />
Second delayed compressor output<br />
Auxiliary output with switch off<br />
Light output with switch off<br />
No function associated with the AUX output<br />
Reverse output in control with dead band<br />
Second compressor step output<br />
Second compressor step output with rotation<br />
Door switch with compressor, fan off and light<br />
management<br />
Door switch with compressor off and light<br />
management<br />
Curtain switch with set point variation and light<br />
management<br />
Light sensor and light management<br />
Auxiliary output activation switch<br />
Door switch with compressor, fan off, no light<br />
management<br />
Door switch with compressor off, no light management<br />
Light activation from keypad or supervisor<br />
Auxiliary activation from keypad or supervisor<br />
Alarms<br />
Virtual control probe alarm<br />
Product probe alarm<br />
Defrost probe alarm<br />
Condenser probe alarm<br />
Antifreeze probe alarm<br />
Normal operation<br />
Normal operation<br />
Normal operation<br />
Normal operation<br />
Normal operation<br />
Normal operation<br />
On hold<br />
On hold<br />
Normal operation<br />
Normal operation<br />
Normal operation<br />
Normal operation<br />
Normal operation<br />
Normal operation<br />
Normal operation<br />
Normal operation<br />
Normal operation<br />
See table of alarms and signals<br />
Normal operation<br />
Normal operation<br />
Defrost ended by timeout<br />
Normal operation<br />
Normal operation<br />
Tab. 6.6.9.1<br />
6.7 Nuove modalità di esecuzione sbrinamento<br />
Questo controllo offre la possibilità di gestire l’esecuzione dello sbrinamento<br />
secondo tre diverse modalità oltre a quelle standard previste.<br />
6.7.1 Sbrinamento in funzione del tempo di funzionamento del<br />
compressore.<br />
Per abilitare il controllo a questa modalità di funzionamento si dovrà impostare un<br />
valore >0 nel parametro d10.<br />
Cosi’ facendo si agisce sullo start sbrinamento ovvero a seconda della temperatura<br />
sull’evaporatore (parametro d11), il controllo verifi ca il tempo di funzionamento del<br />
compressore (parametro d10) e decide se attivare o meno lo sbrinamento.<br />
Sono previsti due parametri:<br />
• d10: il tempo di funzionamento del compressore, con temperatura di<br />
evaporazione inferiore alla soglia, dopo il quale si ha la generazione di una<br />
richiesta di sbrinamento;<br />
• d11: la soglia di temperatura di evaporazione.<br />
Lo sbrinamento viene generato se il compressore ha funzionato:<br />
• per il tempo d10;<br />
• con un valore della sonda di evaporazione inferiore a d11.<br />
Nel caso di due evaporatori saranno previsti due timer separati per ogni<br />
evaporatore e il conteggio di ogni timer verrà attivato ogniqualvolta il compressore<br />
è on e la corrispondente sonda di evaporazione è inferiore alla soglia d11. Lo start<br />
dello sbrinamento si avrà quando almeno uno dei due timer è scaduto, cioè quando<br />
almeno uno degli evaporatori ha funzionato per il tempo d10 al di sotto della soglia<br />
di temperatura d11.<br />
6.7.2 Sbrinamento a intervalli di tempo dI variabile.<br />
Per abilitare il controllo a questa modalità di funzionamento si dovrà impostare il<br />
parametro d12=1.<br />
In questa confi gurazione l’algoritmo del controllo, in funzione della durata dello<br />
sbrinamento precedente, incrementa o decrementa in modo proporzionale<br />
l’intervallo di sbrinamento (dI) per gli sbrinamenti successivi.<br />
I parametri legati a questa funzionalità sono:<br />
• dI: Intervallo tra gli sbrinamenti;<br />
• d12: abilitazione funzionalità;<br />
• dn: durata nominale dello sbrinamento, in proporzione al timeout<br />
sbrinamento impostato (valore espresso in %);<br />
• dP1 e dP2: durata massima sbrinamento evaporatore 1 e 2;<br />
• dH: fattore proporzionale di regolazione.<br />
L’algoritmo calcola con le seguenti formule: dn1<br />
dn<br />
100<br />
dP1<br />
e dn2<br />
dn<br />
100<br />
dP2 ,<br />
26<br />
6.7 New defrost activation modes<br />
With this controller, defrosts can be managed in three different modes, in addition<br />
to the standard mode:<br />
6.7.1 Defrost according to compressor running time<br />
To enable the controller for this operating mode, set a value >0 for parameter d10.<br />
This mode affects the start defrost, that is, according to the evaporator temperature<br />
(parameter d11), the controller checks the compressor running time (parameter<br />
d10) and decides whether to activate the defrost or not.<br />
There are two parameters:<br />
• d10: compressor running time, with the evaporation temperature less than the<br />
threshold, after which a defrost request is generated.<br />
• d11: evaporation temperature threshold.<br />
The defrost is generated if the compressor has operated:<br />
• for time d10;<br />
• with an evaporator probe reading less than d11.<br />
If there are two evaporators, two separate timers will be installed for each<br />
evaporator, and the count of each timer will be activated whenever the compressor<br />
is ON and relevant evaporation probe is below threshold d11. The defrost will start<br />
when at least one of the two timers has expired, that is, when at least one of the<br />
evaporators has operated for the time d10 below the temperature threshold d11.<br />
6.7.2 Defrost at variable intervals.<br />
To enable the controller for this operating mode, set parameter d12=1.<br />
In this confi guration, the control algorithm, according to the duration of the<br />
previous defrost, increases or decreases the defrost interval (dI) proportionally for<br />
the following defrosts.<br />
The following parameters are associated with this function:<br />
• d I: interval between defrosts;<br />
• d12: enable the function;<br />
• dn: nominal duration of the defrost, in proportion to the set defrost timeout<br />
(value expressed as a %);<br />
• dP1 and dP2: maximum defrost duration for evaporator 1 and 2;<br />
• dH: control proportional factor.<br />
The algorithm calculates with the following formulae: dn1<br />
dn<br />
100<br />
dP1 and<br />
+030220140 - rel. 1.2 - del 06-06-2005
i tempi nominali per lo sbrinamento dn1 e dn2 (nel caso del secondo evaporatore)<br />
ottenuti come percentuale “dn” di “dP1” e “dP2”.<br />
Quindi se uno sbrinamento dura meno del tempo “dn” stabilito, l’algoritmo allunga<br />
in modo proporzionale (a seconda del valore assegnato al parametro dH)<br />
l’intervallo di sbrinamento “dI n ” successivo.<br />
Il parametro dH è un fattore di proporzionalità che permette di amplifi care o<br />
attenuare la variazione di “dI n ”.<br />
∆dI<br />
dn<br />
100<br />
dE *<br />
dP<br />
dI<br />
dH<br />
50<br />
dn<br />
dn2 dP2<br />
100 , the nominal defrost times dn1 and dn2 (in the case of the<br />
second evaporator) obtained as percentages dn of dP1 and dP2.<br />
Therefore, if a defrost lasts less than the set time “dn”, the algorithm proportionally<br />
lengthens (depending on the value assigned to parameter dH) the next defrost<br />
interval “dIn”.<br />
The parameter ‘dH’ is a proportional factor that amplifi es or attenuates the variation<br />
of “dI n ”.<br />
∆dI<br />
dn<br />
100<br />
dE *<br />
dP<br />
dI<br />
dH<br />
50<br />
dE* = durata effettiva dello sbrinamento<br />
n<br />
dI<br />
dI<br />
∆dI<br />
dE* = effective defrost duration<br />
n<br />
dI<br />
dI<br />
∆dI<br />
Sbrinamento<br />
∆dI<br />
∆dI<br />
dE < dn% dE < dn% dE < dn%<br />
0<br />
Intervallo di tempo dI (impostato)<br />
tra gli sbrinamenti<br />
Time interval “dI” (set) between<br />
defrosts<br />
dI dI 1 dI<br />
dI 2 dI<br />
Nuovo intervallo di tempo (calcolato)<br />
tra gli sbrinamenti<br />
New time interval (calcolated) between<br />
defrosts<br />
Intervallo di tempo dI (impostato)<br />
tra gli sbrinamenti<br />
Time interval “dI” (set) between<br />
defrosts<br />
tempo<br />
Time<br />
Fig. 6.7.2.1<br />
Esempio:<br />
Se l’intervallo di sbrinamento (dI) è settato ogni 8 ore e la durata massima dello<br />
sbrinamento (dP1 o dP2) è impostata a 30 minuti ma solitamente si necessita di<br />
sbrinare per un tempo inferiore a dP1 o dP2 del 50 %, si setterà il parametro dn =<br />
50 %. L’algoritmo dello strumento calcolerà secondo la formula dn/100 x dP1= dn1<br />
oppure dn/100 x dP2= dn2 (se esiste il secondo evaporatore) il/i tempo/i nominale/i<br />
“dn1” o “dn2” per lo sbrinamento che nell’esempio riportato corrisponde a 15 minuti<br />
ovvero al 50 % di dP.<br />
Il nuovo intervallo dI1 per lo sbrinamento successivo viene calcolato<br />
dall’algoritmo secondo la formula:<br />
dI<br />
1 dI<br />
dn<br />
100<br />
dE<br />
dP<br />
dI<br />
dH<br />
50<br />
Example:<br />
If, for example, the defrost interval (dI) is set to 8 hours and the maximum defrost<br />
duration (dP1 or dP2) is set to 30 minutes, however usually the defrost is required<br />
for 50% less than the time dP1 or dP2, set parameter dn = 50%. The control<br />
algorithm will calculate, using the formula dn/100 x dP1= dn1 or dn/100 x dP2=<br />
dn2 (in the case of the second evaporator), the nominal defrost times “dn1” or<br />
“dn2”, which, in the example shown, corresponds to 15 minutes, that is, 50% of dP.<br />
The new interval dI1 for the next defrost is calculated by the algorithm, using the<br />
formula:<br />
dI<br />
1 dI<br />
dn<br />
100<br />
dE<br />
dP<br />
dI<br />
dH<br />
50<br />
dove settando il parametro dH (fattore proporzionale di variazione di dI) da 0 a 100,<br />
è possibile ottenere un guadagno proporzionale da 0 a 2, quindi:<br />
where by setting the parameter dH (proportional factor for the variation in dI)<br />
between 0 an 100, a proportional gain from 0 to 2 can be selected, consequently:<br />
se dH 0 dI 1 dI<br />
if dH 0 dI 1 dI<br />
se<br />
dH 50 dI 1 dI + dI<br />
dn<br />
100<br />
dE<br />
dP<br />
if<br />
dH 50 dI 1 dI + dI<br />
dn<br />
100<br />
dE<br />
dP<br />
se<br />
1<br />
dH 100 dI dI + 2<br />
dn<br />
100<br />
dE<br />
dP<br />
if<br />
dH 100 dI 1 dI + 2<br />
dn<br />
100<br />
dE<br />
dP<br />
27<br />
+030220140 - rel. 1.2 - del 06-06-2005
A questo punto se lo sbrinamento dovesse terminare dopo 10 minuti (dE),<br />
sostituendo i valori noti nella formula otterremo:<br />
dI<br />
1 8 50 10<br />
100 30<br />
8<br />
dH<br />
50<br />
At this point, if the defrost ends after 10 minutes (dE), replacing the known values in<br />
the formula gives:<br />
dI<br />
1 8 50 10<br />
100 30<br />
8<br />
dH<br />
50<br />
quindi<br />
1<br />
dI<br />
8<br />
1.167<br />
dH<br />
50<br />
consequently<br />
1<br />
dI<br />
8<br />
1.167<br />
dH<br />
50<br />
E’ evidente come a questo punto il fattore dH sia rilevante per l’incremento o<br />
decremento del nuovo dI1.<br />
6.7.3 Sbrinamento ad intervalli calcolati in funzione della durata dello<br />
sbrinamento precedente: Skip defrost<br />
Per abilitare il controllo a questa modalità di funzionamento si dovrà impostare il<br />
parametro d12=2.<br />
In questo caso il controllo in base al tempo di esecuzione dell’ultimo sbrinamento<br />
esegue o meno lo sbrinamento successivo.<br />
I parametri legati a questa funzionalità sono:<br />
• d12: abilitazione funzionalità;<br />
• dI: intervallo tra gli sbrinamenti;<br />
• dn: durata nominale dello sbrinamento, in proporzione al timeout sbrinamento<br />
(valore espresso in %);<br />
• dP1 e dP2: durata massima sbrinamento evaporatore 1 e 2.<br />
Impostando correttamente questi parametri l’algoritmo calcola con le seguenti<br />
dn<br />
dn<br />
formule: dn1 dP1<br />
100 e dn2 dP2<br />
100 , i tempi nominali per lo<br />
sbrinamento dn1 e dn2 (nel caso del secondo evaporatore) ottenuti come<br />
percentuale “dn” di “dP1” e “dP2”.<br />
Questa funzione si basa su un principio molto semplice ma molto effi cace. Se lo<br />
sbrinamento dura un tempo minore o uguale al tempo dn1 o dn2 (calcolati con<br />
le formule riportate sopra), lo sbrinamento successivo previsto dopo il tempo “dI”<br />
verrà saltato.<br />
Al successivo sbrinamento effettuato si ripeterà la verifi ca e se l’esito dovesse essere<br />
lo stesso di quello appena descritto allora si salteranno i due sbrinamenti successivi<br />
previsti, e così via fi no a un massimo di 3 sbrinamenti consecutivi saltati. Nel caso in<br />
cui vengano ignorati 3 sbrinamenti consecutivi e il tempo dello sbrinamento<br />
effettuato risulta essere ancora inferiore ad dn%, il ciclo è terminato e il controllo<br />
provvederà a saltare nuovamente uno sbrinamento successivo.<br />
Non appena il tempo dello sbrinamento sarà superiore al dn% del tempo dP, allora<br />
lo sbrinamento successivo previsto verrà eseguito e la funzione ripartirà da capo.<br />
L’algoritmo mantiene un contatore dei defrost da saltare.<br />
• se lo sbrinamento termina in un tempo inferiore a dn1 viene incrementato di<br />
1 il contatore degli sbrinamenti da saltare. Il valore attuale del contatore<br />
indica gli sbrinamenti da saltare;<br />
• se lo sbrinamento termina normalmente il prossimo sbrinamento viene eseguito;<br />
• quando il contatore raggiunge il valore 3, vengono saltati tre sbrinamenti e poi<br />
il contatore viene portato a 1;<br />
• all’accensione dello strumento lo sbrinamento viene eseguito per 7 volte senza<br />
incrementare il contatore, poi viene abilitato l’aggiornamento del contatore<br />
(dall’ottavo in poi).<br />
Di seguito una descrizione grafi ca di quanto descritto:<br />
It is therefore clear how the factor dH increases or decreases the new dI1.<br />
6.7.3 Defrost at intervals calculated according to the duration of the<br />
previous defrost: Skip defrost<br />
To enable the controller for this operating mode, set the parameter d12=2.<br />
In this case, according to the duration of the last defrost operation, the controller<br />
establishes whether the next defrost is skipped or not.<br />
The following parameters are associated with this function:<br />
• d12: enable the function;<br />
• dI: interval between defrosts;<br />
• dn: nominal duration of the defrost, in proportion to the defrost timeout<br />
(value expressed as a %);<br />
• dP1 and dP2: maximum defrost duration for evaporator 1 and 2.<br />
When setting these parameters correctly, the algorithm calculates, using the<br />
dn<br />
dn<br />
following formulae: dn1 dP1<br />
100 and dn2 dP2<br />
100 , the nominal<br />
defrost times dn1 and dn2 (in the case of the second evaporator) obtained as<br />
percentages dn of dP1 and dP2.<br />
This function is based on a very simple but very effective principle. If the defrost<br />
lasts less than or equal to the time dn1 or dn2 (calculated with the formulae shown<br />
above), the next defrost due after the time “dI” will be skipped.<br />
When the next defrost is performed, the check is repeated, and if the outcome is the<br />
same, then the following two due defrosts are skipped, and so on according to the<br />
criteria described above (maximum 3 successive defrosts skipped).<br />
If 3 consecutive defrosts are skipped and the actual defrosting time is still less than<br />
dn%, the cycle is terminated and the controller will skip one more defrost.<br />
As soon as the defrost time exceeds dn% of the time dP, the next defrost will be<br />
performed and the function will start again.<br />
The algorithm counts the defrosts to be skipped.<br />
• if defrost fi nishes in less time than dn1, the counter of the defrost operations<br />
to be skipped is increased by 1. The current value of the counter indicates<br />
the defrost operations to be skipped;<br />
• if the defrost ends normally, the next defrost is performed as normal;<br />
• when the counter reaches the value 3, three defrosts are skipped, and then<br />
the counter is reset to 1;<br />
• when the instrument is switched on, the defrost is performed the fi rst 7 times<br />
without increasing the counter, after which the counter can be updated<br />
(from the eighth defrost on).<br />
The following is a graphical description of the function:<br />
Sbrinamento<br />
Defrost<br />
dE < dn% dE < dn% dE < dn%<br />
dI<br />
dI<br />
dI dI dI dI dI dI dI dI<br />
tempo<br />
time<br />
si salta lo sbrinamento previsto<br />
skipped planned defrost<br />
si saltano due sbrinamenti previsti<br />
two skipped planned defrost<br />
Fig. 6.7.3.1<br />
28<br />
si saltano tre sbrinamenti previsti<br />
three skipped planned defrost<br />
+030220140 - rel. 1.2 - del 06-06-2005
Sbrinamento<br />
Defrost<br />
dE < dn%<br />
dE < dn%<br />
dE < dn%<br />
dI<br />
dI dI dI dI dI<br />
tempo<br />
time<br />
si salta lo sbrinamento<br />
skipped planned defrost<br />
lo sbrinamento viene eseguito regolarmente<br />
regularly performed defrost<br />
Fig. 6.7.3.2<br />
si salta lo sbrinamento<br />
skipped planned defrost<br />
E’ consigliabile utilizzare questa funzione con una programmazione degli<br />
sbrinamenti equamente distribuiti nell’arco della giornata (es. sbrinamenti ciclici,<br />
parametro “dI”). Questo per evitare che vengano saltati sbrinamenti che<br />
risulterebbero essere gli ultimi prima di un lungo periodo programmato senza<br />
sbrinamenti (per esempio quando con programmazione da orologio si concentrano<br />
gli sbrinamenti dell’utenza solo nella notte).<br />
6.7.4 Sbrinamento in funzione della durata dello sbrinamento<br />
precedente con skip defrost e dI variabile (mix. 1 e 2)<br />
Per abilitare il controllo a questa modalità di funzionamento si dovrà impostare il<br />
parametro d12=3.<br />
Con questa gestione il controllo effettua l’esecuzione dello sbrinamento tenendo<br />
conto sia della durata dello sbrinamento precedente con la possibilità di saltare<br />
l’esecuzione, che di adottare l’intervallo impostato tramite il parametro dI.<br />
Parametri utilizzati:<br />
• d I: Intervallo tra gli sbrinamenti;<br />
• d12: abilitazione funzionalità;<br />
• dn: durata nominale dello sbrinamento, in proporzione al timeout<br />
sbrinamento impostato (valore espresso in %);<br />
• dP1 e dP2: durata massima sbrinamento evaporatore 1 e 2;<br />
• dH: fattore proporzionale di regolazione.<br />
dn<br />
dn<br />
L’algoritmo calcola con le seguenti formule: dn1 dP1<br />
100 e dn2 dP2<br />
100<br />
, i tempi nominali per lo sbrinamento dn1 e dn2 (nel caso del secondo evaporatore)<br />
ottenuti come percentuale “dn” di “dP1” e “dP2”.<br />
Il parametro “dH” è un fattore di proporzionalità che permette di amplifi care o<br />
attenuare la variazione di “dIn”.<br />
n<br />
dI<br />
dI<br />
dn<br />
100<br />
dE<br />
dP<br />
dI<br />
dH<br />
50<br />
Quindi, in questa modalità di funzionamento, se uno sbrinamento dura meno del<br />
tempo “dn” stabilito, l’algoritmo aggiungerà in modo proporzionale (a seconda del<br />
valore assegnato al parametro dH) il tempo residuo dello sbrinamento precedente<br />
all’intervallo di sbrinamento “dI1” successivo (vedi paragrafo 6.7.2). Oltre a questo,<br />
l’algoritmo provvederà a saltare con il principio dello “skip defrost” (vedi paragrafo<br />
6.7.3) lo o gli sbrinamenti successivi a seconda del valore raggiunto dal contatore<br />
degli sbrinamenti da saltare (da 1 a 3).<br />
6.8 Pump down e bassa pressione<br />
6.8.1 Abilitazione della funzionalità<br />
La funzionalità di pump down viene attivata portando il parametro c7 (durata del<br />
pump down) diverso da zero. La valvola di pump down deve essere collegata all’<br />
uscita ausiliaria, predisponendo il parametro relativo (H1).<br />
È inoltre necessario impostare uno degli ingressi digitali (A4, A5) come ingresso di<br />
bassa pressione.<br />
6.8.2 Funzionalità di pump down<br />
Al raggiungimento del set point, se è trascorso il tempo minimo di on del<br />
compressore c3, la regolazione chiude la valvola di pump down, bloccando il gas<br />
refrigerante in aspirazione del compressore.<br />
This function should be used with the programming of the defrosts equally<br />
distributed over the day (e.g. cyclical defrosts, parameter “dI”). This prevents<br />
skipping defrosts that would be the last before a long period programmed without<br />
defrosts (for example, when the clock is used to program the defrosting of the utility<br />
at night only).<br />
6.7.4 Defrost according to the duration of the previous defrost with<br />
skip defrost and variable dI (combination of 1 and 2)<br />
To enable the controller for this operating mode, set parameter d12=3.<br />
In this mode, the controller performs the defrosts considering both the duration of<br />
the previous defrost and the possibility of skipping the defrost, as well as the interval<br />
set using parameter dI.<br />
Parameters used:<br />
• dI: interval between defrosts;<br />
• d12: enable the function;<br />
• dn: nominal duration of the defrost, in proportion to the set defrost timeout<br />
(value expressed as a %);<br />
• dP1 and dP2: maximum defrost duration for evaporator 1 and 2;<br />
• dH: control proportional factor.<br />
dn<br />
The algorithm calculates with the following formulae: dn1 dP1<br />
100 and<br />
dn<br />
dn2 dP2<br />
100 , the nominal defrost times dn1 and dn2 (in the case of the<br />
second evaporator) obtained as percentages dn of dP1 and dP2.<br />
The parameter ‘dH’ is a proportional factor that amplifi es or attenuates the variation<br />
of “dIn”.<br />
n<br />
dI<br />
dI<br />
dn<br />
100<br />
dE<br />
dP<br />
dI<br />
dH<br />
50<br />
Consequently, in this operating mode, if a defrost lasts less than the time “dn”<br />
established, the algorithm will proportionally add (according to the value assigned<br />
to parameter dH) the time remaining from the previous defrost to the following<br />
defrost interval “dI1” (see paragraph 6.7.2). In addition to this, the algorithm will<br />
skip, using the “skip defrost” principle (see paragraph 6.7.3) the next<br />
defrost/defrosts depending on the value reached by the skip defrost counter (from<br />
1 to 3).<br />
6.8 Pump down and low pressure<br />
6.8.1 Enabling the function<br />
The Pump-Down function is activated by setting parameter ‘c7’ (pump down<br />
duration) to any value other than zero. The Pump-Down valve must be connected<br />
to the auxiliary output, setting the relevant parameter (H1).<br />
In addition, one of the digital inputs (‘A4’, ‘A5’) must be set as a low pressure input.<br />
6.8.2 Pump down function<br />
When the set point is reached, if the minimum compressor ON time ‘c3’ has<br />
elapsed, the controller closes the Pump-Down valve, stopping the refrigerant gas on<br />
the compressor suction side.<br />
29<br />
+030220140 - rel. 1.2 - del 06-06-2005
Con il parametro c10 è possibile selezionare il pump down in pressione. In questo<br />
caso, una volta chiusa la valvola di pump down, il compressore funziona fi no al raggiungimento<br />
della bassa pressione o del tempo c7. Scaduto tale tempo il compressore<br />
viene spento, indipendentemente dallo stato dell’ingresso di bassa pressione e<br />
l’allarme Pd (pump down terminato per timeout) risulta disattivato.<br />
In questo caso la funzione di autostart del compressore in pump down è disabilitata.<br />
Nota: se la richiesta di spegnimento avviene con compressore spento e valvola<br />
aperta (perché, a seguito dell’apertura della valvola, il compressore non si è ancora<br />
attivato) la routine spegne la valvola ed eventualmente attiva il pump down se non<br />
in bassa pressione (se abilitato autostart e pump down in pressione).<br />
Quando la regolazione richiede l’accensione del compressore, se sono trascorsi il<br />
tempo minimo di off c2 e il tempo minimo tra due accensioni del<br />
compressore c1, la valvola di pump down viene aperta, permettendo al gas refrigerante<br />
di ritornare in aspirazione del compressore. Il compressore viene acceso dopo<br />
il tempo di ritardo c8 dall’apertura della valvola.<br />
Nota: se la richiesta di accensione avviene con compressore acceso e valvola spenta<br />
(perché in pump down o in autostart) si procede all’apertura immediata della<br />
valvola.<br />
6.8.3 Autostart del compressore in pump down<br />
Con il parametro c9 è possibile selezionare l’autostart del compressore nella<br />
situazione di pump down. Una volta spento il compressore in pump down per<br />
raggiungimento della bassa pressione, se il pressostato di bassa pressione segnala<br />
un innalzamento della stessa, imputabile ad una mancanza di tenuta della valvola<br />
di pump down, il compressore viene rimesso in moto fi no al raggiungimento della<br />
bassa pressione.<br />
Nell’autostart del compressore vengono rispettati il tempo minimo di off c2 e il<br />
tempo tra due accensioni c1, mentre non viene rispettato il tempo minimo di ON.<br />
Quindi, al raggiungimento della bassa pressione, il compressore viene spento anche<br />
se non è trascorso il tempo c2. L’attivazione di un ciclo di autostart del compressore<br />
in pump down viene segnalato con il messaggio AtS a ripristino automatico, al<br />
successivo ciclo di pump down corretto.<br />
6.8.4 Allarme di bassa pressione<br />
L’allarme di bassa pressione LP viene segnalato quando il pressostato segnala una<br />
situazione di bassa pressione con la valvola di pump down aperta e il compressore<br />
attivato. Tale segnalazione d’allarme è tuttavia ritardata del tempo impostato<br />
attraverso il parametro A7. La bassa pressione non viene segnalata durante la fase<br />
di accensione del compressore (apertura della valvola di pump down e successiva<br />
accensione del compressore dopo c8), spegnimento del compressore con procedura<br />
di pump down e autostart del compressore in pump down. L’allarme di bassa<br />
pressione porta alla disattivazione della valvola di Pump Down e del compressore ed<br />
è a ripristino automatico.<br />
Il reset dell’allarme di bassa pressione può avvenire in qualsiasi situazione.<br />
Nota: nel caso sia selezionata la regolazione con due gradini per il compressore (con<br />
o senza rotazione, H1= 12 o 13) il pump-down viene eseguito allo spegnimento di<br />
entrambi i gradini. La funzione di autostart prevede la riaccensione di entrambi i<br />
gradini.<br />
Parameter ‘c10’ can be used to select Pump-Down by pressure. In this case, once<br />
the Pump-Down valve closes, the compressor continues to operate until reaching<br />
the low pressure value or the time ‘c7’. When this time elapses, the compressor is<br />
switched OFF, irrespective of the status of the low pressure input and the ‘Pd’ alarm<br />
(Pump-Down ended by timeout) is disabled.<br />
In this case, the compressor autostart function in Pump-Down is disabled.<br />
Note: if the shut-down request occurs when the compressor is off and the valve<br />
open (since, following the opening of the valve, the compressor has not yet started<br />
again), the routine closes the valve and if necessary starts the Pump-Down<br />
procedure if not in low pressure (if autostart and Pump-Down by pressure is<br />
enabled).<br />
When the controller requests the activation of the compressor, if the minimum OFF<br />
time ‘c2’ and the minimum time between two starts of the compressor ‘c1’ have<br />
elapsed, the pump down valve is opened, allowing the refrigerant gas to return to<br />
the compressor intake. The compressor is started after the delay time ‘c8’ from the<br />
opening of the valve.<br />
Note: if the start request occurs when the compressor is ON and the valve OFF (as<br />
it is in Pump-Down or autostart mode), the valve is opened immediately.<br />
6.8.3 Compressor autostart in Pump-Down<br />
Parameter ‘c9’ is used to enable the compressor autostart function in pump down<br />
status. Once the compressor has been stopped in pump down due to low pressure,<br />
if the low pressure switch signals an increase in pressure, due to the faulty seal<br />
of the pump down valve, the compressor is started again until it reaches the low<br />
pressure value.<br />
The compressor autostart function considers the minimum OFF time ‘c2’ and the<br />
time between two starts ‘c1’, while minimum ON time is ignored. Consequently,<br />
when reaching the low pressure value, the compressor is stopped even if time ‘c2’<br />
has not elapsed. The activation of a compressor autostart cycle in Pump-Down is<br />
signalled by the message ‘AtS’ on automatic restoration of the next correct pump<br />
down cycle.<br />
6.8.4 Low pressure alarm<br />
The low pressure alarm ‘LP’ is signalled when the pressure switch signals a low<br />
pressure situation with the pump down valve open and the compressor operating.<br />
The low pressure alarm signal is nonetheless delayed by the time set for parameter<br />
‘A7’.<br />
Low pressure is not signalled during the compressor start-up phase (opening of the<br />
pump down valve and subsequent activation of the compressor after the time ‘c8’),<br />
during shutdown of the compressor in pump down and during the compressor<br />
autostart cycle in pump down.<br />
The low pressure alarm shuts off the pump down valve and the compressor, and is<br />
on automatic reset.<br />
The low pressure alarm can be reset in any situation.<br />
Note: if control with two compressor steps is selected (with or without rotation,<br />
H1= 12 or 13) the pump down is performed when both steps are deactivated. The<br />
autostart function re-activates both steps.<br />
6.9 Ciclo continuo<br />
Premendo il pulsante aux per più di 5 secondi si attiva la funzionalità di ciclo<br />
continuo ovvero il compressore continua a funzionare, indipendentemente dalla<br />
regolazione, per il tempo cc, per abbassare la temperatura anche al di sotto del set<br />
point. Se il tempo cc viene settato a 0 il ciclo continuo non viene mai attivato.<br />
Il ciclo continuo viene interrotto al raggiungimento del tempo cc o della temperatura<br />
minima prevista, che corrisponde alla soglia di allarme di minima temperatura (AL).<br />
Se la temperatura dovesse, dopo il termine del funzionamento a ciclo continuo,<br />
scendere per inerzia sotto la soglia di minima temperatura, è possibile evitare la<br />
segnalazione dell’allarme di bassa temperatura, impostando opportunamente il<br />
ritardo c6 di esclusione allarme dopo ciclo continuo.<br />
6.9.1 Attivazione del ciclo continuo<br />
• Pressione del pulsante aux per più di 5 secondi.<br />
6.9.2 Il ciclo continuo non si attiva se:<br />
• la durata del ciclo continuo (cc) è impostata a 0;<br />
• la temperatura è inferiore alla soglia di bassa;<br />
• in funzionamento reverse (caldo), da parametro(r3) o da ingresso digitale (A4, A5);<br />
• nello stato di OFF.<br />
30<br />
6.9 Continuous cycle<br />
Pressing aux for more than 5 seconds activates the continuous cycle function, that<br />
is, the compressor continues to operate, independently of the controller, for the time<br />
cc, so as to lower the temperature even below the set point.<br />
If time cc is set to 0, the continuous cycle is never activated.<br />
The continuous cycle is stopped after the time cc or when reaching the minimum<br />
specifi ed temperature, corresponding to the minimum temperature alarm threshold<br />
(AL). If, after the end of the continuous cycle, the temperature falls by inertia below<br />
the minimum temperature threshold, the low temperature alarm signal can be<br />
ignored by suitably setting the alarm bypass delay time after continuous cycle, ‘c6’.<br />
6.9.1 Activation of the continuous cycle<br />
• Pressing aux for more than 5 seconds.<br />
6.9.2 The continuous cycle is not activated if:<br />
• the duration of the continuous cycle (cc) is set to 0;<br />
the temperature is below the low level threshold;<br />
• in Reverse operation (heating), from parameter (r3) or from digital input (A4, A5),<br />
• when the unit is OFF<br />
+030220140 - rel. 1.2 - del 06-06-2005
6.9.3 Stato di attesa di attivazione del ciclo continuo<br />
Si resta in questo stato quando si è richiesta l’attivazione del ciclo continuo ma non è<br />
possibile attivarlo per uno dei seguenti motivi:<br />
• tempi di protezione del compressore (c1, c2, c3), in quanto ritardano<br />
l’attivazione del compressore;<br />
• allarme immediato o ritardato da ingresso digitale esterno (A4, A5), se ritarda<br />
l’attivazione del compressore;<br />
• esecuzione dello sbrinamento, del gocciolamento e del post gocciolamento;<br />
• ritardo start compressore e ventilatori all’accensione;<br />
• porta aperta (vedi Esecuzione del ciclo continuo, più sotto);<br />
• allarme di bassa pressione (LP) attivo in quanto ritarda l’attivazione del<br />
compressore;<br />
• allarme di alta temperatura condensatore (CHt) in quanto ritarda l’attivazione<br />
del compressore.<br />
Durante la situazione di ciclo continuo richiesto l’icona lampeggia.<br />
6.9.4 Esecuzione del ciclo continuo<br />
Durante l’esecuzione del ciclo continuo:<br />
• Il compressore rimane sempre acceso.<br />
• L’allarme di bassa temperatura è disattivato.<br />
• L’icona è accesa.<br />
Se viene aperta la porta e uno degli ingressi digitali è settato come gestione apertura<br />
porta, il compressore si spegne e il ciclo continuo viene<br />
temporaneamente<br />
interrotto. Alla chiusura della porta esso riprende da dove era stato<br />
interrotto, quindi in pratica il conteggio del timer interno legato alla durata del ciclo<br />
(cc), viene messo in pausa all’apertura della porta e viene ripreso alla chiusura della<br />
porta.<br />
6.9.5 Fine del ciclo continuo<br />
Il ciclo continuo termina per:<br />
• pressione del pulsante aux per più di 5 secondi;<br />
• raggiungimento della temperatura minima prevista (AL);<br />
• raggiungimento della durata massima (cc);<br />
• spegnimento dello strumento (off) da tastiera e supervisore;<br />
• passaggio dalla modalità di funzionamento Direct o Direct con sbrinamento a<br />
Reverse (caldo), da parametro (r3) o da ingresso digitale (A4 ,A5);<br />
L’allarme di bassa temperatura viene escluso per un tempo (c6) dal termine del ciclo<br />
continuo.<br />
Nota: nel caso sia selezionata la regolazione con 2 gradini per il compressore (con o<br />
senza rotazione, H1= 12 o 13) il ciclo continuo attiva entrambi i gradini.<br />
Funzionalità attiva<br />
Funzionalità con Ciclo Continuo<br />
Normale regolazione direct o reverse<br />
Sospesa<br />
OFF remoto, da supervisore o da tastiera In OFF ciclo continuo viene<br />
terminato<br />
Defrost<br />
Eventualmente rimane richiesto<br />
durante il ciclo continuo<br />
Ciclo continuo<br />
Normale funzionamento<br />
Monitoraggio allarmi di temperatura<br />
Normale funzionamento<br />
Regolazione ventilatori di evaporazione<br />
Normale funzionamento<br />
Power on<br />
Normale funzionamento<br />
Uscita allarme normalmente aperta o chiusa Normale funzionamento<br />
Uscita ausiliaria<br />
Normale funzionamento<br />
Uscita luce<br />
Normale funzionamento<br />
Uscita secondo evaporatore<br />
Normale funzionamento<br />
Uscita di comando per valvola di pump down Normale funzionamento<br />
Uscita regolazione ventilatore di<br />
Normale funzionamento<br />
condensazione<br />
Uscita secondo compressore ritardato<br />
Normale funzionamento<br />
Uscita ausiliaria con spegnimento in off<br />
Normale funzionamento<br />
Uscita luce con spegnimento in off<br />
Normale funzionamento<br />
Nessuna funzione associata all’uscita aux Normale funzionamento<br />
Uscita reverse in regolazione con zona neutra Normale funzionamento<br />
Uscita gradino secondo compressore<br />
Attivato<br />
Uscita gradino secondo compressore con rotazione Attivato<br />
Switch porta con blocco compressore, ventole e Normale funzionamento<br />
gestione luce<br />
Switch porta con blocco ventole e gestione luce Normale funzionamento<br />
Switch tenda con variazione del set point e gestione Normale funzionamento<br />
della luce<br />
Sensore di luce e gestione luce<br />
Normale funzionamento<br />
Switch di attivazione uscita ausiliaria<br />
Normale funzionamento<br />
Switch porta con blocco compressore, ventole Normale funzionamento<br />
senza gestione luce<br />
Switch porta con blocco ventole senza gestione Normale funzionamento<br />
luce<br />
Attivazione luce da tastiera o supervisore Normale funzionamento<br />
Attivazione ausiliario da tastiera o supervisore Normale funzionamento<br />
31<br />
6.9.3 Await continuous cycle status<br />
This status exists when the activation of the continuous cycle is requested, however<br />
it cannot be started for one of the following reasons:<br />
• compressor protection times (c1, c2, c3), as they delay activation of the<br />
compressor;<br />
• immediate or delayed alarm from external digital input (‘A4’, ‘A5’, ‘A9’), if<br />
this delays activation of the compressor;<br />
• defrost, dripping or post-dripping in progress;<br />
• compressor and fan start delay on start-up;<br />
• door open (see Continuous cycle in progress, below);<br />
• low pressure alarm (‘LP’) active, as this delays activation of the compressor;<br />
• high condenser temperature alarm (‘CHt’) as this delays activation of the<br />
compressor.<br />
During the continuous cycle request, the icon fl ashes.<br />
6.9.4 Continuous cycle in progress<br />
When the continuous cycle is running:<br />
• The compressor is always ON;<br />
• The low temperature alarm is deactivated;<br />
• The icon is on steady.<br />
If, during the continuous cycle, the door is opened and one of the digital inputs is<br />
set to manage the opening of the door, the compressor stops and consequently the<br />
continuous cycle is temporarily interrupted. When the door closes the continuous<br />
cycle starts from where it left off, and thus ,in practice, the continuous cycle duration<br />
timer (cc) is put on hold when the door is opened, and starts again when the door<br />
closes.<br />
6.9.5 End of the continuous cycle<br />
The continuous cycle ends in the following ways:<br />
• push-button aux pressed for more than 5 seconds;<br />
• minimum specifi ed temperature (AL) reached;<br />
• maximum duration of the continuous cycle (cc) reached;<br />
• instrument switched off (OFF) from the keypad or supervisor;<br />
• changeover from Direct operating mode or Direct with defrost to<br />
Reverse-cycle mode (heating), by parameter (r3) or the digital input (A4, A5);<br />
The low temperature alarm is bypassed for a time (‘c6’) from the end of the<br />
continuous cycle.<br />
Note: if control with 2 compressor steps is selected (with or without rotation, H1= 12<br />
or 13) the continuous cycle activates both steps.<br />
Active function<br />
Normal direct or reverse-cycle control<br />
Remote off, from supervisor or keypad<br />
Defrost<br />
Continuous cycle<br />
Temperature alarm monitoring<br />
Evaporator fan control<br />
Power on<br />
Normally-open or normally-closed alarm output<br />
Auxiliary output<br />
Light output<br />
Second evaporator output<br />
Control output for pump down valve<br />
Condenser fan control output<br />
Second delayed compressor output<br />
Auxiliary output with switch off<br />
Light output with switch off<br />
No function associated with the AUX output<br />
Reverse output in control with dead band<br />
Second compressor step output<br />
Second compressor step output with rotation<br />
Door switch with compressor, fan off and light<br />
management<br />
Door switch with compressor off and light<br />
management<br />
Curtain switch with set point variation and light<br />
management<br />
Light sensor and light management<br />
Auxiliary output activation switch<br />
Door switch with compressor, fan off, no light<br />
management<br />
Door switch with compressor off, no light<br />
management<br />
Light activation from keypad or supervisor<br />
Auxiliary activation from keypad or supervisor<br />
Function with continuous cycle<br />
On hold<br />
When off the continuous cycle is<br />
terminated<br />
If necessary, the request remains<br />
during the continuous cycle<br />
Normal operation<br />
Normal operation<br />
Normal operation<br />
Normal operation<br />
Normal operation<br />
Normal operation<br />
Normal operation<br />
Normal operation<br />
Normal operation<br />
Normal operation<br />
Normal operation<br />
Normal operation<br />
Normal operation<br />
Normal operation<br />
Normal operation<br />
Activated<br />
Activated<br />
Normal operation<br />
Normal operation<br />
Normal operation<br />
Normal operation<br />
Normal operation<br />
Normal operation<br />
Normal operation<br />
Normal operation<br />
Normal operation<br />
+030220140 - rel. 1.2 - del 06-06-2005
Allarmi<br />
Allarme sonda virtuale di regolazione<br />
Allarme sonda prodotto<br />
Allarme sonda defrost<br />
Allarme sonda condensazione<br />
Allarme sonda antifreeze<br />
Si veda tabella allarmi e<br />
segnalazioni<br />
Normale funzionamento<br />
Normale funzionamento<br />
Normale funzionamento<br />
Normale funzionamento<br />
Normale funzionamento<br />
Tab. 6.9.5.1<br />
Alarms<br />
Virtual control probe alarm<br />
Product probe alarm<br />
Defrost probe alarm<br />
Condenser probe alarm<br />
Antifreeze probe alarm<br />
See table of alarms and signals<br />
Normal operation<br />
Normal operation<br />
Normal operation<br />
Normal operation<br />
Normal operation<br />
Tab. 6.9.5.1<br />
6.10 Allarme di alta temperatura condensazione<br />
Se una sonda è impostata come sonda condensatore (/A2, /A3, /A4) è possibile<br />
monitorare la temperatura del condensatore per segnalare l’alta temperatura,<br />
probabilmente riconducibile a situazioni di sporcizia e intasamento. Se non è selezionata<br />
alcuna sonda di condensazione il preallarme e l’allarme di condensazione sono<br />
disabilitati. L’uscita ventilatori di condensazione, se selezionata, è sempre OFF.<br />
Nel caso siano selezionate due sonde di condensazione gli algoritmi di gestione<br />
pre-allarme e allarme di alta temperatura condensatore vengono eseguiti con<br />
riferimento alla sonda di valore più elevato.<br />
Lo stato di allarme di una delle due sonde di condensazione porta alle gestione<br />
dell’allarme, ignorando il valore dell’altra sonda.<br />
E’ possibile impostare la soglia di alta temperatura del condensatore attraverso il<br />
parametro Ac e una isteresi usata nell’attivazione dell’allarme di alta temperatura<br />
del condensatore e nella regolazione dei ventilatori di condensazione attraverso il<br />
parametro AE.<br />
Se la temperatura del condensatore è >‘Ac’-(‘AE’/2)viene segnalata la situazione<br />
di preallarme, in cui non c’è alcuna modifi ca allo stato dei carichi, ma viene solo<br />
visualizzato sul display il messaggio ‘cht’. Se nella situazione di preallarme la<br />
temperatura del condensatore diventa ‘Ac’ viene attivato il timer di ritardo<br />
allarme(che è possibile settare attraverso il parametro ‘Acd’). Se allo scadere del<br />
ritardo ‘Acd’ la temperatura è ancora al di sopra della soglia ‘Ac’, scatta l’allarme ‘CHt’,<br />
viene visualizzato sul display il messaggio ‘CHt’ e il compressore viene spento senza<br />
rispettare le tempistiche di sicurezza (‘c1’,’c2’,’c3’). L’allarme ‘CHt’ è solo ripristino<br />
<strong>manual</strong>e. Se, al contrario, la temperatura ritorna al di sotto della soglia, il timer viene<br />
resettato e rimane o lo stato di preallarme precedente o il normale funzionamento.<br />
È possibile impostare il relè ausiliario come uscita ventole condensatore (‘H1’), la<br />
quale si attiva se la temperatura del condensatore<br />
> ‘F4’ + ‘F5’ e si disattivano se la temperatura del condensatore < ‘F4’.<br />
Nel caso siano selezionate due sonde di condensazione l’algoritmo di gestione<br />
ventole di condensazione viene eseguito con riferimento alla sonda di valore più<br />
elevato.<br />
Lo stato di allarme di una delle due sonde di condensazione porta alle gestione<br />
dell’allarme, ignorando il valore dell’altra sonda.<br />
Nel caso di errore sonda di condensazione il preallarme cht e l’allarme CHt vengono<br />
generati automaticamente.<br />
Nella situazione di cui sopra l’eventuale uscita ausiliaria viene attivata.<br />
6.10 High condensing temperature alarm<br />
If a probe is set as a condenser probe (‘/A2’, ‘/A3’, ‘/A4’, ‘/A5’), the condensing<br />
temperature can be monitored and a high temperature condition signalled,<br />
probably due to situations of fouling and obstruction.<br />
If no condenser probe is selected, the condenser pre-alarm and alarm are disabled.<br />
The condenser fan output, if selected, is always OFF.<br />
If two condenser probes are selected, the high condenser temperature pre-alarm<br />
and alarm management algorithms are performed with reference to the probe with<br />
the higher value.<br />
The alarm status on one of the two condenser probes activates alarm<br />
management, ignoring the value of the other probe.<br />
The condenser high temperature threshold can be set with the parameter Ac and<br />
with a hysteresis used for activating the high condenser temperature alarm and for<br />
controlling the condensation fans by parameter AE.<br />
If the condenser temperature is > ‘Ac’+ (‘AE’/2), the pre-alarm is signalled, and there<br />
is no modifi cation to the status of the loads, but the display simply shows message<br />
‘cht’. If in the pre-alarm situation the condenser temperature falls to ‘Ac’, the alarm delay timer is started (this can be<br />
set using the parameter ‘Acd’).<br />
If, at the end of delay ‘Acd’, the temperature is still above the threshold ‘Ac’, the<br />
alarm ‘CHt’ is activated, the message ‘CHt’ is shown on the display and the<br />
compressor is stopped, without observing the safety times (‘c1’, ‘c2’, ‘c3’). Alarm<br />
‘CHt’ is <strong>manual</strong> reset only. If, on the other hand, the temperature returns below the<br />
threshold, the timer is reset and the pre-alarm status or normal operation resumes.<br />
The auxiliary relays can be set as condenser fan outputs (‘H1’), which are activated<br />
if the condenser temperature is > ‘F4’ + ‘F5’ and are deactivated if the condenser<br />
temperature is < ‘F4’.<br />
If two condenser probes are selected, the high condenser temperature pre-alarm<br />
and alarm management algorithms are performed with reference to the probe with<br />
the higher value.<br />
The alarm status on one of the two condenser probes activates alarm<br />
management, ignoring the value of the other probe.<br />
In the event of a condenser probe error, the pre-alarm cht and the alarm CHt are<br />
generated automatically.<br />
In the above situation, any auxiliary outputs confi gured accordingly are activated.<br />
Sonda condensazione Preallarme Allarme Uscita ventole condensazione selezionata<br />
Non presente Non generato Non generato off<br />
Presenti due sonda Su sonda maggiore Su sonda maggiore Su sonda maggiore<br />
In errore (una delle due sonde) Generato Generato on<br />
Tab. 6.10.1<br />
Condenser probe Pre-alarm Alarm Condenser fan outputs selected<br />
Not present Not generated Not generated off<br />
Two probes On probe with higher value On probe with higher value On probe with higher value<br />
Error (one of the probes) Generated Generated on<br />
Tab. 6.10.1<br />
Funzionalità attiva<br />
Normale regolazione direct o reverse<br />
off remoto, da supervisore o da tastiera<br />
Defrost<br />
Ciclo continuo<br />
Monitoraggio allarmi di temperatura<br />
Regolazione ventilatori di evaporazione<br />
Power on<br />
Uscita allarme normalmente aperta o chiusa<br />
Funzionalità con regolazione ventole<br />
condensazione<br />
Normale funzionamento<br />
Uscite condensarore disattivate,<br />
preallarme ed allarme condensatore<br />
resettati<br />
Normale funzionamento<br />
Normale funzionamento<br />
Normale funzionamento<br />
Normale funzionamento<br />
Normale funzionamento<br />
Uscita eccitata in ‘CHT’<br />
32<br />
Active function<br />
Function with condenser fan<br />
control<br />
Normal direct or reverse-cycle control<br />
Normal operation<br />
Remote off, from supervisor or keypad<br />
Condenser outputs deactivated,<br />
condenser pre-alarm and alarm reset<br />
Defrost<br />
Normal operation<br />
Continuous cycle<br />
Normal operation<br />
Temperature alarm monitoring<br />
Normal operation<br />
Evaporator fan control<br />
Normal operation<br />
Power on<br />
Normal operation<br />
Normally-open or normally-closed alarm output Output energised with ‘CHT’<br />
Auxiliary output<br />
Normal operation<br />
+030220140 - rel. 1.2 - del 06-06-2005
Uscita ausiliaria<br />
Uscita luce<br />
Uscita secondo evaporatore<br />
Uscita di comando per valvola di pump down<br />
Uscita regolazione ventilatore di<br />
condensazione<br />
Uscita secondo compressore ritardato<br />
Uscita ausiliaria con spegnimento in off<br />
Uscita luce con spegnimento in off<br />
Nessuna funzione associata all’uscita aux<br />
Uscita reverse in regolazione con zona neutra<br />
Uscita gradino secondo compressore<br />
Uscita gradino secondo compressore con<br />
rotazione<br />
Switch porta con blocco compressore, ventole e<br />
gestione luce<br />
Switch porta con blocco ventole e gestione luce<br />
Switch tenda con variazione del set point e<br />
gestione della luce<br />
Sensore di luce e gestione luce<br />
Switch di attivazione uscita ausiliaria<br />
Switch porta con blocco compressore, ventole<br />
senza gestione luce<br />
Switch porta con blocco ventole senza gestione<br />
luce<br />
Attivazione luce da tastiera o<br />
supervisore<br />
Attivazione ausiliario da tastiera o<br />
supervisore<br />
Allarmi<br />
Allarme sonda virtuale di regolazione<br />
Allarme sonda prodotto<br />
Allarme sonda defrost<br />
Allarme sonda condensazione<br />
Allarme sonda antifreeze<br />
Normale funzionamento<br />
Normale funzionamento<br />
Normale funzionamento<br />
Normale funzionamento<br />
Normale funzionamento<br />
Normale funzionamento<br />
Normale funzionamento<br />
Normale funzionamento<br />
Normale funzionamento<br />
Normale funzionamento<br />
Normale funzionamento<br />
Normale funzionamento<br />
Normale funzionamento<br />
Normale funzionamento<br />
Normale funzionamento<br />
Normale funzionamento<br />
Normale funzionamento<br />
Normale funzionamento<br />
Normale funzionamento<br />
Normale funzionamento<br />
Normale funzionamento<br />
Si veda tabella allarmi e segnalazioni<br />
Normale funzionamento<br />
Normale funzionamento<br />
Normale funzionamento<br />
Uscita condensatore on, preallarme ed<br />
allarme condensatore generati.<br />
Normale funzionamento<br />
Tab. 6.10.2<br />
Light output<br />
Second evaporator output<br />
Control output for pump down valve<br />
Condenser fan control output<br />
Second delayed compressor output<br />
Auxiliary output with switch off<br />
Light output with switch off<br />
No function associated with the AUX output<br />
Reverse output in control with dead band<br />
Second compressor step output<br />
Second compressor step output with rotation<br />
Door switch with compressor, fan off and light<br />
management<br />
Door switch with compressor off and light<br />
management<br />
Curtain switch with set point variation and light<br />
management<br />
Light sensor and light management<br />
Auxiliary output activation switch<br />
Door switch with compressor, fan off, no light<br />
management<br />
Door switch with compressor off, no light<br />
management<br />
Light activation from keypad or<br />
supervisor<br />
Auxiliary activation from keypad or supervisor<br />
Alarms<br />
Virtual control probe alarm<br />
Product probe alarm<br />
Defrost probe alarm<br />
Condenser probe alarm<br />
Antifreeze probe alarm<br />
Normal operation<br />
Normal operation<br />
Normal operation<br />
Normal operation<br />
Normal operation<br />
Normal operation<br />
Normal operation<br />
Normal operation<br />
Normal operation<br />
Normal operation<br />
Normal operation<br />
Normal operation<br />
Normal operation<br />
Normal operation<br />
Normal operation<br />
Normal operation<br />
Normal operation<br />
Normal operation<br />
Normal operation<br />
Normal operation<br />
See table of alarms and signals<br />
Normal operation<br />
Normal operation<br />
Normal operation<br />
Condenser output on, pre-alarm<br />
and alarm condenser generated.<br />
Normal operation<br />
Tab. 6.10.2<br />
6.11 Regolazione con banda morta.<br />
È possibile attivare la regolazione con banda morta prevedendo di utilizzare per il<br />
gradino reverse l’uscita aux1: H1=11.<br />
Il set point ‘St’ è centrale rispetto alla zona neutra.<br />
Il parametro ‘rd’ rappresenta il differenziale nella regolazione associata al<br />
compressore, ‘rn’ l’entità della banda morta, ‘rr’ il differenziale nella regolazione<br />
reverse associata alla uscita aux1.<br />
Di seguito un diagramma della regolazione con zona neutra nel caso di modalità di<br />
funzionamento direct (‘r3’=0 e 1).<br />
6.11 Control with dead band<br />
Control with dead band can be activated by using the aux1 output for the reverse<br />
step: H1=11.<br />
The set point ‘St’ is in the centre of the dead band.<br />
The parameter ‘rd’ represents the control differential associated with the<br />
compressor, ‘rn’ the size of the dead band, ‘rr’ the differential for reverse control<br />
associated with the aux1 output.<br />
Below is a diagram of control with dead band in the case of direct operating mode<br />
(‘r3’=0 and 1).<br />
rr rn rd<br />
REVERSE<br />
R<br />
= =<br />
zona di non<br />
intervento<br />
Non-intervention<br />
zone<br />
DIRECT<br />
D<br />
St<br />
Fig. 6.11.1<br />
Grandezza controllata<br />
Controlled measurement<br />
Si prevede di utilizzare la zona morta principalmente nella modalità di<br />
funzionamento direct. Di seguito un diagramma della regolazione con zona neutra<br />
nel caso di modalità di funzionamento reverse (‘r3’=2).<br />
The dead band is mainly used in direct operating mode.<br />
Below is a diagram of control with dead band in the case of reverse operating<br />
mode (‘r3’=2).<br />
rr<br />
rn/2<br />
rn<br />
rn/2<br />
rd<br />
R<br />
R<br />
St<br />
Fig. 6.11.2<br />
Temperatura<br />
Temperature<br />
33<br />
+030220140 - rel. 1.2 - del 06-06-2005
Il gradino associato all’uscita aux1 rimane in reverse.<br />
l gradino associato all’uscita compressore passa da direct a reverse.<br />
Nota 1: il gradino associato all’uscita aux1 ha associata solo la temporizzazione<br />
di protezione ‘c0’, mentre il gradino associato al compressore (sia in direct che in<br />
reverse) ha associate le temporizzazioni ‘c0’ ‘c1’ ‘c2’ ‘c3’. Si può verifi care quindi che i<br />
gradini siano attivi contemporaneamente per effetto delle<br />
protezioni associate al gradino del compressore (tempo minimo ci on), nonchè dello<br />
stato di defrost della macchina.<br />
Nota 2: nel caso sia abilitata la funzione di switch tenda (‘A4’=7) Switch-tenda il<br />
controllore modifi ca il set point alla chiusura del contatto, aggiungendo o togliendo il<br />
valore del parametro ‘r4’, il nuovo valore viene utilizzato per tutte le funzioni relative<br />
al set-Point (Es. Allarmi Alta e Bassa temperatura relativi, banda morta, ecc.). Con<br />
‘r4’=3.0 (valore pre-programmato) il set point viene<br />
aumentato di 3 gradi rispetto al valore utilizzato con tenda aperta in direct e diminuito<br />
di 3 gradi in reverse.<br />
Nota: non è prevista la rotazione dei carichi in modalità di funzionamento reverse<br />
(‘r3’=2).<br />
La tabella che segue defi nisce lo stato dell’uscita reverse (aux1 ) in regolazione con<br />
zona neutra.<br />
Funzionalità attiva<br />
Uscita reverse in regolazione<br />
con zona neutra<br />
Normale regolazione direct o reverse<br />
Normale funzionamento<br />
off remoto, da supervisore o da tastiera<br />
Uscita reverse spenta<br />
Defrost<br />
Normale funzionamento<br />
Ciclo continuo<br />
Uscita reverse spenta<br />
Monitoraggio allarmi di temperatura<br />
Normale funzionamento<br />
Regolazione ventilatori di evaporazione<br />
Normale funzionamento<br />
Power on<br />
Normale funzionamento<br />
Uscita allarme normalmente aperta o chiusa Normale funzionamento<br />
Uscita ausiliaria<br />
Normale funzionamento<br />
Uscita luce<br />
Normale funzionamento<br />
Uscita secondo evaporatore<br />
Normale funzionamento<br />
Uscita di comando per valvola di pump down Normale funzionamento<br />
Uscita regolazione ventilatore di condensazione Normale funzionamento<br />
Uscita secondo compressore ritardato<br />
Normale funzionamento<br />
Uscita ausiliaria con spegnimento in off<br />
Normale funzionamento<br />
Uscita luce con spegnimento in off<br />
Normale funzionamento<br />
Nessuna funzione associata all’uscita aux<br />
Normale funzionamento<br />
Uscita reverse in regolazione con zona neutra -<br />
Uscita gradino secondo compressore<br />
Normale funzionamento<br />
Uscita gradino secondo compressore con rotazione Normale funzionamento<br />
Switch porta con blocco compressore, ventole e Normale funzionamento<br />
gestione luce<br />
Switch porta con blocco ventole e gestione luce Normale funzionamento<br />
Switch tenda con variazione del set point e Normale funzionamento<br />
gestione della luce<br />
Sensore di luce e gestione luce<br />
Normale funzionamento<br />
Switch di attivazione uscita ausiliaria<br />
Normale funzionamento<br />
Switch porta con blocco compressore, ventole senza Normale funzionamento<br />
gestione luce<br />
Switch porta con blocco ventole senza gestione luce Normale funzionamento<br />
Attivazione luce da tastiera o<br />
Normale funzionamento<br />
supervisore<br />
Attivazione ausiliario da tastiera o supervisore Normale funzionamento<br />
Allarmi<br />
Si veda tabella allarmi e<br />
segnalazioni<br />
Allarme sonda virtuale di regolazione<br />
Uscita reverse spenta<br />
Allarme sonda prodotto<br />
Normale funzionamento<br />
Allarme sonda defrost<br />
Normale funzionamento<br />
Allarme sonda condensazione<br />
Normale funzionamento<br />
Allarme sonda antifreeze<br />
Normale funzionamento<br />
Tab. 6.11.1<br />
The step associated with the aux1 output remains in reverse.<br />
The step associated with the compressor output passes from direct to reverse.<br />
Note 1: the step associated with the aux1 output is only associated with the protection<br />
timer ‘c0’, while the step associated with the compressor (in both direct and<br />
reverse) is associated with the timers ‘c0’ ‘c1’ ‘c2’ ‘c3’. As a result, the steps may be<br />
active at the same time due to the protectors associated with the compressor step<br />
(minimum on time), as well as the unit defrost status.<br />
Note 2: if the curtain switch function is enabled (‘A4’=7), the controller modifi es the<br />
set point when the contact closes, adding or subtracting the value of parameter ‘r4’;<br />
the new value is used for all functions relating to the set point (e.g. relative high<br />
and low temperature alarms, dead band, etc.).<br />
When ‘r4’=3.0 (preset value) the set point is increased by 3 degrees compared to<br />
the value used with the curtain open in direct mode, and decreased by 3 degrees in<br />
reverse mode.<br />
Note: the rotation of the loads is not envisaged in reverse operating mode (‘r3’=2).<br />
The following table defi nes the status of the reverse output (aux1) in control with<br />
dead band.<br />
Active function<br />
Reverse output in control with<br />
dead band<br />
Normal direct or reverse-cycle control<br />
Normal operation<br />
Remote off, from supervisor or keypad Reverse output deactivated<br />
Defrost<br />
Normal operation<br />
Continuous cycle<br />
Reverse output deactivated<br />
Temperature alarm monitoring<br />
Normal operation<br />
Evaporator fan control<br />
Normal operation<br />
Power on<br />
Normal operation<br />
Normally-open or normally-closed alarm output Normal operation<br />
Auxiliary output<br />
Normal operation<br />
Light output<br />
Normal operation<br />
Second evaporator output<br />
Normal operation<br />
Control output for pump down valve<br />
Normal operation<br />
Condenser fan control output<br />
Normal operation<br />
Second delayed compressor output<br />
Normal operation<br />
Auxiliary output with switch off<br />
Normal operation<br />
Light output with switch off<br />
Normal operation<br />
No function associated with the AUX output Normal operation<br />
Reverse output in control with dead band -<br />
Second compressor step output<br />
Normal operation<br />
Second compressor step output with rotation Normal operation<br />
Door switch with compressor, fan off and light Normal operation<br />
management<br />
Door switch with compressor off and light Normal operation<br />
management<br />
Curtain switch with set point variation and light Normal operation<br />
management<br />
Light sensor and light management<br />
Normal operation<br />
Auxiliary output activation switch<br />
Normal operation<br />
Door switch with compressor, fan off, no light Normal operation<br />
management<br />
Door switch with compressor off, no light Normal operation<br />
management<br />
Light activation from keypad or supervisor Normal operation<br />
Auxiliary activation from keypad or supervisor Normal operation<br />
Alarms<br />
See table of alarms and signals<br />
Virtual control probe alarm<br />
Reverse output deactivated<br />
Product probe alarm<br />
Normal operation<br />
Defrost probe alarm<br />
Normal operation<br />
Condenser probe alarm<br />
Normal operation<br />
Antifreeze probe alarm<br />
Normal operation<br />
Tab. 6.11.1<br />
6.12 Regolazione con secondo gradino<br />
È possibile attivare la regolazione con secondo gradino prevedendo di utilizzare<br />
l’uscita aux1, ‘H1=12 o 13 (con selezione della rotazione).<br />
Il set point per il secondo gradino è dato dalla somma del setpoint ‘St’ con il<br />
parametro ‘rd’/2 che rappresenta il differenziale.<br />
È ancora possibile la regolazione in reverse per il secondo gradino con le stesse<br />
modalità del primo ( parametro r3, ingresso digitale ) , per cui si può arrivare ad<br />
avere ( con la zona neutra ) tre gradini in reverse.<br />
Di seguito un diagramma della regolazione con secondo gradino nel caso di<br />
modalità di funzionamento direct (‘r3’=0 e 1).<br />
6.12 Control with second step<br />
Control with a second step can be activated, using the aux1 output, ‘H1=12 or 13<br />
(with selection of rotation).<br />
The set point for the second step is equal to the sum of the set point ‘St’ and the<br />
parameter ‘rd’/2, which represents the differential.<br />
Control in reverse mode is possible for the second step in the same way as for the<br />
fi rst ( parameter r3, digital input), therefore three steps are possible in reverse (with<br />
dead band control).<br />
Below is a diagram of control with the second step in the case of direct operating<br />
mode (‘r3’=0 and 1).<br />
34<br />
+030220140 - rel. 1.2 - del 06-06-2005
Direct<br />
Zona neutra<br />
Neutral zone<br />
Reverse<br />
Direct<br />
rr St rd/2 rd Grandezza controllata<br />
Controlled measurement<br />
Fig. 6.12.1<br />
Direct<br />
St<br />
rd/2<br />
rd/2<br />
Sonda virtuale<br />
Virtual probe<br />
Fig. 6.12.2<br />
Reverse<br />
rd/2<br />
rd/2<br />
St<br />
Sonda virtuale<br />
Virtual probe<br />
Fig. 6.12.3<br />
Direct + zona neutra<br />
Direct + dead band<br />
r2<br />
rn/2<br />
St<br />
rn/2<br />
rd/2<br />
rd/2<br />
Sonda virtuale<br />
Virtual probe<br />
Fig. 6.12.4<br />
rr rn/2 rn<br />
rn/2<br />
R<br />
R<br />
R<br />
St<br />
rd/2<br />
rd/2<br />
Temperatura<br />
Temperature<br />
Fig. 6.12.5<br />
35<br />
+030220140 - rel. 1.2 - del 06-06-2005
Nota: il gradino corrispondente all’uscita aux1 ha associate le temporizzazioni<br />
‘c0’,‘c1’,‘c2’,‘c3’. Inoltre è attivo il parametro ‘c11’ di ritardo di accensione tra il primo<br />
ed il secondo gradino in modo da diluire nel tempo lo spunto alla partenza mentre<br />
non è previsto alcun ritardo in fase di spegnimento.<br />
Nel caso sia abilitata la funzione di switch tenda (‘A4’=7) il controllore modifi ca il set<br />
point alla chiusura del contatto, aggiungendo o togliendo il valore del parametro ‘r4’.<br />
Il nuovo valore viene utilizzato per tutte le funzioni relative al set-Point (Es. Allarmi<br />
Alta e Bassa temperatura relativi, banda morta, ecc.).<br />
Con ‘r4’=3.0 (valore pre-programmato) il set point viene aumentato di 3 gradi rispetto<br />
al valore utilizzato con tenda aperta in direct e diminuito di 3 gradi in reverse.<br />
Nota: è prevista la rotazione dei carichi con il secondo gradino. Impostando il valore<br />
di ‘H1’=13 si attiva la funzionalità secondo la seguente tabella:<br />
Gradino 1 Gradino 2 Rotazione Compressore 1 Compressore 2<br />
off off 0 off off<br />
on off 0 on off<br />
on on 0 on on<br />
on off 1 off on<br />
off off 0 off off<br />
on off 0 on off<br />
off off 1 off off<br />
on off 1 off on<br />
on on 1 on on<br />
on off 0 on off<br />
off off 1 off off<br />
on off 1 off on<br />
off off 0 off off<br />
on off 0 on off<br />
off off 1 off off<br />
on off 1 off on<br />
off off 0 off off<br />
off off 0 off off<br />
on off 0 on off<br />
on on 0 on on<br />
on off 1 off on<br />
on on 1 on on<br />
on off 0 on off<br />
on on 0 on on<br />
Tab. 6.12.1<br />
Con ‘H1’=13 il fl ag di rotazione viene invertito ad ogni spegnimento del compressore,<br />
quindi alla successiva richiesta di accensione o al successivo spegnimento di uno dei<br />
due carichi verrà utilizzato il carico non impegnato nella precedente accensione o<br />
spegnimento.<br />
Nota: nel caso sia selezionata la regolazione con 2 gradini per il compressore, tutte<br />
le funzionalità che prevedono l’accensione o lo spegnimento del<br />
compressore porteranno allo spegnimento o all’accensione di ambedue i gradini.<br />
La tabella che segue defi nisce lo stato dell’uscita secondo gradino (aux1) in<br />
regolazione .<br />
Funzionalità attiva<br />
Uscita secondo gradino<br />
Normale regolazione direct o reverse<br />
Normale funzionamento<br />
off remoto, da supervisore o da tastiera<br />
Uscita spenta<br />
Defrost<br />
Normale funzionamento<br />
Ciclo continuo<br />
Normale funzionamento<br />
Monitoraggio allarmi di temperatura<br />
Normale funzionamento<br />
Regolazione ventilatori di evaporazione<br />
Normale funzionamento<br />
Power on<br />
Normale funzionamento<br />
Uscita allarme normalmente aperta o chiusa Normale funzionamento<br />
Uscita ausiliaria<br />
Normale funzionamento<br />
Uscita luce<br />
Normale funzionamento<br />
Uscita secondo evaporatore<br />
Normale funzionamento<br />
Uscita di comando per valvola di pump down Normale funzionamento<br />
Uscita regolazione ventilatore di condensazione Normale funzionamento<br />
Uscita secondo compressore ritardato<br />
Normale funzionamento<br />
Uscita ausiliaria con spegnimento in off<br />
Normale funzionamento<br />
Uscita luce con spegnimento in off<br />
Normale funzionamento<br />
Nessuna funzione associata all’uscita aux Normale funzionamento<br />
Uscita reverse in regolazione con zona neutra Normale funzionamento<br />
Uscita gradino secondo compressore -<br />
Uscita gradino secondo compressore con rotazione -<br />
Switch porta con blocco compressore, ventole e Uscita spenta<br />
gestione luce<br />
Switch porta con blocco ventole e gestione luce Normale funzionamento<br />
Switch tenda con variazione del set point e gestione Normale funzionamento<br />
della luce<br />
36<br />
Note: the step corresponding to the aux1 output is associated with the timers<br />
‘c0’,‘c1’,‘c2’,‘c3’. In addition, parameter ‘c11’ is active, setting the activation delay<br />
between the fi rst and second step so as to distribute the starts over time; no delay is<br />
available when deactivating.<br />
If the curtain switch function is enabled (‘A4’=7), the controller modifi es the set<br />
point when the contact closes, adding or subtracting the value of parameter ‘r4’; the<br />
new value is used for all functions relating to the set point (e.g. relative high and<br />
low temperature alarms, dead band, etc.).<br />
When ‘r4’=3.0 (preset value) the set point is increased by 3 degrees compared to<br />
the value used with the curtain open in direct mode, and decreased by 3 degrees in<br />
reverse mode.<br />
Note: the rotation of the loads is available with the second step. Setting ‘H1’=13<br />
activates the function, according to the following table:<br />
Step 1 Step 2 Rotation Compressor 1 Compressor 2<br />
off off 0 off off<br />
on off 0 on off<br />
on on 0 on on<br />
on off 1 off on<br />
off off 0 off off<br />
on off 0 on off<br />
off off 1 off off<br />
on off 1 off on<br />
on on 1 on on<br />
on off 0 on off<br />
off off 1 off off<br />
on off 1 off on<br />
off off 0 off off<br />
on off 0 on off<br />
off off 1 off off<br />
on off 1 off on<br />
off off 0 off off<br />
off off 0 off off<br />
on off 0 on off<br />
on on 0 on on<br />
on off 1 off on<br />
on on 1 on on<br />
on off 0 on off<br />
on on 0 on on<br />
Tab. 6.12.1<br />
When ‘H1’=13, the rotation fl ag is reversed whenever the compressor stops, and<br />
then on the following start request or the following deactivation of one of the two<br />
loads, the load not involved in the previous activation or deactivation will be used.<br />
Note: if control with 2 compressor steps is selected, all the functions that feature the<br />
activation or deactivation of the compressor will activate or deactivate both steps.<br />
The following table defi nes the status of the second step output (aux1).<br />
Active function<br />
Second step output<br />
Normal direct or reverse-cycle control<br />
Normal operation<br />
Remote off, from supervisor or keypad Output off<br />
Defrost<br />
Normal operation<br />
Continuous cycle<br />
Normal operation<br />
Temperature alarm monitoring<br />
Normal operation<br />
Evaporator fan control<br />
Normal operation<br />
Power on<br />
Normal operation<br />
Normally-open or normally-closed alarm output Normal operation<br />
Auxiliary output<br />
Normal operation<br />
Light output<br />
Normal operation<br />
Second evaporator output<br />
Normal operation<br />
Control output for pump down valve<br />
Normal operation<br />
Condenser fan control output<br />
Normal operation<br />
Second delayed compressor output<br />
Normal operation<br />
Auxiliary output with switch off<br />
Normal operation<br />
Light output with switch off<br />
Normal operation<br />
No function associated with the AUX output Normal operation<br />
Reverse output in control with dead band Normal operation<br />
Second compressor step output -<br />
Second compressor step output with rotation -<br />
Door switch with compressor, fan off and light Output off<br />
management<br />
Door switch with compressor off and light Normal operation<br />
management<br />
+030220140 - rel. 1.2 - del 06-06-2005
Sensore di luce e gestione luce<br />
Normale funzionamento<br />
Switch di attivazione uscita ausiliaria<br />
Normale funzionamento<br />
Switch porta con blocco compressore, ventole senza Normale funzionamento<br />
gestione luce<br />
Switch porta con blocco ventole senza gestione luce Normale funzionamento<br />
Attivazione luce da tastiera o supervisore Normale funzionamento<br />
Attivazione ausiliario da tastiera o supervisore Normale funzionamento<br />
Allarmi<br />
Si veda tabella allarmi e<br />
segnalazioni<br />
Allarme sonda virtuale di regolazione<br />
Uscita spenta<br />
Allarme sonda prodotto<br />
Normale funzionamento<br />
Allarme sonda defrost<br />
Normale funzionamento<br />
Allarme sonda condensazione<br />
Normale funzionamento<br />
Allarme sonda antifreeze<br />
Normale funzionamento<br />
Tab. 6.12.2<br />
Curtain switch with set point variation and light<br />
management<br />
Light sensor and light management<br />
Auxiliary output activation switch<br />
Door switch with compressor, fan off, no light<br />
management<br />
Door switch with compressor off, no light<br />
management<br />
Light activation from keypad or supervisor<br />
Auxiliary activation from keypad or supervisor<br />
Alarms<br />
Virtual control probe alarm<br />
Product probe alarm<br />
Defrost probe alarm<br />
Condenser probe alarm<br />
Antifreeze probe alarm<br />
Normal operation<br />
Normal operation<br />
Normal operation<br />
Normal operation<br />
Normal operation<br />
Normal operation<br />
Normal operation<br />
See table of alarms and signals<br />
Output off<br />
Normal operation<br />
Normal operation<br />
Normal operation<br />
Normal operation<br />
Tab. 6.12.2<br />
6.13 Funzione anti-sweat heater<br />
La funzione anti-sweat heater permette di mantenere l’uscita aux1, confi gurata come<br />
luce o aux: H1= 2, 3, 8, 9, disattivate fi nchè la temperatura di regolazione (sonda<br />
virtuale) risulta inferiore a ‘St’+‘Hdh’ per la prima volta dopo l’accensione dello<br />
strumento (power-up) o il ripristino degli allarmi ‘HI’ ‘IA’ ‘dA’ ‘CHt’‘EE’ ‘EF’ ‘rE’ o il<br />
passaggio da off a on.<br />
Durante i suddetti allarmi l’uscita aux1, confi gurata come sopra, è disattivata.<br />
‘Hdh’rappresenta l’offset rispetto al set point della funzione anti-sweat heater. Nel<br />
caso ‘Hdh’=0 la funzione anti-sweat heater è disabilitata.<br />
Nota: al termine della funzione anti-sweat heater le uscite confi gurate come luce<br />
o ausiliario sono comandabili dall’utente attraverso la tastiera, il supervisore o gli<br />
ingressi digitali.<br />
Nel caso l’uscita aux1 sia confi gurata come luce o ausiliario all’accensione (power<br />
on), essa conserva lo stato posseduto al momento dello spegnimento. Se è attivata<br />
la funzione anti-sweat heater ciò non è più vero: l’uscita all’accensione rimane off per<br />
tutto il tempo in cui la funzione rimane attiva. Quando la temperatura di regolazione<br />
(sonda virtuale) raggiunge il valore di ‘St’+‘Hdh’ la funzione termina attivando l’uscita<br />
luce e l’uscita ausiliaria indipendentemente dallo stato delle stesse al momento dello<br />
spegnimento.<br />
Funzionalità attiva<br />
Funzione anti-sweat heater<br />
Normale regolazione direct o reverse Normale funzionamento<br />
off remoto, da supervisore o da tastiera Funzione retriggherata nel passaggio da<br />
off a on<br />
Defrost<br />
Normale funzionamento<br />
Ciclo continuo<br />
Normale funzionamento<br />
Monitoraggio allarmi di temperatura Normale funzionamento<br />
Regolazione ventilatori di evaporazione Normale funzionamento<br />
Power on<br />
Normale funzionamento<br />
Uscita allarme normalmente aperta o chiusa Normale funzionamento<br />
Uscita ausiliaria<br />
Normale funzionamento<br />
Uscita luce<br />
Normale funzionamento<br />
Uscita secondo evaporatore<br />
Normale funzionamento<br />
Uscita di comando per valvola di pump Normale funzionamento<br />
down<br />
Uscita regolazione ventilatore di condensazione<br />
Normale funzionamento<br />
Uscita secondo compressore ritardato Normale funzionamento<br />
Uscita ausiliaria con spegnimento in off Normale funzionamento<br />
Uscita luce con spegnimento in off Normale funzionamento<br />
Nessuna funzione associata all’uscita aux Normale funzionamento<br />
Uscita reverse in regolazione con zona Normale funzionamento<br />
neutra<br />
Uscita gradino secondo compressore Normale funzionamento<br />
Uscita gradino secondo compressore con Normale funzionamento<br />
rotazione<br />
Switch porta con blocco compressore, Normale funzionamento<br />
ventole e gestione luce<br />
Switch porta con blocco ventole e gestione Normale funzionamento<br />
luce<br />
Switch tenda con variazione del set point e Normale funzionamento<br />
gestione della luce<br />
Sensore di luce e gestione luce<br />
Normale funzionamento<br />
Switch di attivazione uscita ausiliaria Normale funzionamento<br />
Switch porta con blocco compressore, Normale funzionamento<br />
ventole senza gestione luce<br />
Switch porta con blocco ventole senza Normale funzionamento<br />
gestione luce<br />
Attivazione luce da tastiera o supervisore Normale funzionamento<br />
Attivazione ausiliario da tastiera o supervisore<br />
Normale funzionamento<br />
Allarmi<br />
Si veda tabella allarmi e segnalazioni<br />
Allarme sonda virtuale di regolazione Funzione retriggherata.<br />
37<br />
6.13 Anti-sweat heater function<br />
The anti-sweat heater function is used to maintain the aux1 output, confi gured as<br />
the light or aux (H1= 2, 3, 8, 9) deactivated while the control temperature (virtual<br />
probe) is less than ‘St’+‘Hdh’ when the instrument is fi rst powered up, the ‘HI’ ‘IA’<br />
‘dA ‘CHt’ ‘EE’ ‘EF’ ‘rE’ alarms are reset, or when switching on.<br />
During the aforementioned alarms, the aux1 output, confi gured as above, is<br />
deactivated.<br />
‘Hdh’ represents the offset from the set point for the anti-sweat heater function. If<br />
‘Hdh’=0, the anti-sweat heater function is disabled.<br />
Note: at the end of the anti-sweat heater function the outputs confi gured as the<br />
light or auxiliary can be controlled by the user using the keypad, the supervisor or<br />
the digital inputs.<br />
If the aux1 output is confi gured as light or auxiliary on power-up, it maintains the<br />
same status as prior to shutdown. If the anti-sweat heater function is enabled, this<br />
is no longer true: on power-up, the output remains off for the entire time that the<br />
function remains active. When the control temperature (virtual probe) reaches the<br />
value of ‘St’+‘Hdh’, the function ends, activating the light output and the auxiliary<br />
output, irrespective of their status prior to shutdown.<br />
Active function<br />
Function with anti-sweat heater<br />
Normal direct or reverse-cycle control Normal operation<br />
Remote off, from supervisor or keypad Function restarted when switching on<br />
Defrost<br />
Normal operation<br />
Continuous cycle<br />
Normal operation<br />
Temperature alarm monitoring<br />
Normal operation<br />
Evaporator fan control<br />
Normal operation<br />
Power on<br />
Normal operation<br />
Normally-open or normally-closed alarm Normal operation<br />
output<br />
Auxiliary output<br />
Normal operation<br />
Light output<br />
Normal operation<br />
Second evaporator output<br />
Normal operation<br />
Control output for pump down valve Normal operation<br />
Condenser fan control output<br />
Normal operation<br />
Second delayed compressor output Normal operation<br />
Auxiliary output with switch off<br />
Normal operation<br />
Light output with switch off<br />
Normal operation<br />
No function associated with the AUX output Normal operation<br />
Reverse output in control with dead band Normal operation<br />
Second compressor step output<br />
Normal operation<br />
Second compressor step output with Normal operation<br />
rotation<br />
Door switch with compressor, fan off and Normal operation<br />
light management<br />
Door switch with compressor off and light Normal operation<br />
management<br />
Curtain switch with set point variation and Normal operation<br />
light management<br />
Light sensor and light management Normal operation<br />
Auxiliary output activation switch Normal operation<br />
Door switch with compressor, fan off, no Normal operation<br />
light management<br />
Door switch with compressor off, no light Normal operation<br />
management<br />
Light activation from keypad or supervisor Normal operation<br />
Auxiliary activation from keypad or Normal operation<br />
supervisor<br />
Alarms<br />
See table of alarms and signals<br />
Virtual control probe alarm<br />
Function restarted<br />
Product probe alarm<br />
Normal operation<br />
Defrost probe alarm<br />
Normal operation<br />
Condenser probe alarm<br />
Normal operation<br />
+030220140 - rel. 1.2 - del 06-06-2005
Allarme sonda prodotto<br />
Allarme sonda defrost<br />
Allarme sonda condensazione<br />
Allarme sonda antifreeze<br />
Normale funzionamento<br />
Normale funzionamento<br />
Normale funzionamento<br />
Normale funzionamento<br />
Tab. 6.13.1<br />
Antifreeze probe alarm<br />
Normal operation<br />
Tab. 6.13.1<br />
6.14 Allarme anti freeze.<br />
L’allarme antifreeze è attivo solo se una sonda è stata impostata come sonda di<br />
antifreeze /Ax = 4 (x=2-5).<br />
ALF stabilisce il valore di temperatura sotto il quale viene attivo l’allarme antifreezeed<br />
AFr è ritardato del tempo inpostato con il parametro AdF.<br />
Il ripristino dell’allarme è <strong>manual</strong>e o da supervisore.<br />
Questa condizione comporta lo spegnimento del compressore e l’attivazione del relè<br />
di allarme, se impostatoH1=0,1.<br />
6.14 Anti freeze alarm<br />
The antifreeze alarm is only active if a probe has been set as the antifreeze probe,<br />
/Ax = 4 (x=2-5).<br />
ALF defi nes the temperature value below which the antifreeze alarm AFr is activated,<br />
delayed by the time set for parameter AdF.<br />
The alarm is reset <strong>manual</strong>ly or from the supervisor.<br />
This condition involves the deactivation of the compressor and the activation of the<br />
alarm relay, if H1=0.1.<br />
Funzionalità attiva<br />
Funzionalità in antifreeze<br />
Normale regolazione direct o reverse<br />
Normale funzionamento<br />
off remoto, da supervisore o da tastiera<br />
Funzione disabilitata (timer retriggherato)<br />
Defrost<br />
Normale funzionamento<br />
Ciclo continuo<br />
Sospeso o pendente<br />
Monitoraggio allarmi di temperatura<br />
Normale funzionamento<br />
Regolazione ventilatori di evaporazione<br />
Normale funzionamento<br />
Power on<br />
Normale funzionamento<br />
Uscita allarme normalmente aperta o chiusa Uscita eccitata in ‘AFr’<br />
Uscita ausiliaria<br />
Normale funzionamento<br />
Uscita luce<br />
Normale funzionamento<br />
Uscita secondo evaporatore<br />
Normale funzionamento<br />
Uscita di comando per valvola di pump down Normale funzionamento<br />
Uscita regolazione ventilatore di condensazione Normale funzionamento<br />
Uscita secondo compressore ritardato<br />
Normale funzionamento<br />
Uscita ausiliaria con spegnimento in off<br />
Normale funzionamento<br />
Uscita luce con spegnimento in off<br />
Normale funzionamento<br />
Nessuna funzione associata all’uscita aux Normale funzionamento<br />
Uscita reverse in regolazione con zona neutra Normale funzionamento<br />
Uscita gradino secondo compressore<br />
Normale funzionamento<br />
Uscita gradino secondo compressore con rotazione Normale funzionamento<br />
Switch porta con blocco compressore, ventole e Normale funzionamento<br />
gestione luce<br />
Switch porta con blocco ventole e gestione luce Normale funzionamento<br />
Switch tenda con variazione del set point e gestione Normale funzionamento<br />
della luce<br />
Sensore di luce e gestione luce<br />
Normale funzionamento<br />
Switch di attivazione uscita ausiliaria<br />
Normale funzionamento<br />
Switch porta con blocco compressore, ventole Normale funzionamento<br />
senza gestione luce<br />
Switch porta con blocco ventole senza gestione Normale funzionamento<br />
luce<br />
Attivazione luce da tastiera o supervisore Normale funzionamento<br />
Attivazione ausiliario da tastiera o supervisore Normale funzionamento<br />
Allarmi<br />
Si veda tabella allarmi e<br />
segnalazioni<br />
Allarme sonda virtuale di regolazione<br />
Normale funzionamento<br />
Allarme sonda prodotto<br />
Normale funzionamento<br />
Allarme sonda defrost<br />
Normale funzionamento<br />
Allarme sonda condensazione<br />
Normale funzionamento<br />
Allarme sonda antifreeze<br />
Attivazione allarme ‘AFr’<br />
Tab. 6.14.1<br />
Active function<br />
Normal direct or reverse-cycle control<br />
Remote off, from supervisor or keypad<br />
Defrost<br />
Continuous cycle<br />
Temperature alarm monitoring<br />
Evaporator fan control<br />
Power on<br />
Normally-open or normally-closed alarm output<br />
Auxiliary output<br />
Light output<br />
Second evaporator output<br />
Control output for pump down valve<br />
Condenser fan control output<br />
Second delayed compressor output<br />
Auxiliary output with switch off<br />
Light output with switch off<br />
No function associated with the AUX output<br />
Reverse output in control with dead band<br />
Second compressor step output<br />
Second compressor step output with rotation<br />
Door switch with compressor, fan off and light<br />
management<br />
Door switch with compressor off and light<br />
management<br />
Curtain switch with set point variation and light<br />
management<br />
Light sensor and light management<br />
Auxiliary output activation switch<br />
Door switch with compressor, fan off, no light<br />
management<br />
Door switch with compressor off, no light<br />
management<br />
Light activation from keypad or supervisor<br />
Auxiliary activation from keypad or supervisor<br />
Alarms<br />
Virtual control probe alarm<br />
Product probe alarm<br />
Defrost probe alarm<br />
Condenser probe alarm<br />
Antifreeze probe alarm<br />
Functionality in antifreeze<br />
Normal operation<br />
Function disabled (timer<br />
restarted)<br />
Normal operation<br />
Suspended or in progress<br />
Normal operation<br />
Normal operation<br />
Normal operation<br />
Output energised with ‘AFr’<br />
Normal operation<br />
Normal operation<br />
Normal operation<br />
Normal operation<br />
Normal operation<br />
Normal operation<br />
Normal operation<br />
Normal operation<br />
Normal operation<br />
Normal operation<br />
Normal operation<br />
Normal operation<br />
Normal operation<br />
Normal operation<br />
Normal operation<br />
Normal operation<br />
Normal operation<br />
Normal operation<br />
Normal operation<br />
Normal operation<br />
Normal operation<br />
See table of alarms and signals<br />
Normal operation<br />
Normal operation<br />
Normal operation<br />
Normal operation<br />
Activation of ‘AFr’ alarm<br />
Tab. 6.14.1<br />
6.15 Funzioni particolari per la gestione di banchi<br />
canalizzati (MPX)<br />
Defrost canalizzato<br />
Il defrost canalizzato permette il sincronismo dei defrost dei banchi appartenenti ad<br />
una stessa sottorete. Per quanto concerne gli strumenti ed eventuali suoi derivati la<br />
gestione viene demandata ad un sincronizzatore che l’inizio e la fi ne sbrinamento e<br />
quando tutti i controlli l’hanno portato a termine (prima della fase di gocciolamento).<br />
Il master inizia spontaneamente il defrost (da una qualsiasi delle s<strong>org</strong>enti: Rtc,<br />
tastiera, supervisore, a intervalli, …).<br />
Il sincronizzatore rileva l’inizio del defrost del master e si incarica di attivarlo anche<br />
sugli slave.<br />
Master e slave segnalano al sincronizzatore di aver raggiunto la condizione di fi ne<br />
defrost (prima della fase di gocciolamento).<br />
Il sincronizzatore si incarica di segnalare a tutte le unità nello stato di defrost la possibilità<br />
di terminarlo e di passare al gocciolamento quando tutte avranno raggiunto la<br />
condizione di fi ne defrost (inclusa la fi ne del defrost per time out, parametro dP)<br />
38<br />
6.15 Special functions for the management of<br />
multiplexed cabinets (MPX)<br />
Multiplexed defrost<br />
The multiplexed defrost allows the showcases belonging to the same<br />
sub-network to be defrosted in synch. As regards the instruments, the function is<br />
managed by a synchronizer that controls the start and the end of the defrost, as<br />
well as checking when all the controllers have reached the end (before the dripping<br />
phase).<br />
The master spontaneously starts the defrost (from any of the sources: RTC, keypad,<br />
supervisor, cycles, …).<br />
The synchronizer detects the start of the defrost on the master and then activates it<br />
on the slaves.<br />
The master and slaves tell the synchronizer when they have reached the end defrost<br />
condition (before the dripping phase).<br />
The synchronizer sends a signal to all the units in the defrost status to end the<br />
procedure and pass to the dripping phase when all of them have reached the end<br />
defrost condition (including the end defrost by time out, parameter dP)<br />
+030220140 - rel. 1.2 - del 06-06-2005
Nota: la sincronizzazione del defrost canalizzato viene attivata solo nei controlli<br />
Master e Slave (‘In’=1-6).<br />
Nel caso dello Slave la sincronizzazione si ha solo se il defrost è stato richiesto da<br />
supervisore.<br />
Segnalazione allarmi remoti<br />
È possibile abilitare la segnalazione dello stato di allarme di altri controlli del sistema.<br />
Questo vuol dire che su ogni controllo il sincronizzatore può attivare una<br />
segnalazione di allarme presente su un altro controllo con la simbologia nx, dove x<br />
può andare da 1 a 6.<br />
Per cui, ad esempio, se il controllo con indirizzo di rete locale 2 (slave 2) è in<br />
allarme, sui controlli con abilitata la visualizzazione, comparirà n 2.<br />
Il parametro HSA abilita il sincronizzatore a remotare sul controllo gli allarmi di altri<br />
dispositivi della rete locale.<br />
Durante la visualizzazione degli allarmi remoti il relè di allarme, se selezionato, viene<br />
attivato.<br />
Note: the synchronization of the multiplexed defrost is only activated in the Master<br />
and Slave controllers (‘In’=1 to 6).<br />
In the case of Slaves, the synchronization only takes place if the defrost has been<br />
started from the supervisor.<br />
Remote alarm signals<br />
The alarm signals can be activated on other controllers in the system.<br />
This means that on each controller, the synchronizer can activate an alarm signal<br />
relating to another controller, using the symbol nx, where x may be between 1 and 6.<br />
Therefore, for example, if the controller with local network address 2 (slave 2) has<br />
an alarm, the signal n2 will be displayed on the controllers enabled.<br />
The parameter HSA enables the synchronizer to remotely signal the alarms from<br />
other devices in the local network.<br />
When displaying the remote alarms the alarm relay, if selected, is activated.<br />
Note: the synchronizer decides which alarms are signalled remotely.<br />
Nota: spetta al sincronizzatore decidere quali allarmi devono essere remotati.<br />
Remotazione luce e ausiliario<br />
È possibile abilitare la sincronizzazione dei relè luce ed aux del master sulle unità<br />
slave connesse nella rete locale.<br />
I parametri ‘HrL’ e ‘HrA’ abilitano il sincronizzatore a remotare sui controlli lo stato<br />
rispettivamente della luce e del relè ausiliario del master.<br />
Nota: la funzione di remotazione luce ed ausiliario è demandata al<br />
sincronizzatore.<br />
Download dei parametri<br />
L’ingresso nei parametri di confi gurazione, con password corrente + 44 (22 + 44 =<br />
66) permette di attivare il download dei parametri.<br />
Il download può essere effettuato sia dal master che da uno slave presente nella rete<br />
locale. Il controllo che richiede il abilita il trasferimento dei propri parametri alle altre<br />
unità.<br />
Il sincronizzatore attiva su tutti i controlli il messaggio ‘dnL’ per tutto il tempo<br />
dell’operazione.<br />
In caso di errori nel trasferimento dei parametri, errore di rete, oppure in caso di<br />
errore di memorizzazione dei parametri nel controllo e al termine del download il<br />
sincronizzatore attiva il corrispondente messaggio di errore (dx, x=1-6) per indicare<br />
che il download sull’unità x non è stato eseguito correttamente.<br />
Nota: Il download dei parametri è eseguito dal sincronizzatore di rete, quindi<br />
quest’ultimo determinerà i parametri trasferiti con il download.<br />
Remote light and auxiliary<br />
The light and aux relays on the master and on the slaves connected in the local<br />
network can be synchronized.<br />
The parameters ‘HrL’ and ‘HrA’ enable the synchronizer to send the status of the<br />
master light and the auxiliary relay, respectively.<br />
Note: the remote light and auxiliary function is managed by the synchronizer.<br />
Downloading the parameters<br />
Entering parameter confi guration mode, with the current password + 44 (22 + 44 =<br />
66), activates the download of the parameters.<br />
The download can be performed either from the master or from a slave in the local<br />
network. The controller that starts the function transfers its parameters to the other<br />
units.<br />
The synchronizer activates the message ‘dnL’ on all the controllers for the duration<br />
of the operation.<br />
In the event of errors when transferring the parameters, network errors, or errors<br />
saving the parameters to the controller, at the end of the download the synchronizer<br />
activates the corresponding error message (dx, x=1 to 6) to indicate that the<br />
download to unit x was not performed correctly.<br />
Note: The parameters are downloaded by the network synchronizer, and thus this<br />
devices defi nes which parameters are transferred during the download.<br />
6.16 HACCP (Hazard Analysis and Critical Control<br />
Point)<br />
Questa funzione è attivabile unicamente sui controlli con opzione Real time clock<br />
inserita e permette il controllo avanzato della temperatura di esercizio e la<br />
registrazione di eventuali anomalie dovute a cadute di tensione o ad innalzamenti<br />
della temperatura di esercizio per varie cause (rotture, condizioni operative gravose,<br />
errori d’utilizzo, ecc…). Vengono presi in considerazione due tipi di allarme HACCP<br />
segnalati a display rispettivamente con i codici HA e HF. “HA” - nel caso in cui,<br />
durante il funzionamento, si rilevi una temperatura superiore alla soglia impostata<br />
nel parametro “AH ” (soglia allarme alta temperatura) per un tempo Th superiore alla<br />
somma del parametro “Ad” (ritardo allarme temperatura HACCP) e del parametro<br />
“Htd” (ritardo rilevazione allarmi di temperatura), viene generato l’allarme HA.<br />
Temperatura<br />
Temperature<br />
Allarme HA<br />
HA Alarm<br />
6.16 HACCP (Hazard Analysis and Critical Control<br />
Point)<br />
This function allows advanced control of the operating temperature and the<br />
recording of any anomalies due to power failures or increases in the operating<br />
temperature due to various causes (breakages, severe operating conditions,<br />
operator errors, etc…). This function can only be activated on the controllers with<br />
the RTC option fi tted. There are two types of HACCP alarm, signalled on the display<br />
with the following codes respectively: HA and HF. “HA” - if, during operation, the<br />
temperature measured is higher than the threshold set for the parameter “AH”<br />
(high temperature alarm threshold) for a time Th higher than the sum of the<br />
parameter “Ad” (HACCP alarm delay) and the parameter “Htd” (temperature alarm<br />
detection delay), the HA alarm is generated.<br />
Registrazione massima temperatura<br />
Maximum temperature recording<br />
AH<br />
set point (St)<br />
Fig. 6.16.1<br />
Htd+Ad<br />
Durata allarme<br />
Alarm duration<br />
Tempo<br />
Time<br />
39<br />
+030220140 - rel. 1.2 - del 06-06-2005
“HF” – si verifi ca dopo una caduta di tensione per un tempo prolungato (>1 minuto)<br />
quando, al ritorno dell’alimentazione, la temperatura risulta essere maggiore della<br />
soglia impostata nel parametro “AH” (valore assoluto, se “A1”= 0; valore relativo<br />
formato da “AH” + “St”, se “A1”= 1.<br />
Temperatura<br />
Temperature<br />
“HF” – this occurs after a power failure for an extended time (>1 minute) if, when<br />
power returns, the temperature is higher than the threshold set for the parameter<br />
“AH” (the absolute value of AH, if “A1”= 0; the relative value equal to “AH” + “St”, if<br />
“A1”= 1).<br />
Allarme HF<br />
HF Alarm<br />
Black out<br />
AH<br />
set point (St)<br />
Fig. 6.16.2<br />
Tempo<br />
Time<br />
Al verifi carsi dell’evento HA o HF vengono registrati i seguenti dati:<br />
• ora, minuti e giorno della settimana,<br />
• tipo di allarme,<br />
• massima temperatura raggiunta dopo il verifi carsi dell’allarme,<br />
• durata della mancanza di alimentazione.<br />
La memorizzazione di uno o di entrambi gli allarmi provoca il lampeggio del LED<br />
e la visualizzazione del codice d’allarme sul display, oltre alla registrazione<br />
dell’allarme in E2PROM e all’attivazione del relè di allarme o del buzzer (se presenti).<br />
La pressione dei tasti Set e def<br />
per più di 5 secondi provoca il reset del<br />
lampeggio del LED , della segnalazione HA e/o HF e la<br />
reinizializzazione del monitoraggio di HA.<br />
La pressione del tasto provoca la tacitazione del buzzer e il rilascio del relè di<br />
allarme (se presenti).<br />
È possibile visualizzare data e ora degli ultimi 3 allarmi HA e HF attraverso i 6<br />
parametri HA: HA1, HA2 e HF, HF1, HF2. L’intervento di un nuovo allarme HA o HF<br />
fa scorrere la lista degli ultimi 3 allarmi facendo uscire il meno recente ed è possibile<br />
visualizzarlo attraverso il parametro che identifi ca l’allarme più recente cioè HA o HF.<br />
Il contatore degli eventi di allarme HAn o HFn viene incrementato e può assumere<br />
un valore massimo di 15.<br />
The following data are saved when the HA or HF event occurs:<br />
• hour, minutes and day of the week,<br />
• type of alarm,<br />
• maximum temperature reached after the activation of the alarm,<br />
• duration of the power failure.<br />
The activation of one or both of the alarms causes the LED to fl ash and the<br />
display of the alarm code, as well as the recording of the alarm to the E2PROM and<br />
the activation of the alarm relay or buzzer (if present).<br />
Pressing Set and def<br />
or more than 5 seconds, resets the fl ashing of the<br />
LED, the HA and/or HF signal and reinitialises the monitoring of HA.<br />
Pressing mutes the buzzer and resets the alarm relay (if present).<br />
The date and time of the last 3 alarms. HA and HF. can be displayed by using 6<br />
parameters: HA, HA1, HA2 and HF, HF1, HF2. The activation of a new ‘HA’ or ‘HF’<br />
alarm shifts the list of the last 3 alarms, deleting the oldest event. The new alarm<br />
can be displayed using the parameter that identifi es the most recent alarm, that<br />
is, HA or HF. The counter of the HAn or HFn alarm events is increased, up to a<br />
maximum value of 15.<br />
7. DESCRIZIONE DEI PARAMETRI DI<br />
FUNZIONAMENTO<br />
7. DESCRIPTION OF THR OPERATING<br />
PARAMETERS<br />
7.1 Parametri relativi alla gestione delle sonde di<br />
temperatura<br />
7.1 Temperature probe management parameters<br />
N° Cod. Parametro MSYF U.M. Tipo Def. Max Min<br />
1 /2 Stabilità misura MSYF - C 4 15 1<br />
2 /3 Rallentamento visualizzazione sonda MSYF - C 0 15 0<br />
3 /4 Sonda virtuale MSYF - C 0 100 0<br />
4 /5 Selezione °C o°F MSYF fl ag C 0 1 0<br />
5 /6 Punto decimale MSYF fl ag C 0 1 0<br />
6 /tI Visualizzazione su terminale interno MSYF - C 1 6 1<br />
7 /tE Visualizzazione su terminale esterno MSYF - C 0 6 0<br />
8 /P Selezione tipo di sonda MSYF - C 0 2 0<br />
9 /A2 Confi gurazione sonda 2 M-YF<br />
-S--<br />
-<br />
-<br />
C<br />
C<br />
2<br />
0<br />
3<br />
3<br />
0<br />
0<br />
10 /A3 Confi gurazione sonda 3 MSYF - C 0 3 0<br />
11 /A4 Confi gurazione sonda 4 MSYF - C 0 3 0<br />
12 /c1 Calibrazione sonda 1 MSYF °C/°F C 0.0 20 -20<br />
13 /c2 Calibrazione sonda 2 MSYF °C/°F C 0.0 20 -20<br />
14 /c3 Calibrazione sonda 3 MSYF °C/°F C 0.0 20 -20<br />
15 /c4 Calibrazione sonda 4 MSYF °C/°F C 0.0 20 -20<br />
Tab. 7.1.1<br />
40<br />
+030220140 - rel. 1.2 - del 06-06-2005
N° Cod. Paramter MSYF U.M. Type Def. Max Min<br />
1 /2 Measurement stability MSYF - C 4 15 1<br />
2 /3 Probe display response MSYF - C 0 15 0<br />
3 /4 Virtual probe MSYF - C 0 100 0<br />
4 /5 Select °C or °F MSYF fl ag C 0 1 0<br />
5 /6 Decimal point MSYF fl ag C 0 1 0<br />
6 /tI Display on internal terminal MSYF - C 1 6 1<br />
7 /tE Display on external terminal MSYF - C 0 6 0<br />
8 /P Select type of probe MSYF - C 0 2 0<br />
9 /A2 Confi guration of probe 2 M-YF<br />
-S--<br />
-<br />
-<br />
C<br />
C<br />
2<br />
0<br />
3<br />
3<br />
0<br />
0<br />
10 /A3 Confi guration of probe 3 MSYF - C 0 3 0<br />
11 /A4 Confi guration of probe 4 MSYF - C 0 3 0<br />
12 /c1 Calibration of probe 1 MSYF °C/°F C 0.0 20 -20<br />
13 /c2 Calibration of probe 2 MSYF °C/°F C 0.0 20 -20<br />
14 /c3 Calibration of probe 3 MSYF °C/°F C 0.0 20 -20<br />
15 /c4 Calibration of probe 4 MSYF °C/°F C 0.0 20 -20<br />
Tab. 7.1.1<br />
/2: Stabilità misura<br />
Defi nisce il coeffi ciente usato per stabilizzare la misura di temperatura.<br />
Valori bassi assegnati a questo parametro consentono una risposta pronta del<br />
sensore alle variazioni di temperatura ma la lettura diventa maggiormente sensibile<br />
ai disturbi. Valori alti rallentano la risposta ma garantiscono una maggiore immunità<br />
ai disturbi, ovvero una lettura più stabile e più precisa.<br />
Il parametro opera un fi ltraggio delle minime variazioni sulle misure di temperatura<br />
e, allo stesso tempo, considera il valore medio della misura effettuata.<br />
/3: Rallentamento della visualizzazione sonda<br />
Questo parametro permette di impostare la velocità di aggiornamento a display<br />
della temperatura visualizzata. La temperatura mostrata sul display, tenderà a<br />
inseguire molto lentamente bruschi scostamenti del set point e, viceversa,<br />
varierà molto velocemente nel caso in cui la temperatura da visualizzare si muova<br />
in direzione del set point. Nel caso in cui la temperatura di regolazione superasse le<br />
soglie di alta o bassa temperatura e si presentasse quindi un allarme AL o AH, o nel<br />
caso in cui il numero massimo di step di fi ltraggio (pari a 255) venisse superato (vedi<br />
colonna Timeout nella tabella sottostante), il fi ltraggio verrebbe subito bypassato<br />
e la temperatura visualizzata diventerebbe la temperatura effettivamente misurata,<br />
fi no al completo rientro degli allarmi. L’azione del parametro ha effetto solo sulla<br />
temperatura visualizzata e non sulla temperatura usata per la regolazione.<br />
Attenzione:<br />
• la temperatura di regolazione effettivamente misurata, è diversa da quella<br />
visualizzata, quindi, l’attivazione delle uscite può non essere in relazione con<br />
quest’ultima.<br />
• il parametro agisce sulla temperatura visualizzata sul display dello strumento,<br />
se /tE=0 (nessuna sonda visualizzata sul display ripetitore); nel caso in cui sia<br />
prevista la visualizzazione nel display ripetitore (/tE 0), il parametro /3<br />
agirà sulla temperatura visualizzata nel display ripetitore stesso.<br />
Esempio: nel caso di banchi frigo di tipo “Bottle cooler”, nell’utilizzo tipico di un<br />
supermercato, è possibile che a fronte di frequenti aperture delle porte e a causa<br />
della maggior inerzia termica dei liquidi rispetto all’aria, essendo la sonda in aria e<br />
non direttamente sui prodotti, lo strumento rilevi una temperatura più alta rispetto<br />
all’effettiva temperatura delle bibite, visualizzando sul display una temperatura poco<br />
“realistica”. Impostando il parametro /3 ad un valore diverso da 0 tutte le brusche<br />
variazioni di temperatura vengono “fi ltrate” in visualizzazione, mostrando un andamento<br />
della temperatura più “vicino” al reale andamento della temperatura della<br />
merce. Di seguito la tabella dei possibili valori di /3 e i corrispondenti valori di ritardo<br />
aggiornamento del display (Trit).<br />
Valore par. /3 Ritardo visual. (Trit) Timeout<br />
0 Disabilitato 0<br />
1 5 s 21 min.<br />
2 10 s. 42 min.<br />
3 15 s. 64 min.<br />
4 20 s. 85 min.<br />
5 25 s. 106 min.<br />
6 30 s. 127 min.<br />
7 40 s. 170 min.<br />
8 50 s. 212 min.<br />
9 60 s 255 min.<br />
10 75 s 319 min.<br />
11 90 s 382 min.<br />
12 105 s 446 min.<br />
13 120 s 510 min.<br />
14 150 s 637 min.<br />
15 180 s 765 min.<br />
Tab. 7.1.2<br />
/4: Media sonde (sonda virtuale)<br />
Questo parametro permette di scegliere se regolare la temperatura facendo<br />
riferimento alla sola sonda ambiente oppure se regolare facendo riferimento alla<br />
/2: Measurement stability<br />
Defi nes the coeffi cient used to stabilise the temperature reading. Low values<br />
assigned to this parameter allow a prompt response of the sensor to<br />
temperature variations, but the reading becomes more sensitive to<br />
disturbance. High values slow down the response, but guarantee greater immunity<br />
to disturbance, that is, a more stable and more precise reading.<br />
The parameter acts on the temperature measurements, fi ltering the minimum<br />
variations, and at the same time considers the average value of the<br />
measurements made.<br />
/3: Probe display response<br />
This parameter is used to set the rate at which the temperature display is updated.<br />
The temperature shown on the display tends to follow rapid deviations away from<br />
the set point very slowly, and vice-versa, moves very quickly in the event where<br />
the temperature displayed is approaching the set point. If the control temperature<br />
exceeds the high or low temperature thresholds and an alarm is activated, AL or<br />
AH, or if the maximum number of fi ltering steps (255) is exceeded (see the Timeout<br />
column in the table below), the fi ltering would immediately be bypassed and the<br />
temperature displayed would be the temperature effectively measured, until all<br />
the alarms are reset. The action of the parameter only affects the temperature<br />
displayed, and not the temperature used for the control functions.<br />
Important:<br />
• the adjustment temperature actually measured differs from the displayed<br />
value, and, therefore, the outputs may not be activated with reference to the<br />
latter temperature value.<br />
• the parameter acts on the temperature displayed by the instrument, if /tE=0<br />
(no probe displayed by the repeater display); if the repeater display is<br />
envisaged (/tE 0), the parameter /3 will act on the temperature displayed<br />
by the repeater.<br />
Example: in the case of “bottle coolers”, typically used in supermarkets, when<br />
the doors are opened frequently, due to the greater thermal inertia of the liquids<br />
compared to the air, and the fact that the probe is positioned in the air and not<br />
directly on the products, the instrument measures a temperature that is higher<br />
than effective temperature of the soft drinks, thus displaying a quite “unrealistic”<br />
temperature. Setting the parameter /3 to a value other than 0, any abrupt variations<br />
in temperature are “fi ltered” on the display, showing a temperature trend that is<br />
“closer” to the actual trend of the product temperature. The following table shows<br />
the possible values of ‘/3’ and the corresponding display delayed update values<br />
(Tdel).<br />
Par. value /3 Display delay (Trit) Timeout<br />
0 Disabled 0<br />
1 5 s 21 min.<br />
2 10 s. 42 min.<br />
3 15 s. 64 min.<br />
4 20 s. 85 min.<br />
5 25 s. 106 min.<br />
6 30 s. 127 min.<br />
7 40 s. 170 min.<br />
8 50 s. 212 min.<br />
9 60 s 255 min.<br />
10 75 s 319 min.<br />
11 90 s 382 min.<br />
12 105 s 446 min.<br />
13 120 s 510 min.<br />
14 150 s 637 min.<br />
15 180 s 765 min.<br />
Tab. 7.1.2<br />
/4: Probe average (virtual probe)<br />
This parameter is used to choose whether to control the temperature based solely<br />
41<br />
on the room probe reading, or alternatively whether to refer to the “weighted”<br />
+030220140 - rel. 1.2 - del 06-06-2005
media “pesata” della sonda ambiente S1 e alla sonda 2 (S2, vedi parametro /A2). Il<br />
parametro torna utile in applicazioni speciali.<br />
Esempio: ponendo la sonda ambiente in aspirazione e la sonda 2 in mandata, la<br />
regolazione può avvenire sulla media pesata dei 2 valori letti.<br />
La formula usata è: media sonde (sonda virtuale) =[S1 x (100 - P) + (S2 x P)] / 100<br />
dove:<br />
S1 = sonda ambiente;<br />
S2 = sonda 2;<br />
P = valore del parametro /4.<br />
Sonda virtuale:<br />
• /4 = 0 la regolazione è ottenuta utilizzando la sonda ambiente, situazione<br />
tipica.<br />
• /4 =100 la regolazione avviene invece facendo riferimento ai valori letti dalla<br />
sonda 2.<br />
• /4 =50 il controllore regola facendo riferimento ad una sonda “virtuale” che è<br />
data dalla media tra la sonda ambiente e la sonda 2. Con valori superiori a 50<br />
ha peso maggiore la sonda 2, per valori inferiori la sonda ambiente.<br />
Avvertenza: in caso di guasto o non abilitazione della sonda 2, lo strumento<br />
regola sulla sonda ambiente. E nel caso essa fosse guasta è guasta viene segnalato<br />
l’errore “Sonda di regolazione”.<br />
Default: /4 = 0 => regolazione su sonda ambiente.<br />
/5: Selezione °C o °F<br />
Defi nisce l’unità di misura (gradi Centigradi oppure Fahrenheit) visualizzata a<br />
display.<br />
/5 =0 per lavorare in gradi Centigradi.<br />
/5 =1 per lavorare in gradi Fahrenheit.<br />
Default: /5 = 0 => funzionamento in gradi Centigradi.<br />
/6: Punto decimale<br />
Consente di abilitare o disabilitare la visualizzazione della temperatura con la risoluzione<br />
del decimo di grado tra -20 e + 20.<br />
Nota: l’esclusione del punto decimale è attiva solo relativamente alla<br />
visualizzazione della misura sul display principale e remoto, mentre<br />
l’impostazione dei parametri avviene sempre al decimo di grado.<br />
/6 =0 i valori di temperatura sono visualizzati con il decimo di grado, tra -20 e +20 °C<br />
/6 =1 tutti i valori di temperatura sono visualizzati senza il decimo di grado.<br />
Default: /6 = 0 = > punto decimale inserito.<br />
/tI: Visualizzazione sul display<br />
Seleziona la sonda da visualizzare sul display dello strumento.<br />
/tI =1 => sonda virtuale<br />
/tI =2 => sonda 1<br />
/tI =3 => sonda 2<br />
/tI =4 => sonda 3<br />
/tI =5 => sonda 4<br />
/tI =6 => da non selezionare<br />
/tI=7 => set point<br />
Nota:<br />
• La regolazione viene sempre eseguita sulla sonda virtuale di regolazione.<br />
• Se la sonda da visualizzare non è stata abilitata o è in errore il display<br />
mostrerà ‘___’.<br />
Default: /tI =1 => Sonda virtuale.<br />
42<br />
/tE : Visualizzazione su terminale esterno<br />
Seleziona la sonda da visualizzare sul terminale remoto.<br />
/tE =0 => terminale remoto non presente<br />
/tE =1 => sonda virtuale;<br />
/tE =2 => sonda 1<br />
/tE =3 => sonda 2<br />
/tE =4 => sonda 3<br />
/tE =5 => sonda 3<br />
/tE =6 => da non selezionare<br />
Nota:<br />
• Se il terminale non è presente il display rimarrà completamente scuro;<br />
Default: /tE =0 => Terminale remoto non presente.<br />
/P: Selezione tipo di sonda<br />
Permette di selezionare il tipo di sonda da utilizzare per la misurazione.<br />
/P = 0 => NTC standard con range –50T90 °C<br />
/P = 1 => NTC enhanced con range –40T150 °C<br />
/P =2 => PTC standard range –50T150 °C<br />
Per la corretta misura delle sonde PTC è necessario avere a disposizione un hardwaaverage<br />
of the room probe S1 and probe 2 (S2, see the parameter ‘/A2’). This<br />
parameter is useful in special applications.<br />
Example: if the ambient probe is put in suction mode, and probe 2 in delivery<br />
mode, adjustment can be effected on the weighted average of the 2 read values.<br />
The formula used is: probe average (Virtual probe) = ( (S1* (100 - P) ) + (S2*P) )<br />
/ 100 where:<br />
S1 = ambient probe;<br />
S2 = probe 2;<br />
P = value of the parameter ‘/4’.<br />
Virtual probe:<br />
• /4=0 control is performed using the ambient probe. This is the typical<br />
situation.<br />
• /4=100 control is performed in reference to the values read by probe 2.<br />
• /4=50 the controller refers to a “virtual” probe, calculated from the average<br />
between the ambient probe and probe 2. With values above 50, probe 2 has<br />
a greater weight in the calculation, vice-versa for values below 50.<br />
Important: in the event of faults or if probe 2 is not enabled, the instrument uses<br />
the ambient probe only. If the fault is on the ambient probe, the “Control probe”<br />
error is signalled.<br />
Default: ‘/4’=0 => control on ambient probe.<br />
/5: Select °C or °F<br />
Defi nes the measurement unit (degrees Centigrade or degrees Fahrenheit) shown<br />
on the display.<br />
/5=0 to work in degrees Centigrade.<br />
‘/5’=1 to work in degrees Fahrenheit.<br />
Default: ‘/5’=0 => operation in degrees centigrade.<br />
/6: Decimal point<br />
Used to enable or disable the display of the temperature with resolution to the tenth<br />
of a degree between -20 and + 20.<br />
Note: the exclusion of the decimal point is active only with reference to the display<br />
of the reading on the main and remote displays; while the parameters are always<br />
set to the tenth of a degree.<br />
‘/6’=0 the readings are displayed to the tenth of a degree, between -20 and +20 °C;<br />
‘/6’=1 all the readings are displayed without the tenths of a degree.<br />
Default: ‘/6’=0 => decimal point displayed.<br />
/tI: Probe displayed on instrument<br />
For selecting the probe to be displayed by the instrument.<br />
/tI=1 => virtual probe<br />
/tI=2 => probe 1<br />
/tI=3 => probe 2<br />
/tI=4 => probe 3<br />
/tI=5 => probe 4<br />
/tI=6 => do not select<br />
/tI=7 => set point<br />
Note:<br />
• Control is always based on the virtual control probe;<br />
• If the probe to be displayed has not been enabled, the display will show the<br />
message ‘___’;<br />
Default: /tI=1 => Virtual probe;<br />
/tE : Probe displayed on external terminal<br />
Selects the probe to be displayed on the remote terminal.<br />
/tE=0 => remote terminal not present<br />
/tE=1 => virtual probe;<br />
/tE=2 => probe 1;<br />
/tE=3 => probe 2;<br />
/tE=4 => probe 3;<br />
/tE=5 => probe 3;<br />
/tE=6 => do not select.<br />
Note:<br />
• If the terminal is not present, the display will remain completely dark.<br />
Default: /tE=0 => Remote terminal not present<br />
/P: Select type of probe<br />
Used to select the type of probe used for the measurements.<br />
/P=0 => NTC standard with range –50T90 °C<br />
/P=1 => NTC enhanced with range –40T150 °C<br />
/P=2 => PTC standard with range –50T150°C<br />
For correct readings from the PTC probes, the hardware must be prepared to accept<br />
+030220140 - rel. 1.2 - del 06-06-2005
e predisposto per PTC (oltre che NTC).<br />
Default: /P =0 => NTC standard con range –50T90 °C<br />
Disponibile su tutti i modelli dotati di NTC.<br />
/A2: Configurazione sonda 2<br />
Permette di confi gurare la modalità di funzionamento della sonda 2.<br />
/A2 = 0 => sonda assente<br />
/A2 = 1 => sonda prodotto (utilizzata per sola visualizzazione)<br />
/A2 = 2 => sonda sbrinamento<br />
/A2 = 3 => sonda condensazione<br />
/A2 = 4 => sonda antifreeze<br />
In ogni caso la sonda 2 viene utilizzata per il calcolo della sonda virtuale di regolazione.<br />
Default: /A2 = 2 => sonda sbrinamento; /A2 = 0 in modello S => sonda 2 assente<br />
/A3: Configurazione sonda 3<br />
Come sopra ma riferitoalla sonda 3 in particolare<br />
Default: /A3 = 0 => Sonda 3 assente/Ingresso digitale.<br />
/A4: Configurazione sonda 4.<br />
Come sopra ma riferito alla sonda 4, se prevista, in particolare<br />
Default: /A4 = 0 => Sonda 4 assente/Ingresso digitale.<br />
/C1 : Calibrazione o offset sonda 1<br />
/C2 : Calibrazione o offset sonda 2<br />
/C3 : Calibrazione o offset sonda 3<br />
/C4 : Calibrazione o offset sonda 4<br />
Questi parametri permettono di correggere la temperatura misurata dalle sonde attraverso<br />
un offset: il valore assegnato a questi parametri viene infatti aggiunto (valore<br />
positivo) o tolto (valore negativo) alla temperatura rilevata dalle sonde.<br />
La correzione del valore di temperatura con l’offset viene eseguito prima del controllo<br />
di fuori range della misura rilevata.<br />
Esempio: se si vuole diminuire la temperatura misurata dalla sonda 1 di 2,3 gradi è<br />
necessario impostare /C1= -2.3.<br />
L’offset di taratura può essere variato da -20 a +20.<br />
Durante la visualizzazione del parametro premendo Set si visualizza il valore della<br />
sonda corrispondente già corretto con l’offset, mentre una seconda pressione<br />
riporta alla visualizzazione del codice mnemonico.<br />
Default: /C1=/C2=/C3=/C4=0 _ nessun offset<br />
PTC readings (as well as NTC).<br />
Default: ‘/P’=0 => NTC Standard with range –50T90 °C<br />
Available on all models fi tted with NTC inputs.<br />
/A2: Configuration of probe 2<br />
Used to confi gure the operating mode of probe 2.<br />
‘/A2’= 0 => Probe 2 absent;<br />
‘/A2’= 1 => Product probe (used for display only);<br />
‘/A2’= 2 => Defrost probe;<br />
‘/A2’= 3 => Condensation probe;<br />
‘/A2’= 4 => antifreeze probe.<br />
In any case, probe 2 is used for calculating the virtual control probe.<br />
Default: ‘/A2’= 2 => Defrost probe; ‘/A2’= 0 on model S => Probe 2 absent.<br />
/A3: Configuration of probe 3<br />
As above, but relating to probe 3.<br />
Default: ‘/A3’= 0 => Probe 3/Digital input absent.<br />
/A4: Configuration of probe 4<br />
As above, but relating to probe 4, if fi tted.<br />
Default: /A4 = 0 => Probe 4/Digital input absent.<br />
/C1 : Calibration or offset for probe 1<br />
/C2 : Calibration or offset for probe 2<br />
/C3 : Calibration or offset for probe 3<br />
/C4 : Calibration or offset for probe 4<br />
These parameters are used to correct the temperature measured by the probes,<br />
using an offset: the value assigned to these parameters is in fact added to<br />
(positive value) or subtracted from (negative value) the temperature measured<br />
by the probes.<br />
The temperature value is corrected by the offset before checking if the reading is<br />
off-range.<br />
Example: to decrease the temperature measured by probe 1 by 2.3 degrees, set<br />
‘/C1’= -2.3.<br />
The calibration or offset can be set from -20 to +20.<br />
When displaying the parameter, pressing shows the value of the<br />
corresponding probe already corrected with the offset; pressing again displays the<br />
abbreviated code.<br />
Default: /C1=/C2=/C3=/C4=0 _ no offset<br />
7.2 Parametri relativi alla regolazione della<br />
temperatura<br />
7.2 Temperature control parameters<br />
N° Cod. Parametro MSYF U.M. Tipo Def. Max Min<br />
16 St set point temperatura MSYF °C/°F F 0.0 r2 r1<br />
17 rd Delta Regolatore -SYF °C/°F F 2.0 20 0.1<br />
18 rn Zona neutra -SYF °C/°F C 4.0 60 0.0<br />
19 rr Delta regolatore reverse con zona neutra -SYF °C/°F C 2.0 20 0.1<br />
20 r1 Set minimo ammesso MSYF °C/°F C -50 r2 -50<br />
21 r2 Set massimo ammesso MSYF °C/°F C 60 200 r1<br />
22 r3 Modalità di funzionamento -SYF fl ag C 0 2 0<br />
23 r4 Variazione automatica set point notturno MSYF °C/°F C 3.0 20 -20<br />
24 r5 Abilitazione monitoraggio temperatura MSYF fl ag C 0 1 0<br />
25 rt Intervallo monitoraggio temperatura MSYF ore F - 999 0<br />
26 rH Massima temperatura letta MSYF °C/°F F - - -<br />
27 rL Minima temperatura letta MSYF °C/°F F - - -<br />
N° Cod. Parameter MSYF U.M. Type Def. Max Min<br />
16 St Temperature set point MSYF °C/°F F 0.0 r2 r1<br />
17 rd Control delta -SYF °C/°F F 2.0 20 0.1<br />
18 rn Dead band -SYF °C/°F C 4.0 60 0.0<br />
19 rr Reverse differential for control with dead band -SYF °C/°F C 2.0 20 0.1<br />
20 r1 Minimum set point allowed MSYF °C/°F C -50 r2 -50<br />
21 r2 Maximum set point allowed MSYF °C/°F C 60 200 r1<br />
22 r3 Operating mode -SYF fl ag C 0 2 0<br />
23 r4 Automatic night-time set point variation MSYF °C/°F C 3.0 20 -20<br />
24 r5 Enable temperature monitoring MSYF fl ag C 0 1 0<br />
25 rt Temperature monitoring interval MSYF hours F - 999 0<br />
26 rH Maximum temperature read MSYF °C/°F F - - -<br />
27 rL Minimum temperature read MSYF °C/°F F - - -<br />
Tab. 7.2.1<br />
Tab. 7.2.1<br />
43<br />
+030220140 - rel. 1.2 - del 06-06-2005
St: set point<br />
Stabilisce il valore del set point, o punto di lavoro, utilizzato nella regolazione.<br />
Default: St =0,0.<br />
St: set point<br />
Establishes the set point value used by the controller.<br />
Default: ‘St’=0.0.<br />
rd: Delta regolatore<br />
Stabilisce il valore del differenziale, o isteresi, usato nel controllo<br />
della temperatura. Valori bassi garantiscono una temperatura<br />
ambiente che si scosta poco dal set point ma comporta<br />
frequenti inserimenti e spegnimenti dell’attuatore principale<br />
(normalmente il compressore). È comunque possibile<br />
salvaguardare il funzionamento del compressore settando<br />
opportunamente i parametri che limitano il numero di<br />
inserimenti/ora e il tempo minimo di spegnimento (vedi<br />
parametri C).<br />
Set Point<br />
Nota: nel caso sia stata selezionata la regolazione con due gradini per il<br />
compressore (‘H1’=12,13), il differenziale‘rd’ viene suddiviso tra i due gradini.<br />
Default: rd =2.<br />
DIRECT Freddo/Cooling<br />
rd<br />
D<br />
rd: Control delta<br />
Establishes the value of the differential, or hysteresis, used<br />
for temperature control. Low values guarantee an ambient<br />
temperature that deviates only slightly from the set point,<br />
but involves frequent starts and stops of the main actuator<br />
(normally the compressor). In any case, the compressor can<br />
be protected by suitably setting the parameters that limit the<br />
number of activations/hour and the minimum OFF time (see<br />
the C parameters).<br />
Fig. 7.2.1<br />
Note: if control with two compressor steps has been selected<br />
(‘H1’=12.13), the differential ‘rd’ is divided between the two steps.<br />
Direct<br />
ON<br />
attuatore<br />
actuator<br />
OFF<br />
Default: ‘rd’=2.<br />
St<br />
rd/2<br />
rd/2<br />
Sonda virtuale<br />
Virtual probe<br />
Fig. 7.2.2<br />
rn: Zona neutra<br />
Stabilisce il valore della zona neutra<br />
quando l’uscita ausiliaria è selezionata<br />
come riscaldamento, in modalità di<br />
regolazione con zona neutra.<br />
Il differenziale è centrale rispetto alla<br />
zona neutra.<br />
Diagramma della regolazione con zona<br />
neutra nel caso di modalità di<br />
funzionamento direct (r3=0 e 1).<br />
rr rn rd<br />
REVERSE<br />
R<br />
= =<br />
zona di non<br />
intervento<br />
Non-intervention<br />
zone<br />
St<br />
Fig. 7.2.3<br />
DIRECT<br />
D<br />
Grandezza controllata<br />
Controlled measurement<br />
rn: Dead band<br />
Establishes the value of the dead band,<br />
when the auxiliary output is selected<br />
as heating, in control with dead band<br />
mode.<br />
The differential is in the centre of the<br />
dead band.<br />
Diagram of control with dead band for<br />
direct operating mode (r3=0 and 1).<br />
Diagramma della regolazione in direct con due gradini per il compressore:<br />
Direct + zona neutra<br />
Direct + dead band<br />
Diagram of the control in direct mode with two compressor steps:<br />
r2<br />
St<br />
rn/2<br />
rn/2<br />
rd/2<br />
rd/2<br />
Sonda virtuale<br />
Virtual probe<br />
Fig. 7.2.4<br />
Diagramma della regolazione con zona neutra nel caso di modalità di<br />
funzionamento reverse (‘r3’=2).<br />
Diagram of the control with dead band in the case of operating mode reverse<br />
(‘r3’=2).<br />
rr rn/2 rn<br />
rn/2<br />
rd<br />
R<br />
R<br />
St<br />
Temperatura<br />
Temperature<br />
Fig. 7.2.5<br />
44<br />
+030220140 - rel. 1.2 - del 06-06-2005
Diagramma della regolazione in reverse con due gradini per il compressore:<br />
Diagram of control in reverse mode with two compressor steps:<br />
rr rn/2 rn<br />
rn/2<br />
R<br />
R<br />
R<br />
St<br />
rd/2<br />
rd/2<br />
Temperatura<br />
Temperature<br />
Fig. 7.2.6<br />
Il gradino associato all’uscita aux1 rimane in reverse. Il gradino associato all’uscita<br />
compressore passa da direct a reverse.<br />
Nota1: il gradino dell’uscita aux1 ha associato solo la temporizzazione di protezione<br />
c0, mentre il gradino del compressore (sia in direct che in reverse) ha associate le<br />
temporizzazioni c0, c1, c2, c3. Si può verifi care, quindi, che i gradini siano attivi<br />
contemporaneamente per effetto delle protezioni del gradino del compressore<br />
(tempo minimo di on), nonchè dello stato di defrost della macchina.<br />
Nota2: nel caso sia abilitata la funzione di switch tenda (‘A4’=7) il controllore<br />
modifi ca il set point alla chiusura del contatto, aggiungendo il valore del parametro<br />
‘r4’, Il nuovo valore viene utilizzato per tutte le funzioni relative al set point (Es.<br />
allarmi alta e bassa temperatura relativi, banda morta, ecc.).<br />
Con ‘r4’=3.0 (valore pre-programmato) il set point viene aumentato di 3 gradi<br />
rispetto al valore utilizzato con tenda aperta.<br />
Default: ‘rn’=4.<br />
rr: Delta regolatore reverse con zona neutra<br />
Stabilisce il valore del differenziale usato nel controllo della temperatura reverse,<br />
quando l’uscita ausiliaria è selezionata come riscaldamento, in modalità di regolazione<br />
con zona neutra.<br />
Nota: Per l’uscita reverse non sono previsti tempi di protezione.<br />
Default: ‘rr’=2.<br />
r1: set minimo ammesso<br />
Determina il minimo valore impostabile per il set point. Utilizzando questo parametro<br />
si impedisce all’utente di fi ssare un set point inferiore al valore indicato da r1.<br />
Default: r1=-50.<br />
r2: set massimo ammesso<br />
Determina il massimo valore impostabile per il set point. Utilizzando questo parametro<br />
si impedisce all’utente di fi ssare un set point superiore al valore indicato da r2.<br />
Default: r2 = +60.<br />
r3: modalità di funzionamento<br />
ir33 può lavorare come termostato e controllo di sbrinamento per unità statiche a<br />
temperatura normale (r3=0), come semplice termostato in funzionamento Direct (r3<br />
=1) o come semplice termostato in funzionamento Reverse (r3=2).<br />
r3 = 0 termostato Direct con controllo sbrinamento (freddo);<br />
r3 = 1 termostato Direct (freddo);<br />
r3 = 2 termostato Reverse (caldo);<br />
Si veda anche la descrizione dei parametri A4, A5.<br />
The step associated with the aux1 output remains in reverse. The step associated<br />
with the compressor output switches from direct to reverse.<br />
Note 1: the step associated with the aux1 output is only associated with the<br />
protection timer ‘c0’, while the step associated with the compressor (in both direct<br />
and reverse) is associated with the timers ‘c0’ ‘c1’ ‘c2’ ‘c3’. As a result, the steps may<br />
be active at the same time due to the protectors associated with the compressor<br />
step (minimum on time), as well as the unit defrost status.<br />
Note 2: if the curtain switch function is enabled (‘A4’=7), the controller modifi es the<br />
set point when the contact closes, adding or subtracting the value of parameter ‘r4’;<br />
the new value is used for all functions relating to the set point (e.g. relative high<br />
and low temperature alarms, dead band, etc.).<br />
When ‘r4’=3.0 (preset value) the set point is increased by 3 degrees compared to<br />
the value used with the curtain open.<br />
Default: ‘rn’=4.<br />
rr: Reverse differential for control with dead band<br />
Establishes the value of the differential used in reverse temperature control, when<br />
the auxiliary output is selected as heating, in control with dead band mode.<br />
Note: No protection times are featured for the reverse output.<br />
Default: ‘rr’=2.<br />
r1: minimum set point allowed<br />
Determines the minimum value that can be set for the set point. Using this parameter<br />
prevents the user from setting a set point lower than the value indicated by ‘r1’.<br />
Default: ‘r1’=-50.<br />
r2: maximum set point allowed<br />
Determines the maximum value that can be set for the set point. Using this parameter<br />
prevents the user from setting a set point higher than the value indicated by ‘r2’.<br />
Default: ‘r2’=+60.<br />
r3: operating mode<br />
ir33 can work as a thermostat and defrost controller for static units at normal temperature<br />
(r3’=0), as a simple thermostat in Direct operation (‘r3’=1), or as simple<br />
thermostat in Reverse-cycle operation (‘r3’=2).<br />
‘r3’=0 Direct thermostat with defrost control (cooling);<br />
‘r3’=1 Direct thermostat (cooling);<br />
‘r3’=2 Reverse-cycle thermostat (heating).<br />
Also see the description of parameters ‘A4’and ‘A5’.<br />
Note:<br />
1) con r3 =1 e 2 gli sbrinamenti sono sempre disabilitati.<br />
2) un ingresso digitale impostato come Direct/Reverse<br />
risulta essere prioritario rispetto alla modalità di<br />
funzionamento.<br />
REVERSE Caldo/Heating<br />
rd<br />
R<br />
ON<br />
attuatore<br />
actuator<br />
OFF<br />
Note:<br />
1) with ‘r3’=1 and ‘r3’=2, the defrosts are always<br />
disabled.<br />
2) a digital input set for direct/reverse-cycle control has<br />
priority over the operating mode.<br />
Fig. 7.2.7<br />
45<br />
+030220140 - rel. 1.2 - del 06-06-2005
Di seguito la regolazione reverse con 2 gradini per il compressore.<br />
Reverse<br />
The following diagram shows reverse control with 2 compressor steps.<br />
Default: r3=0 => funzionamento termostato Direct con controllo sbrinamento.<br />
r4: Variazione automatica del set point in funzionamento notturno.<br />
Rientra nei parametri per il controllo dello switch-tenda insieme con A4, A5,<br />
programmabili per la confi gurazione degli ingressi digitali. Quando la tenda è<br />
chiusa, e di conseguenza l’ingresso digitale collegato è chiuso, il controllore aumenta<br />
automaticamente il set point del valore assegnato ad r4, in modalità Direct (freddo),<br />
e diminuisce automaticamente il set point del valore assegnato ad r4 , in modalità<br />
Reverse (caldo).<br />
Attenzione: con il valore di r4 negativo il controllore diminuirà il valore del set point<br />
con tenda chiusa, in modalità direct (freddo), aumenterà il set point in modalità<br />
reverse (caldo).<br />
Default: r4 =3.0.<br />
r5: Abilitazione al monitoraggio della temperatura minima e massima.<br />
r5=0 disabilitato<br />
r5=1 abilitato<br />
Default: r4=0<br />
rt: Intervallo effettivo di rilevazione della temperatura massima e minima.<br />
rH: Temperatura massima rilevata nell’intervallo rt.<br />
rL: Temperatura minima rilevata nell’intervallo rt.<br />
Tramite tutti i parametri analizzati, questi strumenti permettono di registrare la<br />
temperatura minima e massima rilevata dalla sonda ambiente in un periodo che può<br />
arrivare fi no a 999 ore (equivalenti a più di 41 giorni).<br />
Per attivare questa funzione, si proceda nel modo seguente:<br />
• porre r5 = 1;<br />
• selezionare rt;<br />
• premere Set per visualizzare da quante ore è attiva la registrazione della<br />
temperatura minima e massima, (se la registrazione è appena stata abilitata,<br />
si ha rt = 0);<br />
• se si vuole far ripartire la registrazione delle temperature, premere il tasto<br />
def<br />
per più di 5 secondi durante la visualizzazione delle ore (il messaggio<br />
rES indica l’avvenuta cancellazione). Lo strumento azzera le ore di<br />
registrazione trascorse e ricomincia il monitoraggio;<br />
• per visualizzare la temperatura massima rilevata dalla sonda, leggere il valore<br />
associato a rH, mentre per la temperatura minima vedere rL<br />
Avvertenza: dopo il tempo massimo di 999 ore il monitoraggio delle temperature<br />
minima e massima continua mentre il tempo rimane fi sso a 999.<br />
Avvertenze: se lo strumento non è collegato ad un gruppo di continuità,<br />
un’interruzione momentanea di tensione, azzera i valori rt, rL e rH per cui al ritorno<br />
della tensione, il monitoraggio riparte automaticamente con rt = 0.<br />
Default: r5 = 0.<br />
rd/2<br />
rd/2<br />
Fig. 7.2.8<br />
St<br />
Sonda virtuale<br />
Virtual probe<br />
Default: r3=0=> Direct thermostat operation with defrost control.<br />
r4: Automatic variation of the set point in night-time operation.<br />
This parameter is part of the group for control of the curtain switch, together with<br />
A4 and A5, programmable for confi guring the digital inputs. When the curtain is<br />
closed, and consequently, the digital input connected to the curtain switch is closed,<br />
the controller automatically increases the set point by the value assigned to r4<br />
in direct mode (cooling), and automatically decreases the set point by the value<br />
assigned to r4, in reverse mode (heating).<br />
Important: if the value of r4 is negative, the controller will decrease the set point<br />
with the curtain closed, in direct mode (cooling), and increase the set point in<br />
reverse mode (heating).<br />
Default: ‘r4’=3.0.<br />
r5: Enable minimum and maximum temperature monitoring.<br />
r5=0 disabled<br />
r5=1 enabled<br />
Default: r4=0<br />
rt : Effective interval for monitoring the maximum and minimum<br />
temperature.<br />
rH: Maximum temperature measured in the interval rt.<br />
rL: Minimum temperature measured in the interval rt.<br />
All these parameters are used by the instruments to record the minimum and<br />
maximum temperature measured by the ambient probe in a period of up to 999<br />
hours (over 41 days).<br />
To enable this function, proceed as follows:<br />
• set ‘r5’=1;<br />
• select ‘rt’;<br />
• press Set to display for how many hours the minimum and maximum<br />
temperature have been recorded (if the function has just been enabled, ‘rt’=0);<br />
• to start recording the temperatures again, press def<br />
for more than 5 seconds<br />
when displaying the hours (the message ‘rES’ indicates that the value has<br />
been reset). The instrument resets the number of hours and restarts the<br />
monitoring process;<br />
• to display the maximum temperature measured by the probe, read the value<br />
associated with rH, while to display the minimum temperature measured by<br />
the probe, read the value associated with rL.<br />
Note: after the maximum time of 999 hours, the monitoring of the minimum and<br />
maximum temperature continues, while the time value remains fi xed at 999.<br />
Warnings: if the instrument is not connected to a UPS unit, a temporary power failure<br />
will reset the values of ‘rt’, ‘rL’ and ‘rH’. and, therefore, when power is restored,<br />
monitoring resumes automatically from rt = 0.<br />
Default: ‘r5’=0.<br />
7.3 Parametri relativi alla gestione del compressore<br />
7.3 Compressor management parameters<br />
N° Cod. Parametro MSYF U.M. Tipo Def. Max Min<br />
28 c0 Ritardo start compressore. ,ventole e aux zona -SYF min C 0 15 0<br />
neutra all’accensione<br />
29 c1 Tempo minimo tra accensioni successive -SYF min C 0 15 0<br />
30 c2 Tempo minimo di Off del compressore -SYF min C 0 15 0<br />
31 c3 Tempo minimo di On del compressore -SYF min C 0 15 0<br />
32 c4 Duty setting -SYF min C 0 100 0<br />
33 cc Durata ciclo continuo -SYF ore C 0 15 0<br />
34 c6 Esclusione allarme dopo ciclo continuo -SYF ore C 2 15 0<br />
35 c7 Tempo massimo di pump down -SYF sec C 0 900 0<br />
36 c8 Ritardo start comp. dopo apert. valvola PD -SYF sec C 5 60 0<br />
37 c9 Abil. funz. di autostart con funz.in PD -SYF fl ag C 0 1 0<br />
38 c10 Selez. pump down a tempo o pressione -SYF fl ag C 0 1 0<br />
39 c11 Ritardo secondo compressore -SYF sec C 4 250 0<br />
Tab. 7.3.1<br />
46<br />
+030220140 - rel. 1.2 - del 06-06-2005
N° Cod. Parameter MSYF U.M. Type Def. Max Min<br />
28 c0 Comp. and fan delay on start-up -SYF min C 0 15 0<br />
29 c1 Minimum time between successive starts -SYF min C 0 15 0<br />
30 c2 Minimum compressor OFF time -SYF min C 0 15 0<br />
31 c3 Minimum compressor ON time -SYF min C 0 15 0<br />
32 c4 Duty setting -SYF min C 0 100 0<br />
33 cc Continuous cycle duration -SYF ore C 0 15 0<br />
34 c6 Alarm bypass after continuous cycle -SYF ore C 2 15 0<br />
35 c7 Maximum pump down time -SYF sec C 0 900 0<br />
36 c8 Comp. start delay after open PD valve -SYF sec C 5 60 0<br />
37 c9 Enable autostart function in PD -SYF fl ag C 0 1 0<br />
38 c10 Select Pump down by time or pressure -SYF fl ag C 0 1 0<br />
39 c11 Second compressor delay -SYF sec C 4 250 0<br />
Tab. 7.3.1<br />
c0: Ritardo start del compressore e dei ventilatori (se presente relè ‘Ventilatore’)<br />
all’accensione<br />
Dal momento in cui viene alimentato il controllo, l’accensione del compressore,<br />
dei ventilatori dell’evaporatore e del relè ausiliario in regolazione con zona neutra<br />
(H1=11) viene ritardata di un tempo (in minuti) pari al valore assegnato a questo<br />
parametro, per consentire di proteggere il compressore da ripetute accensioni nel<br />
caso di frequenti cadute di tensione.<br />
Esempio: ponendo c0=6 si obbliga il compressore ad attendere 6 minuti prima di<br />
partire dal momento in cui è ritornata la tensione.<br />
Nel caso di impianti con più compressori, il<br />
parametro c0 può essere usato anche per<br />
evitare partenze contemporanee di più unità. E’<br />
necessario impostare per ogni compressore un<br />
diverso valore di c0.<br />
Nota: il gradino del secondo compressore,<br />
dell’uscita aux1 (‘H1’=12,13), ha associate le<br />
temporizzazioni ‘c0’,‘c1’,‘c2’,‘c3’.<br />
Default: c0 =0 => non viene imposto alcun<br />
ritardo<br />
accensione strumento<br />
power ON<br />
richiesta di intervento<br />
insertion request<br />
compressore<br />
compressors<br />
C0<br />
c0: Compressor and fans start delay (if ‘FAN’ relay present) on start-up<br />
When the controller is switched on, the compressor and the evaporator fans and the<br />
auxiliary relay in control with dead band (H1=11) start after a delay (in minutes)<br />
equal to the value set for this parameter, in order to protect the compressor against<br />
repeated power-ups in the event of frequent power drops.<br />
Example: setting ‘c0’=6 obliges the compressor to wait 6 minutes before starting<br />
from when power returns.<br />
ON<br />
OFF<br />
ON<br />
OFF<br />
ON<br />
OFF<br />
In the event of systems with more than one<br />
compressor, the parameter c0 can also be<br />
used to avoid simultaneous starts of a series of<br />
units. Simply set a different value of c0 for each<br />
compressor.<br />
Note: the second compressor step, for the aux1<br />
output (‘H1’=12, 13), is associated with the<br />
timers ‘c0’, ‘c1’, ‘c2’, ‘c3’.<br />
Default: ‘c0’=0 => no minimum delay is set.<br />
Fig. 7.3.1<br />
c1: Tempo minimo tra accensioni successive del compressore<br />
Stabilisce il tempo minimo (in minuti) che deve<br />
trascorrere tra le accensioni del compressore,<br />
indipendentemente dalla temperatura e dal set<br />
point. Settando questo parametro è possibile<br />
limitare il numero di accensioni per ora.<br />
Esempio: se il numero di inserimenti/ora massimo<br />
consentito è pari a 10, basta settare c1 = 6<br />
per garantire il rispetto di questo limite.<br />
richiesta inserimento<br />
insertion request<br />
compressore<br />
compressors<br />
C1<br />
c1: Minimum time between two successive starts of the compressor<br />
Sets the minimum time (in minutes) that must<br />
elapse between two starts of the compressor,<br />
ON<br />
irrespective of the temperature and the set<br />
OFF point. Setting this parameter limits the number<br />
ON of starts per hour.<br />
OFF Example: if the maximum number of activations/hour<br />
allowed is 10, simply set c1=6 to<br />
ensure that this limit is respected.<br />
Fig. 7.3.2<br />
Nota: il gradino del secondo compressore, dell’uscita aux1 (‘H1’=12,13), ha associate<br />
le temporizzazioni ‘c0’,‘c1’,‘c2’,‘c3’.<br />
Default: c1 =0 => non viene imposto un tempo minimo tra due inserimenti.<br />
Note: the second compressor step, for the aux1 output (‘H1’=12, 13), is associated<br />
with the timers ‘c0’, ‘c1’, ‘c2’, ‘c3’.<br />
Default: ‘c1’=0 => no minimum time is set between two starts.<br />
c2: Tempo minimo di spegnimento del compressore<br />
Stabilisce il tempo minimo (in minuti) di<br />
spegnimento del compressore. Il compressore<br />
non viene riacceso se non è trascorso il tempo<br />
minimo selezionato (c2) dall’ultimo<br />
spegnimento.<br />
Nota1: questo parametro è utile per garantire<br />
l’equalizzazione delle pressioni dopo lo<br />
spegnimento nel caso di impianti con<br />
compressori ermetici e capillari.<br />
richiesta inserimento<br />
insertion request<br />
compressore<br />
compressors<br />
Nota2: il gradino del secondo compressore, dell’uscita aux1 (‘H1’=12,13),<br />
ha associate le temporizzazioni ‘c0’,‘c1’,‘c2’,‘c3’.<br />
Default: c2=0 => non viene imposto un tempo minimo di off (spegnimento).<br />
c2: Minimum compressor OFF time<br />
Sets the minimum time (in minutes) for the<br />
ON compressor to remain OFF. The compressor<br />
is not started again until the minimum time<br />
OFF<br />
selected (c2) has elapsed from when it last<br />
ON<br />
stopped.<br />
OFF Note 1: this parameter is useful to ensure the<br />
balancing of the pressure after the compressor<br />
C2<br />
stops for systems with hermetic and capillary<br />
Fig. 7.3.3<br />
compressors.<br />
Note 2: the second compressor step, for the aux1 output (‘H1’=12, 13), is associated<br />
with the timers ‘c0’,‘c1’,‘c2’,‘c3’.<br />
Default: c2=0 => no minimum OFF time is set.<br />
47<br />
+030220140 - rel. 1.2 - del 06-06-2005
c3: Tempo minimo di accensione del compressore<br />
Stabilisce il tempo minimo di accensione del compressore ovvero non viene spento<br />
se non è rimasto acceso per un tempo pari al<br />
minimo selezionato (c3).<br />
Nota: il gradino del secondo compressore,<br />
dell’uscita aux1 (‘H1’=12,13), ha associate le<br />
temporizzazioni ‘c0’,‘c1’,‘c2’,‘c3’.<br />
Default: c3 =0 => non viene imposto un<br />
funzionamento minimo.<br />
richiesta inserimento<br />
insertion request<br />
compressore<br />
compressors<br />
C3<br />
Fig. 7.3.4<br />
c3: Minimum compressor ON time<br />
Sets the minimum running time for the compressor. The compressor is not stopped<br />
until it has been ON for at least the minimum<br />
ON<br />
time selected (c3).<br />
OFF<br />
Note: the second compressor step, for the aux1<br />
ON<br />
output (‘H1’=12.13), is associated with the<br />
OFF timers ‘c0’,‘c1’,‘c2’,‘c3’.<br />
Default: ‘c3’=0 => no minimum running time<br />
is set.<br />
c4: Duty setting o sicurezza relè<br />
Nel caso si verifi chi l’allarme sonda virtuale di regolazione guasta (vedi parametro<br />
/4) questo parametro permette di assicurare il funzionamento del compressore in<br />
attesa dell’eliminazione del guasto.<br />
Attenzione: Nel caso di errore della sonda 2, la sonda virtuale corrisponde alla<br />
sonda ambiente (sonda 1) e quindi non viene attivato il Duty Setting.<br />
In pratica il compressore, non potendo essere azionato in base alla temperatura<br />
(a causa della sonda guasta), viene fatto funzionare ciclicamente con un tempo di<br />
funzionamento (tempo di on) pari al valore assegnato al parametro c4 (in minuti) e<br />
un tempo di spegnimento (tempo di off) fi sso di 15 minuti.<br />
Esistono due valori di c4 che causano comportamenti particolari:<br />
c4 =0 in caso di guasto sonda virtuale di regolazione, il compressore rimane sempre<br />
spento;<br />
c4 =100 il compressore rimane sempre acceso, non vengono cioè mai considerati i<br />
15 minuti di spegnimento.<br />
Situazioni particolari:<br />
• Se l’errore sonda virtuale di regolazione avviene mentre il compressore è spento,<br />
esso rimane spento per 15 minuti, poi viene acceso (rispettando i tempi selezionati<br />
con i parametri c1 e c2 ) e rimane in funzionamento per un tempo pari a c4. Inizia<br />
quindi il funzionamento in Duty setting. Il particolare funzionamento è segnalato<br />
dal LED che lampeggia durante le pause di spegnimento del compressore<br />
mentre rimane acceso quando il compressore è in funzionamento. I ventilatori<br />
continuano a funzionare secondo i parametri selezionati (vedi parametri F). Se il<br />
Duty Setting richiede lo spegnimento immediato del compressore a tempo<br />
indeterminato ( c4 = 0) ció viene fatto senza rispettare i tempi di protezione del<br />
compressore.<br />
• Se l’errore sonda virtuale di regolazione è rilevato mentre il compressore è acceso,<br />
esso rimane acceso per il tempo c4 , poi viene spento (senza rispettare il tempo<br />
minimo di funzionamento eventualmente selezionato con il parametro c3) e<br />
rimane spento per 15 minuti (il LED lampeggia in questa fase). Dopo di ciò<br />
inizia il funzionamento periodico con tempo di funzionamento pari al valore di c4 .<br />
Avvertenza: Se l’errore sonda scompare, la macchina ritorna in funzionamento<br />
normale;<br />
C4<br />
c4: Duty setting or relay safety device<br />
If the virtual control probe fault alarm occurs (see parameter ‘/4’), this parameter is<br />
used to ensure the operation of the compressor until the fault is resolved.<br />
Important: In the event of errors on probe 2, the virtual probe corresponds to the<br />
ambient probe (probe 1) and consequently the Duty Setting is not activated.<br />
In practice, as the compressor is no longer able to operate based according to the<br />
temperature (due to the probe fault), it is made to run cyclically with an operating<br />
time (ON time) equal to the value assigned to parameter ‘c4’ (in minutes) and a<br />
fi xed OFF time of 15 minutes.<br />
ON time = value (c4)<br />
OFF time = 15 minutes (fi xed)<br />
There are two values of ‘c4’ causing special behaviour:<br />
‘c4’=0, in the event of faults involving the virtual control probe, the compressor is<br />
always OFF;<br />
‘c4’=100, the compressor is always ON, that is, the 15 minute OFF time is always<br />
ignored.<br />
Special situations:<br />
• If the virtual control probe error occurs while the compressor is OFF, it<br />
remains OFF for 15 minutes, and is then started (respecting the times set<br />
for parameters ‘c1’ and ‘c2’) and remains ON for a time equal to ‘c4’. It then<br />
starts duty setting operation. This special operation is signalled by the<br />
LED that fl ashes during the compressor OFF period, and remains on steady<br />
when the compressor is operating. The fans continue to operate according<br />
the set parameters (see F parameters). If the duty setting requires the<br />
immediate shut-down of the compressor for a non-specifi ed time (‘c4’= 0),<br />
this is done without observing the compressor protection times.<br />
• If the virtual control probe error occurs while the compressor is ON, it<br />
remains ON for the time ‘c4’, and then is stopped (without observing the<br />
minimum ON time, if set for parameter ‘c3’) and remains OFF for 15 minutes<br />
(the LED fl ashes in this phase). After this, periodic operation starts, with<br />
an operating time equal to the value of ‘c4’.<br />
Warning: If the probe error disappears, the unit returns to normal operation;<br />
compressore<br />
compressors<br />
OFF = 15 min.<br />
Fig. 7.3.5<br />
ON<br />
OFF<br />
Nota: nel caso sia selezionata la regolazione con 2 gradini per il compressore (con o<br />
senza rotazione, ‘H1’= 12 o 13) il duty setting agisce su ambedue i gradini.<br />
Default: c4 =0 => compressore sempre Off in caso di guasto sonda virtuale di<br />
regolazione.<br />
cc: Durata ciclo continuo<br />
È il tempo (in ore) in cui il compressore rimane in continua attività per abbassare la<br />
temperatura anche sotto il set point.<br />
Con cc =0 => il ciclo continuo è disabilitato.<br />
Il controllore esce dalla procedura ciclo continuo dopo che è trascorso il tempo<br />
impostato per il parametro cc o per raggiungimento della temperatura minima<br />
prevista (si veda l’allarme di minima temperatura, parametro AL).<br />
Nota: nel caso sia selezionata la regolazione con 2 gradini per il compressore (con o<br />
senza rotazione, ‘H1’= 12 o 13) il ciclo continuo agisce su ambedue i gradini.<br />
Default: cc =0 (ore).<br />
c6: Esclusione allarme dopo ciclo ontinuo<br />
È il tempo (in ore) in cui l’allarme di temperatura viene disattivato dopo un ciclo<br />
continuo. Se la temperatura dell’unità refrigerata, dopo il ciclo continuo, dovesse<br />
48<br />
Note: if control with 2 compressor steps is selected (with or without rotation, ‘H1’=<br />
12 or 13), the duty setting acts on both steps.<br />
Default: ‘c4’=0 => compressor always Off in the event of a virtual control probe<br />
error.<br />
cc: Continuous cycle duration<br />
This is the time (in hours) during which the compressor operates continuously to<br />
lower the temperature, even below the set point.<br />
With ‘cc’=0 => the continuous cycle is disabled.<br />
The controller exits the continuous cycle procedure after the time set for parameter<br />
‘cc’ has elapsed, or upon reaching the minimum specifi ed temperature (see the<br />
minimum temperature alarm, parameter ‘AL’).<br />
Note: if control with 2 compressor steps is selected (with or without rotation, ‘H1’=<br />
12 or 13), the continuous cycle acts on both steps.<br />
Default: ‘cc’=0 (hours).<br />
c6: Alarm bypass after continuous cycle<br />
This is the time (in hours) for which the temperature alarm is deactivated after a<br />
continuous cycle. If the temperature of the refrigeration unit, after the continuous<br />
+030220140 - rel. 1.2 - del 06-06-2005
abbassarsi per inerzia sotto il livello di minima temperatura (set point – AL) si ritarda<br />
l’attivazione dell’allarme di bassa temperatura per il tempo c6 impostato.<br />
Avvertenza: si ricorda che alla temperatura minima prevista (si veda l’allarme di<br />
minima temperatura, parametro AL) il ciclo continuo viene forzatamente terminato<br />
e disattivato.<br />
Default: c6 =2 (ore).<br />
c7: Tempo massimo di pump down<br />
Questo parametro determina, a seconda dell’impostazione del parametro c10, il<br />
tempo massimo in secondi entro il quale il circuito deve raggiungere la bassa<br />
pressione nel funzionamento in pump down ( c10 =0) o il tempo di funzionamento<br />
del compressore dopo la chiusura della valvola di pump down nel caso di pump<br />
down a tempo ( c10 =1). La valvola di pump down deve essere collegata all’uscita<br />
ausiliaria, predisponendo il parametro relativo ( H1 ).<br />
Pump down a pressione (c10 =0):<br />
Al raggiungimento del tempo massimo di pump down il compressore viene fermato<br />
e scatta l’allarme Pd, il quale disabilita l’autostart del compressore (vedi parametro<br />
c9) con valvola di pump down chiusa, su richiesta di “alta pressione” del pressostato.<br />
Il compressore rimane spento fi no a quando la regolazione richieda la produzione<br />
di freddo.<br />
Al raggiungimento del set point viene eseguito un pump down e l’allarme viene<br />
resettato automaticamente se la bassa pressione è raggiunta entro il tempo c7.<br />
La bassa pressione viene monitorata collegando il pressostato di bassa pressione<br />
ad uno dei due ingressi digitali e impostando il parametro A4, A5.<br />
Pump down a tempo (c10=1):<br />
Al raggiungimento del tempo c7 di funzionamento compressore dopo l’apertura<br />
della valvola, il compressore viene fermato, indipendentemente dall’ingresso di<br />
bassa pressione e l’allarme Pd risulta disattivato. Ad ogni modo al raggiungimento<br />
della bassa pressione il compressore viene spento.<br />
In questo caso l’autostart in pump down risulta disabilitato.<br />
Default: c7 =0 => pump down disabilitato.<br />
c8 : Ritardo accensione compressore dopo apertura valvola PD<br />
Questo parametro determina dopo quanti secondi dall’apertura della valvola di<br />
pump down entra in funzione il compressore.<br />
E’ utile per evitare di far scattare un allarme LP non signifi cativo.<br />
L’allarme di bassa pressione (LP), con valvola aperta e compressore on, viene<br />
attivato dall’apertura del presso stato e comporta lo spegnimento del compressore a<br />
ripristino automatico.<br />
Il parametro è attivo se c7 =0.<br />
Default: c8 =5 => 5 secondi di ritardo.<br />
c9: Abilitazione funzione di autostart con funzionamento in PD (attiva con C7=6)<br />
Se il parametro è impostato a 0 il sistema eseguirà un ciclo di pump down ad ogni<br />
chiusura della valvola di pump down.<br />
Viceversa impostato a 1 il sistema eseguirà un ciclo di pump down ad ogni chiusura<br />
della valvola di pump down e ad ogni successiva richiesta da parte del pressostato di<br />
bassa pressione che avvenga in assenza di richiesta di refrigerazione (situazione di<br />
autostart). L’autostart è disabilitato in caso di allarme Pd o di Pump-Down a tempo.<br />
Nota: l’autostart è disabilitato nello stato di off e se il controllo è stato acceso ma<br />
non è stato ancora attivato il compressore (dopo la prima attivazione del<br />
compressore l’autostart, se selezionato, sarà sempre attivo.<br />
Default: c9 =0 => un solo ciclo di pump down ad ogni chiusura della valvola di<br />
pump down.<br />
c10: Selezione pump down a pressione o a tempo<br />
Questo parametro determina se il pump down debba essere terminato per<br />
intervento del pressostato di bassa pressione o per tempo. In quest’ultimo caso,<br />
dopo la chiusura della valvola, il compressore funziona per il tempo c7 o fi no al<br />
raggiungimento della bassa pressione. Scaduto tale tempo il compressore viene<br />
spento, indipendentemente dallo stato dell’ingresso di bassa pressione.<br />
L’allarme Pd (pump down terminato per timeout) e la funzione di autostart del<br />
compressore in pump down sono disattivati.<br />
Default: c10 =0 => pump down a pressione.<br />
c11: Ritardo secondo compressore<br />
Questo parametro determina il ritardo del secondo compressore, rispetto al<br />
compressore principale, in fase di accensione (‘H1’=7).<br />
Lo spegnimento dei due compressori, invece, avviene contemporaneamente.<br />
Nel caso siano selezionati due gradini per il compressore (‘H1’=12,13), il parametro<br />
cycle, falls due by inertia below the minimum temperature (set point – ‘AL’ ), the<br />
activation of the low temperature alarm is delayed for time ‘c6’.<br />
Warning: remember that at the minimum specifi ed temperature (see the minimum<br />
temperature alarm, parameter ‘AL’ ) the continuous cycle is forced OFF and<br />
deactivated.<br />
Default: ‘c6’=2 (hours).<br />
c7: Maximum pump down time<br />
This parameter determines, depending on the setting of parameter ‘c10’, the<br />
maximum time in minutes by which the circuit must reach the required low pressure<br />
value in pump down operation (‘c10’=0), or the compressor operating time after<br />
the closing of the pump down valve in case of pump down operation by time<br />
(‘c10’=1). The pump down valve must be connected to the auxiliary output, setting<br />
the relevant parameter (H1).<br />
Pump down by pressure (c10=0):<br />
When reaching the maximum pump down time, the compressor stops and alarm<br />
‘Pd’ is activated, which disables the compressor autostart function (see parameter<br />
c9) with the pump down valve closed, on the “high pressure” request from the<br />
pressure switch.<br />
The compressor remains OFF until the controller requires cooling.<br />
When reaching the set point, a pump down procedure is run and the alarm is<br />
automatically reset if the low pressure is reached within the time ‘c7’.<br />
Low pressure is monitored by connecting the low pressure switch to one of the two<br />
digital inputs and setting the parameter ‘A4’, A4 or A5.<br />
Pump down by time (c10=0):<br />
When the compressor operating time c7 is reached after the opening of the valve,<br />
the compressor is stopped, irrespective of the low pressure reading, and the Pd<br />
alarm is deactivated.<br />
In any case, the compressor is stopped when reaching the low pressure.<br />
In this case, autostart in pump down is disabled.<br />
Default: ‘c7’=0 => Pump down disabled.<br />
c8: Compressor start delay after opening of PD valve<br />
This parameter determines after how many seconds from the opening of the pump<br />
down valve the compressor starts.<br />
It is useful to avoid activating the LP alarm unnecessarily.<br />
The low pressure alarm (LP), with valve open and compressor ON, is activated by<br />
the opening of the pressure switch. This alarm stops the compressor and is reset<br />
automatically.<br />
The parameter is active if ‘c7’=0.<br />
Default: ‘c8’=5 => 5 seconds delay.<br />
c9: Enable autostart function with PD operation (active when C7=6)<br />
If the parameter is set to 0, the system will perform a pump down cycle each time<br />
the pump down valve closes. If the parameter is set to 1, on the other hand, the<br />
system will perform a pump down cycle each time the pump down valve closes and<br />
on each successive request from the low pressure switch when there is no cooling<br />
requirement (autostart situation).<br />
The autostart function is disabled if Pd alarms are active or if pump down by time<br />
is selected.<br />
Note: the autostart function is disabled in the off status and if the controller has<br />
been switched on but the compressor has not yet been activated (after the fi rst<br />
activation of the compressor, the autostart function, if selected, will be always active).<br />
Default: ‘c9’=0 => only one pump down cycle is run whenever the pump down<br />
valve is closed.<br />
c10: Select pump down by pressure or by time<br />
This parameter determines if the pump down procedure must end following the<br />
activation of the low pressure switch, or after a set time. In this case, after the valve<br />
closes, the compressor works for time ‘c7’ or until the low pressure value is reached.<br />
When this time has elapsed, the compressor is stopped, irrespective of the status of<br />
the low pressure input.<br />
The PD alarm (Pump-down fi nished by timeout) and the compressor autostart<br />
function in Pump-down state, are disabled<br />
Default: ‘c10’=0 => Pump down by pressure.<br />
c11: Second compressor delay<br />
This parameter determines the delay of the second compressor, compared to the<br />
main compressor, during start-up(‘H1’=7).<br />
Vice-versa, the two compressors are stopped at the same time.<br />
If two compressor steps have been selected (‘H1’=12.13), the parameter ‘c11’<br />
49<br />
+030220140 - rel. 1.2 - del 06-06-2005
‘c11’ rappresenta il ritardo di inserimento del secondo gradino rispetto al primo.<br />
Attenzione: è necessario selezionare l’uscita ausiliaria come compressore ritardato o<br />
secondo gradino compressore, agendo sul parametro ‘H1’.<br />
Default: ‘c11’=4 => Ritardo di 4 secondi.<br />
represents the delay for the activation of the second step from the fi rst.<br />
Important: select the auxiliary output as a delayed compressor, using the H1<br />
parameter.<br />
Default: ‘c11’=4 => 4 second delay.<br />
7.4 Parametri relativi alla gestione dello<br />
sbrinamento<br />
7.4 Defrost management parameters<br />
N° Cod. Parametro MSYF U.M. Tipo Def. Max Min<br />
40 d0 Tipo di defrost -SYF fl ag C 0 4 0<br />
41 dI Intervallo tra i defrost -SYF ore F 8 250 0<br />
42 dt1 Temperatura di fi ne defrost evap. -SYF °C/°F F 4.0 200 -50<br />
43 dt2 Temperatura di fi ne defrost evap. aux -SYF °C/°F F 4.0 200 -50<br />
44 dP1 Durata massima defrost evaporatore -SYF min F 30 250 1<br />
45 dP2 Durata massima defrost evap. aux -SYF min F 30 250 1<br />
46 d3 Ritardo inserimento defrost -SYF Min C 0 250 0<br />
47 d4 Abilitazione defrost allo start up -SYF fl ag C 0 1 0<br />
48 d5 Ritardo defrost allo start up -SYF min C 0 250 0<br />
49 d6 Blocco display durante il defrost -SYF - C 1 2 0<br />
50 dd Tempo di gocciolamento dopo il defrost -SYF min F 2 15 0<br />
51 d8 Esclusione allarmi dopo il defrost -SYF ore F 1 15 0<br />
52 d9 Priorità defrost su protezioni compressore -SYF fl ag C 0 1 0<br />
53 d/1 Visualizzazione sonda defrost 1 MSYF °C/°F F - - -<br />
54 d/2 Visualizzazione sonda defrost 2 MSYF °C/°F F - - -<br />
55 dC Base dei tempi per defrost -SYF fl ag C 0 1 0<br />
56 d10 Running time del compressore -SYF ore C 0 250 0<br />
57 d11 Soglia di temperatura di running time -SYF °C/°F C 1.0 20 -20<br />
58 d12 Defrost avanzati -SYF - C 0 3 0<br />
59 dn Durata nominale defrost -SYF - C 65 100 1<br />
60 dH Fattore proporzionale variazione di -SYF - C 50 100 0<br />
N° Cod. Parameter MSYF U.M. Type Def. Max Min<br />
40 d0 Type of defrost -SYF fl ag C 0 4 0<br />
41 dI Interval between defrosts -SYF ore F 8 250 0<br />
42 dt1 End defrost temperature, evaporator -SYF °C/°F F 4.0 200 -50<br />
43 dt2 End defrost temperature, aux evap. -SYF °C/°F F 4.0 200 -50<br />
44 dP1 Maximum defrost duration, evaporator -SYF min F 30 250 1<br />
45 dP2 Maximum defrost duration, aux evap. -SYF min F 30 250 1<br />
46 d3 Defrost start delay -SYF Min C 0 250 0<br />
47 d4 Enable defrost on start-up -SYF fl ag C 0 1 0<br />
48 d5 Defrost delay on start-up -SYF min C 0 250 0<br />
49 d6 Display on hold during defrost -SYF - C 1 2 0<br />
50 dd Dripping time after defrost -SYF min F 2 15 0<br />
51 d8 Alarm bypass after defrost -SYF ore F 1 15 0<br />
52 d9 Defrost priority over compressor protectors -SYF fl ag C 0 1 0<br />
53 d/1 Display of defrost probe 1 MSYF °C/°F F - - -<br />
54 d/2 Display of defrost probe 2 MSYF °C/°F F - - -<br />
55 dC Time base for defrost -SYF fl ag C 0 1 0<br />
56 d10 Compressor running time -SYF ore C 0 250 0<br />
57 d11 Running time temperature threshold -SYF °C/°F C 1.0 20 -20<br />
58 d12 Advanced defrost -SYF - C 0 3 0<br />
59 dn Nominal defrost duration -SYF - C 65 100 1<br />
60 dH Proportional factor, variation in dI -SYF - C 50 100 0<br />
Tab. 7.4.1<br />
Tab. 7.4.1<br />
Avvertenza importante: affi nchè i tempi impostati diventino immediatamente<br />
operativi, è necessario spegnere e riaccendere lo strumento. Nel caso non si effettui<br />
tale operazione, la temporizzazione diventerà operativa al suo successivo utilizzo.<br />
d0: Tipo di sbrinamento<br />
Per gli strumenti dotati di relè di sbrinamento:<br />
• d0 =0 sbrinamento a resistenza in temperatura;<br />
• d0 =1 sbrinamento a gas caldo in temperatura;<br />
• d0 =2 sbrinamento a resistenza a tempo, non compaiono Ed1 e Ed2 a display;<br />
• d0 =3 sbrinamento a gas caldo a tempo, non compaiono Ed1 e Ed2 a display;<br />
• d0 =4 sbrinamento termostatato a resistenza a tempo, non compaiono ‘Ed1’<br />
e ‘Ed2’ a display.<br />
Per tutti i modelli lo sbrinamento può essere eseguito:<br />
• in temperatura, sfruttando la sonda di sbrinamento posta sull’evaporatore.<br />
In ogni caso lo sbrinamento sarà interrotto dopo una durata massima di<br />
sicurezza (dP1 e dP2), impostabile. Le segnalazioni Ed1 e Ed2 “fi ne<br />
sbrinamento per durata massima” (parametro A8) possono essere<br />
disabilitate;<br />
• a tempo: in mancanza della sonda di sbrinamento;<br />
• a tempo termostatato: permette di attivare l’uscita di defrost se la temperatura<br />
si trova al di sotto della soglia di fi ne sbrinamento, permettendo un risparmio<br />
energetico e garantendo lo sbrinamento completo dell’evaporatore anche nei<br />
casi più diffi cili.<br />
50<br />
Important warning: for the set times to become immediately operational, the<br />
instrument needs to be turned off and on again. If this operation is not carried out,<br />
timing resumes operation the next time it is used.<br />
d0: Type of defrost<br />
For the instruments fi tted with defrost relays:<br />
• d0=0 electric heater defrost by temperature;<br />
• d0=1 hot gas defrost by temperature;<br />
• d0=2 electric heater defrost by time, ‘Ed1’ and ‘Ed2’ not displayed;<br />
• d0=3 hot gas defrost by time, Ed1 and Ed2 not displayed.<br />
Defrosts can be performed for all models::<br />
• by temperature, using the defrost probe fi tted on the evaporator. In any case, the<br />
defrost will be stopped after a maximum set safety time (dP1 and dP2).<br />
The alarms ‘Ed1’ and ‘Ed2’, “end defrost due to maximum duration” (parameter<br />
‘A8’) can be disabled;<br />
• by time: without the defrost probe;<br />
• by time with temperature control: the defrost output is activated if the temperature<br />
is below the end defrost threshold, allowing energy savings and guaranteeing the<br />
complete defrost of the evaporator even in the most extreme cases.<br />
+030220140 - rel. 1.2 - del 06-06-2005
Nota: il modello S non è dotato del relè relativo allo sbrinamento, quindi è possibile<br />
eseguire solo defrost per fermata del compressore selezionando comunque la fi ne<br />
dello sbrinamento a tempo o temperatura.<br />
Se le segnalazioni Ed1 e Ed2 non sono stati inibite, in caso di intervento è<br />
possibile cancellarli premendo insieme i tasti e aux<br />
per più di 5 secondi<br />
oppure automaticamente all’inizio dello sbrinamento successivo.<br />
Nota: nel caso sia selezionata la regolazione con 2 gradini per il compressore (con<br />
o senza rotazione, H1= 12 o 13) lo sbrinamento viene eseguito agendo su ambedue<br />
i gradini.<br />
Default: d0=0 => sbrinamento a resistenza in temperatura.<br />
dI: Intervallo tra gli sbrinamenti<br />
Gli sbrinamenti vengono eseguiti ciclicamente con periodo pari al valore dI, in ore<br />
(o minuti, si veda il parametro dC), conteggiato dall’inizio del precedente. La durata<br />
dello sbrinamento non infl uenza, quindi, l’intervallo tra gli sbrinamenti.<br />
L’intervallo dI viene mantenuto anche durante la situazione di unità off. Se l’intervallo<br />
dI scade durante il periodo di off, alla riaccensione verrà eseguito uno sbrinamento.<br />
Se dI =0 => lo sbrinamento non viene mai eseguito tranne nei casi in cui è forzato<br />
da tastiera (sbrinamento <strong>manual</strong>e), da supervisore, da ingresso digitale (si veda il<br />
parametro A4 ) o da Real Time Clock.<br />
Attenzione: Per garantire la periodicità dello sbrinamento, l’intervallo fra gli<br />
sbrinamenti deve essere maggiore della durata massima dello sbrinamento,<br />
aumentata del tempo di gocciolamento e del tempo di post gocciolamento.<br />
Nota: durante lo sbrinamento sono inibiti gli allarmi di temperatura.<br />
Default: dI =8 ore.<br />
dt1: set point temperatura di fi ne sbrinamento evaporatore<br />
Questo parametro permette di fi ssare la temperatura di fi ne sbrinamento,<br />
rilevata sull’evaporatore. In ogni caso la durata massima dello sbrinamento è pari al<br />
valore impostato per il parametro dP1, in minuti.<br />
• Se alla richiesta di uno sbrinamento, la temperatura rilevata dalla sonda di<br />
sbrinamento dell’evaporatore è maggiore di quella impostata come fi ne<br />
sbrinamento, il ciclo non viene effettuato (comprese le fasi di gocciolamento e<br />
post-gocciolamento). Ciò vale anche per lo sbrinamento all’accensione, da<br />
contatto digitale, da Rtc e da tastiera.<br />
• Se la sonda di sbrinamento dell’evaporatore è in errore o disabilitata, il controllore<br />
esegue uno sbrinamento a tempo, con durata pari al valore impostato per il<br />
parametro dP1.<br />
• Se la temperatura di fi ne sbrinamento non viene raggiunta nel tempo indicato dal<br />
parametro dp1, lo sbrinamento viene interrotto. Se è stato abilitato (parametro<br />
A8), viene visualizzato l’errore Ed1 che permane fi no all’inizio del prossimo ciclo<br />
di sbrinamento.<br />
Nel defrost termostatato il parametro permette di stabilire la soglia di spegnimento o<br />
accensione del relativo relè di sbrinamento.<br />
Default: dt1 =4°C.<br />
dt2: set point temperatura di fi ne sbrinamento evaporatore ausiliario<br />
dt2 agisce in modo identico al parametro dtl descritto sopra facendo però<br />
riferimento all’avaporatore ausiliario.<br />
Nota per dt1 e dt2: nel defrost termostatato il parametro permette di stabilire la<br />
soglia di spegnimento o accensione del relativo relè di sbrinamento.<br />
Default: dt2 =4°C.<br />
dP1: Durata massima sbrinamento evaporatore<br />
Determina la durata massima dello sbrinamento dell’evaporatore in minuti (o<br />
secondi, si veda il parametro dC ) se selezionato lo sbrinamento in temperatura. Se<br />
impostato a tempo, rappresenta la durata effettiva dello sbrinamento.<br />
Default: dP1=30 minuti.<br />
dP2: Durata massima sbrinamento evaporatore ausiliario<br />
Come dP1 facendo però riferimento all’evaporatore ausiliario.<br />
Default: dP2 =30 minuti.<br />
d3: Ritardo attivazione sbrinamento<br />
Questo parametro determina l’intervallo di tempo che intercorre, nella fase di<br />
attivazione degli sbrinamenti, tra lo spegnimento del compressore (sbrinamento a<br />
resistenza) o l’accensione (sbrinamento a gas caldo), e l’attivazione dei relè<br />
sbrinamento evaporatore principale e ausiliario.<br />
51<br />
Note: model S does not have a defrost relay, and consequently the defrost can only<br />
be performed by stopping the compressor and selecting end of defrost by time or<br />
temperature.<br />
If the alarms Ed1 and Ed2 are not disabled, when activated, they can be cancelled<br />
by pressing and aux<br />
together for more than 5 seconds, or automatically at<br />
the start of the next defrost operation.<br />
Note: if control with 2 compressor steps is selected (with or without rotation, H1= 12<br />
or 13) the defrost is performed acting on both steps.<br />
Default: d0=0 electric heater defrost by temperature;<br />
dI: Interval between defrosts<br />
The defrosts are performed cyclically at an interval equal to the value of dI in hours<br />
(or minutes, see parameter dC), counted from the end of the previous period. The<br />
duration of the defrost therefore does not therefore affect the interval between<br />
defrosts.<br />
The interval dI is also maintained when the unit is OFF. If the interval dI expires<br />
when the controller is OFF, when it is started again a defrost is performed.<br />
If dI =0 => the defrost is never performed except when forced from the keypad<br />
(<strong>manual</strong> defrost), from the supervisor or from the digital input (see parameter A4),<br />
or from the Real Time Clock.<br />
Important: To ensure regular defrosts, the interval between defrosts must be greater<br />
than the maximum defrost duration, plus the dripping time and post-dripping time.<br />
Note: during the defrost, temperature alarms are disabled.<br />
Default: dI =8 hours.<br />
dt1: set point temperature at end of evaporator defrost<br />
This parameter is used to set the end defrost temperature, measured on the<br />
evaporator. In any case, the maximum defrost duration is equal to the value, in<br />
minutes, set for parameter ‘dP1’.<br />
• If when a defrost is requested, the temperature measured by the defrost probe on<br />
the evaporator is greater than the value set for the end defrost, the cycle is not<br />
performed (including the dripping and post-dripping phases).<br />
The same is true for the defrost on start-up, from digital contact, from RTC and<br />
from the keypad.<br />
• If the defrost probe on the evaporator is faulty or disabled, the controller performs<br />
a timed defrost, with a duration equal to the value set for parameter ‘dP1’.<br />
• If the end defrost set point is not reached within the time set for parameter<br />
dp1, the defrost is stopped. If enabled (parameter ‘A8’), the error ‘Ed1’ is<br />
displayed, which persists until the start of the next defrost cycle.<br />
In the defrost by temperature, the parameter establishes the threshold for activating<br />
or deactivating the corresponding defrost relay.<br />
Default: dt1=4°C.<br />
dt2: end defrost temperature set point, auxiliary evaporator<br />
dt2 acts in the same way as parameter dt1 described above, but referring to the<br />
auxiliary evaporator.<br />
Notes for dt1 and dt2: in the defrost by temperature, the parameter establishes the<br />
threshold for activating or deactivating the corresponding defrost relay.<br />
Default: dt2 =4°C.<br />
dP1: Maximum evaporator defrost duration<br />
Determines the maximum defrost duration on the evaporator in minutes (or<br />
seconds, see parameter ‘dC’) if defrost by temperature is selected. If timed defrost<br />
has been selected, this is the actual duration of the defrost.<br />
Default: dP1=30 minutes<br />
dP2: Maximum defrost duration, auxiliary evaporator<br />
As for parameter dP1 described above, but refers to the auxiliary evaporator.<br />
Default: dP2=30 minutes.<br />
d3: Defrost start delay<br />
This parameter determines the time that must elapse, when the defrost is<br />
activated, between the stopping of the compressor (electric heater defrost) or the<br />
starting of the compressor (hot gas defrost), and the activation of the defrost relays<br />
on the main and auxiliary evaporators.<br />
+030220140 - rel. 1.2 - del 06-06-2005
Il ritardo d3 è utile, negli sbrinamenti a gas caldo, per avere una quantità suffi ciente<br />
di gas caldo disponibile per lo sbrinamento prima dell’attivazione della valvola di<br />
inversione ciclo, in applicazioni molto particolari (vedi paragrafo “Descrizione delle<br />
funzionalità software”).<br />
Default: d3 =0 minuti.<br />
d4: Sbrinamento all’accensione dello strumento<br />
Attiva uno sbrinamento all’accensione dello strumento.<br />
Avvertenza: tale richiesta ha priorità sull’inserimento del compressore e<br />
sull’attivazione del ciclo continuo.<br />
I valori previsti sono:<br />
d4 =0 non c’è sbrinamento all’accensione dello strumento<br />
d4 =1 viene eseguito uno sbrinamento all’accensione dello strumento<br />
Forzare uno sbrinamento all’accensione dello strumento può essere utile in<br />
situazioni molto particolari.<br />
Esempio: nell’impianto si verifi cano frequenti cadute di tensione che comportano<br />
l’azzeramento dell’orologio interno il quale calcola l’intervallo tra due sbrinamenti,<br />
ripartendo da zero. Se la frequenza della caduta di tensione fosse, per assurdo,<br />
maggiore della frequenza di sbrinamento (per es. una caduta di tensione ogni 8<br />
ore contro uno sbrinamento ogni 10 ore) il controllore non sbrinerebbe mai. In<br />
una situazione di questo tipo è preferibile attivare lo sbrinamento all’accensione,<br />
soprattutto se è controllato in temperatura (sonda sull’evaporatore) per cui si evitano<br />
sbrinamenti inutili o, quantomeno, si riducono i tempi di esecuzione. Nel caso<br />
di impianti con molte unità, se si seleziona la partenza in sbrinamento, potrebbe<br />
succedere, dopo una caduta di tensione, che tutte le unità partano in sbrinamento<br />
causando sovraccarichi di tensione. Per ovviare a ciò si può sfruttare il parametro d5<br />
che permette di inserire un ritardo prima dello sbrinamento, ovviamente diverso per<br />
ogni unità.<br />
Default: d4 =0 lo strumento non esegue uno sbrinamento all’accensione.<br />
d5: Ritardo sbrinamento all’accensione dello strumento o da ingresso<br />
multifunzione<br />
Rappresenta il tempo in minuti, che deve intercorrere tra l’accensione del controllore<br />
e l’inizio dello sbrinamento.<br />
• Nel caso l’ingresso digitale sia utilizzato per abilitare lo sbrinamento (vedi<br />
parametro A4 =3) o per avviare uno sbrinamento da contatto esterno (vedi<br />
parametro A4 =4), il parametro d5 rappresenta il ritardo tra l’abilitazione dello<br />
sbrinamento o la sua richiesta, e l’inizio effettivo.<br />
• L’ingresso digitale di gestione sbrinamento (vedi parametro A4) può essere<br />
profi cuamente usato per eseguire sbrinamenti in tempo reale collegandovi un<br />
timer. Lo sbrinamento sarà attivato alla chiusura del contatto del timer.<br />
• Nel caso di più unità collegate allo stesso timer si suggerisce di usare il parametro<br />
d5 per ritardare i vari sbrinamenti, evitando quindi sovraccarichi di corrente.<br />
Inoltre, per evitare sbrinamenti indesiderati comandati dall’orologio interno, si<br />
suggerisce di settare il parametro dI=0 (solo sbrinamenti <strong>manual</strong>i, da tastiera,<br />
da Rtc, da calcolo del running time del compressore o da contatto Multifunzione).<br />
Avvertenza importante: per il collegamento di più unità allo stesso timer, la<br />
soluzione migliore è quella di isolare tutti i contatti galvanicamente, inserendo dei<br />
relè di rimando per ogni contatto.<br />
Default: d5=0 => assenza di ritardo nello sbrinamento dall’accensione dello<br />
strumento o dall’attivazione dell’ingresso multifunzione.<br />
d6: Visualizzazione durante lo sbrinamento<br />
Valori previsti:<br />
• d6 =0 => durante lo sbrinamento lo strumento visualizza alternativamente la<br />
scritta dEF con il valore della sonda selezionata per la visualizzazione con il<br />
parametro /tI. Questo per avvertire che un valore eventualmente elevato della<br />
temperatura è dovuto alla procedura di sbrinamento in atto.<br />
• d6 =1 => durante lo sbrinamento resta visualizzata l’ultima temperatura mostrata<br />
prima del suo inizio. La visualizzazione riprende normalmente quando la<br />
temperatura di regolazione raggiunge il set point , la temperatura da visualizzare<br />
risulta inferiore al valore bloccato sul display o, in ogni caso, dopo il tempo settato<br />
come “esclusione allarmi dopo lo sbrinamento” (d8).<br />
• d6 =2 => durante lo sbrinamento lo strumento visualizza la scritta dEF fi ssa sul<br />
display.<br />
Nota: in off e in reverse il blocco display dopo sbrinamento viene terminato.<br />
Default: d6 =1 => durante lo sbrinamento resta visualizzata l’ultima temperatura<br />
rilevata prima dell’inizio sia sul terminale interno che sul terminale remoto.<br />
The delay ‘d3’ is useful, in the hot gas defrost, to ensure a suffi cient quantity of hot<br />
gas for the defrost before the activation of the cycle reversing valve, in very special<br />
applications (see paragraph “Description of software functions”).<br />
Default: d3=0 minutes.<br />
d4: Defrost when the instrument is switched on<br />
Activates a defrost when the instrument is switched on.<br />
Warning: this request has priority over the activation of the compressor and the<br />
continuous cycle.<br />
The possible values are:<br />
d4=0, no defrost is performed when the instrument is switched on;<br />
d4=1, a defrost is performed when the instrument is switched on.<br />
Starting a defrost when the instrument is switched on may be useful in special<br />
situations.<br />
Example: frequent power drops occur in the system, which cause the internal clock<br />
to be reset. This clock calculates the interval between two defrosting operations,<br />
restarting from zero. If the frequency of the power failure were, in an extreme case,<br />
greater than the defrost frequency (e.g. a power failure every 8 hours, against a<br />
defrost every 10 hours) the controller would never perform a defrost. In a situation<br />
of this type, it is preferable to enable defrost on start-up, above all if the defrost is<br />
controlled by temperature (probe on the evaporator), therefore avoiding<br />
unnecessary defrosts or at least reducing the running times.<br />
In the case of systems with a large number of units, if selecting defrosts at start-up,<br />
after a power failure all the units will start defrosting, thus causing a voltage<br />
overload. To overcome this, the parameter d5 can be used. It adds a delay before<br />
the defrost, and this delay must obviously be different for each unit.<br />
Default: ‘d4’=0 the instrument does not perform a defrost on start-up.<br />
d5: Defrost delay when the instrument is switched on or from multifunction<br />
input<br />
The time that must elapse between start-up of the controller and the start of the<br />
defrost.<br />
• If the digital input is used to enable the defrost (see parameter ‘A4’=3) or to<br />
start a defrost from external contact (see parameter ‘A4’=4), the parameter<br />
‘d5’ refers to the delay between enabling of the defrost or request to enable,<br />
and the effective start.<br />
• The defrost digital input (see parameter ‘A4’) can be usefully employed to<br />
perform defrosts in real time, connecting a timer to the input. The defrost will be<br />
activated when the timer contact closes.<br />
• If several units are connected to the same timer, parameter ‘d5’ should be used<br />
to delay the various defrosts, thus avoiding power overloads. In addition, to avoid<br />
unwanted defrosts started by the clock inside the instrument, set parameter ‘dI’=0<br />
(<strong>manual</strong> defrosts only, started from the keypad, by the RTC, by the calculation of<br />
the compressor running time or by the Multifunction contact).<br />
Important warning: when connecting a series of units to the same timer, the best<br />
solution is to insulate all the contacts galvanically, fi tting intermediate relays for<br />
each contact.<br />
Default: ‘d5’=0 => no delayed defrost when switching the instrument on or following<br />
the activation of the multifunction input.<br />
d6: Display during defrost<br />
Specifi ed values:<br />
• ‘d6’=0 => during the defrost the instrument displays the text ‘dEF’ alternating<br />
with the value read by the probe selected using parameter ‘/tI’. This is to signal<br />
that any high temperature values are due to the defrost procedure in progress.<br />
• ‘d6’=1 => during the defrost the last temperature shown before the start<br />
of the cycle remains on the display. The display returns to normal when the<br />
control temperature reaches the set point, the temperature to be displayed is<br />
less than the value locked on the display or, in any case, after the time set for<br />
the “alarm bypass after defrosting” (‘d8’).<br />
• ‘d6’=2 => during the defrost the instrument displays the text ‘dEF’ steady on<br />
the display.<br />
Note: in OFF and REVERSE modes, the display is unlocked after the defrost.<br />
Default: ‘d6’=1 => during the defrost the last temperature read before the start of<br />
the cycle remains on the display.<br />
52<br />
+030220140 - rel. 1.2 - del 06-06-2005
dd: Tempo di gocciolamento<br />
Questo parametro permette di forzare in minuti la fermata del compressore e dei<br />
ventilatori dell’evaporatore dopo uno sbrinamento al fi ne di favorire il gocciolamento<br />
dell’ evaporatore stesso.<br />
Se dd =0 => non è previsto nessun tempo di gocciolamento per cui alla fi ne dello<br />
sbrinamento viene immediatamente riattivata la regolazione.<br />
Nota: nel caso sia selezionata la regolazione con 2 gradini per il compressore (con o<br />
senza rotazione, H1= 12 o 13) il gocciolamento agisce su ambedue i gradini.<br />
Default: dd =2 minuti.<br />
d8: Tempo esclusione allarmi dopo sbrinamento e/o porta aperta<br />
Indica il tempo, in ore, di esclusione della segnalazione dell’allarme di alta temperatura<br />
dalla fi ne di uno sbrinamento o dall’apertura della porta della cella, nel caso che<br />
l’ingresso Multifunzione sia collegato allo “switch porta” (si veda i parametri A4, A5).<br />
Default: d8 =1 ora di esclusione.<br />
d9: Priorità sbrinamento sulle protezioni compressore<br />
Annulla i tempi di protezione del compressore all’inizio dello sbrinamento. Tempi di<br />
protezione del compressore:<br />
• c1: tempo minimo tra 2 accensioni successive;<br />
• c2: tempo minimo di spegnimento;<br />
• c3: tempo minimo di funzionamento.<br />
d9 = 0 i tempi di protezione sono rispettati<br />
d9 = 1 i tempi di protezione non sono rispettati quindi lo sbrinamento ha priorità<br />
maggiore e non segue i tempi del compressore.<br />
Questa funzione è utile nello sbrinamento a gas caldo per evitare di ritardare<br />
l’effettuazione dello sbrinamento nel caso in cui il compressore si sia appena spento<br />
e sia stato attivato un tempo minimo tra due inserimenti del compressore. Si ricordi<br />
però che in questa evenienza potrebbe non essere rispettato il numero massimo di<br />
inserimenti ora del compressore.<br />
Avvertenza: si consideri anche che se lo sbrinamento richiede l’inserimento del<br />
compressore (sbrinamento a gas caldo) e si pone il parametro d9 =1, si può rischiare<br />
di danneggiare il compressore a causa di un eccesso di inserimenti ravvicinati.<br />
Default: d9 =0 => lo sbrinamento rispetta i tempi del compressore (però per default<br />
essi sono posti a zero).<br />
d/1: Lettura sonda sbrinamento 1<br />
Selezionando questo parametro è possibile visualizzare il valore rilevato dalla sonda di<br />
sbrinamento 1 (negli strumenti che ne sono dotati) premendo il tasto Set .<br />
Nel caso la sonda fosse disabilitata saranno visualizzati tre trattini orizzontali ‘_ _ _’.<br />
d/2: Lettura sonda sbrinamento 2<br />
Come d/1, facendo però riferimento alla sonda di sbrinamento 2.<br />
dC: Base dei tempi<br />
Consente di modifi care l’unità di misura utilizzata per il conteggio dei tempi per i<br />
parametri dI (intervallo di sbrinamento), dP1 e dP2 (durata dello sbrinamento).<br />
dC =0 => dI espresso in ore, dP1 e dP2 in minuti.<br />
dC =1 => dI espresso in minuti , dP1 e dP2 in secondi.<br />
Il parametro dC =1 può essere usato per testare il funzionamento dello sbrinamento<br />
con tempi ridotti. Diventa utilissimo nel caso si voglia usare lo strumento per la<br />
gestione di essiccatori d’aria. Il ciclo di sbrinamento diventa allora il ciclo di scarico<br />
condensa che deve avvenire con intervalli ravvicinati (minuti) e con durate<br />
brevissime (secondi).<br />
Default: dC =0 => dI in ore, dP1 e dP2 in minuti.<br />
d10: Running time del compressore<br />
Questo parametro indica il tempo di funzionamento, in ore, del compressore, con<br />
temperatura dell’evaporatore inferiore alla soglia indicata dal parametro d11, dopo il<br />
quale si ha la generazione di una richiesta di sbrinamento.<br />
Impostando d10 =0 si disabilita la funzione.<br />
Nota: nel caso sia selezionata la regolazione con 2 gradini per il compressore (con<br />
o senza rotazione, H1= 12 o 13) il running time del compressore è calcolato solo sul<br />
primo gradino.<br />
Default: d10 =0 => Funzione disabilitata.<br />
d11: Soglia di temperatura di Running time<br />
Questo parametro indica la temperatura di evaporazione al di sotto della quale il<br />
compressore deve continuare a funzionare per il tempo d10 per generare una<br />
richiesta di sbrinamento.<br />
Default: d11 =1 => 1°C.<br />
53<br />
dd: Dripping time<br />
This parameter is used to stop (in minutes) the compressor and the evaporator fans<br />
after a defrost to facilitate evaporator dripping,<br />
If ‘dd’=0 => there is no dripping time, therefore, at the end of the defrost the control<br />
functions start immediately .<br />
Note: if control with 2 compressor steps is selected (with or without rotation, H1= 12<br />
or 13) the dripping acts on both steps.<br />
Default: ‘dd’=2 minutes.<br />
d8: Alarm bypass time after defrost and/or door open<br />
Indicates the time (in hours) that the high temperature alarm signal is ignored from<br />
after the end of a defrost cycle or from when the door to the cold room is opened, if<br />
the Multifunction input is connected to the “door switch” (see parameters ‘A4’ and ‘A5’).<br />
Default: ‘d8’=1 hour bypass.<br />
d9: Defrost priority over compressor protective devices<br />
Ignores the compressor protection times at the start of the defrost. Compressor<br />
protection times:<br />
• c1: minimum time between 2 successive starts;<br />
• c2 : minimum OFF time;<br />
• c3: minimum operating time.<br />
d9 = 0 the protection times are respected<br />
d9 = 1 the protection times are not respected. Therefore, defrost has higher priority<br />
and the compressor times are ignored.<br />
In the hot gas defrost, this is useful to avoid delaying the start of the defrost if the<br />
compressor has just stopped and there is a minimum time between two starts of<br />
the compressor. Remember, however, that in this event the maximum number of<br />
compressor starts per hour may not necessarily be respected.<br />
Warning: if the defrost requires the activation of the compressor (hot gas defrost)<br />
and parameter ‘d9’=1, the compressor may risk being damaged due to an excessive<br />
number of close starts.<br />
Default: ‘d9’=0 => the defrost respects the compressor times (however by default<br />
these are set to zero).<br />
d/1: Defrost probe 1 reading<br />
This parameter is used to display the value measured by defrost probe 1 (on the<br />
instruments where this is fi tted), by pressing Set button.<br />
If defrost probe 1 is disabled, three horizontal dashes ‘_ _ _’will be displayed.<br />
d/2: Defrost probe 2 reading<br />
As for parameter d/1 described above, but refers to defrost probe 2.<br />
dC: Time base<br />
Used to modify the measurement unit used to count the times set for parameters<br />
‘dI’ (defrost interval), ‘dP1’ and ‘dP2’ (defrost duration).<br />
dC=0 =>dI expressed in hours, ‘dP1’ and ‘dP2’ in minutes.<br />
dC=1 =>dI expressed in hours, ‘dP1’ and ‘dP2’ in minutes.<br />
The parameter dC=1 can be used to test defrost operation at shorter times. In<br />
addition, it is useful for using the instrument to manage air driers. The defrost cycle<br />
then becomes the condensate discharge cycle, which must be performed at close<br />
intervals (minutes) and for short durations (seconds).<br />
Default: dC=0 =>dI expressed in hours, dP1 and dP2 in minutes.<br />
d10: Compressor running time<br />
This parameter indicates the compressor operating time in hours, with the<br />
temperature below the threshold indicated by the parameter d11, after which a<br />
defrost request is generated.<br />
Setting d10=0 disables the function.<br />
Note: if control with 2 compressor steps is selected (with or without rotation, H1= 12<br />
or 13) the compressor running time is only calculated on the fi rst step.<br />
Default: d10=0 => Function disabled.<br />
d11: Running time temperature threshold<br />
This parameter indicates the evaporation temperature below which the compressor<br />
must continue to operate for the time ‘d10’ in order to generate a defrost request.<br />
Default: ‘d11’=1 => 1°C.<br />
+030220140 - rel. 1.2 - del 06-06-2005
d12: Sbrinamenti avanzati autoadattativi<br />
Questo parametro permette di abilitare e disabilitare le funzionalità di sbrinamento<br />
avanzato, secondo la seguente tabella:<br />
d12 Skip sbrinamento Variazione automatica di dI<br />
0 Disabilitato Disabilitato<br />
1 Disabilitato Abilitato<br />
2 Abilitato Disabilitato<br />
3 Abilitato Abilitato<br />
Tab. 7.4.1<br />
Default: d12 =0 => Entrambe le funzionalità disabilitate.<br />
dn: Durata nominale dello sbrinamento<br />
Indica la durata media dello sbrinamento in condizioni di normale<br />
funzionamento. Viene espressa come percentuale, rispetto ai parametri dP1 e dP2 ,<br />
secondo le seguenti formule:<br />
dn1<br />
dn<br />
dn<br />
dP1 dn2<br />
100 ; 100<br />
dP2<br />
Esempio: con dn = 65, dP1 = 90 min. e dP2 =120 min.<br />
Durata nominale sbrinamento evaporatore principale: 59 min.<br />
Durata nominale sbrinamento evaporatore secondario: 78 min.<br />
Default: dn = 65 => 65% di dP1 o dP2<br />
dH: Fattore proporzionale nella variazione dell’intervallo di sbrinamento<br />
Questo parametro permette di aumentare o diminuire l’infl uenza della durata<br />
effettiva dello sbrinamento, in rapporto alla durata nominale, nell’algoritmo di<br />
variazione automatica dell’intervallo di sbrinamento. Impostando dH = 0 la durata<br />
effettiva non ha alcuna infl uenza sulla durata dell’intervallo di sbrinamento, viceversa<br />
con dH =100 si ottiene la massima infl uenza.<br />
Default: dH=50<br />
d12: Advanced auto-adapting defrosts<br />
This parameter is used to enable and disable the advanced defrost function, as per<br />
the following table:<br />
d12 Skip Defrost Automatic variation of dI<br />
0 Disabled Disabled<br />
1 Disabled Enabled<br />
2 Enabled Disabled<br />
3 Enabled Enabled<br />
Tab. 7.4.1<br />
Default: ‘d12’=0 => Both the functions are disabled.<br />
dn: Nominal defrost duration<br />
This indicates the average duration of the defrost in normal operating conditions. It<br />
is expressed as a percentage, with reference to parameters ‘dP1’ and ‘dP2’, according<br />
to the following formulas:<br />
dn1<br />
dn<br />
dn<br />
dP1 dn2<br />
100 ; 100<br />
dP2<br />
Example: with ‘dn’=65, ‘dP1’=90 min. and ‘dP2’=120 min.<br />
Nominal defrost duration on main evaporator: 59 min.<br />
Nominal defrost duration on auxiliary evaporator: 78 min.<br />
Default: ‘dn’=65 => 65% of ‘dP1’ or ‘dP2’<br />
dH: Proportional factor in the variation of the defrost interval<br />
This parameter is used to increase or decrease the infl uence of the effective<br />
duration of the defrost, in relation to the nominal duration, in the algorithm that<br />
manages the automatic variation of the defrost interval.<br />
By setting ‘dH’=0, the effective duration has no infl uence on the duration of the<br />
defrost interval. Vice versa, with dH = 100, one obtains maximum effi ciency.<br />
Default: dH=50<br />
7.5 Parametri relativi alla gestione degli allarmi<br />
7.5 Alarm management parameters<br />
N° Cod. Parametro MSYF U.M. Tipo Def. Max Min<br />
61 A0 Differenziale allarmi e ventole MSYF °C/°F C 2.0 20 0.1<br />
62 A1 Tipo di soglia AL e AH MSYF fl ag C 0 1 0<br />
63 AL Soglia di allarme di bassa temperatura MSYF °C/°F F 0.0 200 -50<br />
64 AH Soglia di allarme di alta temperatura MSYF °C/°F F 0.0 200 -50<br />
65 Ad Ritardo segnalazione bassa e alta temperatura MSYF min F 120 250 0<br />
66 A4 Confi gurazione ingresso digitale 1 -SYF<br />
M---<br />
-<br />
-<br />
C<br />
C<br />
0<br />
0<br />
14<br />
14<br />
0<br />
0<br />
67 A5 Confi gurazione ingresso digitale 2 MSYF - C 0 14 0<br />
68 A6 Blocco compressore da allarme esterno -SYF min C 0 100 0<br />
69 A7 Ritardo rilevazione allarme esterno -SYF min C 0 250 0<br />
70 A8 Abilitazione allarmi Ed1 ed Ed2 -SYF fl ag C 0 1 0<br />
71 Ado Modalità gestione luce con switch porta MSYF fl ag C 0 1 0<br />
72 Ac Allarme alta temperatura condensatore -SYF °C/°F C 70.0 200 0.0<br />
73 AE Differenziale allarme alta temp. cond. -SYF °C/°F C 5.0 20 0.1<br />
74 Acd Ritardo allarme alta temperatura condensatore -SYF min C 0 250 0<br />
75 AF Tempo spegnimento con sensore di luce -SYF sec C 0 250 0<br />
76 ALF Soglia di allarme antifreeze MSYF °C/°F C -5.0 200 -50<br />
77 AdF Ritardo allarme antifreeze MSYF min C 1 15 0<br />
N° Cod. Parameter MSYF U.M. Type Def. Max Min<br />
61 A0 Alarm and fan differential MSYF °C/°F C 2.0 20 0.1<br />
62 A1 Type of threshold ‘AL’ and ‘AH’ MSYF fl ag C 0 1 0<br />
63 AL Low temperature alarm threshold MSYF °C/°F F 0.0 200 -50<br />
64 AH High temperature alarm threshold MSYF °C/°F F 0.0 200 -50<br />
65 Ad Low and high temperature signal delay MSYF min F 120 250 0<br />
66 A4 Digital input 1 confi guration -SYF<br />
M---<br />
-<br />
-<br />
C<br />
C<br />
0<br />
0<br />
14<br />
14<br />
0<br />
0<br />
67 A5 Digital input 2 confi guration MSYF - C 0 14 0<br />
68 A6 Stop compressor from external alarm -SYF min C 0 100 0<br />
69 A7 External alarm detection delay -SYF min C 0 250 0<br />
70 A8 Enable alarms ‘Ed1’ and ‘Ed2’ -SYF fl ag C 0 1 0<br />
71 Ado Light management mode with door switch MSYF fl ag C 0 1 0<br />
72 Ac High condenser temperature alarm -SYF °C/°F C 70.0 200 0.0<br />
73 AE High condenser temperature alarm differential -SYF °C/°F C 5.0 20 0.1<br />
74 Acd High condenser temperature alarm delay -SYF min C 0 250 0<br />
75 AF Light sensor OFF time -SYF sec C 0 250 0<br />
76 ALF Antifreeze alarm threshold MSYF °C/°F C -5.0 200 -50<br />
77 AdF Antifreeze alarm delay MSYF min C 1 15 0<br />
Tab. 7.5.1<br />
Tab. 7.5.1<br />
Avvertenza importante: affi nchè i tempi impostati diventino immediatamente<br />
operativi, è necessario spegnere e riaccendere lo strumento. Nel caso non si effettui<br />
tale operazione, la temporizzazione diventerà operativa al suo successivo utilizzo.<br />
54<br />
Important warning: for the set times to become immediately operational, the inst<br />
rument needs to be turned off and on again. If this operation is not carried out,<br />
timing resumes operation the next time it is used.<br />
+030220140 - rel. 1.2 - del 06-06-2005
A0: Differenziale allarme e ventilatori<br />
allarme bassa temperatura/low temperature alarm<br />
Rappresenta il differenziale usato per<br />
la disattivazione degli allarmi di alta e<br />
bassa temperatura (AL e AH) (si veda<br />
A0<br />
la fi gura a fi anco) e per la gestione<br />
ventilatori (si vedano i parametri F).<br />
AL<br />
Nel caso di allarme, come si vede<br />
dalla fi gura, il valore del punto di<br />
set point<br />
rientro A0 concorre alla determinazione<br />
dei punti<br />
Fig. 7.5.1<br />
di reale intervento degli allarmi di temperatura.<br />
Default: A0 =2,0 gradi.<br />
Default: A0=2.0 degrees.<br />
allarme alta temperatura/high temperature alarm<br />
A0<br />
A0: Alarm and fan differential<br />
This is the differential used for<br />
disabling high and low temperature<br />
alarms (AL and AH) (see the fi gure<br />
shown below) and for managing<br />
the fans (see the F<br />
parameters). In the event of an<br />
alarm, as can be seen from the<br />
fi gure, the value of A0 in part<br />
determines the effective activation<br />
points of the temperature alarms.<br />
A1: Tipo di soglia AL e AH<br />
Permette di selezionare se i valori dei parametri AL e AH siano soglie assolute o<br />
relative rispetto il set point.<br />
A1 = 0 => AL e AH soglie relative.<br />
A1 = 1 => AL e AH soglie assolute.<br />
Default: A1 = 0 => AL e AH soglie relative.<br />
AL: Allarme di minima temperatura<br />
Permette di determinare la soglia di attivazione dell’allarme di bassa temperatura.<br />
Soglia relativa allarme di bassa temperatura = (set point) - (valore di AL )<br />
Soglia assoluta allarme di bassa temperatura = valore di AL<br />
A1: Type of threshold ‘AL’ and ‘AH’<br />
Used for selection, if the values of parameters ‘AL’ and ‘AH’ are considered absolute<br />
thresholds or relative with respect to the value of the set point.<br />
A1 = 0 => AL and AH are considered as relative thresholds.<br />
A1 = 1 => AL and AH are considered absolute thresholds.<br />
Default: A1 = 0 => AL and AH are considered relative thresholds.<br />
AL: Minimum temperature alarm<br />
This is used to determine the activation threshold for the low temperature alarm.<br />
Relative threshold for low temperature alarm = (set point) - (value of ‘AL’)<br />
Absolute threshold for low temperature alarm = value of AL.<br />
Attenzione: Nel caso si sia selezionata la soglia AL come relativa il valore di<br />
disabilitazione dell’allarme è 0, viceversa, assoluta, il valore di disabilitazione<br />
dell’allarme è –50.<br />
Avvertenze nel caso di soglia relativa<br />
• il valore di AL non indica la temperatura di allarme, bensì lo scostamento<br />
massimo ammesso rispetto al set point ; variando il set point automaticamente<br />
l’allarme di bassa temperatura, mentre rimane fi sso lo scostamento massimo<br />
ammesso (quindi = AL);<br />
Avvertenze in caso di utilizzo del ciclo continuo<br />
• l’allarme di bassa temperatura è utilizzato anche nel ciclo continuo (si veda<br />
la descrizione del parametro cc ). Infatti, se la temperatura scende fi no al<br />
livello di allarme si ha la disattivazione automatica del ciclo continuo, anche<br />
se non è trascorso il periodo di tempo selezionato. La disattivazione non<br />
comporta, comunque, segnalazione di allarme.<br />
Default: AL =0 => allarme bassa temperatura disabilitato.<br />
AH: Allarme di alta temperatura<br />
Permette di determinare la soglia di attivazione dell’allarme di alta temperatura.<br />
Soglia relativa allarme di alta temperatura = (set point) + (valore di AH )<br />
Soglia assoluta allarme di alta temperatura = valore di AH<br />
Attenzione: Nel caso si sia selezionata la soglia AH come relativa il valore di<br />
disabilitazione dell’allarme è 0, viceversa, assoluta, il valore di disabilitazione<br />
dell’allarme è 200.<br />
Avvertenze in caso di soglia relativa:<br />
• il valore di AH non indica la temperatura di allarme bensì lo scostamento<br />
massimo ammesso rispetto al set point ; quindi, variando il set point cambia<br />
automaticamente l’allarme di alta temperatura, mentre rimane fi sso lo<br />
scostamento massimo ammesso (=AH).<br />
Avvertenze:<br />
• l’allarme di bassa temperatura è a reinserzione automatica: signifi ca che se<br />
la temperatura ritorna sopra/sotto il valore minimo previsto, la segnalazione<br />
di allarme si annulla automaticamente.<br />
• In caso di allarma sonda di regolazione viene resettato l’allarme di alta/bassa<br />
temperatura e reiniziato il monitoraggio.<br />
Default: AH =0 => allarme alta temperatura disabilitato.<br />
Ad: Ritardo allarme di temperatura<br />
Indica dopo quanti minuti viene segnalato l’allarme di temperatura dal momento in<br />
cui è stato rilevato il superamento della soglia di temperatura<br />
Avvertenze:<br />
• Imporre un ritardo alla segnalazione degli allarmi di temperatura può contribuire<br />
ad eliminare falsi allarmi dovuti a interferenze sul segnale della sonda o a situazioni<br />
limitate nel tempo (ad esempio la porta della cella aperta per un breve periodo).<br />
• Durante lo sbrinamento ed il ciclo continuo non vengono generati allarmi di<br />
temperatura.<br />
55<br />
Important: If the threshold AL is selected as relative, the value for disabling the<br />
alarm is 0, while if selected as absolute, the alarm disabling value is –50.<br />
Warnings for the relative threshold:<br />
• the value of AL does not indicate the alarm temperature, but the maximum<br />
permissible deviation off the set point; changing the set point automatically<br />
changes the low temperature alarm, while the maximum deviation allowed<br />
(=AL ) remains fi xed;<br />
Warnings for using the continuous cycle:<br />
• the low temperature alarm is also used in the continuous cycle (see the<br />
description of parameter ‘cc’). In fact, if the temperature falls to the alarm<br />
level, the continuous cycle is stopped automatically, even if the selected time<br />
has not yet elapsed. This deactivation, however, does not involve an alarm<br />
signal.<br />
Default: ‘AL’ =0 => low temperature alarm disabled.<br />
AH: High temperature alarm<br />
This is used to determine the activation threshold for the high temperature alarm.<br />
Relative threshold for high temperature alarm = (set point) + (value of AH)<br />
Absolute threshold for high temperature alarm = value of AH.<br />
Important: If the threshold AH is selected as relative, the value for disabling the<br />
alarm is 0, while if selected as absolute, the alarm disabling value is 200.<br />
Warnings for the relative threshold:<br />
• the value of AH does not indicate the alarm temperature, but the maximum<br />
permissible deviation from the set point; consequently, changing the set point<br />
automatically changes the high temperature alarm, while the maximum<br />
deviation allowed (=AH) remains fi xed;<br />
Warnings:<br />
• the high temperature alarm has automatic reset: this means that if the<br />
temperature returns above/below the minimum value envisaged, the alarm<br />
signal is cancelled automatically<br />
• in the event of a control probe alarm, the high temperature alarm is reset<br />
and monitoring reinitialised.<br />
Default: AH=0 => high temperature alarm disabled.<br />
Ad: Temperature alarm delay<br />
Indicates after how many minutes the temperature alarm is signalled when the<br />
temperature threshold is exceeded.<br />
Warnings:<br />
• Setting a delay for signalling the temperature alarm may help eliminate false<br />
alarms due to interference on the probe signal or brief situations (for example,<br />
the door to the cold room opened for a short period);<br />
• No temperature alarms are generated during the defrost and continuous cycle<br />
procedures.<br />
• The temperature alarm is delayed by the time ‘d8’ after the defrost and by the<br />
+030220140 - rel. 1.2 - del 06-06-2005
• L’allarme di temperatura è ritardato del tempo d8 dopo lo sbrinamento e del<br />
tempo c6 dopo il ciclo continuo. Al termine delle due temporizzazioni l’allarme di<br />
temperatura, se rilevato, viene segnalato senza attendere il tempo Ad. Nel caso le<br />
temporizzazioni d8 e c6 siano nulle l’allarme di temperatura viene segnalato<br />
attendendo il tempo Ad .<br />
Come già indicato dai valori di default dei parametri AL e AH , gli strumenti<br />
vengono programmati in fabbrica con soglie relative, inoltre gli allarmi di alta e bassa<br />
temperatura sono disabilitati. Gli allarmi, quando abilitati, comportano l’attivazione<br />
del cicalino interno, se abilitato, e mostrano un codice sul display: HI per l’alta<br />
temperatura e LO per la bassa. Le condizioni che generano l’allarme di temperatura<br />
sono:<br />
• allarme alta temperatura: la temperatura rilevata dalla sonda virtuale di regolazione<br />
è superiore alla soglia impostata con il parametro AH;<br />
• allarme bassa temperatura: la temperatura rilevata dalla sonda virtuale di<br />
regolazione è inferiore alla soglia impostata con il parametro AL.<br />
Default: Ad =120 => 120 minuti di ritardo sulla segnalazione degli allarmi di<br />
temperatura.<br />
A4: Configurazione ingresso digitale Multifunzione<br />
Nella serie ir33 questo parametro assieme al modello di controllo utilizzato,<br />
defi niscono il signifi cato dell’ingresso digitale Multifunzione. Di seguito vengono<br />
descritti i funzionamenti previsti:<br />
A4=0 Ingresso non attivo<br />
L’ingresso digitale Multifunzione non viene usato ed è la confi gurazione prevista in<br />
fabbrica per tutte le versioni.<br />
A4=1 Allarme esterno immediato<br />
È possibile collegare all’ingresso digitale un allarme esterno che richiede intervento<br />
immediato (ad esempio allarme di alta pressione o termico compressore).<br />
In particolare l’allarme viene rilevato quando il contatto si apre (funzionamento<br />
regolare con contatto chiuso).<br />
L’attivazione dell’allarme:<br />
• provoca la segnalazione sul display (IA)<br />
• segnalazione lampeggiante<br />
• attiva il buzzer, se abilitato<br />
• attiva il relè di allarme, se selezionato<br />
• comporta le seguenti azioni sugli attuatori:<br />
- compressore: funziona secondo i valori assegnati al parametro A6 (blocco<br />
compressore da allarme esterno).<br />
- ventilatori: continuano a funzionare secondo i parametri ventilatori (F).<br />
Nello spegnimento del compressore non è rispettato il tempo minimo di on (c3).<br />
Quando l’allarme cessa, viene ripristinata la possibilità di eseguire lo sbrinamento e il<br />
ciclo continuo mentre il compressore ritorna al normale funzionamento.<br />
Avvertenza importante: si ricorda che per garantire la sicurezza dell’unità in caso<br />
di allarmi gravi, è necessario predisporre sull’unità stessa tutte le sicurezze<br />
elettromeccaniche necessarie a garantire un corretto funzionamento.<br />
A4=2 Allarme esterno ritardato<br />
L’allarme esterno ritardato è equivalente all’allarme esterno immediato (A4=1),<br />
eccetto che tale situazione viene segnalata dopo il tempo A7 dalla sua rilevazione<br />
(segnalazione ‘dA’). Questa confi gurazione torna particolarmente utile per gestire<br />
l’allarme di bassa pressione. È frequente infatti che, in fase di prima partenza, l’unità<br />
rilevi un allarme di bassa pressione dovuto alle condizioni ambientali e non a<br />
malfunzionamenti dell’unità. Imponendo un ritardo all’allarme si evitano false<br />
segnalazioni. Infatti, calcolando opportunamente il ritardo, se la bassa pressione è<br />
dovuta a situazioni ambientali (bassa temperatura) si avrà il reinserimento<br />
automatico dell’allarme prima che sia trascorso il ritardo impostato.<br />
Note:<br />
1. nel caso sia ‘A7’=0 l’attivazione dell’allarme non condiziona il compressore a<br />
funzionare secondo i valori assegnati al parametro ‘A6’ (blocco compressore<br />
da allarme esterno); sono invece attive la segnalazione ‘dA’ sul display, il<br />
lampeggio dell’icona , il buzzer e il relè di allarme (se selezionato). L’allarme<br />
esterno ritardato diviene quindi di sola segnalazione.<br />
2. sia l’allargare esterno immediato come ritardato sono a ripristino automatico.<br />
A4 =3 Il signifi cato varia a seconda del modello usato:<br />
Versione ir33M = selezione sonde<br />
Consente di sfruttare l’ingresso digitale per visualizzare sul display la sonda selezionata<br />
dal parametro /tI o la prima sonda abilitata (vedi parametri /A2, /A3, /A4). In<br />
particolare con contatto aperto viene visualizzata la sonda selezionata dal parametro<br />
/tI, con contatto chiuso la prima sonda abilitata.<br />
Default: A4=3 ingresso digitale per selezione sonde.<br />
56<br />
time ‘c6’ after the continuous cycle. At the end of these two times, the<br />
temperature alarm, if detected, is signalled without waiting for the time set<br />
for ‘Ad’. If times ‘d8’ and ‘c6’ are set on zero, the temperature alarm is signalled<br />
after the time ‘Ad’.<br />
As already indicated by the default value for parameters ‘AL’ and ‘AH’, the<br />
instruments are programmed at our factory as default with the relevant thresholds,<br />
and the high and low temperature alarms are disabled. The alarms, when enabled,<br />
activate the buzzer, if enabled, and show a code on the display: ‘HI’ for the high<br />
temperature and ‘LO’ for the low temperature alarm. The following conditions<br />
generate the temperature alarms:<br />
• high temperature alarm: the temperature measured by the virtual control probe is<br />
above the threshold set for parameter ‘AH’;<br />
• low temperature alarm: the temperature measured by the virtual control probe is<br />
below the threshold set for parameter ‘AL’ .<br />
Default: ‘Ad’=120 => 120 delay, in minutes, with respect to the signalling of the<br />
temperature alarms.<br />
A4: Multifunction digital input confi guration<br />
In the ir33 series, this parameter and the model of controller used, defi ne the<br />
meaning of the multifunction digital input. The possibilities are described below:<br />
A4=0 Input not active<br />
The multifunction digital input is not used and is the factory-specifi ed confi guration<br />
for all versions.<br />
A4=1 Immediate external alarm<br />
The digital input can be connected to an external alarm that requires immediate<br />
activation (for example, high pressure alarm or compressor thermal overload).<br />
Specifi cally, the alarm is detected when the contact opens (normal operation with<br />
contact closed).<br />
The activation of the alarm:<br />
• shows the message on the display (‘IA’);<br />
- signal fl ashing<br />
- the buzzer is activated, if enabled<br />
- the alarm relay is activated, if selected<br />
– compressor: operates depending on the values assigned to parameter ‘A6’<br />
(stop compressor from external alarm).<br />
– fans: continue to operate according to the fan parameters (‘F’).<br />
When stopping the compressor, the minimum ON time (‘c3’) is ignored. When the<br />
alarm stops, the defrost and the continuous cycle can be performed again, and the<br />
compressor returns to normal operation.<br />
Important warning: remember that in order to ensure the safety of the unit in<br />
the event of serious alarms, all the electromechanical safety devices required to<br />
guarantee correct operation must be fi tted on the unit.<br />
A4=2 Delayed external alarm<br />
The delayed external alarm is equivalent to the immediate external alarm (A4=1),<br />
except that this alarm is signalled after the time A7 from when it is detected (‘dA’<br />
signal). This confi guration is especially useful for managing the low pressure alarm.<br />
In fact, when starting for the fi rst time, the unit often detects a low pressure alarm<br />
due to the environmental conditions rather than the malfunctioning of the unit.<br />
Setting a delay for the alarm will avoid false signals. In fact, by suitably calculating<br />
the delay, if the low pressure is due to environmental conditions (low temperature),<br />
the alarm will be automatically reset before the delay has elapsed.<br />
Note:<br />
1. if ‘A7’=0, the activation of the alarm does not cause the compressor to operate<br />
according to the values assigned to the parameter ‘A6’ (stop compressor from<br />
external alarm); on the other hand, the ‘dA’ signal is displayed, the icon<br />
fl ashes, the buzzer and the alarm relay (if selected) are activated; the delayed<br />
external alarm is thus signal-only.<br />
2. both the immediate and delayed external alarm have automatic reset.<br />
A4=3 The meaning varies according to the model used:<br />
Version ir33M = probe selection<br />
This is used to exploit the digital input in order to show, on the display, the probe<br />
selected by parameter /tI or the fi rst enabled probe (see parameters /A2, /A3, /A4,<br />
/A5). In practice, if the contact is open, the probe selected by parameter /tl is shown,<br />
whereas, if the contact is closed, the fi rst enabled probe is shown.<br />
Default: A4=3 digital input for probe selection<br />
+030220140 - rel. 1.2 - del 06-06-2005
Per tutti gli altri modelli = Abilitazione sbrinamento<br />
È possibile collegare un contatto esterno all’ingresso multifunzione per abilitare o<br />
inibire lo sbrinamento.<br />
• Contatto aperto:<br />
- lo sbrinamento è inibito.<br />
• Contatto chiuso:<br />
- lo sbrinamento è abilitato.<br />
• Contatto chiuso senza richiesta da parte del regolatore:<br />
- lo sbrinamento non viene effettuato.<br />
• Contatto chiuso ed è in corso uno sbrinamento:<br />
- all’eventuale apertura dell’ingresso digitale, lo sbrinamento viene<br />
immediatamente interrotto e l’unità riprende il funzionamento normale (senza<br />
eseguire le fasi di gocciolamento o post-gocciolamento). Il LED inizia a<br />
lampeggiare indicando la richiesta di sbrinamento, in attesa della prossima<br />
abilitazione (successiva chiusura del contatto), quando lo sbrinamento sarà<br />
eseguito completamente.<br />
Suggerimento: questa funzione è utile, ad esempio:<br />
- nel caso di banchi frigoriferi canalizzati con sbrinamento a gas caldo. In questi<br />
impianti è necessario sbrinare per “isole” per cui, nello stesso istante, alcune isole<br />
sono abilitate a sbrinare, altre sono inibite;<br />
- per impedire sbrinamenti delle unità esposte al pubblico durante il periodo di<br />
apertura. Una eventuale richiesta di sbrinamento avvenuta con il contatto aperto<br />
rimarrà in attesa fi no alla chiusura del contatto.<br />
A4 = 4 Inizio sbrinamento da contatto esterno<br />
Questa funzione consente di far partire lo sbrinamento da contatto esterno. Se si<br />
pone dI =0 e non si imposta alcun trigger di sbrinamento legato all’orologio, lo<br />
sbrinamento può avvenire solo all’accensione, da ingresso digitale, da supervisore e<br />
da tastiera. Questa funzione è utile nel caso sia necessario eseguire sbrinamenti in<br />
tempo reale. Per realizzarli è suffi ciente collegare un timer ciclico, meccanico o elettronico,<br />
all’ingresso digitale: quando il contatto del timer passa da aperto a chiuso si<br />
innesca la richiesta di sbrinamento. È possibile, come anticipato nella descrizione del<br />
parametro d5, collegare più unità allo stesso timer.<br />
Avvertenza importante per le versioni a 12 Vac e 12…24 Vac:<br />
per il collegamento di più unità allo stesso timer, la<br />
soluzione migliore è quella di isolare tutti i contatti t<br />
galvanicamente, inserendo dei relè di rinvio per ogni<br />
sbrinamento/defrost<br />
contatto. Scegliendo il valore di d5 diverso in ogni unità<br />
sarà possibile evitare sbrinamenti contemporanei.<br />
dP<br />
Legenda:<br />
t = impulso del timer per iniziare lo sbrinamento: la<br />
durata minima deve essere di 0.5 secondi<br />
dP (1) = durata massima sbrinamento unità 1.<br />
d5(2) = ritardo sbrinamento da contatto esterno per<br />
l’unità 2, maggiore di dP(1) per evitare<br />
sovrapposizione tra gli sbrinamenti.<br />
Signifi cati analoghi per d5(3) e dP(3).<br />
d5<br />
d5<br />
richiesta di sbrinamento<br />
defrost request<br />
sbrinamento/defrost<br />
d<br />
For all other models = Defrost enabling<br />
An external contact can be connected to the multifunction input to enable or inhibit<br />
the defrost.<br />
• Contact open:<br />
- the defrost is inhibited.<br />
• Contact closed:<br />
- the defrost is enabled.<br />
• Contact closed without request from the controller:<br />
– the defrost is not performed.<br />
• Contact closed and defrost in progress:<br />
- when the digital input is opened, the defrost is immediately stopped and the<br />
unit restarts normal operation (without performing the dripping or<br />
post-dripping phased). The LED starts fl ashing to indicate that the defrost<br />
request is pending, awaiting the next enabling signal (closing of the contact),<br />
when the defrost will be performed completely.<br />
Suggestion: this function is useful in the following situations, for example:<br />
- multiplexed showcases with hot gas defrost. In these systems, defrosts must be<br />
performed by “islands”, and therefore, at any one time, some islands are enabled<br />
to be defrosted, while others are inhibited;<br />
- to prevent defrosts on the units accessible by the public during opening times. Any<br />
defrost request arriving when the contact is open will remain pending until the<br />
contact closes.<br />
A4= 4 Start defrost from external contact<br />
This function used to start the defrost from an external contact. If dI=0 and no<br />
defrost enabling signal related to the clock is set, the defrost can only be performed<br />
on start-up, from the digital input, by the supervisor and from the keypad. This<br />
function is useful to run real time defrosts. To perform the defrosts, connect a cyclic,<br />
mechanical or electronic timer to the digital input: When the contact of the timer<br />
closes, the defrost request is sent. As in the description of parameter ‘d5’, a series of<br />
units can be connected to the same timer.<br />
Important warning for versions operating on 12 Vac and 12-24 Vac:<br />
when connecting a series of units to the same timer,<br />
tempo/time the best solution is to insulate all the contacts galvanically,<br />
inserting an intermediate relay for each contact.<br />
Setting a different value for ‘d5’ on each unit will avoid<br />
simultaneous defrosts.<br />
unità 1/unit 1<br />
Key:<br />
t = impulse from the timer to start the defrost: the<br />
minimum duration allowed is 0.5 seconds<br />
unità 2/unit 2 dP (1) = maximum defrost duration, unit 1;<br />
sbrinamento/defrost<br />
d5 (2) = defrost delay from external contact for unit 2;<br />
this must be greater than dP (1), to avoid overlapping<br />
unità 3/unit 3 of defrosts.<br />
Similarly for d5 (3) and dP (3).<br />
Fig. 7.5.2<br />
A4 =5 Switch porta con spegnimento di compressore e ventilatori Impostando A4 A4=5 Door switch with compressor and fan stop<br />
=5 è possibile gestire l’interruttore della porta cella. Il comportamento dello switch Setting A4=5 manages the cold room door switch. The behaviour of the door switch<br />
porta dipende dal fatto che la porta venga aperta con “luce spenta” o “accesa”. La depends on whether the door is opened with the light OFF or light ON. The need<br />
necessità di differenziare le due modalità di funzionamento è rivolta principalmente to differentiate the two operating modes is mainly designed for controlling display<br />
alle applicazioni del controllo per armadi frigoriferi o per celle di conservazione.<br />
cases and cold rooms.<br />
Caso 1: apertura della porta con luce spenta.<br />
Case 1: door opened with light OFF.<br />
Se la porta viene aperta con luce spenta:<br />
If the door is opened with the light OFF:<br />
• il compressore e i ventilatori evaporatore vengono spenti (se si desidera lo<br />
• the compressor and evaporator fans are switched off (to stop the fans only,<br />
spegnimento dei soli ventilatori impostare il param. A4 =9 ).<br />
set parameter A4=9);<br />
• la luce viene accesa (solo nei modelli dotati del relè ausiliario programmato<br />
• the light is switched on (only in the models fi tted with at least 1 auxiliary<br />
come uscita luce).<br />
relay programmed as the Light output);<br />
• la misura visualizzata e l’icona lampeggiano.<br />
• the reading displayed and the icon fl ash;<br />
• gli allarmi di temperatura sono disabilitati.<br />
• the temperature alarms are disabled.<br />
Se la porta resta aperta per un tempo superiore a d8, il controllore riavvia il normale If the door remains open for longer than time d8, the controller restarts normal<br />
funzionamento:<br />
operation:<br />
• compressore e ventilatore on se richiesti.<br />
• compressor and fan ON, if requested;<br />
• luce accesa (il relè ausiliario è selezionato come luce).<br />
• light ON (the auxiliary relay is selected as the light);<br />
• il buzzer e il relè di allarme vengono attivati.<br />
• the buzzer and the alarm relay are activated;<br />
• gli allarmi di temperatura sono abilitati.<br />
• the temperature alarms are enabled.<br />
• la misura lampeggia.<br />
• the reading fl ashes;<br />
Alla chiusura della porta, il controllore ritorna in funzionamento normale,<br />
When the door is closed, the controller returns to normal operation, switching off<br />
spegnendo la luce ed abilitando gli allarmi di temperatura dopo il tempo di<br />
the light and enabling the temperature alarm after the delay time d8. The<br />
57<br />
+030220140 - rel. 1.2 - del 06-06-2005
itardo d8. Nella riaccensione del compressore vengono rispettati gli eventuali tempi<br />
di protezione selezionati (si vedano i parametri C).<br />
compressor is re-started respecting any protection times selected (see the ‘c’<br />
parameters).<br />
Caso 2: apertura della porta con luce accesa.<br />
Si suppone che l’utente entri nella cella di conservazione accendendo la luce prima<br />
di entrare, richiudendosi la porta alle spalle, e successivamente riesca dalla cella,<br />
chiudendo la porta una seconda volta.<br />
Quando la porta viene aperta:<br />
• il compressore e i ventilatori evaporatore vengono spenti (se si desidera lo<br />
spegnimento dei soli ventilatori impostare il parametro A4=9);<br />
• la luce rimane accesa (solo nei modelli dotati del relè ausiliario programmato<br />
come uscita luce).<br />
• la misura visualizzata e l’icona lampeggiano.<br />
• gli allarmi di temperatura sono disabilitati.<br />
Alla prima chiusura della porta, il controllore mantiene la situazione allo stato<br />
precedente.<br />
Alla seconda chiusura della porta, il controllore ritorna in funzionamento normale,<br />
spegnendo la luce ed abilitando gli allarmi di temperatura dopo il tempo di ritardo<br />
d8. Nella riaccensione del compressore vengono comunque rispettati gli eventuali<br />
tempi di protezione selezionati (si vedano i parametri c).<br />
Se, dopo l’apertura, la porta rimane aperta per un tempo superiore a d8, il<br />
controllore ritorna in funzionamento normale:<br />
• compressore e ventilatore on se richiesti;<br />
• luce spenta;<br />
• la misura lampeggia;<br />
• il buzzer e il relè di allarme vengono attivati;<br />
• gli allarmi di temperatura sono abilitati;<br />
• alla chiusura della porta non viene impostato il ritardo<br />
allarmi di temperatura d8.<br />
Se, dopo la prima chiusura, la porta rimane chiusa per un<br />
tempo superiore a d8 o viene spenta la luce <strong>manual</strong>mente<br />
, il controllore riavvia il normale funzionamento:<br />
• compressore e ventilatore on se richiesti,<br />
• luce spenta,<br />
• gli allarmi di temperatura sono abilitati,<br />
• viene impostato il ritardo allarmi di temperatura d8.<br />
Se, dopo la prima chiusura, viene spenta la luce<br />
<strong>manual</strong>mente, il controllore riavvia il normale<br />
funzionamento; come sopra.<br />
Note:<br />
1. se la luce era stata precedentemente accesa<br />
<strong>manual</strong>mente, alla seconda chiusura della porta, essa<br />
viene automaticamente spenta.<br />
Fig. 7.5.3<br />
Case 2: door opened with light ON.<br />
Assuming the user enters the cold room, turning on the light before entering,<br />
closing the door behind him, and then exits the room, closing the door a second<br />
time.<br />
When the door is opened:<br />
• the compressor the evaporator fans are switched off (to stop the fans only, set<br />
parameter A4=9);<br />
• the light stays on (only in the models fi tted with an auxiliary relay programmed<br />
as the light output);<br />
• the reading displayed and the icon fl ash;<br />
• the temperature alarms are disabled.<br />
When the door is closed the fi rst time, the controller maintains the previous situation.<br />
When the door is closed the second time, the controller returns to normal operation,<br />
switching off the light and enabling the temperature alarm after the delay time d8.<br />
The compressor is re-started respecting any protection times selected (see the ‘c’<br />
parameters).<br />
If, after opening, the door remains open for a time longer than ‘d8’, the controller<br />
returns to normal operation:<br />
• compressor and fan ON, if requested;<br />
• light OFF;<br />
• the reading fl ashes;<br />
• the buzzer and the alarm relay are activated;<br />
• the temperature alarms are enabled.<br />
• when the door closes the temperature alarm delay<br />
d8 is not set.<br />
If, after being closed for the fi rst time, the door remains<br />
closed for longer than time d8, or if the light is switched off<br />
<strong>manual</strong>ly, the controller restarts normal operation:<br />
• compressor and fan ON, if requested;<br />
• light OFF;<br />
• the temperature alarms are enabled;<br />
• the temperature alarm delay d8 is set.<br />
If, after the door is closed for the fi rst time, the light is<br />
switched off <strong>manual</strong>ly, the controller resumes normal<br />
operation, as above.<br />
Note:<br />
If the light was previously switched on <strong>manual</strong>ly, when<br />
the door is closed for the second time, it is automatically<br />
switched off.<br />
Avvertenza: anche nel caso in cui il ventilatore sia gestito dal regolatore (si vedano i<br />
parametri F) si forza lo spegnimento con porta aperta.<br />
L’algoritmo risolve ogni problema legato ad eventuali guasti o malfunzionamenti<br />
dello “switch-porta”.<br />
A4 =6 ON/OFF remoto<br />
L’ingresso digitale può essere programmato anche come ON/OFF remoto. Con<br />
logica contatto chiuso il controllore è on.<br />
Quando il controllore è spento:<br />
• la temperatura è visualizzata alternativamente al messaggio off<br />
• il timer interno relativo al parametro dI viene aggiornato. Se dI scade con<br />
macchina in stato di off, alla riaccensione si esegue uno sbrinamento<br />
• rimane attivo il relè ausiliario impostati come aux o luce<br />
• il buzzer e il relè di allarme vengono disattivati<br />
• il controllore non esegue la regolazione, gli sbrinamenti, il ciclo continuo, la<br />
segnalazione degli allarmi di temperatura e tutte le altre funzioni<br />
• vengono rispettati i tempi di protezione del compressore.<br />
alla riaccensione dello strumento vengono riattivate tutte le funzioni ad eccezione di:<br />
- sbrinamento all’accensione<br />
- ritardo compressore e ventilatori all’accensione.<br />
Contatto chiuso => on.<br />
L’ON/OFF da ingresso digitale esterno è prioritario su quello da tastiera e da<br />
supervisore.<br />
Se A4, A5 =6 => il controllore è on con tutti i contatti chiusi.<br />
A4 =7 Switch tenda<br />
Warning: even when the fan is managed by the fan controller (see the family of ‘F’<br />
parameters), the fans are forced to stop when the door is open.<br />
This algorithm resolves any problems relating to faults or malfunctions of the “door<br />
switch”.<br />
A4=6 remote ON/OFF<br />
The digital input can also be programmed as a remote ON/OFF switch. When the<br />
contact is closed, the controller is ON.<br />
When the controller is OFF:<br />
• the temperature is displayed alternating with the message ‘OFF’;<br />
• the internal timer for parameter ‘dI’ is updated. If ‘dI’ expires when the unit is<br />
OFF, a defrost is performed when the unit is switched on again;<br />
• the auxiliary relay set to AUX and LIGHT remains active;<br />
• the buzzer and the alarm relay are de-activated;<br />
• the controller does not perform adjustment, defrosts, continuous cycle,<br />
signalling the temperature alarm and all other functions.<br />
• the compressor protection times are observed;<br />
When the instrument is switched back on, all the functions are re-activated, with the<br />
exception of:<br />
- defrost on start-up;<br />
- Compressor and fan delay on start-up;<br />
Contact closed => ON.<br />
The ON/OFF from external digital input has priority over the keypad and the<br />
supervisor.<br />
If A4=6, A5=6, the controller is ON with all the contacts closed.<br />
A4=7 Curtain switch<br />
58<br />
+030220140 - rel. 1.2 - del 06-06-2005
Se l’ingresso viene selezionato come switch tenda, il controllore modifi ca il set point<br />
alla chiusura del contatto, aggiungendoli il valore del parametro r4. Questo nuovo<br />
valore viene utilizzato per tutte le funzioni relative al set point (Es. allarmi alta e bassa<br />
temperatura relativi, regolazione con banda morta, regolazione con due gradini per<br />
il compressore ecc.).<br />
Con r4 =3.0 (valore pre-programmato) il set point viene aumentato di 3 gradi<br />
rispetto al valore utilizzato con tenda aperta.<br />
Contatto chiuso => tenda abbassata.<br />
Nel caso una delle uscite ausiliarie sia utilizzata per la gestione della luce,<br />
l’abbassamento della tenda spegne automaticamente la luce, mentre il sollevamento<br />
l’accende.<br />
A4 =8 Ingresso pressostato di bassa pressione per pump down<br />
Impostando A4 =8 è possibile gestire il pressostato di bassa pressione.<br />
L’allarme di bassa pressione LP viene segnalato quando il pressostato segnala<br />
una situazione di bassa pressione con la valvola di pump down aperta e il<br />
compressore attivato, nel caso sia attivo il Pump-Down, o quando il compressore è<br />
acceso. La segnalazione dell’allarme di bassa pressione è tuttavia ritardata del tempo,<br />
in minuti, impostato attraverso il parametro A7.<br />
L’allarme di bassa pressione ‘LP’ porta allo spegnimento del compressore.<br />
Questo parametro, insieme con i parametri c7 , c8 , c9 e H1 consente la gestione<br />
dell’algoritmo pump down.<br />
Contatto aperto => bassa pressione.<br />
Attenzione: Nel caso sia c7 =0 (pump down disabilitato) la bassa pressione può<br />
essere comunque rilevata.<br />
Nota: nel caso più ingressi digitali siano confi gurati come ingresso pressostato di<br />
bassa pressione, l’allarme di bassa pressione si ha quando almeno uno di questi è<br />
nello stato di aperto.<br />
A4 =9 Switch porta con spegnimento dei soli ventilatori<br />
Stesso funzionamento selezionando A4 =5 con la differenza che all’apertura della<br />
porta vengono spenti i soli ventilatori anziché il compressore e i ventilatori.<br />
Nota: nel caso più ingressi digitali siano confi gurati come switch porta, lo stato di<br />
porta aperta si ha quando almeno uno di questi è nello stato di aperto.<br />
A4=10 Funzionamento Direct/Reverse<br />
L’ingresso digitale è utilizzato per selezionare il funzionamento direct (per<br />
refrigerazione), contatto aperto, o reverse (per riscaldamento), contatto chiuso.<br />
È possibile collegare, ad esempio, un deviatore che selezioni, a seconda della<br />
posizione, il funzionamento caldo/freddo.<br />
A seconda del valore del parametro r3 si possono ottenere le seguenti confi gurazioni:<br />
con r3 =0:<br />
- Contatto aperto = funzionamento direct con controllo sbrinamento;<br />
- Contatto chiuso = funzionamento reverse.<br />
con r3 =1 o r3 =2<br />
- Contatto aperto = funzionamento direct;<br />
- Contatto chiuso = funzionamento reverse.<br />
Avvertenza: se A4 =10 lo stato dell’ingresso digitale ha priorità sul parametro r3 ,<br />
ovvero il valore assegnato al parametro r3 diventa indifferente e conta solo lo stato<br />
(aperto o chiuso) dell’ingresso digitale.<br />
Note:<br />
1. Direct o reverse agisce su ambedue i gradini.<br />
A4 =11 Sensore di luce<br />
L’ingresso digitale è utilizzato per leggere un sensore di luce (si tratta in realtà di un<br />
ingresso analogico, da cui si ricava un segnale digitale utilizzando il parametro o la<br />
soglia del sensore di luce), e può essere posto:<br />
• nella battuta della porta,<br />
• all’interno della cella o dell’armadio.<br />
Nel primo caso il sensore visualizza l’apertura e la chiusura della porta in quanto,<br />
rispettivamente, a porta aperta ci sarà la luce e a porta chiusa sarà segnalato il buio<br />
(il sensore si trova nella battuta della porta e sarà quindi oscurato con porta chiusa).<br />
La luce interna sarà automaticamente accesa con porta aperta e spenta con porta<br />
chiusa.<br />
Lo spegnimento della luce avviene per un tempo minimo di 5s, in modo da evitare<br />
impulsi ravvicinati al relè luce.<br />
Per attivare questa modalità di funzionamento dovrà essere AF=0.<br />
Nel secondo caso viene segnalata l’apertura della porta della cella o dell’armadio per<br />
effetto della luce esterna che sollecita il sensore attivando la luce interna. La chiusura<br />
della porta è rilevata a tempo in quanto la luce interna alla cella o all’armadio è in<br />
grado di autosostenere il sensore. Dopo il tempo AF (maggiore di 0) la luce interna<br />
viene spenta per 5 secondi. Se il sensore di luce segnala oscurità la porta sarà chiusa<br />
59<br />
If the input is selected as a curtain switch, the controller modifi es the set point when<br />
the contact closes, adding the value of parameter r4; the new value is then used<br />
for all the functions relating to the set point (e.g. relative high and low temperature<br />
alarms, control with dead band, control with two compressor steps, etc.).<br />
When ‘r4’=3.0 (pre-programmed value), the set point is increased by 3 degrees<br />
from the value used when the curtain is open.<br />
Contact closed => curtain lowered.<br />
If one of the auxiliary outputs is used to manage the light, lowering the curtain<br />
automatically switches the light off, while raising it switches the light on.<br />
Note: if more than one digital input is confi gured as a curtain switch, the curtain<br />
open status occurs when at least one of the inputs is open.<br />
A4=8 Low pressure switch input for pump down<br />
Set ‘A4’=8 to mange the low pressure switch.<br />
The low pressure alarm ‘LP’ is signalled when the pressure switch signals a low<br />
pressure situation with the pump down valve open and the compressor on, if the<br />
pump down function is active, or when the compressor is on. The low pressure<br />
alarm signal is nonetheless delayed by the time in minutes set for parameter ‘A7’.<br />
The low pressure alarm ‘LP’ door stops the compressor.<br />
This parameter, together with parameters ‘C7’, ‘C8’, ‘C9’ and ‘H1’, allows<br />
management of the “pump down” algorithm.<br />
Contact open => low pressure.<br />
Important: If ‘c7’=0 (pump down disabled), the low pressure situation can still be<br />
detected.<br />
Note: if more than one digital input is confi gured as the low pressure switch input,<br />
the low pressure alarm is activated when at least one of the inputs is open.<br />
A4=9 Door switch with fan stop only<br />
Same as for option ‘A4’=5, with the difference that when opening the door, only the<br />
fans are stopped, rather than the compressor and the fans.<br />
Note: if more than one digital input is confi gured as the door switch, the door open<br />
status occurs when at least one of the inputs is open.<br />
A4=10 Direct/Reverse operation<br />
The digital input is used to select direct operation (cooling), with open contact, or<br />
reverse operation (heating), with the contact closed.<br />
A switch can therefore be connected to select heating or cooling operation,<br />
according to the position. .<br />
Depending on the value of parameter r3, the following confi gurations are possible:<br />
when ‘r3’=0:<br />
- Contact open = direct operation with defrost control;<br />
- Contact closed = reverse operation.<br />
when ‘r3’=1 or ‘r3’=2<br />
- Contact open = direct operation;<br />
- Contact closed = reverse operation.<br />
Warning: if ‘A4’=10, the status of the digital input has priority over the parameter<br />
‘r3’, that is, the value assigned to parameter ‘r3’ is ignored and only the status<br />
(open or closed) of the digital input is considered.<br />
Note:<br />
1. Direct or reverse mode acts on both steps.<br />
A4=11 Light sensor<br />
The digital input is used to read a light sensor (actually an analogue input, from<br />
which a digital signal is taken using the parameter or threshold of the light sensor).<br />
The light sensor may be located:<br />
• in the door stop,<br />
• inside the cold room or cabinet.<br />
In the fi rst case, the sensor signals the opening and the closing of the door,<br />
because, with the door open, light is signalled, and with the door closed, darkness<br />
is signalled (the sensor is located in the door stop and thus will be shadowed when<br />
the door is closed). The inside light will be automatically switched on when the door<br />
is open and switched off when the door is closed.<br />
The light stays OFF for a minimum time of 5s, to avoid rapid, successive impulses<br />
of the light relay.<br />
To select this operating mode, set AF=0.<br />
In the second case, the light sensor signals the opening of the door of the cold<br />
room or the cabinet due to the outside light that the sensor detects, thus activating<br />
the inside light. The closing of the door is measured by time, as the light inside the<br />
cold room or cabinet will illuminate the sensor. After time AF (greater than 0), the<br />
inside light is switched off for 5 seconds. If the light sensor signals darkness, the<br />
door must be closed and the light will therefore remain OFF. Otherwise, the door<br />
+030220140 - rel. 1.2 - del 06-06-2005
e la luce rimarrà spenta. In caso contrario la porta sarà ancora aperta e la luce verrà<br />
riaccesa. Per selezionare questa modalità di funzionamento dovrà essere AF>0.<br />
A4 =12 Attivazione uscita aux<br />
L’ingresso digitale permette di attivare/disattivare l’uscita aux, se confi gurata con il<br />
parametro H1, con la seguente logica:<br />
Ingresso digitale<br />
Uscita aux<br />
apertura<br />
disattivazione<br />
chiusura<br />
attivazione<br />
Tab. 7.5.2<br />
L’attivazione/disattivazione avviene alla chiusura/apertura del contatto, in modo da<br />
rendere compatibile questa modialità di funzionamento con la presenza del tasto aux<br />
e del comando da supervisore.<br />
A4 =13 Switch porta con spegnimento di compressore e ventole con luce non gestita.<br />
Stesso funzionamento della selezione A4=5 con la differenza che non viene<br />
modifi cata l’uscita luce.<br />
A4 =14 Switch porta con spegnimento delle sole ventole con luce non gestita.<br />
Stesso funzionamento della selezione A4=9 con la differenza che non viene<br />
modifi cata l’uscita luce.<br />
Nota: per A4/5= 13 o 14: in entrambi i casi l’algoritmo di gestione porta Ado.<br />
Default: A4 =0 => Ingresso digitale non attivo (per tutti gli altri modelli).<br />
La tabella seguente riassume le funzioni che possono essere assunte<br />
dall’ingresso digitale in corrispondenza del valore assegnato alla variabile A4.<br />
stays open and the light is re-lighted. To select this operating mode, set AF>0<br />
A4=12 Activation of the AUX output<br />
The digital input is used to activate/deactivate the AUX output, if confi gured with<br />
parameters ‘H1’, with the following logic .<br />
Digital input<br />
AUX output<br />
open<br />
deactivation<br />
close<br />
activation<br />
Tab. 7.5.2<br />
The output is activated/deactivated on closing/opening the contact, to make this<br />
operating mode compatible with the presence of the AUX button and the control<br />
signal from the supervisor.<br />
A4 =13 Door switch with compressor and fans off and light not managed.<br />
Same as for A4=5, with the difference that the light output is not modifi ed.<br />
A4 =14 Door switch with fans only off and light not managed.<br />
Same as for A4=9, with the difference that the light output is not modifi ed.<br />
Note: for A4/5= 13 or 14: the Ado door management algorithm is used in both<br />
cases.<br />
Default: A4=0 => Digital input not active (for all other models).<br />
The table below summarises the functions of the digital input<br />
corresponding to the value assigned to the variable A4.<br />
Valore A4 Funzionalità Funzione attiva Accensione LED<br />
0 ingresso non attivo<br />
1 allarme esterno immediato aperto = allarme aperto<br />
2 allarme esterno con ritardo attuazione aperto = allarme aperto<br />
3 se modello M selezione sonde aperto = sonda selezionata dal parametro /tI<br />
chiuso = prima sonda abilitata<br />
3 altri modelli abilitazione sbrinamento chiuso= abilitato<br />
4 inizio sbrinamento chiusura = richiesta sbrinamento<br />
5 switch porta con off di compressore e ventilatori aperto = porta aperta<br />
6 ON/OFF remoto aperto = strumento off<br />
7 switch tenda chiuso = tenda chiusa<br />
8 pressostato di bassa pressione aperto = bassa pressione<br />
9 switch porta con off dei soli ventilatori aperto = porta aperta<br />
10 direct / reverse aperto = direct<br />
11 sensore di luce sopra la soglia = spento<br />
12 attivazione uscita aux apertura = disattivazione<br />
Tab. 7.5.3<br />
Note:<br />
• Nel caso in cui piu’ ingressi digitali siano confi gurati nello stesso modo,<br />
l’attivazione della funzione associata sarà abilitata se almeno uno di questi è<br />
nello stato di aperto.<br />
• Nel caso di regolazione con due gradini per il compressore (con o senza<br />
rotazione, H1=12 o 13) l’attivazione associata agli ingressi digitali agisce su<br />
ambedue.<br />
Value of A4 Function Function active LED on<br />
0 input not active<br />
1 immediate external alarm open = alarm open<br />
2 delayed external alarm open = alarm open<br />
3 for model M, select probes open = probe selected by parameter /tI<br />
closed = fi rst probe enabled<br />
3 other models, enable defrost closed= enabled<br />
4 start defrost closing = defrost request<br />
5 door switch with compressor and fans OFF open = door open<br />
6 remote ON/OFF open = instrument OFF<br />
7 curtain switch closed = curtain closed<br />
8 low pressure switch open = low pressure<br />
9 door switch with fans OFF only open = door open<br />
10 direct / reverse open = direct<br />
11 light sensor above the threshold = off<br />
12 activation of AUX output opening = deactivation<br />
Note:<br />
• If more than one digital input is confi gured in the same way, the activation<br />
of the associated function will be enabled if at least one of these is open.<br />
• For control with two compressor steps (with or without rotation, H1=12<br />
or 13) the function associated with the digital inputs is activated on both.<br />
Tab. 7.5.3<br />
60<br />
+030220140 - rel. 1.2 - del 06-06-2005
A5: Configurazione del secondo ingresso digitale Multifunzione.<br />
Per questo parametro vale la stessa descrizione relativa al parametro A4, ovviamente<br />
riferita al secondo ingresso digitale.<br />
Default: A5 =0 => Ingresso digitale non attivo.<br />
A6: Blocco compressore da allarme esterno (ingresso multifunzione)<br />
Il signifi cato di questo parametro è analogo a quello del parametro c4 (duty-setting).<br />
Nel caso in cui si verifi chi un allarme esterno (sia immediato che ritardato) il<br />
compressore funziona per un tempo pari al valore assegnato al parametro A6 (in<br />
minuti), mentre rimane spento per un periodo fi sso di 15 minuti.<br />
Casi particolari:<br />
A6 =0 il compressore rimane sempre spento<br />
A6 =100 il compressore rimane sempre acceso<br />
I ventilatori continuano ad essere gestiti secondo i parametri selezionati (si veda<br />
categoria F ). Nel caso sia attivo anche il duty-setting per l’allarme sonda (parametro<br />
c4 ), il controllore utilizza il valore di A6 .<br />
Default: A6 =0 => compressore spento in caso di allarme esterno.<br />
A7: Ritardo rilevazione dell’allarme esterno (ingresso multifunzione)<br />
Stabilisce il ritardo (in minuti) di rilevamento dell’allarme esterno quando selezionato<br />
come ritardato (A4, A5=2) o di segnalazione dell’allarme di bassa pressione (LP).<br />
A8: Abilitazione segnalazioni Ed1 ed Ed2<br />
Le segnalazioni Ed1 ed Ed2 indicano la fi ne dello sbrinamento per<br />
raggiungimento della durata massima del tempo di sbrinamento dP1/dP2 e possono<br />
essere disabilitate, con A8 =0. Tali segnalazioni Ed1 ed Ed2 vengono cancellate<br />
all’inizio del successivo sbrinamento o con un ripristino <strong>manual</strong>e attraverso la<br />
pressione dei tasti e aux per più di 5 secondi.<br />
Default: A8 =0 => segnalazioni Ed1 ed Ed2 disabilitate.<br />
Ado: Modalità gestione luce con switch porta<br />
Questo parametro permette di scegliere l’algoritmo di gestione della porta.<br />
Ado Luce all’apertura della<br />
porta<br />
0 spenta<br />
accesa<br />
1 spenta<br />
accesa<br />
Algoritmo<br />
normale<br />
esteso<br />
esteso<br />
normale<br />
Descrizione<br />
apertura-chiusura<br />
apertura-chiusura-apertura-chiusura<br />
apertura-chiusura-apertura-chiusura<br />
apertura-chiusura<br />
Tab. 7.5.4<br />
Nota: nel caso sia selezionato l’ingresso digitale in modo da non gestire la luce (A4,<br />
A5 = 13 o 14) l’algoritmo risulta cosi’ modifi cato:<br />
Ado Luce all’apertura della porta Algoritmo Descrizione<br />
1 spenta normale apertura-chiusura<br />
Tab. 7.5.5<br />
Default: Ado =0 => Algoritmo normale.<br />
Ac: Allarme alta temperatura condensatore<br />
Se una sonda è impostata come sonda condensatore, è possibile monitorare la<br />
temperatura del condensatore per segnalare l’alta temperatura, probabilmente<br />
riconducibile a situazioni di intasamento o sporcizia.<br />
Quando temperatura condensatore > Ac + (AE / 2) viene segnalata la situazione<br />
di preallarme in cui viene solo visualizzato l’allarme cht. Se in questq situazione la<br />
temperatura condensatore diventa < Ac , il preallarme rientra e la<br />
segnalazione cht sparisce.<br />
Se la temperatura del condensatore diventa > Ac + AE allora scatta l’allarme CHt e<br />
viene spento il compressore. In questo<br />
caso è possibile rientrare dall’allarme solo<br />
attraverso un ripristino <strong>manual</strong>e.<br />
“AC” + “AE”/2<br />
Nel caso di errore sonda di<br />
condensazione vengono attivati<br />
l’allarme e il preallarme.<br />
Nota: nel caso sia selezionata la<br />
regolazione con 2 gradini per il<br />
compressore (con o senza rotazione,<br />
H1= 12 o 13) l’allarme di alta<br />
temperatura condensatore agisce su<br />
ambedue i gradini.<br />
“Ac”<br />
A5: Configuration of the second multifunction digital input.<br />
For this parameter the same description relating to parameter ‘A4’ is valid, obviously<br />
referring to the second digital input.<br />
Default: ‘A5’=0 => Digital input not active.<br />
A6: Stop compressor from external alarm (multifunction input)<br />
The meaning of this parameter is similar to that of parameter ‘c4’ (duty-setting).<br />
If an external alarm occurs (immediate or delayed), the compressor works for a<br />
time equal to the value set for parameter ‘A6’ (in minutes), while it remains OFF for<br />
a fi xed period of 15 minutes.<br />
Special cases:<br />
A6=0 the compressor is always OFF;<br />
A6=100 the compressor is always ON.<br />
The fans continue to be managed according to the set parameters (see category<br />
‘F’). If duty-setting for the probe alarm (parameter ‘c4’) is also active, the controller<br />
uses the value of A6.<br />
Default: ‘A6’=0 => compressor OFF in the event of external alarms.<br />
A7: Delay in detecting the external alarm (multifunction input)<br />
Establishes the delay (in minutes) in detecting an external alarm, if selected as a<br />
delayed external alarm (A4 , A5=2) or the signal of the low pressure (LP) alarm.<br />
A8: Enable signals Ed1 and Ed2<br />
The alarms Ed1 and Ed2 signal the end of the defrost due to “maximum duration of<br />
the defrost time” dP1/dP2 and can be disabled by setting A8=0.<br />
The alarms Ed1 and Ed2, if enabled, are cancelled at the start of the following<br />
defrost or can be reset <strong>manual</strong>ly by pressing the and aux buttons for more<br />
than 5 seconds.<br />
Default: A8=0 => alarms Ed1 and Ed2 disabled.<br />
Ado: Configuration of the third multifunction digital input<br />
This parameter is used to select the algorithm for managing the door.<br />
Ado Light when opening<br />
the door<br />
0 off<br />
on<br />
1 off<br />
on<br />
Algorithm<br />
normal<br />
extended<br />
extended<br />
normal<br />
Description<br />
opening-closing<br />
opening-closing-opening-closing<br />
opening-closing-opening-closing<br />
opening-closing<br />
Tab 7.5.4<br />
Note: if the digital input is selected so as not to manage the light (A4, A5 = 13 or<br />
14) the algorithm is modifi ed as follows:<br />
Ado Light when opening the door Algorithm Description<br />
1 off normal opening-closing<br />
Tab. 7.5.4<br />
Default: ‘Ado’=0 => Normal algorithm.<br />
Ac: Condenser high temperature alarm<br />
If a probe is set as the condenser probe, the condenser temperature can be<br />
monitored to signal the high temperature alarm, probably due to obstruction or<br />
fouling.<br />
If the condenser temperature is > Ac+ (AE/2), the pre-alarm is signalled, displaying<br />
the alarm message cht. If in the pre-alarm situation, the condenser temperature<br />
falls to < Ac, the pre-alarm is reset and the signal cht is cancelled;<br />
If the condenser temperature increases to > Ac + AE, the alarm CHt is activated and<br />
the compressor is stopped. The alarm can only be reset <strong>manual</strong>ly.<br />
Allarme “CHt” e off refrigerazione (ripristino <strong>manual</strong>e)<br />
‘HC’ alarm and Refrigeration OFF (<strong>manual</strong> reset)<br />
Preallarme<br />
solo visualizzazione allarme “HC”<br />
(ripristino automatico)<br />
Pre-alarm<br />
Only ‘HC’ alarm display<br />
(automatic reset)<br />
Fig. 7.5.4<br />
“Ac” + “AE”<br />
temp. condensatore<br />
condenser temp.<br />
In case of an error to the condensation<br />
probe, the alarm and pre-alarm are<br />
activated.<br />
Note: if control with 2 compressor<br />
steps is selected (with or without<br />
rotation, H1= 12 or 13) the high<br />
condenser temperature alarm acts on<br />
both steps.<br />
61<br />
+030220140 - rel. 1.2 - del 06-06-2005
Attenzione:<br />
1. nel caso non sia selezionata alcuna sonda di condensazione l’allarme e il<br />
preallarme di condensazione vengono disabilitati.<br />
2. è possibile effettuare la regolazione ON/OFF delle ventole di condensazione; per<br />
questa funzionalità si rimanda ai parametri F4 ed F5.<br />
Default: Ac =70,0 gradi.<br />
AE: Differenziale allarme alta temperatura condensatore<br />
Rappresenta il differenziale usato<br />
per la disattivazione dell’allarme di alta<br />
temperatura del condensatore e nella<br />
regolazione dei ventilatori di<br />
condensazione.<br />
Important:<br />
1. if no condenser probe is selected, the condensing temperature alarm and<br />
pre-alarm are disabled.<br />
2. the condenser fans can be controlled in ON/OFF mode; for this function, refer to<br />
parameters F4 and F5.<br />
Default: Ac=70.0 degrees.<br />
AE: High condenser temperature alarm differential<br />
This is the differential used for activation of the<br />
high condenser temperature alarm and control<br />
ON<br />
of the condenser fans.<br />
Default: AE=5.0.<br />
Default: AE =5.0.<br />
“Ac”<br />
“AE”<br />
temp. condensatore<br />
condenser temp.<br />
Acd: Ritardo allarme alta temperatura condensatore<br />
Attraverso il parametro Acd è possibile settare un ritardo sull’attivazione dell’allarme<br />
di alta temperatura del condensatore. Al superamento della soglia Ac + AE viene<br />
attivato il timer di ritardo allarme, se allo scadere del ritardo Acd la temperatura è<br />
ancora al di sopra della soglia scatta l’allarme CHt . Viceversa, il timer viene<br />
resettato e l’allarme CHt non viene visualizzato.<br />
Default: Acd =0 => 0 minuti, allarme alta temperatura condensatore immediato.<br />
Fig. 7.5.5<br />
Acd: Condenser high temperature alarm delay<br />
The parameter Acd can be used to set a delay on the activation of the condenser<br />
high temperature alarm. When the threshold Ac + AE is exceeded, the alarm delay<br />
timer is started. If, when the delay time Acd has elapsed, the temperature is still<br />
above the threshold, the alarm CHt is activated. Otherwise, if the temperature<br />
returns below the threshold, the timer is reset and the alarm CHt is not displayed.<br />
Default: Acd=0 => 0 minutes, immediate high condenser temperature alarm.<br />
AF: Tempo spegnimento con sensore di luce.<br />
Permette di gestire il sensore di luce, connesso ad un ingresso digitale, come:<br />
AF = 0<br />
sensore nella battuta della porta<br />
AF > 0<br />
sensore interno alla cella o all’armadio<br />
Tab. 7.5.6<br />
Con AF=0 la luce interna viene accesa quando il sensore rileva la luce e viene spenta<br />
quando il sensore rileva il buio. Lo spegnimento della luce avviene per un tempo<br />
minimo di 3 secondi, in modo da evitare impulsi ravvicinati al relè luce.<br />
Nota: il sensore deve essere posizionato in modo tale da rilevare il buio con porta<br />
chiusa.<br />
Con AF > 0 la luce interna viene accesa quando il sensore rileva la luce. Dopo un<br />
tempo in secondi pari ad AF la luce viene spenta per 3 secondi per vedere se la<br />
porta è stata chiusa. In caso di buio la luce interna rimane chiusa, viceversa la luce<br />
interna viene riaccesa (dopo un tempo minimo di 3 secondi) e riprende il ciclo<br />
descritto.<br />
Default: AF = 0.<br />
ALF: Soglia di allarme antifreeze.<br />
Stabilisce il valore di temperatura sotto il quale viene rilevato l’allarme antifreeze, con<br />
il messaggio AFr.<br />
Tale funzione è attiva se una sonda è stata impostata come sonda di antifreeze /A2,<br />
/A3 o /A4 = 4 ed è ritardato del tempo impostato con il parametro AdF.<br />
L’allarme antifreeze spegne il compressore e attiva il relè di allarme, se impostato<br />
H1=0,1 ed è a ripristino <strong>manual</strong>e o da supervisore<br />
Nota: nel caso sia selezionata la regolazione con 2 gradini per il compressore (con o<br />
senza rotazione, H1 = 12 o 13) l’allarme antifreeze agisce su ambedue i gradini.<br />
Default: ALF= -5.0.<br />
AdF: Ritardo allarme antifreeze.<br />
Stabilisce il ritardo di rilevazione dell’allarme antifreeze.<br />
Default: AdF= 1.<br />
AF: Light sensor OFF time<br />
Used to manage the light sensor, connected to a digital input, as:<br />
AF = 0<br />
sensor in the door stop<br />
AF > 0<br />
sensor inside the cold room or cabinet<br />
Tab. 7.5.6<br />
When AF=0 the inside light is switched on when the sensor detects light, and is<br />
switched off when the sensor detects darkness. The light is switched off for a minimum<br />
of 3 seconds, so as to avoid close successive impulses of the light relay.<br />
Note: the sensor must be positioned so as to detect darkness when the door is<br />
closed.<br />
When AF>0, the inside light is switched on when the sensor detects light. After a<br />
time in seconds equal to AF, the light is switched off for 5 seconds to check if the<br />
door has been closed. If darkness is detected, the inside light remains OFF, but if<br />
light is detected, the inside light is switched back on (after a minimum time of 3<br />
seconds) and the same cycle starts again.<br />
Default: AF = 0<br />
ALF: Antifreeze alarm threshold<br />
Defi nes the temperature value below which the antifreeze alarm is detected, with<br />
the message AFr.<br />
The function is active if a probe has been set as an antifreeze probe, /A2, /A3 or /A4<br />
= 4 and is delayed by the time set for parameter AdF.<br />
The antifreeze alarm stops the compressor and activates the alarm relay, if H1=0, 1,<br />
and has <strong>manual</strong> reset.<br />
Note: if control with 2 compressor steps is selected (with or without rotation, H1 =<br />
12 or 13) the antifreeze alarm acts on both steps.<br />
Default: ALF= -5.0.<br />
AdF: Antifreeze alarm delay.<br />
Sets the delay for detecting the antifreeze alarm.<br />
Default: AdF= 1.<br />
7.6 Parametri relativi alla gestione dei ventilatori<br />
dell’evaporatore<br />
7.6 Evaporator fan management parameters<br />
N° Cod. Parametro MSYF U.M. Tipo Def. Max. Min.<br />
78 F0 Gestione ventilatori ---F fl ag C 0 2 0<br />
79 F1 Temperatura accensione ventilatore ---F °C/°F F 5.0 200 -50<br />
80 F2 Ventilatore off con compressore off ---F fl ag C 1 1 0<br />
81 F3 Ventilatore in sbrinamento ---F fl ag C 1 1 0<br />
82 Fd Spegnimento ventole dopo gocciolamento ---F min F 1 15 0<br />
83 F4 Temperatura spegnimento ventilatore condensatore MSYF °C/°F C 40 200 -50<br />
84 F5 Differenziale accensione ventilatore condensatore MSYF °C/°F C 5.0 20 0.1<br />
Tab. 7.6.1<br />
62<br />
+030220140 - rel. 1.2 - del 06-06-2005
N° Cod. Parameter MSYF U.M. Type Def. Max. Min.<br />
78 F0 Fan management ---F fl ag C 0 2 0<br />
79 F1 Fan start temperature ---F °C/°F F 5.0 200 -50<br />
80 F2 Fan OFF with compressor OFF ---F fl ag C 1 1 0<br />
81 F3 Fans in defrost ---F fl ag C 1 1 0<br />
82 Fd Fan OFF after dripping ---F min F 1 15 0<br />
83 F4 Condenser fan stop temperature MSYF °C/°F C 40 200 -50<br />
84 F5 Condenser fan start differential MSYF °C/°F C 5.0 20 0.1<br />
Tab. 7.6.1<br />
I controllori della serie ir 33, possono gestire i ventilatori dell’evaporatore nei modi<br />
seguenti:<br />
• sempre accesi<br />
• accesi solo quando il compressore è attivato<br />
• accesi in funzione della temperatura dell’evaporatore e della temperatura<br />
ambiente<br />
F0: Gestione ventilatori<br />
I ventilatori possono essere sottoposti al “regolatore ventilatori”, il quale li gestisce<br />
in funzione della temperatura rilevata dalle sonde di sbrinamento e virtuale di<br />
regolazione.<br />
In alternativa sono sempre accesi.<br />
Mentre è possibile spegnerli, nelle seguenti situazioni:<br />
• quando il compressore è fermo (si veda il parametro F2 )<br />
• durante lo sbrinamento (si veda il parametro F3 )<br />
• durante il periodo di gocciolamento (si veda il parametro dd );<br />
• e per un ulteriore periodo di post-gocciolamento (si veda il parametro Fd )<br />
Mentre è possibile forzarla durante lo sbrinamento (si veda il parametro F3 );<br />
I valori ammessi per questo parametro sono:<br />
F0 =0 ventilatori sempre accesi<br />
F0 =1 ventilatori termostatati in base alla differenza tra la sonda virtuale di<br />
regolazione e la temperatura evaporatore<br />
F0 =2 ventilatori termostatati in base alla temperatura dell’evaporatore<br />
Avvertenza: si ricorda che se è previsto un periodo di gocciolamento (dd = 0), i<br />
ventilatori vengono comunque spenti, indipendentemente dal valore di F0 .<br />
Default: F0 =0 => ventilatori sempre accesi, non sottoposti al “regolatore ventilatori”.<br />
F1: Temperatura accensione ventilatori (parametro operativo solo se F0 =1 o 2)<br />
Con F0=1, il parametro F1 indica la minima differenza che deve esistere tra la temperatura<br />
ambiente ed evaporatore perché i ventilatori vengano azionati. Quindi, con:<br />
• temperatura evaporatore < (sonda virtuale – F1 - A0) i ventilatori sono on<br />
• temperatura evaporatore > (sonda virtuale – F1) i ventilatori sono off<br />
Una volta spenti, i ventilatori ripartono quando la differenza tra le due sonde è pari<br />
a F1 + A0 , dove A0 è il differenziale del “regolatore ventilatori” (si veda la fi gura di<br />
seguito).<br />
The ir33 series controllers manage the evaporator fans in the following modes:<br />
• always ON;<br />
• ON only when the compressor is ON;<br />
• ON according to evaporator and room temperature.<br />
F0: Fan management<br />
The fans can be managed by the “fan controller”, which controls them according to<br />
the temperature measured by the defrost and virtual control probes.<br />
Otherwise, the fans can be left always ON.<br />
They can be stopped in the following situations:<br />
• when the compressor is OFF (see parameter ‘F2’);<br />
• during defrosts (see parameter ‘F3’);<br />
• during the dripping period (see parameter ‘dd’);<br />
• and for a further post-dripping period (see parameter ‘Fd’).<br />
They can be forced ON during defrosts (see parameter ‘F3’).<br />
The following values are allowed for this parameter:<br />
‘F0’=0 fans always ON;<br />
‘F0’=1 fans controlled according to the temperature difference between the<br />
virtual control probe and the evaporator temperature;<br />
‘F0’=2 fans thermostat controlled according to the evaporator temperature.<br />
Warning: remember that if a dripping period is set (‘dd’=0), the fans are<br />
nevertheless stopped irrespective of the value of ‘F0’.<br />
Default: ‘F0’=0 => fans always ON, not managed by the “fan controller”.<br />
F1: Fan start temperature (parameter valid only if ‘F0’=1 or ‘F0’=2)<br />
When F0=1, parameter F1 indicates the minimum difference between room<br />
temperature and evaporator temperature for the fans to be started. Therefore:<br />
• evaporator temperature < (virtual probe – F1-A0), the fans are ON;<br />
• evaporator temperature > (virtual probe – F1), the fans are OFF.<br />
When stopped, the fans can start again when the difference between the two<br />
probes is equal to F1+A0, where A0 is the “fan controller” differential (see the<br />
following fi gure).<br />
Con F0 =2, il parametro F1 indica la<br />
temperatura assoluta di attivazione dei<br />
ventilatori, ovvero:<br />
• temperatura evaporatore < ( F1 - A ), i<br />
ventilatori sono on<br />
• temperatura evaporatore > ( F1), i ventilatori<br />
sono off<br />
temperatura/temperature<br />
Amb.<br />
Amb. F1<br />
Amb. F1 - A0<br />
Evap.<br />
ON<br />
Evap. Fan<br />
OFF<br />
When F0=2, parameter F1 indicates the absolute<br />
temperature for starting the fans, that is:<br />
• evaporator temperature < ( F1-A0), the fans<br />
are ON;<br />
• evaporator temperature > ( F1), the fans are<br />
OFF.<br />
Fig. 7.6.1<br />
Note:<br />
• nel caso ci siano due evaporatori , quindi due sonde di evaporazione, la<br />
regolazione sarà effettuata sul valore massimo delle due sonde, per garantire<br />
che i ventilatori si attivino quando ambedue gli evaporatori siano arrivati in<br />
temperatura.<br />
• nel caso di errore delle sonde utilizzate per la regolazione, le ventole vengono<br />
sempre accese.<br />
Default: F1 =5 =>(se F0=1 o 2), i ventilatori rimangono accesi fi ntantoché<br />
l’evaporatore è 5 gradi più freddo della temperatura ambiente.<br />
F2: Stop ventilatori a compressore fermo (dipendente da F0 )<br />
Permette di decidere se i ventilatori devono funzionare secondo quanto stabilito dal<br />
parametro F0 (tranne nel ciclo di sbrinamento, si vedano i parametri F3 , dd e Fd) o<br />
quando il compressore è attivo.<br />
• F2 =0 => i ventilatori funzionano sempre (F0 =0) o su richiesta del regolatore<br />
63<br />
Notes:<br />
• if there are two evaporators and therefore two evaporator probes, control will<br />
be performed using the maximum value read by the two probes, to ensure<br />
that the fans are started when both evaporators reach the set temperature.<br />
• in the event of errors on the control probes, the fans are always on.<br />
Default: F1=5 =>(if F0=1 or 2), fi gure, the fans remain ON while the evaporator is 5<br />
degrees colder than the room temperature.<br />
F2: Fans OFF with compressor OFF (according to the value of F0)<br />
This enables you to decide if the fans must operate according to the contents of<br />
parameter F0 (with the exception of the defrost cycle, parameters F3, dd and Fd are<br />
displayed) or when the compressor is active.<br />
• F2=0 => the fans are always ON (F0=0) or when requested by the fan<br />
+030220140 - rel. 1.2 - del 06-06-2005
ventilatori ( F0 =1,2), anche quando il compressore è fermo<br />
• F2 =1 => i ventilatori sono fermi quando il compressore è fermo.<br />
Nota: nel caso sia selezionata la regolazione con 2 gradini per il compressore (con o<br />
senza rotazione, H1 = 12 o 13) ed il parametro F2 =1 le ventole sono ferme quando<br />
ambebue i compressori sono spenti.<br />
Default: F2 =1 => ventilatori fermi a compressore spento.<br />
F3: Ventilatori in sbrinamento<br />
Permette di decidere se i ventilatori devono funzionare o meno durante lo sbrinamento.<br />
F3 =0 => i ventilatori funzionano durante lo sbrinamento<br />
F3 =1 => i ventilatori non funzionano durante lo sbrinamento<br />
Si ricorda che durante il tempo di gocciolamento e il tempo di<br />
post-gocciolamento, se previsti, i ventilatori sono sempre spenti.<br />
Default: F3 =1 => ventilatori evaporatore spenti durante lo sbrinamento.<br />
controller (F0=1,2), even when the compressor is OFF;<br />
• F2=1 => the fans are OFF when the compressor is OFF.<br />
Note: if control with 2 compressor steps is selected (with or without rotation, H1 =<br />
12 or 13) and parameter F2 =1, the fans are off when both the<br />
compressors are off.<br />
Default: F2=1 => fans OFF with compressor OFF.<br />
F3: Fans in defrost<br />
This is used to decide if the fans should operate or not during the defrosts.<br />
F3=0 => the fans operate during defrosts;<br />
F3=1 => the fans do not operate during defrosts.<br />
Remember that during the dripping time and post-dripping time, if specifi ed, the<br />
fans are always OFF.<br />
Default: F3=1 => evaporator fans OFF during the defrost.<br />
Fd: Fermo post-gocciolamento<br />
I ventilatori, dopo lo sbrinamento, possono essere bloccati per un ulteriore periodo<br />
oltre dd (in minuti), defi nito dal valore di Fd. Questo è utile per consentire<br />
all’evaporatore di tornare in temperatura dopo lo sbrinamento, evitando quindi di<br />
forzare aria “calda” all’interno del frigorifero. Nel caso di gestione con regolatore<br />
ventilatori, non è necessario selezionare un tempo Fd in quanto il regolatore<br />
provvede a far ripartire i ventilatori quando l’evaporatore è in temperatura. Se il<br />
“regolatore ventilatori” è attivo (F0!=0), assegnando ad Fd un valore diverso da zero,<br />
i ventilatori restano spenti per un tempo pari al valore di Fd, indipendentemente<br />
dalla temperatura dell’evaporatore.<br />
Default: Fd=1 => 1 minuto di fermata post-gocciolamento.<br />
F4: Temperatura spegnimento ventole<br />
condensatore<br />
Consente di selezionare la temperatura alla<br />
quale si devono spegnere le ventole del<br />
condensatore. Impostando il relè ausiliario<br />
come uscita ventola condensatore (vedi<br />
parametro H1), permetterà di effettuare la<br />
regolazione secondo lo schema di Fig. 7.6.2.<br />
“F4” 0.2<br />
prima accensione<br />
Start up<br />
Fig. 7.6.2<br />
Fd: Fans OFF for post-dripping<br />
The fans, after defrosting, can be stopped for a further period beyond dd (in<br />
minutes), defi ned by the value of Fd. This is useful to allow the evaporator to return<br />
to its operating temperature after defrosting, thus avoiding forcing “hot” air into the<br />
refrigerated environment. In the event of management by fan controller, the time Fd<br />
does not need to be set, as the controller starts the fans again when the evaporator<br />
reaches its operating temperature. If the “fan controller” is active (F0!=0), when<br />
assigning to Fd a value other than zero, the fans remain OFF for a time equal to the<br />
value of Fd, irrespective of evaporator temperature.<br />
Default: Fd=1 => 1 minute stop for post-dripping.<br />
on ventole<br />
Ventilatoren EIN<br />
“F4” + “F5”<br />
temp. condensatore<br />
condenser temp.<br />
F4: Condenser fan stop temperature<br />
For selecting the temperature at which the<br />
condenser fans should be switched OFF.<br />
If setting the auxiliary relay as the condenser<br />
fan output (see parameter H1), this will<br />
enable adjustments according to the diagram<br />
in Fig. 7.6.2.<br />
In fase di prima accensione del compressore le ventole vengono portate in on a F4 +<br />
0.2 gradi per compensare rapidi incrementi di temperatura non facilmente seguibili<br />
dalla sonda. Successivamente la regolazione avviene in temperatura e cioè:<br />
accensione : F4 + F5<br />
spegnimento : F4<br />
Nel caso di errore sonda di condensazione, l’uscita ventole di condensazione, se<br />
selezionata, viene sempre attivata.<br />
Attenzione: nel caso non sia selezionata alcuna sonda di condensazione, l’uscita<br />
ventole di condensazione, se selezionata, viene disattivata.<br />
Default: F4 =40,0 gradi.<br />
F5: Differenziale accensione ventole condensatore<br />
Rappresenta il differenziale usato nella regolazione delle ventole di condensazione.<br />
Default: F5 =5.0.<br />
At fi rst power-up of the compressor, the fans are switched ON at F4 + 0.2 degrees<br />
to compensate for rapid temperature increases that are not easy to follow by the<br />
probe. After this control is performed normally, i.e.:<br />
on : F4 + F5<br />
off : F4<br />
In the event of condenser probe errors, the condenser fan output, if selected, is<br />
activated.<br />
Important: If no condensation probe is selected, the condenser fan output, if<br />
selected, is disabled.<br />
Default: F4=40.0 degrees.<br />
F5: Condenser fan start differential<br />
This is the differential used for adjusting the condensation fans.<br />
Default: F5=5.0<br />
7.7 Parametri generali di configurazione<br />
7.7 General configuration parameters<br />
N° Cod. Parametro MSYF U.M. Tipo Def. Max Min<br />
85 H0 Indirizzo seriale MSYF - C 1 207 0<br />
86 H1 Funzionalità relè 4 MSYF fl ag C 1 10 0<br />
87 H2 Disabilitazione tastiera/ir MSYF fl ag C 1 6 1<br />
88 H3 Codice abilitazione telecomando MSYF - C 0 255 0<br />
89 H4 Disabilitazione buzzer MSYF fl ag C 0 1 0<br />
90 H5 Funzionalità relè 5 MSYF fl ag C 1 10 0<br />
91 H6 Blocco tasti MSYF - C 0 255 0<br />
92 H8 Selezione uscita attivazione con fascia oraria MSYF fl ag C 0 1 0<br />
93 H9 Abilitazione variazione del set point con fascia oraria. MSYF fl ag C 0 1 0<br />
94 HPr Profi lo di stampa MSYF - C 0 15 0<br />
95 Hdn Numero set parametri di default disponibili MSYF - C 0 6 0<br />
96 Hdh Offset anti-sweat heater MSYF °C/°F C 0.0 200 -50<br />
97 HrL Abilitazione a remotare lo stato del relè luce del master MSYF fl ag C 0 1 0<br />
98 HrA Abilitazione a remotare lo stato del relè luce del master MSYF fl ag C 0 1 0<br />
99 HsA Abilitazione allarmi di altri dispositivi della rete locale MSYF fl ag C 0 1 0<br />
100 In Selezione unità normale, master o slave MSYF - C 0 6 0<br />
Tab. 7.7.1<br />
64<br />
+030220140 - rel. 1.2 - del 06-06-2005
N° Cod. Parameter MSYF U.M. Type Def. Max Min<br />
85 H0 Serial address MSYF - C 1 207 0<br />
86 H1 Function of relay 4 MSYF fl ag C 1 10 0<br />
87 H2 Disable keypad/IR MSYF fl ag C 1 6 1<br />
88 H3 Remote control enabling code MSYF - C 0 255 0<br />
89 H4 Disable buzzer MSYF fl ag C 0 1 0<br />
90 H5 Function of relay 5 MSYF fl ag C 1 10 0<br />
91 H6 Lock keypadi MSYF - C 0 255 0<br />
92 H8 Select activation of output with time band MSYF fl ag C 0 1 0<br />
93 H9 Enable set point variation with time band MSYF fl ag C 0 1 0<br />
94 HPr Print profi le MSYF - C 0 15 0<br />
95 Hdn Number of sets of default parameters available MSYF - C 0 6 0<br />
96 Hdh Anti-sweat heater offset MSYF °C/°F C 0.0 200 -50<br />
97 HrL Enable remote master light relay status MSYF fl ag C 0 1 0<br />
98 HrA Enable remote master aux relay status MSYF fl ag C 0 1 0<br />
99 HsA Enable alarm from other devices in the local network MSYF fl ag C 0 1 0<br />
100 In Select normal, master or slave unit MSYF - C 0 6 0<br />
Tab. 7.7.1<br />
H0: Indirizzo seriale<br />
Consente di assegnare allo strumento un indirizzo quando è collegato ad un sistema<br />
di supervisione o teleassistenza.<br />
Default: H0=1.<br />
H1: Modo di funzionamento uscita logica aux1<br />
Stabilisce se il quarto relè è usato come uscita ausiliaria. Di seguito le funzionalità<br />
associabili.<br />
H1=0 Uscita di allarme normalmente eccitato: Il relè si diseccita al verifi carsi di un<br />
allarme.<br />
L’uscita aux in funzionamento “allarme” può lavorare sia come relè eccitato, che<br />
come non eccitato. Quest’ultimo modo di funzionamento assicura la massima<br />
sicurezza in quanto l’allarme si attiva anche in caso di caduta di tensione o di<br />
disconnessione dei cavi.<br />
H1=1 Uscita di allarme normalmente diseccitato Il relè si eccita al verifi carsi di un<br />
allarme;<br />
H1=2 Uscita ausiliari: E’ possibile attivare/disattivare l’attuatore collegato agendo sul<br />
tasto aux .<br />
Lo stato è confermato dall’accensione/spegnimento dell’icona sul display.<br />
H1=3 Uscita luce: E’ possibile accendere/spegnere la luce dell’unità all’apertura<br />
della porta se attivato lo switch porta con gestione luce (si veda il parametro A4).<br />
In questo caso la luce si spegne alla chiusura della porta se non precedentemente<br />
spenta da tastiera. L’accensione/spegnimento della luce è associata all’accensione/<br />
spegnimento dell’icona sul display.<br />
H1=4 Uscita sbrinamento evaporatore ausiliari: E’ possibile attivare una resistenza<br />
o una valvola di inversione ciclo per eseguire uno sbrinamento a resistenza o a gas<br />
caldo sull’evaporatore ausiliario.<br />
H1=5 Uscita valvola di pump down: E’ possibile comandare<br />
l’attivazione/disattivazione della valvola di pump down.<br />
H1=6 Uscita ventola condensatore: Nel caso sia attivato l’allarme alta temperatura<br />
condensatore (vedi Ac) è possibile utilizzare l’uscita come ventola condensatore.<br />
H1=7 Uscita compressore ritardato: L’uscita si attiva alcuni secondi dopo l’attivazione<br />
del compressore (il ritardo è stabilito dal parametro c11), mentre alla disattivazione<br />
dell’uscita compressore corrisponde l’immediata disattivazione del compressore ritardato.<br />
Se è impostata questa modalità di funzionamento essa è attiva anche durante le fasi di<br />
pump down e di Autostart del compressore, se selezionate con gli opportuni parametri.<br />
H1=8 Uscita ausiliaria con disattivazione nello stato di off: Durante lo stato di off<br />
l’uscita ausiliaria non può essere attivata. Alla riaccensione l’uscita ausiliaria ritorna<br />
allo stato precedente.<br />
H1=9 Uscita luce con disattivazione nello stato di off: Durante lo stato di off la luce<br />
non può essere attivata. Alla riaccensione la luce ritorna allo stato precedente.<br />
H1=10 Nessuna funzione associata all’uscita In questo caso l’uscita logica aux1 non<br />
è utilizzata per alcuna funzione.<br />
H1=11 Uscita reverse in regolazione con zona neutra: Permette di attivare la<br />
regolazione con zona neutra (‘St’ ‘rd’ ‘rn’ ‘rr’) ed utilizza l’uscita ausiliaria aux1 per<br />
effettuarla reverse.<br />
H1=12 Uscita gradino secondo compressore<br />
H1=13 Uscita gradino secondo compressore con rotazione<br />
Default: H1=1 => relè eccitato con allarme attivo. Disponibile su tutti i modelli forniti<br />
dell’uscita aux1.<br />
65<br />
H0: Serial address<br />
This is used to assign to the instrument an address it responds to when connected<br />
to a supervisory or telemaintenance system.<br />
Default: H0=1<br />
H1: Operating mode: logic of output AUX1 (relay 4)<br />
This establishes whether the fourth relay is used as an auxiliary output. The<br />
following functions can be associated.<br />
H1=0 (Alarm output usually energised): The relay is de-energised when an alarm<br />
occurs;<br />
The AUX output in “alarm” mode can be set to operate either with the relay<br />
energised or de-energised. The latter mode ensures maximum safety, because the<br />
alarm is also activated in the event of power failures or disconnection of the cables.<br />
H1=1 (Alarm output usually non energised): The relay is energised when an alarm<br />
occurs<br />
H1=2 Auxiliary output: The connected actuator can be switched ON/OFF using the<br />
aux button.<br />
Switching the actuator ON/OFF is signalled by the icon on the display.<br />
H1=3 (Light output): The light on the unit can be switched ON/OFF when the door<br />
is opened, if the door switch is enabled (see parameter A4). In this case, the light<br />
is switched off when the door is closed, unless previously switched off from the<br />
keypad. Switching the light ON/OFF is signalled by the icon on the display.<br />
H1=4 (Auxiliary evaporator defrost output): A heater or reversing valve can be<br />
controlled to perform an electric heater defrost or hot gas defrost on the auxiliary<br />
evaporator.<br />
H1=5 (Pump down valve output): The activation and the deactivation of the pump<br />
down valve can be controlled.<br />
H1=6 (Condenser fan output): If the high condenser temperature alarm is activated<br />
(see Ac), the output can be used to control the condenser fans.<br />
H1=7 (Delayed compressor output); The output is activated a few seconds after the<br />
compressor starts (the delay is established by parameter ‘c11’, deactivation of the<br />
compressor output corresponds to immediate deactivation of the delayed<br />
compressor. If this operating mode is set, it is also active during the compressor<br />
pump down and autostart phases, if selected with the appropriate parameters.<br />
H1=8 (Auxiliary output with deactivation when OFF): In the off status, the auxiliary<br />
output cannot be activated. When starting again, the auxiliary output returns to the<br />
previous status.<br />
H1=9 (Light output with deactivation when OFF): In the off status, the light cannot<br />
be activated. When starting again, the light returns to the previous status.<br />
H1=10 ( No function associated with the output): In this case, the logical output<br />
AUX1 is not used for any function.<br />
H1=11 Reverse output in control with dead band Used to activate control with dead<br />
band (‘St’ ‘rd’ ‘rn’ ‘rr’), using the auxiliary output aux1 for the reverse function.<br />
H1=12 Second compressor step output<br />
H1=13 Second compressor step output with rotation<br />
Default: H1=1 => relay energised with alarm active. Available on all models<br />
supplied with the aux output.<br />
+030220140 - rel. 1.2 - del 06-06-2005
H2: Disabilitazione tastiera e/o telecomando<br />
Utilizzando il parametro H2 è possibile inibire alcune funzionalità legate all’utilizzo<br />
della tastiera, ad esempio, la modifi ca dei parametri e del set point nel caso il<br />
regolatore fosse esposto al pubblico.<br />
Le possibilità sono:<br />
Funzionalità della tastiera<br />
Parametro “H2” 0 1 2 3 4 5 6<br />
HACCP<br />
PRG/MUTE (mute)<br />
UP/aux • • •<br />
DOWN/DEF (sbrinamento) • • •<br />
set (modifi ca parametri tipo F) • • • • •<br />
Modifi ca set point • • • •<br />
Modifi ca da telecomando • •<br />
Tab. 7.7.2<br />
Con le funzionalità modifica set point e modifi ca parametri inibite, non è<br />
possibile modifi care il set point ed i parametri di tipo F, è però possibile visualizzare<br />
il loro valore. I parametri di tipo C, invece, essendo protetti da password, possono<br />
essere anche modificati da tastiera seguendo la procedura precedentemente<br />
descritta. Con il telecomando disabilitato è solo possibile vedere il valore dei<br />
parametri ma non modifi carli, inoltre vengono disabilitate le funzioni mute, defrost,<br />
ciclo continuo, aux (ausiliaria 1), luce (ausiliaria 2), ON/OFF.<br />
Avvertenze: Se si pone H2=2 o 3 da telecomando, questo viene<br />
istantaneamente disabilitato. Per riabilitare il telecomando porre H2=0 o H2=1 da<br />
tastiera.<br />
Default: H2=1 => tutto abilitato<br />
H3: Codice di abilitazione per la programmazione da telecomando<br />
Il parametro H3 attribuisce un codice di accesso al controllo. Come già indicato, ciò<br />
rende possibile l’utilizzo del telecomando quando vi siano più controllori presenti<br />
sullo stesso pannello senza il pericolo di interferenze.<br />
Per maggiori dettagli si veda il paragrafo relativo all’utilizzo del telecomando.<br />
Default: H3=00 => programmazione da telecomando senza codice.<br />
H4: Disabilitazione Buzzer<br />
Questo parametro può assumere due valori:<br />
H4=0 buzzer abilitato<br />
H4=1 buzzer disabilitato<br />
Default: H4=0 => buzzer abilitato.<br />
Disponibile su tutti i modelli.<br />
H5: Modo di funzionamento uscita logica aux2<br />
Come per il parametro H1 solo riferito all’uscita logica ausiliare 2 (o relè 5).<br />
Parametro disponibile solo per modelli della linea DIN<br />
H2: Disable keypad and/or remote control<br />
Parameter ‘H2’ can be used to inhibit some functions relating to the use of the<br />
keypad, for example, the modifi cation of the parameters and the set point if the unit<br />
is accessible by the public.<br />
The following are available:<br />
Keypad functions<br />
Parameter “H2” 0 1 2 3 4 5 6<br />
HACCP<br />
PRG/MUTE (mute)<br />
UP/AUX • • •<br />
DOWN/DEF (defrost) • • •<br />
SET (modifi cation of type F parameters) • • • • •<br />
Modifi cation of the set point • • • •<br />
Modifi cation from the remote control • •<br />
Tab. 7.7.2<br />
When the set point modification and parameter modification functions are<br />
inhibited, neither the set point nor the type F parameters can be changed, while<br />
their values can still be displayed. The type C parameters, on the other hand,<br />
being password protected, can also be modifi ed from the keypad, following the<br />
procedure described previously. With the remote control disabled, only the values<br />
of the parameters can be displayed, but they cannot be modifi ed; in addition, the<br />
mute, defrost, continuous cycle, aux (auxiliary 1), light (auxiliary 2) and ON/OFF<br />
functions are disabled.<br />
Warnings: If H2=2 or H2=3 is set on the remote control, the control is immediately<br />
disabled. To re-enable the remote control, set H2=0 or H2=1 on the keypad.<br />
Default: H2=1=> all enabled<br />
H3: Enabling code for programming from the remote control<br />
Parameter ‘H3’ assigns an access code to the remote control. As already described,<br />
this allows the remote control to be used when there is more than one controller<br />
present on the same panel, without the risk of interference.<br />
For further details, see the paragraph on the use of the remote control.<br />
Default: ‘H3’=‘00’ => programming from the remote control without code.<br />
H4: Disable buzzer<br />
This parameter can have two values:<br />
H4=0 buzzer enabled;<br />
H4=1 buzzer disabled<br />
Default: H4=0=> buzzer enabled.<br />
Available on all models.<br />
H5: Operating mode of logical output aux2<br />
The same as for parameter H1, only in this case referring to the auxiliary 2 logical<br />
output (or relay 5). Parameter only available for the DIN models<br />
H6: Blocco tasti<br />
Attraverso i singoli bit è possibile disabilitare (impostando a 0) le funzioni collegate ai<br />
singoli tasti della tastiera secondo le seguenti corrispondenze:<br />
Tastiera ir33:<br />
3 2 1 0<br />
0 x 08 0 x 04 0 x 02 0 x 01<br />
Fig. 7.7.1<br />
Tastiera standard<br />
Tasto Set<br />
Tasto down/def<br />
Tasto up/aux<br />
Tasto prg/mute<br />
Valore<br />
Funzione Disabilitazione +<br />
tasto set 1<br />
tasto down/def 2<br />
tasto Up/ aux 4<br />
tasto Prg/mute 8<br />
Tab . 7. 7. 3<br />
Totale (valore parametro H6)<br />
Per calcolare il valore da assegnare al parametro H6 è suffi ciente sommare i valori<br />
assegnati alle funzioni che si desiderano disabilitare.<br />
66<br />
H6: Lock keypad<br />
This is used to disable the functions assigned to the individual buttons.<br />
Using the corresponding bits, the functions relating to the individual buttons on the<br />
keypad can be disabled (setting to 0), according to the following relationships:<br />
ir33 Keypad:<br />
3 2 1 0<br />
0 x 08 0 x 04 0 x 02 0 x 01<br />
Fig. 7.7.1<br />
Standard keypad<br />
Set button<br />
Down/def button<br />
Up/aux button<br />
Prg/mute button<br />
Value<br />
Function Disable +<br />
SET button 1<br />
Down/def button 2<br />
Up/Aux button 4<br />
Prg/mute button 8<br />
Total (value of parameter H6)<br />
To calculate the value to be assigned to parameter H6, simply sum the values<br />
assigned to the functions that should be disabled.<br />
+030220140 - rel. 1.2 - del 06-06-2005
Attenzione: le funzioni disabilitate con il parametro H6 si aggiungono a quelle<br />
disabilitate con il parametro H2.<br />
Esempio: disabilitazione per “tasto Set”, “tasto aux”<br />
_ 1 + 4 = 5 _ Parametro H6<br />
Bit Mask tasto Funzioni abilitabili\disabilitabili<br />
0 1 Set Ingresso in HACCP;<br />
Procedura di stampa del report<br />
1 2 def Sbrinamento;<br />
Ciclo continuo;<br />
Ingresso in HACCP<br />
2 4<br />
Abilitazione/Disabilitazione uscita ausiliaria 1;<br />
Ciclo continuo<br />
aux<br />
3 8 Mute<br />
Tab. 7.7.4: Funzioni disabilitabili tastiera standard.<br />
Default: H6=0 => tutti i tasti disabilitati.<br />
H8: Selezione uscita luce o aux per l’attivazione con fascia oraria.<br />
Attraverso questo parametro è possibile selezionare l’uscita da attivare o disattivare<br />
secondo la fascia oraria prevista (si vedano i parametri ton e tof).<br />
H8=0 => Fascia oraria legata all’uscita confi gurata come luce.<br />
H8=1 => Fascia oraria legata all’uscita confi gurata come aux.<br />
Nota: l’uscita che si intende comandare (luce o aux) deve essere disponibile e<br />
selezionata con il parametro H1.<br />
Default: H8=0 => Fascia oraria legata alla luce.<br />
H9: Abilitazione variazione del setpoint con fascia oraria.<br />
Attraverso questo parametro è possibile abilitare la variazione del set point secondo<br />
la fascia oraria prevista (si vedano i parametri ton e toF).<br />
Il controllore modifi ca il set point aggiungendogli il valore del parametro r4 (al tempo<br />
toF), il nuovo valore viene utilizzato per tutte le funzioni relative al set point (Es.<br />
Allarmi Alta e Bassa temperatura relativi, regolazione con banda morta, regolazione<br />
con due gradini per il compressore ecc.).<br />
H9=0 => Variazione setpoint con fascia oraria disabilitata.<br />
H9=1 => Variazione setpoint con fascia oraria abilitata.<br />
Nota: Con r4=3.0 (valore pre-programmato) il set point viene aumentato di 3 gradi<br />
rispetto al valore utilizzato prima del tempo toF, al tempo ton il valore del setpoint<br />
sarà quello impostato con il parametro St.<br />
Poiché alla fascia oraria impostata da ton e toF è legata l’uscita ausiliaria<br />
selezionabile con il parametro H8, al tempo ton si accenderà l’uscita<br />
corrispondente, al tempo toF si spegnerà.<br />
Quindi, con H9=1, si avranno i seguenti effetti:<br />
- ton : set point normale e uscita selezionata accesa.<br />
- toF : set point + r4 e uscita selezionata spenta.<br />
Default: H9=0 => Funzionalità disabilitata.<br />
HPr: Profilo di stampa<br />
Permette di selezionare il profi lo desiderato per la stampa del report attraverso una<br />
stampante esterna .<br />
L’interfaccia per stampare i dati dallo strumento necessita di un accessorio specifi co.<br />
Default: HPr=0 => Stampa report disabilitata.<br />
Important: the functions disabled using parameter H6 are added to those disabled<br />
using parameter H2.<br />
Example: disabling “SET button”, and “Aux button”<br />
_ 1 + 4 = 5 _ Parameter H6<br />
Bit Mask Key Functions that can be enabled/disabled<br />
0 1 Set Enter HACCP;<br />
Report printing procedure<br />
1 2 def Defrost;<br />
Continuous cycle;<br />
Enter HACCP<br />
2 4<br />
Enable/disable auxiliary output 1<br />
Continuous cycle<br />
aux<br />
3 8 Mute<br />
Tab. 7.7.1: Functions disabled on the standard keypad.<br />
Default: H6=0=> all buttons disabled.<br />
H8: Select light or aux output to activate with time band.<br />
This parameter can be used to select the output that is activated or deactivate<br />
according to the time band (see parameters ton and tof).<br />
H8=0=> Time band linked to output confi gured for light.<br />
H8=1=> Time band linked to output confi gured as AUX.<br />
Note: the output you wish to command (light o aux) must be available and be<br />
selected with parameter H1.<br />
Default: H8=0 => time band linked to light<br />
H9: Enable set point variation with time band.<br />
This parameter can be used to enable the variation of the set point according to the<br />
time band (see parameters ton and toF).<br />
The controller modifi es the set point by adding the value of parameter r4 (to the<br />
time toF), the new value is used for all the functions relating to the set point (e.g.<br />
relative high and low temperature alarms, control with dead band, control with two<br />
compressor steps etc.).<br />
H9=0 => Set point variation with time band disabled.<br />
H9=1 => Set point variation with time band enabled.<br />
Note: When r4=3.0 (value preset) the set point is increased of 3 degrees compared<br />
to the value used before toF, at ton the value of the set point will be the value set<br />
for parameter St.<br />
As the time band set by ton and toF is related to the output auxiliary selected using<br />
parameter H8, the corresponding output will switch on at ton, and will switch off at<br />
toF.<br />
Therefore, when H9=1, the following will be true:<br />
- ton : normal set point and selected output on.<br />
- toF : set point + r4 and selected output off.<br />
Default: H9=0 => Function disabled.<br />
HPr: Print profile<br />
This is used for selecting the profi le you require for printing the report on an<br />
external printer.<br />
The interface for printing the data from the instrument requires a specifi c accessory.<br />
Default: HPr=0 => Report printing disabled.<br />
Hdn: Numero set di parametri di default disponibili<br />
Il controllo può disporre di uno o più set di parametri di default. Il set 0 è<br />
standard e non personalizzabile. Gli altri set sono personalizzabili dal cliente fi nale<br />
con il kit di programmazione della chiave PSOPZPGR00.<br />
Hdn: Number of sets of default parameters available<br />
The controller can feature one or more sets of default parameters. Set 0 is standard<br />
and cannot be customised. The other sets can be customised by the user with the<br />
programming key kit PSOPZPGR00.<br />
Set Personalizzabile Note<br />
0 NO/NO Non modifi ca i livelli di visibilità. Permette di impostare i valori solo dei parametri visibili.<br />
The levels of visibility are not modifi ed. Sets the values of the visible parameters only<br />
1<br />
2<br />
3<br />
4<br />
5<br />
6<br />
SI/YES<br />
Imposta i livelli di visibilità e i valori di tutti i parametri di funzionamento e macchina.<br />
The levels of visibility and the values of all the operating and unit parameters are set<br />
Tab. 7.7.5<br />
Note:<br />
1. sul controllo è possibile utilizzare i set di parametri di default personalizzabili dal<br />
cliente solo se si dispone dell’hardware adeguato (la chiave di<br />
programmazionecon memoria Eeprom espansa).<br />
67<br />
Notes:<br />
1. The set of customisable default parameters can only be used on the controller if<br />
there is suitable hardware (expanded EEPROM memory)<br />
2. If when loading a set of customised default parameters there is an EF<br />
+030220140 - rel. 1.2 - del 06-06-2005
2. dopo aver caricato un set di parametri di default personalizzato nel caso vi sia un<br />
errore Eeprom EF o EE (in quanto risulta corrotta la memoria del controllo) è<br />
possibile ripristinare i parametri precedenti spegnendo è riaccendendo lo strumento.<br />
3. invece, con errore Eeprom EF, dE si desidera conservare i parametri caricati, pur<br />
in presenza di errore Eeprom, è possibile entrare in modifi ca dei parametri di<br />
confi gurazione, verifi carne il valore e memorizzare gli stessi in Eeprom con la<br />
opportuna procedura. Al temine dell’operazione scomparirà la segnalazione di<br />
errore Eeprom.<br />
4. nel caso vi sia un ricorrente errore Eeprom EE o EF nel caricamento di un set di<br />
parametri di default personalizzato sarà opportuno correggere l’Eeprom interna<br />
dello strumento con la chiave hardware di programmazione.<br />
5. dopo il caricamento di un set di default personalizzato il controllo procede<br />
automaticamente ad aggiornare la memoria di lavoro memorizzando sia i livelli di<br />
visibilità che i valori dei parametri.<br />
6. il parametro Hdn deve avere lo stesso valore in tutti i set di parametri di default<br />
personalizzati.<br />
7. per maggiore protezione il parametro Hdn dovrà essere impostato non visibile.<br />
Default: Hdn=0 => solo parametri di default standard.<br />
Hdh: Offset anti-sweat heater<br />
Rapprensenta l’offset rispetto al set point della funzione anti-sweat heater.<br />
Nel caso Hdh =0 la funzione anti-sweat heater è disabilitata.<br />
La funzione anti-sweat heater permette mantenere l’uscita aux1, confi gurata come<br />
luce o aux H1=2, 3, 8, 9, disattivate fi nchè la temperatura di regolazione (sonda<br />
virtuale) risulta inferiore a ‘St’ + ‘Hdh’ per la prima volta dopo l’accensione dello<br />
strumento (power-up) o il ripristino degli allarmi ‘HI’ ‘IA’ ‘dA’ ‘CHt’‘EE’ ‘EF’ ‘rE’.<br />
Durante i suddetti allarmi l’uscita aux1, confi gurata come sopra, è disattivata.<br />
Tale funzione è attiva, nel caso siano impostate le funzioni luce o aux con spegnimento<br />
in off ,‘H1’ o ‘H5’=8,9 anche nel passaggio del controllo da off a on.<br />
Default: Hdh =0.0 => funzione disabilitata.<br />
HrL: Abilita il sincronizzatore a remotare sul controllo slave lo stato del relè luce<br />
del master.<br />
Il parametro HrL abilita il sincronizzatore a remotare sul controllo slave lo stato del relè<br />
luce del master, quindi il relè luce dello slave ripeterà lo stato del relè luce del master<br />
Default: HrL=0 =>remotazione disabilitata.<br />
HrA: Abilita il sincronizzatore a remotare sul controllo lo stato del relè ausiliario<br />
del master.<br />
Come prima ma riferito al relè ausiliario del master.<br />
Default: HrA=0 =>remotazione disabilitata.<br />
HSA: Abilita il sincronizzatore a remotare sul controllo gli allarmi di altri<br />
dispositivi della rete locale.<br />
Il parametro HSA abilita il sincronizzatore a remotare sul controllo gli allarmi di altri<br />
dispositivi della rete locale.<br />
Se HSA vale 1, gli allarmi degli altri controlli presenti nella rete saranno visualizzati sul<br />
display locale con la simbologia<br />
Nx, dove x=1,…,6)<br />
Default: HSA=0 =>visualizzazione disabilitata.<br />
In: Selezione unità normale, master o slave.<br />
Il parametro In permette di stabilire se l’unità è normale, master o slave.<br />
Il numero massimo di slave in una sottorete è 5.<br />
- Normale: unità stand-alone<br />
- Master : unità master. Permette la sincronizzazione del defrost, dei relè luce e aux e<br />
del download dei parametri.<br />
- Slave : unità slave. Unità che fa parte di una rete locale asservito al master.<br />
Di seguito i valori del parametro:<br />
In<br />
0 No Master-Slave (normale)<br />
1 Master<br />
2 Slave 1<br />
3 Slave 2<br />
4 Slave 3<br />
5 Slave 4<br />
6 Slave 5<br />
Tab. 7.7.6<br />
EEPROM error (memory error on the controller), the previous parameters<br />
can be restored by switching the instrument off and on again.<br />
3. If there is an EF EEPROM error, to maintain the loaded parameters, enter<br />
parameter confi guration mode, check the values then save them to the EEPROM<br />
using the special procedure. At then end of the operation, the EEPROM error<br />
signal will be cancelled.<br />
4. If there is a recurring EF EEPROM error when loading a set of customised<br />
default parameters, the EEPROM on the instrument should be corrected<br />
using the programming hardware key.<br />
5. After loading a set of customised default parameter, the controller automatically<br />
updates the memory, saving both the levels of visibility and the values of the<br />
parameters.<br />
6. The parameter ‘Hdn’ must have the same value in all the sets of customised<br />
default parameters.<br />
7. For greater protection, parameter ‘Hdn’ must be set to not visible.<br />
Default: Hdn=0 => standard default parameters only.<br />
Hdh: Anti-sweat heater offset<br />
This represents the offset from the set point for the anti-sweat heater function.<br />
If Hdh =0, the anti-sweat heater function is disabled.<br />
The anti-sweat heater function is used to maintain the aux1 output, confi gured as<br />
the light or aux (H1= 2, 3, 8, 9) deactivated while the control temperature (virtual<br />
probe) is less than ‘St’ + ‘Hdh’ when the instrument is fi rst powered up, the ‘HI’ ‘IA’<br />
‘dA ‘CHt’ ‘EE’ ‘EF’ ‘rE’ alarms are reset.<br />
During the aforementioned alarms, the aux1 output, confi gured as above, is<br />
deactivated.<br />
The function is active, id the light or aux functions are set to be deactivated when off ,<br />
‘H1’ or ‘H5’=8, 9, even when switching the controller on.<br />
Default: Hdh =0.0 => function disabled.<br />
HrL: Enable the synchronizer to remote the status of the master light relay to<br />
the slave controller.<br />
The parameter HrL enables the synchronizer to remote the light relay status light<br />
on the master to the slave controller. Consequently, the light relay on the slave will<br />
repeat the status of the light relay on the master.<br />
Set to 1 to enable the function.<br />
Default: HrL=0 =>remote status disabled.<br />
HrA: Enable the synchronizer to remote the status of the master auxiliary relay<br />
to the controller.<br />
As above, but relating to the auxiliary relay on the master.<br />
Default: HrA=0 => remote status disabled.<br />
HSA: Enable the synchronizer to remote the alarms from others devices in the<br />
local network to the controller.<br />
The parameter HSA enables the synchronizer to remote the alarms from other<br />
devices in the local network to the controller.<br />
If HSA is equal to 1, the alarms on the other controllers in the network will be shown<br />
on the local display, with the symbol Nx, where x=1 to 6)<br />
Default: HSA=0 =>display disabled.<br />
In: Selection normal, master or slave unit.<br />
The parameter In establishes whether the unit is normal, master or slave.<br />
The maximum number of slaves in a sub-network is 5.<br />
- Normal: stand-alone unit<br />
- Master: Master unit. Allows the synchronisation of the defrosts, the light and aux<br />
relays, and of the download of the parameters.<br />
- Slave: Slave unit. Unit part of a local network serving the master.<br />
The following table shows the values of the parameter:<br />
In<br />
0 No Master-Slave (normal)<br />
1 Master<br />
2 Slave 1<br />
3 Slave 2<br />
4 Slave 3<br />
5 Slave 4<br />
6 Slave 5<br />
Tab. 7.7.6<br />
68<br />
+030220140 - rel. 1.2 - del 06-06-2005
Nota: la sincronizzazione del defrost canalizzato viene attivata solo nei controlli<br />
Master e Slave.<br />
Default: In=0 => normale.<br />
Note: the synchronisation of the multiplexed defrost is activated only on Master and<br />
Slave controllers.<br />
Default: In=0 => normal.<br />
7.8 Parametri relativi alla gestione dell’allarme HACCP<br />
7.8 HACCP alarm management parameters<br />
N° Cod. Parametro MSYF U.M. Tipo Def. Max Min<br />
101 HAn Numero di eventi HA intervenuti MSYF fl ag C 0 15 0<br />
102 HA Data/ora dell’ultimo evento HA MSYF - C - - -<br />
103 HA1 Data/ora del penultimo evento HA MSYF - C - - -<br />
104 HA2 Data/ora del terz’ultimo evento HA MSYF - C - - -<br />
105 HFn Numero di eventi HF intervenuti MSYF - C 0 15 0<br />
106 HF Data/ora dell’ultimo evento HF MSYF - C - - -<br />
107 HF1 Data/ora del penultimo evento HF MSYF - C - - -<br />
108 HF2 Data/ora del terzultimo evento HF MSYF - C - - -<br />
109 Htd Ritardo allarme HACCP MSYF - C 0 250 0<br />
N° Cod. Parameter MSYF U.M. Type Def. Max Min<br />
101 HAn Number of HA events recorded MSYF fl ag C 0 15 0<br />
102 HA Date/time of last HA event MSYF - C - - -<br />
103 HA1 Date/time of penultimate HA event MSYF - C - - -<br />
104 HA2 Date/time of third from last HA event MSYF - C - - -<br />
105 HFn Number of HF events recorded MSYF - C 0 15 0<br />
106 HF Date/time of last HF event MSYF - C - - -<br />
107 HF1 Date/time of penultimate HF event MSYF - C - - -<br />
108 HF2 Date/time of third-to-last HF event MSYF - C - - -<br />
109 Htd HACCP alarm delay MSYF - C 0 250 0<br />
Tab. 7.7.7<br />
Tab. 7.7.7<br />
HAn: Numero di eventi di allarme HA occorsi<br />
Questo parametro indica il numero di allarmi HA intervenuti. Il numero massimo di<br />
eventi conteggiabili è pari a 15. E. per ogni evento di allarme successivo, il contatore<br />
rimane fi sso a 15.<br />
Default: HAn=0<br />
HA: Data/ora in cui è avvenuto l’ultimo evento HA<br />
HA1 : Data/ora in cui è avvenuto il penultimo evento HA<br />
HA2 : Data/ora in cui è avvenuto il terzultimo evento HA<br />
Questo parametro dà accesso ad un sottomenù nel quale, attraverso aux e def<br />
, è<br />
possibile scorrere anno, mese, giorno, ora, minuto e durata dell’ultimo allarme HA<br />
intervenuto.<br />
Es: y03 -> M07 -> d22 -> h23 -> m57 -> t99<br />
indica che l’ultimo allarme Ha è intervenuto il 22 Luglio 2003 alle ore 23:57 ed è<br />
durato 99 ore.<br />
Default: 0<br />
HFn: Numero di eventi di allarme HF occorsi: Come per HAn<br />
Default: HFn=0<br />
HF: Data/ora in cui è avvenuto l’ultimo evento HF<br />
HF1: Data/ora in cui è avvenuto il penultimo evento HF<br />
HF2: Data/ora in cui è avvenuto il terzultimo evento HF<br />
Default: 0<br />
Htd: Ritardo allarme HACCP<br />
Tempo di ritardo in minuti che, sommato al tempo Ad determina l’intervallo di<br />
tempo trascorso il quale viene attivato l’allarme HA.<br />
Se impostato a 0, il monitoraggio HACCP (sia HA che HF) è disabilitato.<br />
Eventuali allarmi già memorizzati verranno mantenuti, anche con Htd=0.<br />
Default: Htd=0 => Monitoraggio HACCP disabilitato.<br />
HAn: Number of HA alarm events recorded<br />
This parameter indicates the number of HA alarms activated. A maximum of 15<br />
events can be counted. For each alarm event after the 15th, the counter stays at 15.<br />
Default: HAn=0<br />
HA: Date/time of the last HA event<br />
HA1: Date/time of the penultimate HA event<br />
HA2: Date/time of the third from last HA event<br />
This parameter accesses a submenu where, by pressing the aux and def<br />
buttons,<br />
the year, month, day, hour, minutes and duration of the last HA alarm activated<br />
can be scrolled.<br />
e.g.: y03 -> M07 -> d22 -> h23 -> m57 -> t99<br />
indicates that the last alarm HA was activated on 22 July 2003 at 23:57 and lasted<br />
99 hours.<br />
Default: 0<br />
HFn: Number of HF alarm events recorded<br />
As for HAn.<br />
Default: HFn=0<br />
HF: Date/time of the last HF event<br />
HF1: Date/time of the penultimate HF event<br />
HF2: Date/time of the third from last HF event<br />
Default: 0<br />
Htd: HACCP alarm delay<br />
Delay time in minutes that, added to the time Ad, determines the time interval after<br />
which the HA error is activated. If set to 0, HACCP monitoring (HA that HF) is disabled.<br />
Any alarms already saved will still be stored, even when Htd=0.<br />
Default: Htd=0=> HACCP monitoring disabled<br />
7.9 Parametri relativi alla gestione dell’Rtc e degli<br />
sbrinamenti temporizzati<br />
69<br />
7.9 RTC and timed defrost management<br />
parameters<br />
N° Cod. Parametro MSYF U.M. Tipo Def. Max Min<br />
110 td1 Fascia oraria sbrinamento 1 -SYF - C - - -<br />
111 td2 Fascia oraria sbrinamento 2 -SYF - C - - -<br />
112 td3 Fascia oraria sbrinamento 3 -SYF - C - - -<br />
113 td4 Fascia oraria sbrinamento 4 -SYF - C - - -<br />
114 td5 Fascia oraria sbrinamento 5 -SYF - C - - -<br />
115 td6 Fascia oraria sbrinamento 6 -SYF - C - - -<br />
116 td7 Fascia oraria sbrinamento 7 -SYF - C - - -<br />
117 td8 Fascia oraria sbrinamento 8 -SYF - C - - -<br />
118 ton Fascia oraria accensione luce/aux e ripristino set point -SYF - C - - -<br />
119 tof Fascia oraria spegnimento luce/aux e modifi ca set point -SYF - C - - -<br />
120 tc Impostazione data/ora Rtc MSYF - C - - -<br />
Tab. 7.9.1<br />
+030220140 - rel. 1.2 - del 06-06-2005
N° Cod. Parameter MSYF U.M. Type Def. Max Min<br />
110 td1 Defrost time band 1 -SYF - C - - -<br />
111 td2 Defrost time band 2 -SYF - C - - -<br />
112 td3 Defrost time band 3 -SYF - C - - -<br />
113 td4 Defrost time band 4 -SYF - C - - -<br />
114 td5 Defrost time band 5 -SYF - C - - -<br />
115 td6 Defrost time band 6 -SYF - C - - -<br />
116 td7 Defrost time band 7 -SYF - C - - -<br />
117 td8 Defrost time band 8 -SYF - C - - -<br />
118 ton Light/aux on time band -SYF - C - - -<br />
119 tof Light/aux off time band -SYF - C - - -<br />
120 tc RTC date/time setting MSYF - C - - -<br />
td1...td8: fascia oraria sbrinamento 1…8<br />
Attraverso questi parametri è possibile impostare fi no a 8 eventi di sbrinamento<br />
collegati all’orologio di sistema. Per visualizzare e impostare o modifi care uno degli<br />
eventi, è necessario posizionarsi su uno dei parametri tra td1 e td8 e premere il<br />
pulsante Set : si entra in un sottomenù all’interno del quale, muovendosi con<br />
aux o def<br />
, è possibile visualizzare e impostare giorno, ora e minuto dell’evento di<br />
sbrinamento.<br />
Nell’esempio seguente: giorno 8 (dal Lunedì al Venerdì), ore 23, minuto 57.<br />
d08 def h23 def m57 def d08 def …<br />
Per modifi care giorno, ora o minuto dell’evento, posizionarsi sul parametro<br />
desiderato attraverso aux o def<br />
e premere Set per modifi carlo:<br />
scompare la lettera identifi cativa del parametro ed è possibile, a questo punto,<br />
incrementare o decrementare il valore rispettivamente con aux o def .<br />
Il parametro d__ imposta il giorno dell’evento nel seguente modo:<br />
‘d__’=0 => evento disabilitato<br />
‘d__’=1..7 => Lunedì..Domenica<br />
‘d__’=8 => da Lunedì a Venerdì<br />
‘d__’=9 => da Lunedì a Sabato<br />
‘d__’=10 => Sabato a Domenica<br />
‘d__’=11 => tutti i giorni<br />
Con ‘h__’(0…23), ‘m__’(0…59) si impostano ora e minuto dell’evento.<br />
Default: ‘d__’=0, ‘h__’=0, ‘m__’=0 => Evento disabilitato<br />
Premendo Set è possibile salvare temporaneamente il parametro modifi cato e<br />
ritornare al sottomenù di impostazione dell’evento.<br />
Si può ora continuare l’operazione di visualizzazione o modifi ca dei parametri relativi<br />
all’evento o tornare all’elenco dei parametri Rtc premendo .<br />
td1 to td8: Defrost time band 1 to 8<br />
These parameters can be used to set up to 8 defrost events linked to the system<br />
clock. To display and set or modify one of the events, access one of the parameters<br />
between td1 and td8, and then press Set . This enters a submenu in which the<br />
aux or def<br />
button can be used to display and set the day, hour and minutes of<br />
the defrost event:<br />
In the following example. day 8 (from the Monday to Friday), hours 23, minutes 57.<br />
d08 def h23 def m57 def d08 def …<br />
To modify the day, hour or minutes of the event, access the desired parameter by<br />
pressing the aux or def<br />
button and then press Set to modify the value.<br />
The letter identifying the parameter disappears, and, at this point, the value can be<br />
increased or decreased using aux or def .<br />
The parameter d__ sets the day of the event, as follows:<br />
‘d__’=0 => event disabled<br />
‘d__’=1..7 => Monday to Sunday<br />
‘d__’=8 => from Monday to Friday<br />
‘d__’=9 => from Monday to Saturday<br />
‘d__’=10 => Saturday to Sunday<br />
‘d__’=11 => all days<br />
Setting ‘h__’ (0 to 23), ‘m__’ (0 to 59) sets the hour and minutes of the event.<br />
Default: ‘d__’=0, ‘h__’=0, ‘m__’=0 => Event disabled<br />
Tab. 7.9.1<br />
Pressing Set temporarily saves the changes to the modifi ed parameter and<br />
returns to the submenu for setting the event.<br />
The display or modifi cation of the parameters corresponding to the event can be<br />
continued, or return to the list of RTC parameters by pressing .<br />
ton e tof: fascia oraria accensione e spegnimento luce/aux<br />
Attraverso questi parametri è possibile impostare l’accensione e/o lo spegnimento<br />
della luce o dell’aux collegati all’orologio di sistema (per la selezione aux o luce si<br />
veda il parametro H8); è, inoltre, possibile spostare il set point in base alll’orologio di<br />
sistema (per l’attivazione e la descrizione della funzionalità si veda il parametro H9).<br />
Per visualizzare e impostare o modifi care uno dei due eventi, è necessario posizionarsi<br />
su uno dei due parametri ton o toF e premere il pulsante Set . Il parametro ton<br />
imposta il momento di accensione, mentre il toF quello di spegnimento.<br />
Alla pressione di Set si entra in un sottomenù all’interno del quale, muovendosi<br />
con i tasti aux o def<br />
, è possibile visualizzare e impostare giorno, ora e minuto<br />
dell’evento di accensione o spegnimento.<br />
Ad esempio, per impostare l’accensione dal Lunedì al Sabato alle 08.30 e lo<br />
spegnimento dal Lunedì al Sabato alle 19.30:<br />
ton:<br />
d09 def h8 def m30 def<br />
toF:<br />
d09 def h19 def m30 def<br />
Per modifi care giorno, ora o minuto dell’evento, posizionarsi sul parametro<br />
desiderato attraverso la pressione di aux o def<br />
e premere Set per modifi carlo.<br />
Premendo Set scompare la lettera identifi cativa del parametro ed è possibile, a<br />
questo punto, incrementare o decrementare il valore rispettivamente con aux o def .<br />
Il parametro ‘d__’ imposta il giorno dell’evento nel seguente modo:<br />
‘d__’=0 => evento disabilitato<br />
‘d__’=1..7 => Lunedì..Domenica<br />
‘d__’=8 => da Lunedì a Venerdì<br />
70<br />
ton and tof: Light/aux ON/OFF time band<br />
These parameters are used to set the ON/OFF of the light or the aux, based on the<br />
system clock (to select aux or light, see parameter H8); in addition, the set point can<br />
be modifi ed based on the system clock (for the activation and the description of the<br />
function, see parameter H9).<br />
To display, set or modify one of the two events, access one of the two parameters,<br />
ton or toF, and then press Set .<br />
Use the ton parameter to set activation time, and the toF parameter to disable it.<br />
Press Set to enter a submenu in which the aux or def<br />
button can be used to<br />
display and set the day, hour and minutes of the defrost ON or OFF event.<br />
For example, to set ON from Monday to Saturday at 8.30 hours, and OFF from<br />
Monday to Saturday at 19.30 hours.:<br />
ton;<br />
d09 def h8 def m30 def<br />
toF:<br />
d09 def h19 def m30 def<br />
To modify the day, hour or minutes of the event, access the desired parameter by<br />
pressing the aux or def<br />
button and then press Set to modify the value.<br />
When pressing Set , the letter identifying the parameter disappears, and the value<br />
can no longer be increased or decreased using aux or def .<br />
The parameter ‘d__’ sets the day of the event, as follows:<br />
‘d__’=0 => event disabled<br />
‘d__’=1..7 => Monday to Sunday<br />
‘d__’=8 => from Monday to Friday<br />
+030220140 - rel. 1.2 - del 06-06-2005
‘d__’=9 => da Lunedì a Sabato<br />
‘d__’=10 => Sabato a Domenica<br />
‘d__’=11 => tutti i giorni<br />
Con ‘h__’(0…23), ‘m__’(0…59) si impostano ora e minuto dell’evento.<br />
Default: ‘d__’=0, ‘h__’=0, ‘m__’=0 => Evento disabilitato<br />
Premendo il tasto Set è possibile salvare temporaneamente il parametro<br />
modifi cato e ritornare al sottomenù di impostazione dell’evento. Si può ora<br />
continuare l’operazione di visualizzazione o modifi ca dei parametri relativi all’evento<br />
o tornare all’elenco dei parametri Rtc premendo il pulsante .<br />
Durante la fascia di on o di off dell’uscita selezionata con il parametro H8 è possibile<br />
disattivare o attivare l’uscita tramite tastiera e comunque restano valide tutte le<br />
altre s<strong>org</strong>enti di accensione/spegnimento (switch porta, switch tenda, sensore luce,<br />
tastiera… ).<br />
Attenzione: E’ possibile utilizzare anche solo uno degli eventi, accensione o<br />
spegnimento, nel qual caso l’evento rispettivamente di spegnimento o<br />
accensione potrà essere attivato dall’utente (esempio: si potrà avere<br />
l’accensione automatica delle luci la mattina e il loro spegnimento <strong>manual</strong>e da<br />
tastiera, quando l’utente lascia il locale).<br />
Gli eventi temporizzati ton e toF di accensione e/o spegnimento di luce o aux (in<br />
funzione del parametro H8) sono attivi anche nello stato di off.<br />
E’ possibile utilizzare anche solo uno degli eventi, innalzamento del setpoint (toF)<br />
o normale (ton), nel qual caso resterà al valore determinato dall’evento (esempio:<br />
innalzamento dell setpoint alla sera).<br />
Gli eventi temporizzati ‘ton’e ‘toF’ di innalzamento del setpoint o normale (in<br />
funzione dell’attivazione con il parametro ‘H9’) sono attivi anche nello stato di off.<br />
Potrà, quindi, capitare che, se il setpoint è quello normale in off, se un avento di<br />
innalzamento del setpoint si verifi ca durante lo stato di off, alla riaccensione sarà<br />
‘St’+‘r4’.<br />
La modifi ca del setpoint avviene in corrispondenza degli eventi ton e toF;<br />
all’accensione si ha quello normale fi no al verifi carsi del primo evento toF<br />
programmato.<br />
tc: Impostazione Data/Ora Rtc<br />
Attraverso questo parametro è possibile impostare la data/ora del Real Time Clock<br />
interno.<br />
Selezionando il parametro tc e premendo Set si accede ad un sottomenù,<br />
all’interno del quale, muovendosi con aux o def<br />
, è possibile visualizzare e<br />
impostare anno, mese, giorno del mese, giorno della settimana, ora e minuto<br />
correnti.<br />
y03 def M03 def d06 def u04 def h11 def m56<br />
nell’esempio si è impostato: Giovedì 6 Marzo 03 ore 11.56 dove:<br />
‘y__’: indica l’anno (0…99);<br />
‘M__’: indica il mese (1…12) dove Gennaio=1…Dicembre=12;<br />
‘d__’: indica il giorno del mese (1...31);<br />
‘u__’: indica il giorno della settimana (1...7) dove Lunedì=1…Domenica=7;<br />
‘h__’: indica l’ora (0...23);<br />
‘m__’: indica il minuto (0...59).<br />
Per impostare i parametri di settaggio dell’ Rtc si segua la stessa procedura descritta<br />
nei parametri td1... td8.<br />
Questi parametri hanno effetto immediato, ovvero vengono salvati<br />
indipendentemente dalla pressione di 5 secondi del tasto Set .<br />
L’allarme EtC indica una procedura legata al funzionamento dell’orologio, viene<br />
generato quando il malfunzionamento si presentata per più di 3 volte consecutive.<br />
Nel caso un malfunzionamento, pur non avendo generato un errore EtC, abbia<br />
impedito di leggere correttamente l’ora attuale, le funzioni legate all’orologio (calcolo<br />
off time, attivazione defrost su fascia oraria) saranno temporaneamente sospese o<br />
eseguite con riferimento all’ultima ora letta correttamente. Le letture dell’orologio si<br />
ripetono con periodo di 5 secondi.<br />
All’accensione si assume come data e ora Sabato (6) 01/01/00 ore 00:00.<br />
Per eliminare l’errore EtC basta regolare l’orologio tramite gli opportuni parametri.<br />
Nota: Se appare l’errore EtCe poi si spegne il sistema alla riaccensione l’errore EtC<br />
non sarà più presente perché corretto dalla precedente accensione.<br />
‘d__’=9 => from Monday to Saturday<br />
‘d__’=10 => Saturday and Sunday<br />
‘d__’=11 => all days<br />
Setting ‘h__’ (0 to 23), ‘m__’ (0 to 59) sets the hour and minutes of the event.<br />
Default: ‘d__’=0, h__=0, m__=0 => Event disabled<br />
Pressing Set temporarily saves the changes to the parameter and returns to the<br />
submenu for setting the event.<br />
The display or modifi cation of the parameters corresponding to the event can be<br />
continued, or return to the list of RTC parameters by pressing .<br />
During the ON or OFF band of the output selected with parameter H8, you can<br />
disable or enable the output with the keypad, and, in any event, all other ON/OFF<br />
sources remain valid: door switch, curtain switch, keypad….<br />
Important: Just one of the ON or OFF events can be used, in which case the user<br />
can enable the OFF or ON event (for example: the lights can be set to go on<br />
automatically and be turned off <strong>manual</strong>ly from the keypad, when leaving the<br />
premises).<br />
The ton and toF timed light or aux ON and OFF events (according to parameter<br />
H8) are also active in OFF status.<br />
It is possible to use just one of the events, increase set point (toF) or normal (ton),<br />
in which case the set point will remain at the value determined by the event<br />
(example: increase the set point in the evening).<br />
The timed ‘ton’ and ‘toF’ events, increase the set point or normal (according to the<br />
setting of parameter ‘H9’) are also active in OFF status.<br />
Consequently, if the set point is normal when off, if an increase set point event<br />
occurs during the OFF status, when re-starting the set point will be ‘St’+‘r4’.<br />
The set point is modifi ed corresponding of the ton and toF events; on power-up the<br />
set point is normal, until the fi rst programmed toF event occurs.<br />
tc: RTC date/time setting<br />
This parameter is used be set the date/time of the internal Real Time Clock.<br />
Selecting the parameter tc and pressing the Set button accesses a submenu<br />
in which the aux or def<br />
button can be used to display and set the current year,<br />
month, day of the month, day of the week, hour and minute.<br />
y03 def M03 def d06 def u04 def h11 def m56<br />
the following are set in the example: Thursday 6 March 03 at 11.56 hours, where:<br />
‘y__’: indicates the year (0 to 99);<br />
‘M__’: indicates the month (1 to 12) where January=1…December=12;<br />
‘d__’: indicates the day of the month (1...31);<br />
‘u__’: indicates the day of the week (1...7) where Monday=1…Sunday=7;<br />
‘h__’: indicates the hour (0...23);<br />
‘m__’: indicates the minutes (0...59).<br />
To set the RTC parameters, follow the procedure as described for parameters td1...td8.<br />
These parameters have an immediate effect, that is, they are saved without having<br />
to press the Set button for 5 seconds.<br />
The EtC alarm is generated when the malfunction occurs more than 3 consecutive<br />
times. If a malfunction, despite not having generated an EtC error, has prevented<br />
the correct reading of the current time, the clock functions (off time calculation,<br />
defrost activation on time bands) will be temporarily suspended or performed with<br />
reference to the last time read correctly. The clock readings are repeated every 5<br />
seconds.<br />
On power-up, the date and time are set to Saturday (6) 01/01/00 at 00:00 hours.<br />
To cancel the EtC error, simply set the clock using the appropriate parameters.<br />
Note: If the EtC error appears and the system is then switched off, on re-start the<br />
EtC will no longer be present, being corrected by the previous start-up.<br />
71<br />
+030220140 - rel. 1.2 - del 06-06-2005
7.10 Tabella riassuntiva dei parametri di<br />
funzionamento<br />
U.M. = Unità di misura; Def. = Valore di fabbrica.<br />
72<br />
7.10 Summary table of operating parameters<br />
UOM = Unit of measure; Def. = Default value.<br />
N° Cod. Parametro/Parameter MSYF U.M. Tipo/ Def. Max Min<br />
Type<br />
Pw password/password MSYF - C 22 200 0<br />
1 /2 Stabilità misura/Measurement stability MSYF - C 4 15 1<br />
2 /3 Rallentamento visualizzazione sonda/Probe display response MSYF - C 0 15 0<br />
3 /4 Sonda virtuale/Virtual probe MSYF - C 0 100 0<br />
4 /5 Selezione °C o °F/Select °C or °F MSYF fl ag C 0 1 0<br />
5 /6 Punto decimale/Decimal point MSYF fl ag C 0 1 0<br />
6 /tI Visualizzazione su terminale interno/Display on internal terminal MSYF - C 1 6 1<br />
7 /tE Visualizzazione su terminale esterno/Display on external terminal MSYF - C 0 6 0<br />
8 /P Selezione tipo di sonda/Select type of probe MSYF - C 0 2 0<br />
9 /A2 Confi gurazione sonda 2<br />
Confi guration of probe 2<br />
M-YF<br />
-S--<br />
-<br />
-<br />
C<br />
C<br />
2<br />
2<br />
4<br />
4<br />
0<br />
0<br />
10 /A3 Confi gurazione sonda 3/Confi guration of probe 3 MSYF - C 0 4 0<br />
11 /A4 Confi gurazione sonda 4/Confi guration of probe 4 MSYF - C 0 4 0<br />
12 /c1 Calibrazione sonda 1/Calibration of probe 1 MSYF °C/°F C 0.0 20 -20<br />
13 /c2 Calibrazione sonda 2/Calibration of probe 2 MSYF °C/°F C 0.0 20 -20<br />
14 /c3 Calibrazione sonda 3/Calibration of probe 3 MSYF °C/°F C 0.0 20 -20<br />
15 /c4 Calibrazione sonda 4/Calibration of probe 4 MSYF °C/°F C 0.0 20 -20<br />
16 St Set point temperatura/Temperature set point MSYF °C/°F F 0.0 r2 r1<br />
17 rd Delta regolatore/Control delta -SYF °C/°F F 2.0 20 0.1<br />
18 rn Zona neutra/Dead band -SYF °C/°F C 4.0 60 0.0<br />
19 rr Delta regolatore reverse con zona neutra/Reverse differential for control with dead band -SYF °C/°F C 2.0 20 0.1<br />
20 r1 Set minimo ammesso/Minimum set point allowed MSYF °C/°F C -50 r2 -50<br />
21 r2 Set massimo ammesso/Maximum set point allowed MSYF °C/°F C 60 200 r1<br />
22 r3 Modalità di funzionamento/Operating mode -SYF fl ag C 0 2 0<br />
23 r4 Variazione automatica set point notturno/Automatic night-time set point variation MSYF °C/°F C 3.0 20 -20<br />
24 r5 Abilitazione monitoraggio temperatura/Enable temperature monitoring MSYF fl ag C 0 1 0<br />
25 rt Intervallo monitoraggio temperatura/Temperature monitoring interval MSYF ore F - 999 0<br />
26 rH Massima temperatura letta/Maximum temperature read MSYF °C/°F F - - -<br />
27 rL Minima temperatura letta/Minimum temperature read MSYF °C/°F F - - -<br />
28 c0 Ritardo start compressore, fan e aux in regolazione con zona neutra all’accensione<br />
-SYF min C 0 15 0<br />
Comp. and fan delay on start-up<br />
29 c1 Tempo minimo tra accensioni successive/Minimum time between successive starts -SYF min C 0 15 0<br />
30 c2 Tempo minimo di Off del compressore/Minimum compressor OFF time -SYF min C 0 15 0<br />
31 c3 Tempo minimo di On del compressore/Minimum compressor ON time -SYF min C 0 15 0<br />
32 c4 Duty setting/Duty setting -SYF min C 0 100 0<br />
33 cc Durata ciclo continuo/Continuous cycle duration -SYF ore C 0 15 0<br />
34 c6 Esclusione allarme dopo ciclo continuo/Alarm bypass after continuous cycle -SYF ore C 2 15 0<br />
35 c7 Tempo massimo di pump down/Maximum pump down time -SYF sec C 0 900 0<br />
36 c8 Ritardo start comp. dopo apert. valvola PD/Comp. start delay after open PD valve -SYF sec C 5 60 0<br />
37 c9 Abil. funz. di autostart con funz.in PD/Enable autostart function in PD -SYF fl ag C 0 1 0<br />
38 c10 Selez. pump down a tempo o pressione/Select Pump down by time or pressure -SYF fl ag C 0 1 0<br />
39 c11 Ritardo secondo compressore/Second compressor delay -SYF sec C 4 250 0<br />
40 d0 Tipo di defrost/Type of defrost -SYF fl ag C 0 4 0<br />
41 dI Intervallo tra i defrost/Interval between defrosts -SYF ore F 8 250 0<br />
42 dt1 Temperatura di fi ne defrost evap./End defrost temperature, evaporator -SYF °C/°F F 4.0 200 -50<br />
43 dt2 Temperatura di fi ne defrost evap. aux/End defrost temperature, aux evap. -SYF °C/°F F 4.0 200 -50<br />
44 dP1 Durata massima defrost evap./Maximum defrost duration, evaporator -SYF min F 30 250 1<br />
45 dP2 Durata massima defrost evap. aux/Maximum defrost duration, aux evap. -SYF min F 30 250 1<br />
46 d3 Ritardo inserimento defrost/Defrost start delay -SYF Min C 0 250 0<br />
47 d4 Abilitazione defrost allo start up/Enable defrost on start-up -SYF fl ag C 0 1 0<br />
48 d5 Ritardo defrost allo start up/Defrost delay on start-up -SYF min C 0 250 0<br />
49 d6 Blocco display durante il defrost/Display on hold during defrost -SYF - C 1 2 0<br />
50 dd Tempo di gocciolamento dopo il defrost/Dripping time after defrost -SYF min F 2 15 0<br />
51 d8 Esclusione allarmi dopo il defrost/Alarm bypass after defrost -SYF ore F 1 15 0<br />
52 d9 Priorità defrost su protezioni compressore/Defrost priority over compressor protectors -SYF fl ag C 0 1 0<br />
53 d/1 Visualizzazione sonda defrost/Display of defrost probe 1 MSYF °C/°F F - - -<br />
54 d/2 Visualizzazione sonda defrost/Display of defrost probe 2 MSYF °C/°F F - - -<br />
55 dC Base dei tempi per defrost/Time base for defrost -SYF fl ag C 0 1 0<br />
56 d10 Running time del compressore/Compressor running time -SYF ore C 0 250 0<br />
57 d11 Soglia di temperatura di running time/Running time temperature threshold -SYF °C/°F C 1.0 20 -20<br />
58 d12 Defrost avanzati/Advanced defrost -SYF - C 0 3 0<br />
59 dn Durata nominale defrost/Nominal defrost duration -SYF - C 65 100 1<br />
60 dH Fattore proporzionale variaziazione di dI/Proportional factor, variation in dI -SYF - C 50 100 0<br />
61 A0 Differenziale allarmi e ventole/Alarm and fan differential MSYF °C/°F C 2.0 20 0.1<br />
62 A1 Tipo di soglia AL e AH/Type of threshold ‘AL’ and ‘AH’ MSYF fl ag C 0 1 0<br />
63 AL Soglia di allarme di bassa temperatura/Low temperature alarm threshold MSYF °C/°F F 0.0 200 -50<br />
64 AH Soglia di allarme di alta temperatura/High temperature alarm threshold MSYF °C/°F F 0.0 200 -50<br />
65 Ad Ritardo allarme bassa e alta temperatura/Low and high temperature signal delay MSYF min F 120 250 0<br />
66 A4 Confi gurazione ingresso digitale 1<br />
Digital input 1 confi guration<br />
-SYF<br />
M---<br />
-<br />
-<br />
C<br />
C<br />
0<br />
0<br />
14<br />
14<br />
0<br />
0<br />
67 A5 Confi gurazione ingresso digitale 2/Digital input 2 confi guration MSYF - C 0 14 0<br />
68 A6 Blocco compressore da allarme esterno/Stop compressor from external alarm -SYF min C 0 100 0<br />
69 A7 Ritardo rilevazione allarme esterno/External alarm detection delay -SYF min C 0 250 0<br />
70 A8 Abilitazione allarmi Ed1 ed Ed2/Enable alarms ‘Ed1’ and ‘Ed2’ -SYF fl ag C 0 1 0<br />
71 Ado Modalità gestione luce con switch porta/Light management mode with door switch MSYF fl ag C 0 1 0<br />
72 Ac Allarme alta temperatura condensatore/High condenser temperature alarm -SYF °C/°F C 70.0 200 0.0<br />
73 AE Differenziale allarme alta temp. cond./High condenser temperature alarm differential -SYF °C/°F C 5.0 20 0.1<br />
74 Acd Ritardo allarme alta temperatura condens./High condenser temperature alarm differential -SYF min C 0 250 0<br />
75 AF Tempo spegnimento con sensore di luce/Light sensor OFF time -SYF sec C 0 250 0<br />
76 ALF Soglia di allarme antifreeze/Antifreeze alarm threshold MSYF °C/°F C -5.0 200 -50<br />
+030220140 - rel. 1.2 - del 06-06-2005
77 AdF Ritardo allarme antifreeze/Antifreeze alarm delay MSYF min C 1 15 0<br />
78 F0 Gestione ventola/Fan management ---F fl ag C 0 2 0<br />
79 F1 Temperatura accensione ventola/Fan start temperature ---F °C/°F F 5.0 200 -50<br />
80 F2 Ventola Off con compressore Off/Fan OFF with compressor OFF ---F fl ag C 1 1 0<br />
81 F3 Ventole in sbrinamento/Fans in defrost ---F fl ag C 1 1 0<br />
82 Fd Spegnimento ventole dopo gocciolamento/Fan OFF after dripping ---F min F 1 15 0<br />
83 F4 Temperatura spegnimento ventola cond./Condenser fan stop temperature MSYF °C/°F C 40 200 -50<br />
84 F5 Differenziale accensione ventole cond./Condenser fan start differential MSYF °C/°F C 5.0 20 0.1<br />
85 H0 Indirizzo seriale/Serial address MSYF - C 1 207 0<br />
86 H1 Funzionalità relè 4/Function of relay 4 MSYF fl ag C 1 13 0<br />
87 H2 Disabilitazione tastiera/Ir/Disable keypad/IR MSYF fl ag C 1 6 1<br />
88 H3 Codice abilitazione telecomando/Remote control enabling code MSYF - C 0 255 0<br />
89 H4 Disabilitazione buzzer/Disable buzzer MSYF fl ag C 0 1 0<br />
90 H6 Blocco tasti/Lock keypad MSYF - C 0 255 0<br />
91 H8 Selezione uscita attivazione con fascia oraria/Select activation of output with time band MSYF fl ag C 0 1 0<br />
92 HPr Profi lo di stampa/Print profi le MSYF - C 0 15 0<br />
93 H9 Abilitazione variazione del set point con fascia oraria<br />
MSYF fl ag C 0 1 0<br />
Enable set point variation with time band<br />
94 Hdn Numero set parametri di default disponibili<br />
MSYF - C 0 6 0<br />
Number of sets of default parameters available<br />
95 Hdh Offset anti-sweat heater/Anti-sweat heater offset MSYF °C/°F C 0.0 200 -50<br />
96 HrL abilitazione a remotare lo stato del relè luce del master<br />
MSYF fl ag C 0 1 0<br />
Enable remote master light relay status<br />
97 HrA abilitazione a remotare lo stato del relè luce del master<br />
MSYF fl ag C 0 1 0<br />
Enable remote master light relay status<br />
98 HsA abilitazione allarmi di altri dispositivi della rete locale<br />
MSYF fl ag C 0 1 0<br />
Enable alarm from other devices in the local network<br />
99 In stabilisce se l’unità è normale, master o slave/Select normal, master or slave unit MSYF - C 0 6 0<br />
100 HAn Numero di eventi HA intervenuti/Number of HA events recorded MSYF - C 0 15 0<br />
101 HA<br />
y__<br />
M__<br />
d__<br />
h__<br />
n__<br />
t__<br />
Data/ora dell’ ultimo evento HA/Date/time of last HA event<br />
Anno/Year<br />
Mese/Month<br />
Giorno/Day<br />
Ora/Hour<br />
Minuto/Minute<br />
Durata/Duration<br />
MSYF<br />
****<br />
****<br />
****<br />
****<br />
****<br />
****<br />
-<br />
Anni/Years<br />
Mesi/Months<br />
Giorni/Days<br />
Ore/Hours<br />
Min./Minutes<br />
Ore/Hours<br />
C<br />
*<br />
*<br />
*<br />
*<br />
*<br />
*<br />
0<br />
0<br />
0<br />
0<br />
0<br />
0<br />
-<br />
99<br />
12<br />
7<br />
23<br />
59<br />
99<br />
-<br />
0<br />
1<br />
1<br />
0<br />
0<br />
0<br />
102 HA1<br />
y__<br />
M__<br />
d__<br />
h__<br />
n__<br />
t__<br />
Data/ora del penultimo evento HA/Date/time of penultimate HA event<br />
Anno/Year<br />
Mese/Month<br />
Giorno/Day<br />
Ora/Hour<br />
Minuto/Minute<br />
Durata/Duration<br />
MSYF<br />
****<br />
****<br />
****<br />
****<br />
****<br />
****<br />
-<br />
Anni/Years<br />
Mesi/Months<br />
Giorni/Days<br />
Ore/Hours<br />
Min./Minutes<br />
Ore/Hours<br />
103 HA2<br />
y__<br />
M__<br />
d__<br />
h__<br />
n__<br />
t__<br />
Data/ora del terzultimo evento HA/Date/time of third-to-last HA event<br />
Anno/Year<br />
Mese/Month<br />
Giorno/Day<br />
Ora/Hour<br />
Minuto/Minute<br />
Durata/Duration<br />
MSYF<br />
****<br />
****<br />
****<br />
****<br />
****<br />
****<br />
-<br />
Anni/Years<br />
Mesi/Months<br />
Giorni/Days<br />
Ore/Hours<br />
Min./Minutes<br />
Ore/Hours<br />
C<br />
*<br />
*<br />
*<br />
*<br />
*<br />
*<br />
-<br />
0<br />
0<br />
0<br />
0<br />
0<br />
0<br />
-<br />
99<br />
12<br />
7<br />
23<br />
59<br />
99<br />
-<br />
0<br />
1<br />
1<br />
0<br />
0<br />
0<br />
104 HFn Numero di eventi HF intervenuti/Number of HF events recorded MSYF - C 0 15 0<br />
105 HF<br />
y__<br />
M__<br />
d__<br />
h__<br />
n__<br />
t__<br />
106 HF1<br />
y__<br />
M__<br />
d__<br />
h__<br />
n__<br />
t__<br />
Data/ora dell’ ultimo evento HF/Date/time of last HF event<br />
Anno/Year<br />
Mese/Month<br />
Giorno/Day<br />
Ora/Hour<br />
Minuto/Minute<br />
Durata/Duration<br />
Data/ora del penultimo evento HF/Date/time of penultimate HF event<br />
Anno/Year<br />
Mese/Month<br />
Giorno/Day<br />
Ora/Hour<br />
Minuto/Minute<br />
Durata/Duration<br />
MSYF<br />
****<br />
****<br />
****<br />
****<br />
****<br />
****<br />
MSYF<br />
****<br />
****<br />
****<br />
****<br />
****<br />
****<br />
-<br />
Anni/Years<br />
Mesi/Months<br />
Giorni/Days<br />
Ore/Hours<br />
Min./Minutes<br />
Ore/Hours<br />
-<br />
Anni/Years<br />
Mesi/Months<br />
Giorni/Days<br />
Ore/Hours<br />
Min./Minutes<br />
Ore/Hours<br />
107 HF2<br />
y__<br />
M__<br />
d__<br />
h__<br />
n__<br />
t__<br />
Data/ora del terzultimo evento HF/Date/time of third-to-last HF event<br />
Anno/Year<br />
Mese/Month<br />
Giorno/Day<br />
Ora/Hour<br />
Minuto/Minute<br />
Durata/Duration<br />
MSYF<br />
****<br />
****<br />
****<br />
****<br />
****<br />
****<br />
-<br />
Anni/Years<br />
Mesi/Months<br />
Giorni/Days<br />
Ore/Hours<br />
Min./Minutes<br />
Ore/Hours<br />
C<br />
*<br />
*<br />
*<br />
*<br />
*<br />
*<br />
0<br />
0<br />
0<br />
0<br />
0<br />
0<br />
0<br />
-<br />
99<br />
12<br />
7<br />
23<br />
59<br />
99<br />
-<br />
0<br />
1<br />
1<br />
0<br />
0<br />
0<br />
108 Htd Ritardo allarme HACCP/HACCP alarm delay MSYF min C 0 250 0<br />
109 td1<br />
d__<br />
h__<br />
n__<br />
110 td2<br />
d__<br />
h__<br />
n__<br />
Fascia oraria defrost 1/Defrost time band 1<br />
Giorno/Day<br />
Ora/Hour<br />
Minuto/Minute<br />
Fascia oraria defrost 2/Defrost time band 2<br />
Giorno/Day<br />
Ora/Hour<br />
Minuto/Minute<br />
-SYF<br />
****<br />
****<br />
****<br />
-SYF<br />
****<br />
****<br />
****<br />
-<br />
Giorni/Days<br />
Ore/Hours<br />
Min./Minutes<br />
-<br />
Giorni/Days<br />
Ore/Hours<br />
Min./Minutes<br />
C<br />
*<br />
*<br />
*<br />
*<br />
*<br />
*<br />
C<br />
*<br />
*<br />
*<br />
*<br />
*<br />
*<br />
C<br />
*<br />
*<br />
*<br />
*<br />
*<br />
*<br />
C<br />
*<br />
*<br />
*<br />
C<br />
*<br />
*<br />
*<br />
-<br />
0<br />
0<br />
0<br />
0<br />
0<br />
0<br />
-<br />
0<br />
0<br />
0<br />
0<br />
0<br />
0<br />
-<br />
0<br />
0<br />
0<br />
0<br />
0<br />
0<br />
-<br />
0<br />
0<br />
0<br />
-<br />
0<br />
0<br />
0<br />
-<br />
99<br />
12<br />
7<br />
23<br />
59<br />
99<br />
-<br />
99<br />
12<br />
7<br />
23<br />
59<br />
99<br />
-<br />
99<br />
12<br />
7<br />
23<br />
59<br />
99<br />
-<br />
11<br />
23<br />
59<br />
-<br />
11<br />
23<br />
59<br />
-<br />
0<br />
1<br />
1<br />
0<br />
0<br />
0<br />
-<br />
0<br />
1<br />
1<br />
0<br />
0<br />
0<br />
-<br />
0<br />
1<br />
1<br />
0<br />
0<br />
0<br />
-<br />
0<br />
0<br />
0<br />
-<br />
0<br />
0<br />
0<br />
73<br />
+030220140 - rel. 1.2 - del 06-06-2005
111 td3<br />
d__<br />
h__<br />
n__<br />
112 td4<br />
d__<br />
h__<br />
n__<br />
113 td5<br />
d__<br />
h__<br />
n__<br />
114 td6<br />
d__<br />
h__<br />
n__<br />
115 td7<br />
d__<br />
h__<br />
n__<br />
116 td8<br />
d__<br />
h__<br />
n__<br />
117 ton<br />
d__<br />
h__<br />
n__<br />
118 ton<br />
d__<br />
h__<br />
n__<br />
119 tc<br />
y__<br />
M__<br />
d__<br />
h__<br />
n__<br />
t__<br />
Fascia oraria defrost 3/Defrost time band 3<br />
Giorno/Day<br />
Ora/Hour<br />
Minuto/Minute<br />
Fascia oraria defrost 4/Defrost time band 4<br />
Giorno/Day<br />
Ora/Hour<br />
Minuto/Minute<br />
Fascia oraria defrost 5/Defrost time band 5<br />
Giorno/Day<br />
Ora/Hour<br />
Minuto/Minute<br />
Fascia oraria defrost 6/Defrost time band 6<br />
Giorno/Day<br />
Ora/Hour<br />
Minuto/Minute<br />
Fascia oraria defrost 7/Defrost time band 7<br />
Giorno/Day<br />
Ora/Hour<br />
Minuto/Minute<br />
Fascia oraria defrost 8/Defrost time band 8<br />
Giorno/Day<br />
Ora/Hour<br />
Minuto/Minute<br />
Fascia oraria accensione luce/aux/Light/aux on time band<br />
Giorno/Day<br />
Ora/Hour<br />
Minuto/Minute<br />
Fascia oraria spegnimento luce/aux/Light/aux off time band<br />
Giorno/Day<br />
Ora/Hour<br />
Minuto/Minute<br />
Impostazione Data/Ora Rtc/RTC date/time setting<br />
Anno/Year<br />
Mese/Month<br />
Giorno del mese/Day of the month<br />
Giorno della settimana/Day of the week<br />
Ora/Hour<br />
Minuto/Minute<br />
-SYF<br />
****<br />
****<br />
****<br />
-SYF<br />
****<br />
****<br />
****<br />
-SYF<br />
****<br />
****<br />
****<br />
-SYF<br />
****<br />
****<br />
****<br />
-SYF<br />
****<br />
****<br />
****<br />
-SYF<br />
****<br />
****<br />
****<br />
-SYF<br />
****<br />
****<br />
****<br />
-SYF<br />
****<br />
****<br />
****<br />
MSYF<br />
****<br />
****<br />
****<br />
****<br />
****<br />
****<br />
-<br />
Giorni/Days<br />
Ore/Hours<br />
Min./Minutes<br />
-<br />
Giorni/Days<br />
Ore/Hours<br />
Min./Minutes<br />
-<br />
Giorni/Days<br />
Ore/Hours<br />
Min./Minutes<br />
-<br />
Giorni/Days<br />
Ore/Hours<br />
Min./Minutes<br />
-<br />
Giorni/Days<br />
Ore/Hours<br />
Min./Minutes<br />
-<br />
Giorni/Days<br />
Ore/Hours<br />
Min./Minutes<br />
-<br />
Giorni/Days<br />
Ore/Hours<br />
Min./Minutes<br />
-<br />
Giorni/Days<br />
Ore/Hours<br />
Min./Minutes<br />
-<br />
Anni/Years<br />
Mesi/Months<br />
Giorni/Days<br />
Giorni/Days<br />
Ore/Hours<br />
Min./Minute<br />
C<br />
*<br />
*<br />
*<br />
C<br />
*<br />
*<br />
*<br />
C<br />
*<br />
*<br />
*<br />
C<br />
*<br />
*<br />
*<br />
C<br />
*<br />
*<br />
*<br />
C<br />
*<br />
*<br />
*<br />
C<br />
*<br />
*<br />
*<br />
C<br />
*<br />
*<br />
*<br />
C<br />
0<br />
1<br />
1<br />
6<br />
0<br />
0<br />
-<br />
0<br />
0<br />
0<br />
-<br />
0<br />
0<br />
0<br />
-<br />
0<br />
0<br />
0<br />
-<br />
0<br />
0<br />
0<br />
-<br />
0<br />
0<br />
0<br />
-<br />
0<br />
0<br />
0<br />
-<br />
0<br />
0<br />
0<br />
-<br />
0<br />
0<br />
0<br />
-<br />
0<br />
1<br />
1<br />
6<br />
0<br />
0<br />
-<br />
11<br />
23<br />
59<br />
-<br />
11<br />
23<br />
59<br />
-<br />
11<br />
23<br />
59<br />
-<br />
11<br />
23<br />
59<br />
-<br />
11<br />
23<br />
59<br />
-<br />
11<br />
23<br />
59<br />
-<br />
11<br />
23<br />
59<br />
-<br />
11<br />
23<br />
59<br />
-<br />
99<br />
12<br />
31<br />
7<br />
23<br />
59<br />
-<br />
0<br />
0<br />
0<br />
-<br />
0<br />
0<br />
0<br />
-<br />
0<br />
0<br />
0<br />
-<br />
0<br />
0<br />
0<br />
-<br />
0<br />
0<br />
0<br />
-<br />
0<br />
0<br />
0<br />
-<br />
0<br />
0<br />
0<br />
-<br />
0<br />
0<br />
0<br />
-<br />
0<br />
1<br />
1<br />
1<br />
0<br />
0<br />
Tab. 7.10.1<br />
8. TABELLE ALLARMI E SEGNALAZIONI<br />
8. TABLES OF ALARMS AND SIGNALS<br />
8.1 Tabella allarmi e segnalazioni: display, buzzer<br />
e relè.<br />
Di seguito la tabella che riporta gli allarmi e le segnalazioni del controllo, con una<br />
loro descrizione, lo stato del buzzer, del relè di allarme e la modalità di ripristino.<br />
8.1 Table of alarms and signals: display, buzzer<br />
and relay.<br />
The following table describes the alarms and signals on the controller, with their<br />
description, the status of the buzzer, the alarm relay and the reset mode.<br />
Codice Icona sul display Relè allarme Buzzer Ripristino Descrizione<br />
rE<br />
lampeggiante<br />
attivo attivo automatico sonda virtuale di regolazione guasta<br />
E0<br />
lampeggiante<br />
spento spento automatico sonda ambiente S1 guasta<br />
E1<br />
lampeggiante<br />
spento spento automatico sonda sbrinamento S2 guasta<br />
E2<br />
lampeggiante<br />
spento spento automatico sonda S3 guasta<br />
E3<br />
lampeggiante<br />
spento spento automatico sonda S4 guasta<br />
E4<br />
lampeggiante<br />
spento spento automatico sonda S5 guasta<br />
‘___’ Nessuna spento spento automatico sonda non abilitata<br />
LO<br />
lampeggiante<br />
attivo attivo automatico allarme bassa temperatura<br />
HI<br />
lampeggiante<br />
attivo attivo automatico allarme alta temperatura<br />
AFr<br />
lampeggiante<br />
attivo attivo <strong>manual</strong>e allarme antifreeze<br />
IA<br />
lampeggiante<br />
attivo attivo automatico allarme immediato da contatto esterno<br />
dA<br />
lampeggiante<br />
attivo attivo automatico allarme ritardato da contatto esterno<br />
dEF<br />
acceso<br />
spento spento automatico sbrinamento in esecuzione<br />
Ed1 Nessuna spento spento automatico/<strong>manual</strong>e sbrinamento su evaporatore 1 terminato per timeout<br />
Ed2 Nessuna spento spento automatico/<strong>manual</strong>e sbrinamento su evaporatore 2 terminato per timeout<br />
Pd<br />
lampeggiante<br />
attivo attivo automatico/<strong>manual</strong>e allarme tempo massimo di Pump Down<br />
LP<br />
lampeggiante<br />
attivo attivo automatico/<strong>manual</strong>e allarme di bassa pressione<br />
AtS<br />
lampeggiante<br />
attivo attivo automatico/<strong>manual</strong>e autostart in Pump Down<br />
cht Nessuna spento spento automatico/<strong>manual</strong>e preallarme alta temperatura condensatore<br />
CHT<br />
lampeggiante<br />
attivo attivo <strong>manual</strong>e allarme alta temperatura condensatore<br />
dor<br />
lampeggiante<br />
attivo attivo automatico allarme porta aperta per troppo tempo<br />
74<br />
+030220140 - rel. 1.2 - del 06-06-2005
Etc<br />
lampeggiante<br />
spento spento automatico Real Time Clock guasto<br />
EE<br />
lampeggiante<br />
spento spento automatico errore E_prom parametri macchina<br />
EF<br />
lampeggiante<br />
spento spento automatico errore E_prom parametri di funzionamento<br />
HA<br />
lampeggiante<br />
spento spento automatico allarme HACCP di tipo HA<br />
HF<br />
lampeggiante<br />
spento spento automatico allarme HACCP di tipo HF<br />
rCt Nessuna spento spento automatico strumento abilitato alla programmazione da telecomando<br />
Add Nessuna spento spento automatico procedura di assegnazione automatica indirizzo in corso<br />
Prt Nessuna spento spento automatico stampa del report in corso<br />
LrH Nessuna spento spento automatico attivazione della procedura di bassa umidità relativa<br />
HrH Nessuna spento spento automatico attivazione della procedura di alta umidità relativa<br />
ccb Segnalazione richiesta inizio ciclo continuo<br />
ccE Segnalazione richiesta fi ne ciclo continuo<br />
dFb Segnalazione richiesta inizio sbrinamento<br />
dFE Segnalazione richiesta fi ne sbrinamento<br />
On Segnalazione passaggio a stato di on<br />
off Segnalazione passaggio a stato di off<br />
rES Segnalazione reset allarmi a ripristino <strong>manual</strong>e<br />
reset allarmi HACCP<br />
reset monitoraggio temperatura<br />
n1 - n6<br />
lampeggiante<br />
attivo attivo automatico Indica allarme sull’unità 1-6 presente nella rete.<br />
dnL Segnalazione Segnala download in corso<br />
d1 - d6<br />
lampeggiante<br />
spento spento Segnala download con errori sull’unità 1-6.<br />
Il Buzzer viene attivato se abilitato dal parametro H4.<br />
Il relè di allarme viene attivato se l’uscita ausiliaria 1 (H1) è stata assegnata a tale<br />
funzione.<br />
Nota: il buzzer viene disattivato dal sistema di supervisione CAREL.<br />
Tab. 8.1.1<br />
Code Icon on the display Alarm relay Buzzer Reset Description<br />
rE<br />
fl ashing<br />
active active automatic virtual control probe fault<br />
E0<br />
fl ashing<br />
off off automatic room probe S1 fault<br />
E1<br />
fl ashing<br />
off off automatic defrost probe S2 fault<br />
E2<br />
fl ashing<br />
off off automatic probe S3 fault<br />
E3<br />
fl ashing<br />
off off automatic probe S4 fault<br />
E4<br />
fl ashing<br />
off off automatic probe S5 fault<br />
‘___’ no off off automatic probe not enabled<br />
LO<br />
fl ashing<br />
active active automatic low temperature alarm<br />
HI<br />
fl ashing<br />
active active automatic high temperature alarm<br />
AFr<br />
fl ashing<br />
active active <strong>manual</strong> antifreeze alarm<br />
IA<br />
fl ashing<br />
active active automatic immediate alarm from external contact<br />
dA<br />
fl ashing<br />
active active automatic delayed alarm from external contact<br />
dEF<br />
on<br />
off off automatic defrost running<br />
Ed1 no off off automatic/<strong>manual</strong> defrost on evaporator 1 ended by timeout<br />
Ed2 no off off automatic/<strong>manual</strong> defrost on evaporator 2 ended by timeout<br />
Pd<br />
fl ashing<br />
active active automatic/<strong>manual</strong> maximum pump down time alarm<br />
LP<br />
fl ashing<br />
active active automatic/<strong>manual</strong> low pressure alarm<br />
AtS<br />
fl ashing<br />
active active automatic/<strong>manual</strong> autostart in pump down<br />
cht no off off automatic/<strong>manual</strong> high condenser temperature pre-alarm<br />
CHT<br />
fl ashing<br />
active active <strong>manual</strong> high condenser temperature alarm<br />
dor<br />
fl ashing<br />
active active automatic door open too long alarm<br />
Etc<br />
fl ashing<br />
off off automatic real time clock fault<br />
EE<br />
fl ashing<br />
off off automatic E_prom error, unit parameters<br />
EF<br />
fl ashing<br />
off off automatic E_prom error, operating parameters<br />
HA<br />
fl ashing<br />
off off automatic HACCP alarm, HA<br />
HF<br />
fl ashing<br />
off off automatic HACCP alarm, HF<br />
rCt no off off automatic instrument enabled for programming from the remote control<br />
Add no off off automatic automatic address assignment procedure in progress<br />
Prt no off off automatic printing report<br />
LrH no off off automatic activation of low relative humidity procedure<br />
HrH no off off automatic activation of high relative humidity procedure<br />
ccb Signal start continuous cycle request<br />
ccE Signal end continuous cycle request<br />
dFb Signal start defrost request<br />
dFE Signal end defrost request<br />
On Signal switch to ON<br />
off Signal switch to OFF<br />
rES Signal reset alarms with <strong>manual</strong> reset<br />
reset HACCP alarms<br />
reset temperature monitoring<br />
n1 - n6<br />
fl ashing<br />
active active automatic Indicates an alarm on unit 1 to 6 present in the network<br />
dnL Signal signals download in progress<br />
d1 - d6<br />
fl ashing<br />
off off signals download with errors on unit 1 to 6<br />
75<br />
Tab. 8.1.1<br />
+030220140 - rel. 1.2 - del 06-06-2005
The buzzer sounds if enabled by parameter H4.<br />
The alarm relay is activated if auxiliary output 1 (H1) has been assigned the alarm<br />
relay function.<br />
Note: the buzzer is not affected by the CAREL supervisory system.<br />
8.2 Tabella allarmi e segnalazioni: funzionalità<br />
abilitate/disabilitate.<br />
Di seguito la tabella che evidenzia le funzionalità abilitate e disabilitate nelle varie<br />
situazioni d’allarme.<br />
8.2 Table of alarms and signals: functions<br />
enabled/disabled.<br />
The following table highlights the functions that are enabled and disabled in the<br />
various alarm situations.<br />
Codice Valvola PD<br />
Compressore<br />
Sbrinamento<br />
Ventilatori evap. Ventilatori cond. Ciclo continuo<br />
Code PD valve<br />
Compressor<br />
Defrost<br />
Evap. fans Cond. fans Cont. cycle<br />
rE Duty setting (c4)/Duty setting (c4) Duty setting (c4)/Duty setting (c4) invariato/unvaried invariato/unvaried invariato/unvaried invariato/unvaried<br />
E0 Duty setting (c4)/Duty setting (c4) Duty setting (c4)/Duty setting (c4) invariato/unvaried invariato/unvaried invariato/unvaried invariato/unvaried<br />
E1 invariato/unvaried invariato/unvaried invariato/unvaried invariato/unvaried invariato/unvaried invariato/unvaried<br />
E2 invariato/unvaried invariato/unvaried invariato/unvaried invariato/unvaried invariato/unvaried invariato/unvaried<br />
E3 invariato/unvaried invariato/unvaried invariato/unvaried invariato/unvaried invariato/unvaried invariato/unvaried<br />
E4 invariato/unvaried invariato/unvaried invariato/unvaried invariato/unvaried invariato/unvaried invariato/unvaried<br />
‘___’ invariato/unvaried invariato/unvaried invariato/unvaried invariato/unvaried invariato/unvaried invariato/unvaried<br />
LO invariato/unvaried invariato/unvaried invariato/unvaried invariato/unvaried invariato/unvaried invariato/unvaried<br />
HI invariato/unvaried invariato/unvaried invariato/unvaried invariato/unvaried invariato/unvaried invariato/unvaried<br />
AFr spento/off spento/off invariato/unvaried invariato/unvaried invariato/unvaried invariato/unvaried<br />
IA Duty Setting (A6)/Duty setting (A6) Duty setting (A6)/Duty setting (A6) invariato/unvaried invariato/unvaried invariato/unvaried invariato/unvaried<br />
dA Duty setting (A6) se A70 Duty setting (A6) se A70 invariato/unvaried invariato/unvaried invariato/unvaried invariato/unvaried<br />
Duty setting (A6) if A70 Duty setting (A6) if A70<br />
dEF invariato/unvaried invariato/unvaried invariato/unvaried invariato/unvaried invariato/unvaried invariato/unvaried<br />
Ed1 invariato/unvaried invariato/unvaried invariato/unvaried invariato/unvaried invariato/unvaried invariato/unvaried<br />
Ed2 invariato/unvaried invariato/unvaried invariato/unvaried invariato/unvaried invariato/unvaried invariato/unvaried<br />
Pd invariato/unvaried invariato/unvaried invariato/unvaried invariato/unvaried invariato/unvaried invariato/unvaried<br />
LP spento spento/off invariato/unvaried invariato/unvaried invariato/unvaried invariato/unvaried<br />
Ats invariato/unvaried invariato/unvaried invariato/unvaried invariato/unvaried invariato/unvaried invariato/unvaried<br />
cht invariato/unvaried invariato/unvaried invariato/unvaried invariato/unvaried invariato/unvaried invariato/unvaried<br />
CHt spento spento/off invariato/unvaried invariato/unvaried invariato/unvaried invariato/unvaried<br />
dor invariato/unvaried invariato/unvaried invariato/unvaried invariato/unvaried invariato/unvaried invariato/unvaried<br />
Etc invariato/unvaried invariato/unvaried invariato/unvaried invariato/unvaried invariato/unvaried invariato/unvaried<br />
EE spento spento/off invariato/unvaried spenti/off spenti/off invariato/unvaried<br />
EF spento spento/off non eseguito/not performed spento/off spento/off non eseguito/not performed<br />
HA invariato/unvaried invariato/unvaried invariato/unvaried invariato/unvaried invariato/unvaried invariato/unvaried<br />
HF invariato/unvaried invariato/unvaried invariato/unvaried invariato/unvaried invariato/unvaried invariato/unvaried<br />
n1-n6 invariato/unvaried invariato/unvaried invariato/unvaried invariato/unvaried invariato/unvaried invariato/unvaried<br />
dnL invariato/unvaried invariato/unvaried invariato/unvaried invariato/unvaried invariato/unvaried invariato/unvaried<br />
d1 - d6 invariato/unvaried invariato/unvaried invariato/unvaried invariato/unvaried invariato/unvaried invariato/unvaried<br />
Codice/Code aux zona neutra<br />
aux in dead band<br />
aux luce anti-sweat<br />
aux light in anti-sweat<br />
aux ausiliario anti sweat<br />
aux auxiliary in anti sweat<br />
aux secondo gradino<br />
aux in second step<br />
rE spento/off spento/off spento/off Duty setting (C4)/Duty setting (C4)<br />
E0 spento/off spento/off spento/off Duty setting (C4)/Duty setting (C4)<br />
E1 invariato/unvaried invariato/unvaried invariato/unvaried invariato/unvaried<br />
E2 invariato/unvaried invariato/unvaried invariato/unvaried invariato/unvaried<br />
E3 invariato/unvaried invariato/unvaried invariato/unvaried invariato/unvaried<br />
E4 invariato/unvaried invariato /unvaried invariato/unvaried invariato/unvaried<br />
‘___’ invariato/unvaried invariato/unvaried invariato/unvaried invariato/unvaried<br />
LO invariato/unvaried invariato/unvaried invariato/unvaried invariato/unvaried<br />
HI invariato/unvaried spento/off spento/off invariato/unvaried<br />
AFr invariato/unvaried invariato/unvaried invariato/unvaried spento/off<br />
IA spento/off spento/off spento/off Duty setting (A6)/Duty setting (A6)<br />
dA spento se A70/off if A70 spento se A70/off if A70 spento se A70/off if A70 Duty setting (A6) se A70/Duty setting (A6) if A70<br />
dEF invariato/unvaried invariato/unvaried invariato/unvaried invariato/unvaried<br />
Ed1 invariato/unvaried invariato/unvaried invariato/unvaried invariato/unvaried<br />
Ed2 invariato/unvaried invariato/unvaried invariato/unvaried invariato/unvaried<br />
Pd invariato/unvaried invariato/unvaried invariato/unvaried invariato/unvaried<br />
LP invariato/unvaried invariato/unvaried invariato/unvaried spento/off<br />
Ats invariato/unvaried invariato/unvaried invariato/unvaried invariato/unvaried<br />
cht invariato/unvaried invariato/unvaried invariato/unvaried invariato/unvaried<br />
CHt spento/off spento/off invariato/unvaried spento/off<br />
dor invariato/unvaried invariato/unvaried invariato/unvaried invariato/unvaried<br />
Etc invariato/unvaried invariato/unvaried invariato/unvaried invariato/unvaried<br />
EE spento/off spento/off spento/off spento/off<br />
EF spento/off spento/off spento/off spento/off<br />
HA invariato/unvaried invariato/unvaried invariato/unvaried invariato/unvaried<br />
HF invariato/unvaried invariato/unvaried invariato/unvaried invariato/unvaried<br />
n1 - n6 invariato/unvaried invariato/unvaried invariato/unvaried invariato/unvaried<br />
dnL invariato/unvaried invariato/unvaried invariato/unvaried invariato/unvaried<br />
d1 - d6 invariato/unvaried invariato/unvaried invariato/unvaried invariato/unvaried<br />
Tab. 8.2.1<br />
Tab. 8.2.2<br />
76<br />
+030220140 - rel. 1.2 - del 06-06-2005
9 SUPERVISIONE<br />
Il controllo supporta il protocollo seriale standard CAREL .<br />
9.1 Procedura assegnazione semiautomatica<br />
indirizzi in rete CAREL<br />
La procedura di assegnazione semiautomatica degli indirizzi nella rete CAREL è<br />
eseguita da un programma su PC che gestisce le varie fasi.<br />
9.1.1 Fase 1, acquisizione dello stato della rete<br />
Partendo da una rete già installata, è necessario acquisirne lo stato.<br />
Il programma su PC provvederà a “fotografare” la rete CAREL, interrogando tutti gli<br />
indirizzi possibili e registrando quelli fi sicamente presenti.<br />
Il programma potrà anche fare riferimento alla tabella di descrizione della rete,<br />
salvata alla fi ne della precedente installazione e recuperare, per gli indirizzi già<br />
assegnati, anche la loro descrizione e tipologia.<br />
Esempio:<br />
Indirizzo Linea Descrizione Tipo di macchina<br />
1 1 Latticini IR32<br />
5 1 Carne IRMPX<br />
7 1 Surgelati IR32<br />
Tab. 9.1.1.1<br />
Eventuali nuovi controlli, non presenti in tabella, alla fi ne della scansione della rete<br />
compariranno senza descrizione. Sarà possibile per l’utente integrare la descrizione<br />
stessa.<br />
Esempio:<br />
Indirizzo Linea Descrizione Tipo di macchina<br />
1 1 Latticini IR32<br />
2 1 Latticini 3 PB<br />
5 1 Carne IRMPX<br />
7 1 Surgelati IR32<br />
Tab. 9.1.1.2<br />
9.1.2 Fase 2, assegnazione semiautomatica degli indirizzi<br />
A questo punto vanno aggiunti i controlli che si intende gestire in rete.<br />
Nel programma viene lanciata la procedura di assegnazione semiautomatica indirizzi,<br />
inviando in rete il comando:<br />
<br />
con = 0 in modo che venga ricevuto da tutti i controlli.<br />
Questo comando è eseguito solamente dal controllo che si trova nello stato di<br />
assegnazione indirizzo, al ricevimento del quale l’unità:<br />
• memorizza il nuovo indirizzo seriale;<br />
• spedisce il pacchetto di risposta al PC;<br />
• visualizza a display l’indirizzo ricevuto;<br />
• esce dalla procedura di assegnazione indirizzo.<br />
Il comando, ricevuto da uno strumento con 0, assegna all’indirizzo seriale<br />
il nuovo valore contenuto in .<br />
Risposta al PC è la stessa della richiesta di versione software :<br />
[]<br />
In questo modo il programma su PC riesce ad aggiornare la tabella con il tipo di<br />
macchina, automaticamente.<br />
L’utente, da parte sua, avrà provveduto ad annotare la corrispondenza tra indirizzo<br />
assegnato dalla procedura semiautomatica e descrizione del controllo.<br />
Esempio:<br />
Indirizzo Linea Descrizione Tipo di macchina<br />
1 1 Latticini IR32<br />
2 1 Latticini 3 IR32<br />
3 1 Latticini 2 PB<br />
4 1 Carne 2 IRMPX<br />
5 1 Carne IRMPX<br />
7 1 Surgelati IR32<br />
Tab. 9.1.1.3<br />
Al termine dell’assegnazione degli indirizzi l’utente potrà aggiornare le descrizioni dei<br />
nuovi controlli inseriti.<br />
I controlli ir33 entreranno nello stato di assegnazione indirizzo con la seguente<br />
sequenza di operazioni:<br />
• pressione di Set e per 5 secondi;<br />
• impostazione della password 66;<br />
• pressione di Set .<br />
A questo punto lo strumento visualizzerà il messaggio Add. Al ricevimento del nuovo<br />
77<br />
9. SUPERVISION<br />
The controller supports the CAREL standard serial protocol.<br />
9.1 Semi-automatic procedure for assigning<br />
addresses in the CAREL network<br />
The semi-automatic procedure for assigning the addresses in the CAREL network is<br />
performed using a program running on a PC that manages the various phases.<br />
9.1.1 Phase 1, acquisition of network status<br />
Starting off from a pre-installed network, the network status must be acquired.<br />
The program on the PC will scan the CAREL network, interrogating all the possible<br />
addresses and recording those that are physically present.<br />
The program also refers to the network description table, saved at the end of the<br />
previous installation and then recovered, regarding the addresses already assigned,<br />
and their description and type.<br />
Example:<br />
Address Line Description Type of unit<br />
1 1 Dairy IR32<br />
5 1 Meat IRMPX<br />
7 1 Frozen IR32<br />
Tab. 9.1.1.1<br />
Any new controllers not present in the table will appear without description at the<br />
end of the scan. The user can then add the description.<br />
Example:<br />
Address Line Description Type of unit<br />
1 1 Dairy IR32<br />
2 1 Dairy 3 PB<br />
5 1 Meat IRMPX<br />
7 1 Frozen IR32<br />
Tab. 9.1.1.2<br />
9.1.2 Phase 2, semi-automatic assignment of the addresses<br />
At this point, the controllers to be included in the network must be added.<br />
The program runs the automatic address assignment procedure, sending the<br />
following command in the network;<br />
<br />
Where = 0 so that the command is received by all the controllers.<br />
This is performed only by the controller in address assignment status, and when the<br />
command is received, the unit:<br />
• saves the new serial address,<br />
• sends the response packet to the PC,<br />
• displays the address received;<br />
• qexits the address assignment procedure.<br />
The command, received from an instrument with 0, assigns the new<br />
value contained in for the serial address.<br />
The response to the PC is the same as the request for the software version :<br />
[]<br />
In this way, the program on the PC automatically updates the table with the type<br />
of unit.<br />
The user will have noted the whether the address assigned by the semi-automatic<br />
procedure corresponds to the description of the controller.<br />
Example:<br />
Address Line Description Type of unit<br />
1 1 Dairy IR32<br />
2 1 Dairy 3 IR32<br />
3 1 Dairy 2 PB<br />
4 1 Meat 2 IRMPX<br />
5 1 Meat IRMPX<br />
7 1 Frozen IR32<br />
Tab. 9.1.1.3<br />
At the end of the address assignment procedure, the user can update the<br />
descriptions of the new controllers installed.<br />
The ir33 controllers can enter address assignment status with the following<br />
sequence of operations:<br />
• pressing Set and for 5 seconds;<br />
• setting the password 66;<br />
• pressing Set .<br />
Now the instrument displays the Add. message. When it receives the new address, it<br />
+030220140 - rel. 1.2 - del 06-06-2005
indirizzo mostrerà a display il valore dello stesso per 5 secondi.<br />
La procedura di assegnazione indirizzo ha un timeout fi sso di 60 secondi.<br />
9.1.3 Fase 3, spostamento indirizzi<br />
La terza fase permette all’utente di modifi care o di cambiare gli indirizzi seriali assegnati<br />
ai controlli, passando per indirizzi liberi utilizzati come temporanei.<br />
Esempio:<br />
Indirizzo Linea Descrizione Tipo di macchina<br />
1 1 Latticini IR32<br />
2 1 Latticini 2 IR32<br />
3 1 Latticini 3 IR32<br />
5 1 Carne IRMPX<br />
6 1 Carne 2 IRMPX<br />
7 1 Surgelati IR32<br />
Tab. 9.1.1.4<br />
Con alcuni controlli lo spostamento degli indirizzi non è possibile (in quanto l’indirizzo<br />
seriale non è modifi cabile da supervisore o impostato meccanicamente): in questo<br />
caso il programma segnalerà l’impossibilità ad eseguire le funzioni richieste.<br />
9.1.4 Fase 4, generazione tabelle<br />
Una volta confi gurata la rete sarà possibile generare automaticamente i seguenti fi le:<br />
• driver.ini (defi nendo i parametri di comunicazione con una opportuna<br />
maschera);<br />
• driver.cct;<br />
• .ncf per PlantVisor;<br />
• descrizione della rete (inclusi i parametri di comunicazione).<br />
will show its value for 5 seconds on the display.<br />
The address assignment procedure has a fi xed timeout of 60 seconds.<br />
9.1.3 Phase 3, changing addresses<br />
In the third phase, the use can modify or change the serial addresses assigned to<br />
the controls, changing over to free addresses for temporary use.<br />
Example:<br />
Address Line Description Type of unit<br />
1 1 Dairy IR32<br />
2 1 Dairy 2 IR32<br />
3 1 Dairy 3 IR32<br />
5 1 Meat IRMPX<br />
6 1 Meat 2 IRMPX<br />
7 1 Frozen IR32<br />
Tab. 9.1.1.4<br />
For some controllers the addresses cannot be changed (as the serial address is not<br />
modifi able via the supervisor or is set mechanically). In this case, the program will<br />
signal that the desired functions cannot be performed.<br />
9.1.4 Phase 4, table generation<br />
When the network has been confi gured, the following fi les are generated<br />
automatically:<br />
• driver.ini (defi ning the communication parameters on a special screen);<br />
• driver. cct;<br />
• .ncf for PlantVisor;<br />
• description of the network (including the communication parameters).<br />
10. SPECIFICHE E CONNESSIONI<br />
10.1 Caratteristiche elettriche<br />
Alimentazione<br />
Isolamento garantito dall’alimentazione<br />
Ingressi<br />
Tipo sonda<br />
Modello Tensione Potenza<br />
E<br />
A<br />
H<br />
L<br />
O<br />
E, A, H<br />
O, L<br />
S1<br />
S2<br />
D11<br />
S3<br />
D12<br />
S4<br />
230 V~ (+10…-15%), 50/60 Hz<br />
115 V~ (+10…-15%), 50/60 Hz<br />
115...230 V~ (+10...-15%), 50/60 Hz<br />
12...24 V~ (+10...-15%), 50/60 Hz<br />
12 Vdc da 12 a 30 Vdc<br />
12 V~ (+10…-15%), 50/60 Hz<br />
12 Vdc da12 a 18 Vdc<br />
isolamento rispetto alla bassissima tensione<br />
isolamento rispetto alle uscite relè<br />
isolamento rispetto alla bassissima tensione<br />
isolamento rispetto alle uscite relè<br />
NTC o PTC a seconda del modello<br />
NTC o PTC a seconda del modello<br />
contatto pulito, resistenza contatto < 10 Ω, corrente di chiusura 6 mA<br />
NTC o PTC a seconda del modello<br />
contatto pulito, resistenza contatto < 10 Ω, corrente di chiusura 6 mA<br />
NTC o PTC a seconda del modello<br />
3 VA, 25 mA~ max<br />
3 VA, 50 mA~ max<br />
6 VA, 50 mA~ max<br />
3 VA, 300 mA~ max<br />
Trasformatore TRA12VDE00<br />
fusibile nel secondario 315 mA ritardato<br />
4 VA, 300 mA~ max<br />
Trasformatore TRADR4W012<br />
fusibile nel secondario 315 mA ritardato<br />
rinforzato<br />
6 mm in aria, 8 mm superfi ciali<br />
3750 V isolamento<br />
principale<br />
3 mm in aria, 4 mm superfi ciali<br />
1250 V isolamento<br />
da garantire esternamente con trasformatore di sicurezza<br />
rinforzato<br />
6 mm in aria, 8 mm superfi ciali<br />
3750 V isolamento<br />
Distanza massima sonde ed ingressi digitali minore di 10 mt.<br />
Nota: nell’installazione si raccomanda di tenere separati i collegamenti di alimentazione e dei carichi dai cavi delle sonde, ingressi digitali,<br />
display ripetitore e supervisore.<br />
NTC std. CAREL<br />
NTC high temperature<br />
PTC std. CAREL (modello<br />
specifi co)<br />
10 k Ω a 25 °C, range da –50T90 °C<br />
errore di misura 1°C nel range da –50T50 °C<br />
3°C nel range da +50T90 °C<br />
50 kΩ a 25 °C, range da –40 T150 °C<br />
errore di misura 1,5 °C nel range da –20T115 °C<br />
4 °C nel range esterno –20T115 °C<br />
985 Ω a 0 °C, range da –50T150 °C<br />
errore di misura 2 °C nel range –50T50 °C<br />
4°C nel range +50T150 °C<br />
78<br />
+030220140 - rel. 1.2 - del 06-06-2005
a seconda del modello<br />
Uscite relè EN60730-1 UL 873<br />
250 V~ cicli di manovra 250 V~ cicli di manovra<br />
5 A slim 5 (1) A 100000 5A res 1FLA 6LRA C300 30000<br />
5 A 5 (1) A 100000 5A res 1FLA 6LRA C300 30000<br />
8 A 8 (4) A su N.O.<br />
6 (4) A su N.C. 100000 8A res 2FLA 12LRA C300 30000<br />
2 (2) A su N.O. e N.C.<br />
16 A 10 (4) A fi no a 60 °C su N.O.<br />
12 (2) A su N.O. e N.C. 100000 12A res 5FLA 30LRA C300 30000<br />
2HP 10 (10) A 100000 12A res 12FLA 72LRA 30000<br />
isolamento rispetto la bassissima tensione rinforzato<br />
6 mm in aria, 8 superfi ciali<br />
isolamento tra le uscite relè indipendenti<br />
3750 V isolamento<br />
principale<br />
3 mm in aria, 4 superfi ciali<br />
1250 V isolamento<br />
Connessioni Tipo connessione Sezione Corrente massima<br />
a vite fi ssi per cavi da 0,5 a 2,5 mm 2 12A<br />
estraibile per blocchetti a vite<br />
faston con contatto a crimpare<br />
Il corretto dimensionamento dei cavi di alimentazione e di collegamento tra lo strumento e i carichi è a cura dell’istallatore.<br />
A seconda del modello la massima corrente nei morsetti comuni 1 e 3 è di 12 A.<br />
Nel caso di utilizzo del controllo alla massima temperatura di funzionamento e a pieno carico utilizzare cavi con temperatura massima di<br />
funzionamento di almeno 105 °C.<br />
Contenitore plastico E, A dimensioni 34,4x76,2x65 mm<br />
0, L, H 34,4x76,2x79 mm<br />
E, A profondità incasso 56,5 mm<br />
0, L, H 70,5 mm<br />
Montaggio a pannello mediante staffe di fi ssaggio laterali<br />
dima di foratura<br />
29x71mm<br />
Display<br />
cifre visualizzazione<br />
stati di funzionamento<br />
3 digit LED da -99 a 999<br />
indicati con icone grafi che sul display<br />
Tastiera<br />
4 tasti in gomma siliconica<br />
Ricevitore infrarossi<br />
opzionale in funzione del modello<br />
Orologio con batteria tampone<br />
opzionale in funzione del modello<br />
Buzzer<br />
presente in tutti i modelli<br />
Orologio<br />
errore a 25°C<br />
errore nel range di temperatura –10/60 °C<br />
invecchiamento<br />
Tempo di scarica<br />
Tempo di ricarica<br />
± 10ppm (±5,3min/anno)<br />
- 50ppm (-27min/anno)<br />
< ±5ppm (±2,7min/anno)<br />
6 mesi typico (8 mesi massimo)<br />
5 ore tipico (< di 8 ore massimo)<br />
Temperatura di funzionamento -10T60 °C<br />
Umidità di funzionamento<br />
Power supply<br />
Insulation guaranteed by the<br />
power supply<br />
Inputs<br />
Probe types<br />
10. SPECIFICATIONS AND CONNECTIONS<br />
10.1 Electrical specifications<br />
Model Voltage Power<br />
E<br />
A<br />
H<br />
L<br />
O<br />
E, A, H<br />
O, L<br />
S1<br />
S2<br />
D11<br />
S3<br />
D12<br />
S4<br />
230 V~ (+10…-15%), 50/60 Hz<br />
115 V~ (+10…-15%), 50/60 Hz<br />
115...230 V~ (+10...-15%), 50/60 Hz<br />
12...24 V~ (+10...-15%), 50/60 Hz<br />
12 Vdc da 12 a 30 Vdc<br />
12 V~ (+10…-15%), 50/60 Hz<br />
12 Vdc da12 a 18 Vdc<br />
insulation from very low voltage parts<br />
insulation from relay outputs<br />
insulation from very low voltage parts<br />
insulation from relay outputs<br />
NTC or PTC, depending on the model<br />
NTC or PTC, depending on the model<br />
voltage-free contact, contact resistance < 10 Ω, closing current 6 mA<br />
NTC or PTC, depending on the model<br />
voltage-free contact, contact resistance < 10 Ω, closing current 6 mA<br />
NTC or PTC, depending on the model<br />
3 VA, 25 mA~ max<br />
3 VA, 50 mA~ max<br />
6 VA, 50 mA~ max<br />
3 VA, 300 mA~ max<br />
Transformer TRA12VDE00<br />
315 mA slow-blow fuse in the secondary<br />
4 VA, 300 mA~ max<br />
Traco TRADR4W012<br />
315 mA slow-blow fuse in the secondary<br />
reinforced<br />
6 mm in air, 8 mm on surface<br />
3750V insulation<br />
primary<br />
3 mm in air, 4 mm on surface<br />
1,250V insulation<br />
to be guaranteed externally with safety<br />
transformer<br />
reinforced<br />
6 mm in air, 8 mm on surface<br />
3750 V insulation<br />
Maximum probe and digital input distance less than 10 m.<br />
Note: the power supply and load connections should be kept separate from the probe, digital input, repeater display and supervisor cables.<br />
NTC std. CAREL<br />
High temperature NTC<br />
Std. CAREL (specifi c model)<br />
10 k Ω at 25 °C, range from –50T90 °C<br />
measurement error: 1°C in the range –50T50 °C<br />
3°C in the range 50T90 °C<br />
50 k Ω at 25 °C, range -40T150 °C<br />
measurement error:<br />
1.5°C in the range -20T115°C<br />
4 °C in external range –20T115 °C<br />
985 Ω at 0°C, range –50T150 °C<br />
measurement error 2 °C in range –50T50 °C<br />
4 °C in the range 50T150 °C<br />
Relay outputs<br />
depending on the model<br />
EN60730-1 UL 873<br />
250 V~ operating cycles 250V~ operating cycles<br />
5 A slim 5 (1) A 100000 5A res 1FLA 6LRA C300 30000<br />
5 A 5 (1) A 100000 5A res 1FLA 6LRA C300 30000<br />
8 A 8 (4) A on N.O.<br />
6 (4) A on N.C. 100000 8A res 2FLA 12LRA C300 30000<br />
2 (2) A on N.O. e N.C.<br />
16 A 10 (4) A up to 60 °C su N.O.<br />
12 (2) A on N.O. e N.C. 100000 12A res 5FLA 30LRA C300 30000<br />
2HP 10 (10) A 100000 12A res 12FLA 72LRA 30000<br />
insulation from the very low voltage parts reinforced<br />
6 mm in air, 8 on surface<br />
3750 V insulation<br />
insulation between independent relay outputs primary<br />
3 mm in air, 4 on surface<br />
1,250 V insulation<br />
Connections Type of connection Cross-section Current maximum<br />
fi xed screw on for cables from 0.5 to 2.5 mm 2 12A<br />
removable for screw blocks<br />
faston with crimped contact<br />
Correct sizing of the power cables and connection between the instrument and the loads is the responsibility of the installer.<br />
The maximum current in common terminals 1 and 3 is 12 A according to model.<br />
If using the controller at maximum operating temperature and at full load, use cables with maximum operating temperature of at least 105 °C<br />
Case plastic E, A dimensions 34,4x76,2x65 mm<br />
0, L, H 34,4x76,2x79 mm<br />
E, A embedding depth 56,5 mm<br />
0, L, H 70,5 mm<br />
Installation panel mounting with side securing brackets<br />
Display<br />
drilling template<br />
digits display<br />
operating status<br />
3 digit LED from –99 to 999<br />
indicated with graphic icons on the display<br />
dimensions 29x71 mm<br />
80<br />
+030220140 - rel. 1.2 - del 06-06-2005
Keypad<br />
4 silicon rubber buttons<br />
Infrared receiver<br />
optional according to the model<br />
Clock with b buffer battery<br />
optional according to the model<br />
Buzzer<br />
available on all models<br />
error at 25 °C<br />
Clock<br />
error in the temperature range -10/60 °C<br />
ageing<br />
Discharge time<br />
Recharge time<br />
Operating temperature -10T60 °C<br />
Operating humidity<br />
Connessioni Tipo connessione Sezione Corrente massima<br />
a vite fi ssi 20 A per cavi da 0,5 a 2,5 mm 2 20 A<br />
a vite fi ssi<br />
12 A<br />
estraibile per blocchetti a vite<br />
Il corretto dimensionamento dei cavi di alimentazione e di collegamento tra lo strumento e i carichi è a cura dell’istallatore.<br />
A seconda del modello la massima corrente nei morsetti comuni 1 e 3 è di 12 A.<br />
Nel caso di utilizzo del controllo alla massima temperatura di funzionamento e a pieno carico utilizzare cavi con temperatura massima di<br />
funzionamento di almeno 105 °C.<br />
Contenitore plastico E, A dimensioni 34,4x76,2x79 mm<br />
E, A profondità incasso 70,5 mm<br />
Montaggio a pannello mediante staffe di fi ssaggio laterali<br />
dima di foratura<br />
29x71mm<br />
Display<br />
cifre visualizzazione<br />
stati di funzionamento<br />
3 digit LED da -99 a 999<br />
indicati con icone grafi che sul display<br />
Tastiera<br />
4 tasti in gomma siliconica<br />
Ricevitore infrarossi<br />
opzionale in funzione del modello<br />
Orologio con batteria tampone<br />
opzionale in funzione del modello<br />
Buzzer<br />
presente in tutti i modelli<br />
Orologio<br />
errore a 25°C<br />
errore nel range di temperatura –10/60 °C<br />
invecchiamento<br />
Tempo di scarica<br />
Tempo di ricarica<br />
± 10ppm (±5,3min/anno)<br />
- 50ppm (-27min/anno)<br />
< ±5ppm (±2,7min/anno)<br />
6 mesi typico (8 mesi massimo)<br />
5 ore tipico (< di 8 ore massimo)<br />
Temperatura di funzionamento -10T60 °C<br />
Umidità di funzionamento<br />
Relay outputs<br />
depending on the model<br />
EN60730-1 UL 873<br />
250 V~ operating cycles 250V~ operating cycles<br />
5 A slim 1 (1) A 100000 1 A res 1 FLA 6 LRA C 300 30000<br />
8 A 8 (4) A on N.O.<br />
6 (4) A on N.C. 100000 8 A res 2 FLA 12 LRA C 300 30000<br />
2 (2) A on N.O. e N.C.<br />
16 A 10 (4) A up to 60 °C su N.O.<br />
12 (2) A on N.O. e N.C. 100000 12 A res 5 FLA 30 LRA C 300 30000<br />
2HP 10 (10) A 100000 12 A res 12 FLA 72 LRA 30000<br />
insulation from the very low voltage parts reinforced<br />
6 mm in air, 8 on surface<br />
3750 V insulation<br />
insulation between independent relay outputs primary<br />
3 mm in air, 4 on surface<br />
1,250 V insulation<br />
Connections Type of connection Cross-section Current maximum<br />
fi xed screw on 20 A for cables from 0.5 to 2.5 mm 2 20 A<br />
fi xed screw on<br />
12 A<br />
removable for screw blocks<br />
Correct sizing of the power cables and connection between the instrument and the loads is the responsibility of the installer.<br />
The maximum current in common terminals 1 and 3 is 12 A according to model.<br />
If using the controller at maximum operating temperature and at full load, use cables with maximum operating temperature of at least 105 °C<br />
Case plastic E, A dimensions 34,4 x 76,2 x 79 mm<br />
E, A embedding depth 70,5 mm<br />
Installation panel mounting with side securing brackets<br />
Display<br />
Keypad<br />
Infrared receiver<br />
Clock with b buffer battery<br />
Buzzer<br />
Clock<br />
drilling template<br />
digits display<br />
operating status<br />
4 silicon rubber buttons<br />
optional according to the model<br />
optional according to the model<br />
available on all models<br />
error at 25 °C<br />
error in the temperature range -10/60 °C<br />
ageing<br />
Discharge time<br />
Recharge time<br />
Operating temperature -10T60 °C<br />
Operating humidity<br />
10.4 Connessioni<br />
Di seguito le connessioni per il montaggio dell’ ir33 a seconda del modello:<br />
Connessioni ir33: versione a trasformatore 230 Vac o 115 Vac.<br />
10.4 Connections<br />
The following are the connections for the assembly of ir33, according to model:<br />
ir33 connections: 230 Vac or 115 Vac transformer version.<br />
Fig. 10.4.1 Fig. 10.4.2<br />
Fig. 10.4.3 Fig. 10.4.4<br />
Fig. 10.4.5 Fig. 10.4.6<br />
Connessioni ir33: versioni a trasformatore 230Vac o 115Vac e relè da 16A<br />
ir33 connections: 230 Vac or 115 Vac with transformer and 16 A relay version<br />
Fig. 10.4.7 Fig. 10.4.8<br />
84<br />
+030220140 - rel. 1.2 - del 06-06-2005
Fig. 10.4.9<br />
Connessioni ir33: versioni switching 115…230Vac<br />
ir33 connections: 115 to 230Vac switching versions<br />
Fig. 10.4.10 Fig. 10.4.11<br />
Fig. 10.4.10 Fig. 10.4.11<br />
Fig. 10.4.12<br />
85<br />
+030220140 - rel. 1.2 - del 06-06-2005
Connessioni ir33: versioni switching 12Vac o 12…24Vac<br />
ir33 connections: 12 Vac or 12 to 24 Vac switching versions<br />
Fig. 10.4.13 Fig. 10.4.14<br />
Fig. 10.4.15 Fig. 10.4.16<br />
Fig. 10.4.17 Fig. 10.4.18<br />
Fig. 10.4.19 Fig. 10.4.20<br />
86<br />
+030220140 - rel. 1.2 - del 06-06-2005
Connessioni ir33 DIN:<br />
ir33 DIN connections:<br />
Fig. 10.4.21 Fig. 10.4.22<br />
Fig. 10.4.23 Fig. 10.4.24<br />
Fig. 10.4.25 Fig. 10.4.26<br />
Fig. 10.4.27<br />
87<br />
+030220140 - rel. 1.2 - del 06-06-2005
Connessioni ir33 powerline: versioni a trasformatore 230 Vac o 115 Vac, con<br />
connessione A, B, C, D.<br />
Contatti relè con comune condiviso con l alimentazione scheda:<br />
Modello M senza ausiliario/Model M without auxiliary<br />
ir33 powerline connections: versions with 230 Vac or 115 Vac transformer, with<br />
connection A, B, C, D.<br />
Relay contacts with common shared with board power supply:<br />
Modello M con ausiliario/Model M with auxiliary<br />
Fig. 10.4.28 Fig. 10.4.29<br />
Modello S senza ausiliario/Model S without auxiliary<br />
Modello S con ausiliario/Model S with auxiliary<br />
Fig. 10.4.30 Fig. 10.4.31<br />
Modello Y senza ausiliario/Model Y without auxiliary<br />
Modello Y con ausiliario/Model Y with auxiliary<br />
Fig. 10.4.32<br />
Modello F senza ausiliario/Model F without auxiliary<br />
Fig. 10.4.33<br />
Fig. 10.4.34<br />
CAREL si riserva la possibilità di apportare modifi che o cambiamenti ai propri<br />
prodotti senza alcun preavviso<br />
88<br />
CAREL reserves the right to modify or change its products without prior notice.<br />
+030220140 - rel. 1.2 - del 06-06-2005
Note<br />
89<br />
+030220140 - rel. 1.2 - del 06-06-2005
Note<br />
90<br />
+030220140 - rel. 1.2 - del 06-06-2005
Agenzia/Agency<br />
CAREL S.p.A.<br />
Via dell’Industria, 11 - 35020 Brugine - Padova (Italy)<br />
Tel. (+39) 049.9716611 - Fax (+39) 049.9716600<br />
e-mail: carel@carel.com - www.carel.com<br />
+030220140 - rel. 1.2 - del 06.06.2005