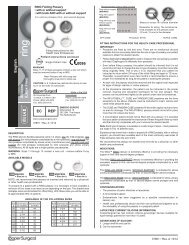
8200 ⢠Pipelle® Endometrial Suction Curette ... - CooperSurgical
8200 ⢠Pipelle® Endometrial Suction Curette ... - CooperSurgical
8200 ⢠Pipelle® Endometrial Suction Curette ... - CooperSurgical

Create successful ePaper yourself
Turn your PDF publications into a flip-book with our unique Google optimized e-Paper software.
<strong>8200</strong> • Pipelle ® <strong>Endometrial</strong> <strong>Suction</strong> <strong>Curette</strong><br />
Directions for Use (English)<br />
DESCRIPTION<br />
The Pipelle ® is a single-use, sterile, disposable, suction curette for obtaining<br />
a histologic biopsy of the uterine mucosal lining or sample extraction of uterine<br />
menstrual content for microscopic examination or culturing.<br />
The device consists of a clear, flexible, polypropylene sheath that is 26.5 cm<br />
(overall) 23.5 cm (effective) length with a 3.1 mm OD (Outside Diameter) and<br />
a 2.6 mm ID (Internal Diameter). The sheath is marked with colored, graduated<br />
markings from 4 cm to 10 cm, distance from the distal tip of the sheath to<br />
indicate the depth of insertion of the sheath into the uterus during use (see<br />
diagram below).<br />
A B 4 cm 8 cm C D E F<br />
7 cm 10 cm<br />
The 4, 7, 8, and 10 cm point depth markings on the sheath are accentuated<br />
and numbered. At 4 mm from the distal tip of the sheath is the center of the<br />
curette opening (A) which is 1.93 mm in diameter. This opening has sharp<br />
edges and leads to the lumen of the sheath. An EVA piston (B) affixed to the<br />
distal end of a soft acetal resin rod (E) can be moved forward and backward<br />
within almost the full length of the lumen of sheath. This is accomplished by<br />
manipulation of the knob (F) affixed to the proximal end of the piston rod which<br />
extends beyond the proximal end of the sheath. The piston is prevented from<br />
being totally pulled from within the sheath by means of an indentation (D) in<br />
the sheath located 1 cm from its proximal end. An orientation mark (C)<br />
indicates the position of the curette opening.<br />
Rapid movement of the piston within the sheath from its fully inserted position to<br />
its maximum retracted position creates a negative pressure (suction) within the<br />
lumen of the sheath. This negative pressure draws the mucosal tissue through<br />
the curette opening and into the lumen of the sheath as the curette scrapes<br />
against the endometrial wall while it is maneuvered within the uterine cavity.<br />
WARNINGS<br />
In patients with amenorrhea, obtaining an endometrial biopsy with the Pipelle<br />
should be performed only after confirmation of the absence of detectable<br />
circulating HCG levels.<br />
CAUTION<br />
U.S. Federal law restricts this device to sale by or on the order of a physician.<br />
INDICATIONS FOR USE<br />
Histologic biopsy of the epithelium and glandular mucosal layer (endometrium)<br />
of the uterine wall or sample extraction of uterine menstrual content for:<br />
• Detection of endometrial carcinoma and precancerous conditions<br />
37219 • Rev. B • 3/11
• Determination of endometrial tissue response to hormonal influences by<br />
visual observation of the histologic sample, such as:<br />
a. <strong>Endometrial</strong> dating<br />
b. Periodic scrutiny of the effects of hormonal therapy on the uterine<br />
endometrium, particularly in patients receiving estrogen replacement<br />
therapy for menopausal symptoms and prophylaxis of osteoporosis<br />
c. Luteal insufficiency (visually determined histologically from endometrial<br />
tissue obtained only during the secretory [progestational] phase of the<br />
menstrual cycle)<br />
d. Functional metrorrhagia (contraception, pre-menopause)<br />
• Diagnosis of pathology associated with infertility<br />
• Bacterial culturing to specifically identify causative uterine pathogens<br />
CONTRAINDICATIONS<br />
The Pipelle ® should not be used in patients who are pregnant or in patients<br />
suspected of being pregnant.<br />
PRECAUTIONS<br />
By virtue of its flexibility and small caliber, with the Pipelle a histologic<br />
endometrial biopsy can be performed with minimal danger of uterine wall<br />
perforation. However, care should be taken prior to its insertion to ascertain the<br />
depth of the uterus and any uterine retroflexion or anteflexion present in<br />
individual patients. Best clinical judgement should be used to allow for any<br />
variations from anatomical norms during insertion and in no case should the<br />
instrument be forced against digitally felt resistance.<br />
If passage of the Pipelle through the cervical canal is not found to be easily<br />
achievable, the instrument should not be forced and the possibility of the<br />
presence of pathologic cervical stenosis considered. With elderly patients in<br />
whom an extremely dry cervix may cause resistance to the instrument’s<br />
passage, very slight lubrication of the sheath with a sterile water soluble gel<br />
may facilitate its insertion.<br />
ADVERSE REACTIONS<br />
The following adverse reactions have been occasionally suspected or<br />
reported. The order of listing does not indicate frequency or severity.<br />
• Injury to uterus (perforation)<br />
• Cramping<br />
• Uterine spasm<br />
DIRECTIONS FOR USE<br />
1. Prepare the vagina and cervix using currently accepted antiseptic<br />
techniques as you would for any intrauterine procedure.<br />
2. With the vaginal speculum in place and open to expose the uterine cervix,<br />
gently probe the uterus for both its depth and direction with a uterine<br />
sound. DO NOT USE the Pipelle as a uterine sound. Then grasp the<br />
cervix with a very fine forceps or a tenaculum. If the uterus is anteverted,<br />
this grasp should be applied to the anterior lip of the cervix. If the uterus<br />
is retroverted, the grasp should be applied to the posterior lip of the cervix.<br />
If the uterus is normally positioned and the cervix is stable, it is possible<br />
that the use of forceps or a tenaculum may not be necessary.
3. Now withdraw the speculum approximately 2 cm and apply gentle traction<br />
to the forceps or tenaculum to straighten any cervical curvature and to<br />
stabilize the cervix.<br />
4. With the piston positioned at the extreme distal end of the sheath, the<br />
Pipelle ® is then inserted into and gently passed through the cervical canal<br />
and into the cavity of the uterus to a depth that corresponds to that which<br />
was determined by uterine depth finding (Figure 1). Slight friction can<br />
usually be felt with the fingers as the Pipelle<br />
passes through the internal cervical os. IN<br />
NO EVENT SHOULD FORCE BE USED to<br />
obtain passage if resistance is encountered.<br />
Slight lubrication of the sheath with a sterile<br />
water soluble gel may facilitate its passage<br />
in patients with an extremely dry or narrow<br />
cervical canal. If, as is usually not the case,<br />
negotiation of the cervical canal proves<br />
painful, brief topical use of an anaesthetic agent may help facilitate<br />
introduction of the Pipelle.<br />
5. When the sheath is in position within the uterine cavity, discontinue any<br />
traction you have applied with a tenaculum of forceps. Then, while holding<br />
the sheath in position with one hand, with the other hand rapidly pull the<br />
piston firmly and without interruption (with one swift steady motion) toward<br />
the proximal end of the sheath as far as it will go (Figure 2).<br />
NOTE: Slow interrupted or partial withdrawal of the piston will not produce<br />
the amount of negative pressure (suction) necessary to obtain the<br />
maximum tissue biopsy.<br />
An indentation in the wall<br />
of the sheath will prevent<br />
total withdrawal of the<br />
piston from within<br />
the sheath. This action<br />
creates a negative<br />
pressure (suction) within<br />
Figure 2<br />
Figure 1<br />
the sheath that draws the tissue into the curette opening at the distal end<br />
of the sheath and captures the separated tissue within its lumen.<br />
6. Immediately after pulling the piston the full permissible distance, the<br />
sheath should be continuously rotated 360° by rolling or twirling between<br />
the fingers while moving the sheath laterally and back and forth (in and<br />
out) between the fundus and internal os at least 3 or 4 times to obtain<br />
sample. It should then be gently withdrawn from the uterus (Figure 3).<br />
Examination of the sheath should then reveal a specimen of the uterine<br />
mucosa of histologic quality clearly visible within the sheath. Bleeding, if<br />
it occurs at all, is usually minimal.<br />
Figure 3<br />
For Best Results:<br />
At least 3 or 4 slow,<br />
spiralling passes<br />
between the fundus and<br />
internal os should be<br />
made before withdrawing<br />
the Pipelle from the<br />
uterus.
7. For histologic assessment of the specimen, the tip of the sheath should<br />
now be sectioned just proximal to its distal curette opening (Figure 4).<br />
The piston should then be advanced within the sheath to express the<br />
specimen from the sectioned sheath into an appropriate transport medium<br />
(Figure 5).<br />
Figure 4 Figure 5<br />
8. For bacterial culturing of the specimen, leave the piston in its fully<br />
withdrawn position and do not section the sheath at its distal curette<br />
opening. Immediately send the entire, intact instrument with the specimen<br />
captured within it to the laboratory with instructions to section the distal tip<br />
at a point at least 2 mm proximal to the distal curette opening and then to<br />
express the sample by use of the piston onto the appropriate culturing<br />
medium. Alternatively, immediately following biopsy, section the sheath<br />
just proximal to the distal curette opening and then, by advancing the<br />
piston, express the sample onto appropriate medium in a transport<br />
container and send it to the laboratory for culturing.<br />
EXPLANATION OF SYMBOLS<br />
REF Reorder Number<br />
LOT Batch Code<br />
Use By<br />
STERILE EO Ethylene Oxide Sterilized<br />
LATEX<br />
2<br />
!<br />
Latex Free<br />
Do Not Reuse<br />
ATTENTION:<br />
See instructions for use.<br />
CAUTION: U.S. Federal law restricts this device to sale<br />
by or on the order of a physician.<br />
Product conforms to the Medical Device<br />
Directive 93/42/EEC<br />
EC REP<br />
Authorized Representative in the European Community.<br />
Pipelle ® is a registered trademark of <strong>CooperSurgical</strong>, Inc.<br />
© 2011 <strong>CooperSurgical</strong>, Inc.<br />
Made in the USA<br />
95 Corporate Drive • Trumbull, CT 06611 USA<br />
Phone: (800) 243-2974 • Fax: (800) 262-0105<br />
International:<br />
Phone: (203) 601-9818<br />
Fax: (203) 601-4747<br />
www.coopersurgical.com<br />
EC REP<br />
Leisegang Feinmechanik GmbH<br />
Leibnizstraße 32<br />
D-10625, Berlin GERMANY<br />
37219 • Rev. B • 3/11
<strong>8200</strong> • Pipelle ® Endometrium-Saugkürette<br />
Gebrauchsanleitung (Deutsch / German)<br />
BESCHREIBUNG<br />
Die Pipelle ® ist eine sterile Einweg-Saugkürette zum Einmalgebrauch zur Gewinnung<br />
einer histologischen Biopsie der Gebärmutterschleimhaut oder zur Probenextraktion<br />
von Gebärmutterinhalten bei Menstruationsblutung zur mikroskopischen Untersuchung<br />
oder Kulturanzüchtung.<br />
Das Instrument besteht aus einem durchsichtigen, flexiblen Polypropylenschaft mit einer<br />
Gesamtlänge von 26,5 cm und einer effektiven Länge von 23,5 cm und einem<br />
Außendurchmesser von 3,1 mm und einem Innendurchmesser von 2,6 mm. Der Schaft<br />
ist mit farbigen Skalenmarkierungen im Abstand von 4 cm bis 10 cm von der distalen<br />
Spitze des Schafts versehen, die die Einschubtiefe des Schafts in der Gebärmutter<br />
während der Verwendung anzeigen (siehe nachstehendes Diagramm).<br />
A B<br />
4 cm 8 cm C D E F<br />
7 cm 10 cm<br />
Die Tiefenmarkierungen an den Punkten 4, 7, 8 und 10 cm sind hervorgehoben und<br />
nummeriert. Die Mitte der Kürettenöffnung (A) mit einem Durchmesser von 1,93 mm<br />
befindet sich 4 mm von der distalen Spitze des Schafts. Diese Öffnung weist scharfe<br />
Kanten auf und führt zum Schaftlumen. Ein EVA-Kolben (B), der am distalen Ende eines<br />
weichen Acetalharz-Stabs (E) befestigt ist, kann innerhalb der fast gesamten Länge des<br />
Schaftlumens vorwärts und rückwärts bewegt werden. Das erfolgt durch eine<br />
Manipulation des Knopfs (F), der am proximalen Ende des Kolbenstabs befestigt ist,<br />
der sich über das proximale Ende des Schafts hinaus erstreckt. Durch eine<br />
Vertiefung (D) im Schaft, die sich 1 cm vom proximalen Ende befindet, wird verhindert,<br />
dass der Kolben vollständig aus dem Schaft gezogen werden kann. Eine<br />
Orientierungsmarkierung (C) zeigt die Position der Kürettenöffnung an.<br />
Eine schnelle Bewegung des Kolbens im Schaft von der vollständig eingeschobenen<br />
Position bis zur maximal zurückgezogenen Position erzeugt einen Negativdruck<br />
(Saugwirkung) innerhalb des Schaftlumens. Durch diesen Negativdruck wird das<br />
Schleimhautgewebe durch die Kürettenöffnung in das Lumen des Schafts eingezogen,<br />
während die Kürette bei Bewegung in der Gebärmutterhöhle die Endometriumwand<br />
abschabt.<br />
WARNHINWEISE<br />
Bei Patientinnen mit Amenorrhö ist die Gewinnung einer Endometriumbiopsie mit der<br />
Pipelle-Kürette erst nach einer Bestätigung des Fehlens von nachweisbaren<br />
zirkulierenden HCG-Spiegeln durchzuführen.<br />
VORSICHT<br />
Laut US-Bundesgesetz ist der Verkauf dieses Produkts nur an Ärzte oder im Auftrag<br />
von Ärzten erlaubt.<br />
INDIKATIONEN<br />
Histologische Biopsie der Epithel- und Drüsenschleimhautschicht (Endometrium) der<br />
Gebärmutterwand oder Probenextraktion von Menstruationsinhalten der Gebärmutter zu<br />
folgenden Zwecken:<br />
• Nachweis von Endometriumkarzinom und präkanzerösen Zuständen<br />
37219 • Rev. B • 3/11
• Bestimmung des Ansprechens von Endometriumgewebe auf Hormoneinflüsse<br />
durch visuelle Beobachtung der histologischen Probe, z. B.:<br />
a. Endometrium-Datierung<br />
b. Regelmäßige Überprüfung der Effekte einer Hormontherapie auf das uterine<br />
Endometrium, insbesondere bei Patientinnen, die eine Östrogenersatztherapie<br />
für Wechseljahrsbeschwerden und zur Osteroporoseprophylaxe erhalten<br />
c. Lutealinsuffizienz (visuelle histologische Bestimmung aufgrund von<br />
Endometriumgewebe, das nur während der Sekretionsphase [gestagenen<br />
Phase] des Menstruationszyklus gewonnen wird)<br />
d. Funktionale Metrorrhagie (Kontrazeption, Präklimakterium)<br />
• Diagnose einer Pathologie in Verbindung mit Infertilität<br />
• Bakterienkultivierung zur spezifischen Identifikation von kausativen uterinen<br />
Pathogenen<br />
KONTRAINDIKATIONEN<br />
Die Pipelle ® Kürette darf nicht bei schwangeren oder vermutlich schwangeren<br />
Patientinnen angewendet werden.<br />
VORSICHTSMASSNAHMEN<br />
Aufgrund der Flexibilität und des geringen Durchmessers kann mit der Pipelle-Kürette<br />
eine histologische Endometriumbiopsie unter minimaler Gefahr einer Perforation der<br />
Gebärmutterwand durchgeführt werden. Vor der Einführung ist jedoch vorsichtig<br />
vorzugehen, um die Tiefe der Gebärmutter und eine etwaige Uterusretroflexion oder -<br />
anteflexion bei einzelnen Patientinnen festzustellen. Um bei der Einführung des<br />
Instruments etwaige Abweichungen von der anatomischen Norm zu berücksichtigen,<br />
sind Erfahrung und klinische Beurteilung gefordert. Auf keinen Fall darf das Instrument<br />
forciert werden, wenn mit den Fingern ein Widerstand verspürt wird.<br />
Wenn sich der Durchgang der Pipelle-Kürette durch den Zervikalkanal schwierig<br />
gestaltet, darf das Instrument nicht forciert werden und es sollte die Möglichkeit erwogen<br />
werden, dass eine pathologische Zervixstenose vorliegt. Bei älteren Patientinnen, bei<br />
denen die Einführung des Instruments durch eine extrem trockene Zervix behindert<br />
wird, kann der Einschub durch leichte Lubrikation des Schafts mit einem sterilen<br />
wasserlöslichen Gel erleichtert werden.<br />
UNERWÜNSCHTE REAKTIONEN<br />
Die folgenden unerwünschten Reaktionen wurden gelegentlich vermutet oder berichtet.<br />
Die Reihenfolge der Auflistung entspricht nicht der Häufigkeit oder Schwere.<br />
• Uterusverletzung (Perforation)<br />
• Krämpfe<br />
• Gebärmutterkrampf<br />
GEBRAUCHSANLEITUNG<br />
1. Bereiten Sie den Vaginalbereich und die Zervix wie für jeden anderen intrauterinen<br />
Eingriff mit Hilfe gegenwärtig anerkannten antiseptischen Techniken vor.<br />
2. Untersuchen Sie vorsichtig – wenn das Vaginalspekulum angelegt und geöffnet<br />
ist, so dass die Zervix freiliegt – die Tiefe und Ausrichtung der Gebärmutter mit<br />
einer Gebärmuttersonde. VERWENDEN SIE NICHT die Pipelle-Kürette als<br />
Gebärmuttersonde. Ergreifen Sie dann die Zervix mit einer sehr feinen Zange oder<br />
einer Hakenzange. Wenn der Uterus antevertiert ist, ist die Zervix an der anterioren<br />
Zervixlippe zu ergreifen. Wenn der Uterus retrovertiert ist, ist die Zervix an der<br />
posterioren Zervixlippe zu ergreifen. Wenn der Uterus normal positioniert ist und die<br />
Zervix stabil ist, ist die Verwendung einer Zange oder Hakenzange möglicherweise<br />
nicht notwendig.
3. Ziehen Sie jetzt das Spekulum ca. 2 cm zurück und wenden Sie vorsichtig Zugkraft<br />
auf die Zange oder die Hakenzange an, um eine etwaig vorliegende<br />
Zervixkrümmung gerade zu ziehen und die Zervix zu stabilisieren.<br />
4. Wenn der Kolben am äußersten distalen Ende des Schafts positioniert ist, wird die<br />
Pipelle ® Kürette in den Zervixkanal eingeführt und vorsichtig durch den Zervixkanal<br />
hindurch in die Gebärmutterhöhle vorgeschoben, und zwar bis auf eine Tiefe, die<br />
der Uterus-Tiefenbestimmung entspricht (Abb. 1). Eine leichte Reibung ist in der<br />
Regel mit den Fingern spürbar, wenn die Pipelle-Kürette durch den inneren<br />
Muttermund tritt. Wenn sich ein Widerstand<br />
bemerkbar macht, DARF DER VORSCHUB AUF<br />
KEINEN FALL FORCIERT WERDEN. Eine<br />
leichte Lubrikation des Schafts mit sterilem<br />
wasserlöslichem Gel kann die Passage bei<br />
Patientinnen mit einem sehr trockenen oder<br />
engen Zervixkanal erleichtern. Wenn sich der<br />
Einschub durch den Zervixkanal als schmerzhaft<br />
erweist (was normalerweise nicht der Fall ist),<br />
kann durch eine kurze topische Anwendung eines Lokalanästhetikums die<br />
Einführung der Pipelle-Kürette erleichtert werden.<br />
5. Wenn der Schaft in der Gebärmutterhöhle positioniert ist, stellen Sie jegliche<br />
Zugwirkung mit der Hakenzange oder Zange ein. Halten Sie dann den Schaft mit<br />
einer Hand in dieser Position fest und ziehen Sie mit der anderen Hand den Kolben<br />
fest und in einem Zug (mit einer schnellen, gleichmäßigen Bewegung) so weit wie<br />
möglich zum proximalen Ende des Schafts zurück (Abb. 2).<br />
HINWEIS: Ein langsames, unterbrochenes oder partielles Zurückziehen des<br />
Kolbens erzeugt nicht den Negativdruck (Saugwirkung), der zur Gewinnung der<br />
maximalen Gewebebiopsie<br />
notwendig ist. Eine Vertiefung<br />
in der Wand des Schafts<br />
verhindert, dass der Kolben<br />
vollständig vom Schaftinneren<br />
zurückgezogen wird. Diese<br />
Bewegung erzeugt einen<br />
Negativdruck (Saugwirkung)<br />
innerhalb des Schafts, der das<br />
Abb. 2<br />
Abb. 1<br />
Gewebe am distalen Schaftende in die Kürettenöffnung zieht und das separierte<br />
Gewebe im Lumen auffängt.<br />
6. Der Schaft ist sofort nach Rückzug des Kolbens um die zulässige Gesamtdistanz<br />
kontinuierlich um 360° zu drehen, indem Sie ihn zwischen den Fingern rollen oder<br />
zwirbeln, während der Schaft mindestens 3 oder 4 Mal zur Gewinnung der Probe<br />
zwischen dem Fundus und dem inneren Muttermund seitlich und hin und zurück<br />
(hinein und hinaus) bewegt wird. Dann ist er vorsichtig aus dem Uterus<br />
zurückzuziehen (Abb. 3). Die Untersuchung des Schafts sollte dann eine im Schaft<br />
klar sichtbare Probe der Gebärmutterschleimhaut von histologischer Qualität<br />
ergeben. Eine Blutung ist in der Regel minimal, wenn sie überhaupt auftritt.<br />
Abb. 3<br />
Für beste Ergebnisse:<br />
Vor dem Rückzug der<br />
Pipelle-Kürette aus dem<br />
Uterus sind mindestens<br />
3 oder 4 langsame<br />
spiralförmige Durchgänge<br />
zwischen dem Fundus und<br />
inneren Muttermund<br />
durchzuführen.
7. Für die histologische Beurteilung der Probe ist nun die Schaftspitze direkt proximal<br />
zur distalen Kürettenöffnung abzuschneiden (Abb. 4). Der Kolben ist nun im Schaft<br />
vorzuschieben, um die Probe aus dem abgeschnittenen Schaft in ein geeignetes<br />
Transportmedium auszustoßen (Abb. 5).<br />
Abb. 4 Abb. 5<br />
SYMBOLE<br />
8. Zur Anzüchtung von Bakterien aus der Probe ist der Kolben in seiner vollständig<br />
zurückgezogenen Position zu belassen und der Schaft nicht an der distalen<br />
Kürettenöffnung abzuschneiden. Schicken Sie das gesamte unversehrte<br />
Instrument mit der darin erfassten Probe an das Labor mit der Anweisung zum<br />
Abschneiden der distalen Spitze an einem Punkt mindestens 2 mm proximal zur<br />
distalen Kürettenöffnung und zum anschließenden Ausstoßen der Probe mittels<br />
des Kolbens auf das entsprechende Kulturmedium. Alternativ kann der Schaft<br />
sofort nach der Biopsie direkt proximal zur distalen Kürettenöffnung abgeschnitten<br />
und die Probe durch Vorschieben des Kolbens auf ein entsprechendes Medium<br />
in einem Transportbehälter ausgestoßen und an das Labor zur Kultivierung<br />
gesandt werden.<br />
REF Nachbestellnummer<br />
LOT Chargencode<br />
Verfallsdatum<br />
STERILE EO Ethylenoxidsterilisation<br />
LATEX<br />
2<br />
!<br />
Latexfrei<br />
Nicht wiederverwenden<br />
ACHTUNG: Siehe<br />
Gebrauchsanleitung.<br />
VORSICHT: Laut US-Bundesgesetz ist der Verkauf dieses Produkts<br />
nur an Ärzte oder im Auftrag von Ärzten erlaubt.<br />
Produkt entspricht der Medizinprodukterichtlinie<br />
93/42/EEG<br />
EC REP<br />
Autorisierte Vertretung in der Europäischen Gemeinschaft.<br />
Pipelle ® ist eine eingetragene Marke von <strong>CooperSurgical</strong>, Inc.<br />
© 2011 <strong>CooperSurgical</strong>, Inc.<br />
Hergestellt in USA<br />
95 Corporate Drive • Trumbull, CT 06611 USA<br />
Tel: +1 (800) 243-2974 • Fax: +1 (800) 262-0105<br />
International:<br />
Tel: +1 (203) 601-9818<br />
Fax: +1 (203) 601-4747<br />
www.coopersurgical.com<br />
EC REP<br />
Leisegang Feinmechanik GmbH<br />
Leibnizstraße 32<br />
D-10625, Berlin GERMANY<br />
37219 • Rev. B • 3/11
<strong>8200</strong> • Cureta de succión endometrial Pipelle ®<br />
Instrucciones de uso (Español / Spanish)<br />
DESCRIPCIÓN<br />
Pipelle ® es una cureta de succión estéril, de un solo uso y desechable que permite<br />
obtener una biopsia para diagnóstico histológico del recubrimiento de la mucosa uterina<br />
o extraer una muestra del contenido menstrual uterino para su examen microscópico o<br />
su cultivo.<br />
El dispositivo consta de una vaina de polipropileno transparente y flexible de 26,5 cm<br />
(totales) y 23,5 cm (eficaces) de longitud, con un diámetro exterior (DE) de 3,1 mm y<br />
un diámetro interior (DI) de 2,6 mm. La vaina presenta marcas graduadas en color<br />
desde los 4 cm a los 10 cm desde su extremo distal para indicar la profundidad de<br />
inserción de la vaina en el útero durante el uso (consulte el diagrama de abajo).<br />
A B 4 cm 8 cm C D E F<br />
7 cm 10 cm<br />
Las marcas de profundidad de 4, 7, 8 y 10 cm de la vaina aparecen resaltadas y<br />
numeradas. A 4 mm del extremo distal de la vaina se encuentra el centro de la abertura<br />
de la cureta (A), que tiene 1,93 mm de diámetro. Esta abertura tiene bordes afilados y<br />
se dirige hacia el lumen de la vaina. Un pistón EVA (B), fijado en el extremo distal de<br />
una varilla suave de resina de acetal (E), puede moverse hacia adelante y hacia atrás<br />
dentro de casi la longitud completa del lumen de la vaina. Dicho movimiento se logra<br />
manipulando el mando (F) fijado en el extremo proximal de la varilla del pistón, el cual<br />
se extiende más allá del extremo proximal de la vaina. El pistón cuenta con una<br />
muesca (D) en la vaina, localizada a 1 cm de su extremo proximal, para impedir sacar<br />
totalmente el pistón de la vaina. Una marca de orientación (C) indica la posición de la<br />
abertura de la cureta.<br />
El movimiento rápido del pistón dentro de la vaina, desde su posición completamente<br />
insertada hasta su posición retraída máxima, crea una presión negativa (succión) dentro<br />
del lumen de la vaina. Esta presión negativa aspira el tejido de la mucosa a través de la<br />
abertura de la cureta hasta el lumen de la vaina cuando la cureta raspa la pared endometrial<br />
mientras que se maniobra dentro de la cavidad uterina.<br />
ADVERTENCIAS<br />
En pacientes con amenorrea, la obtención de una biopsia endometrial con Pipelle debe<br />
realizarse únicamente después de confirmar la ausencia de niveles perceptibles de<br />
GCH circulante.<br />
PRECAUCIÓN<br />
Las leyes federales de EE UU limitan la venta de este dispositivo a médicos o por<br />
prescripción médica.<br />
INDICACIONES DE USO<br />
Biopsia para diagnóstico histológico del epitelio y de la capa de la mucosa glandular<br />
(endometrio) de la pared uterina o extracción de muestras del contenido menstrual<br />
uterino para:<br />
• Detección de carcinoma endometrial y de afecciones precancerosas<br />
37219 • Rev. B • 3/11
• Determinación de la respuesta del tejido endometrial a las influencias hormonales<br />
por observación visual de la muestra histológica, por ejemplo:<br />
a. Datación endometrial<br />
b. Escrutinio periódico de los efectos de la terapia hormonal en el endometrio<br />
uterino, particularmente en pacientes que reciben terapia de reemplazo de<br />
estrógenos para síntomas menopáusicos y profilaxis de la osteoporosis<br />
c. Insuficiencia luteal (determinada histológicamente de forma visual a partir<br />
del tejido endometrial obtenido exclusivamente durante la fase secretora<br />
[progestacional] del ciclo menstrual)<br />
d. Metrorragia funcional (contracepción, premenopausia)<br />
• Diagnóstico de la patología asociada con la infertilidad<br />
• Cultivo bacteriano para identificar específicamente patógenos uterinos<br />
causativos<br />
CONTRAINDICACIONES<br />
Pipelle ® no debe utilizarse en pacientes embarazadas o que se sospeche que puedan<br />
estarlo.<br />
PRECAUCIONES<br />
Gracias a su flexibilidad y pequeño calibre, con Pipelle puede realizarse una biopsia<br />
endometrial para diagnóstico histológico con un peligro mínimo de perforación de la<br />
pared uterina. Sin embargo, antes de su inserción, se debe tener la precaución de<br />
cerciorarse de la profundidad del útero y de cualquier retroflexión o anteflexión uterinas<br />
presentes en pacientes individuales. Debe utilizarse el mejor juicio clínico y considerarse<br />
cualquier variación de las normas anatómicas durante la inserción; en ningún caso debe<br />
forzarse el instrumento si se percibe con los dedos cualquier resistencia.<br />
Si no se logra fácilmente el paso de Pipelle a través del canal cervical, no debe forzarse<br />
el instrumento y debe considerarse la posibilidad de que exista una estenosis cervical<br />
patológica. En las pacientes de mayor edad con un cuello uterino extremadamente seco<br />
que puede dificultar el paso del instrumento: lubricar levemente la vaina con un gel<br />
soluble en agua estéril puede facilitar la inserción.<br />
REACCIONES ADVERSAS<br />
Se tiene la sospecha o se ha informado ocasionalmente de las reacciones adversas<br />
siguientes. El orden del listado no indica frecuencia o gravedad.<br />
• Lesión del útero (perforación)<br />
• Calambres<br />
• Espasmo uterino<br />
INSTRUCCIONES DE USO<br />
1. Prepare la vagina y el cuello del útero mediante técnicas antisépticas actualmente<br />
aceptadas y como se haría para cualquier procedimiento intrauterino.<br />
2. Con el espéculo vaginal en su sitio y abierto para exponer el cuello uterino, sondee<br />
suavemente el útero para conocer su profundidad y dirección con una sonda<br />
uterina. NO UTILICE Pipelle a modo de sonda uterina. A continuación, atrape el<br />
cuello uterino con un fórceps o un tenáculo muy finos. Si el útero está antevertido,<br />
se debe atrapar el labio anterior del cuello uterino. Si el útero está retrovertido, se<br />
debe atrapar el labio posterior del cuello uterino. Si el útero está colocado<br />
normalmente y el cuello uterino es estable, es posible que no sea necesario utilizar<br />
el fórceps ni el tenáculo.
3. Ahora retire el espéculo aproximadamente 2 cm y tire suavemente del fórceps<br />
o el tenáculo para enderezar cualquier curvatura cervical y estabilizar el cuello<br />
uterino.<br />
4. Con el pistón colocado en el extremo más distal de la vaina, inserte y pase<br />
suavemente Pipelle ® a través del canal cervical hasta la cavidad del útero, a una<br />
profundidad que se corresponda con lo determinado al sondear la profundidad<br />
uterina (Figura 1). Normalmente se suele<br />
percibir una leve fricción en los dedos al pasar Figura 1<br />
Pipelle a través del orificio cervical interno.<br />
NUNCA DEBE APLICARSE FUERZA para lograr<br />
el paso si se encuentra resistencia. Una ligera<br />
lubricación de la vaina con un gel soluble en<br />
agua estéril puede facilitar el paso en pacientes<br />
con un canal cervical extremadamente seco o<br />
estrecho. Aunque no suele ser el caso, si la manipulación del canal cervical<br />
provoca dolor, el uso tópico breve de un agente anestésico puede facilitar la<br />
introducción de Pipelle.<br />
5. Cuando la vaina esté en posición dentro de la cavidad uterina, interrumpa la<br />
tracción aplicada con el fórceps o el tenáculo. A continuación, mientras que<br />
sostiene la vaina en posición con una mano, tire de forma rápida y firme del pistón<br />
con la otra mano y sin interrupción (con un movimiento constante y rápido) hacia<br />
el extremo proximal de la vaina tanto como sea posible (Figura 2).<br />
NOTA: la retirada lenta,<br />
interrumpida o parcial del Figura 2<br />
pistón no producirá la<br />
cantidad de presión negativa<br />
(succión) necesaria para<br />
obtener la máxima biopsia<br />
del tejido. Una muesca en la<br />
pared de la vaina impedirá la<br />
retirada total del pistón dentro de la vaina. Esta acción crea una presión negativa<br />
(succión) dentro de la vaina que aspira el tejido dentro de la abertura de la cureta<br />
en el extremo distal de la vaina y captura el tejido separado dentro de su lumen.<br />
6. Inmediatamente después de tirar del pistón toda la distancia permitida, la vaina<br />
debe girarse 360° de forma continua, haciéndola rodar entre los dedos mientras<br />
que se mueve lateralmente y hacia adelante y hacia atrás (dentro y fuera) entre el<br />
fondo y el orificio interno, al menos 3 o 4 veces para obtener la muestra. A<br />
continuación puede retirarse suavemente del útero (Figura 3). El examen de la<br />
vaina debe revelar un espécimen de mucosa uterina de calidad histológica<br />
claramente visible dentro de la vaina. Si se produce una hemorragia, esta suele ser<br />
mínima.<br />
Figura 3<br />
Para obtener mejores<br />
resultados: deben<br />
realizarse al menos 3 ó 4<br />
pasadas lentas en espiral<br />
entre el fondo y el orificio<br />
interno antes de retirar<br />
Pipelle del útero.
7. Para la evaluación histológica del espécimen, ahora debe seccionarse la punta de<br />
la vaina en un punto lo más próximo posible a la abertura distal de la cureta<br />
(Figura 4). A continuación se debe hacer avanzar el pistón dentro de la vaina para<br />
sacar el espécimen de la vaina seccionada y colocarlo en un medio de transporte<br />
adecuado (Figura 5).<br />
Figura 4 Figura 5<br />
8. Para realizar un cultivo bacteriano del espécimen, deje el pistón en su posición<br />
completamente retirada y no seccione la vaina en la abertura distal de la cureta.<br />
Envíe inmediatamente al laboratorio el instrumento entero e intacto, con el<br />
espécimen capturado dentro del mismo, con instrucciones para seccionar la punta<br />
distal en un punto al menos 2 mm proximal a la abertura distal de la cureta, sacar<br />
la muestra por medio del pistón y colocarla en el medio de cultivo adecuado. Como<br />
alternativa, inmediatamente después de la biopsia, seccione la vaina en un punto<br />
lo más próximo posible a la abertura distal de la cureta; a continuación, haga<br />
avanzar el pistón, saque la muestra, colóquela sobre un medio adecuado en un<br />
envase de transporte y envíela al laboratorio para realizar el cultivo.<br />
EXPLICACIÓN DE SÍMBOLOS<br />
REF Número de pedido<br />
LOT Código de lote<br />
STERILE EO<br />
Utilizar antes de<br />
Esterilización con óxido<br />
de etileno<br />
LATEX<br />
2<br />
!<br />
Sin látex<br />
No reutilizar<br />
ATENCIÓN: consultar<br />
las instrucciones de uso.<br />
PRECAUCIÓN: las leyes federales de EE UU limitan la venta de este<br />
dispositivo a médicos o por prescripción médica.<br />
El producto cumple con la directiva sobre dispositivos<br />
médicos 93/42/CEE<br />
EC REP<br />
Representante autorizado en la Comunidad Europea.<br />
Pipelle ® es una marca comercial registrada de <strong>CooperSurgical</strong>, Inc.<br />
© 2011 <strong>CooperSurgical</strong>, Inc.<br />
Fabricado en EE UU<br />
95 Corporate Drive • Trumbull, CT 06611 USA<br />
Teléfono: +1 (800) 243-2974 • Fax: +1 (800) 262-0105<br />
Internacional:<br />
Teléfono: +1 (203) 601-9818<br />
Fax: +1 (203) 601-4747<br />
www.coopersurgical.com<br />
EC REP<br />
Leisegang Feinmechanik GmbH<br />
Leibnizstraße 32<br />
D-10625, Berlin GERMANY<br />
37219 • Rev. B • 3/11
<strong>8200</strong> • <strong>Curette</strong> d’aspiration endométriale Pipelle ®<br />
Mode d’emploi (Français / French)<br />
DESCRIPTION<br />
Le dispositif Pipelle ® est une curette d’aspiration jetable, stérile et à usage unique prévue<br />
pour obtenir une biopsie histologique de la muqueuse de l’utérus ou prélever un<br />
échantillon menstruel utérin aux fins d’analyses microscopiques ou de cultures.<br />
Le dispositif est constitué d’une gaine transparente et souple en polypropylène d’une<br />
longueur globale de 26,5 cm et d’une longueur effective de 23,5 cm, avec un diamètre<br />
externe de 3,1 mm et un diamètre interne de 2,6 mm. La gaine est munie de repères<br />
gradués colorés de 4 à 10 cm représentant la distance à partir de l’extrémité distale de<br />
la gaine, pour indiquer la profondeur d’insertion de la gaine dans l’utérus pendant<br />
l’utilisation (voir le schéma ci-dessous).<br />
A B 4 cm 8 cm C D E F<br />
7 cm 10 cm<br />
Les repères de profondeur situés à 4, 7, 8 et 10 cm sur la gaine sont mis en valeur et<br />
numérotés. Le centre de l’ouverture de la curette (A), qui présente un diamètre de<br />
1,93 mm, se situe à 4 mm de l’extrémité distale de la gaine. Cette ouverture a des bords<br />
tranchants et communique avec la lumière de la gaine. Un piston EVA (B) fixé à<br />
l’extrémité distale d’une tige en résine acétalique souple (E) peut être déplacé vers<br />
l’avant et vers l’arrière sur presque toute la longueur de la lumière de la gaine. Une telle<br />
opération s’effectuer en manipulant la mollette (F) qui est fixée à l’extrémité proximale<br />
de la tige de piston qui dépasse de l’extrémité proximale de la gaine. Un<br />
renfoncement (D) dans la gaine, situé à 1 cm de son extrémité proximale, empêche au<br />
piston d’être complètement retiré de la gaine. Un repère d’orientation (C) indique la<br />
position de l’ouverture de la curette.<br />
Une dépression (aspiration) est créée dans la lumière de la gaine en déplaçant rapidement<br />
le piston dans la gaine, d’une position complètement insérée jusqu’à une position<br />
complètement sortie. Cette dépression aspire la muqueuse par l’ouverture de la curette et<br />
dans la lumière de la gaine, à mesure que la curette râcle la paroi endométriale lorsqu’elle<br />
est manœuvrée au sein de la cavité de l’utérus.<br />
AVERTISSEMENTS<br />
Chez les patientes présentant une aménorrhée, l’obtention d’une biopsie endométriale<br />
avec la Pipelle doit être réalisée uniquement après confirmation de l’absence de taux<br />
d’HCG détectables.<br />
ATTENTION<br />
Selon la loi fédérale américaine, ce produit ne peut être vendu que par un médecin ou<br />
sur son ordonnance.<br />
INDICATIONS<br />
Biopsie histologique de l’épithélium et de la couche muqueuse glandulaire (endomètre)<br />
de la paroi utérine ou prélèvement d’un échantillon menstruel utérin aux fins suivantes :<br />
• Détection d’un carcinome ou d’un état précancéreux de l’endomètre<br />
37219 • Rév. B • 3/11
• Détermination de la réponse tissulaire endométriale aux influences hormonales<br />
par observation visuelle du prélèvement histologique, tels que :<br />
a. Histologie de l’endomètre<br />
b. Examin périodique des effets de l’hormonothérapie sur l’endomètre utérin,<br />
particulièrement chez les patientes recevant un traitement hormonal substitutif<br />
par œstrogènes pour traiter les symptômes de ménopause et en prophylaxie de<br />
l’ostéoporose<br />
c. Insuffisance lutéale (déterminée visuellement par histologie du tissu<br />
endométrial obtenu uniquement au cours de la phase sécrétoire [progestative]<br />
du cycle menstruel)<br />
d. Métrorragie fonctionnelle (contraception, pré-menopause)<br />
• Diagnostic de pathologie associée à l’infertilité<br />
• Culture bactérienne pour identifier spécifiquement les pathogènes utérins en<br />
cause<br />
CONTRE-INDICATIONS<br />
La curette Pipelle ® ne doit pas être utilisée chez les patientes enceintes ou susceptibles<br />
d’être enceintes.<br />
PRECAUTIONS<br />
Du fait de sa flexibilité et de son petit calibre, la curette Pipelle permet de réaliser une<br />
biopsie histologique de l’endomètre avec un risque minimal de perforation de la paroi<br />
utérine. Cependant, il convient de prendre préalablement toute précaution requise avant<br />
insertion, afin de vérifier la profondeur de l’utérus et le caractère rétroversé ou antéversé<br />
de l’utérus de chaque patiente. Faire preuve de bon jugement clinique afin de prendre<br />
en compte les variations anatomiques éventuelles pendant l’insertion et ne jamais<br />
insérer l’instrument de force si une résistance est ressentie.<br />
Si le passage de la curette Pipelle par le canal cervical n’est pas facilement obtenu, ne<br />
pas forcer l’instrument et envisager la présence d’un rétrécissement cervical<br />
pathologique. Chez les patientes âgées, un col utérin exrtêmement sec peut produire<br />
une certaine résistance au passage de l’instrument. Il convient dans ce cas de lubrifier<br />
très légèrement la gaine avec un gel hydrosoluble stérile pour faciliter l’insertion.<br />
EFFETS INDÉSIRABLES<br />
Les réactions indésirables suivantes ont été suspectées ou signalées de temps à autre.<br />
L’ordre dans lequel elles figurent ici ne correspond ni à leur fréquence, ni à leur sévérité.<br />
• Lésion de l’utérus (perforation)<br />
• Crampes<br />
• Spasme utérin<br />
MODE D’EMPLOI<br />
1. Préparer le vagin et le col utérin selon les techniques antiseptiques établies, comme<br />
pour une procédure intra-utérine.<br />
2. Avec le spéculum en place et ouvert afin d’exposer le col utérin, examiner l’utérus<br />
avec une sonde utérine pour en déterminer la profondeur et l’orientation. NE PAS<br />
UTILISER la curette Pipelle comme sonde utérine. Saisir ensuite le col avec une<br />
pince très fine ou un ténaculum. Si l’utérus est antéversé, saisir la lèvre antérieure<br />
du col. Si l’utérus est rétroversé, saisir la lèvre postérieure du col. Si la position de<br />
l’utérus est normale et que le col utérin est stable, il est possible que l’utilisation<br />
d’une pince ou d’un ténaculum ne soit pas nécessaire.
3. Retirer maintenant le spéculum sur environ 2 cm et exercer une légère traction sur<br />
la pince ou le ténaculum pour éliminer au besoin la courbe cervicale et pour<br />
stabiliser le col.<br />
4. Avec le piston positionné complètement à l’extrémité distale de la gaine, insérer et<br />
passer délicatement la curette Pipelle ® à travers le canal cervical et dans la cavité<br />
utérine, jusqu’à une profondeur correspondant à celle déterminée lors du sondage<br />
de l’utérus (Figure 1). Habituellement, une légère<br />
friction peut être ressentie au niveau des doigts à<br />
Figure 1<br />
mesure que la curette Pipelle passe par l’orifice<br />
cervical interne. NE FORCER EN AUCUN CAS<br />
le passage si une résistance se fait sentir. Une<br />
légère lubrification de la gaine avec un gel<br />
hydrosoluble stérile peut faciliter le passage chez<br />
des patientes dont le canal cervical est extrêment<br />
sec ou étroit. Dans de très rares cas, si l’abord<br />
du canal cervical s’avère douloureux, il peut convenir d’utiliser brièvement un agent<br />
anesthésique topique pour faciliter l’introduction de la curette Pipelle.<br />
5. Quand la gaine est en position dans la cavité utérine, cesser la traction appliquée<br />
avec la pince ou le ténaculum. Ensuite, tout en maintenant d’une main la position<br />
de la gaine, tirer rapidement et fermement le piston de l’autre main, sans<br />
interruption (d’un seul geste continu), en direction de l’extrémité proximale de la<br />
gaine et jusqu’à butée (Figure 2).<br />
REMARQUE : Un retrait du<br />
Figure 2<br />
piston trop lent ou<br />
interrompu ne produira pas<br />
le niveau de dépression<br />
(aspiration) nécessaire pour<br />
obtenir la biopsie tissulaire<br />
maximale. Un renfoncement<br />
dans la paroi de la gaine<br />
empêche de retirer complètement le piston de l’intérieur de la gaine. Cette action<br />
produit une dépression (aspiration) à l’intérieur de la gaine pour aspirer le tissu<br />
dans l’ouverture de la curette située à l’extrémité distale de la gaine et capturer le<br />
tissu sectionné dans la lumière.<br />
6. Immédiatement après avoir tiré le piston jusqu’à la butée, tourner continuellement<br />
la gaine sur 360° en la roulant entre les doigts, tout en la déplaçant latéralement<br />
et vers l’avant et l’arrière (allée-venue) entre le fond et l’orifice interne, ceci au<br />
moins 3 à 4 fois, pour obtenir le prélèvement. La retirer ensuite délicatement de<br />
l’utérus (Figure 3). L’examen de la gaine doit alors révéler un prélèvement de<br />
muqueuse utérine de qualité histologique, clairement visible à l’intérieur de la gaine.<br />
Tout saignement, le cas échéant, est généralement minimal.<br />
Figure 3<br />
Pour des résultats<br />
optimaux : Effectuer<br />
lentement au moins 3 à 4<br />
passages en spirale entre le<br />
fond et l’orifice interne avant<br />
de retirer la curette Pipelle<br />
de l’utérus.
7. Pour l’évaluation histologique du prélèvement, l’extrémité de la gaine doit<br />
maintenant être sectionnée juste en amont de l’ouverture distale de la curette<br />
(Figure 4). Avancer ensuite le piston à l’intérieur de la gaine pour libérer le<br />
prélèvement de la gaine sectionnée dans un milieu de transport adapté (Figure 5).<br />
Figure 4 Figure 5<br />
8. Pour la culture bactérienne du prélèvement, laisser le piston dans sa position<br />
complètement sortie et ne pas sectionner la gaine au niveau de l’ouverture distale<br />
de la curette. Envoyer immédiatement au laboratoire l’instrument intact, en<br />
intégralité, avec le prélèvement capturé à l’intérieur, accompagné d’instructions<br />
expliquant comment sectionner l’extrémité distale à 2 mm au moins en amont de<br />
l’ouverture distale de la curette, puis comment libérer le prélèvement sur le milieu<br />
de culture adapté au moyen du piston. Une autre alternative consiste à sectionner<br />
la gaine juste en amont de l’ouverture distale de la curette immédiatement après<br />
la biopsie, puis à libérer le prélèvement sur le milieu adapté dans un récipient de<br />
transport en avançant le piston, et à l’envoyer au laboratoire aux fins de culture.<br />
EXPLICATION DES SYMBOLES<br />
REF Numéro de référence<br />
LOT Code de lot<br />
STERILE EO<br />
Date limite d’utilisation<br />
Stérilisation à l’oxyde<br />
d’éthylène<br />
LATEX<br />
2<br />
!<br />
Sans latex<br />
Ne pas réutiliser<br />
ATTENTION : Consulter<br />
le mode d’emploi.<br />
ATTENTION : Selon la loi fédérale américaine, ce produit ne peut être<br />
vendu que par un médecin ou sur son ordonnance.<br />
Produit conforme à la directive 93/42/CEE<br />
relative aux dispositifs médicaux<br />
EC REP<br />
Représentant agréé au sein de la Communauté européenne.<br />
Pipelle ® est une marque déposée de <strong>CooperSurgical</strong>, Inc.<br />
© 2011 <strong>CooperSurgical</strong>, Inc.<br />
95 Corporate Drive • Trumbull, CT 06611 USA<br />
Téléphone : +1 (800) 243-2974 • Fax : +1 (800) 262-0105<br />
International :<br />
Téléphone : +1 (203) 601-9818<br />
Fax : +1 (203) 601-4747<br />
www.coopersurgical.com<br />
Fabriqué aux États-Unis<br />
EC REP<br />
Leisegang Feinmechanik GmbH<br />
Leibnizstraße 32<br />
D-10625, Berlin GERMANY<br />
37219 • Rev. B • 3/11
<strong>8200</strong> • <strong>Curette</strong> per aspirazione endometriale Pipelle ®<br />
Istruzioni per l’uso (Italiano / Italian)<br />
DESCRIZIONE<br />
La curette per aspirazione Pipelle ® è un dispositivo sterile monouso e viene impiegata<br />
per ottenere una biopsia istologica del rivestimento mucoso dell’utero o estrarre un<br />
campione di materiale mestruale uterino per l’esame microscopico o la coltura.<br />
Il dispositivo è costituito da una guaina in polipropilene, trasparente e flessibile, con una<br />
lunghezza complessiva di 26,5 cm ed effettiva di 23,5 cm e un diametro esterno di<br />
3,1 mm e interno di 2,6 mm. La guaina presenta indicatori colorati di graduazione posti<br />
a una distanza compresa tra 4 cm e 10 cm dalla punta distale, che ne indicano la<br />
profondità di inserimento nell’utero durante l’uso (vedere il diagramma che segue).<br />
A B 4 cm 8 cm C D E F<br />
7 cm 10 cm<br />
Gli indicatori di profondità che corrispondono a 4, 7, 8 e 10 cm sono evidenziati e<br />
numerati. A 4 mm dalla punta distale della guaina si trova il centro dell’apertura della<br />
curette (A), con diametro di 1,93 mm. Quest’apertura ha margini affilati e conduce al<br />
lume della guaina. Un pistone in EVA (B) fissato all’estremità distale di un’asta flessibile<br />
in resina acetalica (E) può essere spostato in avanti e indietro quasi per l’intera<br />
lunghezza del lume della guaina. Questo movimento viene effettuato agendo sulla<br />
manopola (F) fissata all’estremità prossimale dell’asta del pistone che si estende oltre<br />
l’estremità prossimale della guaina. Una tacca (D) posta a 1 cm dall’estremità prossimale<br />
della guaina impedisce al pistone di fuoriuscire completamente dalla guaina stessa. Un<br />
indicatore di orientamento (C) indica la posizione dell’apertura della curette.<br />
Il rapido movimento del pistone all’interno della guaina, dalla sua posizione di completo<br />
inserimento a quella di massima ritrazione, crea pressione negativa (aspirazione) all’interno<br />
del lume della guaina. Tale pressione negativa aspira il tessuto mucosale attraverso<br />
l’apertura della curette all’interno del lume della guaina mentre la curette raschia la parete<br />
endometriale quando viene manovrata all’interno della cavità uterina.<br />
AVVERTENZE<br />
Nelle pazienti con amenorrea, la biopsia endometriale con la curette Pipelle va eseguita<br />
solo dopo conferma dell’assenza di livelli circolanti di HCG rilevabili.<br />
ATTENZIONE<br />
La legge federale statunitense limita la vendita di questo dispositivo ai medici o su<br />
presentazione di prescrizione medica.<br />
INDICAZIONI PER L’USO<br />
Biopsia istologica dell’epitelio e dello strato mucosale ghiandolare (endometrio) della<br />
parete uterina o estrazione di un campione di materiale mestruale uterino per gli scopi<br />
seguenti.<br />
• Individuazione del carcinoma dell’endometrio e delle condizioni precancerose<br />
37219 • Rev. B • 3/11
• Determinazione della risposta del tessuto endometriale alle influenze ormonali<br />
mediante osservazione visiva del campione istologico, quali:<br />
a. datazione endometriale<br />
b. esame periodico degli effetti della terapia ormonale sull’endometrio uterino,<br />
particolarmente nelle pazienti in terapia ormonale sostitutiva con estrogeni per<br />
sintomi di menopausa e profilassi dell’osteoporosi<br />
c. insufficienza luteinica (determinata visivamente e istologicamente da tessuto<br />
endometriale ottenuto solo durante la fase secretiva [progestazionale] del ciclo<br />
mestruale)<br />
d. metrorragia funzionale (contraccezione, pre-menopausa)<br />
• Diagnosi di patologia associata a infertilità<br />
• Coltura batterica volta a identificare specificamente i patogeni uterini<br />
responsabili<br />
CONTROINDICAZIONI<br />
La curette Pipelle ® non deve essere usata nelle pazienti in gravidanza accertata o<br />
sospetta.<br />
PRECAUZIONI<br />
Grazie alla flessibilità e al calibro ridotto della curette Pipelle è possibile eseguire una<br />
biopsia endometriale istologica con il minimo pericolo di perforazione della parete<br />
uterina. Prima dell’inserimento è comunque necessario verificare la profondità dell’utero<br />
di ogni singola paziente e la presenza di eventuali retroflessioni o anteflessioni uterine.<br />
Durante l’inserimento usare il migliore giudizio clinico tenendo presenti eventuali<br />
variazioni dalle norme anatomiche; lo strumento non deve in ogni caso essere forzato<br />
in presenza di resistenza accertata con le dita.<br />
Se il passaggio della curette Pipelle nel canale cervicale risulta difficoltoso, non forzare<br />
lo strumento, ma prendere in considerazione la possibilità di trovarsi di fronte a un caso<br />
di stenosi cervicale patologica. Nelle pazienti anziane in cui una cervice uterina molto<br />
secca potrebbe causare resistenza al passaggio dello strumento, l’inserimento potrebbe<br />
essere facilitato da una leggera lubrificazione della guaina con gel idrosolubile sterile.<br />
REAZIONI INDESIDERATE<br />
Di tanto in tanto sono state sospettate o riportate le seguenti reazioni indesiderate.<br />
L’ordine di elencazione non ne indica né la frequenza né la gravità.<br />
• Lesione all’utero (perforazione)<br />
• Crampi<br />
• Spasmo uterino<br />
ISTRUZIONI PER L’USO<br />
1. Preparare la vagina e la cervice adottando le tecniche antisettiche correntemente<br />
accettate, analogamente a qualsiasi altra procedura intrauterina.<br />
2. Con lo specolo vaginale in posizione ed aperto al fine di esporre la cervice uterina,<br />
con una sonda uterina esaminare con delicatezza l’utero per determinarne la<br />
profondità e l’orientamento. NON USARE la curette Pipelle come sonda uterina.<br />
Quindi afferrare la cervice con una pinza molto sottile o un tenacolo. Se l’utero è<br />
antiverso, lo strumento va applicato al labbro anteriore della cervice. Se l’utero è<br />
retroverso, lo strumento va applicato al labbro posteriore della cervice. Se l’utero<br />
è in posizione normale e la cervice è stabile, potrebbe non essere necessario usare<br />
una pinza o un tenacolo.
3. A questo punto ritirare lo specolo di circa 2 cm e applicare una leggera trazione alla<br />
pinza o al tenacolo per raddrizzare eventuali curvature cervicali e stabilizzare la<br />
cervice.<br />
4. Con il pistone alla fine dell’estremità distale della guaina, introdurre con delicatezza<br />
la curette Pipelle ® nel canale cervicale e poi nella cavità uterina a una profondità<br />
corrispondente a quella determinata mediante la valutazione della profondità<br />
uterina (Figura 1). Di solito si può avvertire un leggero attrito con le dita quando la<br />
curette Pipelle passa attraverso l’ostio cervicale<br />
interno. Se si incontra resistenza NON Figura 1<br />
FORZARE IN NESSUN CASO il passaggio.<br />
Nelle pazienti con un canale cervicale<br />
estremamente secco o stretto, una leggera<br />
lubrificazione della guaina con un gel idrosolubile<br />
sterile potrebbe agevolare il passaggio dello<br />
strumento. Nei rari casi in cui il passaggio<br />
attraverso il canale cervicale si rivelasse doloroso, il breve uso di un anestetico<br />
topico potrebbe contribuire ad agevolare l’introduzione della curette Pipelle.<br />
5. Quando la guaina è in posizione all’interno della cavità uterina, interrompere la<br />
trazione applicata con il tenacolo o la pinza. Quindi, tenendo in posizione la guaina<br />
con una mano, con l’altra tirare rapidamente e fermamente il pistone senza<br />
interruzione (con un movimento costante e rapido) verso l’estremità prossimale<br />
della guaina fino alla fine della sua corsa (Figura 2).<br />
NOTA – Un ritiro lento,<br />
interrotto o parziale del Figura 2<br />
pistone non genererà il<br />
livello di pressione negativa<br />
(aspirazione) necessario a<br />
ottenere una biopsia tessutale<br />
adeguata. Una tacca nella<br />
parete della guaina impedisce<br />
l’estrazione completa del pistone dalla guaina. Quest’azione genera una pressione<br />
negativa (aspirazione) all’interno della guaina che aspira il tessuto nell’apertura<br />
della curette posta all’estremità distale della guaina e cattura all’interno del lume il<br />
tessuto distaccatosi.<br />
6. Immediatamente dopo aver tirato il pistone per tutta la distanza consentita, ruotare<br />
senza interruzione di 360° la guaina facendola girare con le dita, muovendola<br />
contemporaneamente da lato a lato e avanti e indietro (avanzando e arretrando)<br />
tra il fondo dell’utero e l’ostio interno almeno 3 o 4 volte per ottenere il campione.<br />
Estrarla quindi con delicatezza dall’utero (Figura 3). L’esame della guaina dovrebbe<br />
evidenziare un campione di mucosa uterina di qualità istologica chiaramente visibile<br />
all’interno della guaina stessa. Eventuale sanguinamento, se presente, è<br />
solitamente minimo.<br />
Figura 3<br />
Per un campione ottimale<br />
Eseguire almeno 3 o 4<br />
passaggi lenti con<br />
movimento rotatorio tra il<br />
fondo dell’utero e l’ostio<br />
interno prima di ritirare la<br />
Pipelle dall’utero.
7. Per la valutazione istologica del campione, sezionare ora la punta della guaina<br />
appena prossimalmente all’apertura distale della curette (Figura 4). Far poi<br />
avanzare il pistone all’interno della guaina per far fuoriuscire il campione dalla<br />
guaina sezionata e trasferirlo in un mezzo di trasporto idoneo (Figura 5).<br />
Figura 4 Figura 5<br />
8. Per la coltura batterica del campione, lasciare il pistone nella posizione<br />
completamente ritirata e non sezionare la guaina in corrispondenza della apertura<br />
distale. Inviare immediatamente in laboratorio l’intero strumento intatto con il<br />
campione al suo interno, con istruzioni di sezionare la punta distale in un punto<br />
prossimale di almeno 2 mm all’apertura distale della curette e poi di far fuoriuscire<br />
il campione con il pistone e di trasferirlo su un mezzo di coltura idoneo. In<br />
alternativa, immediatamente dopo la biopsia, sezionare la guaina appena<br />
prossimale all’apertura distale della curette e poi, facendo avanzare il pistone, far<br />
fuoriuscire il campione su un mezzo appropriato in un contenitore di trasporto e<br />
inviarlo al laboratorio per la coltura.<br />
SPIEGAZIONE DEI SIMBOLI<br />
REF Numero di riordine<br />
LOT Codice del lotto<br />
STERILE EO<br />
Utilizzare entro<br />
Sterilizzazione tramite<br />
ossido di etilene<br />
LATEX<br />
2<br />
!<br />
Non contiene lattice<br />
Non riutilizzare<br />
ATTENZIONE – Vedere<br />
le istruzioni per l’uso.<br />
ATTENZIONE – La legge federale statunitense limita la vendita di<br />
questo dispositivo ai medici o su presentazione di prescrizione medica.<br />
Questo prodotto è conforme ai requisiti della Direttiva<br />
93/42/CEE concernente i dispositivi medici<br />
EC REP<br />
Rappresentante autorizzato per la Comunità Europea.<br />
Pipelle ® è un marchio depositato di <strong>CooperSurgical</strong>, Inc.<br />
© 2011 <strong>CooperSurgical</strong>, Inc.<br />
Fabbricato negli USA<br />
95 Corporate Drive • Trumbull, CT 06611 USA<br />
Tel: +1 (800) 243-2974 • Fax: +1 (800) 262-0105<br />
Internazionale:<br />
Tel: +1 (203) 601-9818<br />
Fax: +1 (203) 601-4747<br />
www.coopersurgical.com<br />
EC REP<br />
Leisegang Feinmechanik GmbH<br />
Leibnizstraße 32<br />
D-10625, Berlin GERMANY<br />
37219 • Rev. B • 3/11