HW F 1000 HW F 1300 INOX HW F 1400 INOX - Pompy ogrodowe
HW F 1000 HW F 1300 INOX HW F 1400 INOX - Pompy ogrodowe
HW F 1000 HW F 1300 INOX HW F 1400 INOX - Pompy ogrodowe
You also want an ePaper? Increase the reach of your titles
YUMPU automatically turns print PDFs into web optimized ePapers that Google loves.
Designated use<br />
The domestic water system is designed for home<br />
use in your house or garden. Please observe the<br />
technical data given in the instructions before<br />
putting the system into operation. Your domestic<br />
water system has been designed for use in the<br />
following applications:<br />
− irrigation and watering, e.g. of your lawn or<br />
flower and vegetable gardens,<br />
− domestic water supply,<br />
− increasing pressure in the domestic water<br />
supply.<br />
Please observe the regulations issued by your<br />
local water works. If necessary, ask a plumber.<br />
The system is designed to pump only the following<br />
liquids:<br />
− clear water,<br />
− rain water.<br />
Prohibited use<br />
Your domestic water system is not intended for<br />
permanent operation.<br />
The system may not be used to pump the following<br />
liquids:<br />
− saltwater,<br />
− beverages or liquid foods,<br />
− corrosives or chemicals,<br />
− acids or combustible, explosive or gasforming<br />
liquids,<br />
− liquids with a temperature above 35 °C,<br />
− sandy water or water containing abrasives.<br />
Description of the system<br />
Domestic water system/accessories<br />
(Figs. A, B)<br />
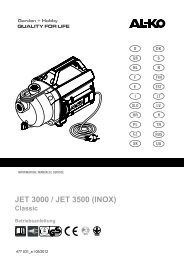
1 pump housing<br />
2 filler screw<br />
3 pump outlet/pressure hose connection<br />
4 motor housing<br />
5 valve<br />
6 reservoir<br />
7 pressure gauge<br />
8 connection cable<br />
9 draining screw (pump chamber)<br />
10 pressure switch pump<br />
11 compensation hose<br />
12 draining screw (filter chamber)<br />
13 pump inlet/suction hose connection<br />
14 transparent filter cover<br />
15 angular nipple<br />
16 flat seal<br />
17 connection nipple<br />
18 round seal ring<br />
19 pressure hose (accessory)<br />
20 AL-KO suction fitting (accessory)<br />
21 seals for filter<br />
22 filter<br />
23 non-return valve<br />
24 seal<br />
25 round seal ring (transparent cover filter<br />
chamber)<br />
26 flat seal<br />
Scope of supply<br />
Your domestic water system comes equipped<br />
with a pressure switch, a pressure gauge and an<br />
electric cable with an earthing-contact type plug.<br />
A filter key (see Fig. C) is part of the scope of<br />
supply.<br />
The accessory is not part of the scope of<br />
supply.<br />
Function<br />
The domestic water system works automatically.<br />
The pump automatically switches on or off depending<br />
on the pressure set (see technical data).<br />
The system sucks the liquid to be pumped<br />
through the pump inlet (13) and lets it out into the<br />
reservoir (6). Upon reaching the set cut-out<br />
pressure (reservoir is full), the system automatically<br />
switches off.<br />
As soon as the pressure falls to below 2,0 bar<br />
(water is drained from the reservoir), the system<br />
automatically switches back on and continues<br />
pumping the liquid until either the reservoir is full<br />
or any draining process running has been completed<br />
and the reservoir is full.<br />
Thermal protection<br />
Your domestic water system is equipped with a<br />
thermal protection switch, which switches the<br />
pump off if it overheats. The pump will remain off<br />
until it has cooled down. After about 15 - 20<br />
minutes, the pump will automatically switch on.<br />
Setting up and operating the system<br />
Before putting your domestic water system<br />
into operation, check the inlet pressure<br />
at the diaphragm which can be read<br />
out from the valve (5) on the reservoir.<br />
Make sure that the pressure is approx. 1.5<br />
bar and correct if required (see Checking<br />
the Inlet Pressure).<br />
• Place the device onto a hard, flat surface so<br />
that it cannot tip over and so that it will not be<br />
near the flow of water.<br />
Translation of original user instructions GB 2


