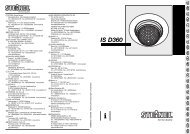
HF 3360 - Elfa
HF 3360 - Elfa
HF 3360 - Elfa

You also want an ePaper? Increase the reach of your titles
YUMPU automatically turns print PDFs into web optimized ePapers that Google loves.
Betriebsstörungen<br />
Störung Ursache Abhilfe<br />
Sensor<br />
ohne Spannung<br />
Sensor<br />
schaltet nicht ein<br />
Sensor<br />
schaltet nicht aus<br />
Sensor<br />
schaltet immer EIN/AUS<br />
LED blinkt schnell<br />
(ca. 5 x pro Sekunde)<br />
Funktionsgarantie<br />
■ Sicherung defekt,<br />
nicht eingeschaltet<br />
■ Kurzschluss<br />
■ Zusätzlicher<br />
Wechselschalter AUS<br />
■ Sicherung defekt<br />
■ Glühlampe defekt<br />
■ bei Tagesbetrieb,<br />
Dämmerungseinstellung<br />
steht auf Nachtbetrieb<br />
■ Zusätzlicher<br />
Wechselschalter AUS<br />
■ Sicherung defekt<br />
■ dauernde Bewegung im<br />
Erfassungsbereich<br />
■ Dauerlicht eingeschaltet<br />
(rote LED leuchtet)<br />
■ weiterer Sensor parallel<br />
geschaltet und noch aktiv<br />
Dieses STEINEL-Produkt ist mit größter Sorgfalt<br />
hergestellt, funktions- und sicherheitsgeprüft<br />
nach geltenden Vorschriften, und anschließend<br />
einer Stichprobenkontrolle unterzogen.<br />
STEINEL übernimmt die Garantie für<br />
einwandfreie Beschaffenheit und Funktion.<br />
Die Garantiefrist beträgt 36 Monate und<br />
beginnt mit dem Tag des Verkaufs an den<br />
Verbraucher. Wir beseitigen Mängel, die auf<br />
Material- oder Fabrikationsfehlern beruhen. Die<br />
Garantieleistung erfolgt durch Instandsetzung<br />
oder Austausch mangelhafter Teile nach unserer<br />
Wahl.<br />
Eine Garantieleistung entfällt für Schäden an<br />
Verschleißteilen, sowie für Schäden und<br />
Mängel, die durch unsachgemäße Behandlung<br />
oder Wartung auftreten.<br />
Weitergehende Folgeschäden an fremden<br />
Gegenständen sind ausgeschlossen.<br />
■ Gardine, Blume etc. bewegt<br />
sich im Erfassungsbereich<br />
des Sensors und schaltet<br />
durch Bewegung neu<br />
10<br />
■ neue Sicherung, Netzschalter<br />
einschalten, Leitung mit<br />
Spannungsprüfer überprüfen<br />
■ Anschlüsse überprüfen<br />
■ einschalten<br />
■ neue Sicherung,<br />
evtl. Anschlüsse überprüfen<br />
■ Glühlampe austauschen<br />
■ neu einstellen<br />
■ einschalten<br />
■ neue Sicherung,<br />
evtl. Anschluss überprüfen<br />
■ Bereich kontrollieren<br />
■ Dauerlicht ausschalten<br />
■ Zeiteinstellung des anderen<br />
Sensors abwarten<br />
■ Bereich kontrollieren<br />
■ zu große Last angeschlossen ■ Last verkleinern oder Schütz<br />
verwenden<br />
Die Garantie wird nur gewährt, wenn das unzerlegte<br />
Gerät mit kurzer Fehlerbeschreibung,<br />
Kassenbon oder Rechnung (Kaufdatum und<br />
Händlerstempel), gut verpackt, an die zutreffende<br />
Servicestation eingesandt wird.<br />
Reparaturservice:<br />
Nach Ablauf der Garantiezeit oder Mängeln<br />
ohne Garantieanspruch repariert<br />
unser Werksservice. Bitte das<br />
Produkt gut verpackt an die<br />
nächste Servicestation senden.<br />
GB<br />
Principle<br />
Installation instructions<br />
Dear Customer,<br />
Congratulations on purchasing your new<br />
STEINEL high-frequency sensor and thank you<br />
for the confidence you have shown in us. You<br />
have chosen a high-quality product that has<br />
been manufactured, tested and packed with the<br />
greatest care.<br />
Please familiarise yourself with these instruc-<br />
The <strong>HF</strong> <strong>3360</strong> is an active motion detector that<br />
responds to the smallest of movements – independently<br />
of temperature. The integrated <strong>HF</strong><br />
sensor emits high-frequency electromagnetic<br />
waves (5.8 GHz) and receives their echo.<br />
In response to the slightest movement in the<br />
Installation<br />
An optional corner wall mount (product no.<br />
648015 black or 648114 white) is available for<br />
installing the sensor on an internal or external<br />
corner.<br />
The mains lead consists of a 3 phase cable.<br />
L = Phase<br />
N = Neutral conductor<br />
PE = Protective-earth conductor<br />
System components<br />
Standard installation<br />
Installation in ceiling box<br />
Basic element<br />
Concealed wiring<br />
Surface wiring<br />
Plug-in terminals<br />
Fitting the sensor cover<br />
Reach setting (1 – 8 m)<br />
Twilight setting (2 – 2000 lux)<br />
Safety warnings<br />
■ Disconnect the power supply before attempting<br />
any work on the sensor!<br />
■ The electrical connection lead must be dead<br />
during installation. Therefore, switch off the<br />
power first and use a voltage tester to make<br />
sure the wiring is off circuit.<br />
tions before attempting to install the sensor<br />
because prolonged reliable and trouble-free<br />
operation will only be ensured if it is fitted<br />
properly.<br />
We hope your new high-frequency sensor<br />
brings you lasting pleasure.<br />
detection zone, the change in echo is perceived<br />
by the sensor. A microprocessor subsequently<br />
triggers almost without delay the<br />
switching command "light on". Detection is<br />
possible through doors, panes of glass or thin<br />
walls.<br />
If the rubber seal is damaged, the cable entry<br />
openings must be sealed with an M 16 or M 20<br />
(at least IP 54) double seal cable gland.<br />
A condensation hole is indicated next to the<br />
rubber seal. This must be opened if necessary.<br />
Note on ceiling mounting: A water drainage<br />
hole is indicated on the faceplate opposite the<br />
sensor opening. This must be opened if necessary.<br />
Time setting (5 sec. – 15 min.)<br />
Reset button for returning reach, twilight<br />
and time setting to the factory settings of<br />
1 m, 2000 lux and 5 sec. respectively<br />
Fitting the decorative faceplate<br />
Drainage hole for wall installation<br />
(open if necessary)<br />
Drainage hole for ceiling installation<br />
(open with a 5 mm drill if necessary)<br />
■ Installing the sensor involves work on the<br />
mains power supply. This work must therefore<br />
be carried out professionally in accordance<br />
with applicable national wiring regulations<br />
and electrical operating conditions.<br />
(D-VDE 0100, A-ÖVE-EN 1, -SEV 1000)<br />
GB