

Samsung ML-3050 - User Manual_9.08 MB, pdf, ENGLISH
Samsung ML-3050 - User Manual_9.08 MB, pdf, ENGLISH
Samsung ML-3050 - User Manual_9.08 MB, pdf, ENGLISH

You also want an ePaper? Increase the reach of your titles
YUMPU automatically turns print PDFs into web optimized ePapers that Google loves.
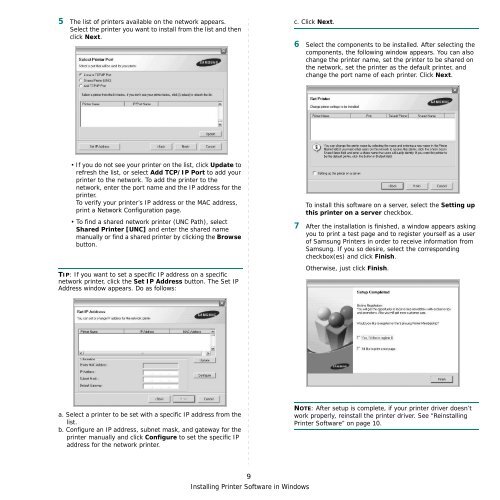
5 The list of printers available on the network appears.<br />
Select the printer you want to install from the list and then<br />
click Next.<br />
c. Click Next.<br />
6 Select the components to be installed. After selecting the<br />
components, the following window appears. You can also<br />
change the printer name, set the printer to be shared on<br />
the network, set the printer as the default printer, and<br />
change the port name of each printer. Click Next.<br />
• If you do not see your printer on the list, click Update to<br />
refresh the list, or select Add TCP/IP Port to add your<br />
printer to the network. To add the printer to the<br />
network, enter the port name and the IP address for the<br />
printer.<br />
To verify your printer’s IP address or the MAC address,<br />
print a Network Configuration page.<br />
• To find a shared network printer (UNC Path), select<br />
Shared Printer [UNC] and enter the shared name<br />
manually or find a shared printer by clicking the Browse<br />
button.<br />
TIP: If you want to set a specific IP address on a specific<br />
network printer, click the Set IP Address button. The Set IP<br />
Address window appears. Do as follows:<br />
To install this software on a server, select the Setting up<br />
this printer on a server checkbox.<br />
7 After the installation is finished, a window appears asking<br />
you to print a test page and to register yourself as a user<br />
of <strong>Samsung</strong> Printers in order to receive information from<br />
<strong>Samsung</strong>. If you so desire, select the corresponding<br />
checkbox(es) and click Finish.<br />
Otherwise, just click Finish.<br />
a. Select a printer to be set with a specific IP address from the<br />
list.<br />
b. Configure an IP address, subnet mask, and gateway for the<br />
printer manually and click Configure to set the specific IP<br />
address for the network printer.<br />
NOTE: After setup is complete, if your printer driver doesn’t<br />
work properly, reinstall the printer driver. See “Reinstalling<br />
Printer Software” on page 10.<br />
9<br />
Installing Printer Software in Windows


