

Sony MHS-TS20K - MHS-TS20K Istruzioni per l'uso Inglese
Sony MHS-TS20K - MHS-TS20K Istruzioni per l'uso Inglese
Sony MHS-TS20K - MHS-TS20K Istruzioni per l'uso Inglese

You also want an ePaper? Increase the reach of your titles
YUMPU automatically turns print PDFs into web optimized ePapers that Google loves.
Installing the software<br />
You can do the following using the Bloggie Software (pre-loaded on the internal memory).<br />
– Import images shot with the camera to a computer, and play back.<br />
– Upload images to a network service.<br />
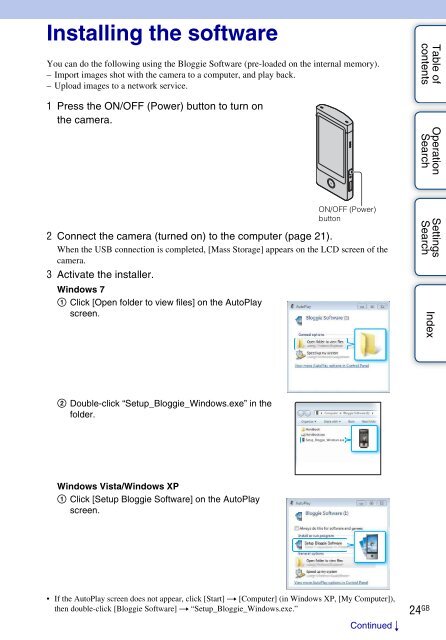
1 Press the ON/OFF (Power) button to turn on<br />
the camera.<br />
Table of<br />
contents<br />
O<strong>per</strong>ation<br />
Search<br />
ON/OFF (Power)<br />
button<br />
2 Connect the camera (turned on) to the computer (page 21).<br />
When the USB connection is completed, [Mass Storage] appears on the LCD screen of the<br />
camera.<br />
3 Activate the installer.<br />
Windows 7<br />
1 Click [Open folder to view files] on the AutoPlay<br />
screen.<br />
Settings<br />
Search<br />
Index<br />
2 Double-click “Setup_Bloggie_Windows.exe” in the<br />
folder.<br />
Windows Vista/Windows XP<br />
1 Click [Setup Bloggie Software] on the AutoPlay<br />
screen.<br />
• If the AutoPlay screen does not appear, click [Start] t [Computer] (in Windows XP, [My Computer]),<br />
then double-click [Bloggie Software] t “Setup_Bloggie_Windows.exe.”<br />
Continued r<br />
24 GB


