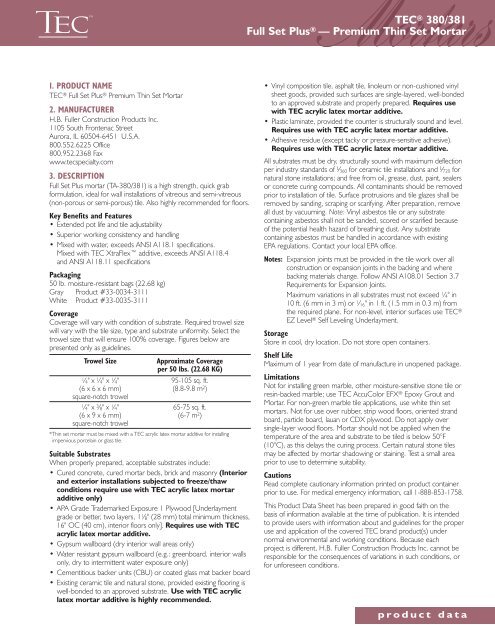
TEC® 380/381 Full Set Plus® — Premium Thin Set Mortar - Centura
TEC® 380/381 Full Set Plus® — Premium Thin Set Mortar - Centura
TEC® 380/381 Full Set Plus® — Premium Thin Set Mortar - Centura

You also want an ePaper? Increase the reach of your titles
YUMPU automatically turns print PDFs into web optimized ePapers that Google loves.
ortarsTEC ® <strong>380</strong>/<strong>381</strong><strong>Full</strong> <strong>Set</strong> Plus ® <strong>—</strong> <strong>Premium</strong> <strong>Thin</strong> <strong>Set</strong> <strong>Mortar</strong>4. TECHNICAL DATAApplicable Standard<strong>Full</strong> <strong>Set</strong> Plus ® <strong>Premium</strong> <strong>Thin</strong> <strong>Set</strong> <strong>Mortar</strong>, TA-<strong>380</strong>/<strong>381</strong>Description ANSI Requirement Typical ResultsTested in accordance with ANSI A118.1 Specifications forDry <strong>Set</strong> <strong>Mortar</strong>s28 Day Shear StrengthGlazed Wall Tile > 250 psi (1.7 MPa) 250-325 psi (1.7-2.2 MPa)Impervious Ceramic Tile (Porcelain) > 150 psi (1.0 MPa) 150-200 psi (1.0-1.4 MPa)Quarry Tile > 100 psi (0.7 MPa) 300-400 psi (2.1-2.8 MPa)Sag on Vertical Surfaces _ 50 minutes 50-60 minutesAdjustability at Room Temperature >_ 30 minutes 30-40 minutesFinal <strong>Set</strong> 9-15 hours 9-15 hoursDescription ANSI Requirement Typical Results when mixedwith XtraFlexTested in accordance with ANSI A118.4 Specifications forLatex-Modified Dry <strong>Set</strong> <strong>Mortar</strong>s over Exterior Grade Plywood28 Day Shear StrengthGlazed Wall Tile > 300 psi (2.1 MPa) > 600 psi* (4.1 MPa)Impervious Ceramic Tile (Porcelain) > 200 psi (1.4 MPa) 375-450 psi (2.6-3.1 MPa)Quarry Tile > 150 psi (1.0 MPa) 450-600 psi (3.1-4.1 MPa)Sag on Vertical Surfaces _ 50 minutes 90-120 minutesAdjustability at Room Temperature >_ 30 minutes 50-70 minutesFinal <strong>Set</strong> 9-15 hours 9-15 hoursFlexibility (movement absorbed before No ANSI spec 1⁄ 16" (1.6 mm)shear) Porcelain to Concretecurrently availableTested in accordance with ANSI A118.11 Specifications forLatex-Modified Dry <strong>Set</strong> <strong>Mortar</strong>s over Exterior Grade Plywood28 Day Shear Strength No ANSI spec > 250 psi (1.7 MPa)Quarry Tilecurrently available* ANSI-sapecified glazed wall tile failed at 600 psi (4.1 MPa).Physical PropertiesDescriptionPhysical StateColorPot LifeInitial Cure [at 72°F (22°C)]Final CureFoot Traffic Rating (ASTM C627)StorageShelf LifeDry powderAvailable in white and gray4 to 5 hours16 to 24 hours21 daysResidential to Extra Heavy Commercial(depending on substrate)Store in cool, dry location. Do not store opencontainers.Maximum 1 year from date of manufacture inproperly stored, unopened package5. INSTALLATION INSTRUCTIONSMixing<strong>—</strong>With WaterFor best results, maintain all tiling materials, substrates, room andadhesives at 50°-70°F (10-21°C) for 24 hours before and 48 hoursafter installation. Thoroughly mix 50 lbs. (22.68 kg) <strong>Full</strong> <strong>Set</strong> Plus with5 to 6 quarts (4.7-5.7 L) clean, cool water. Add powder to liquid forease of mixing. Mix material to a thick creamy consistency, then allowthe mortar to stand for 10 minutes. Remix and apply. Avoid breathingdust and contact with eyes and skin. Avoid using high speed mixing,not to exceed 300 rpm, to prevent entraining air.Mixing<strong>—</strong>With Latex AdditiveFor improved performance in any application, use TEC XtraFlexacrylic latex mortar additive in place of water. For installations subjectedto freeze/thaw conditions; bonding over most non-cementitioussubstrates; bonding porcelain and other difficult-to-bond tile; or anyANSI A118.4 or ANSI A118.11 latex mortar project, the use ofXtraFlex additive is required.When using a mortar additive, always follow label directions fordetailed mixing and substrate recommendations.ApplicationApply mortar using flat side of trowel to promote better substratecontact, then comb in one direction with the notched side of thetrowel. Spread only an area that can be tiled while surface is still tacky(typically 20-30 minutes). Press tiles into setting bed, then push in adirection perpendicular to the notched trowel ridges to achieveoptimum coverage. Apply mortar in a heavy enough layer so thatcomplete contact (no voids) between mortar and tile is accomplishedwhen tile is positioned. It may be necessary to “back-butter” largetiles to achieve complete coverage and firm support. Periodicallyremove and check a tile to assure proper coverage. Keep a minimumof 2 ⁄ 3 of the joint depth between tiles for grouting.Open time and tile hand adjustability may vary with job site conditions.Stir occasionally during use to maintain the smooth, creamyconsistency of the product. Do not add additional water.Clean-upClean tools, hands, and excess materials from face of tile, whilemortar is still fresh, with warm soapy water.Grouting/CuringGrouting may be accomplished when tiles are held firmly in place,typically 16 to 24 hours after installation is completed. No traffic ispermitted over the tiles prior to grouting. Cold temperatures or highhumidity may extend curing time. Unglazed tiles may require sealingprior to grouting so discolorations will not occur. The use of TECbrand grouts is highly recommended.6. AVAILABILITY AND COSTAvailabilityTEC <strong>Premium</strong> Tile and Stone Installation Products are availablenationwide. To locate a distributor in your area, please contact:Phone: 800-832-9002Website: www.tecspecialty.comCostContact your local TEC Distributor.7. WARRANTYFor warranty details, see your sales associate or www.tecspecialty.com.8. MAINTENANCENot applicable9. TECHNICAL SERVICESTechnical assistanceInformation is available by calling the Technical Support Hotline.Toll Free: 1-800-832-9023Fax: 630-952-1235Technical and safety literatureTo acquire technical and safety literature, please visit our website atwww.tecspecialty.com.10. FILING SYSTEMDivision 9H.B. <strong>Full</strong>er Construction Products Inc.1105 South Frontenac StreetAurora, IL 60504-6451 U.S.A.www.tecspecialty.comPrinted in U.S.A. ©2010 H.B. <strong>Full</strong>er Construction Products Inc. Form # DS<strong>380</strong>/<strong>381</strong> R1210-1