Manual tehnic expresoare Philips-Saeco HD8323/09 - Cafea
Manual tehnic expresoare Philips-Saeco HD8323/09 - Cafea
Manual tehnic expresoare Philips-Saeco HD8323/09 - Cafea
Create successful ePaper yourself
Turn your PDF publications into a flip-book with our unique Google optimized e-Paper software.
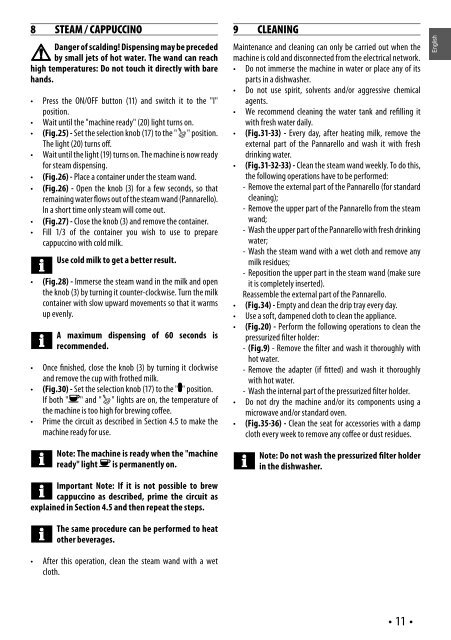
8 STEAM / CAPPUCCINO<br />
Danger of scalding! Dispensing may be preceded<br />
by small jets of hot water. The wand can reach<br />
high temperatures: Do not touch it directly with bare<br />
hands.<br />
• Press the ON/OFF button (11) and switch it to the "I"<br />
position.<br />
• Wait until the "machine ready" (20) light turns on.<br />
• (Fig.25) - Set the selection knob (17) to the " " position.<br />
The light (20) turns off .<br />
• Wait until the light (19) turns on. The machine is now ready<br />
for steam dispensing.<br />
• (Fig.26) - Place a container under the steam wand.<br />
• (Fig.26) - Open the knob (3) for a few seconds, so that<br />
remaining water fl ows out of the steam wand (Pannarello).<br />
In a short time only steam will come out.<br />
• (Fig.27) - Close the knob (3) and remove the container.<br />
• Fill 1/3 of the container you wish to use to prepare<br />
cappuccino with cold milk.<br />
Use cold milk to get a better result.<br />
• (Fig.28) - Immerse the steam wand in the milk and open<br />
the knob (3) by turning it counter-clockwise. Turn the milk<br />
container with slow upward movements so that it warms<br />
up evenly.<br />
A maximum dispensing of 60 seconds is<br />
recommended.<br />
• Once fi nished, close the knob (3) by turning it clockwise<br />
and remove the cup with frothed milk.<br />
• (Fig.30) - Set the selection knob (17) to the " " position.<br />
If both " " and " " lights are on, the temperature of<br />
the machine is too high for brewing coff ee.<br />
• Prime the circuit as described in Section 4.5 to make the<br />
machine ready for use.<br />
Note: The machine is ready when the "machine<br />
ready" light is permanently on.<br />
Important Note: If it is not possible to brew<br />
cappuccino as described, prime the circuit as<br />
explained in Section 4.5 and then repeat the steps.<br />
The same procedure can be performed to heat<br />
other beverages.<br />
• After this operation, clean the steam wand with a wet<br />
cloth.<br />
9 CLEANING<br />
Maintenance and cleaning can only be carried out when the<br />
machine is cold and disconnected from the electrical network.<br />
• Do not immerse the machine in water or place any of its<br />
parts in a dishwasher.<br />
• Do not use spirit, solvents and/or aggressive chemical<br />
agents.<br />
• We recommend cleaning the water tank and refi lling it<br />
with fresh water daily.<br />
• (Fig.31-33) - Every day, after heating milk, remove the<br />
external part of the Pannarello and wash it with fresh<br />
drinking water.<br />
• (Fig.31-32-33) - Clean the steam wand weekly. To do this,<br />
the following operations have to be performed:<br />
- Remove the external part of the Pannarello (for standard<br />
cleaning);<br />
- Remove the upper part of the Pannarello from the steam<br />
wand;<br />
- Wash the upper part of the Pannarello with fresh drinking<br />
water;<br />
- Wash the steam wand with a wet cloth and remove any<br />
milk residues;<br />
- Reposition the upper part in the steam wand (make sure<br />
it is completely inserted).<br />
Reassemble the external part of the Pannarello.<br />
• (Fig.34) - Empty and clean the drip tray every day.<br />
• Use a soft, dampened cloth to clean the appliance.<br />
• (Fig.20) - Perform the following operations to clean the<br />
pressurized fi lter holder:<br />
- (Fig.9) - Remove the fi lter and wash it thoroughly with<br />
hot water.<br />
- Remove the adapter (if fi tted) and wash it thoroughly<br />
with hot water.<br />
- Wash the internal part of the pressurized fi lter holder.<br />
• Do not dry the machine and/or its components using a<br />
microwave and/or standard oven.<br />
• (Fig.35-36) - Clean the seat for accessories with a damp<br />
cloth every week to remove any coff ee or dust residues.<br />
Note: Do not wash the pressurized fi lter holder<br />
in the dishwasher.<br />
• 11 •<br />
English


