Manual tehnic expresoare Philips-Saeco HD8323/09 - Cafea
Manual tehnic expresoare Philips-Saeco HD8323/09 - Cafea
Manual tehnic expresoare Philips-Saeco HD8323/09 - Cafea
Create successful ePaper yourself
Turn your PDF publications into a flip-book with our unique Google optimized e-Paper software.
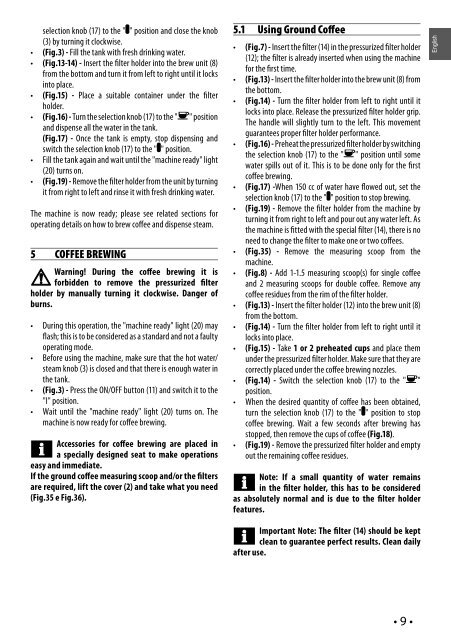
selection knob (17) to the " " position and close the knob<br />
(3) by turning it clockwise.<br />
• (Fig.3) - Fill the tank with fresh drinking water.<br />
• (Fig.13-14) - Insert the fi lter holder into the brew unit (8)<br />
from the bottom and turn it from left to right until it locks<br />
into place.<br />
• (Fig.15) - Place a suitable container under the fi lter<br />
holder.<br />
• (Fig.16) - Turn the selection knob (17) to the " " position<br />
and dispense all the water in the tank.<br />
(Fig.17) - Once the tank is empty, stop dispensing and<br />
switch the selection knob (17) to the " " position.<br />
• Fill the tank again and wait until the "machine ready" light<br />
(20) turns on.<br />
• (Fig.19) - Remove the fi lter holder from the unit by turning<br />
it from right to left and rinse it with fresh drinking water.<br />
The machine is now ready; please see related sections for<br />
operating details on how to brew coff ee and dispense steam.<br />
5 COFFEE BREWING<br />
Warning! During the coff ee brewing it is<br />
forbidden to remove the pressurized fi lter<br />
holder by manually turning it clockwise. Danger of<br />
burns.<br />
• During this operation, the "machine ready" light (20) may<br />
fl ash; this is to be considered as a standard and not a faulty<br />
operating mode.<br />
• Before using the machine, make sure that the hot water/<br />
steam knob (3) is closed and that there is enough water in<br />
the tank.<br />
• (Fig.3) - Press the ON/OFF button (11) and switch it to the<br />
"I" position.<br />
• Wait until the "machine ready" light (20) turns on. The<br />
machine is now ready for coff ee brewing.<br />
Accessories for coff ee brewing are placed in<br />
a specially designed seat to make operations<br />
easy and immediate.<br />
If the ground coff ee measuring scoop and/or the fi lters<br />
are required, lift the cover (2) and take what you need<br />
(Fig.35 e Fig.36).<br />
5.1 Using Ground Coff ee<br />
• (Fig.7) - Insert the fi lter (14) in the pressurized fi lter holder<br />
(12); the fi lter is already inserted when using the machine<br />
for the fi rst time.<br />
• (Fig.13) - Insert the fi lter holder into the brew unit (8) from<br />
the bottom.<br />
• (Fig.14) - Turn the fi lter holder from left to right until it<br />
locks into place. Release the pressurized fi lter holder grip.<br />
The handle will slightly turn to the left. This movement<br />
guarantees proper fi lter holder performance.<br />
• (Fig.16) - Preheat the pressurized fi lter holder by switching<br />
the selection knob (17) to the " " position until some<br />
water spills out of it. This is to be done only for the fi rst<br />
coff ee brewing.<br />
• (Fig.17) -When 150 cc of water have fl owed out, set the<br />
selection knob (17) to the " " position to stop brewing.<br />
• (Fig.19) - Remove the fi lter holder from the machine by<br />
turning it from right to left and pour out any water left. As<br />
the machine is fi tted with the special fi lter (14), there is no<br />
need to change the fi lter to make one or two coff ees.<br />
• (Fig.35) - Remove the measuring scoop from the<br />
machine.<br />
• (Fig.8) - Add 1-1.5 measuring scoop(s) for single coff ee<br />
and 2 measuring scoops for double coff ee. Remove any<br />
coff ee residues from the rim of the fi lter holder.<br />
• (Fig.13) - Insert the fi lter holder (12) into the brew unit (8)<br />
from the bottom.<br />
• (Fig.14) - Turn the fi lter holder from left to right until it<br />
locks into place.<br />
• (Fig.15) - Take 1 or 2 preheated cups and place them<br />
under the pressurized fi lter holder. Make sure that they are<br />
correctly placed under the coff ee brewing nozzles.<br />
• (Fig.14) - Switch the selection knob (17) to the " "<br />
position.<br />
• When the desired quantity of coff ee has been obtained,<br />
turn the selection knob (17) to the " " position to stop<br />
coff ee brewing. Wait a few seconds after brewing has<br />
stopped, then remove the cups of coff ee (Fig.18).<br />
• (Fig.19) - Remove the pressurized fi lter holder and empty<br />
out the remaining coff ee residues.<br />
Note: If a small quantity of water remains<br />
in the fi lter holder, this has to be considered<br />
as absolutely normal and is due to the fi lter holder<br />
features.<br />
Important Note: The fi lter (14) should be kept<br />
clean to guarantee perfect results. Clean daily<br />
after use.<br />
• 9 •<br />
English


