User manual HUSQVARNA YTH 150 TWIN - MY PDF MANUALS
User manual HUSQVARNA YTH 150 TWIN - MY PDF MANUALS
User manual HUSQVARNA YTH 150 TWIN - MY PDF MANUALS

You also want an ePaper? Increase the reach of your titles
YUMPU automatically turns print PDFs into web optimized ePapers that Google loves.
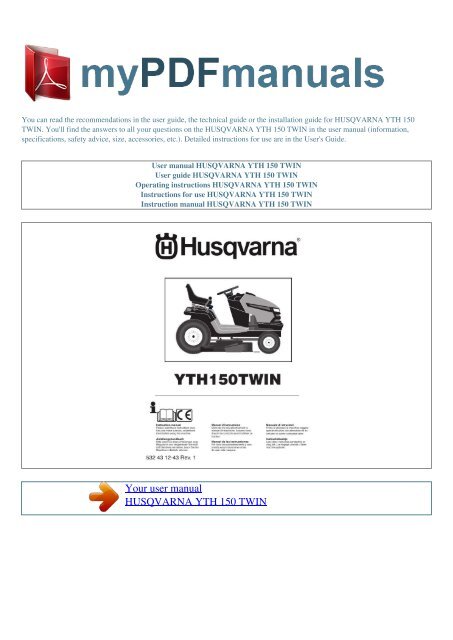
You can read the recommendations in the user guide, the technical guide or the installation guide for <strong>HUSQVARNA</strong> <strong>YTH</strong> <strong>150</strong><br />
<strong>TWIN</strong>. You'll find the answers to all your questions on the <strong>HUSQVARNA</strong> <strong>YTH</strong> <strong>150</strong> <strong>TWIN</strong> in the user <strong>manual</strong> (information,<br />
specifications, safety advice, size, accessories, etc.). Detailed instructions for use are in the <strong>User</strong>'s Guide.<br />
<strong>User</strong> <strong>manual</strong> <strong>HUSQVARNA</strong> <strong>YTH</strong> <strong>150</strong> <strong>TWIN</strong><br />
<strong>User</strong> guide <strong>HUSQVARNA</strong> <strong>YTH</strong> <strong>150</strong> <strong>TWIN</strong><br />
Operating instructions <strong>HUSQVARNA</strong> <strong>YTH</strong> <strong>150</strong> <strong>TWIN</strong><br />
Instructions for use <strong>HUSQVARNA</strong> <strong>YTH</strong> <strong>150</strong> <strong>TWIN</strong><br />
Instruction <strong>manual</strong> <strong>HUSQVARNA</strong> <strong>YTH</strong> <strong>150</strong> <strong>TWIN</strong><br />
Your user <strong>manual</strong><br />
<strong>HUSQVARNA</strong> <strong>YTH</strong> <strong>150</strong> <strong>TWIN</strong>
Powered by TC<strong>PDF</strong> (www.tcpdf.org)<br />
Manual abstract:<br />
replace worn or damaged blades and bolts in sets to preserve balance. On multi-bladed machines, take care as rotating one blade can cause other blades to<br />
rotate. Stop the engine and disengage drive to attachment - before refueling; - before removing the grass catcher; - before making height adjustment unless<br />
adjustment can be made from the operator's position. Reduce the throttle setting during engine run-out and, if the engine is provided with a shut-off valve,<br />
turn the fuel off at the conclusion of mowing. Keep all nuts, bolts and screws tight to be sure the equipment is in safe working condition. Never store the<br />
equipment with petrol in the tank inside a building where fumes may reach an open flame or spark. Allow the engine to cool before storing in any enclosure.<br />
To reduce the fire hazard, keep the engine, silencer, battery compartment and petrol storage area free of grass, leaves, or excessive grease. If the fuel tank has<br />
to be drained, this should be done outdoors. On multi-bladed machines, take care as rotating one blade can cause other blades to rotate.<br />
When machine is to be parked, stored or left unattended, lower the cutting means unless a positive mechanical lock is used. WARNING: Always disconnect<br />
spark plug wire and place wire where it cannot contact spark plug in order to prevent accidental starting when setting up, transporting, adjusting or making<br />
repairs. These symbols may appear on your machine or in the literature supplied with the product. Learn and understand their meaning. These symbols may<br />
appear on your machine or in the literature supplied with the product.<br />
Learn and understand their meaning. Before the tractor can be used certain parts must be assembled, which for transportation reasons are enclosed in the<br />
packing. NOTE: If battery is put into service after month and year indicated on label, charge battery for minimum of one hour at 6-10 amps. WARNING:<br />
Before installing battery remove metal bracelets, wrist watch bands, rings, etc. from your person.<br />
Touching these items to battery could result in burns. remove terminal portective caps and discard. Connect the red cable to (+) and then the black earth<br />
cable to (-). Lift up adjustment lever (A) and slide seat until a comfortable position is reached which allows you to press clutch/brake pedal all the way down.<br />
Release lever to lock seat in position. Check that the flex is correctly connected to the safety switch (3) on the seat holder. Gauge wheels are properly adjusted<br />
when they are slightly off the ground when mower is at the desired cutting height in operating position. Gauge wheels then keep the deck in proper position to<br />
help prevent scalping in most terrain conditions. â· Adjust gauge wheels with tractor on a flat level surface. With mower in desired height of cut position,<br />
gauge wheels should be assembled so they are slightly off the ground.<br />
The throttle control regulates the engine revs and thus the rotation speed of the blades. = Full speed = Idling speed Used for braking the tractor and starting<br />
the engine. There are four different positions for this lever: N = Neutral (no drive) S = Slow F = Fast R = Reverse The lever can be moved steplessly between<br />
S and F to ensure the required speed. Quick lifting/lowering of the cutting unit Pull the lever backwards to quickly lift the cutting unit when passing over<br />
irregularities in the lawn, etc. During transportation the cutting unit shall be in the highest position. Pull the lever back until it locks. There are four different<br />
positions for the ignition key: OFF All electric current broken. Reverse Operation System (ROS) - Allows operation of mower deck or other powered<br />
attachment while in reverse (See section 5 - "Driving"). wARNING! Never leave the key in the ignition lock when leaving the machine on its own. Press down<br />
the brake pedal to bottom position.<br />
2. Move the parking brake lever upwards and hold in this position. To release the parking brake all that is necessary is to push down the brake pedal. To tow<br />
or move the tractor without the aid of the engine, the free-wheel control knob must be pulled out and locked in position. When the engine is cold the choke<br />
should be pulled out before starting.<br />
When the engine has started and is running smoothly push the choke in..<br />
Your user <strong>manual</strong><br />
<strong>HUSQVARNA</strong> <strong>YTH</strong> <strong>150</strong> <strong>TWIN</strong>