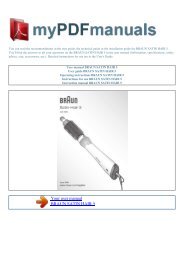
User manual BIFINETT KH 1191 ELECTRIC PASTRY PRESS
User manual BIFINETT KH 1191 ELECTRIC PASTRY PRESS
User manual BIFINETT KH 1191 ELECTRIC PASTRY PRESS

Create successful ePaper yourself
Turn your PDF publications into a flip-book with our unique Google optimized e-Paper software.
You can read the recommendations in the user guide, the technical guide or the installation guide for <strong>BIFINETT</strong> <strong>KH</strong> <strong>1191</strong><br />
<strong>ELECTRIC</strong> <strong>PASTRY</strong> <strong>PRESS</strong>. You'll find the answers to all your questions on the <strong>BIFINETT</strong> <strong>KH</strong> <strong>1191</strong> <strong>ELECTRIC</strong> <strong>PASTRY</strong><br />
<strong>PRESS</strong> in the user <strong>manual</strong> (information, specifications, safety advice, size, accessories, etc.). Detailed instructions for use are in the<br />
<strong>User</strong>'s Guide.<br />
<strong>User</strong> <strong>manual</strong> <strong>BIFINETT</strong> <strong>KH</strong> <strong>1191</strong> <strong>ELECTRIC</strong> <strong>PASTRY</strong> <strong>PRESS</strong><br />
<strong>User</strong> guide <strong>BIFINETT</strong> <strong>KH</strong> <strong>1191</strong> <strong>ELECTRIC</strong> <strong>PASTRY</strong> <strong>PRESS</strong><br />
Operating instructions <strong>BIFINETT</strong> <strong>KH</strong> <strong>1191</strong> <strong>ELECTRIC</strong> <strong>PASTRY</strong> <strong>PRESS</strong><br />
Instructions for use <strong>BIFINETT</strong> <strong>KH</strong> <strong>1191</strong> <strong>ELECTRIC</strong> <strong>PASTRY</strong> <strong>PRESS</strong><br />
Instruction <strong>manual</strong> <strong>BIFINETT</strong> <strong>KH</strong> <strong>1191</strong> <strong>ELECTRIC</strong> <strong>PASTRY</strong> <strong>PRESS</strong><br />
Your user <strong>manual</strong><br />
<strong>BIFINETT</strong> <strong>KH</strong> <strong>1191</strong> <strong>ELECTRIC</strong> <strong>PASTRY</strong> <strong>PRESS</strong>
Powered by TCPDF (www.tcpdf.org)<br />
Manual abstract:<br />
Press on the start switch w until the first biscuit has been formed. 4. Release the start switch w and direct the biscuit shaper at another position. How long you<br />
must press the start switch w is dependant on the desired size and shape of the biscuit. If you press the start switch w only shortly, you will form a small<br />
biscuit. Repeat the steps until you have shaped a sufficient number of biscuits. The pastry to be processed must be at room temperature. If it is too soft, place it<br />
in the refrigerator for a short time. 1. Turn the container u so that the arrow points to the open lock .<br />
2. Remove the container u from the motor unit r. Leave the threaded rod t with the pusher y in the motor unit r. If need be, moisten the inner surface of the<br />
container u with water before filling it with pastry. Doing so helps avoid having the pastry stick to the inner surfaces of the container u.<br />
This permits easier filling. Fill the container u with this pastry roll. Should the pastry be too sticky, place it in the refrigerator for 15 minutes. The decoration<br />
substance must have a soft and creamy consistency, otherwise it will block the nozzle o. â· Press the start switch w only shortly to start with, to see how the<br />
substance responds.<br />
It can happen that the substance may continue to flow out for a short time. Place the lock device on the nozzle adaptor i onto "OPEN". As soon as the<br />
decorative substance starts to flow from the nozzle o, move the Biscuit Shaper in accord with the decorative design you wish to create. Press and hold the<br />
start button w until the pusher y has returned itself to the MAX marking. Remove the plug e from the wall socket before refilling the container. Should the<br />
threaded t rod not retract, first remove the lock ring s and, whilst holding the start switch w pressed down, lightly push the threaded rod t to the rear. If<br />
necessary, also remove any pastry that may have collected behind the pusher y. Should the pusher y block during use, it could be that the substance or the<br />
pastry is too firm. remove all of the substance resp. The pastry and, if possible, blend some fluids into it.<br />
The motor unit r may NOT be submerged in water. If necessary, it can be wiped clean with a moist cloth. 4. Clean the parts that may be covered with pastry<br />
and dry them well. (see chapter "Cleaning and care") 5. Fill the Biscuit Shaper with pastry or the decorative substance, reassemble the Biscuit Shaper as<br />
described and continue. Press and hold the start button w until the threaded rod t has completely extended itself outwards. With some pastries and motif discs<br />
it is better to work quickly, with others, better to work slowly. â· Simply use trial and error until you can produce biscuits that match your expectations. â· If<br />
you want to use various motif discs and nozzles, first of all use all of the currently filled pastry or decorative substance.<br />
Remove the power plug e from the wall socket before disassembling the appliance. Turn the container u so that the arrow is directed at the open lock . 5.<br />
Loosen the container u from the motor unit r . The threaded rod t with pusher y can now also be dismantled.<br />
Remove the plug e from the wall socket before cleaning the appliance. As it is difficult to remove dried-on pastry remains, always clean the Biscuit Shaper and<br />
the motif discs employed d directly after use. If need be, remove residues from the Biscuit Shaper with a knife, pastry scraper or similar. â· The consistency of<br />
the pastry or the decorative substance should be such that it easily flows from the motif discs d or nozzles o and remains affixed onto the baking paper or the<br />
item being decorated. â· Should the appliance refuse to start, it could be that the pastry or the decorative substance is too firm or that the container u is not<br />
correctly attached to the motor unit r.<br />
â· If the pastry is too firm to be processed, knead in some egg yolk or mix in some fluids. â· Biscuit pastry that has lain in the re-frigerator can become too<br />
firm for processing. â· Should the pastry to be processed be too soft, lay it in the refrigerator for approx. Nuts or almonds), select a motif disc d with larger<br />
openings. The motor unit r may NOT be submerged in water. If necessary, this can be wiped clean with a moist cloth..<br />
Your user <strong>manual</strong><br />
<strong>BIFINETT</strong> <strong>KH</strong> <strong>1191</strong> <strong>ELECTRIC</strong> <strong>PASTRY</strong> <strong>PRESS</strong>