Create successful ePaper yourself
Turn your PDF publications into a flip-book with our unique Google optimized e-Paper software.
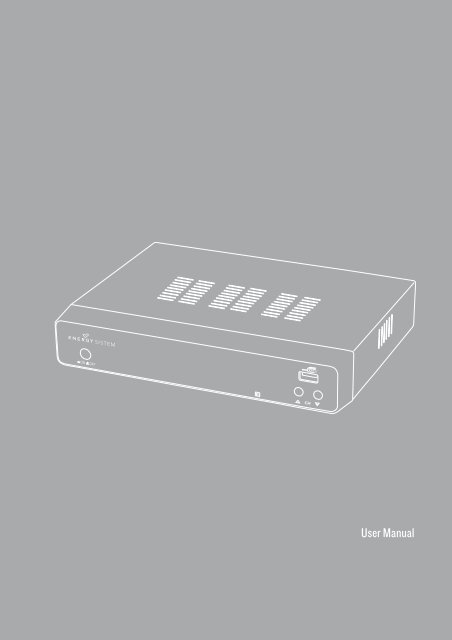
<strong>User</strong> <strong>Manual</strong>
1. INTRODUCTION<br />
To ensure your safety and the safety of others, please ensure that you read all the safety information<br />
before operating this product.<br />
Keep this information in a safe place for future reference.<br />
This symbol indicates that this product incorporates double insulation between hazardous<br />
mains voltage and user accessible parts.<br />
WARNING: To reduce the risk of fire or electric shock, do not expose this apparatus to rain or<br />
moisture.<br />
Safety Considerations.<br />
≥≥<br />
Position the cables so that they cannot be walked on or pinched by items placed on or against<br />
them.<br />
≥≥<br />
Do not use the set top box in humid or damp conditions.<br />
≥≥<br />
Do not allow the set top box to get wet.<br />
≥≥<br />
Do not expose the set top box to dripping or splashing.<br />
≥≥<br />
Do not place water filled objects such as vases on top of the set top box.<br />
≥≥<br />
Do not place naked flame sources, such as candles, on the top of the set top box.<br />
Ventilation<br />
The slots and openings on the set top box are for ventilation. Do not cover or block them as it may<br />
cause overheating.<br />
NEVER let children push anything into the holes or slots on the case.<br />
Servicing<br />
There are no user serviceable parts in this set top box.<br />
Battery Disposal<br />
Please ensure batteries are disposed of safely.<br />
Never dispose of batteries in a fire or with other household waste.<br />
Check with your local authority for disposal regulations.<br />
3
Cleaning<br />
ALWAYS unplug the set top box before you clean it.<br />
Do not use liquid or aerosol cleaners.<br />
Clean the set top box with a soft, damp (not wet) cloth.<br />
Place the product in a well-ventilated area<br />
T5250 handling and care<br />
Don’t install it in the cold or under direct sunlight<br />
Leave a minimum 10cm gap all around the product<br />
Do not disassemble, repair,<br />
or reorganize the product<br />
Don’t place cups with water or other liquids<br />
on the top of the product<br />
Don’t place objects on the top of the product<br />
4
l<br />
l<br />
2. FRONT PANEL<br />
5<br />
1 2 3 4<br />
1. POWER: Used to switch the set top box ON or OFF.<br />
2. Standby Indicator: Used to visually show the power state of the set top box:<br />
green LED will show if is turned on the set top box<br />
red LED will be light if the set top box entered standby mode.<br />
3. REMOTE CONTROL SENSOR: Used to receive the signal from the remote control.<br />
4. CHANNEL UP/DOWN: Used to change channels without using the remote control.<br />
5. USB CONNECTOR: Used to attach your external USB hub/card reader/storage device.<br />
3. REAR PANEL<br />
Digita<br />
Audio<br />
100-240V~<br />
50/60Hz<br />
R F<br />
IN<br />
R F LOOP<br />
THROUGH<br />
Coaxia<br />
VCR O O TV<br />
1 2 3 4 5 6<br />
1. RF IN: This socket connects to your external aerial.<br />
2. RF LOOPTHROUGH: This socket will bypass the RF signal to either your TV or another video<br />
system.<br />
3. COAXIAL: This socket connects to a S/PDIF RCA socket on your surround sound system.<br />
4. VCR SCART: This socket connects to either a DVD or other video system.<br />
5. TV SCART: This socket connects to your TV.<br />
6. MAINS CABLE: This is used to connect to your main power supply.<br />
5
4. REMOTE CONTROL<br />
4.1. BUTTON DESCRIPTIONS<br />
STANDB Y DTV/<br />
VCR<br />
1 13<br />
2<br />
3<br />
4<br />
5<br />
6<br />
7<br />
8 9<br />
10<br />
11 12<br />
VOL<br />
-<br />
MUTE<br />
MENU<br />
REC LIST<br />
INFO<br />
EPG<br />
CH+<br />
OK<br />
CH-<br />
1 2 3<br />
4 5 6<br />
PLA Y/ PAUSE<br />
EXIT<br />
GAME<br />
RECALL<br />
VOL<br />
+<br />
FAVORITE<br />
7 8 9 0<br />
TV/RADIO AUDIO SUBTITLE TEXT<br />
SLEEP LIST MSM<br />
RECORD STOP REV FWD<br />
14 15<br />
16 17<br />
18<br />
19<br />
20<br />
21<br />
22 23<br />
24 25<br />
1. STANDBY: Switch the set top box between on and standby mode.<br />
2. MUTE: Mute/unmute the sound.<br />
3. MENU: Open the main menu window.<br />
4. CH+/-: Move around the menu screens or change the channels in<br />
normal play mode.<br />
5. VOL+/-: Move around the menu screens or change the volume in<br />
normal play mode.<br />
6. RECLIST: Show the recorded programs list.<br />
7. NUMBER KEYS: Select channel numbers or input numbers in<br />
menus.<br />
8. TV/RADIO: Switch between TV channels and Radio stations.<br />
9. AUDIO: Select the available audio track or set the sound mode as<br />
LR(stereo), LL(left), RR(right).<br />
10. COLOR KEYS(RED/GREEN/YELLOW/BLUE): Operate different<br />
functions in TEXT screen or other menus.<br />
RED: SLEEP function (adjustable timer).<br />
GREEN: LIST function.<br />
YELLOW: MSM – Multi Screen Mosaic.<br />
11. RECORD: Record the program manually.<br />
12. STOP: Stop the current recording if exists or stop the playback<br />
and return to DTV mode.<br />
13. DTV/VCR: Switch between VCR SCART input and DTV output<br />
mode.<br />
14. INFO: Display information about the channel being viewed or<br />
further information about the program when in normal play mode.<br />
15. PLAY/PAUSE: Pause or playback the program being viewed.<br />
16. EPG: Display information about the program being viewed and<br />
what’s on next.<br />
17. EXIT: Return to the previous screen or menu.<br />
18. OK: Confirm a selection within a menu.<br />
19. FAVORITE: Access your favourite channels.<br />
20. GAME: Select an accessory: Gomoku, Calendar or Calculator.<br />
21. RECALL: Switch between the last two viewed channels.<br />
22. SUBTITLE: Switch among different subtitles that are broadcasted.<br />
23. TEXT: Display teletext (if available in the broadcasted stream).<br />
24. REV: Fast backward at selectable speeds.<br />
25. FWD: Fast forward at selectable speeds.<br />
NOTE: SUBTITLES/TEXT/AUDIO may not be available for all channels.<br />
6
4.2. INSTALLING THE BATTERIES<br />
Remove the battery cover from the remote control and put 2xAAA size batteries inside the<br />
compartment.<br />
The diagram inside the battery compartment shows the correct way to install the batteries.<br />
1. Open the cover 2. Install the batteries 3. Close the cover<br />
4.3. USING THE REMOTE CONTROL<br />
To use the remote control point it towards the front of the digital set top box.<br />
The remote control has a range of up to 7 metres (23 feet) from the set top box at an angle of up to<br />
60 degrees.<br />
The remote control will not operate if its path is blocked.<br />
Sunlight or very bright light will decrease the sensitivity of the remote control.<br />
30º<br />
30º<br />
7
l<br />
l<br />
5. CONNECTIONS<br />
Caution: Make sure to check that the voltage of the wall outlet has the same rating than the receiver.<br />
To prevent the risk of electric shock, do not open the cover or the back of the receiver.<br />
When connecting the receiver to other equipment (e.g. TV, VCR and amplifier) make sure to refer to<br />
relevant user manual for instruction. Also, make sure you disconnect all the equipments from the<br />
mains supply before the connection.<br />
5.1. CONNECTING TO A TV SET<br />
TV aerial<br />
TV<br />
Digita<br />
Audio<br />
100-240V~<br />
50/60Hz<br />
R F<br />
IN<br />
R F LOOP<br />
THROUGH<br />
Coaxia<br />
VCR O O TV<br />
8
l<br />
l<br />
5.2. CONNECTING TO TV AND VCR<br />
TV aerial<br />
TV<br />
Digita<br />
Audio<br />
100-240V~<br />
50/60Hz<br />
R F<br />
IN<br />
R F LOOP<br />
THROUGH<br />
Coaxia<br />
VCR O O TV<br />
VCR<br />
9
l<br />
l<br />
5.3. CONNECTING TO AN A/V RECEIVER WITH DIGITAL AUDIO INPUT<br />
Digita<br />
Audio<br />
100-240V~<br />
50/60Hz<br />
R F<br />
IN<br />
R F LOOP<br />
THROUGH<br />
Coaxia<br />
VCR O O TV<br />
A/V Receiver<br />
10
6. USER INTERFACE - MAIN MENU<br />
Note that the first time you use T5250 it will automaticaly show the Setup->Installation screen in<br />
order to scan for TV and radio channels. Please refer to Setup->Instalation in page 11.<br />
Once the channel scan is finished and all the channels are stored into the database, you can start to<br />
watch the digital terrestrial TV channel or listen to the radio broadcast, some typical operations are<br />
given in this chapter.<br />
Press to enter Main Menu. See Figure 1.<br />
Press to display T5250 version information.<br />
6.1. SETUP<br />
Set the system settings. See Figure 1.<br />
6.1.1. Installation<br />
Figure 1. Main Menu - Setup<br />
Figure 2. SETUP - Installation<br />
Figure 3. SETUP - Installation (continued)<br />
Set the receiving and playing program settings of T5250. See Figure 2, Figure 3.<br />
11
Antenna Setting<br />
Set the antenna power on or off to supply +5V power to antenna or not.<br />
Note: The default is OFF, set this option to ON only if T5250 is connected to an active antenna which<br />
amplifies the received RF signal, otherwise please set it to OFF.<br />
Country Setting<br />
Set the country for Auto Scan, <strong>Manual</strong> Scan and Time Zone.<br />
Note: Change the Country Setting will automatically change the default Time Zone and set the default<br />
Frequency and Bandwidth for Auto Scan.<br />
OSD Language<br />
Set the On Screen Display Language.<br />
Audio Language<br />
Set the audio language for watching a program (availability depends on channel broadcaster).<br />
Subtitle Language<br />
Set the language for displaying subtitle program (availability depends on channel broadcaster).<br />
LCN<br />
Set the Logical Channel Number to ON or OFF.<br />
Note: LCN is a number that uniquely identifies a logical channel, which is popular in some European<br />
countries such as England or France.<br />
Auto Time Zone / Time Zone<br />
Allows you to enable or disable auto time zone update. If you know the GMT (Greenwich Mean Time)<br />
time zone offset of your location, set the Auto Time Zone to OFF and select an appropriate Time<br />
Zone, otherwise set it to ON and let the system update the time zone automatically according to the<br />
transport stream. See Figure 3.<br />
Note: Some Countries are covered with more than one Time Zone.<br />
Auto Scan<br />
Auto Scan will erase the database first, and scan default frequency and bandwidth by Country<br />
Setting.<br />
Press button to start Auto Scan.<br />
Press button to confirm clear action and start Auto Scan.<br />
It costs time to do Auto Scan, you can press button to exit at anytime. See Figure 4, Figure 5.<br />
12
Figure 4. Clear database message<br />
Figure 5. AutoScan Finished<br />
<strong>Manual</strong> Scan<br />
Press button to start <strong>Manual</strong> Scan.<br />
<strong>Manual</strong> Scan adds the scanning results into database, it doesn’t erase the database. But you have to<br />
indicate the Frequency and Bandwidth for scanning. If you scan the same Frequency and Bandwidth<br />
more than once, the previous programs will be overwritten.<br />
Press button to enter <strong>Manual</strong> Scan Page.<br />
Press button to select Frequency option.<br />
Press button to input the Frequency value.<br />
Press button to select Bandwidth option.<br />
Press button to set Bandwidth value.<br />
Press button to start scan or exit. See Figure 6, Figure 7.<br />
Figure 6. <strong>Manual</strong> Scan edit<br />
Figure 7. <strong>Manual</strong> Scan finished<br />
6.1.2. TV Setup<br />
Setup the display mode for TV. See Figure 8.<br />
13
Figure 8. TV Setup<br />
TV Format<br />
≥≥<br />
4:3LB(LetterBox): Typically for wide screen content on conventional 4:3 TV with black bars above<br />
and below the picture.<br />
≥≥<br />
4:3PS(PanScan): Typically for wide screen content on conventional 4:3 TV with left and right<br />
edges cropped.<br />
≥≥<br />
16:9PB(PillarBox)/16:9 AUTO: Typically for wide screen 16:9 TV.<br />
TV Mode<br />
Set PAL, NTSC or AUTO for display. AUTO will switch PAL or NTSC by program content. This setting<br />
should be matched with user’s TV.<br />
OSD Transparency<br />
Set the On Screen Display transparency. “1” is the most transparent.<br />
Banner Display Time<br />
Set Banner display time. Banner does not automatically disappear when set as “Always” and<br />
disappears at timeout when set to other values.<br />
Video Output<br />
Set the video output mode to TV: RGB or CVBS.<br />
Video Enhancement<br />
Set the Video Enhancement. See Figure 9.<br />
Press button to select Video Enhancement option.<br />
Press button to set Video Enhancement.<br />
Press button to select Flesh Tone or Black/White Expansion.<br />
Press button to set Flesh Tone and Black/White Expansion.<br />
14
Figure 9. Video Enhancement<br />
15<br />
Figure 10. Password page<br />
6.1.3. Password<br />
Set password for menu, channel or censorship lock. And the user can change password here, the<br />
default Password is 6666. See Figure 10.<br />
Menu Lock<br />
Password-lock the menus.<br />
Channel Lock<br />
Lock the channel which has been set to lock status when turning on the Channel Lock. Please see<br />
section “Lock” on page 16 for details.<br />
Censorship Lock<br />
Lock the program by password and censorship threshold. The censorship info is in program content.<br />
Under the censorship rating, user has to enter the right password for watching program.<br />
Change Password<br />
To change the Password, select this option, press button to trigger changing password<br />
and buttons to enter old password, new password and confirm new password. If succeed,<br />
the Password Changed message will be displayed, otherwise the Password Error message will be<br />
displayed.<br />
6.1.4. Advance Timer<br />
<strong>User</strong> can set timer for watching the program by date and time manually or from the TV/Radio<br />
Guide(see section “Guide” on page 17). When scheduled date/time arrives, T5250 will automatically<br />
switch to the scheduled program. Press any key except button, T5250 will ask you<br />
to abort it or not when watching booked program. You can delete the event while it is not running.<br />
6.1.5. Set Default
Restore T5250 to factory default settings. All user settings will be restored to factory default values<br />
and the TV/radio channel database will be erased together.<br />
6.1.6. SW Update<br />
Updates T5250 firmware by USB.<br />
6.2. TV/RADIO<br />
There are two types of programs: TV and Radio.<br />
The operation of the List and Guide of TV and Radio are almost the same. Herein take TV as an<br />
example.<br />
6.2.1. List<br />
Figure 11. TV List<br />
There are several options to manage channels:<br />
Favorites<br />
<strong>User</strong> can quickly arrange the favorite programs by favorite filter. There are 8 groups of favorite<br />
channels: News, Sport, Movie, Music, Shopping, Travel, Boy and Girl. Press button to set or<br />
clear the favorite group when Favorites option is selected.<br />
Lock<br />
Lock will ask for the password before watching this program when Setup -> Password ->Channel<br />
Lock is turned on. Please see section “Channel Lock” on page 15 for details. Press button to set<br />
or clear lock status when Lock option is selected.<br />
Edit<br />
You can edit the program name, maximum length is 20 characters.<br />
Press button to select Edit option and button to select the program.<br />
Press button to display program info and press it again to edit program name.<br />
16
Press button to select the character.<br />
Press button to finish the editing and return to previous program info page.<br />
Press button to save the editing and return to List or press button to return to List<br />
without saving.<br />
Move<br />
Move will allow you to move the position of the channels in the list.<br />
Note: This option will not appear when SETUP->Installation->LCN is set to ON.<br />
Sort<br />
Sort will allow you to sort the channels by AZ or PayFree.<br />
Note: This option will not appear when SETUP->Installation->LCN is set to ON.<br />
Skip<br />
Skip will skip the program when changing a program by CH+/-. Press button to set or clear skip<br />
status when Skip option is selected.<br />
Delete<br />
Delete will delete the program permanently from the database. You must rescan to recover it.<br />
Press button to set delete one or delete all when Delete option is selected.<br />
Search<br />
<strong>User</strong> can search the program name by partial keyword.<br />
Press button to select Search option.<br />
Press button to entry search page.<br />
Press button to input keyword.<br />
Press button to Search and return List. The matched program will be focused.<br />
Press button to the next or previous matched program.<br />
6.2.2. Guide<br />
Guide is also known as EPG (Electronic Program Guide). See Figure 12, Figure 13.<br />
Press button to select program or EPG event.<br />
Press button to change event or date.<br />
Press button to exit all the menus or show the detailed information of a selected event (availability<br />
depends on channel broadcaster).<br />
Press button to exit to previous menu.<br />
Press button to enter Book page and button to save after edition. If it’s in conflict<br />
with itself or other event, a conflict message will be displayed. The successful booking will be added<br />
17
to Main Menu-> Setup-> Advanced Timer(see section 6.1.4 on page 15).<br />
Figure 12. Guide - Event<br />
Figure 13. Guide - Event (detail)<br />
6.3. MULTIMEDIA<br />
Multimedia must be used with external USB device inserted, otherwise the “Device is not ready!”<br />
message will be displayed. If you remove the USB device a “Device is removed!” message will be<br />
shown and the system will return to Main Menu.<br />
6.3.1. My Album<br />
Use this option to view JPEG/BMP/GIF files.<br />
If there are photos in the device root folder it will start in Thumbnail mode, otherwise it will start in<br />
Folder mode. Press button to switch to Folder mode and button to return to Thumbnail<br />
mode again.<br />
The info (width x height and date) of selected photo will be displayed at the left bottom in Thumbnail<br />
mode and right up in Folder mode. See Figure 14,Figure 15.<br />
Figure 14. My Album - Thumbnails<br />
Figure 15. My Album - Folder<br />
Use to browse folders or files.<br />
18
Press to view the selected photo and press again to start slide show.<br />
Press to view the available functions.<br />
Zoom<br />
Press to zoom in / zoom out the photo in view mode. The zoom factor can be:<br />
25-50-100-150-200 %<br />
If zoom factor is greater than 100% you can use to move through the zoomed<br />
picture.<br />
Rotation<br />
Press to rotate clock/counterclockwise and to flip horizontal or vertical<br />
direction.<br />
Slide show<br />
Press to view the photo in Thumbnail or Folder mode and press it again to start the slide show.<br />
Press to play/pause the slide show.<br />
Press to set background music while slide show is running.<br />
Press to switch between repeating modes.<br />
Press to set the time gap between photos.<br />
Press to manually select the previous/next photo.<br />
6.3.2. My Music<br />
Use this option to listen to MP3/WMA files.<br />
The music jukebox display includes (see Figure 16, Figure 17):<br />
≥≥<br />
Progress bar with elapsed and total playing time.<br />
≥≥<br />
Audio spectrum visualizer.<br />
Press to browse folders and files.<br />
Press to play or pause.<br />
Press to stop.<br />
Press to set play mode as Repeat All / Repeat Random / Repeat Off.<br />
Press to set fast forward speed as x2 / x3 / x4 / normal.<br />
Press button to adjust volume while playing.<br />
19
Figure 16. My Music - Browser<br />
Figure 17. My Music - Play<br />
6.3.3. My Movie<br />
My Movie can play most of MPEG2, DivX, Xvid standard-resolution files.*<br />
It displays the playing file name at the top left corner and use the INFO key to get the current playing<br />
time and total time information while playing. See Figure 18, Figure 19.<br />
Press INFO button to select device if an external USB hub connected while browsing, and to show the<br />
control info bar while playing.<br />
Press to select folders and files during browsing<br />
Press button to select a file to play.<br />
Press button to play or pause while playing.<br />
Press button to play the frame one by one while playing.<br />
Press button to set fast backguard speed as x2,x4,x8,x16,x32, normal.<br />
Figure 18. My Movie - Browser<br />
Figure 19. My Movie - Play<br />
* Multimedia files compatibility depends on container file format and audio / video codec<br />
6.3.4. My Record<br />
Within My Record you can view the programs already recorded and configure recording options.<br />
Note: the external storage device file system must be FAT or FAT32.<br />
≥≥<br />
Recorded List<br />
20
View or delete recorded programs.<br />
≥≥<br />
Recording Device<br />
Select the storage device and partition where the recordings will be stored.<br />
≥≥<br />
Recording Preference<br />
Time Shift Size<br />
Note that Time Shift Size is calculated automatically according to the current storage device or<br />
partition and cannot be modified.<br />
Time Shift<br />
Pause: Timeshift starts when button is pressed.<br />
Auto: Timeshift is continuously active.<br />
Off: Timeshift disabled<br />
One Button recording<br />
On: T5250 starts recording with a simple button press.<br />
Off: After pushing you have to specify the lenght of the recording.<br />
Default recording period<br />
Specify the default recording period from 15 minutes to 8 hours in 15-minutes steps.<br />
Figure 20. My Record<br />
Figure 21.Recorded list<br />
21
Figure 22. Recording Device<br />
Figure 23. Recording Preferences<br />
6.4. ACCESSORY<br />
There are three options: Gomoku, Calendar, Calculator.<br />
6.4.1. Gomoku<br />
Press button to set play mode and difficulty. Press button to start play<br />
Gomoku.<br />
Press button to select the position. Press button to place the piece.<br />
6.4.2. Calendar<br />
Displays the year, month and day.<br />
6.4.3. Calculator<br />
For mathematical calculations.<br />
22
7. NORMAL PLAY<br />
Normal Play means T5250 under watching TV or listening to the Radio. See Figure 24, Figure 25, .<br />
Figure 24. Normal Play - TV<br />
Figure 25. Normal Play - Radio<br />
7.1. INFORMATION<br />
Press button once to display info banner. Banner displays the program No., favorite setting,<br />
current time, program name, now and next event, lock, scramble, subtitle and teletext info. See<br />
Figure 26.<br />
Press button when banner exists to display detailed info of a present event<br />
Press button when detail exist to display current program info. See Figure 27.<br />
Figure 26. Information banner<br />
23<br />
Figure 27. Program Info<br />
7.2. SWITCH PROGRAM<br />
<strong>User</strong> can switch program by or input channel number directly. If the input program number<br />
doesn’t exist, T5250 will ignore the input.<br />
Press button to switch to the last watched channel from the current program.<br />
7.3. VOLUME<br />
Press button to adjust the volume. Press button to mute.
If you adjust the volume while on mute, mute will be cancelled.<br />
7.4. PROGRAM LIST<br />
Press button to display Program List with No., name and lock/scramble/skip status. See Figure<br />
28.<br />
Press to change the channel. Press to return to the normal play<br />
mode.<br />
Figure 28. Program List<br />
Figure 29. Audio Channels<br />
7.5. AUDIO<br />
Switch the sound channel and switch sound mode to LR(stereo) or LL(left) or RR(right). If setting<br />
audio language at Setup->Installation->Audio Language, the audio channel default language will be<br />
chosen by setting. See Figure 29. Press button to display the audio channel page.<br />
Press button to select Channel/Audio PID or Sound Mode option.<br />
Press button to set the value.<br />
7.6. PAUSE<br />
Pause video and audio. But it will be cancelled by any input.<br />
7.7. FAVORITES<br />
<strong>User</strong> can switch the favorite programs in the same favorite group. About favorites settings, see<br />
section “Favorites” on page 16 for details.<br />
Press button to switch to the favorite group in Program list.<br />
Press button to switch to the same favorite program in normal play mode.<br />
7.8. TELETEXT<br />
Display teletext on screen, the style of teletext may be different by content provider. See Figure 30,<br />
Figure 31.<br />
24
Press button to display the teletext setting page.<br />
Press button to select the teletext language if the program has teletext (availability<br />
depends on channel broadcaster).<br />
Press button to exit the teletext setting page.<br />
Press button to change teletext page (if available).<br />
Figure 30. Teletext settings<br />
Figure 31. Teletext<br />
7.9. SUBTITLES<br />
Display subtitles on screen. The style of subtitles may be different by content provider (availability<br />
depends on channel broadcaster). See Figure 32, Figure 33.<br />
Press button to display subtitle setting page.<br />
Press button to select subtitle language, if subtitles are available.<br />
Press button to exit subtitle setting page.<br />
Figure 32. Subtitle settings<br />
Figure 33. Subtitles<br />
7.10. TELETEXT SUBTITLE<br />
Display subtitle by teletext, the style of the teletext subtitle may be different by content provider<br />
25
(availability depends on channel broadcaster). See Figure 34, Figure 35.<br />
Press button to display teletext or subtitle setting page. Press button<br />
to select “TTX Subtitle”.<br />
Press button to select teletext subtitle language. Press button to exit the<br />
setting page.<br />
Figure 34. Teletext language<br />
Figure 35. Teletext subtitles<br />
7.11. GUIDE<br />
Press button at normal play state, see section “Guide” on page 17 for details.<br />
7.12. LIST<br />
Press button at normal play state, see section “List” on page 16 for details.<br />
7.13. MSM : MULTI SCREEN MOSAIC – EASY ZAPPING<br />
MSM (MultiScreen Mosaic) can display 9 programs on screen at the same time. The highlighted<br />
program is playing and the other channels will display a snapshot. See Figure 36. Press <br />
button to display MSM.<br />
Press button to browse program.<br />
Press button to switch program and watch it.<br />
Press button to return normal play mode.<br />
Figure 36. MultiScreen Mosaic<br />
26
7.14. MESSAGES<br />
There are some messages to inform user the current status of the T5250.<br />
≥≥<br />
No Signal<br />
If T5250 can’t get the signal, for example if the antenna cable is disconnected.<br />
≥≥<br />
No Service<br />
Program doesn’t have any contents to play.<br />
≥≥<br />
Encoded Service<br />
Program is encoded for payment, you need to contact with the content provider to know how to<br />
decode it.<br />
≥≥<br />
Antenna Overload<br />
The power of antenna is overloaded.<br />
≥≥<br />
HDTV Not Support<br />
If the program content is HDTV format, T5250 doesn’t support it.<br />
≥≥<br />
Channel Locked<br />
Program is locked by setting lock (see section “Lock” on page 16) and turning on channel lock in<br />
password setting (see section “Channel Lock” on page 15). You must input the correct password to<br />
watch the channel. See Figure 37.<br />
Figure 37. Password-locked channel<br />
27
8. TROUBLESHOOTING<br />
If you experience problems with this receiver or its installation, in the first instance please read<br />
carefully the relevant sections of this <strong>User</strong> <strong>Manual</strong> and this Troubleshooting section.<br />
Problem Possible cause What to do<br />
Standby LED not lit Mains lead unplugged Check mains lead<br />
No signal found<br />
No picture or sound<br />
Mosaic blocks in picture or<br />
picture freezes<br />
Aerial is disconnected.<br />
Aerial is damaged/misaligned.<br />
Out of digital signal area.<br />
Viewing incorrect SCART<br />
output<br />
Tuned to digital teletext<br />
channel<br />
Aerial may not be compatible<br />
Check aerial lead.<br />
Check aerial.<br />
Check with dealer.<br />
Press the DTV/VCR button<br />
Change to another channel<br />
Check aerial<br />
Scrambled channel message Channel is scrambled Select an alternative channel<br />
Forgotten channel lock code<br />
Re-install channels to cancel<br />
channel lock<br />
No response to remote control Receiver off Plug in and turn on receiver<br />
After moving the device to<br />
another room can’t receive the<br />
digital signal<br />
Remote control not aimed<br />
correctly<br />
Front panel obstructed<br />
Remote control batteries are<br />
inserted incorrectly<br />
Remote control batteries<br />
exhausted<br />
The aerial feed may come<br />
through a distribution system<br />
which may reduce the digital<br />
signal<br />
Aim the remote control at<br />
front panel<br />
Check for obstructions<br />
Check batteries direction<br />
Replace remote control<br />
batteries<br />
Try a direct feed from antenna
9. SPECIFICATIONS<br />
Item<br />
Specification<br />
Tuner Frequency range VHF: 174 — 230 MHz / UHF: 470 — 862 MHz<br />
Input Impedance<br />
Signal input level<br />
Bandwidth<br />
29<br />
75 Ohms unbalanced<br />
-78 — -25 dbm<br />
7/8 MHz<br />
Modulation Demodulator COFDM<br />
OFDM Modulation<br />
2k, 8k FFT, SFN and MFN<br />
Connectors RF in IEC 169-2 female connector<br />
RF loopthrough<br />
SCART TV<br />
SCART VCR<br />
Coaxial<br />
USB 2.0<br />
IEC 169-2 male connector<br />
Composite video (CVBS), RGB, audio L/R<br />
Composite video (CVBS), audio L/R<br />
RCA, S/PDIF digital audio output<br />
Multimedia playback and DVB-T recording<br />
Power Input 100—240 V 50—60 Hz<br />
Consumption<br />
10 W max.<br />
Display Decoder Module PAL, NTSC<br />
Resolution<br />
720 x 576 (PAL)<br />
720 x 480 (NTSC)<br />
Aspect Ratio 4:3 (Letterbox, Pan & Scan), 16:9<br />
Decoding Video MPEG 2 Transport MP@ML<br />
Audio<br />
MPEG 2 audio layer I & II<br />
Others Compliance ETSI EN 300 744 DVB-T<br />
Multimedia<br />
Formats<br />
Video<br />
Audio<br />
MPEG2, DivX, Xvid<br />
MP3, WMA<br />
Photo<br />
JPEG, GIF, BMP<br />
Specifications are subject to change without further notice.
WARRANTY<br />
<strong>Energy</strong> <strong>Sistem</strong> Soyntec S.A. warrants its products to be free from defects in materials and workmanship<br />
at the time of purchase.<br />
The warranty period is 36 months from the date of purchase for DVB-T STB receivers.<br />
WARRANTY PROCEDURE<br />
≥≥<br />
Visit the Support section at http://support.energysistem.com and select your product to view the<br />
FAQ (Frequently Asked Questions). The solution to your problem is very likely to have been already<br />
published there. You will also be able to download user manuals, user guides, drivers and updates.<br />
≥≥<br />
If you cannot find an appropriate solution in the Support section, you may send us your enquiry or<br />
warranty service request by email: support@energysistem.com<br />
≥≥<br />
Alternatively, you may prefer to contact the distributor from which you purchased the product,<br />
presenting the purchase receipt or invoice.<br />
Specifications are subject to change without notice.<br />
© 2009 by <strong>Energy</strong> <strong>Sistem</strong>®. All rights reserved.<br />
TRADEMARKS.<br />
All company, brand and product names are trademarks or registered trademarks of their respective<br />
companies.<br />
DECLARATION OF CONFORMITY<br />
Manufacturer Name: <strong>Energy</strong> <strong>Sistem</strong> Soyntec S. A.<br />
Address: Pol. Ind. Finestrat C/ Calpe esq. C/ Alicante S/N, 03509 Finestrat Alicante<br />
Tel: 902 388 388<br />
Fax: 902 119 034<br />
NIF: A53107488<br />
We declare under our own exclusive responsibility that the product:<br />
<strong>Energy</strong> <strong>Sistem</strong>® Multimedia DVB-T Recorder <strong>Energy</strong> T5250<br />
Is in compliance with the essential directives, norms and standards of the European Union 89/336/<br />
EEC (EMC Directive).<br />
Manufacturing country: China<br />
30


