Falcon 9 Launch Vehicle Payload User's Guide - SpaceX
Falcon 9 Launch Vehicle Payload User's Guide - SpaceX
Falcon 9 Launch Vehicle Payload User's Guide - SpaceX
You also want an ePaper? Increase the reach of your titles
YUMPU automatically turns print PDFs into web optimized ePapers that Google loves.
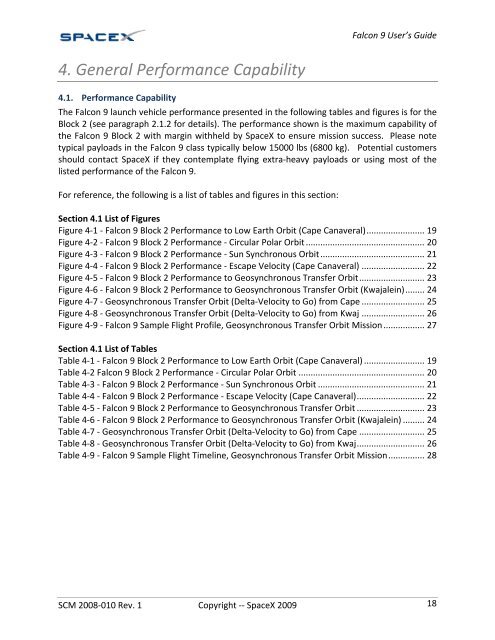
4. General Performance Capability<br />
<strong>Falcon</strong> 9 User’s <strong>Guide</strong><br />
4.1. Performance Capability<br />
The <strong>Falcon</strong> 9 launch vehicle performance presented in the following tables and figures is for the<br />
Block 2 (see paragraph 2.1.2 for details). The performance shown is the maximum capability of<br />
the <strong>Falcon</strong> 9 Block 2 with margin withheld by <strong>SpaceX</strong> to ensure mission success. Please note<br />
typical payloads in the <strong>Falcon</strong> 9 class typically below 15000 lbs (6800 kg). Potential customers<br />
should contact <strong>SpaceX</strong> if they contemplate flying extra‐heavy payloads or using most of the<br />
listed performance of the <strong>Falcon</strong> 9.<br />
For reference, the following is a list of tables and figures in this section:<br />
Section 4.1 List of Figures<br />
Figure 4‐1 ‐ <strong>Falcon</strong> 9 Block 2 Performance to Low Earth Orbit (Cape Canaveral) ........................ 19<br />
Figure 4‐2 ‐ <strong>Falcon</strong> 9 Block 2 Performance ‐ Circular Polar Orbit ................................................. 20<br />
Figure 4‐3 ‐ <strong>Falcon</strong> 9 Block 2 Performance ‐ Sun Synchronous Orbit ........................................... 21<br />
Figure 4‐4 ‐ <strong>Falcon</strong> 9 Block 2 Performance ‐ Escape Velocity (Cape Canaveral) .......................... 22<br />
Figure 4‐5 ‐ <strong>Falcon</strong> 9 Block 2 Performance to Geosynchronous Transfer Orbit ........................... 23<br />
Figure 4‐6 ‐ <strong>Falcon</strong> 9 Block 2 Performance to Geosynchronous Transfer Orbit (Kwajalein) ........ 24<br />
Figure 4‐7 ‐ Geosynchronous Transfer Orbit (Delta‐Velocity to Go) from Cape .......................... 25<br />
Figure 4‐8 ‐ Geosynchronous Transfer Orbit (Delta‐Velocity to Go) from Kwaj .......................... 26<br />
Figure 4‐9 ‐ <strong>Falcon</strong> 9 Sample Flight Profile, Geosynchronous Transfer Orbit Mission ................. 27<br />
Section 4.1 List of Tables<br />
Table 4‐1 ‐ <strong>Falcon</strong> 9 Block 2 Performance to Low Earth Orbit (Cape Canaveral) ......................... 19<br />
Table 4‐2 <strong>Falcon</strong> 9 Block 2 Performance ‐ Circular Polar Orbit .................................................... 20<br />
Table 4‐3 ‐ <strong>Falcon</strong> 9 Block 2 Performance ‐ Sun Synchronous Orbit ............................................ 21<br />
Table 4‐4 ‐ <strong>Falcon</strong> 9 Block 2 Performance ‐ Escape Velocity (Cape Canaveral) ............................ 22<br />
Table 4‐5 ‐ <strong>Falcon</strong> 9 Block 2 Performance to Geosynchronous Transfer Orbit ............................ 23<br />
Table 4‐6 ‐ <strong>Falcon</strong> 9 Block 2 Performance to Geosynchronous Transfer Orbit (Kwajalein) ......... 24<br />
Table 4‐7 ‐ Geosynchronous Transfer Orbit (Delta‐Velocity to Go) from Cape ........................... 25<br />
Table 4‐8 ‐ Geosynchronous Transfer Orbit (Delta‐Velocity to Go) from Kwaj ............................ 26<br />
Table 4‐9 ‐ <strong>Falcon</strong> 9 Sample Flight Timeline, Geosynchronous Transfer Orbit Mission ............... 28<br />
SCM 2008‐010 Rev. 1 Copyright ‐‐ <strong>SpaceX</strong> 2009 18


