User manual POLAROID 545 PRO FILM HOLDER - 1
User manual POLAROID 545 PRO FILM HOLDER - 1
User manual POLAROID 545 PRO FILM HOLDER - 1

Create successful ePaper yourself
Turn your PDF publications into a flip-book with our unique Google optimized e-Paper software.
You can read the recommendations in the user guide, the technical guide or the installation guide for <strong>POLAROID</strong> <strong>545</strong> <strong>PRO</strong> <strong>FILM</strong><br />
<strong>HOLDER</strong>. You'll find the answers to all your questions on the <strong>POLAROID</strong> <strong>545</strong> <strong>PRO</strong> <strong>FILM</strong> <strong>HOLDER</strong> in the user <strong>manual</strong><br />
(information, specifications, safety advice, size, accessories, etc.). Detailed instructions for use are in the <strong>User</strong>'s Guide.<br />
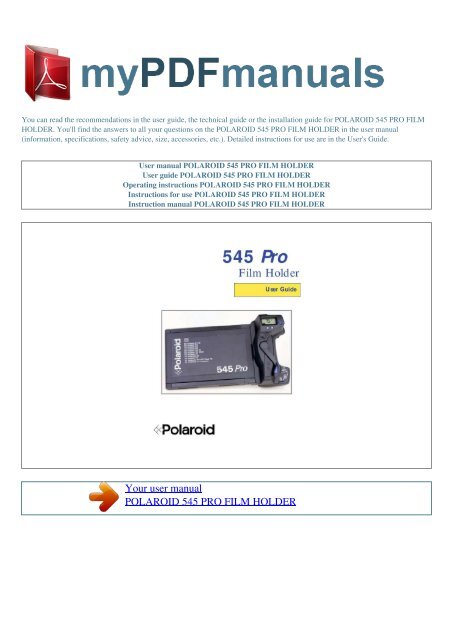
<strong>User</strong> <strong>manual</strong> <strong>POLAROID</strong> <strong>545</strong> <strong>PRO</strong> <strong>FILM</strong> <strong>HOLDER</strong><br />
<strong>User</strong> guide <strong>POLAROID</strong> <strong>545</strong> <strong>PRO</strong> <strong>FILM</strong> <strong>HOLDER</strong><br />
Operating instructions <strong>POLAROID</strong> <strong>545</strong> <strong>PRO</strong> <strong>FILM</strong> <strong>HOLDER</strong><br />
Instructions for use <strong>POLAROID</strong> <strong>545</strong> <strong>PRO</strong> <strong>FILM</strong> <strong>HOLDER</strong><br />
Instruction <strong>manual</strong> <strong>POLAROID</strong> <strong>545</strong> <strong>PRO</strong> <strong>FILM</strong> <strong>HOLDER</strong><br />
Your user <strong>manual</strong><br />
<strong>POLAROID</strong> <strong>545</strong> <strong>PRO</strong> <strong>FILM</strong> <strong>HOLDER</strong>
Powered by TCPDF (www.tcpdf.org)<br />
Manual abstract:<br />
If your camera has slide locks, use them in addition to the spring back; the locks fit into slots on the sides of the film holder. Determining the processing time<br />
The processing time for any exposure is dependent on the film type. Each Polaroid film type has a two digit timer code which can be found on the film<br />
packaging, on the film holder or in the table on the previous page. This timer code has to be entered <strong>manual</strong>ly into the timer: Press the mode button until the<br />
film timer code icon is displayed. 5 c Pushing the scroll button again will rotate the numbers from 0 to 9. d 5 e When you have reached the desired number<br />
press the mode button and the right digit will flash. Repeat step c. Once the correct film timer code is displayed, press the mode button to save the selection.<br />
Displaying the ambient temperature Press the mode button until the temperature icon is displayed. 6 a a b Pressing the scroll button changes the display from<br />
°C to °F.<br />
b Pressing the scroll button will cause the left digit to flash. 6 English Caution: The timer will function only within the temperature range -10°C 35°C<br />
(14°F-95°F). If outside this range, the timer will show a warning signal in which the LCD display will alternate between showing the peel time and a "HI" or<br />
"LO" signal. This indicates that the film is being used outwith the recommended temperature guidelines and therefore in these extreme conditions the<br />
indicated peel timer may be inaccurate. 8 a Displaying the film processing time Press the mode button until the processing time icon is displayed.<br />
Film processing time is dependent on film type (film timer code) and ambient temperature. When the film is removed from the film holder, this mode is<br />
selected automatically and the time counts down to zero. 9 Changing the auto off options mode This function allows you to <strong>manual</strong>ly turn off the timer and / or<br />
alter the period after which the timer automatically powers down if no user intervention. Press the mode button until the auto off options icon is displayed.<br />
Pressing the scroll button will cause the OFF display to flash.<br />
7 a Displaying the exposure compensation value To obtain the best results from some Polaroid films, the camera exposure must be altered by a value<br />
dependent on temperature and film type. Press the mode button until the exposure compensation a b icon is displayed. Adjust the camera by the number of<br />
stops shown. b English c If you wish to <strong>manual</strong>ly switch off the timer, press the mode button at this point and the display will power down. Alternatively, to<br />
change the time out period, press the scroll button to toggle through the auto off settings. The timer can be set to power down after 1, 5, 15, 30 minutes or 1<br />
hour. if no user intervention occurs 7 d Press the mode button to save the auto off time. 10 LCD Backlight The timer comes with an LCD backlight to operate<br />
this press and hold the blue button (1k) below the display. When the button is not depressed the backlight will go off. 11 Loading the film a Move the control<br />
arm to L (2).<br />
b Hold the envelope as shown (3) and insert the metal clip end into the holder. Be sure that the side marked THIS SIDE TOWARD LENS faces the lens. Do<br />
not hold the envelope by the end when first inserting it into the holder, as you may buckle the envelope (4) and damage the film. Do not press on the area<br />
marked DO NOT PRESS HERE where the pod of developer chemicals is located. c Push the envelope in halfway (5), then shift your grip to the end, and push<br />
it in the rest of the way (6). When the envelope is fully inserted the timer will display a film engaged symbol in the top right corner. If this is not displayed, the<br />
film is not engaged correctly. Remove the film from the holder and repeat the process. Note that if film is loaded and no user intervention of the timer occurs<br />
for more than 4 hours, the engaged symbol will disappear from the display. 8 English exposed film is now ready to be processed.<br />
13 Processing the film a Move the control arm to P (9). b Grip the envelope firmly, and pull it straight, all the way out of the holder (10). Pull smoothly, at<br />
medium speed, without slowing down or stopping. You will feel a slight resistance when the metal cap reaches the rollers, but continue pulling without<br />
hesitation..<br />
Your user <strong>manual</strong><br />
<strong>POLAROID</strong> <strong>545</strong> <strong>PRO</strong> <strong>FILM</strong> <strong>HOLDER</strong>