ThinkCentre Hardware Maintenance Manual - Lenovo
ThinkCentre Hardware Maintenance Manual - Lenovo
ThinkCentre Hardware Maintenance Manual - Lenovo

Create successful ePaper yourself
Turn your PDF publications into a flip-book with our unique Google optimized e-Paper software.
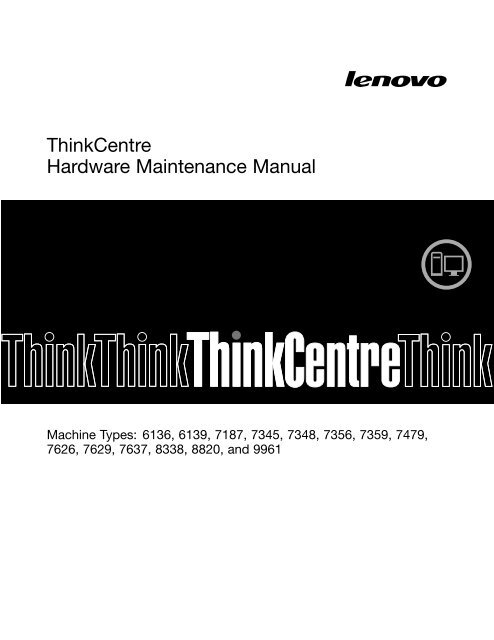
<strong>ThinkCentre</strong><br />
<strong>Hardware</strong> <strong>Maintenance</strong> <strong>Manual</strong><br />
Machine Types: 6136, 6139, 7187, 7345, 7348, 7356, 7359, 7479,<br />
7626, 7629, 7637, 8338, 8820, and 9961
<strong>ThinkCentre</strong><br />
<strong>Hardware</strong> <strong>Maintenance</strong> <strong>Manual</strong><br />
Machine Types: 6136, 6139, 7187, 7345, 7348, 7356, 7359, 7479,<br />
7626, 7629, 7637, 8338, 8820, and 9961
Note: Before using this information and the product it supports, be sure to read and understand the Chapter<br />
2 “Safety information” on page 3 and Appendix A “Notices” on page 279.<br />
Eleventh Edition (February 2012)<br />
© Copyright <strong>Lenovo</strong> 2008, 2012.<br />
LIMITED AND RESTRICTED RIGHTS NOTICE: If data or software are delivered pursuant a General Services<br />
Administration “GSA” contract, use, reproduction, or disclosure is subject to restrictions set forth in Contract No.<br />
GS-35F-05925.
Contents<br />
Chapter 1. About this manual . . . . . . 1<br />
Important safety information . . . . . . . . . . 1<br />
Important information about replacing RoHS<br />
compliant FRUs . . . . . . . . . . . . . . . 1<br />
Chapter 2. Safety information. . . . . . 3<br />
General safety . . . . . . . . . . . . . . . . 3<br />
Electrical safety . . . . . . . . . . . . . . . 3<br />
Voltage-selection switch . . . . . . . . . . . . 5<br />
Safety inspection guide . . . . . . . . . . . . 5<br />
Handling electrostatic discharge-sensitive<br />
devices . . . . . . . . . . . . . . . . . . 6<br />
Grounding requirements . . . . . . . . . . . . 6<br />
Safety notices (multi-lingual translations) . . . . . 6<br />
Chapter 3. General information . . . . 29<br />
Online Books folder. . . . . . . . . . . . . 29<br />
<strong>Lenovo</strong> ThinkVantage Tools . . . . . . . . . 29<br />
<strong>Lenovo</strong> Solution Center . . . . . . . . . . . 30<br />
SimpleTap . . . . . . . . . . . . . . . . 30<br />
ThinkVantage Productivity Center . . . . . . . 30<br />
Access Help . . . . . . . . . . . . . . . 30<br />
Additional information resources . . . . . . . 31<br />
Specifications . . . . . . . . . . . . . . . 31<br />
Chapter 4. General checkout . . . . . 33<br />
Checking for power problems. . . . . . . . . 33<br />
Problem determination tips . . . . . . . . . . 34<br />
Chapter 5. Diagnostic programs . . . 37<br />
<strong>Lenovo</strong> ThinkVantage Toolbox . . . . . . . . 37<br />
<strong>Lenovo</strong> Solution Center . . . . . . . . . . . 37<br />
<strong>Lenovo</strong> System Toolbox . . . . . . . . . . . 38<br />
PC-Doctor for Rescue and Recovery . . . . . . 38<br />
PC-Doctor for DOS . . . . . . . . . . . . . 38<br />
Creating a diagnostic disc . . . . . . . . 39<br />
Running the diagnostic program from the<br />
diagnostic disc . . . . . . . . . . . . . 39<br />
Navigating through the diagnostics<br />
programs . . . . . . . . . . . . . . . 39<br />
Running tests . . . . . . . . . . . . . 39<br />
Viewing the test log . . . . . . . . . . . 41<br />
Chapter 6. Using the Setup Utility<br />
program . . . . . . . . . . . . . . . . 43<br />
Starting the Setup Utility program . . . . . . . 43<br />
Viewing and changing settings . . . . . . . . 43<br />
Using passwords . . . . . . . . . . . . . 43<br />
Password considerations . . . . . . . . . 43<br />
Power-On Password . . . . . . . . . . 44<br />
Administrator Password . . . . . . . . . 44<br />
Hard Disk User Password . . . . . . . . 44<br />
Setting, changing, and deleting a password . 44<br />
Enabling or disabling a device . . . . . . . . 44<br />
Selecting a startup device . . . . . . . . . . 45<br />
Selecting a temporary startup device . . . . 45<br />
Selecting or changing the startup device<br />
sequence . . . . . . . . . . . . . . . 45<br />
Exiting the Setup Utility program . . . . . . . 45<br />
Chapter 7. Symptom-to-FRU index . . 47<br />
Hard disk drive boot error . . . . . . . . . . 47<br />
Diagnostic error codes . . . . . . . . . . . 47<br />
Beep symptoms . . . . . . . . . . . . . . 63<br />
POST error codes . . . . . . . . . . . . . 63<br />
Miscellaneous error messages . . . . . . . . 64<br />
Undetermined problems . . . . . . . . . . . 66<br />
Chapter 8. Replacing FRUs . . . . . . 67<br />
Locations. . . . . . . . . . . . . . . . . 67<br />
Locating connectors on the front of the<br />
computer . . . . . . . . . . . . . . . 67<br />
Locating connectors on the rear of the<br />
computer . . . . . . . . . . . . . . . 68<br />
Locating components . . . . . . . . . . 69<br />
Locating parts on the system board . . . . 70<br />
Opening the computer cover . . . . . . . . . 71<br />
Replacing the battery . . . . . . . . . . . . 72<br />
Replacing a memory module . . . . . . . . . 73<br />
Replacing the adapter card. . . . . . . . . . 74<br />
Replacing the front audio and USB assembly . . 76<br />
Replacing the heat sink . . . . . . . . . . . 77<br />
Replacing the microprocessor . . . . . . . . 78<br />
Replacing the system board . . . . . . . . . 80<br />
Replacing the system fan . . . . . . . . . . 83<br />
Replacing the hard disk drive . . . . . . . . . 85<br />
Replacing the optical drive . . . . . . . . . . 86<br />
Replacing the internal speaker . . . . . . . . 88<br />
Completing the FRU replacement . . . . . . . 89<br />
Chapter 9. FRU lists . . . . . . . . . . 91<br />
Overall: MT 6136, 6139, 7187, 7345, 7348, 7356,<br />
7359, 7479, 7626, 7629, 7637, 8338, 8820, and<br />
9961 . . . . . . . . . . . . . . . . . . 91<br />
Mechanical FRUs . . . . . . . . . . . . . 113<br />
Keyboard and Mouse . . . . . . . . . . . . 123<br />
© Copyright <strong>Lenovo</strong> 2008, 2012 iii
Adapters and miscellaneous FRUs . . . . . . . 153<br />
Power Cords . . . . . . . . . . . . . . . 156<br />
Recovery discs . . . . . . . . . . . . . . 162<br />
Windows XP Professional Recovery CD . . . 162<br />
Windows Vista 32 Home Basic Recovery<br />
CD . . . . . . . . . . . . . . . . . 172<br />
Windows Vista Home Basic 32 SP2 Recovery<br />
CD . . . . . . . . . . . . . . . . . 182<br />
Windows Vista Business 32 Recovery CD . . 192<br />
Windows Vista Business 32 SP2 Recovery<br />
CD . . . . . . . . . . . . . . . . . 202<br />
Windows Vista Business 64 Recovery CD . . 212<br />
Windows Vista Ultimate 32 Recovery CD . . 215<br />
Windows Vista Starter SP2 Recovery CD . . 218<br />
Windows 7 Home Basic 32 Recovery CD . . 218<br />
Windows 7 Home Basic 32 SP1 Recovery<br />
CD . . . . . . . . . . . . . . . . . 221<br />
Windows 7 Home Premium 32 Recovery<br />
CD . . . . . . . . . . . . . . . . . 225<br />
Windows 7 Home Premium 32 SP1 Recovery<br />
CD . . . . . . . . . . . . . . . . . 230<br />
Windows 7 Professional 32 Recovery CD . . 236<br />
Windows 7 Professional 32 SP1 Recovery<br />
CD . . . . . . . . . . . . . . . . . 246<br />
Windows 7 Professional 64 Recovery CD . . 255<br />
Windows 7 Professional 64 SP1 Recovery<br />
CD . . . . . . . . . . . . . . . . . 264<br />
iv <strong>ThinkCentre</strong> <strong>Hardware</strong> <strong>Maintenance</strong> <strong>Manual</strong><br />
Windows 7 Ultimate 32 SP1 Recovery CD . . 272<br />
Windows 7 Ultimate 64 SP1 Recovery CD . . 273<br />
Windows 7 Starter 32 SP1 Recovery CD. . . 273<br />
Chapter 10. Additional service<br />
information . . . . . . . . . . . . . 275<br />
Security features . . . . . . . . . . . . . . 275<br />
<strong>Hardware</strong> controlled passwords . . . . . . 275<br />
Operating system password . . . . . . . 275<br />
Vital Product Data . . . . . . . . . . . 275<br />
Secure Managed Client . . . . . . . . . 275<br />
BIOS levels . . . . . . . . . . . . . . . . 275<br />
Updating (flashing) BIOS from a disc . . . . . . 276<br />
Recovering from a POST/BIOS update failure . . 276<br />
Power management . . . . . . . . . . . . 277<br />
Automatic configuration and power interface<br />
(ACPI) BIOS . . . . . . . . . . . . . . 277<br />
Automatic Power-On features . . . . . . . 277<br />
Appendix A. Notices. . . . . . . . . 279<br />
Television output notice . . . . . . . . . . . 280<br />
Trademarks . . . . . . . . . . . . . . . . 280<br />
Index. . . . . . . . . . . . . . . . . 281
Chapter 1. About this manual<br />
This manual contains service and reference information for <strong>ThinkCentre</strong>® computer machine types listed on<br />
the front cover. This manual is intended only for trained Service Providers who are familiar with <strong>Lenovo</strong>®<br />
computer products.<br />
Note: Be sure to read and understand the Chapter 2 “Safety information” on page 3 before using the<br />
information in this manual.<br />
The “Symptom-to-FRU Index” chapter and the “Additional service information” chapter apply to all<br />
<strong>ThinkCentre</strong> computers.<br />
This manual includes a complete FRU part number list for each machine type listed on the front cover. If you<br />
have internet access, the FRU part numbers are also available at:<br />
http://www.lenovo.com/support<br />
Important safety information<br />
Be sure to read all caution and danger statements in this manual before performing any of the instructions.<br />
Veuillez lire toutes les consignes de type DANGER et ATTENTION du présent document avant d'exécuter<br />
les instructions.<br />
Lesen Sie unbedingt alle Hinweise vom Typ "ACHTUNG" oder "VORSICHT" in dieser Dokumentation, bevor<br />
Sie irgendwelche Vorgänge durchführen<br />
Leggere le istruzioni introdotte da ATTENZIONE e PERICOLO presenti nel manuale prima di eseguire una<br />
qualsiasi delle istruzioni<br />
Certifique-se de ler todas as instruções de cuidado e perigo neste manual antes de executar qualquer<br />
uma das instruções<br />
Es importante que lea todas las declaraciones de precaución y de peligro de este manual antes de seguir<br />
las instrucciones.<br />
Important information about replacing RoHS compliant FRUs<br />
RoHS, the Restriction of Hazardous Substances in Electrical and Electronic Equipment Directive<br />
(2002/95/EC) is a European Union legal requirement affecting the global electronics industry. RoHS<br />
requirements must be implemented on <strong>Lenovo</strong> products placed on the market and sold in the<br />
European Union after June, 2006. Products on the market before June, 2006 are not required to<br />
have RoHS compliant parts. If the parts are not compliant originally, replacement parts can also<br />
© Copyright <strong>Lenovo</strong> 2008, 2012 1
e noncompliant, but in all cases, if the parts are compliant, the replacement parts must also be<br />
compliant.<br />
Note: RoHS and non-RoHS FRU part numbers with the same fit and function are identified with unique<br />
FRU part numbers.<br />
<strong>Lenovo</strong> plans to transition to RoHS compliance well before the implementation date and expects its suppliers<br />
to be ready to support <strong>Lenovo</strong>'s requirements and schedule in the EU. Products sold in 2005, will contain<br />
some RoHS compliant FRUs. The following statement pertains to these products and any product <strong>Lenovo</strong><br />
produces containing RoHS compliant parts.<br />
RoHS compliant <strong>ThinkCentre</strong> parts have unique FRU part numbers. Before or after June, 2006, failed RoHS<br />
compliant parts must always be replaced using RoHS compliant FRUs, so only the FRUs identified as<br />
compliant in the system HMM or direct substitutions for those FRUs can be used.<br />
Products marketed before June 2006 Products marketed after June 2006<br />
Current or original part Replacement FRU Current or original part Replacement FRU<br />
Non-RoHS Can be Non-RoHS<br />
Non-RoHS Can be RoHS<br />
Non-RoHS Can sub to RoHS<br />
RoHS Must be RoHS<br />
Must be RoHS Must be RoHS<br />
Note: A direct substitution is a part with a different FRU part number that is automatically shipped by the<br />
distribution center at the time of order.<br />
2 <strong>ThinkCentre</strong> <strong>Hardware</strong> <strong>Maintenance</strong> <strong>Manual</strong>
Chapter 2. Safety information<br />
This chapter contains the safety information that you need to be familiar with before servicing a computer.<br />
General safety<br />
Follow these rules to ensure general safety:<br />
• Observe good housekeeping in the area of the machines during and after maintenance.<br />
• When lifting any heavy object:<br />
1. Ensure you can stand safely without slipping.<br />
2. Distribute the weight of the object equally between your feet.<br />
3. Use a slow lifting force. Never move suddenly or twist when you attempt to lift.<br />
4. Lift by standing or by pushing up with your leg muscles; this action removes the strain from the<br />
muscles in your back. Do not attempt to lift any objects that weigh more than 16 kg (35 lb) or objects<br />
that you think are too heavy for you.<br />
• Do not perform any action that causes hazards to the customer, or that makes the equipment unsafe.<br />
• Before you start the machine, ensure that other service representatives and the customer's personnel are<br />
not in a hazardous position.<br />
• Place removed covers and other parts in a safe place, away from all personnel, while you are servicing<br />
the machine.<br />
• Keep your tool case away from walk areas so that other people will not trip over it.<br />
• Do not wear loose clothing that can be trapped in the moving parts of a machine. Ensure that your sleeves<br />
are fastened or rolled up above your elbows. If your hair is long, fasten it.<br />
• Insert the ends of your necktie or scarf inside clothing or fasten it with a nonconductive clip, approximately<br />
8 centimeters (3 inches) from the end.<br />
• Do not wear jewelry, chains, metal-frame eyeglasses, or metal fasteners for your clothing.<br />
Remember: Metal objects are good electrical conductors.<br />
• Wear safety glasses when you are: hammering, drilling soldering, cutting wire, attaching springs, using<br />
solvents, or working in any other conditions that might be hazardous to your eyes.<br />
• After service, reinstall all safety shields, guards, labels, and ground wires. Replace any safety device<br />
that is worn or defective.<br />
• Reinstall all covers correctly before returning the machine to the customer.<br />
Electrical safety<br />
CAUTION:<br />
Electrical current from power, telephone, and communication cables can be hazardous. To avoid<br />
personal injury or equipment damage, disconnect the attached power cords, telecommunication<br />
systems, networks, and modems before you open the server/workstation covers, unless instructed<br />
otherwise in the installation and configuration procedures.<br />
Observe the following rules when working on electrical equipment.<br />
© Copyright <strong>Lenovo</strong> 2008, 2012 3
Important: Use only approved tools and test equipment. Some hand tools have handles covered with a soft<br />
material that does not insulate you when working with live electrical currents. Many customers have, near<br />
their equipment, rubber floor mats that contain small conductive fibers to decrease electrostatic discharges.<br />
Do not use this type of mat to protect yourself from electrical shock.<br />
• Find the room emergency power-off (EPO) switch, disconnecting switch, or electrical outlet. If an electrical<br />
accident occurs, you can then operate the switch or unplug the power cord quickly.<br />
• Do not work alone under hazardous conditions or near equipment that has hazardous voltages.<br />
• Disconnect all power before:<br />
– Performing a mechanical inspection<br />
– Working near power supplies<br />
– Removing or installing Field Replaceable Units<br />
• Before you start to work on the machine, unplug the power cord. If you cannot unplug it, ask the customer<br />
to power-off the wall box that supplies power to the machine and to lock the wall box in the off position.<br />
• If you need to work on a machine that has exposed electrical circuits, observe the following precautions:<br />
– Ensure that another person, familiar with the power-off controls, is near you.<br />
Remember: Another person must be there to switch off the power, if necessary.<br />
– Use only one hand when working with powered-on electrical equipment; keep the other hand in your<br />
pocket or behind your back.<br />
Remember: There must be a complete circuit to cause electrical shock. By observing the above rule,<br />
you may prevent a current from passing through your body.<br />
– When using testers, set the controls correctly and use the approved probe leads and accessories for<br />
that tester.<br />
– Stand on suitable rubber mats (obtained locally, if necessary) to insulate you from grounds such as<br />
metal floor strips and machine frames.<br />
Observe the special safety precautions when you work with very high voltages; these instructions are in<br />
the safety sections of maintenance information. Use extreme care when measuring high voltages.<br />
• Regularly inspect and maintain your electrical hand tools for safe operational condition.<br />
• Do not use worn or broken tools and testers.<br />
• Never assume that power has been disconnected from a circuit. First, check that it has been powered-off.<br />
• Always look carefully for possible hazards in your work area. Examples of these hazards are moist floors,<br />
nongrounded power extension cables, power surges, and missing safety grounds.<br />
• Do not touch live electrical circuits with the reflective surface of a plastic dental mirror. The surface is<br />
conductive; such touching can cause personal injury and machine damage.<br />
• Do not service the following parts with the power on when they are removed from their normal operating<br />
places in a machine:<br />
– Power supply units<br />
– Pumps<br />
– Blowers and fans<br />
– Motor generators<br />
and similar units. (This practice ensures correct grounding of the units.)<br />
• If an electrical accident occurs:<br />
– Use caution; do not become a victim yourself.<br />
– Switch off power.<br />
– Send another person to get medical aid.<br />
4 <strong>ThinkCentre</strong> <strong>Hardware</strong> <strong>Maintenance</strong> <strong>Manual</strong>
Voltage-selection switch<br />
Some computers are equipped with a voltage-selection switch located near the power-cord connection<br />
point on the computer. If your computer has a voltage-selection switch, ensure that you set the switch to<br />
match the voltage available at your electrical outlet. Setting the voltage-selection switch incorrectly can<br />
cause permanent damage to the computer.<br />
If your computer does not have a voltage-selection switch, your computer is designed to operate only at the<br />
voltage provided in the country or region where the computer was originally purchased.<br />
If you relocate your computer to another country, be aware of the following:<br />
• If your computer does not have a voltage-selection switch, do not connect the computer to an electrical<br />
outlet until you have verified that the voltage provided is the same as it was in the country or region<br />
where the computer was originally purchased.<br />
• If your computer has a voltage-selection switch, do not connect the computer to an electrical outlet until<br />
you have verified that the voltage-selection switch is set to match the voltage provided in that country<br />
or region.<br />
If you are not sure of the voltage provided at your electrical outlet, contact your local electric company or<br />
refer to official Web sites or other literature for travelers to the country or region where you are located.<br />
Safety inspection guide<br />
The intent of this inspection guide is to assist you in identifying potentially unsafe conditions on these<br />
products. Each machine, as it was designed and built, had required safety items installed to protect users<br />
and service personnel from injury. This guide addresses only those items. However, good judgment should<br />
be used to identify potential safety hazards due to attachment of features or options not covered by this<br />
inspection guide.<br />
If any unsafe conditions are present, you must determine how serious the apparent hazard could be and<br />
whether you can continue without first correcting the problem.<br />
Consider these conditions and the safety hazards they present:<br />
• Electrical hazards, especially primary power (primary voltage on the frame can cause serious or fatal<br />
electrical shock).<br />
• Explosive hazards, such as a damaged CRT face or bulging capacitor<br />
• Mechanical hazards, such as loose or missing hardware<br />
The guide consists of a series of steps presented in a checklist. Begin the checks with the power off, and<br />
the power cord disconnected.<br />
Checklist:<br />
1. Check exterior covers for damage (loose, broken, or sharp edges).<br />
2. Power-off the computer. Disconnect the power cord.<br />
3. Check the power cord for:<br />
a. A third-wire ground connector in good condition. Use a meter to measure third-wire ground<br />
continuity for 0.1 ohm or less between the external ground pin and frame ground.<br />
b. The power cord should be the appropriate type as specified in the parts listings.<br />
c. Insulation must not be frayed or worn.<br />
4. Remove the cover.<br />
Chapter 2. Safety information 5
5. Check for any obvious alterations. Use good judgment as to the safety of any alterations.<br />
6. Check inside the unit for any obvious unsafe conditions, such as metal filings, contamination, water or<br />
other liquids, or signs of fire or smoke damage.<br />
7. Check for worn, frayed, or pinched cables.<br />
8. Check that the power-supply cover fasteners (screws or rivets) have not been removed or tampered with.<br />
Handling electrostatic discharge-sensitive devices<br />
Any computer part containing transistors or integrated circuits (ICs) should be considered sensitive to<br />
electrostatic discharge (ESD). ESD damage can occur when there is a difference in charge between objects.<br />
Protect against ESD damage by equalizing the charge so that the machine, the part, the work mat, and the<br />
person handling the part are all at the same charge.<br />
Notes:<br />
1. Use product-specific ESD procedures when they exceed the requirements noted here.<br />
2. Make sure that the ESD protective devices you use have been certified (ISO 9000) as fully effective.<br />
When handling ESD-sensitive parts:<br />
• Keep the parts in protective packages until they are inserted into the product.<br />
• Avoid contact with other people while handling the part.<br />
• Wear a grounded wrist strap against your skin to eliminate static on your body.<br />
• Prevent the part from touching your clothing. Most clothing is insulative and retains a charge even when<br />
you are wearing a wrist strap.<br />
• Use the black side of a grounded work mat to provide a static-free work surface. The mat is especially<br />
useful when handling ESD-sensitive devices.<br />
• Select a grounding system, such as those listed below, to provide protection that meets the specific<br />
service requirement.<br />
Note: The use of a grounding system is desirable but not required to protect against ESD damage.<br />
– Attach the ESD ground clip to any frame ground, ground braid, or green-wire ground.<br />
– Use an ESD common ground or reference point when working on a double-insulated or<br />
battery-operated system. You can use coax or connector-outside shells on these systems.<br />
– Use the round ground-prong of the ac plug on ac-operated computers.<br />
Grounding requirements<br />
Electrical grounding of the computer is required for operator safety and correct system function. Proper<br />
grounding of the electrical outlet can be verified by a certified electrician.<br />
Safety notices (multi-lingual translations)<br />
The caution and danger safety notices in this section are provided in the following languages:<br />
• English<br />
• Arabic<br />
• Brazilian/Portuguese<br />
• Chinese (simplified)<br />
• Chinese (traditional)<br />
6 <strong>ThinkCentre</strong> <strong>Hardware</strong> <strong>Maintenance</strong> <strong>Manual</strong>
• French<br />
• German<br />
• Hebrew<br />
• Italian<br />
• Korean<br />
• Spanish<br />
DANGER<br />
Electrical current from power, telephone and communication cables is hazardous.<br />
To avoid a shock hazard:<br />
• Do not connect or disconnect any cables or perform installation, maintenance, or reconfiguration<br />
of this product during an electrical storm.<br />
• Connect all power cords to a properly wired and grounded electrical outlet.<br />
• Connect to properly wired outlets any equipment that will be attached to this product.<br />
• When possible, use one hand only to connect or disconnect signal cables.<br />
• Never turn on any equipment when there is evidence of fire, water, or structural damage.<br />
• Disconnect the attached power cords, telecommunications systems, networks, and modems<br />
before you open the device covers, unless instructed otherwise in the installation and configuration<br />
procedures.<br />
• Connect and disconnect cables as described in the following tables when installing, moving, or<br />
opening covers on this product or attached devices.<br />
To Connect To Disconnect<br />
1. Turn everything OFF.<br />
2. First, attach all cables to devices.<br />
3. Attach signal cables to connectors.<br />
4. Attach power cords to outlet.<br />
5. Turn device ON.<br />
1. Turn everything OFF.<br />
2. First, remove power cords from outlet.<br />
3. Remove signal cables from connectors.<br />
4. Remove all cables from devices.<br />
CAUTION:<br />
When replacing the lithium battery, use only Part Number 45C1566 or an equivalent type battery<br />
recommended by the manufacturer. If your system has a module containing a lithium battery, replace<br />
it only with the same module type made by the same manufacturer. The battery contains lithium and<br />
can explode if not properly used, handled, or disposed of. Do not:<br />
• Throw or immerse into water<br />
• Heat to more than 100°C (212°F)<br />
• Repair or disassemble<br />
Dispose of the battery as required by local ordinances or regulations.<br />
Chapter 2. Safety information 7
CAUTION:<br />
When laser products (such as CD-ROMs, DVD-ROM drives, fiber optic devices, or transmitters) are<br />
installed, note the following:<br />
• Do not remove the covers. Removing the covers of the laser product could result in exposure to<br />
hazardous laser radiation. There are no serviceable parts inside the device.<br />
• Use of controls or adjustments or performance of procedures other than those specified herein<br />
might result in hazardous radiation exposure.<br />
DANGER<br />
Some laser products contain an embedded Class 3A or Class 3B laser diode. Note the following:<br />
Laser radiation when open. Do not stare into the beam, do not view directly with optical<br />
instruments, and avoid direct exposure to the beam.<br />
CAUTION:<br />
Use safe practices when lifting.<br />
≥18 kg (37 lbs) ≥32 kg (70.5 lbs) ≥55 kg (121.2 lbs)<br />
CAUTION:<br />
The power control button on the device and the power switch on the power supply do not turn off<br />
the electrical current supplied to the device. The device also might have more than one power<br />
cord. To remove all electrical current from the device, ensure that all power cords are disconnected<br />
from the power source.<br />
2<br />
1<br />
8 <strong>ThinkCentre</strong> <strong>Hardware</strong> <strong>Maintenance</strong> <strong>Manual</strong>
Chapter 2. Safety information 9
PERIGO<br />
≥18 kg (37 lbs) ≥32 kg (70.5 lbs) ≥55 kg (121.2 lbs)<br />
10 <strong>ThinkCentre</strong> <strong>Hardware</strong> <strong>Maintenance</strong> <strong>Manual</strong><br />
2<br />
1
A corrente elétrica proveniente de cabos de alimentação, de telefone e de comunicações é perigosa.<br />
Para evitar risco de choque elétrico:<br />
• Não conecte nem desconecte nenhum cabo ou execute instalação, manutenção ou reconfiguração<br />
deste produto durante uma tempestade com raios.<br />
• Conecte todos os cabos de alimentação a tomadas elétricas corretamente instaladas e aterradas.<br />
• Todo equipamento que for conectado a este produto deve ser conectado a tomadas corretamente<br />
instaladas.<br />
• Quando possível, utilize apenas uma das mãos para conectar ou desconectar cabos de sinal.<br />
• Nunca ligue nenhum equipamento quando houver evidência de fogo, água ou danos estruturais.<br />
• Antes de abrir tampas de dispositivos, desconecte cabos de alimentação, sistemas de telecomunicação,<br />
redes e modems conectados, a menos que especificado de maneira diferente nos procedimentos de<br />
instalação e configuração.<br />
• Conecte e desconecte os cabos conforme descrito na tabela apresentada a seguir ao instalar, mover ou<br />
abrir tampas deste produto ou de dispositivos conectados.<br />
Para Conectar: Para Desconectar:<br />
1. DESLIGUE Tudo.<br />
2. Primeiramente, conecte todos os cabos aos<br />
dispositivos.<br />
3. Conecte os cabos de sinal aos conectores.<br />
4. Conecte os cabos de alimentação às tomadas.<br />
5. LIGUE os dispositivos.<br />
CUIDADO:<br />
1. DESLIGUE Tudo.<br />
2. Primeiramente, remova os cabos de alimentação das<br />
tomadas.<br />
3. Remova os cabos de sinal dos conectores.<br />
4. Remova todos os cabos dos dispositivos.<br />
Ao substituir a bateria de lítio, utilize apenas uma bateria com Número de Peça 45C1566 ou um tipo<br />
de bateria equivalente recomendado pelo Se o seu sistema possui um módulo com uma bateria de<br />
lítio, substitua-o apenas por um módulo do mesmo tipo e do mesmo fabricante. A bateria contém lítio<br />
e pode explodir se não for utilizada, manuseada ou descartada de maneira correta.<br />
Não:<br />
• Jogue ou coloque na água<br />
• Aqueça a mais de 100°C (212°F)<br />
• Conserte nem desmonte<br />
Descarte a bateria conforme requerido pelas leis ou regulamentos locais.<br />
PRECAUCIÓN:<br />
Quando produtos a laser (como unidades de CD-ROMs, unidades de DVD-ROM, dispositivos de fibra ótica<br />
ou transmissores) estiverem instalados, observe o seguinte:<br />
Chapter 2. Safety information 11
• Não remova as tampas. A remoção das tampas de um produto a laser pode resultar em exposição<br />
prejudicial à radiação de laser. Não existem peças que podem ser consertadas no interior do dispositivo.<br />
• A utilização de controles ou ajustes ou a execução de procedimentos diferentes dos especificados aqui<br />
pode resultar em exposição prejudicial à radiação.<br />
PERIGO<br />
Alguns produtos a laser contêm diodo de laser integrado da Classe 3A ou da Classe 3B. Observe o seguinte:<br />
Radiação a laser quando aberto. Não olhe diretamente para o feixe a olho nu ou com instrumentos ópticos e<br />
evite exposição direta ao feixe.<br />
CUIDADO:<br />
≥18 kg (37 lbs) ≥32 kg (70.5 lbs) ≥55 kg (121.2 lbs)<br />
Utilize procedimentos de segurança para levantar equipamentos.<br />
CUIDADO:<br />
O botão de controle de alimentação do dispositivo e o botão para ligar/desligar da fonte de alimentação<br />
não desligam a corrente elétrica fornecida ao dispositivo. O dispositivo também pode ter mais de um cabo<br />
de alimentação. Para remover toda a corrente elétrica do dispositivo, assegure que todos os cabos de<br />
alimentação estejam desconectados da fonte de alimentação.<br />
2<br />
1<br />
12 <strong>ThinkCentre</strong> <strong>Hardware</strong> <strong>Maintenance</strong> <strong>Manual</strong>
Chapter 2. Safety information 13
2<br />
1<br />
14 <strong>ThinkCentre</strong> <strong>Hardware</strong> <strong>Maintenance</strong> <strong>Manual</strong>
Chapter 2. Safety information 15
2<br />
1<br />
DANGER<br />
Le courant électrique provenant de l'alimentation, du téléphone et des câbles de transmission peut présenter<br />
un danger.<br />
Pour éviter tout risque de choc électrique :<br />
• Ne manipulez aucun câble et n'effectuez aucune opération d'installation, d'entretien ou de reconfiguration<br />
de ce produit au cours d'un orage.<br />
• Branchez tous les cordons d'alimentation sur un socle de prise de courant correctement câblé et mis à la<br />
terre.<br />
• Branchez sur des socles de prise de courant correctement câblés tout équipement connecté à ce produit.<br />
• Lorsque cela est possible, n'utilisez qu'une seule main pour connecter ou déconnecter les câbles<br />
d'interface.<br />
• Ne mettez jamais un équipement sous tension en cas d'incendie ou d'inondation, ou en présence de<br />
dommages matériels.<br />
• Avant de retirer les carters de l'unité, mettez celle-ci hors tension et déconnectez ses cordons<br />
d'alimentation, ainsi que les câbles qui la relient aux réseaux, aux systèmes de télécommunication et aux<br />
modems (sauf instruction contraire mentionnée dans les procédures d'installation et de configuration).<br />
• Lorsque vous installez, que vous déplacez, ou que vous manipulez le présent produit ou des périphériques<br />
qui lui sont raccordés, reportez-vous aux instructions ci-dessous pour connecter et déconnecter les<br />
différents cordons.<br />
16 <strong>ThinkCentre</strong> <strong>Hardware</strong> <strong>Maintenance</strong> <strong>Manual</strong>
Connexion Déconnexion<br />
1. Mettez les unités HORS TENSION.<br />
2. Commencez par brancher tous les cordons sur les<br />
unités.<br />
3. Branchez les câbles d'interface sur des connecteurs.<br />
4. Branchez les cordons d'alimentation sur des prises.<br />
5. Mettez les unités SOUS TENSION.<br />
ATTENTION:<br />
1. Mettez les unités HORS TENSION.<br />
2. Débranchez les cordons d'alimentation des prises.<br />
3. Débranchez les câbles d'interface des connecteurs.<br />
4. Débranchez tous les câbles des unités.<br />
Remplacer la pile au lithium usagée par une pile de référence identique exclusivement, (référence<br />
45C1566), ou suivre les instructions du fabricant qui en définit les équivalences. Si votre système est<br />
doté d'un module contenant une pile au lithium, vous devez le remplacer uniquement par un module<br />
identique, produit par le même fabricant. La pile contient du lithium et peut exploser en cas de<br />
mauvaise utilisation, de mauvaise manipulation ou de mise au rebut inappropriée.<br />
Ne pas :<br />
• la jeter à l'eau,<br />
• l'exposer à des températures supérieures à 100°C,<br />
• chercher à la réparer ou à la démonter.<br />
Ne pas mettre la pile à la poubelle. Pour la mise au rebut, se reporter à la réglementation en vigueur.<br />
ATTENTION:<br />
Si des produits à laser (tels que des unités de CD-ROM, de DVD-ROM, des unités à fibres optiques, ou<br />
des émetteurs) sont installés, prenez connaissance des informations suivantes :<br />
• Ne retirez pas le carter. En ouvrant l'unité de CD-ROM ou de DVD-ROM, vous vous exposez au<br />
rayonnement dangereux du laser. Aucune pièce de l'unité n'est réparable.<br />
• Pour éviter tout risque d'exposition au rayon laser, respectez les consignes de réglage et<br />
d'utilisation des commandes, ainsi que les procédures décrites dans le présent manuel.<br />
DANGER<br />
Certains produits à laser contiennent une diode à laser intégrée de classe 3A ou 3B. Prenez<br />
connaissance des informations suivantes:<br />
Rayonnement laser lorsque le carter est ouvert. Evitez toute expositiondirecte au rayon laser. Evitez<br />
de regarder fixement le faisceau ou del'observer à l'aide d'instruments optiques.<br />
Chapter 2. Safety information 17
ATTENTION:<br />
Soulevez la machine avec précaution.<br />
ATTENTION:<br />
≥18 kg (37 lbs) ≥32 kg (70.5 lbs) ≥55 kg (121.2 lbs)<br />
L'interrupteur de contrôle d'alimentation de l'unité et l'interrupteur dubloc d'alimentation ne coupent<br />
pas le courant électrique alimentantl'unité. En outre, le système peut être équipé de plusieurs<br />
cordonsd'alimentation. Pour mettre l'unité hors tension, vous devez déconnectertous les cordons<br />
de la source d'alimentation.<br />
2<br />
1<br />
VORSICHT<br />
An Netz-, Telefon- und Datenleitungen können gefährliche Spannungen anliegen.<br />
Aus Sicherheitsgründen:<br />
• Bei Gewitter an diesem Gerät keine Kabel anschließen oder lösen. Ferner keine Installations-,<br />
Wartungs- oder Rekonfigurationsarbeiten durchführen.<br />
• Gerät nur an eine Schutzkontaktsteckdose mit ordnungsgemäß geerdetem Schutzkontakt<br />
anschließen.<br />
• Alle angeschlossenen Geräte ebenfalls an Schutzkontaktsteckdosen mit ordnungsgemäß<br />
geerdetem Schutzkontakt anschließen.<br />
• Die Signalkabel nach Möglichkeit einhändig anschließen oder lösen, um einen Stromschlag durch<br />
Berühren von Oberflächen mit unterschiedlichem elektrischem Potenzial zu vermeiden.<br />
• Geräte niemals einschalten, wenn Hinweise auf Feuer, Wasser oder Gebäudeschäden vorliegen.<br />
18 <strong>ThinkCentre</strong> <strong>Hardware</strong> <strong>Maintenance</strong> <strong>Manual</strong>
• Die Verbindung zu den angeschlossenen Netzkabeln, Telekommunikationssystemen, Netzwerken<br />
und Modems ist vor dem Öffnen des Gehäuses zu unterbrechen, sofern in den Installations- und<br />
Konfigurationsprozeduren keine anders lautenden Anweisungen enthalten sind.<br />
• Zum Installieren, Transportieren und Öffnen der Abdeckungen des Computers oder der<br />
angeschlossenen Einheiten die Kabel gemäß der folgenden Tabelle anschließen und abziehen.<br />
Zum Anschließen der Kabel gehen Sie wie folgt vor Zum Abziehen der Kabel gehen Sie wie folgt vor<br />
1. Schalten Sie alle Einheiten AUS.<br />
2. Schließen Sie erst alle Kabel an die Einheiten an.<br />
3. Schließen Sie die Signalkabel an die Buchsen an.<br />
4. Schließen Sie die Netzkabel an die Steckdose an.<br />
5. Schalten Sie die Einheit EIN.<br />
CAUTION:<br />
1. Schalten Sie alle Einheiten AUS.<br />
2. Ziehen Sie zuerst alle Netzkabel aus den<br />
Netzsteckdosen.<br />
3. Ziehen Sie die Signalkabel aus den Buchsen.<br />
4. Ziehen Sie alle Kabel von den Einheiten ab.<br />
Eine verbrauchte Lithiumbatterie nur durch eine Batterie mit der Teilenummer 45C1566 oder eine<br />
gleichwertige, vom Hersteller empfohlene Batterie ersetzen. Enthält das System ein Modul mit einer<br />
Lithiumbatterie, dieses nur durch ein Modul desselben Typs und von demselben Hersteller ersetzen.<br />
Die Batterie enthält Lithium und kann bei unsachgemäßer Verwendung, Handhabung oder Entsorgung<br />
explodieren.<br />
Die Batterie nicht:<br />
• mit Wasser in Berührung bringen.<br />
• über 100 C erhitzen.<br />
• reparieren oder zerlegen.<br />
Die örtlichen Bestimmungen für die Entsorgung von Sondermüll beachten.<br />
ACHTUNG:<br />
Bei der Installation von Lasergeräten (wie CD-ROM-Laufwerken, DVD- aufwerken, Einheiten mit<br />
Lichtwellenleitertechnik oder Sendern) Folgendes beachten:<br />
• Die Abdeckungen nicht entfernen. Durch Entfernen der Abdeckungen des Lasergeräts können<br />
gefährliche Laserstrahlungen freigesetzt werden. Das Gerät enthält keine zu wartenden Teile.<br />
• Werden Steuerelemente, Einstellungen oder Durchführungen von Prozeduren anders als hier<br />
angegeben verwendet, kann gefährliche Laserstrahlung auftreten.<br />
VORSICHT<br />
Einige Lasergeräte enthalten eine Laserdiode der Klasse 3A oder 3B. Beachten Sie Folgendes:<br />
Chapter 2. Safety information 19
Laserstrahlung bei geöffneter Verkleidung. Nicht in den Strahl blicken. Keine Lupen oder Spiegel<br />
verwenden. Strahlungsbereich meiden.<br />
ACHTUNG:<br />
≥18 kg (37 lbs) ≥32 kg (70.5 lbs) ≥55 kg (121.2 lbs)<br />
Arbeitsschutzrichtlinien beim Anheben der Maschine beachten.<br />
ACHTUNG:<br />
Mit dem Netzschalter an der Einheit und am Netzteil wird die Stromversorgung für die Einheit<br />
nicht unterbrochen. Die Einheit kann auch mit mehreren Netzkabeln ausgestattet sein. Um die<br />
Stromversorgung für die Einheit vollständig zu unterbrechen, müssen alle zum Gerät führenden<br />
Netzkabel vom Netz getrennt werden.<br />
2<br />
1<br />
20 <strong>ThinkCentre</strong> <strong>Hardware</strong> <strong>Maintenance</strong> <strong>Manual</strong>
Chapter 2. Safety information 21
PERICOLO<br />
La corrente elettrica proveniente dai cavi di alimentazione, del telefono e di comunicazione può essere<br />
pericolosa.<br />
Per evitare il rischio di scosse elettriche:<br />
• Non collegare o scollegare qualsiasi cavo oppure effettuare l'installazione, la manutenzione o la<br />
riconfigurazione del prodotto durante un temporale.<br />
• Collegare tutti i fili elettrici a una presa di alimentazione correttamente cablata e dotata di messa a<br />
terra.<br />
• Collegare alle prese elettriche appropriate tutte le apparecchiature che verranno utilizzate per<br />
questo prodotto.<br />
22 <strong>ThinkCentre</strong> <strong>Hardware</strong> <strong>Maintenance</strong> <strong>Manual</strong><br />
2<br />
1
• Se possibile, utilizzare solo una mano per collegare o scollegare i cavi di segnale.<br />
• Non accendere assolutamente apparecchiature in presenza di incendi, perdite d'acqua o danno<br />
strutturale.<br />
• Scollegare i cavi di alimentazione, i sistemi di telecomunicazione, le reti e il modem prima di<br />
aprire i coperchi del dispositivo, salvo istruzioni contrarie relative alle procedure di installazione e<br />
configurazione.<br />
• Collegare e scollegare i cavi come descritto nella seguente tabella quando vengono effettuate<br />
operazioni di installazione, spostamento o apertura dei coperchi di questo prodotto o delle unità<br />
collegate.<br />
Per collegarsi Per scollegarsi<br />
1. SPEGNERE le apparecchiature.<br />
2. Innanzitutto, collegare tutti i cavi alle unità.<br />
3. Collegare i cavi di segnale ai connettori.<br />
4. Collegare i cavi di alimentazione alla presa.<br />
5. Accendere l'unità.<br />
ATTENZIONE:<br />
1. SPEGNERE le apparecchiature.<br />
2. Innanzitutto, rimuovere i cavi di alimentazione dalla<br />
presa.<br />
3. Rimuovere i cavi di segnale dai connettori.<br />
4. Rimuovere tutti i cavi dalle unità.<br />
Quando si sostituisce la batteria al litio, utilizzare solo il Numero parte 45C1566 o un tipo di batteria<br />
equivalente consigliato dal produttore. Se sul sistema è presente un modulo che contiene una batteria<br />
al litio, sostituirlo solo con un tipo di modulo dello stesso tipo della stessa casa di produzione. La<br />
batteria contiene litio e può esplodere se usata, maneggiata o smaltita in modo non corretto.<br />
Non:<br />
• Gettare o immergere la batteria nell'acqua<br />
• Riscaldarla ad una temperatura superiore ai 100 gradi C (212 gradi F)<br />
• Smontarla, ricaricarla o tentare di ripararla<br />
Le batterie usate vanno smaltite in accordo alla normativa in vigore (DPR 915/82 e successive<br />
disposizioni e disposizioni locali).<br />
ATTENZIONE:<br />
Quando vengono installati prodotti laser (quali CD-ROM, unità DVD-ROM, unità a fibre ottiche o<br />
trasmittenti), tener presente quanto segue:<br />
• Non rimuovere gli sportelli. L'apertura di un'unità laser può determinare l'esposizione a radiazioni<br />
laser pericolose. All'interno dell'unità non vi sono parti su cui effettuare l'assistenza tecnica.<br />
• L'utilizzo di controlli, regolazioni o l'esecuzione di procedure non descritti nel presente manuale<br />
possono provocare l'esposizione a radiazioni pericolose.<br />
Chapter 2. Safety information 23
PERICOLO<br />
Alcune unità laser contengono un diodo laser di Classe 3A o Classe 3B. Tener presente quanto segue:<br />
Aprendo l'unità vengono emesse radiazioni laser. Non fissare il fascio, non guardarlo direttamente<br />
con strumenti ottici ed evitare l'esposizione al fascio.<br />
ATTENZIONE:<br />
≥18 kg (37 lbs) ≥32 kg (70.5 lbs) ≥55 kg (121.2 lbs)<br />
Prestare attenzione nel sollevare l'apparecchiatura.<br />
ATTENZIONE:<br />
Il pulsante di controllo dell'alimentazione presente sull'unità e l'interruttore dell'alimentatore non<br />
disattivano l'alimentazione corrente fornita all'unità. E' possibile che l'unità disponga di più cavi di<br />
alimentazione. Per disattivare l'alimentazione dall'unità, accertarsi che tutti i cavi di alimentazione<br />
siano scollegati dalla fonte di alimentazione.<br />
2<br />
1<br />
24 <strong>ThinkCentre</strong> <strong>Hardware</strong> <strong>Maintenance</strong> <strong>Manual</strong>
Chapter 2. Safety information 25
2<br />
1<br />
PELIGRO<br />
La corriente eléctrica procedente de cables de alimentación, teléfonos y cables de comunicación puede<br />
ser peligrosa.<br />
Para evitar el riesgo de descarga eléctrica:<br />
• No conecte ni desconecte los cables ni realice ninguna tarea de instalación, mantenimiento o<br />
reconfiguración de este producto durante una tormenta eléctrica.<br />
• Conecte todos los cables de alimentación a tomas de corriente debidamente cableadas y<br />
conectadas a tierra.<br />
• Cualquier equipo que se conecte a este producto también debe conectarse a tomas de corriente<br />
debidamente cableadas.<br />
• Siempre que sea posible, utilice una sola mano para conectar o desconectar los cables de señal.<br />
• No encienda nunca un equipo cuando hay señales de fuego, agua o daños estructurales.<br />
26 <strong>ThinkCentre</strong> <strong>Hardware</strong> <strong>Maintenance</strong> <strong>Manual</strong>
• Desconecte los cables de alimentación, los sistemas de telecomunicaciones, las redes y los<br />
módems conectados antes de abrir las cubiertas de los dispositivos, a menos que se indique lo<br />
contrario en los procedimientos de instalación y configuración.<br />
• Conecte y desconecte los cables, como se describe en la tabla siguiente, cuando instale, mueva o<br />
abra las cubiertas de este producto o de los dispositivos conectados.<br />
Para conectar Para desconectar<br />
1. APÁGUELO todo.<br />
2. En primer lugar, conecte todos los cables a los<br />
dispositivos.<br />
3. Conecte los cables de señal a los conectores.<br />
4. Enchufe los cables de alimentación a las tomas de<br />
corriente.<br />
5. Encienda el dispositivo.<br />
PRECAUCIÓN:<br />
1. APÁGUELO todo.<br />
2. En primer lugar, desenchufe los cables de alimentación<br />
de las tomas de corriente.<br />
3. Desconecte los cables de señal de los conectores.<br />
4. Desconecte todos los cables de los dispositivos.<br />
Cuando sustituya una batería de litio, utilice solamente una batería número de pieza 45C1566 u otra<br />
de tipo equivalente recomendada por el fabricante. Si su sistema dispone de un módulo que contiene<br />
una batería de litio, reemplácelo sólo con el mismo tipo de módulo, del mismo fabricante. La batería<br />
contiene litio y puede explotar si no se utiliza, manipula o desecha correctamente.<br />
No debe:<br />
• Arrojarla al agua o sumergirla en ella<br />
• Exponerla a temperaturas superiores a 100°C (212°F)<br />
• Repararla o desmontarla<br />
Deshágase de la batería según especifiquen las leyes o normas locales.<br />
PRECAUCIÓN:<br />
Cuando haya productos láser (como unidades de CD-ROM, unidades de DVD, dispositivos de fibra<br />
óptica o transmisores) instalados, tenga en cuenta lo siguiente:<br />
• No quite las cubiertas. Si quita las cubiertas del producto láser, podría quedar expuesto a radiación<br />
láser peligrosa. Dentro del dispositivo no existe ninguna pieza que requiera servicio técnico.<br />
• Si usa controles o ajustes o realiza procedimientos que no sean los especificados aquí, podría<br />
exponerse a radiaciones peligrosas.<br />
PELIGRO<br />
Chapter 2. Safety information 27
Algunos productos láser tienen incorporado un diodo láser de clase 3A o clase 3B. Tenga en cuenta lo<br />
siguiente:<br />
Cuando se abre, queda expuesto a radiación láser. No mire directamente al rayo láser, ni siquiera con<br />
instrumentos ópticos, y evite exponerse directamente al rayo láser.<br />
PRECAUCIÓN:<br />
≥18 kg (37 lbs) ≥32 kg (70.5 lbs) ≥55 kg (121.2 lbs)<br />
Adopte procedimientos seguros al levantar el equipo.<br />
PRECAUCIÓN:<br />
El botón de control de alimentación del dispositivo y el interruptor de alimentación de la fuente de<br />
alimentación no desconectan la corriente eléctrica suministrada al dispositivo. Además, el dispositivo<br />
podría tener más de un cable de alimentación. Para suprimir toda la corriente eléctrica del dispositivo,<br />
asegúrese de que todos los cables de alimentación estén desconectados de la toma de corriente.<br />
2<br />
1<br />
28 <strong>ThinkCentre</strong> <strong>Hardware</strong> <strong>Maintenance</strong> <strong>Manual</strong>
Chapter 3. General information<br />
This chapter provides general information that applies to all machine types supported by this manual.<br />
Online Books folder<br />
Note: The Online Books folder is only available on computers with an internal hard disk drive and preinstalled<br />
software programs from <strong>Lenovo</strong>.<br />
The Online Books folder preinstalled on your computer contains the <strong>ThinkCentre</strong> User Guide, which provides<br />
information about your computer to help you set up, use, and maintain your computer. It requires no<br />
Internet access to view the publication.<br />
To view the publication, click StartÆAll ProgramsÆOnline BooksÆOnline Books, then double-click<br />
the publication for your computer. The publication is also available on the <strong>Lenovo</strong> Support Web site at:<br />
http://www.lenovo.com/support<br />
Notes:<br />
1. The publication is in Portable Document Format (PDF). To view the publication, you need to have the<br />
Adobe Reader program preinstalled on your computer. If the Adobe Reader program has not been<br />
installed on your computer, a message will be displayed when you attempt to view the PDF file and you<br />
will be guided through the Adobe Reader installation.<br />
2. The publication is available in other languages on the <strong>Lenovo</strong> Support Web site at:<br />
http://www.lenovo.com/support<br />
3. If you want to install a different language version of the Adobe Reader program rather than the version<br />
preinstalled on your computer, download the desired language version from the Adobe Web site at:<br />
http://www.adobe.com<br />
<strong>Lenovo</strong> ThinkVantage Tools<br />
Note: The <strong>Lenovo</strong> ThinkVantage® Tools program is only available on computers with an internal hard disk<br />
drive, the Microsoft® Windows® 7 operating system, and preinstalled software programs from <strong>Lenovo</strong>.<br />
The <strong>Lenovo</strong> ThinkVantage Tools program helps you work more easily and securely by providing easy access<br />
to various tools, such as:<br />
• <strong>Lenovo</strong> ThinkVantage Toolbox/<strong>Lenovo</strong> Solution Center<br />
• Password Manager<br />
• Power Manager<br />
• Product Recovery<br />
• Rescue and Recovery®<br />
• ThinkVantage System Update<br />
• SimpleTap<br />
To access the <strong>Lenovo</strong> ThinkVantage Tools program, click StartÆAll ProgramsÆ<strong>Lenovo</strong> ThinkVantage<br />
Tools.<br />
© Copyright <strong>Lenovo</strong> 2008, 2012 29
<strong>Lenovo</strong> Solution Center<br />
The <strong>Lenovo</strong> Solution Center program enables you to troubleshoot and resolve computer problems. It<br />
combines diagnostic tests, system information collection, security status, and support information, along<br />
with hints and tips for maximum system performance. See “<strong>Lenovo</strong> Solution Center” on page 37 for detailed<br />
information.<br />
SimpleTap<br />
The SimpleTap program provides you with a quick way to customize some basic computer settings such as<br />
muting the speakers, adjusting the volume, locking the computer operating system, launching a program,<br />
opening a Web page, opening a file, and so on. You also can use the SimpleTap program to access the<br />
<strong>Lenovo</strong> App Shop, from which you can download various applications and computer software.<br />
To start the SimpleTap program in a quick way, do any of the following:<br />
• Click the red SimpleTap launch point on the desktop. The red launch point is available on the desktop<br />
after you have launched the SimpleTap program for the first time.<br />
• Press the blue ThinkVantage button if your keyboard has one.<br />
Note: The SimpleTap program is only available on certain models preinstalled with the Windows 7 operating<br />
system. If your Windows 7 model is not preinstalled with the SimpleTap program, you can download it<br />
from http://www.lenovo.com/support.<br />
ThinkVantage Productivity Center<br />
Note: The ThinkVantage Productivity Center program is only available on computers with an internal hard<br />
disk drive, the preinstalled Microsoft Windows Vista® operating system or the preinstalled Microsoft<br />
Windows XP operating system from <strong>Lenovo</strong>.<br />
The ThinkVantage Productivity Center program contains information sources and tools designed to make<br />
computing easy and secure. It provides easy access to various technologies, such as:<br />
• Client Security Solution or Password Manager<br />
• Power Manager<br />
• Product Recovery<br />
• Rescue and Recovery<br />
To access the ThinkVantage Productivity Center program, click StartÆAll ProgramsÆThinkVantage<br />
Æ Productivity Center.<br />
Access Help<br />
Note: The Access Help information system is only available on computers with an internal hard disk drive<br />
and preinstalled software programs from <strong>Lenovo</strong>.<br />
The Access Help information system provides information about getting started, doing basic tasks,<br />
customizing settings for your personal preference, protecting data, expanding and upgrading, and<br />
troubleshooting.<br />
• To open the Access Help information system on the Windows 7 operating system, click StartÆHelp<br />
and Support Æ <strong>Lenovo</strong> Access Help.<br />
• To open the Access Help information system on the Windows Vista operating system or the Windows XP<br />
operating system, click StartÆAll ProgramsÆThinkVantageÆAccess Help.<br />
30 <strong>ThinkCentre</strong> <strong>Hardware</strong> <strong>Maintenance</strong> <strong>Manual</strong>
After you have opened the Access Help information system, use the left panel to make a selection from the<br />
Contents tab or the Index tab, or use the Search tab to find a particular word or phrase.<br />
Additional information resources<br />
If you have Internet access, the most up-to-date information for your computer is available at:<br />
http://www.lenovo.com/support<br />
You can find the following information:<br />
• Customer Replaceable Unit (CRU) installation or replacement instructions<br />
• Downloads and drivers<br />
• Parts information<br />
• Publications<br />
• Troubleshooting information<br />
• Links to other useful sources of information<br />
Specifications<br />
This section lists the physical specifications for your computer.<br />
Dimensions<br />
Width: 275 mm (10.83 inches)<br />
Height: 80 mm (3.15 inches)<br />
Depth: 238 mm (9.37 inches)<br />
Weight<br />
Note: The weight does not include the power supply or any external cables.<br />
Maximum configuration as shipped: 4.18 kg (9.22 lbs)<br />
Environment<br />
• Air temperature:<br />
• Humidity:<br />
Operating: 10° to 35°C (50° to 95°F)<br />
Non-operating: -40° to 60°C (-40° to 140°F)<br />
Operating: 10% to 80% (10% per hour, non condensing)<br />
Non-operating: 10% to 90% (10% per hour)<br />
• Maximum altitude:<br />
Operating: -50 to 10,000 ft (-15.2 to 3048 m)<br />
Non-operating: -50 to 35,000 ft (-15.2 to 10,668 m)<br />
Electrical input<br />
• Input voltage:<br />
– Low range:<br />
Minimum: 100 V AC<br />
Maximum: 127 V AC<br />
Input frequency range: 50/60 Hz<br />
Voltage-selection switch setting: 115 V AC<br />
– High range:<br />
Minimum: 200 V AC<br />
Chapter 3. General information 31
Maximum: 240 V AC<br />
Input frequency range: 50/60 Hz<br />
Voltage-selection switch setting: 230 V AC<br />
32 <strong>ThinkCentre</strong> <strong>Hardware</strong> <strong>Maintenance</strong> <strong>Manual</strong>
Chapter 4. General checkout<br />
Attention<br />
The drives in the computer you are servicing might have been rearranged or the drive startup sequence<br />
changed. Be extremely careful during write operations such as copying, saving, or formatting. Data or<br />
programs can be overwritten if you select an incorrect drive.<br />
General error messages appear if a problem or conflict is found by an application program, the operating<br />
system, or both. For the explanation of these messages, refer to the information supplied with that software<br />
package.<br />
Before replacing any FRUs, ensure that the latest level of BIOS is installed on the system. A down-level BIOS<br />
might cause false errors and unnecessary replacement of the system board. For more information on how to<br />
determine and obtain the latest level BIOS, see “BIOS levels” on page 275.<br />
Notes: For computer models that do not have an internal hard disk drive and use a remote hard disk drive<br />
accessed through the Secure Managed Client - Storage Array (SMC - Storage Array):<br />
• You might receive the error message “No operating system found. Press F1 to repeat boot sequence.” In<br />
this case, press Ctrl+Alt+Delete instead of F1 to establish a connection to the storage area network where<br />
your operating system is stored. Verify that the user name is not logged on in another location.<br />
• If the SMC login prompt disappears before you log in and then a black screen displays, contact your<br />
administrator.<br />
Use the following procedure to help determine the cause of the problem:<br />
1. Power-off the computer and all external devices.<br />
2. Check all cables and power cords.<br />
3. Set all display controls to the middle position.<br />
4. Power-on all external devices.<br />
5. Power-on the computer.<br />
• Look for displayed error codes<br />
• Listen for beep codes<br />
• Look for readable instructions or a main menu on the display.<br />
If you did not receive the correct response, proceed to step 6 on page 33.<br />
If you do receive the correct response, run the diagnostics. .See “Running the diagnostic program<br />
from the diagnostic disc” on page 39.<br />
6. Look at the following conditions and follow the instructions:<br />
• If you hear beep codes during POST, go to “Beep symptoms” on page 63.<br />
• If the computer displays a POST error, go to “POST error codes” on page 63.<br />
• If the computer hangs and no error is displayed, go to “Power problems” on page 33.<br />
Checking for power problems<br />
If the computer does not turn on when the power switch is pressed, use the following procedure to help<br />
troubleshoot:<br />
1. Press the power switch to turn on the computer. Check the power indicator LED next to the power<br />
switch.<br />
• If the LED is illuminated (on), the computer power is OK. Attempt to run the diagnostics. See<br />
“Running the diagnostic program from the diagnostic disc” on page 39.<br />
© Copyright <strong>Lenovo</strong> 2008, 2012 33
• If the LED is not illuminated (off), go to step 2 on page 34<br />
2. Check the status of the power indicator LED on the AC/DC power adapter.<br />
• If the LED is illuminated (on), go to step 7 on page 34.<br />
• If the LED is not illuminated (off), go to the next step 3 on page 34.<br />
3. Verify that the power cord is properly connected to an AC power outlet.<br />
4. Verify that you are using a good AC power outlet. Plug another device into the outlet or contact the<br />
power company or supplier to verify that the outlet is working correctly .<br />
5. Check the power cord continuity.<br />
6. Replace the AC/DC power adapter.<br />
7. Verify that the power cord from the AC/DC power adapter to the computer is properly connected. See<br />
“Locating connectors on the rear of the computer” on page 68.<br />
8. Open the cover. See “Opening the computer cover” on page 71.<br />
9. Check the power switch/LED assembly connector on the system board. See “Locating parts on the<br />
system board” on page 70. Reseat the cable from the power switch/LED assembly to the system board.<br />
10. Replace the power switch/LED assembly.<br />
11. Replace the system board. See “Replacing the system board” on page 80.<br />
Problem determination tips<br />
Due to the variety of hardware and software combinations that can be encountered, use the following<br />
information to assist you in problem determination. If possible, have this information available when<br />
requesting assistance from Service Support and Engineering functions.<br />
• Machine type and model<br />
• Processor or hard disk upgrades<br />
• Failure symptom<br />
– Do diagnostics indicate a failure?<br />
– What, when, where, single, or multiple systems?<br />
– Is the failure repeatable?<br />
– Has this configuration ever worked?<br />
– If it has been working, what changes were made prior to it failing?<br />
– Is this the original reported failure?<br />
• Diagnostics version<br />
– Type and version level<br />
• <strong>Hardware</strong> configuration<br />
– Print (print screen) configuration currently in use<br />
– BIOS level<br />
• Operating system software<br />
– Type and version level<br />
Notes: To eliminate confusion, identical systems are considered identical only if they:<br />
1. Are the exact machine type and models<br />
2. Have the same BIOS level<br />
3. Have the same adapters/attachments in the same locations<br />
4. Have the same address jumpers/terminators/cabling<br />
34 <strong>ThinkCentre</strong> <strong>Hardware</strong> <strong>Maintenance</strong> <strong>Manual</strong>
5. Have the same software versions and levels<br />
6. Have the same Diagnostic Diskettes (version)<br />
7. Have the same configuration options set in the system<br />
8. Have the same setup for the operating system control files<br />
Comparing the configuration and software setup between “working and non-working” systems will often<br />
lead to problem resolution.<br />
Chapter 4. General checkout 35
36 <strong>ThinkCentre</strong> <strong>Hardware</strong> <strong>Maintenance</strong> <strong>Manual</strong>
Chapter 5. Diagnostic programs<br />
Diagnostic programs are used to test hardware components of your computer. Diagnostic programs can<br />
also report operating-system-controlled settings that interfere with the correct operation of your system.<br />
You can use the preinstalled diagnostic program to diagnose computer problems, if your computer is<br />
running in the Windows ® operating system.<br />
Notes:<br />
1. Depending on the date when your computer was manufactured, your computer is preinstalled with<br />
either the <strong>Lenovo</strong> Solution Center program or the <strong>Lenovo</strong> ThinkVantage Toolbox program for diagnostic<br />
purposes. For more information about the <strong>Lenovo</strong> ThinkVantage Toolbox program, see “<strong>Lenovo</strong><br />
ThinkVantage Toolbox” on page 37. For more information about the <strong>Lenovo</strong> Solution Center program,<br />
see “<strong>Lenovo</strong> Solution Center” on page 37.<br />
2. You can also download the PC-Doctor for DOS diagnostic program from http://www.lenovo.com/support.<br />
See “PC-Doctor for DOS” on page 38 for detailed information.<br />
3. If you are unable to isolate and repair the problem yourself after running the programs, save and print<br />
the log files created by the programs. You will need the log files when you speak to a <strong>Lenovo</strong> technical<br />
support representative.<br />
<strong>Lenovo</strong> ThinkVantage Toolbox<br />
Note: The <strong>Lenovo</strong> ThinkVantage Toolbox program is only available on computers preinstalled with the<br />
Windows 7 operating system from <strong>Lenovo</strong>.<br />
The <strong>Lenovo</strong> ThinkVantage Toolbox program helps you maintain your computer, improve computing security,<br />
diagnose computer problems, get familiar with the innovative technologies provided by <strong>Lenovo</strong>, and get<br />
more information about your computer. You can use the diagnostics feature of the <strong>Lenovo</strong> ThinkVantage<br />
Toolbox program to test devices, diagnose computer problems, create bootable diagnostic media, update<br />
system drivers, and view system information.<br />
To run the <strong>Lenovo</strong> ThinkVantage Toolbox program, click StartÆAll ProgramsÆ<strong>Lenovo</strong> ThinkVantage<br />
ToolsÆSystem Health and Diagnostics. Follow the instructions on the screen.<br />
For additional information about running the <strong>Lenovo</strong> ThinkVantage Toolbox program, refer to the <strong>Lenovo</strong><br />
ThinkVantage Toolbox help system.<br />
<strong>Lenovo</strong> Solution Center<br />
The <strong>Lenovo</strong> Solution Center program enables you to troubleshoot and resolve computer problems. It<br />
combines diagnostic tests, system information collection, security status, and support information, along<br />
with hints and tips for maximum system performance.<br />
Notes:<br />
• The <strong>Lenovo</strong> Solution Center program is available only on models preinstalled with the Windows 7<br />
operating system. If your Windows 7 model is not preinstalled with the program, you can download it<br />
from http://www.lenovo.com/diagnose.<br />
• If you are using the Windows Vista or Windows XP operating system, go to<br />
http://www.lenovo.com/diagnose for the latest information on diagnostics for your<br />
computer.<br />
© Copyright <strong>Lenovo</strong> 2008, 2012 37
To run the <strong>Lenovo</strong> Solution Center program on the Windows 7 operating system, click Start ➙ All Programs<br />
➙ <strong>Lenovo</strong> ThinkVantage Tools ➙ System Health and Diagnostics. Follow the instructions on the screen.<br />
For additional information, refer to the <strong>Lenovo</strong> Solution Center help system.<br />
Note: If you are unable to isolate and repair the problem yourself after running the program, save and print<br />
the log files created by the program. You will need the log files when you speak to a <strong>Lenovo</strong> technical<br />
support representative.<br />
<strong>Lenovo</strong> System Toolbox<br />
Note: The <strong>Lenovo</strong> System Toolbox program is only available on computers preinstalled with the Windows<br />
Vista operating system or the Windows XP operating system from <strong>Lenovo</strong>.<br />
The <strong>Lenovo</strong> System Toolbox program works through the Windows operating system to enable you to test<br />
devices, view symptoms and solutions for computer problems, update system drivers, and view system<br />
information.<br />
To run the <strong>Lenovo</strong> System Toolbox program, click StartÆAll ProgramsÆ<strong>Lenovo</strong> ServicesÆ<strong>Lenovo</strong><br />
System Toolbox. Follow the instructions on the screen.<br />
For additional information about running the <strong>Lenovo</strong> System Toolbox program, refer to the <strong>Lenovo</strong> System<br />
Toolbox help system.<br />
PC-Doctor for Rescue and Recovery<br />
The PC-Doctor for Rescue and Recovery diagnostic program is part of the Rescue and Recovery workspace<br />
on your <strong>Lenovo</strong> computer. Use the PC-Doctor for Rescue and Recovery program if you are unable to<br />
start the Windows operating system.<br />
To run the PC-Doctor for Rescue and Recovery program from the Rescue and Recovery workspace, do<br />
the following:<br />
1. Turn off the computer.<br />
2. Repeatedly press and release the F11 key when turning on the computer. When you hear beeps or see<br />
a logo screen, release the F11 key. The Rescue and Recovery workspace opens after a short delay.<br />
3. From the Rescue and Recovery workspace, select Launch advanced Rescue and Recovery Æ<br />
Diagnose hardware. The PC-Doctor for Rescue and Recovery program opens.<br />
4. Select the desired diagnostic test. Then, follow the instructions on the screen.<br />
For additional information about running the PC-Doctor for Rescue and Recovery program, refer to the<br />
PC-Doctor for Rescue and Recovery help system.<br />
Note: If you encounter failures that prevent you from gaining access to the Rescue and Recovery workspace,<br />
you can run the PC-Doctor for Rescue and Recovery program after using a rescue medium to recover the<br />
computer from failures and gaining access to the Rescue and Recovery workspace. Refer to the “Creating<br />
and using rescue media” section in your <strong>ThinkCentre</strong> User Guide for more information.<br />
PC-Doctor for DOS<br />
You can also download the latest version of the PC-Doctor for DOS diagnostic program from<br />
http://www.lenovo.com/support. The PC-Doctor for DOS diagnostic program runs independently of the<br />
Windows operating system. Use the PC-Doctor for DOS diagnostic program if you are unable to start the<br />
Windows operating system. You can run the PC-Doctor for DOS diagnostic program from a diagnostic<br />
disc that you created.<br />
38 <strong>ThinkCentre</strong> <strong>Hardware</strong> <strong>Maintenance</strong> <strong>Manual</strong>
Creating a diagnostic disc<br />
This section provides instructions on how to create a diagnostic disc.<br />
To create a diagnostic disc, do the following:<br />
1. Download a self-starting bootable disc image (known as an ISO image) of the diagnostic program from:<br />
http://www.lenovo.com/support<br />
2. Use any CD/DVD burning software to create a diagnostic disc with the ISO image.<br />
Running the diagnostic program from the diagnostic disc<br />
This section provides instructions on how to run the diagnostic program from the diagnostic disc that<br />
you created.<br />
To run the diagnostic program from the diagnostic disc that you created, do the following:<br />
1. Make sure that your computer is turned off.<br />
2. Repeatedly press and release the F12 key when turning on the computer. When the Startup Device<br />
Menu opens, release the F12 key.<br />
3. Insert the diagnostic disc into the optical drive.<br />
4. Select the optical drive with the diagnostic disc as the startup device and press Enter. The diagnostic<br />
program opens.<br />
5. Follow the instructions on the screen to run the desired diagnostic test. For additional help, press<br />
the F1 key.<br />
6. Remove the diagnostic disc from the optical drive after completing the diagnostic test.<br />
Navigating through the diagnostics programs<br />
Use the cursor movement keys to navigate within the menus.<br />
• The Enter key is used to select a menu item.<br />
• The Esc key is used to back up to the previous menu.<br />
• For online help select F1.<br />
Running tests<br />
There are four ways to run the diagnostic tests.<br />
• Using the cursor movement keys, highlight Run Normal Test or Run Quick Test from the Diagnostics<br />
menu and then press Enter. This automatically runs a pre-defined group of tests from each test category.<br />
Run Normal Test runs a more extensive set of tests than does Run Quick Test and takes longer to<br />
complete.<br />
• Press F5 to automatically run all selected tests in all categories.<br />
• From within a test category, press Ctrl-Enter to automatically run only the selected tests in that category.<br />
• Using the cursor movement keys, highlight a single test within a test category, and then press Enter.<br />
This runs only that test.<br />
Press Esc at any time to stop the testing process.<br />
Test results (N/A, PASSED, FAILED, ABORTED) are displayed in the field beside the test description and in<br />
the test log. See “Viewing the test log” on page 41.<br />
To select one or more tests, use the following procedure.<br />
Chapter 5. Diagnostic programs 39
1. Open the corresponding test category.<br />
2. Using the cursor movement keys, highlight the desired test.<br />
3. Press the space bar.<br />
A selected test is marked by >>. Pressing the space bar again de-selects a test and removes the >>.<br />
4. Repeat steps 2 and 3 above to select all desired tests.<br />
Test results<br />
Diagnostics test results produce the following error code format:<br />
Function Code Failure Type DeviceID Date ChkDigits Text<br />
• Function Code:<br />
40 <strong>ThinkCentre</strong> <strong>Hardware</strong> <strong>Maintenance</strong> <strong>Manual</strong>
Represents the feature or function within the PC.<br />
• Failure Type:<br />
Represents the type of error encountered.<br />
• DeviceID:<br />
Contains the component's unit-ID which corresponds to either a fixed disk drive, removable media drive,<br />
processor, specific RIMM, or a device on the PCI bus.<br />
• Date:<br />
Contains the date when the diagnostic test was run. The date is retrieved from CMOS and displayed<br />
using the YYYYMMDD format.<br />
• ChkDigits:<br />
Contains a 2-digit check-digit value to ensure the following:<br />
– Diagnostics were run on the specified date.<br />
– Diagnostics were run on the specified computer.<br />
– The diagnostic error code is recorded correctly.<br />
• Text:<br />
Description of the error.<br />
Note: See “Diagnostic error codes” on page 47 for error code listings.<br />
Quick and Full erase - hard drive<br />
The diagnostics program offers two hard drive format utilities:<br />
• Quick Erase Hard Drive<br />
• Full Erase Hard Drive<br />
The Quick Erase Hard Drive provides a DOS utility that performs the following:<br />
• Destroys the Master Boot Record (MBR) on the hard drive.<br />
• Destroys all copies of the FAT Table on all partitions (both the master and backup).<br />
• Destroys the partition table.<br />
• Provides messages that warn the user that this is a non-recoverable process.<br />
The Full Erase Hard Drive provides a DOS utility that performs the following:<br />
• Performs all the steps in Quick Erase.<br />
• Provides a DOS utility that writes random data to all sectors of the hard drive.<br />
• Provides an estimate of time to completion along with a visual representation of completion status.<br />
• Provides messages that warn the user about non-recoverable process.<br />
Important: Make sure that all data is backed up before using the Quick or Full Erase functions.<br />
To select the Quick Erase or Full Erase Hard Drive utility, use the following procedure:<br />
1. Select the UTILITY option on the toolbar and press Enter.<br />
2. Select either the QUICK ERASE or FULL ERASE HARD DISK option and follow the instructions.<br />
Viewing the test log<br />
Errors reported by the diagnostic test will be displayed by the program as a failed test.<br />
Chapter 5. Diagnostic programs 41
To view details of a failure or to view a list of test results, use the following procedure from any test category<br />
screen:<br />
1. Press F3 to activate the log file.<br />
2. Press F3 again to save the file to diskette or press F2 to print the file.<br />
42 <strong>ThinkCentre</strong> <strong>Hardware</strong> <strong>Maintenance</strong> <strong>Manual</strong>
Chapter 6. Using the Setup Utility program<br />
The Setup Utility program is used to view and change the configuration settings of your computer, regardless<br />
of which operating system you are using. However, the operating-system settings might override any similar<br />
settings in the Setup Utility program.<br />
Starting the Setup Utility program<br />
To start the Setup Utility program, do the following:<br />
1. If your computer is already on when you start this procedure, shut down the operating system and<br />
turn off the computer.<br />
2. Repeatedly press and release the F1 key when turning on the computer. When you hear multiple beeps,<br />
release the F1 key. The Setup Utility program opens.<br />
Note: If a Power-On Password or an Administrator Password has been set, the Setup Utility program<br />
menu is not displayed until you type the correct password. For more information, see “Using passwords<br />
” on page 43.<br />
The Setup Utility program might start automatically when POST detects that hardware has been removed or<br />
new hardware has been installed in your computer.<br />
Viewing and changing settings<br />
The Setup Utility program menu lists items that identify system configuration topics. To view or change<br />
settings, see “Starting the Setup Utility program” on page 43.<br />
When working with the Setup Utility program menu, you must use the keyboard. The keys used to perform<br />
various tasks are displayed at the bottom of each screen.<br />
Using passwords<br />
By using the Setup Utility program, you can set passwords to prevent unauthorized persons from gaining<br />
access to your computer and data. See “Starting the Setup Utility program” on page 43. The following<br />
types of passwords are available:<br />
• Power-On Password<br />
• Administrator Password<br />
• Hard Disk User Password<br />
You do not have to set any passwords to use your computer. However, if you decide to set any passwords,<br />
read the following sections.<br />
Password considerations<br />
A password can be any combination of up to 64 (1 to 64) alphabetic and numeric characters. For security<br />
reasons, it is recommended to use a strong password that cannot be easily compromised. A strong<br />
password should adhere to the following rules:<br />
• Have at least eight characters in length and contain at least one alphabetic character and one numeric<br />
character<br />
• Setup Utility program and hard disk drive passwords are not case sensitive<br />
© Copyright <strong>Lenovo</strong> 2008, 2012 43
• Not be your name or your user name<br />
• Not be a common word or a common name<br />
• Be significantly different from your previous password<br />
Power-On Password<br />
When a Power-On Password is set, the computer cannot be used until a valid password is typed from the<br />
keyboard.<br />
Administrator Password<br />
When an Administrator Password is set, it deters unauthorized persons from changing configuration<br />
settings. If you are responsible for maintaining the settings of several computers, you might want to set an<br />
Administrator Password.<br />
After you set an Administrator Password, a password prompt is displayed each time you try to access the<br />
Setup Utility program.<br />
If both the Power-On Password and the Administrator Password are set, you can type either password.<br />
However, to change any configuration settings, you must use your Administrator Password.<br />
Hard Disk User Password<br />
When a Hard Disk User Password is set, it prevents unauthorized users from accessing the data on the<br />
hard disk drive.<br />
For computer models that do not have an internal hard disk drive and use a remote hard disk drive accessed<br />
through the SMC - Storage Array, contact your network or storage administrator.<br />
Setting, changing, and deleting a password<br />
To set, change, or delete a password, do the following:<br />
Note: A password can be any combination of up to 64 (1 to 64) alphabetic and numeric characters. For more<br />
information, see “Password considerations” on page 43.<br />
1. Start the Setup Utility program. See Chapter 6 “Using the Setup Utility program” on page 43.<br />
2. From the Setup Utility program, select SecurityÆSet Passwords.<br />
3. Read the information displayed on the right side of the screen.<br />
Enabling or disabling a device<br />
This section provides information on how to enable or disable user access to the following devices:<br />
Serial ATA When this feature is set to Disabled, all devices connected to the SATA connectors<br />
(such as hard disk drives or the optical drive) are disabled and will not be displayed in<br />
the system configuration.<br />
External SATA Port When this feature is set to Disabled, the device connected to the External SATA<br />
connector cannot be accessed.<br />
Legacy Diskette A (some<br />
models)<br />
To enable or disable a device, do the following:<br />
When this feature is set to Disabled, the diskette drive cannot be accessed.<br />
1. Start the Setup Utility program. See “Starting the Setup Utility program” on page 43.<br />
44 <strong>ThinkCentre</strong> <strong>Hardware</strong> <strong>Maintenance</strong> <strong>Manual</strong>
2. From the Setup Utility program, select Devices or select DevicesÆATA Drive Setup.<br />
3. Select the desired devices and settings and press Enter.<br />
4. Return to the Setup Utility program menu and select Exit and then Save Settings or Save and exit<br />
the Setup Utility.<br />
Note: If you do not want to save the settings, select Exit the Setup Utility without saving.<br />
Selecting a startup device<br />
If your computer does not start up from a device such as the disc, diskette, or hard disk drive as expected,<br />
use one of the following procedures to select a startup device.<br />
Selecting a temporary startup device<br />
Use this procedure to startup from any start device.<br />
Note: Not all discs, hard disk drives, and diskettes are bootable.<br />
1. Turn off your computer.<br />
2. Repeatedly press and release the F12 key when turning on the computer. When the Startup Device<br />
menu opens, release the F12 key.<br />
3. Select the desired startup device from the Startup Device Menu and press Enter to begin.<br />
Note: Selecting a startup device from the Startup Device menu does not permanently change the startup<br />
sequence.<br />
Selecting or changing the startup device sequence<br />
To view or permanently change the configured startup device sequence, do the following:<br />
1. Start the Setup Utility program. See “Starting the Setup Utility program” on page 43.<br />
2. Select StartupÆStartup Sequence. See the information displayed on the right side of the screen.<br />
3. Select the devices for the Primary Startup Sequence, the Automatic Startup Sequence, and the Error<br />
Startup Sequence.<br />
4. Select Exit from the Setup Utility menu and then Save Settings or Save and exit the Setup Utility.<br />
If you have changed these settings and want to return to the default settings, select Load Default Settings<br />
on the Exit menu.<br />
Exiting the Setup Utility program<br />
After you finish viewing or changing settings, press Esc to return to the Setup Utility program menu (you<br />
might have to press Esc several times). If you want to save the new settings, select Save Settings or Save<br />
and exit the Setup Utility. Otherwise, your changes will not be saved.<br />
Chapter 6. Using the Setup Utility program 45
46 <strong>ThinkCentre</strong> <strong>Hardware</strong> <strong>Maintenance</strong> <strong>Manual</strong>
Chapter 7. Symptom-to-FRU index<br />
The Symptom-to-FRU index lists error symptoms and possible causes. The most likely cause is listed first.<br />
Always begin with the Chapter 4 “General checkout” on page 33. You can use this index to help you decide<br />
which FRUs are needed when servicing a computer. If you are unable to correct the problem using this<br />
index, go to “Undetermined problems” on page 66.<br />
Notes:<br />
1. If you have both an error message and an incorrect audio response, diagnose the error message first.<br />
2. If you cannot run the diagnostic tests or you get a diagnostic error code when running a test, but did receive a<br />
POST error message, diagnose the POST error message first.<br />
3. If you did not receive any error message, look for a description of your error symptoms in the first part of this index.<br />
4. For computer models that do not have an internal hard disk drive and use a remote hard disk drive accessed<br />
through the SMC - Storage Array:<br />
• You might receive the error message “No operating system found. Press F1 to repeat boot sequence.” In this<br />
case, press Ctrl+Alt+Delete instead of F1 to establish a connection to the storage area network where your<br />
operating system is stored. Verify that the user name is not logged on in another location.<br />
• If the SMC login prompt disappears before you log in and then a black screen displays, contact the<br />
administrator.<br />
Hard disk drive boot error<br />
A hard disk drive boot error (error codes 1962 and I999030X) can have the following causes.<br />
Note: For computer models that do not have an internal hard disk drive and use a remote hard disk drive<br />
accessed through the SMC - Storage Array, contact the network or storage administrator.<br />
Error FRU/Action<br />
The start-up drive is not in the boot sequence in<br />
configuration.<br />
Check the configuration and ensure the start-up drive is<br />
in the boot sequence.<br />
No operating system installed on the boot drive. Install an operating system on the boot drive.<br />
The boot sector on the start-up drive is corrupted. The drive must be formatted, do the following:<br />
The drive is defective. Replace the hard disk drive.<br />
Diagnostic error codes<br />
1. Attempt to back-up the data on the failing hard disk<br />
drive.<br />
2. Using the operating systems programs, format the<br />
hard disk drive.<br />
Refer to the following diagnostic error codes when using the diagnostic tests. See “Running tests” on page<br />
39 for the specific type for information about the Diagnostic programs.<br />
In the following index, X can represent any number.<br />
© Copyright <strong>Lenovo</strong> 2008, 2012 47
Diagnostic Error Code FRU/Action<br />
000-000-XXX BIOS Test Passed No action<br />
000-002-XXX BIOS Timeout 1. Flash the system. See “Updating (flashing) BIOS<br />
from a disc” on page 276<br />
2. System board<br />
000-024-XXX BIOS Addressing test failure 1. Flash the system. See “Updating (flashing) BIOS<br />
from a disc” on page 276<br />
2. System board<br />
000-025-XXX BIOS Checksum Value error 1. Flash the system. See “Updating (flashing) BIOS<br />
from a disc” on page 276<br />
2. System board<br />
000-026-XXX FLASH data error 1. Flash the system. See “Updating (flashing) BIOS<br />
from a disc” on page 276<br />
2. System board<br />
000-027-XXX BIOS Configuration/Setup error 1. Run Setup<br />
2. Flash the system. See “Updating (flashing) BIOS<br />
from a disc” on page 276<br />
3. System board<br />
000-034-XXX BIOS Buffer Allocation failure 1. Reboot the system<br />
2. Flash the system. See “Updating (flashing) BIOS<br />
from a disc” on page 276<br />
3. Run memory test<br />
4. System board<br />
000-035-XXX BIOS Reset Condition detected 1. Flash the system. See “Updating (flashing) BIOS<br />
from a disc” on page 276<br />
2. System board<br />
000-036-XXX BIOS Register error 1. Flash the system. See “Updating (flashing) BIOS<br />
from a disc” on page 276<br />
2. System board<br />
000-038-XXX BIOS Extension failure 1. Flash the system. See “Updating (flashing) BIOS<br />
from a disc” on page 276<br />
2. Adapter card<br />
3. System board<br />
000-039-XXX BIOS DMI data error 1. Flash the system. See “Updating (flashing) BIOS<br />
from a disc” on page 276<br />
2. System board<br />
000-195-XXX BIOS Test aborted by user Information only Re-start the test, if necessary<br />
000-196-XXX BIOS test halt, error threshold exceeded 1. Press F3 to review the log file<br />
2. Re-start the test to reset the log file<br />
000-197-XXX BIOS test warning 1. Make sure the component that is called out is<br />
connected and/or enabled. See Chapter 6 “Using<br />
the Setup Utility program” on page 43<br />
48 <strong>ThinkCentre</strong> <strong>Hardware</strong> <strong>Maintenance</strong> <strong>Manual</strong><br />
2. Re-run test<br />
3. Replace the component that is called out in warning<br />
statement<br />
4. Replace the component under test
Diagnostic Error Code FRU/Action<br />
000-198-XXX BIOS test aborted 1. Make sure the component that is called out is<br />
connected and/or enabled. See Chapter 6 “Using<br />
the Setup Utility program” on page 43<br />
2. Flash the system and retest. See “Updating (flashing)<br />
BIOS from a disc” on page 276<br />
3. Go to “Undetermined problems” on page 66<br />
000-199-XXX BIOS test failed, cause unknown 1. Go to “Undetermined problems” on page 66<br />
2. Flash the system and re-test<br />
3. Replace component under function test<br />
000-250-XXX BIOS APM failure 1. Flash the system. See “Updating (flashing) BIOS<br />
from a disc” on page 276<br />
2. System board<br />
000-270-XXX BIOS ACPI failure 1. Flash the system. See “Updating (flashing) BIOS<br />
from a disc” on page 276<br />
2. System board<br />
001-000-XXX System Test Passed No action<br />
001-00X-XXX System Error System board<br />
001-01X-XXX System Error System board<br />
001-024-XXX System Addressing test failure System board<br />
001-025-XXX System Checksum Value error 1. Flash the system. See “Updating (flashing) BIOS<br />
from a disc” on page 276<br />
2. System board<br />
001-026-XXX System FLASH data error 1. Flash the system. See “Updating (flashing) BIOS<br />
from a disc” on page 276<br />
2. System board<br />
001-027-XXX System Configuration/Setup error 1. Run Setup<br />
2. Flash the system. See “Updating (flashing) BIOS<br />
from a disc” on page 276<br />
3. System board<br />
001-032-XXX System Device Controller failure System board<br />
001-034-XXX System Device Buffer Allocation failure 1. Reboot the system<br />
2. Flash the system. See “Updating (flashing) BIOS<br />
from a disc” on page 276<br />
3. Run memory test<br />
4. System board<br />
001-035-XXX System Device Reset condition detected System board<br />
001-036-XXX System Register error System board<br />
001-038-XXX System Extension failure 1. Adapter card<br />
2. System board<br />
001-039-XXX System DMI data structure error 1. Flash the system. See “Updating (flashing) BIOS<br />
from a disc” on page 276<br />
2. System board<br />
001-040-XXX System IRQ failure 1. Power-off/on system and re-test<br />
2. System board<br />
Chapter 7. Symptom-to-FRU index 49
Diagnostic Error Code FRU/Action<br />
001-041-XXX System DMA failure 1. Power-off/on system and re-test<br />
2. System board<br />
001-195-XXX System Test aborted by user Information only Re-start the test, if necessary<br />
001-196-XXX System test halt, error threshold exceeded 1. Press F3 to review the log file<br />
2. Re-start the test to reset the log file<br />
001-197-XXX System test warning 1. Make sure the component that is called out is<br />
connected and/or enabled. See Chapter 6 “Using<br />
the Setup Utility program” on page 43<br />
2. Re-run test<br />
3. Replace the component that is called out in warning<br />
statement<br />
4. Replace the component under test<br />
001-198-XXX System test aborted 1. If a component is called out, make sure it is<br />
connected and/or enabled. See Chapter 6 “Using<br />
the Setup Utility program” on page 43<br />
2. Flash the system and retest. See “Updating (flashing)<br />
BIOS from a disc” on page 276<br />
3. Go to “Undetermined problems” on page 66<br />
001-199-XXX System test failed, cause unknown 1. Go to “Undetermined problems” on page 66<br />
001-250-XXX System ECC error System board<br />
001-254-XXX 001-255-XXX 001-256-XXX 001-257-XXX<br />
System DMA error<br />
2. Flash the system and re-test<br />
3. Replace component under function test<br />
System board<br />
001-260-XXX 001-264-XXX System IRQ error System board<br />
001-268-XXX System IRQ1 failure 1. Device on IRQ1<br />
2. System board<br />
001-269-XXX System IRQ2 failure 1. Device on IRQ2<br />
2. System board<br />
001-270-XXX System IRQ3 failure 1. Device on IRQ3<br />
2. System board<br />
001-271-XXX System IRQ4 failure 1. Device on IRQ4<br />
2. System board<br />
001-272-XXX System IRQ5 failure 1. Device on IRQ5<br />
2. System board<br />
001-273-XXX System IRQ6 (diskette drive) failure 1. Diskette Cable<br />
2. Diskette drive<br />
3. System board<br />
001-274-XXX System IRQ7 failure 1. Device on IRQ7<br />
2. System board<br />
001-275-XXX System IRQ8 failure 1. Device on IRQ8<br />
50 <strong>ThinkCentre</strong> <strong>Hardware</strong> <strong>Maintenance</strong> <strong>Manual</strong><br />
2. System board
Diagnostic Error Code FRU/Action<br />
001-276-XXX System IRQ9 failure 1. Device on IRQ9<br />
2. System board<br />
001-277-XXX System IRQ10 failure 1. Device on IRQ10<br />
2. System board<br />
001-278-XXX System IRQ11 failure 1. Device on IRQ11<br />
2. System board<br />
001-279-XXX System IRQ12 failure 1. Device on IRQ12<br />
2. System board<br />
001-280-XXX System IRQ13 failure 1. Device on IRQ13<br />
2. System board<br />
001-281-XXX System IRQ14 (hard disk drive) failure 1. Hard disk drive cable<br />
2. Hard disk drive<br />
3. System board<br />
001-282-XXX System IRQ15 failure 1. Device on IRQ15<br />
001-286-XXX 001-287-XXX 001-288-XXX System Timer<br />
failure<br />
2. System board<br />
System board<br />
001-292-XXX System CMOS RAM error 1. Run Setup and re-test<br />
2. System board<br />
001-293-XXX System CMOS Battery 1. CMOS Battery<br />
2. System board<br />
001-298-XXX System RTC date/time update failure 1. Flash the system. See “Updating (flashing) BIOS<br />
from a disc” on page 276<br />
2. System board<br />
001-299-XXX System RTC periodic interrupt failure System board<br />
001-300-XXX System RTC Alarm failure System board<br />
001-301-XXX System RTC Century byte error 1. Flash the system. See “Updating (flashing) BIOS<br />
from a disc” on page 276<br />
2. System board<br />
005-000-XXX Video Test Passed No action<br />
005-00X-XXX Video error 1. Video card, if installed<br />
005-010-XXX 005-011-XXX 005-012-XXX 005-013-XXX<br />
Video Signal failure<br />
2. System board<br />
1. Video card, if installed<br />
2. System board<br />
005-016-XXX Video Simple Pattern test failure 1. Video Ram<br />
2. Video card, if installed<br />
3. System board<br />
005-024-XXX Video Addressing test failure 1. Video card, if installed<br />
2. System board<br />
005-025-XXX Video Checksum Value error 1. Video card, if installed<br />
2. System board<br />
Chapter 7. Symptom-to-FRU index 51
Diagnostic Error Code FRU/Action<br />
005-027-XXX Video Configuration/Setup error 1. Run Setup<br />
2. Video drivers update<br />
3. Video card, if installed<br />
4. System board<br />
005-031-XXX Video Device Cable failure 1. Video cable<br />
2. Monitor<br />
3. Video card, if installed<br />
4. System board<br />
005-032-XXX Video Device Controller failure 1. Video card, if installed<br />
2. System board<br />
005-036-XXX Video Register error 1. Video card, if installed<br />
2. System board<br />
005-038-XXX System BIOS extension failure 1. Video card, if installed<br />
2. System board<br />
005-040-XXX Video IRQ failure 1. Video card, if installed<br />
2. System board<br />
005-195-XXX Video Test aborted by user Information only Re-start the test, if necessary<br />
005-196-XXX Video test halt, error threshold exceeded 1. Press F3 to review the log file<br />
2. Re-start the test to reset the log file<br />
005-197-XXX Video test warning 1. Make sure the component that is called out is<br />
connected and/or enabled. See Chapter 6 “Using<br />
the Setup Utility program” on page 43<br />
2. Re-run test<br />
3. Replace the component called out in warning<br />
statement<br />
4. Replace the component under test<br />
005-198-XXX Video test aborted 1. If a component is called out, make sure it is<br />
connected and/or enabled. See Chapter 6 “Using<br />
the Setup Utility program” on page 43<br />
2. Flash the system and re-test. See “Updating<br />
(flashing) BIOS from a disc” on page 276<br />
3. Go to “Undetermined problems” on page 66<br />
005-199-XXX Video test failed, cause unknown 1. Go to “Undetermined problems” on page 66<br />
2. Flash the system and re-test. See “Updating<br />
(flashing) BIOS from a disc” on page 276<br />
3. Replace component under function test<br />
005-2XX-XXX 005-3XX-XXX Video subsystem error 1. Video card, if installed<br />
2. System board<br />
006-000-XXX Diskette interface Test Passed No action<br />
006-0XX-XXX Diskette interface error 1. Diskette drive Cable<br />
2. Diskette drive<br />
3. System board<br />
006-195-XXX Diskette interface Test aborted by user Information only Re-start the test, if necessary<br />
52 <strong>ThinkCentre</strong> <strong>Hardware</strong> <strong>Maintenance</strong> <strong>Manual</strong>
Diagnostic Error Code FRU/Action<br />
006-196-XXX Diskette interface test halt, error threshold<br />
exceeded<br />
1. Press F3 to review the log file<br />
2. Re-start the test to reset the log file<br />
006-197-XXX Diskette interface test warning 1. If a component is called out, make sure it is<br />
connected and/or enabled<br />
2. Re-run test<br />
3. Replace the component that is called out in warning<br />
statement<br />
4. Replace the component under test<br />
006-198-XXX Diskette interface test aborted 1. If a component is called out, make sure it is<br />
connected and/or enabled<br />
006-199-XXX Diskette interface test failed, cause<br />
unknown<br />
2. Flash the system and re-test. See “Updating<br />
(flashing) BIOS from a disc” on page 276<br />
3. Go to “Undetermined problems” on page 66<br />
1. Go to “Undetermined problems” on page 66<br />
2. Flash the system and re-test<br />
3. Replace component under function test<br />
006-25X-XXX Diskette interface Error 1. Diskette drive cable<br />
2. Diskette drive<br />
3. System board<br />
015-000-XXX USB port Interface Test Passed No action<br />
015-001-XXX USB port Presence 1. Remove USB device(s) and re-test<br />
2. System board<br />
015-002-XXX USB port Timeout 1. Remove USB device(s) and re-test<br />
2. System board<br />
015-015-XXX USB port External Loopback failure 1. Remove USB device(s) and re-test<br />
2. System board<br />
015-027-XXX USB port Configuration/Setup error 1. Flash the system. See “Updating (flashing) BIOS<br />
from a disc” on page 276<br />
2. System board<br />
015-032-XXX USB port Device Controller failure System board<br />
015-034-XXX USB port buffer allocation failure 1. Reboot the system<br />
2. Flash the system and re-test. See “Updating<br />
(flashing) BIOS from a disc” on page 276<br />
3. Run memory test<br />
4. System board<br />
015-035-XXX USB port Reset condition detected 1. Remove USB device(s) and re-test<br />
2. System board<br />
015-036-XXX USB port Register error System board<br />
015-040-XXX USB port IRQ failure 1. Run setup and check for conflicts<br />
2. Flash the system. See “Updating (flashing) BIOS<br />
from a disc” on page 276<br />
3. System board<br />
015-195-XXX USB port Test aborted by user Information only Re-start the test, if necessary<br />
Chapter 7. Symptom-to-FRU index 53
Diagnostic Error Code FRU/Action<br />
015-196-XXX USB port test halt, error threshold exceeded 1. Press F3 to review the log file<br />
2. Re-start the test to reset the log file<br />
015-197-XXX USB port test warning 1. Make sure the component that is called out is<br />
connected and/or enabled. See Chapter 6 “Using<br />
the Setup Utility program” on page 43<br />
2. Re-run test<br />
3. Replace the component that is called out in warning<br />
statement<br />
4. Replace the component under test<br />
015-198-XXX USB port test aborted 1. If a component is called out, make sure it is<br />
connected and/or enabled. See Chapter 6 “Using<br />
the Setup Utility program” on page 43<br />
2. Flash the system and re-test. See “Updating<br />
(flashing) BIOS from a disc” on page 276<br />
3. Go to “Undetermined problems” on page 66<br />
015-199-XXX USB port test failed, cause unknown 1. Go to “Undetermined problems” on page 66<br />
018-000-XXX PCI Card Test Passed No action<br />
2. Flash the system and re-test. See “Updating<br />
(flashing) BIOS from a disc” on page 276<br />
3. Replace component under function test<br />
018-0XX-XXX PCI Card Failure 1. Riser card, if installed<br />
2. System board<br />
018-195-XXX PCI Card Test aborted by user 1. PCI card<br />
2. Information only Re-start the test, if necessary<br />
018-196-XXX PCI Card test halt, error threshold exceeded 1. Press F3 to review the log file<br />
2. Re-start the test to reset the log file<br />
018-197-XXX PCI Card test warning 1. Make sure the component that is called out is<br />
connected and/or enabled. See Chapter 6 “Using<br />
the Setup Utility program” on page 43<br />
2. Re-run test<br />
3. Replace the component that is called out in warning<br />
statement<br />
4. Replace the component under test<br />
018-198-XXX PCI Card test aborted 1. If a component is called out, make sure it is<br />
connected and/or enabled. See Chapter 6 “Using<br />
the Setup Utility program” on page 43<br />
2. Flash the system and re-test. See “Updating<br />
(flashing) BIOS from a disc” on page 276<br />
3. Go to “Undetermined problems” on page 66<br />
018-199-XXX PCI Card test failed, cause unknown 1. Go to “Undetermined problems” on page 66<br />
54 <strong>ThinkCentre</strong> <strong>Hardware</strong> <strong>Maintenance</strong> <strong>Manual</strong><br />
2. Flash the system and re-test. See “Updating<br />
(flashing) BIOS from a disc” on page 276<br />
3. Replace component under function test
Diagnostic Error Code FRU/Action<br />
018-250-XXX PCI Card Services error 1. PCI card<br />
2. Riser card, if installed<br />
3. System board<br />
020-000-XXX PCI Interface Test Passed No action<br />
020-0XX-XXX PCI Interface error 1. PCI card<br />
2. Riser card, if installed<br />
3. System board<br />
020-195-XXX PCI Test aborted by user Information only Re-start the test, if necessary<br />
020-196-XXX PCI test halt, error threshold exceeded 1. Press F3 to review the log file<br />
2. Re-start the test to reset the log file<br />
020-197-XXX PCI test warning 1. Make sure the component that is called out is<br />
connected and/or enabled. See Chapter 6 “Using<br />
the Setup Utility program” on page 43<br />
2. Re-run test<br />
3. Replace the component that is called out in warning<br />
statement<br />
4. Replace the component under test<br />
020-198-XXX PCI test aborted 1. If a component is called out, make sure it is<br />
connected and/or enabled. See Chapter 6 “Using<br />
the Setup Utility program” on page 43<br />
2. Flash the system and re-test. See “Updating<br />
(flashing) BIOS from a disc” on page 276<br />
3. Go to “Undetermined problems” on page 66<br />
020-199-XXX PCI test failed, cause unknown 1. Go to “Undetermined problems” on page 66<br />
020-262-XXXPCI system error 1. PCI card<br />
2. Flash the system and re-test. See “Updating<br />
(flashing) BIOS from a disc” on page 276<br />
3. Replace component under function test<br />
2. Riser card, if installed<br />
3. System board<br />
025-000-XXXIDE interface Test Passed No action<br />
025-00X-XXX 025-01X-XXX IDE interface failure 1. IDE signal cable<br />
2. Check power supply voltages<br />
3. Reseat IDE signal cable<br />
4. IDE device<br />
5. System board<br />
025-027-XXX IDE interface Configuration/Setup error 1. IDE signal cable<br />
2. Flash the system. See “Updating (flashing) BIOS<br />
from a disc” on page 276<br />
3. Reseat IDE signal cable<br />
4. IDE device<br />
5. System board<br />
Chapter 7. Symptom-to-FRU index 55
Diagnostic Error Code FRU/Action<br />
025-02X-XXX 025-03X-XXX 025-04X-XXX IDE Interface<br />
failure<br />
1. IDE signal cable<br />
2. Check AC/DC power adapter<br />
3. Reseat IDE signal cable<br />
4. IDE device<br />
5. System board<br />
025-195-XXX IDE interface Test aborted by user Information only Re-start the test, if necessary<br />
025-196-XXX IDE interface test halt, error threshold<br />
exceeded<br />
1. Press F3 to review the log file<br />
2. Re-start the test to reset the log file<br />
025-197-XXX IDE interface test warning 1. Make sure the component that is called out is<br />
connected and/or enabled. See Chapter 6 “Using<br />
the Setup Utility program” on page 43<br />
2. Re-run test<br />
3. Replace the component that is called out in warning<br />
statement<br />
4. Replace the component under test<br />
025-198-XXX IDE interface test aborted 1. If a component is called out, make sure it is<br />
connected and/or enabled. See Chapter 6 “Using<br />
the Setup Utility program” on page 43<br />
2. Flash the system and re-test. See “Updating<br />
(flashing) BIOS from a disc” on page 276<br />
3. Go to “Undetermined problems” on page 66<br />
025-199-XXX IDE interface test failed, cause unknown 1. Go to “Undetermined problems” on page 66<br />
030-000-XXX SCSI interface Test Passed No action<br />
2. Flash the system and re-test. See “Updating<br />
(flashing) BIOS from a disc” on page 276<br />
3. Replace component under function test<br />
030-00X-XXX 030-01X-XXX SCSI interface failure 1. SCSI signal cable<br />
2. Check AC/DC power adapter<br />
3. SCSI device<br />
4. SCSI adapter card, if installed<br />
5. System board<br />
030-027-XXX SCSI interface Configuration/Setup error 1. SCSI signal cable<br />
2. Flash the system. See “Updating (flashing) BIOS<br />
from a disc” on page 276<br />
3. SCSI device<br />
4. SCSI adapter card, if installed<br />
5. System board<br />
030-03X-XXX 030-04X-XXX SCSI interface error 1. SCSI signal cable<br />
2. Check AC/DC power adapter<br />
3. SCSI device<br />
4. SCSI adapter card, if installed<br />
5. System board<br />
030-195-XXX SCSI interface Test aborted by user Information only Re-start the test, if necessary<br />
56 <strong>ThinkCentre</strong> <strong>Hardware</strong> <strong>Maintenance</strong> <strong>Manual</strong>
Diagnostic Error Code FRU/Action<br />
030-196-XXX SCSI interface test halt, error threshold<br />
exceeded<br />
1. Press F3 to review the log file<br />
2. Re-start the test to reset the log file<br />
030-197-XXX SCSI interface test warning 1. Make sure the component that is called out is<br />
connected and/or enabled. See Chapter 6 “Using<br />
the Setup Utility program” on page 43<br />
2. Re-run test<br />
3. Replace the component that is called out in warning<br />
statement<br />
4. Replace the component under test<br />
030-198-XXX SCSI interface test aborted 1. If a component is called out, make sure it is<br />
connected and/or enabled. See Chapter 6 “Using<br />
the Setup Utility program” on page 43<br />
2. Flash the system and re-test. See “Updating<br />
(flashing) BIOS from a disc” on page 276<br />
3. Go to “Undetermined problems” on page 66<br />
030-199-XXX SCSI interface test failed, cause unknown 1. Go to “Undetermined problems” on page 66<br />
035-000-XXX RAID interface Test Passed No action<br />
2. Flash the system and re-test. See “Updating<br />
(flashing) BIOS from a disc” on page 276<br />
3. Replace component under function test<br />
035-0XX-XXX RAID interface Failure 1. RAID signal cable<br />
2. RAID device<br />
3. RAID adapter card, if installed<br />
4. System board<br />
035-195-XXX RAID interface Test aborted by user Information only Re-start the test, if necessary<br />
035-196-XXX RAID interface test halt, error threshold<br />
exceeded<br />
1. Press F3 to review the log file<br />
2. Re-start the test to reset the log file<br />
035-197-XXX RAID interface test warning 1. Make sure the component that is called out is<br />
connected and/or enabled. See Chapter 6 “Using<br />
the Setup Utility program” on page 43<br />
2. Re-run test<br />
3. Replace the component that is called out in warning<br />
statement<br />
4. Replace the component under test<br />
035-198-XXX RAID interface test aborted 1. If a component is called out, make sure it is<br />
connected and/or enabled. See Chapter 6 “Using<br />
the Setup Utility program” on page 43<br />
2. Flash the system and re-test. See “Updating<br />
(flashing) BIOS from a disc” on page 276<br />
3. Go to “Undetermined problems” on page 66<br />
035-199-XXX RAID interface test failed, cause unknown 1. See “Undetermined problems” on page 66<br />
071-000-XXX Audio port Interface Test Passed No action<br />
2. Flash the system and re-test. See “Updating<br />
(flashing) BIOS from a disc” on page 276<br />
3. Replace component under function test<br />
Chapter 7. Symptom-to-FRU index 57
Diagnostic Error Code FRU/Action<br />
071-00X-XXX 071-01X-XXX 071-02X-XXXAudio port<br />
error<br />
1. Run Setup<br />
2. Flash the system. See “Updating (flashing) BIOS<br />
from a disc” on page 276<br />
3. System board<br />
071-03X-XXX Audio port failure 1. Speakers<br />
2. Microphone<br />
3. Audio card, if installed<br />
4. System board<br />
071-04X-XXX Audio port failure 1. Run Setup<br />
2. Audio card, if installed<br />
3. System board<br />
071-195-XXX Audio port Test aborted by user Information only Re-start the test, if necessary<br />
071-196-XXX Audio port test halt, error threshold<br />
exceeded<br />
1. Press F3 to review the log file<br />
2. Re-start the test to reset the log file<br />
071-197-XXX Audio port test warning 1. Make sure the component that is called out is<br />
connected and/or enabled. See Chapter 6 “Using<br />
the Setup Utility program” on page 43<br />
2. Re-run test<br />
3. Replace the component that is called out in warning<br />
statement<br />
4. Replace the component under test<br />
071-198-XXX Audio port test aborted 1. If a component is called out, make sure it is<br />
connected and/or enabled. See Chapter 6 “Using<br />
the Setup Utility program” on page 43<br />
2. Flash the system and re-test. See “Updating<br />
(flashing) BIOS from a disc” on page 276<br />
3. Go to “Undetermined problems” on page 66<br />
071-199-XXX Audio port test failed, cause unknown 1. See “Undetermined problems” on page 66<br />
071-25X-XXX Audio port failure 1. Speakers<br />
2. Flash the system and re-test. See “Updating<br />
(flashing) BIOS from a disc” on page 276<br />
3. Replace component under function test<br />
2. Audio card, if installed<br />
3. System board<br />
080-000-XXX Game Port interface Test Passed No action<br />
080-XXX-XXX Game Port interface Error 1. Remove the game port device and re-test the<br />
system<br />
080-195-XXX Game Port interface Test aborted by user Information only Re-start the test, if necessary<br />
080-196-XXX Game Port interface test halt, error<br />
threshold exceeded<br />
58 <strong>ThinkCentre</strong> <strong>Hardware</strong> <strong>Maintenance</strong> <strong>Manual</strong><br />
1. Press F3 to review the log file<br />
2. Re-start the test to reset the log file
Diagnostic Error Code FRU/Action<br />
080-197-XXX Game Port interface test warning 1. Make sure the component that is called out is<br />
connected and/or enabled. See Chapter 6 “Using<br />
the Setup Utility program” on page 43<br />
2. Re-run test<br />
3. Replace the component that is called out in warning<br />
statement<br />
4. Replace the component under test<br />
080-198-XXX Game Port interface test aborted 1. If a component is called out, make sure it is<br />
connected and/or enabled. See Chapter 6 “Using<br />
the Setup Utility program” on page 43<br />
080-199-XXX Game Port interface test failed, cause<br />
unknown<br />
086-000-XXX Mouse Port interface Test Passed No action<br />
086-001-XXX Mouse Port interface Presence 1. Mouse<br />
086-032-XXX Mouse Port interface Device controller<br />
failure<br />
2. Flash the system and re-test. See “Updating<br />
(flashing) BIOS from a disc” on page 276<br />
3. Go to “Undetermined problems” on page 66<br />
1. See “Undetermined problems” on page 66<br />
2. Flash the system and re-test. See “Updating<br />
(flashing) BIOS from a disc” on page 276<br />
3. Replace component under function test<br />
2. System board<br />
1. Mouse<br />
2. System board<br />
086-035-XXX Mouse Port interface Reset 1. Mouse<br />
2. System board<br />
086-040-XXX Mouse Port interface IRQ failure 1. Run Setup<br />
2. Mouse<br />
3. System board<br />
086-195-XXX Mouse Port interface Test aborted by user Information only Re-start the test, if necessary<br />
086-196-XXX Mouse Port interface test halt, error<br />
threshold exceeded<br />
1. Press F3 to review the log file<br />
2. Re-start the test to reset the log file<br />
086-197-XXX Mouse Port interface test warning 1. Make sure the component that is called out is<br />
connected and/or enabled. See Chapter 6 “Using<br />
the Setup Utility program” on page 43<br />
2. Re-run test<br />
3. Replace the component that is called out in warning<br />
statement<br />
4. Replace the component under test<br />
086-198-XXX Mouse Port interface test aborted 1. If a component is called out, make sure it is<br />
connected and/or enabled. See Chapter 6 “Using<br />
the Setup Utility program” on page 43<br />
2. Flash the system and re-test. See “Updating<br />
(flashing) BIOS from a disc” on page 276<br />
3. Go to “Undetermined problems” on page 66<br />
Chapter 7. Symptom-to-FRU index 59
Diagnostic Error Code FRU/Action<br />
086-199-XXX Mouse Port interface test failed, cause<br />
unknown<br />
089-000-XXX Microprocessor Test Passed No action<br />
1. See “Undetermined problems” on page 66<br />
2. Flash the system and re-test. See “Updating<br />
(flashing) BIOS from a disc” on page 276<br />
3. Replace component under function test<br />
089-XXX-XXX Microprocessor failure 1. Microprocessor(s)<br />
2. System board<br />
089-195-XXX Microprocessor Test aborted by user Information only Re-start the test, if necessary<br />
089-196-XXX Microprocessor test halt, error threshold<br />
exceeded<br />
1. Press F3 to review the log file<br />
2. Re-start the test to reset the log file<br />
089-197-XXX Microprocessor test warning 1. Make sure the component that is called out is<br />
connected and/or enabled. See Chapter 6 “Using<br />
the Setup Utility program” on page 43<br />
2. Re-run test<br />
3. Replace the component that is called out in warning<br />
statement<br />
4. Replace the component under test<br />
089-198-XXX Microprocessor test aborted 1. Flash the system. See “Updating (flashing) BIOS<br />
from a disc” on page 276<br />
2. Go to “Undetermined problems” on page 66<br />
089-199-XXX Microprocessor test failed, cause unknown 1. See “Undetermined problems” on page 66<br />
170-000-XXX Voltage Sensor(s) Test Passed No action<br />
170-0XX-XXX Voltage Sensor(s) failure 1. Flash system<br />
2. Flash the system and re-test. See “Updating<br />
(flashing) BIOS from a disc” on page 276<br />
3. Replace component under function test<br />
2. System board<br />
170-195-XXX Voltage Sensor(s) Test aborted by user Information only Re-start the test, if necessary<br />
170-196-XXX Voltage Sensor(s) test halt, error threshold<br />
exceeded<br />
1. Press F3 to review the log file<br />
2. Re-start the test to reset the log file<br />
170-197-XXX Voltage Sensor(s) test warning 1. Make sure the component that is called out is<br />
connected and/or enabled. See Chapter 6 “Using<br />
the Setup Utility program” on page 43<br />
2. Re-run test<br />
3. Replace the component that is called out in warning<br />
statement<br />
4. Replace the component under test<br />
170-198-XXX Voltage Sensor(s) test aborted 1. If a component is called out, make sure it is<br />
connected and/or enabled. See Chapter 6 “Using<br />
the Setup Utility program” on page 43<br />
60 <strong>ThinkCentre</strong> <strong>Hardware</strong> <strong>Maintenance</strong> <strong>Manual</strong><br />
2. Flash the system and re-test. See “Updating<br />
(flashing) BIOS from a disc” on page 276<br />
3. Go to “Undetermined problems” on page 66
Diagnostic Error Code FRU/Action<br />
170-199-XXX Voltage Sensor(s) test failed, cause<br />
unknown<br />
170-250-XXX 170-251-XXX Voltage Sensor(s) Voltage<br />
limit error<br />
170-254-XXX Voltage Sensor(s) Voltage Regulator<br />
Module error<br />
1. See “Undetermined problems” on page 66<br />
2. Flash the system and re-test. See “Updating<br />
(flashing) BIOS from a disc” on page 276<br />
3. Replace component under function test<br />
1. AC/DC power adapter<br />
2. System board<br />
1. Voltage Regulator Module (VRM)<br />
2. Microprocessor<br />
3. System board<br />
175-000-XXX Thermal Sensor(s) Test Passed No action<br />
175-0XX-XXX Thermal Sensor(s) failure 1. Flash system<br />
2. System board<br />
175-195-XXX Thermal Sensor(s) Test aborted by user Information only Re-start the test, if necessary<br />
175-196-XXX Thermal Sensor(s) test halt, error threshold<br />
exceeded<br />
1. Press F3 to review the log file<br />
2. Re-start the test to reset the log file<br />
175-197-XXX Thermal Sensor(s) test warning 1. Make sure the component that is called out is<br />
connected and/or enabled. See Chapter 6 “Using<br />
the Setup Utility program” on page 43<br />
2. Re-run test<br />
3. Replace the component that is called out in warning<br />
statement<br />
4. Replace the component under test<br />
175-198-XXX Thermal Sensor(s) test aborted 1. If a component is called out, make sure it is<br />
connected and/or enabled<br />
175-199-XXX Thermal Sensor(s) test failed, cause<br />
unknown<br />
175-250-XXX 175-251-XXX Thermal Sensor(s) limit error 1. Check fans<br />
2. Flash the system and re-test. See “Updating<br />
(flashing) BIOS from a disc” on page 276<br />
3. Go to “Undetermined problems” on page 66<br />
1. See “Undetermined problems” on page 66<br />
2. Flash the system and re-test. See “Updating<br />
(flashing) BIOS from a disc” on page 276<br />
3. Replace component under function test<br />
2. Check AC/DC power adapter voltages<br />
3. Microprocessor<br />
4. System board<br />
185-000-XXX Asset Security Test Passed No action<br />
185-XXX-XXX Asset Security failure 1. Flash system<br />
2. System board<br />
185-278-XXX Asset Security Chassis Intrusion 1. Assure Asset Security Enabled<br />
2. C2 Cover Switch<br />
3. System board<br />
201-000-XXX System Memory Test Passed No action<br />
Chapter 7. Symptom-to-FRU index 61
Diagnostic Error Code FRU/Action<br />
201-XXX-XXX System Memory error 1. Replace the memory module called out by the test<br />
2. System board<br />
202-000-XXX System Cache Test Passed No action<br />
202-XXX-XXX System Cache error 1. Cache, if removable<br />
2. System board<br />
206-000-XXX Diskette Drive Test Passed No action<br />
3. Microprocessor<br />
206-XXX-XXX Diskette Drive error 1. Diskette Drive Cable<br />
2. Check AC/DC power adapter voltages<br />
3. Diskette drive<br />
4. System board<br />
215-000-XXX CD-ROM Drive Test Passed No action<br />
215-XXX-XXX CD-ROM Drive error 1. CD-ROM Drive Cable<br />
2. Check AC/DC power adapter voltages<br />
3. CD-ROM drive<br />
4. System board<br />
217-000-XXX Hard Disk Drive Test Passed No action<br />
217-25X-XXX 217-26X-XXX Hard Disk Drive (IDE) error 1. Hard Disk Drive Cable<br />
2. Check AC/DC power adapter voltages<br />
3. Reseat the hard disk drive cable<br />
4. Hard Disk drive (IDE)<br />
5. System board<br />
217-28X-XXX 217-29X-XXX Hard Disk Drive (SCSI) error 1. Hard Disk Drive Cable<br />
2. Check AC/DC power adapter voltages<br />
3. Reseat the hard disk drive cable<br />
4. Hard Disk drive (SCSI)<br />
5. SCSI adapter card<br />
6. System board<br />
220-000-XXX Hi-Capacity Cartridge Drive Test Passed No action<br />
220-XXX-XXX Hi-Capacity Cartridge Drive error 1. Remove the Hi-Capacity Cartridge Drive and<br />
re-test the system<br />
301-XXX-XXX Keyboard error 1. Keyboard<br />
2. Check and test mouse<br />
3. System board<br />
301-000-XXX Keyboard Test Passed No action<br />
302-000-XXX Mouse Test Passed No action<br />
302-XXX-XXX Mouse error 1. Mouse<br />
2. Check and test Keyboard<br />
3. System board<br />
303-000-XXX Joystick Test Passed No action<br />
303-XXX-XXX Joystick error Remove the Joystick and re-test the system<br />
62 <strong>ThinkCentre</strong> <strong>Hardware</strong> <strong>Maintenance</strong> <strong>Manual</strong>
Diagnostic Error Code FRU/Action<br />
305-000-XXX Monitor DDC Test Passed No action<br />
305-250-XXX Monitor DDC self test failure 1. Run Setup to enable DDC<br />
2. Cable<br />
3. Monitor<br />
4. Video card<br />
5. System board<br />
415-000-XXXModem Test Passed No action<br />
415-XXX-XXX Modem error Remove the Modem and re-test the system<br />
Beep symptoms<br />
Beep symptoms are tones or a series of tones separated by pauses (intervals without sound) during POST.<br />
The following tables describes beep symptoms.<br />
Beep Symptom FRU/Action<br />
Four sets of three beeps Reseat the memory modules. If the error persists, replace<br />
the memory modules one at a time until the failing module<br />
is determined.<br />
4, 5, 6, or 7 beeps9, 10, or 11 beeps Before replacing the system board, remove any optional<br />
adapters (Express card, Modem card, Media reader) and<br />
retry. If the problem persists, replace the system board.<br />
Otherwise, reinstall the optional adapters one at a time<br />
until the failing adapter is determined.<br />
8 beeps Replace the system board.<br />
POST error codes<br />
Each time you power-on the system, it performs a series of tests that check the operation of the system<br />
and some options. This series of tests is called the Power-On Self-Test, or POST. POST does the following<br />
operations.<br />
• Checks some basic system-board operations<br />
• Checks the memory operation<br />
• Starts the video operation<br />
• Verifies that the boot drive is working<br />
If the POST detects a problem, an error message appears on the screen. A single problem can cause several<br />
error messages to appear. When you correct the cause of the first error message, the other error messages<br />
probably will not appear on the screen the next time you turn on the system.<br />
Chapter 7. Symptom-to-FRU index 63
POST Error Message Description/Action<br />
CMOS battery failed The CMOS battery is no longer functional.<br />
Replace the battery.<br />
CMOS checksum error - defaults loaded Checksum of CMOS is incorrect.<br />
The computer loads the default configuration settings.<br />
This error might indicate that CMOS has become corrupt<br />
due to a weak CMOS battery.<br />
CPU at nnnn nnnn is the running speed of the microprocessor.<br />
Press Esc to skip memory test Pressing Esc skips the full memory test<br />
HARD DISK INSTALL FAILURE Cannot find or initialize the hard disk drive controller or<br />
the drive.<br />
Make sure the hard disk drive is correctly installed.<br />
If no hard disk drives are installed, make sure the hard<br />
disk drive selection in Setup is set to NONE.<br />
Keyboard error or no keyboard present Cannot initialize the keyboard.<br />
Make sure the keyboard is properly connected to the<br />
computer and that no keys are held pressed during POST.<br />
To purposely configure the computer without a keyboard,<br />
set the error halt condition in Setup to HALT ON ALL, BUT<br />
KEYBOARD. The BIOS then ignores the missing keyboard<br />
during POST.<br />
Memory Test: This message displays during a full memory test, counting<br />
down the memory areas being tested.<br />
Memory test fail If POST detects an error during memory testing, additional<br />
information appears. This information gives specifics<br />
about the type and location of the memory error.<br />
Press TAB to show POST screen Pressing the TAB key permits the user to toggle between<br />
the default POST display screen and a custom POST<br />
display screen.<br />
Error: Non-System disk or disk error Replace and press<br />
any key when ready<br />
Miscellaneous error messages<br />
Message/Symptom FRU/Action<br />
Changing display colors Display/Monitor<br />
Computer will not power-off. See “Power problems” on<br />
page 33.<br />
64 <strong>ThinkCentre</strong> <strong>Hardware</strong> <strong>Maintenance</strong> <strong>Manual</strong><br />
The BIOS was unable to find a suitable boot device.<br />
Make sure the boot drive is properly connected to the<br />
computer.<br />
Make sure you have bootable media.<br />
1. Power Switch<br />
2. System Board<br />
3. Riser card, if installed
Message/Symptom FRU/Action<br />
Computer will not PXE from server 1. Ensure that network is in startup sequence as<br />
first device or first device after diskette<br />
2. Ensure that network adapter is enabled for PXE<br />
3. Network adapter (Advise network administrator of<br />
new MAC address)<br />
Computer will not perform a Wake on LAN® (if applicable) 1. Check power supply and signal cable connections<br />
to network adapter<br />
2. Ensure that the operating system settings are set to<br />
enable Wake on LAN<br />
3. Ensure Wake on LAN feature is enabled in<br />
Setup/Configuration (see “Starting the Setup Utility<br />
program” on page 43)<br />
4. Ensure network administrator is using correct MAC<br />
address<br />
5. Ensure no interrupt or I/O address conflicts<br />
6. Network adapter (advise network administrator of<br />
new MAC address)<br />
Dead computer. See “Power problems” on page 33. 1. AC/DC Power Adapter<br />
Diskette drive in-use light remains on or does not light<br />
when drive is active.<br />
2. System Board<br />
1. Diskette Drive<br />
2. System Board<br />
3. Diskette Drive Cable<br />
Flashing cursor with an otherwise blank display. 1. System Board<br />
2. Primary Hard Disk Drive<br />
3. Hard Disk Drive Cable<br />
Incorrect memory size during POST 1. Run the Memory tests<br />
"Insert a Diskette" icon appears with a known-good<br />
diagnostics diskette in the first 3.5-inch diskette drive.<br />
Intensity or color varies from left to right of characters<br />
and color bars<br />
2. Memory Module<br />
3. System Board<br />
1. System Board<br />
2. Diskette Drive Cable<br />
3. Network Adapter<br />
1. Display<br />
2. Video adapter (if present)<br />
3. System Board<br />
No power or fan not running 1. See “Power problems” on page 33.<br />
Non-system disk or disk error-type message with a<br />
known-good diagnostic diskette.<br />
Other display symptoms not listed above (including blank<br />
or illegible display)<br />
Power-on indicator or hard disk drive in-use light not on,<br />
but computer works correctly<br />
1. Diskette Drive<br />
2. System Board<br />
3. Diskette Drive Cable<br />
1. Display<br />
2. System Board<br />
1. Power switch/LED assembly<br />
2. System Board<br />
Printer problems 1. Printer<br />
2. System Board<br />
Chapter 7. Symptom-to-FRU index 65
Message/Symptom FRU/Action<br />
Program loads from the hard disk with a known-good<br />
diagnostics diskette in the first 3.5-inch diskette drive<br />
PXE computer cannot access programs from its own hard<br />
disk.<br />
1. Run Setup and check Startup sequence.<br />
2. Diskette Drive<br />
3. Diskette Drive Cable<br />
4. System Board<br />
5. AC/DC power adapter<br />
Replace the hard disk drive<br />
PXE computer does not PXE from server 1. Check startup sequence<br />
Some or all keys on the keyboard do not work 1. Keyboard<br />
Undetermined problems<br />
If you encounter undetermined problems, do the following:<br />
1. Turn off the computer and the power.<br />
2. Check the network adapter LED status<br />
2. Keyboard Cable<br />
3. System Board<br />
2. Remove or disconnect the following components (if installed) one at a time.<br />
a. External devices (modem, printer, or mouse)<br />
b. Any adapter cards<br />
c. Memory modules<br />
d. Extended video memory<br />
e. External Cache<br />
f. External Cache RAM<br />
g. Hard disk drive<br />
h. Diskette drive<br />
3. Turn on the power and the computer to re-test the system.<br />
4. Repeat steps 1 through 3 until you find the failing device or adapter cards.<br />
If all devices and adapter cards have been removed, and the problem continues, replace the system board.<br />
See “Replacing the system board” on page 80.<br />
66 <strong>ThinkCentre</strong> <strong>Hardware</strong> <strong>Maintenance</strong> <strong>Manual</strong>
Chapter 8. Replacing FRUs<br />
This chapter provides step-by-step instructions for replacing major FRUs.<br />
Important<br />
Be sure to read and understand the Chapter 2 “Safety information” on page 3 before replacing any FRU.<br />
These precautions and guidelines will help you work safely.<br />
FRU replacements are to be done only by trained service technicians.<br />
Locations<br />
This section provides illustrations to help you locate the various connectors and components of your<br />
computer.<br />
Locating connectors on the front of the computer<br />
The following illustration shows the location of the connectors on the front of your computer.<br />
Note: Not all computer models have the following connectors.<br />
Figure 1. Front connector locations<br />
1 USB connector 3 Microphone connector<br />
2 Headphone connector 4 USB connector<br />
© Copyright <strong>Lenovo</strong> 2008, 2012 67
Locating connectors on the rear of the computer<br />
The following illustration shows the locations of the connectors on the rear of the computer.<br />
Figure 2. Rear connector locations<br />
1 VGA (Video Graphics Array) monitor<br />
connector<br />
8 Cover-release button<br />
2 USB connectors (3) 9 Adapter card slot<br />
3 Ethernet connector 10 Audio line-out connector<br />
4 Audio line-in connector 11 Microphone connector<br />
5 Standard mouse and keyboard connectors<br />
(some models)<br />
12 USB connectors (3)<br />
6 Serial port (some models) 13 DisplayPort connector<br />
7 Cable lock connector 14 AC power adapter connector<br />
68 <strong>ThinkCentre</strong> <strong>Hardware</strong> <strong>Maintenance</strong> <strong>Manual</strong>
Locating components<br />
The following illustration shows the locations of the various components in the computer.<br />
Figure 3. Component locations<br />
1 Optical drive 5 Heat sink<br />
2 Front bezel 6 Battery<br />
3 Hard disk drive 7 Memory slots (2)<br />
4 System fan assembly 8 Internal speaker<br />
Chapter 8. Replacing FRUs 69
Locating parts on the system board<br />
The following illustration shows the locations of parts on the system board.<br />
Figure 4. System board parts locations<br />
1 Microprocessor 9 PCI slot<br />
2 Clear CMOS/Recovery jumper 10 Front USB connector 2<br />
3 Thermal sensor connector 11 Intrusion switch connector/Cover presence switch<br />
connector<br />
4 Battery 12 Front I/O and LED/Switch header<br />
5 Memory slots (2) 13 eSATA connector<br />
6 Internal speaker connector 14 Internal power distribution connector<br />
7 Serial (COM) connector 15 System fan connector<br />
8 SATA connectors (2)<br />
70 <strong>ThinkCentre</strong> <strong>Hardware</strong> <strong>Maintenance</strong> <strong>Manual</strong>
Opening the computer cover<br />
Attention<br />
Do not open your computer or attempt any repair before reading and understanding the “Important safety information”<br />
in the <strong>ThinkCentre</strong> Safety and Warranty Guide that came with your computer. To obtain a copy of the <strong>ThinkCentre</strong><br />
Safety and Warranty Guide, go to:<br />
http://www.lenovo.com/support<br />
This section provides instructions on how to open the computer cover.<br />
CAUTION:<br />
Turn off the computer and wait three to five minutes to let the computer cool before<br />
opening the computer cover.<br />
To open the computer cover:<br />
1. Remove any media from the drives, shut down your operating system, and turn off all attached devices<br />
and the computer.<br />
2. Unplug all power cords from electrical outlets.<br />
3. Disconnect the cables attached to the computer. This includes power cords, Input/Output (I/O) cables,<br />
and any other cables that are connected to the computer. See “Locating connectors on the front of the<br />
computer” on page 67 and “Locating connectors on the rear of the computer” on page 68.<br />
4. Remove any locking devices, such as a cable lock that secures the computer cover.<br />
5. Carefully lift and position the computer upside down as shown in .<br />
6. Pivot the cover-release button 1 on the rear of the computer and then open the computer cover as<br />
shown.<br />
Figure 5. Opening the computer cover<br />
Chapter 8. Replacing FRUs 71
Replacing the battery<br />
Attention<br />
Do not open your computer or attempt any repair before reading and understanding the “Important safety information”<br />
in the <strong>ThinkCentre</strong> Safety and Warranty Guide that came with your computer. To obtain a copy of the <strong>ThinkCentre</strong><br />
Safety and Warranty Guide, go to:<br />
http://www.lenovo.com/support<br />
This section provides instructions on how to replace the battery.<br />
Your computer has a special type of memory that maintains the date, time, and settings for built-in features,<br />
such as the parallel-port assignments (configuration). A battery keeps these information active when you<br />
turn off the computer.<br />
The battery normally requires no charging or maintenance throughout its life; however, no battery lasts<br />
forever. If the battery fails, the date, time, and configuration information (including passwords) are lost. An<br />
error message is displayed when you turn on the computer.<br />
Refer to the “Lithium battery notice” in the <strong>ThinkCentre</strong> Safety and Warranty Guide for information about<br />
replacing and disposing of the battery.<br />
To replace the battery:<br />
1. Open the computer cover. See “Opening the computer cover” on page 71.<br />
2. Locate the battery. See “Locating parts on the system board” on page 70.<br />
3. Remove the old battery.<br />
Figure 6. Removing the old battery<br />
4. Install a new battery by pushing the new battery straight down until it snaps into position.<br />
Figure 7. Installing a new battery<br />
5. Reconnect all the cables to the system board and close the computer. See “Completing the FRU<br />
replacement” on page 89.<br />
Note: When the computer is turned on for the first time after replacing the battery, an error message<br />
might be displayed. This is normal after replacing the battery.<br />
72 <strong>ThinkCentre</strong> <strong>Hardware</strong> <strong>Maintenance</strong> <strong>Manual</strong>
6. Turn on the computer and all attached devices.<br />
7. Use the Setup Utility program to set the date, time, and any passwords. See Chapter 6 “Using the Setup<br />
Utility program” on page 43.<br />
Replacing a memory module<br />
Attention<br />
Do not open your computer or attempt any repair before reading and understanding the “Important safety information”<br />
in the <strong>ThinkCentre</strong> Safety and Warranty Guide that came with your computer. To obtain a copy of the <strong>ThinkCentre</strong><br />
Safety and Warranty Guide, go to:<br />
http://www.lenovo.com/support<br />
This section provides instructions on how to replace a memory module.<br />
Your computer has two slots for installing or replacing SODIMMs (small outline dual inline memory modules)<br />
that provide up to a maximum of 4 GB of system memory.<br />
When installing or replacing a memory module, use the following guidelines:<br />
• Use 1.8 V, 200-pin DDR3 SDRAM (double data rate 3 synchronous dynamic random access memory).<br />
• Use 1 GB or 2 GB memory modules in any combination up to a maximum of 4 GB.<br />
To replace a memory module:<br />
1. Open the computer cover. See “Opening the computer cover” on page 71.<br />
2. Locate the memory slot. See “Locating parts on the system board” on page 70.<br />
3. Remove the memory module being replaced by opening the retaining clips as shown.<br />
Figure 8. Removing the memory module<br />
4. Insert the notched end 2 of the new memory module into the socket 1 . Press the memory module<br />
firmly, and pivot the memory module until it snaps into place. Make sure that the memory module is<br />
firmly fixed in the slot and does not move easily.<br />
Chapter 8. Replacing FRUs 73
Figure 9. Installing the new memory module<br />
5. Go to “Completing the FRU replacement” on page 89.<br />
Replacing the adapter card<br />
Attention<br />
Do not open your computer or attempt any repair before reading and understanding the “Important safety information”<br />
in the <strong>ThinkCentre</strong> Safety and Warranty Guide that came with your computer. To obtain a copy of the <strong>ThinkCentre</strong><br />
Safety and Warranty Guide, go to:<br />
http://www.lenovo.com/support<br />
This section provides instructions on how to replace the adapter card.<br />
Note: You need to remove the system board in order to replace the adapter card.<br />
To replace the adapter card:<br />
1. Open the computer cover. See “Opening the computer cover” on page 71.<br />
2. Locate the system board and disconnect all cables connected to the system board. See “Locating<br />
parts on the system board” on page 70.<br />
3. Press the two side tabs inward and then pivot the system board as shown to release it from the chassis.<br />
74 <strong>ThinkCentre</strong> <strong>Hardware</strong> <strong>Maintenance</strong> <strong>Manual</strong>
Figure 10. Releasing the system board<br />
4. Place the system board on a clean and flat surface.<br />
5. Locate the adapter card slot. See “Locating parts on the system board” on page 70.<br />
6. Rotate the adapter card retainer to the open position and remove the adapter card being replaced by<br />
pulling it out of the adapter card slot.<br />
Figure 11. Removing the adapter card<br />
7. Remove the new adapter card from its static-protective package.<br />
8. Install the new adapter card into the adapter card slot. Make sure that the adapter card is firmly fixed<br />
in the slot and does not move easily.<br />
9. Close the adapter card retainer.<br />
10. Slide the system board to the rear of the chassis and then pivot the system board until it is locked<br />
by the mounting stud on each side of the cover.<br />
11. Reconnect all cables that were disconnected from the system board.<br />
12. Go to “Completing the FRU replacement” on page 89.<br />
Chapter 8. Replacing FRUs 75
Replacing the front audio and USB assembly<br />
Attention<br />
Do not open your computer or attempt any repair before reading and understanding the “Important safety information”<br />
in the <strong>ThinkCentre</strong> Safety and Warranty Guide that came with your computer. To obtain a copy of the <strong>ThinkCentre</strong><br />
Safety and Warranty Guide, go to:<br />
http://www.lenovo.com/support<br />
This section provides instructions on how to replace the front audio and USB assembly.<br />
To replace the front audio and USB assembly:<br />
1. Open the computer cover. See “Opening the computer cover” on page 71.<br />
2. Remove the front bezel by releasing the two tabs and pivoting the front bezel forward to remove<br />
completely.<br />
Figure 12. Removing the front bezel<br />
3. Disconnect the front audio and USB assembly cables from the system board. See “Locating parts on<br />
the system board” on page 70.<br />
4. Note the front audio and USB assembly cables routing and remove the screw that secures the assembly<br />
to the chassis.<br />
76 <strong>ThinkCentre</strong> <strong>Hardware</strong> <strong>Maintenance</strong> <strong>Manual</strong>
Figure 13. Removing the front audio and USB assembly<br />
5. Remove the failing front audio and USB assembly from the chassis.<br />
6. Install the new front audio and USB assembly into the chassis and secure it with the screw.<br />
7. Connect the front audio and USB assembly cables to the system board.<br />
8. To reinstall the front bezel, align the plastic tabs on the bottom of the bezel with the corresponding holes<br />
in the chassis, then pivot the bezel inward until it snaps into position.<br />
9. Go to “Completing the FRU replacement” on page 89.<br />
Replacing the heat sink<br />
Attention<br />
Do not open your computer or attempt any repair before reading and understanding the “Important safety information”<br />
in the <strong>ThinkCentre</strong> Safety and Warranty Guide that came with your computer. To obtain a copy of the <strong>ThinkCentre</strong><br />
Safety and Warranty Guide, go to:<br />
http://www.lenovo.com/support<br />
This section provides instructions on how to replace the heat sink.<br />
CAUTION:<br />
The heat sink might be very hot. Turn off the computer and wait three to five minutes to<br />
let the computer cool before opening the computer cover.<br />
To replace the heat sink:<br />
1. Open the computer cover. See “Opening the computer cover” on page 71.<br />
2. Locate the heat sink. See “Locating components” on page 69.<br />
3. Remove the four screws that secure the heat sink to the system board.<br />
Note: Carefully remove the four screws from the system board to avoid any possible damage. The four<br />
screws cannot be removed from the heat sink.<br />
Chapter 8. Replacing FRUs 77
Figure 14. Removing the heat sink<br />
4. Lift the failing heat sink off the system board.<br />
Notes:<br />
a. You might have to gently twist the heat sink to free it from the microprocessor.<br />
b. Do not touch the thermal grease while handling the heat sink.<br />
5. Position the new heat sink on the system board so that the four screws are aligned with the holes<br />
on the system board.<br />
6. Alternate tightening each screw a small and equal amount until the heat sink is secured to the system<br />
board. Do not over-tighten the screws.<br />
7. Go to “Completing the FRU replacement” on page 89.<br />
Replacing the microprocessor<br />
Attention<br />
Do not open your computer or attempt any repair before reading and understanding the “Important safety information”<br />
in the <strong>ThinkCentre</strong> Safety and Warranty Guide that came with your computer. To obtain a copy of the <strong>ThinkCentre</strong><br />
Safety and Warranty Guide, go to:<br />
http://www.lenovo.com/support<br />
This section provides instructions on how to replace the microprocessor.<br />
CAUTION:<br />
The heat sink and microprocessor might be very hot. Turn off the computer and wait<br />
three to five minutes to let the computer cool before opening the computer cover.<br />
To replace the microprocessor:<br />
1. Open the computer cover. See “Opening the computer cover” on page 71.<br />
2. Remove any parts or cables that may prevent your access to the system board.<br />
78 <strong>ThinkCentre</strong> <strong>Hardware</strong> <strong>Maintenance</strong> <strong>Manual</strong>
3. Locate the heat sink and remove it from the system board. See “Locating components” on page<br />
69 and “Replacing the heat sink” on page 77.<br />
4. Place the heat sink on its side so that the thermal grease does not come in contact with anything.<br />
5. Lift the small handle 3 and open the retainer 1 to access the microprocessor 2 .<br />
Figure 15. Accessing the microprocessor<br />
6. Lift the microprocessor straight up and out of the socket.<br />
Notes:<br />
a. Your microprocessor and socket might look different from the one illustrated.<br />
b. Note the orientation of the microprocessor in the socket. You can either look for the small triangle 1<br />
on one corner of the microprocessor or note the orientation of the notches 2 on the microprocessor.<br />
This is important when installing the new microprocessor on the system board.<br />
c. Touch only the sides of the microprocessor. Do not touch the gold contacts on the bottom.<br />
d. Do not drop anything onto the microprocessor socket while it is exposed. The socket pins must be<br />
kept as clean as possible.<br />
Chapter 8. Replacing FRUs 79
Figure 16. Removing the microprocessor<br />
7. Make sure that the small handle is in the raised position and the microprocessor retainer is fully open.<br />
8. Remove the protective cover 2 that protects the gold contacts on the new microprocessor 1 .<br />
9. Hold the new microprocessor and align the notches on it with the tabs in the microprocessor socket, or<br />
align the small triangle on one corner with the corresponding beveled corner of the microprocessor<br />
socket.<br />
10. Lower the new microprocessor straight down into the microprocessor socket on the system board.<br />
11. Close the microprocessor retainer and lock it into position with the small handle to secure the new<br />
microprocessor in the socket.<br />
12. Reinstall the heat sink on the system board. See “Replacing the heat sink” on page 77.<br />
13. Reinstall any other parts or reconnect any other cables you removed.<br />
14. Go to “Completing the FRU replacement” on page 89.<br />
Replacing the system board<br />
Attention<br />
Do not open your computer or attempt any repair before reading and understanding the “Important safety information”<br />
in the <strong>ThinkCentre</strong> Safety and Warranty Guide that came with your computer. To obtain a copy of the <strong>ThinkCentre</strong><br />
Safety and Warranty Guide, go to:<br />
http://www.lenovo.com/support<br />
80 <strong>ThinkCentre</strong> <strong>Hardware</strong> <strong>Maintenance</strong> <strong>Manual</strong>
This section provides instructions on how to replace the system board.<br />
CAUTION:<br />
The heat sink and microprocessor might be very hot. Turn off the computer and wait<br />
three to five minutes to let the computer cool before opening the computer cover.<br />
To replace the system board:<br />
1. Open the computer cover. See “Opening the computer cover” on page 71.<br />
2. Take notes of the location of all the cable connectors on the system board and then disconnect all the<br />
cables. See “Locating parts on the system board” on page 70.<br />
3. Press the two side tabs inward and then pivot the system board as shown to release the system board<br />
from the chassis.<br />
Figure 17. Releasing the system board<br />
4. Place the system board on a clean and flat surface.<br />
5. Remove the heat sink from the system board. See “Replacing the heat sink” on page 77.<br />
6. Remove the memory modules from the failing system board. See “Replacing a memory module”<br />
on page 73.<br />
7. Remove the adapter card from the failing system board. See “Replacing the adapter card” on page 74.<br />
8. Remove the battery from the failing system board. See “Replacing the battery” on page 72.<br />
9. Remove the microprocessor from the failing system board. See “Replacing the microprocessor” on<br />
page 78.<br />
10. Remove the screws that secure the failing system board to the protective cover.<br />
11. Lift the failing system board off the cover.<br />
12. Position the new system board so that the screw holes are aligned with the mounting studs on the cover.<br />
13. Install the screws to secure the new system board to the protective cover.<br />
14. Install the memory modules, adapter card, battery, and microprocessor that you removed from the<br />
failing system board to the new system board.<br />
Chapter 8. Replacing FRUs 81
15. Slide the new system board to the rear of the chassis and then pivot it inward until it is locked into<br />
position.<br />
16. Connect all the cables to the new system board. See “Locating parts on the system board” on page 70.<br />
17. Install the heat sink to the new system board. See “Replacing the heat sink” on page 77.<br />
18. Go to “Completing the FRU replacement” on page 89.<br />
The failing system board must be returned with a microprocessor socket cover to protect the pins during<br />
shipping and handling.<br />
To install the microprocessor socket cover:<br />
1. Remove the microprocessor from the microprocessor socket. See “Replacing the microprocessor”<br />
on page 78.<br />
2. Close the microprocessor retainer and lock it into position with the small handle.<br />
3. Insert the tabs 1 of the socket cover into the hinged side of the socket, and then press the other side<br />
of the socket cover downward until the tabs 2 snap into position.<br />
Figure 18. Tabs on the microprocessor socket cover (bottom view)<br />
Figure 19. Installing the microprocessor socket cover<br />
82 <strong>ThinkCentre</strong> <strong>Hardware</strong> <strong>Maintenance</strong> <strong>Manual</strong>
Replacing the system fan<br />
Attention<br />
Do not open your computer or attempt any repair before reading and understanding the “Important safety information”<br />
in the <strong>ThinkCentre</strong> Safety and Warranty Guide that came with your computer. To obtain a copy of the <strong>ThinkCentre</strong><br />
Safety and Warranty Guide, go to:<br />
http://www.lenovo.com/support<br />
This section provides instructions on how to replace the system fan.<br />
To replace the system fan:<br />
1. Open the computer cover. See “Opening the computer cover” on page 71.<br />
2. Disconnect the system fan cable from the system fan connector on the system board. See “Locating<br />
parts on the system board” on page 70.<br />
3. Remove the heat sink to gain access to the system fan. See “Replacing the heat sink” on page 77.<br />
4. Locate the two rubber mounts that secure the system fan to the chassis. Remove the rubber mounts<br />
by breaking them or cutting them with scissors.<br />
Note: When you receive the new system fan, you will also receive new rubber mounts.<br />
5. Lift the system fan out of the chassis.<br />
Figure 20. Removing the system fan<br />
6. Install the two short rubber mounts in the new system fan as shown.<br />
Chapter 8. Replacing FRUs 83
Figure 21. Installing the short rubber mounts<br />
7. Install the two long rubber mounts into the rear of the chassis. Push the mounts through the holes of the<br />
chassis. If necessary, pull the mounts through the holes from inside the chassis.<br />
8. To install the new system fan assembly into the chassis, align the open holes in the system fan assembly<br />
with the long rubber mounts in the chassis. Pull the rubber mounts through the holes in the system<br />
fan assembly until the fan is in place.<br />
Figure 22. Replacing the system fan assembly<br />
9. Once the system fan assembly is secure, you should remove the extra rubber from the mounts.<br />
10. Connect the system fan assembly cable to the fan connector on the system board.<br />
11. Replace the heat sink. See “Replacing the heat sink” on page 77.<br />
12. Go to “Completing the FRU replacement” on page 89.<br />
84 <strong>ThinkCentre</strong> <strong>Hardware</strong> <strong>Maintenance</strong> <strong>Manual</strong>
Replacing the hard disk drive<br />
Attention<br />
Do not open your computer or attempt any repair before reading and understanding the “Important safety information”<br />
in the <strong>ThinkCentre</strong> Safety and Warranty Guide that came with your computer. To obtain a copy of the <strong>ThinkCentre</strong><br />
Safety and Warranty Guide, go to:<br />
http://www.lenovo.com/support<br />
This section provides instructions on how to replace the hard disk drive if your computer has one. For<br />
computer models that do not have an internal hard disk drive installed and use a remote hard disk drive<br />
accessed through the SMC - Storage Array, contact your network or storage administrator.<br />
Important<br />
When you receive a new hard disk drive, you also receive a set of Product Recovery discs. The set of<br />
Product Recovery discs will enable you to restore the contents of the hard disk to the same state as when<br />
your computer was originally shipped from the factory. For more information on recovering factory-installed<br />
software, refer to “Recovering software” in your <strong>ThinkCentre</strong> User Guide.<br />
To replace the hard disk drive:<br />
1. Open the computer cover. See “Opening the computer cover” on page 71.<br />
2. Disconnect the power cable from the optical drive.<br />
3. Place your finger on the tab located on the front of the hard disk drive and push upward. Then press<br />
inward on the side tabs and pivot the hard disk drive upward to remove.<br />
Figure 23. Removing the hard disk drive<br />
4. Remove the failing hard disk drive from the chassis.<br />
5. Disconnect the signal and power cables from the hard disk drive.<br />
6. Remove the hard disk drive from the plastic bracket by flexing the sides of the bracket enough to slide<br />
it free of the hard disk drive.<br />
7. To install the new hard disk drive into the plastic bracket, flex the bracket and align pin 1 , pin 2 , pin<br />
3 , and pin 4 on the bracket with the holes in the hard disk drive. Do not touch the circuit board 5<br />
on the bottom of the hard disk drive.<br />
Chapter 8. Replacing FRUs 85
Figure 24. Installing the hard disk drive into the bracket<br />
8. Connect the signal and power cables to the rear of the new hard disk drive.<br />
9. Slide the new hard disk drive into the drive bay until it snaps into position.<br />
10. Reconnect the power cable to the optical drive.<br />
11. Go to “Completing the FRU replacement” on page 89.<br />
Replacing the optical drive<br />
Attention<br />
Do not open your computer or attempt any repair before reading and understanding the “Important safety information”<br />
in the <strong>ThinkCentre</strong> Safety and Warranty Guide that came with your computer. To obtain a copy of the <strong>ThinkCentre</strong><br />
Safety and Warranty Guide, go to:<br />
http://www.lenovo.com/support<br />
This section provides instructions on how to replace the optical drive.<br />
To replace the optical drive:<br />
1. Open the computer cover. See “Opening the computer cover” on page 71.<br />
2. Remove the front bezel by releasing the two tabs and pivoting the bezel forward to remove completely.<br />
86 <strong>ThinkCentre</strong> <strong>Hardware</strong> <strong>Maintenance</strong> <strong>Manual</strong>
Figure 25. Removing the front bezel<br />
3. Disconnect the signal and power cables from the rear of the optical drive.<br />
4. Press the optical drive lock button to remove the optical drive out the front of the computer.<br />
Figure 26. Removing the optical drive<br />
5. Remove the retainer bracket from the failing drive and install it on the new optical drive.<br />
Figure 27. Retainer bracket for optical drive<br />
6. Slide the new optical drive into the drive bay until it snaps into position.<br />
Chapter 8. Replacing FRUs 87
Figure 28. Replacing the optical drive<br />
7. Connect the signal and power cables to the drive.<br />
8. To reinstall the front bezel, align the plastic tabs on the bottom of the bezel with the corresponding holes<br />
in the chassis, then pivot the bezel inward until it snaps into position.<br />
9. Go to “Completing the FRU replacement” on page 89.<br />
Replacing the internal speaker<br />
Attention<br />
Do not open your computer or attempt any repair before reading and understanding the “Important safety information”<br />
in the <strong>ThinkCentre</strong> Safety and Warranty Guide that came with your computer. To obtain a copy of the <strong>ThinkCentre</strong><br />
Safety and Warranty Guide, go to:<br />
http://www.lenovo.com/support<br />
This section provides instructions on how to replace the internal speaker.<br />
To replace the internal speaker:<br />
1. Open the computer cover. See “Opening the computer cover” on page 71.<br />
2. Locate the internal speaker. See “Locating components” on page 69.<br />
3. Disconnect the internal speaker cable from the system board. See “Locating parts on the system<br />
board” on page 70.<br />
4. Press the internal speaker lock latch 1 , slide the internal speaker downwards and remove it from<br />
the chassis.<br />
88 <strong>ThinkCentre</strong> <strong>Hardware</strong> <strong>Maintenance</strong> <strong>Manual</strong>
;<br />
Figure 29. Removing the internal speaker<br />
5. Position the new internal speaker into the metal clips 2 and push the internal speaker upwards until it is<br />
secured by the lock latch 1 .<br />
6. Connect the new internal speaker cable to the system board.<br />
7. Go to “Completing the FRU replacement” on page 89.<br />
Completing the FRU replacement<br />
This section provides instructions on how to complete the parts replacement.<br />
After completing all parts replacement, you need to close the cover and reconnect cables, such as power<br />
cords. Depending on the parts replaced, you might need to confirm the updated information in the Setup<br />
Utility program. See Chapter 6 “Using the Setup Utility program” on page 43.<br />
To complete the parts replacement:<br />
1. Ensure that all components have been reassembled correctly and that no tools or loose screws are left<br />
inside your computer. See “Locating components” on page 69 for the location of various components.<br />
2. Make sure that the cables are routed correctly before closing the computer cover.<br />
Chapter 8. Replacing FRUs 89
Figure 30. Routing the cables<br />
Important<br />
Correctly route all power supply cables to avoid interference when closing the computer cover. Keep<br />
cables clear of the hinges and sides of the computer chassis.<br />
3. Close the computer cover.<br />
Figure 31. Closing the computer cover<br />
4. If a cover lock is installed, lock the cover.<br />
5. Reconnect the external cables and power cords to the computer. See “Locating connectors on the rear<br />
of the computer” on page 68.<br />
6. To update your configuration, see Chapter 6 “Using the Setup Utility program” on page 43.<br />
90 <strong>ThinkCentre</strong> <strong>Hardware</strong> <strong>Maintenance</strong> <strong>Manual</strong>
Chapter 9. FRU lists<br />
This chapter lists the information on the field replaceable units (FRUs).<br />
Attention: Be sure to read and understand all the safety information before replacing any FRUs.<br />
Note: In the following tables, a customer replaceable unit (CRU) is identified as either "1", "2", or "N" in the<br />
CRU column. "N" means that the part is not a CRU, "1" means that the part is a Self-service CRU, and "2"<br />
means that the part is an Optional-service CRU.<br />
Overall: MT 6136, 6139, 7187, 7345, 7348, 7356, 7359, 7479, 7626, 7629,<br />
7637, 8338, 8820, and 9961<br />
The following replaceable components are available for the 6136, 6139, 7187, 7345, 7348, 7356, 7359, 7479,<br />
7626, 7629, 7637, 8338, 8820, and 9961 machine type models.<br />
Item # FRUs FRU # CRU<br />
1<br />
Optical drive, DVD-ROM 16X Max SATA<br />
• MT 6139:<br />
• MT 6175:<br />
• MT 7187:<br />
• MT 7345:<br />
• MT 7348:<br />
• MT 7356:<br />
• MT 7359: D6M D8M DGJ DKJ DQJ DUU DUF F2J F3J F9J FKJ<br />
• MT 7479: AMM B1J B4J BBJ C2J<br />
• MT 7637:<br />
41N3325 1<br />
© Copyright <strong>Lenovo</strong> 2008, 2012 91
Item # FRUs FRU # CRU<br />
1<br />
1<br />
• MT 8820:<br />
• MT 9961:<br />
• MT 6136, 7626, 7629, and 8338_SB<br />
Optical drive, DVD Recordable SATA/CD-RW Rambo 8 - SATA Vista &<br />
non-Vista<br />
• MT 6139: A1G A2G A3G A4G A5G A6G<br />
• MT 6175: A2G<br />
• MT 7187: AKG<br />
• MT 7345: A6G<br />
• MT 7348: A1G A2G A3G A4G A5G<br />
• MT 7356: A2G<br />
• MT 7359: B9A B9T D3M D4M D5M D7M D7A D7T D9M DDJ DFJ DHJ<br />
DJJ DNJ DPJ DVU DVF DWU DWF F1J F4J F6G F7U F7F F7L F8J FAJ<br />
FBM FCJ FDM FFM FGJ FHJ FLJ<br />
• MT 7479: B5A B5T ANM APM AQM ARM ASM AUM AVJ AWJ B2J B3J<br />
ALM B9U B9F BAJ BDM BEU BEF C1J C3J<br />
• MT 7637: A2U A2F A2S A2P A2L A2D A2Y A2M A2A A2Q A2T A2C A2B<br />
A2H A2V A2K A2R A2E A2J A3Q<br />
• MT 8820: AJG AKG ALG AMG APG ARS ARD ARY ASG<br />
• MT 9961: AkU AkF AkS AkP AkD AkY ALU ALF ALS AMG<br />
• MT 6136, 7626, 7629, and 8338_SB<br />
Optical drive, DVD Recorder Rambo 8 - SATA 12XRAM write<br />
• MT 6139:<br />
• MT 6175:<br />
• MT 7187:<br />
• MT 7345:<br />
• MT 7348:<br />
• MT 7356:<br />
• MT 7359: B9A B9T D3M D4M D5M D7M D7A D7T D9M DDJ DFJ DHJ<br />
DJJ DNJ DPJ DVU DVF DWU DWF F1J F4J F6G F7U F7F F7L F8J FAJ<br />
FBM FCJ FDM FFM FGJ FHJ FLJ<br />
• MT 7479: B5A B5T ANM APM AQM ARM ASM AUM AVJ AWJ B2J B3J<br />
ALM B9U B9F BAJ BDM BEU BEF C1J C3J<br />
• MT 7637: A2U A2F A2S A2P A2L A2D A2Y A2M A2A A2Q A2T A2C A2B<br />
A2H A2V A2K A2R A2E A2J A3Q<br />
• MT 8820: ARS ARD ARY ASG<br />
• MT 9961:<br />
• MT 6136, 7626, 7629, and 8338_SB<br />
92 <strong>ThinkCentre</strong> <strong>Hardware</strong> <strong>Maintenance</strong> <strong>Manual</strong><br />
43C1042 1<br />
71Y5545 1
Item # FRUs FRU # CRU<br />
2<br />
2<br />
2<br />
Power supply, 130W AC/DC pwer adapter (for G model )<br />
• MT 6139:<br />
• MT 6175:<br />
• MT 7187:<br />
• MT 7345:<br />
• MT 7348:<br />
• MT 7356:<br />
• MT 7359:<br />
• MT 7479:<br />
• MT 7637:<br />
• MT 8820:<br />
• MT 9961:<br />
• MT 6136, 7626, 7629, and 8338_SB<br />
Power supply, 130W AC/DC power adapter (no G model)<br />
• MT 6139:<br />
• MT 6175:<br />
• MT 7187:<br />
• MT 7345:<br />
• MT 7348:<br />
• MT 7356:<br />
• MT 7359:<br />
• MT 7479:<br />
• MT 7637:<br />
• MT 8820:<br />
• MT 9961:<br />
• MT 6136, 7626, 7629, and 8338_SB<br />
Power supply, 130W AC/DC power adapter (for G model )<br />
• MT 6139:<br />
• MT 6175:<br />
• MT 7187:<br />
• MT 7345:<br />
• MT 7348:<br />
• MT 7356:<br />
• MT 7359:<br />
• MT 7479:<br />
• MT 7637:<br />
• MT 8820:<br />
• MT 9961:<br />
• MT 6136, 7626, 7629, and 8338_SB<br />
54Y8856 1<br />
54Y8857 1<br />
41A9767 1<br />
Chapter 9. FRU lists 93
Item # FRUs FRU # CRU<br />
3<br />
3<br />
3<br />
Hard disk drive, SATA 160GB 7200RPM/3Gb/8MB<br />
• MT 6139:<br />
• MT 6175:<br />
• MT 7187: AKG<br />
• MT 7345: A6G<br />
• MT 7348:<br />
• MT 7356:<br />
• MT 7359: F4J<br />
• MT 7479:<br />
• MT 7637:<br />
• MT 8820:<br />
• MT 9961:<br />
• MT 6136, 7626, 7629, and 8338_SB<br />
Hard disk drive, 160 GB 7200rpm SATA<br />
• MT 6139:<br />
• MT 6175:<br />
• MT 7187: AKG<br />
• MT 7345: A6G<br />
• MT 7348:<br />
• MT 7356:<br />
• MT 7359: F4J<br />
• MT 7479:<br />
• MT 7637:<br />
• MT 8820:<br />
• MT 9961:<br />
• MT 6136, 7626, 7629, and 8338_SB<br />
Hard disk drive, SATA 250GB 7200RPM/3Gb/8MB<br />
• MT 6139:<br />
• MT 6175:<br />
• MT 7187:<br />
• MT 7345:<br />
• MT 7348: A1G A4G<br />
• MT 7356: A2G<br />
• MT 7359: B9A B9T D3M D4M D6M D7M D7A D7T DNJ DPJ DQJ DUU<br />
DUF DVU DVF DWU DWF F1J F2J F3J F6G F7U F7F F7L F8J F9J FHJ<br />
FKJ<br />
• MT 7479: AMM ANM APM AQM ALM B9U B9F BDM BEU BEF<br />
• MT 7637: A2U A2F A2S A2P A2L A2D A2Y A2M A2A A2Q A2T A2C A2B<br />
A2H A2V A2K A2R A2E A2J A3Q<br />
• MT 8820: AnU AnF AnS AnP AnD AnY AQU AQF AQS<br />
• MT 9961: AkU AkF AkS AkP AkD AkY ALU ALF ALS AMG<br />
• MT 6136, 7626, 7629, and 8338_SB<br />
94 <strong>ThinkCentre</strong> <strong>Hardware</strong> <strong>Maintenance</strong> <strong>Manual</strong><br />
40Y9035 1<br />
53Y6837 1<br />
40Y9036 1
Item # FRUs FRU # CRU<br />
3<br />
3<br />
3<br />
Hard disk drive, 250 GB 7200rpm SATA<br />
• MT 6139:<br />
• MT 6175:<br />
• MT 7187:<br />
• MT 7345:<br />
• MT 7348: A4G<br />
• MT 7356: A2G<br />
• MT 7359: B9A B9T D3M D4M D6M D7M D7A D7T DNJ DPJ DQJ DUU<br />
DUF DVU DVF DWU DWF F1J F2J F3J F6G F7U F7F F7L F8J F9J FHJ<br />
FKJ<br />
• MT 7479: AMM ANM APM AQM ALM B9U B9F BDM BEU BEF<br />
• MT 7637: A2U A2F A2S A2P A2L A2D A2Y A2M A2A A2Q A2T A2C A2B<br />
A2H A2V A2K A2R A2E A2J A3Q<br />
• MT 8820: AQU AQF AQS<br />
• MT 9961: AkU AkF AkS AkP AkD AkY ALU ALF ALS AMG<br />
• MT 6136, 7626, 7629, and 8338_SB<br />
Hard disk drive, SATA 320GB 7200rpm SATA/8MB<br />
• MT 6139: A1G A2G A3G A4G A5G A6G<br />
• MT 6175:<br />
• MT 7187:<br />
• MT 7345:<br />
• MT 7348: A2G A3G A5G<br />
• MT 7356:<br />
• MT 7359: D5M D8M D9M DDJ DFJ DGJ DHJ DJJ DKJ FAJ FBM FCJ<br />
FDM FFM FHJ FKJ<br />
• MT 7479: B5A B5T ARM ASM AUM AVJ AWJ B1J B2J B3J B4J BAJ<br />
BBJ C1J C2J C3J<br />
• MT 7637:<br />
• MT 8820: AJG AKG ALG AMG APG ARS ARD ARY<br />
• MT 9961:<br />
• MT 6136, 7626, 7629, and 8338_SB<br />
Hard disk drive, 320 GB 7200rpm SATA<br />
• MT 6139: A1G A2G A3G A4G A5G A6G<br />
• MT 6175:<br />
• MT 7187:<br />
• MT 7345:<br />
• MT 7348: A2G A3G A5G<br />
• MT 7356:<br />
• MT 7359: D5M D8M D9M DDJ DFJ DGJ DHJ DJJ DKJ FAJ FBM FCJ<br />
FDM FFM FHJ FKJ<br />
• MT 7479: B5A B5T ARM ASM AUM AVJ AWJ B1J B2J B3J B4J BAJ<br />
BBJ C1J C2J C3J<br />
• MT 7637:<br />
• MT 8820: AJG AKG ALG AMG APG ARS ARD ARY<br />
45K0408 1<br />
87H4891 1<br />
45K0409 1<br />
Chapter 9. FRU lists 95
Item # FRUs FRU # CRU<br />
3<br />
3<br />
3<br />
• MT 9961:<br />
• MT 6136, 7626, 7629, and 8338_SB<br />
Hard disk drive, SATA 500GB 7200RPM/3Gb/s/8MB<br />
• MT 6139:<br />
• MT 6175:<br />
• MT 7187:<br />
• MT 7345:<br />
• MT 7348:<br />
• MT 7356:<br />
• MT 7359:<br />
• MT 7479:<br />
• MT 7637:<br />
• MT 8820:<br />
• MT 9961:<br />
• MT 6136, 7626, 7629, and 8338_SB<br />
Hard disk drive, 500GB 7200rpm SATA<br />
• MT 6139:<br />
• MT 6175:<br />
• MT 7187:<br />
• MT 7345:<br />
• MT 7348:<br />
• MT 7356:<br />
• MT 7359:<br />
• MT 7479:<br />
• MT 7637:<br />
• MT 8820: ASG<br />
• MT 9961:<br />
• MT 6136, 7626, 7629, and 8338_SB<br />
Hard disk drive, SATA 1TB 7200RPM/3Gb/8MB<br />
• MT 6139: 91Z<br />
• MT 6175:<br />
• MT 7187:<br />
• MT 7345:<br />
• MT 7348:<br />
• MT 7356:<br />
• MT 7359: 91Z<br />
• MT 7479: 91Z<br />
• MT 7637: 91Z<br />
• MT 8820: 91Z<br />
• MT 9961: 91Z<br />
• MT 6136, 7626, 7629, and 8338_SB<br />
96 <strong>ThinkCentre</strong> <strong>Hardware</strong> <strong>Maintenance</strong> <strong>Manual</strong><br />
41X5582 1<br />
45K0410 1<br />
45C5973 1
Item # FRUs FRU # CRU<br />
3<br />
3<br />
4<br />
Hard disk drive, 1TB 7200rpm SATA<br />
• MT 6139: 91Z<br />
• MT 6175:<br />
• MT 7187:<br />
• MT 7345:<br />
• MT 7348: 91Z<br />
• MT 7356:<br />
• MT 7359: 91Z<br />
• MT 7479: 91Z<br />
• MT 7637: 91Z<br />
• MT 8820: 91Z<br />
• MT 9961: 91Z<br />
• MT 6136, 7626, 7629, and 8338_SB<br />
Hard disk drive, 500G HDD with cache size 8M -> 16M<br />
• MT 6139:<br />
• MT 6175:<br />
• MT 7187:<br />
• MT 7345:<br />
• MT 7348:<br />
• MT 7356:<br />
• MT 7359:<br />
• MT 7479:<br />
• MT 7637:<br />
• MT 8820:<br />
• MT 9961:<br />
• MT 6136, 7626, 7629, and 8338_SB<br />
FRU, system fan assembly<br />
• MT 6139: all models<br />
• MT 6175:<br />
• MT 7187: all models<br />
• MT 7345: all models<br />
• MT 7348: all models<br />
• MT 7356: all models<br />
• MT 7359: all models<br />
• MT 7479: all models<br />
• MT 7637: all models<br />
• MT 8820: all models<br />
• MT 9961: all models<br />
• MT 6136, 7626, 7629, and 8338_SB<br />
45K0412 1<br />
45X5582 1<br />
43N9655 2<br />
Chapter 9. FRU lists 97
Item # FRUs FRU # CRU<br />
5<br />
6<br />
6<br />
FRU, 65W Heatsink kit<br />
• MT 6139: all models<br />
• MT 6175:<br />
• MT 7187: all models<br />
• MT 7345: all models<br />
• MT 7348: all models<br />
• MT 7356: all models<br />
• MT 7359: all models<br />
• MT 7479: all models<br />
• MT 7637: all models<br />
• MT 8820: all models<br />
• MT 9961: all models<br />
• MT 6136, 7626, 7629, and 8338_SB<br />
Microprocessor, E4700 Conroe 2.60GHz 800MHz FSB 2M<br />
• MT 6139:<br />
• MT 6175:<br />
• MT 7187:<br />
• MT 7345:<br />
• MT 7348:<br />
• MT 7356:<br />
• MT 7359:<br />
• MT 7479:<br />
• MT 7637:<br />
• MT 8820:<br />
• MT 9961:<br />
• MT 6136, 7626, 7629, and 8338_SB<br />
Microprocessor, E8600 Wolfdale,3.33GHZ,1333M FSB 6M E-0<br />
• MT 6139:<br />
• MT 6175:<br />
• MT 7187:<br />
• MT 7345:<br />
• MT 7348:<br />
• MT 7356:<br />
• MT 7359:<br />
• MT 7479:<br />
• MT 7637:<br />
• MT 8820:<br />
• MT 9961:<br />
• MT 6136, 7626, 7629, and 8338_SB<br />
98 <strong>ThinkCentre</strong> <strong>Hardware</strong> <strong>Maintenance</strong> <strong>Manual</strong><br />
43N9427 2<br />
45R5786 2<br />
46R8640 2
Item # FRUs FRU # CRU<br />
6<br />
6<br />
6<br />
Microprocessor, Core 2 Duo E8500 Processor 3.16GHz 1333MHz FSB<br />
6M L2 65W C-0<br />
• MT 6139:<br />
• MT 6175:<br />
• MT 7187:<br />
• MT 7345:<br />
• MT 7348:<br />
• MT 7356:<br />
• MT 7359:<br />
• MT 7479: ASM BEU BEF<br />
• MT 7637:<br />
• MT 8820:<br />
• MT 9961:<br />
• MT 6136, 7626, 7629, and 8338_SB<br />
Microprocessor, Core 2 Duo E8400 processor 3.00GHz 1333MHz FSB<br />
6M L2 65W C-0<br />
• MT 6139:<br />
• MT 6175:<br />
• MT 7187:<br />
• MT 7345: A6G<br />
• MT 7348:<br />
• MT 7356: A2G<br />
• MT 7359:<br />
• MT 7479: AMM ANM APM AQM ARM AVJ AWJ B1J B2J B3J B4J ALM<br />
B9U B9F BAJ BBJ BDM C1J C2J C3J<br />
• MT 7637:<br />
• MT 8820:<br />
• MT 9961: AkU AkF AkS AkP AkD AkY ALU ALF ALS<br />
• MT 6136, 7626, 7629, and 8338_SB<br />
Microprocessor, Core 2 Duo E8300 processor 2.83GHz 1333MHz FSB<br />
6M L2 65W C-0<br />
• MT 6139:<br />
• MT 6175:<br />
• MT 7187:<br />
• MT 7345:<br />
• MT 7348:<br />
• MT 7356:<br />
• MT 7359:<br />
• MT 7479:<br />
• MT 7637:<br />
• MT 8820:<br />
• MT 9961:<br />
• MT 6136, 7626, 7629, and 8338_SB<br />
45C7735 2<br />
45C7736 2<br />
45C7737 2<br />
Chapter 9. FRU lists 99
Item # FRUs FRU # CRU<br />
6<br />
6<br />
6<br />
Microprocessor, E7200 Wolfdale 2.53GHZ 1066MHZFSB 3MB M-0<br />
• MT 6139:<br />
• MT 6175:<br />
• MT 7187:<br />
• MT 7345:<br />
• MT 7348:<br />
• MT 7356:<br />
• MT 7359:<br />
• MT 7479:<br />
• MT 7637:<br />
• MT 8820:<br />
• MT 9961:<br />
• MT 6136, 7626, 7629, and 8338_SB<br />
Microprocessor, E7300 Wolfdale 2.66GHZ 1066FSB FSB 3MB M-0<br />
• MT 6139:<br />
• MT 6175:<br />
• MT 7187:<br />
• MT 7345:<br />
• MT 7348:<br />
• MT 7356:<br />
• MT 7359:<br />
• MT 7479:<br />
• MT 7637:<br />
• MT 8820:<br />
• MT 9961:<br />
• MT 6136, 7626, 7629, and 8338_SB<br />
Microprocessor, E2200 Conroe-L 2.20GHz 800MHz FSB 1M<br />
• MT 6139:<br />
• MT 6175:<br />
• MT 7187:<br />
• MT 7345:<br />
• MT 7348:<br />
• MT 7356:<br />
• MT 7359:<br />
• MT 7479:<br />
• MT 7637:<br />
• MT 8820:<br />
• MT 9961:<br />
• MT 6136, 7626, 7629, and 8338_SB<br />
100 <strong>ThinkCentre</strong> <strong>Hardware</strong> <strong>Maintenance</strong> <strong>Manual</strong><br />
45R8337 2<br />
46R1622 2<br />
45C5349 2
Item # FRUs FRU # CRU<br />
6<br />
6<br />
6<br />
Microprocessor, E2220 Conroe-L 2.40GHz 800MHz FSB 1M<br />
• MT 6139:<br />
• MT 6175:<br />
• MT 7187:<br />
• MT 7345:<br />
• MT 7348:<br />
• MT 7356:<br />
• MT 7359:<br />
• MT 7479:<br />
• MT 7637:<br />
• MT 8820:<br />
• MT 9961:<br />
• MT 6136, 7626, 7629, and 8338_SB<br />
Microprocessor, E5200 Wolfdale 2.50GHZ 800FSB 2M<br />
• MT 6139:<br />
• MT 6175:<br />
• MT 7187:<br />
• MT 7345:<br />
• MT 7348:<br />
• MT 7356:<br />
• MT 7359:<br />
• MT 7479:<br />
• MT 7637:<br />
• MT 8820:<br />
• MT 9961:<br />
• MT 6136, 7626, 7629, and 8338_SB<br />
Microprocessor, 450 2.20GHZ 800MHz FSB 512K<br />
• MT 6139:<br />
• MT 6175:<br />
• MT 7187:<br />
• MT 7345:<br />
• MT 7348:<br />
• MT 7356:<br />
• MT 7359:<br />
• MT 7479:<br />
• MT 7637:<br />
• MT 8820:<br />
• MT 9961:<br />
• MT 6136, 7626, 7629, and 8338_SB<br />
45C1774 2<br />
46R9512 2<br />
46R9514 2<br />
Chapter 9. FRU lists 101
Item # FRUs FRU # CRU<br />
6<br />
6<br />
6<br />
Microprocessor, E1400 Conroe 2.00GHZ 800MHZFSB 512K - NPI M-0<br />
• MT 6139:<br />
• MT 6175:<br />
• MT 7187:<br />
• MT 7345:<br />
• MT 7348:<br />
• MT 7356:<br />
• MT 7359:<br />
• MT 7479:<br />
• MT 7637:<br />
• MT 8820:<br />
• MT 9961:<br />
• MT 6136, 7626, 7629, and 8338_SB<br />
Microprocessor, Celeron 440 Processor 2.00GHz 800MHz FSB 512K L2<br />
A-1 stepping level, value FMB<br />
• MT 6139:<br />
• MT 6175:<br />
• MT 7187:<br />
• MT 7345:<br />
• MT 7348:<br />
• MT 7356:<br />
• MT 7359:<br />
• MT 7479:<br />
• MT 7637:<br />
• MT 8820:<br />
• MT 9961:<br />
• MT 6136, 7626, 7629, and 8338_SB<br />
Microprocessor, Q9400 Yorkfield 2.66GHZ 1333FSB 6MB VT, TXT R-0<br />
• MT 6139:<br />
• MT 6175:<br />
• MT 7187:<br />
• MT 7345:<br />
• MT 7348:<br />
• MT 7356:<br />
• MT 7359:<br />
• MT 7479: B5A B5T AUM<br />
• MT 7637:<br />
• MT 8820:<br />
• MT 9961:<br />
• MT 6136, 7626, 7629, and 8338_SB<br />
102 <strong>ThinkCentre</strong> <strong>Hardware</strong> <strong>Maintenance</strong> <strong>Manual</strong><br />
45R8339 2<br />
43C1965 2<br />
46R8648 2
Item # FRUs FRU # CRU<br />
6<br />
6<br />
6<br />
Microprocessor, Q9550 Yorkfield 2.83GHz 1333FSB 12MB VT, TXT E-0<br />
• MT 6139:<br />
• MT 6175:<br />
• MT 7187:<br />
• MT 7345:<br />
• MT 7348:<br />
• MT 7356:<br />
• MT 7359:<br />
• MT 7479:<br />
• MT 7637:<br />
• MT 8820:<br />
• MT 9961:<br />
• MT 6136, 7626, 7629, and 8338_SB<br />
Microprocessor, Q8200 Yorkfield 2.33GHZ 1333FSB 4MB R-0<br />
• MT 6139:<br />
• MT 6175:<br />
• MT 7187:<br />
• MT 7345:<br />
• MT 7348:<br />
• MT 7356:<br />
• MT 7359:<br />
• MT 7479:<br />
• MT 7637:<br />
• MT 8820:<br />
• MT 9961:<br />
• MT 6136, 7626, 7629, and 8338_SB<br />
Microprocessor, E7500 Wolfdale 2.93GHZ/1066FSB 3M<br />
ViiV,EIST,EM64T,EDB R-0<br />
• MT 6139:<br />
• MT 6175:<br />
• MT 7187:<br />
• MT 7345:<br />
• MT 7348: A2G A3G A5G<br />
• MT 7356:<br />
• MT 7359: F6G FFM<br />
• MT 7479:<br />
• MT 7637: A2U A2F A2S A2P A2L A2D A2Y A2M A2A A2Q A2T A2C A2B<br />
A2H A2V A2K A2R A2E A2J A3Q<br />
• MT 8820: AJG AKG AnU AnF AnS AnP AnD AnY APG AQU AQF AQS<br />
ASG<br />
• MT 9961:<br />
• MT 6136, 7626, 7629, and 8338_SB<br />
46R8646 2<br />
53Y3946 2<br />
53Y6654 2<br />
Chapter 9. FRU lists 103
Item # FRUs FRU # CRU<br />
6<br />
6<br />
6<br />
Microprocessor, E7400 Wolfdale 2.8GHZ/1066FSB 3M<br />
ViiV,EIST,EM64T,EDB R-0<br />
• MT 6139:<br />
• MT 6175:<br />
• MT 7187:<br />
• MT 7345:<br />
• MT 7348:<br />
• MT 7356:<br />
• MT 7359:<br />
• MT 7479:<br />
• MT 7637:<br />
• MT 8820:<br />
• MT 9961:<br />
• MT 6136, 7626, 7629, and 8338_SB<br />
Microprocessor, E1500 Conroe 2.2GHZ/800FSB 512KB EIST,EM64T,EDB<br />
M-0<br />
• MT 6139:<br />
• MT 6175:<br />
• MT 7187:<br />
• MT 7345:<br />
• MT 7348:<br />
• MT 7356:<br />
• MT 7359:<br />
• MT 7479:<br />
• MT 7637:<br />
• MT 8820:<br />
• MT 9961:<br />
• MT 6136, 7626, 7629, and 8338_SB<br />
Microprocessor, E5400 Wolfdale 2.7GHz/800FSB 2MB EIST,EM64T,EDB<br />
R-0<br />
• MT 6139: A3G A4G<br />
• MT 6175:<br />
• MT 7187:<br />
• MT 7345:<br />
• MT 7348: A4G<br />
• MT 7356:<br />
• MT 7359:<br />
• MT 7479:<br />
• MT 7637:<br />
• MT 8820:<br />
• MT 9961:<br />
• MT 6136, 7626, 7629, and 8338_SB<br />
104 <strong>ThinkCentre</strong> <strong>Hardware</strong> <strong>Maintenance</strong> <strong>Manual</strong><br />
53Y6653 2<br />
53Y9051 2<br />
64Y1075 2
Item # FRUs FRU # CRU<br />
6<br />
6<br />
6<br />
Microprocessor, E5200 Wolfdale 2.5GHZ 800FSB 2M R-0 stepping level<br />
• MT 6139:<br />
• MT 6175:<br />
• MT 7187:<br />
• MT 7345:<br />
• MT 7348:<br />
• MT 7356:<br />
• MT 7359:<br />
• MT 7479:<br />
• MT 7637:<br />
• MT 8820:<br />
• MT 9961:<br />
• MT 6136, 7626, 7629, and 8338_SB<br />
Microprocessor, Intel Core 2 Duo E7600 3.06G/1066/3M/775 VT R0 65W<br />
QLUH<br />
• MT 6139:<br />
• MT 6175:<br />
• MT 7187:<br />
• MT 7345:<br />
• MT 7348:<br />
• MT 7356:<br />
• MT 7359: B9A B9T D6M D7M D7A D7T D8M D9M DDJ DFJ DGJ DHJ<br />
DJJ DKJ DNJ DPJ DQJ F8J F9J FAJ FCJ FGJ FHJ FKJ FLJ<br />
• MT 7479:<br />
• MT 7637:<br />
• MT 8820:<br />
• MT 9961:<br />
• MT 6136, 7626, 7629, and 8338_SB<br />
Microprocessor, Intel Core 2 Quad Q8400S 2.66/1333/4/775 VT R0 65W<br />
QLRY<br />
• MT 6139:<br />
• MT 6175:<br />
• MT 7187:<br />
• MT 7345:<br />
• MT 7348:<br />
• MT 7356:<br />
• MT 7359:<br />
• MT 7479:<br />
• MT 7637:<br />
• MT 8820:<br />
• MT 9961:<br />
• MT 6136, 7626, 7629, and 8338_SB<br />
46R9512 2<br />
71Y3486 2<br />
71Y3490 2<br />
Chapter 9. FRU lists 105
Item # FRUs FRU # CRU<br />
6<br />
6<br />
6<br />
Microprocessor, Intel Pentium Dual Core E6300 2.8G/1066/2M/775 VT R0<br />
65W QLPZ<br />
• MT 6139:<br />
• MT 6175:<br />
• MT 7187:<br />
• MT 7345:<br />
• MT 7348:<br />
• MT 7356:<br />
• MT 7359: D3M D4M D5M DUU DUF DVU DVF DWU DWF<br />
• MT 7479:<br />
• MT 7637:<br />
• MT 8820:<br />
• MT 9961:<br />
• MT 6136, 7626, 7629, and 8338_SB<br />
Microprocessor, E5300 Wolfdale 2.6GHz/800FSB 2MB EIST, EM64T, EDB<br />
R-0<br />
• MT 6139: A1G A2G<br />
• MT 6175:<br />
• MT 7187: A1G A2G<br />
• MT 7345: A1G A2G<br />
• MT 7348: A1G A2G<br />
• MT 7356: A1G A2G<br />
• MT 7359: A1G A2G<br />
• MT 7479: A1G A2G<br />
• MT 7637:<br />
• MT 8820: A1G A2G<br />
• MT 9961: A1G A2G<br />
• MT 6136, 7626, 7629, and 8338_SB<br />
Microprocessor, Inte Celeron Dual Core E3400 2.6GHZ /800 MHz/1MB<br />
R-0 65W VT<br />
• MT 6139:<br />
• MT 6175:<br />
• MT 7187:<br />
• MT 7345:<br />
• MT 7348:<br />
• MT 7356:<br />
• MT 7359:<br />
• MT 7479:<br />
• MT 7637:<br />
• MT 8820:<br />
• MT 9961:<br />
• MT 6136, 7626, 7629, and 8338_SB<br />
106 <strong>ThinkCentre</strong> <strong>Hardware</strong> <strong>Maintenance</strong> <strong>Manual</strong><br />
71Y3484 2<br />
53Y9049 2<br />
89Y0207 2
Item # FRUs FRU # CRU<br />
6<br />
6<br />
6<br />
Microprocessor, Inte Celeron Dual Core E3300 2.5GHZ /800 MHz/1MB<br />
R-0 65W VT<br />
• MT 6139:<br />
• MT 6175:<br />
• MT 7187:<br />
• MT 7345:<br />
• MT 7348:<br />
• MT 7356:<br />
• MT 7359:<br />
• MT 7479:<br />
• MT 7637:<br />
• MT 8820:<br />
• MT 9961:<br />
• MT 6136, 7626, 7629, and 8338_SB<br />
Microprocessor, Intel Celeron Dual Core E3200 2.4GHZ /800 MHz/1MB<br />
R-0 65W VT<br />
• MT 6139:<br />
• MT 6175:<br />
• MT 7187:<br />
• MT 7345:<br />
• MT 7348:<br />
• MT 7356:<br />
• MT 7359:<br />
• MT 7479:<br />
• MT 7637:<br />
• MT 8820:<br />
• MT 9961:<br />
• MT 6136, 7626, 7629, and 8338_SB<br />
Microprocessor, Intel Pentium Dual Core E6500 2.93GHZ /1066 MHz/2MB<br />
R-0 65W<br />
• MT 6139:<br />
• MT 6175:<br />
• MT 7187:<br />
• MT 7345:<br />
• MT 7348:<br />
• MT 7356:<br />
• MT 7359:<br />
• MT 7479:<br />
• MT 7637:<br />
• MT 8820:<br />
• MT 9961:<br />
• MT 6136, 7626, 7629, and 8338_SB<br />
71Y6252 2<br />
71Y6251 2<br />
71Y6250 2<br />
Chapter 9. FRU lists 107
Item # FRUs FRU # CRU<br />
6<br />
6<br />
6<br />
Microprocessor, Intel Pentium Dual Core E6600 3.06GHZ /1066 MHz/2MB<br />
R-0 65W<br />
• MT 6139:<br />
• MT 6175:<br />
• MT 7187:<br />
• MT 7345:<br />
• MT 7348:<br />
• MT 7356:<br />
• MT 7359:<br />
• MT 7479:<br />
• MT 7637:<br />
• MT 8820:<br />
• MT 9961:<br />
• MT 6136, 7626, 7629, and 8338_SB<br />
Microprocessor, Intel Pentium Dual Core E6700 3.20GHZ/1066MHZ/2M<br />
VT R0 65W<br />
• MT 6139:<br />
• MT 6175:<br />
• MT 7187:<br />
• MT 7345:<br />
• MT 7348:<br />
• MT 7356:<br />
• MT 7359: FBM FDM<br />
• MT 7479:<br />
• MT 7637:<br />
• MT 8820:<br />
• MT 9961:<br />
• MT 6136, 7626, 7629, and 8338_SB<br />
Microprocessor, E6800 Pentium Dual Core 3.3GHZ/1066MHZ/2M<br />
Wolfdale-2M R-0 stepping<br />
• MT 6139:<br />
• MT 6175:<br />
• MT 7187:<br />
• MT 7345:<br />
• MT 7348:<br />
• MT 7356:<br />
• MT 7359:<br />
• MT 7479:<br />
• MT 7637:<br />
• MT 8820:<br />
• MT 9961:<br />
• MT 6136, 7626, 7629, and 8338_SB<br />
108 <strong>ThinkCentre</strong> <strong>Hardware</strong> <strong>Maintenance</strong> <strong>Manual</strong><br />
89Y0198 2<br />
03T6009 2<br />
03T6006 2
Item # FRUs FRU # CRU<br />
6<br />
6<br />
8<br />
Microprocessor, E5700 Pentium Dual Core<br />
3.0GHz/800Mhz/2M,Wolfdale-2M R-0 stepping<br />
• MT 6139:<br />
• MT 6175:<br />
• MT 7187:<br />
• MT 7345:<br />
• MT 7348:<br />
• MT 7356:<br />
• MT 7359:<br />
• MT 7479:<br />
• MT 7637:<br />
• MT 8820:<br />
• MT 9961:<br />
• MT 6136, 7626, 7629, and 8338_SB<br />
Microprocessor, E3500 Celeron Dual Core 2.7GHZ/800MHZ/1M<br />
Wolfdale-1M R-0 stepping<br />
• MT 6139:<br />
• MT 6175:<br />
• MT 7187:<br />
• MT 7345:<br />
• MT 7348:<br />
• MT 7356:<br />
• MT 7359:<br />
• MT 7479:<br />
• MT 7637:<br />
• MT 8820:<br />
• MT 9961:<br />
• MT 6136, 7626, 7629, and 8338_SB<br />
Memory module, 1GB PC3-8500 1066MHz DDR3 SoDIMM<br />
• MT 6139:<br />
• MT 6175:<br />
• MT 7187:<br />
• MT 7345:<br />
• MT 7348:<br />
• MT 7356:<br />
• MT 7359: DNJ DPJ DQJ F1J F2J F3J F4J<br />
• MT 7479: B2J B3J B4J<br />
• MT 7637:<br />
• MT 8820:<br />
• MT 9961:<br />
• MT 6136, 7626, 7629, and 8338_SB<br />
03T6007 2<br />
03T6008 2<br />
46R3325 1<br />
Chapter 9. FRU lists 109
Item # FRUs FRU # CRU<br />
8<br />
8<br />
9<br />
Memory module, 2GB PC3-8500 1066MHz DDR3 SoDIMM<br />
• MT 6139: A1G A2G A3G A4G A5G A6G<br />
• MT 6175:<br />
• MT 7187: AKG<br />
• MT 7345: A6G<br />
• MT 7348: A1G A2G A3G A4G A5G<br />
• MT 7356: A2G<br />
• MT 7359: B9A B9T D3M D4M D5M D6M D7M D7A D7T D8M D9M DDJ<br />
DFJ DGJ DHJ DJJ DKJ DUU DUF DVU DVF DWU DWF F6G F7U F7F<br />
F7L F8J F9J FAJ FBM FCJ FDM FFM FGJ FHJ FKJ FLJ<br />
• MT 7479: B5A B5T AMM ANM APM AQM ARM ASM AUM AVJ AWJ B1J<br />
ALM B9U B9F BAJ BBJ BDM BEU BEF C1J C2J C3J<br />
• MT 7637: A2U A2F A2S A2P A2L A2D A2Y A2M A2A A2Q A2T A2C A2B<br />
A2H A2V A2K A2R A2E A2J A3Q<br />
• MT 8820: AJG AKG ALG AMG AnU AnF AnS AnP AnD AnY APG AQU<br />
AQF AQS ARS ARD ARY ASG<br />
• MT 9961: AkU AkF AkS AkP AkD AkY ALU ALF ALS AMG<br />
• MT 6136, 7626, 7629, and 8338_SB<br />
Memory module, 4GB PC3-10600 1333MHz DDR3 SODIMM<br />
• MT 6139:<br />
• MT 6175:<br />
• MT 7187:<br />
• MT 7345:<br />
• MT 7348:<br />
• MT 7356:<br />
• MT 7359:<br />
• MT 7479:<br />
• MT 7637:<br />
• MT 8820:<br />
• MT 9961:<br />
• MT 6136, 7626, 7629, and 8338_SB<br />
System board, 504AT - swallow GA Intel Q45 non-AMT sub from 46R1518<br />
• MT 6139: A1G A2G A3G A4G A5G A6G<br />
• MT 6175:<br />
• MT 7187: AKG<br />
• MT 7345: A6G<br />
• MT 7348: A1G A2G A3G A4G A5G<br />
• MT 7356: A2G<br />
• MT 7359: F6G<br />
• MT 7479: B5A B5T AMM ANM APM AQM ARM ASM AUM AVJ AWJ B1J<br />
B2J B3J B4J ALM B9U B9F BAJ BBJ BDM BEU BEF C1J C2J C3J<br />
• MT 7637: A2U A2F A2S A2P A2L A2D A2Y A2M A2A A2Q A2T A2C A2B<br />
A2H A2V A2K A2R A2E A2J A3Q<br />
• MT 8820: AJG AKG ALG AMG AnU AnF AnS AnP AnD AnY APG AQU<br />
AQF AQS ARS ARD ARY ASG<br />
110 <strong>ThinkCentre</strong> <strong>Hardware</strong> <strong>Maintenance</strong> <strong>Manual</strong><br />
46R3326 1<br />
89Y9225 1<br />
64Y3057 N
Item # FRUs FRU # CRU<br />
9<br />
9<br />
• MT 9961: AkU AkF AkS AkP AkD AkY ALU ALF ALS AMG<br />
• MT 6136, 7626, 7629, and 8338_SB<br />
System board, 504AT - swallow Intel Q45 non-AMT (updated V1.1)<br />
• MT 6139: A1G A2G A3G A4G A5G A6G<br />
• MT 6175:<br />
• MT 7187: AKG<br />
• MT 7345: A6G<br />
• MT 7348: A1G A2G A3G A4G A5G<br />
• MT 7356: A2G<br />
• MT 7359: F6G<br />
• MT 7479: B5A B5T AMM ANM APM AQM ARM ASM AUM AVJ AWJ B1J<br />
B2J B3J B4J ALM B9U B9F BAJ BBJ BDM BEU BEF C1J C2J C3J<br />
• MT 7637: A2U A2F A2S A2P A2L A2D A2Y A2M A2A A2Q A2T A2C A2B<br />
A2H A2V A2K A2R A2E A2J A3Q<br />
• MT 8820: AJG AKG ALG AMG AnU AnF AnS AnP AnD AnY APG AQU<br />
AQF AQS ARS ARD ARY ASG<br />
• MT 9961: AkU AkF AkS AkP AkD AkY ALU ALF ALS AMG<br />
• MT 6136, 7626, 7629, and 8338_SB<br />
System board, planar swallow Intel Q45 non-AMT (GIGA) GA Level (PCB<br />
1.1) support Win7<br />
• MT 6139: A1G A2G A3G A4G A5G A6G<br />
• MT 6175:<br />
• MT 7187: AKG<br />
• MT 7345: A6G<br />
• MT 7348: A1G A2G A3G A4G A5G<br />
• MT 7356: A2G<br />
• MT 7359: B9A B9T D3M D4M D5M D6M D7M D7A D7T D8M D9M DDJ<br />
DFJ DGJ DHJ DJJ DKJ DNJ DPJ DQJ DUU DUF DVU DVF DWU DWF<br />
F1J F2J F3J F4J F6G F7U F7F F7L F8J F9J FAJ FBM FCJ FDM FFM<br />
FGJ FHJ FKJ FLJ<br />
• MT 7479: B5A B5T AMM ANM APM AQM ARM ASM AUM AVJ AWJ B1J<br />
B2J B3J B4J ALM B9U B9F BAJ BBJ BDM BEU BEF C1J C2J C3J<br />
• MT 7637: A2U A2F A2S A2P A2L A2D A2Y A2M A2A A2Q A2T A2C A2B<br />
A2H A2V A2K A2R A2E A2J A3Q<br />
• MT 8820: AJG AKG ALG AMG AnU AnF AnS AnP AnD AnY APG AQU<br />
AQF AQS ARS ARD ARY ASG<br />
• MT 9961: AkU AkF AkS AkP AkD AkY ALU ALF ALS AMG<br />
• MT 6136, 7626, 7629, and 8338_SB<br />
64Y2679 N<br />
64Y9772 N<br />
Chapter 9. FRU lists 111
Item # FRUs FRU # CRU<br />
9<br />
9<br />
9<br />
10<br />
System board, Russian only system planar swallow Intel Q45(GIGA) TPM<br />
disable<br />
• MT 6139:<br />
• MT 6175:<br />
• MT 7187:<br />
• MT 7345:<br />
• MT 7348: 91G<br />
• MT 7356:<br />
• MT 7479:<br />
• MT 7637:<br />
• MT 8820:<br />
• MT 9961:<br />
• MT 6136, 7626, 7629, and 8338_SB<br />
System board, system planar swallow Intel Q45(GIGA) TPM disable<br />
(PCB1.1) support Win7<br />
• MT 6139:<br />
• MT 6175:<br />
• MT 7187:<br />
• MT 7345:<br />
• MT 7348: A5G<br />
• MT 7356:<br />
• MT 7479:<br />
• MT 7637: A2U A2F A2S A2P A2L A2D A2Y A2M A2A A2Q A2T A2C A2B<br />
A2H A2V A2K A2R A2E A2J A3Q<br />
• MT 8820: ARS ARD ARY ASG<br />
• MT 9961:<br />
• MT 6136, 7626, 7629, and 8338_SB<br />
System board, system planar swallow Intel Q45 (GIGA) GA Level (PCB<br />
1.1) EUP<br />
• MT 6139: A1G A2G A3G A4G A5G A6G<br />
• MT 6175:<br />
• MT 7187: AKG<br />
• MT 7345: A6G<br />
• MT 7348: A1G A2G A3G A4G A5G<br />
• MT 7356: A2G<br />
• MT 7479: B5A B5T AMM ANM APM AQM ARM ASM AUM AVJ AWJ B1J<br />
B2J B3J B4J ALM B9U B9F BAJ BBJ BDM BEU BEF C1J C2J C3J<br />
• MT 7637: A2U A2F A2S A2P A2L A2D A2Y A2M A2A A2Q A2T A2C A2B<br />
A2H A2V A2K A2R A2E A2J A3Q<br />
• MT 8820: ARS ARD ARY ASG<br />
• MT 9961: AkU AkF AkS AkP AkD AkY ALU ALF ALS AMG<br />
• MT 6136, 7626, 7629, and 8338_SB<br />
FRU, C2 switch<br />
• MT 6139: all models<br />
112 <strong>ThinkCentre</strong> <strong>Hardware</strong> <strong>Maintenance</strong> <strong>Manual</strong><br />
64Y5548 N<br />
64Y9778 N<br />
71Y6986 N<br />
43N9579 2
Item # FRUs FRU # CRU<br />
• MT 6175:<br />
• MT 7187: all models<br />
• MT 7345: all models<br />
• MT 7348: all models<br />
• MT 7356: all models<br />
• MT 7359: all models<br />
• MT 7479: all models<br />
• MT 7637: all models<br />
• MT 8820: all models<br />
• MT 9961: all models<br />
• MT 6136, 7626, 7629, and 8338_SB<br />
Mechanical FRUs<br />
The FRUs listed in the following tables are not illustrated.<br />
FRU, mechanical kit<br />
• MT 6139: all models<br />
• MT 6175:<br />
• MT 7187: all models<br />
• MT 7345: all models<br />
• MT 7348: all models<br />
• MT 7356: all models<br />
• MT 7359: all models<br />
• MT 7479: all models<br />
• MT 7637: all models<br />
• MT 8820: all models<br />
• MT 9961: all models<br />
• MT 6136, 7626, 7629, and 8338_SB<br />
FRU, vertical stand<br />
• MT 6139: all models<br />
• MT 6175:<br />
• MT 7187: all models<br />
• MT 7345: all models<br />
• MT 7348: all models<br />
• MT 7356: all models<br />
• MT 7359: all models<br />
• MT 7479: all models<br />
• MT 7637: all models<br />
• MT 8820: all models<br />
• MT 9961: all models<br />
• MT 6136, 7626, 7629, and 8338_SB<br />
FRUs FRU # CRU<br />
43N9569 2<br />
43N9578 1<br />
Chapter 9. FRU lists 113
FRU, ODD bezel kit<br />
• MT 6139: all models<br />
• MT 6175:<br />
• MT 7187: all models<br />
• MT 7345: all models<br />
• MT 7348: all models<br />
• MT 7356: all models<br />
• MT 7359: all models<br />
• MT 7479: all models<br />
• MT 7637: all models<br />
• MT 8820: all models<br />
• MT 9961: all models<br />
• MT 6136, 7626, 7629, and 8338_SB<br />
FRU, non-ODD bezel kit<br />
• MT 6139: all models<br />
• MT 6175:<br />
• MT 7187: all models<br />
• MT 7345: all models<br />
• MT 7348: all models<br />
• MT 7356: all models<br />
• MT 7359: all models<br />
• MT 7479: all models<br />
• MT 7637: all models<br />
• MT 8820: all models<br />
• MT 9961: all models<br />
• MT 6136, 7626, 7629, and 8338_SB<br />
FRU, card reader bezel kit<br />
• MT 6139: all models<br />
• MT 6175:<br />
• MT 7187: all models<br />
• MT 7345: all models<br />
• MT 7348: all models<br />
• MT 7356: all models<br />
• MT 7359: all models<br />
• MT 7479: all models<br />
• MT 7637: all models<br />
• MT 8820: all models<br />
• MT 9961: all models<br />
• MT 6136, 7626, 7629, and 8338_SB<br />
114 <strong>ThinkCentre</strong> <strong>Hardware</strong> <strong>Maintenance</strong> <strong>Manual</strong><br />
FRUs FRU # CRU<br />
43N9580 1<br />
43N9581 1<br />
43N9582 1
FRU, non card reader bezel kit<br />
• MT 6139: all models<br />
• MT 6175:<br />
• MT 7187: all models<br />
• MT 7345: all models<br />
• MT 7348: all models<br />
• MT 7356: all models<br />
• MT 7359: all models<br />
• MT 7479: all models<br />
• MT 7637: all models<br />
• MT 8820: all models<br />
• MT 9961: all models<br />
• MT 6136, 7626, 7629, and 8338_SB<br />
FRU, Power cable for HDD.&.ODD<br />
• MT 6139: all models<br />
• MT 6175:<br />
• MT 7187: all models<br />
• MT 7345: all models<br />
• MT 7348: all models<br />
• MT 7356: all models<br />
• MT 7359: all models<br />
• MT 7479: all models<br />
• MT 7637: all models<br />
• MT 8820: all models<br />
• MT 9961: all models<br />
• MT 6136, 7626, 7629, and 8338_SB<br />
FRU, Power cable for ODD&HDD_R_150MM+150mm<br />
• MT 6139: all models<br />
• MT 6175:<br />
• MT 7187: all models<br />
• MT 7345: all models<br />
• MT 7348: all models<br />
• MT 7356: all models<br />
• MT 7359: all models<br />
• MT 7479: all models<br />
• MT 7637: all models<br />
• MT 8820: all models<br />
• MT 9961: all models<br />
• MT 6136, 7626, 7629, and 8338_SB<br />
FRUs FRU # CRU<br />
43N9583 1<br />
43N9136 2<br />
45J9583 2<br />
Chapter 9. FRU lists 115
FRU, SATA cable - HDD 500mm<br />
• MT 6139: all models<br />
• MT 6175:<br />
• MT 7187: all models<br />
• MT 7345: all models<br />
• MT 7348: all models<br />
• MT 7356: all models<br />
• MT 7359: all models<br />
• MT 7479: all models<br />
• MT 7637: all models<br />
• MT 8820: all models<br />
• MT 9961: all models<br />
• MT 6136, 7626, 7629, and 8338_SB<br />
FRU, Internal speaker<br />
• MT 6139: all models<br />
• MT 6175:<br />
• MT 7187: all models<br />
• MT 7345: all models<br />
• MT 7348: all models<br />
• MT 7356: all models<br />
• MT 7359: all models<br />
• MT 7479: all models<br />
• MT 7637: all models<br />
• MT 8820: all models<br />
• MT 9961: all models<br />
• MT 6136, 7626, 7629, and 8338_SB<br />
FRU, Front I/O cable_R(4.5L_PCBA_A400_U400)+LED/switch<br />
• MT 6139: all models<br />
• MT 6175:<br />
• MT 7187: all models<br />
• MT 7345: all models<br />
• MT 7348: all models<br />
• MT 7356: all models<br />
• MT 7359: all models<br />
• MT 7479: all models<br />
• MT 7637: all models<br />
• MT 8820: all models<br />
• MT 9961: all models<br />
• MT 6136, 7626, 7629, and 8338_SB<br />
116 <strong>ThinkCentre</strong> <strong>Hardware</strong> <strong>Maintenance</strong> <strong>Manual</strong><br />
FRUs FRU # CRU<br />
43N9131 2<br />
43N9092 1<br />
43N9078 2
FRU, Serial port cable<br />
• MT 6139: all models<br />
• MT 6175:<br />
• MT 7187: all models<br />
• MT 7345: all models<br />
• MT 7348: all models<br />
• MT 7356: all models<br />
• MT 7359: all models<br />
• MT 7479: all models<br />
• MT 7637: all models<br />
• MT 8820: all models<br />
• MT 9961: all models<br />
• MT 6136, 7626, 7629, and 8338_SB<br />
FRU, USB cable<br />
• MT 6139: all models<br />
• MT 6175:<br />
• MT 7187: all models<br />
• MT 7345: all models<br />
• MT 7348: all models<br />
• MT 7356: all models<br />
• MT 7359: all models<br />
• MT 7479: all models<br />
• MT 7637: all models<br />
• MT 8820: all models<br />
• MT 9961: all models<br />
• MT 6136, 7626, 7629, and 8338_SB<br />
FRU, E-SATA cable<br />
• MT 6139: all models<br />
• MT 6175:<br />
• MT 7187: all models<br />
• MT 7345: all models<br />
• MT 7348: all models<br />
• MT 7356: all models<br />
• MT 7359: all models<br />
• MT 7479: all models<br />
• MT 7637: all models<br />
• MT 8820: all models<br />
• MT 9961: all models<br />
• MT 6136, 7626, 7629, and 8338_SB<br />
FRUs FRU # CRU<br />
41R6198 2<br />
42Y8006 2<br />
43N9143 2<br />
Chapter 9. FRU lists 117
FRU, PS2 cable (150mm)<br />
• MT 6139: all models<br />
• MT 6175:<br />
• MT 7187: all models<br />
• MT 7345: all models<br />
• MT 7348: all models<br />
• MT 7356: all models<br />
• MT 7359: all models<br />
• MT 7479: all models<br />
• MT 7637: all models<br />
• MT 8820: all models<br />
• MT 9961: all models<br />
• MT 6136, 7626, 7629, and 8338_SB<br />
FRU, SATA cable - optical 370mm<br />
• MT 6139: all models<br />
• MT 6175:<br />
• MT 7187: all models<br />
• MT 7345: all models<br />
• MT 7348: all models<br />
• MT 7356: all models<br />
• MT 7359: all models<br />
• MT 7479: all models<br />
• MT 7637: all models<br />
• MT 8820: all models<br />
• MT 9961: all models<br />
• MT 6136, 7626, 7629, and 8338_SB<br />
FRU, parallel to parallel dongle cable_210mm_R<br />
• MT 6139: all models<br />
• MT 6175:<br />
• MT 7187: all models<br />
• MT 7345: all models<br />
• MT 7348: all models<br />
• MT 7356: all models<br />
• MT 7359: all models<br />
• MT 7479: all models<br />
• MT 7637: all models<br />
• MT 8820: all models<br />
• MT 9961: all models<br />
• MT 6136, 7626, 7629, and 8338_SB<br />
118 <strong>ThinkCentre</strong> <strong>Hardware</strong> <strong>Maintenance</strong> <strong>Manual</strong><br />
FRUs FRU # CRU<br />
43N9149 2<br />
43N9134 2<br />
45J9520 2
FRU, access cover assembly<br />
• MT 6139: all models<br />
• MT 6175:<br />
• MT 7187: all models<br />
• MT 7345: all models<br />
• MT 7348: all models<br />
• MT 7356: all models<br />
• MT 7359: all models<br />
• MT 7479: all models<br />
• MT 7637: all models<br />
• MT 8820: all models<br />
• MT 9961: all models<br />
• MT 6136, 7626, 7629, and 8338_SB<br />
FRU, base cover assembly<br />
• MT 6139: all models<br />
• MT 6175:<br />
• MT 7187: all models<br />
• MT 7345: all models<br />
• MT 7348: all models<br />
• MT 7356: all models<br />
• MT 7359: all models<br />
• MT 7479: all models<br />
• MT 7637: all models<br />
• MT 8820: all models<br />
• MT 9961: all models<br />
• MT 6136, 7626, 7629, and 8338_SB<br />
FRU, front bezel assembly<br />
• MT 6139: all models<br />
• MT 6175:<br />
• MT 7187: all models<br />
• MT 7345: all models<br />
• MT 7348: all models<br />
• MT 7356: all models<br />
• MT 7359: all models<br />
• MT 7479: all models<br />
• MT 7637: all models<br />
• MT 8820: all models<br />
• MT 9961: all models<br />
• MT 6136, 7626, 7629, and 8338_SB<br />
FRUs FRU # CRU<br />
43N9656 2<br />
43N9657 2<br />
43N9658 2<br />
Chapter 9. FRU lists 119
FRU, HDD tray assembly<br />
• MT 6139: all models<br />
• MT 6175:<br />
• MT 7187: all models<br />
• MT 7345: all models<br />
• MT 7348: all models<br />
• MT 7356: all models<br />
• MT 7359: all models<br />
• MT 7479: all models<br />
• MT 7637: all models<br />
• MT 8820: all models<br />
• MT 9961: all models<br />
• MT 6136, 7626, 7629, and 8338_SB<br />
FRU, I/O shielding assembly<br />
• MT 6139: all models<br />
• MT 6175:<br />
• MT 7187: all models<br />
• MT 7345: all models<br />
• MT 7348: all models<br />
• MT 7356: all models<br />
• MT 7359: all models<br />
• MT 7479: all models<br />
• MT 7637: all models<br />
• MT 8820: all models<br />
• MT 9961: all models<br />
• MT 6136, 7626, 7629, and 8338_SB<br />
FRU, MB tray assembly<br />
• MT 6139: all models<br />
• MT 6175:<br />
• MT 7187: all models<br />
• MT 7345: all models<br />
• MT 7348: all models<br />
• MT 7356: all models<br />
• MT 7359: all models<br />
• MT 7479: all models<br />
• MT 7637: all models<br />
• MT 8820: all models<br />
• MT 9961: all models<br />
• MT 6136, 7626, 7629, and 8338_SB<br />
120 <strong>ThinkCentre</strong> <strong>Hardware</strong> <strong>Maintenance</strong> <strong>Manual</strong><br />
FRUs FRU # CRU<br />
43N9659 2<br />
43N9660 2<br />
43N9661 2
FRU, universal adapter bracket 5.25 to 3.5 W/bezel<br />
• MT 6139: all models<br />
• MT 6175:<br />
• MT 7187: all models<br />
• MT 7345: all models<br />
• MT 7348: all models<br />
• MT 7356: all models<br />
• MT 7359: all models<br />
• MT 7479: all models<br />
• MT 7637: all models<br />
• MT 8820: all models<br />
• MT 9961: all models<br />
• MT 6136, 7626, 7629, and 8338_SB<br />
FRU, vertical stand<br />
• MT 6139: all models<br />
• MT 6175:<br />
• MT 7187: all models<br />
• MT 7345: all models<br />
• MT 7348: all models<br />
• MT 7356: all models<br />
• MT 7359: all models<br />
• MT 7479: all models<br />
• MT 7637: all models<br />
• MT 8820: all models<br />
• MT 9961: all models<br />
• MT 6136, 7626, 7629, and 8338_SB<br />
FRU, Deco-bezel for universal adapter, 607BT<br />
• MT 6139: all models<br />
• MT 6175:<br />
• MT 7187: all models<br />
• MT 7345: all models<br />
• MT 7348: all models<br />
• MT 7356: all models<br />
• MT 7359: all models<br />
• MT 7479: all models<br />
• MT 7637: all models<br />
• MT 8820: all models<br />
• MT 9961: all models<br />
• MT 6136, 7626, 7629, and 8338_SB<br />
FRUs FRU # CRU<br />
43N9679 2<br />
43N9828 N<br />
43N9584 N<br />
Chapter 9. FRU lists 121
FRU, 1.8 to 2.5 universal HDD bracket<br />
• MT 6139: all models<br />
• MT 6175:<br />
• MT 7187: all models<br />
• MT 7345: all models<br />
• MT 7348: all models<br />
• MT 7356: all models<br />
• MT 7359: all models<br />
• MT 7479: all models<br />
• MT 7637: all models<br />
• MT 8820: all models<br />
• MT 9961: all models<br />
• MT 6136, 7626, 7629, and 8338_SB<br />
FRU, PCI parallel card<br />
• MT 6139: all models<br />
• MT 6175:<br />
• MT 7187: all models<br />
• MT 7345: all models<br />
• MT 7348: all models<br />
• MT 7356: all models<br />
• MT 7359: all models<br />
• MT 7479: all models<br />
• MT 7637: all models<br />
• MT 8820: all models<br />
• MT 9961: all models<br />
• MT 6136, 7626, 7629, and 8338_SB<br />
FRU, thermal sense cable<br />
• MT 6139: all models<br />
• MT 6175: all models<br />
• MT 7187: all models<br />
• MT 7345: all models<br />
• MT 7348: all models<br />
• MT 7356: all models<br />
• MT 7359: all models<br />
• MT 7479: all models<br />
• MT 7637: all models<br />
• MT 8820: all models<br />
• MT 9961: all models<br />
• MT 6136, 7626, 7629, and 8338_SB<br />
122 <strong>ThinkCentre</strong> <strong>Hardware</strong> <strong>Maintenance</strong> <strong>Manual</strong><br />
FRUs FRU # CRU<br />
43N9593 N<br />
46R1519 N<br />
54Y8273 2
Keyboard and Mouse<br />
US English<br />
Keyboard (<strong>Lenovo</strong> Preferred Pro USB -- without hub) FRU # CRU<br />
• MT 6139: A1G A2G A3G A4G A5G A6G<br />
• MT 6175:<br />
• MT 7187: AKG<br />
• MT 7345: A6G<br />
• MT 7348: A1G A2G A3G A4G A5G<br />
• MT 7356: A2G<br />
• MT 7359: B9A D3M D4M D5M D6M D7M D7A D8M D9M DUU DVU DWU F6G<br />
F7U F7L FBM FDM FFM<br />
• MT 7479: B5A AMM ANM APM AQM ARM ASM AUM ALM F9U BDM BEU<br />
• MT 7637: A2U A2L A2G A2M A2A A2Q A2H A2R A2E A3Q<br />
• MT 8820: AJG AKG ALG AMG APG AQU<br />
• MT 9961: AkU ALU AMG<br />
• MT 6136, 7626, 7629, and 8338_SB<br />
Arabic<br />
• MT 6139: A1G A2G A3G A4G A5G A6G<br />
• MT 6175:<br />
• MT 7187: AKG<br />
• MT 7345: A6G<br />
• MT 7348: A1G A2G A3G A4G A5G<br />
• MT 7356: A2G<br />
• MT 7359: F6G<br />
• MT 7479:<br />
• MT 7637: A2G<br />
• MT 8820: AJG AKG ALG AMG APG ASG<br />
• MT 9961: AMG<br />
• MT 6136, 7626, 7629, and 8338_SB<br />
A/F<br />
• MT 6139: A1G A2G A3G A4G A5G A6G<br />
• MT 6175:<br />
• MT 7187: AKG<br />
• MT 7345: A6G<br />
• MT 7348: A1G A2G A3G A4G A5G<br />
• MT 7356: A2G<br />
• MT 7359:<br />
• MT 7479:<br />
• MT 7637:<br />
• MT 8820: AJG AKG ALG AMG APG<br />
• MT 9961:<br />
• MT 6136, 7626, 7629, and 8338_SB<br />
41A5289 1<br />
41A5290 1<br />
41A5291 1<br />
Chapter 9. FRU lists 123
B/F<br />
• MT 6139:<br />
• MT 6175:<br />
• MT 7187:<br />
• MT 7345:<br />
Keyboard (<strong>Lenovo</strong> Preferred Pro USB -- without hub) FRU # CRU<br />
• MT 7348: A1G A2G A3G A4G A5G<br />
• MT 7356: A2G<br />
• MT 7359:<br />
• MT 7479:<br />
• MT 7637: A2G<br />
• MT 8820: ASG<br />
• MT 9961:<br />
• MT 6136, 7626, 7629, and 8338_SB<br />
Belgium English<br />
• MT 6139: A1G A2G A3G A4G A5G A6G<br />
• MT 6175:<br />
• MT 7187: AKG<br />
• MT 7345: A6G<br />
• MT 7348: A1G A2G A3G A4G A5G<br />
• MT 7356: A2G<br />
• MT 7359: F6G<br />
• MT 7479:<br />
• MT 7637: A2G<br />
• MT 8820: AJG AKG ALG AMG APG ASG<br />
• MT 9961: AMG<br />
• MT 6136, 7626, 7629, and 8338_SB<br />
Brazilian Portuguese<br />
• MT 6139:<br />
• MT 6175:<br />
• MT 7187:<br />
• MT 7345:<br />
• MT 7348:<br />
• MT 7356:<br />
• MT 7359:<br />
• MT 7479:<br />
• MT 7637: A2P<br />
• MT 8820: AnP<br />
• MT 9961: AkP<br />
• MT 6136, 7626, 7629, and 8338_SB<br />
124 <strong>ThinkCentre</strong> <strong>Hardware</strong> <strong>Maintenance</strong> <strong>Manual</strong><br />
41A5292 1<br />
41A5293 1<br />
41A5294 1
Bulgarian<br />
Keyboard (<strong>Lenovo</strong> Preferred Pro USB -- without hub) FRU # CRU<br />
• MT 6139: A1G A2G A3G A4G A5G A6G<br />
• MT 6175:<br />
• MT 7187: AKG<br />
• MT 7345: A6G<br />
• MT 7348: A1G A2G A3G A4G A5G<br />
• MT 7356: A2G<br />
• MT 7359: F6G<br />
• MT 7479:<br />
• MT 7637: A2G<br />
• MT 8820: AJG AKG ALG AMG APG ASG<br />
• MT 9961: AMG<br />
• MT 6136, 7626, 7629, and 8338_SB<br />
Chinese/US<br />
• MT 6139:<br />
• MT 6175:<br />
• MT 7187:<br />
• MT 7345:<br />
• MT 7348:<br />
• MT 7356:<br />
• MT 7359:<br />
• MT 7479:<br />
• MT 7637: A2B A2V<br />
• MT 8820: ASG<br />
• MT 9961:<br />
• MT 6136, 7626, 7629, and 8338_SB<br />
Czech (ABB)<br />
• MT 6139: A1G A2G A3G A4G A5G A6G<br />
• MT 6175:<br />
• MT 7187: AKG<br />
• MT 7345: A6G<br />
• MT 7348: A1G A2G A3G A4G A5G<br />
• MT 7356: A2G<br />
• MT 7359:<br />
• MT 7479:<br />
• MT 7637: A2G<br />
• MT 8820: AJG AKG ALG AMG APG ASG<br />
• MT 9961: AMG<br />
• MT 6136, 7626, 7629, and 8338_SB<br />
41A5295 1<br />
41A5296 1<br />
41A5297 1<br />
Chapter 9. FRU lists 125
Danish<br />
Keyboard (<strong>Lenovo</strong> Preferred Pro USB -- without hub) FRU # CRU<br />
• MT 6139: A1G A2G A3G A4G A5G A6G<br />
• MT 6175:<br />
• MT 7187: AKG<br />
• MT 7345: A6G<br />
• MT 7348: A1G A2G A3G A4G A5G<br />
• MT 7356: A2G<br />
• MT 7359: F6G<br />
• MT 7479:<br />
• MT 7637: A2G<br />
• MT 8820: AJG AKG ALG AMG APG ASG<br />
• MT 9961: AMG<br />
• MT 6136, 7626, 7629, and 8338_SB<br />
Dutch<br />
• MT 6139: A1G A2G A3G A4G A5G A6G<br />
• MT 6175:<br />
• MT 7187: AKG<br />
• MT 7345: A6G<br />
• MT 7348: A1G A2G A3G A4G A5G<br />
• MT 7356: A2G<br />
• MT 7359: F6G<br />
• MT 7479:<br />
• MT 7637: A2G<br />
• MT 8820: AJG AKG ALG AMG APG ASG<br />
• MT 9961: AMG<br />
• MT 6136, 7626, 7629, and 8338_SB<br />
French<br />
• MT 6139: A1G A2G A3G A4G A5G A6G<br />
• MT 6175:<br />
• MT 7187: AKG<br />
• MT 7345: A6G<br />
• MT 7348: A1G A2G A3G A4G A5G<br />
• MT 7356: A2G<br />
• MT 7359: F6G<br />
• MT 7479:<br />
• MT 7637: A2G<br />
• MT 8820: AJG AKG ALG AMG APG ASG<br />
• MT 9961: AMG<br />
• MT 6136, 7626, 7629, and 8338_SB<br />
126 <strong>ThinkCentre</strong> <strong>Hardware</strong> <strong>Maintenance</strong> <strong>Manual</strong><br />
41A5298 1<br />
41A5299 1<br />
41A5300 1
French Canadian<br />
Keyboard (<strong>Lenovo</strong> Preferred Pro USB -- without hub) FRU # CRU<br />
• MT 6139: A1G A2G A3G A4G A5G A6G<br />
• MT 6175:<br />
• MT 7187: AKG<br />
• MT 7345: A6G<br />
• MT 7348: A1G A2G A3G A4G A5G<br />
• MT 7356: A2G<br />
• MT 7359: DUF DVF DWF F7F<br />
• MT 7479: B9F BEF<br />
• MT 7637: A2F<br />
• MT 8820: AJG AKG ALG AMG APG AQF<br />
• MT 9961: AkF ALF<br />
• MT 6136, 7626, 7629, and 8338_SB<br />
French Canadian<br />
• MT 6139: A1G A2G A3G A4G A5G A6G<br />
• MT 6175:<br />
• MT 7187: AKG<br />
• MT 7345: A6G<br />
• MT 7348: A1G A2G A3G A4G A5G<br />
• MT 7356: A2G<br />
• MT 7359: DUF DVF DWF F7F<br />
• MT 7479: B9F BEF<br />
• MT 7637: A2F<br />
• MT 8820: AJG AKG ALG AMG APG<br />
• MT 9961: AkF ALF<br />
• MT 6136, 7626, 7629, and 8338_SB<br />
German<br />
• MT 6139: A1G A2G A3G A4G A5G A6G<br />
• MT 6175:<br />
• MT 7187: AKG<br />
• MT 7345: A6G<br />
• MT 7348: A1G A2G A3G A4G A5G<br />
• MT 7356: A2G<br />
• MT 7359: F6G<br />
• MT 7479:<br />
• MT 7637: A2G<br />
• MT 8820: AJG AKG ALG AMG APG ASG<br />
• MT 9961: AMG<br />
• MT 6136, 7626, 7629, and 8338_SB<br />
41A5301 1<br />
41A5302 1<br />
41A5303 1<br />
Chapter 9. FRU lists 127
Greek<br />
Keyboard (<strong>Lenovo</strong> Preferred Pro USB -- without hub) FRU # CRU<br />
• MT 6139: A1G A2G A3G A4G A5G A6G<br />
• MT 6175:<br />
• MT 7187: AKG<br />
• MT 7345: A6G<br />
• MT 7348: A1G A2G A3G A4G A5G<br />
• MT 7356: A2G<br />
• MT 7359: F6G<br />
• MT 7479:<br />
• MT 7637: A2G<br />
• MT 8820: AJG AKG ALG AMG APG ASG<br />
• MT 9961: AMG<br />
• MT 6136, 7626, 7629, and 8338_SB<br />
Greek/US<br />
• MT 6139: A1G A2G A3G A4G A5G A6G<br />
• MT 6175:<br />
• MT 7187: AKG<br />
• MT 7345: A6G<br />
• MT 7348: A1G A2G A3G A4G A5G<br />
• MT 7356: A2G<br />
• MT 7359: F6G<br />
• MT 7479:<br />
• MT 7637: A2G<br />
• MT 8820: AJG AKG ALG AMG APG ASG<br />
• MT 9961: AMG<br />
• MT 6136, 7626, 7629, and 8338_SB<br />
Hebrew<br />
• MT 6139: A1G A2G A3G A4G A5G A6G<br />
• MT 6175:<br />
• MT 7187: AKG<br />
• MT 7345: A6G<br />
• MT 7348: A1G A2G A3G A4G A5G<br />
• MT 7356: A2G<br />
• MT 7359: F6G<br />
• MT 7479:<br />
• MT 7637: A2G<br />
• MT 8820: AJG AKG ALG AMG APG ASG<br />
• MT 9961: AMG<br />
• MT 6136, 7626, 7629, and 8338_SB<br />
128 <strong>ThinkCentre</strong> <strong>Hardware</strong> <strong>Maintenance</strong> <strong>Manual</strong><br />
41A5304 1<br />
41A5305 1<br />
41A5306 1
Hungarian<br />
Keyboard (<strong>Lenovo</strong> Preferred Pro USB -- without hub) FRU # CRU<br />
• MT 6139: A1G A2G A3G A4G A5G A6G<br />
• MT 6175:<br />
• MT 7187: AKG<br />
• MT 7345: A6G<br />
• MT 7348: A1G A2G A3G A4G A5G<br />
• MT 7356: A2G<br />
• MT 7359: F6G<br />
• MT 7479:<br />
• MT 7637: A2G<br />
• MT 8820: AJG AKG ALG AMG APG ASG<br />
• MT 9961: AMG<br />
• MT 6136, 7626, 7629, and 8338_SB<br />
Iceland<br />
• MT 6139: A1G A2G A3G A4G A5G A6G<br />
• MT 6175:<br />
• MT 7187: AKG<br />
• MT 7345: A6G<br />
• MT 7348: A1G A2G A3G A4G A5G<br />
• MT 7356: A2G<br />
• MT 7359: F6G<br />
• MT 7479:<br />
• MT 7637: A2G<br />
• MT 8820: AJG AKG ALG AMG APG ASG<br />
• MT 9961: AMG<br />
• MT 6136, 7626, 7629, and 8338_SB<br />
Italy<br />
• MT 6139: A1G A2G A3G A4G A5G A6G<br />
• MT 6175:<br />
• MT 7187: AKG<br />
• MT 7345: A6G<br />
• MT 7348: A1G A2G A3G A4G A5G<br />
• MT 7356: A2G<br />
• MT 7359: F6G<br />
• MT 7479:<br />
• MT 7637: A2G<br />
• MT 8820: AJG AKG ALG AMG APG ASG<br />
• MT 9961: AMG<br />
• MT 6136, 7626, 7629, and 8338_SB<br />
41A5307 1<br />
41A5308 1<br />
41A5309 1<br />
Chapter 9. FRU lists 129
Japanese<br />
• MT 6139:<br />
• MT 6175:<br />
• MT 7187:<br />
• MT 7345:<br />
• MT 7348:<br />
• MT 7356:<br />
Keyboard (<strong>Lenovo</strong> Preferred Pro USB -- without hub) FRU # CRU<br />
• MT 7359: DNJ DPJ DQJ F1J F2J F3J F4J F8J F9J FAJ FGJ FHJ FKJ FLJ<br />
• MT 7479: B2J B3J B4J BAJ BBJ C1J C2J C3J<br />
• MT 7637: A2J<br />
• MT 8820:<br />
• MT 9961:<br />
• MT 6136, 7626, 7629, and 8338_SB<br />
Korean<br />
• MT 6139:<br />
• MT 6175:<br />
• MT 7187:<br />
• MT 7345:<br />
• MT 7348:<br />
• MT 7356:<br />
• MT 7359:<br />
• MT 7479:<br />
• MT 7637: A2K<br />
• MT 8820:<br />
• MT 9961:<br />
• MT 6136, 7626, 7629, and 8338_SB<br />
LA Spanish<br />
• MT 6139:<br />
• MT 6175:<br />
• MT 7187:<br />
• MT 7345:<br />
• MT 7348:<br />
• MT 7356:<br />
• MT 7359:<br />
• MT 7479:<br />
• MT 7637: A2S A2D A2Y<br />
• MT 8820: AnS AnD AnY AQS ARS ARD ARY<br />
• MT 9961: AkS AkD AkY ALS<br />
• MT 6136, 7626, 7629, and 8338_SB<br />
130 <strong>ThinkCentre</strong> <strong>Hardware</strong> <strong>Maintenance</strong> <strong>Manual</strong><br />
41A5310 1<br />
41A5311 1<br />
41A5312 1
Norwegian<br />
Keyboard (<strong>Lenovo</strong> Preferred Pro USB -- without hub) FRU # CRU<br />
• MT 6139: A1G A2G A3G A4G A5G A6G<br />
• MT 6175:<br />
• MT 7187: AKG<br />
• MT 7345: A6G<br />
• MT 7348: A1G A2G A3G A4G A5G<br />
• MT 7356: A2G<br />
• MT 7359: F6G<br />
• MT 7479:<br />
• MT 7637: A2G<br />
• MT 8820: AJG AKG ALG AMG APG ASG<br />
• MT 9961: AMG<br />
• MT 6136, 7626, 7629, and 8338_SB<br />
Polish<br />
• MT 6139: A1G A2G A3G A4G A5G A6G<br />
• MT 6175:<br />
• MT 7187: AKG<br />
• MT 7345: A6G<br />
• MT 7348: A1G A2G A3G A4G A5G<br />
• MT 7356: A2G<br />
• MT 7359: F6G<br />
• MT 7479:<br />
• MT 7637: A2G<br />
• MT 8820: AJG AKG ALG AMG APG ASG<br />
• MT 9961: AMG<br />
• MT 6136, 7626, 7629, and 8338_SB<br />
Portuguese<br />
• MT 6139: A1G A2G A3G A4G A5G A6G<br />
• MT 6175:<br />
• MT 7187: AKG<br />
• MT 7345: A6G<br />
• MT 7348: A1G A2G A3G A4G A5G<br />
• MT 7356: A2G<br />
• MT 7359: F6G<br />
• MT 7479:<br />
• MT 7637: A2G<br />
• MT 8820: AJG AKG ALG AMG APG ASG<br />
• MT 9961: AMG<br />
• MT 6136, 7626, 7629, and 8338_SB<br />
41A5313 1<br />
41A5314 1<br />
41A5315 1<br />
Chapter 9. FRU lists 131
Romanian<br />
Keyboard (<strong>Lenovo</strong> Preferred Pro USB -- without hub) FRU # CRU<br />
• MT 6139: A1G A2G A3G A4G A5G A6G<br />
• MT 6175:<br />
• MT 7187: AKG<br />
• MT 7345: A6G<br />
• MT 7348: A1G A2G A3G A4G A5G<br />
• MT 7356: A2G<br />
• MT 7359: F6G<br />
• MT 7479:<br />
• MT 7637: A2G<br />
• MT 8820: AJG AKG ALG AMG APG ASG<br />
• MT 9961: AMG<br />
• MT 6136, 7626, 7629, and 8338_SB<br />
Romanian<br />
• MT 6139: A1G A2G A3G A4G A5G A6G<br />
• MT 6175:<br />
• MT 7187: AKG<br />
• MT 7345: A6G<br />
• MT 7348: A1G A2G A3G A4G A5G<br />
• MT 7356: A2G<br />
• MT 7359: F6G<br />
• MT 7479:<br />
• MT 7637: A2G<br />
• MT 8820: AJG AKG ALG AMG APG ASG<br />
• MT 9961: AMG<br />
• MT 6136, 7626, 7629, and 8338_SB<br />
Russian/Cyrillic<br />
• MT 6139: A1G A2G A3G A4G A5G A6G<br />
• MT 6175:<br />
• MT 7187: AKG<br />
• MT 7345: A6G<br />
• MT 7348: A1G A2G A3G A4G A5G<br />
• MT 7356: A2G<br />
• MT 7359: F6G<br />
• MT 7479:<br />
• MT 7637: A2G<br />
• MT 8820: AJG AKG ALG AMG APG ASG<br />
• MT 9961: AMG<br />
• MT 6136, 7626, 7629, and 8338_SB<br />
132 <strong>ThinkCentre</strong> <strong>Hardware</strong> <strong>Maintenance</strong> <strong>Manual</strong><br />
41A5317 1<br />
41A5316 1<br />
41A5318 1
Serbian/Cyrillic<br />
Keyboard (<strong>Lenovo</strong> Preferred Pro USB -- without hub) FRU # CRU<br />
• MT 6139: A1G A2G A3G A4G A5G A6G<br />
• MT 6175:<br />
• MT 7187: AKG<br />
• MT 7345: A6G<br />
• MT 7348: A1G A2G A3G A4G A5G<br />
• MT 7356: A2G<br />
• MT 7359: F6G<br />
• MT 7479:<br />
• MT 7637: A2G<br />
• MT 8820: AJG AKG ALG AMG APG ASG<br />
• MT 9961: AMG<br />
• MT 6136, 7626, 7629, and 8338_SB<br />
Slovak<br />
• MT 6139: A1G A2G A3G A4G A5G A6G<br />
• MT 6175:<br />
• MT 7187: AKG<br />
• MT 7345: A6G<br />
• MT 7348: A1G A2G A3G A4G A5G<br />
• MT 7356: A2G<br />
• MT 7359: F6G<br />
• MT 7479:<br />
• MT 7637: A2G<br />
• MT 8820: AJG AKG ALG AMG APG ASG<br />
• MT 9961: AMG<br />
• MT 6136, 7626, 7629, and 8338_SB<br />
Spanish<br />
• MT 6139: A1G A2G A3G A4G A5G A6G<br />
• MT 6175:<br />
• MT 7187: AKG<br />
• MT 7345: A6G<br />
• MT 7348: A1G A2G A3G A4G A5G<br />
• MT 7356: A2G<br />
• MT 7359: F6G<br />
• MT 7479:<br />
• MT 7637: A2G<br />
• MT 8820: AJG AKG ALG AMG APG ASG<br />
• MT 9961: AMG<br />
• MT 6136, 7626, 7629, and 8338_SB<br />
41A5319 1<br />
41A5320 1<br />
41A5321 1<br />
Chapter 9. FRU lists 133
Swedish/Finnish<br />
Keyboard (<strong>Lenovo</strong> Preferred Pro USB -- without hub) FRU # CRU<br />
• MT 6139: A1G A2G A3G A4G A5G A6G<br />
• MT 6175:<br />
• MT 7187: AKG<br />
• MT 7345: A6G<br />
• MT 7348: A1G A2G A3G A4G A5G<br />
• MT 7356: A2G<br />
• MT 7359: F6G<br />
• MT 7479:<br />
• MT 7637: A2G<br />
• MT 8820: AJG AKG ALG AMG APG ASG<br />
• MT 9961: AMG<br />
• MT 6136, 7626, 7629, and 8338_SB<br />
SF/G<br />
• MT 6139: A1G A2G A3G A4G A5G A6G<br />
• MT 6175:<br />
• MT 7187: AKG<br />
• MT 7345: A6G<br />
• MT 7348: A1G A2G A3G A4G A5G<br />
• MT 7356: A2G<br />
• MT 7359: F6G<br />
• MT 7479:<br />
• MT 7637: A2G<br />
• MT 8820: AJG AKG ALG AMG APG ASG<br />
• MT 9961: AMG<br />
• MT 6136, 7626, 7629, and 8338_SB<br />
Thailand<br />
• MT 6139:<br />
• MT 6175:<br />
• MT 7187:<br />
• MT 7345:<br />
• MT 7348:<br />
• MT 7356:<br />
• MT 7359: B9T D7T<br />
• MT 7479: B5T<br />
• MT 7637: A2T<br />
• MT 8820:<br />
• MT 9961:<br />
• MT 6136, 7626, 7629, and 8338_SB<br />
134 <strong>ThinkCentre</strong> <strong>Hardware</strong> <strong>Maintenance</strong> <strong>Manual</strong><br />
41A5322 1<br />
41A5323 1<br />
41A5324 1
Turkish<br />
Keyboard (<strong>Lenovo</strong> Preferred Pro USB -- without hub) FRU # CRU<br />
• MT 6139: A1G A2G A3G A4G A5G A6G<br />
• MT 6175:<br />
• MT 7187: AKG<br />
• MT 7345: A6G<br />
• MT 7348: A1G A2G A3G A4G A5G<br />
• MT 7356: A2G<br />
• MT 7359: F6G<br />
• MT 7479:<br />
• MT 7637: A2G<br />
• MT 8820: AJG AKG ALG AMG APG ASG<br />
• MT 9961: AMG<br />
• MT 6136, 7626, 7629, and 8338_SB<br />
Turkish<br />
• MT 6139: A1G A2G A3G A4G A5G A6G<br />
• MT 6175:<br />
• MT 7187: AKG<br />
• MT 7345: A6G<br />
• MT 7348: A1G A2G A3G A4G A5G<br />
• MT 7356: A2G<br />
• MT 7359: F6G<br />
• MT 7479:<br />
• MT 7637: A2G<br />
• MT 8820: AJG AKG ALG AMG APG ASG<br />
• MT 9961: AMG<br />
• MT 6136, 7626, 7629, and 8338_SB<br />
UK English<br />
• MT 6139: A1G A2G A3G A4G A5G A6G<br />
• MT 6175:<br />
• MT 7187: AKG<br />
• MT 7345: A6G<br />
• MT 7348: A1G A2G A3G A4G A5G<br />
• MT 7356: A2G<br />
• MT 7359: F6G<br />
• MT 7479:<br />
• MT 7637: A2G<br />
• MT 8820: AJG AKG ALG AMG APG ASG<br />
• MT 9961: AMG<br />
• MT 6136, 7626, 7629, and 8338_SB<br />
41A5325 1<br />
41A5326 1<br />
41A5327 1<br />
Chapter 9. FRU lists 135
US European<br />
Keyboard (<strong>Lenovo</strong> Preferred Pro USB -- without hub) FRU # CRU<br />
• MT 6139: A1G A2G A3G A4G A5G A6G<br />
• MT 6175:<br />
• MT 7187: AKG<br />
• MT 7345: A6G<br />
• MT 7348: A1G A2G A3G A4G A5G<br />
• MT 7356: A2G<br />
• MT 7359: F6G<br />
• MT 7479:<br />
• MT 7637: A2G<br />
• MT 8820: AJG AKG ALG AMG APG ASG<br />
• MT 9961: AMG<br />
• MT 6136, 7626, 7629, and 8338_SB<br />
Slovenian<br />
• MT 6139:<br />
• MT 6175:<br />
• MT 7187:<br />
• MT 7345:<br />
• MT 7348: A1G A2G A3G A4G A5G<br />
• MT 7356: A2G<br />
• MT 7359: F6G<br />
• MT 7479:<br />
• MT 7637: A2G<br />
• MT 8820:<br />
• MT 9961: AMG<br />
• MT 6136, 7626, 7629, and 8338_SB<br />
Arabic (New)<br />
• MT 6139: A1G A2G A3G A4G A5G A6G<br />
• MT 6175:<br />
• MT 7187: AKG<br />
• MT 7345: A6G<br />
• MT 7348: A1G A2G A3G A4G A5G<br />
• MT 7356: A2G<br />
• MT 7359: F6G<br />
• MT 7479:<br />
• MT 7637: A2G<br />
• MT 8820: AJG AKG ALG AMG APG ASG<br />
• MT 9961: AMG<br />
• MT 6136, 7626, 7629, and 8338_SB<br />
Lithuanian<br />
• MT 6139:<br />
• MT 6175:<br />
136 <strong>ThinkCentre</strong> <strong>Hardware</strong> <strong>Maintenance</strong> <strong>Manual</strong><br />
41A5328 1<br />
41A5329 1<br />
45J4880 1<br />
45J4896 1
• MT 7187:<br />
• MT 7345:<br />
Keyboard (<strong>Lenovo</strong> Preferred Pro USB -- without hub) FRU # CRU<br />
• MT 7348: A1G A2G A3G A4G A5G<br />
• MT 7356: A2G<br />
• MT 7359: F6G<br />
• MT 7479:<br />
• MT 7637: A2G<br />
• MT 8820:<br />
• MT 9961: AMG<br />
• MT 6136, 7626, 7629, and 8338_SB<br />
US English<br />
• MT 6139:<br />
• MT 6175:<br />
• MT 7187:<br />
• MT 7345:<br />
• MT 7348:<br />
• MT 7356:<br />
• MT 7359:<br />
• MT 7479:<br />
• MT 7637:<br />
• MT 8820:<br />
• MT 9961:<br />
• MT 6136, 7626, 7629, and 8338_SB<br />
Arabic<br />
• MT 6139:<br />
• MT 6175:<br />
• MT 7187:<br />
• MT 7345:<br />
• MT 7348:<br />
• MT 7356:<br />
• MT 7359:<br />
• MT 7479:<br />
• MT 7637:<br />
• MT 8820:<br />
• MT 9961:<br />
• MT 6136, 7626, 7629, and 8338_SB<br />
Keyboard (<strong>Lenovo</strong> Fingerprint Reader USB) FRU # CRU<br />
57Y4780 1<br />
57Y4781 1<br />
Chapter 9. FRU lists 137
A/F<br />
• MT 6139:<br />
• MT 6175:<br />
• MT 7187:<br />
• MT 7345:<br />
• MT 7348:<br />
• MT 7356:<br />
• MT 7359:<br />
• MT 7479:<br />
• MT 7637:<br />
• MT 8820:<br />
• MT 9961:<br />
• MT 6136, 7626, 7629, and 8338_SB<br />
Belgium French<br />
• MT 6139:<br />
• MT 6175:<br />
• MT 7187:<br />
• MT 7345:<br />
• MT 7348:<br />
• MT 7356:<br />
• MT 7359:<br />
• MT 7479:<br />
• MT 7637:<br />
• MT 8820:<br />
• MT 9961:<br />
• MT 6136, 7626, 7629, and 8338_SB<br />
Belgium English<br />
• MT 6139:<br />
• MT 6175:<br />
• MT 7187:<br />
• MT 7345:<br />
• MT 7348:<br />
• MT 7356:<br />
• MT 7359:<br />
• MT 7479:<br />
• MT 7637:<br />
• MT 8820:<br />
• MT 9961:<br />
• MT 6136, 7626, 7629, and 8338_SB<br />
Keyboard (<strong>Lenovo</strong> Fingerprint Reader USB) FRU # CRU<br />
138 <strong>ThinkCentre</strong> <strong>Hardware</strong> <strong>Maintenance</strong> <strong>Manual</strong><br />
57Y4782 1<br />
57Y4783 1<br />
57Y4784 1
Brazilian Portuguese<br />
• MT 6139:<br />
• MT 6175:<br />
• MT 7187:<br />
• MT 7345:<br />
• MT 7348:<br />
• MT 7356:<br />
• MT 7359:<br />
• MT 7479:<br />
• MT 7637:<br />
• MT 8820:<br />
• MT 9961:<br />
• MT 6136, 7626, 7629, and 8338_SB<br />
Bulgarian<br />
• MT 6139:<br />
• MT 6175:<br />
• MT 7187:<br />
• MT 7345:<br />
• MT 7348:<br />
• MT 7356:<br />
• MT 7359:<br />
• MT 7479:<br />
• MT 7637:<br />
• MT 8820:<br />
• MT 9961:<br />
• MT 6136, 7626, 7629, and 8338_SB<br />
Chinese/US<br />
• MT 6139:<br />
• MT 6175:<br />
• MT 7187:<br />
• MT 7345:<br />
• MT 7348:<br />
• MT 7356:<br />
• MT 7359:<br />
• MT 7479:<br />
• MT 7637:<br />
• MT 8820:<br />
• MT 9961:<br />
• MT 6136, 7626, 7629, and 8338_SB<br />
Keyboard (<strong>Lenovo</strong> Fingerprint Reader USB) FRU # CRU<br />
57Y4785 1<br />
57Y4786 1<br />
57Y4787 1<br />
Chapter 9. FRU lists 139
Czech (ABB)<br />
• MT 6139:<br />
• MT 6175:<br />
• MT 7187:<br />
• MT 7345:<br />
• MT 7348:<br />
• MT 7356:<br />
• MT 7359:<br />
• MT 7479:<br />
• MT 7637:<br />
• MT 8820:<br />
• MT 9961:<br />
• MT 6136, 7626, 7629, and 8338_SB<br />
Danish<br />
• MT 6139:<br />
• MT 6175:<br />
• MT 7187:<br />
• MT 7345:<br />
• MT 7348:<br />
• MT 7356:<br />
• MT 7359:<br />
• MT 7479:<br />
• MT 7637:<br />
• MT 8820:<br />
• MT 9961:<br />
• MT 6136, 7626, 7629, and 8338_SB<br />
Dutch<br />
• MT 6139:<br />
• MT 6175:<br />
• MT 7187:<br />
• MT 7345:<br />
• MT 7348:<br />
• MT 7356:<br />
• MT 7359:<br />
• MT 7479:<br />
• MT 7637:<br />
• MT 8820:<br />
• MT 9961:<br />
• MT 6136, 7626, 7629, and 8338_SB<br />
Keyboard (<strong>Lenovo</strong> Fingerprint Reader USB) FRU # CRU<br />
140 <strong>ThinkCentre</strong> <strong>Hardware</strong> <strong>Maintenance</strong> <strong>Manual</strong><br />
57Y4788 1<br />
57Y4789 1<br />
57Y4790 1
French<br />
• MT 6139:<br />
• MT 6175:<br />
• MT 7187:<br />
• MT 7345:<br />
• MT 7348:<br />
• MT 7356:<br />
• MT 7359:<br />
• MT 7479:<br />
• MT 7637:<br />
• MT 8820:<br />
• MT 9961:<br />
• MT 6136, 7626, 7629, and 8338_SB<br />
French Canadian<br />
• MT 6139:<br />
• MT 6175:<br />
• MT 7187:<br />
• MT 7345:<br />
• MT 7348:<br />
• MT 7356:<br />
• MT 7359:<br />
• MT 7479:<br />
• MT 7637:<br />
• MT 8820:<br />
• MT 9961:<br />
• MT 6136, 7626, 7629, and 8338_SB<br />
French Canadian<br />
• MT 6139:<br />
• MT 6175:<br />
• MT 7187:<br />
• MT 7345:<br />
• MT 7348:<br />
• MT 7356:<br />
• MT 7359:<br />
• MT 7479:<br />
• MT 7637:<br />
• MT 8820:<br />
• MT 9961:<br />
• MT 6136, 7626, 7629, and 8338_SB<br />
Keyboard (<strong>Lenovo</strong> Fingerprint Reader USB) FRU # CRU<br />
57Y4791 1<br />
57Y4792 1<br />
57Y4793 1<br />
Chapter 9. FRU lists 141
German<br />
• MT 6139:<br />
• MT 6175:<br />
• MT 7187:<br />
• MT 7345:<br />
• MT 7348:<br />
• MT 7356:<br />
• MT 7359:<br />
• MT 7479:<br />
• MT 7637:<br />
• MT 8820:<br />
• MT 9961:<br />
• MT 6136, 7626, 7629, and 8338_SB<br />
Greek<br />
• MT 6139:<br />
• MT 6175:<br />
• MT 7187:<br />
• MT 7345:<br />
• MT 7348:<br />
• MT 7356:<br />
• MT 7359:<br />
• MT 7479:<br />
• MT 7637:<br />
• MT 8820:<br />
• MT 9961:<br />
• MT 6136, 7626, 7629, and 8338_SB<br />
Greek/US<br />
• MT 6139:<br />
• MT 6175:<br />
• MT 7187:<br />
• MT 7345:<br />
• MT 7348:<br />
• MT 7356:<br />
• MT 7359:<br />
• MT 7479:<br />
• MT 7637:<br />
• MT 8820:<br />
• MT 9961:<br />
• MT 6136, 7626, 7629, and 8338_SB<br />
Keyboard (<strong>Lenovo</strong> Fingerprint Reader USB) FRU # CRU<br />
142 <strong>ThinkCentre</strong> <strong>Hardware</strong> <strong>Maintenance</strong> <strong>Manual</strong><br />
57Y4794 1<br />
57Y4795 1<br />
57Y4796 1
Hebrew<br />
• MT 6139:<br />
• MT 6175:<br />
• MT 7187:<br />
• MT 7345:<br />
• MT 7348:<br />
• MT 7356:<br />
• MT 7359:<br />
• MT 7479:<br />
• MT 7637:<br />
• MT 8820:<br />
• MT 9961:<br />
• MT 6136, 7626, 7629, and 8338_SB<br />
Hungarian<br />
• MT 6139:<br />
• MT 6175:<br />
• MT 7187:<br />
• MT 7345:<br />
• MT 7348:<br />
• MT 7356:<br />
• MT 7359:<br />
• MT 7479:<br />
• MT 7637:<br />
• MT 8820:<br />
• MT 9961:<br />
• MT 6136, 7626, 7629, and 8338_SB<br />
Iceland<br />
• MT 6139:<br />
• MT 6175:<br />
• MT 7187:<br />
• MT 7345:<br />
• MT 7348:<br />
• MT 7356:<br />
• MT 7359:<br />
• MT 7479:<br />
• MT 7637:<br />
• MT 8820:<br />
• MT 9961:<br />
• MT 6136, 7626, 7629, and 8338_SB<br />
Keyboard (<strong>Lenovo</strong> Fingerprint Reader USB) FRU # CRU<br />
57Y4797 1<br />
57Y4798 1<br />
57Y4799 1<br />
Chapter 9. FRU lists 143
Italy<br />
• MT 6139:<br />
• MT 6175:<br />
• MT 7187:<br />
• MT 7345:<br />
• MT 7348:<br />
• MT 7356:<br />
• MT 7359:<br />
• MT 7479:<br />
• MT 7637:<br />
• MT 8820:<br />
• MT 9961:<br />
• MT 6136, 7626, 7629, and 8338_SB<br />
Japanese<br />
• MT 6139:<br />
• MT 6175:<br />
• MT 7187:<br />
• MT 7345:<br />
• MT 7348:<br />
• MT 7356:<br />
Keyboard (<strong>Lenovo</strong> Fingerprint Reader USB) FRU # CRU<br />
• MT 7359: DDJ DFJ DGJ DHJ DJJ DKJ FCJ<br />
• MT 7479: AVJ AWJ B1J<br />
• MT 7637:<br />
• MT 8820:<br />
• MT 9961:<br />
• MT 6136, 7626, 7629, and 8338_SB<br />
Korean<br />
• MT 6139:<br />
• MT 6175:<br />
• MT 7187:<br />
• MT 7345:<br />
• MT 7348:<br />
• MT 7356:<br />
• MT 7359:<br />
• MT 7479:<br />
• MT 7637:<br />
• MT 8820:<br />
• MT 9961:<br />
• MT 6136, 7626, 7629, and 8338_SB<br />
144 <strong>ThinkCentre</strong> <strong>Hardware</strong> <strong>Maintenance</strong> <strong>Manual</strong><br />
57Y4800 1<br />
57Y4801 1<br />
57Y4802 1
LA Spanish<br />
• MT 6139:<br />
• MT 6175:<br />
• MT 7187:<br />
• MT 7345:<br />
• MT 7348:<br />
• MT 7356:<br />
• MT 7359:<br />
• MT 7479:<br />
• MT 7637:<br />
• MT 8820:<br />
• MT 9961:<br />
• MT 6136, 7626, 7629, and 8338_SB<br />
Norwegian<br />
• MT 6139:<br />
• MT 6175:<br />
• MT 7187:<br />
• MT 7345:<br />
• MT 7348:<br />
• MT 7356:<br />
• MT 7359:<br />
• MT 7479:<br />
• MT 7637:<br />
• MT 8820:<br />
• MT 9961:<br />
• MT 6136, 7626, 7629, and 8338_SB<br />
Polish<br />
• MT 6139:<br />
• MT 6175:<br />
• MT 7187:<br />
• MT 7345:<br />
• MT 7348:<br />
• MT 7356:<br />
• MT 7359:<br />
• MT 7479:<br />
• MT 7637:<br />
• MT 8820:<br />
• MT 9961:<br />
• MT 6136, 7626, 7629, and 8338_SB<br />
Keyboard (<strong>Lenovo</strong> Fingerprint Reader USB) FRU # CRU<br />
57Y4803 1<br />
57Y4804 1<br />
57Y4805 1<br />
Chapter 9. FRU lists 145
Portuguese<br />
• MT 6139:<br />
• MT 6175:<br />
• MT 7187:<br />
• MT 7345:<br />
• MT 7348:<br />
• MT 7356:<br />
• MT 7359:<br />
• MT 7479:<br />
• MT 7637:<br />
• MT 8820:<br />
• MT 9961:<br />
• MT 6136, 7626, 7629, and 8338_SB<br />
Romanian<br />
• MT 6139:<br />
• MT 6175:<br />
• MT 7187:<br />
• MT 7345:<br />
• MT 7348:<br />
• MT 7356:<br />
• MT 7359:<br />
• MT 7479:<br />
• MT 7637:<br />
• MT 8820:<br />
• MT 9961:<br />
• MT 6136, 7626, 7629, and 8338_SB<br />
Romanian<br />
• MT 6139:<br />
• MT 6175:<br />
• MT 7187:<br />
• MT 7345:<br />
• MT 7348:<br />
• MT 7356:<br />
• MT 7359:<br />
• MT 7479:<br />
• MT 7637:<br />
• MT 8820:<br />
• MT 9961:<br />
• MT 6136, 7626, 7629, and 8338_SB<br />
Keyboard (<strong>Lenovo</strong> Fingerprint Reader USB) FRU # CRU<br />
146 <strong>ThinkCentre</strong> <strong>Hardware</strong> <strong>Maintenance</strong> <strong>Manual</strong><br />
57Y4806 1<br />
57Y4808 1<br />
57Y4806 1
Russian/Cyrillic<br />
• MT 6139:<br />
• MT 6175:<br />
• MT 7187:<br />
• MT 7345:<br />
• MT 7348:<br />
• MT 7356:<br />
• MT 7359:<br />
• MT 7479:<br />
• MT 7637:<br />
• MT 8820:<br />
• MT 9961:<br />
• MT 6136, 7626, 7629, and 8338_SB<br />
Serbian/Cyrillic<br />
• MT 6139:<br />
• MT 6175:<br />
• MT 7187:<br />
• MT 7345:<br />
• MT 7348:<br />
• MT 7356:<br />
• MT 7359:<br />
• MT 7479:<br />
• MT 7637:<br />
• MT 8820:<br />
• MT 9961:<br />
• MT 6136, 7626, 7629, and 8338_SB<br />
Slovak<br />
• MT 6139:<br />
• MT 6175:<br />
• MT 7187:<br />
• MT 7345:<br />
• MT 7348:<br />
• MT 7356:<br />
• MT 7359:<br />
• MT 7479:<br />
• MT 7637:<br />
• MT 8820:<br />
• MT 9961:<br />
• MT 6136, 7626, 7629, and 8338_SB<br />
Keyboard (<strong>Lenovo</strong> Fingerprint Reader USB) FRU # CRU<br />
57Y4809 1<br />
57Y4810 1<br />
57Y4811 1<br />
Chapter 9. FRU lists 147
Spanish<br />
• MT 6139:<br />
• MT 6175:<br />
• MT 7187:<br />
• MT 7345:<br />
• MT 7348:<br />
• MT 7356:<br />
• MT 7359:<br />
• MT 7479:<br />
• MT 7637:<br />
• MT 8820:<br />
• MT 9961:<br />
• MT 6136, 7626, 7629, and 8338_SB<br />
Swedish/Finnish<br />
• MT 6139:<br />
• MT 6175:<br />
• MT 7187:<br />
• MT 7345:<br />
• MT 7348:<br />
• MT 7356:<br />
• MT 7359:<br />
• MT 7479:<br />
• MT 7637:<br />
• MT 8820:<br />
• MT 9961:<br />
• MT 6136, 7626, 7629, and 8338_SB<br />
Swiss French/German<br />
• MT 6139:<br />
• MT 6175:<br />
• MT 7187:<br />
• MT 7345:<br />
• MT 7348:<br />
• MT 7356:<br />
• MT 7359:<br />
• MT 7479:<br />
• MT 7637:<br />
• MT 8820:<br />
• MT 9961:<br />
• MT 6136, 7626, 7629, and 8338_SB<br />
Keyboard (<strong>Lenovo</strong> Fingerprint Reader USB) FRU # CRU<br />
148 <strong>ThinkCentre</strong> <strong>Hardware</strong> <strong>Maintenance</strong> <strong>Manual</strong><br />
57Y4812 1<br />
57Y4813 1<br />
57Y4814 1
Thailand<br />
• MT 6139:<br />
• MT 6175:<br />
• MT 7187:<br />
• MT 7345:<br />
• MT 7348:<br />
• MT 7356:<br />
• MT 7359:<br />
• MT 7479:<br />
• MT 7637:<br />
• MT 8820:<br />
• MT 9961:<br />
• MT 6136, 7626, 7629, and 8338_SB<br />
Turkish<br />
• MT 6139:<br />
• MT 6175:<br />
• MT 7187:<br />
• MT 7345:<br />
• MT 7348:<br />
• MT 7356:<br />
• MT 7359:<br />
• MT 7479:<br />
• MT 7637:<br />
• MT 8820:<br />
• MT 9961:<br />
• MT 6136, 7626, 7629, and 8338_SB<br />
Turkish<br />
• MT 6139:<br />
• MT 6175:<br />
• MT 7187:<br />
• MT 7345:<br />
• MT 7348:<br />
• MT 7356:<br />
• MT 7359:<br />
• MT 7479:<br />
• MT 7637:<br />
• MT 8820:<br />
• MT 9961:<br />
• MT 6136, 7626, 7629, and 8338_SB<br />
Keyboard (<strong>Lenovo</strong> Fingerprint Reader USB) FRU # CRU<br />
57Y4815 1<br />
57Y4816 1<br />
57Y4817 1<br />
Chapter 9. FRU lists 149
UK English<br />
• MT 6139:<br />
• MT 6175:<br />
• MT 7187:<br />
• MT 7345:<br />
• MT 7348:<br />
• MT 7356:<br />
• MT 7359:<br />
• MT 7479:<br />
• MT 7637:<br />
• MT 8820:<br />
• MT 9961:<br />
• MT 6136, 7626, 7629, and 8338_SB<br />
US European<br />
• MT 6139:<br />
• MT 6175:<br />
• MT 7187:<br />
• MT 7345:<br />
• MT 7348:<br />
• MT 7356:<br />
• MT 7359:<br />
• MT 7479:<br />
• MT 7637:<br />
• MT 8820:<br />
• MT 9961:<br />
• MT 6136, 7626, 7629, and 8338_SB<br />
Slovenian<br />
• MT 6139:<br />
• MT 6175:<br />
• MT 7187:<br />
• MT 7345:<br />
• MT 7348:<br />
• MT 7356:<br />
• MT 7359:<br />
• MT 7479:<br />
• MT 7637:<br />
• MT 8820:<br />
• MT 9961:<br />
• MT 6136, 7626, 7629, and 8338_SB<br />
Keyboard (<strong>Lenovo</strong> Fingerprint Reader USB) FRU # CRU<br />
150 <strong>ThinkCentre</strong> <strong>Hardware</strong> <strong>Maintenance</strong> <strong>Manual</strong><br />
57Y4818 1<br />
57Y4819 1<br />
57Y4820 1
Optical wheel mouse (400 DPI), USB - red wheel (primary)<br />
• MT 6139: A1G A2G A3G A4G A5G A6G<br />
• MT 6175: A2G<br />
• MT 7187: AKG<br />
• MT 7345: A6G<br />
• MT 7348: A1G A2G A3G A4G A5G<br />
• MT 7356: A2G<br />
Mice FRU # CRU<br />
• MT 7359: B9A B9T D3M D4M D5M D6M D7M D7A D7T D8M D9M DDJ DFJ DGJ<br />
DHJ DJJ DKJ DNJ DPJ DQJ DUU DUF DVU DVF DWU DWF F1J F2J F3J F4J F6G<br />
F7U F7F F7L F8J F9J FAJ FBM FCJ FFM FGJ FHJ FKJ FLJ<br />
• MT 7479: B5A B5T AMM ANM APM AQM ARM ASM AUM AVJ AWJ B1J B2J B3J<br />
B4J ALM B9U B9F BAJ BBJ BDM BEU BEF C1J C2J C3J<br />
• MT 7637: A2U A2F A2S A2P A2L A2D A2Y A2M A2A A2Q A2T A2C A2B A2H A2V<br />
A2K A2R A2E A2J A3Q<br />
• MT 8820: AJG AKG ALG AMG APG AQU AQF AQS ARS ARD ARY ASG<br />
• MT 9961: AkU AkF AkS AkP AkD AkY ALU ALF ALS AMG<br />
• MT 6136, 7626, 7629, and 8338_SB<br />
Optical wheel mouse (400 DPI), USB - red wheel (secondary)<br />
• MT 6139: A1G A2G A3G A4G A5G A6G<br />
• MT 6175: A2G<br />
• MT 7187: AKG<br />
• MT 7345: A6G<br />
• MT 7348: A1G A2G A3G A4G A5G<br />
• MT 7356: A2G<br />
• MT 7359: B9A B9T D3M D4M D5M D6M D7M D7A D7T D8M D9M DDJ DFJ DGJ<br />
DHJ DJJ DKJ DNJ DPJ DQJ DUU DUF DVU DVF DWU DWF F1J F2J F3J F4J F6G<br />
F7U F7F F7L F8J F9J FAJ FBM FCJ FFM FGJ FHJ FKJ FLJ<br />
• MT 7479: B5A B5T AMM ANM APM AQM ARM ASM AUM AVJ AWJ B1J B2J B3J<br />
B4J ALM B9U B9F BAJ BBJ BDM BEU BEF C1J C2J C3J<br />
• MT 7637: A2U A2F A2S A2P A2L A2D A2Y A2M A2A A2Q A2T A2C A2B A2H A2V<br />
A2K A2R A2E A2J A3Q<br />
• MT 8820: AJG AKG ALG AMG APG AQU AQF AQS ARS ARD ARY ASG<br />
• MT 9961: AkU AkF AkS AkP AkD AkY ALU ALF ALS AMG<br />
• MT 6136, 7626, 7629, and 8338_SB<br />
(Tower only) PS/2 Three button ball mouse<br />
• MT 6139:<br />
• MT 6175:<br />
• MT 7187:<br />
• MT 7345:<br />
• MT 7348:<br />
• MT 7356:<br />
• MT 7359:<br />
• MT 7479:<br />
• MT 7637:<br />
• MT 8820:<br />
41U3013 1<br />
41U3030 1<br />
41R0018 1<br />
Chapter 9. FRU lists 151
• MT 9961:<br />
• MT 6136, 7626, 7629, and 8338_SB<br />
Primax LXB MO28UOA USB mouse<br />
• MT 6139:<br />
• MT 6175:<br />
• MT 7187:<br />
• MT 7345:<br />
• MT 7348:<br />
• MT 7356:<br />
• MT 7359:<br />
• MT 7479:<br />
• MT 7637:<br />
• MT 8820:<br />
• MT 9961:<br />
• MT 6136, 7626, 7629, and 8338_SB<br />
Logitech LXB M-U0022-O USB mouse<br />
• MT 6139:<br />
• MT 6175:<br />
• MT 7187:<br />
• MT 7345:<br />
• MT 7348:<br />
• MT 7356:<br />
• MT 7359:<br />
• MT 7479:<br />
• MT 7637:<br />
• MT 8820:<br />
• MT 9961:<br />
• MT 6136, 7626, 7629, and 8338_SB<br />
Liteon LXB SM-1065 USB mouse<br />
• MT 6139:<br />
• MT 6175:<br />
• MT 7187:<br />
• MT 7345:<br />
• MT 7348:<br />
• MT 7356:<br />
• MT 7359:<br />
• MT 7479:<br />
• MT 7637:<br />
• MT 8820:<br />
• MT 9961:<br />
• MT 6136, 7626, 7629, and 8338_SB<br />
152 <strong>ThinkCentre</strong> <strong>Hardware</strong> <strong>Maintenance</strong> <strong>Manual</strong><br />
Mice FRU # CRU<br />
89Y1273 1<br />
89Y1274 1<br />
89Y1275 1
Adapters and miscellaneous FRUs<br />
DP to DVI dongle 200mm<br />
• MT 6139:<br />
• MT 6175:<br />
• MT 7187:<br />
• MT 7345:<br />
• MT 7348:<br />
• MT 7356:<br />
• MT 7359: FCJ FGJ FHJ FKJ FLJ<br />
• MT 7479: C1J C2J C3J<br />
• MT 7637:<br />
• MT 8820:<br />
• MT 9961:<br />
• MT 6136, 7626, 7629, and 8338_SB<br />
IEEE 1394 Firewire adapter (LP)<br />
• MT 6139:<br />
• MT 6175:<br />
• MT 7187:<br />
• MT 7345:<br />
• MT 7348:<br />
• MT 7356:<br />
• MT 7359:<br />
• MT 7479:<br />
• MT 7637:<br />
• MT 8820:<br />
• MT 9961:<br />
• MT 6136, 7626, 7629, and 8338_SB<br />
Speakers (2-piece) <strong>Lenovo</strong> Logo (secondary)<br />
• MT 6139:<br />
• MT 6175:<br />
• MT 7187:<br />
• MT 7345:<br />
• MT 7348:<br />
• MT 7356:<br />
• MT 7359:<br />
• MT 7479:<br />
• MT 7637:<br />
• MT 8820:<br />
• MT 9961:<br />
• MT 6136, 7626, 7629, and 8338_SB<br />
Adapters & miscellaneous FRUs FRU # CRU<br />
43N9160 1<br />
41D2781 1<br />
41A5334 1<br />
Chapter 9. FRU lists 153
Adapters & miscellaneous FRUs FRU # CRU<br />
Speaker power brick - US, Canada, LA low voltage, ASEAN (TOWER ROCKYS&LX-607)<br />
• MT 6139:<br />
• MT 6175:<br />
• MT 7187:<br />
• MT 7345:<br />
• MT 7348:<br />
• MT 7356:<br />
• MT 7359: DUU DVU DWU<br />
• MT 7479:<br />
• MT 7637: A2U A2S A2A<br />
• MT 8820: AnU AnS AQU AQS<br />
• MT 9961: AkU AkS ALU ALS<br />
• MT 6136, 7626, 7629, and 8338_SB<br />
Modem phone cable<br />
• MT 6139:<br />
• MT 6175:<br />
• MT 7187:<br />
• MT 7345:<br />
• MT 7348:<br />
• MT 7356:<br />
• MT 7359:<br />
• MT 7479:<br />
• MT 7637:<br />
• MT 8820:<br />
• MT 9961:<br />
• MT 6136, 7626, 7629, and 8338_SB<br />
Thermal grease Syringe<br />
• MT 6139:<br />
• MT 6175:<br />
• MT 7187:<br />
• MT 7345:<br />
• MT 7348:<br />
• MT 7356:<br />
• MT 7359:<br />
• MT 7479:<br />
• MT 7637:<br />
• MT 8820:<br />
• MT 9961:<br />
• MT 6136, 7626, 7629, and 8338_SB<br />
154 <strong>ThinkCentre</strong> <strong>Hardware</strong> <strong>Maintenance</strong> <strong>Manual</strong><br />
89P8571 1<br />
39K5120 1<br />
91P8835 2
Adapters & miscellaneous FRUs FRU # CRU<br />
AC line cord for AC/DC power adapter - 1.0m/3 wire<br />
• MT 6139:<br />
• MT 6175:<br />
• MT 7187:<br />
• MT 7345:<br />
• MT 7348:<br />
• MT 7356:<br />
• MT 7359:<br />
• MT 7479:<br />
• MT 7637:<br />
• MT 8820:<br />
• MT 9961:<br />
• MT 6136, 7626, 7629, and 8338_SB<br />
AC line cord for AC/DC power adapter - 1.0m/3 wire<br />
• MT 6139:<br />
• MT 6175:<br />
• MT 7187:<br />
• MT 7345:<br />
• MT 7348:<br />
• MT 7356:<br />
• MT 7359:<br />
• MT 7479:<br />
• MT 7637:<br />
• MT 8820:<br />
• MT 9961:<br />
• MT 6136, 7626, 7629, and 8338_SB<br />
Display port to VGA dongle<br />
• MT 6139:<br />
• MT 6175:<br />
• MT 7187:<br />
• MT 7345:<br />
• MT 7348:<br />
• MT 7356:<br />
• MT 7359:<br />
• MT 7479:<br />
• MT 7637:<br />
• MT 8820:<br />
• MT 9961:<br />
• MT 6136, 7626, 7629, and 8338_SB<br />
Soft modem V.90/V.44 - LP<br />
• MT 6139:<br />
• MT 6175:<br />
42T5004 1<br />
42T5089 1<br />
45J9524 1<br />
46R4220 1<br />
Chapter 9. FRU lists 155
• MT 7187:<br />
• MT 7345:<br />
• MT 7348:<br />
• MT 7356:<br />
• MT 7359:<br />
• MT 7479:<br />
• MT 7637:<br />
• MT 8820:<br />
• MT 9961:<br />
• MT 6136, 7626, 7629, and 8338_SB<br />
Power Cords<br />
Line Cord - US/Canada<br />
• MT 6139: A1G A2G A3G A4G A5G A6G<br />
• MT 6175:<br />
• MT 7187: AKG<br />
• MT 7345: A6G<br />
• MT 7348:<br />
• MT 7356:<br />
Adapters & miscellaneous FRUs FRU # CRU<br />
Power Cords --primary FRU # CRU<br />
• MT 7359: B9A D7A DUU DUF DVU DVF DWU DWF F7U F7F F7L<br />
• MT 7479: B5A B9U B9F BEU BEF<br />
• MT 7637: A2U A2F A2S A2D A2L A2A A2T<br />
• MT 8820: AJG AKG ALG AMG APG AQU AQF AQS ARS ARD<br />
• MT 9961: AkU AkF AkS AkD ALU ALF ALS<br />
• MT 6136, 7626, 7629, and 8338_SB<br />
Line Cord - Japan<br />
• MT 6139:<br />
• MT 6175:<br />
• MT 7187:<br />
• MT 7345:<br />
• MT 7348:<br />
• MT 7356:<br />
• MT 7359: DDJ DFJ DGJ DHJ DJJ DKJ DNJ DPJ DQJ F1J F2J F3J F4J F8J F9J<br />
FAJ FGJ FHJ FKJ FLJ<br />
• MT 7479: AVJ AWJ B1J B2J B3J B4J BAJ BBJ C1J C2J C3J<br />
• MT 7637: A2E A2J<br />
• MT 8820:<br />
• MT 9961:<br />
• MT 6136, 7626, 7629, and 8338_SB<br />
156 <strong>ThinkCentre</strong> <strong>Hardware</strong> <strong>Maintenance</strong> <strong>Manual</strong><br />
42T5089 1<br />
42T5096 1
Line Cord -Argentina<br />
• MT 6139:<br />
• MT 6175:<br />
• MT 7187:<br />
• MT 7345:<br />
• MT 7348:<br />
• MT 7356:<br />
• MT 7359: F7L<br />
• MT 7479:<br />
• MT 7637:<br />
• MT 8820: AnY ARY<br />
• MT 9961: AkY<br />
• MT 6136, 7626, 7629, and 8338_SB<br />
Line Cord - Brazil<br />
• MT 6139:<br />
• MT 6175:<br />
• MT 7187:<br />
• MT 7345:<br />
• MT 7348:<br />
• MT 7356:<br />
• MT 7359:<br />
• MT 7479:<br />
• MT 7637: A2P<br />
• MT 8820: AnP<br />
• MT 9961: AkP<br />
• MT 6136, 7626, 7629, and 8338_SB<br />
Line Cord - German<br />
• MT 6139:<br />
• MT 6175:<br />
• MT 7187:<br />
• MT 7345:<br />
• MT 7348:<br />
• MT 7356:<br />
• MT 7359:<br />
• MT 7479:<br />
• MT 7637:<br />
• MT 8820:<br />
• MT 9961: AMG<br />
• MT 6136, 7626, 7629, and 8338_SB<br />
Power Cords --primary FRU # CRU<br />
42T5102 1<br />
42T5177 1<br />
42T5114 1<br />
Chapter 9. FRU lists 157
Line Cord - UK<br />
• MT 6139: A1G A2G A3G A4G A5G A6G<br />
• MT 6175:<br />
• MT 7187: AKG<br />
• MT 7345: A6G<br />
• MT 7348: A1G A2G A3G A4G A5G<br />
• MT 7356: A2G<br />
• MT 7359: B5A<br />
• MT 7479: B5A<br />
• MT 7637: A2B A2H A2G<br />
• MT 8820: AJG AKG ALG AMG APG<br />
• MT 9961: AMG<br />
• MT 6136, 7626, 7629, and 8338_SB<br />
Line Cord - Denmark<br />
• MT 6139:<br />
• MT 6175:<br />
• MT 7187:<br />
• MT 7345:<br />
• MT 7348: A1G A2G A3G A4G A5G<br />
• MT 7356: A2G<br />
• MT 7359: F6G<br />
• MT 7479:<br />
• MT 7637: A2G<br />
• MT 8820:<br />
• MT 9961: AMG<br />
• MT 6136, 7626, 7629, and 8338_SB<br />
Line Cord - Switzerland<br />
• MT 6139: A1G A2G A3G A4G A5G A6G<br />
• MT 6175:<br />
• MT 7187: AKG<br />
• MT 7345: A6G<br />
• MT 7348: A1G A2G A3G A4G A5G<br />
• MT 7356: A2G<br />
• MT 7359: F6G<br />
• MT 7479:<br />
• MT 7637: A2G<br />
• MT 8820: AJG AKG ALG AMG APG<br />
• MT 9961: AMG<br />
• MT 6136, 7626, 7629, and 8338_SB<br />
158 <strong>ThinkCentre</strong> <strong>Hardware</strong> <strong>Maintenance</strong> <strong>Manual</strong><br />
Power Cords --primary FRU # CRU<br />
42T5120 1<br />
42T5126 1<br />
42T5129 1
Line Cord - Italy<br />
• MT 6139: A1G A2G A3G A4G A5G A6G<br />
• MT 6175:<br />
• MT 7187: AKG<br />
• MT 7345: A6G<br />
• MT 7348: A1G A2G A3G A4G A5G<br />
• MT 7356: A2G<br />
• MT 7359: F6G F7L<br />
• MT 7479:<br />
• MT 7637: A2G<br />
• MT 8820: AJG AKG ALG AMG APG ARS ARY<br />
• MT 9961: AkS AkY ALS<br />
• MT 6136, 7626, 7629, and 8338_SB<br />
Line Cord-Australia / New Zealand<br />
• MT 6139:<br />
• MT 6175:<br />
• MT 7187:<br />
• MT 7345:<br />
• MT 7348:<br />
• MT 7356:<br />
Power Cords --primary FRU # CRU<br />
• MT 7359: D3M D4M D5M D6M D7M D8M D9M FBM FDM FFM<br />
• MT 7479: AMM ANM APM AQM ARM ASM AUM ALM BDM<br />
• MT 7637: A2M<br />
• MT 8820:<br />
• MT 9961:<br />
• MT 6136, 7626, 7629, and 8338_SB<br />
Line Cord - South Africa<br />
• MT 6139: A1G A2G A3G A4G A5G A6G<br />
• MT 6175:<br />
• MT 7187: AKG<br />
• MT 7345: A6G<br />
• MT 7348: A1G A2G A3G A4G A5G<br />
• MT 7356: A2G<br />
• MT 7359: B5A AMM ANM APM AQM ARM ASM AUM ALM FBM FDM FFM<br />
• MT 7479: B5A AMM ANM APM AQM ARM ASM AUM ALM BDM<br />
• MT 7637: A2M<br />
• MT 8820: AJG AKG ALG AMG APG<br />
• MT 9961:<br />
• MT 6136, 7626, 7629, and 8338_SB<br />
42T5132 1<br />
42T5135 1<br />
42T5141 1<br />
Chapter 9. FRU lists 159
Line Cord - Israel<br />
• MT 6139: A1G A2G A3G A4G A5G A6G<br />
• MT 6175:<br />
• MT 7187: AKG<br />
• MT 7345: A6G<br />
• MT 7348: A1G A2G A3G A4G A5G<br />
• MT 7356: A2G<br />
• MT 7359: F6G<br />
• MT 7479:<br />
• MT 7637: A2G<br />
• MT 8820: AJG AKG ALG AMG APG<br />
• MT 9961: AMG<br />
• MT 6136, 7626, 7629, and 8338_SB<br />
Line Cord - China<br />
• MT 6139:<br />
• MT 6175:<br />
• MT 7187:<br />
• MT 7345:<br />
• MT 7348:<br />
• MT 7356:<br />
• MT 7359:<br />
• MT 7479:<br />
• MT 7637: A2C<br />
• MT 8820:<br />
• MT 9961:<br />
• MT 6136, 7626, 7629, and 8338_SB<br />
Line Cord - Taiwan<br />
• MT 6139:<br />
• MT 6175:<br />
• MT 7187:<br />
• MT 7345:<br />
• MT 7348:<br />
• MT 7356:<br />
• MT 7359:<br />
• MT 7479:<br />
• MT 7637: A2V<br />
• MT 8820:<br />
• MT 9961:<br />
• MT 6136, 7626, 7629, and 8338_SB<br />
160 <strong>ThinkCentre</strong> <strong>Hardware</strong> <strong>Maintenance</strong> <strong>Manual</strong><br />
Power Cords --primary FRU # CRU<br />
42T5147 1<br />
42T5150 1<br />
42T5156 1
Line Cord - Korea<br />
• MT 6139:<br />
• MT 6175:<br />
• MT 7187:<br />
• MT 7345:<br />
• MT 7348:<br />
• MT 7356:<br />
• MT 7359:<br />
• MT 7479:<br />
• MT 7637: A2K A2R<br />
• MT 8820:<br />
• MT 9961:<br />
• MT 6136, 7626, 7629, and 8338_SB<br />
Line Cord - Thailand<br />
• MT 6139:<br />
• MT 6175:<br />
• MT 7187:<br />
• MT 7345:<br />
• MT 7348:<br />
• MT 7356:<br />
• MT 7359:<br />
• MT 7479:<br />
• MT 7637: A2T<br />
• MT 8820:<br />
• MT 9961:<br />
• MT 6136, 7626, 7629, and 8338_SB<br />
Line Cord - India<br />
• MT 6139:<br />
• MT 6175:<br />
• MT 7187:<br />
• MT 7345:<br />
• MT 7348:<br />
• MT 7356:<br />
• MT 7359:<br />
• MT 7479: B5T<br />
• MT 7637: A2Q A3Q<br />
• MT 8820:<br />
• MT 9961:<br />
• MT 6136, 7626, 7629, and 8338_SB<br />
Power Cords --primary FRU # CRU<br />
42T5162 1<br />
42T4400 1<br />
42T5168 1<br />
Chapter 9. FRU lists 161
Recovery discs<br />
Windows XP Professional Recovery CD<br />
Note: The Windows XP Professional recovery DVDs are available only for models with a valid Microsoft<br />
Windows XP Professional certificate of authenticity (COA) affixed to the system. Due to a Microsoft licensing<br />
limitation, if a model came with Windows XP Professional preinstalled from the factory, but has either a<br />
Windows 7 or Windows Vista COA affixed to the system, that model is eligible only for recovery DVDs that<br />
match the operating system specified on the COA.<br />
Arabic enabled<br />
• MT 6139: CTO<br />
• MT 6175:<br />
• MT 7187:<br />
• MT 7345:<br />
• MT 7348: CTO<br />
• MT 7356: CTO<br />
• MT 7359: CTO<br />
• MT 7479: CTO<br />
• MT 7637: CTO<br />
• MT 8820: CTO<br />
• MT 9961: CTO<br />
• MT 6136, 7626, 7629, and 8338_SB<br />
Brazilian Portuguese<br />
• MT 6139: CTO<br />
• MT 6175:<br />
• MT 7187:<br />
• MT 7345:<br />
• MT 7348: CTO<br />
• MT 7356: CTO<br />
• MT 7359: CTO<br />
• MT 7479: CTO<br />
• MT 7637: CTO<br />
• MT 8820: CTO<br />
• MT 9961: CTO<br />
• MT 6136, 7626, 7629, and 8338_SB<br />
162 <strong>ThinkCentre</strong> <strong>Hardware</strong> <strong>Maintenance</strong> <strong>Manual</strong><br />
Windows XP Professional FRU # CRU<br />
71Y8274 1<br />
71Y8275 1
Simplified Chinese<br />
• MT 6139: CTO<br />
• MT 6175:<br />
• MT 7187:<br />
• MT 7345:<br />
• MT 7348: CTO<br />
• MT 7356: CTO<br />
• MT 7359: CTO<br />
• MT 7479: CTO<br />
• MT 7637: CTO<br />
• MT 8820: CTO<br />
• MT 9961: CTO<br />
• MT 6136, 7626, 7629, and 8338_SB<br />
Traditional Chinese<br />
• MT 6139: CTO<br />
• MT 6175:<br />
• MT 7187:<br />
• MT 7345:<br />
• MT 7348: CTO<br />
• MT 7356: CTO<br />
• MT 7359: CTO<br />
• MT 7479: CTO<br />
• MT 7637: CTO<br />
• MT 8820: CTO<br />
• MT 9961: CTO<br />
• MT 6136, 7626, 7629, and 8338_SB<br />
Czech<br />
• MT 6139: CTO<br />
• MT 6175:<br />
• MT 7187:<br />
• MT 7345:<br />
• MT 7348: CTO<br />
• MT 7356: CTO<br />
• MT 7359: CTO<br />
• MT 7479: CTO<br />
• MT 7637: CTO<br />
• MT 8820: CTO<br />
• MT 9961: CTO<br />
• MT 6136, 7626, 7629, and 8338_SB<br />
Windows XP Professional FRU # CRU<br />
71Y8276 1<br />
89Y1619 1<br />
71Y8278 1<br />
Chapter 9. FRU lists 163
Danish<br />
• MT 6139: CTO<br />
• MT 6175:<br />
• MT 7187:<br />
• MT 7345:<br />
• MT 7348: CTO<br />
• MT 7356: CTO<br />
• MT 7359: CTO<br />
• MT 7479: CTO<br />
• MT 7637: CTO<br />
• MT 8820: CTO<br />
• MT 9961: CTO<br />
• MT 6136, 7626, 7629, and 8338_SB<br />
Finland<br />
• MT 6139: CTO<br />
• MT 6175:<br />
• MT 7187:<br />
• MT 7345:<br />
• MT 7348: CTO<br />
• MT 7356: CTO<br />
• MT 7359: CTO<br />
• MT 7479: CTO<br />
• MT 7637: CTO<br />
• MT 8820: CTO<br />
• MT 9961: CTO<br />
• MT 6136, 7626, 7629, and 8338_SB<br />
French<br />
• MT 6139: CTO<br />
• MT 6175:<br />
• MT 7187:<br />
• MT 7345:<br />
• MT 7348: CTO<br />
• MT 7356: CTO<br />
• MT 7359: CTO<br />
• MT 7479: CTO<br />
• MT 7637: CTO<br />
• MT 8820: CTO<br />
• MT 9961: CTO<br />
• MT 6136, 7626, 7629, and 8338_SB<br />
164 <strong>ThinkCentre</strong> <strong>Hardware</strong> <strong>Maintenance</strong> <strong>Manual</strong><br />
Windows XP Professional FRU # CRU<br />
71Y8279 1<br />
71Y8280 1<br />
71Y8281 1
Greek<br />
• MT 6139: CTO<br />
• MT 6175:<br />
• MT 7187:<br />
• MT 7345:<br />
• MT 7348: CTO<br />
• MT 7356: CTO<br />
• MT 7359: CTO<br />
• MT 7479: CTO<br />
• MT 7637: CTO<br />
• MT 8820: CTO<br />
• MT 9961: CTO<br />
• MT 6136, 7626, 7629, and 8338_SB<br />
German<br />
• MT 6139: CTO<br />
• MT 6175:<br />
• MT 7187:<br />
• MT 7345:<br />
• MT 7348: CTO<br />
• MT 7356: CTO<br />
• MT 7359: CTO<br />
• MT 7479: CTO<br />
• MT 7637: CTO<br />
• MT 8820: CTO<br />
• MT 9961: CTO<br />
• MT 6136, 7626, 7629, and 8338_SB<br />
Hebrew<br />
• MT 6139: CTO<br />
• MT 6175:<br />
• MT 7187:<br />
• MT 7345:<br />
• MT 7348: CTO<br />
• MT 7356: CTO<br />
• MT 7359: CTO<br />
• MT 7479: CTO<br />
• MT 7637: CTO<br />
• MT 8820: CTO<br />
• MT 9961: CTO<br />
• MT 6136, 7626, 7629, and 8338_SB<br />
Windows XP Professional FRU # CRU<br />
71Y8282 1<br />
89Y7347 1<br />
71Y8284 1<br />
Chapter 9. FRU lists 165
Hong Kong<br />
• MT 6139: CTO<br />
• MT 6175:<br />
• MT 7187:<br />
• MT 7345:<br />
• MT 7348: CTO<br />
• MT 7356: CTO<br />
• MT 7359: CTO<br />
• MT 7479: CTO<br />
• MT 7637: CTO<br />
• MT 8820: CTO<br />
• MT 9961: CTO<br />
• MT 6136, 7626, 7629, and 8338_SB<br />
Hungarian<br />
• MT 6139: CTO<br />
• MT 6175:<br />
• MT 7187:<br />
• MT 7345:<br />
• MT 7348: CTO<br />
• MT 7356: CTO<br />
• MT 7359: CTO<br />
• MT 7479: CTO<br />
• MT 7637: CTO<br />
• MT 8820: CTO<br />
• MT 9961: CTO<br />
• MT 6136, 7626, 7629, and 8338_SB<br />
Italian<br />
• MT 6139: CTO<br />
• MT 6175:<br />
• MT 7187:<br />
• MT 7345:<br />
• MT 7348: CTO<br />
• MT 7356: CTO<br />
• MT 7359: CTO<br />
• MT 7479: CTO<br />
• MT 7637: CTO<br />
• MT 8820: CTO<br />
• MT 9961: CTO<br />
• MT 6136, 7626, 7629, and 8338_SB<br />
166 <strong>ThinkCentre</strong> <strong>Hardware</strong> <strong>Maintenance</strong> <strong>Manual</strong><br />
Windows XP Professional FRU # CRU<br />
71Y8285 1<br />
71Y8286 1<br />
71Y8287 1
Japan<br />
• MT 6139: CTO<br />
• MT 6175:<br />
• MT 7187:<br />
• MT 7345:<br />
• MT 7348: CTO<br />
• MT 7356: CTO<br />
• MT 7359: CTO<br />
• MT 7479: CTO<br />
• MT 7637: CTO<br />
• MT 8820: CTO<br />
• MT 9961: CTO<br />
• MT 6136, 7626, 7629, and 8338_SB<br />
Korea<br />
• MT 6139: CTO<br />
• MT 6175:<br />
• MT 7187:<br />
• MT 7345:<br />
• MT 7348: CTO<br />
• MT 7356: CTO<br />
• MT 7359: CTO<br />
• MT 7479: CTO<br />
• MT 7637: CTO<br />
• MT 8820: CTO<br />
• MT 9961: CTO<br />
• MT 6136, 7626, 7629, and 8338_SB<br />
Dutch<br />
• MT 6139: CTO<br />
• MT 6175:<br />
• MT 7187:<br />
• MT 7345:<br />
• MT 7348: CTO<br />
• MT 7356: CTO<br />
• MT 7359: CTO<br />
• MT 7479: CTO<br />
• MT 7637: CTO<br />
• MT 8820: CTO<br />
• MT 9961: CTO<br />
• MT 6136, 7626, 7629, and 8338_SB<br />
Windows XP Professional FRU # CRU<br />
71Y8288 1<br />
71Y8289 1<br />
71Y8290 1<br />
Chapter 9. FRU lists 167
Norway<br />
• MT 6139: CTO<br />
• MT 6175:<br />
• MT 7187:<br />
• MT 7345:<br />
• MT 7348: CTO<br />
• MT 7356: CTO<br />
• MT 7359: CTO<br />
• MT 7479: CTO<br />
• MT 7637: CTO<br />
• MT 8820: CTO<br />
• MT 9961: CTO<br />
• MT 6136, 7626, 7629, and 8338_SB<br />
Polish<br />
• MT 6139: CTO<br />
• MT 6175:<br />
• MT 7187:<br />
• MT 7345:<br />
• MT 7348: CTO<br />
• MT 7356: CTO<br />
• MT 7359: CTO<br />
• MT 7479: CTO<br />
• MT 7637: CTO<br />
• MT 8820: CTO<br />
• MT 9961: CTO<br />
• MT 6136, 7626, 7629, and 8338_SB<br />
Portuguese<br />
• MT 6139: CTO<br />
• MT 6175:<br />
• MT 7187:<br />
• MT 7345:<br />
• MT 7348: CTO<br />
• MT 7356: CTO<br />
• MT 7359: CTO<br />
• MT 7479: CTO<br />
• MT 7637: CTO<br />
• MT 8820: CTO<br />
• MT 9961: CTO<br />
• MT 6136, 7626, 7629, and 8338_SB<br />
168 <strong>ThinkCentre</strong> <strong>Hardware</strong> <strong>Maintenance</strong> <strong>Manual</strong><br />
Windows XP Professional FRU # CRU<br />
71Y8291 1<br />
71Y8292 1<br />
71Y8293 1
Russian English<br />
• MT 6139: CTO<br />
• MT 6175:<br />
• MT 7187:<br />
• MT 7345:<br />
• MT 7348: CTO<br />
• MT 7356: CTO<br />
• MT 7359: CTO<br />
• MT 7479: CTO<br />
• MT 7637: CTO<br />
• MT 8820: CTO<br />
• MT 9961: CTO<br />
• MT 6136, 7626, 7629, and 8338_SB<br />
Russian<br />
• MT 6139: CTO<br />
• MT 6175:<br />
• MT 7187:<br />
• MT 7345:<br />
• MT 7348: CTO<br />
• MT 7356: CTO<br />
• MT 7359: CTO<br />
• MT 7479: CTO<br />
• MT 7637: CTO<br />
• MT 8820: CTO<br />
• MT 9961: CTO<br />
• MT 6136, 7626, 7629, and 8338_SB<br />
Slovenian<br />
• MT 6139: CTO<br />
• MT 6175:<br />
• MT 7187:<br />
• MT 7345:<br />
• MT 7348: CTO<br />
• MT 7356: CTO<br />
• MT 7359: CTO<br />
• MT 7479: CTO<br />
• MT 7637: CTO<br />
• MT 8820: CTO<br />
• MT 9961: CTO<br />
• MT 6136, 7626, 7629, and 8338_SB<br />
Windows XP Professional FRU # CRU<br />
71Y8294 1<br />
71Y8295 1<br />
71Y8296 1<br />
Chapter 9. FRU lists 169
Spanish<br />
• MT 6139: CTO<br />
• MT 6175:<br />
• MT 7187:<br />
• MT 7345:<br />
• MT 7348: CTO<br />
• MT 7356: CTO<br />
• MT 7359: CTO<br />
• MT 7479: CTO<br />
• MT 7637: CTO<br />
• MT 8820: CTO<br />
• MT 9961: CTO<br />
• MT 6136, 7626, 7629, and 8338_SB<br />
Swedish<br />
• MT 6139: CTO<br />
• MT 6175:<br />
• MT 7187:<br />
• MT 7345:<br />
• MT 7348: CTO<br />
• MT 7356: CTO<br />
• MT 7359: CTO<br />
• MT 7479: CTO<br />
• MT 7637: CTO<br />
• MT 8820: CTO<br />
• MT 9961: CTO<br />
• MT 6136, 7626, 7629, and 8338_SB<br />
Turkish<br />
• MT 6139: CTO<br />
• MT 6175:<br />
• MT 7187:<br />
• MT 7345:<br />
• MT 7348: CTO<br />
• MT 7356: CTO<br />
• MT 7359: CTO<br />
• MT 7479: CTO<br />
• MT 7637: CTO<br />
• MT 8820: CTO<br />
• MT 9961: CTO<br />
• MT 6136, 7626, 7629, and 8338_SB<br />
170 <strong>ThinkCentre</strong> <strong>Hardware</strong> <strong>Maintenance</strong> <strong>Manual</strong><br />
Windows XP Professional FRU # CRU<br />
71Y8297 1<br />
71Y8298 1<br />
71Y8299 1
English<br />
• MT 6139: CTO<br />
• MT 6175:<br />
• MT 7187:<br />
• MT 7345:<br />
• MT 7348: CTO<br />
• MT 7356: CTO<br />
• MT 7359: CTO<br />
• MT 7479: CTO<br />
• MT 7637: CTO<br />
• MT 8820: CTO<br />
• MT 9961: CTO<br />
• MT 6136, 7626, 7629, and 8338_SB<br />
MUI Nordics EN-DK-FI-NO-SV<br />
• MT 6139: CTO<br />
• MT 6175:<br />
• MT 7187:<br />
• MT 7345:<br />
• MT 7348: CTO<br />
• MT 7356: CTO<br />
• MT 7359: CTO<br />
• MT 7479: CTO<br />
• MT 7637: CTO<br />
• MT 8820: CTO<br />
• MT 9961: CTO<br />
• MT 6136, 7626, 7629, and 8338_SB<br />
MUI Switz EN-FR-GR-IT<br />
• MT 6139: CTO<br />
• MT 6175:<br />
• MT 7187:<br />
• MT 7345:<br />
• MT 7348: CTO<br />
• MT 7356: CTO<br />
• MT 7359: CTO<br />
• MT 7479: CTO<br />
• MT 7637: CTO<br />
• MT 8820: CTO<br />
• MT 9961: CTO<br />
• MT 6136, 7626, 7629, and 8338_SB<br />
MUI Bel-Lux EN-FR-GR-NL<br />
• MT 6139: CTO<br />
• MT 6175:<br />
Windows XP Professional FRU # CRU<br />
71Y9948 1<br />
89Y7378 1<br />
89Y7379 1<br />
89Y7380 1<br />
Chapter 9. FRU lists 171
• MT 7187:<br />
• MT 7345:<br />
• MT 7348: CTO<br />
• MT 7356: CTO<br />
• MT 7359: CTO<br />
• MT 7479: CTO<br />
• MT 7637: CTO<br />
• MT 8820: CTO<br />
• MT 9961: CTO<br />
• MT 6136, 7626, 7629, and 8338_SB<br />
Windows XP Professional FRU # CRU<br />
Windows Vista 32 Home Basic Recovery CD<br />
Note: The Windows Vista recovery DVDs are available only for models with a valid Microsoft Windows Vista<br />
certificate of authenticity (COA) affixed to the system. Due to a Microsoft licensing limitation, if a model came<br />
with Windows Vista Business or Windows Vista Ultimate preinstalled from the factory, but has a Windows 7<br />
COA affixed to the system, that model is eligible only for recovery DVDs that match the operating system<br />
specified on the COA.<br />
US English<br />
• MT 6139:<br />
• MT 6175:<br />
• MT 7187:<br />
• MT 7345:<br />
• MT 7348:<br />
• MT 7356:<br />
• MT 7359:<br />
• MT 7479:<br />
• MT 7637:<br />
• MT 8820:<br />
• MT 9961:<br />
• MT 6136, 7626, 7629, and 8338_SB<br />
French<br />
• MT 6139:<br />
• MT 6175:<br />
• MT 7187:<br />
• MT 7345:<br />
• MT 7348:<br />
• MT 7356:<br />
• MT 7359:<br />
• MT 7479:<br />
• MT 7637:<br />
• MT 8820:<br />
172 <strong>ThinkCentre</strong> <strong>Hardware</strong> <strong>Maintenance</strong> <strong>Manual</strong><br />
Windows Vista 32 Home Basic FRU # CRU<br />
89Y1969 1<br />
89Y1949 1
• MT 9961:<br />
• MT 6136, 7626, 7629, and 8338_SB<br />
German<br />
• MT 6139:<br />
• MT 6175:<br />
• MT 7187:<br />
• MT 7345:<br />
• MT 7348:<br />
• MT 7356:<br />
• MT 7359:<br />
• MT 7479:<br />
• MT 7637:<br />
• MT 8820:<br />
• MT 9961:<br />
• MT 6136, 7626, 7629, and 8338_SB<br />
Spanish<br />
• MT 6139:<br />
• MT 6175:<br />
• MT 7187:<br />
• MT 7345:<br />
• MT 7348:<br />
• MT 7356:<br />
• MT 7359:<br />
• MT 7479:<br />
• MT 7637:<br />
• MT 8820:<br />
• MT 9961:<br />
• MT 6136, 7626, 7629, and 8338_SB<br />
Brazilian<br />
• MT 6139:<br />
• MT 6175:<br />
• MT 7187:<br />
• MT 7345:<br />
• MT 7348:<br />
• MT 7356:<br />
• MT 7359:<br />
• MT 7479:<br />
• MT 7637:<br />
• MT 8820:<br />
• MT 9961:<br />
• MT 6136, 7626, 7629, and 8338_SB<br />
Windows Vista 32 Home Basic FRU # CRU<br />
89Y1951 1<br />
89Y1966 1<br />
89Y1944 1<br />
Chapter 9. FRU lists 173
Italian<br />
• MT 6139:<br />
• MT 6175:<br />
• MT 7187:<br />
• MT 7345:<br />
• MT 7348:<br />
• MT 7356:<br />
• MT 7359:<br />
• MT 7479:<br />
• MT 7637:<br />
• MT 8820:<br />
• MT 9961:<br />
• MT 6136, 7626, 7629, and 8338_SB<br />
Japanese<br />
• MT 6139:<br />
• MT 6175:<br />
• MT 7187:<br />
• MT 7345:<br />
• MT 7348:<br />
• MT 7356:<br />
• MT 7359:<br />
• MT 7479:<br />
• MT 7637:<br />
• MT 8820:<br />
• MT 9961:<br />
• MT 6136, 7626, 7629, and 8338_SB<br />
Dutch<br />
• MT 6139:<br />
• MT 6175:<br />
• MT 7187:<br />
• MT 7345:<br />
• MT 7348:<br />
• MT 7356:<br />
• MT 7359:<br />
• MT 7479:<br />
• MT 7637:<br />
• MT 8820:<br />
• MT 9961:<br />
• MT 6136, 7626, 7629, and 8338_SB<br />
174 <strong>ThinkCentre</strong> <strong>Hardware</strong> <strong>Maintenance</strong> <strong>Manual</strong><br />
Windows Vista 32 Home Basic FRU # CRU<br />
89Y1955 1<br />
89Y1956 1<br />
89Y1958 1
Czech<br />
• MT 6139:<br />
• MT 6175:<br />
• MT 7187:<br />
• MT 7345:<br />
• MT 7348:<br />
• MT 7356:<br />
• MT 7359:<br />
• MT 7479:<br />
• MT 7637:<br />
• MT 8820:<br />
• MT 9961:<br />
• MT 6136, 7626, 7629, and 8338_SB<br />
India English<br />
• MT 6139:<br />
• MT 6175:<br />
• MT 7187:<br />
• MT 7345:<br />
• MT 7348:<br />
• MT 7356:<br />
• MT 7359:<br />
• MT 7479:<br />
• MT 7637:<br />
• MT 8820:<br />
• MT 9961:<br />
• MT 6136, 7626, 7629, and 8338_SB<br />
Polish<br />
• MT 6139:<br />
• MT 6175:<br />
• MT 7187:<br />
• MT 7345:<br />
• MT 7348:<br />
• MT 7356:<br />
• MT 7359:<br />
• MT 7479:<br />
• MT 7637:<br />
• MT 8820:<br />
• MT 9961:<br />
• MT 6136, 7626, 7629, and 8338_SB<br />
Windows Vista 32 Home Basic FRU # CRU<br />
89Y1947 1<br />
89Y1948 1<br />
89Y1959 1<br />
Chapter 9. FRU lists 175
Russian<br />
• MT 6139:<br />
• MT 6175:<br />
• MT 7187:<br />
• MT 7345:<br />
• MT 7348:<br />
• MT 7356:<br />
• MT 7359:<br />
• MT 7479:<br />
• MT 7637:<br />
• MT 8820:<br />
• MT 9961:<br />
• MT 6136, 7626, 7629, and 8338_SB<br />
Turkish<br />
• MT 6139:<br />
• MT 6175:<br />
• MT 7187:<br />
• MT 7345:<br />
• MT 7348:<br />
• MT 7356:<br />
• MT 7359:<br />
• MT 7479:<br />
• MT 7637:<br />
• MT 8820:<br />
• MT 9961:<br />
• MT 6136, 7626, 7629, and 8338_SB<br />
Hungarian<br />
• MT 6139:<br />
• MT 6175:<br />
• MT 7187:<br />
• MT 7345:<br />
• MT 7348:<br />
• MT 7356:<br />
• MT 7359:<br />
• MT 7479:<br />
• MT 7637:<br />
• MT 8820:<br />
• MT 9961:<br />
• MT 6136, 7626, 7629, and 8338_SB<br />
176 <strong>ThinkCentre</strong> <strong>Hardware</strong> <strong>Maintenance</strong> <strong>Manual</strong><br />
Windows Vista 32 Home Basic FRU # CRU<br />
89Y1963 1<br />
89Y1968 1<br />
89Y1954 1
Greek<br />
• MT 6139:<br />
• MT 6175:<br />
• MT 7187:<br />
• MT 7345:<br />
• MT 7348:<br />
• MT 7356:<br />
• MT 7359:<br />
• MT 7479:<br />
• MT 7637:<br />
• MT 8820:<br />
• MT 9961:<br />
• MT 6136, 7626, 7629, and 8338_SB<br />
Portuguese<br />
• MT 6139:<br />
• MT 6175:<br />
• MT 7187:<br />
• MT 7345:<br />
• MT 7348:<br />
• MT 7356:<br />
• MT 7359:<br />
• MT 7479:<br />
• MT 7637:<br />
• MT 8820:<br />
• MT 9961:<br />
• MT 6136, 7626, 7629, and 8338_SB<br />
Hong Kong<br />
• MT 6139:<br />
• MT 6175:<br />
• MT 7187:<br />
• MT 7345:<br />
• MT 7348:<br />
• MT 7356:<br />
• MT 7359:<br />
• MT 7479:<br />
• MT 7637:<br />
• MT 8820:<br />
• MT 9961:<br />
• MT 6136, 7626, 7629, and 8338_SB<br />
Windows Vista 32 Home Basic FRU # CRU<br />
89Y1950 1<br />
89Y1960 1<br />
89Y1953 1<br />
Chapter 9. FRU lists 177
Simplified Chinese<br />
• MT 6139:<br />
• MT 6175:<br />
• MT 7187:<br />
• MT 7345:<br />
• MT 7348:<br />
• MT 7356:<br />
• MT 7359:<br />
• MT 7479:<br />
• MT 7637:<br />
• MT 8820:<br />
• MT 9961:<br />
• MT 6136, 7626, 7629, and 8338_SB<br />
Traditional Chinese<br />
• MT 6139:<br />
• MT 6175:<br />
• MT 7187:<br />
• MT 7345:<br />
• MT 7348:<br />
• MT 7356:<br />
• MT 7359:<br />
• MT 7479:<br />
• MT 7637:<br />
• MT 8820:<br />
• MT 9961:<br />
• MT 6136, 7626, 7629, and 8338_SB<br />
Korean<br />
• MT 6139:<br />
• MT 6175:<br />
• MT 7187:<br />
• MT 7345:<br />
• MT 7348:<br />
• MT 7356:<br />
• MT 7359:<br />
• MT 7479:<br />
• MT 7637:<br />
• MT 8820:<br />
• MT 9961:<br />
• MT 6136, 7626, 7629, and 8338_SB<br />
178 <strong>ThinkCentre</strong> <strong>Hardware</strong> <strong>Maintenance</strong> <strong>Manual</strong><br />
Windows Vista 32 Home Basic FRU # CRU<br />
89Y1945 1<br />
89Y1946 1<br />
89Y1957 1
Slovenian<br />
• MT 6139:<br />
• MT 6175:<br />
• MT 7187:<br />
• MT 7345:<br />
• MT 7348:<br />
• MT 7356:<br />
• MT 7359:<br />
• MT 7479:<br />
• MT 7637:<br />
• MT 8820:<br />
• MT 9961:<br />
• MT 6136, 7626, 7629, and 8338_SB<br />
Russian English<br />
• MT 6139:<br />
• MT 6175:<br />
• MT 7187:<br />
• MT 7345:<br />
• MT 7348:<br />
• MT 7356:<br />
• MT 7359:<br />
• MT 7479:<br />
• MT 7637:<br />
• MT 8820:<br />
• MT 9961:<br />
• MT 6136, 7626, 7629, and 8338_SB<br />
Hebrew<br />
• MT 6139:<br />
• MT 6175:<br />
• MT 7187:<br />
• MT 7345:<br />
• MT 7348:<br />
• MT 7356:<br />
• MT 7359:<br />
• MT 7479:<br />
• MT 7637:<br />
• MT 8820:<br />
• MT 9961:<br />
• MT 6136, 7626, 7629, and 8338_SB<br />
Windows Vista 32 Home Basic FRU # CRU<br />
89Y1965 1<br />
89Y1961 1<br />
89Y1952 1<br />
Chapter 9. FRU lists 179
Arabic Localized<br />
• MT 6139:<br />
• MT 6175:<br />
• MT 7187:<br />
• MT 7345:<br />
• MT 7348:<br />
• MT 7356:<br />
• MT 7359:<br />
• MT 7479:<br />
• MT 7637:<br />
• MT 8820:<br />
• MT 9961:<br />
• MT 6136, 7626, 7629, and 8338_SB<br />
Slovakian<br />
• MT 6139:<br />
• MT 6175:<br />
• MT 7187:<br />
• MT 7345:<br />
• MT 7348:<br />
• MT 7356:<br />
• MT 7359:<br />
• MT 7479:<br />
• MT 7637:<br />
• MT 8820:<br />
• MT 9961:<br />
• MT 6136, 7626, 7629, and 8338_SB<br />
Romanian<br />
• MT 6139:<br />
• MT 6175:<br />
• MT 7187:<br />
• MT 7345:<br />
• MT 7348:<br />
• MT 7356:<br />
• MT 7359:<br />
• MT 7479:<br />
• MT 7637:<br />
• MT 8820:<br />
• MT 9961:<br />
• MT 6136, 7626, 7629, and 8338_SB<br />
180 <strong>ThinkCentre</strong> <strong>Hardware</strong> <strong>Maintenance</strong> <strong>Manual</strong><br />
Windows Vista 32 Home Basic FRU # CRU<br />
89Y1943 1<br />
89Y1964 1<br />
89Y1962 1
Serbian-Latin<br />
• MT 6139:<br />
• MT 6175:<br />
• MT 7187:<br />
• MT 7345:<br />
• MT 7348:<br />
• MT 7356:<br />
• MT 7359:<br />
• MT 7479:<br />
• MT 7637:<br />
• MT 8820:<br />
• MT 9961:<br />
• MT 6136, 7626, 7629, and 8338_SB<br />
C&L1 Nordics (EN DK FI NO SV)<br />
• MT 6139:<br />
• MT 6175:<br />
• MT 7187:<br />
• MT 7345:<br />
• MT 7348:<br />
• MT 7356:<br />
• MT 7359:<br />
• MT 7479:<br />
• MT 7637:<br />
• MT 8820:<br />
• MT 9961:<br />
• MT 6136, 7626, 7629, and 8338_SB<br />
C&L2 Switzerland (EN FR GR IT)<br />
• MT 6139:<br />
• MT 6175:<br />
• MT 7187:<br />
• MT 7345:<br />
• MT 7348:<br />
• MT 7356:<br />
• MT 7359:<br />
• MT 7479:<br />
• MT 7637:<br />
• MT 8820:<br />
• MT 9961:<br />
• MT 6136, 7626, 7629, and 8338_SB<br />
C&L3 Bel Lux (EN FR GR NL)<br />
• MT 6139:<br />
• MT 6175:<br />
Windows Vista 32 Home Basic FRU # CRU<br />
89Y1967 1<br />
89Y1970 1<br />
89Y1972 1<br />
89Y1971 1<br />
Chapter 9. FRU lists 181
• MT 7187:<br />
• MT 7345:<br />
• MT 7348:<br />
• MT 7356:<br />
• MT 7359:<br />
• MT 7479:<br />
• MT 7637:<br />
• MT 8820:<br />
• MT 9961:<br />
• MT 6136, 7626, 7629, and 8338_SB<br />
Windows Vista 32 Home Basic FRU # CRU<br />
Windows Vista Home Basic 32 SP2 Recovery CD<br />
Note: The Windows Vista recovery DVDs are available only for models with a valid Microsoft Windows Vista<br />
certificate of authenticity (COA) affixed to the system. Due to a Microsoft licensing limitation, if a model came<br />
with Windows Vista Business or Windows Vista Ultimate preinstalled from the factory, but has a Windows 7<br />
COA affixed to the system, that model is eligible only for recovery DVDs that match the operating system<br />
specified on the COA.<br />
US English<br />
• MT 6139:<br />
• MT 6175:<br />
• MT 7187:<br />
• MT 7345:<br />
• MT 7348:<br />
• MT 7356:<br />
• MT 7359:<br />
• MT 7479:<br />
• MT 7637:<br />
• MT 8820:<br />
• MT 9961:<br />
• MT 6136, 7626, 7629, and 8338_SB<br />
French<br />
• MT 6139:<br />
• MT 6175:<br />
• MT 7187:<br />
• MT 7345:<br />
• MT 7348:<br />
• MT 7356:<br />
• MT 7359:<br />
• MT 7479:<br />
• MT 7637:<br />
• MT 8820:<br />
182 <strong>ThinkCentre</strong> <strong>Hardware</strong> <strong>Maintenance</strong> <strong>Manual</strong><br />
Vista Home Basic 32 SP2 FRU # CRU<br />
03T2135 1<br />
03T2115 1
• MT 9961:<br />
• MT 6136, 7626, 7629, and 8338_SB<br />
Greek<br />
• MT 6139:<br />
• MT 6175:<br />
• MT 7187:<br />
• MT 7345:<br />
• MT 7348:<br />
• MT 7356:<br />
• MT 7359:<br />
• MT 7479:<br />
• MT 7637:<br />
• MT 8820:<br />
• MT 9961:<br />
• MT 6136, 7626, 7629, and 8338_SB<br />
Hebrew<br />
• MT 6139:<br />
• MT 6175:<br />
• MT 7187:<br />
• MT 7345:<br />
• MT 7348:<br />
• MT 7356:<br />
• MT 7359:<br />
• MT 7479:<br />
• MT 7637:<br />
• MT 8820:<br />
• MT 9961:<br />
• MT 6136, 7626, 7629, and 8338_SB<br />
Spanish<br />
• MT 6139:<br />
• MT 6175:<br />
• MT 7187:<br />
• MT 7345:<br />
• MT 7348:<br />
• MT 7356:<br />
• MT 7359:<br />
• MT 7479:<br />
• MT 7637:<br />
• MT 8820:<br />
• MT 9961:<br />
• MT 6136, 7626, 7629, and 8338_SB<br />
Vista Home Basic 32 SP2 FRU # CRU<br />
03T2116 1<br />
03T2118 1<br />
03T2132 1<br />
Chapter 9. FRU lists 183
Brazilian<br />
• MT 6139:<br />
• MT 6175:<br />
• MT 7187:<br />
• MT 7345:<br />
• MT 7348:<br />
• MT 7356:<br />
• MT 7359:<br />
• MT 7479:<br />
• MT 7637:<br />
• MT 8820:<br />
• MT 9961:<br />
• MT 6136, 7626, 7629, and 8338_SB<br />
India English<br />
• MT 6139:<br />
• MT 6175:<br />
• MT 7187:<br />
• MT 7345:<br />
• MT 7348:<br />
• MT 7356:<br />
• MT 7359:<br />
• MT 7479:<br />
• MT 7637:<br />
• MT 8820:<br />
• MT 9961:<br />
• MT 6136, 7626, 7629, and 8338_SB<br />
Dutch<br />
• MT 6139:<br />
• MT 6175:<br />
• MT 7187:<br />
• MT 7345:<br />
• MT 7348:<br />
• MT 7356:<br />
• MT 7359:<br />
• MT 7479:<br />
• MT 7637:<br />
• MT 8820:<br />
• MT 9961:<br />
• MT 6136, 7626, 7629, and 8338_SB<br />
184 <strong>ThinkCentre</strong> <strong>Hardware</strong> <strong>Maintenance</strong> <strong>Manual</strong><br />
Vista Home Basic 32 SP2 FRU # CRU<br />
03T2111 1<br />
03T2122 1<br />
03T2124 1
Czech<br />
• MT 6139:<br />
• MT 6175:<br />
• MT 7187:<br />
• MT 7345:<br />
• MT 7348:<br />
• MT 7356:<br />
• MT 7359:<br />
• MT 7479:<br />
• MT 7637:<br />
• MT 8820:<br />
• MT 9961:<br />
• MT 6136, 7626, 7629, and 8338_SB<br />
Polish<br />
• MT 6139:<br />
• MT 6175:<br />
• MT 7187:<br />
• MT 7345:<br />
• MT 7348:<br />
• MT 7356:<br />
• MT 7359:<br />
• MT 7479:<br />
• MT 7637:<br />
• MT 8820:<br />
• MT 9961:<br />
• MT 6136, 7626, 7629, and 8338_SB<br />
Russian<br />
• MT 6139:<br />
• MT 6175:<br />
• MT 7187:<br />
• MT 7345:<br />
• MT 7348:<br />
• MT 7356:<br />
• MT 7359:<br />
• MT 7479:<br />
• MT 7637:<br />
• MT 8820:<br />
• MT 9961:<br />
• MT 6136, 7626, 7629, and 8338_SB<br />
Vista Home Basic 32 SP2 FRU # CRU<br />
03T2114 1<br />
03T2125 1<br />
03T2129 1<br />
Chapter 9. FRU lists 185
Turkish<br />
• MT 6139:<br />
• MT 6175:<br />
• MT 7187:<br />
• MT 7345:<br />
• MT 7348:<br />
• MT 7356:<br />
• MT 7359:<br />
• MT 7479:<br />
• MT 7637:<br />
• MT 8820:<br />
• MT 9961:<br />
• MT 6136, 7626, 7629, and 8338_SB<br />
Italian<br />
• MT 6139:<br />
• MT 6175:<br />
• MT 7187:<br />
• MT 7345:<br />
• MT 7348:<br />
• MT 7356:<br />
• MT 7359:<br />
• MT 7479:<br />
• MT 7637:<br />
• MT 8820:<br />
• MT 9961:<br />
• MT 6136, 7626, 7629, and 8338_SB<br />
German<br />
• MT 6139:<br />
• MT 6175:<br />
• MT 7187:<br />
• MT 7345:<br />
• MT 7348:<br />
• MT 7356:<br />
• MT 7359:<br />
• MT 7479:<br />
• MT 7637:<br />
• MT 8820:<br />
• MT 9961:<br />
• MT 6136, 7626, 7629, and 8338_SB<br />
186 <strong>ThinkCentre</strong> <strong>Hardware</strong> <strong>Maintenance</strong> <strong>Manual</strong><br />
Vista Home Basic 32 SP2 FRU # CRU<br />
03T2134 1<br />
03T2121 1<br />
03T2117 1
Portuguese<br />
• MT 6139:<br />
• MT 6175:<br />
• MT 7187:<br />
• MT 7345:<br />
• MT 7348:<br />
• MT 7356:<br />
• MT 7359:<br />
• MT 7479:<br />
• MT 7637:<br />
• MT 8820:<br />
• MT 9961:<br />
• MT 6136, 7626, 7629, and 8338_SB<br />
Hungarian<br />
• MT 6139:<br />
• MT 6175:<br />
• MT 7187:<br />
• MT 7345:<br />
• MT 7348:<br />
• MT 7356:<br />
• MT 7359:<br />
• MT 7479:<br />
• MT 7637:<br />
• MT 8820:<br />
• MT 9961:<br />
• MT 6136, 7626, 7629, and 8338_SB<br />
Simplified Chinese<br />
• MT 6139:<br />
• MT 6175:<br />
• MT 7187:<br />
• MT 7345:<br />
• MT 7348:<br />
• MT 7356:<br />
• MT 7359:<br />
• MT 7479:<br />
• MT 7637:<br />
• MT 8820:<br />
• MT 9961:<br />
• MT 6136, 7626, 7629, and 8338_SB<br />
Vista Home Basic 32 SP2 FRU # CRU<br />
03T2126 1<br />
03T2120 1<br />
03T2112 1<br />
Chapter 9. FRU lists 187
Traditional Chinese<br />
• MT 6139:<br />
• MT 6175:<br />
• MT 7187:<br />
• MT 7345:<br />
• MT 7348:<br />
• MT 7356:<br />
• MT 7359:<br />
• MT 7479:<br />
• MT 7637:<br />
• MT 8820:<br />
• MT 9961:<br />
• MT 6136, 7626, 7629, and 8338_SB<br />
Korean<br />
• MT 6139:<br />
• MT 6175:<br />
• MT 7187:<br />
• MT 7345:<br />
• MT 7348:<br />
• MT 7356:<br />
• MT 7359:<br />
• MT 7479:<br />
• MT 7637:<br />
• MT 8820:<br />
• MT 9961:<br />
• MT 6136, 7626, 7629, and 8338_SB<br />
Slovenian<br />
• MT 6139:<br />
• MT 6175:<br />
• MT 7187:<br />
• MT 7345:<br />
• MT 7348:<br />
• MT 7356:<br />
• MT 7359:<br />
• MT 7479:<br />
• MT 7637:<br />
• MT 8820:<br />
• MT 9961:<br />
• MT 6136, 7626, 7629, and 8338_SB<br />
188 <strong>ThinkCentre</strong> <strong>Hardware</strong> <strong>Maintenance</strong> <strong>Manual</strong><br />
Vista Home Basic 32 SP2 FRU # CRU<br />
03T2113 1<br />
03T2123 1<br />
03T2131 1
Russian English<br />
• MT 6139:<br />
• MT 6175:<br />
• MT 7187:<br />
• MT 7345:<br />
• MT 7348:<br />
• MT 7356:<br />
• MT 7359:<br />
• MT 7479:<br />
• MT 7637:<br />
• MT 8820:<br />
• MT 9961:<br />
• MT 6136, 7626, 7629, and 8338_SB<br />
Hong Kong<br />
• MT 6139:<br />
• MT 6175:<br />
• MT 7187:<br />
• MT 7345:<br />
• MT 7348:<br />
• MT 7356:<br />
• MT 7359:<br />
• MT 7479:<br />
• MT 7637:<br />
• MT 8820:<br />
• MT 9961:<br />
• MT 6136, 7626, 7629, and 8338_SB<br />
Arabic Localized<br />
• MT 6139:<br />
• MT 6175:<br />
• MT 7187:<br />
• MT 7345:<br />
• MT 7348:<br />
• MT 7356:<br />
• MT 7359:<br />
• MT 7479:<br />
• MT 7637:<br />
• MT 8820:<br />
• MT 9961:<br />
• MT 6136, 7626, 7629, and 8338_SB<br />
Vista Home Basic 32 SP2 FRU # CRU<br />
03T2127 1<br />
03T2119 1<br />
03T2110 1<br />
Chapter 9. FRU lists 189
Slovakian<br />
• MT 6139:<br />
• MT 6175:<br />
• MT 7187:<br />
• MT 7345:<br />
• MT 7348:<br />
• MT 7356:<br />
• MT 7359:<br />
• MT 7479:<br />
• MT 7637:<br />
• MT 8820:<br />
• MT 9961:<br />
• MT 6136, 7626, 7629, and 8338_SB<br />
Romanian<br />
• MT 6139:<br />
• MT 6175:<br />
• MT 7187:<br />
• MT 7345:<br />
• MT 7348:<br />
• MT 7356:<br />
• MT 7359:<br />
• MT 7479:<br />
• MT 7637:<br />
• MT 8820:<br />
• MT 9961:<br />
• MT 6136, 7626, 7629, and 8338_SB<br />
Serbian-Latin<br />
• MT 6139:<br />
• MT 6175:<br />
• MT 7187:<br />
• MT 7345:<br />
• MT 7348:<br />
• MT 7356:<br />
• MT 7359:<br />
• MT 7479:<br />
• MT 7637:<br />
• MT 8820:<br />
• MT 9961:<br />
• MT 6136, 7626, 7629, and 8338_SB<br />
190 <strong>ThinkCentre</strong> <strong>Hardware</strong> <strong>Maintenance</strong> <strong>Manual</strong><br />
Vista Home Basic 32 SP2 FRU # CRU<br />
03T2130 1<br />
03T2128 1<br />
03T2133 1
C&L1 Nordics (EN DK FI NO SV)<br />
• MT 6139:<br />
• MT 6175:<br />
• MT 7187:<br />
• MT 7345:<br />
• MT 7348:<br />
• MT 7356:<br />
• MT 7359:<br />
• MT 7479:<br />
• MT 7637:<br />
• MT 8820:<br />
• MT 9961:<br />
• MT 6136, 7626, 7629, and 8338_SB<br />
C&L2 Switzerland (EN FR GR IT)<br />
• MT 6139:<br />
• MT 6175:<br />
• MT 7187:<br />
• MT 7345:<br />
• MT 7348:<br />
• MT 7356:<br />
• MT 7359:<br />
• MT 7479:<br />
• MT 7637:<br />
• MT 8820:<br />
• MT 9961:<br />
• MT 6136, 7626, 7629, and 8338_SB<br />
C&L3 Bel Lux (EN FR GR NL)<br />
• MT 6139:<br />
• MT 6175:<br />
• MT 7187:<br />
• MT 7345:<br />
• MT 7348:<br />
• MT 7356:<br />
• MT 7359:<br />
• MT 7479:<br />
• MT 7637:<br />
• MT 8820:<br />
• MT 9961:<br />
• MT 6136, 7626, 7629, and 8338_SB<br />
Japanese<br />
• MT 6139:<br />
• MT 6175:<br />
Vista Home Basic 32 SP2 FRU # CRU<br />
03T2136 1<br />
03T2138 1<br />
03T2137 1<br />
03T2170 1<br />
Chapter 9. FRU lists 191
• MT 7187:<br />
• MT 7345:<br />
• MT 7348:<br />
• MT 7356:<br />
• MT 7359:<br />
• MT 7479:<br />
• MT 7637:<br />
• MT 8820:<br />
• MT 9961:<br />
• MT 6136, 7626, 7629, and 8338_SB<br />
Vista Home Basic 32 SP2 FRU # CRU<br />
Windows Vista Business 32 Recovery CD<br />
Note: The Windows Vista recovery DVDs are available only for models with a valid Microsoft Windows Vista<br />
certificate of authenticity (COA) affixed to the system. Due to a Microsoft licensing limitation, if a model came<br />
with Windows Vista Business or Windows Vista Ultimate preinstalled from the factory, but has a Windows 7<br />
COA affixed to the system, that model is eligible only for recovery DVDs that match the operating system<br />
specified on the COA.<br />
US English<br />
• MT 6139:<br />
• MT 6175:<br />
• MT 7187:<br />
• MT 7345:<br />
• MT 7348:<br />
• MT 7356:<br />
• MT 7359:<br />
• MT 7479:<br />
• MT 7637:<br />
• MT 8820:<br />
• MT 9961:<br />
• MT 6136, 7626, 7629, and 8338_SB<br />
French<br />
• MT 6139:<br />
• MT 6175:<br />
• MT 7187:<br />
• MT 7345:<br />
• MT 7348:<br />
• MT 7356:<br />
• MT 7359:<br />
• MT 7479:<br />
• MT 7637:<br />
• MT 8820:<br />
192 <strong>ThinkCentre</strong> <strong>Hardware</strong> <strong>Maintenance</strong> <strong>Manual</strong><br />
Windows Vista Business 32 FRU # CRU<br />
89Y1939 1<br />
89Y1918 1
• MT 9961:<br />
• MT 6136, 7626, 7629, and 8338_SB<br />
German<br />
• MT 6139:<br />
• MT 6175:<br />
• MT 7187:<br />
• MT 7345:<br />
• MT 7348:<br />
• MT 7356:<br />
• MT 7359:<br />
• MT 7479:<br />
• MT 7637:<br />
• MT 8820:<br />
• MT 9961:<br />
• MT 6136, 7626, 7629, and 8338_SB<br />
Spanish<br />
• MT 6139:<br />
• MT 6175:<br />
• MT 7187:<br />
• MT 7345:<br />
• MT 7348:<br />
• MT 7356:<br />
• MT 7359:<br />
• MT 7479:<br />
• MT 7637:<br />
• MT 8820:<br />
• MT 9961:<br />
• MT 6136, 7626, 7629, and 8338_SB<br />
B/P<br />
• MT 6139:<br />
• MT 6175:<br />
• MT 7187:<br />
• MT 7345:<br />
• MT 7348:<br />
• MT 7356:<br />
• MT 7359:<br />
• MT 7479:<br />
• MT 7637:<br />
• MT 8820:<br />
• MT 9961:<br />
• MT 6136, 7626, 7629, and 8338_SB<br />
Windows Vista Business 32 FRU # CRU<br />
89Y1920 1<br />
89Y1936 1<br />
89Y1914 1<br />
Chapter 9. FRU lists 193
Italy<br />
• MT 6139:<br />
• MT 6175:<br />
• MT 7187:<br />
• MT 7345:<br />
• MT 7348:<br />
• MT 7356:<br />
• MT 7359:<br />
• MT 7479:<br />
• MT 7637:<br />
• MT 8820:<br />
• MT 9961:<br />
• MT 6136, 7626, 7629, and 8338_SB<br />
Japanese<br />
• MT 6139:<br />
• MT 6175:<br />
• MT 7187:<br />
• MT 7345:<br />
• MT 7348:<br />
• MT 7356:<br />
• MT 7359:<br />
• MT 7479:<br />
• MT 7637:<br />
• MT 8820:<br />
• MT 9961:<br />
• MT 6136, 7626, 7629, and 8338_SB<br />
Dutch<br />
• MT 6139:<br />
• MT 6175:<br />
• MT 7187:<br />
• MT 7345:<br />
• MT 7348:<br />
• MT 7356:<br />
• MT 7359:<br />
• MT 7479:<br />
• MT 7637:<br />
• MT 8820:<br />
• MT 9961:<br />
• MT 6136, 7626, 7629, and 8338_SB<br />
194 <strong>ThinkCentre</strong> <strong>Hardware</strong> <strong>Maintenance</strong> <strong>Manual</strong><br />
Windows Vista Business 32 FRU # CRU<br />
89Y1925 1<br />
89Y1926 1<br />
89Y1928 1
Czech<br />
• MT 6139:<br />
• MT 6175:<br />
• MT 7187:<br />
• MT 7345:<br />
• MT 7348:<br />
• MT 7356:<br />
• MT 7359:<br />
• MT 7479:<br />
• MT 7637:<br />
• MT 8820:<br />
• MT 9961:<br />
• MT 6136, 7626, 7629, and 8338_SB<br />
Polish<br />
• MT 6139:<br />
• MT 6175:<br />
• MT 7187:<br />
• MT 7345:<br />
• MT 7348:<br />
• MT 7356:<br />
• MT 7359:<br />
• MT 7479:<br />
• MT 7637:<br />
• MT 8820:<br />
• MT 9961:<br />
• MT 6136, 7626, 7629, and 8338_SB<br />
Russian<br />
• MT 6139:<br />
• MT 6175:<br />
• MT 7187:<br />
• MT 7345:<br />
• MT 7348:<br />
• MT 7356:<br />
• MT 7359:<br />
• MT 7479:<br />
• MT 7637:<br />
• MT 8820:<br />
• MT 9961:<br />
• MT 6136, 7626, 7629, and 8338_SB<br />
Windows Vista Business 32 FRU # CRU<br />
89Y1917 1<br />
89Y1929 1<br />
89Y1933 1<br />
Chapter 9. FRU lists 195
Turkish<br />
• MT 6139:<br />
• MT 6175:<br />
• MT 7187:<br />
• MT 7345:<br />
• MT 7348:<br />
• MT 7356:<br />
• MT 7359:<br />
• MT 7479:<br />
• MT 7637:<br />
• MT 8820:<br />
• MT 9961:<br />
• MT 6136, 7626, 7629, and 8338_SB<br />
Hungarian<br />
• MT 6139:<br />
• MT 6175:<br />
• MT 7187:<br />
• MT 7345:<br />
• MT 7348:<br />
• MT 7356:<br />
• MT 7359:<br />
• MT 7479:<br />
• MT 7637:<br />
• MT 8820:<br />
• MT 9961:<br />
• MT 6136, 7626, 7629, and 8338_SB<br />
India English<br />
• MT 6139:<br />
• MT 6175:<br />
• MT 7187:<br />
• MT 7345:<br />
• MT 7348:<br />
• MT 7356:<br />
• MT 7359:<br />
• MT 7479:<br />
• MT 7637:<br />
• MT 8820:<br />
• MT 9961:<br />
• MT 6136, 7626, 7629, and 8338_SB<br />
196 <strong>ThinkCentre</strong> <strong>Hardware</strong> <strong>Maintenance</strong> <strong>Manual</strong><br />
Windows Vista Business 32 FRU # CRU<br />
89Y1938 1<br />
89Y1923 1<br />
89Y1924 1
Greek<br />
• MT 6139:<br />
• MT 6175:<br />
• MT 7187:<br />
• MT 7345:<br />
• MT 7348:<br />
• MT 7356:<br />
• MT 7359:<br />
• MT 7479:<br />
• MT 7637:<br />
• MT 8820:<br />
• MT 9961:<br />
• MT 6136, 7626, 7629, and 8338_SB<br />
Portuguese<br />
• MT 6139:<br />
• MT 6175:<br />
• MT 7187:<br />
• MT 7345:<br />
• MT 7348:<br />
• MT 7356:<br />
• MT 7359:<br />
• MT 7479:<br />
• MT 7637:<br />
• MT 8820:<br />
• MT 9961:<br />
• MT 6136, 7626, 7629, and 8338_SB<br />
Simplified Chinese<br />
• MT 6139:<br />
• MT 6175:<br />
• MT 7187:<br />
• MT 7345:<br />
• MT 7348:<br />
• MT 7356:<br />
• MT 7359:<br />
• MT 7479:<br />
• MT 7637:<br />
• MT 8820:<br />
• MT 9961:<br />
• MT 6136, 7626, 7629, and 8338_SB<br />
Windows Vista Business 32 FRU # CRU<br />
89Y1919 1<br />
89Y1930 1<br />
89Y1915 1<br />
Chapter 9. FRU lists 197
Traditional Chinese<br />
• MT 6139:<br />
• MT 6175:<br />
• MT 7187:<br />
• MT 7345:<br />
• MT 7348:<br />
• MT 7356:<br />
• MT 7359:<br />
• MT 7479:<br />
• MT 7637:<br />
• MT 8820:<br />
• MT 9961:<br />
• MT 6136, 7626, 7629, and 8338_SB<br />
Hong Kong<br />
• MT 6139:<br />
• MT 6175:<br />
• MT 7187:<br />
• MT 7345:<br />
• MT 7348:<br />
• MT 7356:<br />
• MT 7359:<br />
• MT 7479:<br />
• MT 7637:<br />
• MT 8820:<br />
• MT 9961:<br />
• MT 6136, 7626, 7629, and 8338_SB<br />
Korean<br />
• MT 6139:<br />
• MT 6175:<br />
• MT 7187:<br />
• MT 7345:<br />
• MT 7348:<br />
• MT 7356:<br />
• MT 7359:<br />
• MT 7479:<br />
• MT 7637:<br />
• MT 8820:<br />
• MT 9961:<br />
• MT 6136, 7626, 7629, and 8338_SB<br />
198 <strong>ThinkCentre</strong> <strong>Hardware</strong> <strong>Maintenance</strong> <strong>Manual</strong><br />
Windows Vista Business 32 FRU # CRU<br />
89Y1916 1<br />
89Y1922 1<br />
89Y1927 1
Slovenian<br />
• MT 6139:<br />
• MT 6175:<br />
• MT 7187:<br />
• MT 7345:<br />
• MT 7348:<br />
• MT 7356:<br />
• MT 7359:<br />
• MT 7479:<br />
• MT 7637:<br />
• MT 8820:<br />
• MT 9961:<br />
• MT 6136, 7626, 7629, and 8338_SB<br />
Russian English<br />
• MT 6139:<br />
• MT 6175:<br />
• MT 7187:<br />
• MT 7345:<br />
• MT 7348:<br />
• MT 7356:<br />
• MT 7359:<br />
• MT 7479:<br />
• MT 7637:<br />
• MT 8820:<br />
• MT 9961:<br />
• MT 6136, 7626, 7629, and 8338_SB<br />
Romanian<br />
• MT 6139:<br />
• MT 6175:<br />
• MT 7187:<br />
• MT 7345:<br />
• MT 7348:<br />
• MT 7356:<br />
• MT 7359:<br />
• MT 7479:<br />
• MT 7637:<br />
• MT 8820:<br />
• MT 9961:<br />
• MT 6136, 7626, 7629, and 8338_SB<br />
Windows Vista Business 32 FRU # CRU<br />
89Y1935 1<br />
89Y1931 1<br />
89Y1932 1<br />
Chapter 9. FRU lists 199
Serbian-Latin<br />
• MT 6139:<br />
• MT 6175:<br />
• MT 7187:<br />
• MT 7345:<br />
• MT 7348:<br />
• MT 7356:<br />
• MT 7359:<br />
• MT 7479:<br />
• MT 7637:<br />
• MT 8820:<br />
• MT 9961:<br />
• MT 6136, 7626, 7629, and 8338_SB<br />
Slovakian<br />
• MT 6139:<br />
• MT 6175:<br />
• MT 7187:<br />
• MT 7345:<br />
• MT 7348:<br />
• MT 7356:<br />
• MT 7359:<br />
• MT 7479:<br />
• MT 7637:<br />
• MT 8820:<br />
• MT 9961:<br />
• MT 6136, 7626, 7629, and 8338_SB<br />
Arabic Localized<br />
• MT 6139:<br />
• MT 6175:<br />
• MT 7187:<br />
• MT 7345:<br />
• MT 7348:<br />
• MT 7356:<br />
• MT 7359:<br />
• MT 7479:<br />
• MT 7637:<br />
• MT 8820:<br />
• MT 9961:<br />
• MT 6136, 7626, 7629, and 8338_SB<br />
200 <strong>ThinkCentre</strong> <strong>Hardware</strong> <strong>Maintenance</strong> <strong>Manual</strong><br />
Windows Vista Business 32 FRU # CRU<br />
89Y1937 1<br />
89Y1934 1<br />
89Y1913 1
Hebrew<br />
• MT 6139:<br />
• MT 6175:<br />
• MT 7187:<br />
• MT 7345:<br />
• MT 7348:<br />
• MT 7356:<br />
• MT 7359:<br />
• MT 7479:<br />
• MT 7637:<br />
• MT 8820:<br />
• MT 9961:<br />
• MT 6136, 7626, 7629, and 8338_SB<br />
C&L1 Nordics (EN DK FI NO SV)<br />
• MT 6139:<br />
• MT 6175:<br />
• MT 7187:<br />
• MT 7345:<br />
• MT 7348:<br />
• MT 7356:<br />
• MT 7359:<br />
• MT 7479:<br />
• MT 7637:<br />
• MT 8820:<br />
• MT 9961:<br />
• MT 6136, 7626, 7629, and 8338_SB<br />
C&L2 Switzerland (EN FR GR IT)<br />
• MT 6139:<br />
• MT 6175:<br />
• MT 7187:<br />
• MT 7345:<br />
• MT 7348:<br />
• MT 7356:<br />
• MT 7359:<br />
• MT 7479:<br />
• MT 7637:<br />
• MT 8820:<br />
• MT 9961:<br />
• MT 6136, 7626, 7629, and 8338_SB<br />
C&L3 Bel Lux (EN FR GR NL)<br />
• MT 6139:<br />
• MT 6175:<br />
Windows Vista Business 32 FRU # CRU<br />
89Y1921 1<br />
89Y1940 1<br />
89Y1942 1<br />
89Y1941 1<br />
Chapter 9. FRU lists 201
• MT 7187:<br />
• MT 7345:<br />
• MT 7348:<br />
• MT 7356:<br />
• MT 7359:<br />
• MT 7479:<br />
• MT 7637:<br />
• MT 8820:<br />
• MT 9961:<br />
• MT 6136, 7626, 7629, and 8338_SB<br />
Windows Vista Business 32 FRU # CRU<br />
Windows Vista Business 32 SP2 Recovery CD<br />
Note: The Windows Vista recovery DVDs are available only for models with a valid Microsoft Windows Vista<br />
certificate of authenticity (COA) affixed to the system. Due to a Microsoft licensing limitation, if a model came<br />
with Windows Vista Business or Windows Vista Ultimate preinstalled from the factory, but has a Windows 7<br />
COA affixed to the system, that model is eligible only for recovery DVDs that match the operating system<br />
specified on the COA.<br />
US English<br />
• MT 6139:<br />
• MT 6175:<br />
• MT 7187:<br />
• MT 7345:<br />
• MT 7348:<br />
• MT 7356:<br />
• MT 7359:<br />
• MT 7479:<br />
• MT 7637:<br />
• MT 8820:<br />
• MT 9961:<br />
• MT 6136, 7626, 7629, and 8338_SB<br />
French<br />
• MT 6139:<br />
• MT 6175:<br />
• MT 7187:<br />
• MT 7345:<br />
• MT 7348:<br />
• MT 7356:<br />
• MT 7359:<br />
• MT 7479:<br />
• MT 7637:<br />
• MT 8820:<br />
202 <strong>ThinkCentre</strong> <strong>Hardware</strong> <strong>Maintenance</strong> <strong>Manual</strong><br />
Windows Vista Business 32 SP2 FRU # CRU<br />
03T2164 1<br />
03T2144 1
• MT 9961:<br />
• MT 6136, 7626, 7629, and 8338_SB<br />
German<br />
• MT 6139:<br />
• MT 6175:<br />
• MT 7187:<br />
• MT 7345:<br />
• MT 7348:<br />
• MT 7356:<br />
• MT 7359:<br />
• MT 7479:<br />
• MT 7637:<br />
• MT 8820:<br />
• MT 9961:<br />
• MT 6136, 7626, 7629, and 8338_SB<br />
Spanish<br />
• MT 6139:<br />
• MT 6175:<br />
• MT 7187:<br />
• MT 7345:<br />
• MT 7348:<br />
• MT 7356:<br />
• MT 7359:<br />
• MT 7479:<br />
• MT 7637:<br />
• MT 8820:<br />
• MT 9961:<br />
• MT 6136, 7626, 7629, and 8338_SB<br />
B/P<br />
• MT 6139:<br />
• MT 6175:<br />
• MT 7187:<br />
• MT 7345:<br />
• MT 7348:<br />
• MT 7356:<br />
• MT 7359:<br />
• MT 7479:<br />
• MT 7637:<br />
• MT 8820:<br />
• MT 9961:<br />
• MT 6136, 7626, 7629, and 8338_SB<br />
Windows Vista Business 32 SP2 FRU # CRU<br />
03T2146 1<br />
03T2161 1<br />
03T2140 1<br />
Chapter 9. FRU lists 203
Italy<br />
• MT 6139:<br />
• MT 6175:<br />
• MT 7187:<br />
• MT 7345:<br />
• MT 7348:<br />
• MT 7356:<br />
• MT 7359:<br />
• MT 7479:<br />
• MT 7637:<br />
• MT 8820:<br />
• MT 9961:<br />
• MT 6136, 7626, 7629, and 8338_SB<br />
Dutch<br />
• MT 6139:<br />
• MT 6175:<br />
• MT 7187:<br />
• MT 7345:<br />
• MT 7348:<br />
• MT 7356:<br />
• MT 7359:<br />
• MT 7479:<br />
• MT 7637:<br />
• MT 8820:<br />
• MT 9961:<br />
• MT 6136, 7626, 7629, and 8338_SB<br />
Czech<br />
• MT 6139:<br />
• MT 6175:<br />
• MT 7187:<br />
• MT 7345:<br />
• MT 7348:<br />
• MT 7356:<br />
• MT 7359:<br />
• MT 7479:<br />
• MT 7637:<br />
• MT 8820:<br />
• MT 9961:<br />
• MT 6136, 7626, 7629, and 8338_SB<br />
204 <strong>ThinkCentre</strong> <strong>Hardware</strong> <strong>Maintenance</strong> <strong>Manual</strong><br />
Windows Vista Business 32 SP2 FRU # CRU<br />
03T2151 1<br />
03T2153 1<br />
03T2143 1
Polish<br />
• MT 6139:<br />
• MT 6175:<br />
• MT 7187:<br />
• MT 7345:<br />
• MT 7348:<br />
• MT 7356:<br />
• MT 7359:<br />
• MT 7479:<br />
• MT 7637:<br />
• MT 8820:<br />
• MT 9961:<br />
• MT 6136, 7626, 7629, and 8338_SB<br />
Russian<br />
• MT 6139:<br />
• MT 6175:<br />
• MT 7187:<br />
• MT 7345:<br />
• MT 7348:<br />
• MT 7356:<br />
• MT 7359:<br />
• MT 7479:<br />
• MT 7637:<br />
• MT 8820:<br />
• MT 9961:<br />
• MT 6136, 7626, 7629, and 8338_SB<br />
Turkish<br />
• MT 6139:<br />
• MT 6175:<br />
• MT 7187:<br />
• MT 7345:<br />
• MT 7348:<br />
• MT 7356:<br />
• MT 7359:<br />
• MT 7479:<br />
• MT 7637:<br />
• MT 8820:<br />
• MT 9961:<br />
• MT 6136, 7626, 7629, and 8338_SB<br />
Windows Vista Business 32 SP2 FRU # CRU<br />
03T2154 1<br />
03T2158 1<br />
03T2163 1<br />
Chapter 9. FRU lists 205
Hungarian<br />
• MT 6139:<br />
• MT 6175:<br />
• MT 7187:<br />
• MT 7345:<br />
• MT 7348:<br />
• MT 7356:<br />
• MT 7359:<br />
• MT 7479:<br />
• MT 7637:<br />
• MT 8820:<br />
• MT 9961:<br />
• MT 6136, 7626, 7629, and 8338_SB<br />
India English<br />
• MT 6139:<br />
• MT 6175:<br />
• MT 7187:<br />
• MT 7345:<br />
• MT 7348:<br />
• MT 7356:<br />
• MT 7359:<br />
• MT 7479:<br />
• MT 7637:<br />
• MT 8820:<br />
• MT 9961:<br />
• MT 6136, 7626, 7629, and 8338_SB<br />
Greek<br />
• MT 6139:<br />
• MT 6175:<br />
• MT 7187:<br />
• MT 7345:<br />
• MT 7348:<br />
• MT 7356:<br />
• MT 7359:<br />
• MT 7479:<br />
• MT 7637:<br />
• MT 8820:<br />
• MT 9961:<br />
• MT 6136, 7626, 7629, and 8338_SB<br />
206 <strong>ThinkCentre</strong> <strong>Hardware</strong> <strong>Maintenance</strong> <strong>Manual</strong><br />
Windows Vista Business 32 SP2 FRU # CRU<br />
03T2149 1<br />
03T2150 1<br />
03T2145 1
Portuguese<br />
• MT 6139:<br />
• MT 6175:<br />
• MT 7187:<br />
• MT 7345:<br />
• MT 7348:<br />
• MT 7356:<br />
• MT 7359:<br />
• MT 7479:<br />
• MT 7637:<br />
• MT 8820:<br />
• MT 9961:<br />
• MT 6136, 7626, 7629, and 8338_SB<br />
Simplified Chinese<br />
• MT 6139:<br />
• MT 6175:<br />
• MT 7187:<br />
• MT 7345:<br />
• MT 7348:<br />
• MT 7356:<br />
• MT 7359:<br />
• MT 7479:<br />
• MT 7637:<br />
• MT 8820:<br />
• MT 9961:<br />
• MT 6136, 7626, 7629, and 8338_SB<br />
Traditional Chinese<br />
• MT 6139:<br />
• MT 6175:<br />
• MT 7187:<br />
• MT 7345:<br />
• MT 7348:<br />
• MT 7356:<br />
• MT 7359:<br />
• MT 7479:<br />
• MT 7637:<br />
• MT 8820:<br />
• MT 9961:<br />
• MT 6136, 7626, 7629, and 8338_SB<br />
Windows Vista Business 32 SP2 FRU # CRU<br />
03T2155 1<br />
03T2141 1<br />
03T2142 1<br />
Chapter 9. FRU lists 207
Hong Kong<br />
• MT 6139:<br />
• MT 6175:<br />
• MT 7187:<br />
• MT 7345:<br />
• MT 7348:<br />
• MT 7356:<br />
• MT 7359:<br />
• MT 7479:<br />
• MT 7637:<br />
• MT 8820:<br />
• MT 9961:<br />
• MT 6136, 7626, 7629, and 8338_SB<br />
Korean<br />
• MT 6139:<br />
• MT 6175:<br />
• MT 7187:<br />
• MT 7345:<br />
• MT 7348:<br />
• MT 7356:<br />
• MT 7359:<br />
• MT 7479:<br />
• MT 7637:<br />
• MT 8820:<br />
• MT 9961:<br />
• MT 6136, 7626, 7629, and 8338_SB<br />
Slovenian<br />
• MT 6139:<br />
• MT 6175:<br />
• MT 7187:<br />
• MT 7345:<br />
• MT 7348:<br />
• MT 7356:<br />
• MT 7359:<br />
• MT 7479:<br />
• MT 7637:<br />
• MT 8820:<br />
• MT 9961:<br />
• MT 6136, 7626, 7629, and 8338_SB<br />
208 <strong>ThinkCentre</strong> <strong>Hardware</strong> <strong>Maintenance</strong> <strong>Manual</strong><br />
Windows Vista Business 32 SP2 FRU # CRU<br />
03T2148 1<br />
03T2152 1<br />
03T2160 1
Russian English<br />
• MT 6139:<br />
• MT 6175:<br />
• MT 7187:<br />
• MT 7345:<br />
• MT 7348:<br />
• MT 7356:<br />
• MT 7359:<br />
• MT 7479:<br />
• MT 7637:<br />
• MT 8820:<br />
• MT 9961:<br />
• MT 6136, 7626, 7629, and 8338_SB<br />
Romanian<br />
• MT 6139:<br />
• MT 6175:<br />
• MT 7187:<br />
• MT 7345:<br />
• MT 7348:<br />
• MT 7356:<br />
• MT 7359:<br />
• MT 7479:<br />
• MT 7637:<br />
• MT 8820:<br />
• MT 9961:<br />
• MT 6136, 7626, 7629, and 8338_SB<br />
Serbian-Latin<br />
• MT 6139:<br />
• MT 6175:<br />
• MT 7187:<br />
• MT 7345:<br />
• MT 7348:<br />
• MT 7356:<br />
• MT 7359:<br />
• MT 7479:<br />
• MT 7637:<br />
• MT 8820:<br />
• MT 9961:<br />
• MT 6136, 7626, 7629, and 8338_SB<br />
Windows Vista Business 32 SP2 FRU # CRU<br />
03T2156 1<br />
03T2157 1<br />
03T2162 1<br />
Chapter 9. FRU lists 209
Slovakian<br />
• MT 6139:<br />
• MT 6175:<br />
• MT 7187:<br />
• MT 7345:<br />
• MT 7348:<br />
• MT 7356:<br />
• MT 7359:<br />
• MT 7479:<br />
• MT 7637:<br />
• MT 8820:<br />
• MT 9961:<br />
• MT 6136, 7626, 7629, and 8338_SB<br />
Arabic Localized<br />
• MT 6139:<br />
• MT 6175:<br />
• MT 7187:<br />
• MT 7345:<br />
• MT 7348:<br />
• MT 7356:<br />
• MT 7359:<br />
• MT 7479:<br />
• MT 7637:<br />
• MT 8820:<br />
• MT 9961:<br />
• MT 6136, 7626, 7629, and 8338_SB<br />
Hebrew<br />
• MT 6139:<br />
• MT 6175:<br />
• MT 7187:<br />
• MT 7345:<br />
• MT 7348:<br />
• MT 7356:<br />
• MT 7359:<br />
• MT 7479:<br />
• MT 7637:<br />
• MT 8820:<br />
• MT 9961:<br />
• MT 6136, 7626, 7629, and 8338_SB<br />
210 <strong>ThinkCentre</strong> <strong>Hardware</strong> <strong>Maintenance</strong> <strong>Manual</strong><br />
Windows Vista Business 32 SP2 FRU # CRU<br />
03T2159 1<br />
03T2139 1<br />
03T2147 1
C&L1 Nordics (EN DK FI NO SV)<br />
• MT 6139:<br />
• MT 6175:<br />
• MT 7187:<br />
• MT 7345:<br />
• MT 7348:<br />
• MT 7356:<br />
• MT 7359:<br />
• MT 7479:<br />
• MT 7637:<br />
• MT 8820:<br />
• MT 9961:<br />
• MT 6136, 7626, 7629, and 8338_SB<br />
C&L2 Switzerland (EN FR GR IT)<br />
• MT 6139:<br />
• MT 6175:<br />
• MT 7187:<br />
• MT 7345:<br />
• MT 7348:<br />
• MT 7356:<br />
• MT 7359:<br />
• MT 7479:<br />
• MT 7637:<br />
• MT 8820:<br />
• MT 9961:<br />
• MT 6136, 7626, 7629, and 8338_SB<br />
C&L3 Bel Lux (EN FR GR NL)<br />
• MT 6139:<br />
• MT 6175:<br />
• MT 7187:<br />
• MT 7345:<br />
• MT 7348:<br />
• MT 7356:<br />
• MT 7359:<br />
• MT 7479:<br />
• MT 7637:<br />
• MT 8820:<br />
• MT 9961:<br />
• MT 6136, 7626, 7629, and 8338_SB<br />
Japanese<br />
• MT 6139:<br />
• MT 6175:<br />
Windows Vista Business 32 SP2 FRU # CRU<br />
03T2165 1<br />
03T2167 1<br />
03T2166 1<br />
03T2169 1<br />
Chapter 9. FRU lists 211
• MT 7187:<br />
• MT 7345:<br />
• MT 7348:<br />
• MT 7356:<br />
• MT 7359:<br />
• MT 7479:<br />
• MT 7637:<br />
• MT 8820:<br />
• MT 9961:<br />
• MT 6136, 7626, 7629, and 8338_SB<br />
Windows Vista Business 32 SP2 FRU # CRU<br />
Windows Vista Business 64 Recovery CD<br />
Note: The Windows Vista recovery DVDs are available only for models with a valid Microsoft Windows Vista<br />
certificate of authenticity (COA) affixed to the system. Due to a Microsoft licensing limitation, if a model came<br />
with Windows Vista Business or Windows Vista Ultimate preinstalled from the factory, but has a Windows 7<br />
COA affixed to the system, that model is eligible only for recovery DVDs that match the operating system<br />
specified on the COA.<br />
Russian English<br />
• MT 6139:<br />
• MT 6175:<br />
• MT 7187:<br />
• MT 7345:<br />
• MT 7348:<br />
• MT 7356:<br />
• MT 7359:<br />
• MT 7479:<br />
• MT 7637:<br />
• MT 8820:<br />
• MT 9961:<br />
• MT 6136, 7626, 7629, and 8338_SB<br />
Russian French<br />
• MT 6139:<br />
• MT 6175:<br />
• MT 7187:<br />
• MT 7345:<br />
• MT 7348:<br />
• MT 7356:<br />
• MT 7359:<br />
• MT 7479:<br />
• MT 7637:<br />
• MT 8820:<br />
212 <strong>ThinkCentre</strong> <strong>Hardware</strong> <strong>Maintenance</strong> <strong>Manual</strong><br />
Windows Vista Business 64 FRU # CRU<br />
53Y7250 1<br />
53Y7251 1
• MT 9961:<br />
• MT 6136, 7626, 7629, and 8338_SB<br />
German<br />
• MT 6139:<br />
• MT 6175:<br />
• MT 7187:<br />
• MT 7345:<br />
• MT 7348:<br />
• MT 7356:<br />
• MT 7359:<br />
• MT 7479:<br />
• MT 7637:<br />
• MT 8820:<br />
• MT 9961:<br />
• MT 6136, 7626, 7629, and 8338_SB<br />
Japanese<br />
• MT 6139:<br />
• MT 6175:<br />
• MT 7187:<br />
• MT 7345:<br />
• MT 7348:<br />
• MT 7356:<br />
• MT 7359:<br />
• MT 7479:<br />
• MT 7637:<br />
• MT 8820:<br />
• MT 9961:<br />
• MT 6136, 7626, 7629, and 8338_SB<br />
Simplified Chinese<br />
• MT 6139:<br />
• MT 6175:<br />
• MT 7187:<br />
• MT 7345:<br />
• MT 7348:<br />
• MT 7356:<br />
• MT 7359:<br />
• MT 7479:<br />
• MT 7637:<br />
• MT 8820:<br />
• MT 9961:<br />
• MT 6136, 7626, 7629, and 8338_SB<br />
Windows Vista Business 64 FRU # CRU<br />
53Y7252 1<br />
64Y6262 1<br />
53Y7254 1<br />
Chapter 9. FRU lists 213
Brazil Portuguese<br />
• MT 6139:<br />
• MT 6175:<br />
• MT 7187:<br />
• MT 7345:<br />
• MT 7348:<br />
• MT 7356:<br />
• MT 7359:<br />
• MT 7479:<br />
• MT 7637:<br />
• MT 8820:<br />
• MT 9961:<br />
• MT 6136, 7626, 7629, and 8338_SB<br />
Spanish<br />
• MT 6139:<br />
• MT 6175:<br />
• MT 7187:<br />
• MT 7345:<br />
• MT 7348:<br />
• MT 7356:<br />
• MT 7359:<br />
• MT 7479:<br />
• MT 7637:<br />
• MT 8820:<br />
• MT 9961:<br />
• MT 6136, 7626, 7629, and 8338_SB<br />
India English<br />
• MT 6139:<br />
• MT 6175:<br />
• MT 7187:<br />
• MT 7345:<br />
• MT 7348:<br />
• MT 7356:<br />
• MT 7359:<br />
• MT 7479:<br />
• MT 7637:<br />
• MT 8820:<br />
• MT 9961:<br />
• MT 6136, 7626, 7629, and 8338_SB<br />
214 <strong>ThinkCentre</strong> <strong>Hardware</strong> <strong>Maintenance</strong> <strong>Manual</strong><br />
Windows Vista Business 64 FRU # CRU<br />
71Y7954 1<br />
71Y9870 1<br />
71Y9962 1
Windows Vista Ultimate 32 Recovery CD<br />
Note: The Windows Vista recovery DVDs are available only for models with a valid Microsoft Windows Vista<br />
certificate of authenticity (COA) affixed to the system. Due to a Microsoft licensing limitation, if a model came<br />
with Windows Vista Business or Windows Vista Ultimate preinstalled from the factory, but has a Windows 7<br />
COA affixed to the system, that model is eligible only for recovery DVDs that match the operating system<br />
specified on the COA.<br />
US English<br />
• MT 6139:<br />
• MT 6175:<br />
• MT 7187:<br />
• MT 7345:<br />
• MT 7348:<br />
• MT 7356:<br />
• MT 7359:<br />
• MT 7479:<br />
• MT 7637:<br />
• MT 8820:<br />
• MT 9961:<br />
• MT 6136, 7626, 7629, and 8338_SB<br />
Japanese<br />
• MT 6139:<br />
• MT 6175:<br />
• MT 7187:<br />
• MT 7345:<br />
• MT 7348:<br />
• MT 7356:<br />
• MT 7359:<br />
• MT 7479:<br />
• MT 7637:<br />
• MT 8820:<br />
• MT 9961:<br />
• MT 6136, 7626, 7629, and 8338_SB<br />
French<br />
• MT 6139:<br />
• MT 6175:<br />
• MT 7187:<br />
• MT 7345:<br />
• MT 7348:<br />
• MT 7356:<br />
• MT 7359:<br />
• MT 7479:<br />
• MT 7637:<br />
• MT 8820:<br />
Windows Vista Ultimate 32 FRU # CRU<br />
71Y9930 1<br />
64Y6261 1<br />
53Y7242 1<br />
Chapter 9. FRU lists 215
• MT 9961:<br />
• MT 6136, 7626, 7629, and 8338_SB<br />
German<br />
• MT 6139:<br />
• MT 6175:<br />
• MT 7187:<br />
• MT 7345:<br />
• MT 7348:<br />
• MT 7356:<br />
• MT 7359:<br />
• MT 7479:<br />
• MT 7637:<br />
• MT 8820:<br />
• MT 9961:<br />
• MT 6136, 7626, 7629, and 8338_SB<br />
Spanish<br />
• MT 6139:<br />
• MT 6175:<br />
• MT 7187:<br />
• MT 7345:<br />
• MT 7348:<br />
• MT 7356:<br />
• MT 7359:<br />
• MT 7479:<br />
• MT 7637:<br />
• MT 8820:<br />
• MT 9961:<br />
• MT 6136, 7626, 7629, and 8338_SB<br />
Italian<br />
• MT 6139:<br />
• MT 6175:<br />
• MT 7187:<br />
• MT 7345:<br />
• MT 7348:<br />
• MT 7356:<br />
• MT 7359:<br />
• MT 7479:<br />
• MT 7637:<br />
• MT 8820:<br />
• MT 9961:<br />
• MT 6136, 7626, 7629, and 8338_SB<br />
216 <strong>ThinkCentre</strong> <strong>Hardware</strong> <strong>Maintenance</strong> <strong>Manual</strong><br />
Windows Vista Ultimate 32 FRU # CRU<br />
53Y7243 1<br />
53Y7244 1<br />
53Y9471 1
Hong Kong<br />
• MT 6139:<br />
• MT 6175:<br />
• MT 7187:<br />
• MT 7345:<br />
• MT 7348:<br />
• MT 7356:<br />
• MT 7359:<br />
• MT 7479:<br />
• MT 7637:<br />
• MT 8820:<br />
• MT 9961:<br />
• MT 6136, 7626, 7629, and 8338_SB<br />
Arabic Localized<br />
• MT 6139:<br />
• MT 6175:<br />
• MT 7187:<br />
• MT 7345:<br />
• MT 7348:<br />
• MT 7356:<br />
• MT 7359:<br />
• MT 7479:<br />
• MT 7637:<br />
• MT 8820:<br />
• MT 9961:<br />
• MT 6136, 7626, 7629, and 8338_SB<br />
C&L1 Nordics (EN DK FI NO SV)<br />
• MT 6139:<br />
• MT 6175:<br />
• MT 7187:<br />
• MT 7345:<br />
• MT 7348:<br />
• MT 7356:<br />
• MT 7359:<br />
• MT 7479:<br />
• MT 7637:<br />
• MT 8820:<br />
• MT 9961:<br />
• MT 6136, 7626, 7629, and 8338_SB<br />
Windows Vista Ultimate 32 FRU # CRU<br />
53Y7247 1<br />
53Y7248 1<br />
53Y7249 1<br />
Chapter 9. FRU lists 217
Windows Vista Starter SP2 Recovery CD<br />
Note: The Windows Vista recovery DVDs are available only for models with a valid Microsoft Windows Vista<br />
certificate of authenticity (COA) affixed to the system. Due to a Microsoft licensing limitation, if a model came<br />
with Windows Vista Business or Windows Vista Ultimate preinstalled from the factory, but has a Windows 7<br />
COA affixed to the system, that model is eligible only for recovery DVDs that match the operating system<br />
specified on the COA.<br />
India English<br />
• MT 6139:<br />
• MT 6175:<br />
• MT 7187:<br />
• MT 7345:<br />
• MT 7348:<br />
• MT 7356:<br />
• MT 7359:<br />
• MT 7479:<br />
• MT 7637:<br />
• MT 8820:<br />
• MT 9961:<br />
• MT 6136, 7626, 7629, and 8338_SB<br />
Windows Vista Starter SP2 FRU # CRU<br />
Windows 7 Home Basic 32 Recovery CD<br />
English<br />
• MT 6139:<br />
• MT 6175:<br />
• MT 7187:<br />
• MT 7345:<br />
• MT 7348:<br />
• MT 7356:<br />
• MT 7359:<br />
• MT 7479:<br />
• MT 7637:<br />
• MT 8820:<br />
• MT 9961:<br />
• MT 6136, 7626, 7629, and 8338_SB<br />
Spanish<br />
• MT 6139:<br />
• MT 6175:<br />
• MT 7187:<br />
• MT 7345:<br />
• MT 7348:<br />
• MT 7356:<br />
218 <strong>ThinkCentre</strong> <strong>Hardware</strong> <strong>Maintenance</strong> <strong>Manual</strong><br />
03T2168 1<br />
Windows 7 Home Basic 32 FRU # CRU<br />
71Y8340 1<br />
71Y8337 1
• MT 7359:<br />
• MT 7479:<br />
• MT 7637:<br />
• MT 8820:<br />
• MT 9961:<br />
• MT 6136, 7626, 7629, and 8338_SB<br />
Russian<br />
• MT 6139:<br />
• MT 6175:<br />
• MT 7187:<br />
• MT 7345:<br />
• MT 7348:<br />
• MT 7356:<br />
• MT 7359:<br />
• MT 7479:<br />
• MT 7637:<br />
• MT 8820:<br />
• MT 9961:<br />
• MT 6136, 7626, 7629, and 8338_SB<br />
Turkish<br />
• MT 6139:<br />
• MT 6175:<br />
• MT 7187:<br />
• MT 7345:<br />
• MT 7348:<br />
• MT 7356:<br />
• MT 7359:<br />
• MT 7479:<br />
• MT 7637:<br />
• MT 8820:<br />
• MT 9961:<br />
• MT 6136, 7626, 7629, and 8338_SB<br />
Russian English<br />
• MT 6139:<br />
• MT 6175:<br />
• MT 7187:<br />
• MT 7345:<br />
• MT 7348:<br />
• MT 7356:<br />
• MT 7359:<br />
• MT 7479:<br />
• MT 7637:<br />
Windows 7 Home Basic 32 FRU # CRU<br />
71Y8336 1<br />
71Y8339 1<br />
71Y8335 1<br />
Chapter 9. FRU lists 219
• MT 8820:<br />
• MT 9961:<br />
• MT 6136, 7626, 7629, and 8338_SB<br />
Serbian-Latin<br />
• MT 6139:<br />
• MT 6175:<br />
• MT 7187:<br />
• MT 7345:<br />
• MT 7348:<br />
• MT 7356:<br />
• MT 7359:<br />
• MT 7479:<br />
• MT 7637:<br />
• MT 8820:<br />
• MT 9961:<br />
• MT 6136, 7626, 7629, and 8338_SB<br />
Arabic Localized<br />
• MT 6139:<br />
• MT 6175:<br />
• MT 7187:<br />
• MT 7345:<br />
• MT 7348:<br />
• MT 7356:<br />
• MT 7359:<br />
• MT 7479:<br />
• MT 7637:<br />
• MT 8820:<br />
• MT 9961:<br />
• MT 6136, 7626, 7629, and 8338_SB<br />
Brazilian Portuguese<br />
• MT 6139:<br />
• MT 6175:<br />
• MT 7187:<br />
• MT 7345:<br />
• MT 7348:<br />
• MT 7356:<br />
• MT 7359:<br />
• MT 7479:<br />
• MT 7637:<br />
• MT 8820:<br />
• MT 9961:<br />
• MT 6136, 7626, 7629, and 8338_SB<br />
220 <strong>ThinkCentre</strong> <strong>Hardware</strong> <strong>Maintenance</strong> <strong>Manual</strong><br />
Windows 7 Home Basic 32 FRU # CRU<br />
71Y8338 1<br />
71Y8332 1<br />
71Y8333 1
Simplified Chinese<br />
• MT 6139:<br />
• MT 6175:<br />
• MT 7187:<br />
• MT 7345:<br />
• MT 7348:<br />
• MT 7356:<br />
• MT 7359:<br />
• MT 7479:<br />
• MT 7637:<br />
• MT 8820:<br />
• MT 9961:<br />
• MT 6136, 7626, 7629, and 8338_SB<br />
India English<br />
• MT 6139:<br />
• MT 6175:<br />
• MT 7187:<br />
• MT 7345:<br />
• MT 7348:<br />
• MT 7356:<br />
• MT 7359:<br />
• MT 7479:<br />
• MT 7637:<br />
• MT 8820:<br />
• MT 9961:<br />
• MT 6136, 7626, 7629, and 8338_SB<br />
Windows 7 Home Basic 32 FRU # CRU<br />
Windows 7 Home Basic 32 SP1 Recovery CD<br />
English<br />
• MT 6139:<br />
• MT 6175:<br />
• MT 7187:<br />
• MT 7345:<br />
• MT 7348:<br />
• MT 7356:<br />
• MT 7359:<br />
• MT 7479:<br />
• MT 7637:<br />
• MT 8820:<br />
• MT 9961:<br />
71Y8334 1<br />
71Y8650 1<br />
Windows 7 Home Basic 32 SP1 FRU # CRU<br />
03T1805 1<br />
Chapter 9. FRU lists 221
• MT 6136, 7626, 7629, and 8338_SB<br />
Spanish<br />
• MT 6139:<br />
• MT 6175:<br />
• MT 7187:<br />
• MT 7345:<br />
• MT 7348:<br />
• MT 7356:<br />
• MT 7359:<br />
• MT 7479:<br />
• MT 7637:<br />
• MT 8820:<br />
• MT 9961:<br />
• MT 6136, 7626, 7629, and 8338_SB<br />
Russian<br />
• MT 6139:<br />
• MT 6175:<br />
• MT 7187:<br />
• MT 7345:<br />
• MT 7348:<br />
• MT 7356:<br />
• MT 7359:<br />
• MT 7479:<br />
• MT 7637:<br />
• MT 8820:<br />
• MT 9961:<br />
• MT 6136, 7626, 7629, and 8338_SB<br />
Turkish<br />
• MT 6139:<br />
• MT 6175:<br />
• MT 7187:<br />
• MT 7345:<br />
• MT 7348:<br />
• MT 7356:<br />
• MT 7359:<br />
• MT 7479:<br />
• MT 7637:<br />
• MT 8820:<br />
• MT 9961:<br />
• MT 6136, 7626, 7629, and 8338_SB<br />
222 <strong>ThinkCentre</strong> <strong>Hardware</strong> <strong>Maintenance</strong> <strong>Manual</strong><br />
Windows 7 Home Basic 32 SP1 FRU # CRU<br />
03T1802 1<br />
03T1801 1<br />
03T1804 1
Russian English<br />
• MT 6139:<br />
• MT 6175:<br />
• MT 7187:<br />
• MT 7345:<br />
• MT 7348:<br />
• MT 7356:<br />
• MT 7359:<br />
• MT 7479:<br />
• MT 7637:<br />
• MT 8820:<br />
• MT 9961:<br />
• MT 6136, 7626, 7629, and 8338_SB<br />
Sebian-Latin<br />
• MT 6139:<br />
• MT 6175:<br />
• MT 7187:<br />
• MT 7345:<br />
• MT 7348:<br />
• MT 7356:<br />
• MT 7359:<br />
• MT 7479:<br />
• MT 7637:<br />
• MT 8820:<br />
• MT 9961:<br />
• MT 6136, 7626, 7629, and 8338_SB<br />
Arabic Localized<br />
• MT 6139:<br />
• MT 6175:<br />
• MT 7187:<br />
• MT 7345:<br />
• MT 7348:<br />
• MT 7356:<br />
• MT 7359:<br />
• MT 7479:<br />
• MT 7637:<br />
• MT 8820:<br />
• MT 9961:<br />
• MT 6136, 7626, 7629, and 8338_SB<br />
Windows 7 Home Basic 32 SP1 FRU # CRU<br />
03T1800 1<br />
03T1803 1<br />
03T1796 1<br />
Chapter 9. FRU lists 223
Brazilian Portuguese<br />
• MT 6139:<br />
• MT 6175:<br />
• MT 7187:<br />
• MT 7345:<br />
• MT 7348:<br />
• MT 7356:<br />
• MT 7359:<br />
• MT 7479:<br />
• MT 7637:<br />
• MT 8820:<br />
• MT 9961:<br />
• MT 6136, 7626, 7629, and 8338_SB<br />
Simplified Chinese<br />
• MT 6139:<br />
• MT 6175:<br />
• MT 7187:<br />
• MT 7345:<br />
• MT 7348:<br />
• MT 7356:<br />
• MT 7359:<br />
• MT 7479:<br />
• MT 7637:<br />
• MT 8820:<br />
• MT 9961:<br />
• MT 6136, 7626, 7629, and 8338_SB<br />
India English<br />
• MT 6139:<br />
• MT 6175:<br />
• MT 7187:<br />
• MT 7345:<br />
• MT 7348:<br />
• MT 7356:<br />
• MT 7359:<br />
• MT 7479:<br />
• MT 7637:<br />
• MT 8820:<br />
• MT 9961:<br />
• MT 6136, 7626, 7629, and 8338_SB<br />
224 <strong>ThinkCentre</strong> <strong>Hardware</strong> <strong>Maintenance</strong> <strong>Manual</strong><br />
Windows 7 Home Basic 32 SP1 FRU # CRU<br />
03T1797 1<br />
03T1798 1<br />
03T1799 1
Windows 7 Home Premium 32 Recovery CD<br />
English<br />
• MT 6139:<br />
• MT 6175:<br />
• MT 7187:<br />
• MT 7345:<br />
• MT 7348:<br />
• MT 7356:<br />
• MT 7359:<br />
• MT 7479:<br />
• MT 7637:<br />
• MT 8820:<br />
• MT 9961:<br />
• MT 6136, 7626, 7629, and 8338_SB<br />
French<br />
• MT 6139:<br />
• MT 6175:<br />
• MT 7187:<br />
• MT 7345:<br />
• MT 7348:<br />
• MT 7356:<br />
• MT 7359:<br />
• MT 7479:<br />
• MT 7637:<br />
• MT 8820:<br />
• MT 9961:<br />
• MT 6136, 7626, 7629, and 8338_SB<br />
German<br />
• MT 6139:<br />
• MT 6175:<br />
• MT 7187:<br />
• MT 7345:<br />
• MT 7348:<br />
• MT 7356:<br />
• MT 7359:<br />
• MT 7479:<br />
• MT 7637:<br />
• MT 8820:<br />
• MT 9961:<br />
• MT 6136, 7626, 7629, and 8338_SB<br />
Windows 7 Home Premium 32 FRU # CRU<br />
71Y8353 1<br />
71Y8344 1<br />
71Y8345 1<br />
Chapter 9. FRU lists 225
Spanish<br />
• MT 6139:<br />
• MT 6175:<br />
• MT 7187:<br />
• MT 7345:<br />
• MT 7348:<br />
• MT 7356:<br />
• MT 7359:<br />
• MT 7479:<br />
• MT 7637:<br />
• MT 8820:<br />
• MT 9961:<br />
• MT 6136, 7626, 7629, and 8338_SB<br />
Italian<br />
• MT 6139:<br />
• MT 6175:<br />
• MT 7187:<br />
• MT 7345:<br />
• MT 7348:<br />
• MT 7356:<br />
• MT 7359:<br />
• MT 7479:<br />
• MT 7637:<br />
• MT 8820:<br />
• MT 9961:<br />
• MT 6136, 7626, 7629, and 8338_SB<br />
Korean<br />
• MT 6139:<br />
• MT 6175:<br />
• MT 7187:<br />
• MT 7345:<br />
• MT 7348:<br />
• MT 7356:<br />
• MT 7359:<br />
• MT 7479:<br />
• MT 7637:<br />
• MT 8820:<br />
• MT 9961:<br />
• MT 6136, 7626, 7629, and 8338_SB<br />
226 <strong>ThinkCentre</strong> <strong>Hardware</strong> <strong>Maintenance</strong> <strong>Manual</strong><br />
Windows 7 Home Premium 32 FRU # CRU<br />
71Y8352 1<br />
71Y8348 1<br />
71Y8350 1
Hong Kong<br />
• MT 6139:<br />
• MT 6175:<br />
• MT 7187:<br />
• MT 7345:<br />
• MT 7348:<br />
• MT 7356:<br />
• MT 7359:<br />
• MT 7479:<br />
• MT 7637:<br />
• MT 8820:<br />
• MT 9961:<br />
• MT 6136, 7626, 7629, and 8338_SB<br />
Romanian<br />
• MT 6139:<br />
• MT 6175:<br />
• MT 7187:<br />
• MT 7345:<br />
• MT 7348:<br />
• MT 7356:<br />
• MT 7359:<br />
• MT 7479:<br />
• MT 7637:<br />
• MT 8820:<br />
• MT 9961:<br />
• MT 6136, 7626, 7629, and 8338_SB<br />
Japan<br />
• MT 6139:<br />
• MT 6175:<br />
• MT 7187:<br />
• MT 7345:<br />
• MT 7348:<br />
• MT 7356:<br />
• MT 7359:<br />
• MT 7479:<br />
• MT 7637:<br />
• MT 8820:<br />
• MT 9961:<br />
• MT 6136, 7626, 7629, and 8338_SB<br />
Windows 7 Home Premium 32 FRU # CRU<br />
71Y8347 1<br />
71Y8351 1<br />
71Y8349 1<br />
Chapter 9. FRU lists 227
Hebrew<br />
• MT 6139:<br />
• MT 6175:<br />
• MT 7187:<br />
• MT 7345:<br />
• MT 7348:<br />
• MT 7356:<br />
• MT 7359:<br />
• MT 7479:<br />
• MT 7637:<br />
• MT 8820:<br />
• MT 9961:<br />
• MT 6136, 7626, 7629, and 8338_SB<br />
Brazilian Portuguese<br />
• MT 6139:<br />
• MT 6175:<br />
• MT 7187:<br />
• MT 7345:<br />
• MT 7348:<br />
• MT 7356:<br />
• MT 7359:<br />
• MT 7479:<br />
• MT 7637:<br />
• MT 8820:<br />
• MT 9961:<br />
• MT 6136, 7626, 7629, and 8338_SB<br />
Simplified Chinese<br />
• MT 6139:<br />
• MT 6175:<br />
• MT 7187:<br />
• MT 7345:<br />
• MT 7348:<br />
• MT 7356:<br />
• MT 7359:<br />
• MT 7479:<br />
• MT 7637:<br />
• MT 8820:<br />
• MT 9961:<br />
• MT 6136, 7626, 7629, and 8338_SB<br />
228 <strong>ThinkCentre</strong> <strong>Hardware</strong> <strong>Maintenance</strong> <strong>Manual</strong><br />
Windows 7 Home Premium 32 FRU # CRU<br />
71Y8346 1<br />
71Y8341 1<br />
71Y8342 1
Traditional Chinese<br />
• MT 6139:<br />
• MT 6175:<br />
• MT 7187:<br />
• MT 7345:<br />
• MT 7348:<br />
• MT 7356:<br />
• MT 7359:<br />
• MT 7479:<br />
• MT 7637:<br />
• MT 8820:<br />
• MT 9961:<br />
• MT 6136, 7626, 7629, and 8338_SB<br />
C&L Bel Lux (EN FR GR NL)<br />
• MT 6139:<br />
• MT 6175:<br />
• MT 7187:<br />
• MT 7345:<br />
• MT 7348:<br />
• MT 7356:<br />
• MT 7359:<br />
• MT 7479:<br />
• MT 7637:<br />
• MT 8820:<br />
• MT 9961:<br />
• MT 6136, 7626, 7629, and 8338_SB<br />
C&L Nordics (EN DK FI NO SV)<br />
• MT 6139:<br />
• MT 6175:<br />
• MT 7187:<br />
• MT 7345:<br />
• MT 7348:<br />
• MT 7356:<br />
• MT 7359:<br />
• MT 7479:<br />
• MT 7637:<br />
• MT 8820:<br />
• MT 9961:<br />
• MT 6136, 7626, 7629, and 8338_SB<br />
Windows 7 Home Premium 32 FRU # CRU<br />
71Y8343 1<br />
71Y8354 1<br />
71Y8355 1<br />
Chapter 9. FRU lists 229
C&L Switzerland (EN FR GR IT)<br />
• MT 6139:<br />
• MT 6175:<br />
• MT 7187:<br />
• MT 7345:<br />
• MT 7348:<br />
• MT 7356:<br />
• MT 7359:<br />
• MT 7479:<br />
• MT 7637:<br />
• MT 8820:<br />
• MT 9961:<br />
• MT 6136, 7626, 7629, and 8338_SB<br />
India English<br />
• MT 6139:<br />
• MT 6175:<br />
• MT 7187:<br />
• MT 7345:<br />
• MT 7348:<br />
• MT 7356:<br />
• MT 7359:<br />
• MT 7479:<br />
• MT 7637:<br />
• MT 8820:<br />
• MT 9961:<br />
• MT 6136, 7626, 7629, and 8338_SB<br />
Windows 7 Home Premium 32 FRU # CRU<br />
Windows 7 Home Premium 32 SP1 Recovery CD<br />
English<br />
• MT 6139:<br />
• MT 6175:<br />
• MT 7187:<br />
• MT 7345:<br />
• MT 7348:<br />
• MT 7356:<br />
• MT 7359:<br />
• MT 7479:<br />
• MT 7637:<br />
• MT 8820:<br />
• MT 9961:<br />
230 <strong>ThinkCentre</strong> <strong>Hardware</strong> <strong>Maintenance</strong> <strong>Manual</strong><br />
71Y8356 1<br />
71Y8651 1<br />
Windows 7 Home Premium 32 SP1 FRU # CRU<br />
03T1819 1
• MT 6136, 7626, 7629, and 8338_SB<br />
French<br />
• MT 6139:<br />
• MT 6175:<br />
• MT 7187:<br />
• MT 7345:<br />
• MT 7348:<br />
• MT 7356:<br />
• MT 7359:<br />
• MT 7479:<br />
• MT 7637:<br />
• MT 8820:<br />
• MT 9961:<br />
• MT 6136, 7626, 7629, and 8338_SB<br />
German<br />
• MT 6139:<br />
• MT 6175:<br />
• MT 7187:<br />
• MT 7345:<br />
• MT 7348:<br />
• MT 7356:<br />
• MT 7359:<br />
• MT 7479:<br />
• MT 7637:<br />
• MT 8820:<br />
• MT 9961:<br />
• MT 6136, 7626, 7629, and 8338_SB<br />
Spanish<br />
• MT 6139:<br />
• MT 6175:<br />
• MT 7187:<br />
• MT 7345:<br />
• MT 7348:<br />
• MT 7356:<br />
• MT 7359:<br />
• MT 7479:<br />
• MT 7637:<br />
• MT 8820:<br />
• MT 9961:<br />
• MT 6136, 7626, 7629, and 8338_SB<br />
Windows 7 Home Premium 32 SP1 FRU # CRU<br />
03T1810 1<br />
03T1811 1<br />
03T1818 1<br />
Chapter 9. FRU lists 231
Italian<br />
• MT 6139:<br />
• MT 6175:<br />
• MT 7187:<br />
• MT 7345:<br />
• MT 7348:<br />
• MT 7356:<br />
• MT 7359:<br />
• MT 7479:<br />
• MT 7637:<br />
• MT 8820:<br />
• MT 9961:<br />
• MT 6136, 7626, 7629, and 8338_SB<br />
Korean<br />
• MT 6139:<br />
• MT 6175:<br />
• MT 7187:<br />
• MT 7345:<br />
• MT 7348:<br />
• MT 7356:<br />
• MT 7359:<br />
• MT 7479:<br />
• MT 7637:<br />
• MT 8820:<br />
• MT 9961:<br />
• MT 6136, 7626, 7629, and 8338_SB<br />
Hong Kong<br />
• MT 6139:<br />
• MT 6175:<br />
• MT 7187:<br />
• MT 7345:<br />
• MT 7348:<br />
• MT 7356:<br />
• MT 7359:<br />
• MT 7479:<br />
• MT 7637:<br />
• MT 8820:<br />
• MT 9961:<br />
• MT 6136, 7626, 7629, and 8338_SB<br />
232 <strong>ThinkCentre</strong> <strong>Hardware</strong> <strong>Maintenance</strong> <strong>Manual</strong><br />
Windows 7 Home Premium 32 SP1 FRU # CRU<br />
03T1814 1<br />
03T1816 1<br />
03T1813 1
Romanian<br />
• MT 6139:<br />
• MT 6175:<br />
• MT 7187:<br />
• MT 7345:<br />
• MT 7348:<br />
• MT 7356:<br />
• MT 7359:<br />
• MT 7479:<br />
• MT 7637:<br />
• MT 8820:<br />
• MT 9961:<br />
• MT 6136, 7626, 7629, and 8338_SB<br />
Hebrew<br />
• MT 6139:<br />
• MT 6175:<br />
• MT 7187:<br />
• MT 7345:<br />
• MT 7348:<br />
• MT 7356:<br />
• MT 7359:<br />
• MT 7479:<br />
• MT 7637:<br />
• MT 8820:<br />
• MT 9961:<br />
• MT 6136, 7626, 7629, and 8338_SB<br />
Brazilian Portuguese<br />
• MT 6139:<br />
• MT 6175:<br />
• MT 7187:<br />
• MT 7345:<br />
• MT 7348:<br />
• MT 7356:<br />
• MT 7359:<br />
• MT 7479:<br />
• MT 7637:<br />
• MT 8820:<br />
• MT 9961:<br />
• MT 6136, 7626, 7629, and 8338_SB<br />
Windows 7 Home Premium 32 SP1 FRU # CRU<br />
03T1817 1<br />
03T1812 1<br />
03T1806 1<br />
Chapter 9. FRU lists 233
Simplified Chinese<br />
• MT 6139:<br />
• MT 6175:<br />
• MT 7187:<br />
• MT 7345:<br />
• MT 7348:<br />
• MT 7356:<br />
• MT 7359:<br />
• MT 7479:<br />
• MT 7637:<br />
• MT 8820:<br />
• MT 9961:<br />
• MT 6136, 7626, 7629, and 8338_SB<br />
Traditional Chinese<br />
• MT 6139:<br />
• MT 6175:<br />
• MT 7187:<br />
• MT 7345:<br />
• MT 7348:<br />
• MT 7356:<br />
• MT 7359:<br />
• MT 7479:<br />
• MT 7637:<br />
• MT 8820:<br />
• MT 9961:<br />
• MT 6136, 7626, 7629, and 8338_SB<br />
C&L Bel Lux (EN FR GR NL)<br />
• MT 6139:<br />
• MT 6175:<br />
• MT 7187:<br />
• MT 7345:<br />
• MT 7348:<br />
• MT 7356:<br />
• MT 7359:<br />
• MT 7479:<br />
• MT 7637:<br />
• MT 8820:<br />
• MT 9961:<br />
• MT 6136, 7626, 7629, and 8338_SB<br />
234 <strong>ThinkCentre</strong> <strong>Hardware</strong> <strong>Maintenance</strong> <strong>Manual</strong><br />
Windows 7 Home Premium 32 SP1 FRU # CRU<br />
03T1807 1<br />
03T1808 1<br />
03T1820 1
C&L Nordics (EN DK FI NO SV)<br />
• MT 6139:<br />
• MT 6175:<br />
• MT 7187:<br />
• MT 7345:<br />
• MT 7348:<br />
• MT 7356:<br />
• MT 7359:<br />
• MT 7479:<br />
• MT 7637:<br />
• MT 8820:<br />
• MT 9961:<br />
• MT 6136, 7626, 7629, and 8338_SB<br />
C&L Switzerland (EN FR GR IT)<br />
• MT 6139:<br />
• MT 6175:<br />
• MT 7187:<br />
• MT 7345:<br />
• MT 7348:<br />
• MT 7356:<br />
• MT 7359:<br />
• MT 7479:<br />
• MT 7637:<br />
• MT 8820:<br />
• MT 9961:<br />
• MT 6136, 7626, 7629, and 8338_SB<br />
India English<br />
• MT 6139:<br />
• MT 6175:<br />
• MT 7187:<br />
• MT 7345:<br />
• MT 7348:<br />
• MT 7356:<br />
• MT 7359:<br />
• MT 7479:<br />
• MT 7637:<br />
• MT 8820:<br />
• MT 9961:<br />
• MT 6136, 7626, 7629, and 8338_SB<br />
Japanese<br />
• MT 6139:<br />
• MT 6175:<br />
Windows 7 Home Premium 32 SP1 FRU # CRU<br />
03T1821 1<br />
03T1822 1<br />
03T1809 1<br />
03T1815 1<br />
Chapter 9. FRU lists 235
• MT 7187:<br />
• MT 7345:<br />
• MT 7348:<br />
• MT 7356:<br />
• MT 7359:<br />
• MT 7479:<br />
• MT 7637:<br />
• MT 8820:<br />
• MT 9961:<br />
• MT 6136, 7626, 7629, and 8338_SB<br />
Windows 7 Home Premium 32 SP1 FRU # CRU<br />
Windows 7 Professional 32 Recovery CD<br />
US English<br />
• MT 6139: A2G A3G A4G A5G A6G<br />
• MT 6175:<br />
• MT 7187: AKG<br />
• MT 7345: A6G<br />
• MT 7348: A2G A3G A4G A5G<br />
• MT 7356: A2G<br />
Windows 7 Professional 32 FRU # CRU<br />
• MT 7359: B9A D3M D4M D5M D6M D7M D7A D8M D9M DUU DVU DWU F6G<br />
F7U F7L FFM<br />
• MT 7479: B5A AMM ANM APM AQM ARM ASM AUM ALM B9U BDM BEU BEF<br />
• MT 7637: A2U A2L A2G A2M A2A A2Q A2H A2R A2E A3Q<br />
• MT 8820: AJG AKG ALG AMG AnU APG AQU ASG<br />
• MT 9961: AkU ALU AMG<br />
• MT 6136, 7626, 7629, and 8338_SB<br />
French<br />
• MT 6139:<br />
• MT 6175:<br />
• MT 7187:<br />
• MT 7345:<br />
• MT 7348:<br />
• MT 7356:<br />
• MT 7359: DDJ DFJ DGJ DHJ DJJ DKJ DNJ DPJ DQJ F1J F2J F3J F4J F8J F9J FAJ<br />
FCJ FGJ FHJ FKJ FLJ<br />
• MT 7479: B9F<br />
• MT 7637: A2J<br />
• MT 8820:<br />
• MT 9961:<br />
• MT 6136, 7626, 7629, and 8338_SB<br />
236 <strong>ThinkCentre</strong> <strong>Hardware</strong> <strong>Maintenance</strong> <strong>Manual</strong><br />
71Y8328 1<br />
71Y8309
German<br />
• MT 6139: A2G A3G A4G A5G A6G<br />
• MT 6175:<br />
• MT 7187: AKG<br />
• MT 7345: A6G<br />
• MT 7348: A2G A3G A4G A5G<br />
• MT 7356: A2G<br />
• MT 7359: DUF DVF DWF F6G F7F<br />
• MT 7479:<br />
• MT 7637: A2F A2G<br />
• MT 8820: AJG AKG ALG AMG AnF APG AQF ASG<br />
• MT 9961: AkF ALF AMG<br />
• MT 6136, 7626, 7629, and 8338_SB<br />
Japanese<br />
• MT 6139:<br />
• MT 6175:<br />
• MT 7187:<br />
• MT 7345: A6G<br />
• MT 7348: A2G A3G A4G A5G<br />
• MT 7356: A2G<br />
• MT 7359: F6G<br />
Windows 7 Professional 32 FRU # CRU<br />
• MT 7479: AVJ AWJ B1J B2J B3J B4J BAJ BBJ C1J C2J C3J<br />
• MT 7637: A2G<br />
• MT 8820: AJG AKG ALG AMG APG ASG<br />
• MT 9961: AMG<br />
• MT 6136, 7626, 7629, and 8338_SB<br />
Spanish<br />
• MT 6139:<br />
• MT 6175:<br />
• MT 7187:<br />
• MT 7345:<br />
• MT 7348: A2G A3G A4G A5G<br />
• MT 7356: A2G<br />
• MT 7359: F6G<br />
• MT 7479:<br />
• MT 7637: A2S A2D A2Y<br />
• MT 8820: AJG AKG ALG AMG APG AQS ASG<br />
• MT 9961: AkS AkD AkY ALS<br />
• MT 6136, 7626, 7629, and 8338_SB<br />
71Y8311 1<br />
71Y8316 1<br />
71Y8325 1<br />
Chapter 9. FRU lists 237
Italian<br />
• MT 6139:<br />
• MT 6175:<br />
• MT 7187:<br />
• MT 7345:<br />
• MT 7348: A2G A3G A4G A5G<br />
• MT 7356: A2G<br />
• MT 7359: F6G<br />
• MT 7479:<br />
• MT 7637: A2G<br />
• MT 8820: ASG<br />
• MT 9961: AMG<br />
• MT 6136, 7626, 7629, and 8338_SB<br />
Czech<br />
• MT 6139: A2G A3G A4G A5G A6G<br />
• MT 6175:<br />
• MT 7187: AKG<br />
• MT 7345: A6G<br />
• MT 7348: A2G A3G A4G A5G<br />
• MT 7356: A2G<br />
• MT 7359: F6G<br />
• MT 7479:<br />
• MT 7637: A2G<br />
• MT 8820: ASG<br />
• MT 9961: AMG<br />
• MT 6136, 7626, 7629, and 8338_SB<br />
Polish<br />
• MT 6139:<br />
• MT 6175:<br />
• MT 7187:<br />
• MT 7345:<br />
• MT 7348: A2G A3G A4G A5G<br />
• MT 7356: A2G<br />
• MT 7359: F6G<br />
• MT 7479:<br />
• MT 7637: A2G<br />
• MT 8820: AJG AKG ALG AMG APG ASG<br />
• MT 9961: AMG<br />
• MT 6136, 7626, 7629, and 8338_SB<br />
238 <strong>ThinkCentre</strong> <strong>Hardware</strong> <strong>Maintenance</strong> <strong>Manual</strong><br />
Windows 7 Professional 32 FRU # CRU<br />
71Y8315 1<br />
71Y8308 1<br />
71Y8318 1
Russian<br />
• MT 6139: A2G A3G A4G A5G A6G<br />
• MT 6175:<br />
• MT 7187: AKG<br />
• MT 7345: A6G<br />
• MT 7348: A2G A3G A4G A5G<br />
• MT 7356: A2G<br />
• MT 7359: F6G<br />
• MT 7479:<br />
• MT 7637: A2G<br />
• MT 8820: AJG AKG ALG AMG APG ASG<br />
• MT 9961: AMG<br />
• MT 6136, 7626, 7629, and 8338_SB<br />
Turkish<br />
• MT 6139: A2G A3G A4G A5G A6G<br />
• MT 6175:<br />
• MT 7187: AKG<br />
• MT 7345: A6G<br />
• MT 7348: A2G A3G A4G A5G<br />
• MT 7356: A2G<br />
• MT 7359: F6G<br />
• MT 7479:<br />
• MT 7637: A2G<br />
• MT 8820: AJG AKG ALG AMG APG ASG<br />
• MT 9961: AMG<br />
• MT 6136, 7626, 7629, and 8338_SB<br />
Hungarian<br />
• MT 6139: A2G A3G A4G A5G A6G<br />
• MT 6175:<br />
• MT 7187: AKG<br />
• MT 7345: A6G<br />
• MT 7348: A2G A3G A4G A5G<br />
• MT 7356: A2G<br />
• MT 7359: F6G<br />
• MT 7479:<br />
• MT 7637: A2G<br />
• MT 8820: AJG AKG ALG AMG APG ASG<br />
• MT 9961: AMG<br />
• MT 6136, 7626, 7629, and 8338_SB<br />
Windows 7 Professional 32 FRU # CRU<br />
71Y8322 1<br />
71Y8327 1<br />
71Y8314 1<br />
Chapter 9. FRU lists 239
Greek<br />
• MT 6139: A2G A3G A4G A5G A6G<br />
• MT 6175:<br />
• MT 7187: AKG<br />
• MT 7345: A6G<br />
• MT 7348: A2G A3G A4G A5G<br />
• MT 7356: A2G<br />
• MT 7359: F6G<br />
• MT 7479:<br />
• MT 7637: A2G<br />
• MT 8820: AJG AKG ALG AMG APG ASG<br />
• MT 9961: AMG<br />
• MT 6136, 7626, 7629, and 8338_SB<br />
Brazilian Portuguese<br />
• MT 6139: A2G A3G A4G A5G A6G<br />
• MT 6175:<br />
• MT 7187: AKG<br />
• MT 7345: A6G<br />
• MT 7348:<br />
• MT 7356:<br />
• MT 7359:<br />
• MT 7479:<br />
• MT 7637: A2P<br />
• MT 8820: AnP<br />
• MT 9961: AkP<br />
• MT 6136, 7626, 7629, and 8338_SB<br />
Korean<br />
• MT 6139:<br />
• MT 6175:<br />
• MT 7187:<br />
• MT 7345:<br />
• MT 7348:<br />
• MT 7356:<br />
• MT 7359:<br />
• MT 7479:<br />
• MT 7637: A2K<br />
• MT 8820:<br />
• MT 9961:<br />
• MT 6136, 7626, 7629, and 8338_SB<br />
240 <strong>ThinkCentre</strong> <strong>Hardware</strong> <strong>Maintenance</strong> <strong>Manual</strong><br />
Windows 7 Professional 32 FRU # CRU<br />
71Y8310 1<br />
71Y8305 1<br />
71Y8317 1
Slovenian<br />
• MT 6139:<br />
• MT 6175:<br />
• MT 7187:<br />
• MT 7345:<br />
• MT 7348: A2G A3G A4G A5G<br />
• MT 7356: A2G<br />
• MT 7359: F6G<br />
• MT 7479:<br />
• MT 7637: A2G<br />
• MT 8820:<br />
• MT 9961: AMG<br />
• MT 6136, 7626, 7629, and 8338_SB<br />
Russian English<br />
• MT 6139:<br />
• MT 6175:<br />
• MT 7187:<br />
• MT 7345:<br />
• MT 7348: A2G A3G A4G A5G<br />
• MT 7356: A2G<br />
• MT 7359: F6G<br />
• MT 7479:<br />
• MT 7637: A2G<br />
• MT 8820: AJG AKG ALG AMG APG ASG<br />
• MT 9961: AMG<br />
• MT 6136, 7626, 7629, and 8338_SB<br />
Romanian<br />
• MT 6139: A2G A3G A4G A5G A6G<br />
• MT 6175:<br />
• MT 7187: AKG<br />
• MT 7345: A6G<br />
• MT 7348: A2G A3G A4G A5G<br />
• MT 7356: A2G<br />
• MT 7359: F6G<br />
• MT 7479:<br />
• MT 7637: A2G<br />
• MT 8820: AJG AKG ALG AMG APG ASG<br />
• MT 9961: AMG<br />
• MT 6136, 7626, 7629, and 8338_SB<br />
Windows 7 Professional 32 FRU # CRU<br />
71Y8324 1<br />
71Y8320 1<br />
71Y8321 1<br />
Chapter 9. FRU lists 241
Serbian-Latin<br />
• MT 6139: A2G A3G A4G A5G A6G<br />
• MT 6175:<br />
• MT 7187: AKG<br />
• MT 7345: A6G<br />
• MT 7348: A2G A3G A4G A5G<br />
• MT 7356: A2G<br />
• MT 7359: F6G<br />
• MT 7479:<br />
• MT 7637: A2G<br />
• MT 8820:<br />
• MT 9961: AMG<br />
• MT 6136, 7626, 7629, and 8338_SB<br />
Slovakian<br />
• MT 6139:<br />
• MT 6175:<br />
• MT 7187:<br />
• MT 7345:<br />
• MT 7348: A2G A3G A4G A5G<br />
• MT 7356: A2G<br />
• MT 7359: F6G<br />
• MT 7479:<br />
• MT 7637: A2G<br />
• MT 8820: AJG AKG ALG AMG APG ASG<br />
• MT 9961: AMG<br />
• MT 6136, 7626, 7629, and 8338_SB<br />
Arabic Localized<br />
• MT 6139: A2G A3G A4G A5G A6G<br />
• MT 6175:<br />
• MT 7187: AKG<br />
• MT 7345: A6G<br />
• MT 7348: A2G A3G A4G A5G<br />
• MT 7356: A2G<br />
• MT 7359: F6G<br />
• MT 7479:<br />
• MT 7637: A2G<br />
• MT 8820:<br />
• MT 9961: AMG<br />
• MT 6136, 7626, 7629, and 8338_SB<br />
242 <strong>ThinkCentre</strong> <strong>Hardware</strong> <strong>Maintenance</strong> <strong>Manual</strong><br />
Windows 7 Professional 32 FRU # CRU<br />
71Y8326 1<br />
71Y8323 1<br />
71Y8304 1
Hebrew<br />
• MT 6139:<br />
• MT 6175:<br />
• MT 7187:<br />
• MT 7345:<br />
• MT 7348: A2G A3G A4G A5G<br />
• MT 7356: A2G<br />
• MT 7359: F6G<br />
• MT 7479:<br />
• MT 7637: A2G<br />
• MT 8820: AJG AKG ALG AMG APG ASG<br />
• MT 9961: AMG<br />
• MT 6136, 7626, 7629, and 8338_SB<br />
Simplified Chinese<br />
• MT 6139: A2G A3G A4G A5G A6G<br />
• MT 6175:<br />
• MT 7187: AKG<br />
• MT 7345: A6G<br />
• MT 7348:<br />
• MT 7356:<br />
• MT 7359:<br />
• MT 7479:<br />
• MT 7637: A2C<br />
• MT 8820:<br />
• MT 9961:<br />
• MT 6136, 7626, 7629, and 8338_SB<br />
Traditional Chinese<br />
• MT 6139:<br />
• MT 6175:<br />
• MT 7187:<br />
• MT 7345:<br />
• MT 7348:<br />
• MT 7356:<br />
• MT 7359:<br />
• MT 7479:<br />
• MT 7637: A2V<br />
• MT 8820:<br />
• MT 9961:<br />
• MT 6136, 7626, 7629, and 8338_SB<br />
Windows 7 Professional 32 FRU # CRU<br />
71Y8312 1<br />
71Y8306 1<br />
71Y8307 1<br />
Chapter 9. FRU lists 243
Hong Kong<br />
• MT 6139:<br />
• MT 6175:<br />
• MT 7187:<br />
• MT 7345:<br />
• MT 7348:<br />
• MT 7356:<br />
• MT 7359:<br />
• MT 7479:<br />
• MT 7637: A2B<br />
• MT 8820:<br />
• MT 9961:<br />
• MT 6136, 7626, 7629, and 8338_SB<br />
Portuguese<br />
• MT 6139:<br />
• MT 6175:<br />
• MT 7187:<br />
• MT 7345:<br />
• MT 7348: A2G A3G A4G A5G<br />
• MT 7356: A2G<br />
• MT 7359: F6G<br />
• MT 7479:<br />
• MT 7637: A2G<br />
• MT 8820: ASG<br />
• MT 9961: AMG<br />
• MT 6136, 7626, 7629, and 8338_SB<br />
C&L Bel Lux (EN FR GR NL)<br />
• MT 6139: A2G A3G A4G A5G A6G<br />
• MT 6175:<br />
• MT 7187: AKG<br />
• MT 7345: A6G<br />
• MT 7348: A2G A3G A4G A5G<br />
• MT 7356: A2G<br />
• MT 7359: F6G<br />
• MT 7479:<br />
• MT 7637: A2G<br />
• MT 8820:<br />
• MT 9961: AMG<br />
• MT 6136, 7626, 7629, and 8338_SB<br />
244 <strong>ThinkCentre</strong> <strong>Hardware</strong> <strong>Maintenance</strong> <strong>Manual</strong><br />
Windows 7 Professional 32 FRU # CRU<br />
71Y8313 1<br />
71Y8319 1<br />
71Y8329 1
C&L Nordics (EN DK FI NO SV)<br />
• MT 6139: A2G A3G A4G A5G A6G<br />
• MT 6175:<br />
• MT 7187: AKG<br />
• MT 7345: A6G<br />
• MT 7348: A2G A3G A4G A5G<br />
• MT 7356: A2G<br />
• MT 7359: F6G<br />
• MT 7479:<br />
• MT 7637: A2G<br />
• MT 8820:<br />
• MT 9961: AMG<br />
• MT 6136, 7626, 7629, and 8338_SB<br />
C&L Switzerland (EN FR GR IT)<br />
• MT 6139: A2G A3G A4G A5G A6G<br />
• MT 6175:<br />
• MT 7187: AKG<br />
• MT 7345: A6G<br />
• MT 7348: A2G A3G A4G A5G<br />
• MT 7356: A2G<br />
• MT 7359: F6G<br />
• MT 7479:<br />
• MT 7637: A2G<br />
• MT 8820:<br />
• MT 9961: AMG<br />
• MT 6136, 7626, 7629, and 8338_SB<br />
India English<br />
• MT 6139: A2G A3G A4G A5G A6G<br />
• MT 6175:<br />
• MT 7187: AKG<br />
• MT 7345: A6G<br />
• MT 7348:<br />
• MT 7356:<br />
• MT 7359:<br />
• MT 7479:<br />
• MT 7637:<br />
• MT 8820: AJG AKG ALG AMG APG ASG<br />
• MT 9961:<br />
• MT 6136, 7626, 7629, and 8338_SB<br />
Windows 7 Professional 32 FRU # CRU<br />
71Y8330 1<br />
71Y8331 1<br />
71Y8649 1<br />
Chapter 9. FRU lists 245
Windows 7 Professional 32 SP1 Recovery CD<br />
US English<br />
• MT 6139: A2G A3G A4G A5G A6G<br />
• MT 6175:<br />
• MT 7187: AKG<br />
• MT 7345: A6G<br />
• MT 7348: A2G A3G A4G A5G<br />
• MT 7356: A2G<br />
Windows 7 Professional 32 SP1 FRU # CRU<br />
• MT 7359: B9A D3M D4M D5M D6M D7M D7A D8M D9M DUU DVU DWU F6G F7U<br />
F7L FFM<br />
• MT 7479: B5A AMM ANM APM AQM ARM ASM AUM ALM B9U BDM BEU BEF<br />
• MT 7637: A2U A2L A2G A2M A2A A2Q A2H A2R A2E A3Q<br />
• MT 8820: AJG AKG ALG AMG AnU APG AQU ASG<br />
• MT 9961: AkU ALU AMG<br />
• MT 6136, 7626, 7629, and 8338_SB<br />
French<br />
• MT 6139:<br />
• MT 6175:<br />
• MT 7187:<br />
• MT 7345:<br />
• MT 7348: A2G A3G A4G A5G<br />
• MT 7356: A2G<br />
• MT 7359: DUF DVF DWF F6G F7F<br />
• MT 7479: B9F<br />
• MT 7637: A2F A2G<br />
• MT 8820: AJG AKG ALG AMG AnF APG AQF ASG<br />
• MT 9961: AkF ALF AMG<br />
• MT 6136, 7626, 7629, and 8338_SB<br />
German<br />
• MT 6139: A2G A3G A4G A5G A6G<br />
• MT 6175:<br />
• MT 7187: AKG<br />
• MT 7345: A6G<br />
• MT 7348: A2G A3G A4G A5G<br />
• MT 7356: A2G<br />
• MT 7359: F6G<br />
• MT 7479:<br />
• MT 7637: A2G<br />
• MT 8820: AJG AKG ALG AMG APG ASG<br />
• MT 9961: AMG<br />
• MT 6136, 7626, 7629, and 8338_SB<br />
246 <strong>ThinkCentre</strong> <strong>Hardware</strong> <strong>Maintenance</strong> <strong>Manual</strong><br />
03T1792 1<br />
03T1773 1<br />
03T1775 1
Spanish<br />
• MT 6139:<br />
• MT 6175:<br />
• MT 7187:<br />
• MT 7345:<br />
• MT 7348: A2G A3G A4G A5G<br />
• MT 7356: A2G<br />
• MT 7359: F6G<br />
• MT 7479:<br />
• MT 7637: A2S A2D A2Y<br />
• MT 8820: AJG AKG ALG AMG APG AQS ASG<br />
• MT 9961: AkS AkD AkY ALS<br />
• MT 6136, 7626, 7629, and 8338_SB<br />
Italian<br />
• MT 6139:<br />
• MT 6175:<br />
• MT 7187:<br />
• MT 7345:<br />
• MT 7348: A2G A3G A4G A5G<br />
• MT 7356: A2G<br />
• MT 7359: F6G<br />
• MT 7479:<br />
• MT 7637: A2G<br />
• MT 8820: ASG<br />
• MT 9961: AMG<br />
• MT 6136, 7626, 7629, and 8338_SB<br />
Czech<br />
• MT 6139: A2G A3G A4G A5G A6G<br />
• MT 6175:<br />
• MT 7187: AKG<br />
• MT 7345: A6G<br />
• MT 7348: A2G A3G A4G A5G<br />
• MT 7356: A2G<br />
• MT 7359: F6G<br />
• MT 7479:<br />
• MT 7637: A2G<br />
• MT 8820: ASG<br />
• MT 9961: AMG<br />
• MT 6136, 7626, 7629, and 8338_SB<br />
Windows 7 Professional 32 SP1 FRU # CRU<br />
03T1789 1<br />
03T1779 1<br />
03T1771 1<br />
Chapter 9. FRU lists 247
Polish<br />
• MT 6139:<br />
• MT 6175:<br />
• MT 7187:<br />
• MT 7345:<br />
• MT 7348: A2G A3G A4G A5G<br />
• MT 7356: A2G<br />
• MT 7359: F6G<br />
• MT 7479:<br />
• MT 7637: A2G<br />
• MT 8820: AJG AKG ALG AMG APG ASG<br />
• MT 9961: AMG<br />
• MT 6136, 7626, 7629, and 8338_SB<br />
Russian<br />
• MT 6139: A2G A3G A4G A5G A6G<br />
• MT 6175:<br />
• MT 7187: AKG<br />
• MT 7345: A6G<br />
• MT 7348: A2G A3G A4G A5G<br />
• MT 7356: A2G<br />
• MT 7359: F6G<br />
• MT 7479:<br />
• MT 7637: A2G<br />
• MT 8820: AJG AKG ALG AMG APG ASG<br />
• MT 9961: AMG<br />
• MT 6136, 7626, 7629, and 8338_SB<br />
Turkish<br />
• MT 6139: A2G A3G A4G A5G A6G<br />
• MT 6175:<br />
• MT 7187: AKG<br />
• MT 7345: A6G<br />
• MT 7348: A2G A3G A4G A5G<br />
• MT 7356: A2G<br />
• MT 7359: F6G<br />
• MT 7479:<br />
• MT 7637: A2G<br />
• MT 8820: AJG AKG ALG AMG APG ASG<br />
• MT 9961: AMG<br />
• MT 6136, 7626, 7629, and 8338_SB<br />
248 <strong>ThinkCentre</strong> <strong>Hardware</strong> <strong>Maintenance</strong> <strong>Manual</strong><br />
Windows 7 Professional 32 SP1 FRU # CRU<br />
03T1782 1<br />
03T1786 1<br />
03T1791 1
Hungarian<br />
• MT 6139: A2G A3G A4G A5G A6G<br />
• MT 6175:<br />
• MT 7187: AKG<br />
• MT 7345: A6G<br />
• MT 7348: A2G A3G A4G A5G<br />
• MT 7356: A2G<br />
• MT 7359: F6G<br />
• MT 7479:<br />
• MT 7637: A2G<br />
• MT 8820: AJG AKG ALG AMG APG ASG<br />
• MT 9961: AMG<br />
• MT 6136, 7626, 7629, and 8338_SB<br />
Greek<br />
• MT 6139: A2G A3G A4G A5G A6G<br />
• MT 6175:<br />
• MT 7187: AKG<br />
• MT 7345: A6G<br />
• MT 7348: A2G A3G A4G A5G<br />
• MT 7356: A2G<br />
• MT 7359: F6G<br />
• MT 7479:<br />
• MT 7637: A2G<br />
• MT 8820: AJG AKG ALG AMG APG ASG<br />
• MT 9961: AMG<br />
• MT 6136, 7626, 7629, and 8338_SB<br />
Brazilian Portuguese<br />
• MT 6139: A2G A3G A4G A5G A6G<br />
• MT 6175:<br />
• MT 7187: AKG<br />
• MT 7345: A6G<br />
• MT 7348:<br />
• MT 7356:<br />
• MT 7359:<br />
• MT 7479:<br />
• MT 7637: A2P<br />
• MT 8820: AnP<br />
• MT 9961: AkP<br />
• MT 6136, 7626, 7629, and 8338_SB<br />
Windows 7 Professional 32 SP1 FRU # CRU<br />
03T1778 1<br />
03T1774 1<br />
03T1768 1<br />
Chapter 9. FRU lists 249
Korean<br />
• MT 6139:<br />
• MT 6175:<br />
• MT 7187:<br />
• MT 7345:<br />
• MT 7348:<br />
• MT 7356:<br />
• MT 7359:<br />
• MT 7479:<br />
• MT 7637: A2K<br />
• MT 8820:<br />
• MT 9961:<br />
• MT 6136, 7626, 7629, and 8338_SB<br />
Slovenian<br />
• MT 6139:<br />
• MT 6175:<br />
• MT 7187:<br />
• MT 7345:<br />
• MT 7348: A2G A3G A4G A5G<br />
• MT 7356: A2G<br />
• MT 7359: F6G<br />
• MT 7479:<br />
• MT 7637: A2G<br />
• MT 8820:<br />
• MT 9961: AMG<br />
• MT 6136, 7626, 7629, and 8338_SB<br />
Russian English<br />
• MT 6139:<br />
• MT 6175:<br />
• MT 7187:<br />
• MT 7345:<br />
• MT 7348: A2G A3G A4G A5G<br />
• MT 7356: A2G<br />
• MT 7359: F6G<br />
• MT 7479:<br />
• MT 7637: A2G<br />
• MT 8820: AJG AKG ALG AMG APG ASG<br />
• MT 9961: AMG<br />
• MT 6136, 7626, 7629, and 8338_SB<br />
250 <strong>ThinkCentre</strong> <strong>Hardware</strong> <strong>Maintenance</strong> <strong>Manual</strong><br />
Windows 7 Professional 32 SP1 FRU # CRU<br />
03T1781 1<br />
03T1788 1<br />
03T1784 1
Romanian<br />
• MT 6139: A2G A3G A4G A5G A6G<br />
• MT 6175:<br />
• MT 7187: AKG<br />
• MT 7345: A6G<br />
• MT 7348: A2G A3G A4G A5G<br />
• MT 7356: A2G<br />
• MT 7359: F6G<br />
• MT 7479:<br />
• MT 7637: A2G<br />
• MT 8820: AJG AKG ALG AMG APG ASG<br />
• MT 9961: AMG<br />
• MT 6136, 7626, 7629, and 8338_SB<br />
Serbian-Latin<br />
• MT 6139: A2G A3G A4G A5G A6G<br />
• MT 6175:<br />
• MT 7187: AKG<br />
• MT 7345: A6G<br />
• MT 7348: A2G A3G A4G A5G<br />
• MT 7356: A2G<br />
• MT 7359: F6G<br />
• MT 7479:<br />
• MT 7637: A2G<br />
• MT 8820:<br />
• MT 9961: AMG<br />
• MT 6136, 7626, 7629, and 8338_SB<br />
Slovakian<br />
• MT 6139:<br />
• MT 6175:<br />
• MT 7187:<br />
• MT 7345:<br />
• MT 7348: A2G A3G A4G A5G<br />
• MT 7356: A2G<br />
• MT 7359: F6G<br />
• MT 7479:<br />
• MT 7637: A2G<br />
• MT 8820: AJG AKG ALG AMG APG ASG<br />
• MT 9961: AMG<br />
• MT 6136, 7626, 7629, and 8338_SB<br />
Windows 7 Professional 32 SP1 FRU # CRU<br />
03T1785 1<br />
03T1790 1<br />
03T1787 1<br />
Chapter 9. FRU lists 251
Arabic Localized<br />
• MT 6139: A2G A3G A4G A5G A6G<br />
• MT 6175:<br />
• MT 7187: AKG<br />
• MT 7345: A6G<br />
• MT 7348: A2G A3G A4G A5G<br />
• MT 7356: A2G<br />
• MT 7359: F6G<br />
• MT 7479:<br />
• MT 7637: A2G<br />
• MT 8820:<br />
• MT 9961: AMG<br />
• MT 6136, 7626, 7629, and 8338_SB<br />
Hebrew<br />
• MT 6139:<br />
• MT 6175:<br />
• MT 7187:<br />
• MT 7345:<br />
• MT 7348: A2G A3G A4G A5G<br />
• MT 7356: A2G<br />
• MT 7359: F6G<br />
• MT 7479:<br />
• MT 7637: A2G<br />
• MT 8820: AJG AKG ALG AMG APG ASG<br />
• MT 9961: AMG<br />
• MT 6136, 7626, 7629, and 8338_SB<br />
Simplified Chinese<br />
• MT 6139: A2G A3G A4G A5G A6G<br />
• MT 6175:<br />
• MT 7187: AKG<br />
• MT 7345: A6G<br />
• MT 7348:<br />
• MT 7356:<br />
• MT 7359:<br />
• MT 7479:<br />
• MT 7637: A2C<br />
• MT 8820:<br />
• MT 9961:<br />
• MT 6136, 7626, 7629, and 8338_SB<br />
252 <strong>ThinkCentre</strong> <strong>Hardware</strong> <strong>Maintenance</strong> <strong>Manual</strong><br />
Windows 7 Professional 32 SP1 FRU # CRU<br />
03T1767 1<br />
03T1776 1<br />
03T1769 1
Traditional Chinese<br />
• MT 6139:<br />
• MT 6175:<br />
• MT 7187:<br />
• MT 7345:<br />
• MT 7348:<br />
• MT 7356:<br />
• MT 7359:<br />
• MT 7479:<br />
• MT 7637: A2V<br />
• MT 8820:<br />
• MT 9961:<br />
• MT 6136, 7626, 7629, and 8338_SB<br />
Hong Kong<br />
• MT 6139:<br />
• MT 6175:<br />
• MT 7187:<br />
• MT 7345:<br />
• MT 7348:<br />
• MT 7356:<br />
• MT 7359:<br />
• MT 7479:<br />
• MT 7637: A2B<br />
• MT 8820:<br />
• MT 9961:<br />
• MT 6136, 7626, 7629, and 8338_SB<br />
Portuguese<br />
• MT 6139:<br />
• MT 6175:<br />
• MT 7187:<br />
• MT 7345:<br />
• MT 7348: A2G A3G A4G A5G<br />
• MT 7356: A2G<br />
• MT 7359: F6G<br />
• MT 7479:<br />
• MT 7637: A2G<br />
• MT 8820: ASG<br />
• MT 9961: AMG<br />
• MT 6136, 7626, 7629, and 8338_SB<br />
Windows 7 Professional 32 SP1 FRU # CRU<br />
03T1770 1<br />
03T1777 1<br />
03T1783 1<br />
Chapter 9. FRU lists 253
C&L Bel Lux (EN FR GR NL)<br />
• MT 6139: A2G A3G A4G A5G A6G<br />
• MT 6175:<br />
• MT 7187: AKG<br />
• MT 7345: A6G<br />
• MT 7348: A2G A3G A4G A5G<br />
• MT 7356: A2G<br />
• MT 7359: F6G<br />
• MT 7479:<br />
• MT 7637: A2G<br />
• MT 8820:<br />
• MT 9961: AMG<br />
• MT 6136, 7626, 7629, and 8338_SB<br />
C&L Nordics (EN DK FI NO SV)<br />
• MT 6139: A2G A3G A4G A5G A6G<br />
• MT 6175:<br />
• MT 7187: AKG<br />
• MT 7345: A6G<br />
• MT 7348: A2G A3G A4G A5G<br />
• MT 7356: A2G<br />
• MT 7359: F6G<br />
• MT 7479:<br />
• MT 7637: A2G<br />
• MT 8820:<br />
• MT 9961: AMG<br />
• MT 6136, 7626, 7629, and 8338_SB<br />
C&L Switzerland (EN FR GR IT)<br />
• MT 6139: A2G A3G A4G A5G A6G<br />
• MT 6175:<br />
• MT 7187: AKG<br />
• MT 7345: A6G<br />
• MT 7348: A2G A3G A4G A5G<br />
• MT 7356: A2G<br />
• MT 7359: F6G<br />
• MT 7479:<br />
• MT 7637: A2G<br />
• MT 8820:<br />
• MT 9961: AMG<br />
• MT 6136, 7626, 7629, and 8338_SB<br />
254 <strong>ThinkCentre</strong> <strong>Hardware</strong> <strong>Maintenance</strong> <strong>Manual</strong><br />
Windows 7 Professional 32 SP1 FRU # CRU<br />
03T1793 1<br />
03T1794 1<br />
03T1795 1
India English<br />
• MT 6139: A2G A3G A4G A5G A6G<br />
• MT 6175:<br />
• MT 7187: AKG<br />
• MT 7345: A6G<br />
• MT 7348:<br />
• MT 7356:<br />
• MT 7359:<br />
• MT 7479:<br />
• MT 7637:<br />
• MT 8820: AJG AKG ALG AMG APG ASG<br />
• MT 9961:<br />
• MT 6136, 7626, 7629, and 8338_SB<br />
Japanese<br />
• MT 6139:<br />
MT 6175:<br />
• MT 7187:<br />
• MT 7345:<br />
• MT 7348:<br />
• MT 7356:<br />
• MT 7359:<br />
• MT 7479:<br />
• MT 7637:<br />
• MT 8820:<br />
• MT 9961:<br />
• MT 6136, 7626, 7629, and 8338_SB<br />
Windows 7 Professional 32 SP1 FRU # CRU<br />
Windows 7 Professional 64 Recovery CD<br />
US English<br />
• MT 6139:<br />
• MT 6175:<br />
• MT 7187:<br />
• MT 7345:<br />
• MT 7348:<br />
• MT 7356:<br />
• MT 7359: FBM FDM<br />
• MT 7479:<br />
• MT 7637:<br />
• MT 8820:<br />
• MT 9961:<br />
03T1772 1<br />
03T1780 1<br />
Windows 7 Professional 64 FRU # CRU<br />
71Y8366 1<br />
Chapter 9. FRU lists 255
• MT 6136, 7626, 7629, and 8338_SB<br />
French<br />
• MT 6139:<br />
• MT 6175:<br />
• MT 7187:<br />
• MT 7345:<br />
• MT 7348:<br />
• MT 7356:<br />
• MT 7359:<br />
• MT 7479:<br />
• MT 7637:<br />
• MT 8820:<br />
• MT 9961:<br />
• MT 6136, 7626, 7629, and 8338_SB<br />
German<br />
• MT 6139:<br />
• MT 6175:<br />
• MT 7187:<br />
• MT 7345:<br />
• MT 7348:<br />
• MT 7356:<br />
• MT 7359:<br />
• MT 7479:<br />
• MT 7637:<br />
• MT 8820:<br />
• MT 9961:<br />
• MT 6136, 7626, 7629, and 8338_SB<br />
Spanish<br />
• MT 6139:<br />
• MT 6175:<br />
• MT 7187:<br />
• MT 7345:<br />
• MT 7348:<br />
• MT 7356:<br />
• MT 7359:<br />
• MT 7479:<br />
• MT 7637:<br />
• MT 8820:<br />
• MT 9961:<br />
• MT 6136, 7626, 7629, and 8338_SB<br />
256 <strong>ThinkCentre</strong> <strong>Hardware</strong> <strong>Maintenance</strong> <strong>Manual</strong><br />
Windows 7 Professional 64 FRU # CRU<br />
71Y8360 1<br />
71Y8361 1<br />
71Y8365 1
Italian<br />
• MT 6139:<br />
• MT 6175:<br />
• MT 7187:<br />
• MT 7345:<br />
• MT 7348:<br />
• MT 7356:<br />
• MT 7359:<br />
• MT 7479:<br />
• MT 7637:<br />
• MT 8820:<br />
• MT 9961:<br />
• MT 6136, 7626, 7629, and 8338_SB<br />
Brazilian Portuguese<br />
• MT 6139:<br />
• MT 6175:<br />
• MT 7187:<br />
• MT 7345:<br />
• MT 7348:<br />
• MT 7356:<br />
• MT 7359:<br />
• MT 7479:<br />
• MT 7637:<br />
• MT 8820:<br />
• MT 9961:<br />
• MT 6136, 7626, 7629, and 8338_SB<br />
Simplified Chinese<br />
• MT 6139:<br />
• MT 6175:<br />
• MT 7187:<br />
• MT 7345:<br />
• MT 7348:<br />
• MT 7356:<br />
• MT 7359:<br />
• MT 7479:<br />
• MT 7637:<br />
• MT 8820:<br />
• MT 9961:<br />
• MT 6136, 7626, 7629, and 8338_SB<br />
Windows 7 Professional 64 FRU # CRU<br />
71Y8363 1<br />
71Y8357 1<br />
71Y8358 1<br />
Chapter 9. FRU lists 257
Traditional Chinese<br />
• MT 6139:<br />
• MT 6175:<br />
• MT 7187:<br />
• MT 7345:<br />
• MT 7348:<br />
• MT 7356:<br />
• MT 7359:<br />
• MT 7479:<br />
• MT 7637:<br />
• MT 8820:<br />
• MT 9961:<br />
• MT 6136, 7626, 7629, and 8338_SB<br />
Hong Kong<br />
• MT 6139:<br />
• MT 6175:<br />
• MT 7187:<br />
• MT 7345:<br />
• MT 7348:<br />
• MT 7356:<br />
• MT 7359:<br />
• MT 7479:<br />
• MT 7637:<br />
• MT 8820:<br />
• MT 9961:<br />
• MT 6136, 7626, 7629, and 8338_SB<br />
Japan<br />
• MT 6139:<br />
• MT 6175:<br />
• MT 7187:<br />
• MT 7345:<br />
• MT 7348:<br />
• MT 7356:<br />
• MT 7359:<br />
• MT 7479:<br />
• MT 7637:<br />
• MT 8820:<br />
• MT 9961:<br />
• MT 6136, 7626, 7629, and 8338_SB<br />
258 <strong>ThinkCentre</strong> <strong>Hardware</strong> <strong>Maintenance</strong> <strong>Manual</strong><br />
Windows 7 Professional 64 FRU # CRU<br />
71Y8359 1<br />
71Y8362 1<br />
71Y8364 1
C&L Nordics (EN DK FI NO SV)<br />
• MT 6139:<br />
• MT 6175:<br />
• MT 7187:<br />
• MT 7345:<br />
• MT 7348:<br />
• MT 7356:<br />
• MT 7359:<br />
• MT 7479:<br />
• MT 7637:<br />
• MT 8820:<br />
• MT 9961:<br />
• MT 6136, 7626, 7629, and 8338_SB<br />
Switzerland (EN FR GR IT)<br />
• MT 6139:<br />
• MT 6175:<br />
• MT 7187:<br />
• MT 7345:<br />
• MT 7348:<br />
• MT 7356:<br />
• MT 7359:<br />
• MT 7479:<br />
• MT 7637:<br />
• MT 8820:<br />
• MT 9961:<br />
• MT 6136, 7626, 7629, and 8338_SB<br />
India English<br />
• MT 6139:<br />
• MT 6175:<br />
• MT 7187:<br />
• MT 7345:<br />
• MT 7348:<br />
• MT 7356:<br />
• MT 7359:<br />
• MT 7479:<br />
• MT 7637:<br />
• MT 8820:<br />
• MT 9961:<br />
• MT 6136, 7626, 7629, and 8338_SB<br />
Windows 7 Professional 64 FRU # CRU<br />
71Y8367 1<br />
71Y8368 1<br />
71Y8652 1<br />
Chapter 9. FRU lists 259
Arabic<br />
• MT 6139:<br />
• MT 6175:<br />
• MT 7187:<br />
• MT 7345:<br />
• MT 7348:<br />
• MT 7356:<br />
• MT 7359:<br />
• MT 7479:<br />
• MT 7637:<br />
• MT 8820:<br />
• MT 9961:<br />
• MT 6136, 7626, 7629, and 8338_SB<br />
Czech<br />
• MT 6139:<br />
• MT 6175:<br />
• MT 7187:<br />
• MT 7345:<br />
• MT 7348:<br />
• MT 7356:<br />
• MT 7359:<br />
• MT 7479:<br />
• MT 7637:<br />
• MT 8820:<br />
• MT 9961:<br />
• MT 6136, 7626, 7629, and 8338_SB<br />
Greek<br />
• MT 6139:<br />
• MT 6175:<br />
• MT 7187:<br />
• MT 7345:<br />
• MT 7348:<br />
• MT 7356:<br />
• MT 7359:<br />
• MT 7479:<br />
• MT 7637:<br />
• MT 8820:<br />
• MT 9961:<br />
• MT 6136, 7626, 7629, and 8338_SB<br />
260 <strong>ThinkCentre</strong> <strong>Hardware</strong> <strong>Maintenance</strong> <strong>Manual</strong><br />
Windows 7 Professional 64 FRU # CRU<br />
03T5963 1<br />
03T5964 1<br />
03T5965 1
Hebrew<br />
• MT 6139:<br />
• MT 6175:<br />
• MT 7187:<br />
• MT 7345:<br />
• MT 7348:<br />
• MT 7356:<br />
• MT 7359:<br />
• MT 7479:<br />
• MT 7637:<br />
• MT 8820:<br />
• MT 9961:<br />
• MT 6136, 7626, 7629, and 8338_SB<br />
Polish<br />
• MT 6139:<br />
• MT 6175:<br />
• MT 7187:<br />
• MT 7345:<br />
• MT 7348:<br />
• MT 7356:<br />
• MT 7359:<br />
• MT 7479:<br />
• MT 7637:<br />
• MT 8820:<br />
• MT 9961:<br />
• MT 6136, 7626, 7629, and 8338_SB<br />
Portuguese<br />
• MT 6139:<br />
• MT 6175:<br />
• MT 7187:<br />
• MT 7345:<br />
• MT 7348:<br />
• MT 7356:<br />
• MT 7359:<br />
• MT 7479:<br />
• MT 7637:<br />
• MT 8820:<br />
• MT 9961:<br />
• MT 6136, 7626, 7629, and 8338_SB<br />
Windows 7 Professional 64 FRU # CRU<br />
03T5966 1<br />
03T5967 1<br />
03T5968 1<br />
Chapter 9. FRU lists 261
Romanian<br />
• MT 6139:<br />
• MT 6175:<br />
• MT 7187:<br />
• MT 7345:<br />
• MT 7348:<br />
• MT 7356:<br />
• MT 7359:<br />
• MT 7479:<br />
• MT 7637:<br />
• MT 8820:<br />
• MT 9961:<br />
• MT 6136, 7626, 7629, and 8338_SB<br />
Russian<br />
• MT 6139:<br />
• MT 6175:<br />
• MT 7187:<br />
• MT 7345:<br />
• MT 7348:<br />
• MT 7356:<br />
• MT 7359:<br />
• MT 7479:<br />
• MT 7637:<br />
• MT 8820:<br />
• MT 9961:<br />
• MT 6136, 7626, 7629, and 8338_SB<br />
Slovakian<br />
• MT 6139:<br />
• MT 6175:<br />
• MT 7187:<br />
• MT 7345:<br />
• MT 7348:<br />
• MT 7356:<br />
• MT 7359:<br />
• MT 7479:<br />
• MT 7637:<br />
• MT 8820:<br />
• MT 9961:<br />
• MT 6136, 7626, 7629, and 8338_SB<br />
262 <strong>ThinkCentre</strong> <strong>Hardware</strong> <strong>Maintenance</strong> <strong>Manual</strong><br />
Windows 7 Professional 64 FRU # CRU<br />
03T5969 1<br />
03T0491 1<br />
03T5970 1
Slovenian<br />
• MT 6139:<br />
• MT 6175:<br />
• MT 7187:<br />
• MT 7345:<br />
• MT 7348:<br />
• MT 7356:<br />
• MT 7359:<br />
• MT 7479:<br />
• MT 7637:<br />
• MT 8820:<br />
• MT 9961:<br />
• MT 6136, 7626, 7629, and 8338_SB<br />
Serbian-Latin<br />
• MT 6139:<br />
• MT 6175:<br />
• MT 7187:<br />
• MT 7345:<br />
• MT 7348:<br />
• MT 7356:<br />
• MT 7359:<br />
• MT 7479:<br />
• MT 7637:<br />
• MT 8820:<br />
• MT 9961:<br />
• MT 6136, 7626, 7629, and 8338_SB<br />
Turkish<br />
• MT 6139:<br />
• MT 6175:<br />
• MT 7187:<br />
• MT 7345:<br />
• MT 7348:<br />
• MT 7356:<br />
• MT 7359:<br />
• MT 7479:<br />
• MT 7637:<br />
• MT 8820:<br />
• MT 9961:<br />
• MT 6136, 7626, 7629, and 8338_SB<br />
Windows 7 Professional 64 FRU # CRU<br />
03T5971 1<br />
03T5972 1<br />
03T5973 1<br />
Chapter 9. FRU lists 263
Windows 7 Professional 64 SP1 Recovery CD<br />
US English<br />
• MT 6139:<br />
• MT 6175:<br />
• MT 7187:<br />
• MT 7345:<br />
• MT 7348:<br />
• MT 7356:<br />
• MT 7359: FBM FDM<br />
• MT 7479:<br />
• MT 7637:<br />
• MT 8820:<br />
• MT 9961:<br />
• MT 6136, 7626, 7629, and 8338_SB<br />
French<br />
• MT 6139:<br />
• MT 6175:<br />
• MT 7187:<br />
• MT 7345:<br />
• MT 7348:<br />
• MT 7356:<br />
• MT 7359:<br />
• MT 7479:<br />
• MT 7637:<br />
• MT 8820:<br />
• MT 9961:<br />
• MT 6136, 7626, 7629, and 8338_SB<br />
German<br />
• MT 6139:<br />
• MT 6175:<br />
• MT 7187:<br />
• MT 7345:<br />
• MT 7348:<br />
• MT 7356:<br />
• MT 7359:<br />
• MT 7479:<br />
• MT 7637:<br />
• MT 8820:<br />
• MT 9961:<br />
• MT 6136, 7626, 7629, and 8338_SB<br />
264 <strong>ThinkCentre</strong> <strong>Hardware</strong> <strong>Maintenance</strong> <strong>Manual</strong><br />
Windows 7 Professional 64 SP1 FRU # CRU<br />
03T1845 1<br />
03T1829 1<br />
03T1831 1
Spanish<br />
• MT 6139:<br />
• MT 6175:<br />
• MT 7187:<br />
• MT 7345:<br />
• MT 7348:<br />
• MT 7356:<br />
• MT 7359:<br />
• MT 7479:<br />
• MT 7637:<br />
• MT 8820:<br />
• MT 9961:<br />
• MT 6136, 7626, 7629, and 8338_SB<br />
Italian<br />
• MT 6139:<br />
• MT 6175:<br />
• MT 7187:<br />
• MT 7345:<br />
• MT 7348:<br />
• MT 7356:<br />
• MT 7359:<br />
• MT 7479:<br />
• MT 7637:<br />
• MT 8820:<br />
• MT 9961:<br />
• MT 6136, 7626, 7629, and 8338_SB<br />
Brazilian Portuguese<br />
• MT 6139:<br />
• MT 6175:<br />
• MT 7187:<br />
• MT 7345:<br />
• MT 7348:<br />
• MT 7356:<br />
• MT 7359:<br />
• MT 7479:<br />
• MT 7637:<br />
• MT 8820:<br />
• MT 9961:<br />
• MT 6136, 7626, 7629, and 8338_SB<br />
Windows 7 Professional 64 SP1 FRU # CRU<br />
03T1842 1<br />
03T1834 1<br />
03T1824 1<br />
Chapter 9. FRU lists 265
Simplified Chinese<br />
• MT 6139:<br />
• MT 6175:<br />
• MT 7187:<br />
• MT 7345:<br />
• MT 7348:<br />
• MT 7356:<br />
• MT 7359:<br />
• MT 7479:<br />
• MT 7637:<br />
• MT 8820:<br />
• MT 9961:<br />
• MT 6136, 7626, 7629, and 8338_SB<br />
Traditional Chinese<br />
• MT 6139:<br />
• MT 6175:<br />
• MT 7187:<br />
• MT 7345:<br />
• MT 7348:<br />
• MT 7356:<br />
• MT 7359:<br />
• MT 7479:<br />
• MT 7637:<br />
• MT 8820:<br />
• MT 9961:<br />
• MT 6136, 7626, 7629, and 8338_SB<br />
Hong Kong<br />
• MT 6139:<br />
• MT 6175:<br />
• MT 7187:<br />
• MT 7345:<br />
• MT 7348:<br />
• MT 7356:<br />
• MT 7359:<br />
• MT 7479:<br />
• MT 7637:<br />
• MT 8820:<br />
• MT 9961:<br />
• MT 6136, 7626, 7629, and 8338_SB<br />
266 <strong>ThinkCentre</strong> <strong>Hardware</strong> <strong>Maintenance</strong> <strong>Manual</strong><br />
Windows 7 Professional 64 SP1 FRU # CRU<br />
03T1825 1<br />
03T1826 1<br />
03T1832 1
C&L Nordics (EN DK FI NO SV)<br />
• MT 6139:<br />
• MT 6175:<br />
• MT 7187:<br />
• MT 7345:<br />
• MT 7348:<br />
• MT 7356:<br />
• MT 7359:<br />
• MT 7479:<br />
• MT 7637:<br />
• MT 8820:<br />
• MT 9961:<br />
• MT 6136, 7626, 7629, and 8338_SB<br />
Switzerland (EN FR GR IT)<br />
• MT 6139:<br />
• MT 6175:<br />
• MT 7187:<br />
• MT 7345:<br />
• MT 7348:<br />
• MT 7356:<br />
• MT 7359:<br />
• MT 7479:<br />
• MT 7637:<br />
• MT 8820:<br />
• MT 9961:<br />
• MT 6136, 7626, 7629, and 8338_SB<br />
India English<br />
• MT 6139:<br />
• MT 6175:<br />
• MT 7187:<br />
• MT 7345:<br />
• MT 7348:<br />
• MT 7356:<br />
• MT 7359:<br />
• MT 7479:<br />
• MT 7637:<br />
• MT 8820:<br />
• MT 9961:<br />
• MT 6136, 7626, 7629, and 8338_SB<br />
Windows 7 Professional 64 SP1 FRU # CRU<br />
03T1846 1<br />
03T1847 1<br />
03T1828 1<br />
Chapter 9. FRU lists 267
Arabic<br />
• MT 6139:<br />
• MT 6175:<br />
• MT 7187:<br />
• MT 7345:<br />
• MT 7348:<br />
• MT 7356:<br />
• MT 7359:<br />
• MT 7479:<br />
• MT 7637:<br />
• MT 8820:<br />
• MT 9961:<br />
• MT 6136, 7626, 7629, and 8338_SB<br />
Czech<br />
• MT 6139:<br />
• MT 6175:<br />
• MT 7187:<br />
• MT 7345:<br />
• MT 7348:<br />
• MT 7356:<br />
• MT 7359:<br />
• MT 7479:<br />
• MT 7637:<br />
• MT 8820:<br />
• MT 9961:<br />
• MT 6136, 7626, 7629, and 8338_SB<br />
Greek<br />
• MT 6139:<br />
• MT 6175:<br />
• MT 7187:<br />
• MT 7345:<br />
• MT 7348:<br />
• MT 7356:<br />
• MT 7359:<br />
• MT 7479:<br />
• MT 7637:<br />
• MT 8820:<br />
• MT 9961:<br />
• MT 6136, 7626, 7629, and 8338_SB<br />
268 <strong>ThinkCentre</strong> <strong>Hardware</strong> <strong>Maintenance</strong> <strong>Manual</strong><br />
Windows 7 Professional 64 SP1 FRU # CRU<br />
03T1823 1<br />
03T1827 1<br />
03T1830 1
Hebrew<br />
• MT 6139:<br />
• MT 6175:<br />
• MT 7187:<br />
• MT 7345:<br />
• MT 7348:<br />
• MT 7356:<br />
• MT 7359:<br />
• MT 7479:<br />
• MT 7637:<br />
• MT 8820:<br />
• MT 9961:<br />
• MT 6136, 7626, 7629, and 8338_SB<br />
Polish<br />
• MT 6139:<br />
• MT 6175:<br />
• MT 7187:<br />
• MT 7345:<br />
• MT 7348:<br />
• MT 7356:<br />
• MT 7359:<br />
• MT 7479:<br />
• MT 7637:<br />
• MT 8820:<br />
• MT 9961:<br />
• MT 6136, 7626, 7629, and 8338_SB<br />
Portuguese<br />
• MT 6139:<br />
• MT 6175:<br />
• MT 7187:<br />
• MT 7345:<br />
• MT 7348:<br />
• MT 7356:<br />
• MT 7359:<br />
• MT 7479:<br />
• MT 7637:<br />
• MT 8820:<br />
• MT 9961:<br />
• MT 6136, 7626, 7629, and 8338_SB<br />
Windows 7 Professional 64 SP1 FRU # CRU<br />
03T1833 1<br />
03T1836 1<br />
03T1837 1<br />
Chapter 9. FRU lists 269
Romanian<br />
• MT 6139:<br />
• MT 6175:<br />
• MT 7187:<br />
• MT 7345:<br />
• MT 7348:<br />
• MT 7356:<br />
• MT 7359:<br />
• MT 7479:<br />
• MT 7637:<br />
• MT 8820:<br />
• MT 9961:<br />
• MT 6136, 7626, 7629, and 8338_SB<br />
Russian<br />
• MT 6139:<br />
• MT 6175:<br />
• MT 7187:<br />
• MT 7345:<br />
• MT 7348:<br />
• MT 7356:<br />
• MT 7359:<br />
• MT 7479:<br />
• MT 7637:<br />
• MT 8820:<br />
• MT 9961:<br />
• MT 6136, 7626, 7629, and 8338_SB<br />
Slovakian<br />
• MT 6139:<br />
• MT 6175:<br />
• MT 7187:<br />
• MT 7345:<br />
• MT 7348:<br />
• MT 7356:<br />
• MT 7359:<br />
• MT 7479:<br />
• MT 7637:<br />
• MT 8820:<br />
• MT 9961:<br />
• MT 6136, 7626, 7629, and 8338_SB<br />
270 <strong>ThinkCentre</strong> <strong>Hardware</strong> <strong>Maintenance</strong> <strong>Manual</strong><br />
Windows 7 Professional 64 SP1 FRU # CRU<br />
03T1838 1<br />
03T1839 1<br />
03T1840 1
Slovenian<br />
• MT 6139:<br />
• MT 6175:<br />
• MT 7187:<br />
• MT 7345:<br />
• MT 7348:<br />
• MT 7356:<br />
• MT 7359:<br />
• MT 7479:<br />
• MT 7637:<br />
• MT 8820:<br />
• MT 9961:<br />
• MT 6136, 7626, 7629, and 8338_SB<br />
Serbian-Latin<br />
• MT 6139:<br />
• MT 6175:<br />
• MT 7187:<br />
• MT 7345:<br />
• MT 7348:<br />
• MT 7356:<br />
• MT 7359:<br />
• MT 7479:<br />
• MT 7637:<br />
• MT 8820:<br />
• MT 9961:<br />
• MT 6136, 7626, 7629, and 8338_SB<br />
Turkish<br />
• MT 6139:<br />
• MT 6175:<br />
• MT 7187:<br />
• MT 7345:<br />
• MT 7348:<br />
• MT 7356:<br />
• MT 7359:<br />
• MT 7479:<br />
• MT 7637:<br />
• MT 8820:<br />
• MT 9961:<br />
• MT 6136, 7626, 7629, and 8338_SB<br />
Japanese<br />
• MT 6139:<br />
• MT 6175:<br />
Windows 7 Professional 64 SP1 FRU # CRU<br />
03T1841 1<br />
03T1843 1<br />
03T1844 1<br />
03T1835 1<br />
Chapter 9. FRU lists 271
• MT 7187:<br />
• MT 7345:<br />
• MT 7348:<br />
• MT 7356:<br />
• MT 7359:<br />
• MT 7479:<br />
• MT 7637:<br />
• MT 8820:<br />
• MT 9961:<br />
• MT 6136, 7626, 7629, and 8338_SB<br />
Windows 7 Professional 64 SP1 FRU # CRU<br />
Windows 7 Ultimate 32 SP1 Recovery CD<br />
Traditional Chinese<br />
• MT 6139:<br />
• MT 6175:<br />
• MT 7187:<br />
• MT 7345:<br />
• MT 7348:<br />
• MT 7356:<br />
• MT 7359:<br />
• MT 7479:<br />
• MT 7637:<br />
• MT 8820:<br />
• MT 9961:<br />
• MT 6136, 7626, 7629, and 8338_SB<br />
US English<br />
• MT 6139:<br />
• MT 6175:<br />
• MT 7187:<br />
• MT 7345:<br />
• MT 7348:<br />
• MT 7356:<br />
• MT 7359:<br />
• MT 7479:<br />
• MT 7637:<br />
• MT 8820:<br />
• MT 9961:<br />
• MT 6136, 7626, 7629, and 8338_SB<br />
272 <strong>ThinkCentre</strong> <strong>Hardware</strong> <strong>Maintenance</strong> <strong>Manual</strong><br />
Windows 7 Ultimate 32 SP1 FRU # CRU<br />
03T1848 1<br />
03T1849 1
Windows 7 Ultimate 64 SP1 Recovery CD<br />
US English<br />
• MT 6139:<br />
• MT 6175:<br />
• MT 7187:<br />
• MT 7345:<br />
• MT 7348:<br />
• MT 7356:<br />
• MT 7359:<br />
• MT 7479:<br />
• MT 7637:<br />
• MT 8820:<br />
• MT 9961:<br />
• MT 6136, 7626, 7629, and 8338_SB<br />
Windows 7 Ultimate 64 SP1 FRU # CRU<br />
Windows 7 Starter 32 SP1 Recovery CD<br />
India English<br />
• MT 6139:<br />
• MT 6175:<br />
• MT 7187:<br />
• MT 7345:<br />
• MT 7348:<br />
• MT 7356:<br />
• MT 7359:<br />
• MT 7479:<br />
• MT 7637:<br />
• MT 8820:<br />
• MT 9961:<br />
• MT 6136, 7626, 7629, and 8338_SB<br />
03T1850 1<br />
Windows 7 Starter X32 SP1 FRU # CRU<br />
03T2381 1<br />
Chapter 9. FRU lists 273
274 <strong>ThinkCentre</strong> <strong>Hardware</strong> <strong>Maintenance</strong> <strong>Manual</strong>
Chapter 10. Additional service information<br />
This chapter provides additional information that the service representative might find helpful.<br />
Security features<br />
Security features in this section include the following:<br />
• Passwords<br />
• Vital Product Data<br />
• Secure Managed Client (some models)<br />
<strong>Hardware</strong> controlled passwords<br />
Use the Setup Utility program to set the hardware controlled passwords. For more information about<br />
passwords, see “Using passwords ” on page 43.<br />
Operating system password<br />
Note: This section applies only to computer models that have an operating system preinstalled from <strong>Lenovo</strong>.<br />
An operating system password is very similar to a power-on password and denies access to the computer by<br />
an unauthorized user when the password is activated. The computer is unusable until the correct password<br />
is entered and recognized by the computer.<br />
Vital Product Data<br />
Each computer has a unique Vital Product Data (VPD) code stored in the nonvolatile memory on the system<br />
board. After you replace the system board, the VPD must be updated. To update the VPD, see “Updating<br />
(flashing) BIOS from a disc” on page 276.<br />
Secure Managed Client<br />
The Secure Managed Client (SMC) is a storage-based, desktop computing solution that helps businesses<br />
reduce IT costs and improve security by turning off hard disk drives and storing all data in a non-server<br />
remote location while offering users the flexibility and performance of a traditional desktop computer. For<br />
computer models that do not have an internal hard disk drive and a preinstalled operating system, but<br />
use a remote hard disk drive accessed through the SMC - Storage Array, contact the network or storage<br />
administrator.<br />
BIOS levels<br />
An incorrect level of BIOS can cause false errors and unnecessary FRU replacement. Use the following<br />
information to determine the current level of BIOS installed in the computer, the latest BIOS available for the<br />
computer, and where to obtain the latest level of BIOS.<br />
• To determine the current level of BIOS:<br />
– Start the Setup Utility.<br />
– See BIOS Revision Level on the Main setup screen.<br />
• Sources for obtaining the latest level BIOS available<br />
1. <strong>Lenovo</strong> support web site: http://www.lenovo.com/support/<br />
2. <strong>Lenovo</strong> Customer Support Center<br />
© Copyright <strong>Lenovo</strong> 2008, 2012 275
3. Levels 1 and 2 Support<br />
To update (flash) the BIOS, see “Updating (flashing) BIOS from a disc” on page 276.<br />
Updating (flashing) BIOS from a disc<br />
This section provides instructions on how to update (flash) BIOS from a disc. System BIOS program updates<br />
are available at:<br />
http://www.lenovo.com/support<br />
To update (flash) BIOS from a disc:<br />
1. Make sure the optical drive you want to use is set as the first boot device in the startup device sequence.<br />
See “Selecting a startup device” on page 45.<br />
2. Make sure the computer is turned on. Then, insert the system program update (flash) disc into the<br />
optical drive.<br />
3. Turn the computer off and back on again. The update begins.<br />
4. When prompted to change the serial number, press Y.<br />
5. Type in the twenty character serial number of your computer and then press Enter.<br />
6. When prompted to change the machine type/model, press Y.<br />
7. Type in the twenty character machine type/model of your computer and then press Enter.<br />
8. Follow the instructions on the screen to complete the update.<br />
Recovering from a POST/BIOS update failure<br />
If the power to your computer is interrupted while POST/BIOS is being updated (flash update), your computer<br />
might not restart correctly. If this happens, perform the following procedure which is commonly called<br />
Boot-block Recovery.<br />
1. Turn off the computer and any attached devices, such as printers, monitors, and external drives.<br />
2. Unplug all power cords from electrical outlets, and open the computer cover. See “Opening the<br />
computer cover” on page 71.<br />
3. Locate the Clear CMOS/Recovery jumper on the system board. See “Locating parts on the system<br />
board” on page 70.<br />
4. Remove any cables that impede access to the Clear CMOS/Recovery jumper.<br />
5. Move the jumper from the standard position (pin 1 and pin 2) to pins 2 and pin 3.<br />
6. Reconnect any cables that were disconnected. See “Completing the FRU replacement” on page 89.<br />
7. Close the computer cover and reconnect the power cords for the computer and monitor to electrical<br />
outlets.<br />
8. Turn on the computer and the monitor, and then insert the POST/BIOS update (flash update) disc<br />
into the optical drive.<br />
9. Turn the computer off and back on again.<br />
10. The recovery session will take two to three minutes. During this time you will hear a series of beeps. After<br />
the update session is completed, there will be no video, the series of beeps will end, and the system will<br />
automatically turn off. Remove the disc from the optical drive before the system completely turns off.<br />
11. Repeat steps 2 through 4.<br />
12. Move the jumper back to the standard position (pin 1 and pin 2).<br />
13. Reconnect any cables that were disconnected. See “Completing the FRU replacement” on page 89.<br />
14. Close the computer cover and reconnect the power cords for the computer and monitor to electrical<br />
outlets.<br />
276 <strong>ThinkCentre</strong> <strong>Hardware</strong> <strong>Maintenance</strong> <strong>Manual</strong>
15. Turn on the computer to restart the operating system.<br />
Power management<br />
Power management reduces the power consumption of certain components of the computer such as the<br />
system power supply, processor, hard disk drives, and some monitors.<br />
Automatic configuration and power interface (ACPI) BIOS<br />
Being an ACPI BIOS system, the operating system is allowed to control the power management features<br />
of the computer and the setting for Advanced Power Management (APM) BIOS mode is ignored. Not<br />
all operating systems support ACPI BIOS mode.<br />
Automatic Power-On features<br />
The Automatic Power-On features within the Power Management menu allow you to enable and disable<br />
features that turn on the computer automatically.<br />
• RTC resume: You can specify a date and time at which the computer will be turned on automatically.<br />
This can be either a single event or a daily event.<br />
• Wake on LAN: If the computer has a properly configured token-ring or Ethernet LAN adapter card that is<br />
Wake on LAN-enabled and there is remote network management software, you can use the Wake on LAN<br />
feature. When you set Wake on LAN to Enabled, the computer will turn on when it receives a specific<br />
signal from another computer on the local area network (LAN).<br />
Chapter 10. Additional service information 277
278 <strong>ThinkCentre</strong> <strong>Hardware</strong> <strong>Maintenance</strong> <strong>Manual</strong>
Appendix A. Notices<br />
<strong>Lenovo</strong> may not offer the products, services, or features discussed in this document in all countries. Consult<br />
your local <strong>Lenovo</strong> representative for information on the products and services currently available in your<br />
area. Any reference to a <strong>Lenovo</strong> product, program, or service is not intended to state or imply that only that<br />
<strong>Lenovo</strong> product, program, or service may be used. Any functionally equivalent product, program, or service<br />
that does not infringe any <strong>Lenovo</strong> intellectual property right may be used instead. However, it is the user's<br />
responsibility to evaluate and verify the operation of any other product, program, or service.<br />
<strong>Lenovo</strong> may have patents or pending patent applications covering subject matter described in this<br />
document. The furnishing of this document does not give you any license to these patents. You can send<br />
license inquiries, in writing, to:<br />
<strong>Lenovo</strong> (United States), Inc.<br />
1009 Think Place - Building One<br />
Morrisville, NC 27560<br />
U.S.A.<br />
Attention: <strong>Lenovo</strong> Director of Licensing<br />
LENOVO PROVIDES THIS PUBLICATION “AS IS” WITHOUT WARRANTY OF ANY KIND, EITHER EXPRESS<br />
OR IMPLIED, INCLUDING, BUT NOT LIMITED TO, THE IMPLIED WARRANTIES OF NON-INFRINGEMENT,<br />
MERCHANTABILITY OR FITNESS FOR A PARTICULAR PURPOSE. Some jurisdictions do not allow<br />
disclaimer of express or implied warranties in certain transactions, therefore, this statement may not apply<br />
to you.<br />
This information could include technical inaccuracies or typographical errors. Changes are periodically<br />
made to the information herein; these changes will be incorporated in new editions of the publication.<br />
<strong>Lenovo</strong> may make improvements and/or changes in the product(s) and/or the program(s) described in this<br />
publication at any time without notice.<br />
The products described in this document are not intended for use in implantation or other life support<br />
applications where malfunction may result in injury or death to persons. The information contained in this<br />
document does not affect or change <strong>Lenovo</strong> product specifications or warranties. Nothing in this document<br />
shall operate as an express or implied license or indemnity under the intellectual property rights of <strong>Lenovo</strong><br />
or third parties. All information contained in this document was obtained in specific environments and is<br />
presented as an illustration. The result obtained in other operating environments may vary.<br />
<strong>Lenovo</strong> may use or distribute any of the information you supply in any way it believes appropriate without<br />
incurring any obligation to you.<br />
Any references in this publication to non-<strong>Lenovo</strong> Web sites are provided for convenience only and do not in<br />
any manner serve as an endorsement of those Web sites. The materials at those Web sites are not part of<br />
the materials for this <strong>Lenovo</strong> product, and use of those Web sites is at your own risk.<br />
Any performance data contained herein was determined in a controlled environment. Therefore, the result<br />
obtained in other operating environments may vary significantly. Some measurements may have been<br />
made on development-level systems and there is no guarantee that these measurements will be the same<br />
on generally available systems. Furthermore, some measurements may have been estimated through<br />
extrapolation. Actual results may vary. Users of this document should verify the applicable data for their<br />
specific environment.<br />
© Copyright <strong>Lenovo</strong> 2008, 2012 279
Television output notice<br />
The following notice applies to models that have the factory-installed television-output feature.<br />
This product incorporates copyright protection technology that is protected by method claims of certain U.S.<br />
patents and other intellectual property rights owned by Macrovision Corporation and other rights owners.<br />
Use of this copyright protection technology must be authorized by Macrovision Corporation, and is intended<br />
for home and other limited viewing uses only unless otherwise authorized by Macrovision Corporation.<br />
Reverse engineering or disassembly is prohibited.<br />
Trademarks<br />
The following terms are trademarks of <strong>Lenovo</strong> in the United States, other countries, or both:<br />
<strong>Lenovo</strong><br />
PS/2<br />
Rescue and Recovery<br />
The <strong>Lenovo</strong> logo<br />
<strong>ThinkCentre</strong><br />
ThinkVantage<br />
Wake on LAN is a trademark of International Business Machines Corporation in the United States, other<br />
countries, or both.<br />
Celeron, Intel, and Intel Core are trademarks of Intel Corporation in the United States, other countries, or both.<br />
Microsoft, Windows, and Windows Vista are trademarks of the Microsoft group of companies.<br />
Other company, product, or service names may be trademarks or service marks of others.<br />
280 <strong>ThinkCentre</strong> <strong>Hardware</strong> <strong>Maintenance</strong> <strong>Manual</strong>
Index<br />
A<br />
Access Help 30<br />
H<br />
help<br />
Access Help 30<br />
L<br />
<strong>Lenovo</strong> Solution Center 37<br />
<strong>Lenovo</strong> System Toolbox 38<br />
<strong>Lenovo</strong> ThinkVantage Toolbox 37<br />
<strong>Lenovo</strong> ThinkVantage Tools 29<br />
O<br />
Online Books folder 29<br />
P<br />
PC-Doctor for Rescue and Recovery 38<br />
T<br />
ThinkVantage Productivity Center 30<br />
© Copyright <strong>Lenovo</strong> 2008, 2012 281
282 <strong>ThinkCentre</strong> <strong>Hardware</strong> <strong>Maintenance</strong> <strong>Manual</strong>
Part Number: 53Y6832<br />
Printed in USA<br />
(1P) P/N: 53Y6832<br />
*53Y6832*