FOOD PROCESSOR - Kompernass
FOOD PROCESSOR - Kompernass
FOOD PROCESSOR - Kompernass
You also want an ePaper? Increase the reach of your titles
YUMPU automatically turns print PDFs into web optimized ePapers that Google loves.
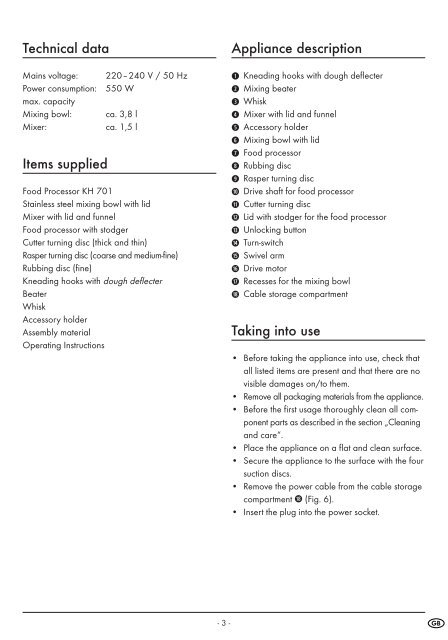
Technical data<br />
Mains voltage:<br />
Power consumption:<br />
max. capacity<br />
Mixing bowl:<br />
Mixer:<br />
Items supplied<br />
220–240 V / 50 Hz<br />
550 W<br />
ca. 3,8 l<br />
ca. 1,5 l<br />
Food Processor KH 701<br />
Stainless steel mixing bowl with lid<br />
Mixer with lid and funnel<br />
Food processor with stodger<br />
Cutter turning disc (thick and thin)<br />
Rasper turning disc (coarse and medium-fine)<br />
Rubbing disc (fine)<br />
Kneading hooks with dough deflecter<br />
Beater<br />
Whisk<br />
Accessory holder<br />
Assembly material<br />
Operating Instructions<br />
Appliance description<br />
q Kneading hooks with dough deflecter<br />
w Mixing beater<br />
e Whisk<br />
r Mixer with lid and funnel<br />
t Accessory holder<br />
y Mixing bowl with lid<br />
u Food processor<br />
i Rubbing disc<br />
o Rasper turning disc<br />
a Drive shaft for food processor<br />
s Cutter turning disc<br />
d Lid with stodger for the food processor<br />
f Unlocking button<br />
g Turn-switch<br />
h Swivel arm<br />
j Drive motor<br />
k Recesses for the mixing bowl<br />
l Cable storage compartment<br />
Taking into use<br />
• Before taking the appliance into use, check that<br />
all listed items are present and that there are no<br />
visible damages on/to them.<br />
• Remove all packaging materials from the appliance.<br />
• Before the first usage thoroughly clean all component<br />
parts as described in the section „Cleaning<br />
and care“.<br />
• Place the appliance on a flat and clean surface.<br />
• Secure the appliance to the surface with the four<br />
suction discs.<br />
• Remove the power cable from the cable storage<br />
compartment l (Fig. 6).<br />
• Insert the plug into the power socket.<br />
- 3 -


