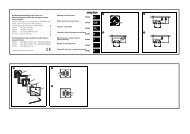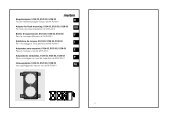
MEG5522-00xx ARGUS Präsenz Sensor-Modul mit IR
MEG5522-00xx ARGUS Präsenz Sensor-Modul mit IR
MEG5522-00xx ARGUS Präsenz Sensor-Modul mit IR

Sie wollen auch ein ePaper? Erhöhen Sie die Reichweite Ihrer Titel.
YUMPU macht aus Druck-PDFs automatisch weboptimierte ePaper, die Google liebt.
<strong>ARGUS</strong> <strong>Präsenz</strong> <strong>Sensor</strong>-<strong>Modul</strong> <strong>mit</strong> <strong>IR</strong>© Merten 2009V5522-581-0012/11<br />
de en<br />
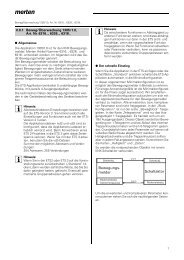
Beispiel zur Verdeutlichung der <strong>Präsenz</strong>funktion:<br />
<strong>ARGUS</strong> <strong>Präsenz</strong> <strong>Sensor</strong>-<strong>Modul</strong> <strong>mit</strong> <strong>IR</strong><br />
Gebrauchsanleitung<br />
Art.-Nr. <strong>MEG5522</strong>-00..<br />
Notwendiges Zubehör<br />
– Komplettieren Sie das <strong>ARGUS</strong> <strong>Präsenz</strong> <strong>Sensor</strong>-<strong>Modul</strong><br />
<strong>mit</strong> <strong>IR</strong> <strong>mit</strong> entsprechenden Einsätzen (siehe Funktionsübersicht).<br />
Zubehör<br />
– Aufputzgehäuse für <strong>ARGUS</strong> <strong>Präsenz</strong><br />
(Art.-Nr. 550619)<br />
– <strong>IR</strong>-Fernbedienung Distance 2010 (Art.-Nr. 570222)<br />
Für Ihre Sicherheit<br />
¼ GEFAHR<br />
Lebensgefahr durch elektrischen Schlag.<br />
Alle Tätigkeiten am Gerät dürfen nur durch ausgebildete<br />
Elektrofachkräfte erfolgen. Beachten Sie<br />
die länderspezifischen Vorschriften.<br />
<strong>Sensor</strong>-<strong>Modul</strong> kennenlernen<br />
Das <strong>ARGUS</strong> <strong>Präsenz</strong> <strong>Sensor</strong>-<strong>Modul</strong> <strong>mit</strong> <strong>IR</strong> (im Folgenden<br />
<strong>Sensor</strong>-<strong>Modul</strong> genannt) ist ein <strong>Präsenz</strong>melder für<br />
die Deckenmontage im Innenbereich. Das <strong>Sensor</strong>-<strong>Modul</strong><br />
kann sowohl in einer Unterputzdose, als auch in einem<br />
Aufputzgehäuse (als Zubehör erhältlich) montiert<br />
werden. Es erfasst sich bewegende Wärmequellen (z. B.<br />
Personen) in einem einstellbaren Erfassungsbereich<br />
und startet eine Treppenlichtfunktion.<br />
Der maximale Erfassungsradius beträgt ca. 7 m. Der Erfassungswinkel<br />
bertägt 360°. Solange eine Bewegung<br />
erfasst wird, bleibt die angeschlossene Last eingeschaltet.<br />
Die einstellbare Nachlaufzeit beginnt erst, wenn keine<br />
Bewegung mehr erkannt wird (Triggerfunktion).<br />
Das <strong>Sensor</strong>-<strong>Modul</strong> verfügt über einen Lichtfühler <strong>mit</strong> einstellbarer<br />
Helligkeitsschwelle, so dass die Beleuchtung<br />
nur unterhalb einer bestimmten Helligkeitsschwelle eingeschaltet<br />
wird (Bewegungsmelderfunktion). Durch die<br />
<strong>Präsenz</strong>funktion kann das <strong>Sensor</strong>-<strong>Modul</strong> die Beleuchtung<br />
trotz einer anwesenden Person ausschalten, wenn<br />
genügend natürliches Licht vorhanden ist.<br />
| Der angegebene Erfassungsradius und die Hel-<br />
ligkeitsschwelle beziehen sich auf durchschnittliche<br />
Verhältnisse bei der empfohlenen<br />
Montagehöhe von ca. 2,50 m und sind deshalb<br />
als Richtwerte anzusehen. Die Reichweite kann<br />
bei wechselnden Temperaturverhältnissen stark<br />
schwanken.<br />
lx<br />
1000<br />
800<br />
600<br />
A<br />
400<br />
200<br />
A Helligkeitsschwelle ist auf 500 Lux eingestellt.<br />
B Beleuchtung ist ausgeschaltet, Helligkeit im Raum<br />
beträgt 200 Lux<br />
C <strong>Sensor</strong>-<strong>Modul</strong> erkennt Bewegung: Beleuchtung<br />
(400 Lux) wird eingeschaltet. Gesamthelligkeit im<br />
Raum beträgt nun 600 Lux.<br />
D Tageslicht und da<strong>mit</strong> die Gesamthelligkeit im Raum<br />
nehmen zu.<br />
E Gesamthelligkeit überschreitet 900 Lux. Tageslicht<br />
alleine liegt nun über der Helligkeitsschwelle von<br />
500 Lux. Die Beleuchtung wird ausgeschaltet (nach<br />
Ablauf der Nachlaufzeit).<br />
F <strong>Sensor</strong>-<strong>Modul</strong> schaltet trotz Bewegungserkennung<br />
die Beleuchtung nicht ein, da das Tageslicht ausreicht.<br />
Die zuschaltbare Lichtregelung (nur in Kombination <strong>mit</strong><br />
dimmbaren Einsätzen) sorgt für eine nahezu konstant<br />
helle Beleuchtung des Raumes. Das <strong>Sensor</strong>-<strong>Modul</strong><br />
misst ständig die Helligkeit im Raum und regelt sie um einen<br />
einstellbaren Sollwert.<br />
Über eine <strong>IR</strong>-Fernbedienung können Sie zwischen den<br />
Funktionen „Automatikbetrieb“, „24 h einschalten“ und<br />
„24 h ausschalten“ wechseln.<br />
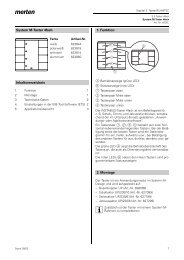
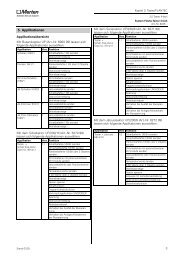
Funktionsübersicht des <strong>Sensor</strong>-<strong>Modul</strong>s<br />
auf empfangenden Einsätzen<br />
Komplettieren Sie das <strong>Sensor</strong>-<strong>Modul</strong> <strong>mit</strong> den empfangenden<br />
Einsätzen zum Schalten oder Dimmen, um lokale<br />
Lichtsteuerung und weitere Funktionen<br />
auszuführen.<br />
Schalten<br />
• Elektronik-Schalt-Einsatz<br />
• Relais-Schalt-Einsatz<br />
• Elektronik-Schalt-Einsatz,<br />
2fach<br />
• Relais-Schalt-Einsatz,<br />
2fach<br />
Dimmen<br />
• Universal-Dimmer-Einsatz<br />
• Steuerungs-Einsatz<br />
1-10 V<br />
• DALI-Steuerungs-Einsatz<br />
• Universal-Dimmer-Einsatz,<br />
2fach<br />
B C D E F<br />
<strong>Sensor</strong>-<strong>Modul</strong>:<br />
helligkeitsabhängige Treppenlichtfunktion<br />
<strong>Sensor</strong>-<strong>Modul</strong>:<br />
Kanal 1: helligkeitsabhängige<br />
Treppenlichtfunktion<br />
Kanal 2: helligkeitsunabhängigeTreppenlichtfunktion<br />
<strong>Sensor</strong>-<strong>Modul</strong>:<br />
helligkeitsabhängige Treppenlichtfunktion,Lichtregelung<br />
<strong>Sensor</strong>-<strong>Modul</strong>:<br />
Kanal 1: helligkeitsabhängige<br />
Treppenlichtfunktion,<br />
Lichtregelung<br />
Kanal 2: helligkeitsunabhängigeTreppenlichtfunktion,<br />
Lichtregelung<br />
Funktionsübersicht des <strong>Sensor</strong>-<strong>Modul</strong>s<br />
auf sendendem Einsatz<br />
Komplettieren Sie das <strong>Sensor</strong>-<strong>Modul</strong> <strong>mit</strong> dem sendenden<br />
Zentralstellen-Einsatz, um globale Lichtsteuerung<br />
über den PlusLink (PL) auszuführen.<br />
Globale Lichtsteuerung:<br />
• Zentralstellen-Einsatz <strong>Sensor</strong>-<strong>Modul</strong>:<br />
helligkeitsunabhängige<br />
Treppenlichtfunktion<br />
<strong>Sensor</strong>-<strong>Modul</strong> im Zusammenspiel <strong>mit</strong><br />
Alarmanlagen<br />
| Bewegungs-/<strong>Präsenz</strong>melder sind nicht als Kom-<br />
| Bewegungs-/<strong>Präsenz</strong>melder können Fehlalarme<br />
ponente einer Alarmanlage im Sinne des Verbandes<br />
der Sachversicherer (VdS) geeignet.<br />
auslösen, wenn der Montageort ungünstig gewählt<br />
wurde.<br />
Bewegungs-/<strong>Präsenz</strong>melder schalten, sobald sie eine<br />
sich bewegende Wärmequelle wahrnehmen. Dabei<br />
kann es sich um Menschen handeln, aber auch um Tiere<br />
oder Temperaturdifferenzen in Fenstern. Um Fehlalarme<br />
zu vermeiden, ist der Montageort so zu wählen, dass unerwünscht<br />
auslösende Wärmequellen nicht erfasst werden<br />
können (siehe Abschnitt „Montageort auswählen“).<br />
Anschlüsse, Anzeigen und<br />
Bedienelemente<br />
Vorderseite:<br />
A rote LED (im Testmodus)<br />
B grüne LED (bei 24 h-Treppenlichtschaltung)<br />
Rückseite:<br />
D<br />
C<br />
B<br />
A<br />
B<br />
10<br />
s<br />
2min<br />
Test<br />
Time Ch.1<br />
30min<br />
LUX<br />
ON DIP<br />
1 2 3 4<br />
Sensitivity<br />
A<br />
A <strong>Modul</strong>-Schnittstelle<br />
B DIP-Schalter<br />
1: <strong>Präsenz</strong>funktion/Bewegungsmelderfunktion<br />
2: 24 h-Treppenlichtschaltung<br />
3: Vorwarnung für Kanal 1<br />
4: Lichtregelung<br />
C Potentiometer für Nachlaufzeit Kanal 1<br />
D Potentiometer für Helligkeitsschwelle<br />
E Potentiometer für Empfindlichkeit<br />
F Potentiometer für Nachlaufzeit Kanal 2<br />
5min<br />
1h<br />
2h<br />
OFF<br />
Time Ch.2<br />
E<br />
F<br />
Montageort auswählen<br />
• <strong>Sensor</strong>-<strong>Modul</strong> an Stellen montieren, die eine optimale<br />
Überwachung des gewünschten Bereichs ermöglichen.<br />
• <strong>Sensor</strong>-<strong>Modul</strong> an der Decke, möglichst in der Mitte<br />
des Raumes, montieren.<br />
• <strong>Sensor</strong>-<strong>Modul</strong> nicht an Schrägen oder Wänden montieren.<br />
• <strong>Sensor</strong>-<strong>Modul</strong> <strong>mit</strong> einem Abstand von mind. 0,5 m zu<br />
Leuchten montieren.<br />
• Die empfohlene Montagehöhe beträgt 2,50 m. Bei abweichenden<br />
Montagehöhen ändert sich der Erfassungsbereich.<br />
• Maximaler Erfassungsbereich des <strong>Sensor</strong>-<strong>Modul</strong>s:<br />
360° Erfassungswinkel, ca. 7 m Erfassungsradius.<br />
2,5 m<br />
12,0 m<br />
14,0 m<br />
• Innerer/äußerer Erfassungsbereich<br />
– innerer Erfassungsbereich (ca. 6 m Radius):<br />
Bewegungserkennung einer sitzenden Person aufgrund<br />
geringerer Bewegung<br />
– äußerer Erfassungsbereich (ca. 7 m Radius):<br />
Bewegungserkennung einer gehenden Person aufgrund<br />
stärkerer Bewegung<br />
• Um eine lückenlose Überwachung, z. B. eines langen<br />
Flures, zu gewährleisten, müssen sich die Erfassungsbereiche<br />
der <strong>Sensor</strong>-<strong>Modul</strong>e überschneiden.<br />
• Bewegungs-/<strong>Präsenz</strong>melder erfassen Objekte, die<br />
Wärme abstrahlen. Wählen Sie den Montageort so,<br />
dass unerwünschte Wärmequellen nicht erfasst werden,<br />
wie z. B.:<br />
– geschaltete Lampe im Erfassungsbereich<br />
– offene Feuer (z. B. Kaminfeuer)<br />
– sich bewegende Vorhänge, Gardinen, usw., die<br />
durch starke Sonneneinstrahlung eine andere Temperatur<br />
haben als deren Umgebung.<br />
– Fenster, in denen es durch die Wechselwirkung zwischen<br />
Sonneneinstrahlung und Wolken zu einer<br />
schnellen Temperaturveränderung kommt.<br />
– größere Wärmequellen (z. B. Autos), die durch<br />
Fenster hindurch erfasst werden.<br />
– lichtdurchflutete Räume, in denen es aufgrund spiegelnder<br />
Gegenstände (z. B. Böden) zu schnellen<br />
Temperaturveränderungen kommt.<br />
– durch Sonneneinstrahlung aufgeheizte Fensterscheiben<br />
– Hunde, Katzen, usw.<br />
• Um Fehlschaltungen zu verhindern, sollte der Einsatz<br />
in einer winddichten Unterputzdose installiert werden.<br />
Bei Unterputzdosen und Rohrverkabelungssystemen<br />
kann ein Luftzug an der Rückseite des Gerätes zum<br />
Auslösen des <strong>Sensor</strong>-<strong>Modul</strong>s führen.<br />
• Direkte Sonneneinstrahlung vermeiden. Diese kann<br />
im Extremfall den <strong>Sensor</strong> zerstören.<br />
<strong>Sensor</strong>-<strong>Modul</strong> montieren<br />
A<br />
C<br />
E<br />
A Unterputzdose<br />
B Aufputzgehäuse für <strong>ARGUS</strong> <strong>Präsenz</strong> (Zubehör)<br />
C Einsatz (siehe Funktionsübersicht)<br />
D Schrauben (im Lieferumfang des Aufputzgehäuses)<br />
E <strong>Sensor</strong>-<strong>Modul</strong><br />
| Bei Netzspannungszufuhr schaltet das <strong>Sensor</strong>-<br />
<strong>Modul</strong> den Kanal 1 für 30 s ein und anschließend<br />
wieder aus. Kanal 2 bleibt ausgeschaltet. In den<br />
folgenden 2 s reagiert das <strong>Sensor</strong>-<strong>Modul</strong> nicht<br />
auf Bewegung. Nach Ablauf dieser Initialisierungszeit<br />
ist das <strong>Sensor</strong>-<strong>Modul</strong> betriebsbereit.<br />
<strong>Sensor</strong>-<strong>Modul</strong> einstellen<br />
Auf der Rückseite des <strong>Sensor</strong>-<strong>Modul</strong>s können Sie über<br />
Potentiometer die Empfindlichkeit, Helligkeitsschwelle<br />
und Nachlaufzeit des <strong>Sensor</strong>-<strong>Modul</strong>s einstellen.<br />
Zusätzliche Einstellmöglichkeiten über DIP-Schalter:<br />
Empfindlichkeit einstellen<br />
Pos. ON<br />
(oben)<br />
Pos. OFF<br />
(unten)<br />
DIP 1 <strong>Präsenz</strong>funktion aktiv inaktiv<br />
DIP 2 24 h-Treppenlichtschaltung<br />
über Plus-<br />
Link<br />
B<br />
C<br />
D<br />
E<br />
24 h „EIN“ 24 h „EIN“<br />
oder 24 h<br />
„AUS“<br />
DIP 3 Vorwarnung für Kanal 1 aktiv inaktiv<br />
DIP 4 Lichtregelung aktiv inaktiv<br />
1<br />
10s<br />
2<br />
A<br />
Test<br />
2min<br />
B<br />
Sensitivity<br />
30min<br />
C<br />
A B C<br />
1 Testmodus aktivieren und Helligkeitsschwelle auf<br />
„unendlich“ stellen.<br />
Die rote LED leuchtet bei erkannter Bewegung.<br />
2 Empfindlichkeit stufenlos einstellen (max. 7 m Erfassungsradius).<br />
3 Erfassungsbereich abschreiten und prüfen, ob das<br />
<strong>Sensor</strong>-<strong>Modul</strong> wie gewünscht schaltet. Empfindlichkeit<br />
ggf. anpassen.<br />
Helligkeitsschwelle einstellen<br />
4<br />
4 Gewünschte Helligkeitsschwelle stufenlos einstellen.<br />
Das <strong>Sensor</strong>-<strong>Modul</strong> schaltet unterhalb der eingestellten<br />
Helligkeitsschwelle.<br />
5 Prüfen, ob das <strong>Sensor</strong>-<strong>Modul</strong> bei gewünschter/eingestellter<br />
Helligkeit schaltet. Helligkeitsschwelle<br />
ggf. anpassen.<br />
| In Kombination <strong>mit</strong> einem 2fach-Einsatz bezieht<br />
erkennt Bewegung bei Dunkelheit (ca. 10 Lux)<br />
erkennt Bewegung bei Tageslicht<br />
(ca. 1000 Lux)<br />
erkennt Bewegung helligkeitsunabhängig<br />
sich die Helligkeitsschwelle nur auf Kanal 1. Der<br />
Kanal 2 schaltet immer helligkeitsunabhängig.<br />
Treppenlichtfunktion einstellen<br />
Sie können die Art der Treppenlichtfunktion (ohne/<strong>mit</strong><br />
Vorwarnung) und die Nachlaufzeit einstellen.<br />
Mit der Nachlaufzeit stellen Sie ein, wie lange der angeschlossene<br />
Verbraucher eingeschaltet bleibt (stufenlos<br />
von 10 s bis 30 min.). Beim 2fach-Einsatz können Sie die<br />
Nachlaufzeit für beide Kanäle separat einstellen.<br />
Die Vorwarnung zeigt das Ende der Nachlaufzeit an. Die<br />
Verbraucher werden kurz aus- und wieder eingeschaltet<br />
(in Kombination <strong>mit</strong> Schalt-Einsätzen), bzw. werden<br />
langsam heruntergedimmt (in Kombination <strong>mit</strong> dimmbaren<br />
Einsätzen). Nach Ablauf der Vorwarnzeit (30 s, nicht<br />
einstellbar) werden die Verbraucher ausgeschaltet.<br />
1 Art der Treppenlichtfunktion wählen und Nachlaufzeit<br />
einstellen<br />
Treppenlichtfunktion ohne Vorwarnung<br />
1<br />
2min<br />
ON DIP<br />
10s<br />
30min<br />
1 2 3 4<br />
Test<br />
A<br />
B<br />
C<br />
A Schalten ohne Vorwarnung<br />
B Dimmen ohne Vorwarnung<br />
C Nachlaufzeit<br />
t<br />
t<br />
V5522-581-00 12/11
Treppenlichtfunktion <strong>mit</strong> Vorwarnung<br />
1<br />
A<br />
B<br />
10s<br />
A Schalten <strong>mit</strong> Vorwarnung<br />
B Dimmen <strong>mit</strong> Vorwarnung<br />
C Nachlaufzeit<br />
D Vorwarnzeit (30 s, nicht einstellbar)<br />
| Die Vorwarnung bezieht sich nur auf Kanal 1.<br />
Test<br />
2min<br />
30min<br />
C<br />
ON DIP<br />
1 2 3 4<br />
D<br />
Nachlaufzeit für Kanal 2 einstellen<br />
Bei Verwendung eines 2fach-Einsatzes können Sie die<br />
Nachlaufzeit für Kanal 2 über ein separates Potentiometer<br />
einstellen. Die einstellbare Zeitspanne unterscheidet<br />
sich von der des Kanals 1.<br />
1<br />
5min<br />
1h<br />
2h<br />
OFF<br />
<strong>Präsenz</strong>funktion aktivieren/deaktivieren<br />
Bei der helligkeitsabhängigen Bewegungserkennung<br />
überprüft das <strong>Sensor</strong>-<strong>Modul</strong> ständig die Helligkeit im<br />
Raum und vergleicht diese <strong>mit</strong> der eingestellten Helligkeitsschwelle.<br />
Ist ausreichend natürliches Licht vorhanden,<br />
schaltet das <strong>Sensor</strong>-<strong>Modul</strong> die Beleuchtung trotz<br />
einer anwesenden Person aus.<br />
Die <strong>Präsenz</strong>funktion des <strong>Sensor</strong>-<strong>Modul</strong>s ist werksseitig<br />
aktiviert. Mit dem DIP-Schalter 1 können Sie die Funktion<br />
deaktivieren („OFF“) und wieder aktivieren („ON“).<br />
ON DIP<br />
1 2 3 4<br />
Bei deaktivierter <strong>Präsenz</strong>funktion führt das <strong>Sensor</strong>-<strong>Modul</strong><br />
weiterhin die Bewegungsmelderfunktion aus.<br />
24 h-Treppenlichtschaltung einstellen<br />
Mit dem DIP-Schalter 2 können Sie eine Treppenlichtschaltung<br />
für 24 Stunden einstellen, die Sie von anderer<br />
Stelle über PlusLink abrufen können.<br />
Dazu haben Sie folgende Möglichkeiten:<br />
• DIP 2 „ON“: Treppenlichtzeit für 24 h über PL nur einschalten<br />
• DIP 2 „OFF“: Treppenlichtzeit für 24 h über PL ein-/<br />
ausschalten<br />
ON DIP<br />
1 2 3 4<br />
Lichtregelung aktivieren/deaktivieren<br />
(Nur in Kombination <strong>mit</strong> dimmbaren Einsätzen, siehe<br />
Funktionsübersicht)<br />
Die Lichtregelung des <strong>Sensor</strong>-<strong>Modul</strong>s ist werksseitig deaktiviert.<br />
Mit dem DIP-Schalter 4 können Sie die Funktion<br />
aktivieren („ON“) und wieder deaktivieren („OFF“).<br />
ON DIP<br />
1 2 3 4<br />
t<br />
t<br />
Lichtregelung<br />
Grundfunktion der Lichtregelung<br />
(Nur in Kombination <strong>mit</strong> dimmbaren Einsätzen)<br />
Die Lichtregelung sorgt für eine nahezu konstant helle<br />
Beleuchtung des Raumes. Das <strong>Sensor</strong>-<strong>Modul</strong> misst<br />
ständig die Helligkeit im Raum und regelt sie um einen<br />
einstellbaren Sollwert. Bei Bewegungserkennung dimmt<br />
der Einsatz die Beleuchtung zunächst zum Sollwert. Ändert<br />
sich die Umgebungshelligkeit, dimmt der Einsatz<br />
die Beleuchtung entsprechend nach. Ist ausreichend<br />
natürliches Licht vorhanden, schaltet das <strong>Sensor</strong>-<strong>Modul</strong><br />
die Beleuchtung trotz einer anwesenden Person aus.<br />
Beispiel zur Verdeutlichung der Lichtregelung:<br />
lx<br />
F<br />
A<br />
B<br />
A Sollwert<br />
B Umgebungshelligkeit<br />
C Beleuchtung ausgeschaltet<br />
D Startphase<br />
E Regelungsphase<br />
F Regelungsbereich<br />
G Vorwarnung<br />
H Beleuchtung ausgeschaltet<br />
| Beim 2fach-Einsatz ist das Verhalten der Lichtre-<br />
gelung für beide Kanäle gleich.<br />
Lichtregelung einstellen<br />
Sobald die Lichtregelung <strong>mit</strong> dem DIP-Schalter 4 aktiviert<br />
ist, bekommen die anderen DIP-Schalter eine neue,<br />
bzw. zusätzliche Funktion:<br />
DIP 1 Reaktionsgeschwindigkeit<br />
DIP 2<br />
C D E G H<br />
Pos. ON<br />
(oben)<br />
Pos. OFF<br />
(unten)<br />
langsam schnell<br />
Sollwertänderung gesperrt per <strong>IR</strong>-Fernbedienung<br />
oder Taster-<br />
<strong>Modul</strong><br />
24 h-Treppenlichtschaltung<br />
über PL<br />
DIP 3 Startphase einstellen<br />
24 h „EIN“ 24 h „EIN“<br />
oder 24 h<br />
„AUS“<br />
50 %-Helligkeit<br />
der Beleuchtung<br />
Sollwert<br />
Reaktionsgeschwindigkeit einstellen<br />
Mit dem DIP-Schalter 1 können Sie die Reaktionsgeschwindigkeit<br />
einstellen, <strong>mit</strong> der das <strong>Sensor</strong>-<strong>Modul</strong> das<br />
Licht an den Sollwert anpasst.<br />
ON DIP<br />
1 2 3 4<br />
lx<br />
A langsame Lichtregelung<br />
ON DIP<br />
1 2 3 4<br />
lx<br />
B schnelle Lichtregelung<br />
Sollwert ändern<br />
Der Sollwert ist ein gewünschter Helligkeitswert, der im<br />
Raum nahezu konstant eingehalten werden soll. Dieser<br />
Wert ergibt sich aus der Umgebungshelligkeit und der<br />
Beleuchtung.<br />
Mit dem DIP-Schalter 2 können Sie wählen, ob der Sollwert<br />
geändert werden darf. Dies ist möglich <strong>mit</strong> der <strong>IR</strong>-<br />
Fernbedienung oder über ein Taster-<strong>Modul</strong> auf dem<br />
Zentralstellen-Einsatz.<br />
Die Helligkeit der Beleuchtung ändert sich bei der Sollwertänderung<br />
entsprechend.<br />
A<br />
B<br />
lx<br />
C<br />
ON DIP<br />
1 2 3 4<br />
ON DIP<br />
1 2 3 4<br />
6<br />
7 5<br />
8 4<br />
3<br />
9<br />
10 2<br />
1<br />
A Sollwertänderung gesperrt<br />
B Sollwertänderung freigegeben <strong>mit</strong> <strong>IR</strong>-Fernbedienung<br />
oder über Taster-<strong>Modul</strong> auf Zentralstellen-Einsatz<br />
C Sollwert ändern<br />
– <strong>mit</strong> <strong>IR</strong>-Fernbedienung:<br />
Taste 8: Sollwert erhöhen<br />
Taste 9: Sollwert reduzieren<br />
– <strong>mit</strong> Taster-<strong>Modul</strong>:<br />
Taste oben: Sollwert erhöhen<br />
Taste unten: Sollwert reduzieren<br />
B<br />
A<br />
t<br />
t<br />
t<br />
Startphase einstellen<br />
Mit dem DIP-Schalter 3 können sie die Startphase einstellen,<br />
<strong>mit</strong> der das <strong>Sensor</strong>-<strong>Modul</strong> das Licht einschaltet.<br />
Start <strong>mit</strong> 50 %-Helligkeit der Beleuchtung<br />
ON DIP<br />
1 2 3 4<br />
lx<br />
A<br />
B<br />
C<br />
D<br />
A max. Gesamthelligkeit (Umgebungshelligkeit und<br />
Beleuchtung)<br />
B Sollwert<br />
C 50 %-Helligkeit der Beleuchtung<br />
D Umgebungshelligkeit<br />
E Beleuchtung ausgeschaltet<br />
F Startphase<br />
G Regelungsphase<br />
Start <strong>mit</strong> Sollwert<br />
ON DIP<br />
1 2 3 4<br />
lx<br />
A<br />
B<br />
A Sollwert<br />
B Umgebungshelligkeit<br />
C Beleuchtung ausgeschaltet<br />
D Startphase<br />
E Regelungsphase<br />
E F G t<br />
C D<br />
E t<br />
<strong>Sensor</strong>-<strong>Modul</strong> <strong>mit</strong> <strong>IR</strong>-Fernbedienung<br />
bedienen<br />
Sie können <strong>mit</strong> der Taste 10 auf der <strong>IR</strong>-Fernbedienung<br />
B zwischen drei Funktionen des <strong>Sensor</strong>-<strong>Modul</strong>s umschalten.<br />
A<br />
B<br />
6<br />
7<br />
8 4<br />
9<br />
2<br />
10<br />
1<br />
3<br />
5<br />
Auto ON OFF Auto ...<br />
24 h 24 h<br />
• Funktion Auto: Das <strong>Sensor</strong>-<strong>Modul</strong> befindet sich im<br />
Automatikbetrieb und schaltet Verbraucher bei erkannter<br />
Bewegung ein und nach Ablauf der Nachlaufzeit<br />
aus.<br />
• 24 h „EIN“: Verbraucher ist für 24 Stunden eingeschaltet<br />
(keine Bewegungserkennung). Grüne LED<br />
A leuchtet.<br />
• 24 h „AUS“: Verbraucher ist für 24 Stunden ausgeschaltet<br />
(keine Bewegungserkennung). Grüne LED<br />
A leuchtet.<br />
<strong>Sensor</strong>-<strong>Modul</strong> von anderer Stelle<br />
steuern<br />
Verbraucher von anderer Stelle über<br />
PlusLink steuern <strong>mit</strong>:<br />
• Taster-<strong>Modul</strong> auf Zentralstellen-Einsatz<br />
• <strong>Sensor</strong>-<strong>Modul</strong> auf Zentralstellen-Einsatz<br />
• Nebenstelle Plus, 1fach/2fach<br />
• mechanischem Taster<br />
Beispiel für globale Steuerung <strong>mit</strong> Taster-<strong>Modul</strong> auf<br />
Zentralstellen-Einsatz<br />
Treppenlichtfunktion starten<br />
Bei Betätigung des Taster-<strong>Modul</strong>s auf dem Zentralstellen-Einsatz<br />
A starten alle lokalen <strong>Sensor</strong>-<strong>Modul</strong>e B in<br />
den PL-Linien die eingestellte Treppenlichtfunktion helligkeitsunabhängig.<br />
A Taster-<strong>Modul</strong> auf Zentralstellen-Einsatz (alternativ:<br />
Nebenstelle Plus für eine PL-Linie)<br />
B <strong>Sensor</strong>-<strong>Modul</strong> in PL-Linie<br />
24 h-Treppenlichtschaltung<br />
• Taste oben links: Treppenlicht für 24 h einschalten<br />
• Taste unten links: Treppenlicht für 24 h ausschalten<br />
(Voraussetzung: DIP2 auf „OFF“)<br />
| Wenn DIP 2 auf „ON“ steht, ist ein Ausschalten<br />
A<br />
PL2<br />
PL3<br />
PL4<br />
PL1<br />
B<br />
B<br />
über ein Taster-<strong>Modul</strong> für 24 h nicht möglich.<br />
• Taste oben/unten rechts: 24 h-Treppenlichtschaltung<br />
deaktivieren.<br />
PL2<br />
PL3<br />
PL4<br />
PL1<br />
B<br />
B<br />
A<br />
A Taster-<strong>Modul</strong> auf Zentralstellen-Einsatz (alternativ:<br />
Nebenstelle Plus für eine PL-Linie)<br />
B <strong>Sensor</strong>-<strong>Modul</strong> in PL-Linie<br />
24 h<br />
Beispiel für globale Steuerung <strong>mit</strong> mechanischem<br />
Taster<br />
Bei Betätigung des mechanischen Tasters A starten<br />
alle lokalen <strong>Sensor</strong>-<strong>Modul</strong>e B in der PL-Linie die eingestellte<br />
Treppenlichtfunktion helligkeitsunabhängig.<br />
A Mechanischer Taster<br />
B <strong>Sensor</strong>-<strong>Modul</strong> in PL-Linie<br />
Beispiel für globale Steuerung <strong>mit</strong> Paniktaster an<br />
Zentralstellen-Einsatz<br />
Bei Betätigung des Paniktasters B starten alle lokalen<br />
<strong>Sensor</strong>-<strong>Modul</strong>e C in den PL-Linien eine feste Nachlaufzeit<br />
von 30 Minuten (Panikszene) helligkeitsunabhängig.<br />
| Ein vorzeitiges Beenden der Funktion ist möglich<br />
PL<br />
<strong>mit</strong> einem Taster-<strong>Modul</strong> auf dem Zentralstellen-<br />
Einsatz. Drücken Sie dazu die rechte Taste.<br />
Beim Zentralstellen-Einsatz in Kombination <strong>mit</strong><br />
einem <strong>Sensor</strong>-<strong>Modul</strong> ist die Panikfunktion daher<br />
nicht möglich.<br />
PL4 PL3<br />
C<br />
C<br />
B<br />
B<br />
A<br />
A B<br />
PL2<br />
PL1<br />
30 min<br />
A Taster-<strong>Modul</strong> auf Zentralstellen-Einsatz<br />
B Mechnischer Taster (Paniktaster)<br />
C <strong>Sensor</strong>-<strong>Modul</strong> in PL-Linie<br />
V5522-581-00 12/11
<strong>Sensor</strong>-<strong>Modul</strong> bedienen: Globale<br />
Treppenlichtfunktion über PlusLink<br />
| Die globale Steuerung über PlusLink ist möglich<br />
in Kombination von Zentralstellen-Einsatz und<br />
<strong>Sensor</strong>-<strong>Modul</strong>.<br />
Beispiel für globale Steuerung über<br />
<strong>Sensor</strong>-<strong>Modul</strong> auf dem Zentralstellen-<br />
Einsatz<br />
Erkennt das <strong>Sensor</strong>-<strong>Modul</strong> A auf dem Zentralstellen-<br />
Einsatz eine Bewegung, sendet es einen Triggerbefehl<br />
an alle lokalen <strong>Sensor</strong>-<strong>Modul</strong>e B in den PL-Linien.<br />
Die lokalen <strong>Sensor</strong>-<strong>Modul</strong>e B prüfen die Umgebungshelligkeit.<br />
Nur wenn die eingestellte Helligkeitsschwelle<br />
unterschritten ist, startet die Treppenlichtfunktion.<br />
Zusätzlich können Sie die Treppenlichtfunktion der Taster-<strong>Modul</strong>e<br />
Comfort und Comfort Plus in den PL-Linien<br />
starten.<br />
A<br />
PL2<br />
PL3<br />
PL4<br />
PL1<br />
B<br />
C<br />
A <strong>Sensor</strong>-<strong>Modul</strong> auf Zentralstellen-Einsatz<br />
B <strong>Sensor</strong>-<strong>Modul</strong> in PL-Linie 1<br />
C Taster-<strong>Modul</strong> Comfort oder Comfort Plus <strong>mit</strong> eingestellter<br />
Treppenlichtfunktion<br />
| Hinweise:<br />
• Taster-<strong>Modul</strong>e C ohne eingestellte Treppenlichtfunktion<br />
ignorieren die Befehle über Plus-<br />
Link.<br />
• Das <strong>Sensor</strong>-<strong>Modul</strong> sendet auf dem Zentralstellen-Einsatz<br />
immer helligkeitsunabhängig.<br />
• Die DIP-Schalter des <strong>Sensor</strong>-<strong>Modul</strong>s haben<br />
auf dem Zentralstellen-Einsatz keine Funktionalität.<br />
Beispiel für zwei <strong>Sensor</strong>-<strong>Modul</strong>e auf Zentralstellen-<br />
Einsätzen in der PL-Linie<br />
A<br />
A<br />
PL1<br />
B<br />
PL1<br />
A <strong>Sensor</strong>-<strong>Modul</strong> auf Zentralstellen-Einsatz<br />
B <strong>Sensor</strong>-<strong>Modul</strong>e in PL-Linie<br />
Was tun bei Störungen?<br />
Verbraucher wird nicht eingeschaltet.<br />
• Empfindlichkeit zu gering eingestellt.<br />
– Empfindlichkeit erneut einstellen.<br />
• Helligkeitsschwelle zu gering eingestellt.<br />
– Helligkeitsschwelle erneut einstellen.<br />
Verbraucher ist ständig eingeschaltet.<br />
• Nachlaufzeit oder Empfindlichkeit zu hoch eingestellt.<br />
Das <strong>Sensor</strong>-<strong>Modul</strong> erkennt ständig neue Bewegungen<br />
und startet die Nachlaufzeit erneut.<br />
– Nachlaufzeit oder Empfindlichkeit reduzieren.<br />
<strong>Sensor</strong>-<strong>Modul</strong> reagiert nicht. Rote LED blinkt<br />
schnell.<br />
• <strong>Sensor</strong>-<strong>Modul</strong> und Einsatz sind nicht kompatibel (z. B.<br />
Jalousiesteuerungs-Einsatz)<br />
– <strong>Sensor</strong>-<strong>Modul</strong> auf kompatiblen Einsatz (siehe Funktionsübersicht)<br />
stecken.<br />
Technische Daten<br />
Erfassungswinkel: 360°<br />
Anzahl der Ebenen: 6<br />
Anzahl der Zonen: 136<br />
Anzahl Bewegungssensoren:<br />
4<br />
Empfohlene Montagehöhe:<br />
2,50 m<br />
Reichweite (einstellbar<br />
über „Sensitivity“):<br />
max. ca. 7 m Erfassungsradius<br />
Helligkeitsschwelle: ca. 10 Lux bis ca. 1000 Lux (stufenlos<br />
einstellbar), helligkeitsunabhängig<br />
Nachlaufzeit<br />
Kanal 1: ca. 10 s bis ca. 30 min. (stufenlos<br />
einstellbar), Testmodus (1 s)<br />
Nachlaufzeit<br />
Kanal 2: ca. 5 min. bis ca. 2 Std. (stufenlos<br />
einstellbar), OFF<br />
Anzeigeelemente: 1 rote LED<br />
1 grüne LED<br />
DIP-Schalter: 1: <strong>Präsenz</strong>funktion/Bewegungsmelderfunktion<br />
2: 24 h-Treppenlichtschaltung<br />
3: Vorwarnung Kanal 1<br />
4: Lichtregelung<br />
Anschluss: <strong>Modul</strong>-Schnittstelle <strong>mit</strong> 8 Kontaktstiften<br />
Merten GmbH<br />
Merten GmbH, Fritz-Kotz-Str. 8, D-51674 Wiehl<br />
www.merten.de<br />
Service Center (Warenrücksendung):<br />
Telefon: +49 2261 702-204<br />
Telefax: +49 2261 702-136<br />
E-Mail: servicecenter@merten.de<br />
Technische Auskünfte / InfoLine:<br />
Telefon: +49 2261 702-235<br />
Telefax: +49 2261 702-680<br />
E-Mail: infoline.merten@schneider-electric.com<br />
<strong>ARGUS</strong> Presence sensor module with <strong>IR</strong>© Merten 2009V5522-581-0012/11<br />
V5522-581-00 12/11
de en<br />
Example to illustrate the presence function:<br />
<strong>ARGUS</strong> Presence sensor module with<br />
<strong>IR</strong><br />
Operating instructions<br />
Art. no. <strong>MEG5522</strong>-00..<br />
Necessary accessories<br />
– Complete the <strong>ARGUS</strong> Presence sensor module with<br />
<strong>IR</strong> with the corresponding inserts (see function overview).<br />
Accessories<br />
– Surface-mounted housing for <strong>ARGUS</strong> Presence<br />
(Art. no. 550619)<br />
– <strong>IR</strong> remote control Distance 2010 (Art. no. 570222)<br />
For your safety<br />
¼ DANGER<br />
Risk of death from electric shock.<br />
All work on the device should only be carried out<br />
by trained and skilled electricians. Observe the<br />
country-specific regulations.<br />
Getting to know the sensor module<br />
The <strong>ARGUS</strong> Presence sensor module with <strong>IR</strong> (referred<br />
to below as sensor module) is a presence detector for<br />
indoor ceiling mounting. The sensor module can be<br />
mounted either in a flush-mounted socket or in surfacemounted<br />
housing (available as an accessory). It detects<br />
moving heat sources (e.g. people) within an adjustable<br />
area of detection and starts a staircase lighting function.<br />
The maximum detection radius is approx. 7 m. The angle<br />
of detection is 360°. As long as a movement is detected,<br />
the connected load remains switched on. The adjustable<br />
overshoot time only begins when no further movements<br />
are detected (trigger function).<br />
The sensor module is equipped with a light sensor with<br />
an adjustable brightness threshold so that the lighting is<br />
only switched on below a specified brightness threshold<br />
(movement detector function). If there is sufficient natural<br />
light, the presence function allows the sensor module<br />
to switch off the lighting even when a person is present.<br />
| The specified detection radius and brightness<br />
threshold refer to average conditions and a recommended<br />
mounting height of approx. 2.50 m<br />
and should therefore be taken as guide values.<br />
The range can vary greatly when the temperature<br />
fluctuates.<br />
lx<br />
1000<br />
800<br />
600<br />
A<br />
400<br />
200<br />
A Brightness threshold is set to 500 lux.<br />
B Lighting is switched off, brightness in the room is<br />
200 lux.<br />
C <strong>Sensor</strong> module detects movement: Lighting<br />
(400 lux) is switched on. Overall brightness in the<br />
room is now 600 lux.<br />
D Daylight and thus the overall brightness in the room<br />
increases.<br />
E Overall brightness exceeds 900 lux. Daylight on its<br />
own is now above the brightness threshold of<br />
500 lux. The lighting is switched off (after the overshoot<br />
time has elapsed).<br />
F Despite detecting movement, the sensor module<br />
does not switch on the lighting since there is still sufficient<br />
daylight.<br />
The switchable light control (only in combination with<br />
dimmable inserts) keeps the lighting in the room at a constant<br />
brightness. The sensor module permanently measures<br />
the brightness in the room and keeps it at an<br />
adjustable setpoint.<br />
You can switch between the "automatic mode", "24 h on"<br />
and "24 h off" modes via an <strong>IR</strong> remote control.<br />
Function overview of the sensor module<br />
on receiving inserts<br />
Complete the sensor module with the receiving inserts<br />
for switching or dimming in order to perform local light<br />
control and other functions.<br />
Switching<br />
• Electronic switch insert <strong>Sensor</strong> module:<br />
• Relay switch insert<br />
brightness-dependent<br />
staircase lighting function<br />
• Electronic switch insert,<br />
2-gang<br />
• Relay switch insert,<br />
2-gang<br />
B C D E F<br />
<strong>Sensor</strong> module:<br />
Channel 1: brightness-dependent<br />
staircase lighting<br />
function<br />
Channel 2: brightness-independent<br />
staircase lighting<br />
function<br />
Dimming<br />
• Universal dimmer insert <strong>Sensor</strong> module:<br />
• 1-10 V insert<br />
brightness-dependent<br />
staircase lighting function,<br />
• DALI insert<br />
light control<br />
• Universal dimmer insert, <strong>Sensor</strong> module:<br />
2-gang<br />
Channel 1: brightness-dependent<br />
staircase lighting<br />
function, light control<br />
Channel 2: brightness-independent<br />
staircase lighting<br />
function, light control<br />
Function overview of the sensor module<br />
on sending insert<br />
Complete the sensor module with the sending central<br />
unit insert in order to perform global light control via the<br />
PlusLink (PL) .<br />
Global light control:<br />
• Central unit insert <strong>Sensor</strong> module:<br />
brightnessindependent<br />
staircase lighting function<br />
Using the sensor module with alarm<br />
systems<br />
| Movement/presence detectors are not suitable<br />
| Movement/presence detectors can trigger false<br />
for use as components of an alarm system.<br />
alarms if the installation site has been chosen unfavourably.<br />
Movement/presence detectors switch on as soon as<br />
they detect a moving heat source. This can be a person,<br />
but also animals or differences in temperature in windows.<br />
In order to avoid false alarms, the chosen installation<br />
site should be such that undesired heat sources<br />
cannot be detected (see section „Selecting the installation<br />
site“).<br />
Connections, displays and operating<br />
elements<br />
Front:<br />
A red LED (in test mode)<br />
B green LED (for 24-h staircase lighting circuit)<br />
Rear:<br />
D<br />
C<br />
B<br />
A<br />
B<br />
10<br />
s<br />
2min<br />
Test<br />
Time Ch.1<br />
30min<br />
LUX<br />
ON DIP<br />
1 2 3 4<br />
Sensitivity<br />
A<br />
A <strong>Modul</strong>e interface<br />
B DIP switches<br />
1: Presence function / movement detector function<br />
2: 24-h staircase lighting circuit<br />
3: Prewarning for channel 1<br />
4: Light control<br />
C Potentiometer for overshoot time channel 1<br />
D Potentiometer for brightness threshold<br />
E Potentiometer for sensitivity<br />
F Potentiometer for overshoot time channel 2<br />
5min<br />
1h<br />
2h<br />
OFF<br />
Time Ch.2<br />
E<br />
F<br />
Selecting the installation site<br />
• Only mount the sensor module in positions that allow<br />
the desired area to be monitored optimally.<br />
• Install the sensor module on the ceiling, if at all possible<br />
in the centre of the room.<br />
• Do not install the sensor module on inclines or walls.<br />
• Install the sensor module at least 0.5 m away from<br />
lights.<br />
• The recommended mounting height is 2.50 m. Any<br />
mounting height which deviates from this will affect the<br />
area of detection.<br />
• Maximum area of detection of the sensor module:<br />
360° angle of detection, approx. 7 m detection radius.<br />
2,5 m<br />
12,0 m<br />
14,0 m<br />
• Inner/outer area of detection<br />
– inner area of detection (approx. 6 m radius):<br />
movement detection of a seated person due to less<br />
movement<br />
– outer area of detection (approx. 7 m radius):<br />
movement detection of a person walking due to<br />
greater movement<br />
• In order to ensure continuous monitoring, e.g. of a<br />
long hall, the areas of detection of the individual sensor<br />
modules have to intersect.<br />
• Movement/presence detectors detect objects that radiate<br />
heat. You should select an installation site that<br />
will not result in undesired heat sources being detected,<br />
such as:<br />
– switched-on lamps in the area of detection<br />
– open fires (such as in fireplaces)<br />
– moving curtains, etc., that have a different temperature<br />
to their environment due to strong sunlight<br />
– windows where the influence of alternating sunlight<br />
and clouds could cause rapid changes in temperature<br />
– larger heat sources (e.g. cars), that are detected<br />
through windows<br />
– sunlit rooms with reflecting objects (e.g. the floor),<br />
which can be the cause of rapid changes in temperature<br />
– windowpanes heated up by sunlight<br />
– dogs, cats, etc.<br />
• To prevent faulty operation, the insert should be installed<br />
in a wind-resistant flush-mounted socket. With<br />
flush-mounted sockets and pipe cabling systems, a<br />
draught of air at the back of the equipment can trigger<br />
the sensor module.<br />
• Avoid direct sunlight. This can destroy the sensor in<br />
extreme cases.<br />
Mounting the sensor module<br />
A<br />
C<br />
E<br />
A Flush-mounted socket<br />
B Surface-mounted housing for <strong>ARGUS</strong> Presence<br />
(accessory)<br />
C Insert (see function overview)<br />
D Screws (included with surface-mounted housing)<br />
E <strong>Sensor</strong> module<br />
| When the mains voltage is supplied, the sensor<br />
module switches channel 1 on for 30 s and then<br />
back off. Channel 2 remains switched off. During<br />
the 2 s that ensue, the sensor module does not<br />
react to any movement. After this initialisation period<br />
has elapsed, the sensor module is ready for<br />
operation.<br />
Setting the sensor module<br />
On the rear side of the sensor module, the potentiometer<br />
can be used to set the sensor module's sensitivity,<br />
brightness threshold and overshoot time.<br />
Additional possible settings using DIP switches:<br />
Setting the sensitivity<br />
Pos. ON<br />
(upper)<br />
Pos. OFF<br />
(lower)<br />
DIP 1 Presence function Active Inactive<br />
DIP 2 24 h staircase lighting<br />
circuit via PlusLink<br />
24 h "ON" 24 h "ON"<br />
or 24 h<br />
"OFF"<br />
DIP 3 Prewarning for channel<br />
1<br />
Active Inactive<br />
DIP 4 Light control Active Inactive<br />
1<br />
10s<br />
2<br />
A<br />
Test<br />
2min<br />
B<br />
Sensitivity<br />
30min<br />
C<br />
1 Activate the test mode and set the brightness<br />
threshold to "infinite".<br />
The red LED lights up when movement is detected.<br />
2 Infinitely adjust the sensitivity (max. 7 m detection<br />
radius).<br />
3 Walk around the area of detection and check whether<br />
the sensor module is switching as desired. Adjust<br />
the sensitivity if required.<br />
B<br />
C<br />
D<br />
E<br />
A B C<br />
Setting the brightness threshold<br />
4<br />
4 Infinitely set the desired brightness threshold. The<br />
sensor module switches below the set brightness<br />
threshold.<br />
5 Check that the sensor module switches at the desired/set<br />
brightness. Adjust the brightness threshold<br />
if required.<br />
| In combination with a 2-gang insert, the bright-<br />
Detects movement in the dark (approx. 10 lux)<br />
Detects movement during daylight<br />
(approx. 1000 lux)<br />
Detects movement independently of brightness<br />
ness threshold only applies to channel 1. Channel<br />
2 always switches independently of<br />
brightness.<br />
Adjusting the staircase lighting function<br />
You can set the type of staircase lighting function (without/with<br />
prewarning) and the overshoot time.<br />
When setting the overshoot time, you specify how long<br />
the connected load remains switched on (continuously<br />
from 10 s to 30 min.). In the case of a 2-gang insert, the<br />
overshoot time for both channels can be adjusted separately.<br />
The prewarning indicates the end of the overshoot time.<br />
The loads are switched off briefly and then back on again<br />
(in combination with switch inserts), or are dimmed down<br />
slowly (in combination with dimmable inserts). The loads<br />
are switched off after the prewarning time has elapsed<br />
(30 s, not adjustable).<br />
1 Select the type of staircase lighting function and set<br />
the overshoot time.<br />
Staircase lighting function without prewarning<br />
1<br />
2min<br />
ON DIP<br />
10s<br />
30min<br />
1 2 3 4<br />
Test<br />
A<br />
B<br />
C<br />
A Switching without prewarning<br />
B Dimming without prewarning<br />
C Overshoot time<br />
t<br />
t<br />
V5522-581-00 12/11
Staircase lighting function with prewarning<br />
1<br />
A<br />
B<br />
10s<br />
A Switching with prewarning<br />
B Dimming with prewarning<br />
C Overshoot time<br />
D Prewarning time (30 s, not adjustable)<br />
| The prewarning only applies to channel 1.<br />
Test<br />
2min<br />
30min<br />
C<br />
ON DIP<br />
1 2 3 4<br />
D<br />
Setting the overshoot time for channel 2<br />
When using a 2-gang insert, the overshoot time for channel<br />
2 can be adjusted using a separate potentiometer.<br />
The adjustable time period differs from that of channel 1.<br />
1<br />
5min<br />
1h<br />
2h<br />
OFF<br />
Activating/deactivating the presence<br />
function<br />
In the case of brightness-dependent movement detection,<br />
the sensor module constantly monitors the brightness<br />
in the room and compares it to the set brightness<br />
threshold. If sufficient natural light is available, the sensor<br />
module will switch the lighting off even if a person is<br />
present.<br />
The sensor module's presence function is activated as a<br />
factory default. You can deactivate the function ("OFF")<br />
and reactivate it ("ON") using DIP switch 1.<br />
ON DIP<br />
1 2 3 4<br />
When the presence function has been deactivated, the<br />
sensor module continues to carry out the movement detector<br />
function.<br />
Adjusting the 24-h staircase lighting circuit<br />
DIP switch 2 can be used to set a 24-hour staircase lighting<br />
circuit which you can retrieve from another location<br />
via PlusLink.<br />
The following options are available for this:<br />
• DIP 2 "ON": only switch on the staircase lighting for<br />
24 h via PL<br />
• DIP 2 "OFF": switch the staircase lighting on/off for<br />
24 h via PL<br />
ON DIP<br />
1 2 3 4<br />
Activating/deactivating light control<br />
(Only in combination with dimmable inserts, see function<br />
overview)<br />
The sensor module's light control is deactivated as a factory<br />
default. You can activate the function ("ON") and deactivate<br />
it ("OFF") using DIP switch 4.<br />
ON DIP<br />
1 2 3 4<br />
t<br />
t<br />
Light control<br />
Basic function of light control<br />
(Only in combination with dimmable inserts)<br />
Light control keeps the lighting in the room at a constant<br />
brightness. The sensor module permanently measures<br />
the brightness in the room and keeps it at an adjustable<br />
setpoint. When movement is detected, the insert initially<br />
dims the lighting to the setpoint value. If the ambient<br />
brightness changes, the insert dims the lighting accordingly.<br />
If sufficient natural light is available, the sensor<br />
module will switch the lighting off even if a person is<br />
present.<br />
Example to illustrate light control:<br />
lx<br />
F<br />
A<br />
B<br />
A Setpoint<br />
B Ambient brightness<br />
C Lighting switched off<br />
D Start phase<br />
E Control phase<br />
F Control range<br />
G Prewarning<br />
H Lighting switched off<br />
| In the case of a 2-gang insert, the behaviour of the<br />
light control is the same for both channels.<br />
Adjusting the light control<br />
As soon as the light control is activated via DIP switch 4,<br />
the other DIP switches take on a new or additional function:<br />
Pos. ON (upper)<br />
DIP 1 Response speed Slow Fast<br />
DIP 2<br />
C D E G H<br />
Pos. OFF<br />
(lower)<br />
Setpoint change Disabled Via <strong>IR</strong> remote<br />
control<br />
or push-button<br />
module<br />
24-h staircase lighting<br />
circuit via PL<br />
DIP 3 Adjust start phase 50% brightness<br />
of the<br />
lighting<br />
24 h "ON" 24 h "ON" or<br />
24 h "OFF"<br />
Setpoint<br />
Adjusting the response speed<br />
The speed with which the sensor module adjusts the<br />
light to the setpoint value can be adjusted using DIP<br />
switch 1.<br />
ON DIP<br />
1 2 3 4<br />
lx<br />
A slow light control<br />
ON DIP<br />
1 2 3 4<br />
lx<br />
B fast light control<br />
Changing the setpoint<br />
The setpoint is a desired brightness value that should be<br />
observed constantly in the room. This value results from<br />
the ambient brightness and the lighting.<br />
You can select whether or not the setpoint value may be<br />
altered using DIP switch 2. This is possible via the <strong>IR</strong> remote<br />
control or via a push-button module on the central<br />
unit insert.<br />
The brightness of the lighting alters accordingly for setpoint<br />
changes.<br />
A<br />
B<br />
lx<br />
C<br />
ON DIP<br />
1 2 3 4<br />
ON DIP<br />
1 2 3 4<br />
6<br />
7 5<br />
8 4<br />
3<br />
9<br />
10 2<br />
1<br />
B<br />
A<br />
A Setpoint change disabled<br />
B Setpoint change enabled via <strong>IR</strong> remote control or<br />
via push-button module on central unit insert<br />
C Change setpoint<br />
– via <strong>IR</strong> remote control:<br />
Push-button 8: Increase setpoint<br />
Push-button 9: Reduce setpoint<br />
– via push-button module:<br />
Upper push-button: Increase setpoint<br />
Lower push-button: Reduce setpoint<br />
t<br />
t<br />
t<br />
Adjusting the start phase<br />
The start phase with which the sensor module switches<br />
on the light can be adjusted using DIP switch 3.<br />
Start at 50% brightness of the lighting<br />
ON DIP<br />
1 2 3 4<br />
lx<br />
A<br />
B<br />
C<br />
D<br />
A max. overall brightness (ambient brightness and<br />
lighting)<br />
B setpoint<br />
C 50% brightness of the lighting<br />
D ambient brightness<br />
E lighting switched off<br />
F start phase<br />
G control phase<br />
Start with setpoint<br />
ON DIP<br />
1 2 3 4<br />
lx<br />
A<br />
B<br />
A setpoint<br />
B ambient brightness<br />
C lighting switched off<br />
D start phase<br />
E control phase<br />
E F G t<br />
C D<br />
E t<br />
Operating sensor module by <strong>IR</strong> remote<br />
control<br />
You can toggle between three functions of the sensor<br />
module by pressing key 10 on the <strong>IR</strong> remote control B.<br />
A<br />
B<br />
6<br />
7<br />
8 4<br />
9<br />
2<br />
10<br />
1<br />
3<br />
5<br />
Auto ON OFF Auto ...<br />
24 h 24 h<br />
• Auto function: The sensor module is in automatic<br />
mode and switches the loads on when movement is<br />
detected and then off again after the overshoot time<br />
has elapsed.<br />
• 24 h "ON": Load is switched on permanently for 24 h<br />
(no movement detection). Green LED A lights up.<br />
• 24 h "OFF": Load is switched off permanently for 24 h<br />
(no movement detection). Green LED A lights up.<br />
Controlling the sensor module from<br />
another location<br />
Controlling loads from another location<br />
via PlusLink with:<br />
• Push-button module on central unit insert<br />
• <strong>Sensor</strong> module on central unit insert<br />
• Side controller Plus, 1-gang/2-gang<br />
• Mechanical push-button<br />
Example of global control with push-button module<br />
on central unit insert<br />
Starting the staircase lighting function<br />
When the push-button module on the central unit insert<br />
A is actuated, all local sensor modules B in the PL<br />
lines start the set staircase lighting function independently<br />
of brightness.<br />
A Push-button module on central unit insert (alternatively:<br />
side controller Plus for one PL line)<br />
B <strong>Sensor</strong> module in PL line<br />
24-h staircase lighting circuit<br />
• Upper left push-button: switch on the staircase lighting<br />
for 24 h<br />
• Lower left push-button: switch off the staircase lighting<br />
for 24 h (prerequisite: DIP2 "OFF")<br />
| If DIP 2 is switched to "ON", the lighting cannot be<br />
A<br />
PL2<br />
PL3<br />
PL4<br />
PL1<br />
B<br />
B<br />
switched off for 24 h via the push-button module.<br />
• Upper/lower right push-button: deactivate the 24-h<br />
staircase lighting circuit.<br />
PL2<br />
PL3<br />
PL4<br />
PL1<br />
B<br />
B<br />
A<br />
A Push-button module on central unit insert (alternatively:<br />
side controller Plus for one PL line)<br />
B <strong>Sensor</strong> module in PL line<br />
24 h<br />
Example of global control with mechanical pushbutton<br />
When the mechanical push-button A is actuated, all local<br />
sensor modules B in the PL lines start the set staircase<br />
lighting function independently of brightness.<br />
A Mechanical push-button<br />
B <strong>Sensor</strong> module in PL line<br />
Example of global control with panic button on the<br />
central unit insert<br />
When the panic button B is actuated, all local sensor<br />
modules C in the PL lines start a fixed overshoot time of<br />
30 minutes (panic scene) independently of brightness.<br />
| When a push-button module is used on the cen-<br />
PL<br />
tral unit insert, the function can be stopped early.<br />
Press the right push-button in order to do this.<br />
When the central unit insert is used in combination<br />
with a sensor module, the panic function is<br />
not available.<br />
PL4 PL3<br />
C<br />
C<br />
B<br />
B<br />
A<br />
A B<br />
PL2<br />
PL1<br />
30 min<br />
A Push-button module on central unit insert<br />
B Mechanical push-button (panic button)<br />
C <strong>Sensor</strong> module in PL line<br />
V5522-581-00 12/11
Operating the sensor module: global<br />
staircase lighting function via PlusLink<br />
| The global control via PlusLink is possible with<br />
the combination of central unit insert and sensor<br />
module.<br />
Example of global control via sensor<br />
module on the central unit insert<br />
If the sensor module A on the central unit insert detects<br />
a movement, it sends a trigger command to all local sensor<br />
modules B in the PL lines.<br />
The local sensor modules B check the ambient brightness.<br />
The staircase lighting function only starts if the<br />
brightness is below the set brightness threshold.<br />
You can also start the staircase lighting function of the<br />
push-button modules Comfort and Comfort Plus in the<br />
PL lines.<br />
A<br />
PL2<br />
PL3<br />
PL4<br />
PL1<br />
B<br />
C<br />
A <strong>Sensor</strong> module on central unit insert<br />
B <strong>Sensor</strong> module in PL line 1<br />
C Push-button modules Comfort or Comfort Plus with<br />
set staircase lighting function<br />
| Notes:<br />
• Push-button modules C without a set staircase<br />
lighting function ignore the commands via<br />
PlusLink.<br />
• On the central unit insert, the sensor module always<br />
sends independently of brightness.<br />
• The sensor module's DIP switches do not function<br />
on the central unit insert.<br />
Example of two sensor modules on central unit inserts<br />
in the PL line<br />
A<br />
A<br />
PL1<br />
B<br />
PL1<br />
A <strong>Sensor</strong> module on central unit insert<br />
B <strong>Sensor</strong> modules in PL line<br />
What should I do if there is a problem?<br />
Load is not switching on.<br />
• The sensitivity is set too low.<br />
– Reset the sensitivity.<br />
• The brightness threshold is set too low.<br />
– Reset the brightness threshold.<br />
Load is permanently switched on.<br />
• The overshoot time or the sensitivity is set too high.<br />
The sensor module constantly detects new movements<br />
and restarts the overshoot time.<br />
– Reduce the overshoot time or sensitivity.<br />
The sensor module is not reacting. The red LED is<br />
flashing quickly.<br />
• The sensor module and insert are not compatible (e.g.<br />
blind control insert)<br />
– Place the sensor module onto a compatible insert<br />
(see function overview).<br />
Technical data<br />
Angle of detection: 360°<br />
Number of levels: 6<br />
Number of zones: 136<br />
Number of presence<br />
detectors: 4<br />
Recommended<br />
mounting height: 2.50 m<br />
Range (can be adjusted<br />
under "Sensitivity"):<br />
max. approx. 7 m detection radius<br />
Brightness threshold:<br />
approx. 10 lux to approx.<br />
1000 lux (infinitely adjustable),<br />
brightness independent<br />
Overshoot time<br />
channel 1: approx. 10 s to approx. 30 min<br />
(infinitely adjustable), test mode<br />
(1 s)<br />
Overshoot time<br />
channel 2: approx. 5 min. to approx. 2 hrs.<br />
(infinitely adjustable), OFF<br />
Display elements: 1 red LED<br />
1 green LED<br />
DIP switches: 1: Presence function / movement<br />
detector function<br />
2: 24-h staircase lighting circuit<br />
3: Prewarning for channel 1<br />
4: Light control<br />
Connection: module interface with 8 contact<br />
pins<br />
Merten GmbH<br />
Merten GmbH, Fritz-Kotz-Str. 8, D-51674 Wiehl<br />
www.merten.com<br />
Service Center:<br />
Phone: +49 2261 702-204<br />
Fax: +49 2261 702-136<br />
E-Mail: servicecenter@merten.de<br />
Technical support / InfoLine:<br />
Phone: +49 2261 702-235<br />
Fax: +49 2261 702-680<br />
E-Mail: infoline.merten@schneider-electric.com<br />
V5522-581-00 12/11