EasyCom 2011 EasyCom 2011 - WIKA Argentina SA
EasyCom 2011 EasyCom 2011 - WIKA Argentina SA
EasyCom 2011 EasyCom 2011 - WIKA Argentina SA
Erfolgreiche ePaper selbst erstellen
Machen Sie aus Ihren PDF Publikationen ein blätterbares Flipbook mit unserer einzigartigen Google optimierten e-Paper Software.
<strong>EasyCom</strong> <strong>2011</strong><br />
<strong>EasyCom</strong> <strong>2011</strong><br />
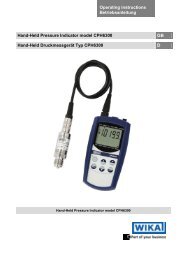
Software<br />
Instruction manual<br />
Bedienungsanleitung<br />
GB<br />
D
GB Instruction manual <strong>EasyCom</strong> <strong>2011</strong> Page 3 - 14<br />
D<br />
Bedienungsanleitung <strong>EasyCom</strong> <strong>2011</strong> Seite 15 - 26<br />
© <strong>2011</strong> <strong>WIKA</strong> Alexander Wiegand SE & Co. KG<br />
All rights reserved. / Alle Rechte vorbehalten.<br />
<strong>WIKA</strong> ® is a registered trademark in various countries.<br />
<strong>WIKA</strong> ® ist eine geschützte Marke in verschiedenen Ländern.<br />
2 <strong>WIKA</strong> instruction manual <strong>EasyCom</strong> <strong>2011</strong><br />
09/<strong>2011</strong> GB/D
09/<strong>2011</strong> GB/D<br />
Contents<br />
Contents<br />
1. General information 4<br />
1.1 Description 4<br />
1.2 Licence agreement 4<br />
1.3 System requirements 5<br />
2. First steps 6<br />
2.1 Driver installation 6<br />
2.2 Software installation 6<br />
3. Overview 7<br />
3.1 Main window 7<br />
4. Instrument list 8<br />
4.1 Add instrument 8<br />
4.2 Remove instrument 8<br />
4.3 Communication 8<br />
5. Working pane 9<br />
6. "Instrument" menu 9<br />
6.1 Information 9<br />
6.2 Adjustment 9<br />
6.3 Settings 11<br />
7. "Data logger" menu 12<br />
7.1 Table view 12<br />
7.2 Graphical view 13<br />
<strong>WIKA</strong> instruction manual <strong>EasyCom</strong> <strong>2011</strong><br />
3<br />
GB
GB<br />
1. General information<br />
1. General information<br />
1.1 Description<br />
<strong>EasyCom</strong> <strong>2011</strong> software is primarily used for the adjustment and configuration of P-3x<br />
precision pressure transmitters (analogue and USB versions). It enables adjustment of<br />
the zero point and the span value. In addition, it is possible to alter the transmission mode<br />
of the USB variant (e.g. cyclic).<br />
1.2 Licence agreement<br />
Subject of the contract<br />
The subject matter of this contract are the programs stored on CD-ROM, the instruction<br />
manual and other associated material.<br />
Grant of licence<br />
You, as the licencee, are entitled to use the program in your company at any place, also at<br />
several workstations.<br />
You, as licencee, may not:<br />
modify, translate, reconvert, decompile, disassemble or decode the program in whole or<br />
in part as well as develop other software derived from the program.<br />
Ownership of rights<br />
When purchasing the program, you will only get ownership of the CD-ROMs on which the<br />
program is stored. You will not hold the rights to the program itself. Any and all rights for<br />
publication, reproduction, editing and usage of the program shall remain with <strong>WIKA</strong>.<br />
Warranty and limitation of liability<br />
■ <strong>WIKA</strong> guarantees that the CDs, on which the program is stored, are faultless with<br />
regard to the selected material under normal operating conditions. Should the data<br />
carriers present any defect, the data carriers may be returned to <strong>WIKA</strong> within 30 days<br />
from the date of first purchase. The CD-ROMs will be replaced promptly and free of<br />
charge.<br />
■ <strong>WIKA</strong> guarantees that the program is generally usable in the sense of the program<br />
description. As it is not possible according to the state-of-the-arts to develop computer<br />
programs that work error-free in all applications and combinations, <strong>WIKA</strong> shall not<br />
assume any liability with regard to freedom from defects and uninterrupted operation<br />
of the program. In particular, <strong>WIKA</strong> does not guarantee that the program meets the<br />
user's requirements or works together with other programs selected by the user. The<br />
purchaser (licencee) is responsible for the correct selection and the consequences of<br />
the program use as well as for the intended or obtained results.<br />
4 <strong>WIKA</strong> instruction manual <strong>EasyCom</strong> <strong>2011</strong><br />
09/<strong>2011</strong> GB/D
09/<strong>2011</strong> GB/D<br />
1. General information<br />
■ <strong>WIKA</strong> is not responsible for correct entry of values and handling of the program. <strong>WIKA</strong><br />
does not assume any liability for any damage due to incorrect entries, configuration,<br />
transfer or consequences thereof. <strong>WIKA</strong> recommends to check the correct function of<br />
each sensor based on the plausibility of some manual measurements over the entire<br />
measuring range after configuration.<br />
■ <strong>WIKA</strong> shall not be liable for any damage, except that this damage has been caused by<br />
<strong>WIKA</strong> due to gross negligence. In this case, <strong>WIKA</strong> shall be liable for direct personnel or<br />
material damage up to ten times the purchase price for each liability case. <strong>WIKA</strong> shall<br />
not be liable for any other damages than the damages mentioned above. Any liability<br />
for damages caused to merchants due to gross negligence is excluded.<br />
Duration of the contract<br />
This contract is in force until the licencee terminates it by destroying the program and<br />
all copies. Furthermore, it terminates when the contract terms are violated. The licencee<br />
undertakes to destroy the program and all copies on termination of the contract.<br />
Improvements and refinements<br />
<strong>WIKA</strong> is entitled to make improvements and refinements of the program in its sole discretion.<br />
Breach of contract<br />
<strong>WIKA</strong> points out that the licencee shall be liable for any and all damages from copyright<br />
infringements, which are caused to <strong>WIKA</strong> due to a breach of the contract terms by the<br />
licencee.<br />
1.3 System requirements<br />
32-bit operating system<br />
■ Microsoft® Windows® 2000<br />
■ Microsoft® Windows® XP<br />
■ Microsoft® Windows® Vista<br />
■ Microsoft ® Windows ® 7<br />
Windows is a registered trademark of Microsoft Corporation in the United States and other countries.<br />
<strong>WIKA</strong> instruction manual <strong>EasyCom</strong> <strong>2011</strong><br />
5<br />
GB
GB<br />
2. First steps<br />
2.1 Driver installation<br />
So that the <strong>EasyCom</strong> <strong>2011</strong> can identify the connected instruments, it is necessary to<br />
install the drivers before using the software.<br />
To install the drivers, carry out the following steps:<br />
1. Insert the installation CD in your computer's drive.<br />
→ The installation window opens automatically.<br />
2. Select the "Driver" option from the appropriate section.<br />
→ The Install Wizard opens automatically.<br />
3. Follow the instructions in the Install Wizard.<br />
2.2 Software installation<br />
To install the corresponding software, the following steps<br />
must be carried out:<br />
1. Insert the installation CD in your computer's drive.<br />
→ The installation window opens automatically.<br />
2. Select the software to be installed from the appropriate<br />
section.<br />
→ The Install Wizard opens automatically.<br />
3. Follow the instructions in the Install Wizard.<br />
Fig. Installation window<br />
If the Autostart function has been deactivated, the installation window will<br />
not open automatically. In this case, the installation window can be opened<br />
via "drive:\InstallWizard.exe".<br />
6 <strong>WIKA</strong> instruction manual <strong>EasyCom</strong> <strong>2011</strong><br />
09/<strong>2011</strong> GB/D
09/<strong>2011</strong> GB/D<br />
3. Overview<br />
3.1 Main window<br />
1) Add instrument<br />
2) Remove instrument<br />
3) Communication<br />
4) Instrument list 5) Working pane<br />
1) Add instrument<br />
Adds connected instruments to the instrument list.<br />
2) Remove instrument<br />
Removes selected instruments from the instrument list.<br />
3) Communication<br />
Communication connection to the instrument is established or disconnected.<br />
4) Instrument list<br />
Displays all instruments added and additional information.<br />
5) Working pane<br />
In the working pane, various functions can be edited.<br />
<strong>WIKA</strong> instruction manual <strong>EasyCom</strong> <strong>2011</strong><br />
7<br />
GB
GB<br />
4. Instrument list<br />
The instrument list is an overview of all identified instruments. In addition, information<br />
such as measuring point, measuring range and COM Port is displayed.<br />
An instrument can only be renamed via the instrument list. To 'tag' an instrument, rightclick<br />
the mouse and select 'Rename' (shortcut 'F2'). The instrument can now be assigned<br />
its desired name.<br />
Communication modes<br />
The 'Tag' name is only stored locally, not in the instrument itself.<br />
4.1 Add instrument<br />
Using the "Add instrument" button enables connected instruments to be added to the<br />
instrument list. On clicking the button, context menu opens, in which the COM Port of the<br />
instrument to be added is selected.<br />
If only one COM Port is available, it will be added automatically.<br />
4.2 Remove instrument<br />
The instrument highlighted in the instrument list will be removed by clicking this button.<br />
4.3 Communication<br />
Depending on whether an instrument connection is already established or not, this button<br />
connects or disconnects the communication.<br />
Communication mode<br />
Not connected Making a connection<br />
Connected<br />
Progress of establishing connection<br />
Adjustment Write access<br />
8 <strong>WIKA</strong> instruction manual <strong>EasyCom</strong> <strong>2011</strong><br />
09/<strong>2011</strong> GB/D
09/<strong>2011</strong> GB/D<br />
5. Working pane<br />
In the working pane, all functions for setting the instrument or reading data can be found.<br />
Under the "Instrument" menu all functions required for the setting of the instrument (e.g.<br />
adjustment) can be found.<br />
Under "Data logger" all the data can be read and recorded for further processing.<br />
"Instrument" menu "Data logger" menu Functions<br />
6. "Instrument" menu<br />
6.1 Information<br />
Under the heading "Information", the various properties of the selected instrument are<br />
shown.<br />
In the section "Pressure" the<br />
current pressure is displayed.<br />
"Temperature" gives the current<br />
operating temperature.<br />
The required unit can be<br />
displayed via the respective dropdown<br />
list.<br />
In the right-hand window, additional instrument information can be found ( e.g. instrument<br />
model, measuring range, accuracy ...).<br />
<strong>WIKA</strong> instruction manual <strong>EasyCom</strong> <strong>2011</strong><br />
9<br />
GB
GB<br />
6.2 Adjustment<br />
With this function it is possible to adjust the zero point and span of the selected instrument.<br />
To carry out an adjustment, follow the steps below:<br />
1. Select the instrument to be adjusted from<br />
the instrument list.<br />
2. Select zero point or span.<br />
3. Click the "Adjust" button.<br />
4. Using the arrow buttons, the "Output<br />
pressure" value can be adjusted up or<br />
down as required.<br />
5. Save the set value by pressing the "Accept" button.<br />
(pressing "Cancel" will discard the changes)<br />
1.<br />
Only adjust the span when a suitable reference is available (at least 3x as<br />
accurate as the instrument being adjusted).<br />
Faster adjustment of the "Output pressure value" by holding down the<br />
arrow button.<br />
Arrow size varies with the speed.<br />
Slowly Quickly<br />
Factory setting<br />
In order to undo an adjustment, it is possible to reset the selected instrument to its factory<br />
settings using the "Restore" button.<br />
10 <strong>WIKA</strong> instruction manual <strong>EasyCom</strong> <strong>2011</strong><br />
2.<br />
3.<br />
5.<br />
6.<br />
09/<strong>2011</strong> GB/D
09/<strong>2011</strong> GB/D<br />
6.3 Settings<br />
Using the operation mode, the communication operation can be configured.<br />
Polling<br />
The instrument only sends a measured value<br />
on a request from the computer.<br />
Cyclic pressure<br />
The instrument sends the applied pressure to<br />
the computer at defined intervals.<br />
Cyclic pressure and temperature<br />
The instrument sends the applied pressure<br />
and the temperature to the computer at<br />
defined intervals.<br />
Cyclic pressure [Digit (10000-60000)]<br />
The instrument sends the applied pressure to<br />
the computer at defined intervals. The value<br />
10000 corresponds to the start of measuring range and 60000 to the end of measuring<br />
range.<br />
Cyclic pressure [Digit (10000-60000)] and temperature<br />
The instrument sends the applied pressure and temperature to the computer at defined<br />
intervals. The value 10000 corresponds to the start of measuring range and 60000 to the<br />
end of measuring range.<br />
The documentation of the serial interface protocol includes a detailed<br />
description of the operating modes.<br />
Parameterisation of the communication<br />
Using the Interval, the time interval (ms) of the cyclic transmission can be set.<br />
These settings have no effect on the operation of the instrument with the<br />
"<strong>EasyCom</strong> <strong>2011</strong>" software.<br />
<strong>WIKA</strong> instruction manual <strong>EasyCom</strong> <strong>2011</strong><br />
11<br />
GB
GB<br />
7. "Data logger" menu<br />
7. "Data logger" menu<br />
Table view Graphical view<br />
7.1 Table view<br />
■ Start condition<br />
There are two possible ways to specify the start of the<br />
data logging:<br />
Immediately (1)<br />
Data logging begins as soon as the "Start" button is<br />
pressed.<br />
Date / time (2)<br />
Data logging begins on a set day at a selected time.<br />
Confirm the settings using the "Start" button.<br />
12 <strong>WIKA</strong> instruction manual <strong>EasyCom</strong> <strong>2011</strong><br />
1<br />
2<br />
Start condition<br />
Stop condition<br />
Unit selection<br />
Setting the<br />
measuring rate<br />
09/<strong>2011</strong> GB/D
09/<strong>2011</strong> GB/D<br />
7. "Data logger" menu<br />
■ Stop condition<br />
There are four possible ways to specify a defined end of<br />
the data logging:<br />
Date / time (1)<br />
Data logging will end on a set day at the selected time.<br />
Duration (2)<br />
Data logging will end once the set time span has<br />
finished.<br />
Count values (3)<br />
The data logging will finish once the number of<br />
measured values set here has been taken.<br />
Manual stop (4)<br />
Data logging will cease immediately.<br />
■ Setting the measuring rate<br />
The measuring rate gives the time (ms) between the individual measurements.<br />
Minimum measuring rate = 30 ms<br />
Maximum measuring rate = unlimited<br />
Example:<br />
Measuring rate 1000 ms = 1 s<br />
Each second, the current measured value will be<br />
recorded.<br />
<strong>WIKA</strong> instruction manual <strong>EasyCom</strong> <strong>2011</strong><br />
1<br />
2<br />
3<br />
4<br />
13<br />
GB
GB<br />
7. "Data logger" menu<br />
7.2 Graphical view<br />
Measuring points<br />
■ (p) pressure<br />
■ (T) temperature<br />
Zoom functions<br />
The following commands are used on the chart.<br />
■ Zoom Keep the left mouse button pressed down and drag<br />
the mouse pointer to the lower or upper right.<br />
■ Original state Keep the left mouse button pressed down and drag<br />
the mouse pointer to the lower or upper left.<br />
■ Scrolling the<br />
chart<br />
Show/hide temperature characteristic<br />
Keep the right mouse button pressed down and move<br />
the mouse pointer<br />
14 <strong>WIKA</strong> instruction manual <strong>EasyCom</strong> <strong>2011</strong><br />
09/<strong>2011</strong> GB/D
09/<strong>2011</strong> GB/D<br />
Inhalt<br />
Inhalt<br />
1. Allgemeines 16<br />
1.1 Beschreibung 16<br />
1.2 Lizenzvereinbarung 16<br />
1.3 Systemvoraussetzung 17<br />
2. Erste Schritte 18<br />
2.1 Treiber-Installation 18<br />
2.2 Software-Installation 18<br />
3. Überblick 19<br />
3.1 Hauptfenster 19<br />
4. Geräteliste 20<br />
4.1 Gerät hinzufügen 20<br />
4.2 Gerät entfernen 20<br />
4.3 Kommunikation 20<br />
5. Arbeitsbereich 21<br />
6. Rubrik „Gerät“ 21<br />
6.1 Information 21<br />
6.2 Justage 22<br />
6.3 Einstellungen 23<br />
7. Rubrik „Datenlogger“ 24<br />
7.1 Tabellenansicht 24<br />
7.2 Grafische Ansicht 26<br />
<strong>WIKA</strong> Bedienungsanleitung <strong>EasyCom</strong> <strong>2011</strong><br />
15<br />
D
D<br />
1. Allgemeines<br />
1. Allgemeines<br />
1.1 Beschreibung<br />
Die Software „<strong>EasyCom</strong> <strong>2011</strong>“ dient primär zur Justage und Konfiguration des Präzisionsdruckmessumformers<br />
P-3x (Analog- und USB-Ausführung). Sie ermöglicht eine<br />
Justage des Nullpunktes sowie des Spannewertes. Zusätzlich ist es möglich den Übertragungsmodus<br />
der USB-Variante zu ändern (z. B. zyklisch).<br />
1.2 Lizenzvereinbarung<br />
Vertragsgegenstand<br />
Gegenstand des Vertrages sind die auf der CD-ROM aufgezeichneten Programme,<br />
Bedienungsanleitung sowie sonstiges, zugehöriges Material.<br />
Lizenzgewährung<br />
Als Lizenznehmer sind Sie berechtigt das Programm in Ihrem Unternehmen an beliebigen<br />
Stellen zu nutzen, auch auf mehreren Arbeitsplätzen.<br />
Als Lizenznehmer ist Ihnen untersagt:<br />
das Programm ganz oder teilweise abzuändern, zu übersetzen, zurückzuentwickeln,<br />
zu entkompilieren, zu entassemblieren oder zu decodieren, sowie von dem Programm<br />
abgeleitete Werke zu erstellen.<br />
Inhaberschaft an Rechten<br />
Sie erhalten mit dem Erwerb des Programmes nur das Eigentum an den CD-ROMs, auf<br />
denen das Programm aufgezeichnet ist. Ein Erwerb an Rechten des Programmes selbst<br />
ist damit nicht verbunden. Alle Rechte zur Veröffentlichung, Vervielfältigung, Bearbeitung<br />
und Verwertung des Programmes verbleiben bei <strong>WIKA</strong>.<br />
Garantie und Haftungsbeschränkung<br />
■ <strong>WIKA</strong> gewährleistet, dass die CDs, auf denen das Programm aufgezeichnet ist, unter<br />
normalen Betriebsbedingungen in Materialausführung einwandfrei sind. Sollten die<br />
Datenträger einen Fehler aufweisen, so können innerhalb einer Frist von 30 Tagen<br />
ab Datum des Ersterwerbs, die Datenträger an <strong>WIKA</strong> eingeschickt werden. Die<br />
CD-ROMs werden umgehend kostenlos ersetzt.<br />
■ <strong>WIKA</strong> gewährleistet, dass das Programm im Sinne der Programmbeschreibung<br />
grundsätzlich brauchbar ist. Da es nach dem Stand der Technik nicht möglich ist,<br />
Computerprogramme so zu erstellen, dass sie in allen Anwendungen und Kombinationen<br />
fehlerfrei arbeiten, übernimmt <strong>WIKA</strong> keine Haftung für die Fehlerfreiheit und den<br />
ununterbrochenen Betrieb des Programmes. Insbesondere wird keine Gewähr dafür<br />
übernommen, dass das Programm den Anforderungen des Anwenders entspricht<br />
oder mit anderen von ihm ausgewählten Programmen zusammenarbeitet. Die Verantwortung<br />
für die richtige Auswahl und die Folgen der Benutzung des Programmes,<br />
sowie der damit beabsichtigten oder erzielten Ergebnisse trägt der Käufer (Lizenznehmer).<br />
16 <strong>WIKA</strong> Bedienungsanleitung <strong>EasyCom</strong> <strong>2011</strong><br />
09/<strong>2011</strong> GB/D
09/<strong>2011</strong> GB/D<br />
1. Allgemeines<br />
■ <strong>WIKA</strong> ist nicht verantwortlich für die ordnungsgemäße Eingabe der Werte und Bedienung<br />
des Programms. <strong>WIKA</strong> übernimmt keine Haftung für Schäden aufgrund falscher<br />
Eingaben, Konfiguration, Übertragung oder Folgen hieraus. <strong>WIKA</strong> empfiehlt, nach<br />
Konfiguration die richtige Funktionsweise von jedem Sensor anhand einiger manueller<br />
Messungen über den gesamten Messbereich auf Plausibilität zu überprüfen.<br />
■ <strong>WIKA</strong> haftet nicht für Schäden, außer der Schaden wurde durch grobe Fahrlässigkeit<br />
seitens <strong>WIKA</strong> verursacht. In diesem Falle haftet <strong>WIKA</strong> für unmittelbare Personen- oder<br />
Sachschäden pro Schadensfall bis zum zehnfachen des Kaufpreises. Für andere als<br />
die vorgenannten Schäden haftet <strong>WIKA</strong> nicht. Gegenüber Kaufleuten wird die Haftung<br />
für grobe Fahrlässigkeit ausgeschlossen.<br />
Vertragsdauer<br />
Dieser Vertrag ist in Kraft, bis der Lizenznehmer ihn durch Vernichtung des Programmes<br />
samt aller Kopien beendet. Darüber hinaus erlischt er bei Verstoß gegen die Vertragsbedingungen.<br />
Der Lizenznehmer verpflichtet sich, bei Vertragsbeendigung das Programm<br />
und alle Kopien zu vernichten.<br />
Verbesserungen und Weiterentwicklungen<br />
<strong>WIKA</strong> ist berechtigt, Verbesserungen und Weiterentwicklungen des Programmes nach<br />
eigenem Ermessen durchzuführen.<br />
Vertragsverletzungen<br />
<strong>WIKA</strong> macht darauf aufmerksam, dass der Lizenznehmer für alle Schäden aufgrund von<br />
Urheberrechtsverletzungen haftet, die <strong>WIKA</strong> aus einer Verletzung dieser Vertragsbestimmungen<br />
durch den Lizenznehmer entstehen.<br />
1.3 Systemvoraussetzung<br />
32-Bit Betriebssystem<br />
■ Microsoft ® Windows ® 2000<br />
■ Microsoft ® Windows ® XP<br />
■ Microsoft ® Windows ® Vista<br />
■ Microsoft ® Windows ® 7<br />
Windows ist eine geschützte Marke der Microsoft Corporation in den Vereinigten Staaten und weiteren Ländern.<br />
<strong>WIKA</strong> Bedienungsanleitung <strong>EasyCom</strong> <strong>2011</strong><br />
17<br />
D
D<br />
2. Erste Schritte<br />
2. Erste Schritte<br />
2.1 Treiber-Installation<br />
Damit <strong>EasyCom</strong> <strong>2011</strong> die angeschlossenen Geräte erkennen kann, ist es notwendig die<br />
Treiber vor Benutzung der Software zu installieren.<br />
Um die Treiber zu installieren, folgende Schritte durchführen:<br />
1. Installations-CD in das Laufwerk Ihres Computers<br />
einlegen.<br />
→ Installationsfenster öffnet sich automatisch.<br />
2. Unter entsprechender Rubrik auf „Treiber“ klicken.<br />
→ Installationsassistent öffnet sich automatisch.<br />
3. Anweisungen des Installationsassistenten folgen.<br />
2.2 Software-Installation<br />
Um zugehörige Software zu installieren, folgende Schritte<br />
durchführen:<br />
1. Installations-CD in das Laufwerk Ihres Computers<br />
einlegen.<br />
→ Installationsfenster öffnet sich automatisch.<br />
2. Unter entsprechender Rubrik die zu installierende<br />
Software auswählen.<br />
→ Installationsassistent öffnet sich automatisch.<br />
3. Anweisungen des Installationsassistenten folgen.<br />
Abb. Installationsfenster<br />
Bei deaktivierter Autostart-Funktion öffnet das Installationsfenster<br />
nicht automatisch. In diesem Fall lässt sich das Installationsfenster<br />
über „Laufwerk:\InstallWizard.exe“ öffnen.<br />
18 <strong>WIKA</strong> Bedienungsanleitung <strong>EasyCom</strong> <strong>2011</strong><br />
09/<strong>2011</strong> GB/D
09/<strong>2011</strong> GB/D<br />
3. Überblick<br />
3. Überblick<br />
3.1 Hauptfenster<br />
1) Gerät hinzufügen<br />
2) Gerät entfernen<br />
3) Kommunikation<br />
4) Geräteliste 5) Arbeitsbereich<br />
1) Gerät hinzufügen<br />
Fügt angeschlossene Geräte der Geräteliste hinzu.<br />
2) Gerät entfernen<br />
Entfernt ausgewähltes Gerät aus der Geräteliste.<br />
3) Kommunikation<br />
Kommunikationsverbindung zum Gerät wird aufgebaut bzw. getrennt.<br />
4) Geräteliste<br />
Zeigt alle hinzugefügten Geräte und zusätzliche Informationen an.<br />
5) Arbeitsbereich<br />
Im Arbeitsbereich lassen sich verschiedene Funktionen bearbeiten.<br />
<strong>WIKA</strong> Bedienungsanleitung <strong>EasyCom</strong> <strong>2011</strong><br />
19<br />
D
D<br />
4. Geräteliste<br />
4. Geräteliste<br />
Die Geräteliste ist eine Übersicht aller erkannten Geräte. Zusätzlich werden Informationen<br />
wie Messstelle, Messbereich und COM-Port angezeigt.<br />
Ein Umbenennen der Geräte ist nur in der Geräteliste möglich. Dazu Gerät markieren, die<br />
rechte Maustaste drücken und Umbenennen auswählen (Shortcut F2). Dem Gerät kann<br />
jetzt die gewünschte Bezeichnung zugewiesen werden.<br />
Kommunikations-Modi<br />
Die Bezeichnung wird nur lokal gespeichert, jedoch nicht im Gerät selbst.<br />
4.1 Gerät hinzufügen<br />
Über die Schaltfläche „Gerät hinzufügen“ lassen sich angeschlossene Geräte der Geräteliste<br />
hinzufügen. Nach dem Anklicken der Schaltfläche öffnet sich ein Kontextmenü, in<br />
dem der COM-Port des hinzuzufügenden Gerätes auszuwählen ist.<br />
Ist nur ein COM-Port verfügbar, wird dieser automatisch hinzugefügt.<br />
4.2 Geräte entfernen<br />
Das in der Geräteliste markierte Gerät wird durch Anklicken der Schaltfläche entfernt.<br />
4.3 Kommunikation<br />
Je nachdem ob eine Geräteverbindung aufgebaut ist oder nicht, wird über diese Schaltfläche<br />
die Kommunikation hergestellt bzw. getrennt.<br />
Kommunikations-Modus<br />
Nicht verbunden Verbindungsaufbau<br />
Verbunden<br />
Fortschritt des Verbindungsaufbaus<br />
Justage Schreibvorgang<br />
20 <strong>WIKA</strong> Bedienungsanleitung <strong>EasyCom</strong> <strong>2011</strong><br />
09/<strong>2011</strong> GB/D
09/<strong>2011</strong> GB/D<br />
5. Arbeitsbereich / 6. Rubrik „Gerät“<br />
5. Arbeitsbereich<br />
Im Arbeitsbereich finden sich alle Funktionen, um Einstellungen am Gerät vorzunehmen<br />
oder Daten auszulesen.<br />
Unter der Rubrik „Gerät“ befinden sich die Funktionen, um das Gerät einzustellen<br />
(z. B. Justage).<br />
Unter „Datenlogger“ lassen sich Daten auslesen und für eine weitere Verarbeitung<br />
aufzeichnen.<br />
Rubrik „Gerät“ Rubrik „Datenlogger“ Funktionen<br />
6. Rubrik „Gerät“<br />
6.1 Information<br />
Unter dem Reiter „Information“ befinden sich die verschiedensten Angaben über das<br />
ausgewählte Gerät.<br />
Im Bereich „Druck“ wird der<br />
anstehende Druck angezeigt.<br />
„Temperatur“ gibt die aktuelle<br />
Betriebstemperatur an.<br />
Über die jeweilige Drop-down-<br />
Liste lässt sich die gewünschte<br />
Einheit darstellen.<br />
Im rechten Fenster finden sich zusätzliche Geräteinformationen (z. B. Gerätetyp, Messbereich,<br />
Genauigkeit ...).<br />
<strong>WIKA</strong> Bedienungsanleitung <strong>EasyCom</strong> <strong>2011</strong><br />
21<br />
D
D<br />
6. Rubrik „Gerät“<br />
6.2 Justage<br />
Mit dieser Funktion ist es möglich, den Nullpunkt und die Spanne des ausgewählten<br />
Gerätes zu justieren.<br />
Folgende Schritte befolgen, um eine Justage durchzuführen:<br />
1. Zu justierendes Geräte aus der Geräteliste<br />
auswählen.<br />
2. Nullpunkt oder Spanne auswählen.<br />
3. Auf Schaltflache „Justieren“ klicken.<br />
4. Über die Pfeiltasten lässt sich der „Ausgabedruckwert“<br />
beliebig nach oben oder<br />
unten justieren.<br />
5. Eingestellten Wert über die Schaltfläche „Übernehmen“ sichern.<br />
(„Abbrechen“ verwirft vorgenommene Veränderung)<br />
1.<br />
Die Spanne nur verstellen, wenn eine ausreichende Referenz (mindestens<br />
3x genauer als das zu justierende Gerät) verfügbar ist.<br />
Schnellere Justage des „Ausgabedruckwertes“ durch Gedrückthalten der<br />
Pfeiltaste.<br />
Pfeilgröße ändert sich mit der Geschwindigkeit.<br />
Langsam Schnell<br />
Werkseinstellung<br />
Um eine Justage rückgängig zu machen, ist es möglich das ausgewählte Gerät über die<br />
Schaltfläche „Wiederherstellen“ auf seine Werkseinstellung zurückzusetzen.<br />
22 <strong>WIKA</strong> Bedienungsanleitung <strong>EasyCom</strong> <strong>2011</strong><br />
2.<br />
3.<br />
5.<br />
6.<br />
09/<strong>2011</strong> GB/D
09/<strong>2011</strong> GB/D<br />
6. Rubrik „Gerät“<br />
6.3 Einstellungen<br />
Über den Betriebsmodus lässt sich der Kommunikationsbetrieb konfigurieren.<br />
Auf Abfrage<br />
Das Gerät sendet nur auf Anfrage des<br />
Computers einen Messwert.<br />
Zyklisch Druck<br />
Das Gerät sendet in definierten Zeitabständen<br />
den anstehenden Druck an den Computer.<br />
Zyklisch Druck und Temperatur<br />
Das Gerät sendet in definierten Zeitabständen<br />
den anstehenden Druck und die Temperatur<br />
an den Computer.<br />
Zyklisch Druck [Digit (10000-60000)]<br />
Das Gerät sendet in definierten Zeitabständen<br />
den anstehenden Druck an den Computer.<br />
Der Wert 10000 entspricht dabei dem Messbereichsanfang und 60000 dem Messbereichsende.<br />
Zyklisch Druck [Digit (10000-60000)] und Temperatur<br />
Das Gerät sendet in definierten Zeitabständen den anstehenden Druck und die Temperatur<br />
an den Computer. Der Wert 10000 entspricht dabei dem Messbereichsanfang und<br />
60000 dem Messbereichsende.<br />
Die Dokumentation des Schnittstellenprotokolls enthält eine detaillierte<br />
Beschreibung der Betriebsmodi.<br />
Parametrierung der Kommunikation<br />
Über das Intervall lässt sich der Zeitabstand (ms) der zyklischen Übertragung einstellen.<br />
Diese Einstellungen haben keine Auswirkung auf die Verwendung des<br />
Gerätes mit der Software „<strong>EasyCom</strong> <strong>2011</strong>“.<br />
<strong>WIKA</strong> Bedienungsanleitung <strong>EasyCom</strong> <strong>2011</strong><br />
23<br />
D
D<br />
7. Rubrik „Datenlogger“<br />
7. Rubrik „Datenlogger“<br />
Tabellenansicht Grafische Ansicht<br />
7.1 Tabellenansicht<br />
■ Startbedingung<br />
Es gibt folgende zwei Möglichkeiten, um den Start der<br />
Messwertaufnahme festzulegen:<br />
Sofort (1)<br />
Messwertaufnahme beginnt sofort nach Betätigung<br />
der Schaltfläche „Start“.<br />
Datum / Uhrzeit (2)<br />
Messwertaufnahme beginnt am eingestellten Tag zur<br />
ausgewählten Uhrzeit.<br />
Einstellungen über die Schaltfläche „Start“ bestätigen.<br />
24 <strong>WIKA</strong> Bedienungsanleitung <strong>EasyCom</strong> <strong>2011</strong><br />
1<br />
2<br />
Startbedingung<br />
Stoppbedingung<br />
Einheitenauswahl<br />
Einstellung<br />
der Messrate<br />
09/<strong>2011</strong> GB/D
09/<strong>2011</strong> GB/D<br />
7. Rubrik „Datenlogger“<br />
■ Stoppbedingung<br />
Es gibt folgende vier Möglichkeiten, um ein definiertes<br />
Ende der Messwertaufnahme festzulegen:<br />
Datum / Uhrzeit (1)<br />
Messwertaufnahme wird am eingestellten Tag zur<br />
ausgewählten Uhrzeit beendet.<br />
Dauer (2)<br />
Messwertaufnahme wird nach Ablauf der eingestellten<br />
Zeitspanne beendet.<br />
Anzahl Messwerte (3)<br />
Messwertaufnahme wird beendet, sobald die hier<br />
eingestellte Anzahl von Messwerten aufgenommen<br />
wurde.<br />
Manueller Stopp (4)<br />
Messwertaufnahme wird sofort beendet.<br />
■ Einstellung der Messrate<br />
Die Messrate gibt die Zeit (ms) zwischen den einzelnen<br />
Messungen an.<br />
Minimale Messrate = 30 ms<br />
Maximale Messrate = unbegrenzt<br />
Beispiel:<br />
Messrate 1000 ms = 1 s<br />
Jede Sekunde wird der aktuelle Messwert aufgezeichnet.<br />
<strong>WIKA</strong> Bedienungsanleitung <strong>EasyCom</strong> <strong>2011</strong><br />
1<br />
2<br />
3<br />
4<br />
25<br />
D
D<br />
7. Rubrik „Datenlogger“<br />
7.2 Grafische Ansicht<br />
Messstellen<br />
■ (p) Druck<br />
■ (T) Temperatur<br />
Zoomfunktionen<br />
Folgende Befehle über dem Diagramm ausführen.<br />
■ Zoomen Linke Maustaste gedrückt halten und Mauszeiger<br />
nach rechts unten oder oben ziehen.<br />
■ Urzustand Linke Maustaste gedrückt halten und Mauszeiger<br />
nach links unten oder oben ziehen.<br />
■ Diagramm<br />
verschieben<br />
Temperaturkennlinie<br />
ein-/ausblenden<br />
Rechte Maustaste gedrückt halten und Mauszeiger<br />
bewegen<br />
26 <strong>WIKA</strong> Bedienungsanleitung <strong>EasyCom</strong> <strong>2011</strong><br />
09/<strong>2011</strong> GB/D
09/<strong>2011</strong> GB/D<br />
<strong>WIKA</strong> global<br />
Europe<br />
Austria<br />
<strong>WIKA</strong> Messgerätevertrieb<br />
Ursula Wiegand<br />
GmbH & Co. KG<br />
1230 Vienna<br />
Tel. (+43) 1 86916-31<br />
Fax: (+43) 1 86916-34<br />
E-Mail: info@wika.at<br />
www.wika.at<br />
Benelux<br />
<strong>WIKA</strong> Benelux<br />
6101 WX Echt<br />
Tel. (+31) 475 535-500<br />
Fax: (+31) 475 535-446<br />
E-Mail: info@wika.nl<br />
www.wika.nl<br />
Belarus<br />
<strong>WIKA</strong> Belarus<br />
Ul. Zaharova 50B<br />
Office 3H<br />
220088 Minsk<br />
Tel. (+375) 17-294 57 11<br />
Fax: (+375) 17-294 57 11<br />
E-mail: k.martynova@wika.by<br />
Bulgaria<br />
<strong>WIKA</strong> Bulgaria EOOD<br />
Bul. „Al. Stamboliiski“ 205<br />
1309 Sofia<br />
Tel. (+359) 2 82138-10<br />
Fax: (+359) 2 82138-13<br />
E-Mail: t.antonov@wika.bg<br />
Croatia<br />
<strong>WIKA</strong> Croatia d.o.o.<br />
Hrastovicka 19<br />
10250 Zagreb-Lucko<br />
Tel. (+385) 1 6531034<br />
Fax: (+385) 1 6531357<br />
E-Mail: info@wika.hr<br />
www.wika.hr<br />
Finland<br />
<strong>WIKA</strong> Finland Oy<br />
00210 Helsinki<br />
Tel. (+358) 9-682 49 20<br />
Fax: (+358) 9-682 49 270<br />
E-Mail: info@wika.fi<br />
www.wika.fi<br />
<strong>WIKA</strong> instruction manual <strong>EasyCom</strong> <strong>2011</strong><br />
France<br />
<strong>WIKA</strong> Instruments s.a.r.l.<br />
95610 Eragny-sur-Oise<br />
Tel. (+33) 1 343084-84<br />
Fax: (+33) 1 343084-94<br />
E-Mail: info@wika.fr<br />
www.wika.fr<br />
Germany<br />
<strong>WIKA</strong> Alexander Wiegand<br />
SE & Co. KG<br />
63911 Klingenberg<br />
Tel. (+49) 9372 132-0<br />
Fax: (+49) 9372 132-406<br />
E-Mail: info@wika.de<br />
www.wika.de<br />
Italy<br />
<strong>WIKA</strong> Italia Srl & C. Sas<br />
20020 Arese (Milano)<br />
Tel. (+39) 02 9386-11<br />
Fax: (+39) 02 9386-174<br />
E-Mail: info@wika.it<br />
www.wika.it<br />
Poland<br />
<strong>WIKA</strong> Polska S.A.<br />
87-800 Wloclawek<br />
Tel. (+48) 542 3011-00<br />
Fax: (+48) 542 3011-01<br />
E-Mail: info@wikapolska.pl<br />
www.wikapolska.pl<br />
Romania<br />
<strong>WIKA</strong> Instruments Romania S.R.L.<br />
Bucuresti, Sector 5<br />
Calea Rahovei Nr. 266-268<br />
Corp 61, Etaj 1<br />
78202 Bucharest<br />
Tel. (+40) 21 4048327<br />
Fax: (+40) 21 4563137<br />
E-Mail: m.anghel@wika.ro<br />
Russia<br />
ZAO <strong>WIKA</strong> MERA<br />
127015 Moscow<br />
Tel. (+7) 495-648 01 80<br />
Fax: (+7) 495-648 01 81<br />
E-Mail: info@wika.ru<br />
www.wika.ru<br />
Serbia<br />
<strong>WIKA</strong> Merna Tehnika d.o.o.<br />
Sime Solaje 15<br />
11060 Belgrade<br />
Tel. (+381) 11 2763722<br />
Fax: (+381) 11 753674<br />
E-Mail: info@wika.co.yu<br />
www.wika.co.yu<br />
Spain<br />
Instrumentos <strong>WIKA</strong>, S.A.<br />
C/Josep Carner, 11-17<br />
08205 Sabadell (Barcelona)<br />
Tel. (+34) 933 938630<br />
Fax: (+34) 933 938666<br />
E-Mail: info@wika.es<br />
www.wika.es<br />
Switzerland<br />
MANOMETER AG<br />
6285 Hitzkirch<br />
Tel. (+41) 41 91972-72<br />
Fax: (+41) 41 91972-73<br />
E-Mail: info@manometer.ch<br />
www.manometer.ch<br />
Turkey<br />
<strong>WIKA</strong> Instruments Istanbul<br />
Basinc ve Sicaklik Ölcme<br />
Cihazlari<br />
Ith. Ihr. ve Tic. Ltd. Sti.<br />
Bayraktar Bulvari No. 21<br />
34775 Yukari Dudullu - Istanbul<br />
Tel. (+90) 216 41590-66<br />
Fax: (+90) 216 41590-97<br />
E-Mail: info@wika.com.tr<br />
www.wika.com.tr<br />
Ukraine<br />
OOO <strong>WIKA</strong> Pribor<br />
Mariny Raskovoj Str. 11<br />
Building A, Office 705 and 708<br />
Kiev, 02660<br />
Business Center „NOVA“<br />
Tel. (+38) 044 496-8380<br />
Fax (+38) 044 496-8380<br />
E-Mail: info@wika.ua<br />
www.wika.ua<br />
United Kingdom<br />
<strong>WIKA</strong> Instruments Ltd<br />
Merstham, Redhill RH13LG<br />
Tel. (+44) 1737 644-008<br />
Fax: (+44) 1737 644-403<br />
E-Mail: info@wika.co.uk<br />
www.wika.co.uk<br />
27
<strong>WIKA</strong> global global<br />
North America<br />
Canada<br />
<strong>WIKA</strong> Instruments Ltd.<br />
Head Office<br />
Edmonton, Alberta, T6N 1C8<br />
Tel. (+1) 780 46370-35<br />
Fax: (+1) 780 46200-17<br />
E-Mail: info@wika.ca<br />
www.wika.ca<br />
Mexico<br />
Instrumentos <strong>WIKA</strong> Mexico S.A.<br />
de C.V.<br />
01210 Mexico D.F.<br />
Tel. (+52) 55 55466329<br />
E-Mail: ventas@wika.com<br />
www.wika.com.mx<br />
U<strong>SA</strong><br />
<strong>WIKA</strong> Instrument Corporation<br />
Lawrenceville, GA 30043<br />
Tel. (+1) 770 5138200<br />
Fax: (+1) 770 3385118<br />
E-Mail: info@wika.com<br />
www.wika.com<br />
<strong>WIKA</strong> Instrument Corporation<br />
Houston Facility<br />
950 Hall Court<br />
Deer Park, TX 77536<br />
Tel. (+1) 713-475 0022<br />
Fax (+1) 713-475 0011<br />
E-mail: info@wikahouston.com<br />
www.wika.com<br />
Mensor Corporation<br />
201 Barnes Drive<br />
San Marcos, TX 78666<br />
Tel. (+1) 512 3964200-15<br />
Fax (+1) 512 3961820<br />
E-Mail: sales@mensor.com<br />
www.mensor.com<br />
South America<br />
<strong>Argentina</strong><br />
<strong>WIKA</strong> <strong>Argentina</strong> S.A.<br />
Buenos Aires<br />
Tel. (+54) 11 47301800<br />
Fax: (+54) 11 47610050<br />
E-Mail: info@wika.com.ar<br />
www.wika.com.ar<br />
Brazil<br />
<strong>WIKA</strong> do Brasil Ind. e Com. Ltda.<br />
CEP 18560-000 Iperó - SP<br />
Tel. (+55) 15 34599700<br />
Fax: (+55) 15 32661650<br />
E-Mail: marketing@wika.com.br<br />
www.wika.com.br<br />
Chile<br />
<strong>WIKA</strong> Chile S.p.A.<br />
Coronel Pereira 72<br />
Oficina 101<br />
Las Condes<br />
Santiago de Chile<br />
Tel. (+56) 2 3651719<br />
E-Mail: info@wika.cl<br />
www.wika.cl<br />
Further <strong>WIKA</strong> subsidiaries worldwide can be found online at www.wika.com.<br />
Weitere <strong>WIKA</strong> Niederlassungen weltweit finden Sie online unter www.wika.de.<br />
<strong>WIKA</strong> Alexander Wiegand SE & Co. KG<br />
Alexander-Wiegand-Straße 30<br />
63911 Klingenberg • Germany<br />
Tel. (+49) 9372/132-0<br />
Fax (+49) 9372/132-406<br />
E-Mail info@wika.de<br />
www.wika.de<br />
28 <strong>WIKA</strong> instruction manual <strong>EasyCom</strong> <strong>2011</strong><br />
Asia<br />
China<br />
<strong>WIKA</strong> International Trading<br />
Co., Ltd.<br />
A2615, NO.100, Zunyi Road<br />
Changning District<br />
Shanghai 200051<br />
Tel. (+86) 21 538525-72<br />
Fax: (+86) 21 538525-75<br />
E-Mail: info@wika.cn<br />
www. wika.com.cn<br />
India<br />
<strong>WIKA</strong> Instruments India Pvt. Ltd.<br />
Village Kesnand, Wagholi<br />
Pune - 412 207<br />
Tel. (+91) 20 66293-200<br />
Fax: (+91) 20 66293-325<br />
E-Mail: sales@wika.co.in<br />
www.wika.co.in<br />
Japan<br />
<strong>WIKA</strong> Japan K. K.<br />
Tokyo 105-0023<br />
Tel. (+81) 3 543966-73<br />
Fax: (+81) 3 543966-74<br />
E-Mail: info@wika.co.jp<br />
Kazakhstan<br />
<strong>WIKA</strong> Kazakhstan LLP<br />
169, Rayimbek avenue<br />
050050 Almaty, Kazakhstan<br />
Tel. (+7) 32 72330848<br />
Fax: (+7) 32 72789905<br />
E-Mail: info@wika.kz<br />
www.wika.kz<br />
09/<strong>2011</strong> GB/D


