Kurzanleitung Short Instructions - ARRI Lighting Rental
Kurzanleitung Short Instructions - ARRI Lighting Rental
Kurzanleitung Short Instructions - ARRI Lighting Rental

Erfolgreiche ePaper selbst erstellen
Machen Sie aus Ihren PDF Publikationen ein blätterbares Flipbook mit unserer einzigartigen Google optimierten e-Paper Software.
<strong>Kurzanleitung</strong><br />
<strong>Short</strong> <strong>Instructions</strong><br />
Stand: 06 / 2008<br />
as of: 06 / 2008<br />
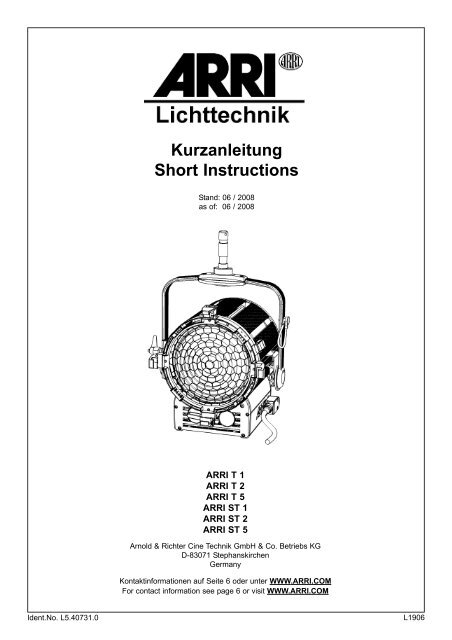
<strong>ARRI</strong> T 1<br />
<strong>ARRI</strong> T 2<br />
<strong>ARRI</strong> T 5<br />
<strong>ARRI</strong> ST 1<br />
<strong>ARRI</strong> ST 2<br />
<strong>ARRI</strong> ST 5<br />
Arnold & Richter Cine Technik GmbH & Co. Betriebs KG<br />
D-83071 Stephanskirchen<br />
Germany<br />
Kontaktinformationen auf Seite 6 oder unter WWW.<strong>ARRI</strong>.COM<br />
For contact information see page 6 or visit WWW.<strong>ARRI</strong>.COM<br />
Ident.No. L5.40731.0 L1906
Allgemeine Hinweise:<br />
Die <strong>ARRI</strong>-Scheinwerfer der T- und ST-Reihe sind für den professionellen<br />
Einsatz im Studio und bei Außenaufnahmen<br />
bestimmt und dürfen ausschließlich von befähigten Personen<br />
betrieben werden.<br />
Lesen Sie diese Bedienungsanleitung sehr sorgfältig vor der<br />
ersten Inbetriebnahme. Der folgende Text enthält wichtige<br />
Hinweise für die Handhabung von <strong>ARRI</strong> Beleuchtungsgeräten.<br />
Beachten Sie in Ihrem eigenen Interesse die Sicherheits- und<br />
Warnhinweise.<br />
Beachten Sie auch die Bedienungsanleitung der Lampenhersteller.<br />
Bewahren Sie diese Betriebsanleitung auch für eventuelle<br />
Nachbesitzer sorgfältig auf.<br />
Entsorgen Sie unserer Umwelt zuliebe das Verpackungsmaterial<br />
in einer entsprechenden Entsorgungsstelle.<br />
Defekte Scheinwerfer, bzw. defektes Zubehör müssen<br />
sachgerecht über entsprechende Entsorgungsstellen entsorgt<br />
werden. Weitere Informationen zur Entsorgung von<br />
Verpackungsmaterial, bzw. Elektrobauteilen erhalten Sie von<br />
Ihrem Händler oder der Gemeinde, bzw. Stadtverwaltung.<br />
Verwenden Sie nur Originalersatzteile und Originalzubehör<br />
(siehe <strong>ARRI</strong> Service-Werkstättennachweis, S. 6,<br />
oder WWW.<strong>ARRI</strong>.COM).<br />
Wichtige Sicherheitshinweise:<br />
VORSICHT: Netzspannung! Lebensgefahr !<br />
Vor dem Lampenwechsel allpolig vom Netz trennen!<br />
Vorsicht heiße Lampe!<br />
Lampe muss vor dem Wechseln ausreichend abgekühlt sein.<br />
Scheinwerfer nicht ohne Lampe einschalten!<br />
Scheinwerfer nicht ohne Stufenlinse, Schutzgitter und<br />
Reflektor betreiben!<br />
Achtung! Das Lampengehäuse kann hohe Temperaturen<br />
annehmen. Beachten Sie die Werte in der Tabelle auf Seite 4,<br />
bzw. den Hinweis auf dem Seitenblech Ihres Scheinwerfers.<br />
Lüftungsschlitze dürfen nicht abgedeckt werden.<br />
Halten Sie die Anschlusskabel vom Scheinwerfer fern.<br />
Direkte Bestrahlung anderer Scheinwerfer vermeiden. Gefahr<br />
der Überhitzung.<br />
Entnehmen Sie die Lampe für den Transport aus dem<br />
Scheinwerfer.<br />
Kabel nicht zum Transport oder Aufhängen des Scheinwerfers<br />
missbrauchen!<br />
Bei jeglichen sichtbaren Schäden der Bauteile darf der<br />
Scheinwerfer nicht mehr verwendet werden. Sind Schäden<br />
feststellbar müssen die betreffenden Teile ausgewechselt<br />
werden, bzw. muss eine <strong>ARRI</strong> Service-Werkstatt kontaktiert<br />
werden (siehe <strong>ARRI</strong> Service-Werkstätten, S. 6).<br />
Überprüfen Sie Ihr Gerät vor jedem Gebrauch auf folgende<br />
mögliche Schäden:<br />
Bauteil mögliche Schäden<br />
Lampe<br />
defekt, matt, deformiert<br />
Kabel<br />
deformiert, Schnitte, angeschmort<br />
Stecker<br />
deformiert, Bruch, angeschmort<br />
Lampenhalter Bruch, Risse, angeschmort<br />
Reflektor matt, deformiert, fehlt<br />
Stufenlinse Bruch, Kratzer, fehlt<br />
Schutzgitter Bruch, fehlt<br />
Verwenden Sie ausschließlich <strong>ARRI</strong> Originalersatzteile und<br />
<strong>ARRI</strong> Originalzubehör.<br />
Sicherung des Scheinwerfers und des Zubehörs:<br />
Bei hängendem Betrieb muss der Scheinwerfer, wie auch das<br />
verwendete Zubehör, mittels eines Sicherungsseiles durch den<br />
Haltebügel, gegen Herabfallen gesichert werden. Das<br />
Sicherungsseil muss ausreichend dimensioniert sein und ist<br />
kurz zu halten.<br />
Die Tragfähigkeit des Sicherungsseiles und der<br />
Verbindungsglieder muss mindestens für das 10-fache Gewicht<br />
des zu tragenden Scheinwerfersystems, wie auch des<br />
Zubehörs, ausgelegt sein.<br />
Bei hängendem Betrieb des Scheinwerfers muss sichergestellt<br />
werden, dass das Zubehör korrekt eingesetzt ist. (Torsicherung<br />
verriegelt , optionale zweite Torsicherung eingerastet)<br />
Stative müssen standsicher aufgestellt und für die Traglast<br />
General Notes:<br />
Our <strong>ARRI</strong> T and ST Series Lampheads are intended for<br />
professional studio and location applications and may only be<br />
operated by qualified persons.<br />
Please read the following operating instructions very carefully<br />
before using this fixture for the first time. They contain<br />
important information on the operation of <strong>ARRI</strong> lighting<br />
equipment.<br />
For your own safety, please follow all safety instructions and<br />
warnings.<br />
Please also follow the operating instructions of the lamp<br />
manufacturers.<br />
Please keep these operating instructions for you and<br />
subsequent users to reference in the future.<br />
Please dispose of the packing material at your local recycling<br />
center.<br />
Defective lampheads or equipment must be disposed of at an<br />
appropriate waste disposal center. For further information,<br />
please ask your retailer or enquire at your local authorities.<br />
Only use <strong>ARRI</strong> spare parts and accessories<br />
(see <strong>ARRI</strong> Service Locations, p. 6 or WWW.<strong>ARRI</strong>.COM).<br />
Important Safety <strong>Instructions</strong>:<br />
CAUTION: Mains voltage ! Danger of Life !<br />
Before replacing the lamp, disconnect lamphead from<br />
power supply or mains.<br />
Caution! Lamp may be hot!<br />
Allow the lamp to cool down sufficiently before replacing it.<br />
Do not switch on the lamphead without lamp!<br />
Do not switch on the lamphead without Fresnel lens, safety<br />
mesh and reflector!<br />
CAUTION! The housing of the lamphead can reach high<br />
temperatures. The maximum values are listed in the table of<br />
technical data on page 4, and on the identification plate on the<br />
side of the lamphead.<br />
Do not cover any ventilation slots.<br />
Always keep the cables at appropriate distance from the<br />
housing.<br />
Do not directly illuminate other lampheads. Risk of overheating<br />
or fire!<br />
Always remove the lamp from the lamphead for transport.<br />
Do not missuse the lamphead cables for transport or<br />
suspension of lamphead!<br />
Do not operate the lamphead if it shows any visible damage. In<br />
case of damage, replace the defective parts or contact an<br />
<strong>ARRI</strong> service station (see page 6).<br />
Check your fixture before every use for any of the following<br />
possible defects:<br />
part possible damage<br />
lamp<br />
dull, deformed, burnt out<br />
cable<br />
deformed, cuts, burnt<br />
connector deformed, broken, burnt<br />
lamp holder burnt, pitted, cracked, broken<br />
reflector dull, deformed, missing<br />
Fresnel lens broken, scratched, missing<br />
safety mesh broken, missing<br />
Stativzapfen locker, deformiert, Risse spigot loose, deformed, cracked<br />
Only use <strong>ARRI</strong> spare parts and accessories.<br />
Protection of Lamphead and Accessories:<br />
When mounting the fixture in a hanging position, additionally<br />
secure the fixture with a safety cable from the mounting pipe or<br />
truss through the fixture stirrup. Accessories, not secured with a<br />
safety top latch on the fixture must be secured with a safety<br />
cable as well. The safety cable must be properly dimensioned<br />
for the fixture and application.<br />
The carrying capacity of the safety rope must be rated at<br />
a minimum of 10 times the weight of the lamphead system<br />
including accessories.<br />
When the lamphead is operated in a hanging position, please<br />
ensure that the accessories are installed correctly. (top latch<br />
locked, optional barndoor catch snapped in).<br />
Stands must be set up in a stable position and capable of<br />
2
ausreichend ausgelegt sein (Gewicht von Zuleitungen und<br />
Zubehör beachten!). Beachten Sie hierzu auch die Hinweise<br />
auf dem "Sicherheitsmerkblatt: <strong>ARRI</strong>-Scheinwerfer";<br />
L5.40731.D<br />
ACHTUNG: Querbelastungen können zu Deformation oder<br />
Bruch des Stativzapfens führen!<br />
Inbetriebnahme:<br />
Benötigtes Werkzeug<br />
Torx-Schraubendreher Nr. 25 (mitgeliefert)<br />
Drehmomentschlüssel / Innensechskant Größe 10 (50 Nm)<br />
Einstellung des Haltebügels / Montage Stativzapfen<br />
Bei Lieferung befindet sich der Haltebügel (2) in<br />
Ausgangsposition (Bügel umschließt Linse).<br />
Schrauben an der Bügelhalterung (6a, Abb. 3) beidseitig mit<br />
Torx- Schraubendreher Nr. 25 leicht lösen, Bügel bis zur<br />
Linsenfassung (12) vorziehen.<br />
Klemmhebel (18) lockern und Haltebügel nach oben<br />
schwenken.<br />
Zur Einstellung des idealen Schwerpunkts Haltebügel mittig<br />
zur Markierung "Centre" (17) verschieben. Ziehen Sie dann<br />
die Schrauben an Bügelhalterung (6a) wieder fest.<br />
Schwenken Sie nun den Haltebügel in die gewünschte<br />
Neigeposition. Klemmhebel wieder festziehen. Zur besseren<br />
Bedienbarkeit lässt sich die Position des Klemmhebels durch<br />
Drücken des Knopfs am Klemmhebel (18a, Abb. 3) verändern.<br />
Den Stativzapfen (1) und das Distanzstück (1a) auf die<br />
Bohrung im Haltebügel aufsetzen, Schraube mit Scheibe und<br />
Federring eindrehen und mit Drehmomentschlüssel auf 50Nm<br />
festziehen.<br />
(Bei Fragen siehe <strong>ARRI</strong> Service-Werkstätten, S. 6)<br />
4<br />
18<br />
13<br />
12<br />
14<br />
15<br />
11<br />
Abb. 1 / figure 1<br />
Abb. 3 / figure 3<br />
Montage Netzstecker<br />
1<br />
4<br />
6a<br />
18<br />
18a<br />
10<br />
1a<br />
VORSICHT - Die Leuchte darf nur mit geeigneter Stecker<br />
betrieben werden. Das Anbringen eines geeigneten Steckers darf<br />
nur von geschultem Fachpersonal durchgeführt werden.<br />
2<br />
3<br />
5<br />
4<br />
8<br />
carrying the load of the lamphead including accessories and<br />
cables (please refer to our safety leaflet "Operating Your <strong>ARRI</strong><br />
Lampheads Safely"; L5.40731.E.<br />
CAUTION: lateral load can cause deformation or breaking of<br />
the spigot!<br />
Placing into Operation:<br />
Required Tools<br />
Torx screwdriver No. 25 (provided)<br />
Torque wrench / Allen key No. 10<br />
(50 Nm/37 foot pounds of torque)<br />
Adjusting Stirrup / Mounting Spigot, Junior Pin<br />
On delivery the stirrup (2) is tilted to the front.<br />
Slightly loosen the screws in the stirrup bearing (6a, figure 3)<br />
on both sides with the No. 25 torque wrench and pull it towards<br />
the lens door (12).<br />
Loosen the tilt lock lever (18) and tilt the stirrup upwards.<br />
In order to position the stirrup at the ideal balance point move it<br />
to the center marking (17) on the side of the lamphead. Then<br />
tighten the screws at the stirrup bearing (6a).<br />
Tilt the stirrup to the desired angle and tighten the tilt lock lever.<br />
For better leverage, press the knob (18a, figure 3) on the tilt<br />
lock lever and turn the lever into the desired position.<br />
Place the spigot (1) and the spacer (1a) onto the boring in the<br />
stirrup, insert the screw with washer and spring washer and<br />
fasten it with the torque wrench to 50Nm / 37 foot pounds of<br />
torque.<br />
(For questions see <strong>ARRI</strong> Service Locations, p. 6 or www.<strong>ARRI</strong>.com).<br />
6<br />
7<br />
1 Stativzapfen / spigot, Junior pin<br />
1a Distanzstück / spacer<br />
2 Haltebügel / stirrup (bale)<br />
3 Verschlußhaken / door catch<br />
4 Halteklaue / accessory bracket<br />
5 Kabelhalteschlaufe / cable tie<br />
6 Bügellager / stirrup bracket<br />
7 drehbarer Gerätestecker / rotatable device connector<br />
8 Netzkabel / mains (power input)<br />
9 Typenschild / identification plate<br />
10 zweite Torsicherung / barndoor catch (optional)<br />
11 Fokusknopf / focus knob<br />
12 Linsenfassung / lens door<br />
13 Schutzgitter / safety mesh<br />
14 Stufenlinse / Fresnel lens<br />
15 Torsicherung / top latch<br />
16 Mantelstromblech / baffle<br />
17 Zentrierhilfe / center marking<br />
18 Klemmhebel / tilt lock lever<br />
Plug Assembly<br />
Abb. 2 / figure 2<br />
WARNING - Do not operate the lamphead without a proper<br />
plug. A properly rated plug must be installed by qualified<br />
personnel only.<br />
3<br />
16<br />
9<br />
11<br />
17
Einsetzen der Lampe<br />
Vor jeder Überprüfung muss der Scheinwerfer vom Netz Before every inspection the lamphead must be disconnected<br />
getrennt sein.<br />
from the power supply or mains.<br />
Überprüfen Sie den Scheinwerfer auf Beschädigungen<br />
Check the lamphead for damage (cp. table p. 2)<br />
(vgl. Tabelle S. 2).<br />
Before inserting, visually check the lamp for functionality.<br />
Überprüfen Sie vor dem Einsetzen der Lampe, ob diese<br />
Damaged lamps must not be operated. Ensure the lamp is<br />
funktionsfähig ist, dann setzen Sie die Lampe ein. Beschädigte firmly fastened in its socket before every use<br />
Lampen dürfen nicht in Betrieb genommen werden. Der feste (cp. paragraph “Lamp Exchange / Inserting Lamp”)<br />
Sitz der Lampe im Sockel und in der Fassung ist vor jeder<br />
Inbetriebnahme zu überprüfen. (s. hierzu Abschnitt<br />
"Lampenwechsel / Einsetzen der Lampe").<br />
Connect the lamphead connector to the power source (mains).<br />
Verbinden Sie den Anschlussstecker des Scheinwerfers mit der<br />
Stromversorgung.<br />
Technische Daten / Technical Data:<br />
Type<br />
empfohlene Leuchtmittel / recommended bulbs<br />
120 V 230 V<br />
to max ..° up<br />
max ..° down<br />
T1<br />
ST1<br />
T2<br />
ST2<br />
T5<br />
ST5<br />
t o<br />
500W (EGN), 750W (EGR),<br />
1000W (EGT)<br />
650W (FKH), 1000W (FKJ)<br />
Produktbeschreibung:<br />
Die <strong>ARRI</strong>-Scheinwerfer der T- und ST-Reihe entsprechen der<br />
neuen Generation von innovativen Glühlichtscheinwerfern. Sie<br />
wurden nach neuesten Erkenntnissen der Lichttechnologie für<br />
den professionellen Gebrauch weiterentwickelt und sind mit<br />
einigen Verbesserungen ausgestattet. Das kompakte Gehäuse,<br />
die maximale Lichtausbeute und exzellente Lichtverteilung<br />
ermöglichen den universellen Einsatz im Studio wie auch im<br />
Außeneinsatz. Das innovative Cross Cooling System<br />
verbessert die Wärmekonvektion des Scheinwerfergehäuses<br />
und sorgt so für eine bessere Kühlung.<br />
Weitere Beschaffenheiten der neuen Scheinwerfergeneration<br />
sind:<br />
Alle Bedienelemente sind übersichtlich und leicht zugänglich<br />
angeordnet.<br />
Die Schwerpunktverstellung der Bügelhalterung ist durch<br />
einfache Bedienung individuell einstellbar und wird durch eine<br />
praktische optische Zentrierhilfe (17) zum Einstellen des<br />
idealen Schwerpunktes ergänzt.<br />
Die Torsicherung (15) ermöglicht den raschen Austausch des<br />
4-Flügeltors, von Filterrahmen und sonstigem Zubehör. Eine<br />
optionale zweite Torsicherung (10) verriegelt das Flügeltor<br />
zusätzlich und sorgt für besonders sicheres Arbeiten.<br />
Die Scheinwerfer sind mit einem 28mm-Zapfen (1) für den<br />
Stativ- wie auch hängenden Betrieb ausgelegt.<br />
Der Haltebügel (2) aus Aluminium sorgt für leichte<br />
Bedienbarkeit und verringert, wie auch das Scheinwerfergehäuse<br />
aus Aluminiumprofil, das Gesamtgewicht des<br />
Scheinwerfers.<br />
Eine neue Bügelklemmung, bestehend aus einer abriebfesten<br />
Edelstahl-Friktionsscheibe, sorgt für ausreichende Klemmung<br />
auch bei Einsatz von schwerem Zubehör.<br />
Die Torsicherung ist optional entweder als schwenkbare<br />
Torsicherung, oder als Location Torsicherung ausgelegt.<br />
Alle Mantelstrombleche (16) sind mit einer Spezialbeschichtung<br />
versehen, die korrosions- und hitzebeständig ist.<br />
Der von <strong>ARRI</strong> entwickelte drehbare Gerätestecker (7) sorgt für<br />
eine optimale Kabelführung im hängenden, wie auch<br />
Stativbetrieb.<br />
Die Scheinwerfer sind sowohl für den Studio- als auch für den<br />
Außeneinsatz konzipiert und erfüllen die Anforderungen des<br />
Schutzgrades IP23 (spritzwassergeschützt). T2, ST2 für USA<br />
entspricht nur IP20.<br />
Halteklauen (4) montierbar auf 45° bzw. 90° Position.<br />
Inserting the lamp<br />
= maximale äußere Leuchtentemperatur im Beharrungszustand / maximum surface temperature<br />
= minimaler Abstand zu brennbaren Werkstoffen / minimum distance to flammable objects<br />
= minimaler Abstand zu angestrahlten Flächen / minimum distance to illuminated areas<br />
= maximaler Neigewinkel nach oben und unten / maximum tilting angle up and down<br />
Maximale Umgebungstemperatur / maximum ambient temperature = 45°C<br />
Das Gewicht des jeweiligen Scheinwerfers (ohne Zubehör und Kabel !) steht auf dem Typenschild des Produkts.<br />
The weight of the individual lampheads (excluding accessories and cables !) is stated on the product itself.<br />
Product Description:<br />
The new <strong>ARRI</strong> T and ST series lampheads are part of the new<br />
generation of innovative tungsten lampheads. They have been<br />
developed for the professional user according to latest findings<br />
in lighting technology and are equipped with a number of<br />
improvements. The compact housing and superb optical<br />
performance make them ideal for professional studio and<br />
location applications. The innovative Cross Cooling System<br />
improves heat convection of the lamphead housing, which<br />
results in a better cooling.<br />
Further features of the new lamphead generation are:<br />
All operating elements are clearly arranged and easily<br />
accessible.<br />
The position of the stirrup can be freely adjusted in a few<br />
simple steps and is completed by a center marking (17) for<br />
finding the ideal balance point.<br />
The top latch (15) enables you to exchange the 4-leaf barn<br />
door, filter frames and other accessories very quickly. The<br />
optional barndoor catch (10) locks the barndoor in the<br />
accessory bracket and provides for extra safety.<br />
The lampheads are equipped with a 28mm spigot (1, Junior<br />
pin) for stand or hanging operation.<br />
The aluminium stirrup (2) provides for easy operation; together<br />
with the aluminium profile lamphead housing it reduces the<br />
overall weight of the lamphead.<br />
The new tilt lock which consists of an abrasion-resistant<br />
friction disk made of stainless-steel ensures firm locking even<br />
with heavy accessory.<br />
For the top latch design you can opt for the rotatable or<br />
the location top latch.<br />
All baffles (16) have a special coating, which makes them<br />
corrosion- and heat-resistant.<br />
The rotatable device connector (7) developed by <strong>ARRI</strong> provides<br />
for ideal cable guidance for both hanging and stand use.<br />
The lampheads have been designed for location and studio<br />
applications and comply with the requirements of protection<br />
grade IP23 (wet location).Version T2, ST2 only complies with<br />
IP20 (dry location) for the US.<br />
Accessory brackets (4) can be mounted at 45° or 90° position.<br />
4<br />
190°C<br />
140°C<br />
1000W (CYV), 1500W (CXZ), 2000W (FKK)<br />
190°C<br />
2000W (CYX)<br />
150°C<br />
5000W (DPY/CP29) 5000W (CP85)<br />
220°C<br />
190°C<br />
Nomenklatur / technical terms<br />
0,5 m<br />
1,0 m<br />
1,0 m<br />
2,0 m<br />
3,0 m<br />
5,0 m<br />
± 90°<br />
± 90°<br />
± 45°<br />
± 90°
Weitere Besonderheiten an Scheinwerfern der T- und ST-Reihe<br />
Hexagonales Schutzgitter (13) aus Edelstahl für optimale<br />
Lichtausbringung.<br />
Tungsten Dual Socket (TDS) (22) passend für G22 oder<br />
G38 -Lampensockel.<br />
Definierter Endanschlag für Lampenklemmung.<br />
Vereinfachte Wartung durch überarbeiteten Gehäuseaufbau<br />
sowie Vereinheitlichung der Schraubverbinder.<br />
Schneller und einfacher Umbau von manueller in stangenbedienbare<br />
(P.O.) Ausführung möglich.<br />
Alle Scheinwerfer erfüllen die europäische RoHS-Richtlinie.<br />
Alle Scheinwerfer für den internationalen Markt sind TÜV-GS<br />
und CB-zertifiziert; alle Scheinwerfer für den amerikanischen<br />
und kanadischen Markt sind cNRTL-zertifiziert.<br />
Lampenwechsel / Einsetzen der Lampe:<br />
Lamp Exchange / Inserting Lamp:<br />
VORSICHT: Netzspannung! Lebensgefahr!<br />
CAUTION: Mains Voltage! Danger of Life!<br />
Der Lampenwechsel ist von einem sicheren Stand aus durch- The lamp exchange must be carried out from a stable position.<br />
zuführen.<br />
Disconnect the lamphead from power supply or mains before<br />
Vor Öffnen des Lampengehäuses , Scheinwerfer allpolig vom opening the lamp housing.<br />
Netz trennen.<br />
CAUTION: Hot Lamp. Allow the lamp to cool down sufficiently<br />
ACHTUNG: heiße Lampe. Vor dem Wechseln, Lampe ausrei- before replacing it.<br />
chend abkühlen lassen.<br />
In order to unlock the lamp (19), turn the lamp lock lever (21)<br />
Zum Entriegeln der Lampe (19), Klemmhebel (21) nach links to left end position.<br />
bis zum Anschlag drücken.<br />
Grab lamp carefully at the socket (23) and pull it upwards out<br />
Lampe vorsichtig am Sockel (23), nach oben aus der<br />
of the Tungsten Dual Socket (TDS) (22).<br />
Tungsten Dual Socket (TDS) (22) nehmen.<br />
Do not touch the glass bulb of the lamp (burned-in fingerprints<br />
Die einzusetzende Lampe nur am Sockel fassen<br />
reduce the lifetime of the lamp). Please follow the cleaning<br />
(Fingerabdrücke am Glaskolben brennen ein und führen zur instructions of the lamp manufacturer. Only use lamps of the<br />
Verkürzung der Brenndauer). Reinigungshinweise des<br />
correct wattage (observe wattage rating).<br />
Lampenherstellers beachten. Nur Lampen in Scheinwerfer ent- Insert lamp carefully as far as possible into the Tungsten Dual<br />
sprechender Leistung verwenden (Leistungsangabe beachten). Socket (TDS), the type identification at the socket should be<br />
Lampe vorsichtig bis zum Anschlag in Tungsten Dual Socket visible from the front.<br />
(TDS) einsetzen, dabei sollte die Typenbezeichnung am Sockel Push the lock lever to right end position.<br />
von vorne zu sehen sein.<br />
Close the lens door (12).<br />
Klemmhebel nach rechts bis zum Anschlag drücken.<br />
Linsenfassung (12) am Scheinwerfer schließen.<br />
23<br />
22<br />
Abb. 4 / figure 4<br />
19<br />
19 Glaskolben / bulb<br />
20 Reflektor / reflector<br />
21 Lampenklemmhebel / lamp lock lever<br />
22 Tungsten Dual Socket (TDS) / Tungsten Dual Socket (TDS)<br />
23 Lampensockel / lamp socket<br />
21<br />
20<br />
Further Special Features of T and ST Series Lampheads<br />
Hexagonal stainless-steel safety mesh (13) for ideal lighting<br />
performance.<br />
Tungsten Dual Socket (TDS) (22) suitable for G22 or G38<br />
lamp socket.<br />
Defined lock position for lamp lock lever.<br />
Improved housing construction and uniform screw format<br />
provide easy maintenance.<br />
Fast and simple conversion from manual to pole-operated<br />
(p.o.) version.<br />
All lampheads comply with the European RoHS standard.<br />
All lampheads for the international market are TÜV-GS and<br />
CB certified; all lampheads for the U.S. and Canadian market<br />
are cNRTL certified.<br />
5<br />
4a<br />
15<br />
4a<br />
4b<br />
15a<br />
4b<br />
Abb. 5 / figure 5<br />
Abb. 6 / figure 6<br />
Abb. 7 / figure 7<br />
4b<br />
10<br />
15<br />
4a
Einsetzen des Zubehörs:<br />
Das Einsetzen und Wechseln von Zubehör ist von einem<br />
sicheren Stand aus durchzuführen.<br />
Modelle mit schwenkbarer Torsicherung (Abb. 5): Torsicherung<br />
(15) senkrecht nach oben ziehen und zur Seite wegdrehen.<br />
Modelle mit Location-Torsicherung (Abb. 6): Stift (15a) seitlich<br />
eindrücken, Torsicherung (15) klappt nach oben.<br />
Bei Modellen mit optionaler zweiter Torsicherung (10, Abb. 7),<br />
diese zuerst öffnen, Zubehör, wie z.B. Flügeltor, einsetzen und<br />
anschließend zweite Torsicherung wieder loslassen. Bei allen<br />
anderen Modellen - Zubehör einfach in Halteklaue (4a, Abb. 7)<br />
einsetzen.<br />
Der hintere Einschub (4b, Abb. 7) der Halteklauen dient zur<br />
Aufnahme von Filterrahmen oder Scrims.<br />
Anschließend die Torsicherung wieder schließen und den<br />
sicheren Halt des Zubehörs prüfen.<br />
VORSICHT! Den Scheinwerfer nicht bei geschlossenem Tor<br />
einsetzen! Gefahr der Überhitzung.<br />
Klauenverstellung<br />
Die Einschubbreite der Halteklauen für Zubehör (4b, Abb. 7)<br />
kann durch Lösen der Schrauben und Längsverschieben nach<br />
Bedarf verstellt werden (Abb. 8 Detail 1). Diese Funktion dient<br />
unter anderem auch zur Reduzierung von Streulicht zwischen<br />
Linsenfassung und Zubehör.<br />
Drehen des Gerätesteckers (nur durch Fachpersonal):<br />
Der <strong>ARRI</strong>-Gerätestecker (7, Abb. 8) ermöglicht die Anpassung<br />
des Kabelverlaufs an die Verwendung des Scheinwerfers.<br />
Hierbei sind zwei Einstellungen möglich. Die Anpassung darf<br />
nur von Fachpersonal durchgeführt werden.<br />
Achtung: Vor dem Einstellen des Gerätesteckers Scheinwerfer<br />
immer vom Netz trennen!<br />
Zum Anpassen die unverlierbaren Schrauben (7a, Abb.8<br />
Detail 2) am Stecker lösen, den Stecker in die gewünschte<br />
Position drehen und Schrauben wieder festziehen.<br />
Abb. 8 Detail 1 / figure 8 detail 1<br />
Pflegehinweise<br />
Abb. 8 / figure 8<br />
Reflektor und Stufenlinse regelmäßig mit handelsüblichen<br />
Glasreinigern säubern und anschließend mit einem weichen<br />
Tuch nachpolieren.<br />
Achten Sie darauf, dass der Reflektor nicht beschädigt ist und<br />
keine Beulen aufweist.<br />
Halten Sie die Kontaktelemente der elektrischen<br />
Steckverbindungen sauber.<br />
Neben der regelmäßigen Sichtprüfung ist eine Wiederholprüfung<br />
der elektrischen Sicherheit mindestens alle 12 Monate<br />
von einer Fachperson durchzuführen und zu protokollieren.<br />
Weitere Hinweise<br />
Für alle Personen- und Sachschäden, die aus nicht bestimmungsgemäßer<br />
Verwendung entstehen, haftet nicht der<br />
Hersteller, sondern der Betreiber des Scheinwerfers.<br />
Besuchen Sie uns unter www.<strong>ARRI</strong>.com zum Einsehen<br />
der CE-Erklärung, sowie der Ersatzteil-Informationen.<br />
Lesen Sie auch das<br />
"Sicherheitsmerkblatt: <strong>ARRI</strong>-Scheinwerfer"; L5.40731.D<br />
Internet: WWW.<strong>ARRI</strong>.COM<br />
Technische Änderungen vorbehalten! Design and specifications subject to change without notice!<br />
<strong>ARRI</strong> Service Werkstätten / <strong>ARRI</strong> Service Locations<br />
Germany<br />
ARNOLD & RICHTER<br />
CINE TECHNIK<br />
GmbH & Co. Betriebs KG<br />
Pulvermühle<br />
D-83071 Stephanskirchen<br />
Tel. +49(0)8036-3009-0<br />
Fax +49(0)8036-2471<br />
Germany<br />
<strong>ARRI</strong> <strong>Lighting</strong><br />
Solution GmbH<br />
Ernst-Augustin Str. 12,<br />
D-12489 Berlin<br />
Tel. +49(0)30-678233-0<br />
Fax +49(0)30-678233-99<br />
4<br />
4<br />
4<br />
4<br />
USA<br />
<strong>ARRI</strong> Inc<br />
New York Office<br />
617 Route 303,<br />
Blauvelt,<br />
NY 109131123<br />
Tel. +1(845)353-1400<br />
Fax +1(845)425-1250<br />
USA<br />
<strong>ARRI</strong> Inc<br />
Burbank Office<br />
600 N. Victory Blvd.<br />
Burbank,<br />
CA 915021639<br />
Tel. +1(818)841-7070<br />
Fax +1(818)848-4028<br />
Inserting Accessories:<br />
Inserting and exchanging accessories must be carried out from<br />
a stable position.<br />
For models with rotatable top latch (figure 5): Pull the top latch<br />
(15) upwards and turn it to the side. For models with location<br />
top latch (figure 6): Push the hinge pin (15a), the top latch (15)<br />
opens.<br />
For models with optional barndoor catch (10, figure 7), open<br />
the barndoor catch and insert accessories, e.g. barndoor, and<br />
then release the catch. For all other models - simply insert the<br />
accessory into the bracket (4a, figure 7).<br />
The rear slot (4b, figure 7) of the accessory bracket holds filter<br />
frames or scrims.<br />
Now close the top latch again and check if the accessories are<br />
securely locked.<br />
CAUTION! Do not operate the lampead with closed barndoor!<br />
Danger of overheating.<br />
Adjustment of Brackets<br />
In order to change the depth of the accessory brackets (4b,<br />
figure 7), loosen the screws and slide the bracket to the desired<br />
position (figure 8 detail 1). This feature also helps reducing<br />
diffused light between lens door and accessory.<br />
Rotating of Device Connector (only by qualified personnel)<br />
The <strong>ARRI</strong> rotating device connector (7, figure 8) allows you to<br />
adjust the cable guidance to the particular use of the lamphead.<br />
There are two alternative positions. The connector may only<br />
be adjusted by qualified personnel.<br />
Caution: Always disconnect the lamphead from the power<br />
supply or mains before rotating the device connector.<br />
Loosen the captive screws (7a, figure 8 detail 2) at the<br />
connector, turn the connector into the desired position and<br />
fasten the screws again.<br />
Care <strong>Instructions</strong><br />
Please clean the reflector and lens regularly with a customary<br />
glass cleaning agent. After cleaning, polish the surface with a<br />
soft cloth.<br />
Please check that the reflector shows no kind of deformation or<br />
damage.<br />
Keep the contact surfaces of the electrical connections and<br />
lamp holder clean.<br />
In addition to the regular visual inspection, we recommend to<br />
have a qualified electrician to carry out a repeated inspection of<br />
electric safety at least ever 12 months.<br />
Further Notes<br />
The manufacturer disclaims liability for any damage to persons<br />
or property caused by inappropriate operation, damage of this<br />
kind lies in the responsibility of the operator.<br />
Please visit www.<strong>ARRI</strong>.com to view the CE-declaration, as well<br />
as the spare parts information.<br />
Please also read our leaflet "Operating Your <strong>ARRI</strong> Lampheads<br />
Safely"; L5.40731.E.<br />
Canada<br />
<strong>ARRI</strong> Canada LTD.<br />
415 Horner Avenue,<br />
Unit 11, Etobicoke,<br />
Ontario M8W 4W3<br />
Tel. +1(416)255-3335<br />
Fax +1(416)255-3399<br />
6<br />
Empfohlen für Stativbetrieb/<br />
recommended for stand use<br />
7<br />
Great Britain<br />
<strong>ARRI</strong> (GB) LTD.<br />
2 Highbridge,<br />
Oxford Road<br />
Uxbridge Middlesex<br />
UB8 1LX<br />
Tel. +44(0)1895-457000<br />
Fax +44(0)1895-457001<br />
Empfohlen für hängenden Betrieb/<br />
recommended for hanging use<br />
120°<br />
Abb. 8 Detail 2 / figure 8 detail 2<br />
Italy<br />
<strong>ARRI</strong> Italia SRL<br />
Viale Edison 318<br />
I-20099 Sesto S.G.<br />
Milano<br />
Tel. +39(02)26227175<br />
Fax +39(02)2421692<br />
7a<br />
Australia<br />
<strong>ARRI</strong> Australia PTY Ltd.<br />
Unit 6c, 5 Talavera Road<br />
Macquarie Park, NSW 2113<br />
Sydney<br />
Tel. +61(2)98554300<br />
Fax +61(2)98554301